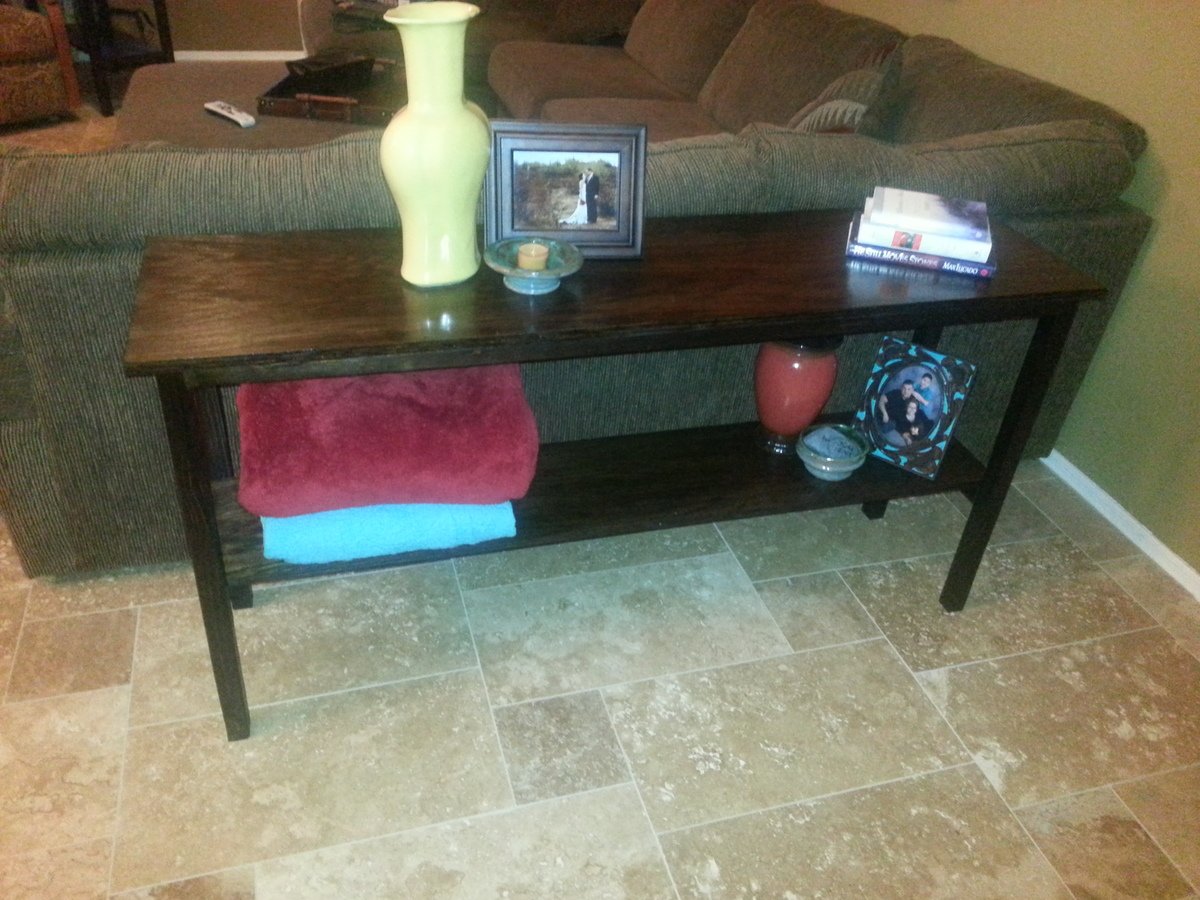
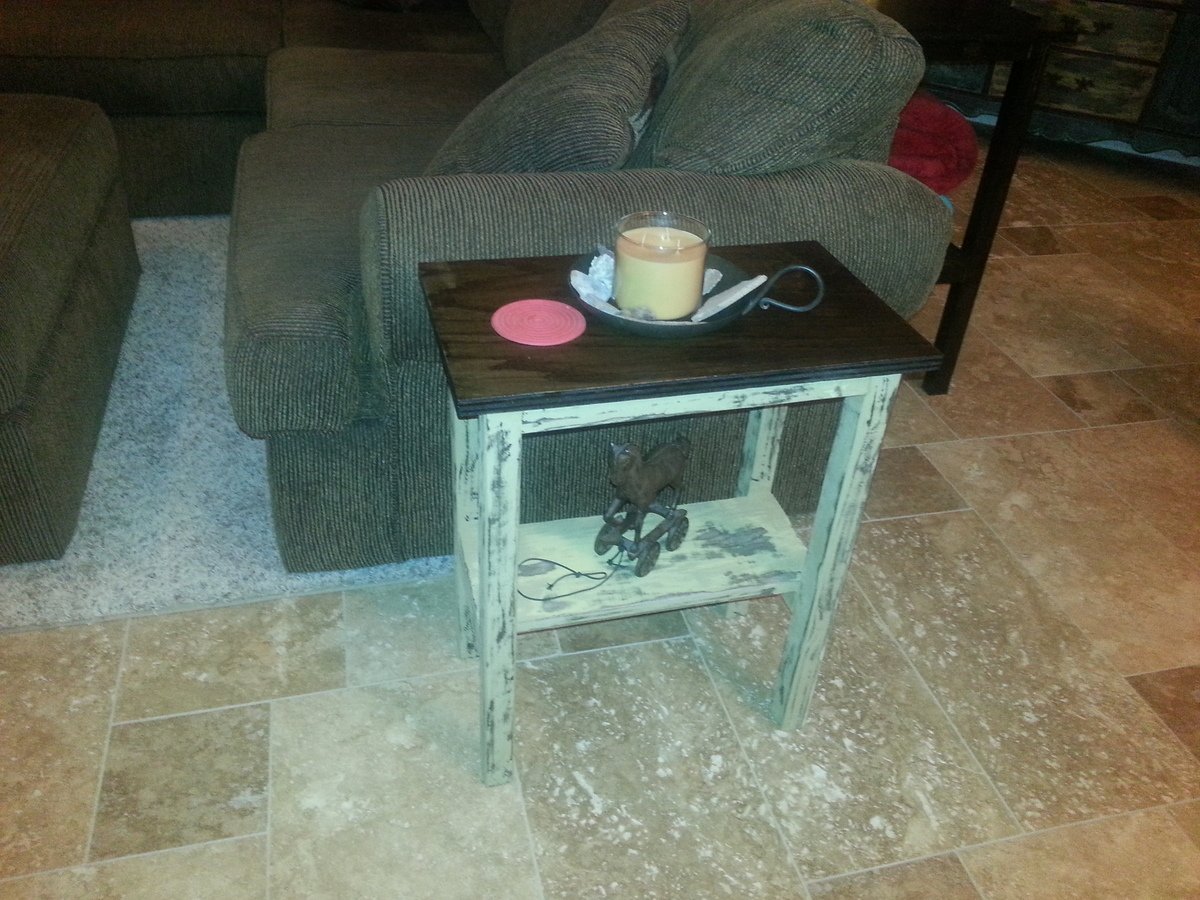
Entry console
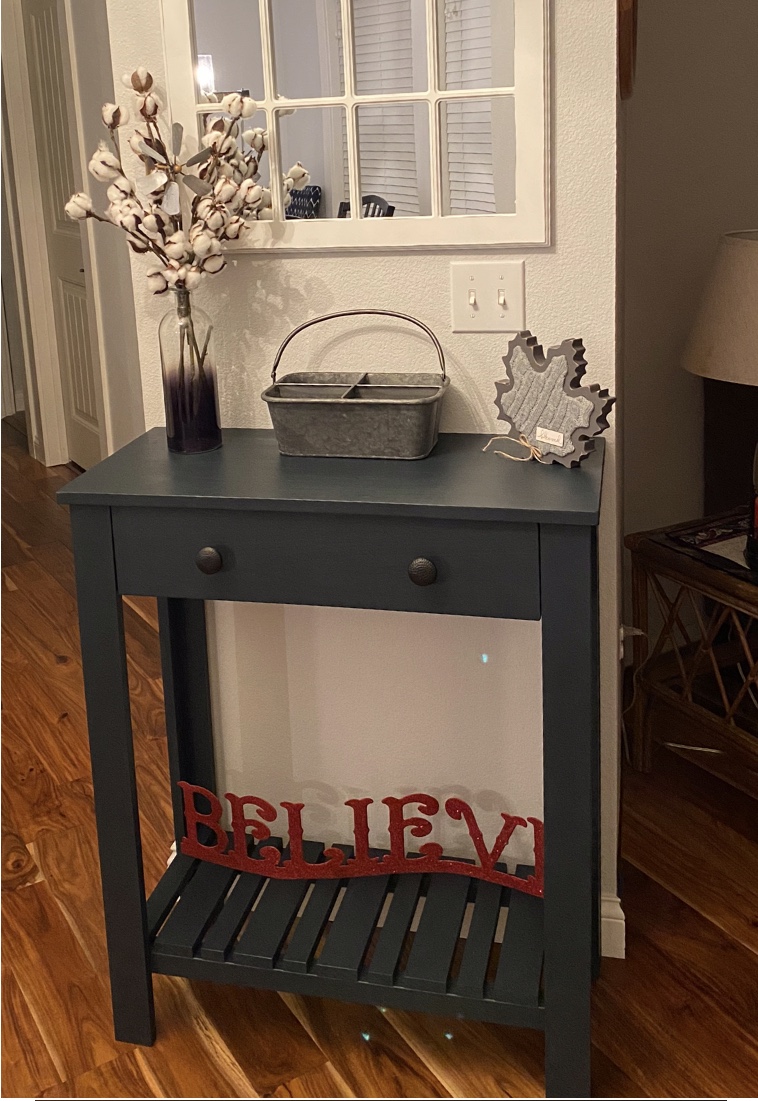
I used one by material because I wanted a piece that was less bulky. I also made side tables from the same plan.8 love these, they are exactly what I have been looking for!
Built from Plan(s)
I used one by material because I wanted a piece that was less bulky. I also made side tables from the same plan.8 love these, they are exactly what I have been looking for!

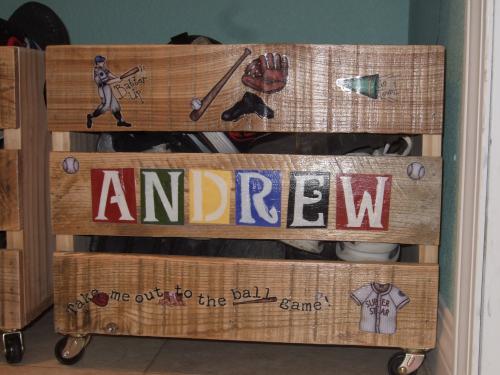
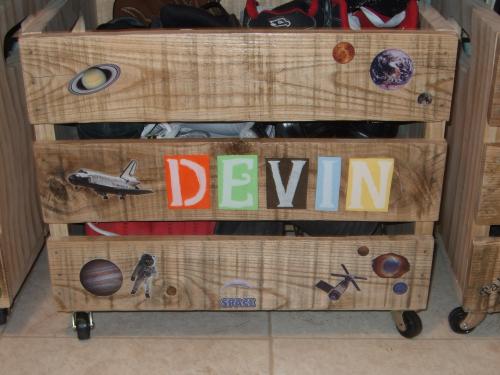
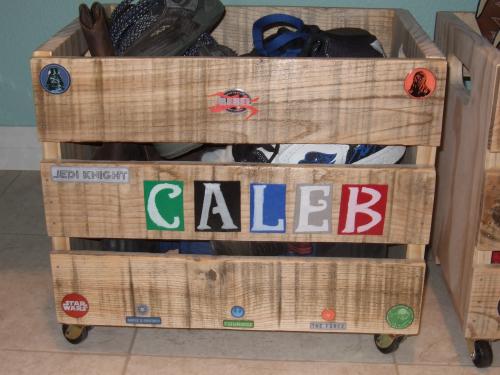
We went a little crazy bringing pallets home once I got the idea that we could build something so cool and functional out of only a small amount of new lumber! We've had these about 6 months now and they still look great and serve our family in a very real and functional way! My boys have been WONDERFUL about keeping all their shoes in their crates!
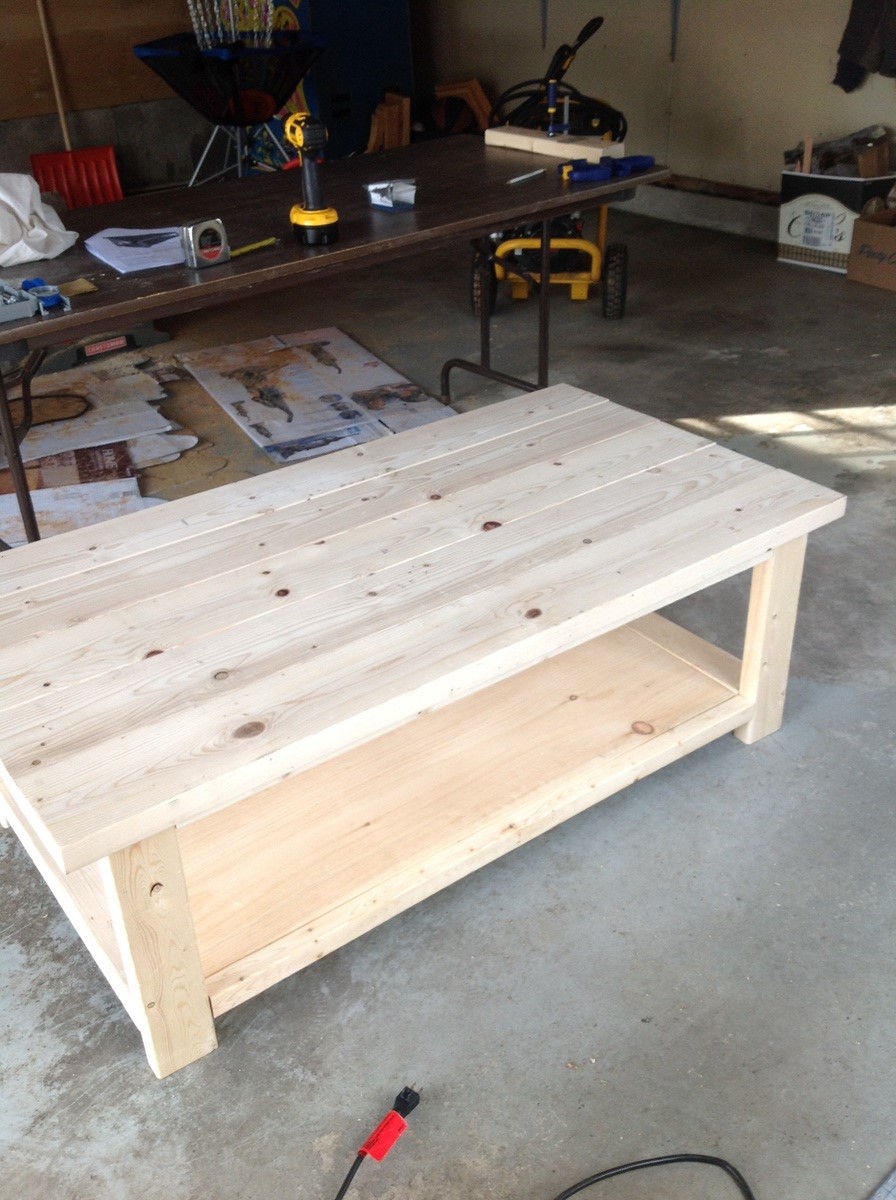
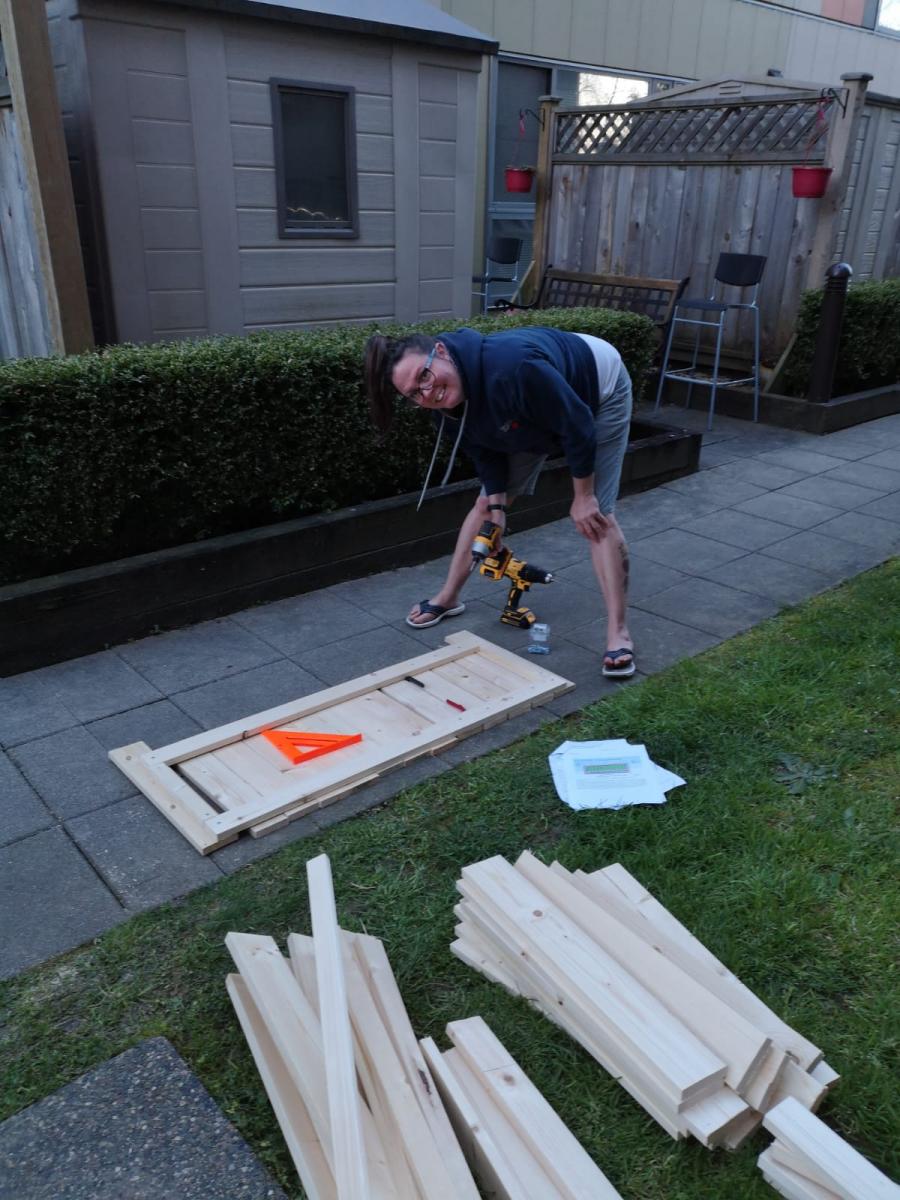
This was my first build and I loved making it! I wasn't able to make the 60 degree cuts needed for the x's but I hope to be able to add them in the future!
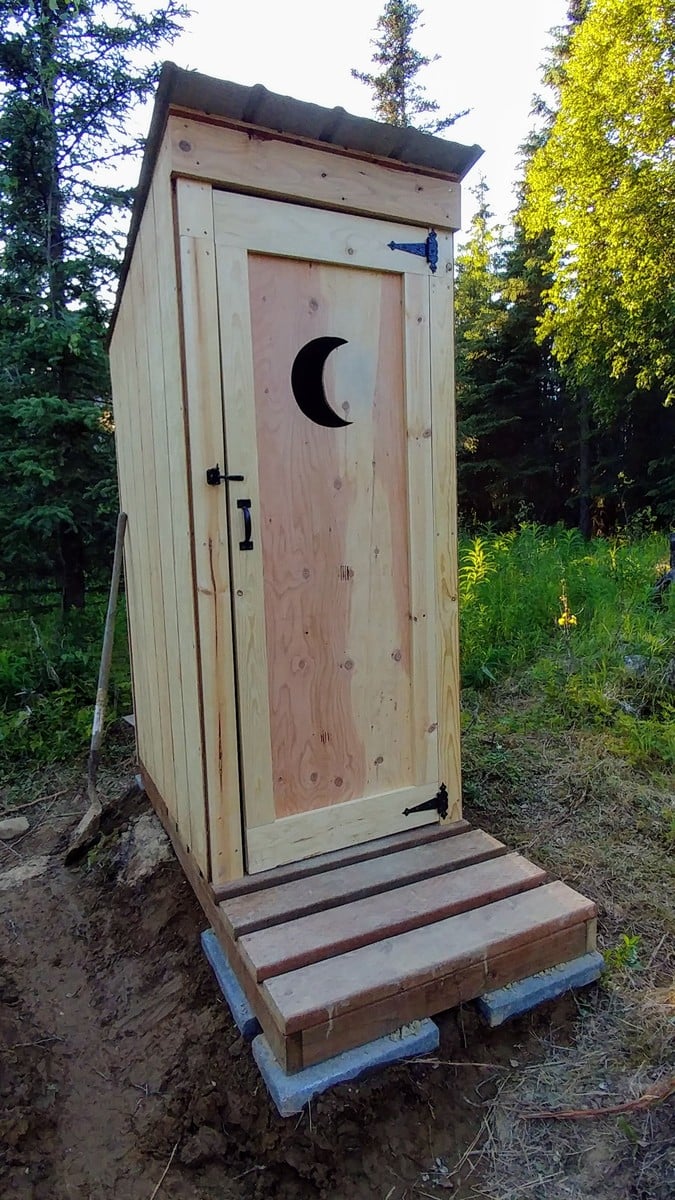
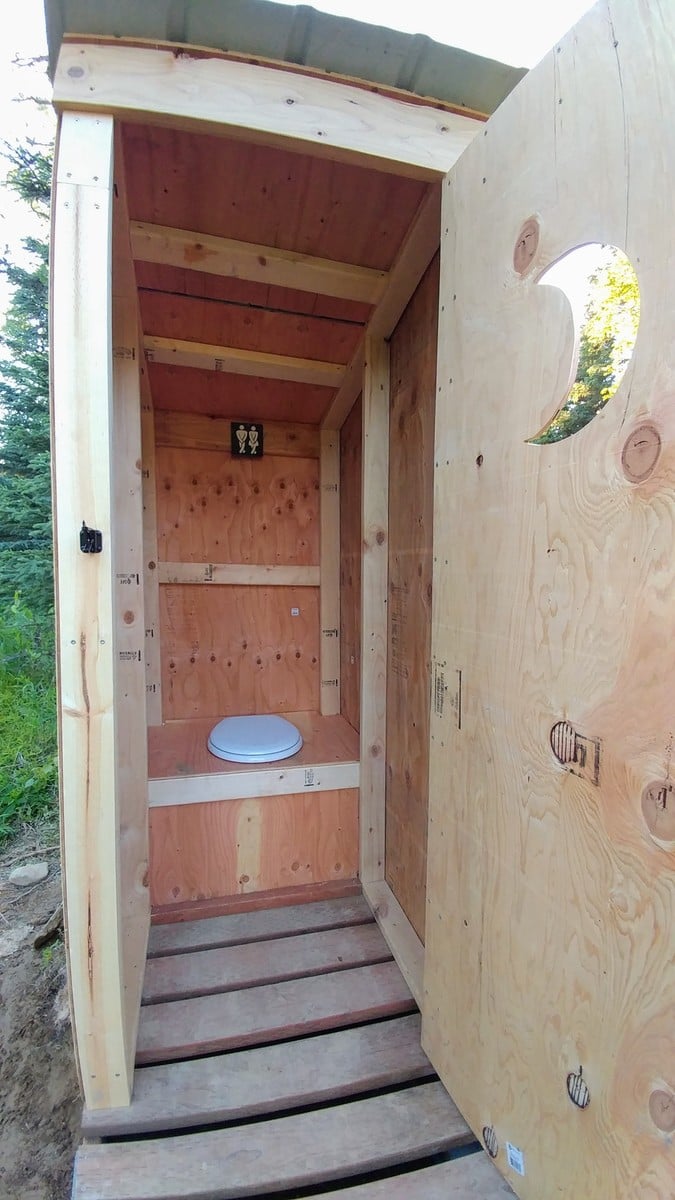
I built this outhouse to go with a dry cabin I'm working on, and also as an emergency backup for my house. I used treated lumber on the base/deck and splurged on T-111 for the siding. I wanted to use greenhouse polycarbonate for the roof, but found a piece of metal roofing in my shed that was exactly the right size so I used that instead. I thought about doing a fancy cutout on the door but ended up going with a half moon because it was easy. I'm thinking about cutting out stars of different sizes all over the rest of the door to let in more light. I'll trim and stain it next summer.
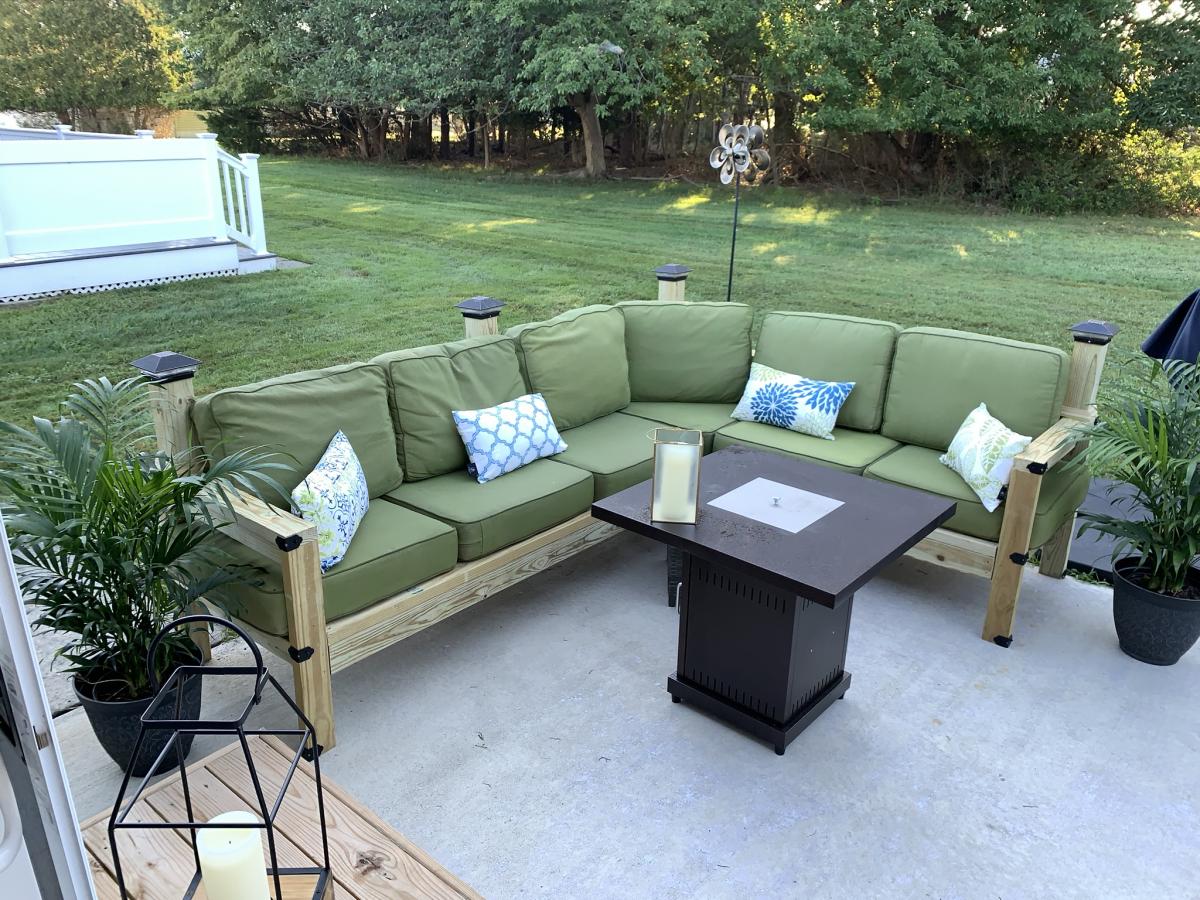
Build an outdoor sectional easily with these free plans.

I built this bench the day before Thanksgiving. I used scrap 2x6's left over from building our son's bunk bed. I shortened the plan to 43 1/2" total length to fit my space and accommodate the boards I had. The top of the bench is 4- 2x6 boards instead of a 1x12 board. The legs are 2x4's instead of 2x6's. I wood puttied all screw holes, sanded, painted 2 coats of Behr's decorator white, and applied 3 coats of Polycrylic.
After using it over the last few months I have noticed some of the pine knots have bled a little yellow into my finish. If I were to do it again, I would prime all knots with Zinsser cover all primer.
We really enjoy this bench and are happy with how it turned out. Although unfinished at the time, our Thanksgiving guests were impressed that I could whip out a bench by myself. Thanks Ana!

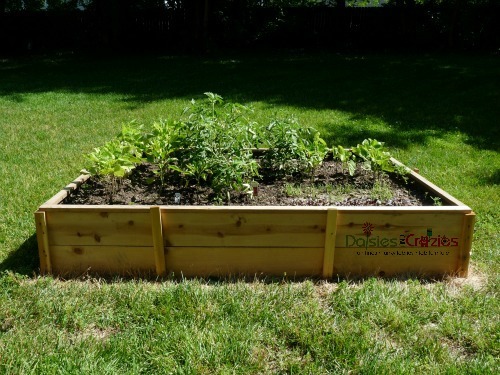
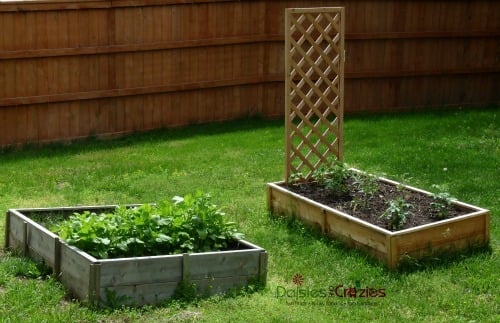
This was an easy project that should help provide us with fresh, pesticide-free produce for many years to come. Thanks, Ana! xo
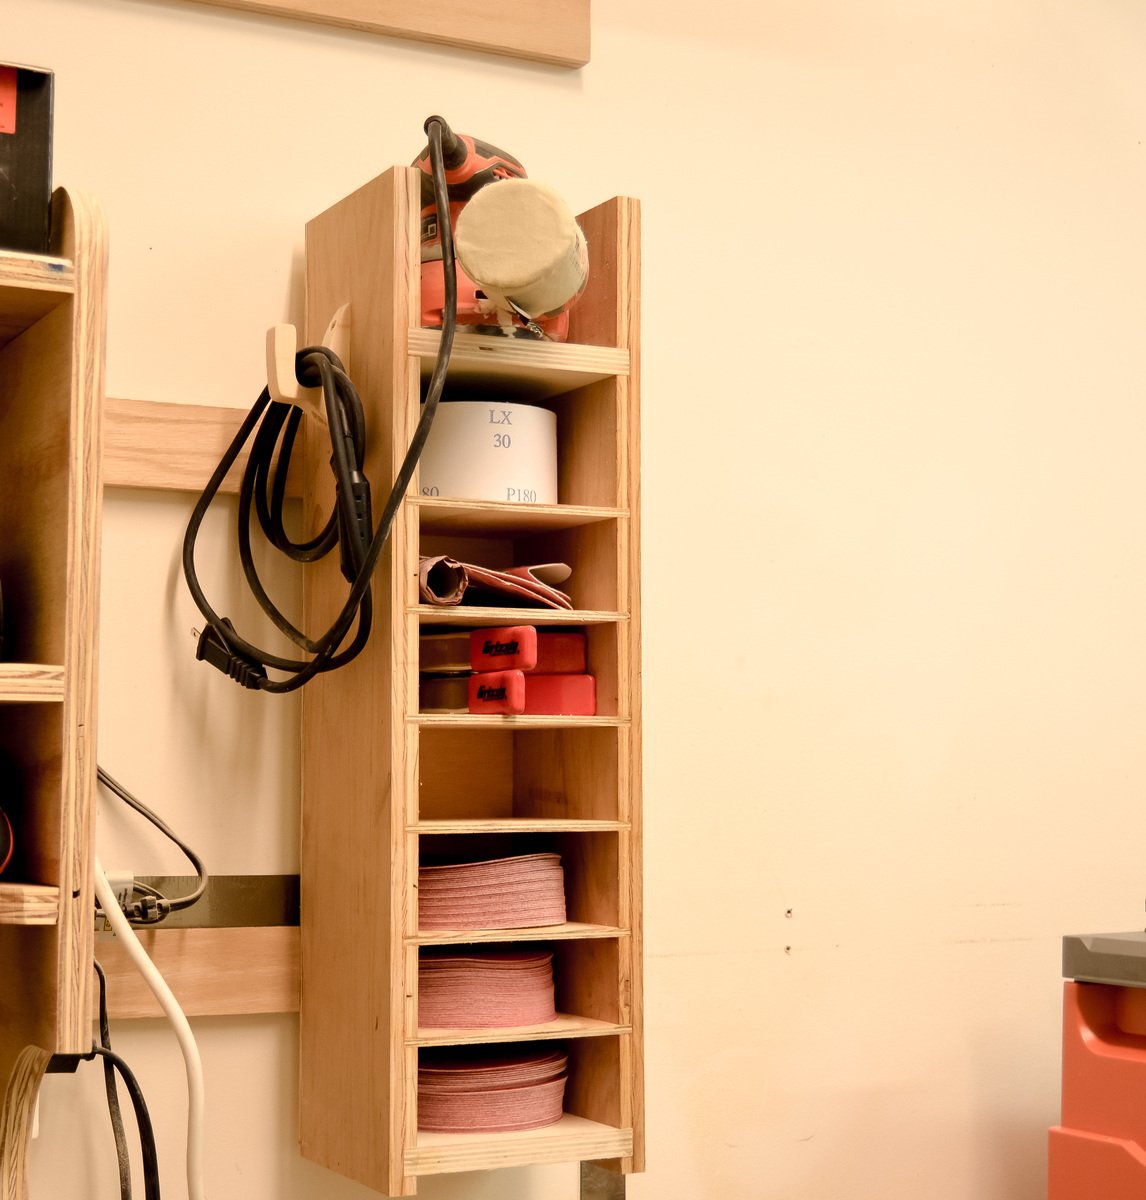
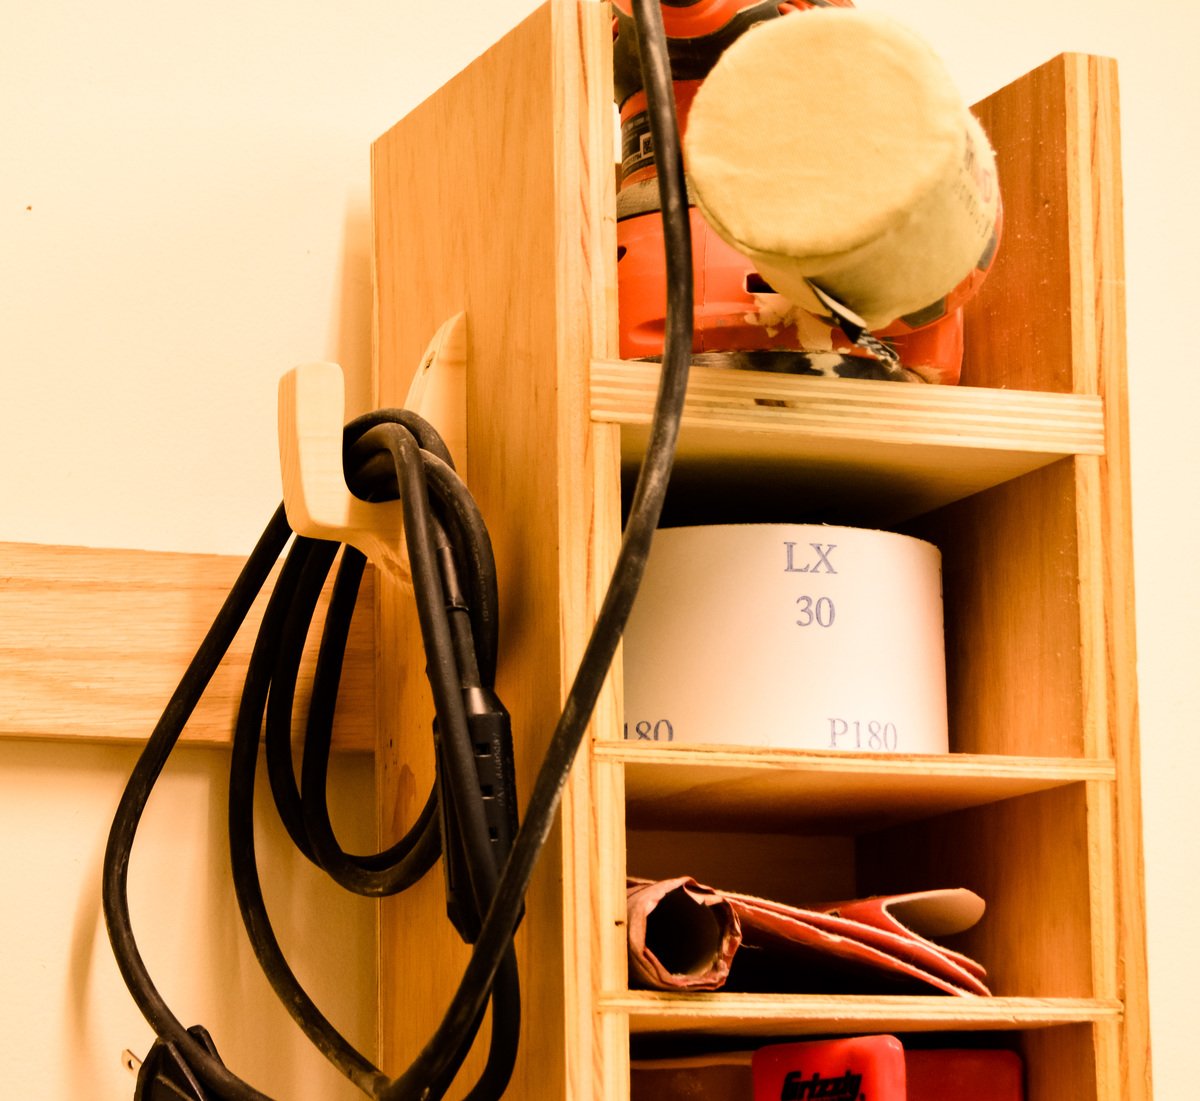
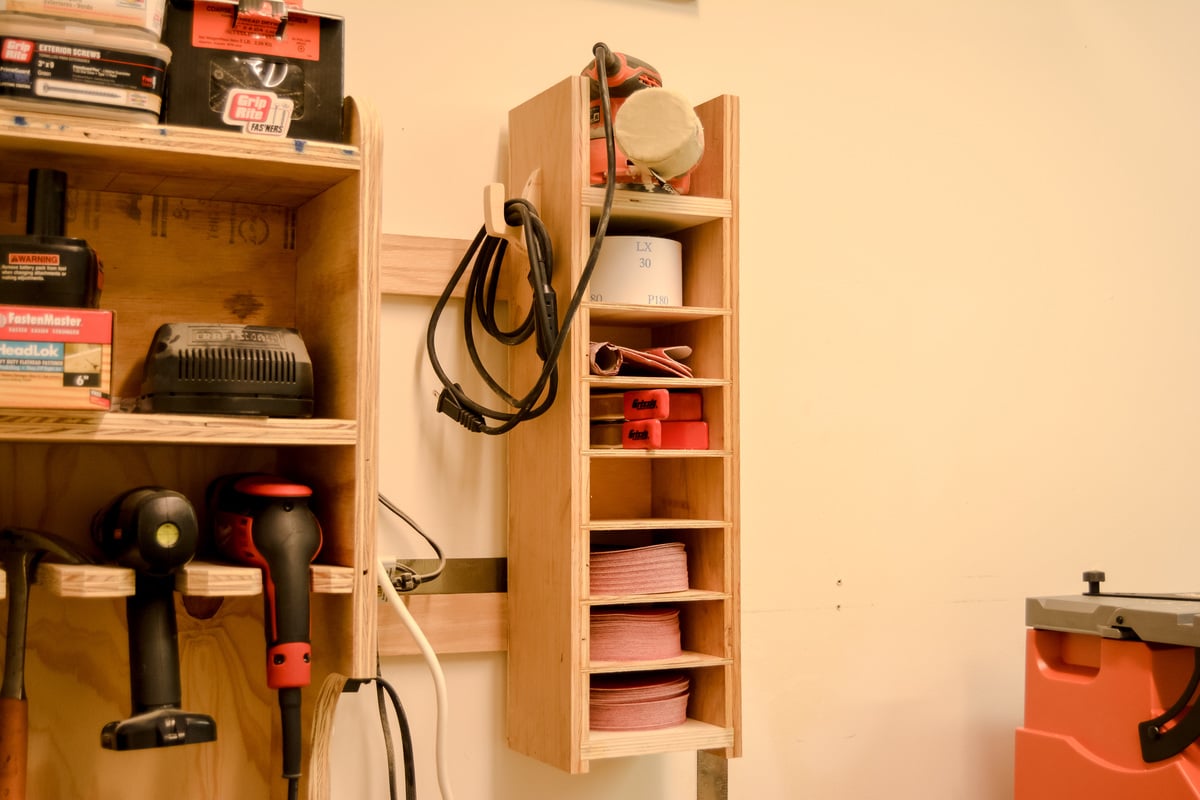
This week I built a french cleat sanding station to house my orbital sander and sand paper!
Blog: http://www.lanebroswoodshop.com/2015/04/french-cleat-sanding-station.ht…
Plans: https://drive.google.com/file/d/0B_RQfvQzkmz3OENtUWdmMENCYlk/view?usp=s…


I love the way this bench turned out! And your plans were so simple to follow (as always). Thanks do much for sharing all your plans!!
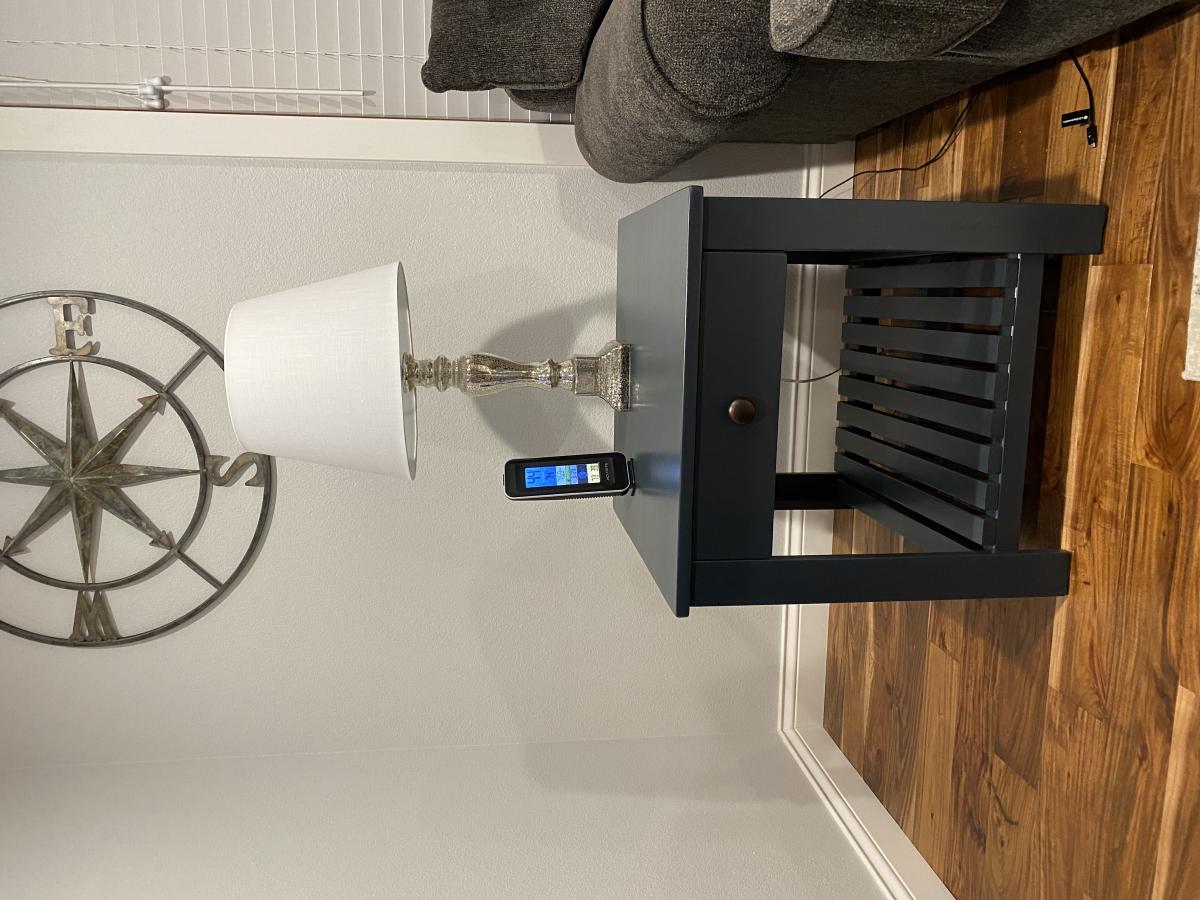
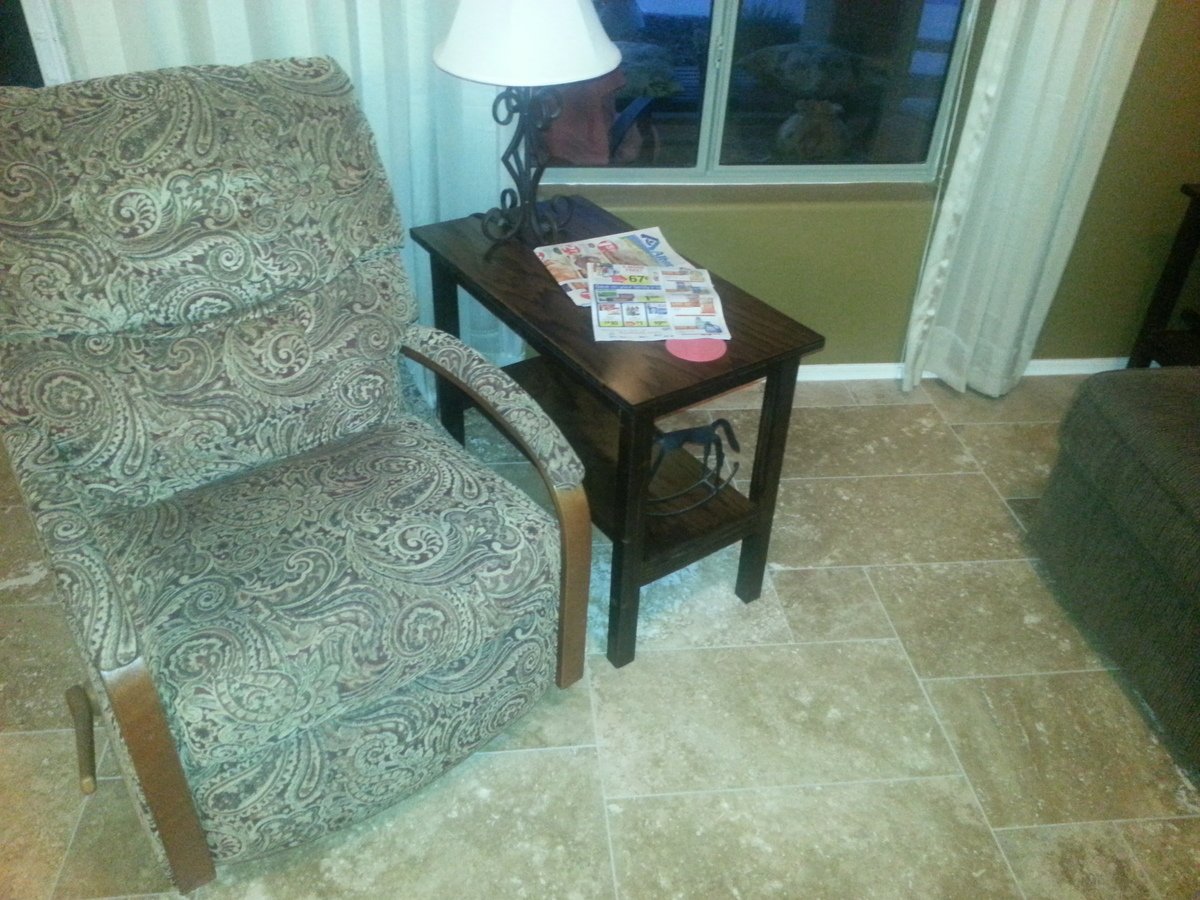
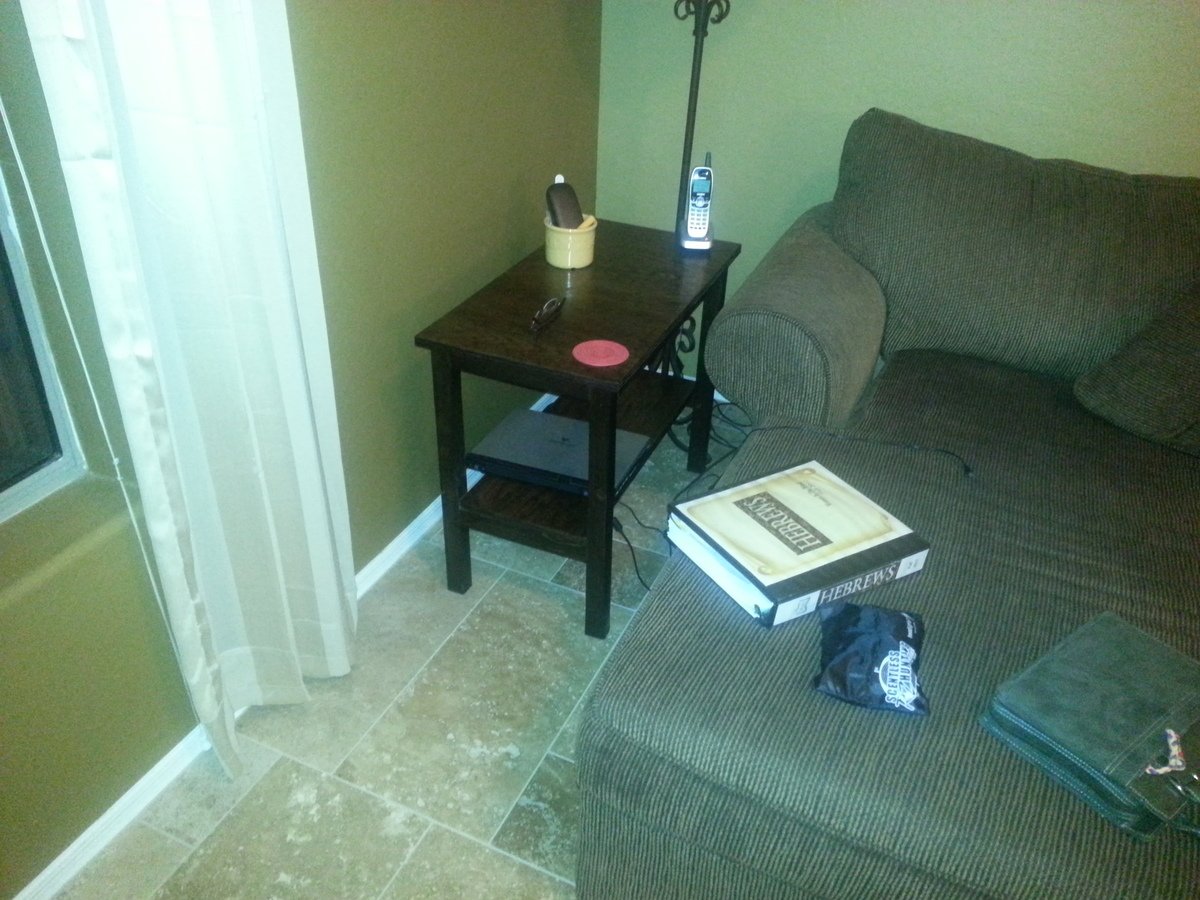
A collection of different sized perfect end tables for my mother.
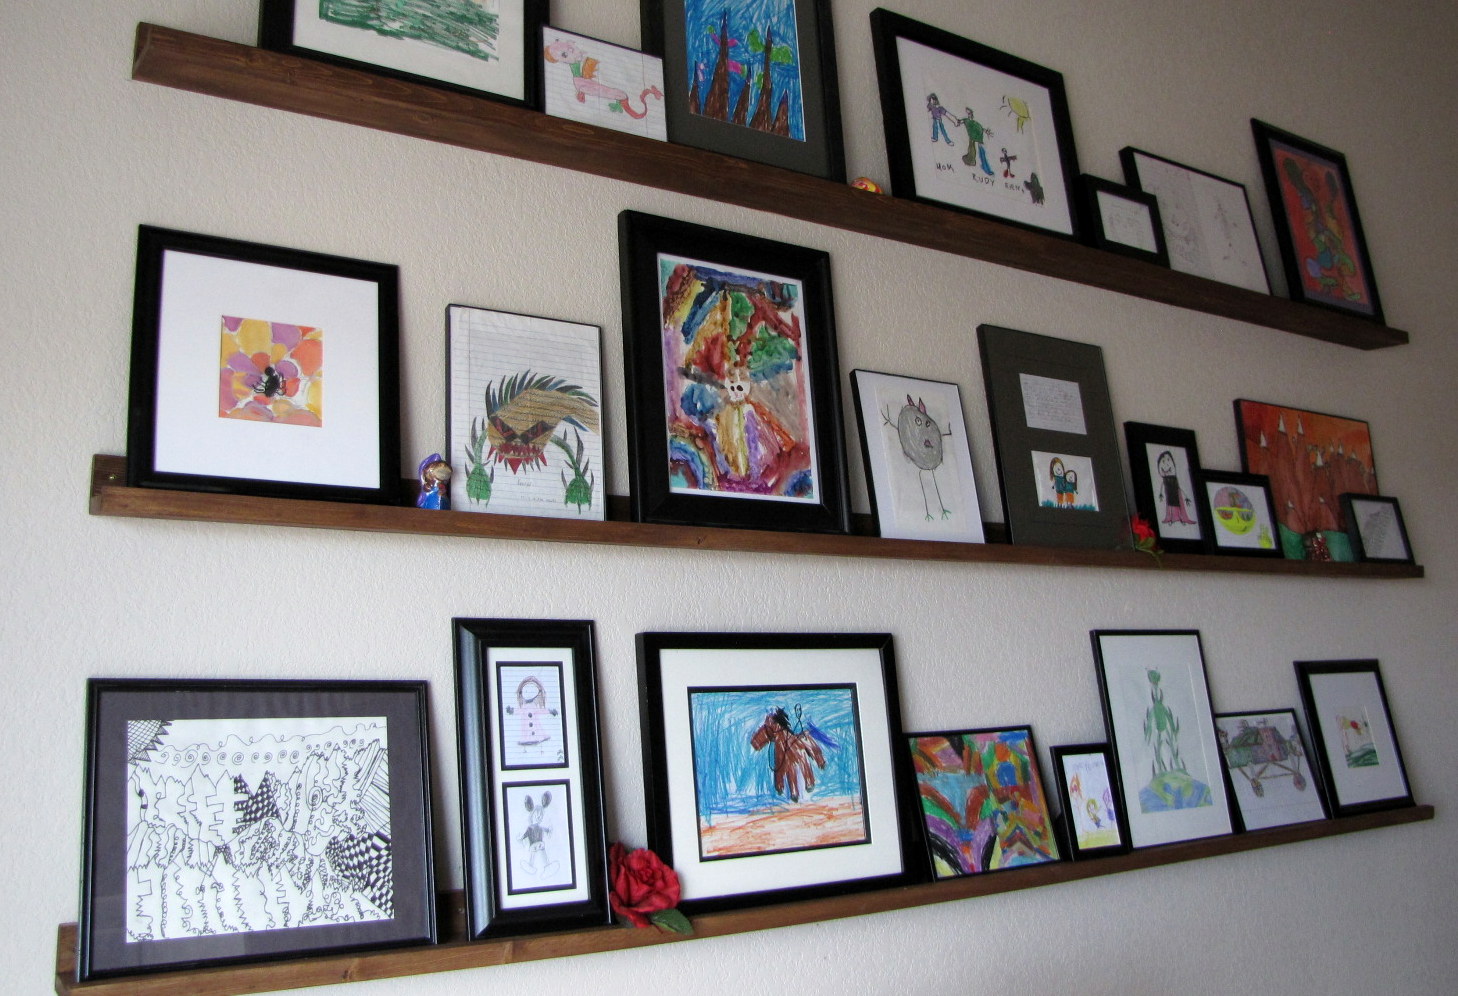
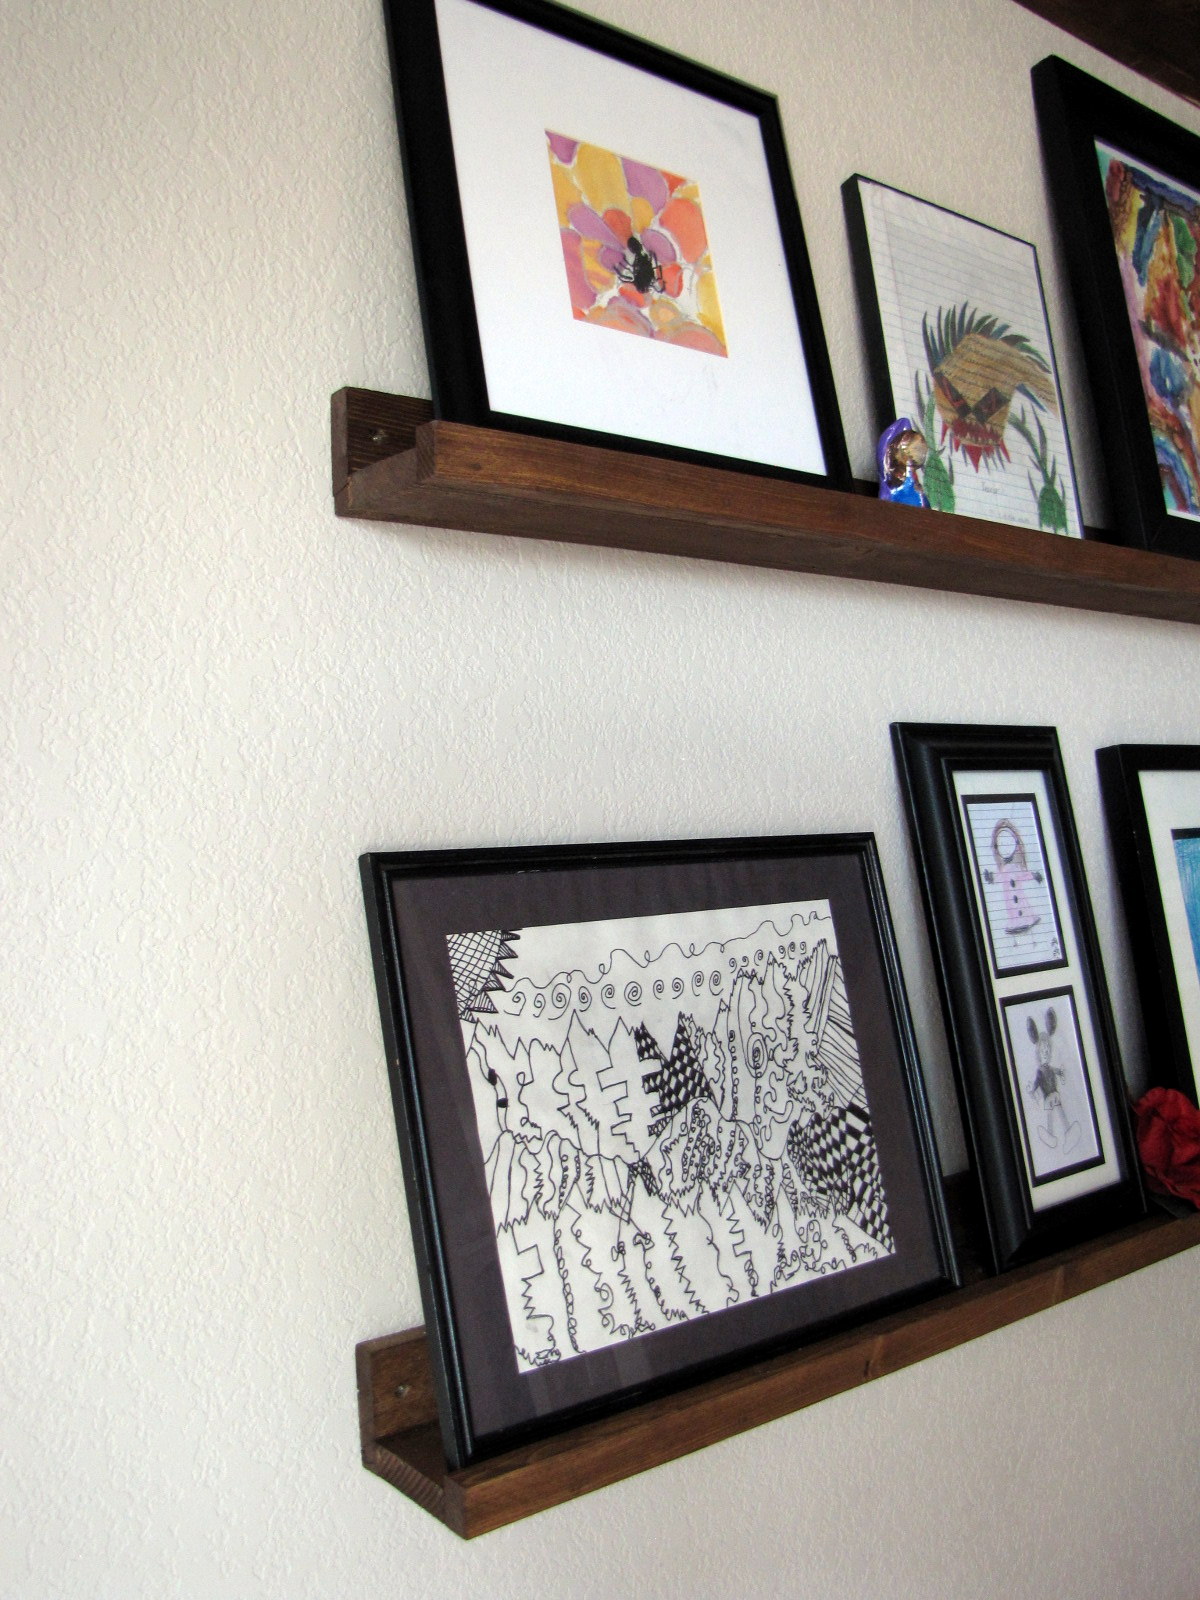
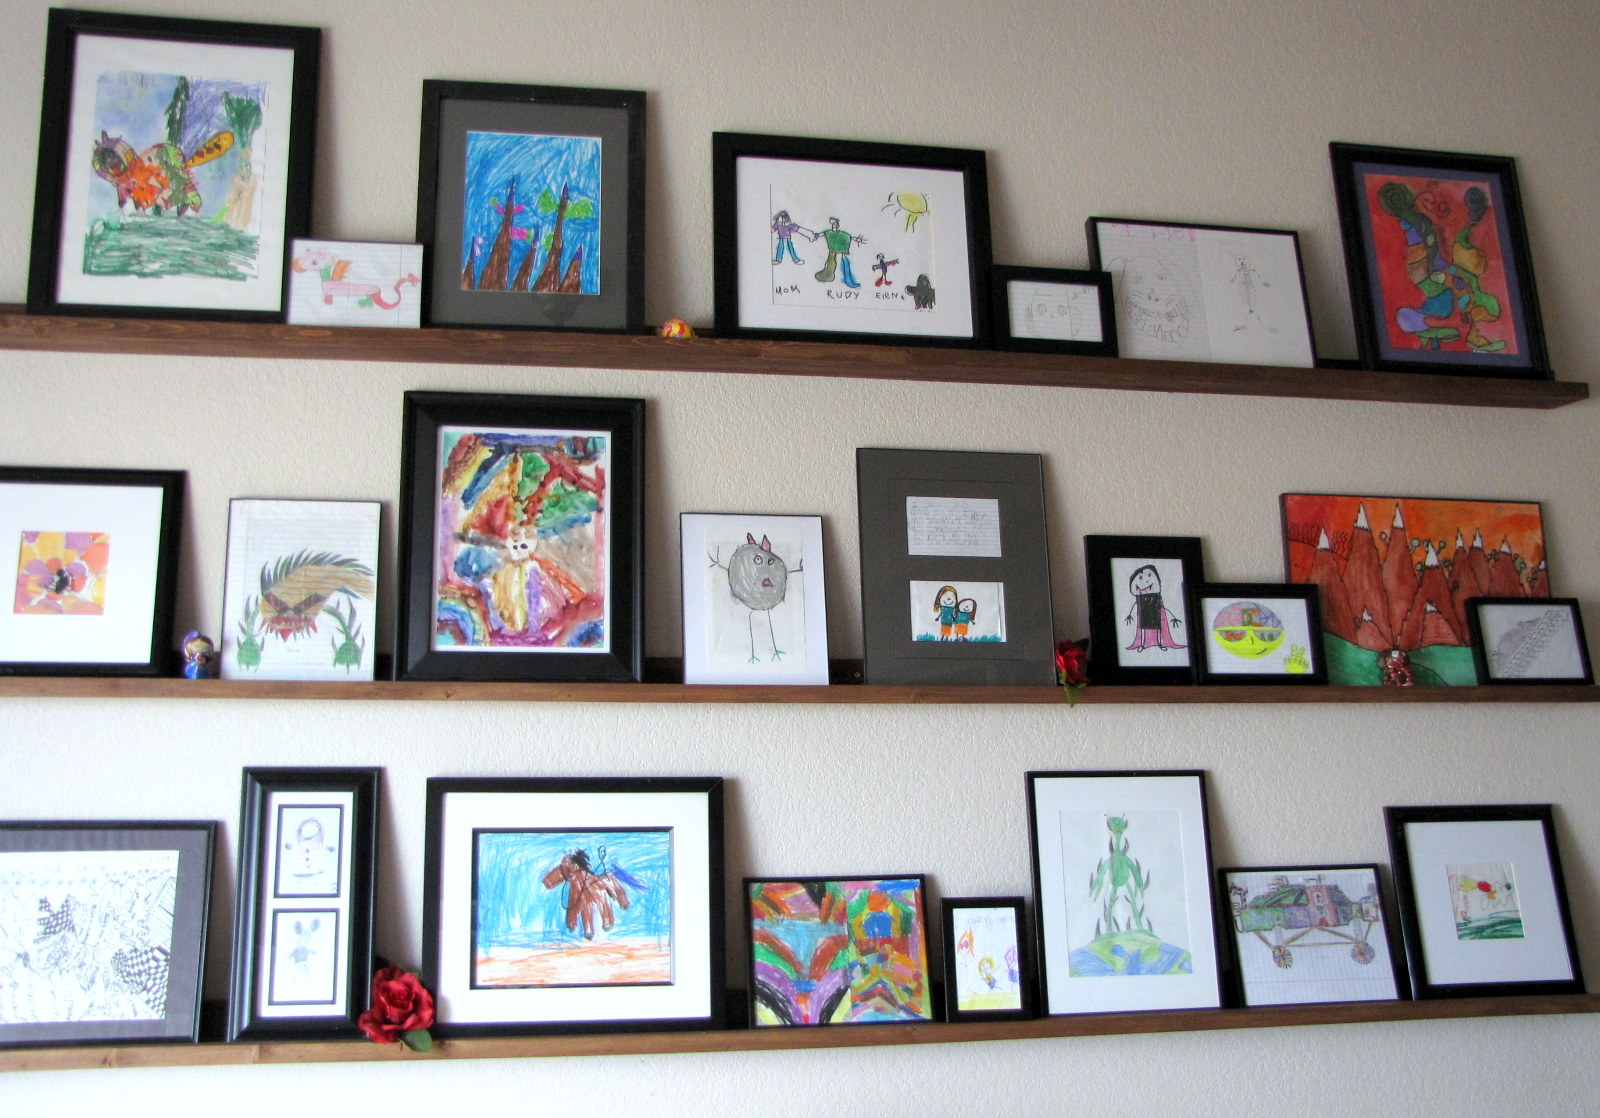
I love these shelves. So simple to build and still make a big impact. I built mine just a little different from the plan. I used 1x3 furring strips for the bottom and back pieces instead of 1x4's and then ripped a 1" strip from another 1x3 for each shelf to create the front trim piece instead of a 1x2. The shorter front trim piece gives me just enough ledge to keep the frames from slipping off the ledge, but provides maxium display area for the art work.
For three shelves just like these you need:
They were assembled using 2" fiinishing nails and lots of wood glue.
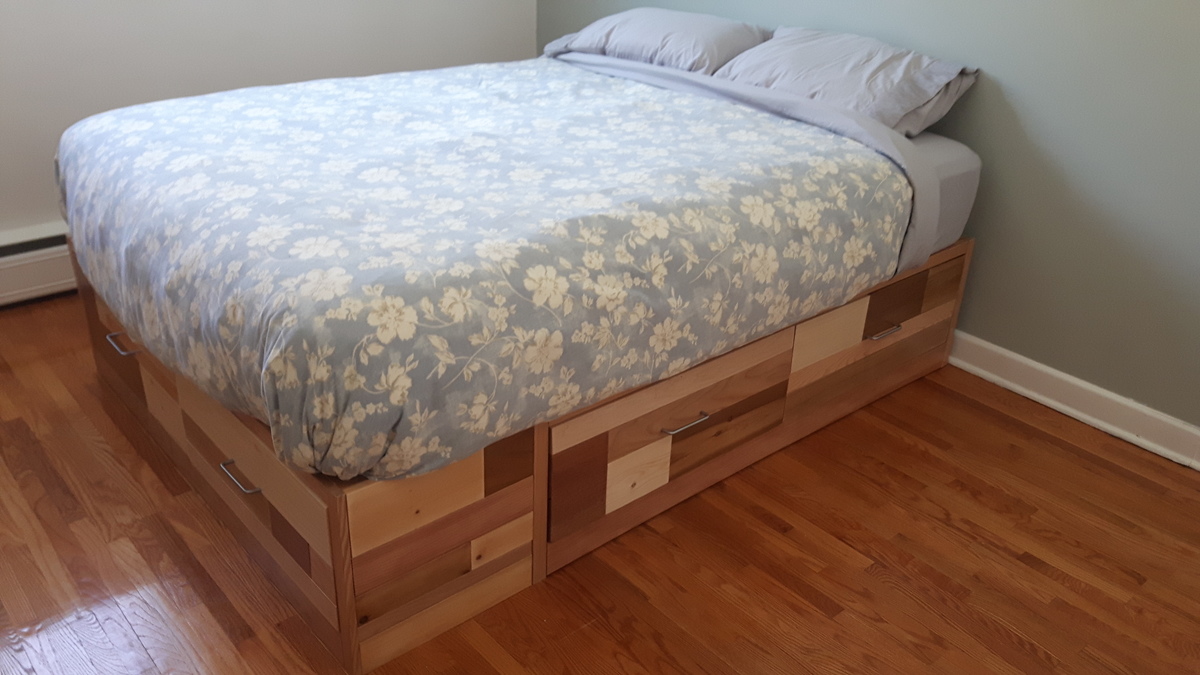
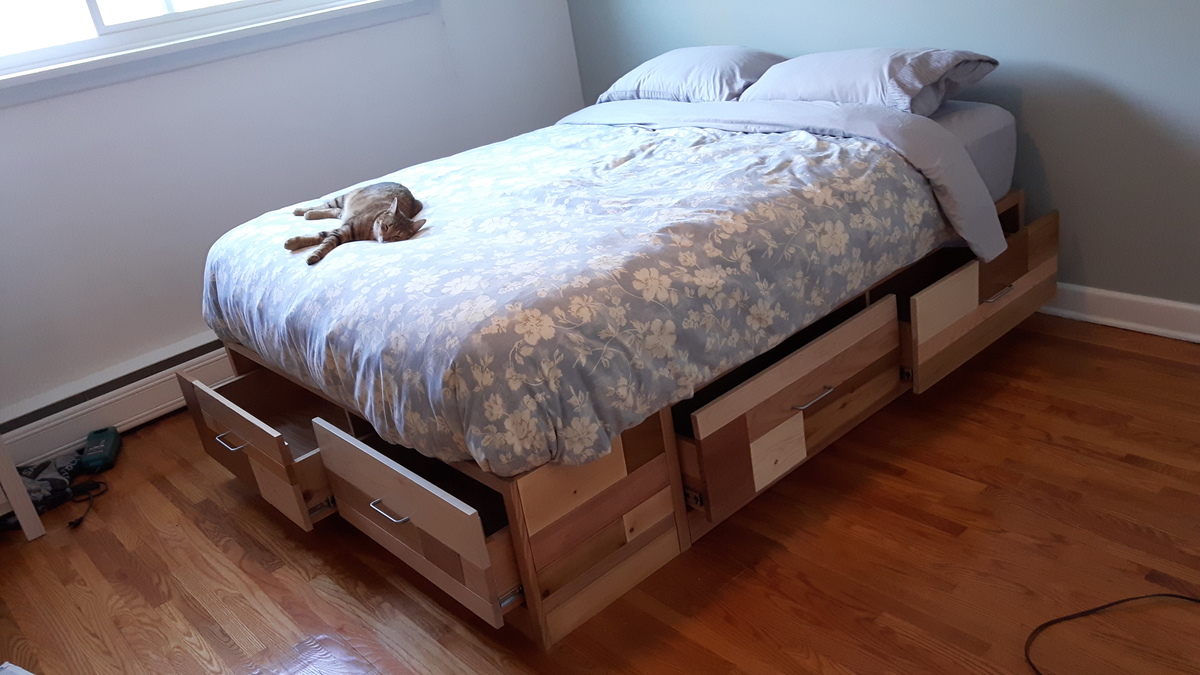
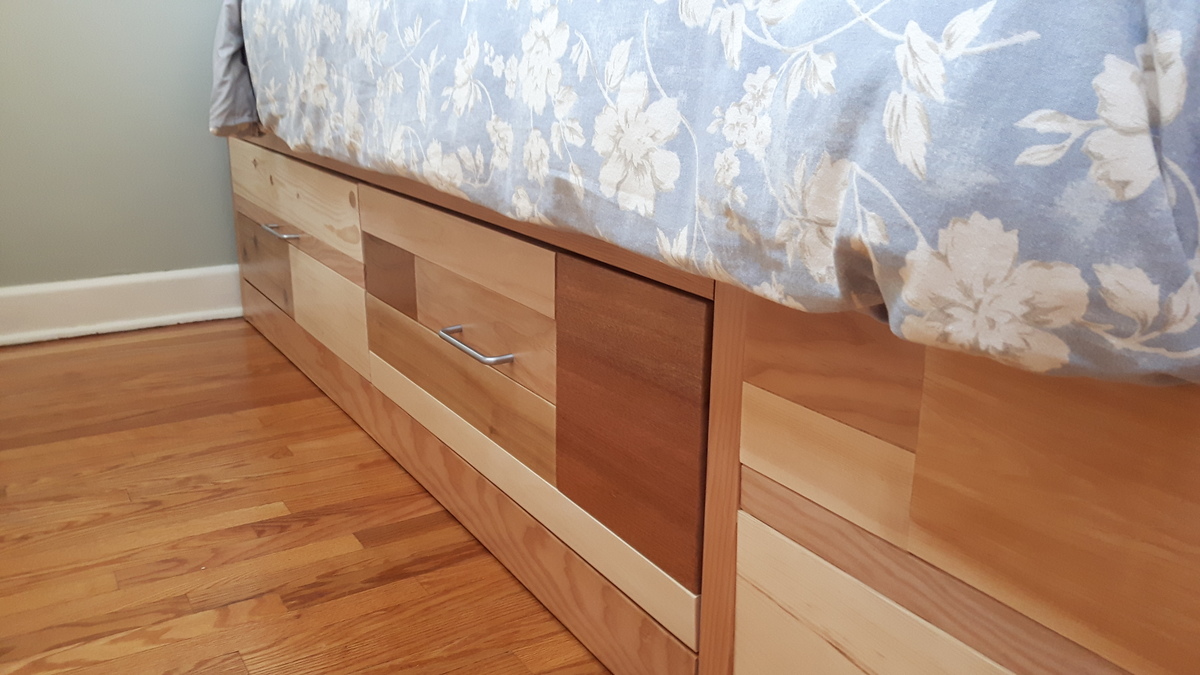
Was really excited to build this when I moved in to my new home. It's such a functional piece! I used different types of wood to cover it instead of staining it different shades. That was a fun puzzle to figure out. Really love it and thanks for the free plans!
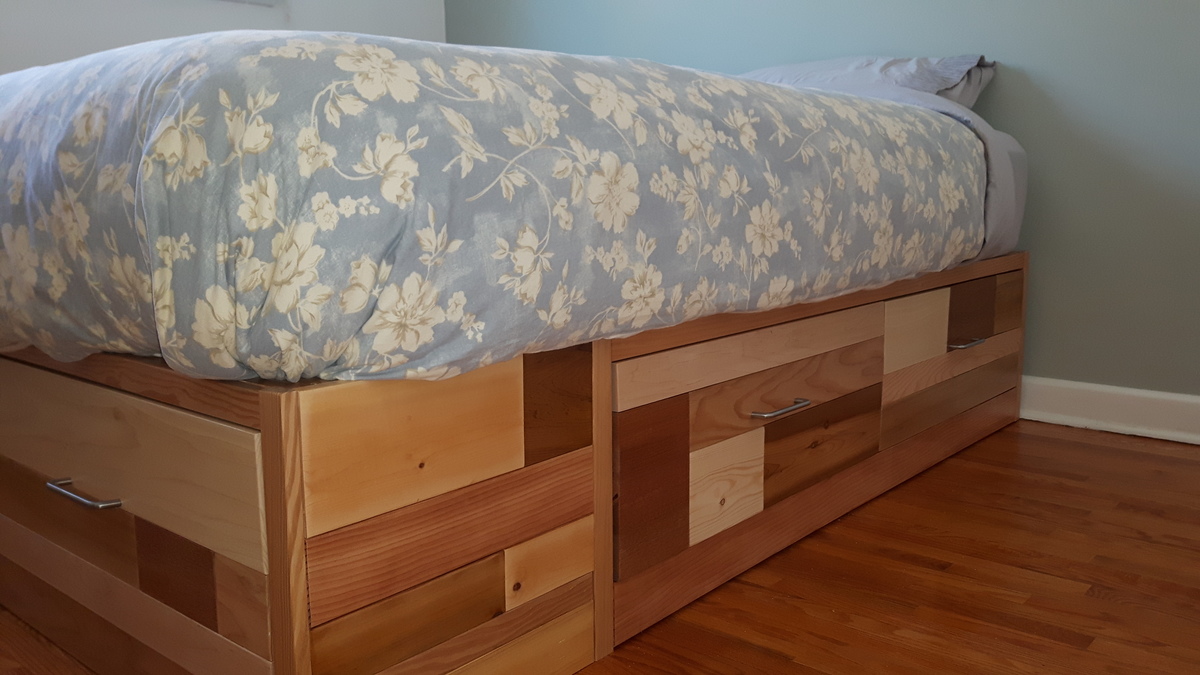
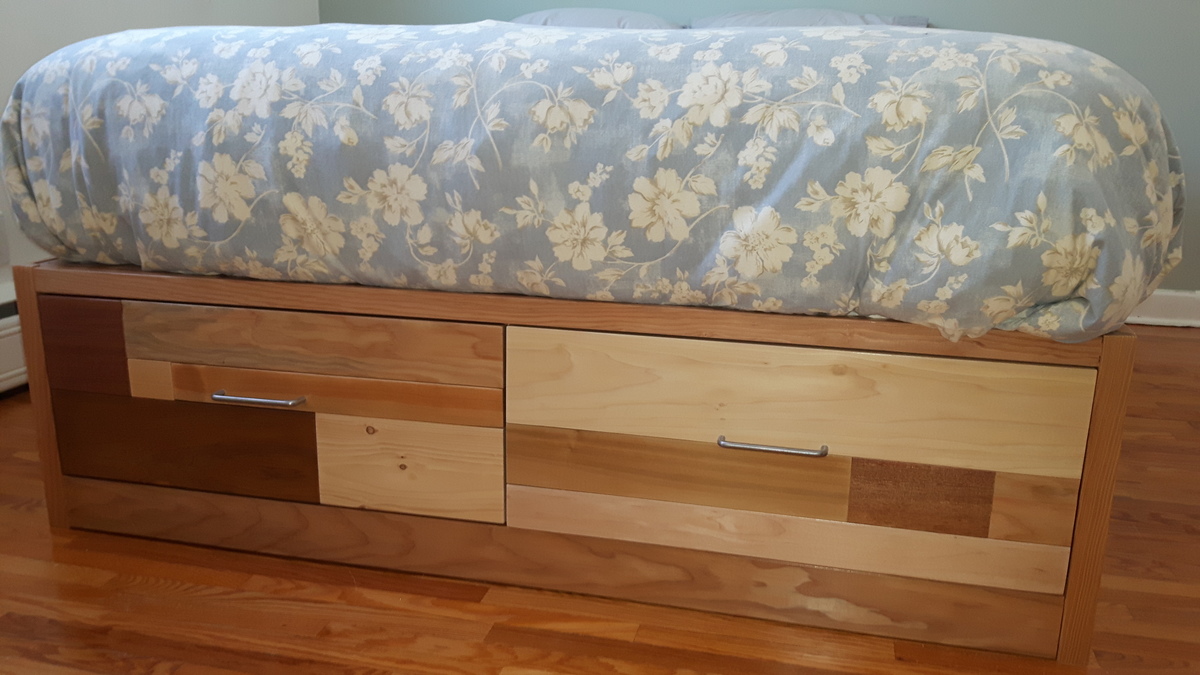
Used Ana’s plan and adapted for slow-close sliding drawers.
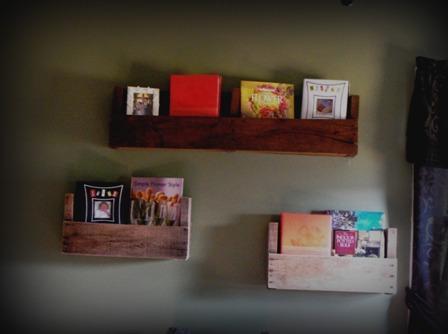
I love pallet shelves! Here I have three different sizes with three different finishes. It is amazing what 10 minutes, a jig saw, and a piece of sandpaper can do!

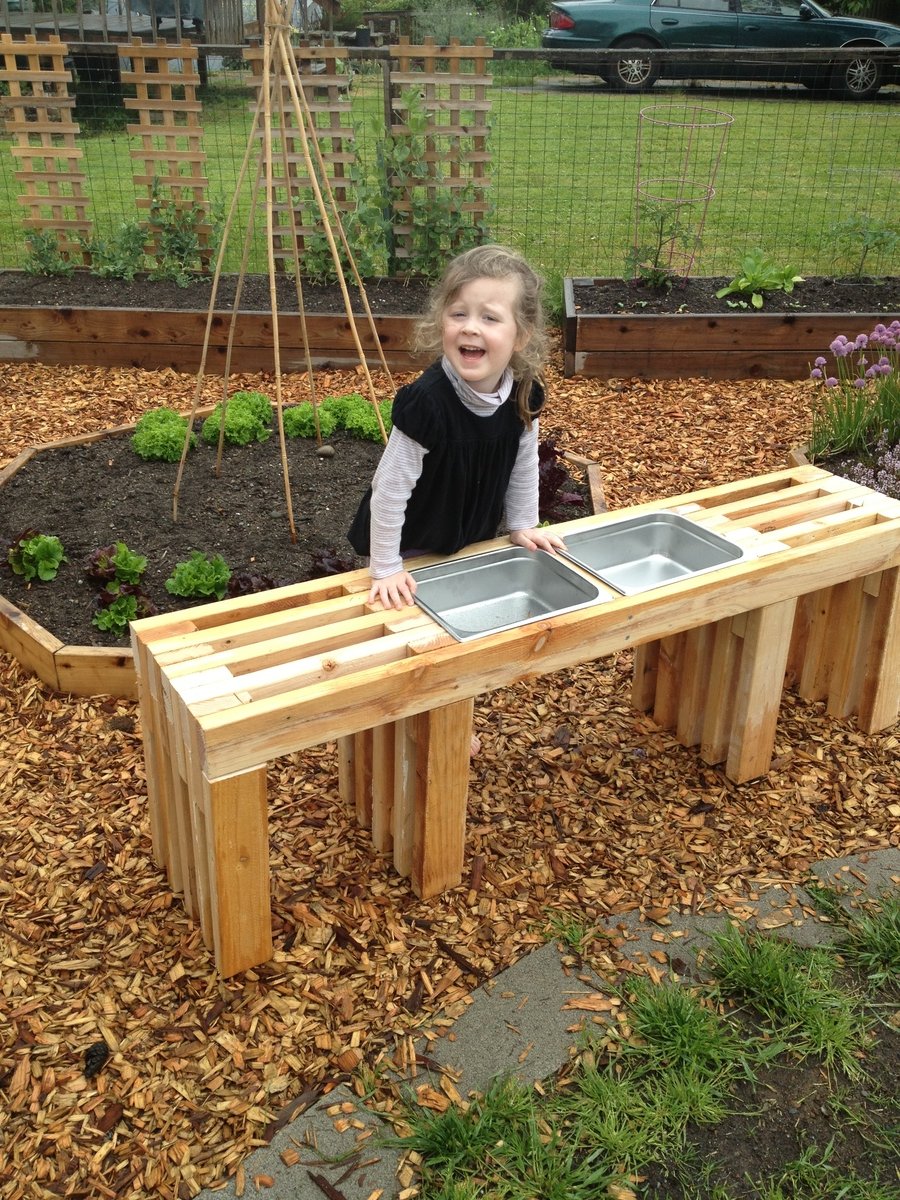
I've been looking for a simple design for a consol table that I could easily modify to fit in my kids' club house. This one fit the bill perfectly! I also happen to have a pile of 2x4s left over from a closet demo, so I wanted to use those up. I basically built 2 of the consol tables, letting the 2 outer-most horizontal beams extend across and 25.5 inch space and connect the two consols. Then I put in a middle beam and that created the perfect space to set some catering pans in it. Also, I only had 2x4s so I used those for all the pieces, making the gaps a little wider than the original design. And lastly, because I didn't quite have enough wood, I shortened the vertical beams. If you look at the picture, all of this will make more sense! Thanks for the inspiration and direction! ps - I have no idea how to rotate the photos. Sorry!
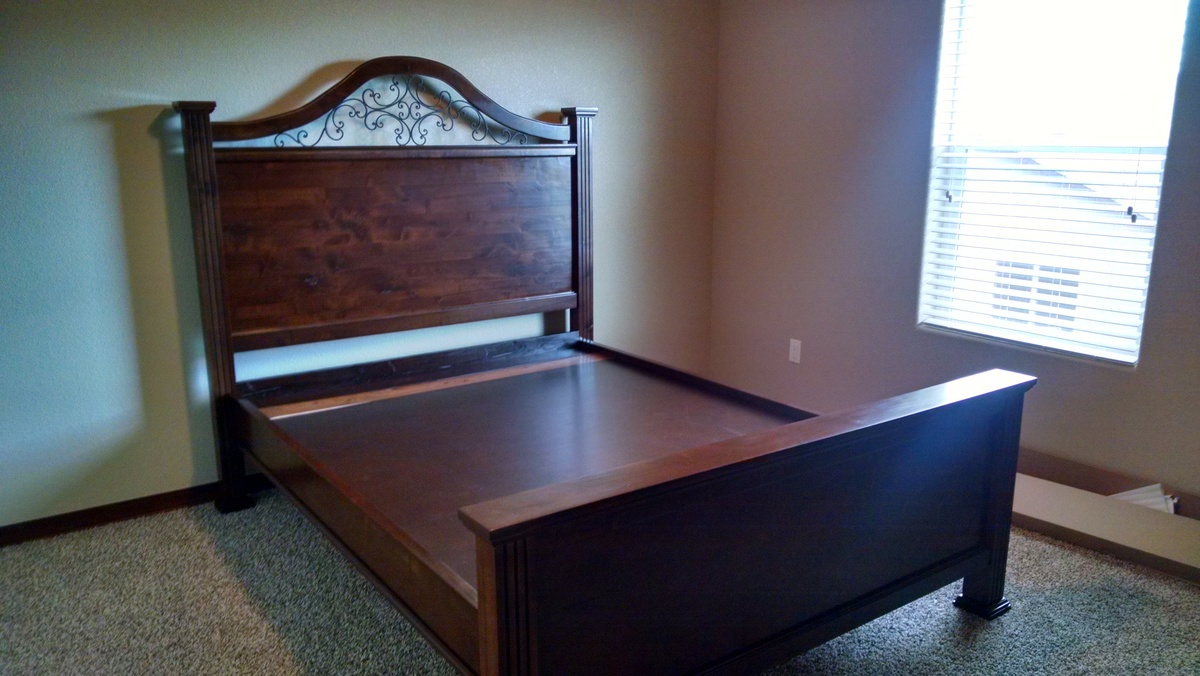
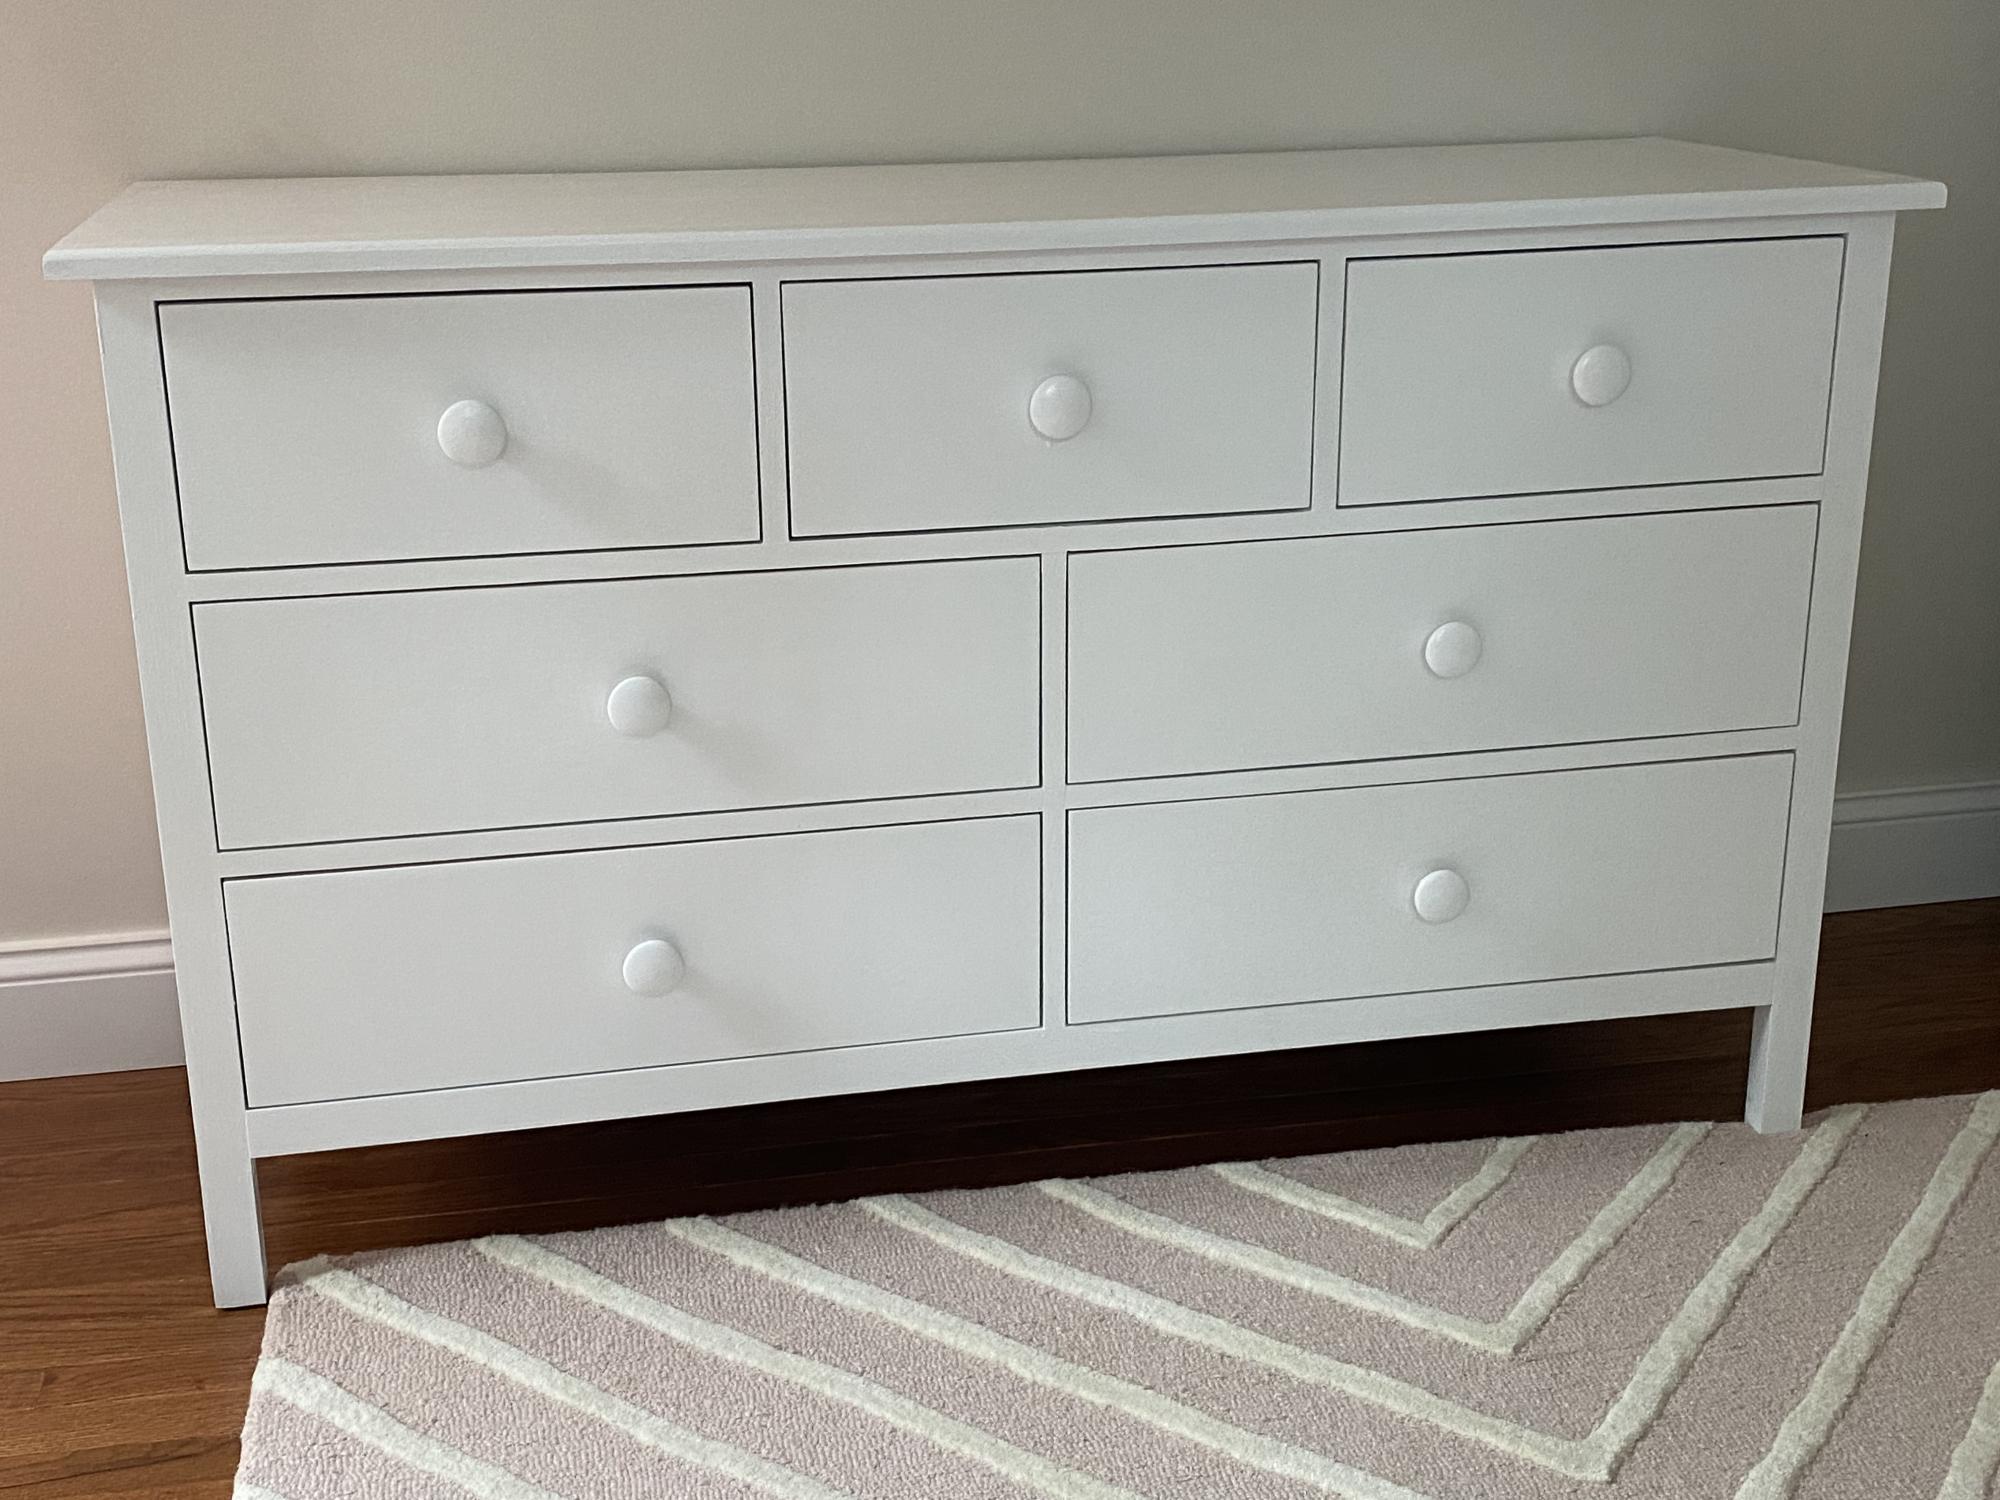
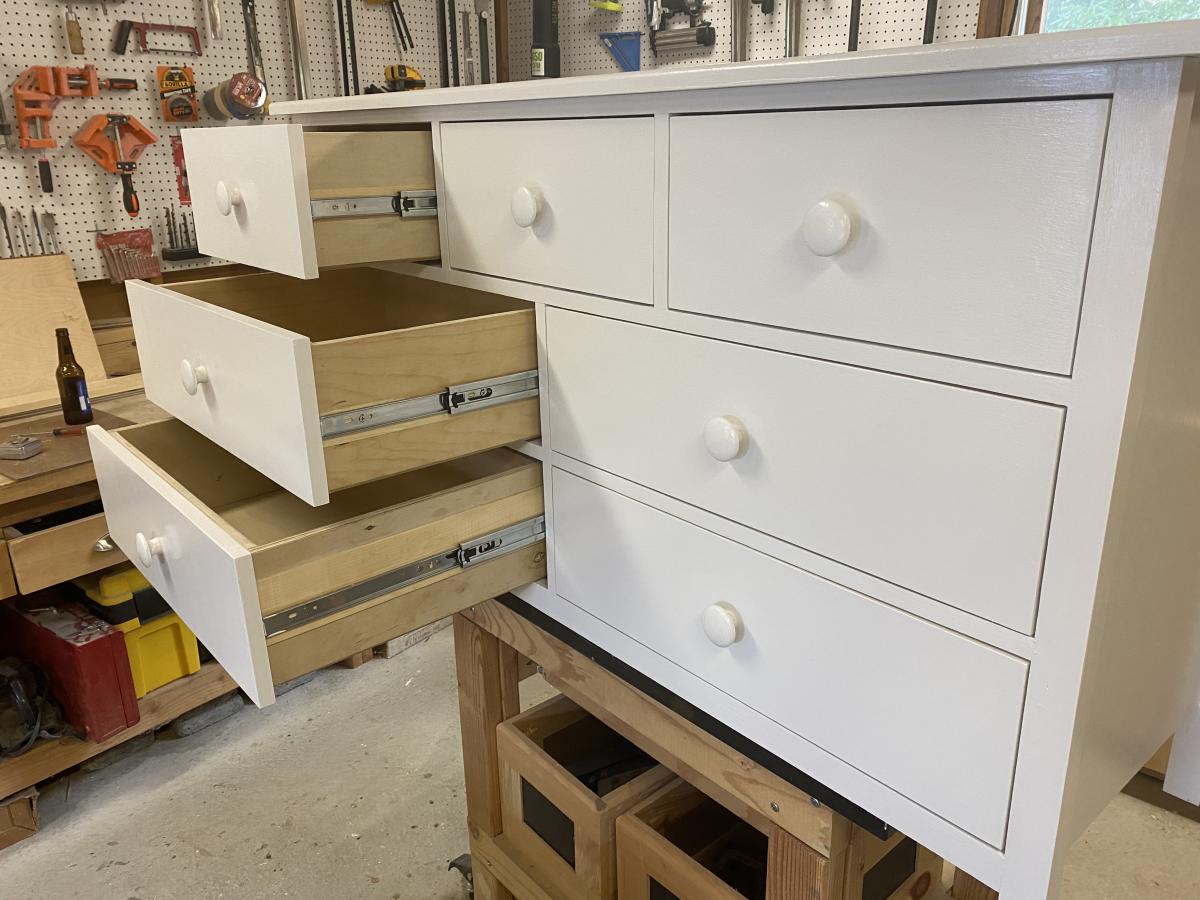
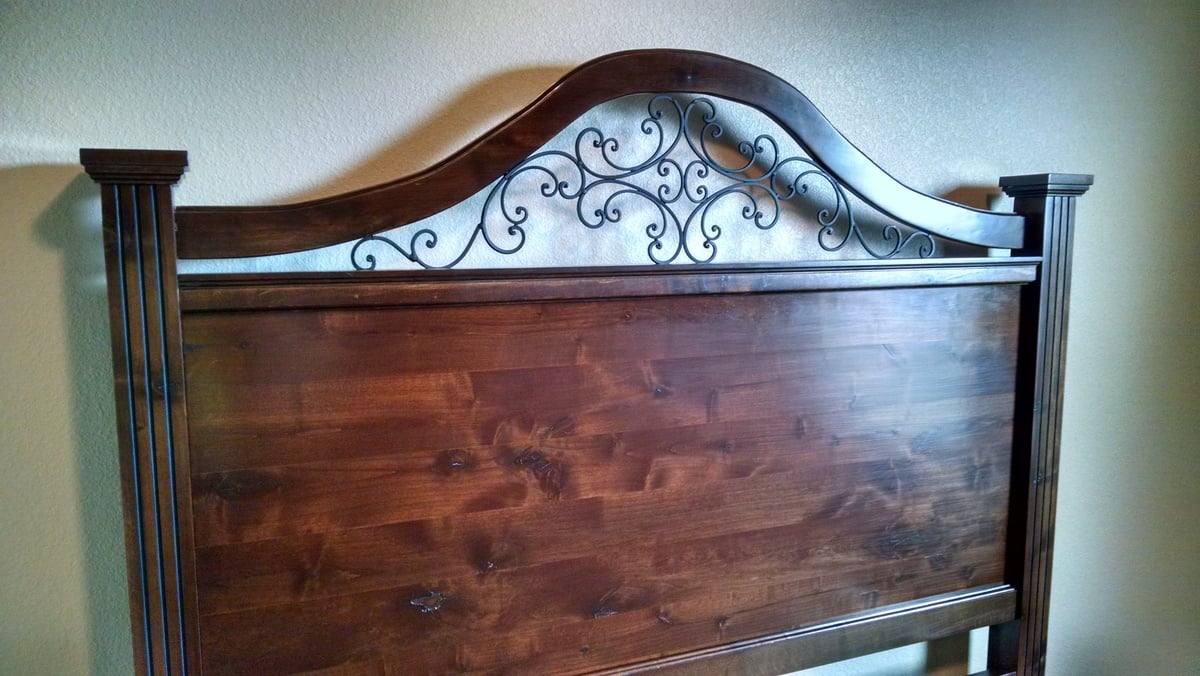
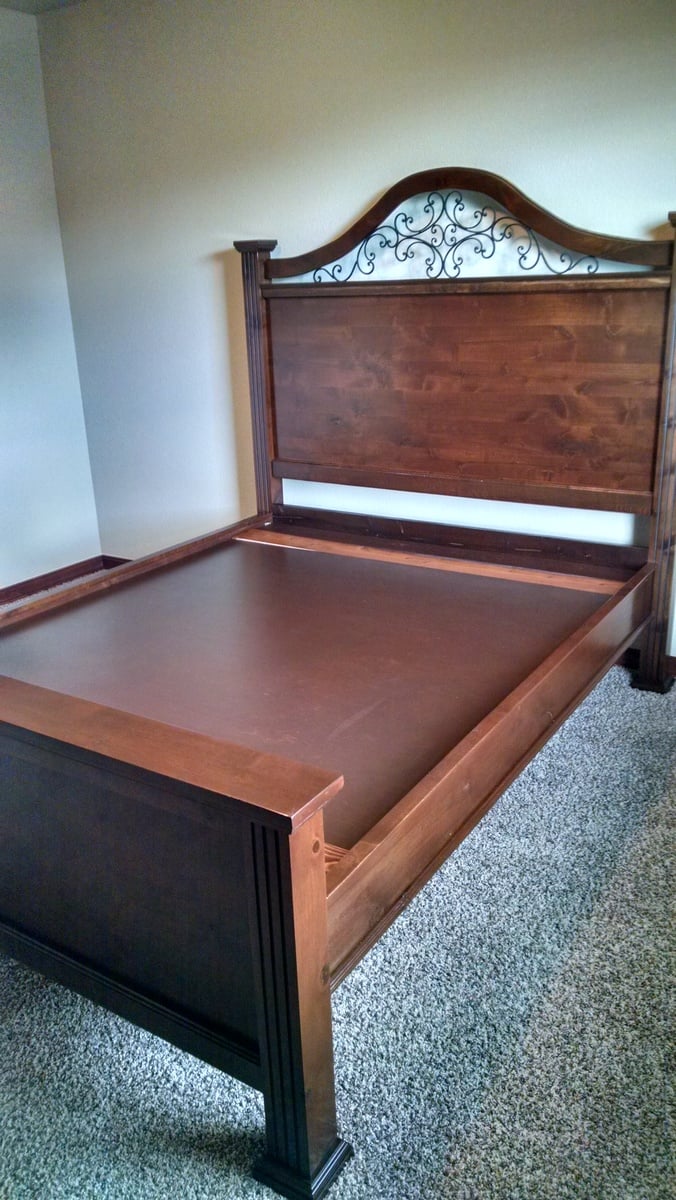
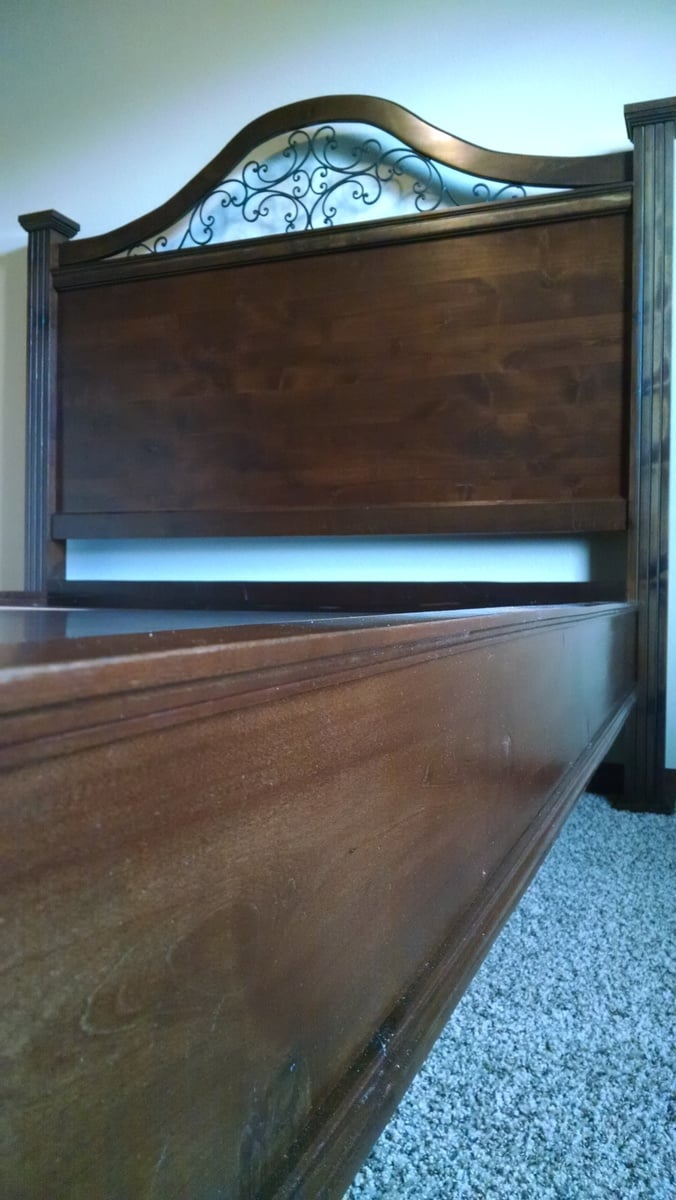
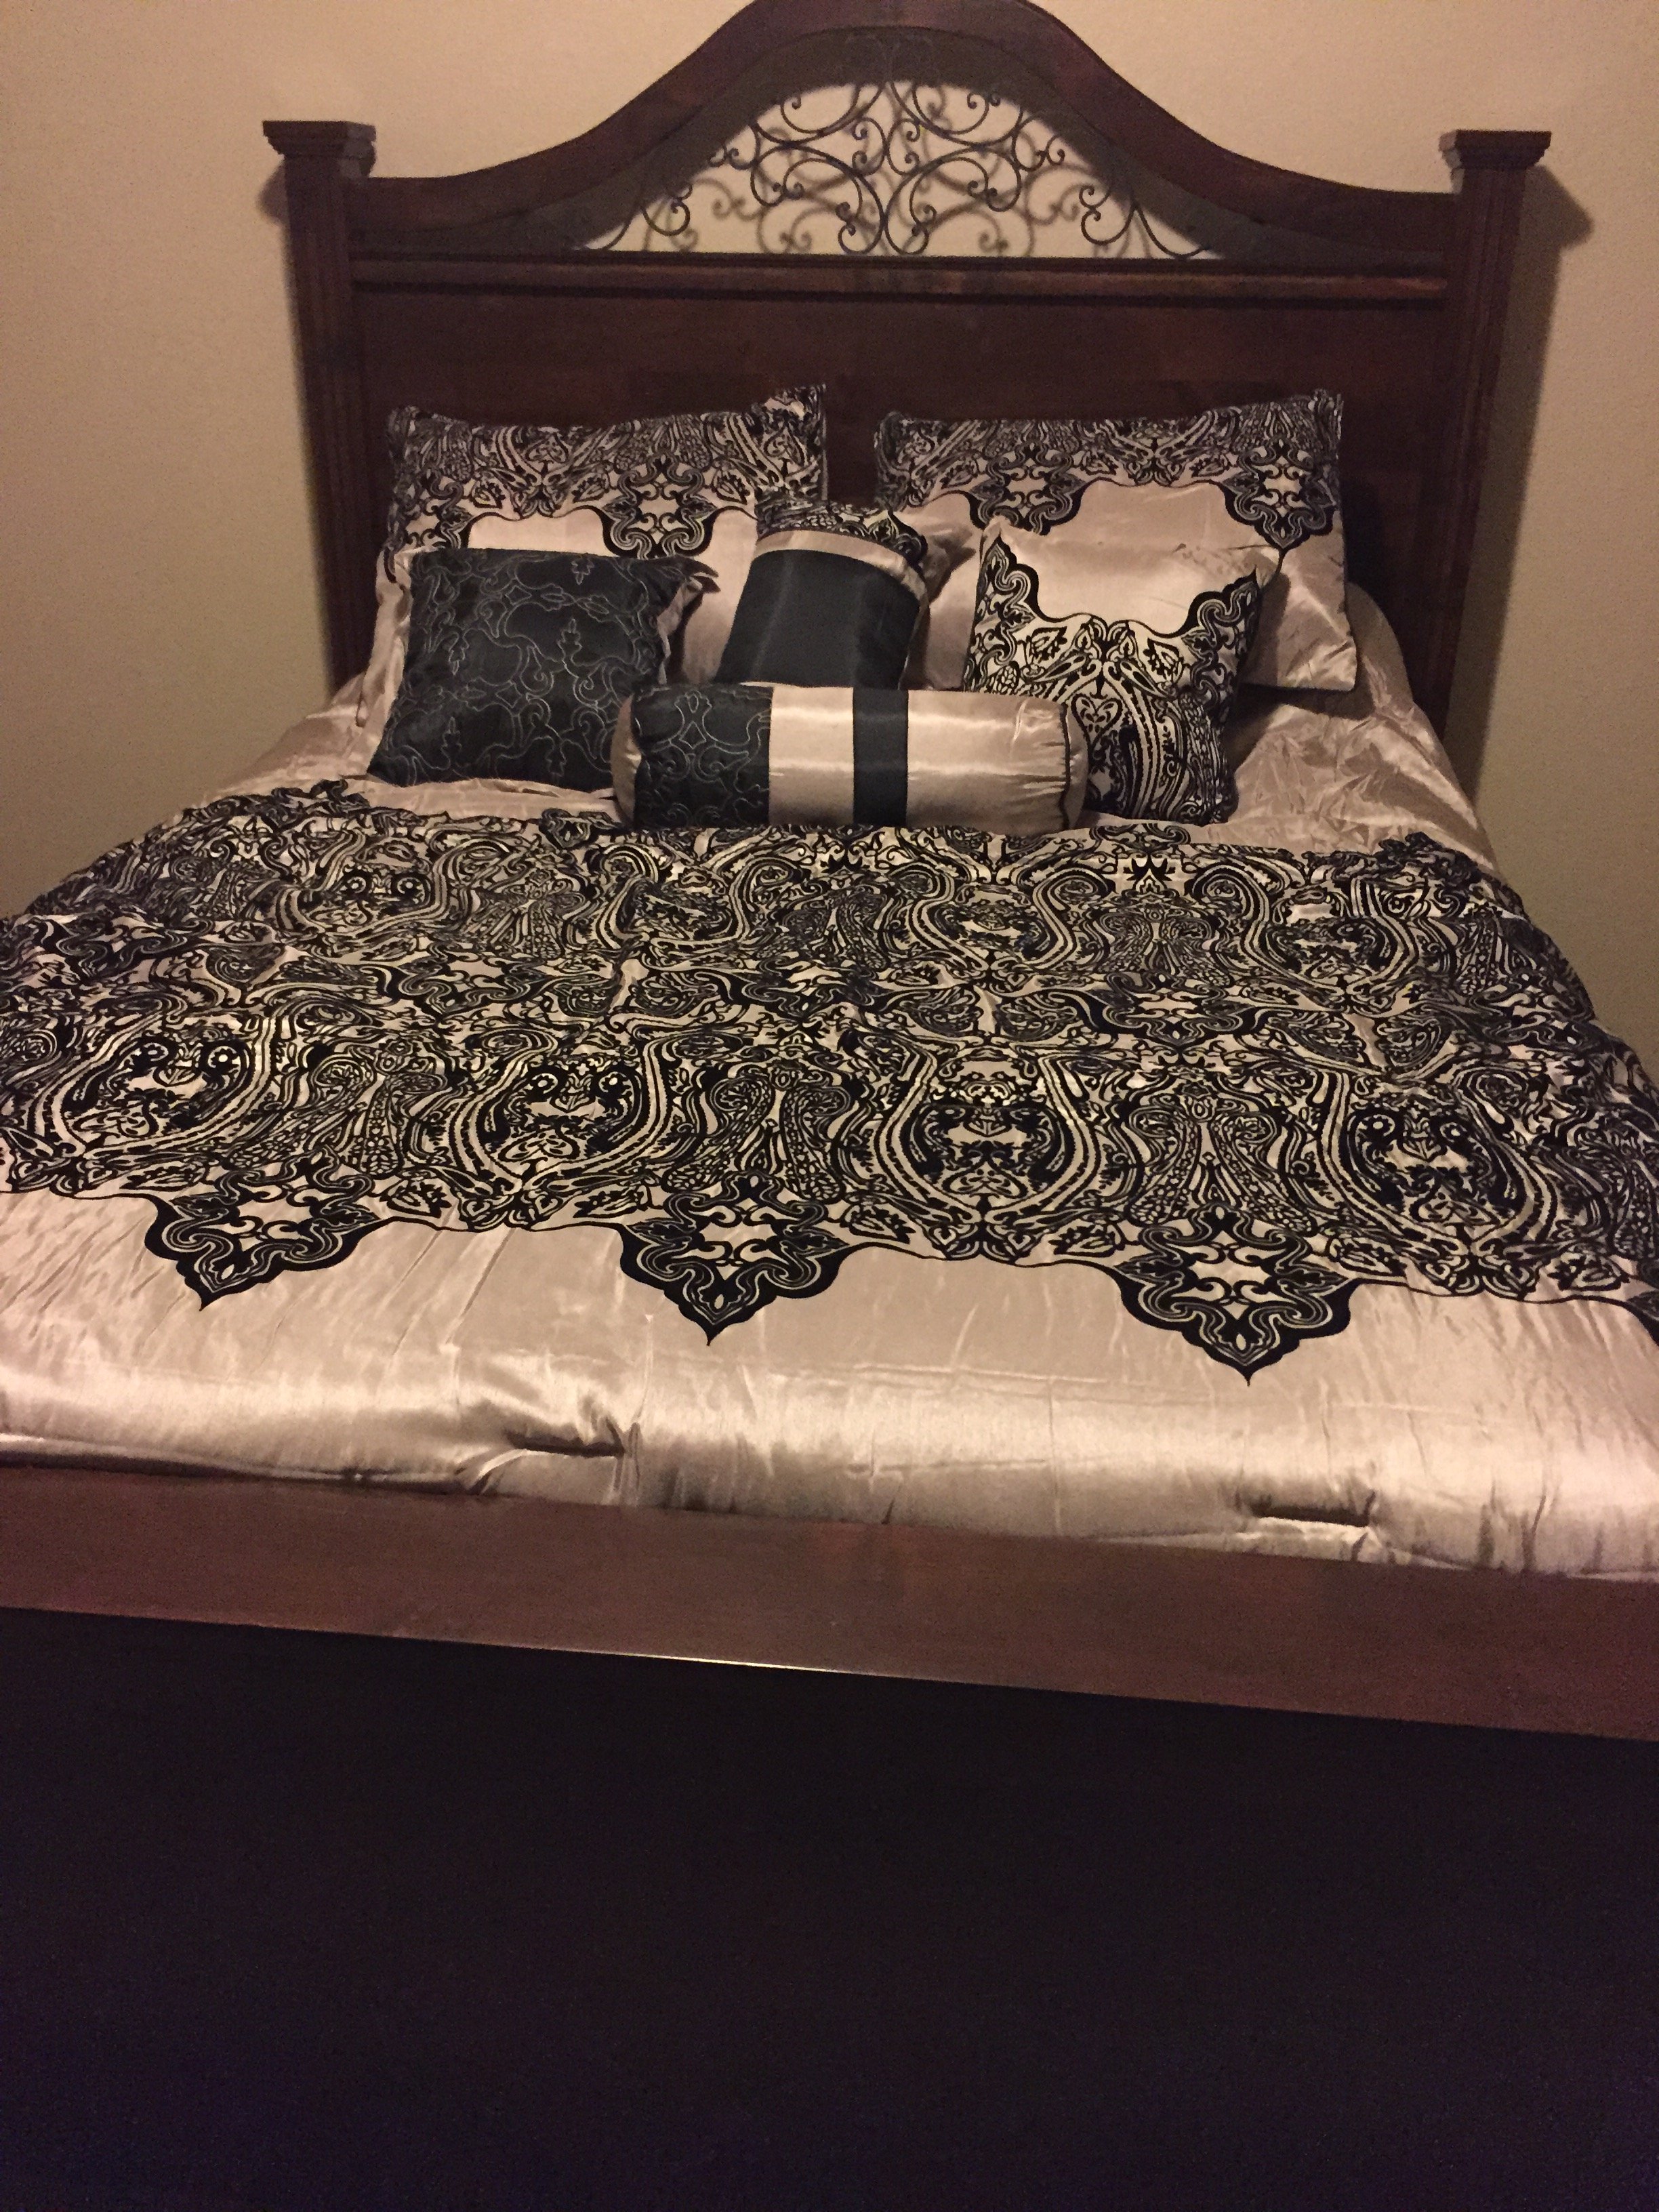
This bed frame is for my daughter’s new house, in the guest bedroom. She chose the design and got all the supplies to make it. The wood is knotty alder. It came out looking fairly close to the inspiration picture my daughter gave me to follow.
I used the Cassidy bed plan and made adjustments to accommodate the iron piece. The feet and top caps are made of one routered square with another slightly larger, unrroutered square stacked on top of it.
Thanks for the easy-to-understand plans. Everything I’ve learned about building has come from this awesome website!

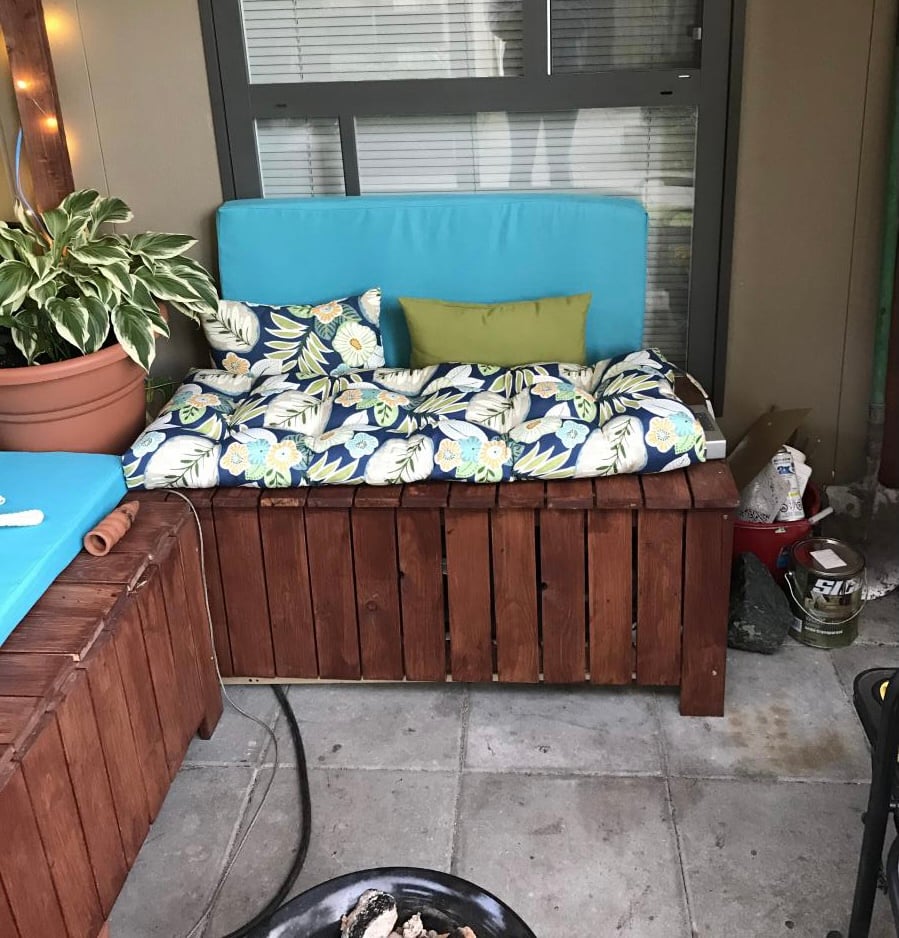
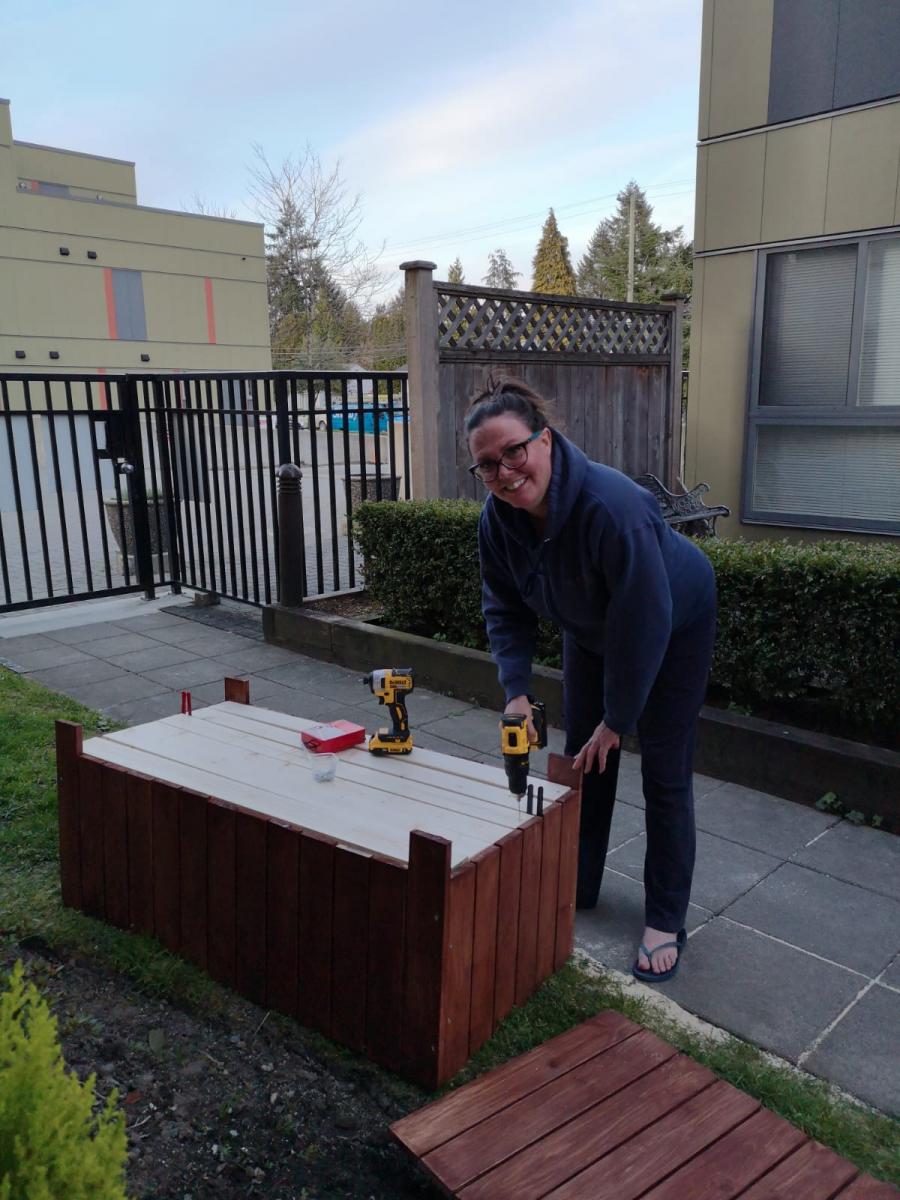
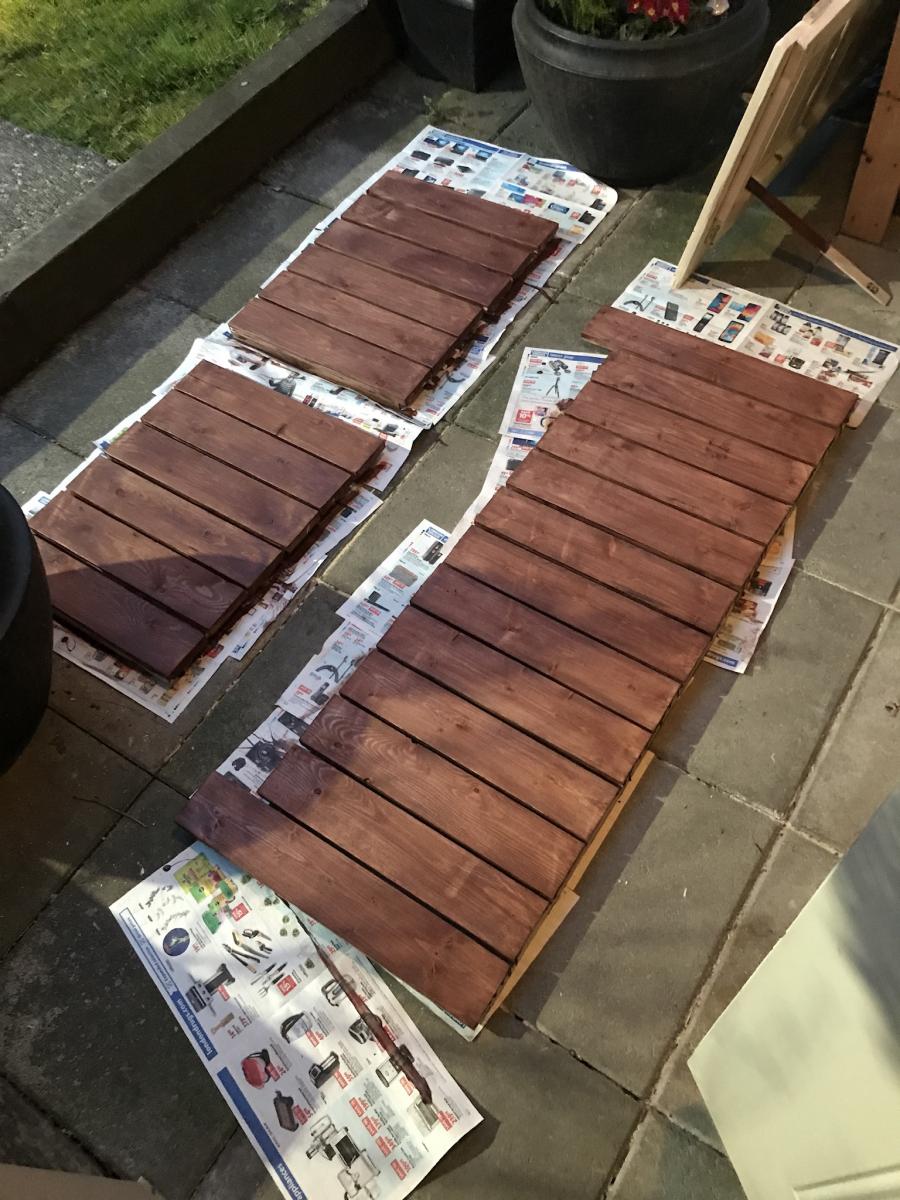
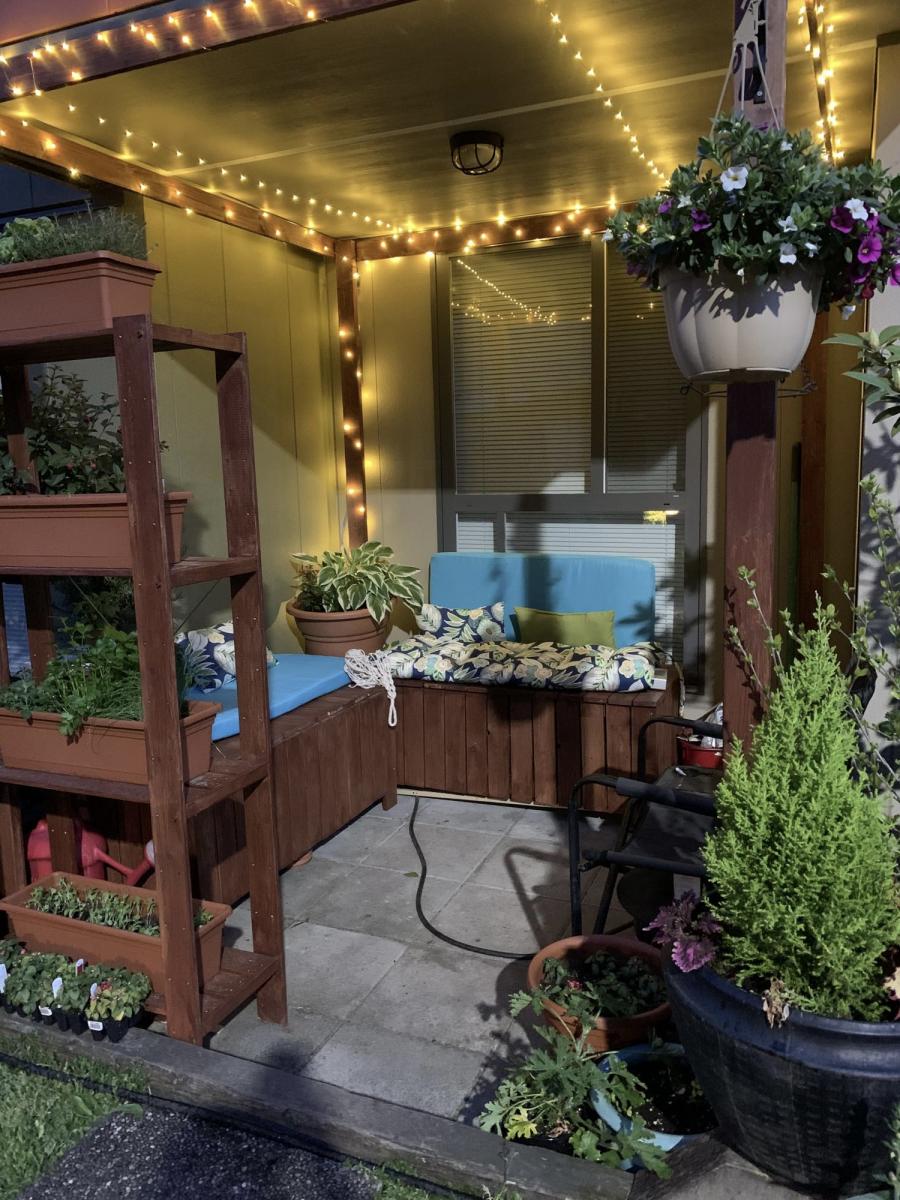
I bought a condo but I didn’t have a lot of space to entertain and grow things so these storage benches were the perfect solution thanks Anna for making such great easy to use plans out there for people of all skill levels
Wed, 10/06/2021 - 10:25
Great solution to add storage and seating outside, thanks for sharing!
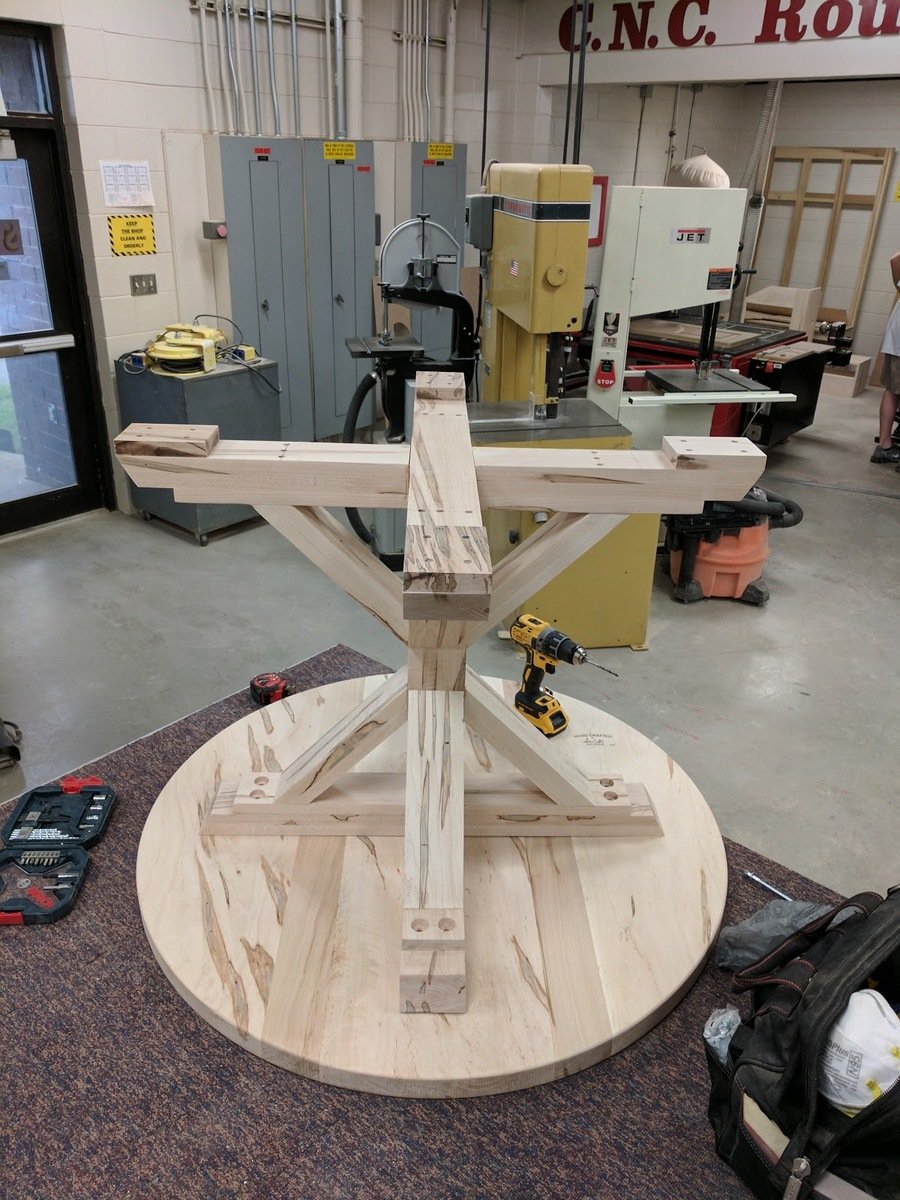
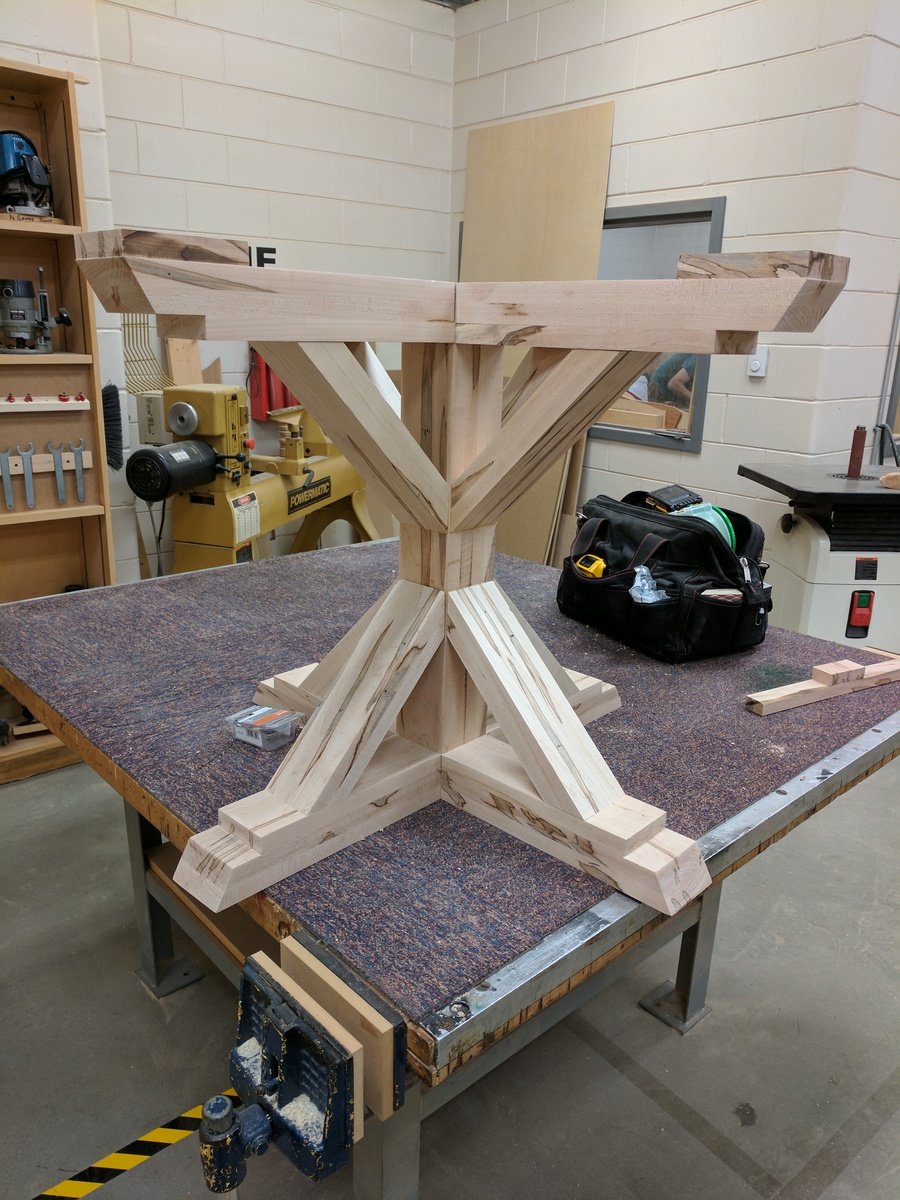
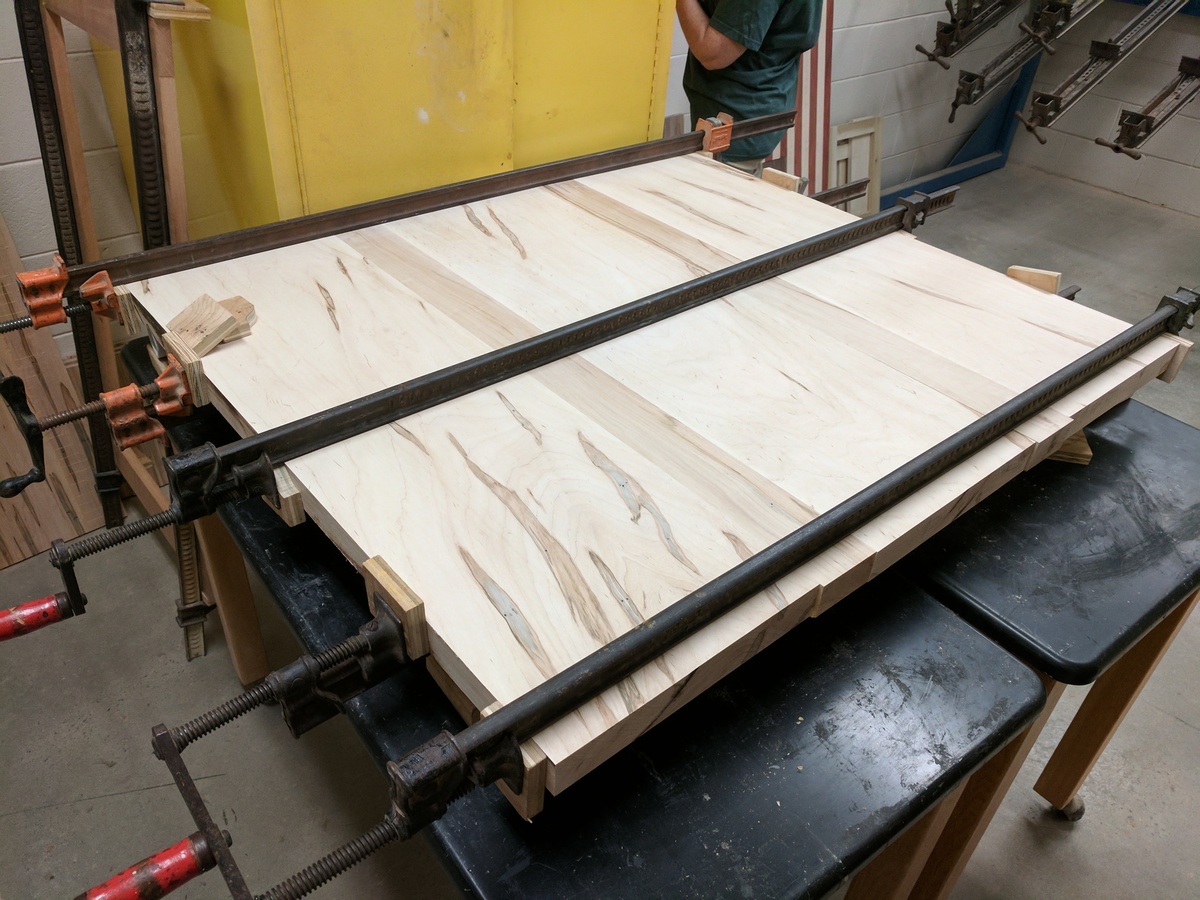
This is my first fine woodworking project after taking two classes at my local Firestarter FabLab community entrepreneurial center.
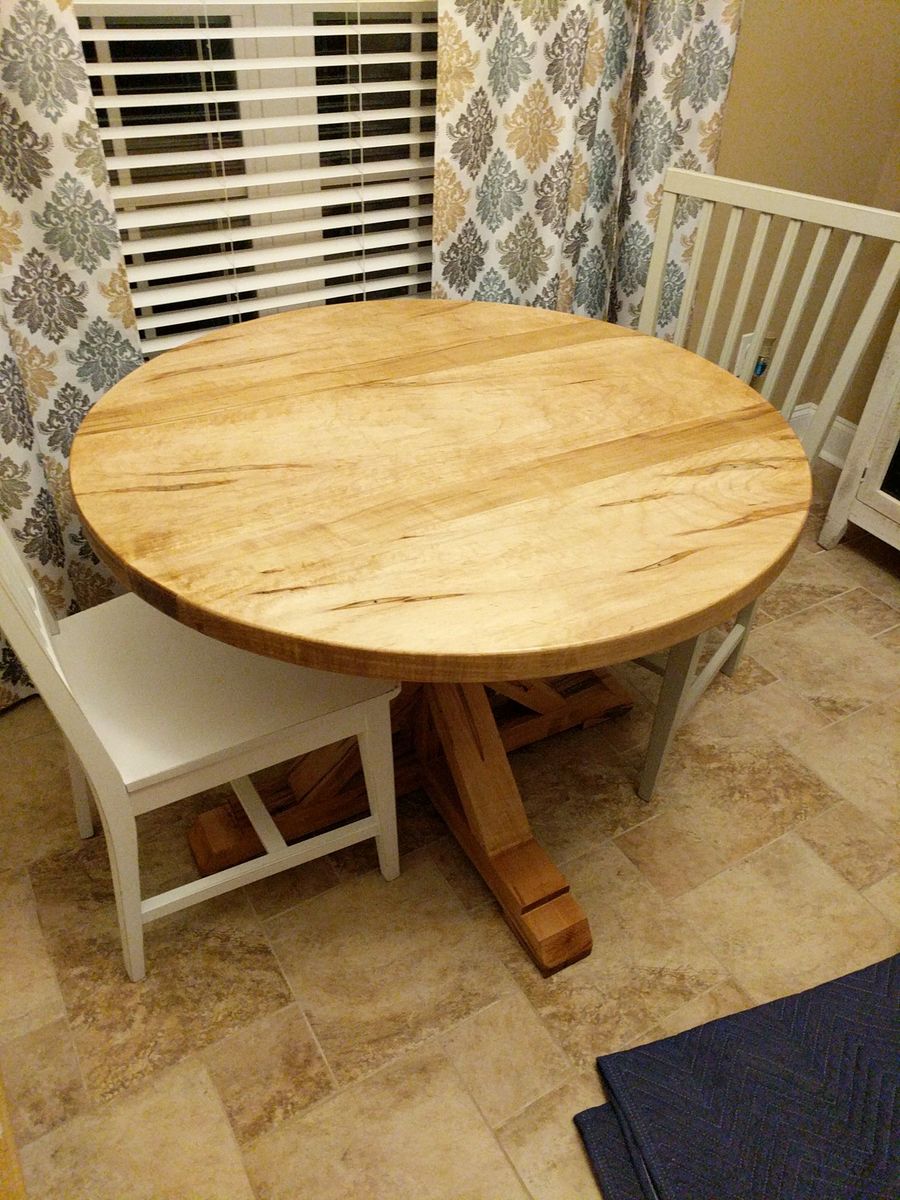
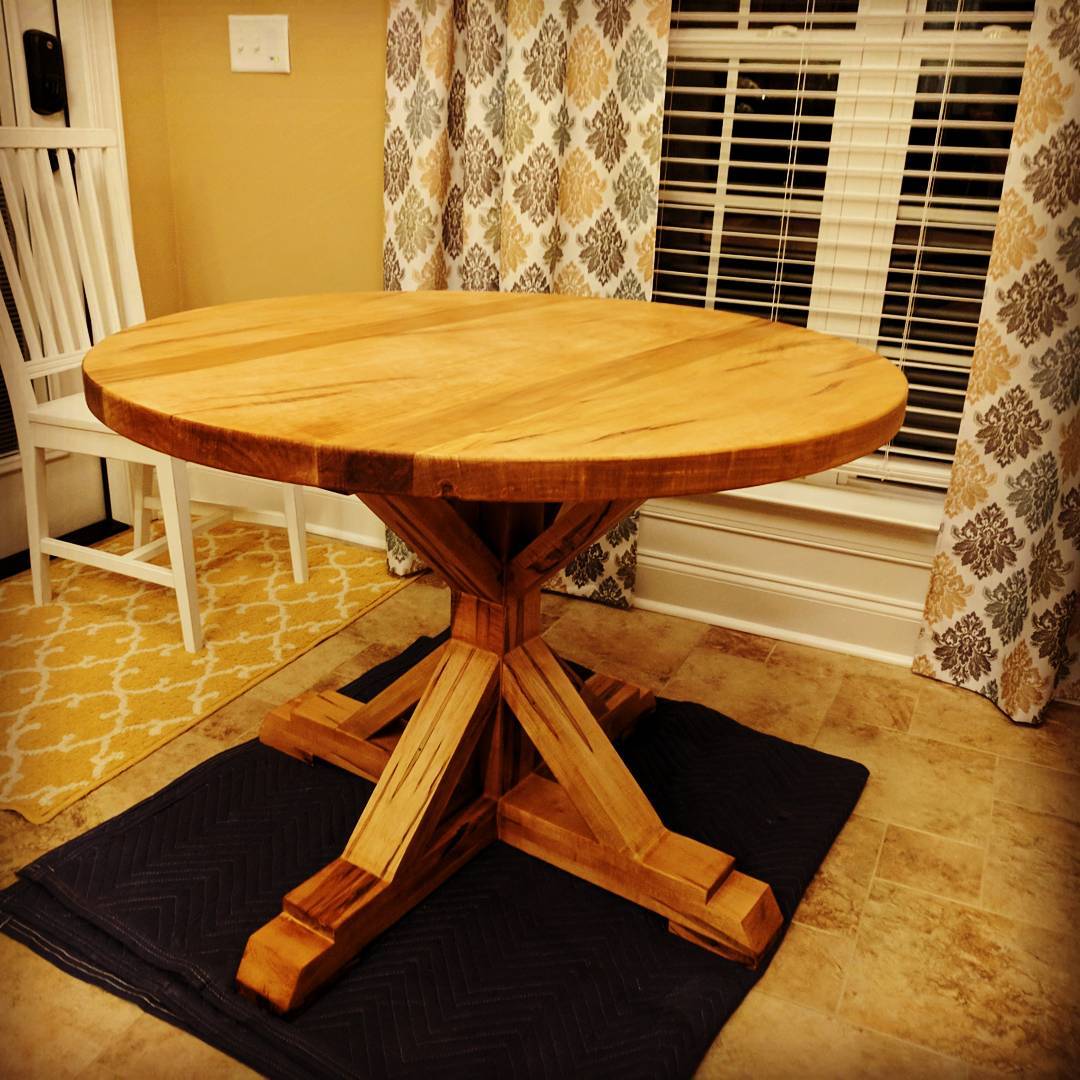
I used wormy maple, the top is 40" x 1 1/2" that I used the CNC router to cut out. The base I used 1" and glued everything to thickness for the the Square X Base Pedestal Dining Table plans, with a few variation. For the 45's I only made 2x4's instead of the specified 4x4's and the same for the X on the bottom. Thrilled with how it turned out.
Thank you for the great inspiration!
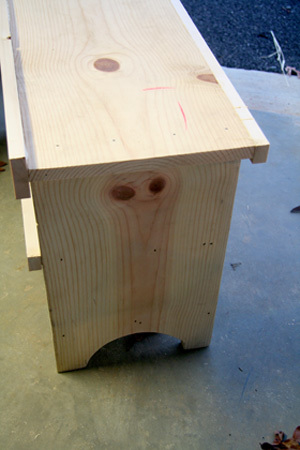
My husband and I put this together to fit a spot that was just slightly off of what standard furniture would accomodate. Looking for something simple as a first build, we went with the Kids Country Bench and made some changes along the way.
We made 3 cubbies on the bottom shelf for extra storage and a little extra stability, since our boards were more bowed than we preferred. We also removed the front and back aprons. In the front we just attached a 1x2 that we ripped into a 1x1 as a trim piece. In the back, we centered a 1x2 to give a slight lip in the back.
I don't have a jigsaw, so we used my FIL's Scroll Saw. That was interesting ... but the sides turned out ok. Not perfect, but ok.
I was hoping to finish this with a high gloss product, but since the boards we ended up with more 'rustic' than I anticipated, I decided to embrace that and go with a distressed finish. I used a spray primer, and then one coat of Sherwin Williams yellow, covered with a dry brush of Sherwin Williams blue. I then sanded the corners and edges and finished with a spray top coat.
We had lots of fun, although it took us a long time. We were only working in small shifts, in between naps. If we had managed to get, say, 3 straight hours to build, I think we could have finished in in that time period.
This was a great starter project, and it's nice to know that we can make MINOR modifications to a plan and not have it fall apart on us :)
Thanks for the inspiration Ana!


Comments
Ana White Admin
Mon, 10/04/2021 - 16:55
Great tables!
Excellent builds, love the color choice! Thank you for sharing ~