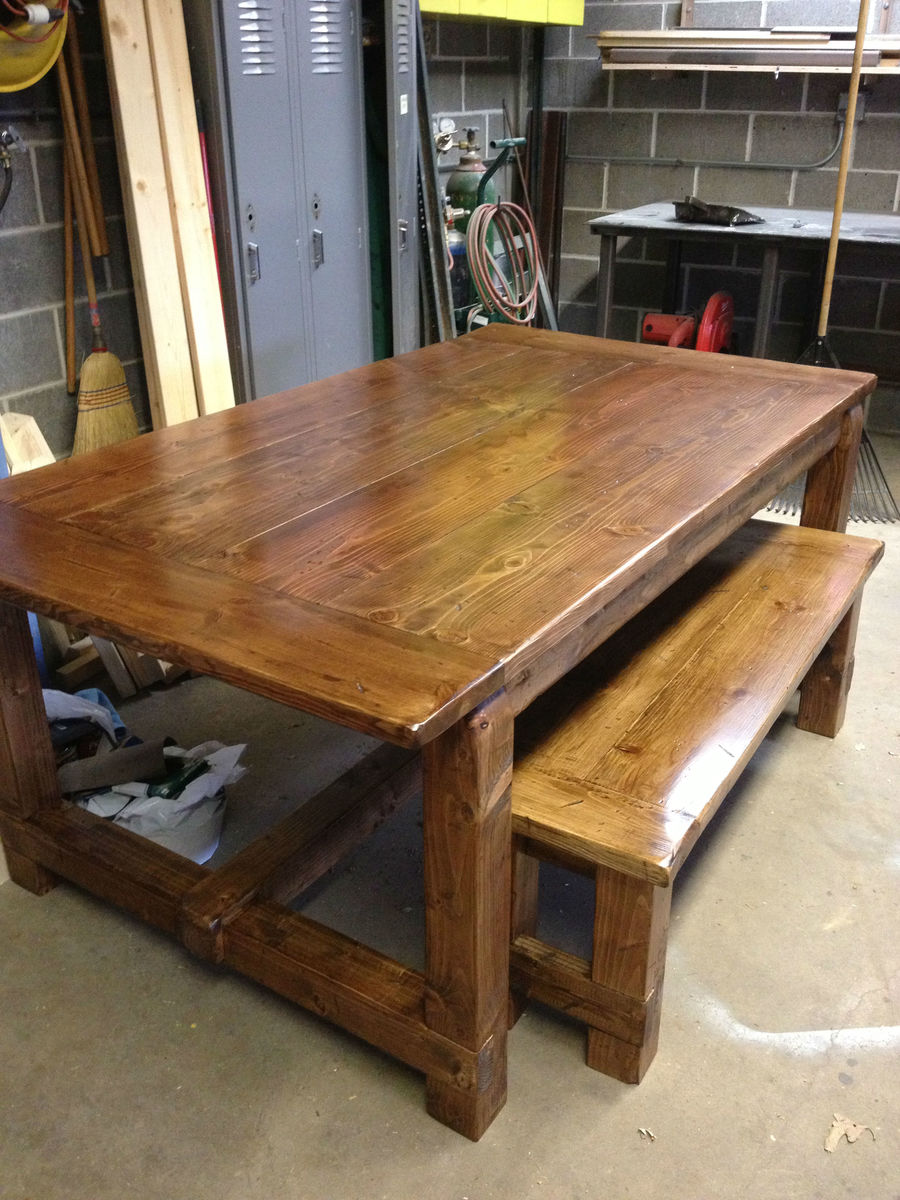
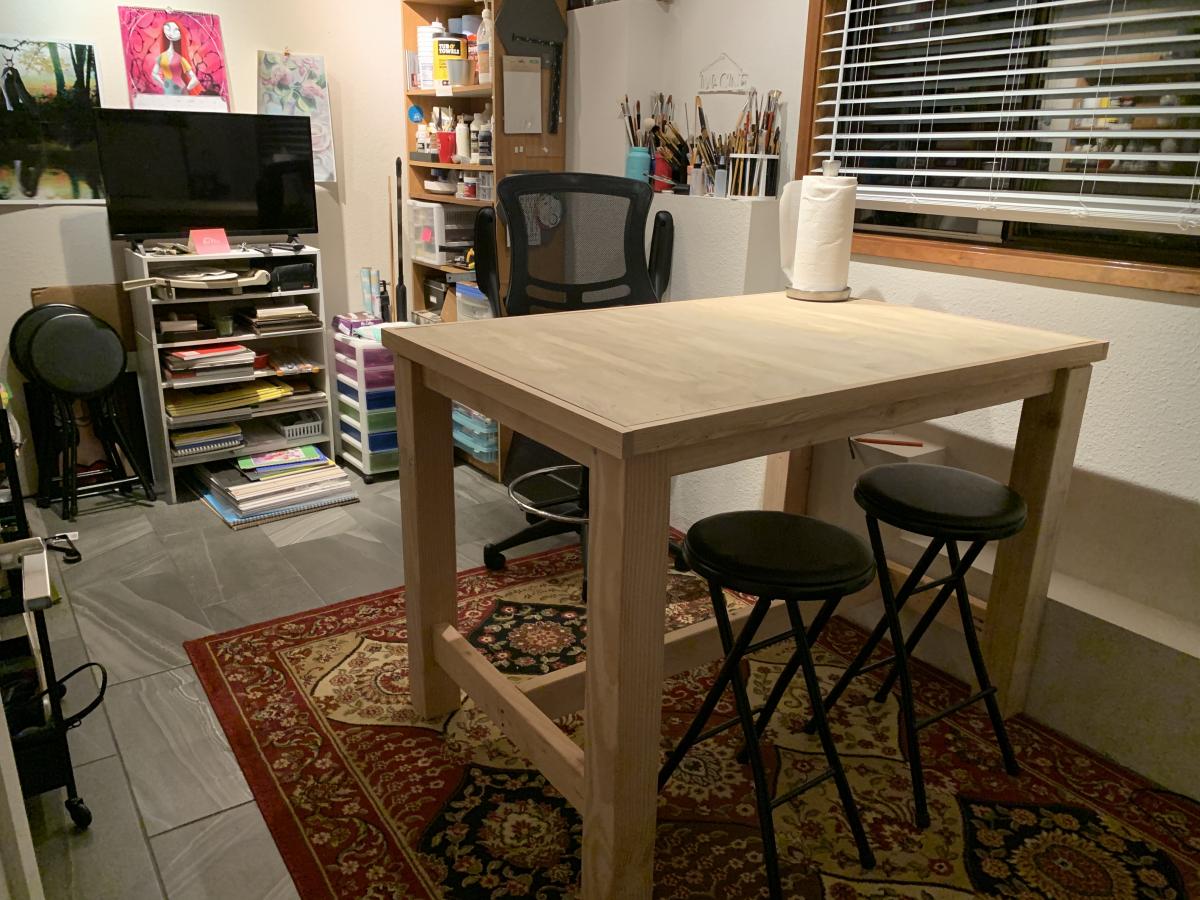
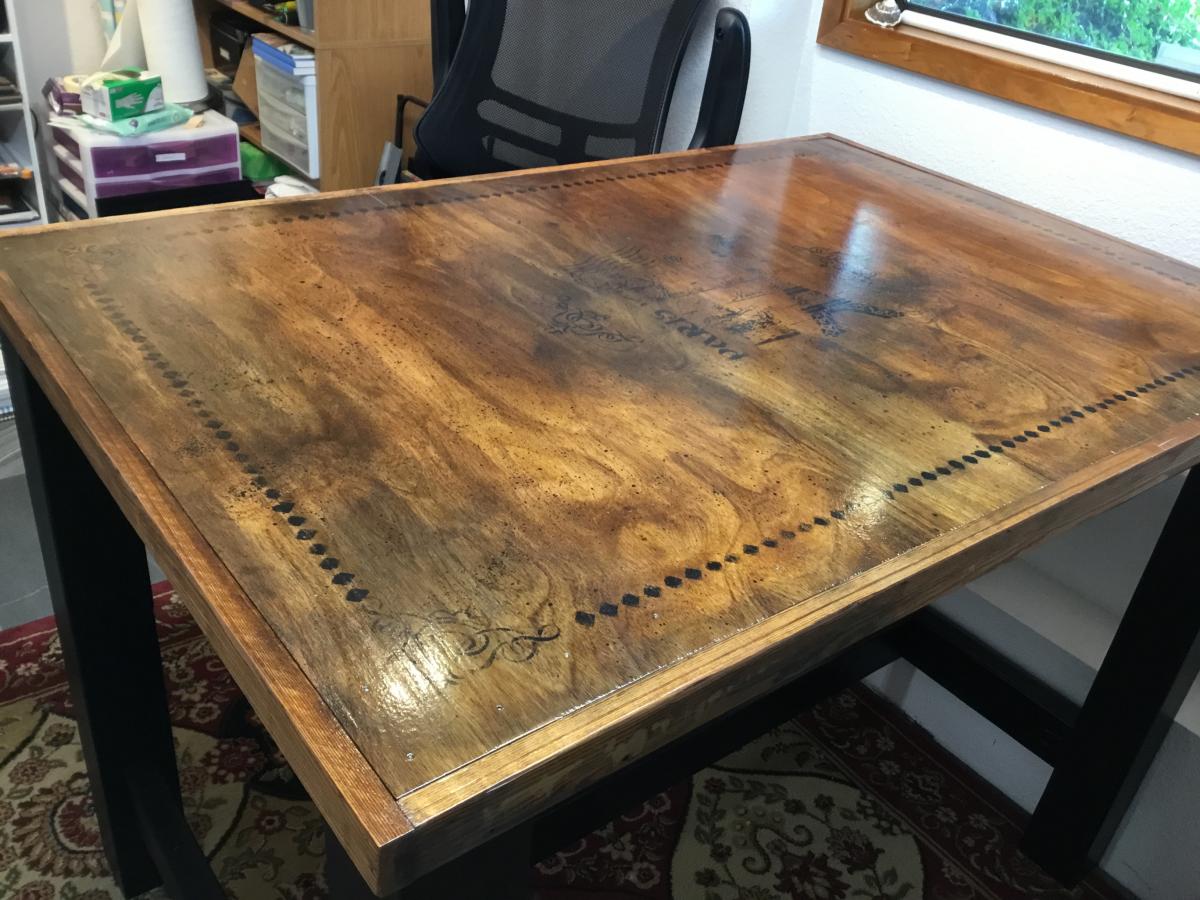
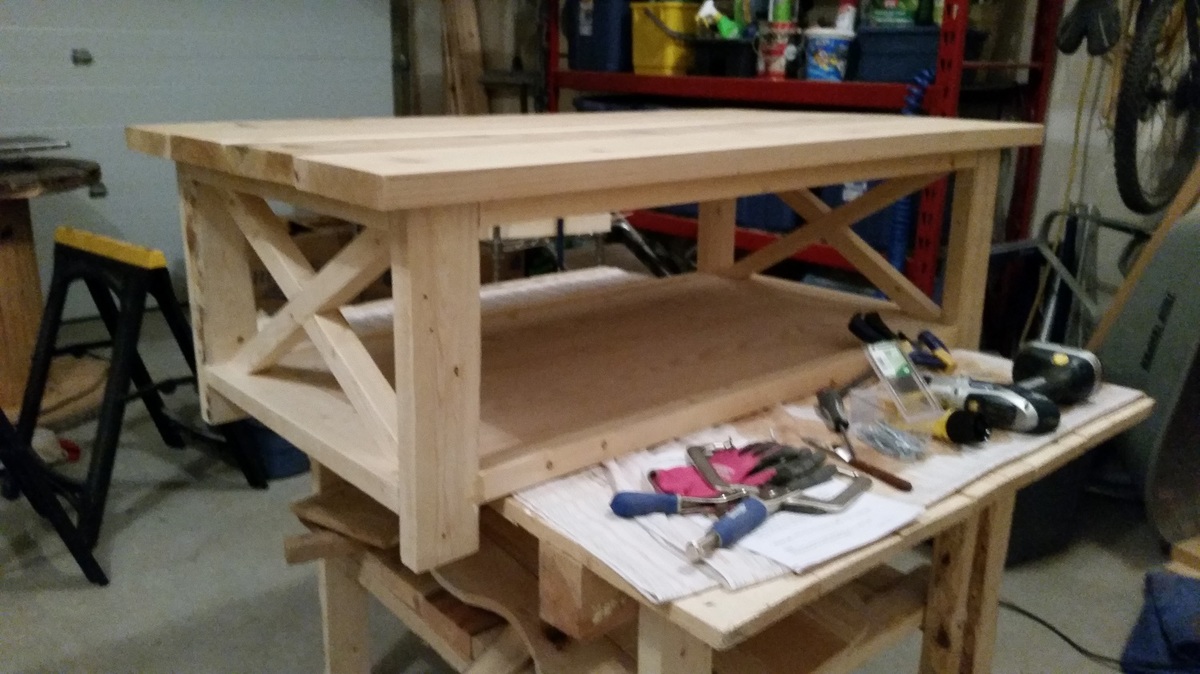
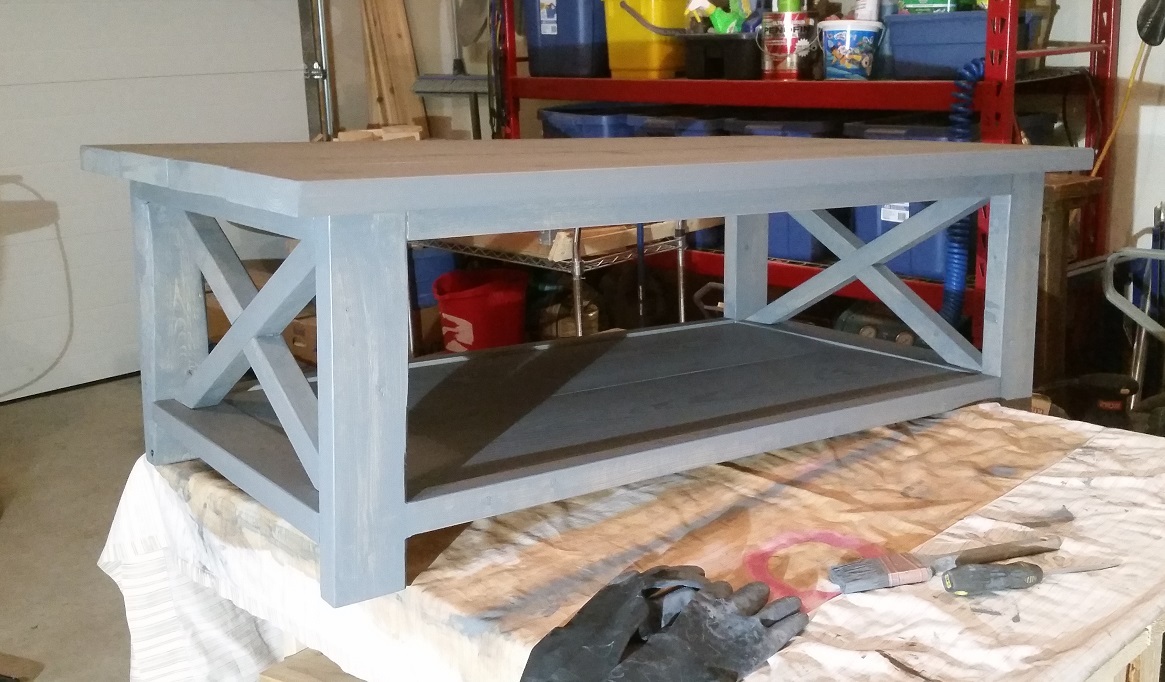
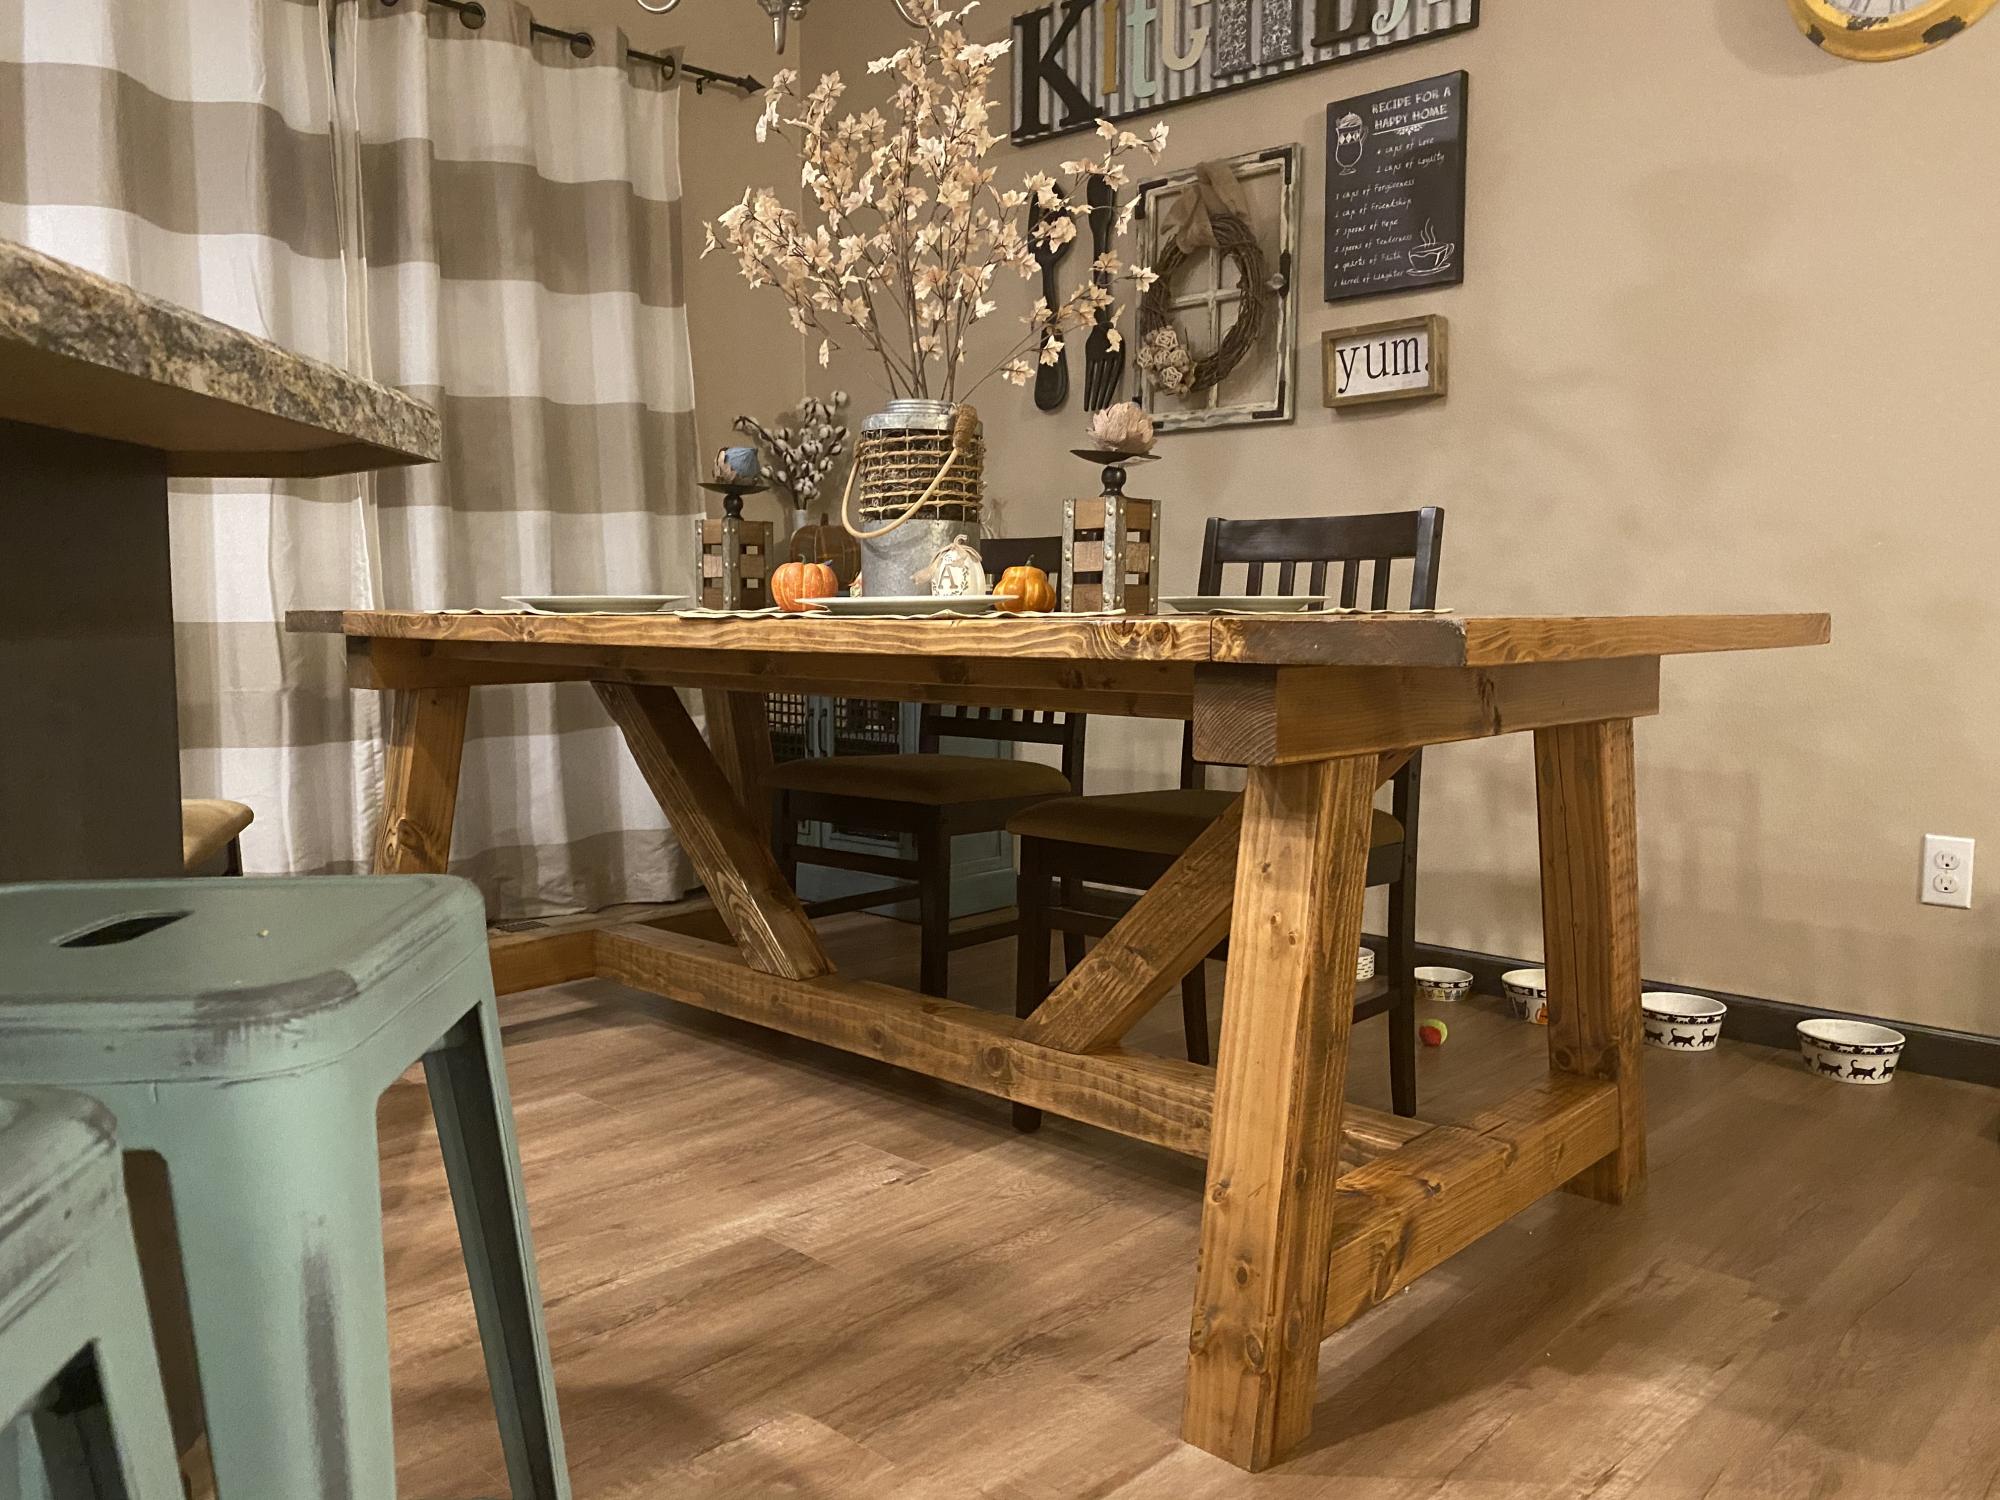
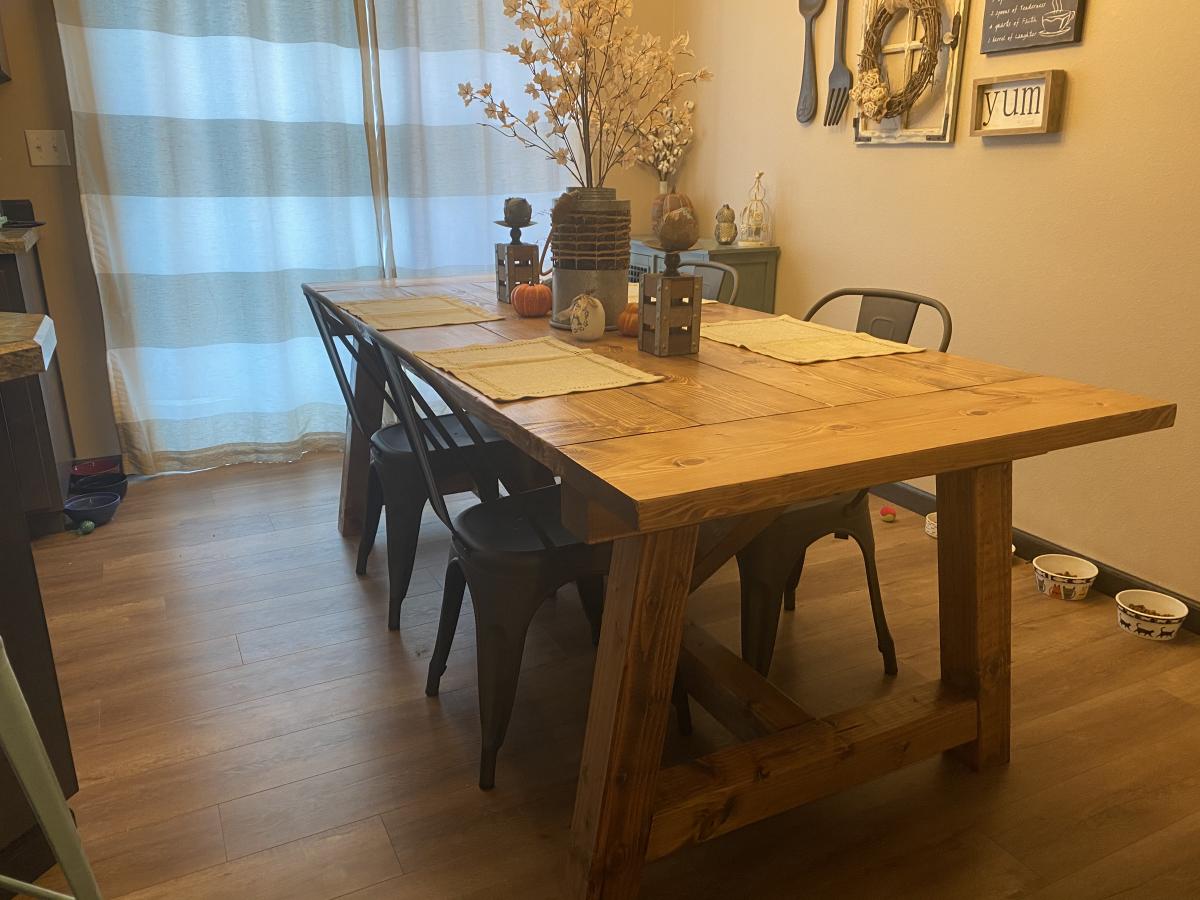
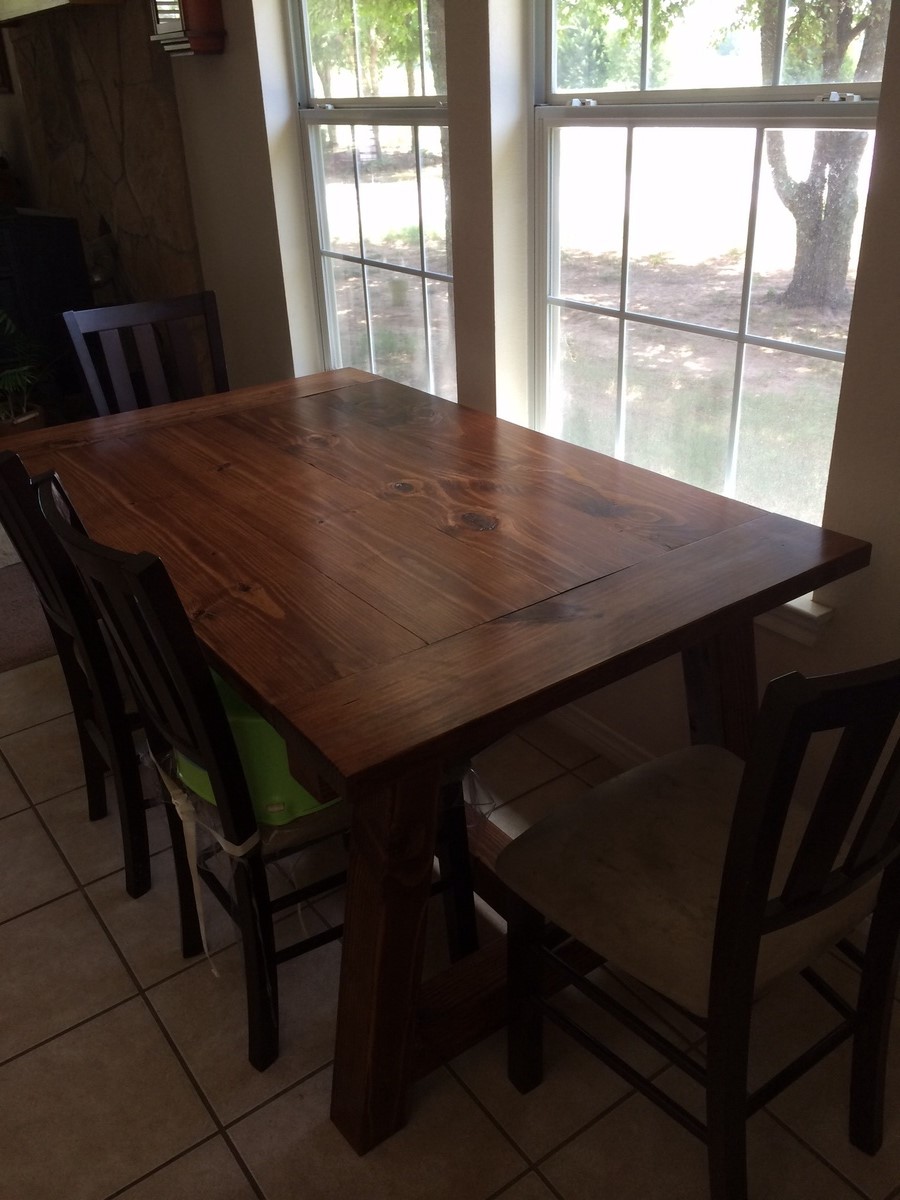
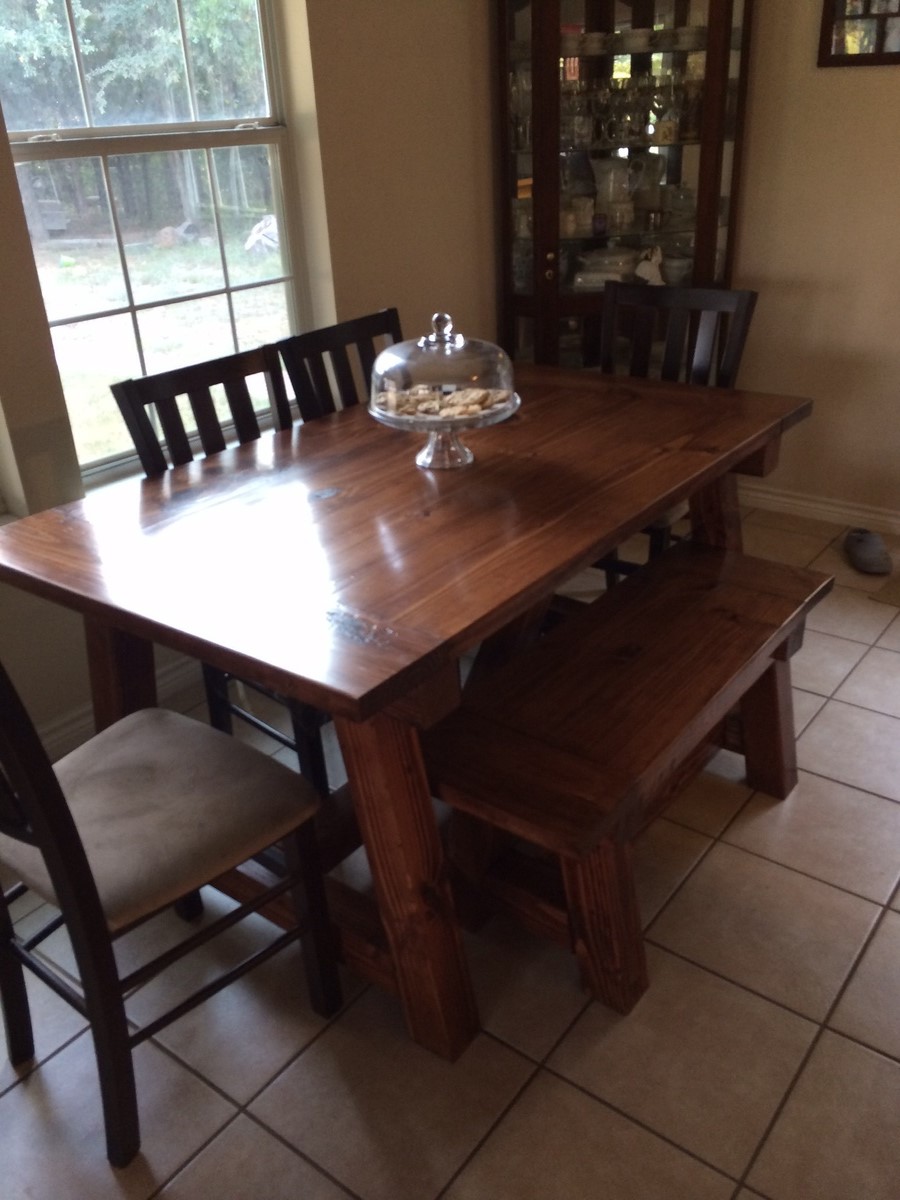
Community Brag Posts

Farmhouse table

Submitted by jleach on Sat, 12/29/2012 - 06:53

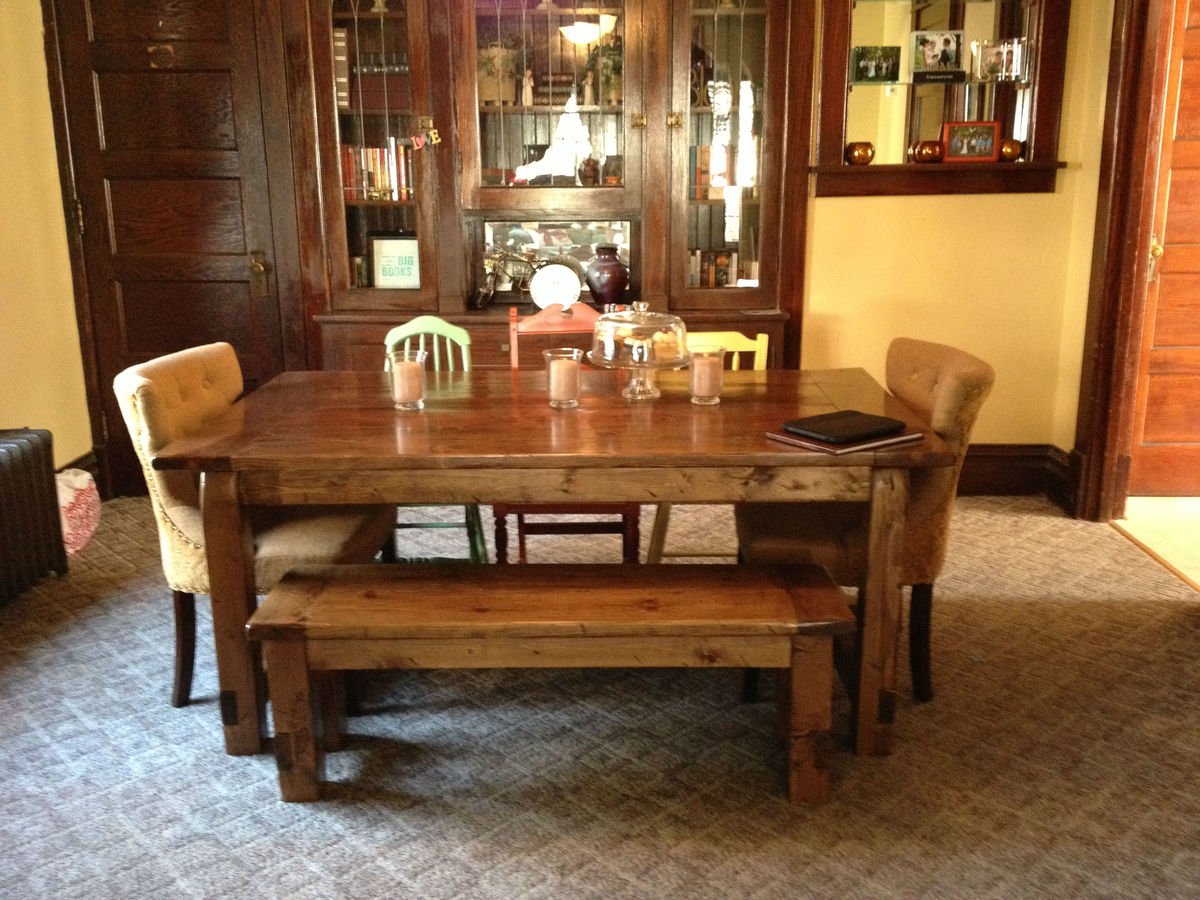
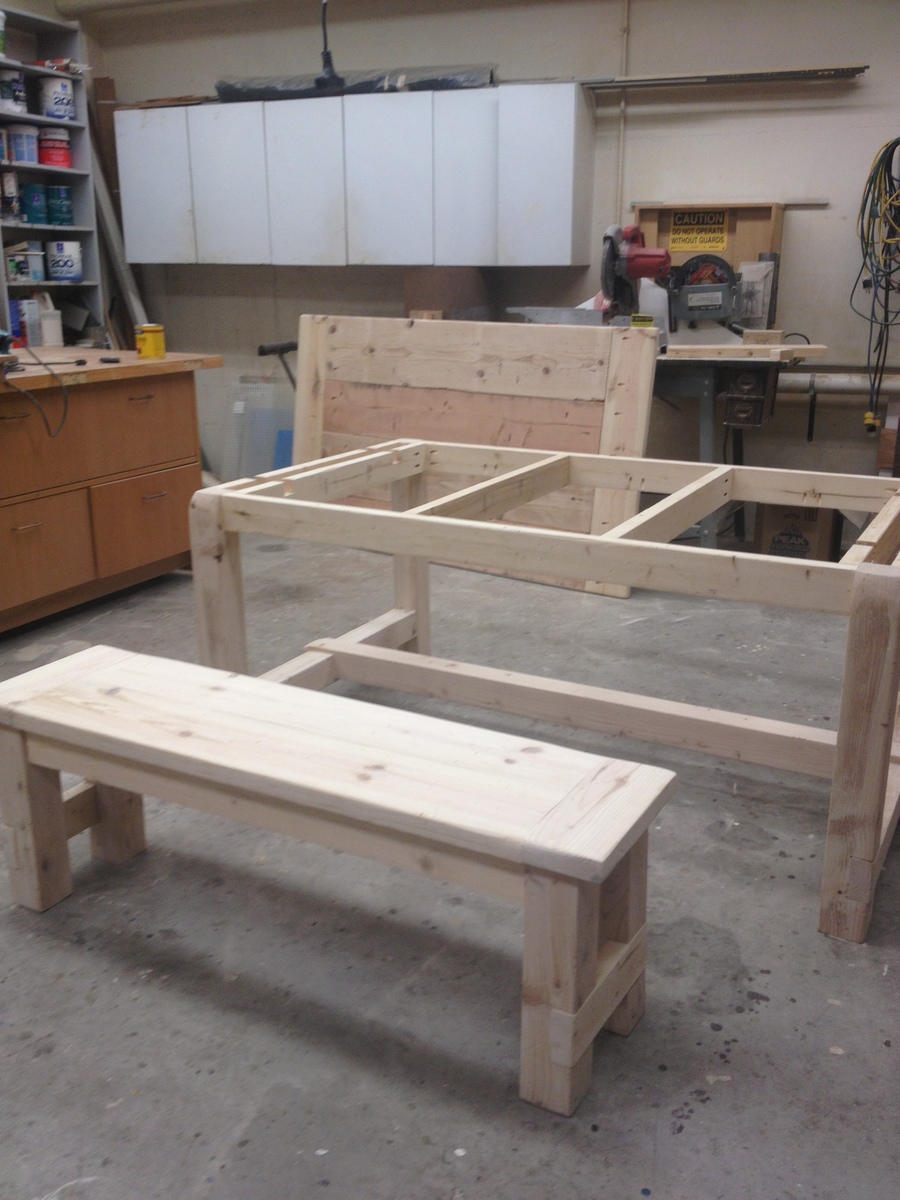
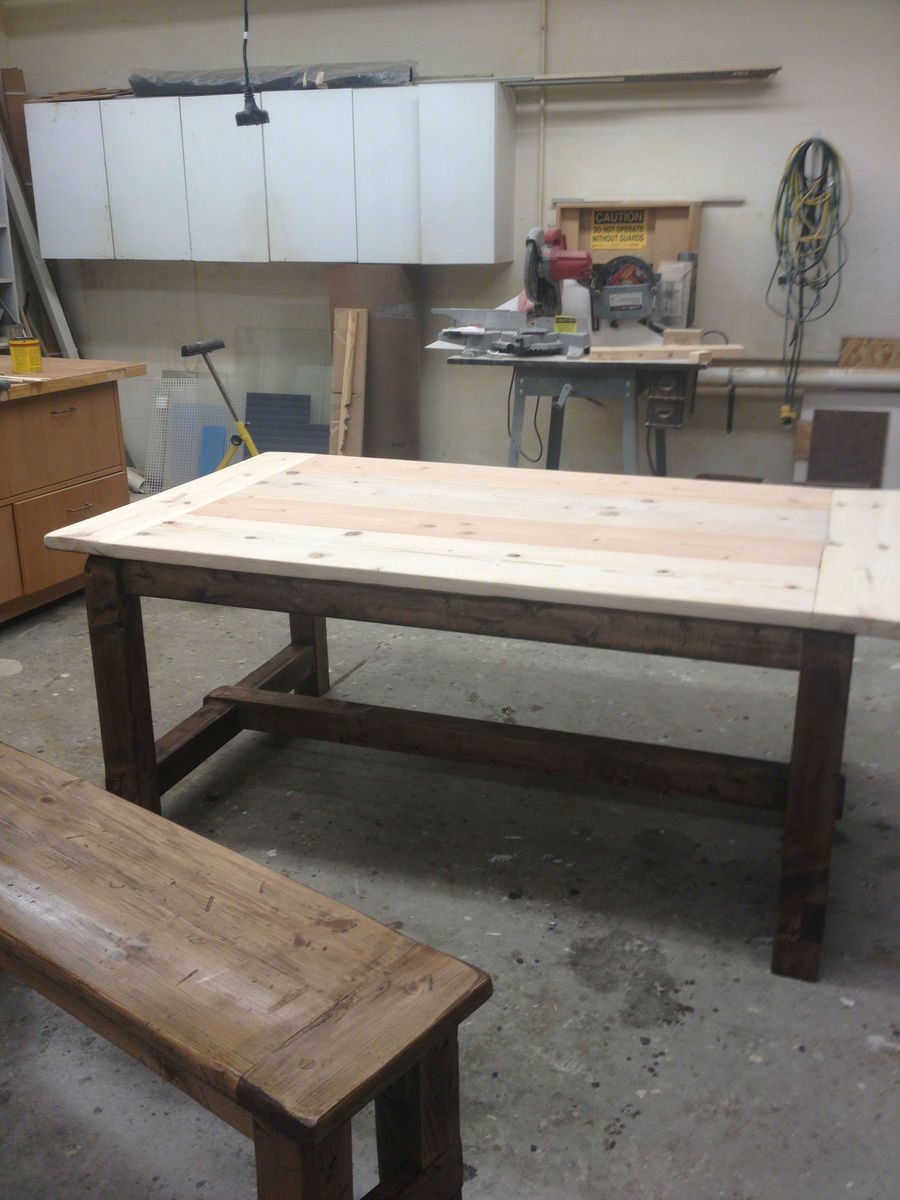
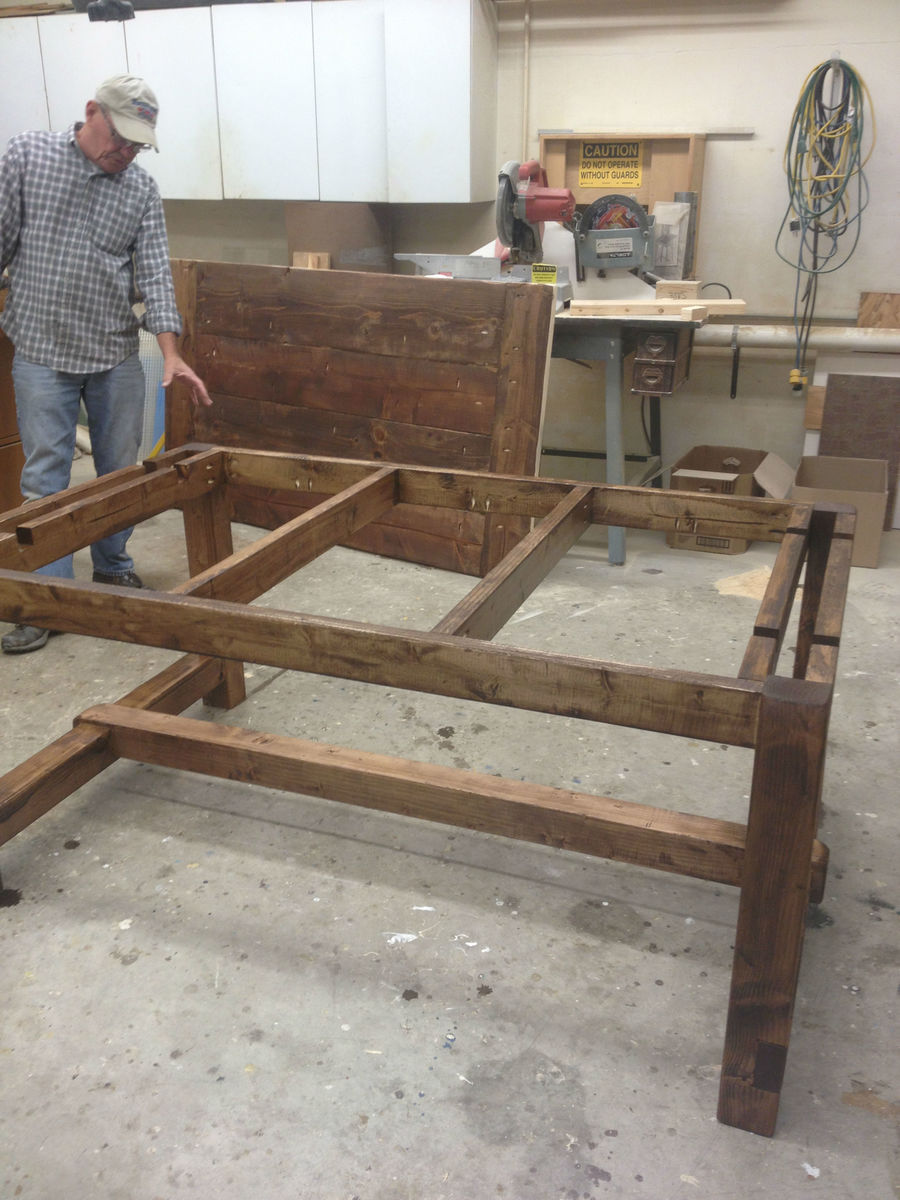
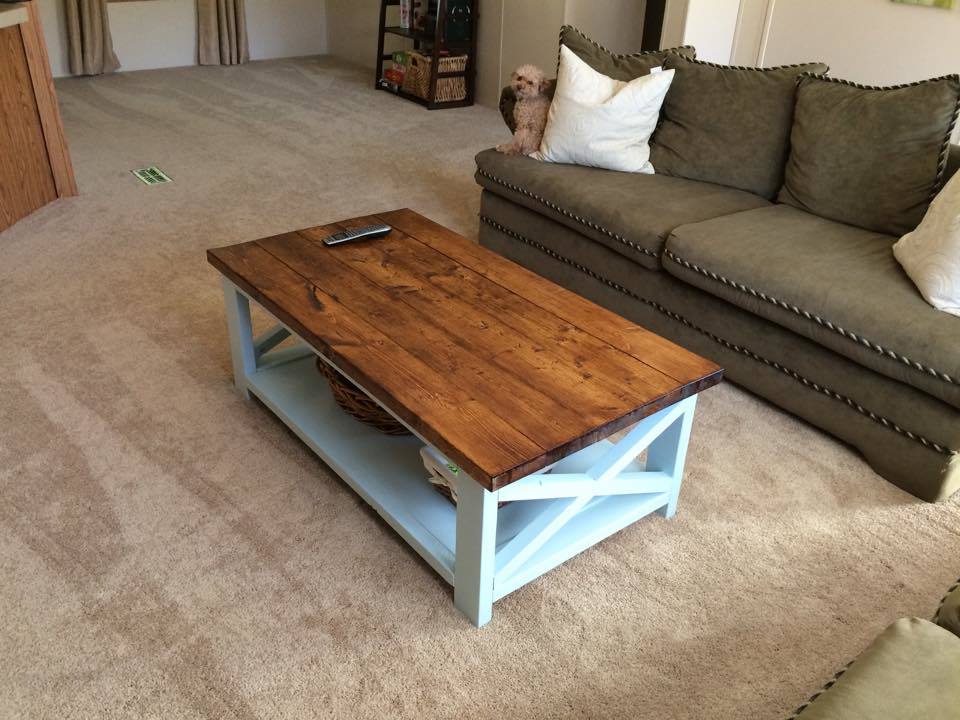
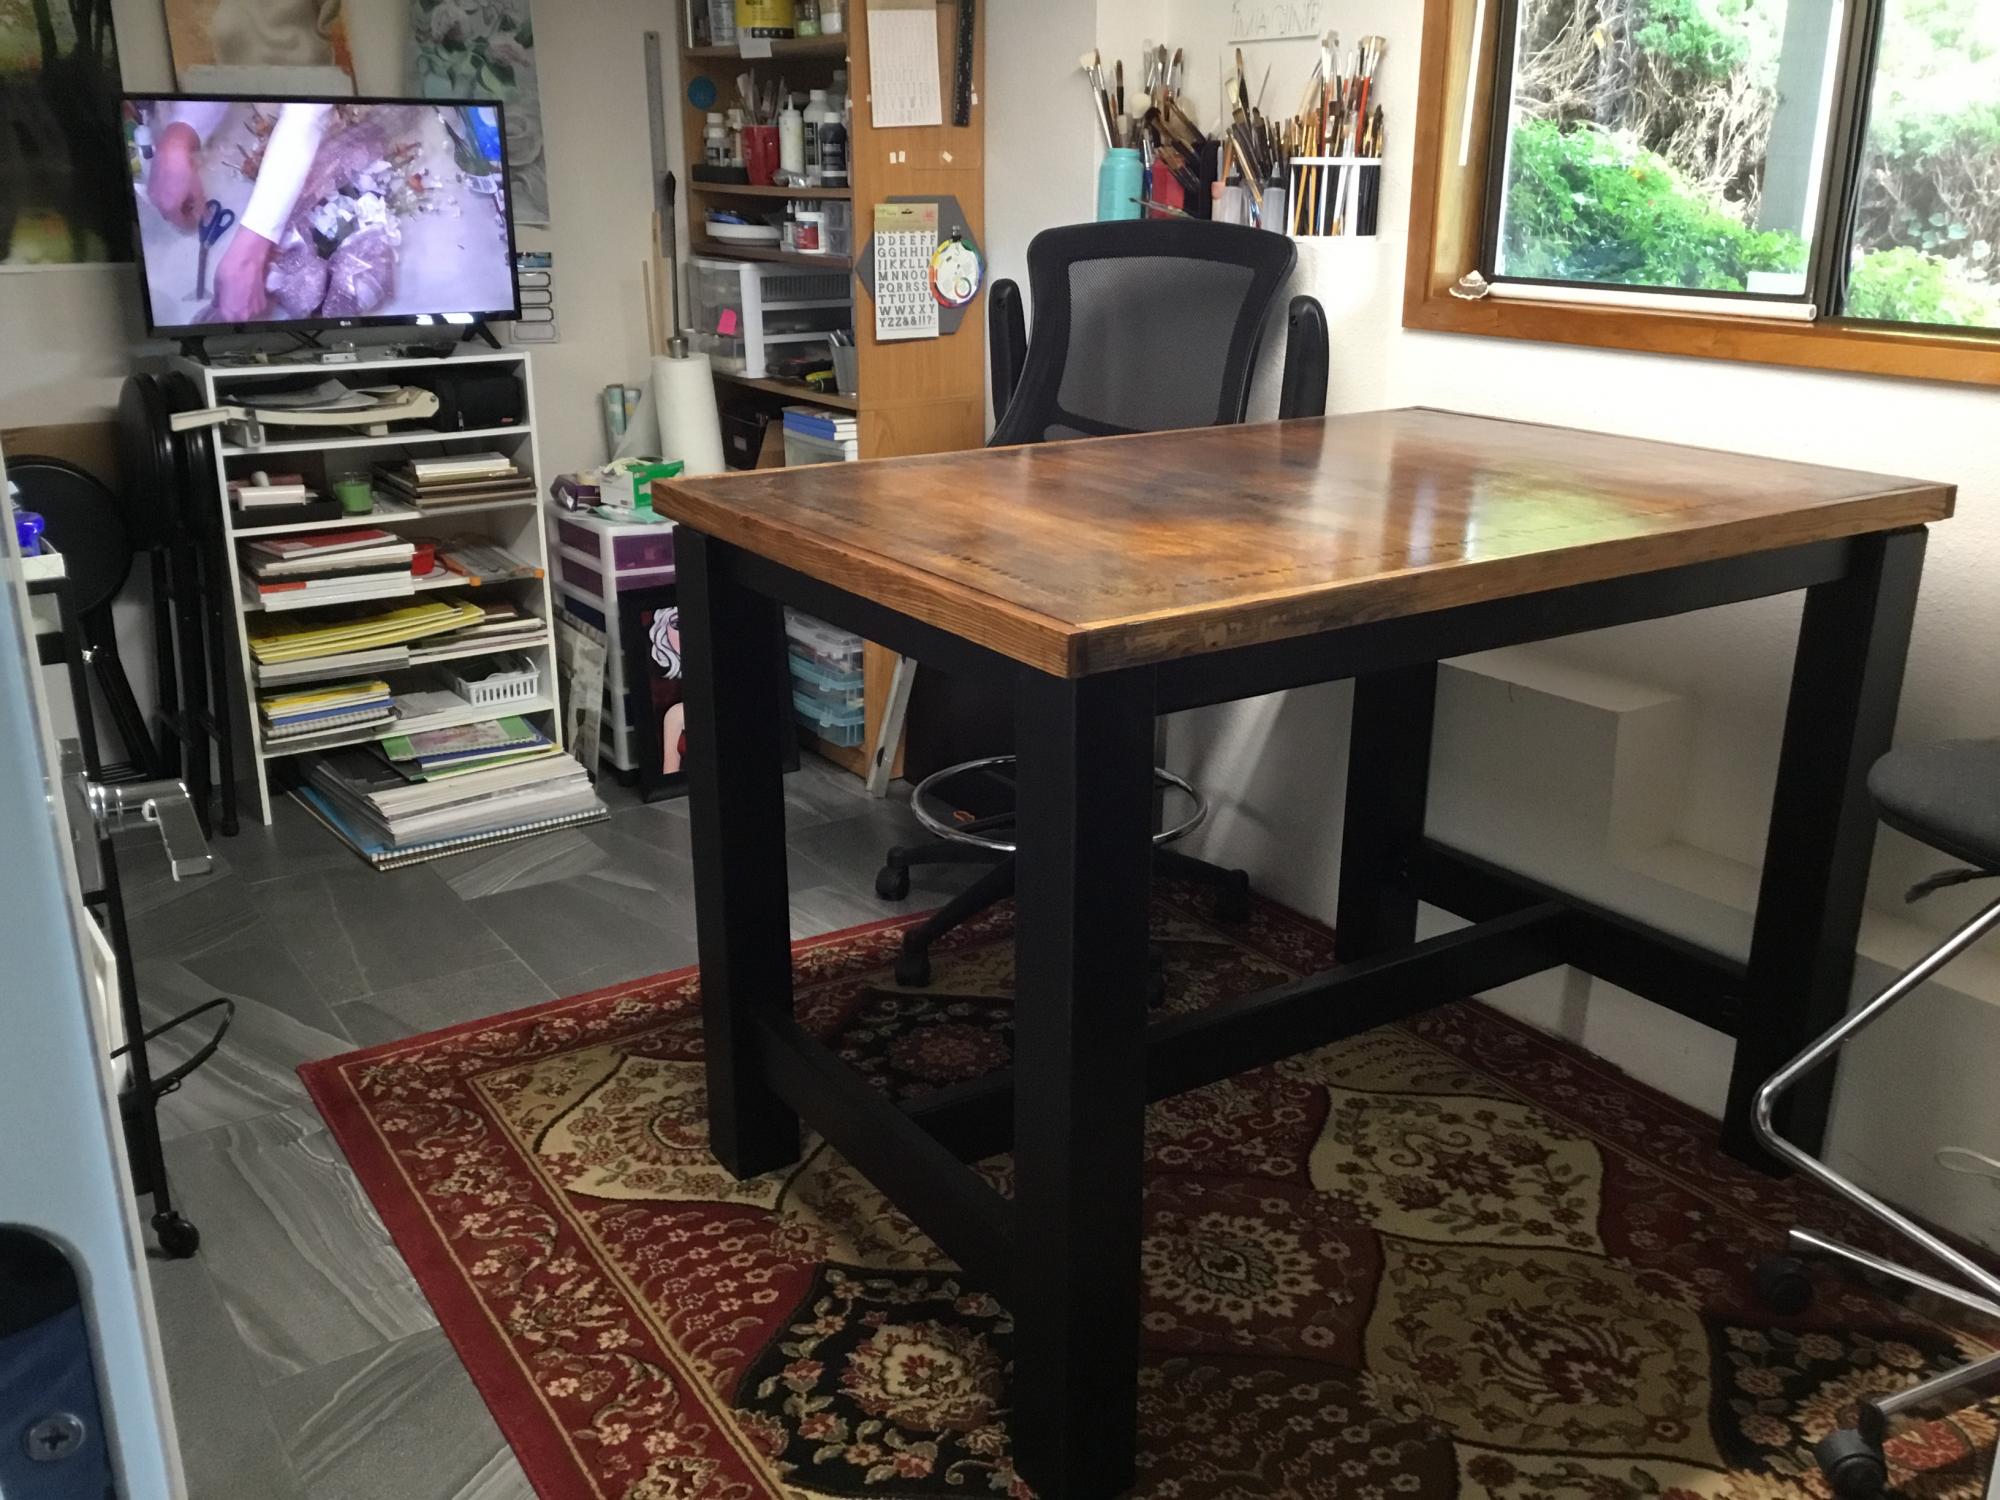
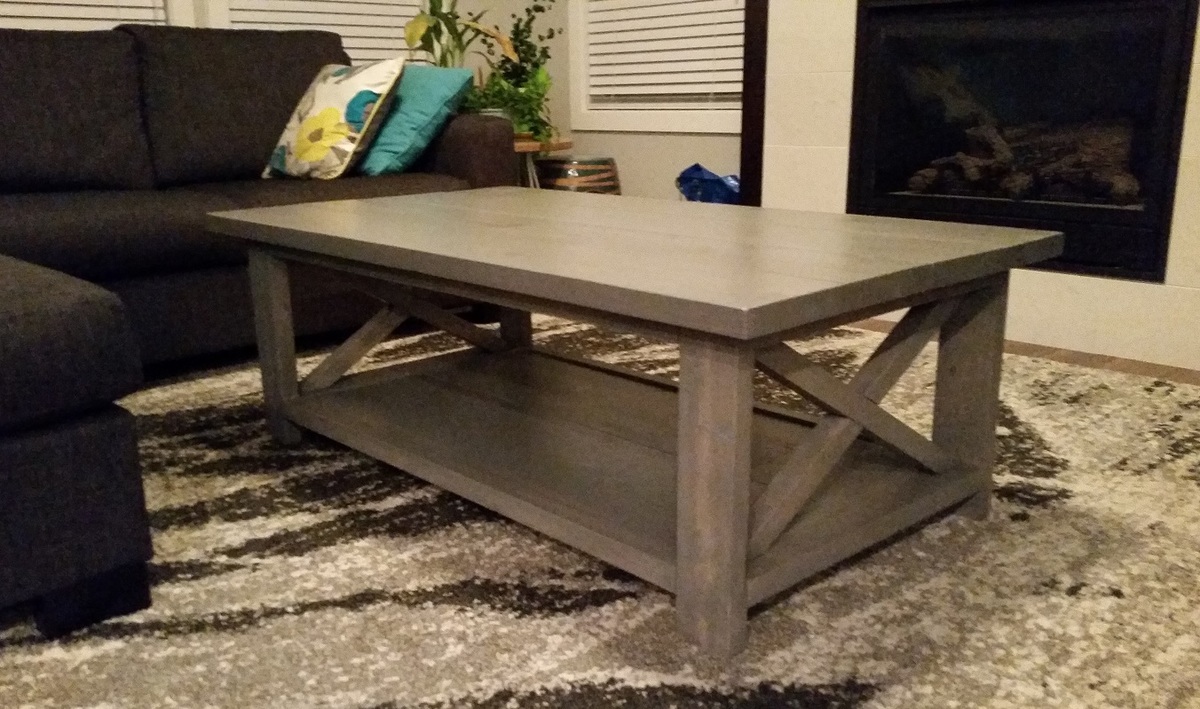
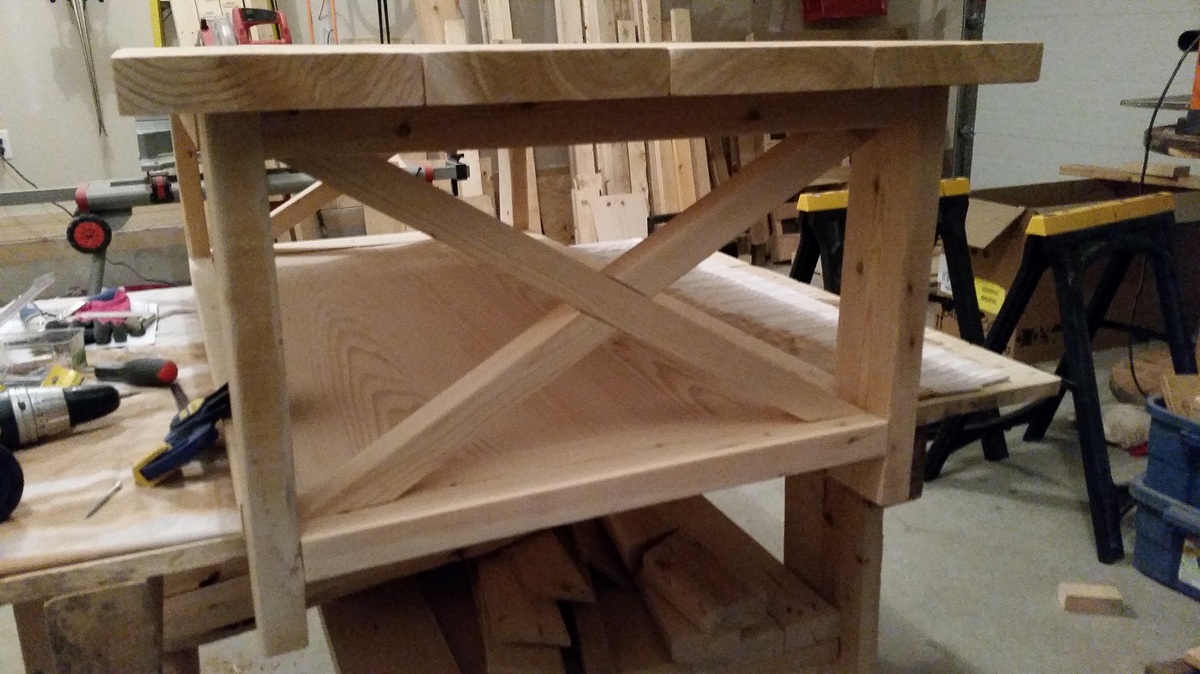
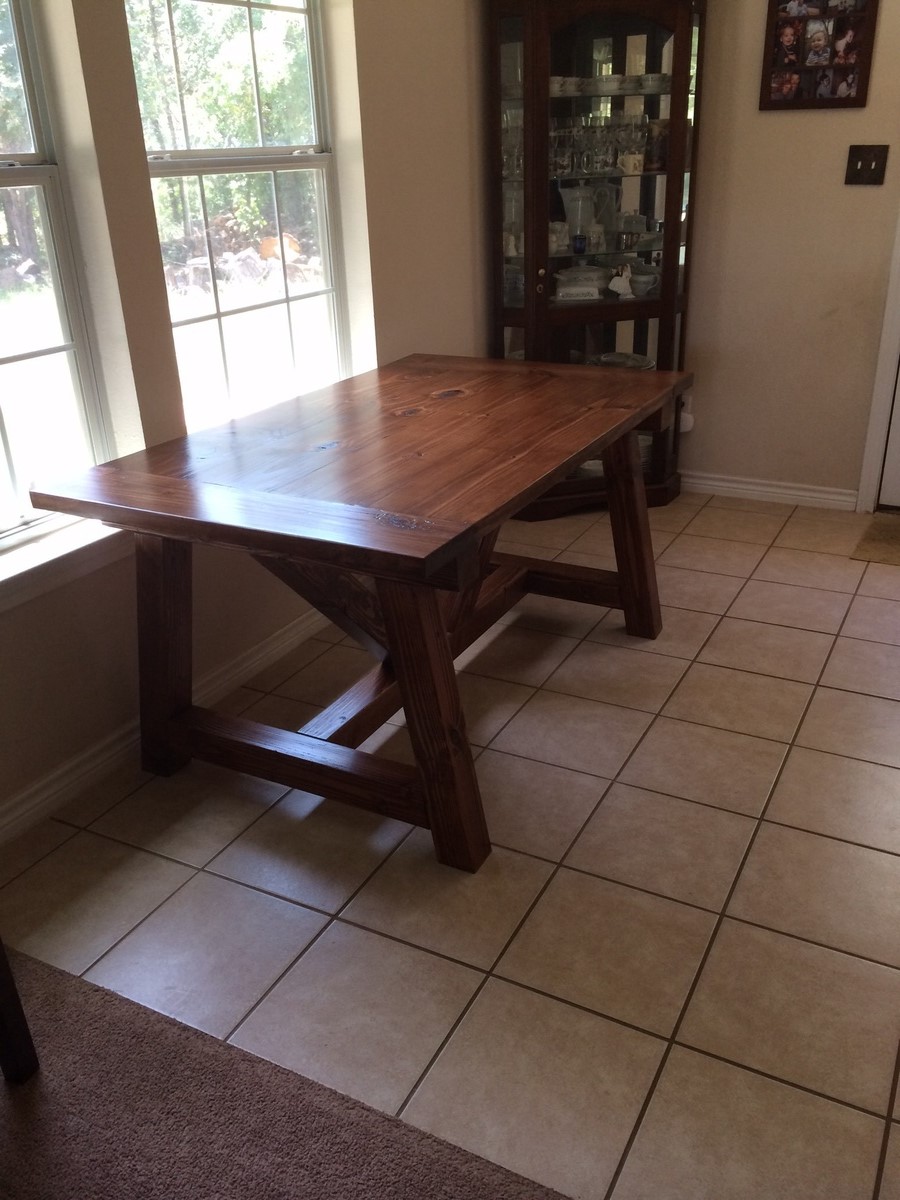
This was my first project. This was a birthday gift for my wife. She wanted one of these farmhouse tables but the cost was a little much for what we needed. I ran across a blog that followed the plans here and it walked me through step by step. It really wasn't that difficult of a build, and I almost want to sell this one(to the many people that have asked about buying one) and building another to fix the minor mistakes I learned while building it.(maybe triming the top so I would have nice tight seams, glue visible between boards, etc..) I started with the bench being this was my first project and first time using the kreg jig. The wife loved it. So much in fact that I took the scrap wood and made a coffee table and end tables for living room that matched. I did change the runner under the table and used another 4x4 instead of the 2x4. I like the beefier look with all the other 4x4 used for the legs. I also used the smaller table plans for the 72x41 plans as we didn't have room before building the larger one. With the extensions, we have comfortable seated 12.

Estimated Cost
200
Estimated Time Investment
Week Long Project (20 Hours or More)
Finish Used
Minwax special walnut and Minwax semi-gloss poly
Recommended Skill Level
Beginner

Comments

lphair

Mon, 12/31/2012 - 19:48

GREAT job! I just built this same table last weekend using what looks like the same plans (Tommy & Ellie?) and I had the same thought run through my mind about selling mine--even though it turned out great, I still wanted to improve on the minor things, like the tighter seams by ripping down the sides of the boards. I posted mine on CL to see what would happen and had it sold within 2 days at a $500 profit.

Yours turned out fantastic, I like the 4x4 lengthwise stretcher, that was a good call.

perry10706

Sun, 07/12/2015 - 22:36

I love the table you made! I checked out the blog post and have been studying your plans for an hour now. I'm really wanting to make this table with my husband! We will be first timers so we don't have all the fancy clamps and stuff. Can this be done without the use of clamps? The original plans don't call for them, but it seems like every other post of people making the table uses clamps. Thanks so much! 

hulkster51

Thu, 09/15/2016 - 16:53

very nice job , im going to tackle it this weekenddid you use 2x4 or 2x6? plans call for 2x4 but neveryone seems to use different sizes


paul

sandy.p56

Mon, 11/06/2017 - 11:26

On your Farmhouse Table and Bench build from 2015, you substituted 4x4s for the leg supports under the table. In the original plans, the 2x4s are notched out to provide support for the other 2x4s. You can't do that if everything is 4x4s, so I was wondering how you connected the pieces...or did you notch out both pieces so they would rest in each other (kind of interlocking)? It's hard to tell from the pictures. Thank you. Sandy

Farmhouse King

Submitted by Anonymous (not verified) on Sun, 01/22/2017 - 19:25

This was my first build this large and turned out great!  Thanks to the DIY plans provided here.  Thank you so much for such a great place!

We did make the foot board about 12 inches taller as we prefer a taller foot board.

Estimated Cost
$200
Estimated Time Investment
Weekend Project (10-20 Hours)
Finish Used
Primer and then black paint
Recommended Skill Level
Intermediate

Simple Bed (twin size)

Submitted by giorod82 on Sat, 10/10/2020 - 15:42

Simple twin bed project. The only modification I made was to shorten the height of the head board to the same size as the foot board.

Built from Plan(s)
Estimated Cost
$100
Estimated Time Investment
Weekend Project (10-20 Hours)
Finish Used
Minwax Red Mahogany
Recommended Skill Level
Beginner

Book Boxes for my Kinders

I was inspired to build a set of book boxes for my classroom after seeing Ana's plans for her Wood Magazine File. I'm currently using those cheap cardboard book boxes teachers can buy from those big teacher stores, but they're starting to fall apart after only 2 months! I'm trying to use only scrap wood, but I'll probably be forced to go out and buy another sheet of plywood soon.

I covered them in scrapbook paper I found on clearance at Michaels and used Mod Podge and nails I already had. For the bottoms I used left over wood from making the Modern Outdoor Table which I have yet to post. So, these babies have only cost me a little over a dollar to make. I'm not sure how long the decoupaged paper is going to last with 5 year olds. My roommate suggested using fabric instead and I think I may do that with the remainder wood I have.

*Tip: Make sure your cuts are straight because only the bottom piece of lumber can be nailed. You have to glue the other joints which can be tricky with funky cuts.

Built from Plan(s)
Estimated Cost
$1.25 if using scraps
Estimated Time Investment
Afternoon Project (3-6 Hours)
Finish Used
Mod Podge
Recommended Skill Level
Starter Project

Rustic X Coffee Table

Submitted by mchunt25 on Wed, 10/15/2014 - 07:17

This was a great project for me. I am a beginner and building a coffee table this nice seemed too difficult. Fortunately, it turned out better than I expected. The biggest difficulty for me was putting in the 1x12's on the bottom. That was really my fault because I didn't square up the sides properly. Rookie mistake and lesson learned. 

Built from Plan(s)
Estimated Cost
$100
Estimated Time Investment
Weekend Project (10-20 Hours)
Finish Used
2 Coats of Stain
2 Coats of Light Blue Paint
Recommended Skill Level
Beginner

Counter height table

Submitted by Randall on Thu, 10/15/2020 - 15:18

I built this table to use in my art studio.
I painted the legs black and stained , stenciled and clear coated the top

Estimated Cost
$50-$60
Estimated Time Investment
Day Project (6-9 Hours)
Finish Used
Spray on clear coat in semi gloss
Recommended Skill Level
Beginner

Comments

Randall

Fri, 10/23/2020 - 10:03

I love finding your web page.. your instructions are so easy to follow... Ive recommenced you to so many people..
Thank you

Matching farmhouse bedside tables

Submitted by mhopper on Tue, 01/01/2013 - 17:50

Decided to make a pair of nightstands! Made them a few inches less wide than the original plans and adjusted the height to match my bed. For the first one, I went with the drawer as-is from Ana's plans, but for the second I got brave and used actual drawer runners from the hardware store. It wasn't as hard as I was afraid of; I just reduced the width of the drawer to account for the runners and used a false front so I could attach the drawer front in the right place.

Built from Plan(s)
Estimated Cost
$70 for the pair
Estimated Time Investment
Week Long Project (20 Hours or More)
Finish Used
One coat of General Finishes "Dark Brown" dye stain, two coats of satin finish polyurethane
Recommended Skill Level
Intermediate

Daughter's Bedroom Bookcase

Submitted by kristyzed on Sun, 10/19/2014 - 09:57

I followed the instructions except for the plywood backing, which I left out.  This was a fairly simple build.  I love the finished product and it fits perfectly in my daughter's room, providing tons of storage space for books, dolls, picture frames, etc.  

Built from Plan(s)
Estimated Cost
$130 not including primer or paint which I had on hand.
Estimated Time Investment
Weekend Project (10-20 Hours)
Finish Used
I used Zinser 1-2-3 primer and 2 coats of HD's Para furniture paint in Cloud White.
Recommended Skill Level
Beginner

Coffee Table with X

Submitted by Anonymous (not verified) on Fri, 01/27/2017 - 11:01

This was my FIRST DIY piece of furniture and I am thrilled with the outcome!

Since I am not really one to go for the rustic cottage look I wanted this DIY coffee table to have a bit more of a modern feel. I chose a grey gel stain to do the job. It gave the table a thicker stain but I am still able to see some of the wood grain beneath it.

Ana White has the best tutorials & free plans to get a crafter to switch to the dark side and become a DIYer! 

I did a full blog post on my progress throughout with a lot more pictures.

Built from Plan(s)
Estimated Cost
$50

For Materials I didn’t want to spend too much on a first attempt build. Thankfully we had some extra fence boards for the top enough 2×4’s hanging out in the garage so I only had to buy 2×2’s, the bottom board for the table, Screws, Stain & Polyurethane.

Estimated Time Investment
Weekend Project (10-20 Hours)
Finish Used
Varathane Gel Stain in Weathered Grey
Non Yellowing Poly, three coats as I have two boys that are eager to play on this thing!
Recommended Skill Level
Beginner

Fancy Hall Tree

Submitted by lyric on Wed, 01/02/2013 - 20:53

This was my first wood project, and I LOVED doing it!!! Now I'm addicted :). Thanks so much, Ana, for the amazing plans and inspiriation!

Built from Plan(s)
Estimated Cost
$150
Estimated Time Investment
Day Project (6-9 Hours)
Finish Used
Varathane Wood Stain, Early American
Recommended Skill Level
Beginner

My Kentwood Nightstands Or End Tables

Submitted by upperair on Tue, 10/21/2014 - 17:45

I needed a new bird stand because the old was.. well.. old.. :) Even the cheapest particle board stuff was $100 and not what I wanted.. so i decided to make one.

Instead of paneling I used beadboard. I added a shelf on the inside, and a larger top.I originally stained the piece but then decided to paint. Much nicer. Larry the cockatiel approves.

Recommended Skill Level
Beginner

Toy Chest with Lego top and chalkboard sides

This toy chest has a lego top and chalkboard paint sides. Easy to put together, a bit harder to paint! The most tedious part was making sure all the sides were at 90 degrees and filling/glueing/trimming the remaining pocket holes afterwards (most I was able to do prior to putting it all together). I increased the depth and width to accommodate more toys and made the top a bit longer so I didn’t need the front edge cutout.  My nephew loves it and my niece has already requested one. Thank you Ana!

Built from Plan(s)
Finish Used
Behr Marquee Semi Glass and Chalkboard paint
Recommended Skill Level
Beginner

4x4 farmhouse table

Submitted by mkadams489 on Thu, 10/22/2020 - 13:30

Had a great time making this table with the husband. We love how it turned out. We had a few hiccups a long the way, but it ended up turning out well.

Built from Plan(s)
Estimated Cost
200
Estimated Time Investment
Weekend Project (10-20 Hours)
Finish Used
Varathane special walnut with Minwax weathered oak on top
Recommended Skill Level
Intermediate

Comments

Seasonal And Holiday

Simple, Cheap and Easy Console Table

Submitted by bashmun on Thu, 01/03/2013 - 22:01

We needed an accent table for our hallway and this simple table was perfect. I cut all the pieces in about an hour the night before and spent approximately four hours building the table the following day.

Estimated Cost
$60
Estimated Time Investment
Day Project (6-9 Hours)
Finish Used
Kona and Polyurethane
Recommended Skill Level
Beginner

Twin storage beds

Submitted by DIY JEFF on Sat, 10/25/2014 - 12:11

Second build for oldest son's room. 

Estimated Cost
250.00
Estimated Time Investment
Weekend Project (10-20 Hours)
Finish Used
Sherwin Williams all purpose enamel.
Recommended Skill Level
Beginner

Comments

VickeyB

Mon, 05/18/2015 - 08:04

Is your $250 estimated cost for the corner unit only, or for the corner unit and the beds? You did a fabulous job!

Modern X Coffee Table

Submitted by TamarasJoy on Thu, 02/02/2017 - 17:50

This was my FIRST DIY piece of furniture and I am thrilled with the outcome!

Since I am not really one to go for the rustic cottage look I wanted this DIY coffee table to have a bit more of a modern feel. I chose a grey gel stain to do the job. It gave the table a thicker stain but I am still able to see some of the wood grain beneath it.

I also have two young boys that play on this table so I gave it three coats of Poly on it for some protection. But the best part of this table is that it can get all dinged up and it just makes it look better!

Ana White has the best tutorials & free plans to get a crafter to switch to the dark side and become a DIYer! 

I did a full blog post on my progress throughout with a lot more pictures.

Built from Plan(s)
Estimated Cost
$50 For Materials I didn’t want to spend too much on a first attempt build. Thankfully we had some extra fence boards for the top enough 2×4’s hanging out in the garage so I only had to buy 2×2’s, the bottom board for the table, Screws, Stain & Polyurethane
Estimated Time Investment
Weekend Project (10-20 Hours)
Finish Used
Varathane Gel Stain in Weathered Grey

Non Yellowing Poly, three coats as I have two boys that are eager to play on this thing!
Recommended Skill Level
Beginner

Rolling storage cart as a laundry caddy

Submitted by Anonymous (not verified) on Tue, 10/27/2020 - 21:30

I needed a laundry caddy that fit in a tight spot in my small laundry room. I adjusted the dimensions of the rolling storage cart, and it works great!

Recommended Skill Level
Beginner

Chalkboard Shelf From Scraps

Submitted by miki0225 on Sat, 01/05/2013 - 21:22

This was SUPER easy and I love it. My daughter wants one now so digging through my scraps is what I will be doing tomorrow. Thanks Ana!

Estimated Cost
6
Estimated Time Investment
An Hour or Two (0-2 Hours)
Finish Used
Homemade chalkboard paint
Recommended Skill Level
Starter Project

4x4 truss beam table

Submitted by Moody on Tue, 10/28/2014 - 05:33

This table was so much fun to make. I couldn't use an 8 foot table so this is 5 ft. My table top has some blemishes that I could have tried to fix but at the time I just wanted to see it done. I think using better than big box store wood would have been a great start. The table is so sturdy. The bench was harder though because it had a wobble that just wouldn't be fixed. 


I used pine for the top and Douglas fir for the legs. I used minwax wood conditioner, minwax early american stain, then minwax red oak stain for a couple of minutes then wiped off. Then topped with 4 coats of poly. 

Estimated Cost
$150
Estimated Time Investment
Weekend Project (10-20 Hours)
Finish Used
Minwax early american and red oak. Semi-gloss polyurethane.
Recommended Skill Level
Beginner

Rekourt Dining Table and Benches

Submitted by T.R. on Mon, 02/06/2017 - 06:29

Built this table from Ana-White plans and the benches from Rouge Engineer plans.  Fun build and looks great.  Easy to customize to fit your dining space.

Built from Plan(s)
Estimated Cost
$150-$200
Estimated Time Investment
Weekend Project (10-20 Hours)
Finish Used
Varathane charcoal gray on the base and Minwax Classical grey on the top with poly acrylic top coats.
Recommended Skill Level
Intermediate