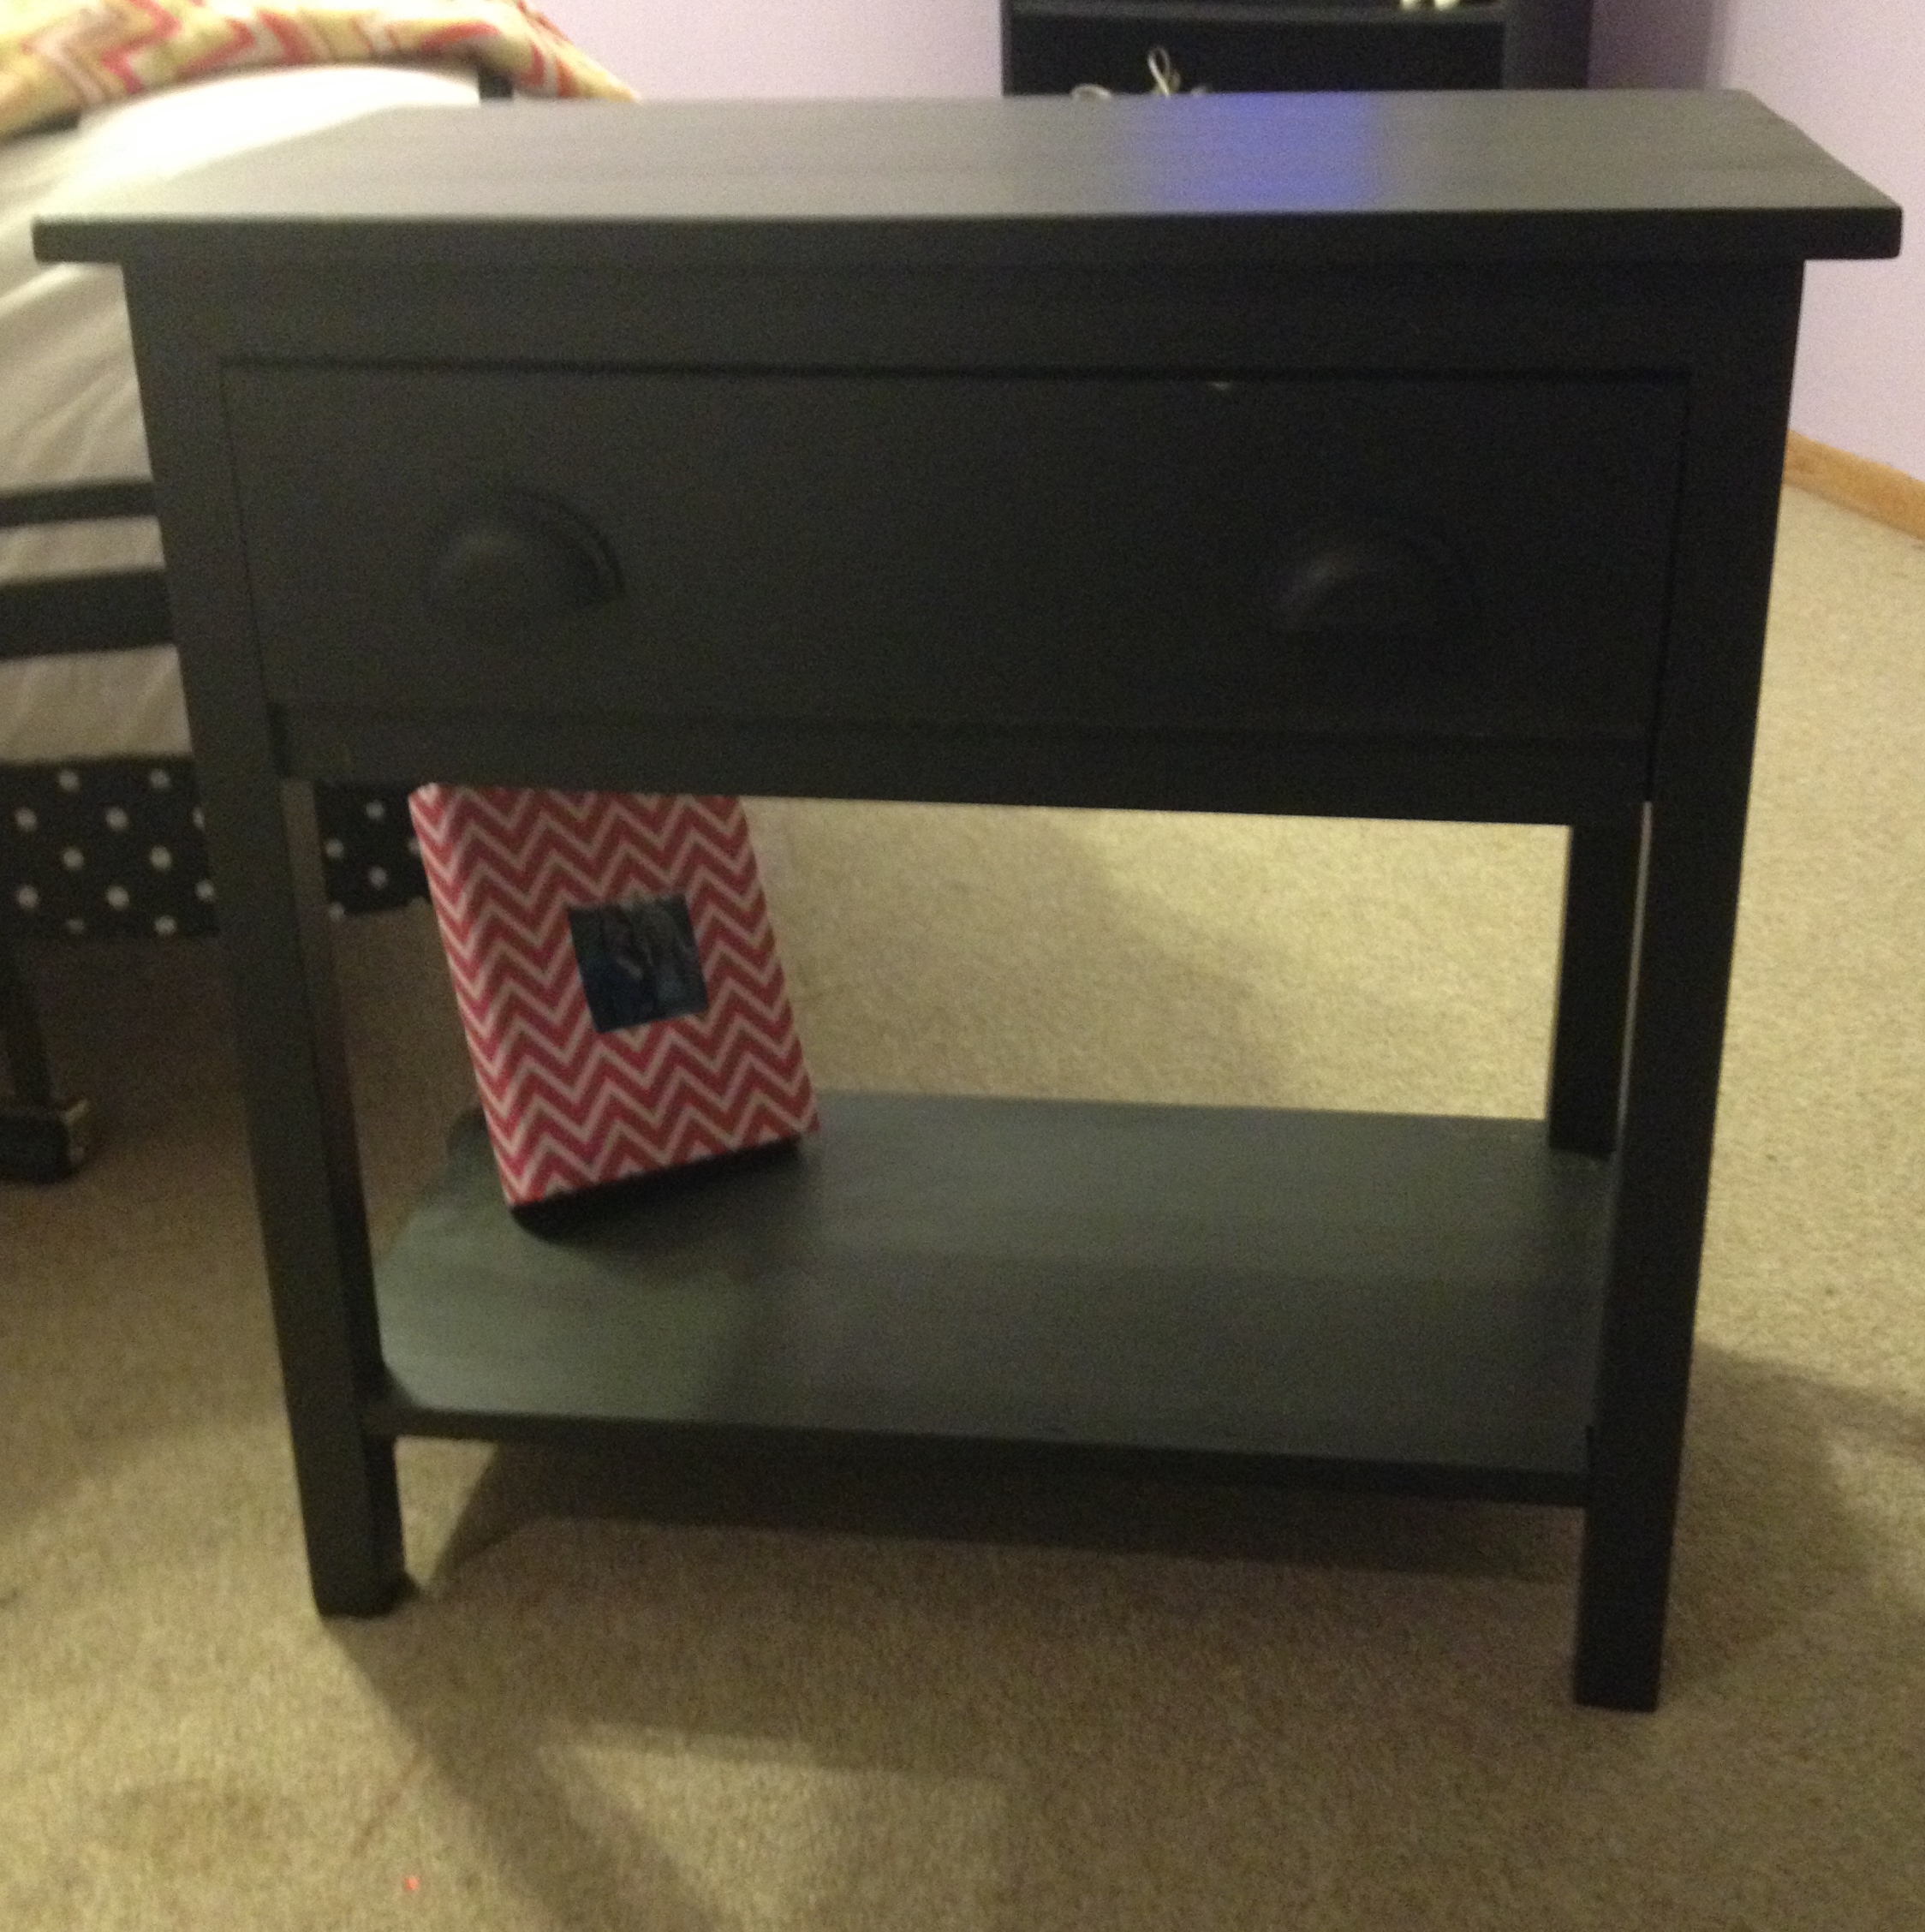
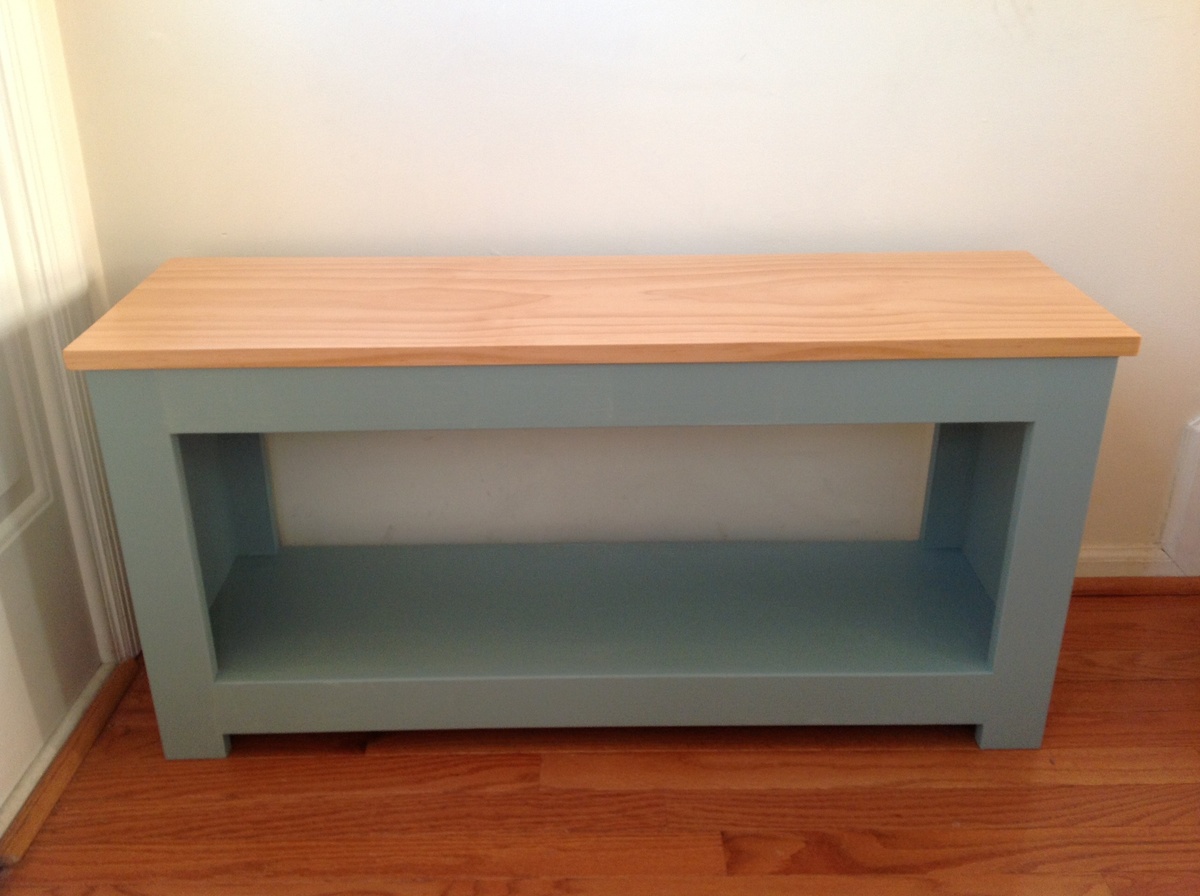
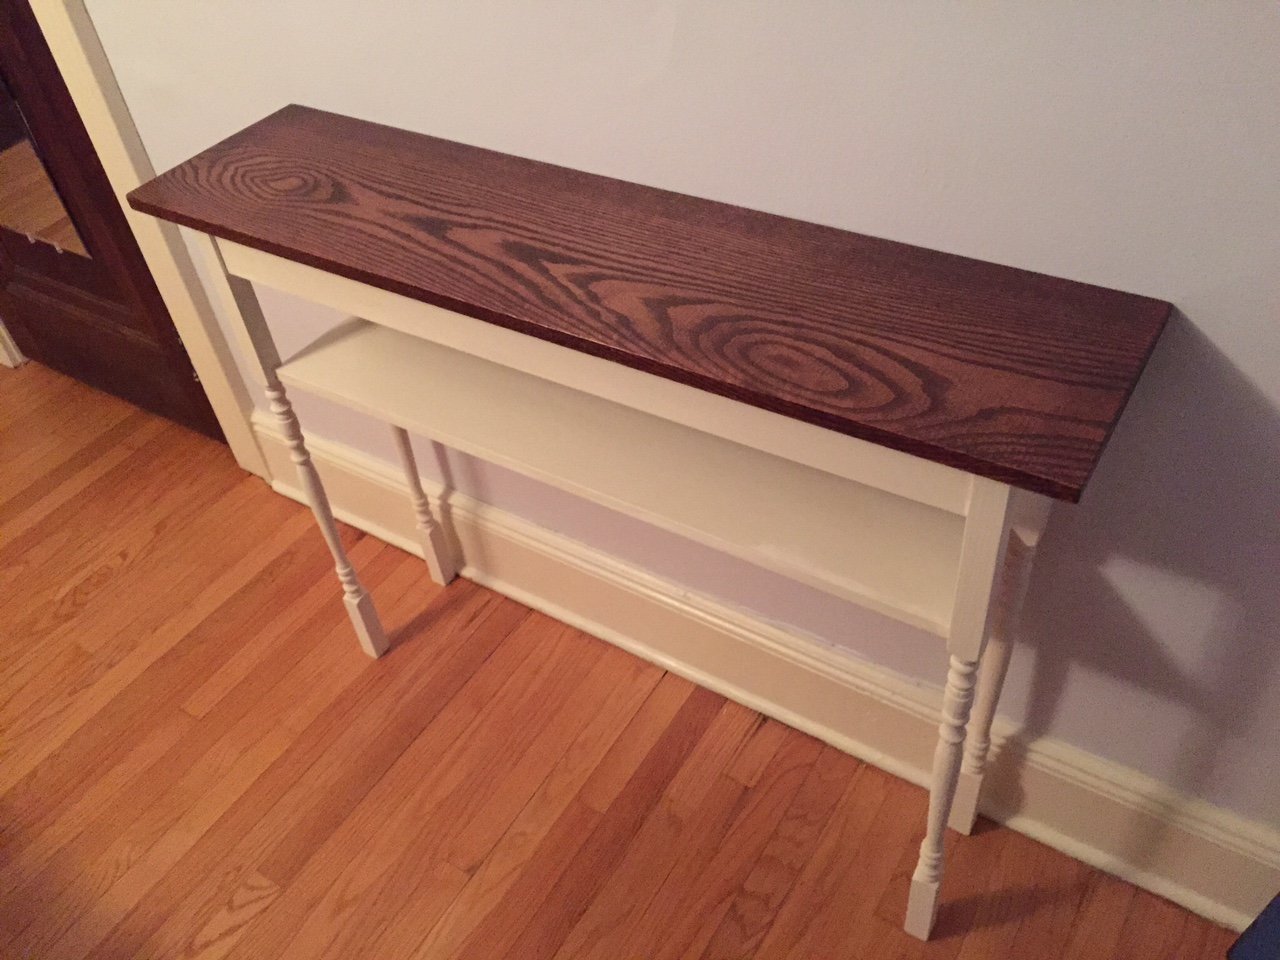
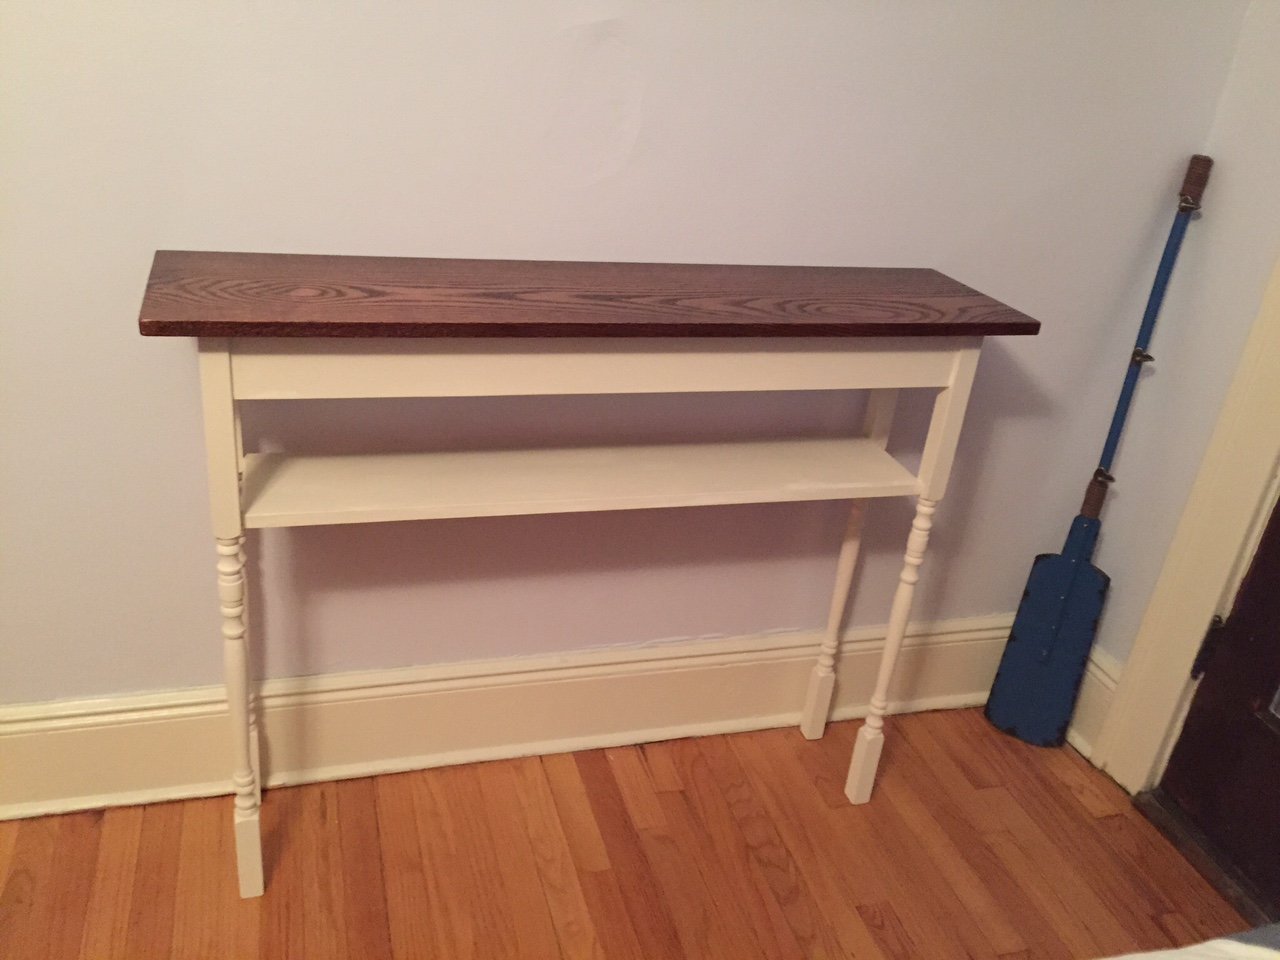
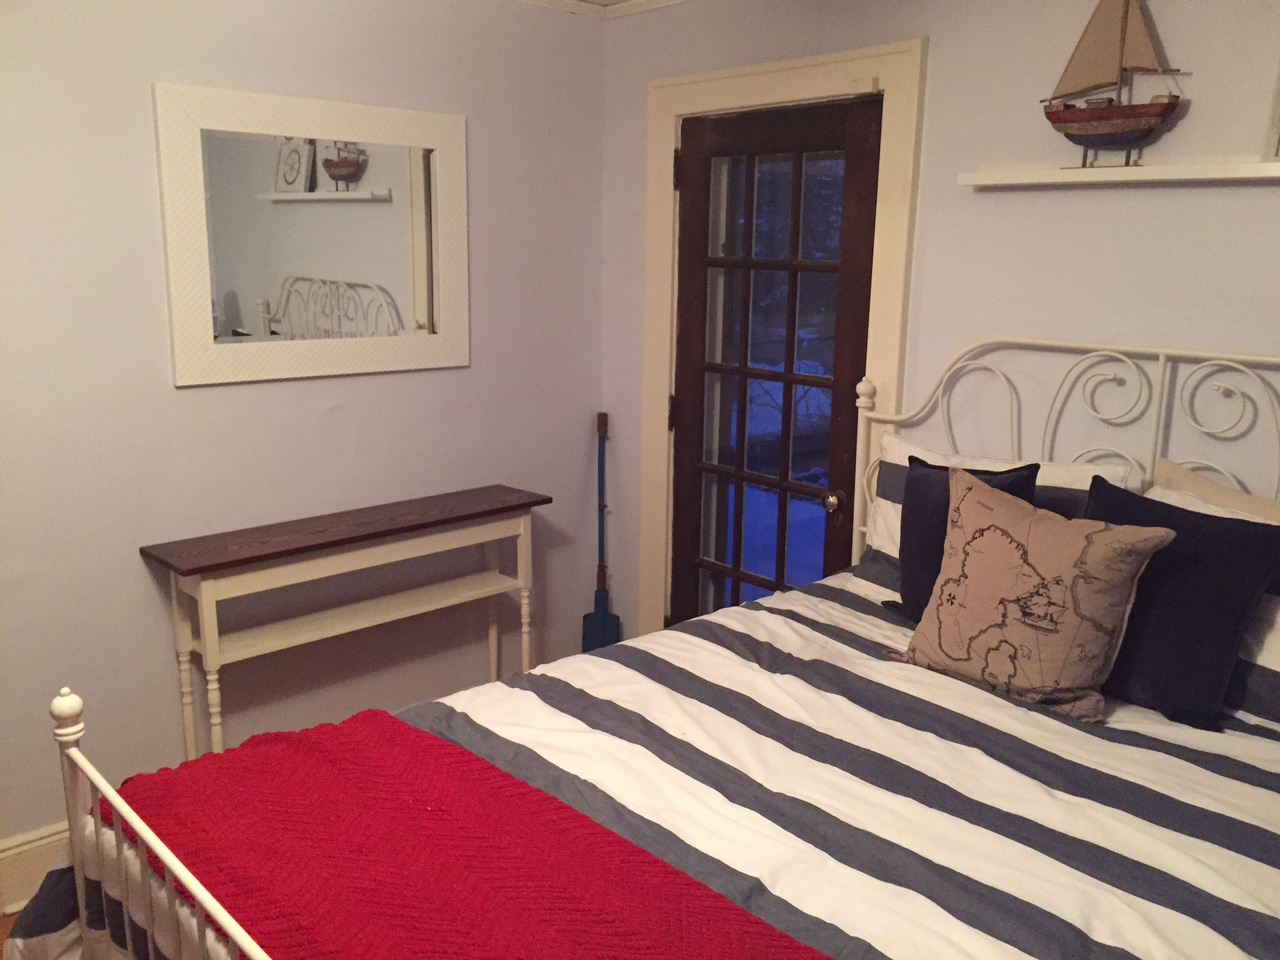
Guest Room Stair Baluster Accent Table
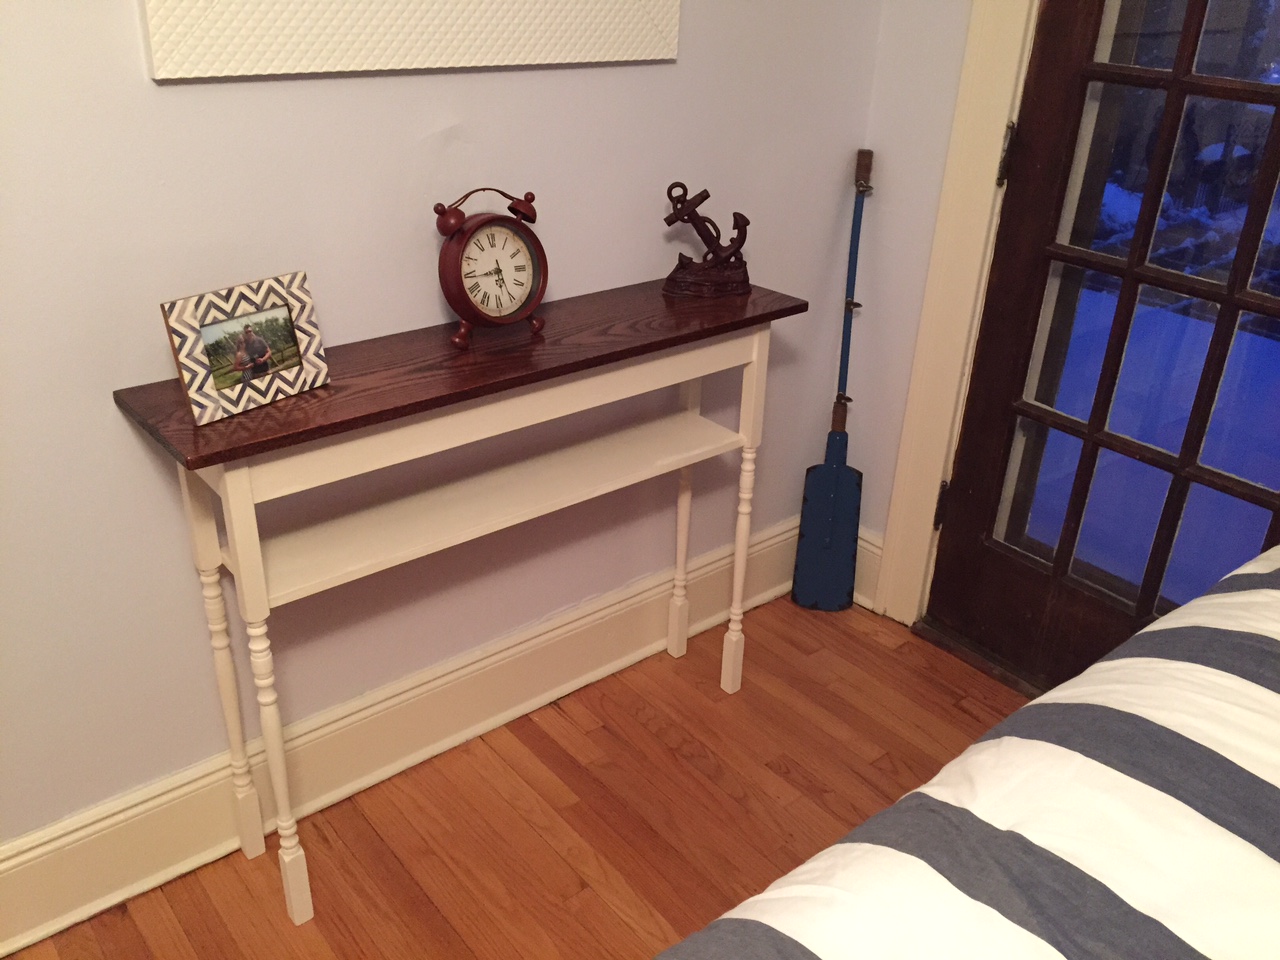
We wanted a narrow console table that would fit next to the bed in our guest room. This accent table is less than 12 inches wide. I came across a stair baluster plan and made it my own. The balusters and top are red oak, the aprons and bottom shelf are poplar. I used white semigloss for the body and red mohagany stain for the top to try and match the doors in the room. Came pretty close! I'm very happy with the two toned look and the project overall. This is my third furniture project! I'm addicted.
Built from Plan(s)
Estimated Cost
$100
Estimated Time Investment
Day Project (6-9 Hours)
Finish Used
Miniwax Red Mohagany
Miniwax Satin Polyurethane
Miniwax Satin Polyurethane
Recommended Skill Level
Beginner