Community Brag Posts

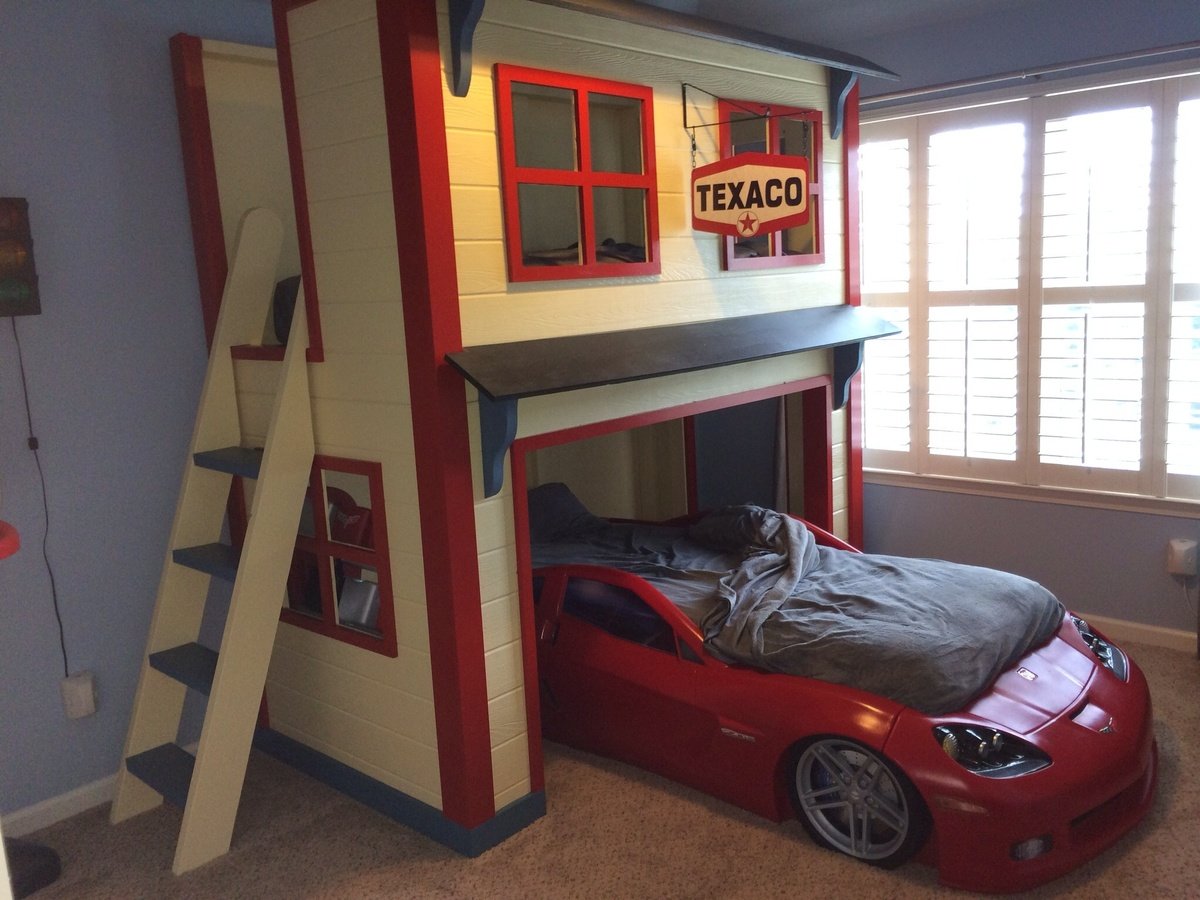
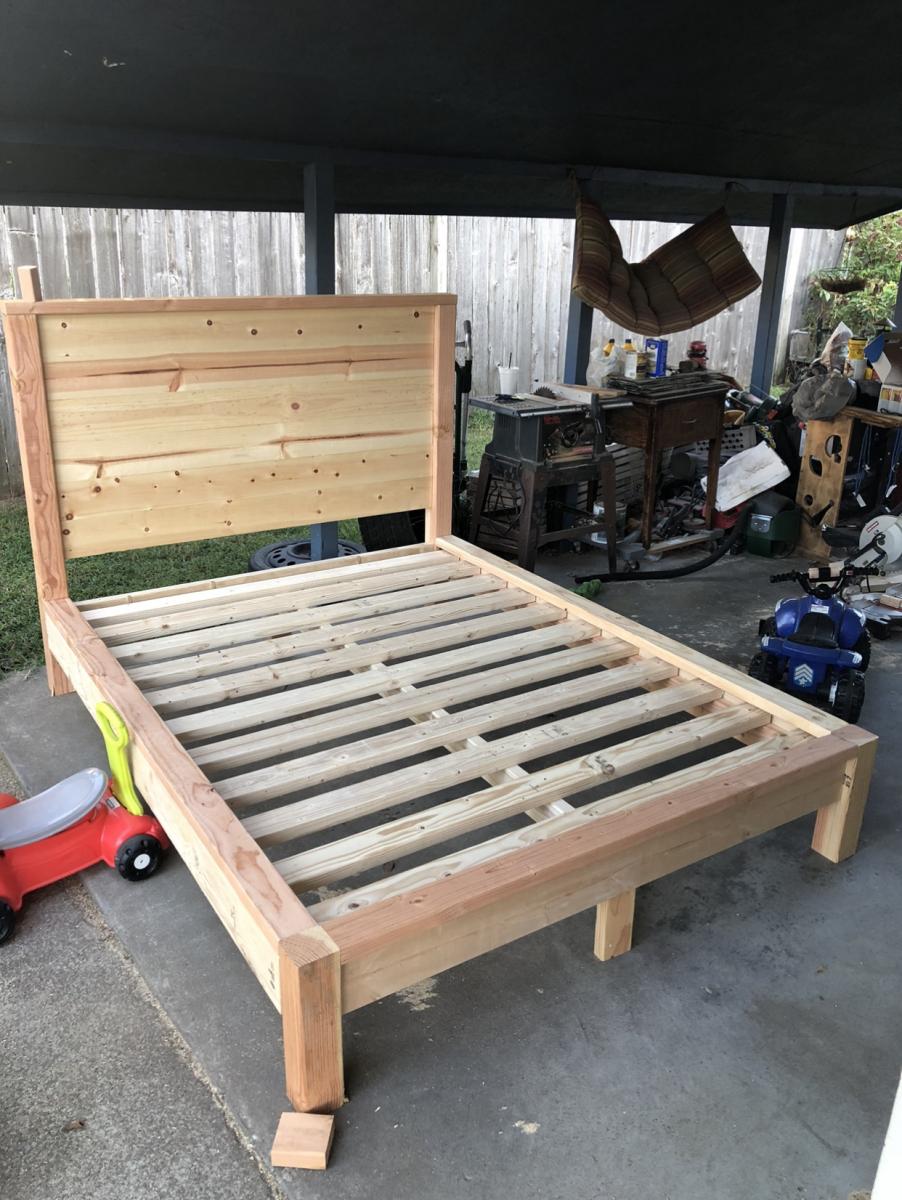
Camp Loft Bed with Stairs, Slide and Fort

Submitted by bmas99 on Wed, 12/26/2012 - 14:35

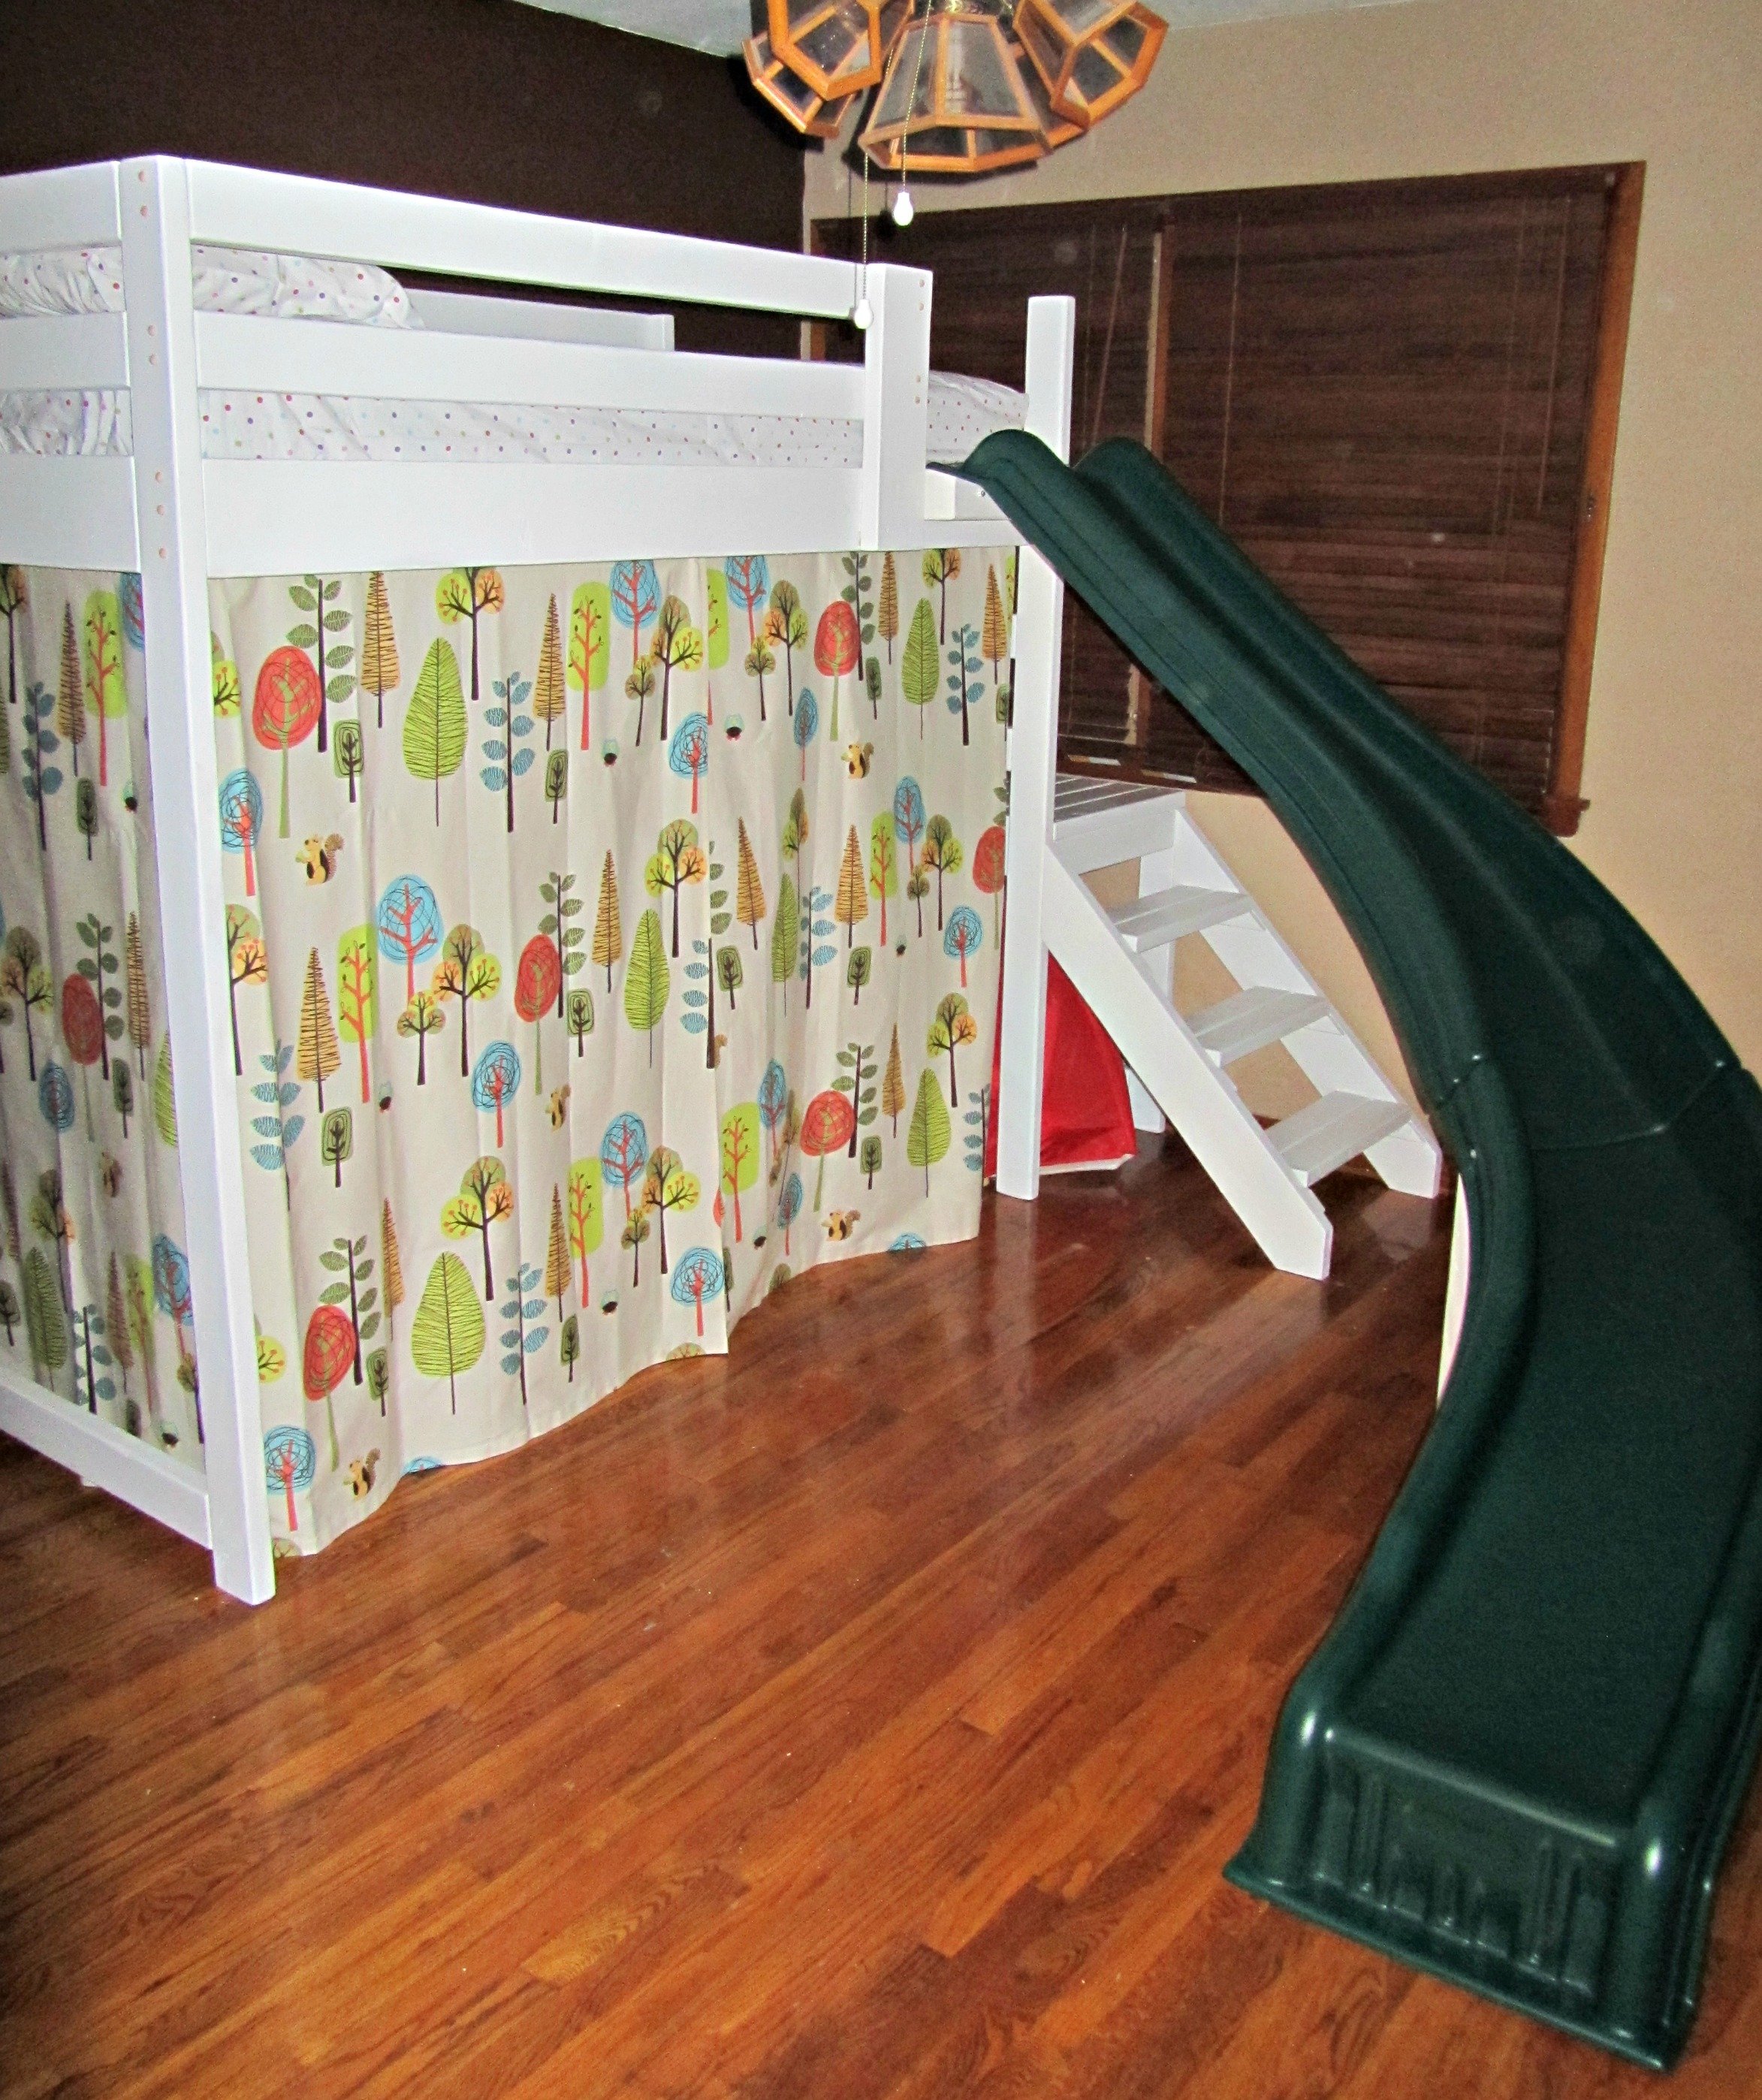
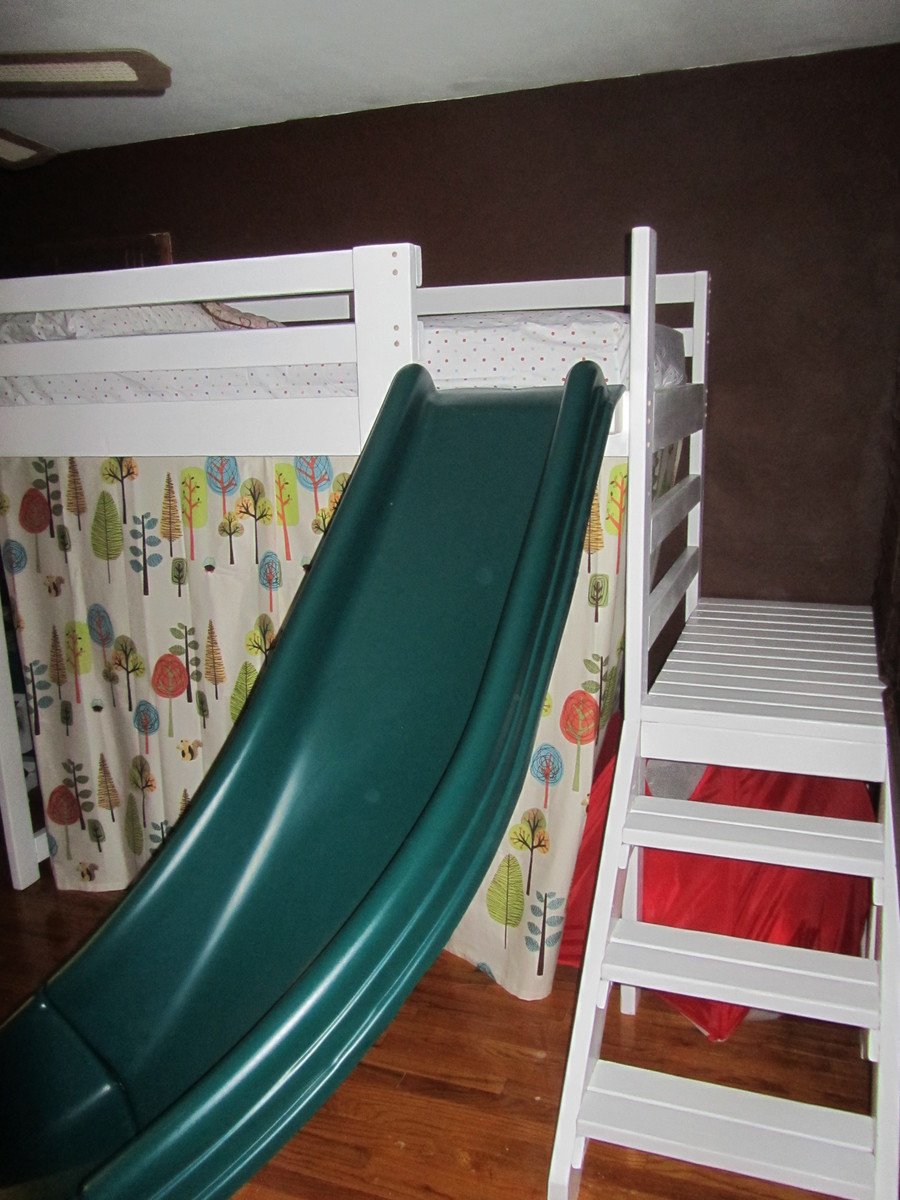
I'm a beginner at this, so for the most part I followed Ana's plans to building the Camp Loft Bed with Stairs. I made a few tweaks, including adding a slide to the front, putting the stairs on the other side, raising it by 7" (since there is a toddler bed underneath), and using hemmed shower curtain to create a fort underneath.
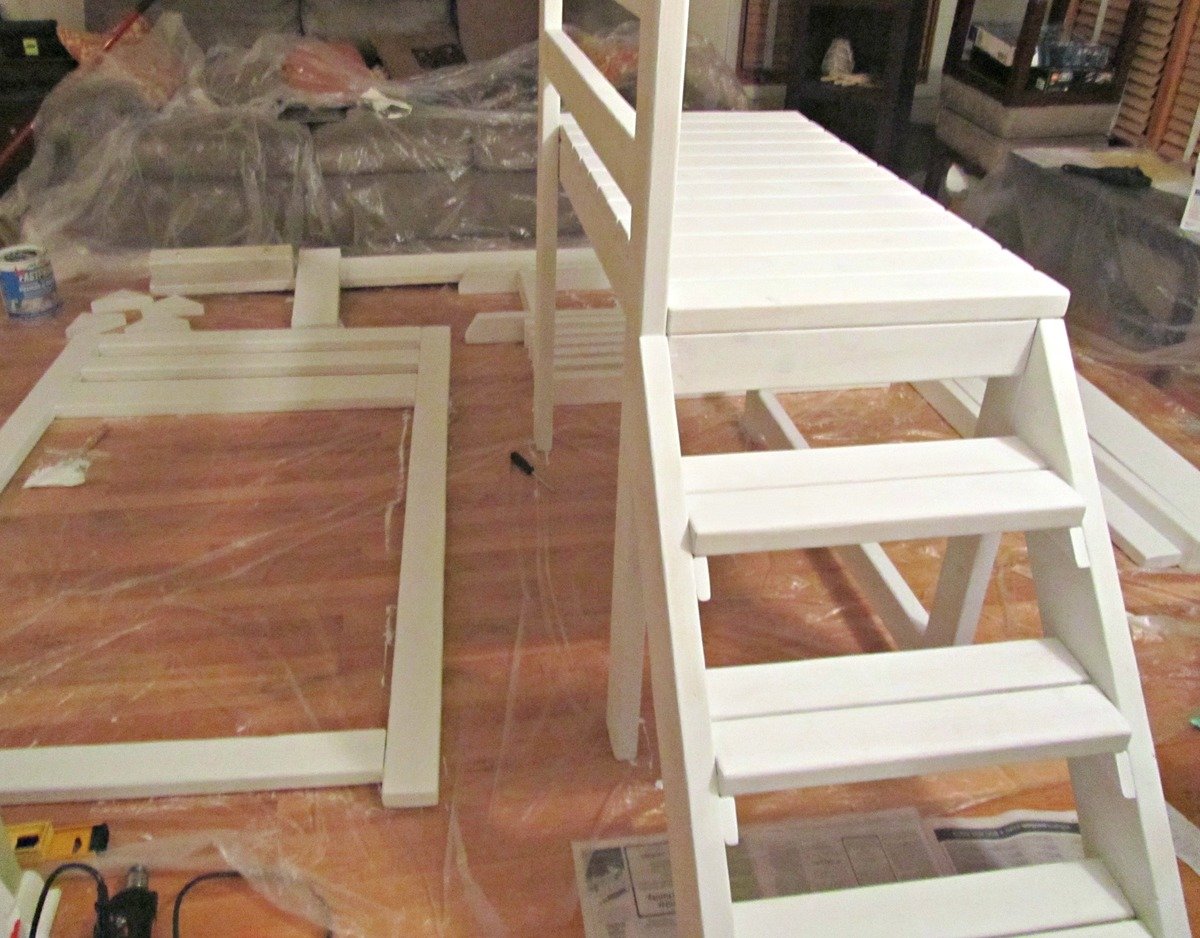
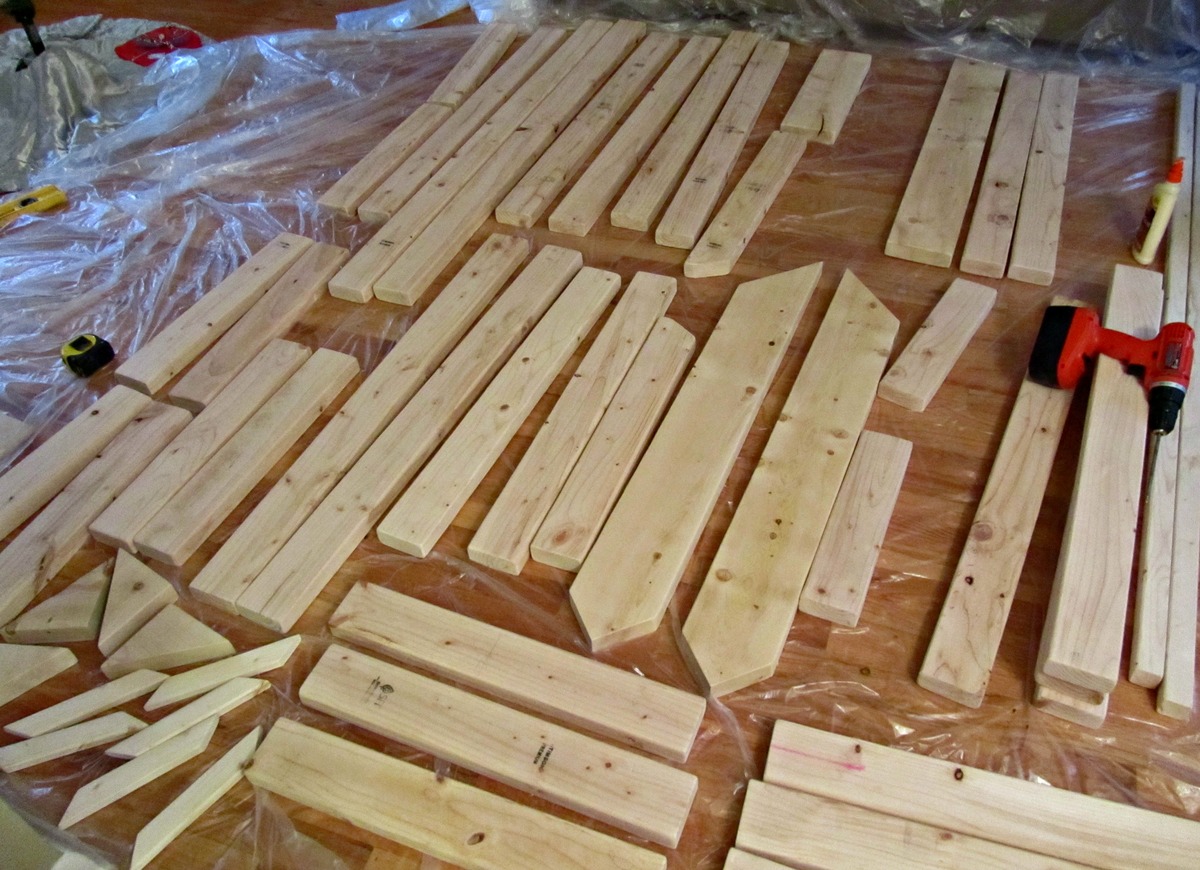
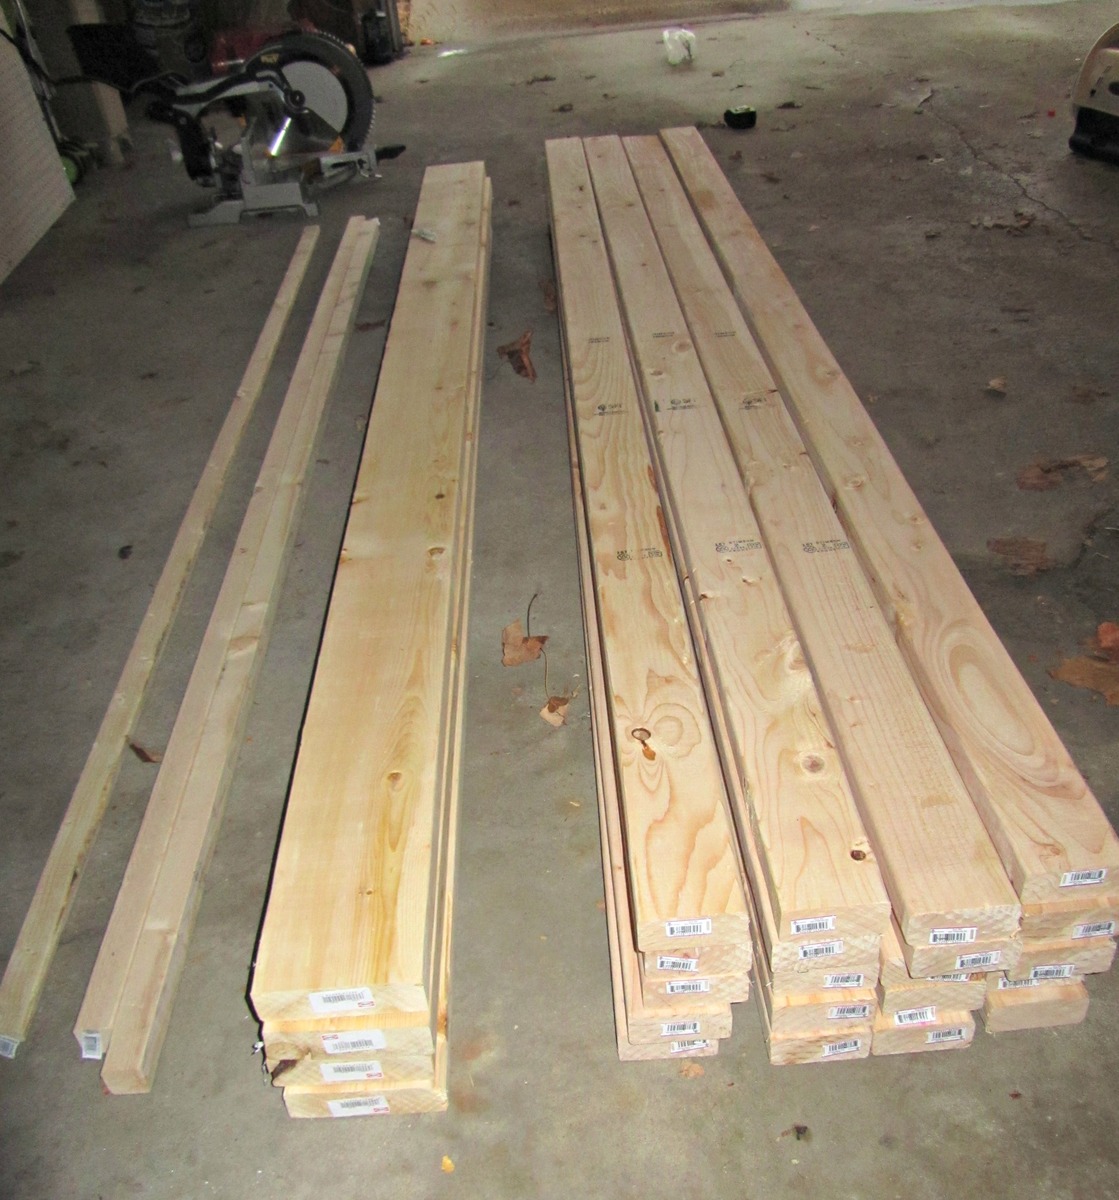
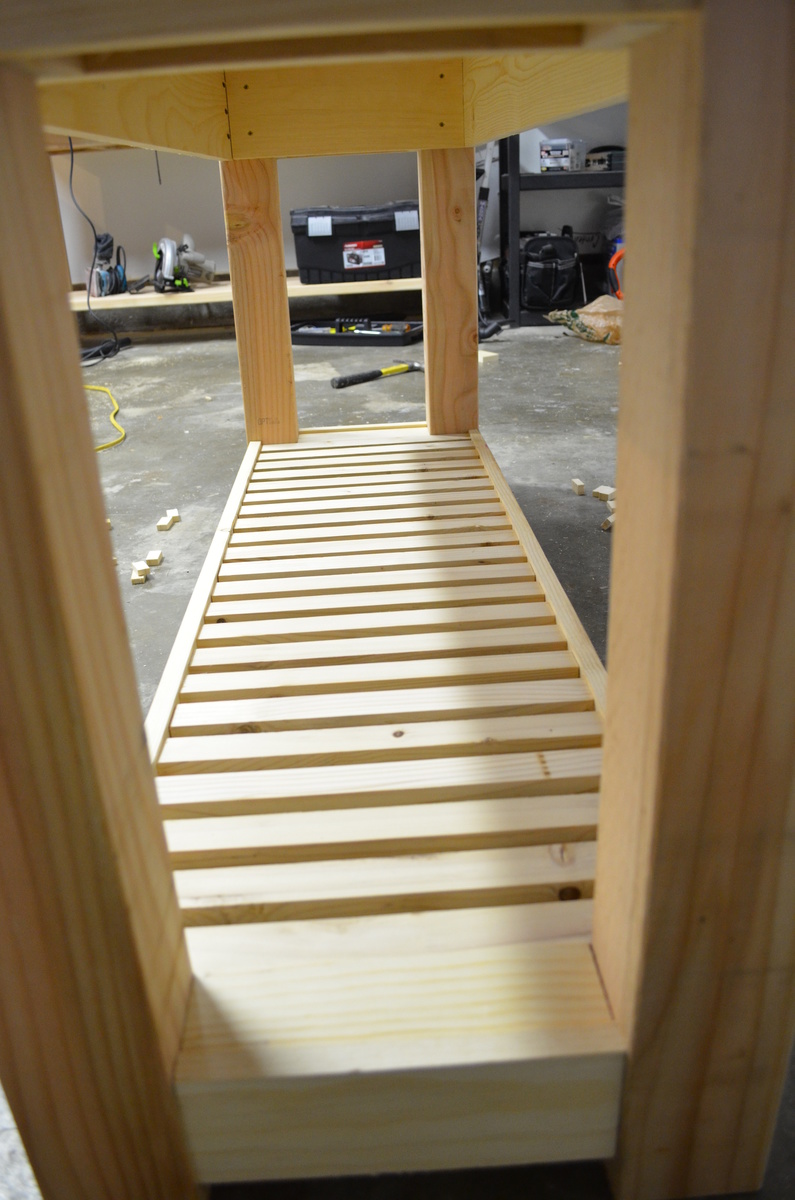
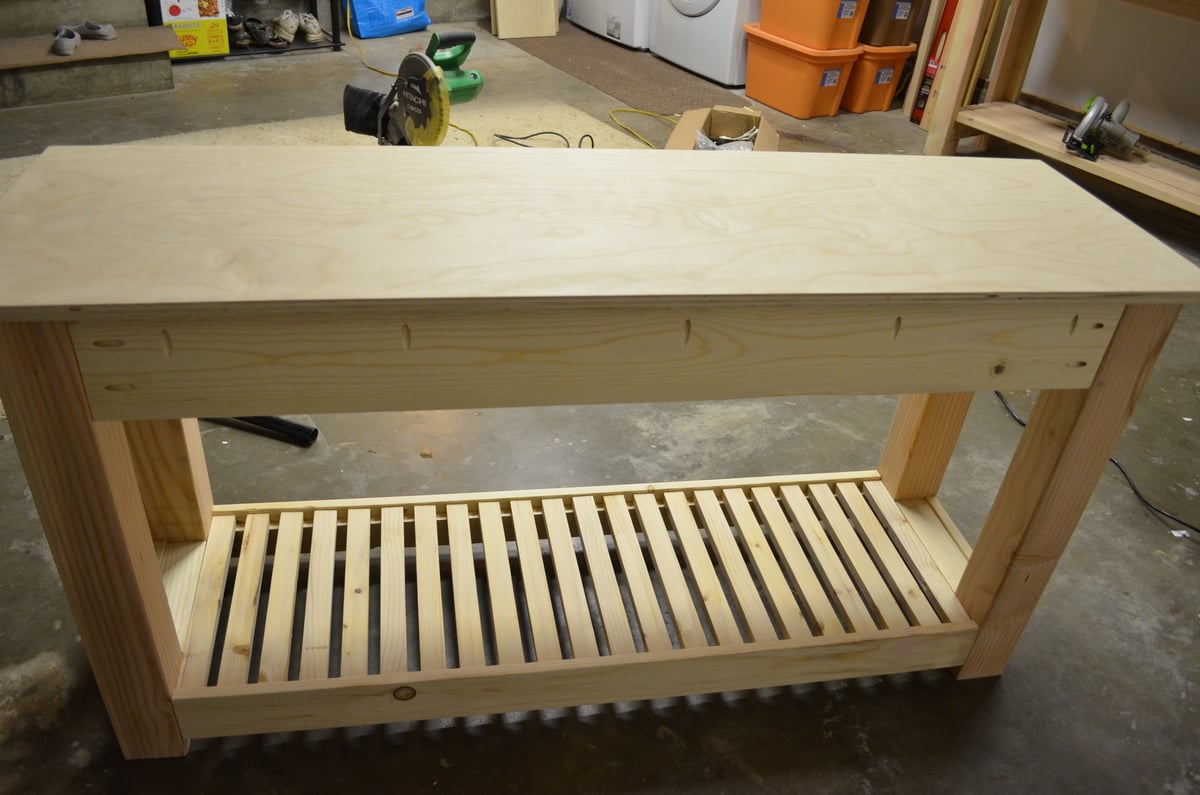
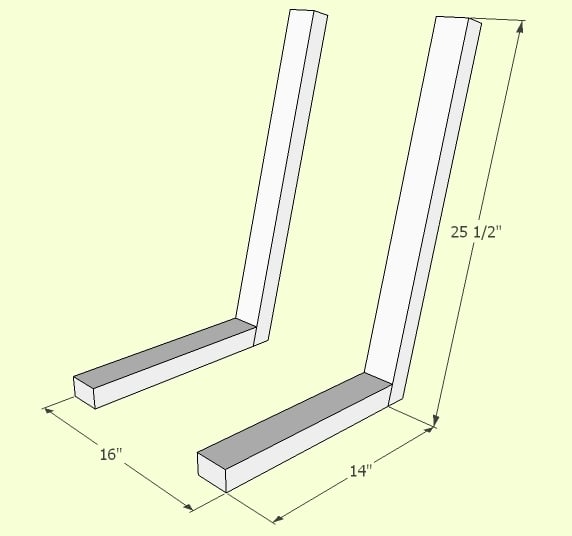
I made all the cuts with a miter saw and sanded all the wood down. I then glued and screwed the stairs, platform, and end pieces together. All the wood then got 1 coat of primer and paint. Then on Christmas Eve the bed was assembled in the kids' room. The sanding, priming, and painting took the longest. Cutting it and putting it together didn't take long.
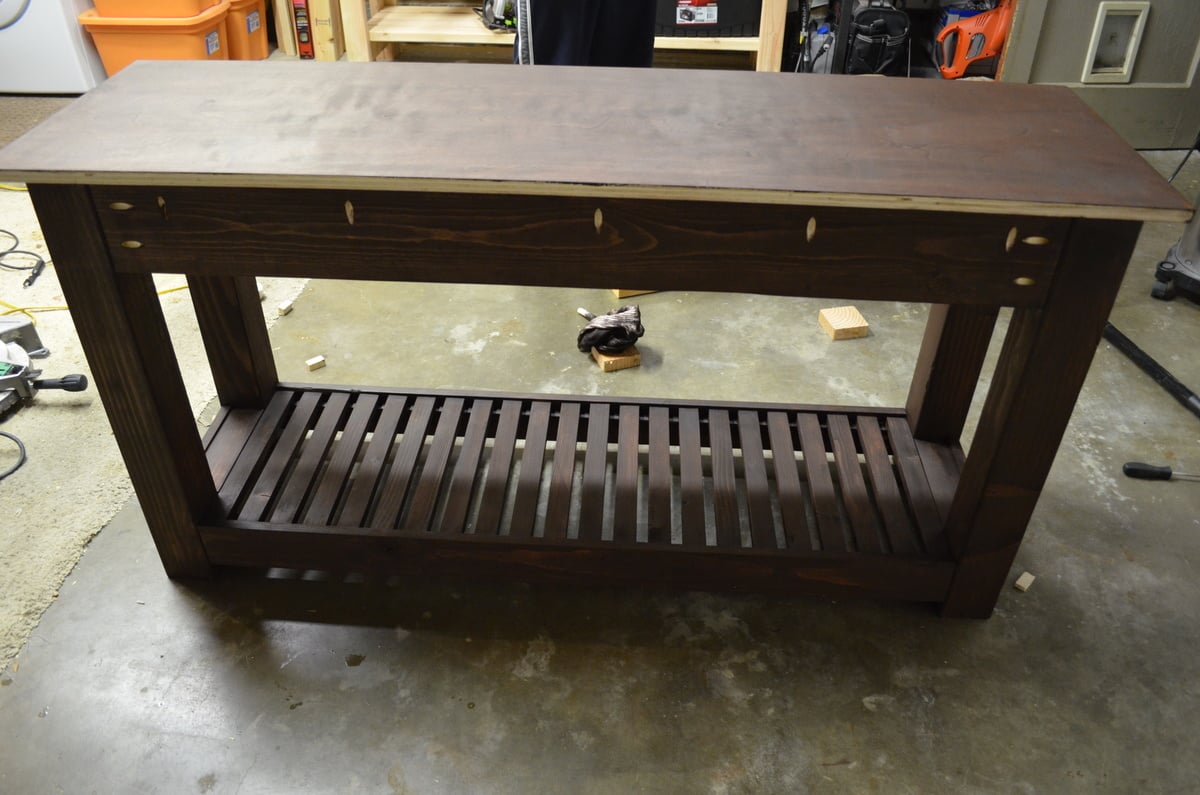
For the railings, I did all screws from the outside to give a stronger hold than the pocket holes, and used 3 3/4" screws for the weigh bearing pieces. I counter sunk all the screws and added buttons to cover them (not yet painted in the photos). I also mounted the 45 degree 2x6 cuts in the 4 weight bearing corners to add extra bracing (not pictured). To brace the slide, I glued and bolted a 4x4 on the front of the bed. The curtains are just 2 off the shelf shower curtains that got hemmed to the correct height, and then were mounted using small teacup hooks. I plan to add an eyehole to each side, so they can be pulled back and hooked open.

Estimated Cost
$150 (all material except slide and curtains)
Estimated Time Investment
Weekend Project (10-20 Hours)
Finish Used
Primer and 1 coat of ultra white semi-gloss paint. For the most part it was painted prior to being fully assembled. Only the parts that were glued were put together before being painted.
Recommended Skill Level
Beginner

Comments

dcostillo

Mon, 05/27/2013 - 13:35

Bmas, this is AMAZING! As we get ready to move to a new home, it's a great excuse to build the new kids bed and kitchen table I've had on the back burner.... Where did you get your slide if we wanted to go the same route?

Thanks,
David

dcostillo

Mon, 05/27/2013 - 13:36

Bmas, this is AMAZING! As we get ready to move to a new home, it's a great excuse to build the new kids bed and kitchen table I've had on the back burner.... Where did you get your slide if we wanted to go the same route?

Thanks,
David

Erica's AG Doll Bed

Submitted by getcz on Tue, 10/07/2014 - 08:34

This is the second of three AG doll beds I made for my nieces.

Estimated Cost
wood - $0 scrap on hand paint - $0 leftover on hand fabric - leftover from a panel
Estimated Time Investment
Afternoon Project (3-6 Hours)
Finish Used
Toy
Recommended Skill Level
Beginner

Rustic "X" Coffee Table

Submitted by Anonymous (not verified) on Thu, 01/19/2017 - 16:35

I am so in love with how this turned out! We will be making the matching Rustic "X" Console Table next!!!

Built from Plan(s)
Estimated Cost
$100
Estimated Time Investment
Weekend Project (10-20 Hours)
Finish Used
We use two applications of Minwax Classic Grey Stain and two coats of HGTV satin Creamy white paint, all supplies purchased at Lowe's.
Recommended Skill Level
Beginner

Comments

Shoe Dresser

I had this space in my mudroom that was a perfect spot to make a custom shoe dresser. I adjusted the plans I found on this website to custom make storage for shoes. Now this weird little space is functional.

Built from Plan(s)
Estimated Cost
80
Estimated Time Investment
Day Project (6-9 Hours)
Finish Used
Rustoleum chalk paint Serenity Blue, classic grey and special walnut Minwax
Recommended Skill Level
Intermediate

Comments

SeeSaw

SeeSaw made for the kids I watch, they love it

Recommended Skill Level
Beginner

Mantel Moulding Headboard with Variations

Submitted by wyosharon on Sat, 10/11/2014 - 19:56

As suggested at the beginning of the instructions, be sure to read through the entire set of instructions before shopping and making this headboard. The parts lists calls for 3 - 7ft pieces of moulding. However, we needed more than three to do the finishing touches. Also, none of the mouldings suggested were at our Home Depot, so we improvised. Cutting some of the mouldings to go around the corners was too challenging for us, so we ended the moulding strips at the end of the bed. To give the ends a finished look, we used some of the 1/4" plywood, cut them, and sanded them. Be sure to sand all the surfaces. The instructions tell you how long to cut some pieces, but they don't say whether the board is supposed to be a 2X4 or 1X6, so be sure to go through the directions thoroughly before starting and cutting. We did use spray paint, and it took more than three cans to provide sufficient coverage, since the wood soaked up much of the first layer of paint.

Built from Plan(s)
Estimated Cost
$150-$200 depending on the types of moulding and paint/stain used
Estimated Time Investment
Weekend Project (10-20 Hours)
Finish Used
We sanded all the surfaces prior to painting. The first coating of spray paint soaked into the wood quite a bit, so we added another three coats of spray paint. The dry time adds some extra time to the complete project. We needed nearly four cans of spray paint.
Recommended Skill Level
Intermediate

Modified Eco Modular Desk

This was my first real project. I started with the base instructions from this site and plugged them into Sketch-Up. From there I modified them a bit to fit my space better and to accomodate my PC and Audio/Video equipment. The desk fir perfectly in the room. My wife and I put the flooring in plus new baseboards, window sills, and paint. I also used some plans for floating shelves from another site and incorporate lighting to complete the look of the room. Can't wait for my next project!!!

Finish Used
Weathered Oak - Minwax
Satin Poly
Recommended Skill Level
Beginner

Farmhouse Vanity with Shelf

This project took us about one week to complete. We spent two days building the vanity itself and added a shelf on the bottom. Staining it took a while and so did the topcoat. The Kreg Jig is amazing to work with, it made building this thing so much easier! The sink is purchased from Amazon along with the drain, together ran about $100. The faucet is from Costco ($70). We are pleased with the result and couldn't believe we were able to do it ourselves. I find myself popping into the bathroom just to make sure it's real!

Estimated Cost
The wood itself is about $80 with lots of leftovers. $40 for the finish and stain.
Estimated Time Investment
Weekend Project (10-20 Hours)
Finish Used
General Finishes Java Gel Stain & General Finishes Gel Topcoat in Satin
Recommended Skill Level
Beginner

Alexia Bench

Submitted by ctay on Wed, 10/15/2014 - 10:28

This was the first time I have built drawers!  I love how it turned out!!  This website has given me the confidence to build things I never thought I would.

Built from Plan(s)
Estimated Cost
90.00
Estimated Time Investment
Weekend Project (10-20 Hours)
Finish Used
Minwax dark walnut, I used wood conditioner first so it would go on evenly. Wiped it off right away to keep it lighter on top. Bottom is painted Dover white, Insul-X trim and cabinet enamel
Recommended Skill Level
Advanced

Garage Mudroom

Submitted by Anonymous (not verified) on Tue, 01/24/2017 - 20:21

We have 6 children and needed a dedicated area for coats, backpacks and other outdoor items.  I loved how I could modify the smiling mudroom plans to fit my needs.  I used plywood for the bench and 1" x 12" pine boards for the shelves and dividers to minimize the cuts.

Built from Plan(s)
Estimated Cost
$200
Estimated Time Investment
Weekend Project (10-20 Hours)
Finish Used
Semi-gloss latex paint
Recommended Skill Level
Beginner

Vegetable Bin

Submitted by Anonymous (not verified) on Fri, 10/16/2020 - 07:02

My first Anna White build. Easy and fun. I made this for my Grandmother for Mother's Day 2019. She absolutely loved it.

Built from Plan(s)
Estimated Time Investment
Weekend Project (10-20 Hours)
Recommended Skill Level
Beginner

My take on the Parson Chair

I bought some cool Parson Chairs to use with my grandparent's 1950s style porcelain top table. Unfortunately, the chairs were way too big to fit between the legs of the table. My friend said she was surprised I didn't build my own chairs in the first place... that's when I remembered seeing a Parson Chair plan on Ana White! I liked the overall design of the chair in the plan, but I wanted to make some changes to make it my own. I made the chair narrower to fit between the legs of my table, changed the angle of the rear legs from 15 degrees to 10 degrees, increased the rear legs from 2x2s to 2x3s and made the back taller. This was my FIRST sewing project and I'm really pleased with the way it turned out!

Built from Plan(s)
Estimated Cost
approximately $150-$175 for two chairs
Estimated Time Investment
Week Long Project (20 Hours or More)
Finish Used
Legs are painted with an eggshell black Martha Stewart paint.
Recommended Skill Level
Intermediate

Comments

mikejillnelson

Wed, 01/02/2013 - 06:25

These look beautiful! Would you mind giving me your opinion on their comfort to sit in? Also, do you mind sharing where and what kind of foam padding you used for the seat? Thank you - and great job!

Knot Perfect

Wed, 01/02/2013 - 18:32

Thank you! They are actually really comfortable to sit in and no one believes I made them! I'm 5' 4", so I should mentioned that I shortened the leg to 14.5" and also shortened the measurement for the depth of the seat to 14". I got a high density foam chair pad from joann.com, but they are also available in the JoAnn store. I cut the chair pad to fit my seat with an electric kitchen knife then wrapped the chair pad with 1/2" batting (got that in the JoAnn store). Hope that helps. Let me know if you have any other questions. Thank you again for your compliments!

amstan103

Wed, 06/26/2013 - 15:44

How much narrower and how much taller did you make the chair? I LOVE your design much more than the original. The narrower frame and taller back make it look much classier in my opinion. Please get back to me when you can. Thank you!!

In reply to by amstan103

Knot Perfect

Tue, 11/26/2013 - 18:03

Sorry I didn't see your question earlier... thank you for the compliments on my redesign :) I posted a new pic with the dimensions for the back and seat. Thank you again and let me know if you have any other questions.

W.E. Emmerson Table Hack

First Brag. Solid pine in 2 X 8s obtained from dumpster diving behind a boat store. This wood is from boat shipping crates. Milled down with table saw to usable sizes. Not hollow like the WE Emmerson table. Very heavy and solid with NO wiggle! 

Estimated Cost
$50.00 screws and glue and finish. Priced about $120.00 if you purchased new 2x4s and 2x6s.
Estimated Time Investment
Weekend Project (10-20 Hours)
Finish Used
Minwax Special Walnut 2 coats and Cabot Satin Poly three coats.
Recommended Skill Level
Intermediate

Comments

Hailey421

Sun, 10/19/2014 - 19:19

This is awesome. I'm a complete newbie. But I've been looking around at different plans to make a dining room table. Did you come up with the plans for this on your own? Again, really fantastic. 

montygal453

Mon, 10/20/2014 - 04:54

Thanks and yes, I just studied the table from the catalogue and put it together, I was very excited how sturdy it is. It is pretty straight forward. Screw and glue the boards together using very strong clamps with each addition of a board to make the top I used the measurements from the catalgue as well. It was fun to figure out. Now it is one of my favorite builds!


Outdoor Bar Height Table with Built-In Ice Trays

Submitted by RuthAU on Fri, 01/27/2017 - 22:11

This was my first furniture project and only my 2nd woodworking project, the previous one a cubby house over 20 years ago, so I was a bit nervous. I did lots of planning, research and designing before the first cut. I incorporated ideas from Ana projects as well as from other sites and learned how to use a drop saw, various sanders and the pocket hole jig.

We wanted a tall table because when sitting a a regular height table the view is blocked by the deck railing.

I decided to make it out of hardwood for durability in the Australian outdoors and also because we get sea air where we are. The hardwood (Blackbutt) was challenging to work with - extremely heavy and difficult to drill into, but the finished product is SO solid and will outlive us all. Due to the weight and density of the timber I overengineered as far as joining went, using more pocket holes than usual.

I saw the idea of the built in ice troughs years ago and was keen to incorporate them into my table. I also made the legs detachable so that the table top could be moved out onto the deck once it was finished and the legs added in situ. Once it was set up my husband put big screws into the legs just in case but it would really take an earthquake to move this thing.

I managed to build it over 3 weekends and finished it just in time for our family Christmas party but it only had 1 coat of stain on it at that stage. I finished it off later and we also decided that the ice trough covers would look good in a contrasting colour so did them in charcoal. If I made it again it would be a much quicker project as there was alot of 'firsts' and learning along the way.

The dimensions are:

2660mm long (about 8' 9")

1150mm wide (about 3' 9.5")

1165mm high (about 3' 10")

The legs are solid - 140 x 140mm (5.5")

It seats 10 - 12 comfortably and 14 at a squeeze.

We got the bar stools 2nd hand for an absolute steal - 12 for $200! They are handmade hardwood too and look great.

The timber was quite expensive but I was able to use the work account so got it at trade price. This would be a very expensive table to buy but all up it cost us about AU$1100.

This project was not exactly easy but I would class myself as a novice. With the right planning and preparation (plus stubbornness) anyone could do this :-)

Estimated Cost
About AU$1100
Estimated Time Investment
Week Long Project (20 Hours or More)
Finish Used
Intergrain Natural Stain - semi transparent - Redwood for the majority and Charcoal for the trough covers.
Recommended Skill Level
Beginner

Comments

Brenchwright Table

Submitted by omahattan on Thu, 01/03/2013 - 08:23

Wanted a proper dining table for Thanksgiving. I worked on it during my son's naps and in the evening, so it took longer than normal. I used pine from Menards.

First I used the straightest 1x6's I could find and attached 8 together with my Kreg Jig on the bottom to make a sold tabletop without space between the planks. Then used a chisel to rough up the seams to make it appear that there is space between planks. I then beat the table with a chain, chiseled out chunks, used an awl to make cracks and used a wire brush on my drill to make it look worn.

I did some figuring and made the extending version of the table. The leafs are just 3 1x6's that rest on two 2x4's that pull out.

I made the legs out of 4x6 poplar, because that was the only untreated I could find in that size. I just didn't like the look of the 4x4's.

Some of the wood is a little warped, but what can you do. i t just adds to the character.

I used plumbing fixtures to attached the turnbuckles to the table and sprayed all the hardware black with rustolium flat spray and primer. The rods are just black pipe from true value that I had a welder attach to the turnbuckles I bought online.

Final dimensions: 72" long (closed) 108" (with leafs) 42" wide.

Got to see the Pottery Barn in person and I like mine way better.

Estimated Cost
$500 (including hardware)
Estimated Time Investment
Week Long Project (20 Hours or More)
Finish Used
Two coats of Minwax Walnut gel (only one on the underside)
3 coats of Minwax Quick Dry Poly on table top, 1 everywhere else
Recommended Skill Level
Intermediate

Comments

Garage Loft Bed

Submitted by GAno1Dad on Tue, 10/21/2014 - 20:24

The garage loft bed was inspired by the plans on your site. I beefed up the framing with 2xs and found siding panels at my local big box. 

Built from Plan(s)
Estimated Cost
$600
Estimated Time Investment
Weekend Project (10-20 Hours)
Recommended Skill Level
Intermediate

Comments

Wolfeman188

Wed, 08/03/2016 - 13:15

Hi, i was just curious if there was plans for this bed anywhere? My son has that exact corvette bed and he is not with me for a little while and i wanted to make it for him to come home to.

Rustic x coffee table

Submitted by Anonymous (not verified) on Tue, 01/31/2017 - 21:04

Dark walnut table top. Weathered 1x4s on the bottom shelf in place of 1x12

Built from Plan(s)
Estimated Cost
$40-$50
Estimated Time Investment
Weekend Project (10-20 Hours)
Recommended Skill Level
Beginner

Modern Farmhouse Bed Frame

Submitted by Anonymous (not verified) on Fri, 10/23/2020 - 06:26

My dad and I built this bed together as our first wood working project. We worked on it off and on for about three weeks before it was finished and in my room. We used brackets instead of pocket holes/screws to attach the side rails. Next up will be matching nightstands and a dresser!

Built from Plan(s)
Estimated Cost
300
Estimated Time Investment
Weekend Project (10-20 Hours)
Finish Used
Varathane Briarsmoke Premium Fast Dry Interior Wood Stain
Recommended Skill Level
Beginner

Play Kitchen Set

Submitted by joshlimo on Fri, 01/04/2013 - 08:36

After looking at the price of kitchen sets I decided to make this one for my daughter last Christmas.

The Sink:
I made the sink and the stove identical. I then stole one of my wife's dish towels and stapled it in front of the shelves. I took an aluminum bowl for the sink and cut it out with a jigsaw, I then put clear caulk around the bowl. The faucet was from a hardware store, i found some pipes and put them together until they looked like a faucet. The knobs were from Michael's, I painted them black and put a nut/bolt so they could be turned.

The Stove:
In order to make the burners, i put painters tape on the top of it after it was painted. Then I used a bowl to trace and cut circles in the tape, i then peeled that tape and used black spraypaint on the circles. The burner knobs were also from Michael's.

This project took a while, maybe 2 weeks of working a couple hours every few days, but i was surprised and impressed with my work after I was done.

Estimated Cost
$200
Estimated Time Investment
Weekend Project (10-20 Hours)
Finish Used
light blue paint, black paint for the knobs
Recommended Skill Level
Beginner