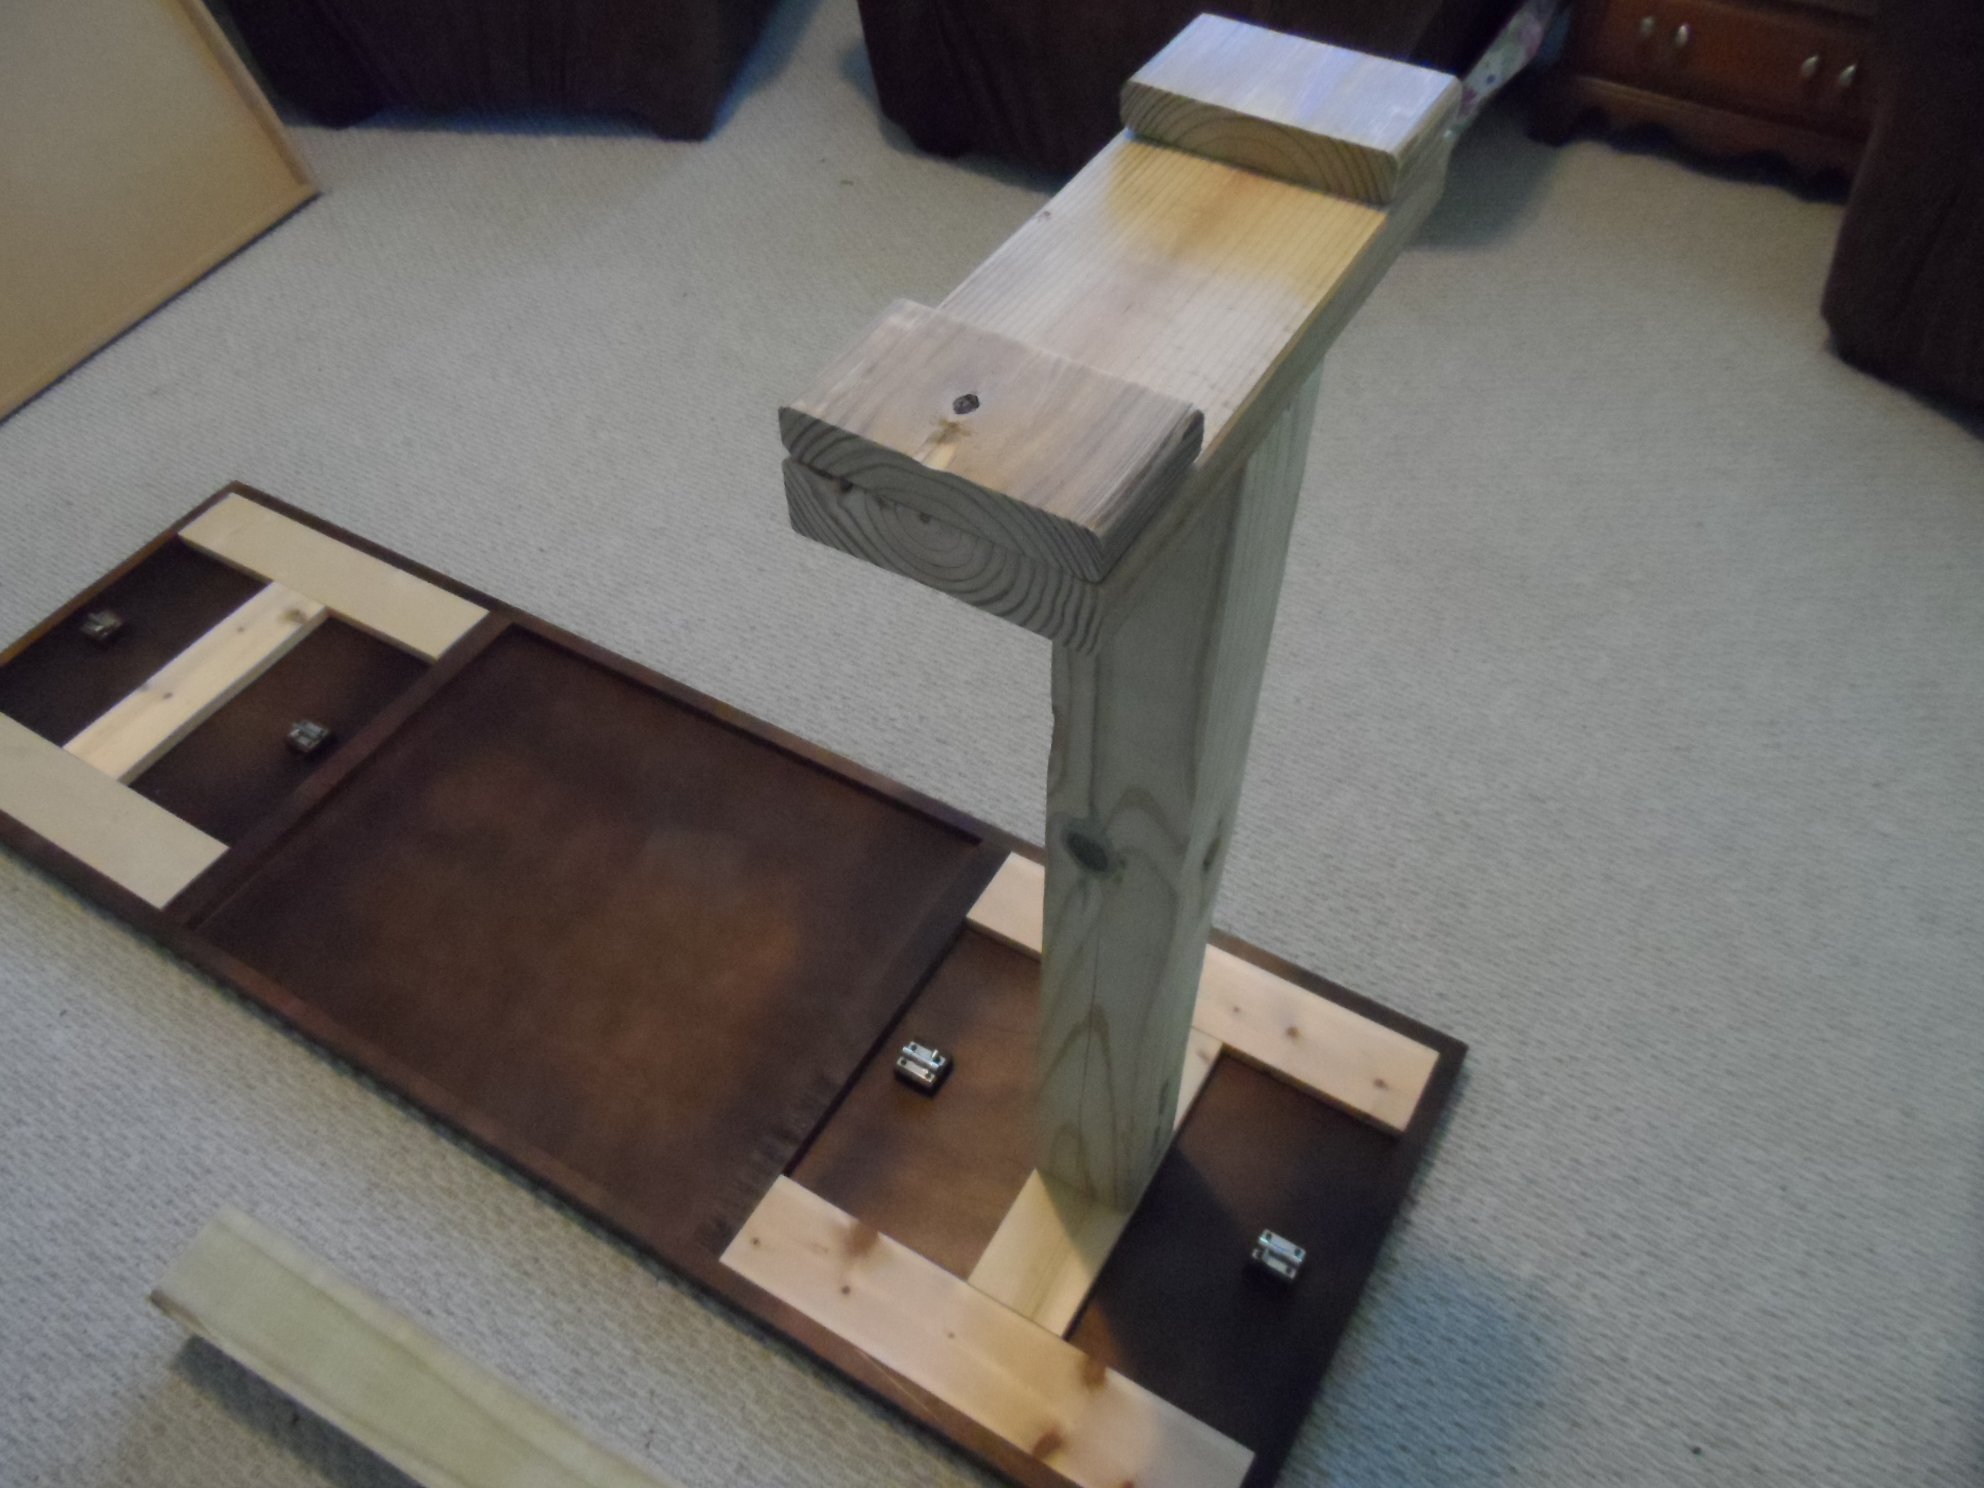
Small Truss Farmhouse Table
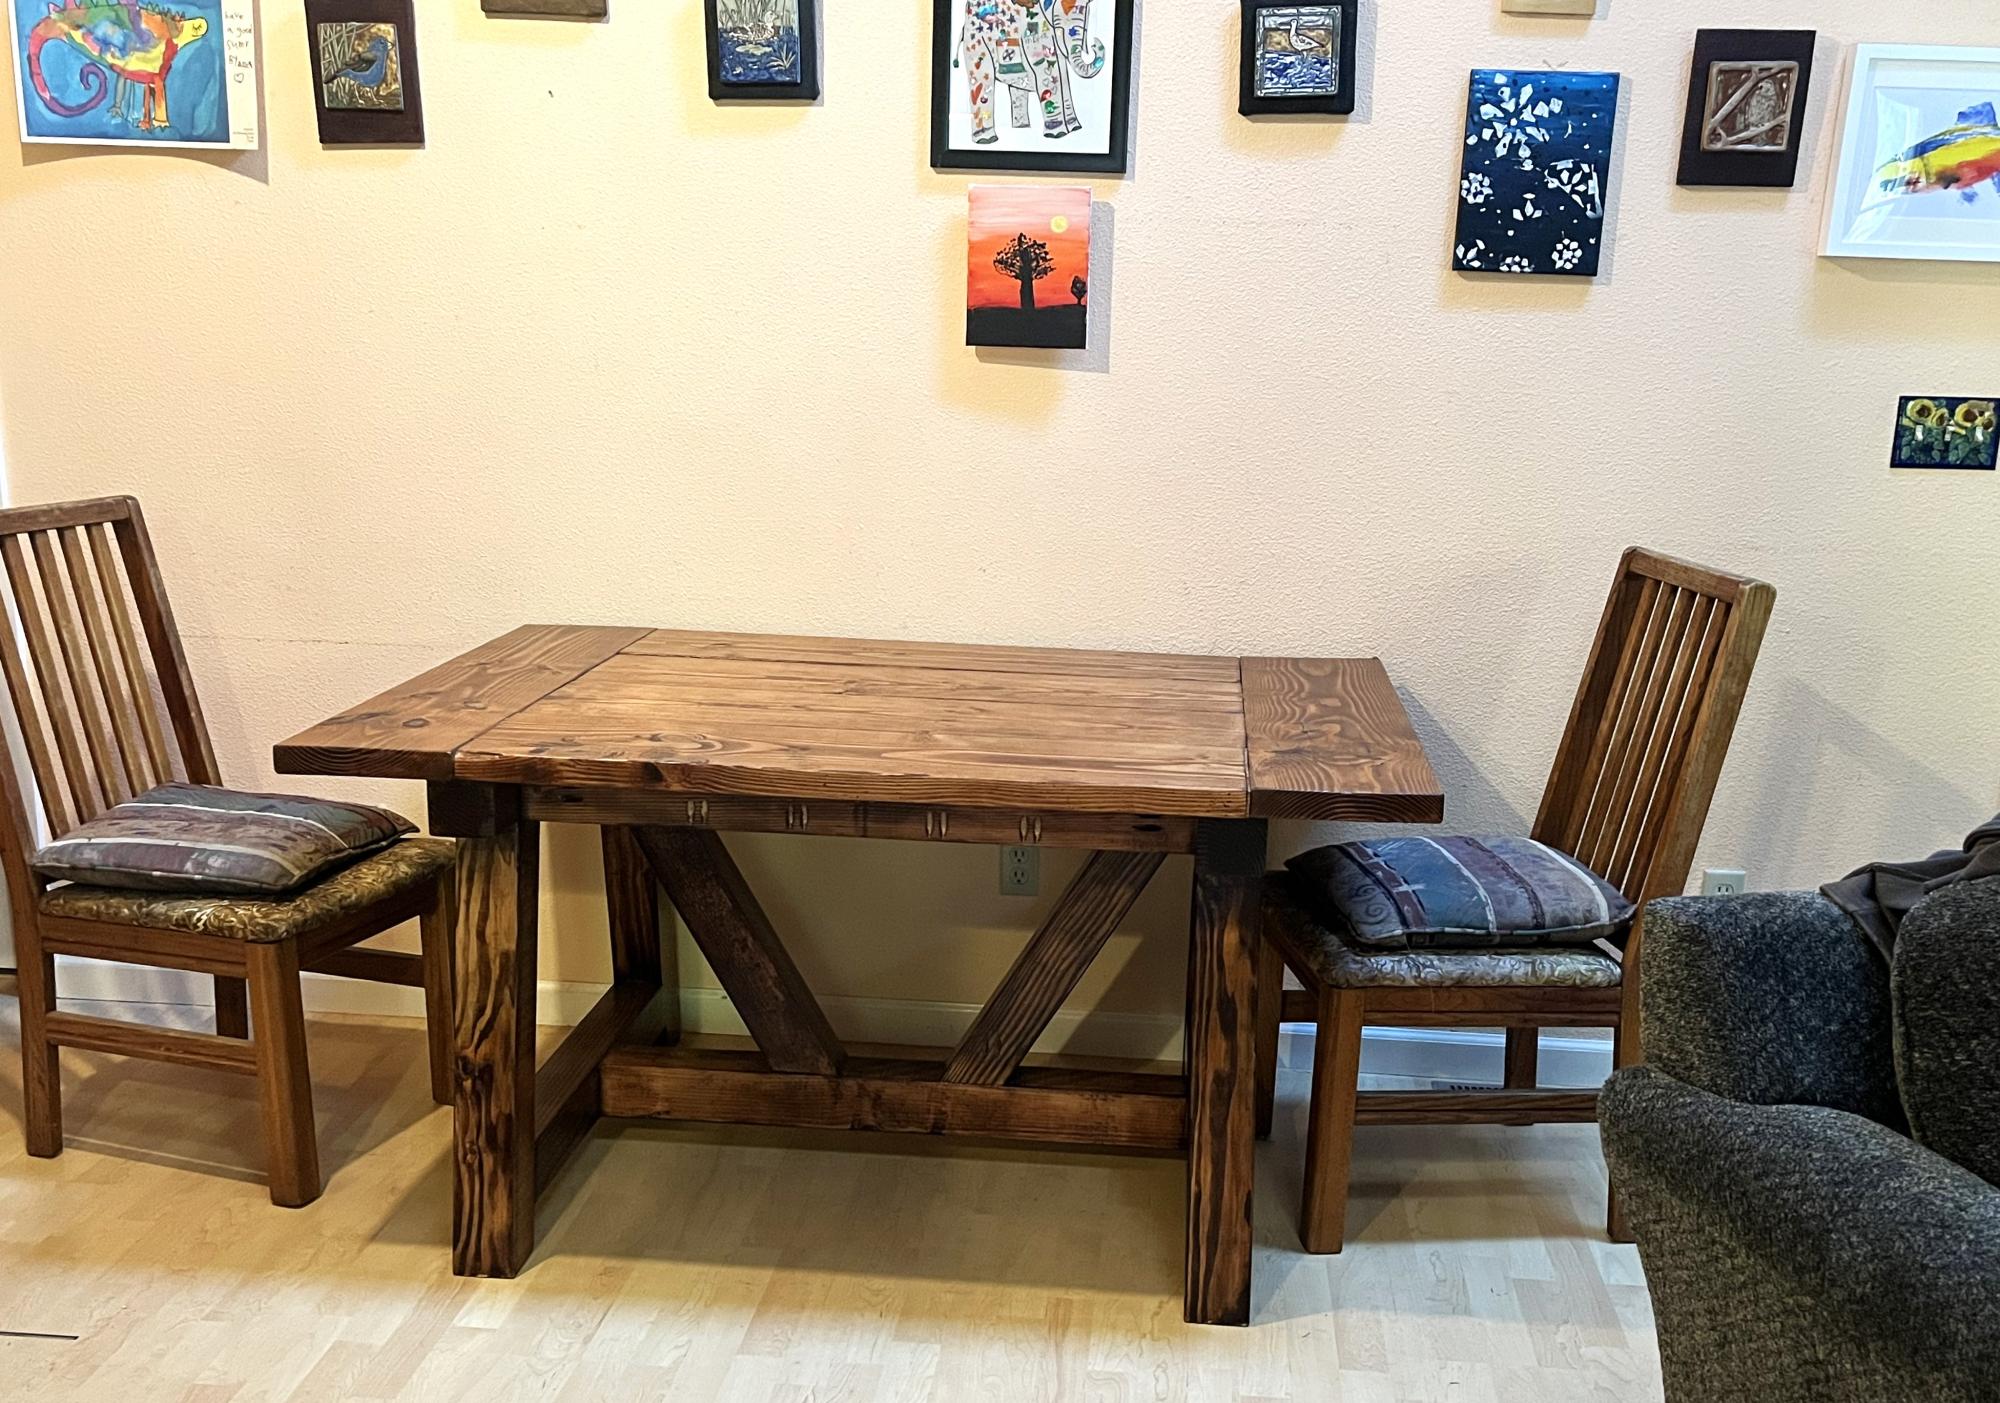
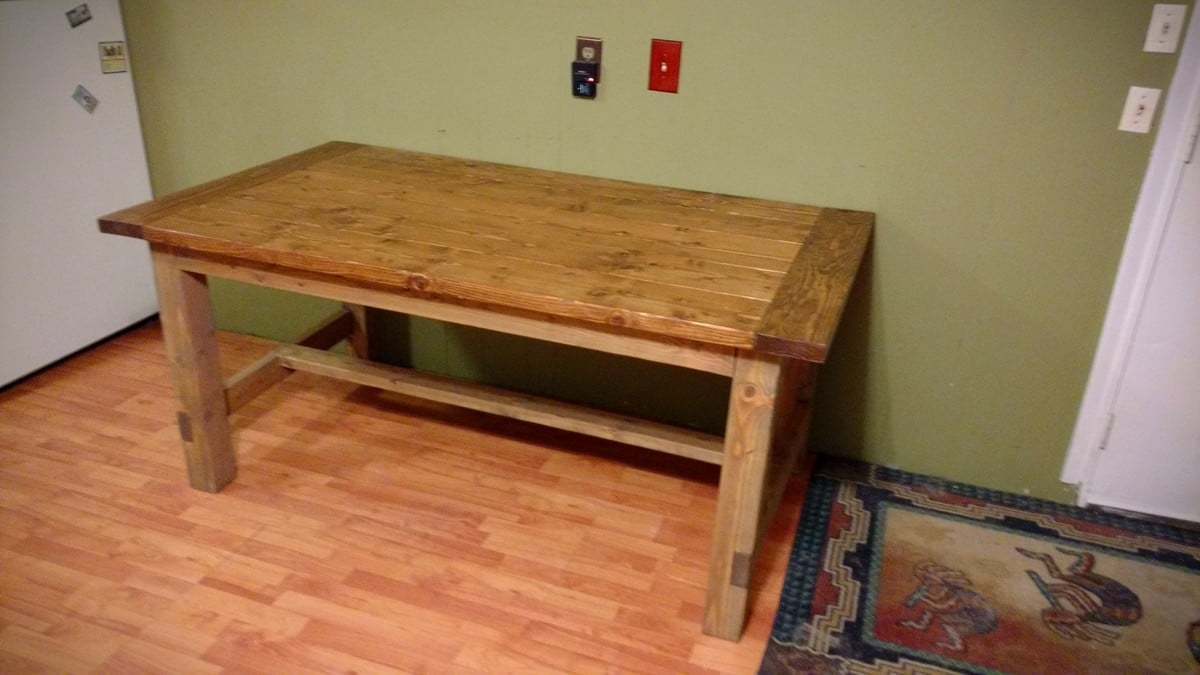
A smaller version of the farmhouse 4x4 truss beam table. Made with inexpensive Douglas Fir construction wood. My biggest woodworking project yet. Very satisfying!
Deb B
Built from Plan(s)
A smaller version of the farmhouse 4x4 truss beam table. Made with inexpensive Douglas Fir construction wood. My biggest woodworking project yet. Very satisfying!
Deb B
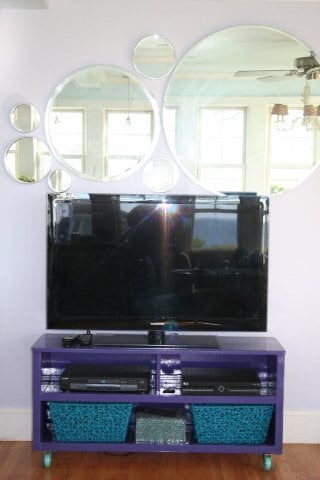
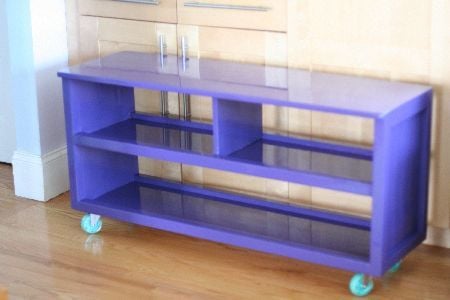
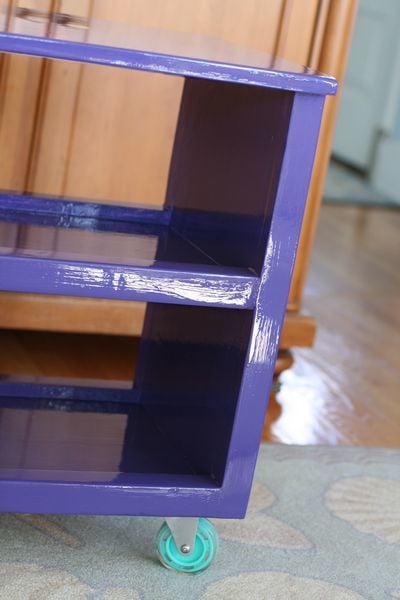
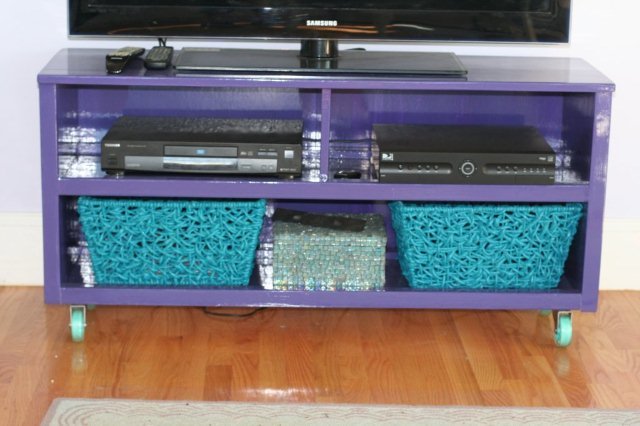
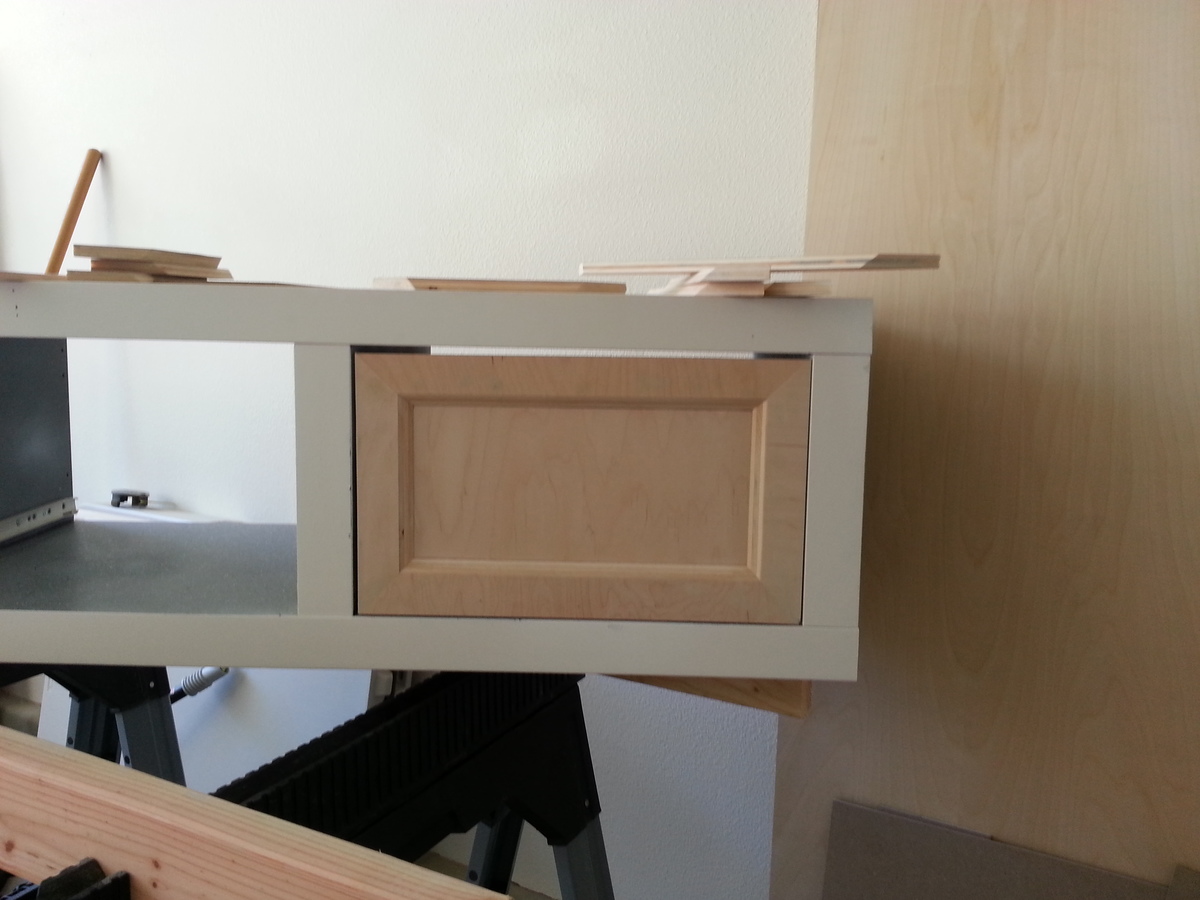
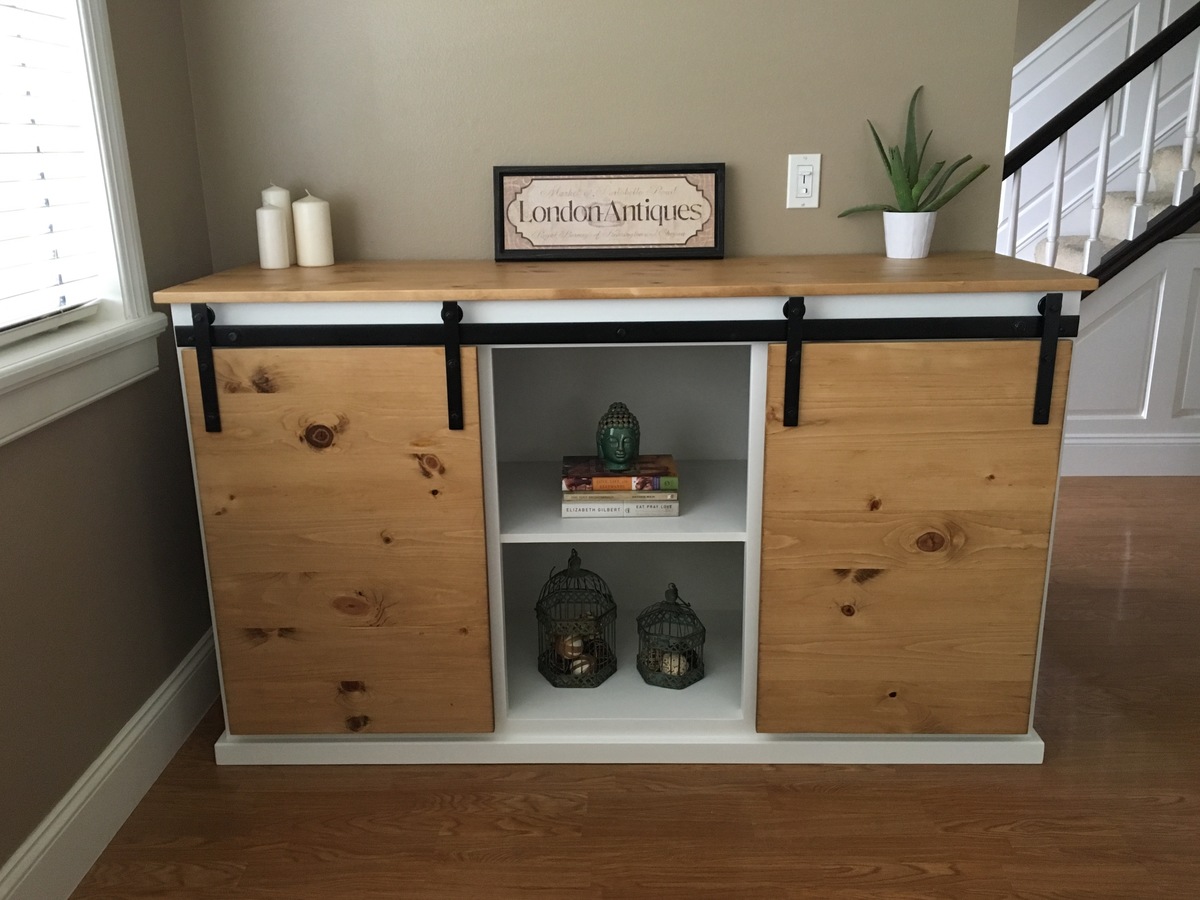
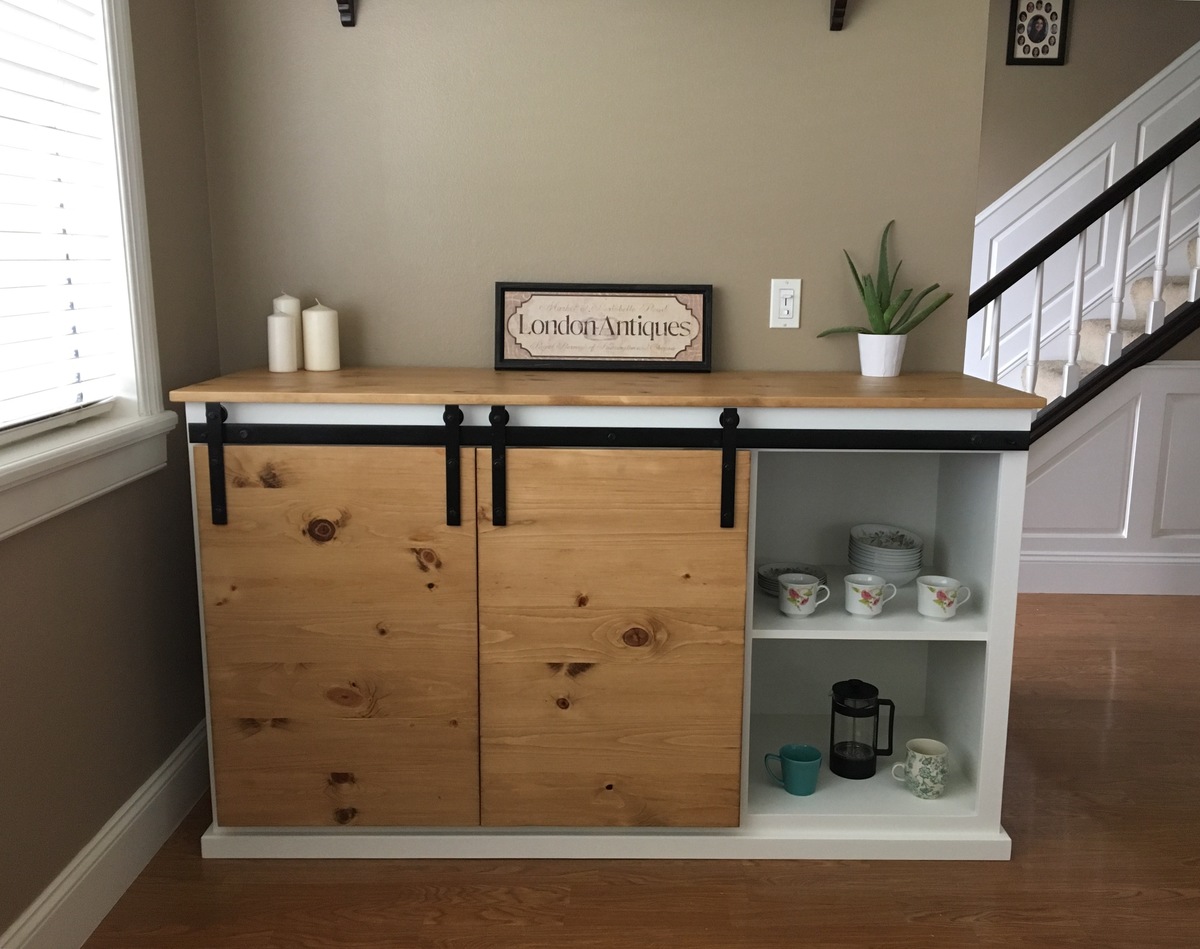
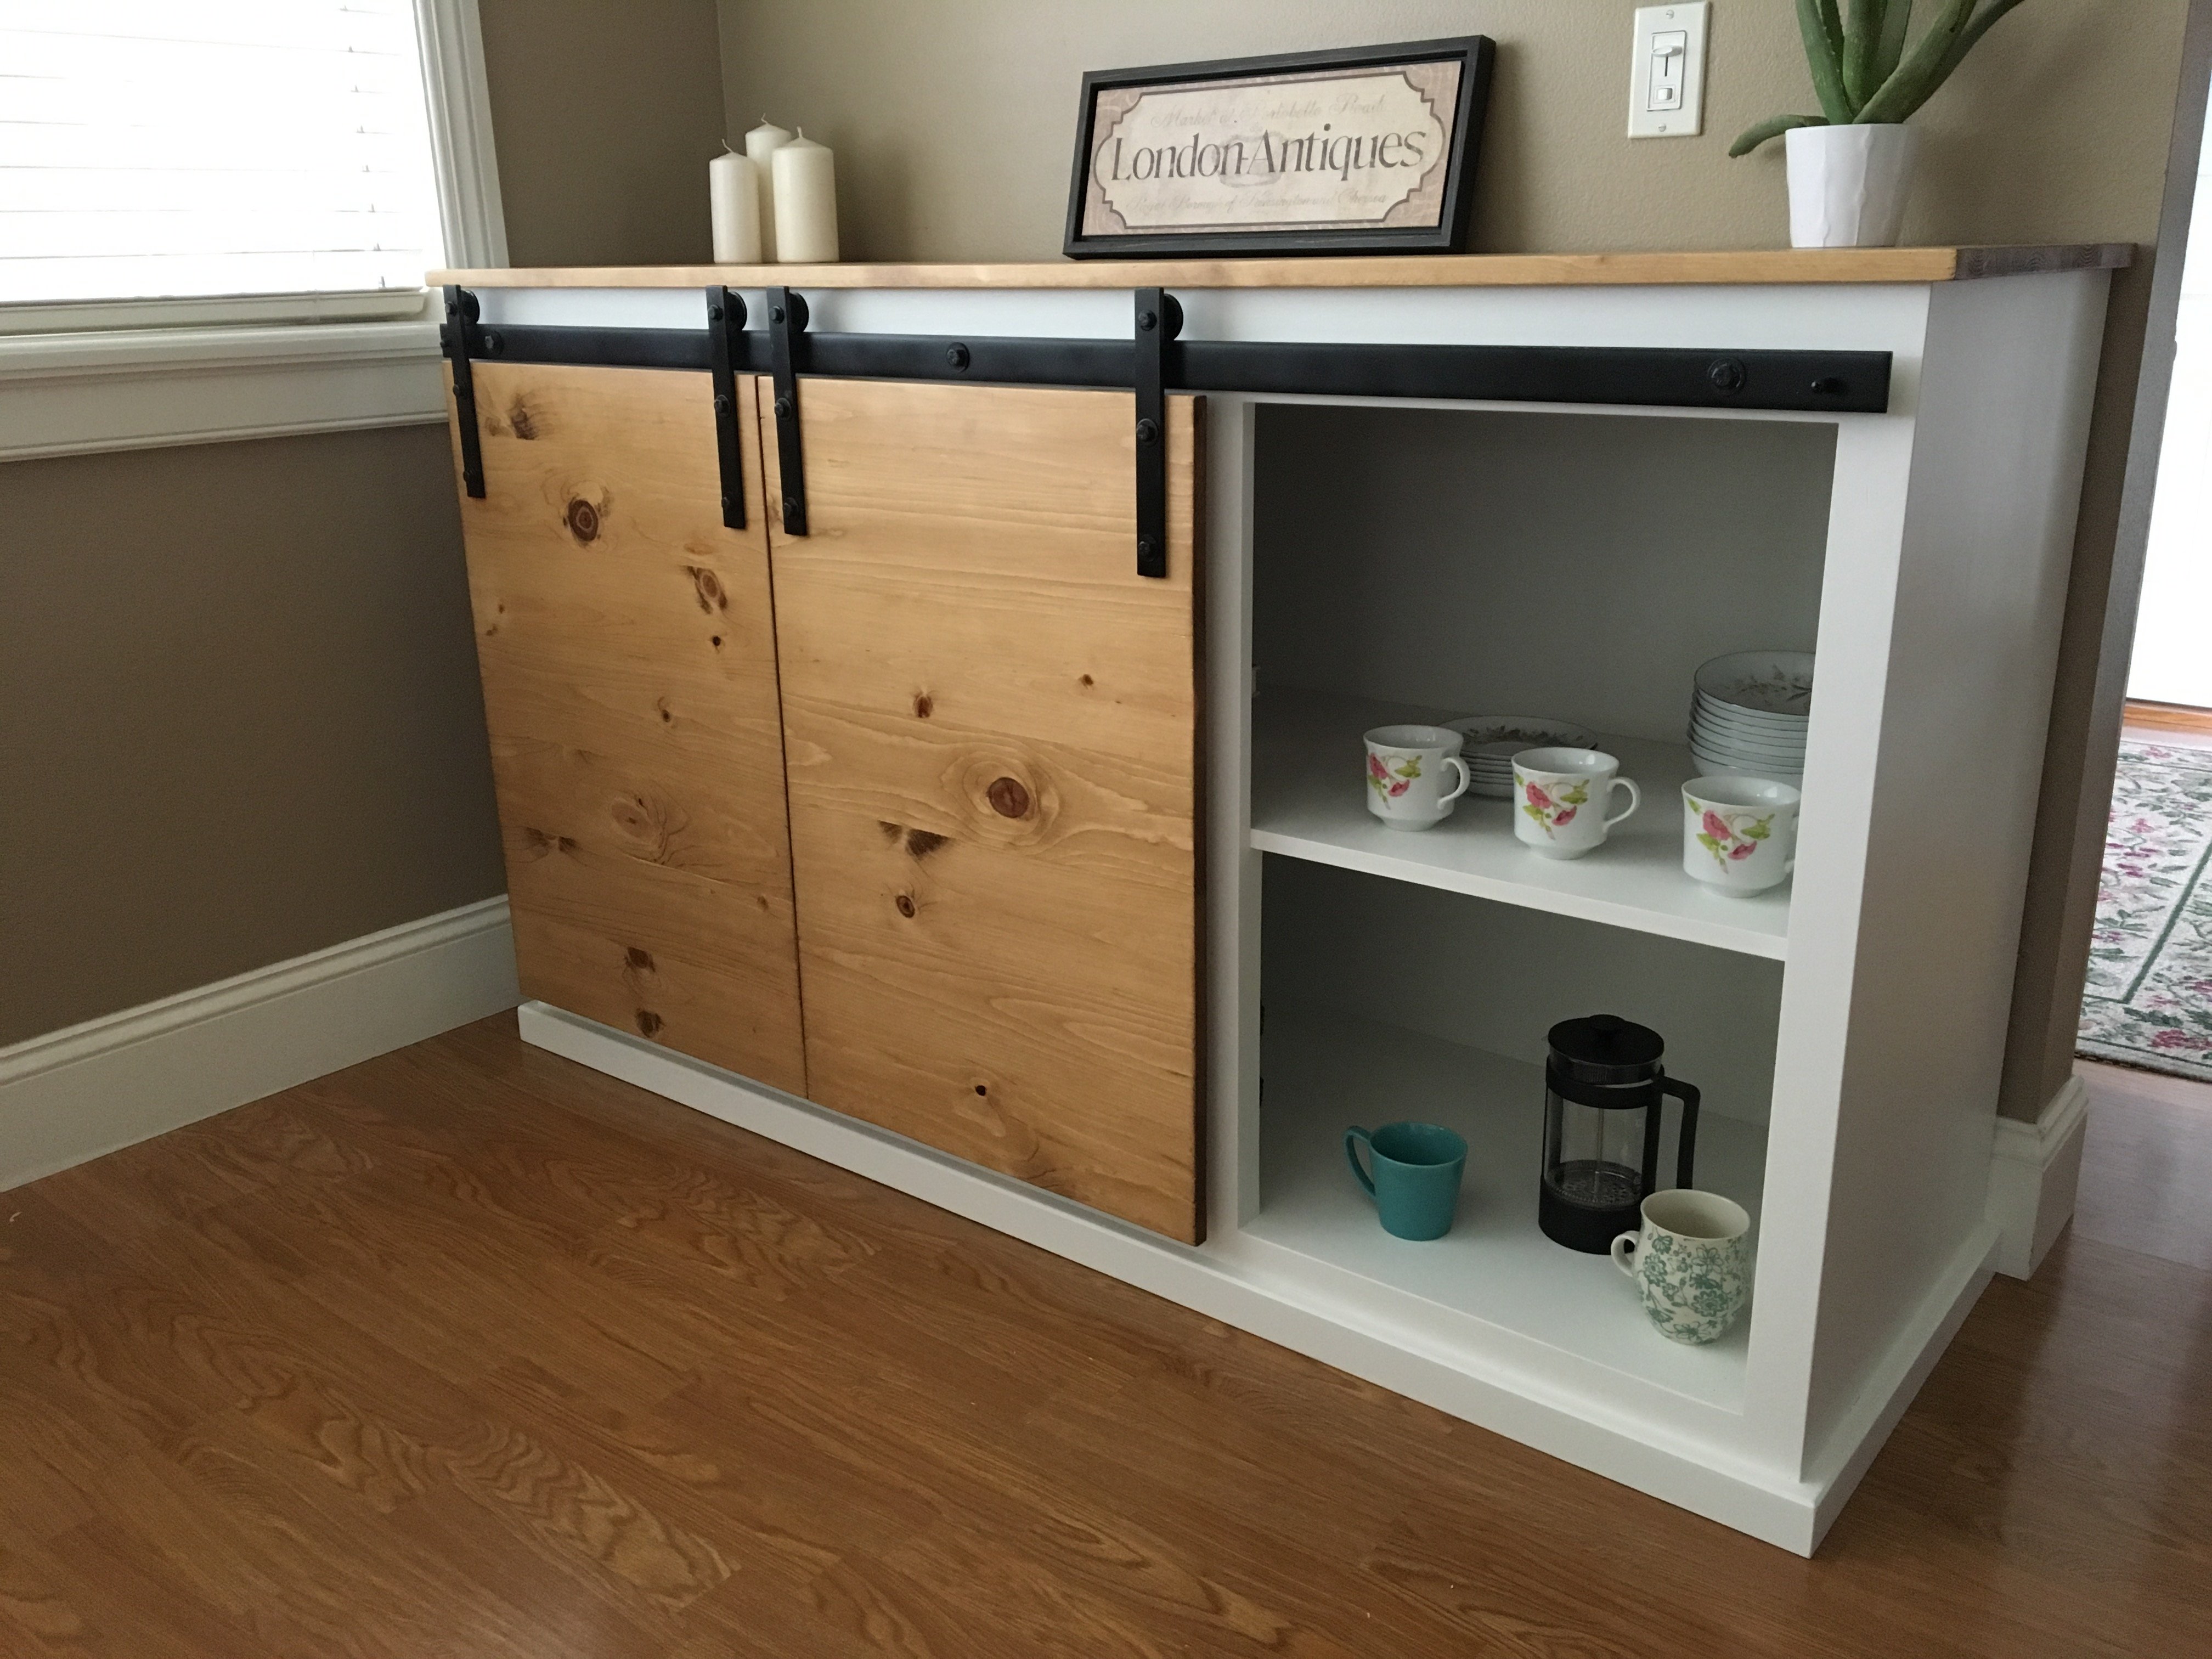
What a fun project. Based on Ana White's Media Console that was very close to what I wanted. I changed up the size to work in my room. I needed a shorter length to fit the space I had. I did not use the doors or drawers. For my first project they intimidated me a bit. I also needed access to the TV box.
I subtracted for the legs so they ended flush with the bottom of the console and used some fun wheels to be able to move it around. Finally, I did not like seeing all of the cords behind it so I added a back with cutout for the cords and painted it the same color as the console.
As it was built "on the fly" I did not keep detailed measurements to share. Can't wait to pick out my next project! Thanks Ana for all you do.

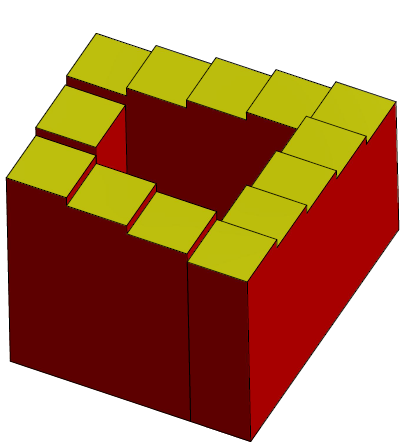
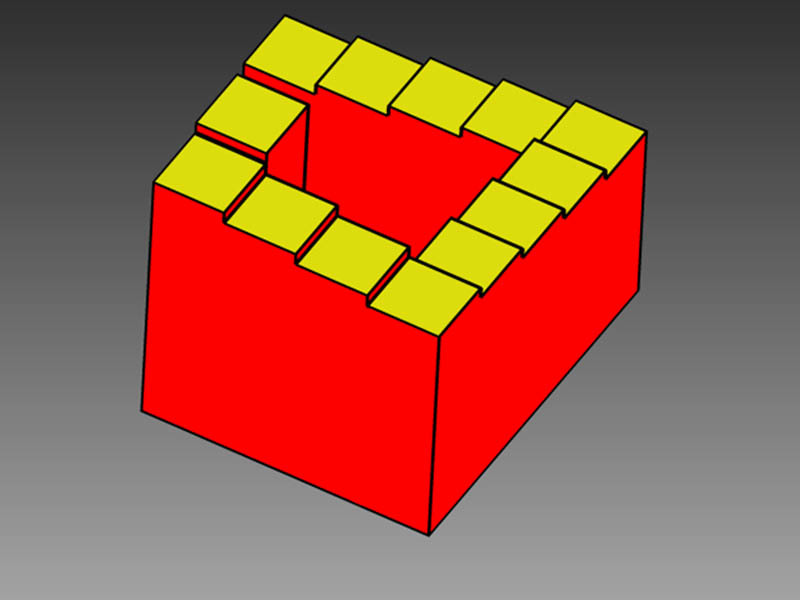
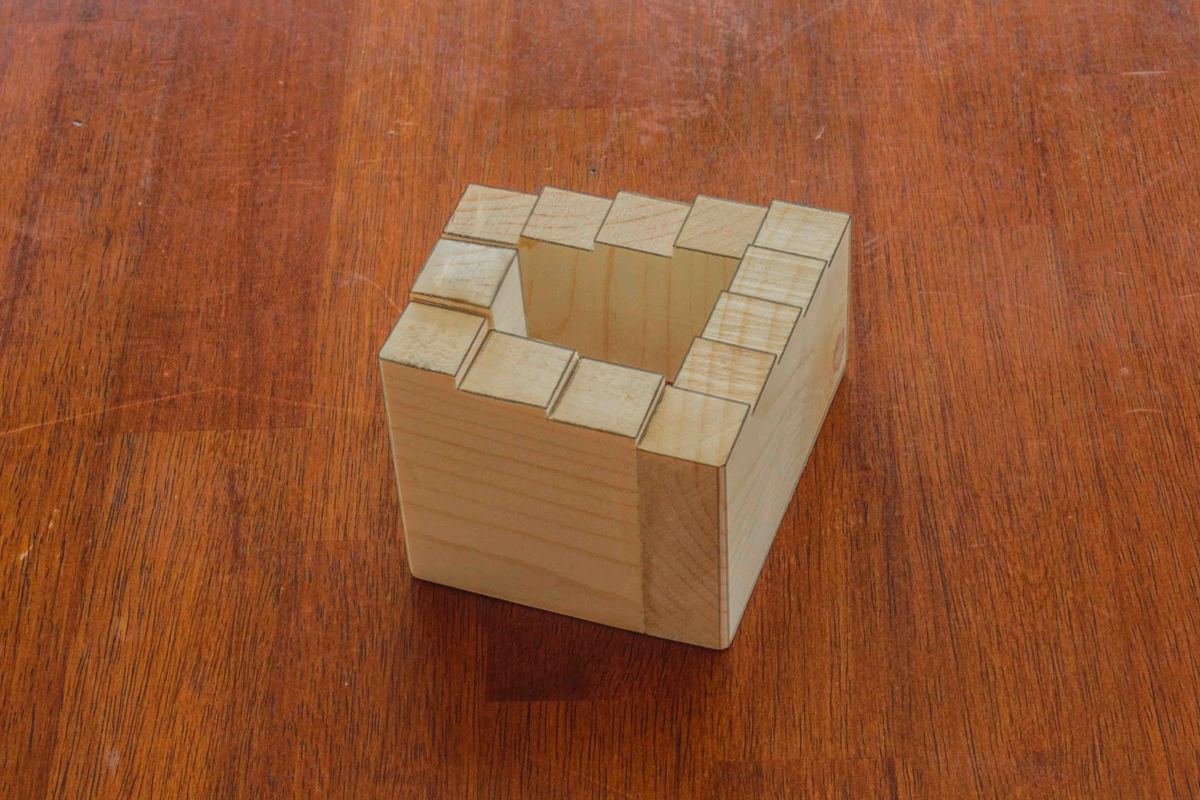
The Penrose stairs, also known as the impossible staircase, is a two-dimensional depiction of a staircase in which the stairs make four 90-degree turns as they ascend or descend yet form a continuous loop. Although the staircase is conceptually impossible, it does interfere with your perception since it looks like a person could climb forever and never get any higher.
Watching the video is the easiest way to see how it works. I’ve included a drawing which is linked in the video description.
http://www.youtube.com/watch?v=VAAZBhA8Pfc
See my Youtube woodworking channel for additional projects
http://www.youtube.com/playlist?list=PLcLIJdluqiyiI7J9qp5VAXrALMOftr0RT

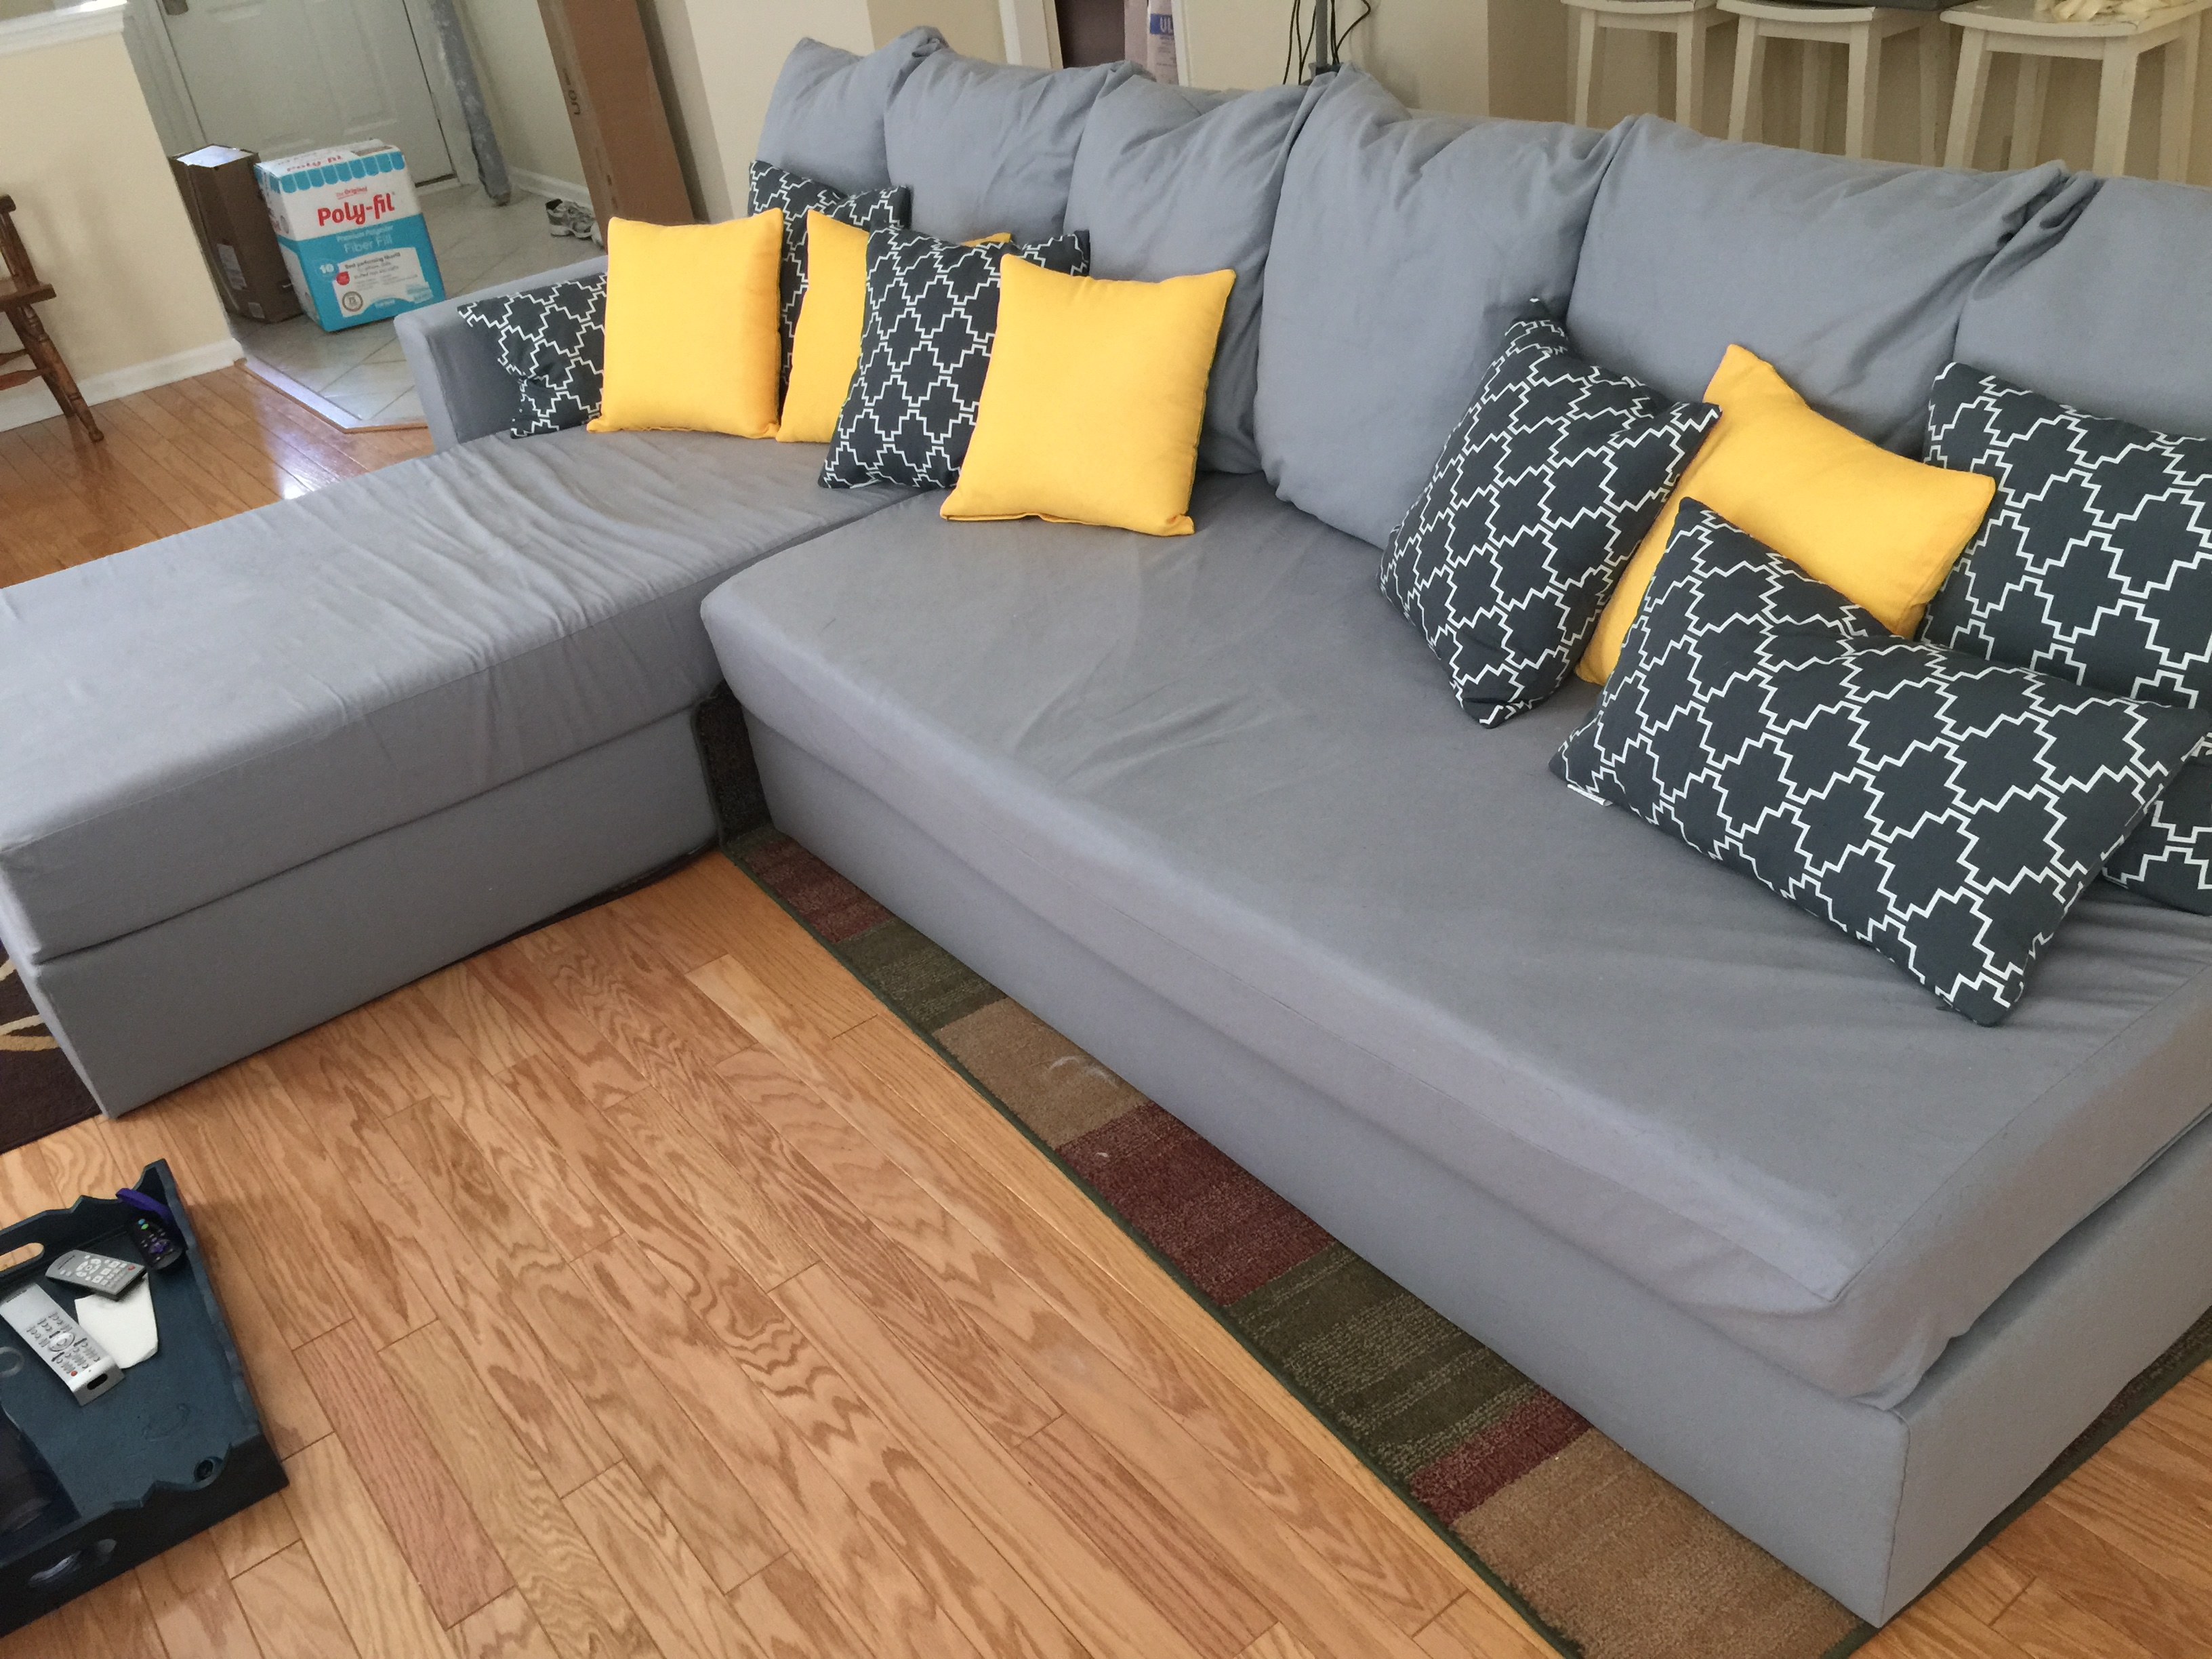
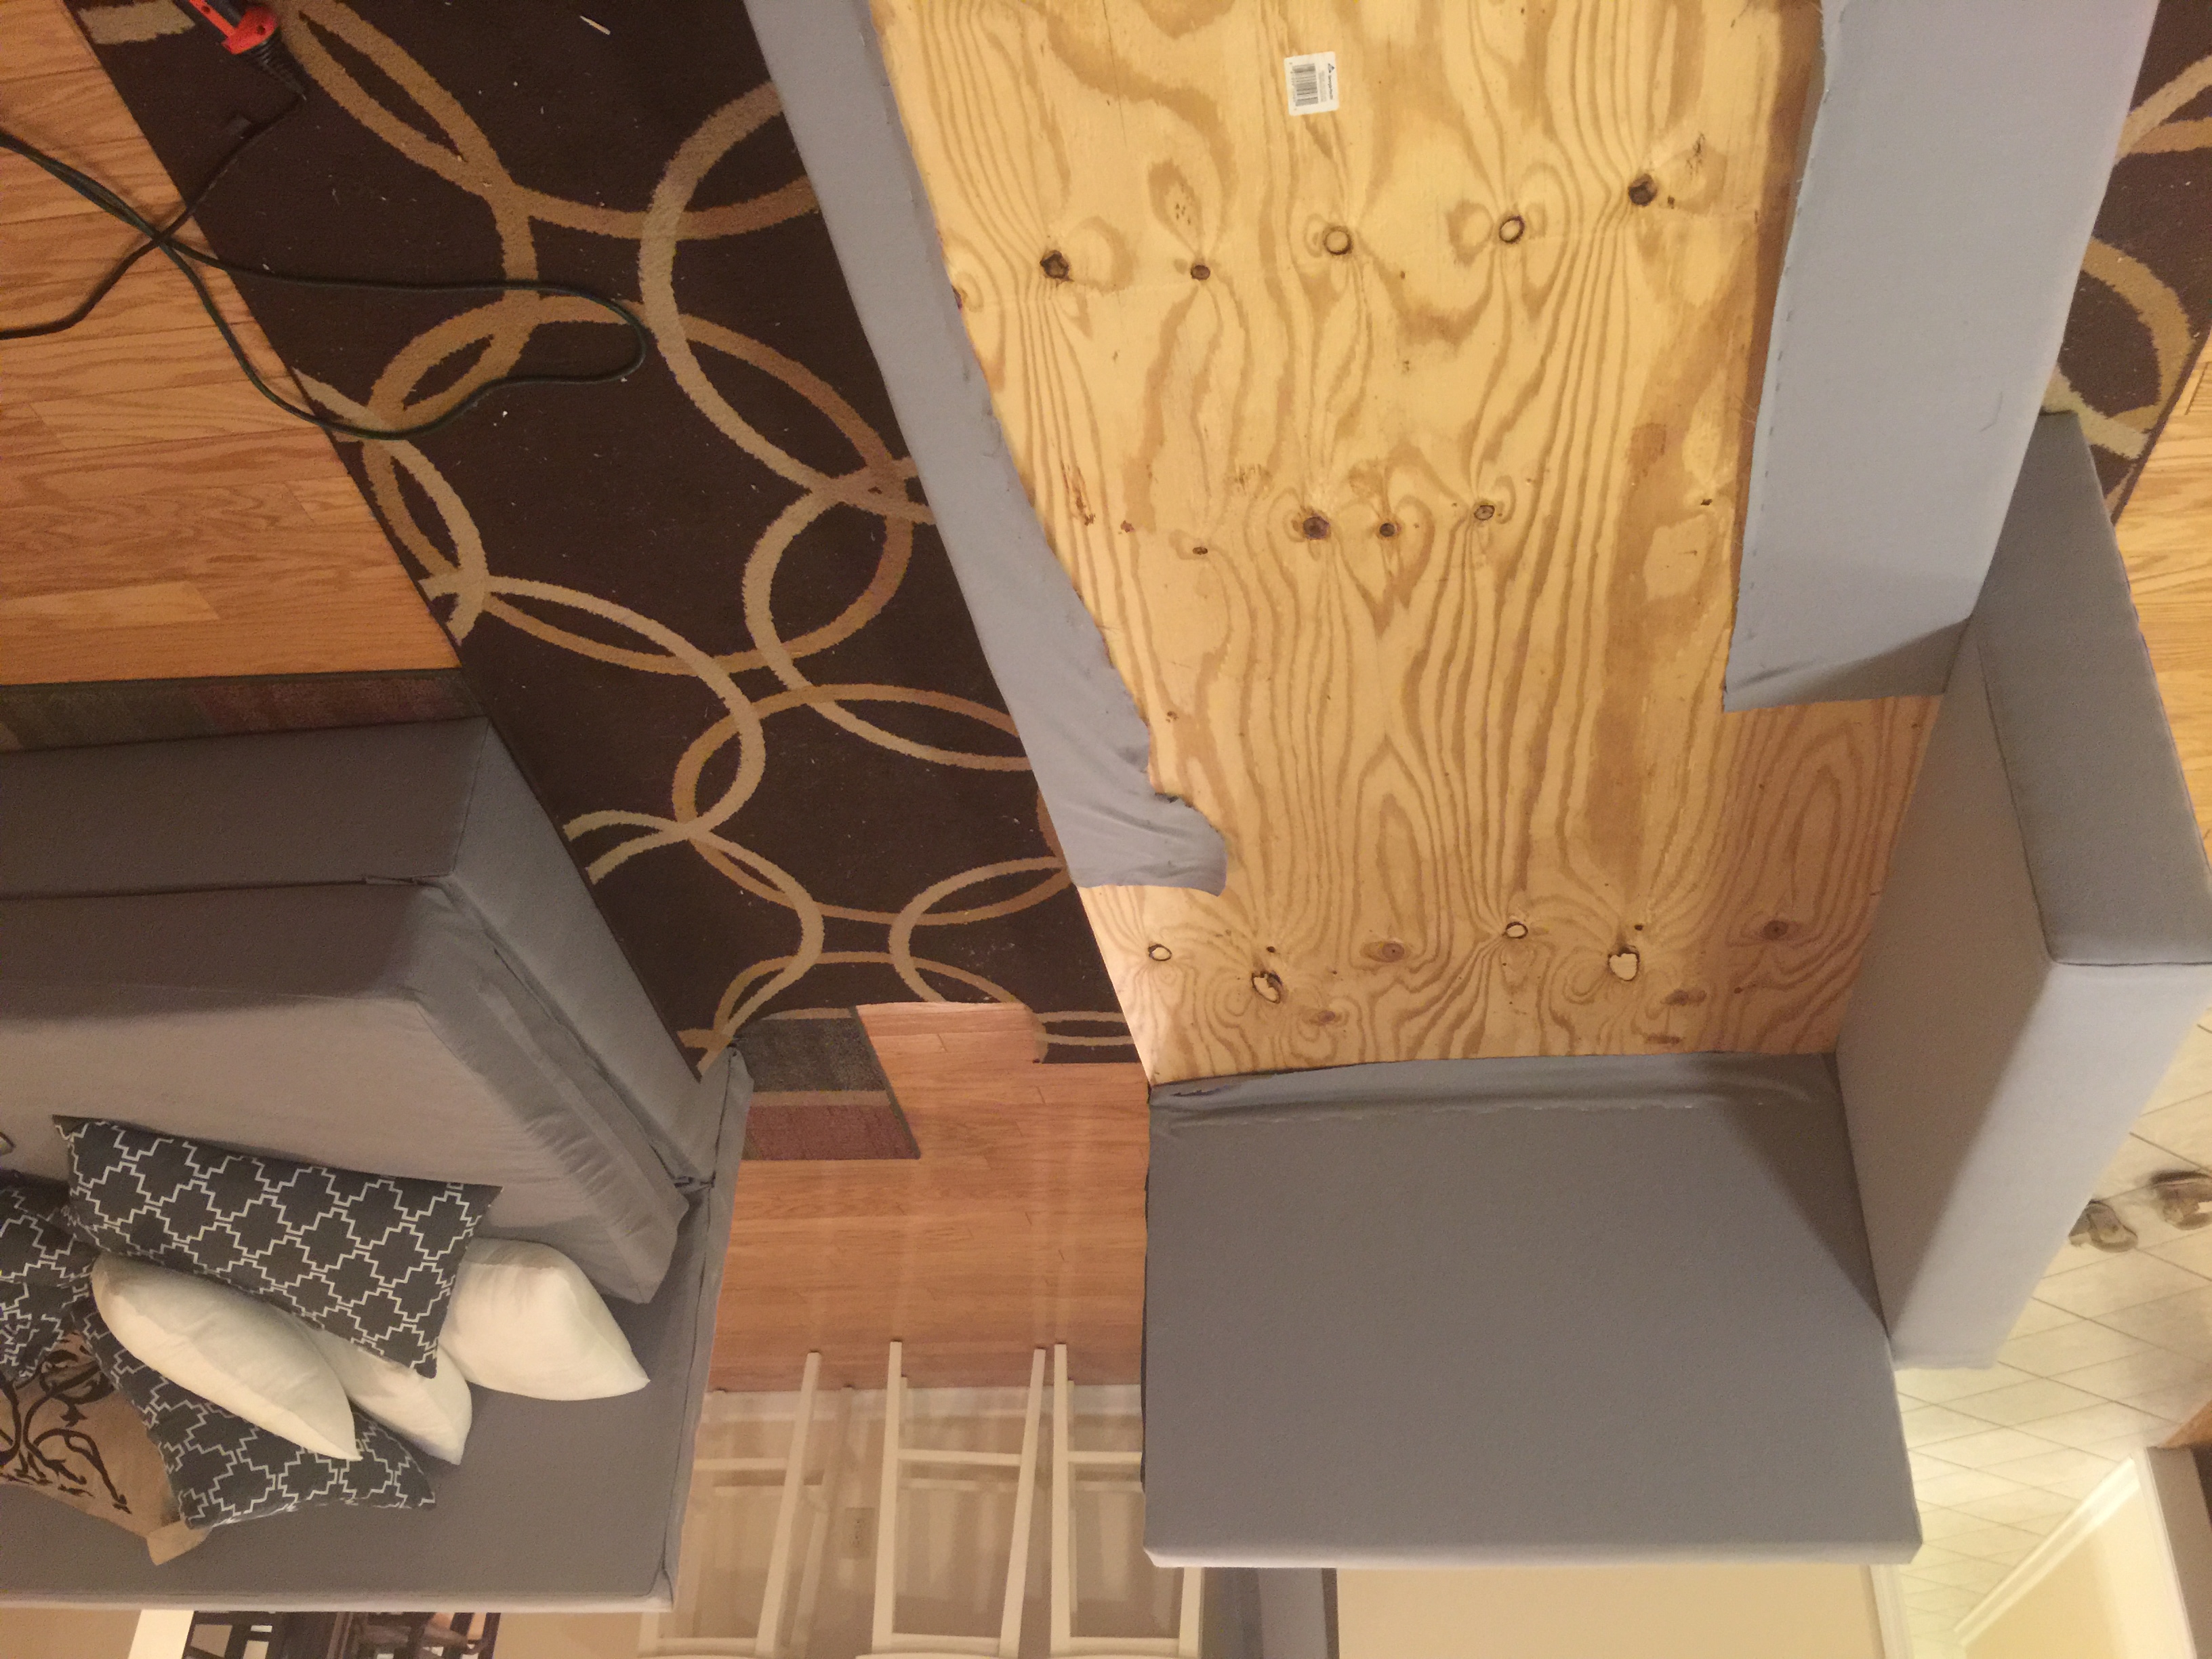
This was my first BIG project that I have ever attempted. Would I do it again? Probably not, it definitely was a "bite off more than you can chew" situation. Many adjustments had to be made to fit our needs, however it turned out wonderful and I am happy with the results.
I tweaked the plans for the folowing reasons:
The framing was easy as pie. We opted to not do the storage concept- we have enough as it is. We bought fabric online from a fabric wholesaler based out of Chicago (found them on Amazon). This was probably the most costly out of everything, and with two cats and a dog I deeply regret going with blue-grey canvas. It looks great, but shows stains very easily.
The padding was relatively simple to do. I should have done more than just one layer, since it seems pretty hard on the corners and edges. Again no big deal, I don't lay on the arm or backing.
For the pillow cases and mattress covers, we found a woman who sews in her spare time to make zipper cushions, so we could easily take the cushions on/off to clean them. This was a little pricey, and I wish I could sew, but sadly I do not have the patience (or sewing machine for that matter).
Stapling the fabric and assembling the couch together... oh what a nightmare and test of patience that all was! Again since I caved on the L shaped approach, I wanted an arm rest for the "chaise" portion of the couch. Seemed pretty simple and straight forward, right? NOPE! I had to strategically assemble and staple the fabric, so the last part to staple down wasn't in a visible area. And to top it all off, the framing was too large to just assemble in the garage and bring inside. Assembled, this five thousand pound monster couldn't even fit through my doorway! So assembling it all together, and uphostering was done in the living room. I must say that this is the most solid (and heavy piece of furniture) that I have ever encountered. If a tornado came ripping through my neighborhood I would probably try to find refuge and hold on to the couch- I can barely move it, it's so heavy.
It was so much fun doing this project. The fabric portion was a challenge to say the least. It was a fabric rubix cube, but we got through it with patience and planning.
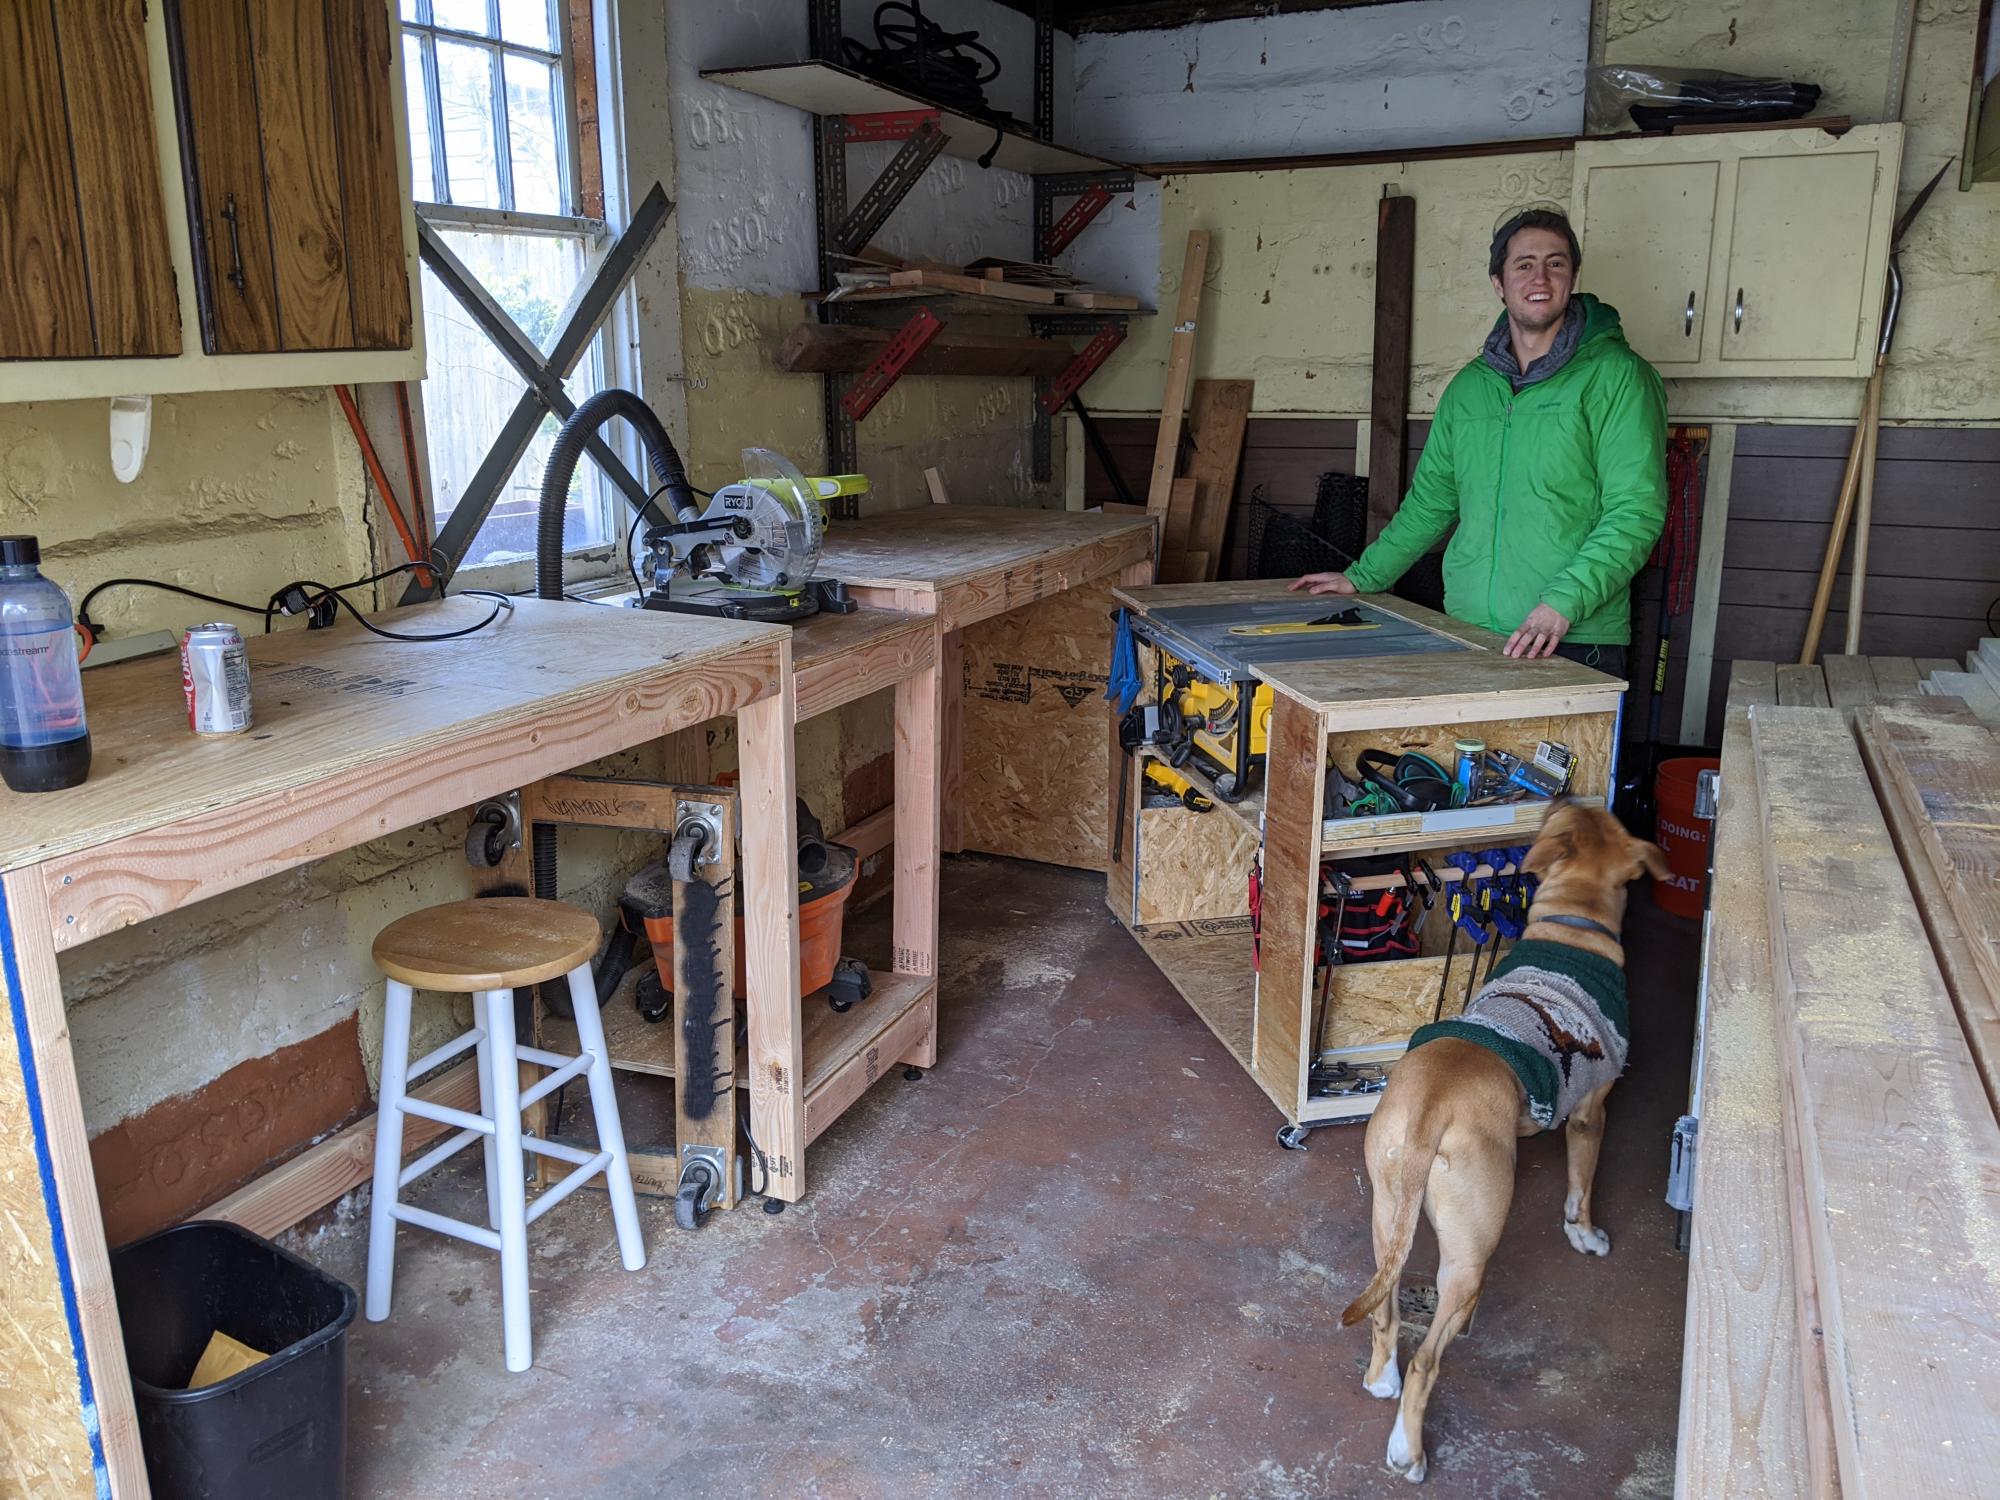
My wife and I just bought our first house and I've been planning out my workbench since we made the offer. I got to finish the table saw rolling cart today. Thank you so much for these plans, I could not be happier! Next up is outdoor furniture!
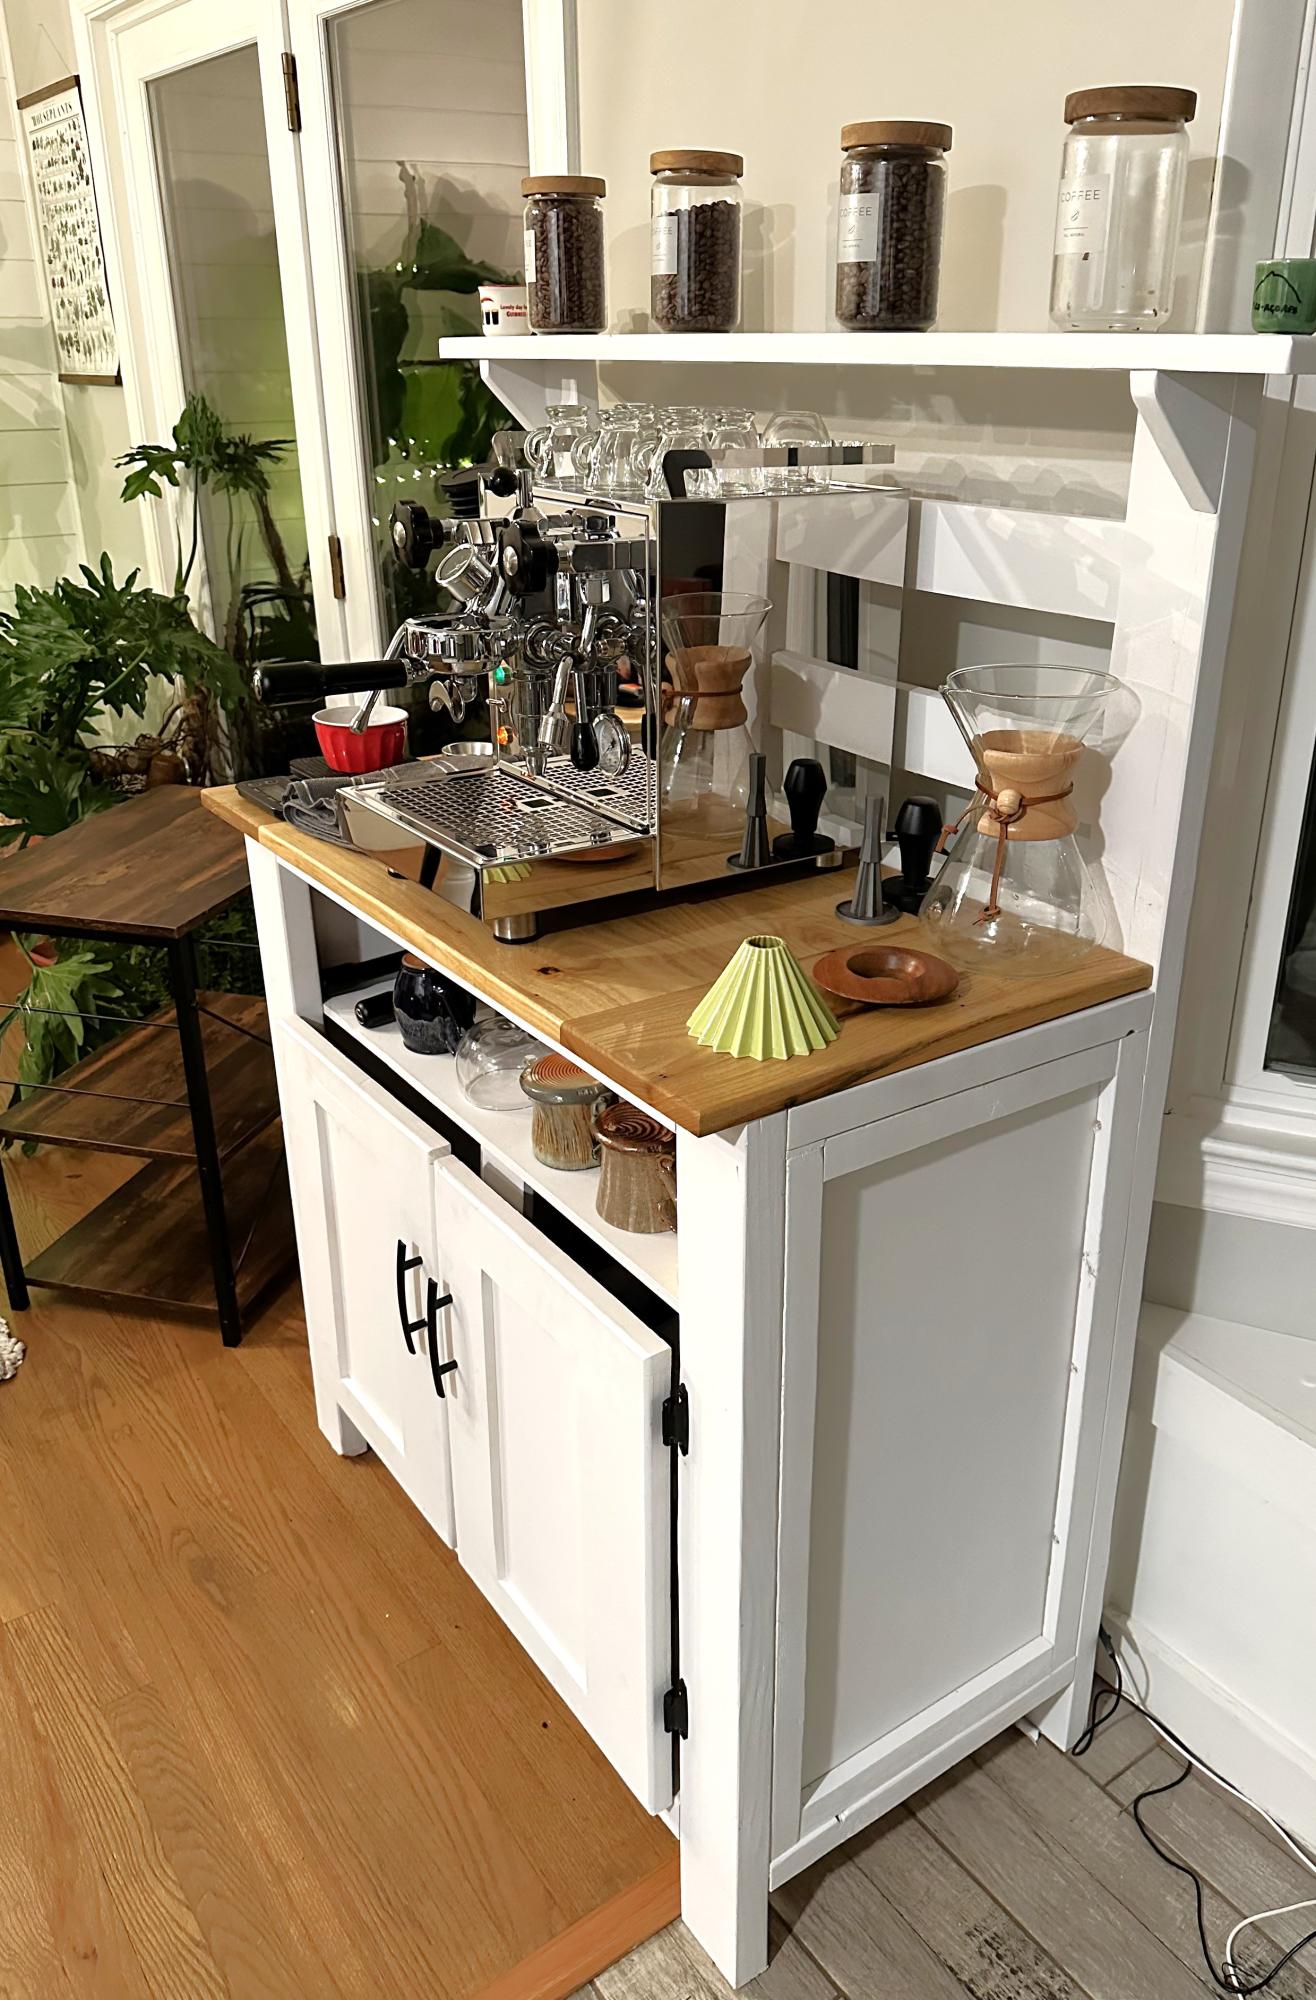
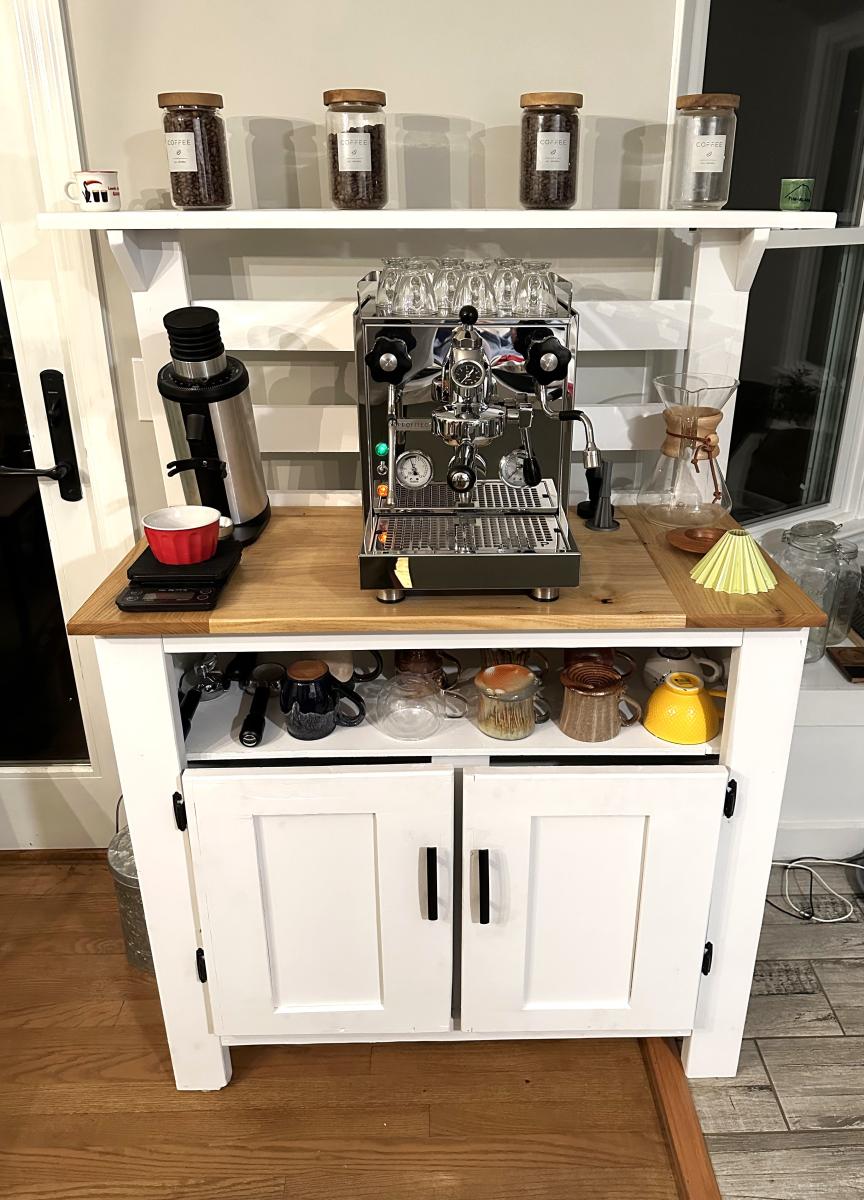
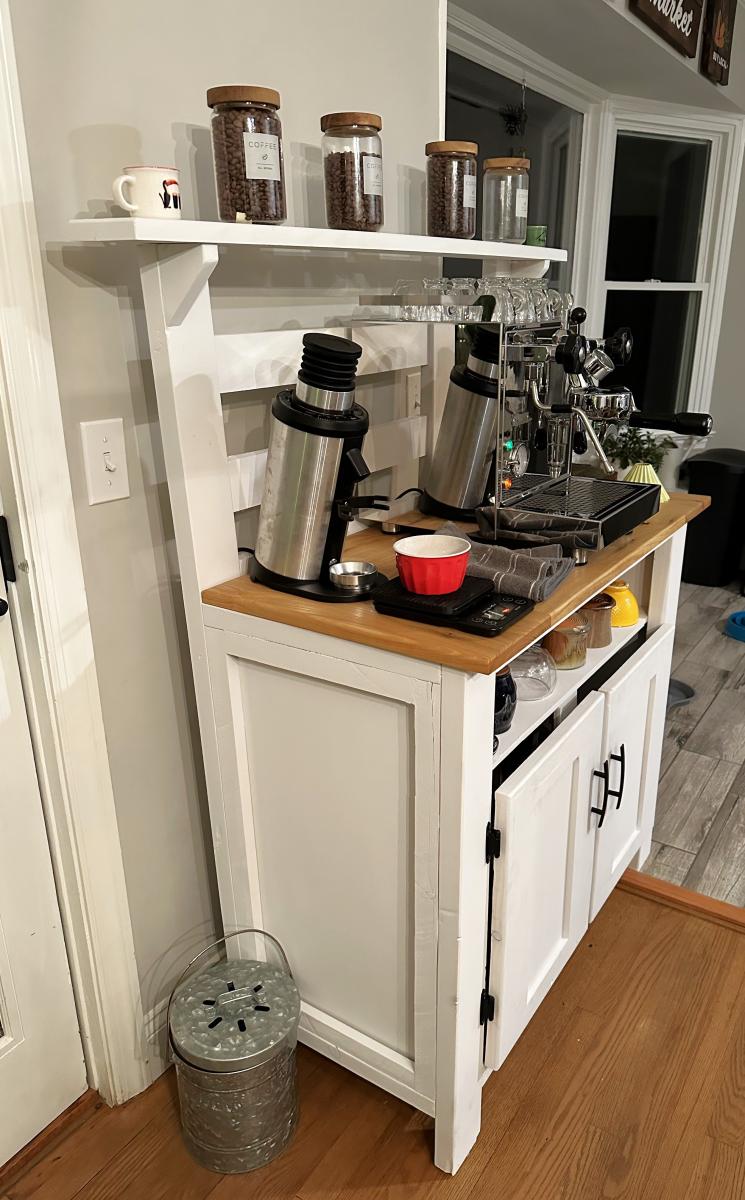
Had a bunch of scrap wood from other projects and random pieces we found in our barn after we moved into our new house so decided to make a new coffee bar to use it up. Modified the Potting Bench plans and pretty happy with how it turned out!
Nate B
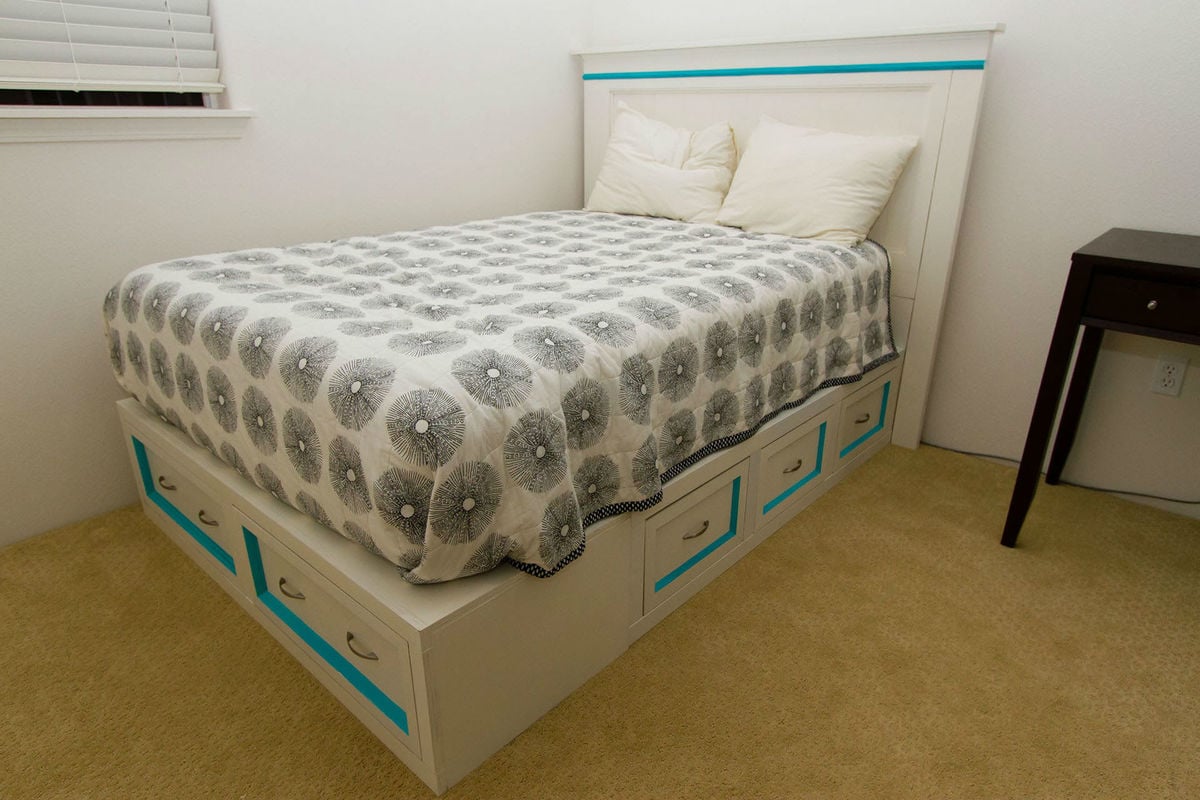
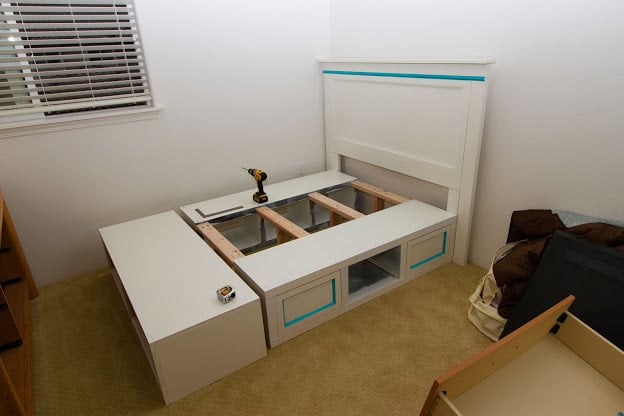
This bed frame was my first project. There are some mistakes, but overall, I love the way it turned out. I combined two plans: "Mom's fancy farmhouse bedframe" and the storage bed.
I love the look of wood and would have loved to stain this project. However, this project was painted due to the fact that I repurposed Ikea bookshelves for the two side pieces. The pieces I built were the headboard, bottom storage bench, and the drawers.
There are a couple of things I learned during this project.
1. Measure, remeasure and if you're building pieces like drawers to fit your frame, measure just one more time. I did not plan to frame the bottom storage box I built, so when I made measurements for my drawers, it was for the frameless box. I, however, changed my mind and ended up framing the box and cutting the drawers. I put them together and checked to see if they fit and ooops.....they don't because I added frames. So, lessoned learned was to double check before I make cuts especially since I made measurements at the beginning of my project.
1A. I also ended up going off the measurements for the "farmhouse bed frame" for the headboard and didn't match my calculations for the storage bed frame to match. So, the headboard ended up being wider than intended and it sticks out. I did not end up rebuilding the headboard or the bedframe since I thought it would be too much work.
2. Making drawers did not agree with me. I seriously had to redo my first drawer four times due to my mismeasuring or calculating. After everything clicked, the rest of the drawers were a breeze.
3. The drawers I made with 1/2 plywood. Looking back, I would have made them with 3/4 plywood. I also would have made the drawers shorter so I could have built the faces of the drawers using Ana-white's drawer face plans (they seem so much easier!).
4. The drawer faces were made with 45 degree cuts to add more interest vs the straight pieces of wood. I'll admit, this was my husband's idea and I LOVE it. However, getting the pieces just right weren't the easiest thing (and they aren't perfect, but it's our first project and it's good enough). It made painting the bevel a little more difficult too. So, if I were to do this again, I would have made the drawers shorter, used 1/2 ply for the face and glue the frame on the 1/2 ply to attach to the drawer.
5. The finishing part took the longest. I used Glidden semi-gloss white paint off the shelf. I actually used old paint that the previous owner of my house left. I would NOT use old paint again. The paint must have been at least 3 years old and I thought I mixed it well, but it seems like there's some yellow in the paint. I'm guessing I didn't mix it well enough.
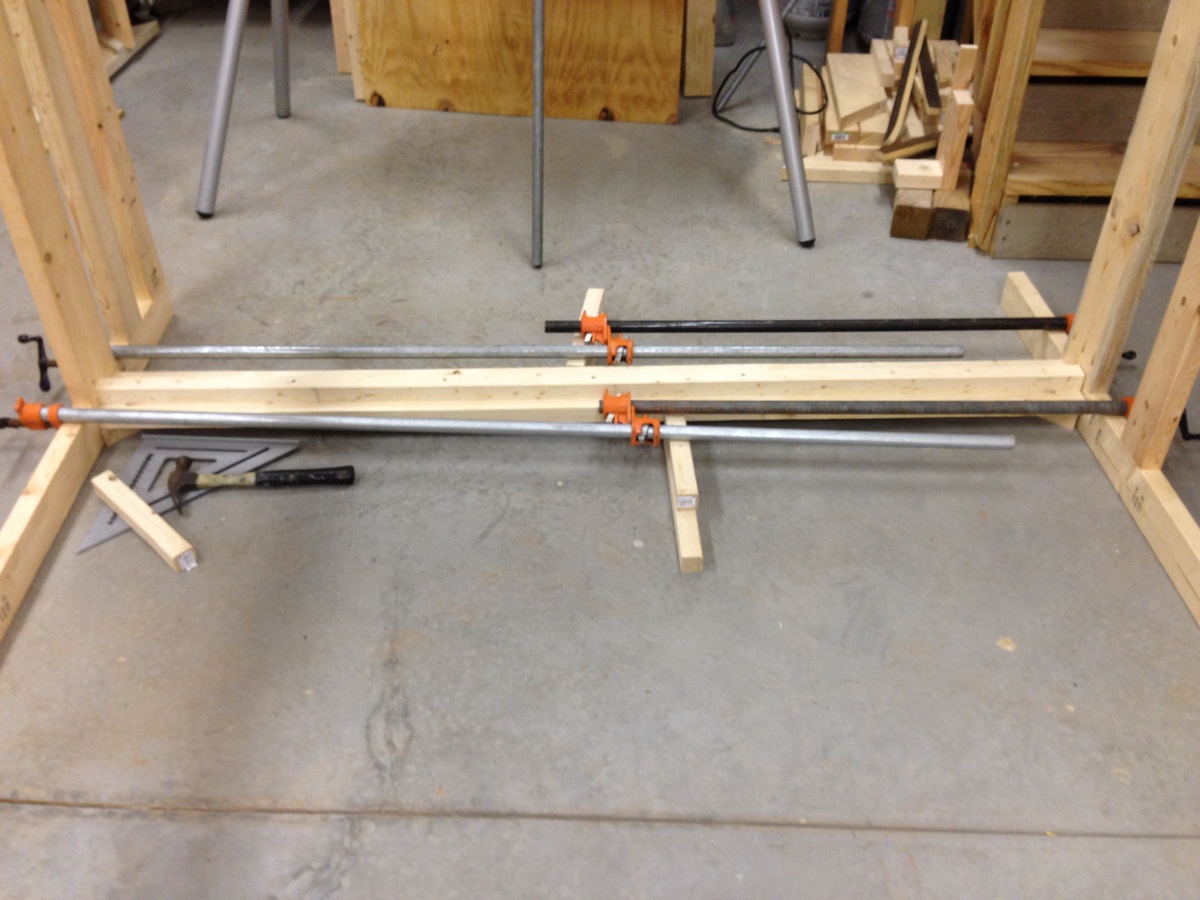
This build was my 5th build and turned out pretty good. I used weathered oak for the base and early american for the top. I will be building a few farmhouse benches to go along each side, and then pick up some oak chairs to refinish for the ends. Total cost for table was probably around $110, since I had polyurethane on hand, and it took me a couple weekends to build. Love how it turned out, very stable table!.

Thu, 06/02/2016 - 22:26
Wondering if there is a way to delete this and resubmit it logged in?
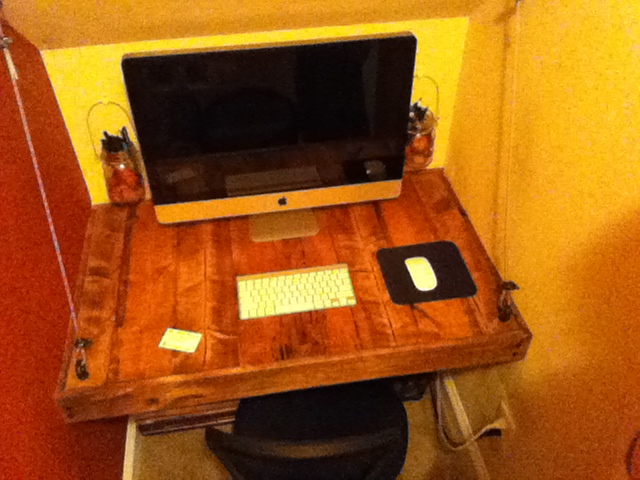
My wife wanted her own little office and we needed to free up our spare bedroom. So we decided to use the walk in closet underneath the stair case. We attached cable and hardware to the desk and ceiling to give it some added character. We spray painted the hardware black with hammered paint. I went to Home Depot to the discount wood section and found wood that had worm holes in it! Given I already had the hardware and cable this project only cost me $10.
Wed, 09/04/2019 - 07:38
Really great setup for workplace at home! It's amazing how small space it took for placing a table with computer. My appartment is really small, and I'm working from home as a freelance writer at https://vip-writers.com writing basically from a lap, so having a desk like that would drastically improve my performance! Thanks for advice!

Made this frame for a mirror and intended to use an existing mirror and break into 2 equal sizes to make two framed mirrors.
Broke the mirror though after making the frame (learnt my lesson there!) and the only mirror glass I could buy would not fit this frame.
Decided rather than waste the frame to make a chalkboard for the kitchen.
Finished in new Minwax Classic Grey and two coats of Minwax Wipe on Satin Poly.
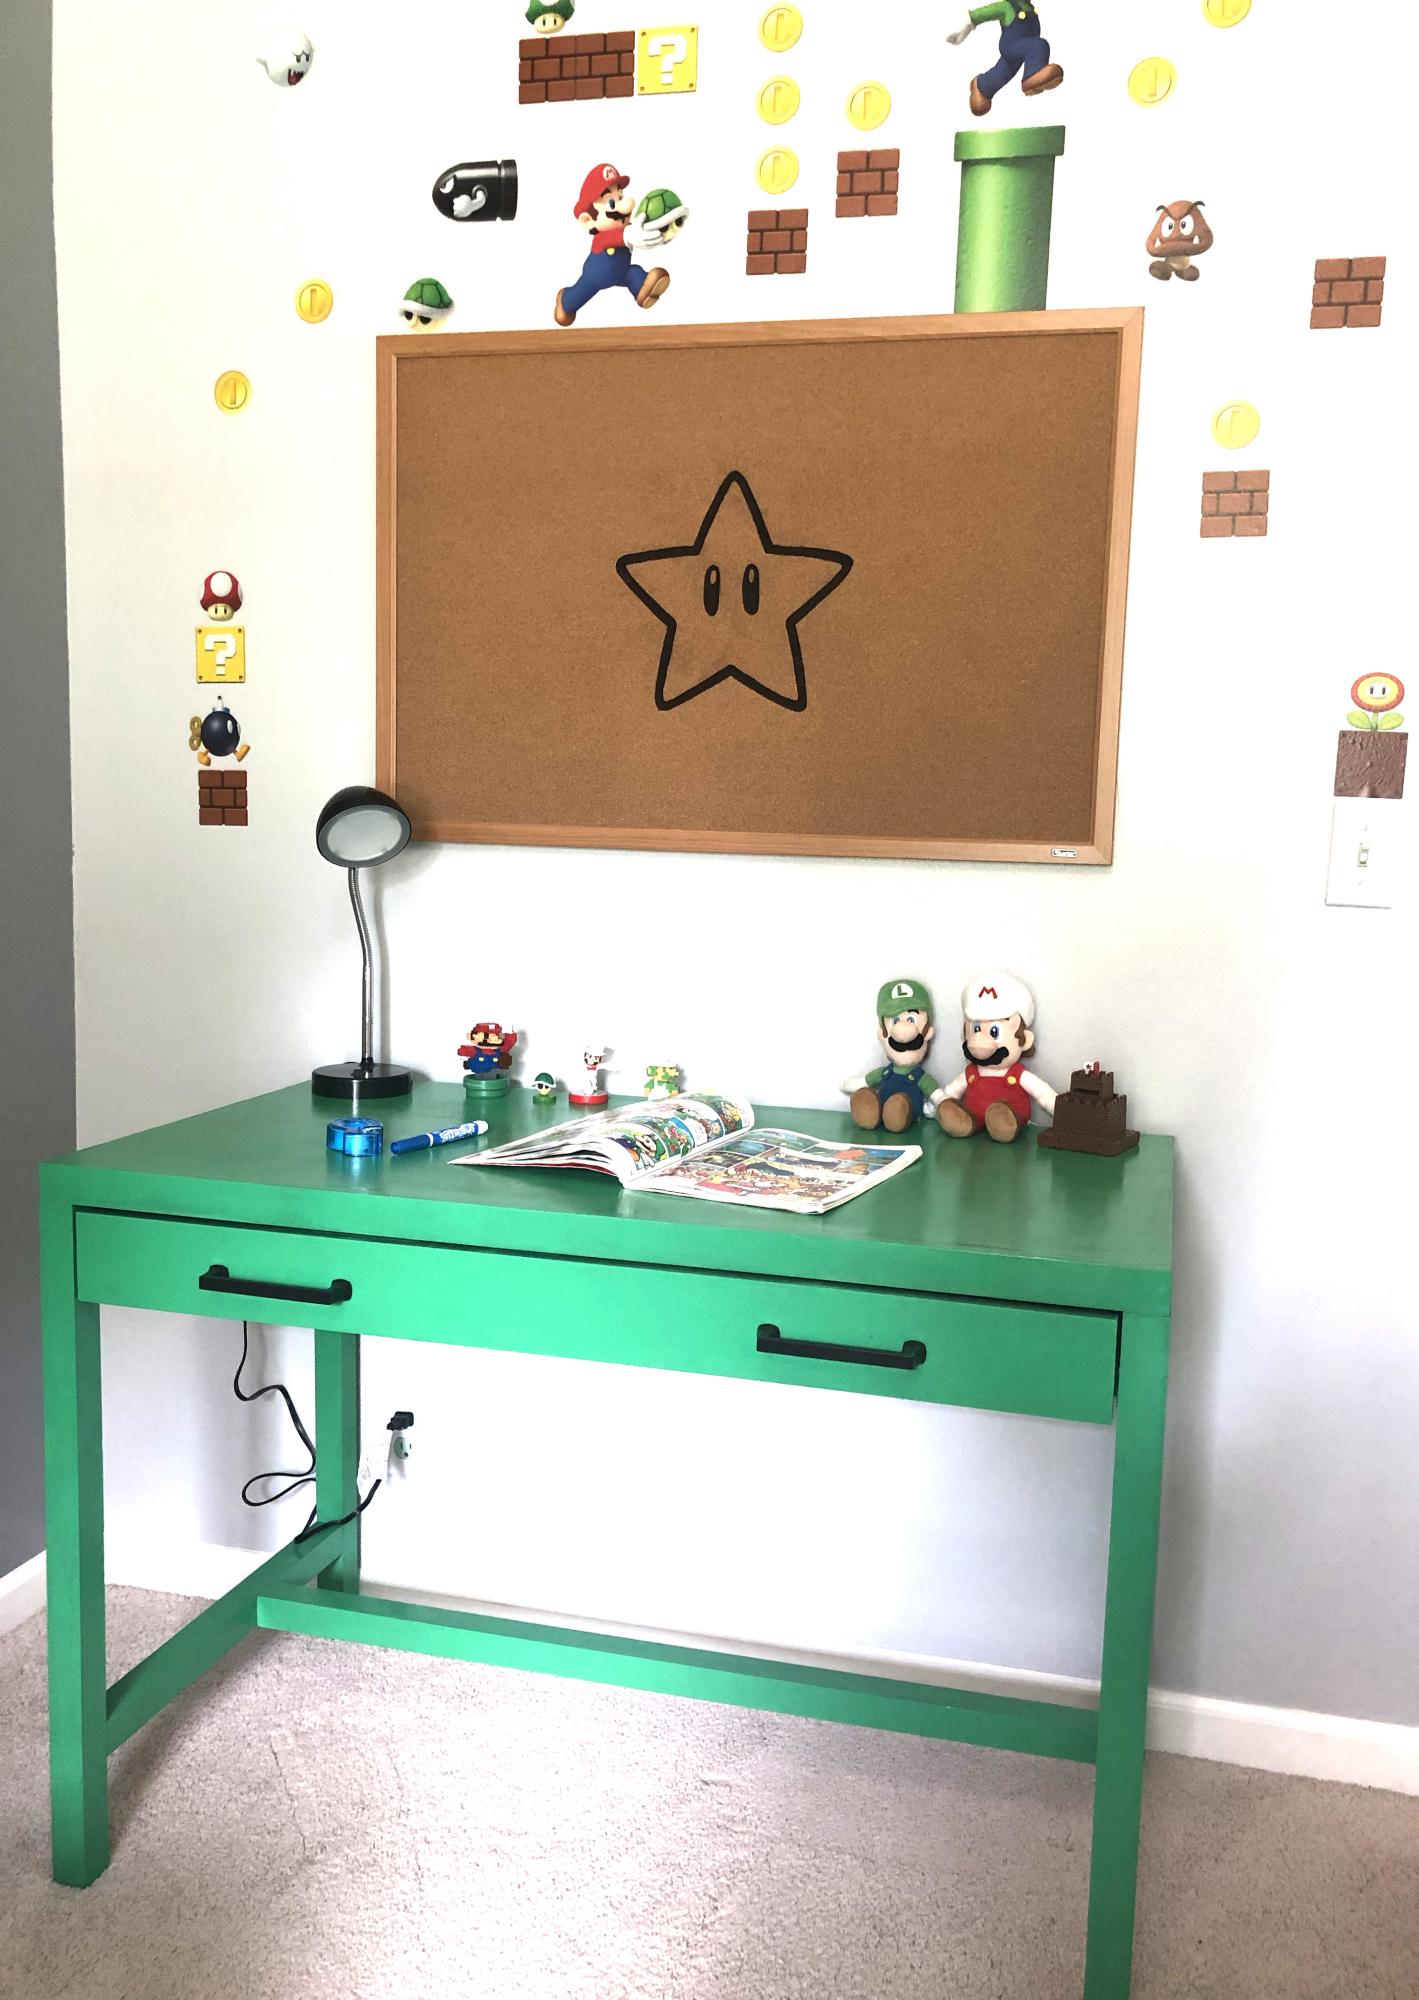
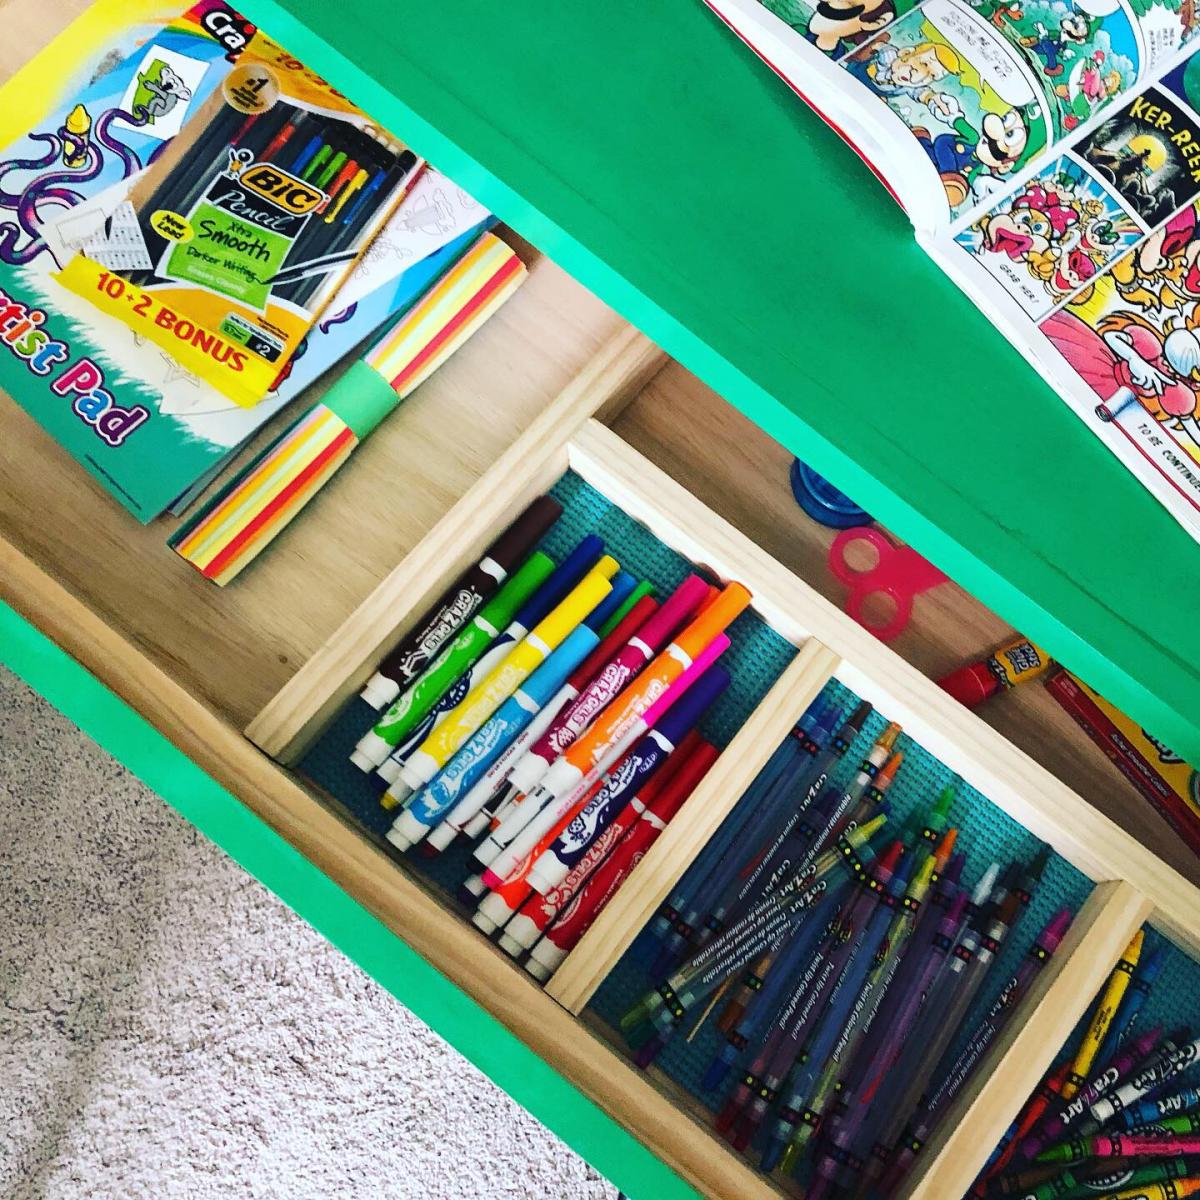
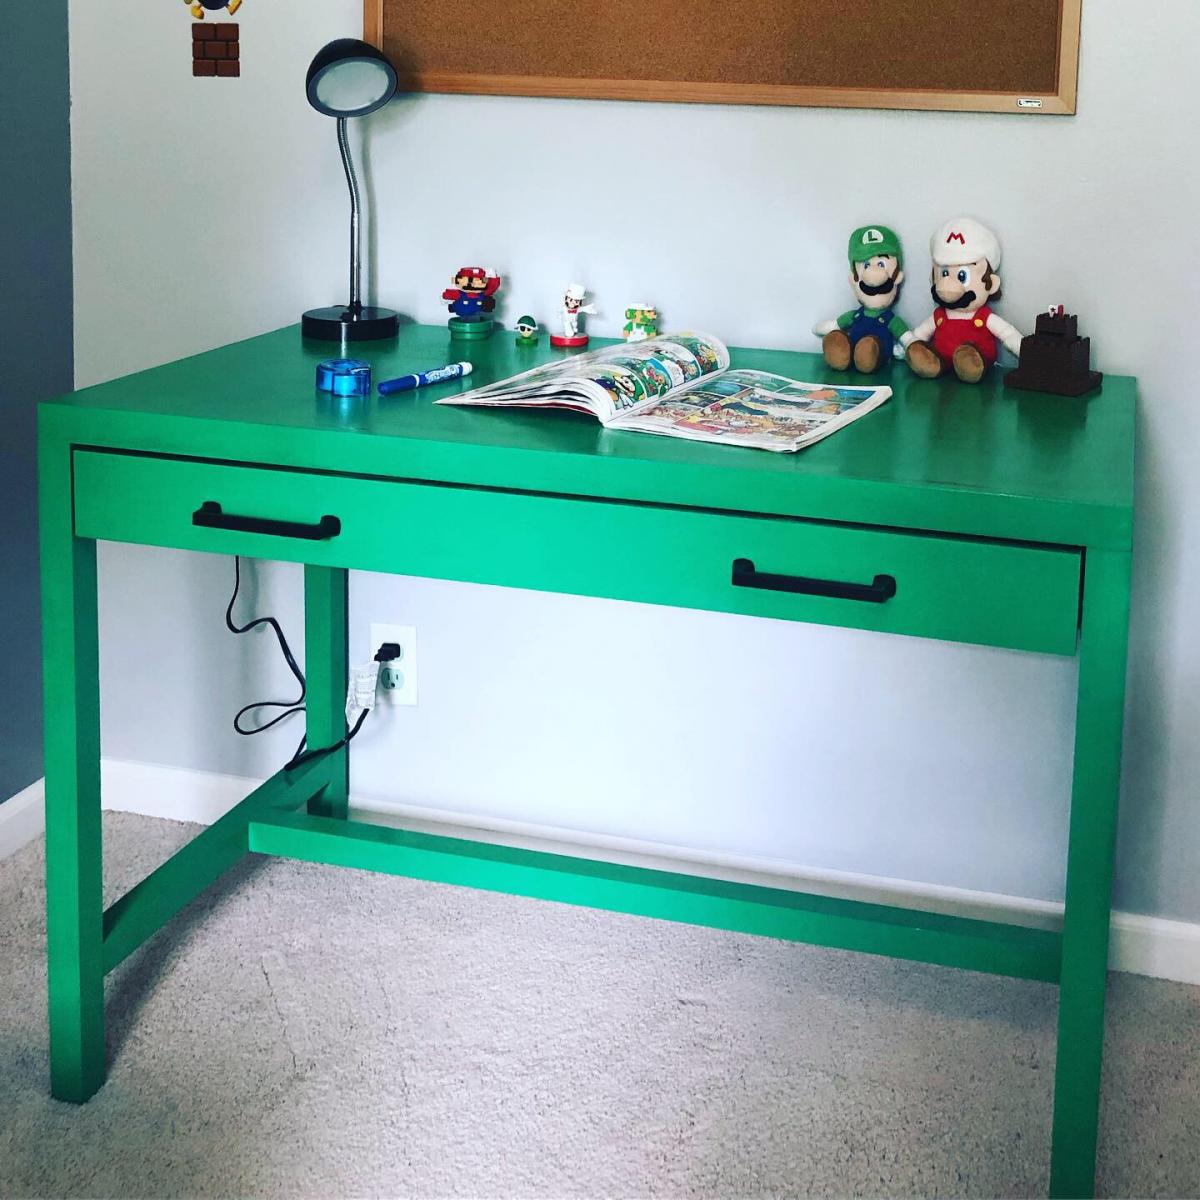
My youngest son is 6yo and he loves Mario! He is such as little artist so I thought it would be fun to surprise him with a Mario desk! I did not want to paint it red as he already has a ton of red Mario themed items in his room, so I chose pipe green instead! My little guy LOVED it! I even made some dividers to separate his crayons, markers, and other odds and ends in his desk. You will notice, I customized a normal bulletin board with a sharpie marker to make it go with the Mario theme :)

I made one of these for my dining room table and my family liked it so much I made 2 more. The last one I made from a live edge piece of black locust and made the base out of black limba. The second one my daughter wanted a little wider so I used a 1X10 instead of a 1X8. A lot of fun to make and everyone really likes them.
Keith Ullrich of Windsor Woodworks
It took about 2 hours to build it. We have a large family, so we put 2 extra legs on each, just in case. We had problems with the hinges. I think we bought 3 or 4 different hinges before we found something that worked for us. But the end result was wonderful!
I built 2 beds by doubling the purchase list, then cutting 2 of everything. The hardest part was figuring out what to cut from each piece of wood. It would have been nice to have a detailed cut list so it would be easier to not waste any wood. As it turned out, I needed to purchase one extra 2x4 to finish the job. Not too much trouble. To cut cost, I bought 2x4 studs and had to dig through a half of a pallet of them at Lowes to find the straight ones, and even then some still had a bit of a twist. It's hard to find straight 2x4's.
On the landing, I predrilled countersunk screw holes about 3/4" deep, then after attaching them, I cut plugs, glued them in and sanded it down to a smooth finish. After paint, you can't tell how they are attached.
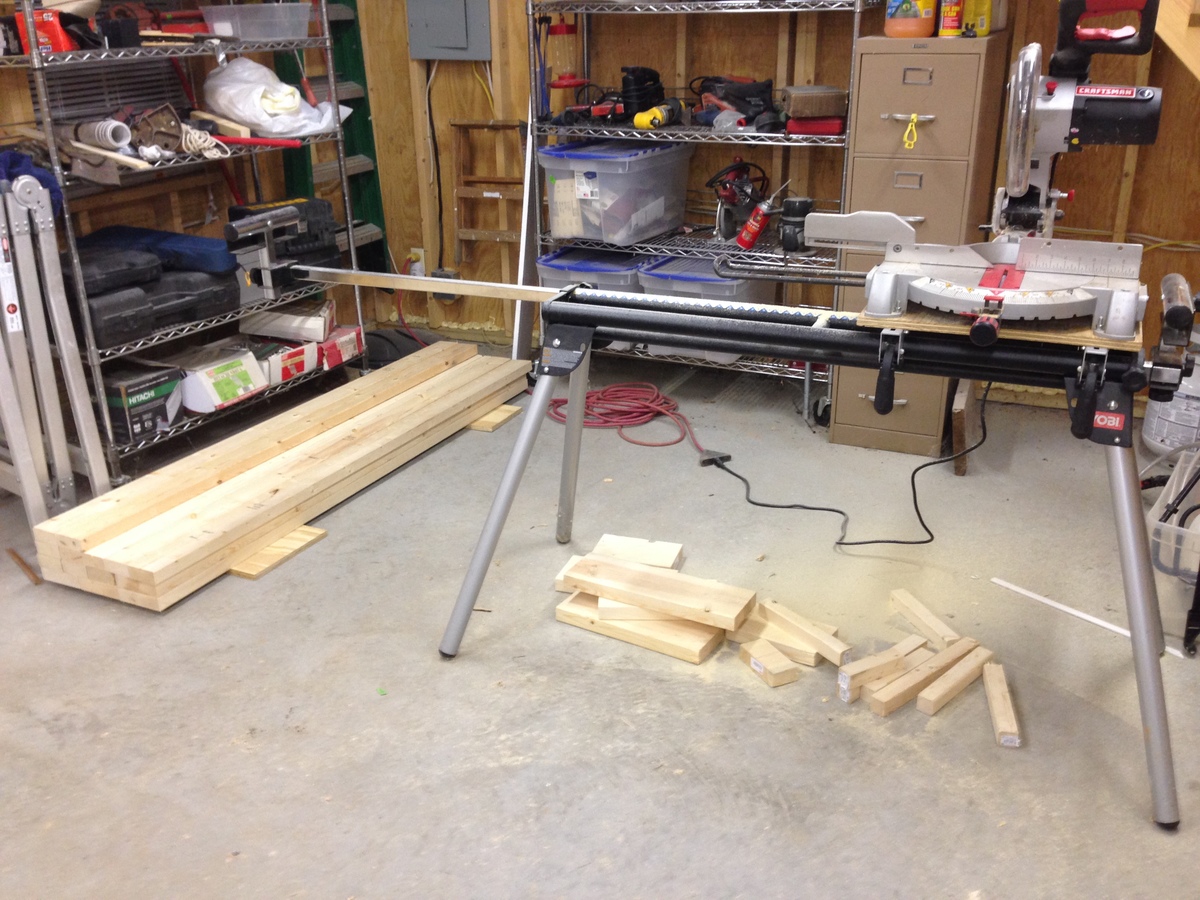
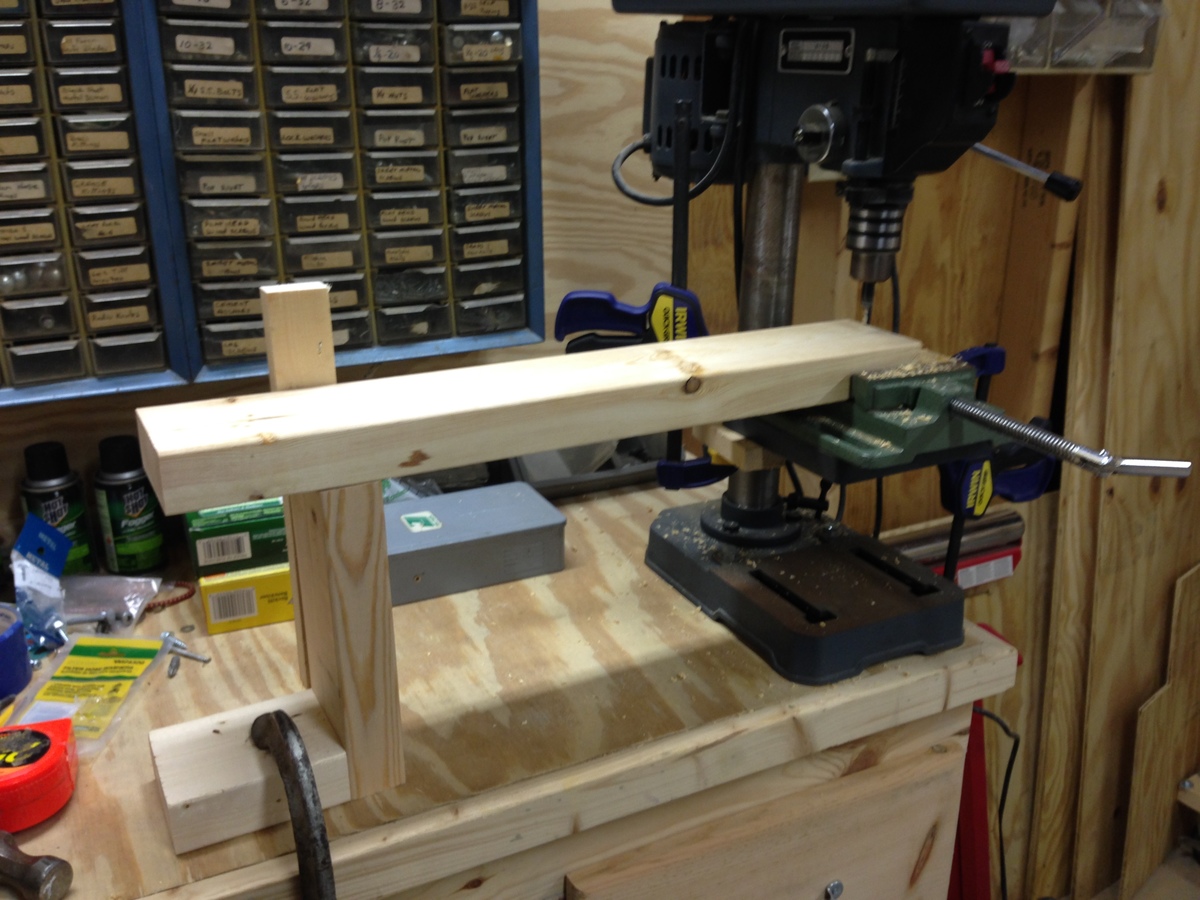
Having a chop saw stand was great because I could set up a cut length and then quickly cut all the boards I needed for that length. I also used a jig for my drill press and set up to drill all the holes at one time for the landing boards.
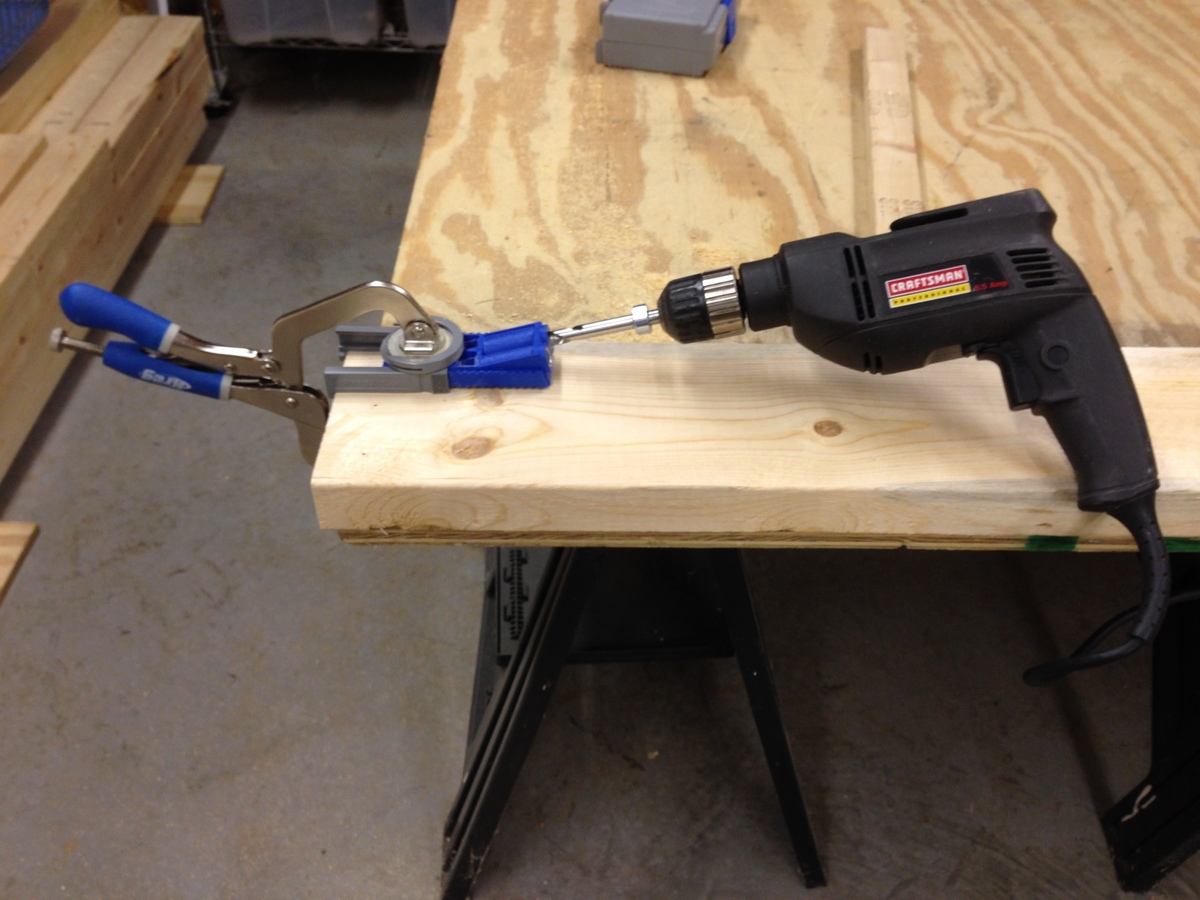
The KREG pocket hole joint works wonderfully well in this application. Just make sure you get the right length and diameter screws. The first box of screws I bought were too big around to fit the hole drilled.
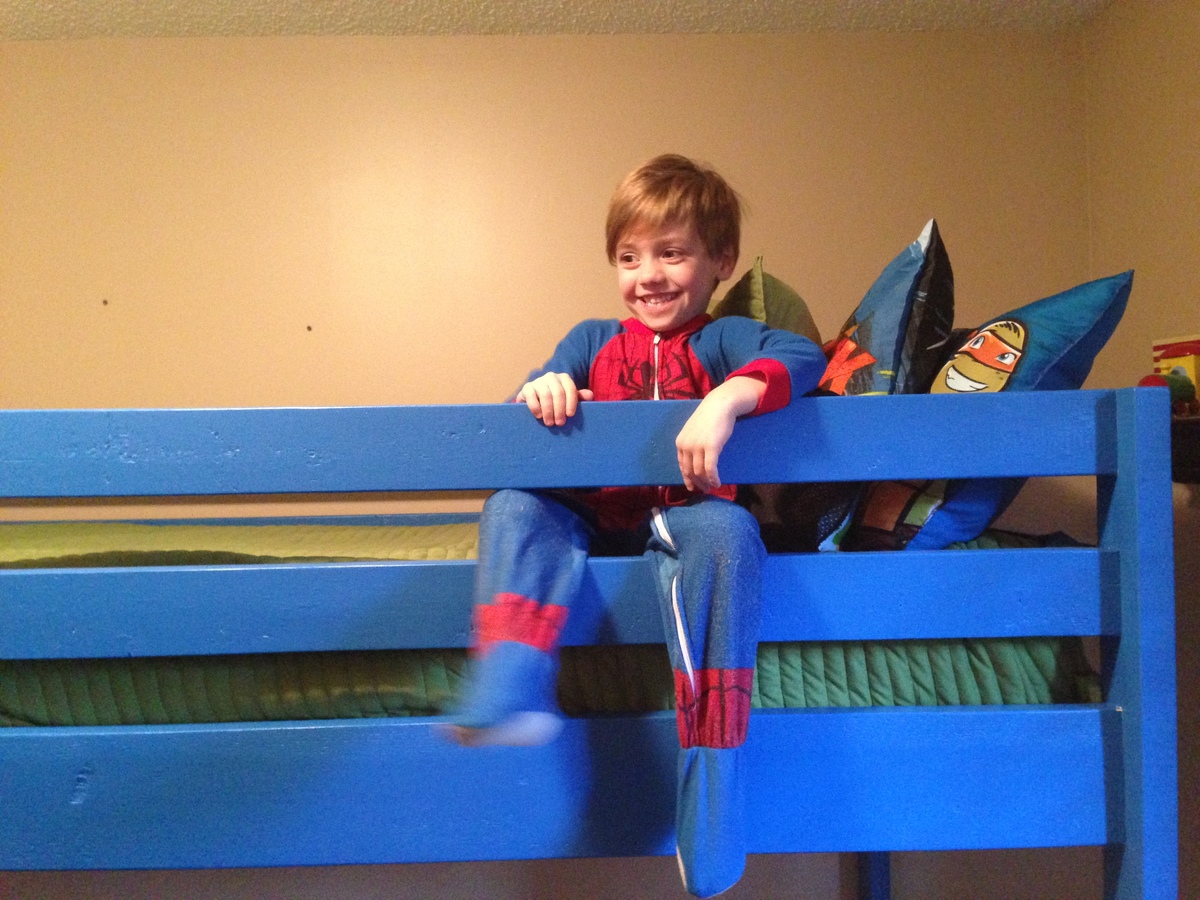
As you can see, there are two happy kids that never want to get down off of their beds.
Thanks for the plans, it was a great experience.
Andy
Tue, 03/11/2014 - 12:23
I found this free cut optimizer tool online, it can break down optimal combination of cuts per board. Just make sure you put it some kind of "Width allowance cutting a kerf", so that it includes what you lose at each cut. You also just have to do one type of board at a time (like 1x2s) but you can put in different board lengths so that it'll tell you how to best use scrap. It's a nice tool.
In reply to Cut Optimizer Tool by balloongal247
Wed, 03/12/2014 - 08:27
Thanks so much. I should have thought about that as there are so many tools available on the web. I'm going to be building more of these so that will come in handy.
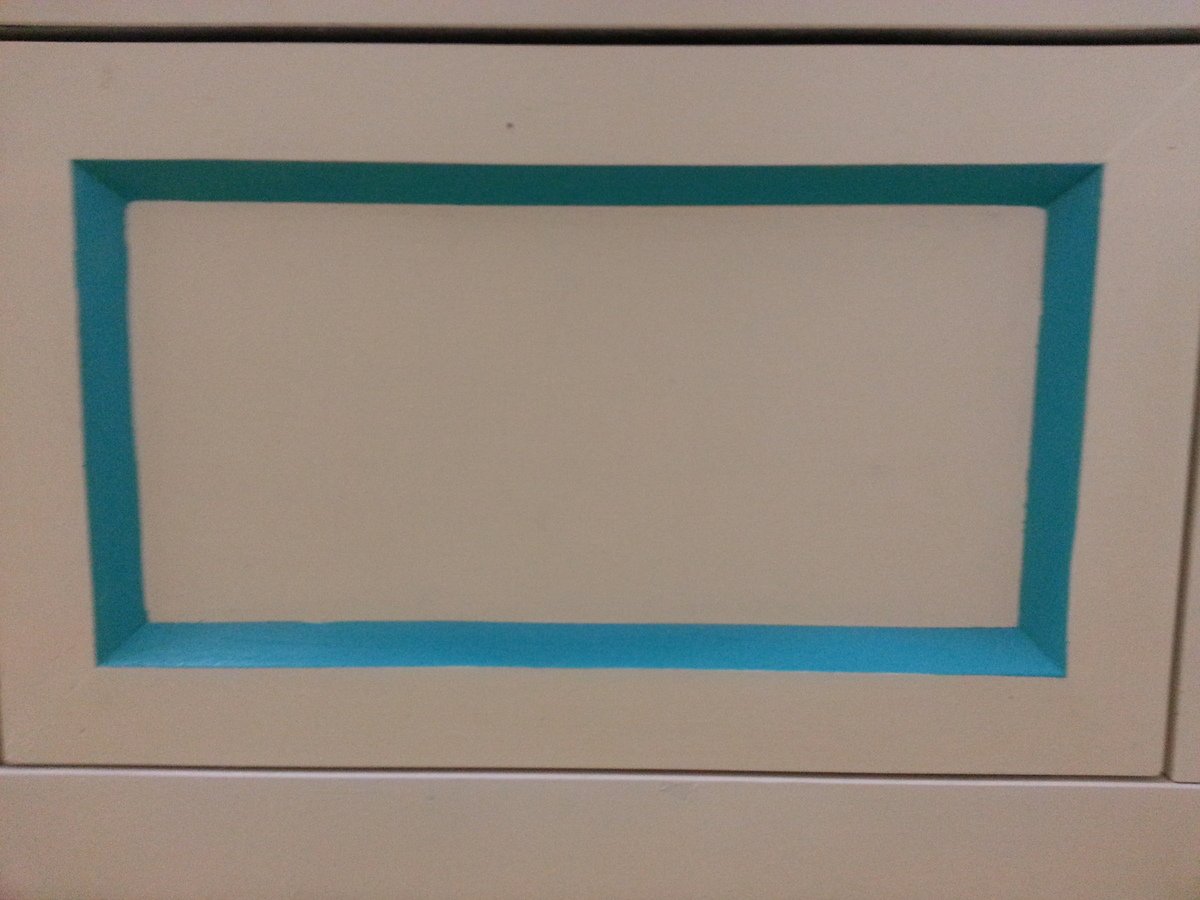
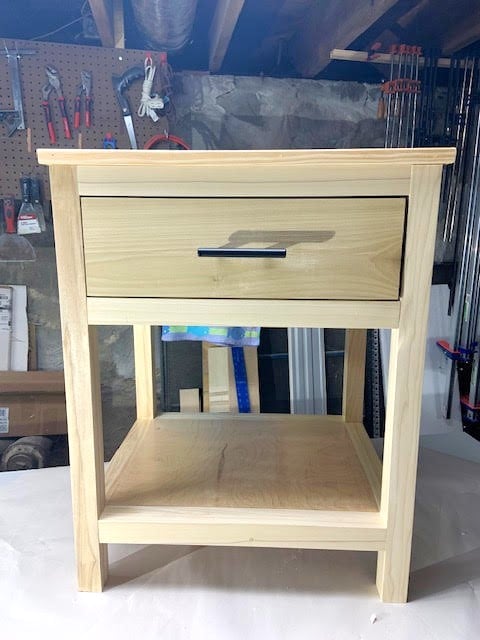
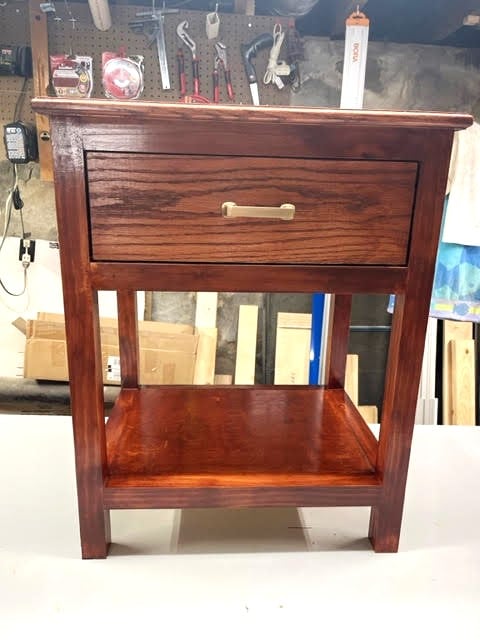
I modified the plans to have three compartments instead of four. Also, the hardware was a challenge. Tip: use a wheel that has an internal bearing.

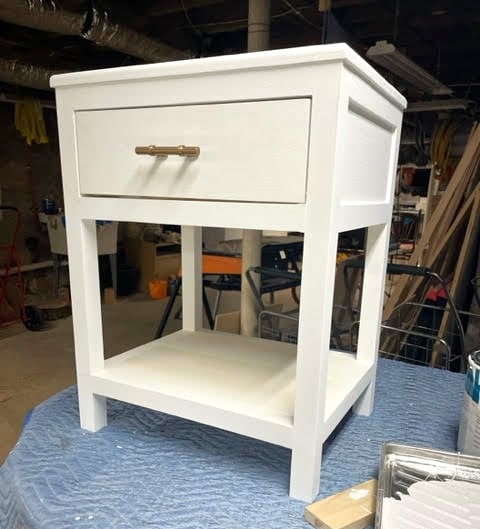
Each nightstand features different hardware and finish.
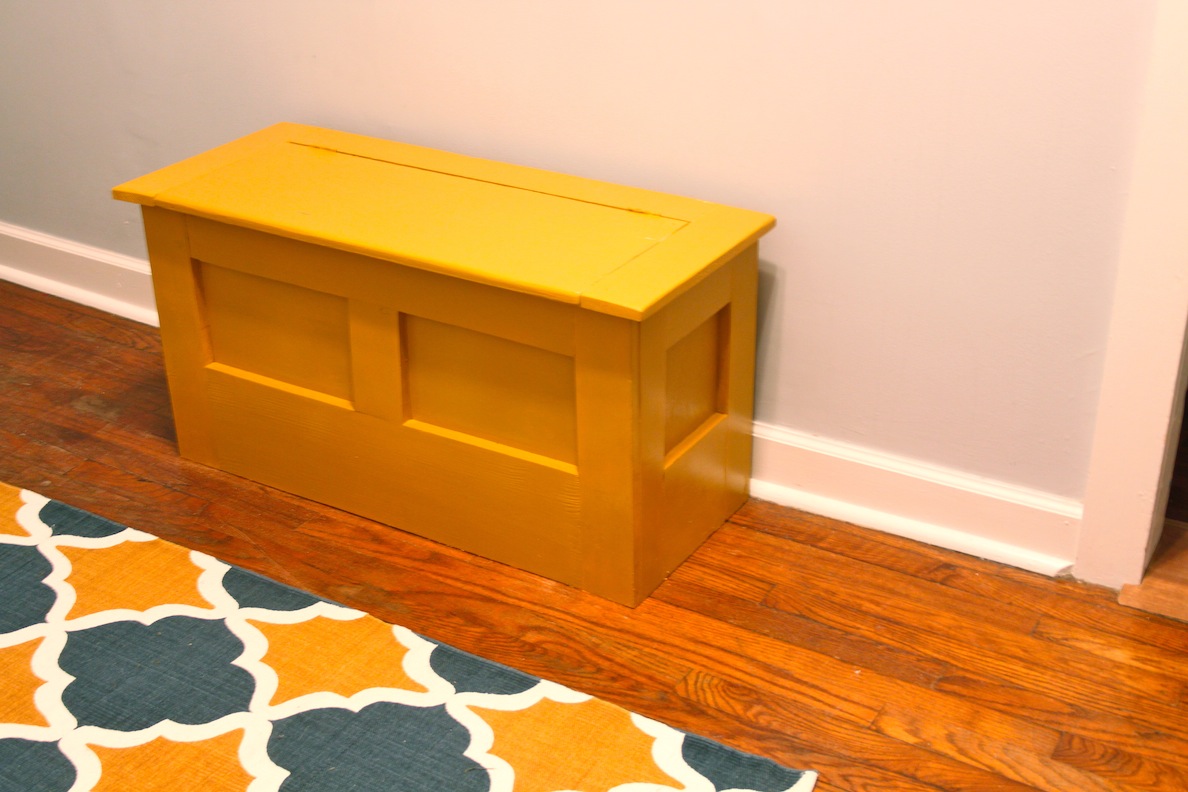
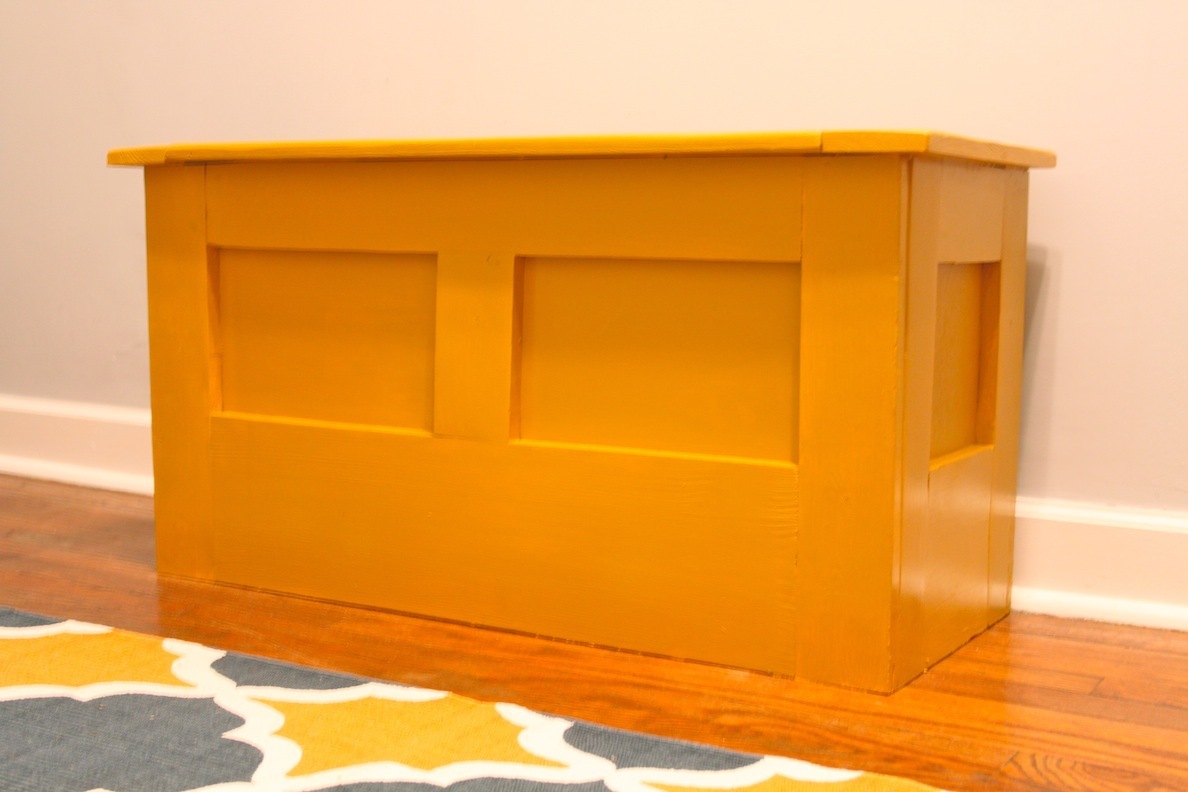
I've been looking for a bench for our hallway for months and have yet to find one I love, but I did fall in love with Mimi's Storage Bench and Hall Tree.
I was determined to make this bench for free. My husband scavenged construction sites for salvage and brought me home quite a bit of scrap. Once I had a nice assortment of boards, I began the job of making them fit the specs. This was much more time consuming than purchasing boards that were the right size to start with. I got quite familiar with the planer (I had to plane down 2x's to 1x's) and even faced the terrifying table saw to rip a few boards down to size.
The lid was made from an old shelf and the inside panels are an old painting from art school--on masonite--that I finally brought myself to part (with). I already had the paint left over from a table I made over, so that was also free!
It didn't take much convincing to get my husband to pick up a pockethole jig. He's been wanting one himself. It was actually a lot more fun and much easier to use than I expected.
Overall, I'm very pleased with the way it turned out. It's made out of some pretty rough wood, so there are a few holes I'll go back and fill in the future--or maybe not. There are also some rough spots and less-than-true boards, but not bad for a free piece of furniture.
This was my first big woodworking project. It was a lot of fun and I gained a lot of knowledge and confidence that I'll use to build more ambitious projects in the future. I think woodworking is actually easier than sewing because boards generally don't stretch, shift, snag, and unravel while you're working.
I plan to scale this plan down, add some safety hinges, and notch the board under the front of the lid to make a bench/toy box for my little girl's room.
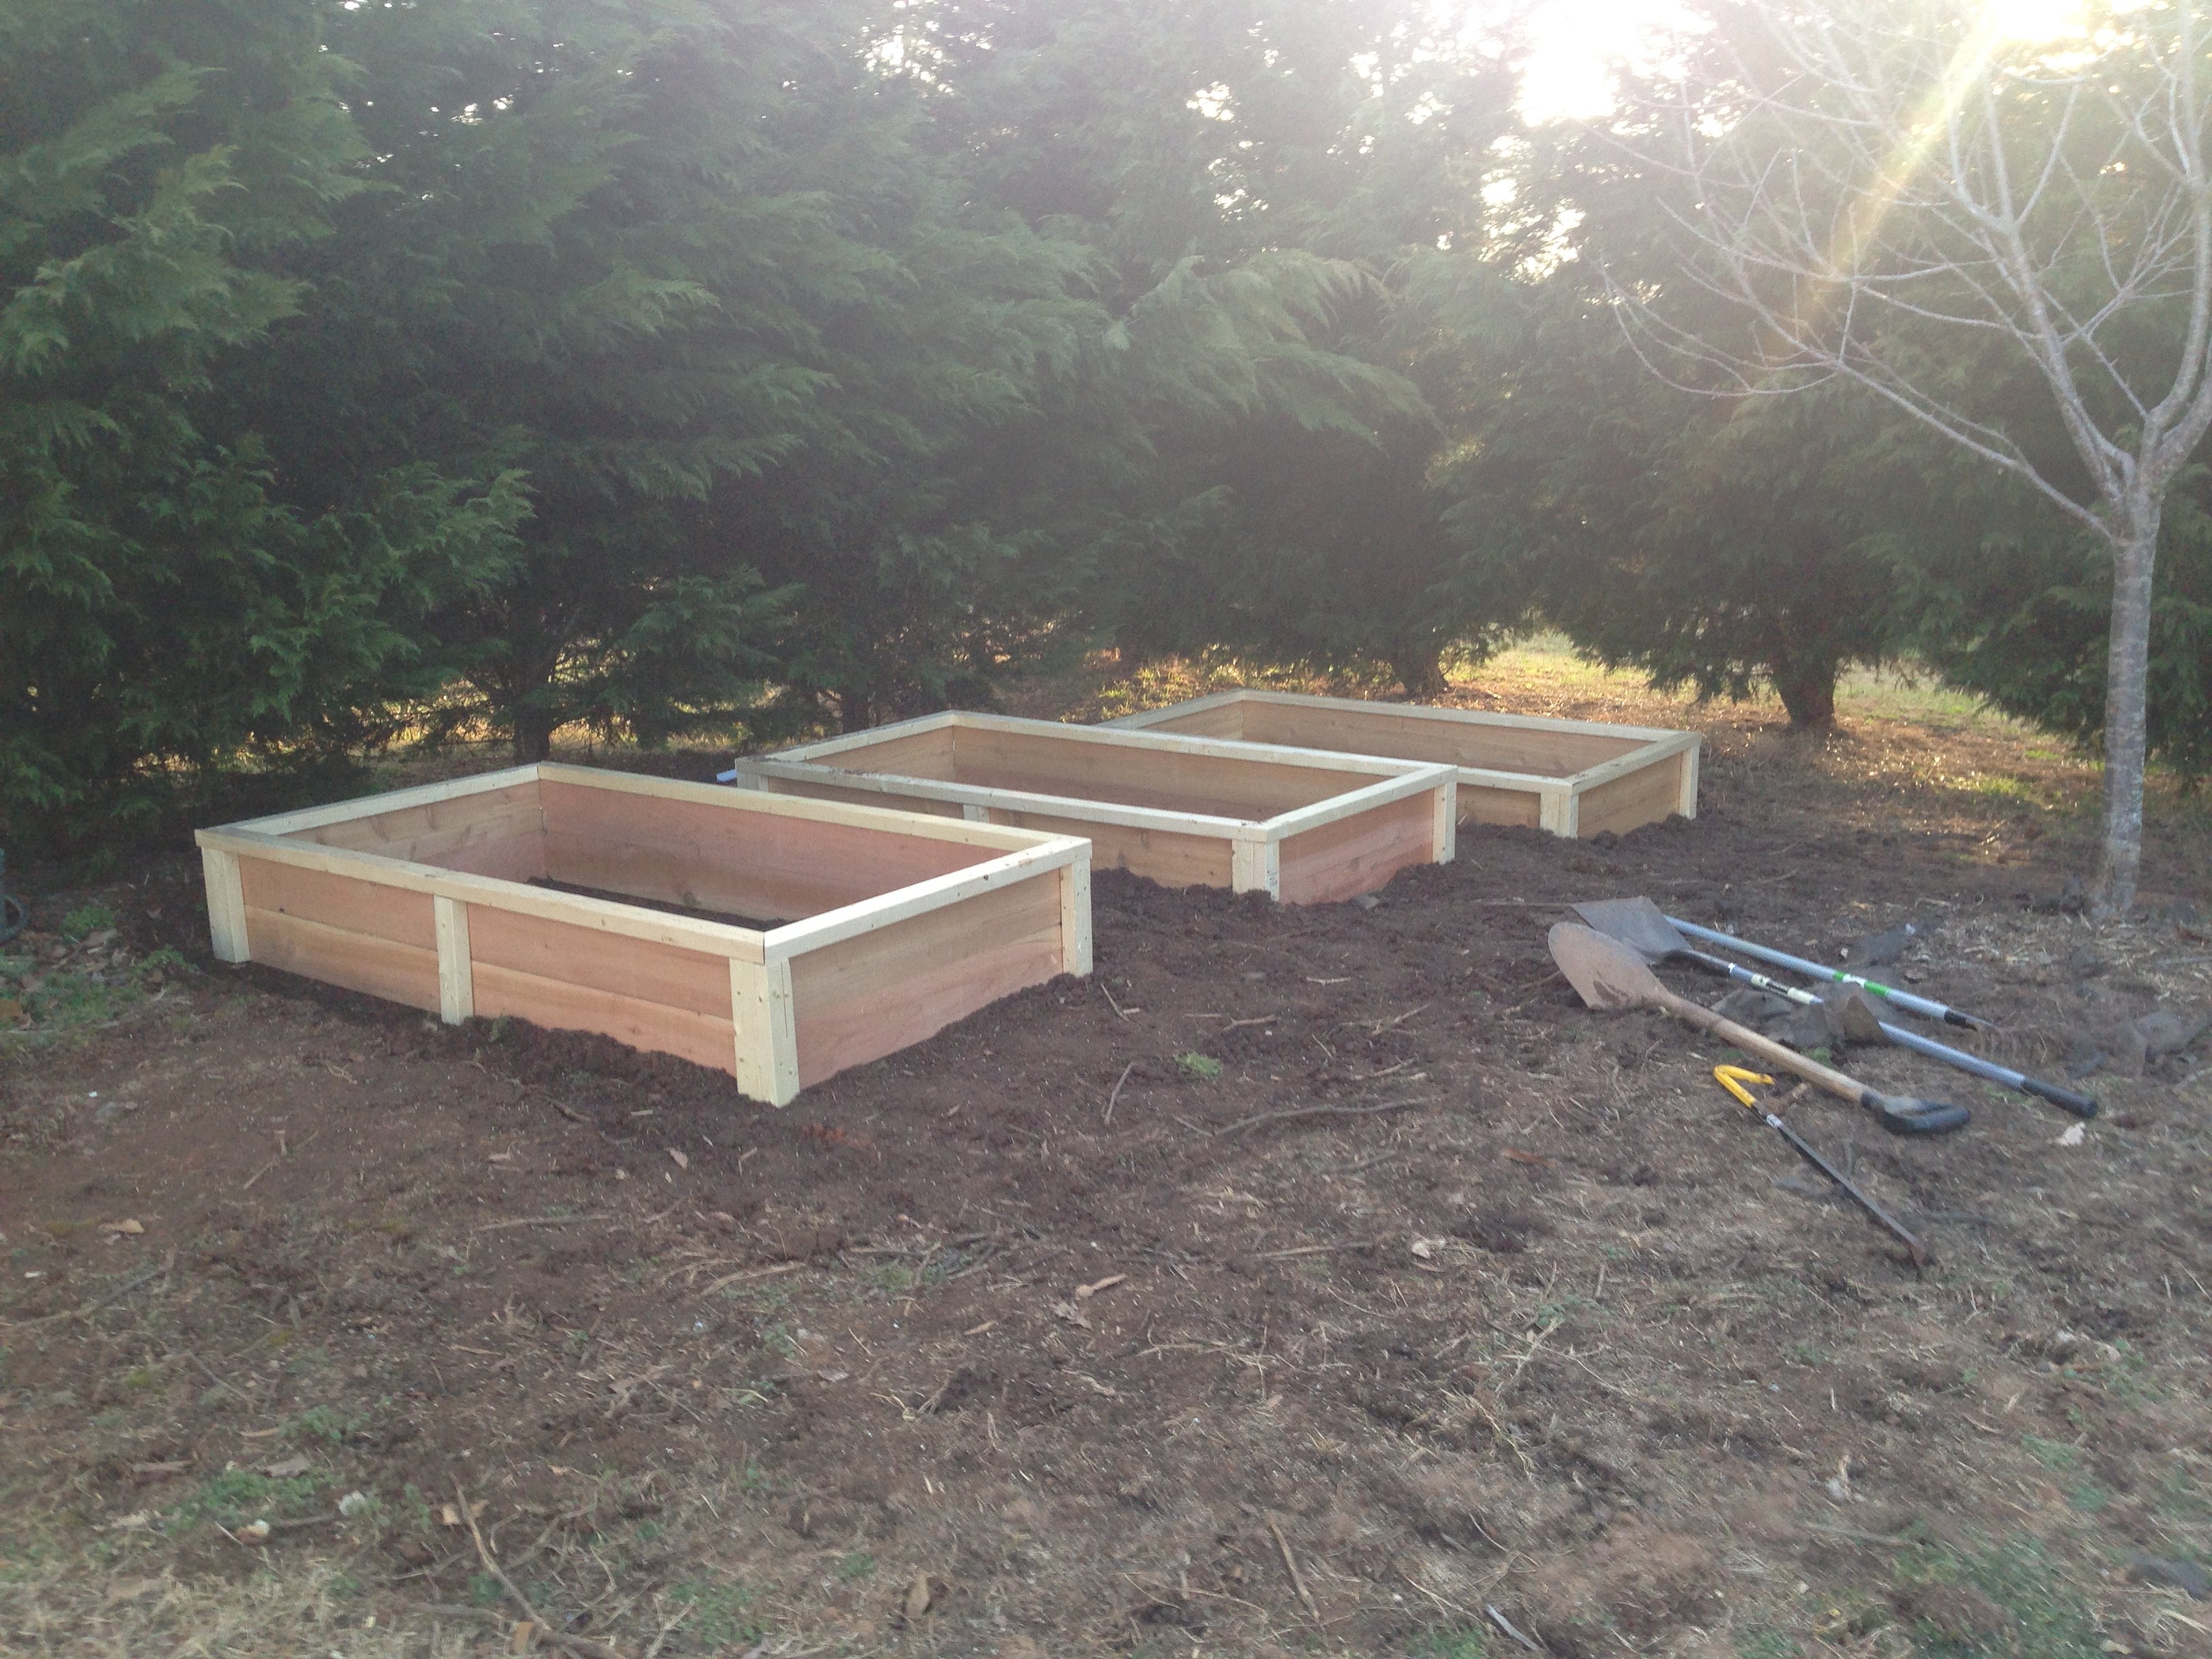
Using Ana's 10 dollar raised garden planter box idea, I made my own using the cedar fence boards and then used 2 x 3 x 8 studs for the L corner supports and mid center support along with top rail. This photo is the first 3, I will have a total of 6 boxes. Will post more as I progress.
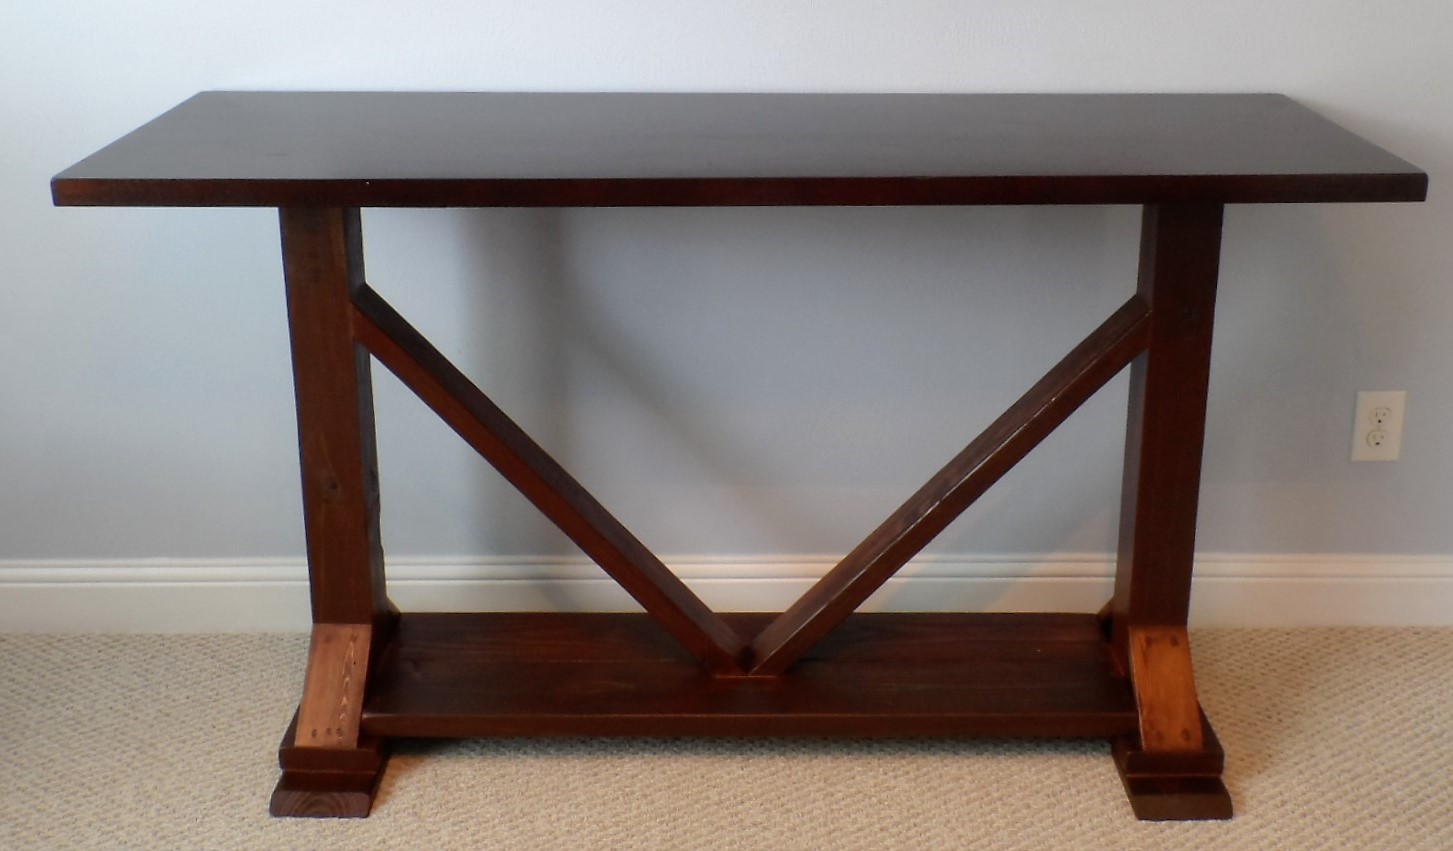
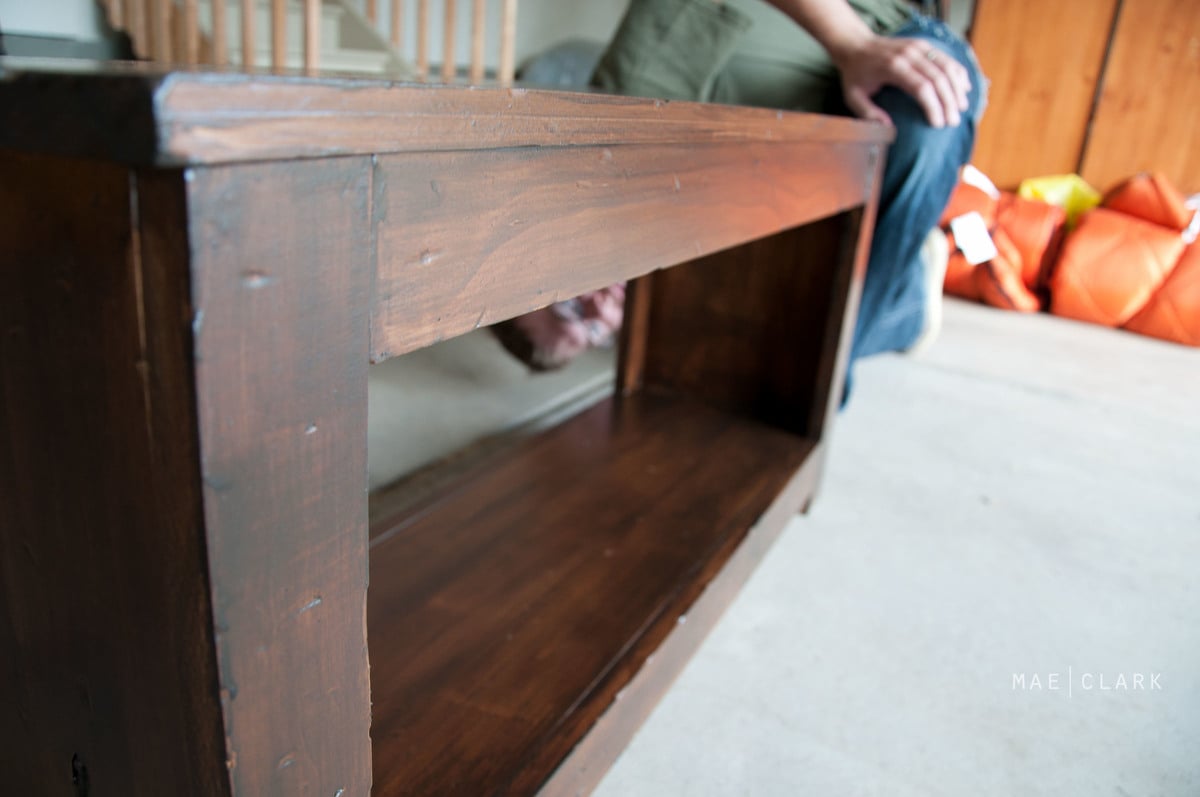
I had been looking for a console table that would compliment my dining table for months. Nothing I found was really working out, but these plans are perfect. The only problem was that I couldn't get the stacked look to work well with the tabletop I had because of the way the apron is made.
Still I love the way it turned out and am glad I found these plans. I also made it taller than a normal console table so it can be multi-purpose for us.