Community Brag Posts
10 Dollar Ledges

This is the first Ana White plan I've used and my first project with a Kreg Jig. It was so easy! I used 6' long lumber. This ledge is 4' long and I have a 2' ledge in the living room.
Built from Plan(s)
Estimated Cost
$17
Estimated Time Investment
An Hour or Two (0-2 Hours)
Finish Used
"Hammered" finish black spray paint
Recommended Skill Level
Starter Project
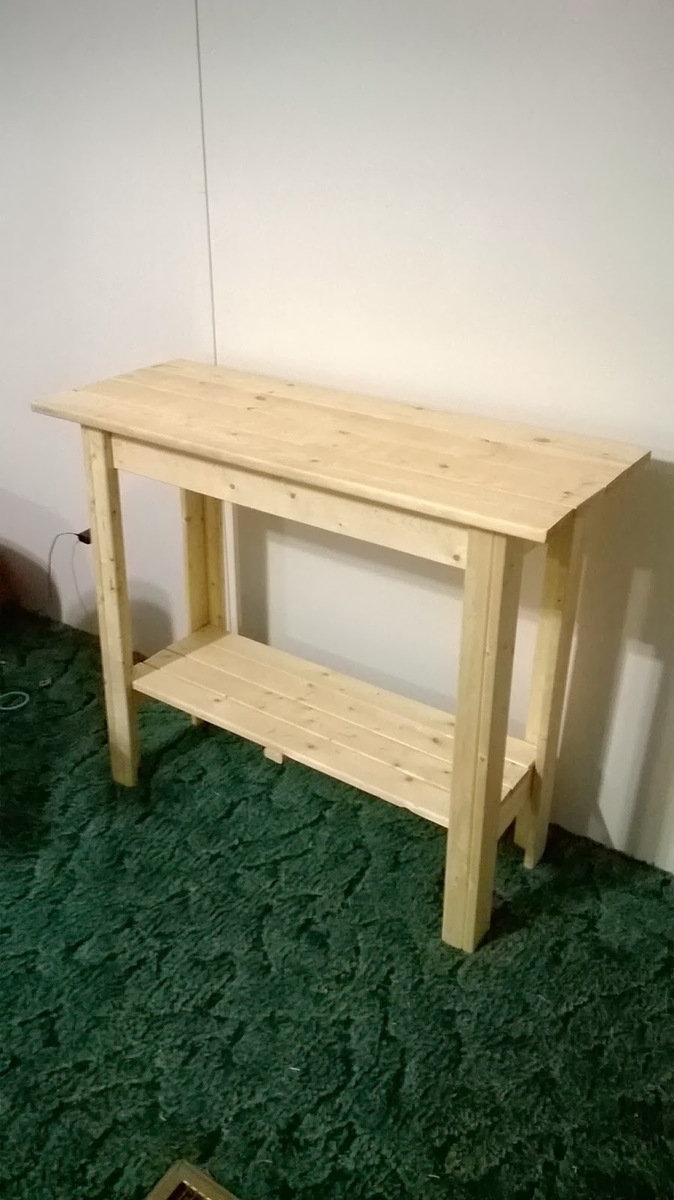
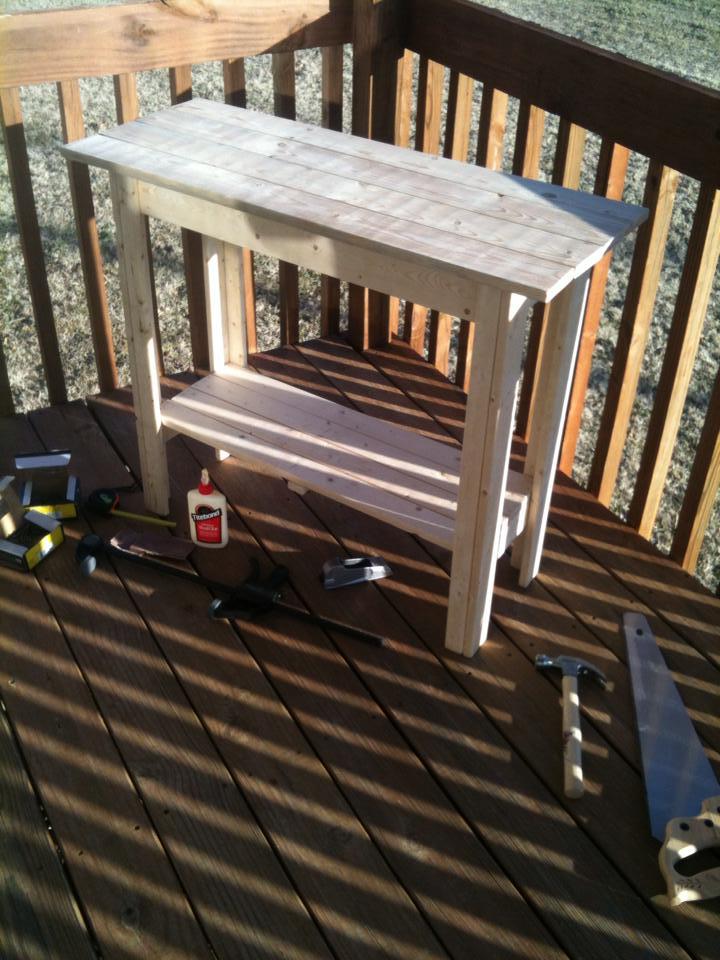
First Console table!
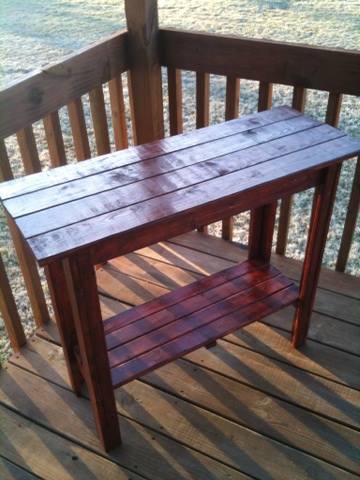
I started this project without a cutting table or any kind of shop set up. I used a burnt out tree as my makeshift cutting table. With only hand tools I used Ana Whites blueprints from her website to do this whole table, the directions were very easy to
follow and very helpful.
Estimated Time Investment
Afternoon Project (3-6 Hours)
Recommended Skill Level
Beginner
House Bed
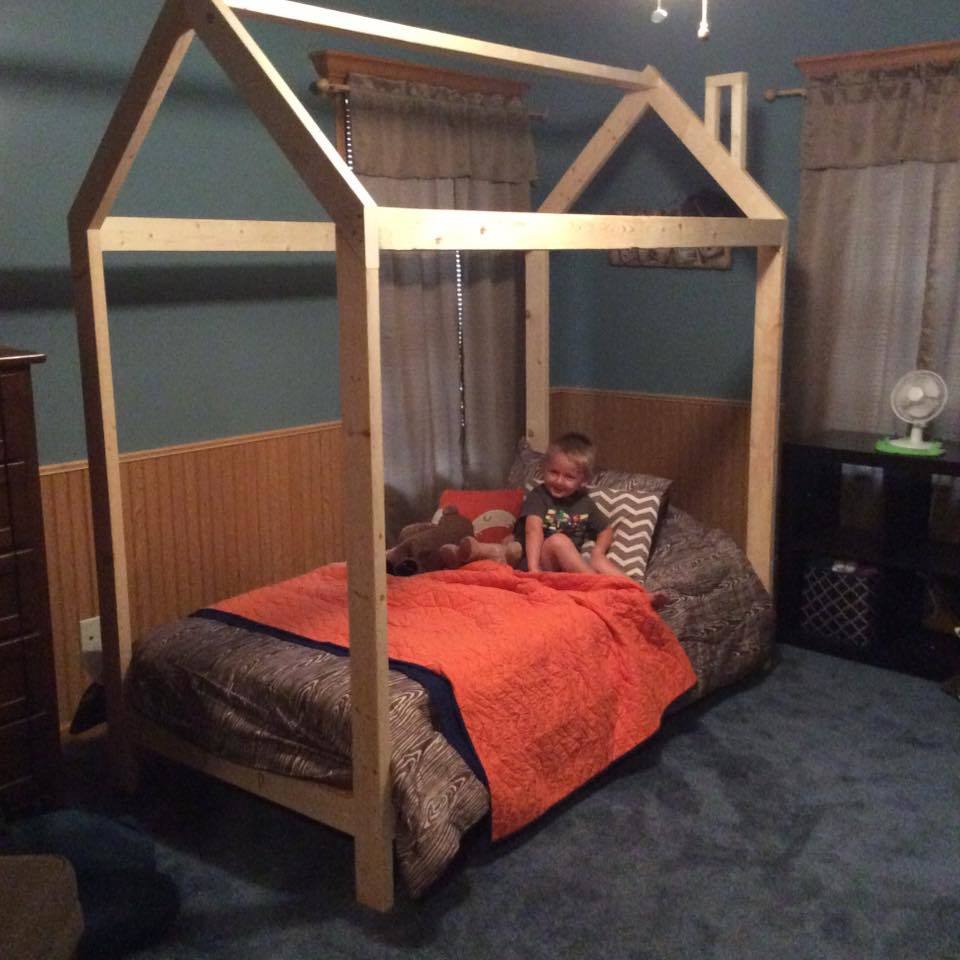
Took a canopy bed plan but made it to look like a house for my grandson.
He loves it!
Built from Plan(s)
Estimated Cost
$75-$100
Estimated Time Investment
Afternoon Project (3-6 Hours)
Recommended Skill Level
Beginner
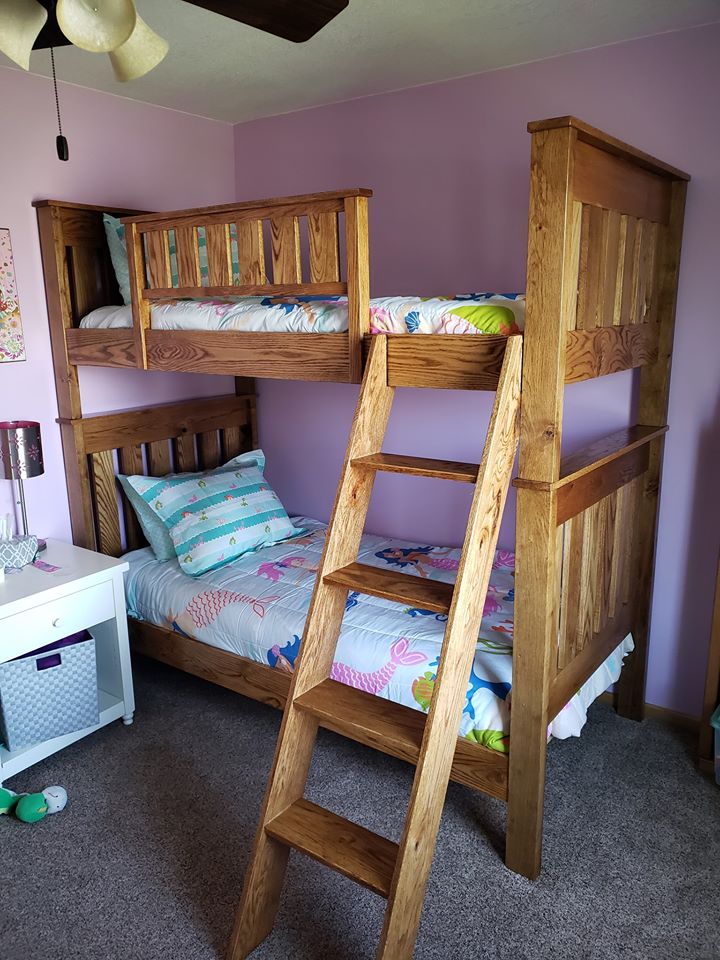
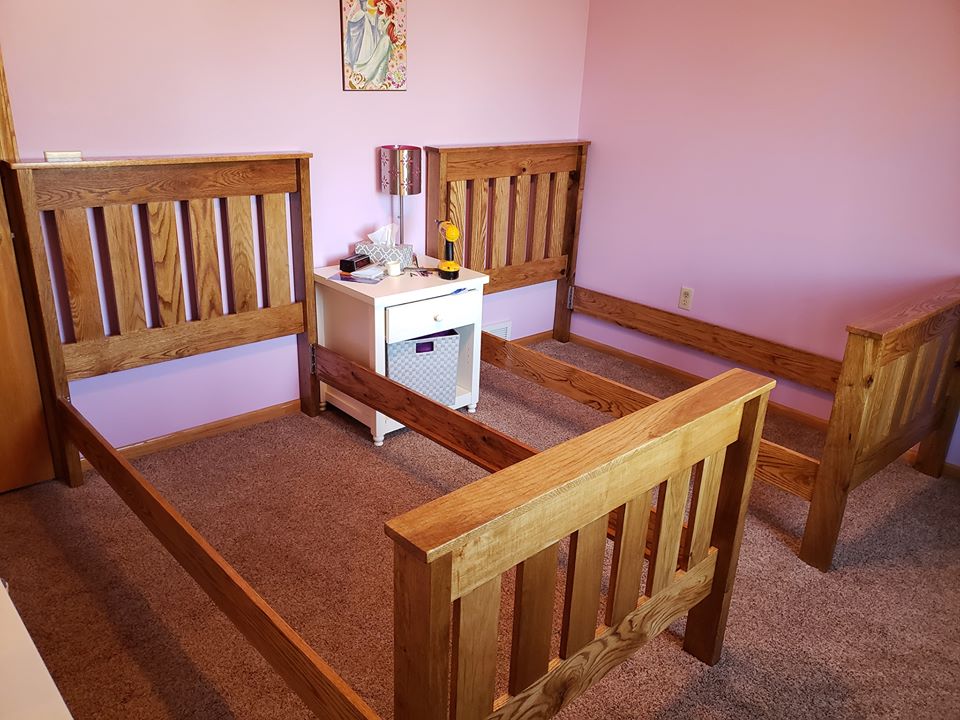
Variation of Simple Bunk Bed Plans

I used the Simple Bunk Bed plans as a rough guide for the sizing of this twin over twin bunk bed plans. Bed is made out of solid oak that I sourced locally for free and planed down the oak slabs. There are a number of variations, but the sizing helped tremendously in putting my plans together.
Built from Plan(s)
Estimated Time Investment
Week Long Project (20 Hours or More)
Finish Used
Minwax Golden Oak & Minwax Glossy Poly
Recommended Skill Level
Advanced
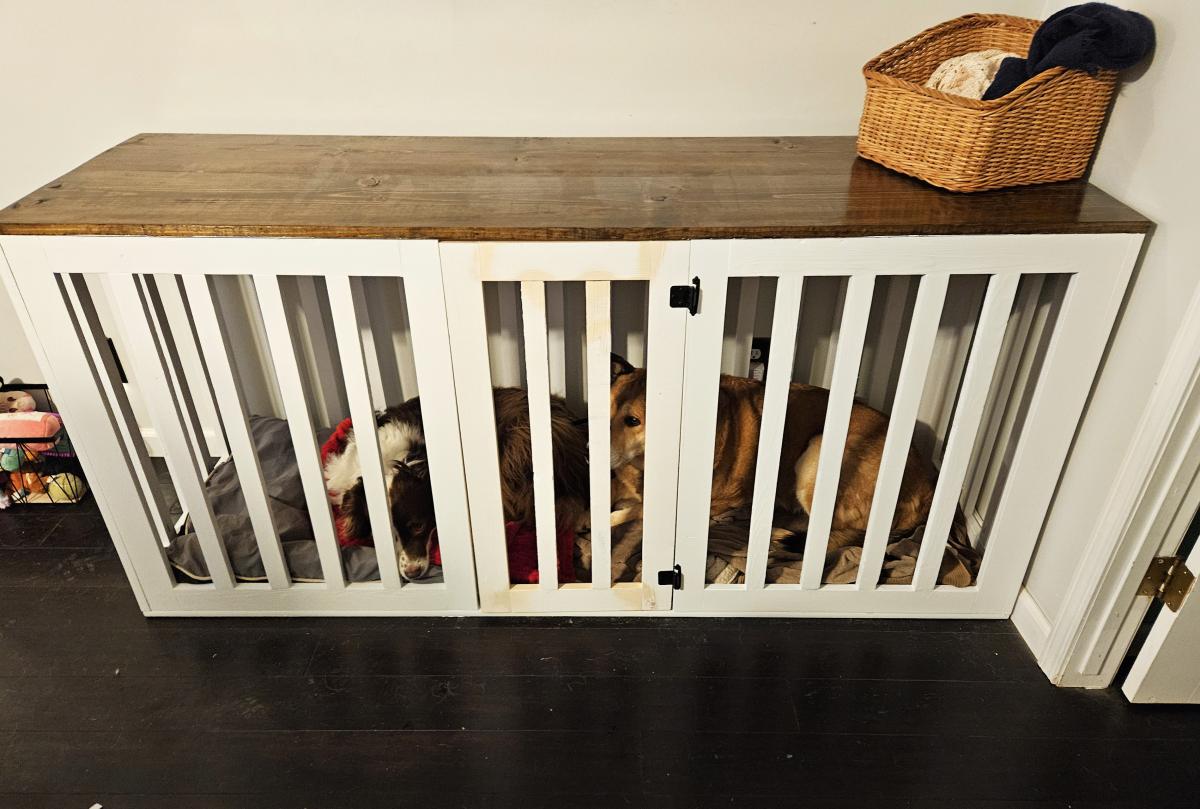
Double-Size Dog Crate
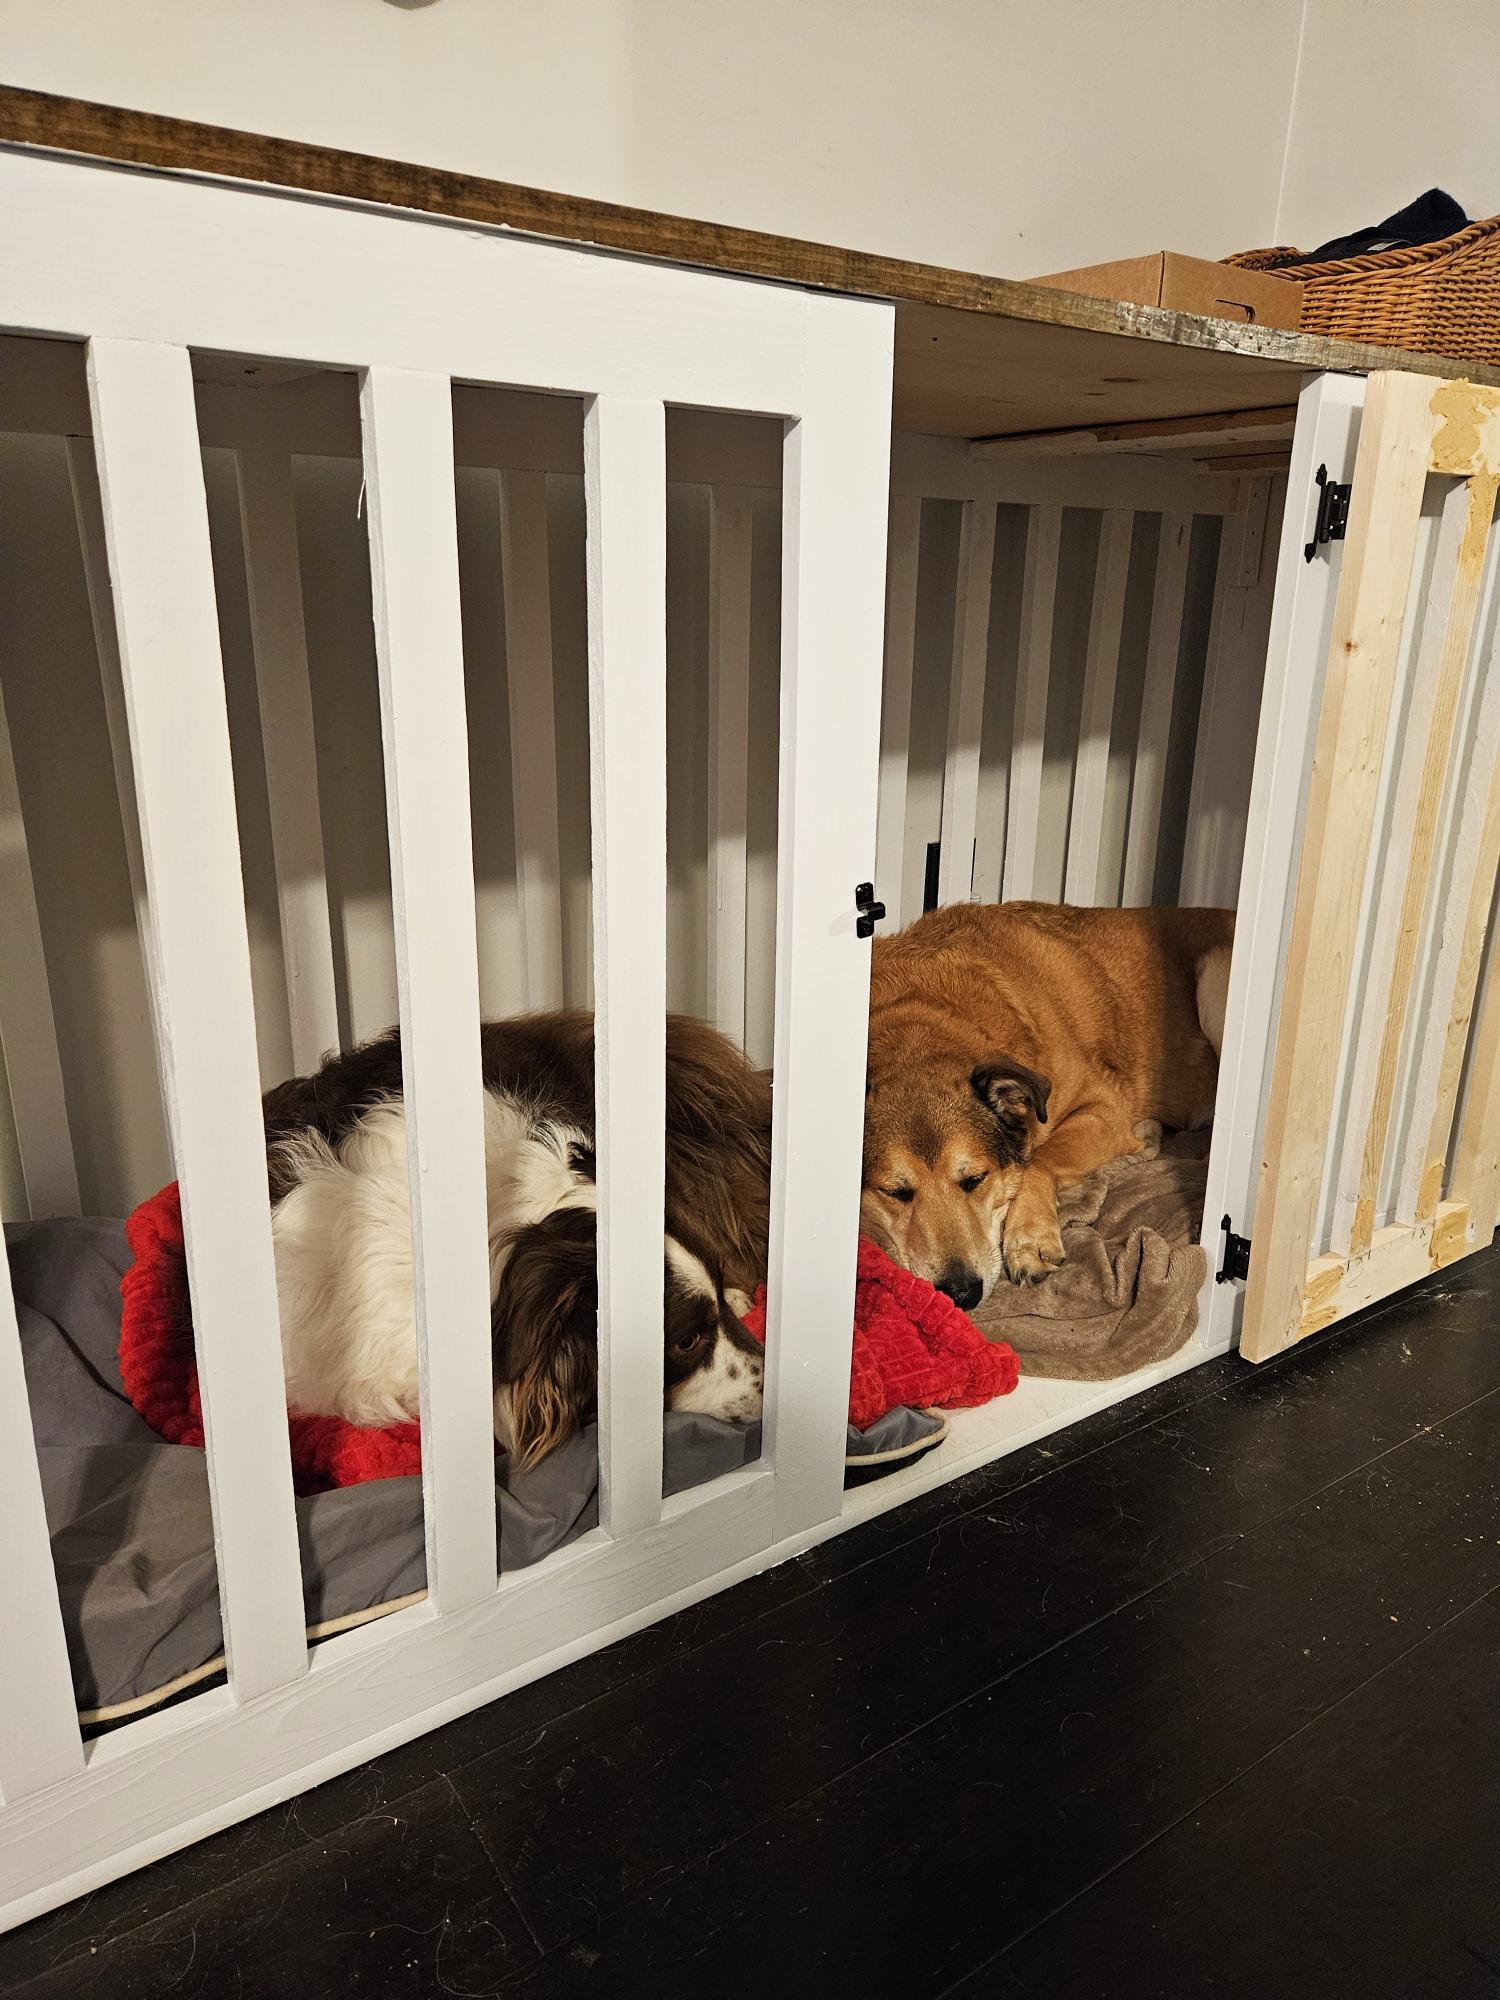
Double sized dog crate adapted from dog crate plan.
Michelle
Built from Plan(s)
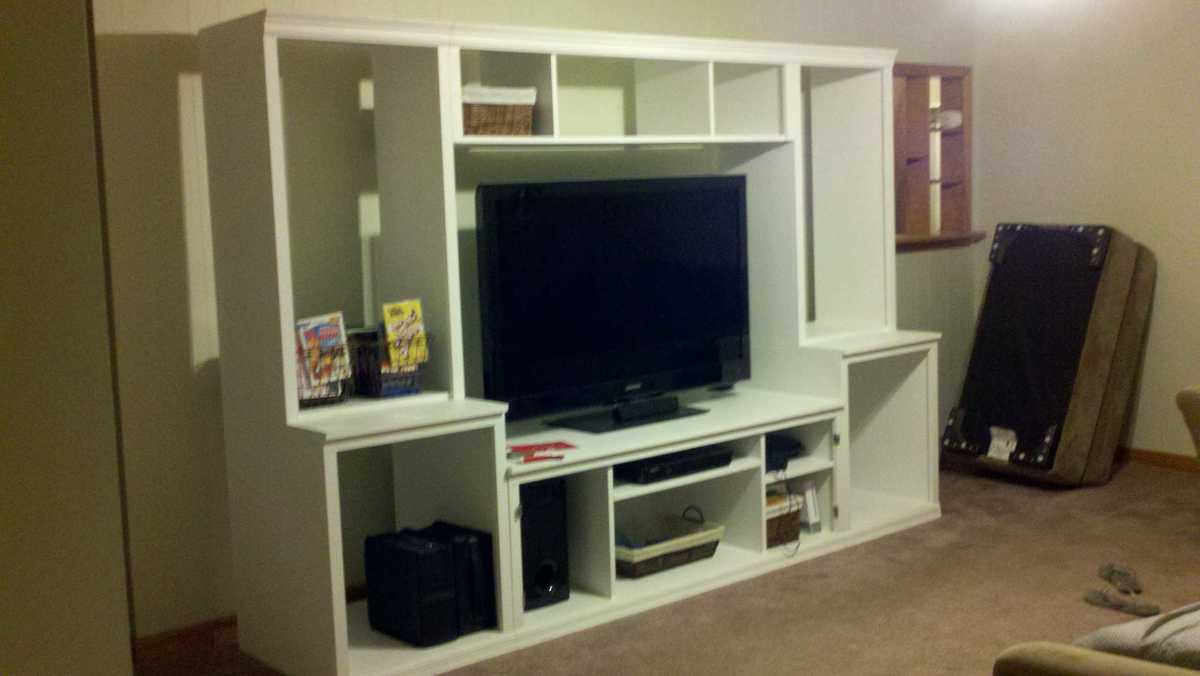
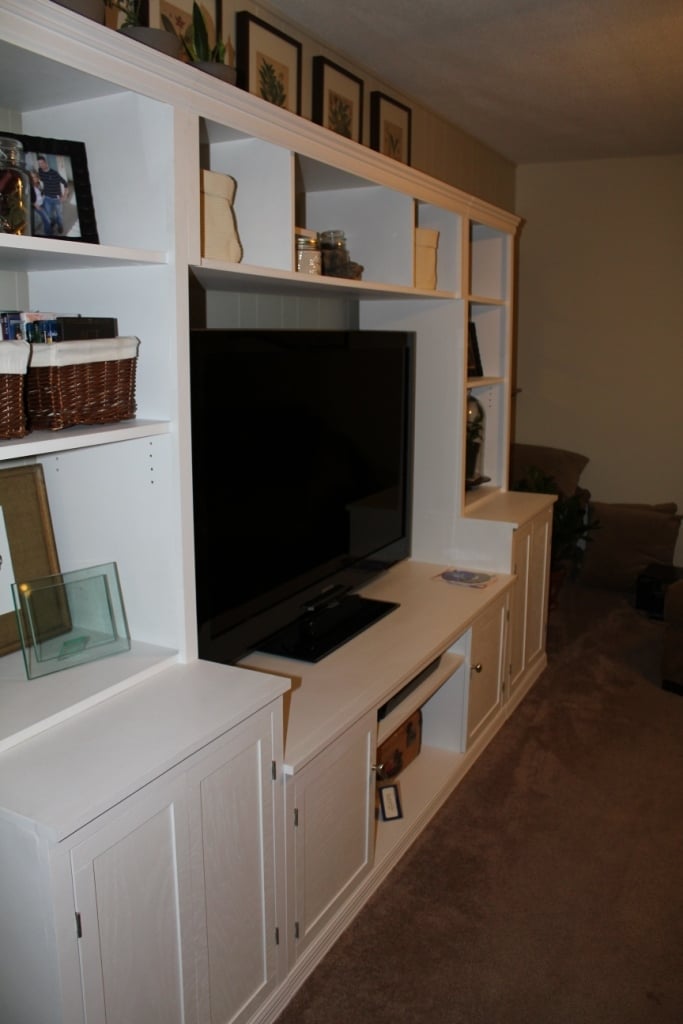
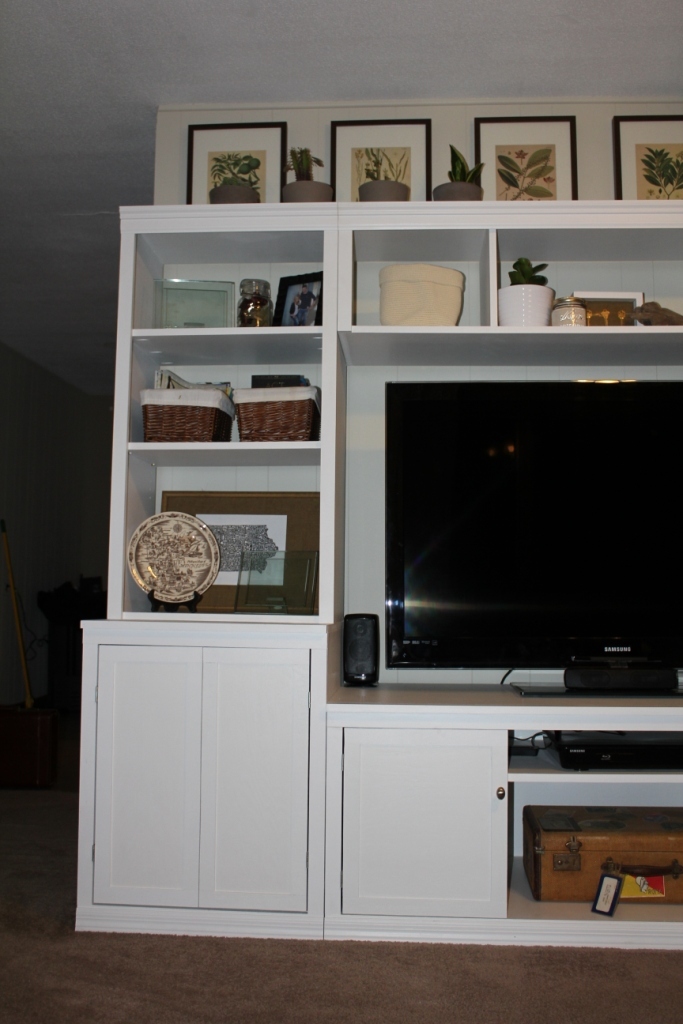
Logan Media Center / Classic Storage Collection
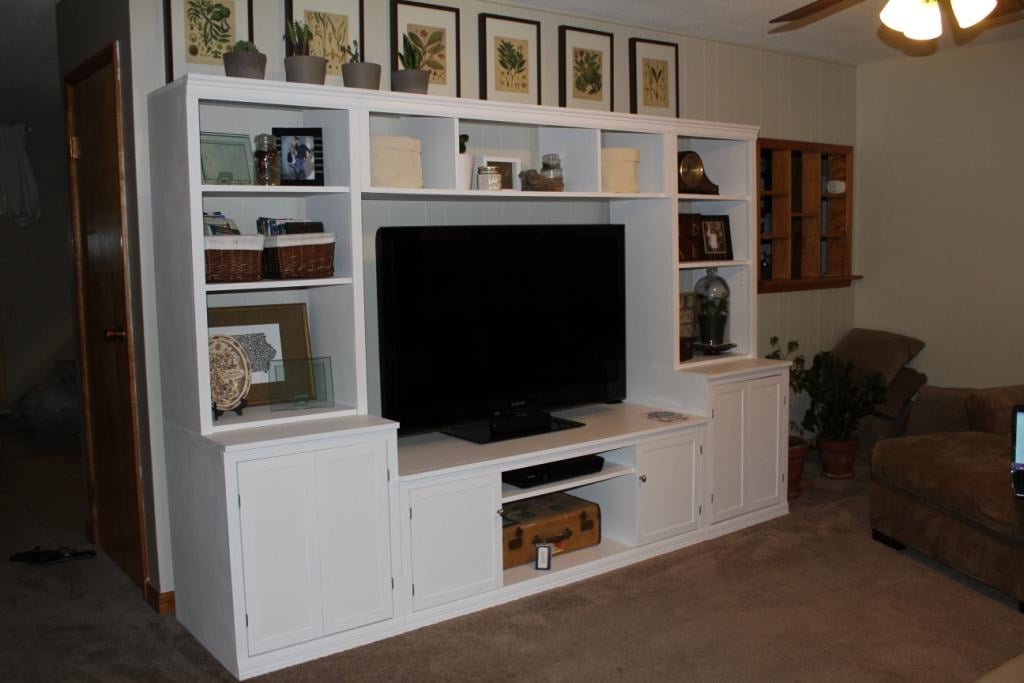
This media center was my hubby and I's very first project! It was definitely a learning experience and its definitely not perfect, but we love it! We love how much it looks like the pottery barn version and that WE MADE IT!!!
This project took us quite some time to complete..... and its still not 100% done as we still need hardware for the 2 outermost doors but are having a hard time finding ones similar to the pottery barn ones that aren’t going to cost us a fortune..... My hubby and I put this together piece by piece as we had time (which seemed to be few and far between). If you had uninterrupted time to work on this , one could probably start and finish it in a weekend. But because of lack of uninterrupted time and the learning curve of this being our first project it took us months to finish.
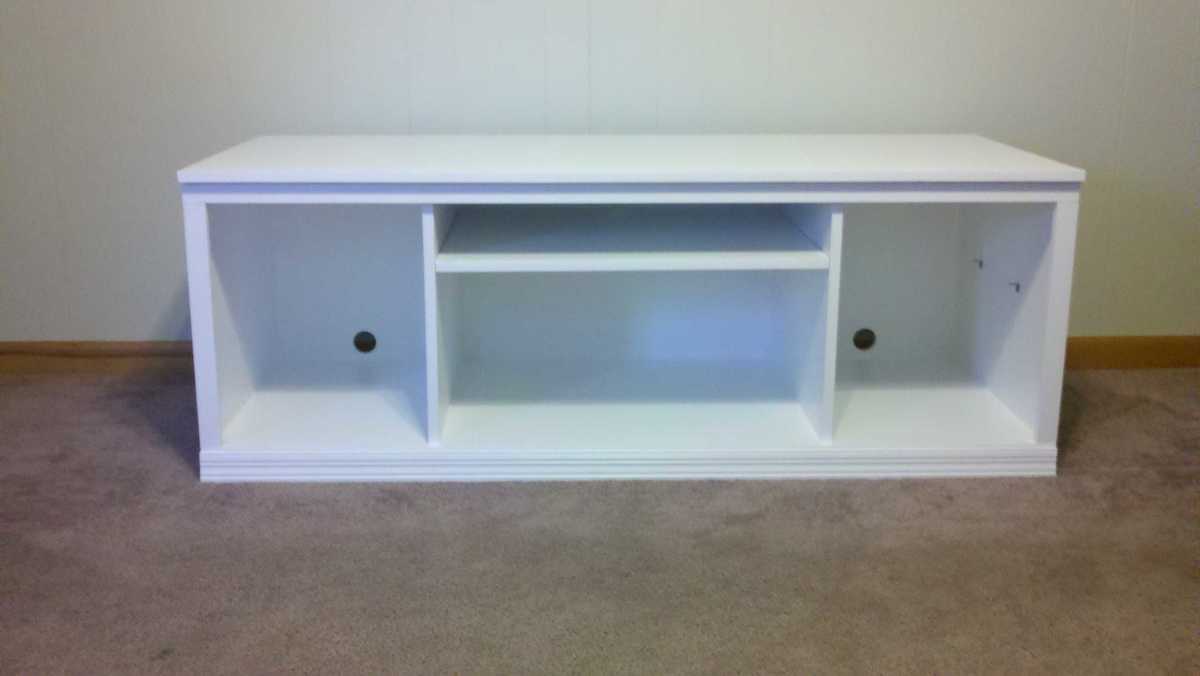
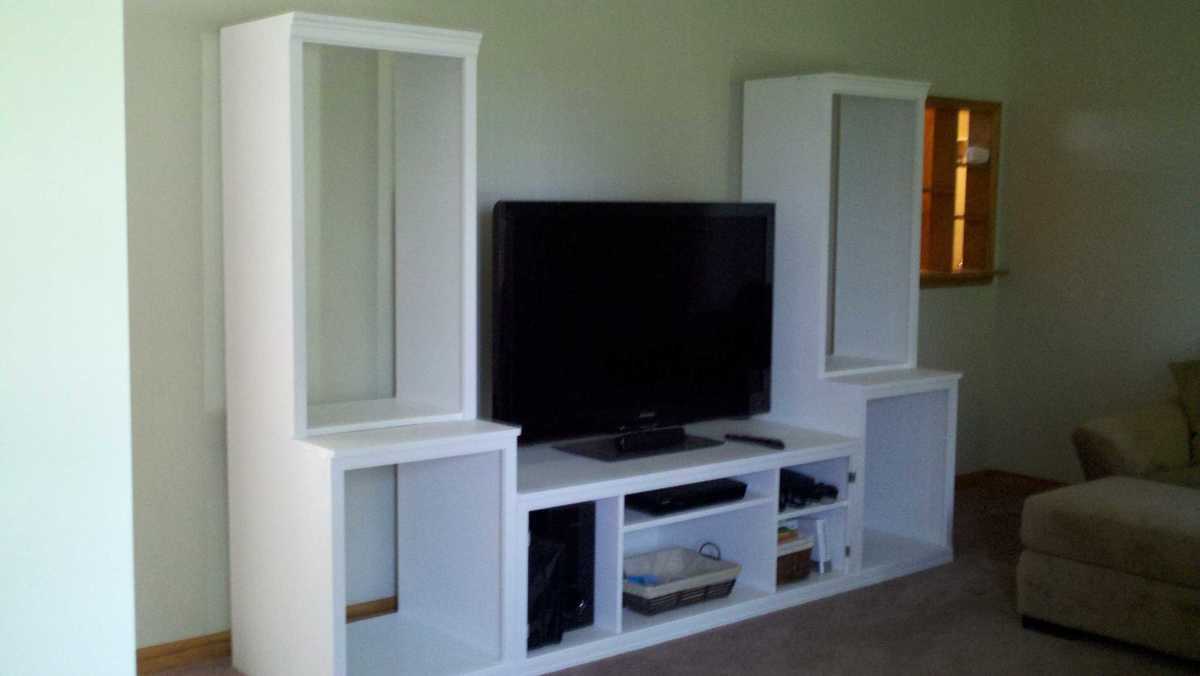
We got the TV base (the bottom middle piece) done first and we were so excited about it that before attempting the rest of the project, we painted it and set it up in the living room :) We were so excited to get the rest of the media center made but my hubby got busy with work and was unable to help me. I got antsy, so antsy in fact that finished the rest of the project COMPLETELY on my own!! And I am SO PROUD OF IT!!! I made and painted the rest of the media center except for the doors because i (not sure why) was completely intimidated by the doors so I procrastinated making them, so the media center sat in the living room for a month or 2 without doors or the adjustable shelves on the towers lol. Last week I finally got up the courage to make the doors and they (to my surprise!) really weren’t that bad!! I painted them and the adjustable shelves and finished assembling the media center. Its now finished and decorated except for some of the door hardware!!! SO EXCITED!!!
Since this was our first project we hadn’t bought a Kreg Jig jet (we have since bought one) and I HIGHLY recommend getting yourself one. It would have made this project so much easier.
Built from Plan(s)
Estimated Cost
$300
Estimated Time Investment
Week Long Project (20 Hours or More)
Finish Used
Primer (1 coat) White paint (3 coats)
Recommended Skill Level
Beginner
Comments

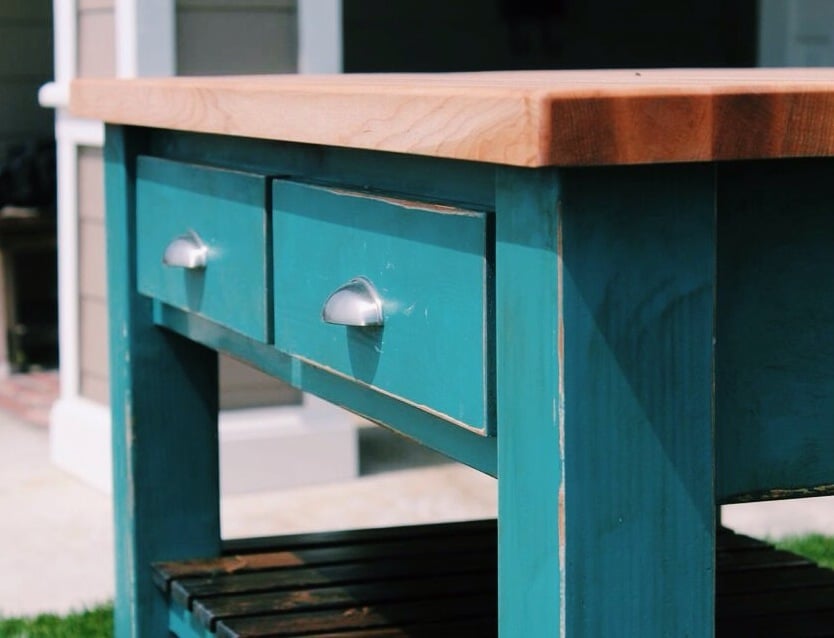
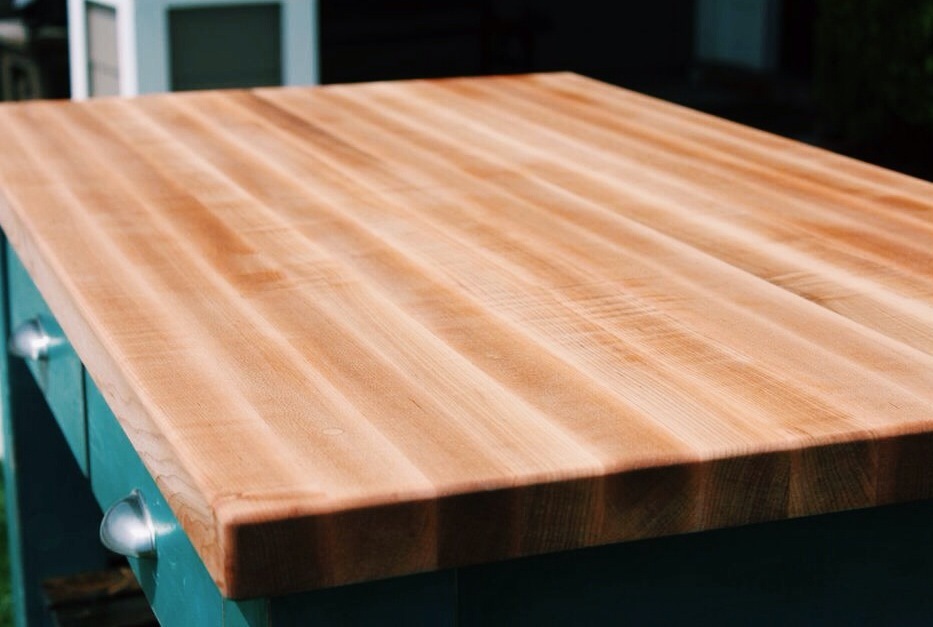
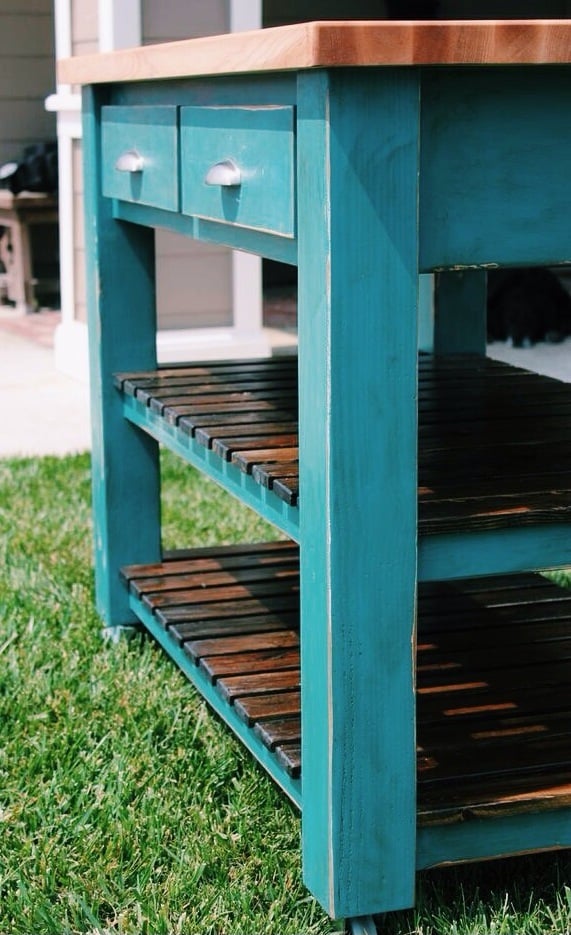
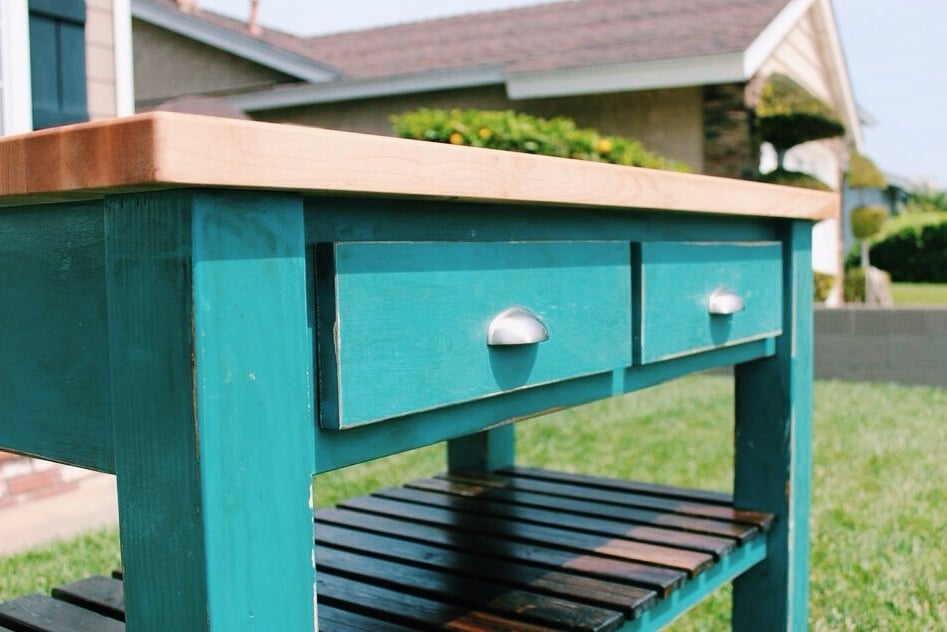
Butcher Block Kitchen Island
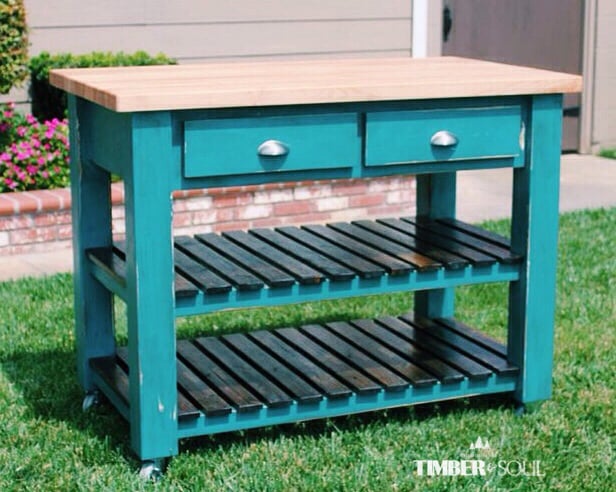
I built this from Ana's plans with some slight modifications. The top is built from hard maple and is an edge grain butcher block. I sealed the top with mineral oil and beeswax. The finish is distressed calypso blue. I also added 3" locking and swiveling casters.
Built from Plan(s)
Estimated Cost
$200.00
Estimated Time Investment
Week Long Project (20 Hours or More)
Finish Used
The paint is calypso blue by Benjamin Moore. I sanded and distressed the piece. I then wiped on stain and wiped off stain to add a rustic look.
Recommended Skill Level
Advanced
Comments
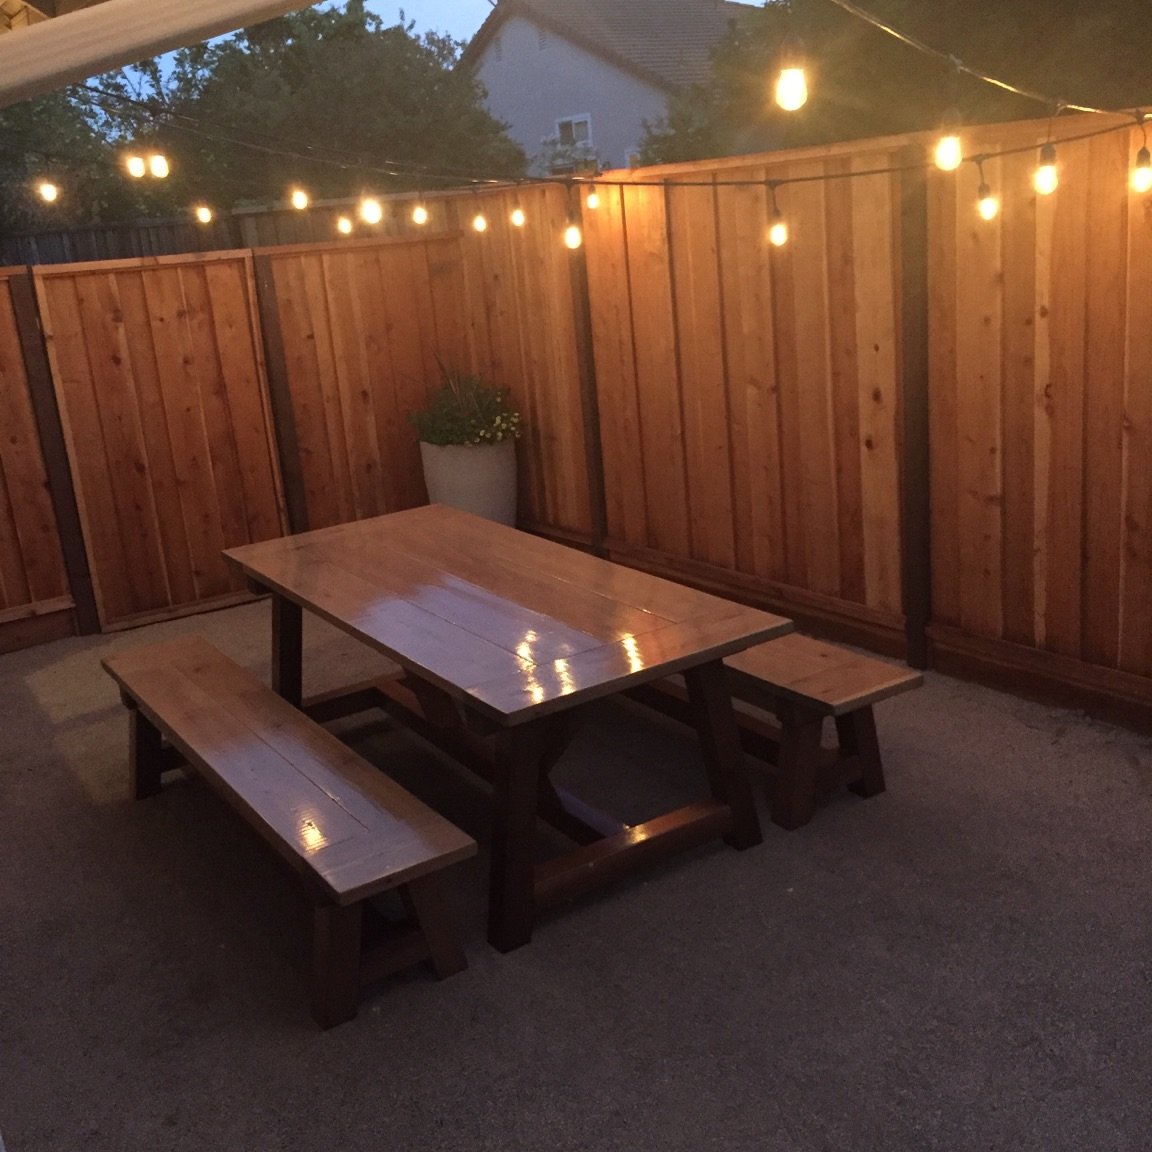
Truss Table and Benches (Western Red Cedar)
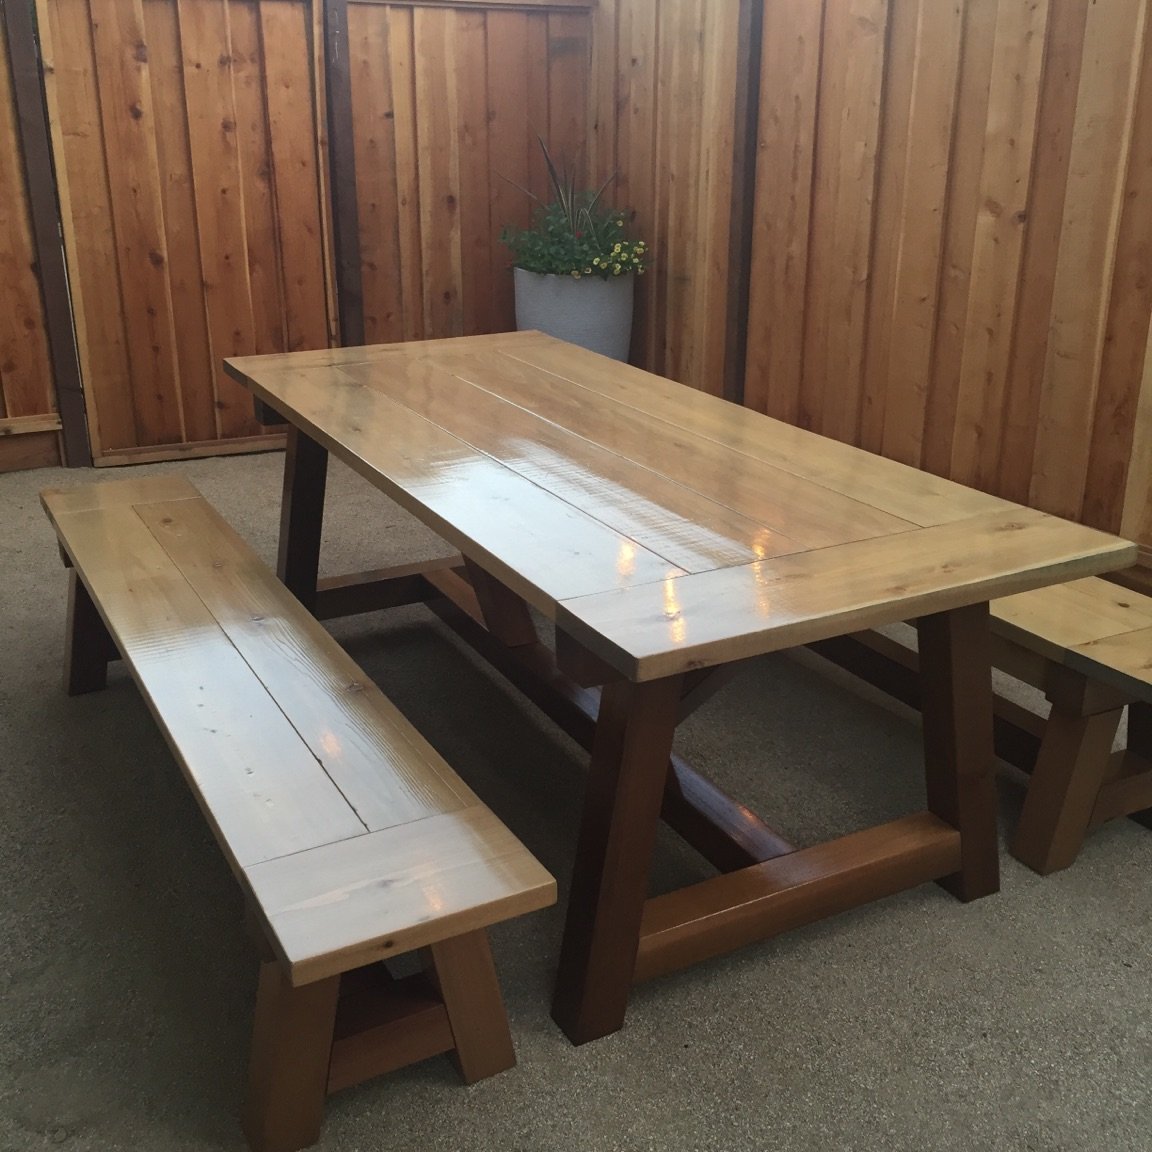
We built this outdoor table and benches using Western Red Cedar for a patio area outside our house. The cedar is pricier than doug fir or other woods, but is highly rot resistant and the best choice for an outdoor table. We used Ana White's 4x4 Truss Beam Table and Benches plans and Kreg blue kote screws since they are weatherproof. The breadboards were a little wobbly, so we reinforced them with black metal corner braces (http://www.truevalue.com/product/Hardware/Miscellaneous-Hardware/Corner…) and black coated exterior screws (http://www.homedepot.com/p/Everbilt-12-x-1-1-4-in-Phillips-Flat-Head-Wo…). These braces provide a cool architectural look and provide much needed support for the table ends, and especially the bench ends. We stained the Western Red Cedar with Minwax Weathered Oak and finished it with two coats of Man O War Spar Urethane in Satin finish. Hopefully it will stand up to the elements and last for years to come. Thanks for the plans Ana!
Built from Plan(s)
Estimated Cost
$600-$700
Estimated Time Investment
Week Long Project (20 Hours or More)
Finish Used
Minwax Weathered Oak (2 coats); Man O War Spar Urethane Satin (2 coats). Sanded with 400 grit sandpaper in between coats of urethane.
Recommended Skill Level
Beginner
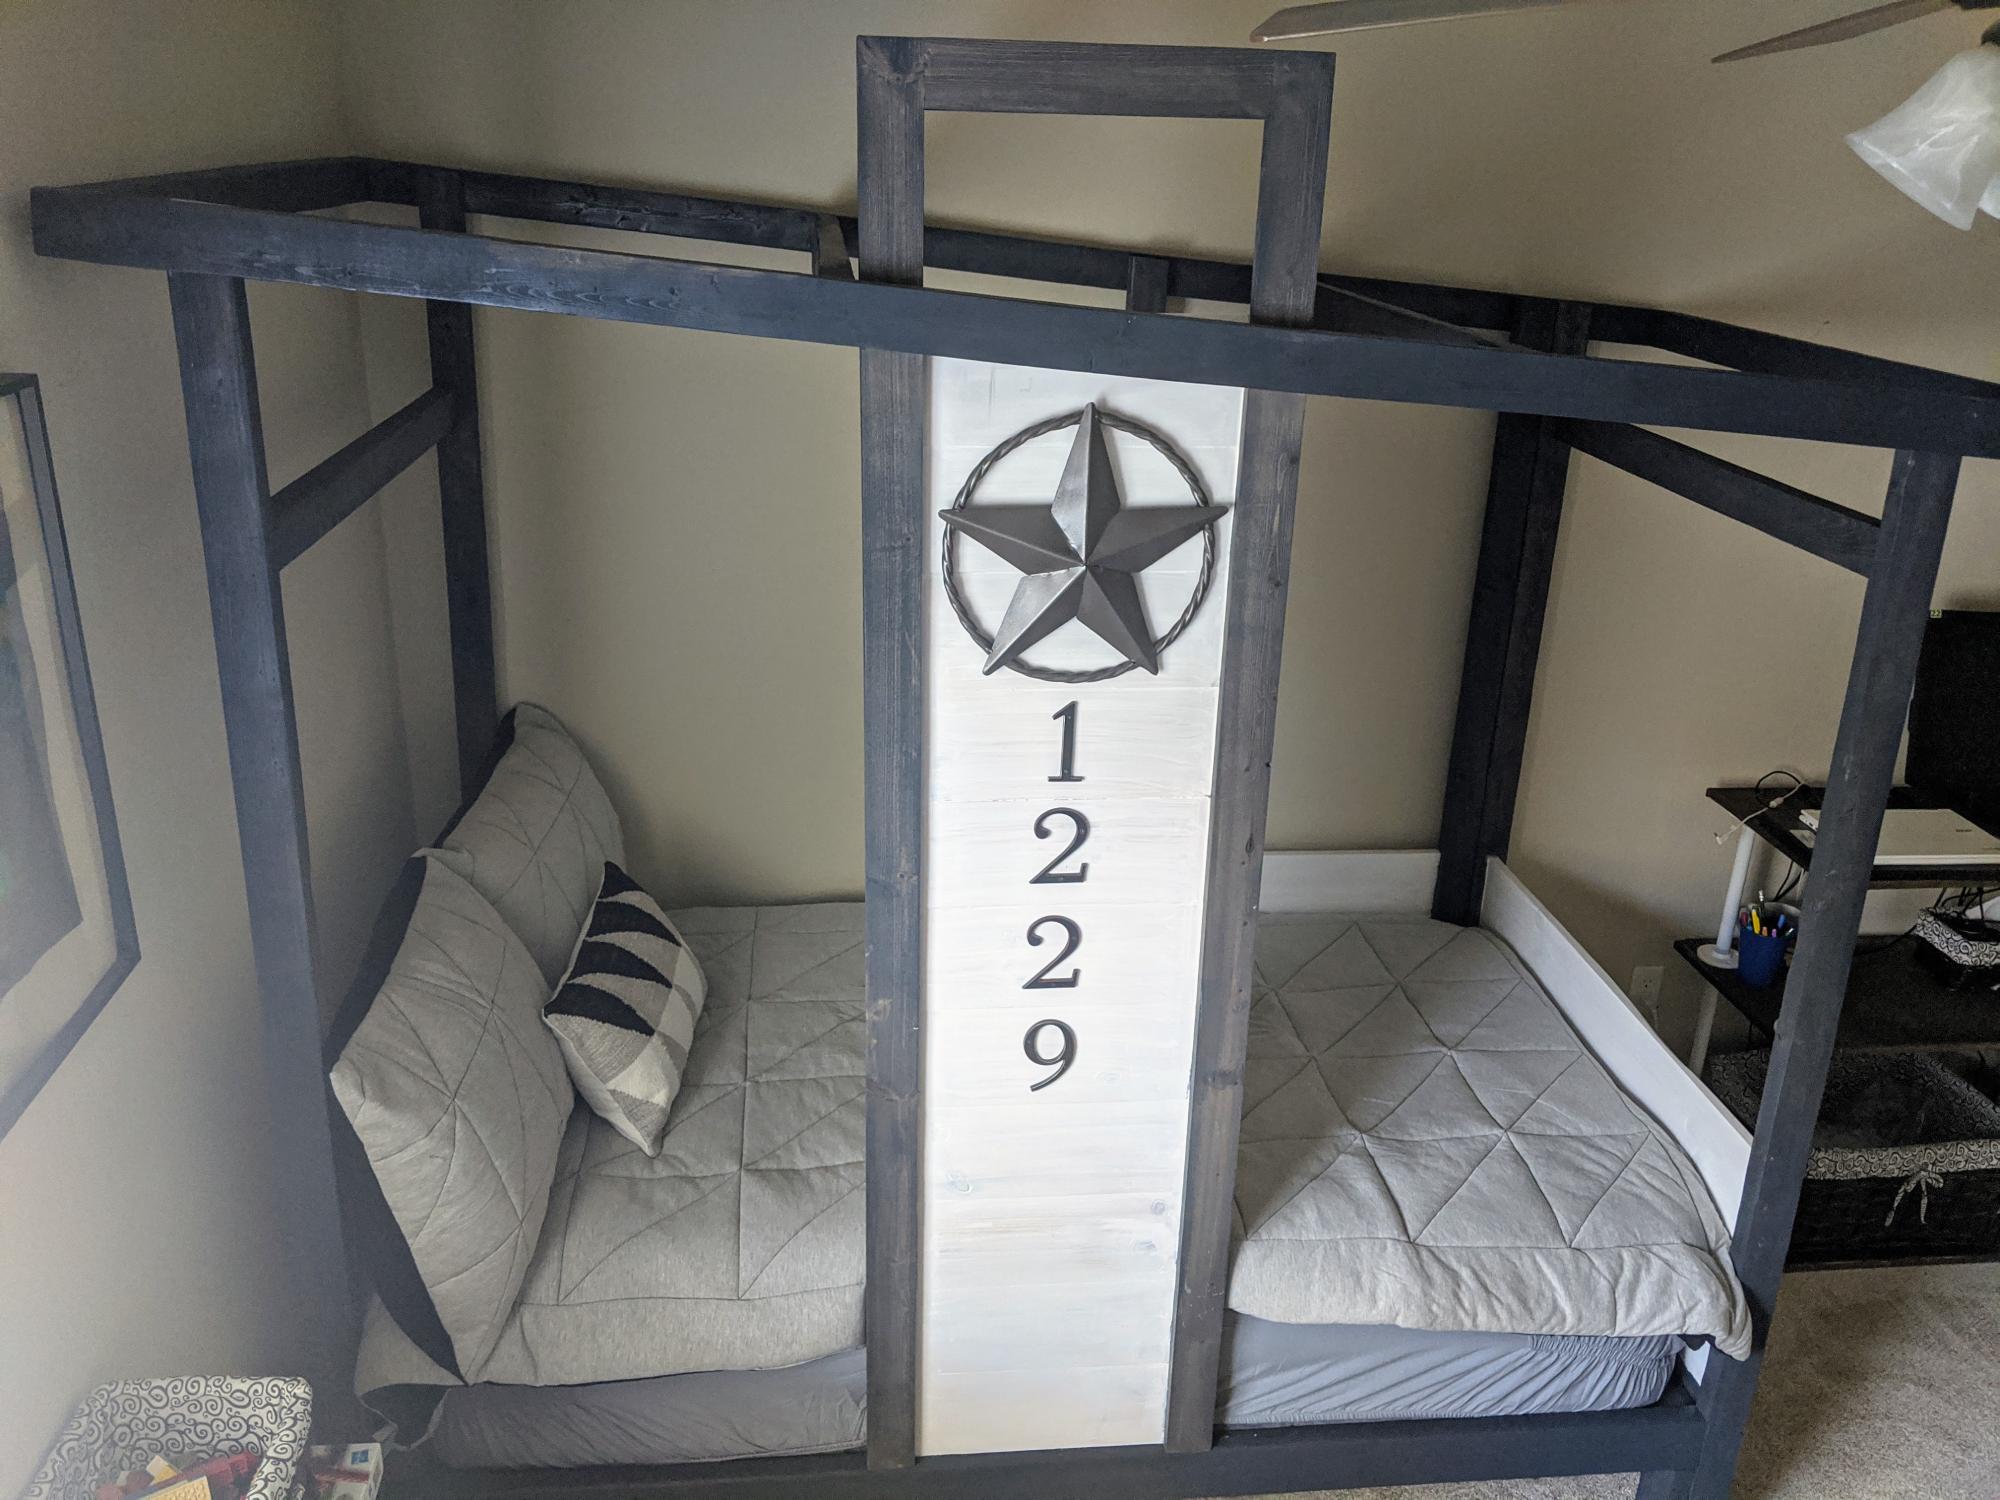
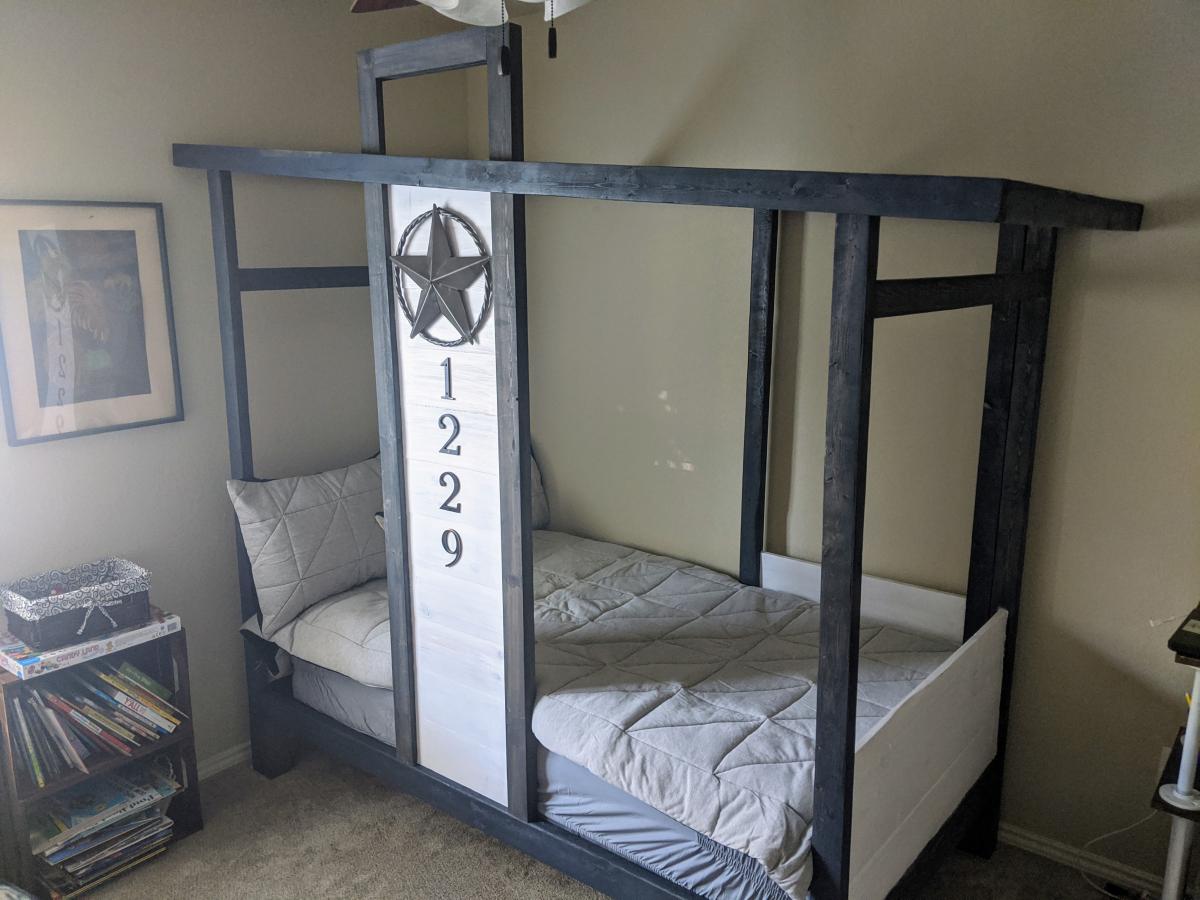
My build of “House Bed Frame - Modern Tiny House Shape” for Ana-White
https://www.ana-white.com/woodworking-projects/house-bed-frame-modern-t…
As a high school teacher, I noticed Ana-White’s post for a contest to build a tiny house-shaped bed heading in to spring break; I entered and was selected. COVID-19 directed my teaching in a very different way and actually slowed down my woodworking while I have finished the project. Inspired by the Ana-White’s writings of making beautiful furniture with typical tools, this project is a perfect example of being able to build without the need for high-end shop machines. I followed the plans almost to the letter while keeping my mind open to slight improvement especially around the process of transportability. As a teacher, I emphasize that every writing is ready for editing and revision; with experience in woodworking, I approach building in a similar manner. My finished project below pictured below has some minor revisions planned for disassembly and reassembly in a minimal number of parts using only a screwdriver.
@anawhitediy
https://www.facebook.com/knockoffwood
Smart and stylish woodworking plans to make your home awesome.
#anawhite
smart.bio/anawhitediy
@SawDustDonLawler
https://www.facebook.com/HHH-Wood
@EduDonLawler
Estimated Cost
$160.00
Estimated Time Investment
Weekend Project (10-20 Hours)
Finish Used
The finish used on this project was Minwax Aged Barrel and Minwax Pure White.
Recommended Skill Level
Intermediate
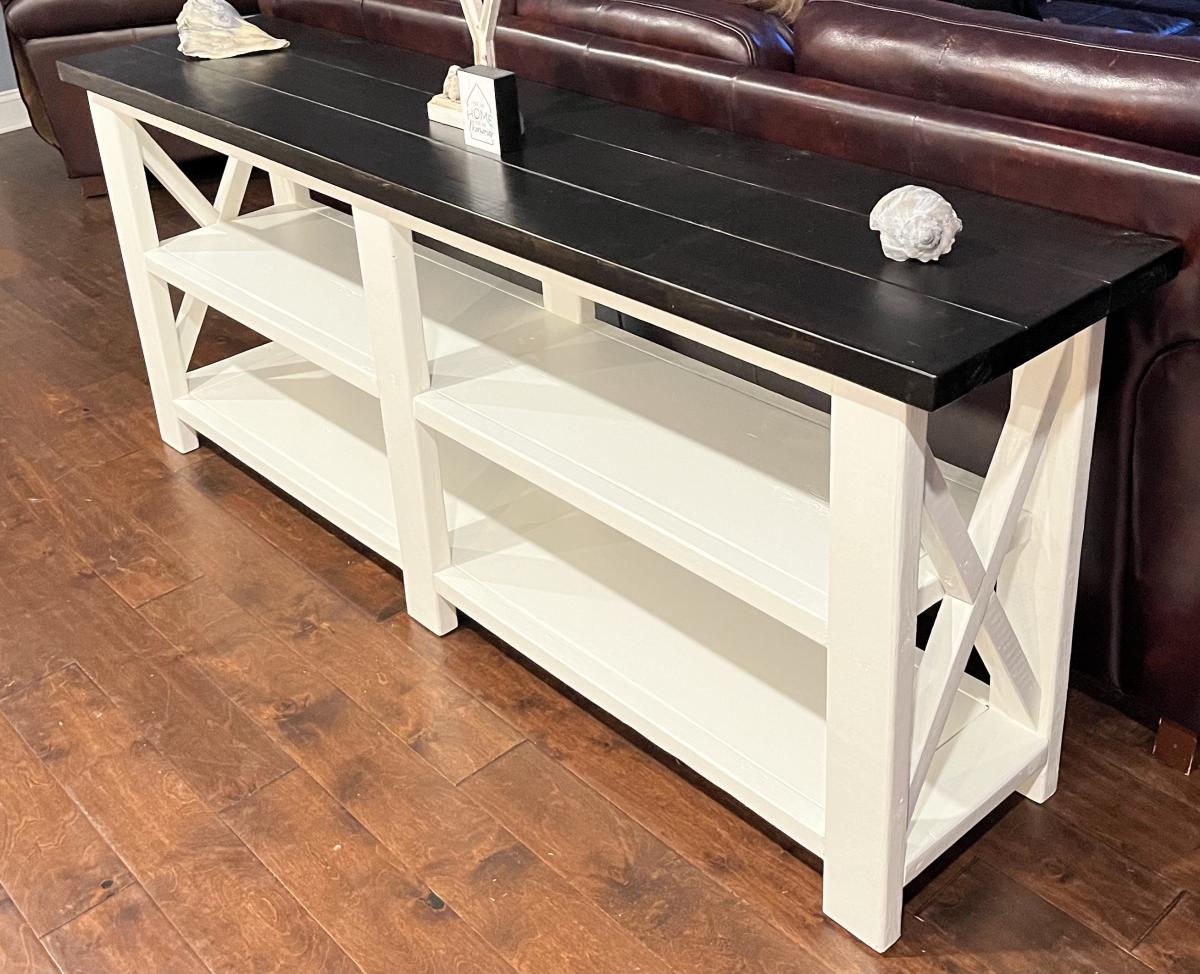
First Woodworkig Project - X Console
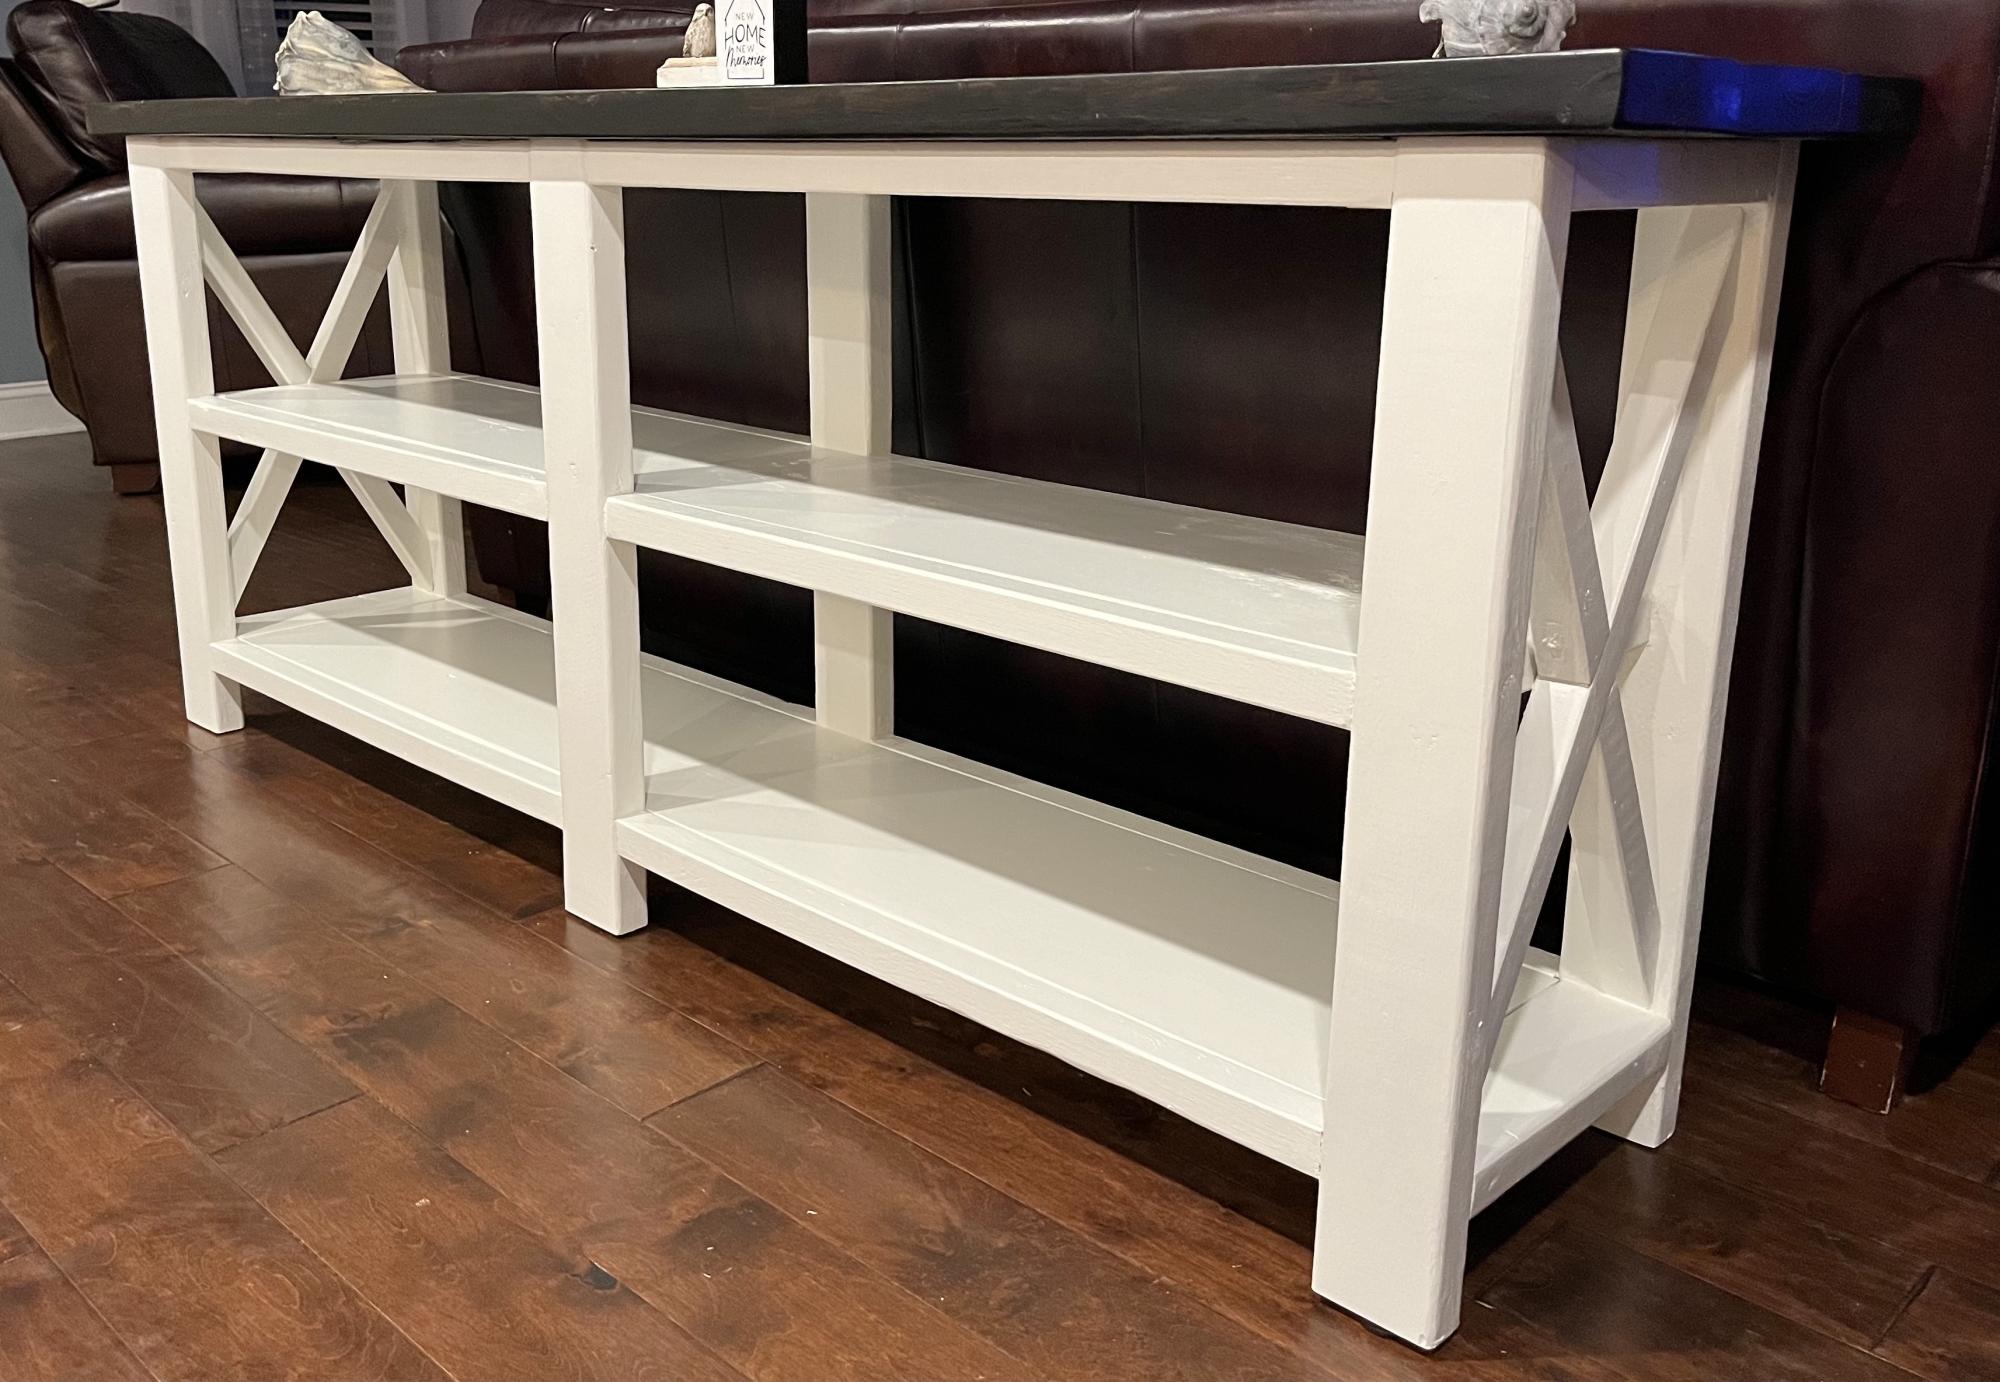
First time building a piece of furniture. Definitely get a small Kreg Jig for the project. Built it for my wife for Christmas. She loves it. A lot of imperfections, but not too bad and very sturdy.
Built from Plan(s)
truss bookshelf
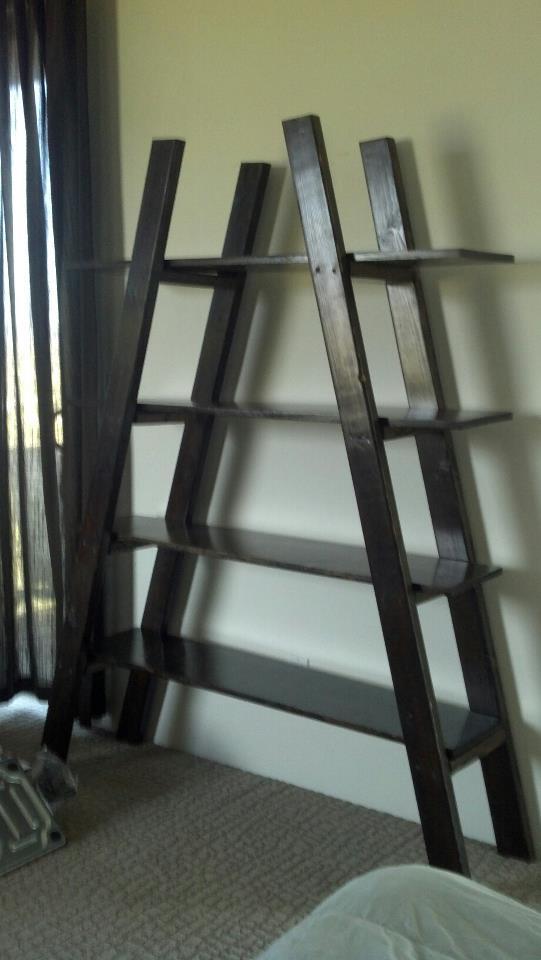
We made this a bit taller then the plan. But everything worked out well. It was our first project. I would NOT recommend this as a first project. Also, wipe the stain off quickly. We let it sit way too long and it came out very dark. It took us a long time to build because we both work. And, Home Depot didn't cut miters so we had to get a neighbor to do it.... fyi
I love it though.
Estimated Time Investment
Week Long Project (20 Hours or More)
Finish Used
Minwax wood finish in Jacobean
Recommended Skill Level
Intermediate
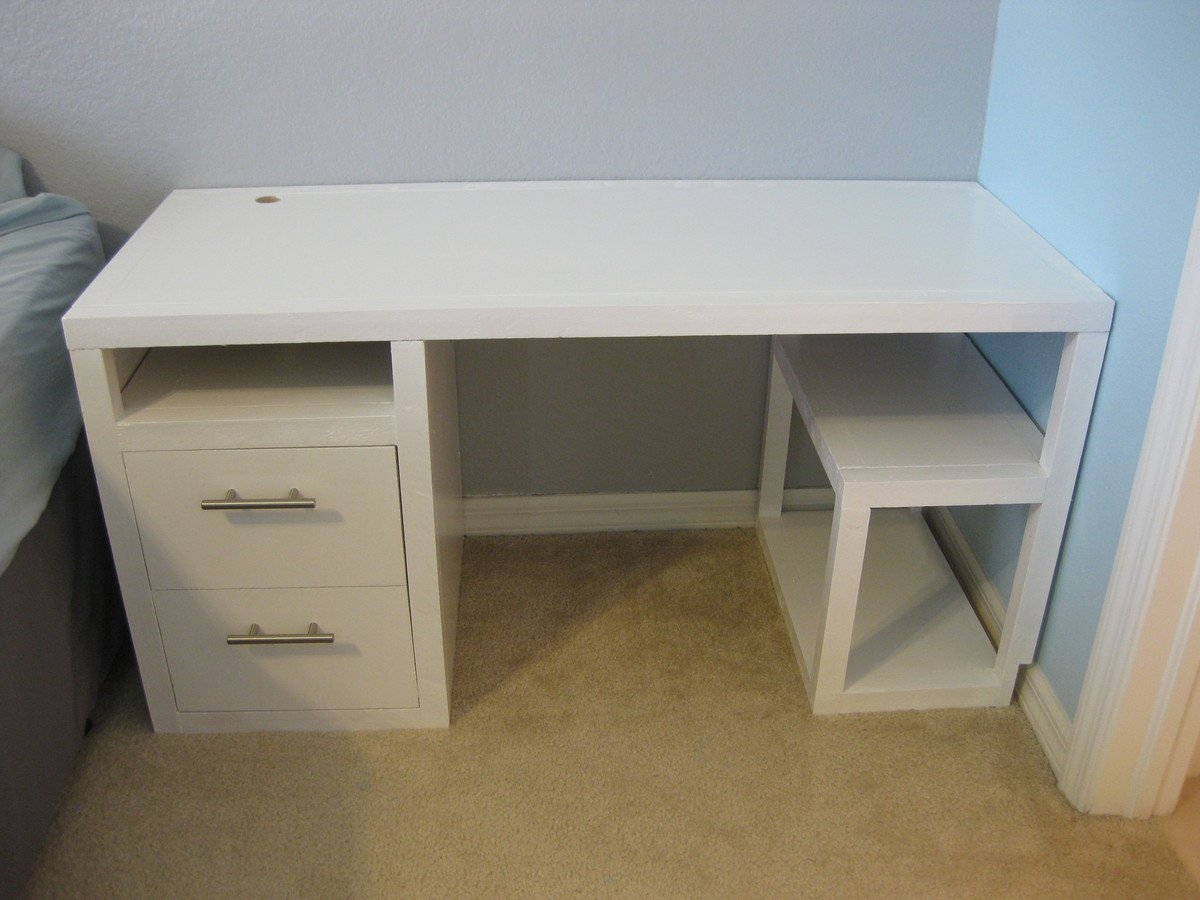
Extended Nightstands
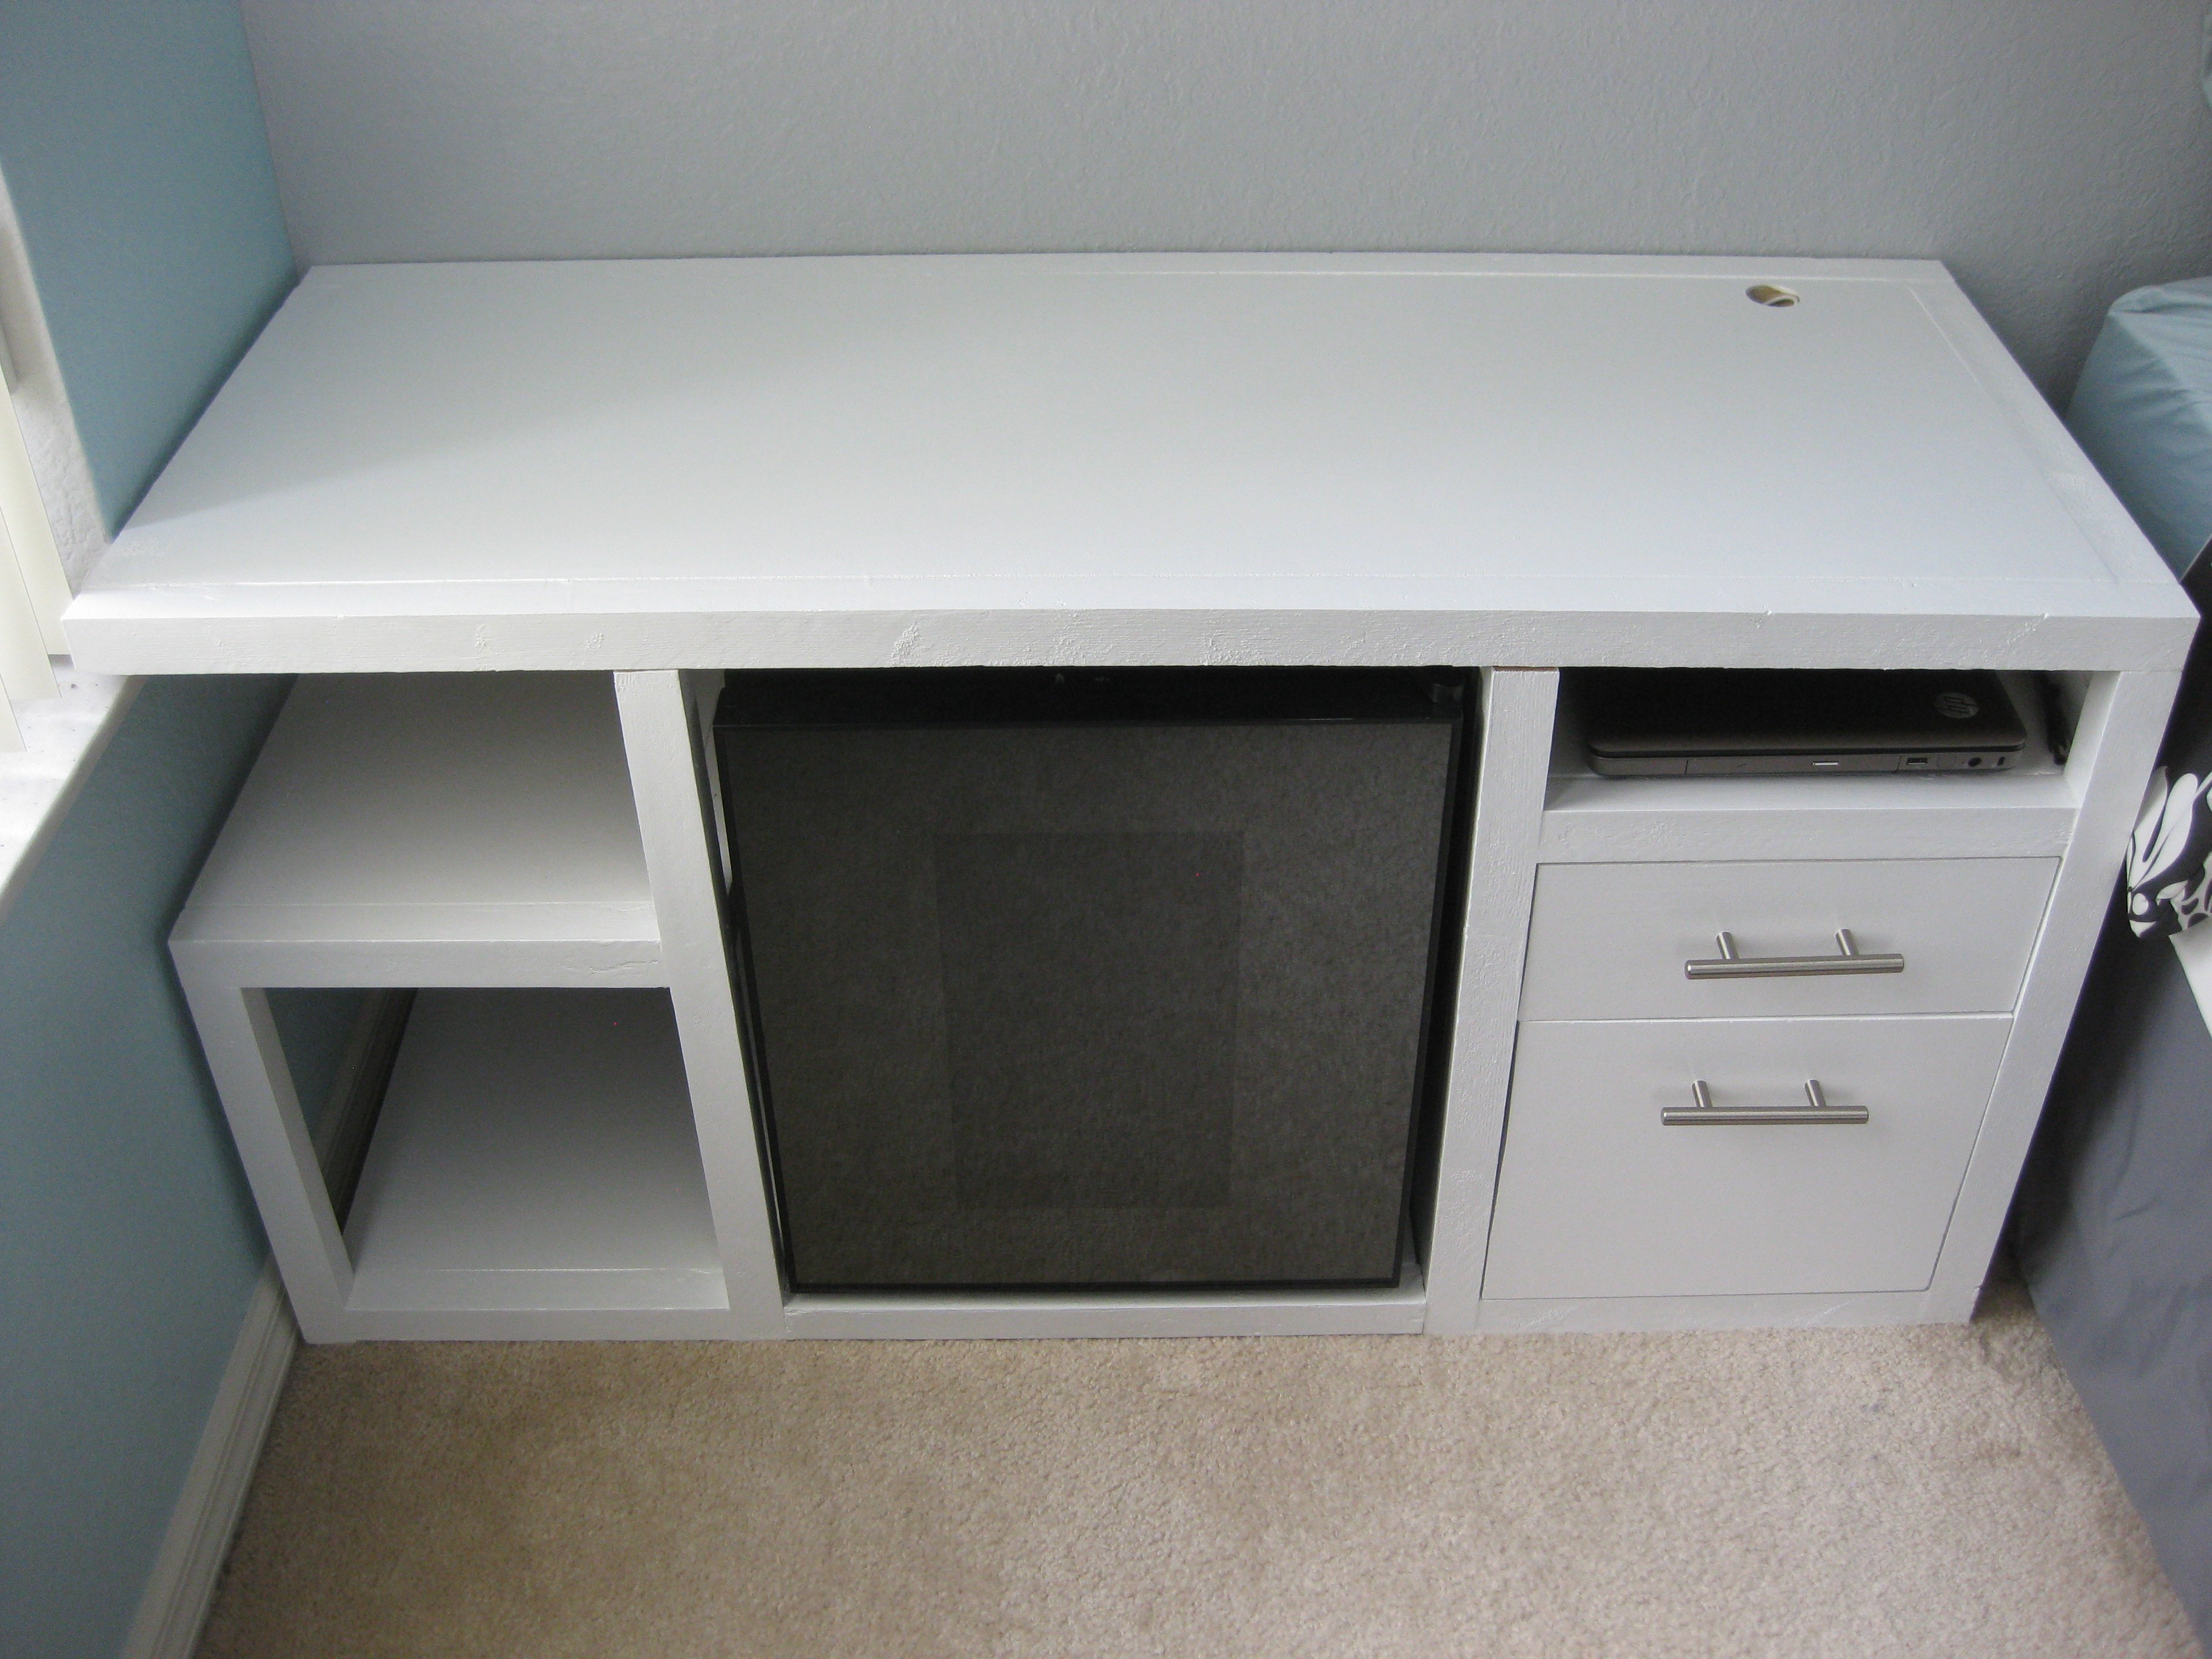
These nightstands span the entire wall of our master bedroom. My husband's side features a mini-fridge, whereas mine has a space for an ottoman that I have yet to buy (or make?). It is a combination of the "Modern Nightstand" and the "Parsons Desk".
Built from Plan(s)
Estimated Cost
$80
Estimated Time Investment
Week Long Project (20 Hours or More)
Finish Used
Behr ultra white gloss paint and polycrylic
Recommended Skill Level
Beginner
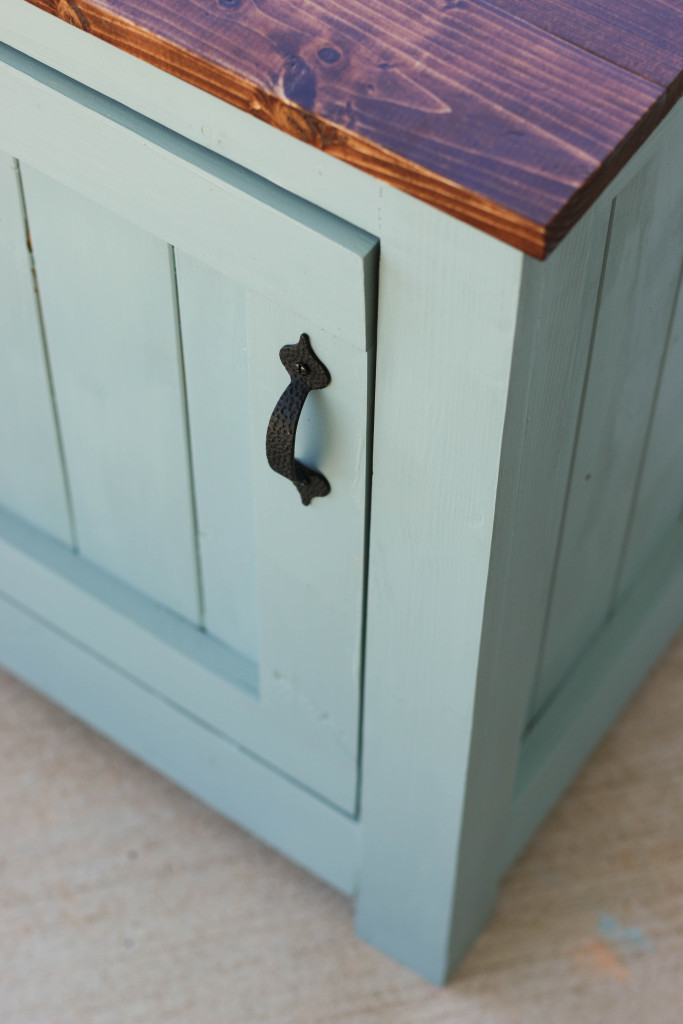
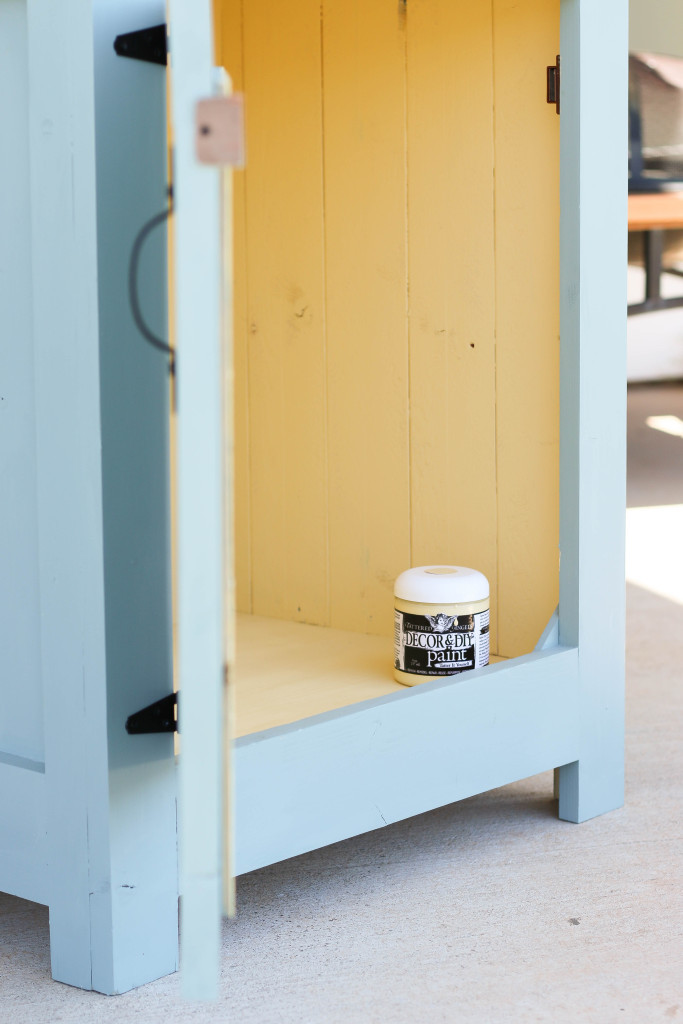
Kentwood Nightstand Painted with Tattered Angels Paints
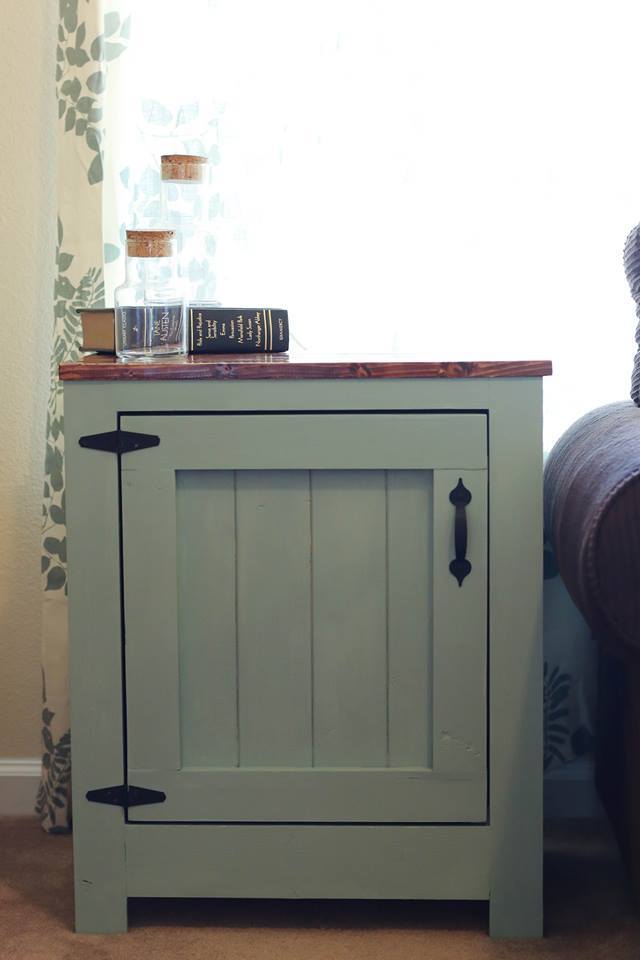
I saw the plans for this nightstand and loved it! It was exactly the piece of furniture I was looking for to use as an end table. I decided to stain the top and paint the bottom. The outside is a greenish-teal color and the inside is a light, fun yellow. I also submitted this project to Canvas Corp Brands' Blog and they published it! See the blog post here: http://blog.canvascorpbrands.com/diy-end-table-painted-with-tattered-angels-paints/
Built from Plan(s)
Estimated Time Investment
Day Project (6-9 Hours)
Finish Used
I used Minwax stain in the color of English Chestnut for the top. I also added two coats of shiny poly over the stain. For the paints on the bottom I applied Tattered Angels DIY and Decor paints in the colors of Mankato and Chamoise. I first wiped down the whole piece with a damp cloth to remove dirt, and then since it was already sanded, I just began to add color. I used a rag to stain the top and applied two coats. I used a small Purdy brush on the bottom to apply the paint. I did a light coat of paint first, then came back with another light coat to cover any spots I missed.
Recommended Skill Level
Beginner
Rustic end table
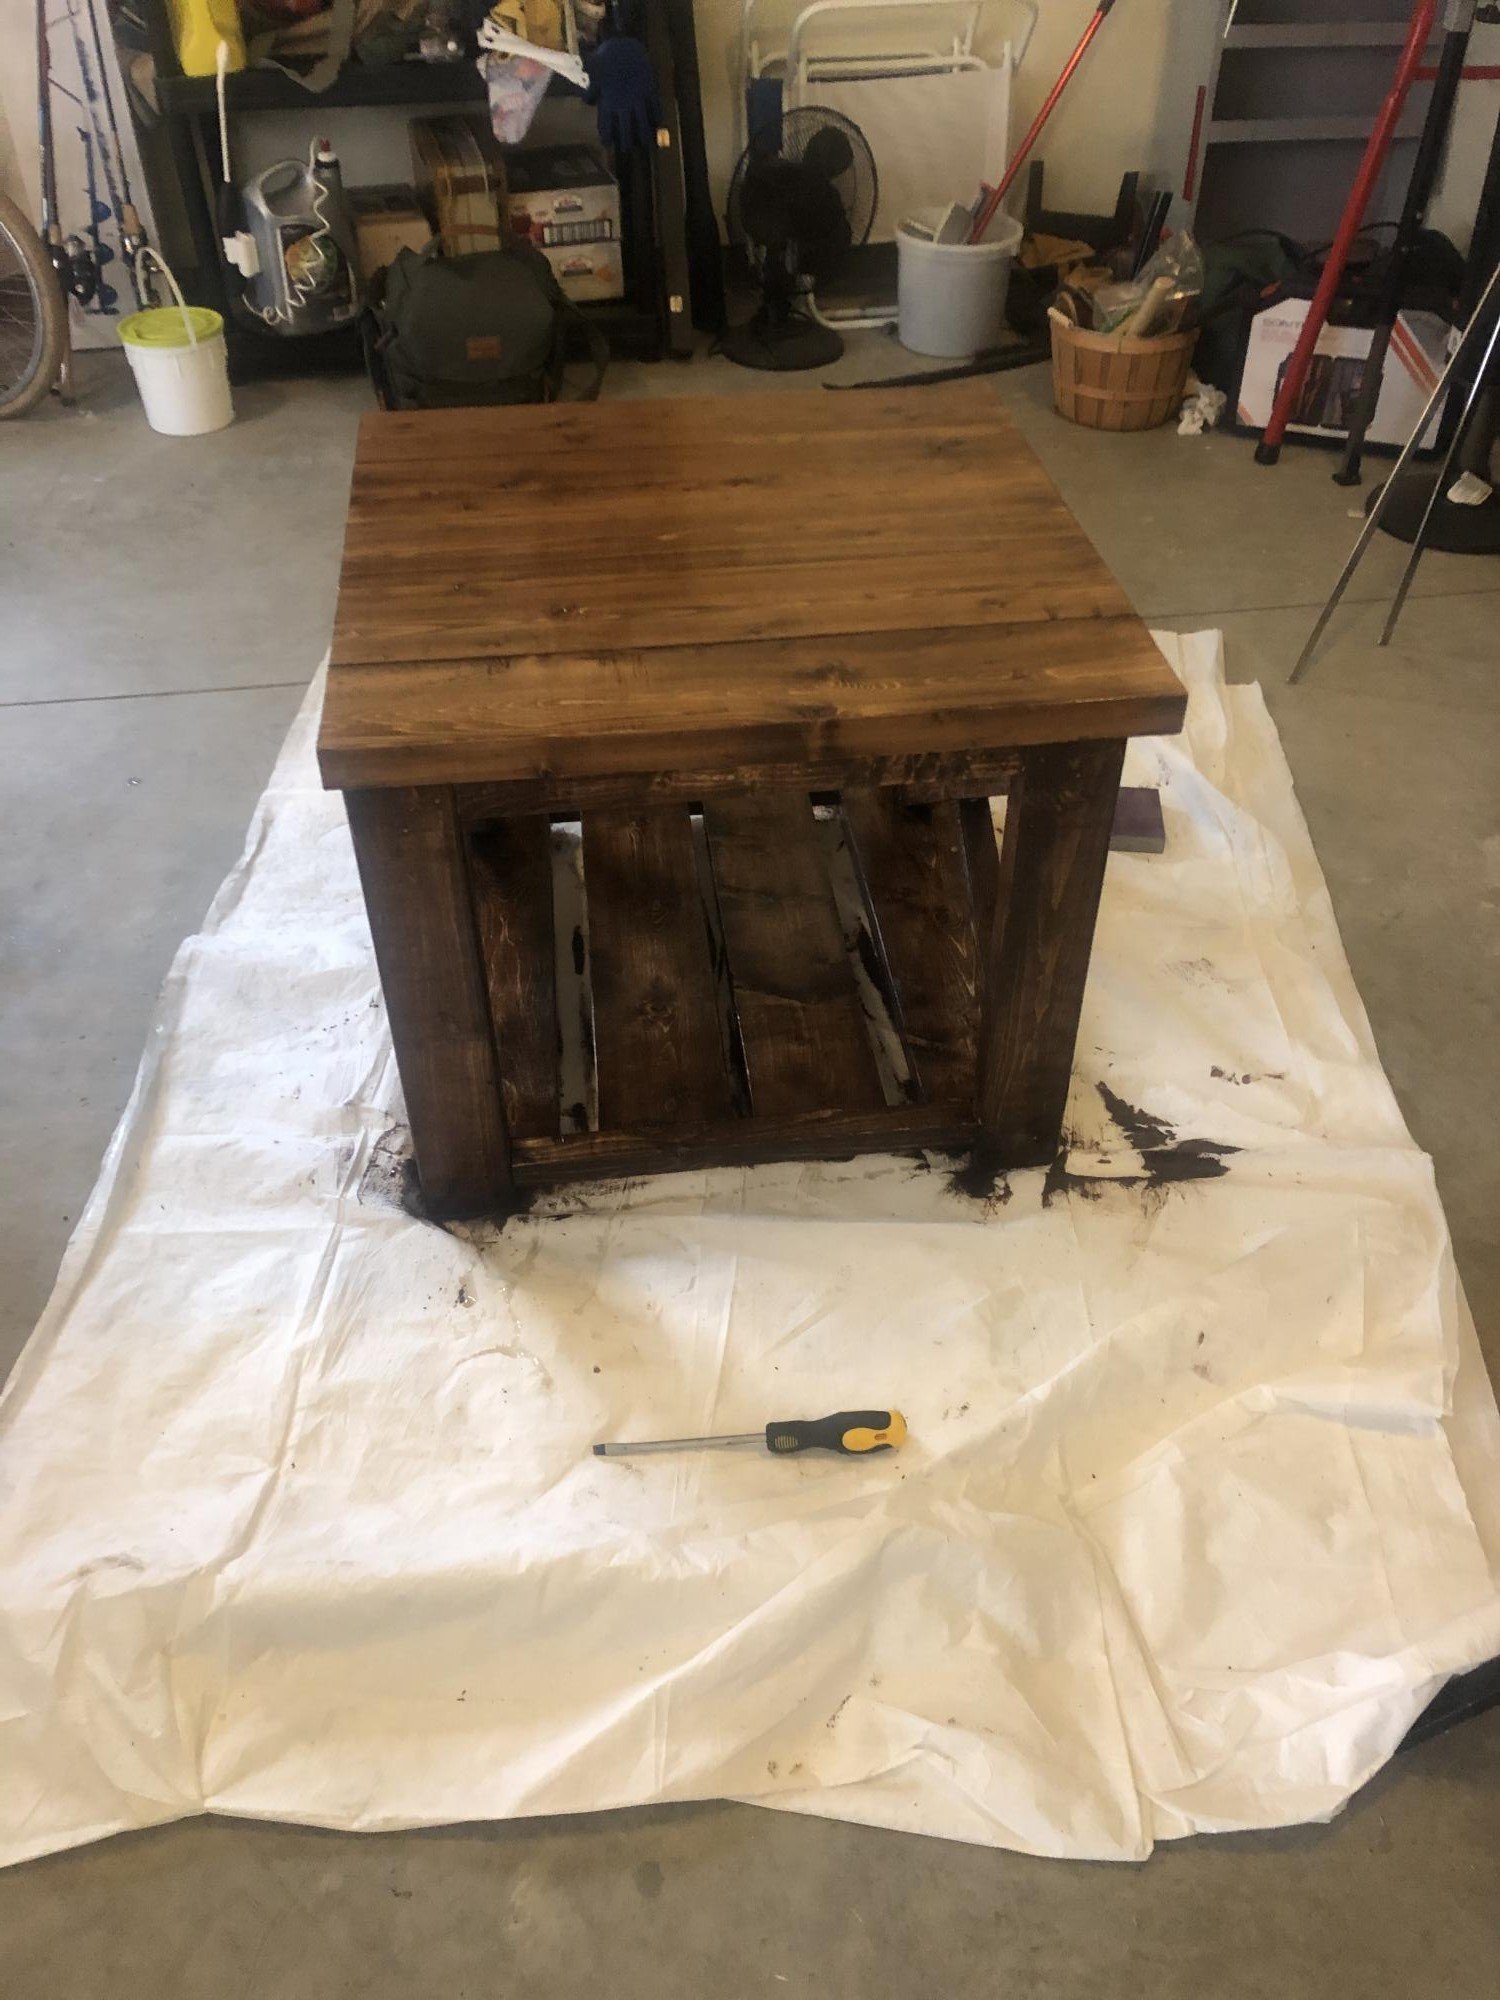
Doing the whole set of rustic coffee/end tables 1st one done! Thanks for the plan!
Built from Plan(s)
Estimated Cost
50
Estimated Time Investment
Weekend Project (10-20 Hours)
Finish Used
Black walnut
Recommended Skill Level
Beginner
Storage Coffee Table
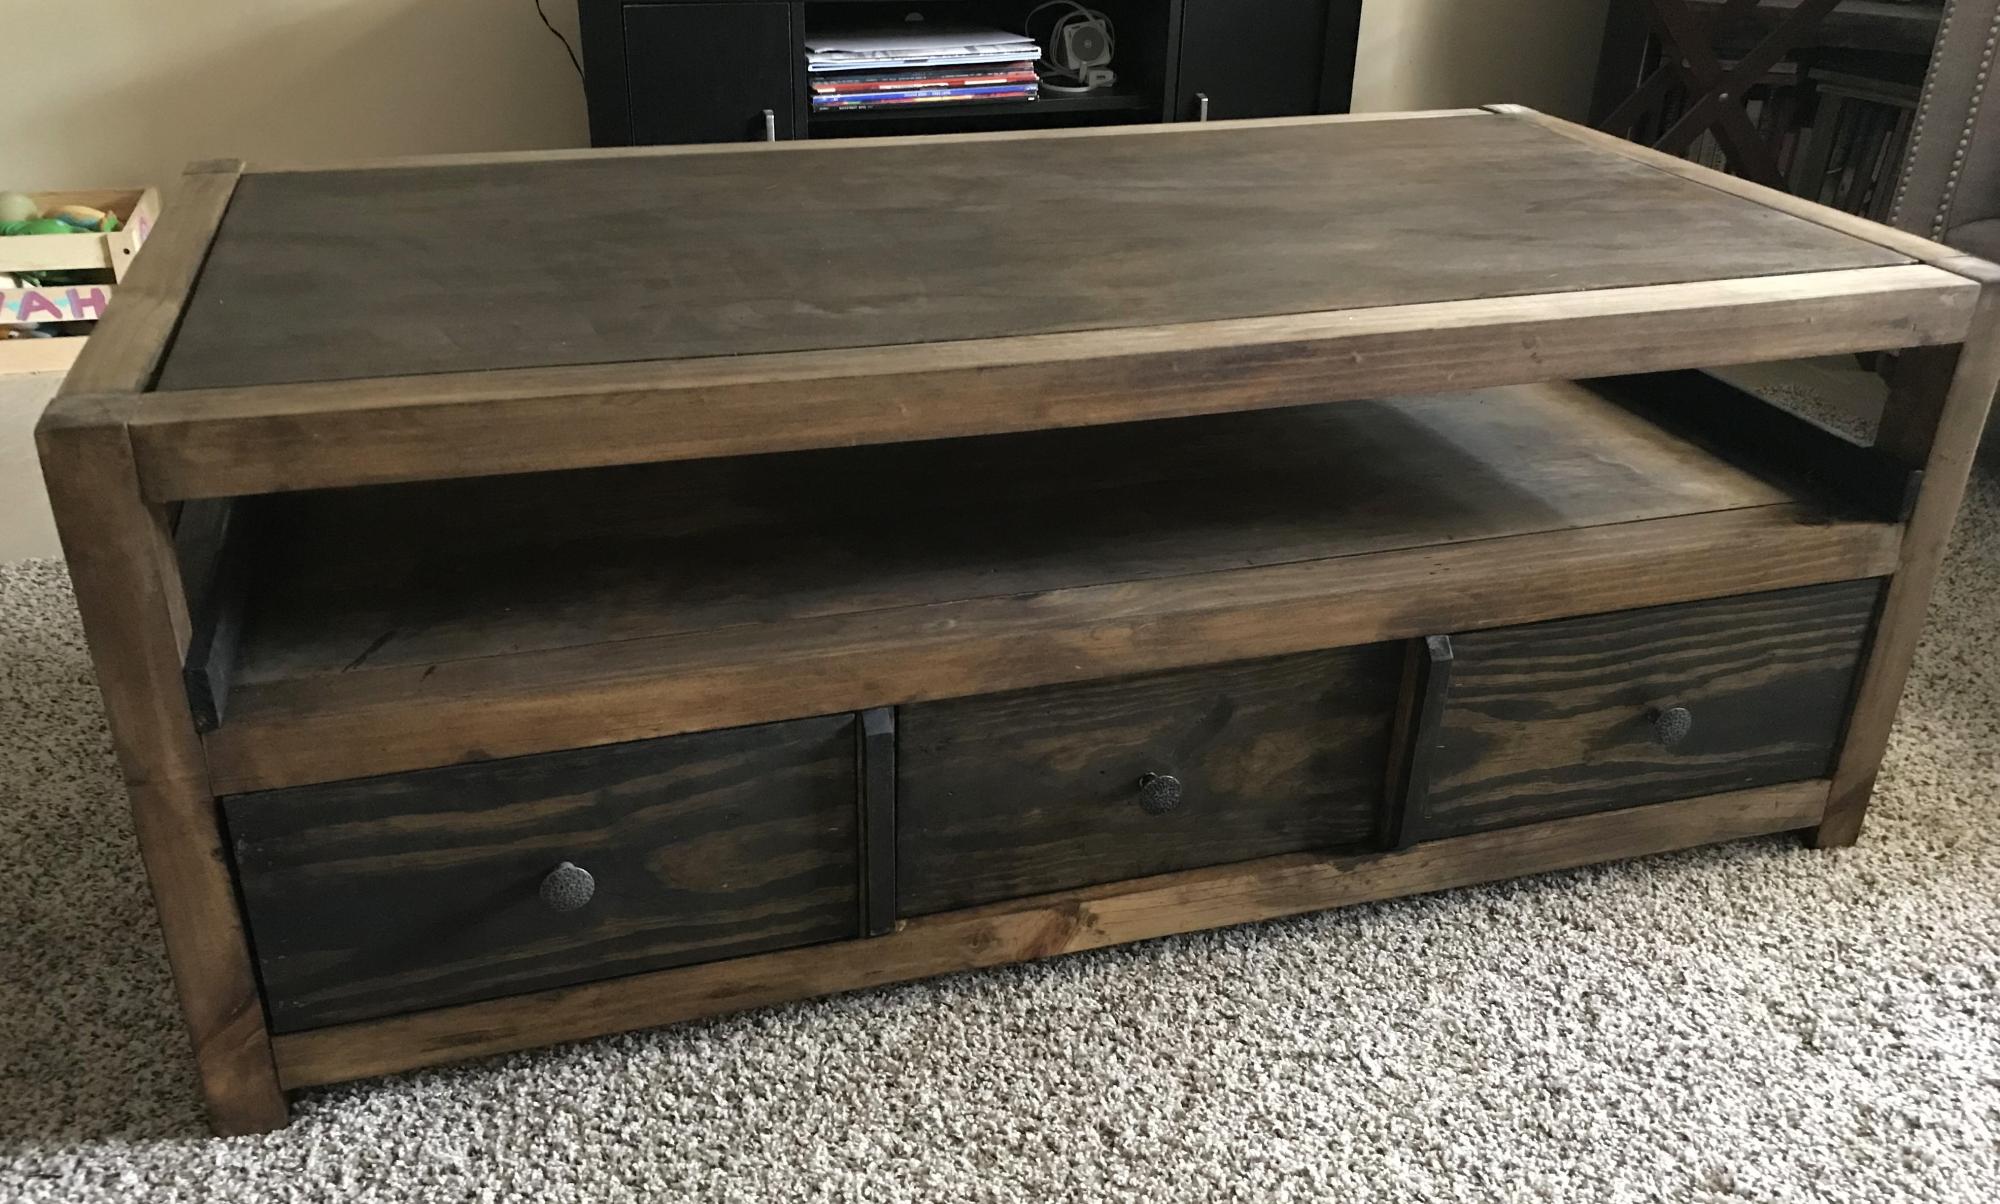
Built this gorgeous table from Ana’s plan. Had to build two more for my grands.
Debbie Cutts
Built from Plan(s)
Fancy Doll Bed

This was my first project! WIth some guidance from my husband, we were able to complete this during naptime (minus paint, of course). It was a fun project and I can't wait to try a different one! (Not sure why it looks so crooked in this picture! It looks nice and even in person.)
Estimated Cost
$50
Estimated Time Investment
An Hour or Two (0-2 Hours)
Recommended Skill Level
Starter Project
Standup Desk built from Modified Farmhouse Potting Bench Plans
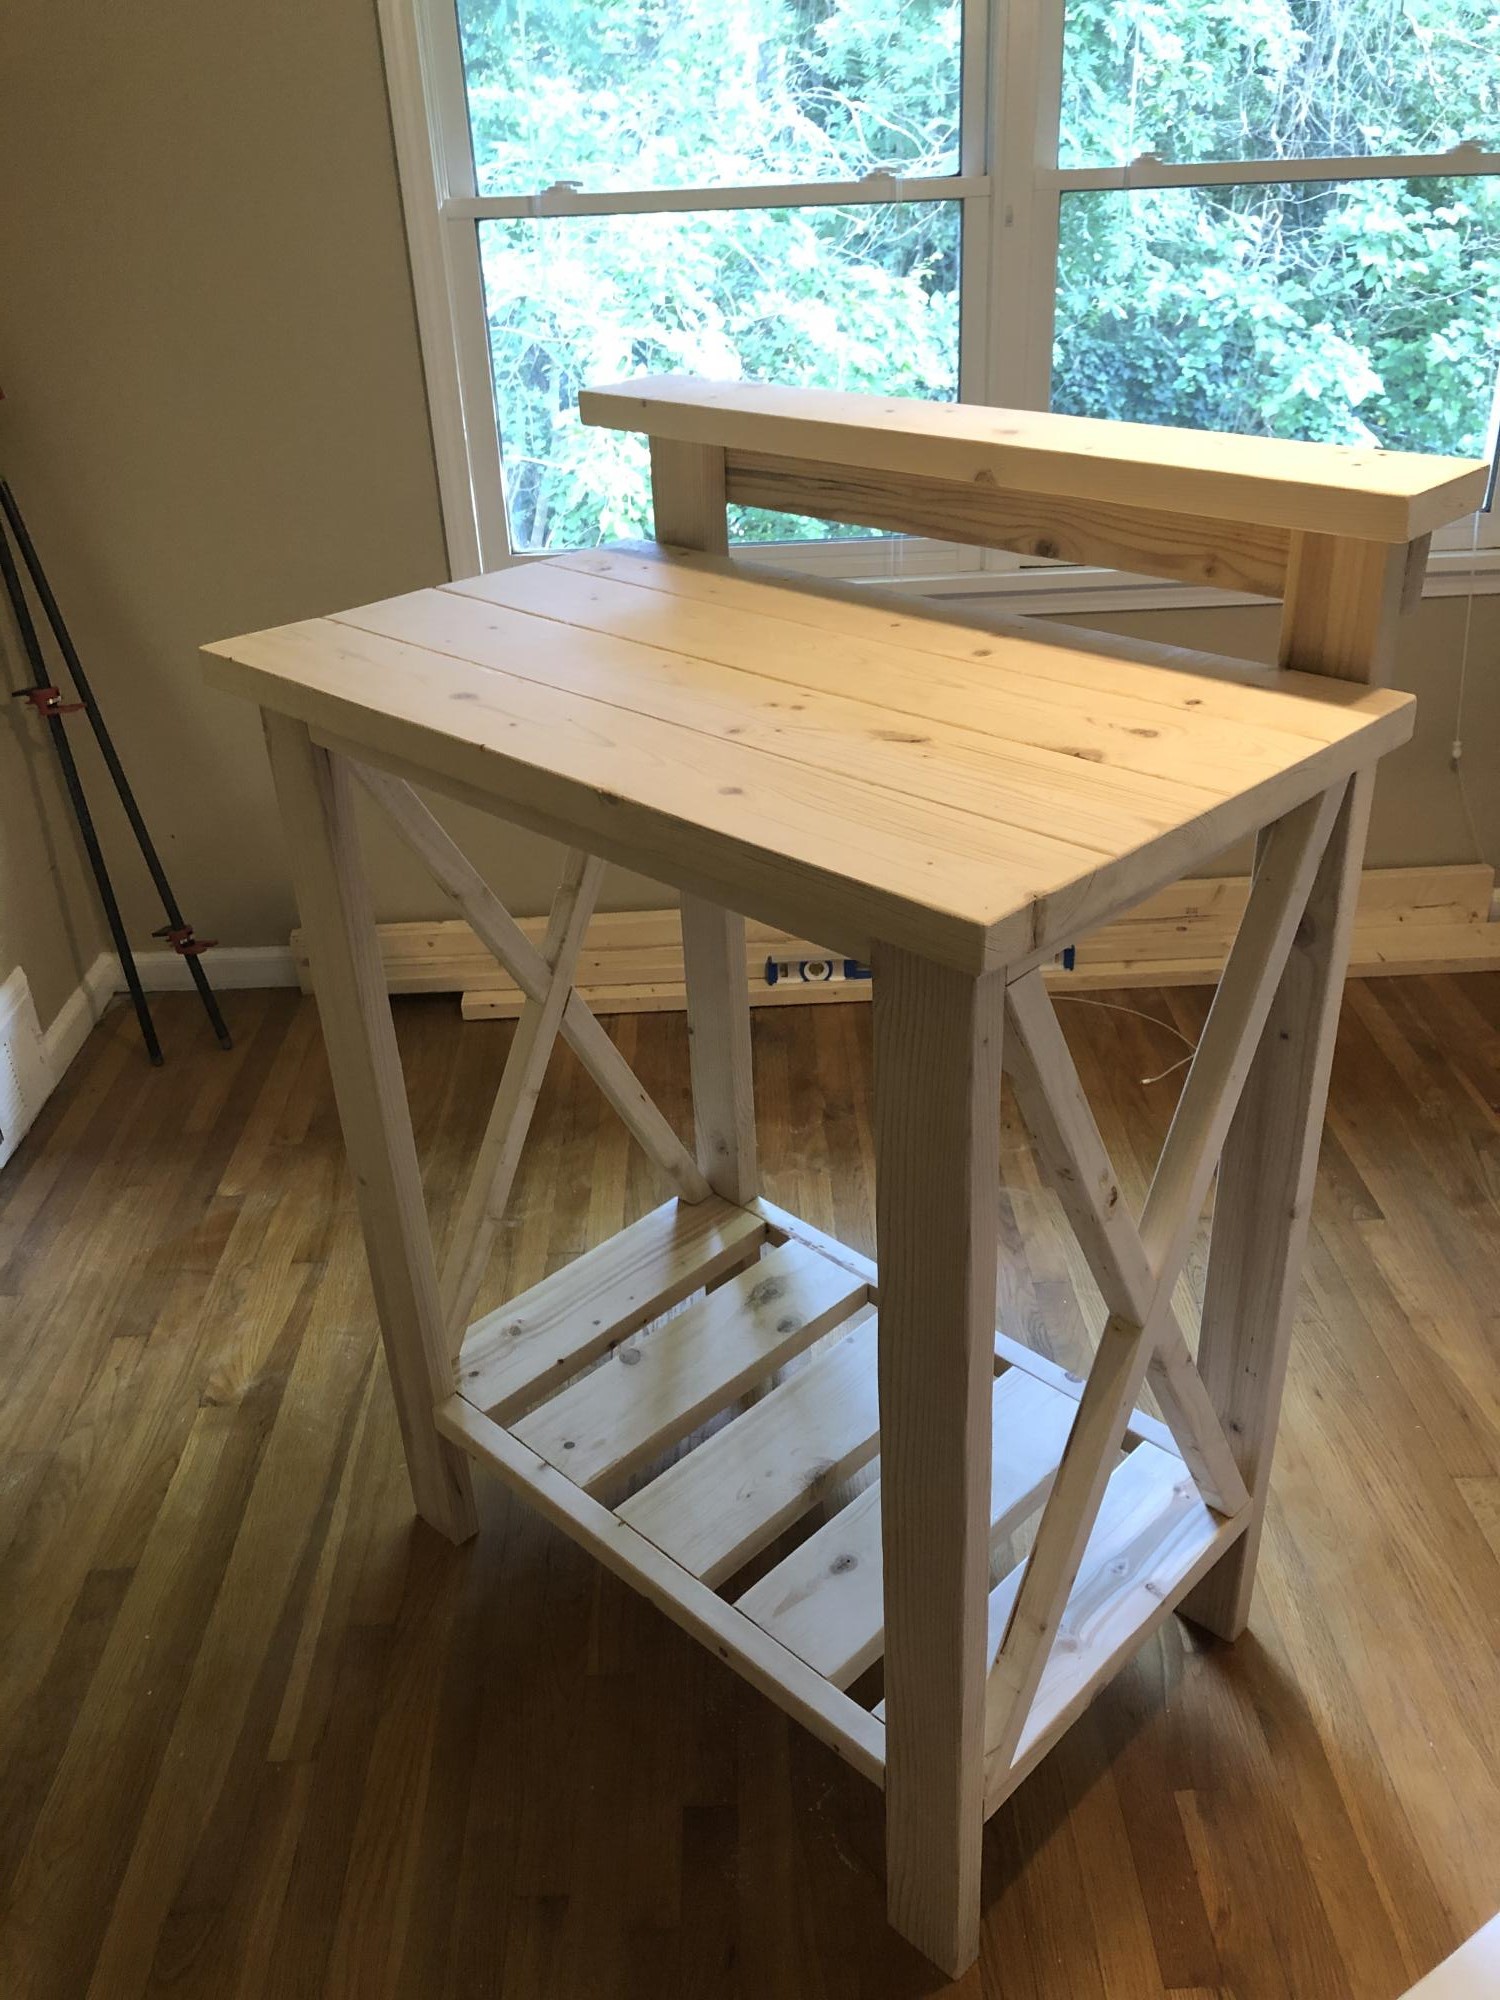
Hello! I used the plans for the Farmhouse Potting Bench and modified them to make a standup desk. This has been awesome for making a simple but effective desk during the quarantine.
Built from Plan(s)
Estimated Cost
$50
Estimated Time Investment
Weekend Project (10-20 Hours)
Finish Used
Golden Oak by Varathane
Recommended Skill Level
Beginner
Comments
Tue, 07/14/2020 - 07:10
Great Mod
This is great! I was thinking of modifying the potting bench plans as well, to build a kitchen unit. My stove recently bit the dust, and seeing as I never use the oven anyway, I'm hoping to build a convection plate cooking unit to put in the old stove's place. I'll probably pop some doors onto it and have closed storage underneath.
DIY Doll Stroller
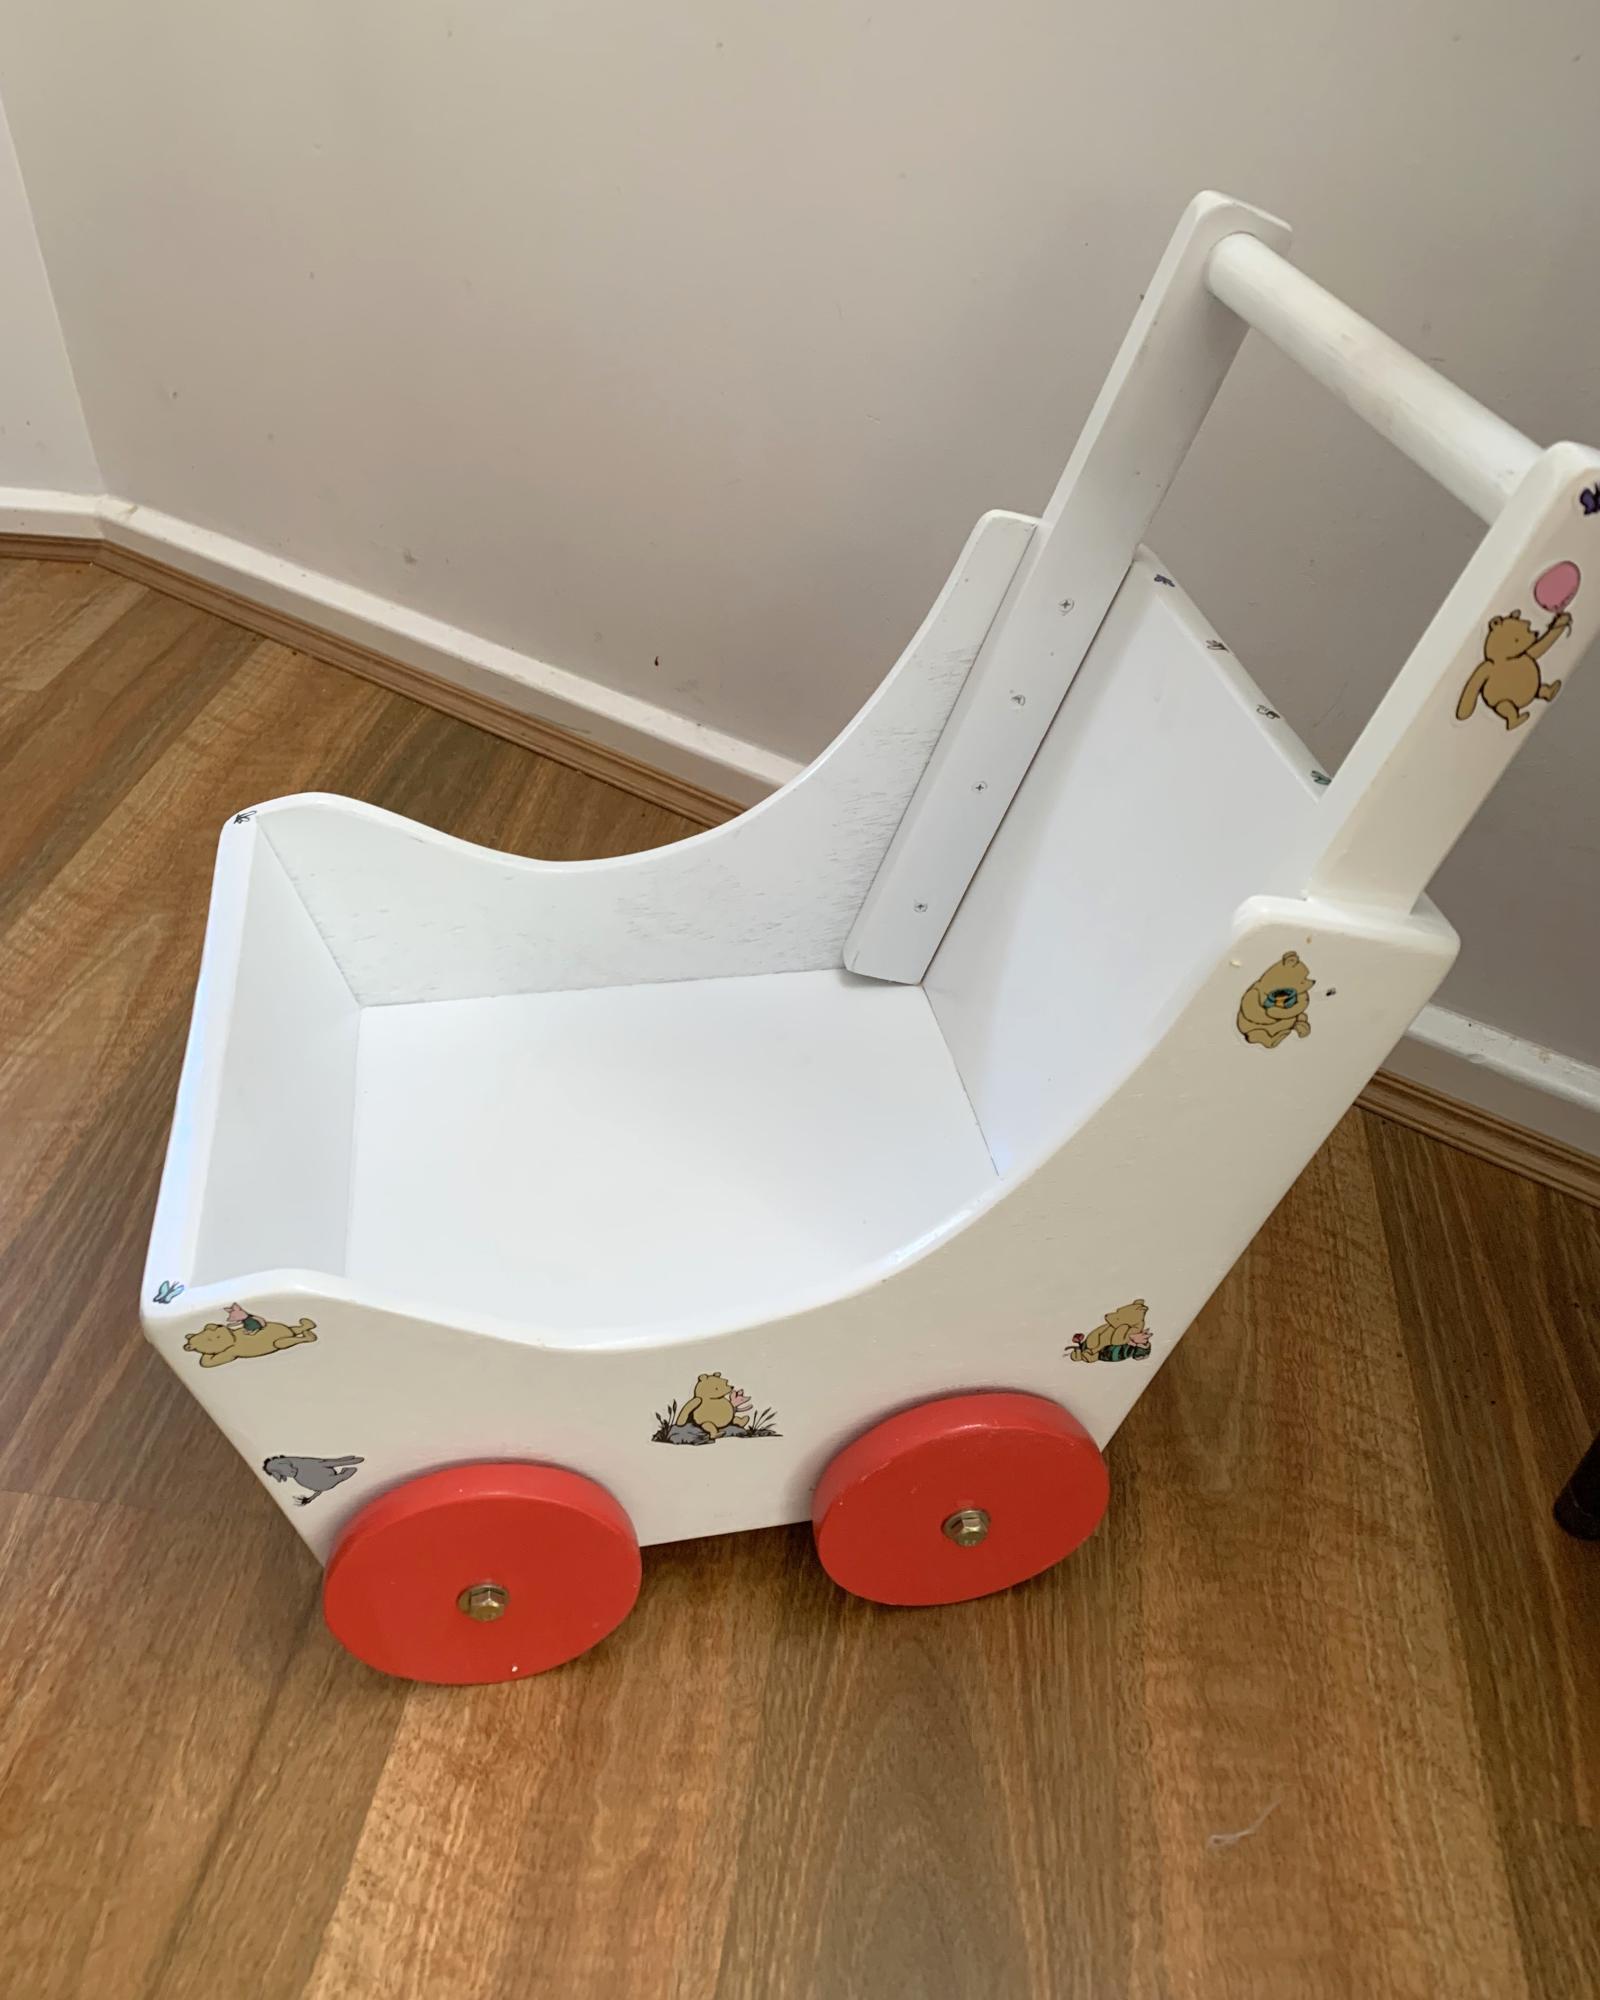
Thank you for the inspiration. In Australia I could not get the same size timber so needed to trim the sides. Next time will create the main frame and use it as a template. Made my own wheels, lock nut (also super glued) to ensure nut does not come off with little ones.
For my granddaughter and finished with Winnie the Pooh stickers.
Lawrie Kirk
Built from Plan(s)
Swing Bed - Time to Relax!
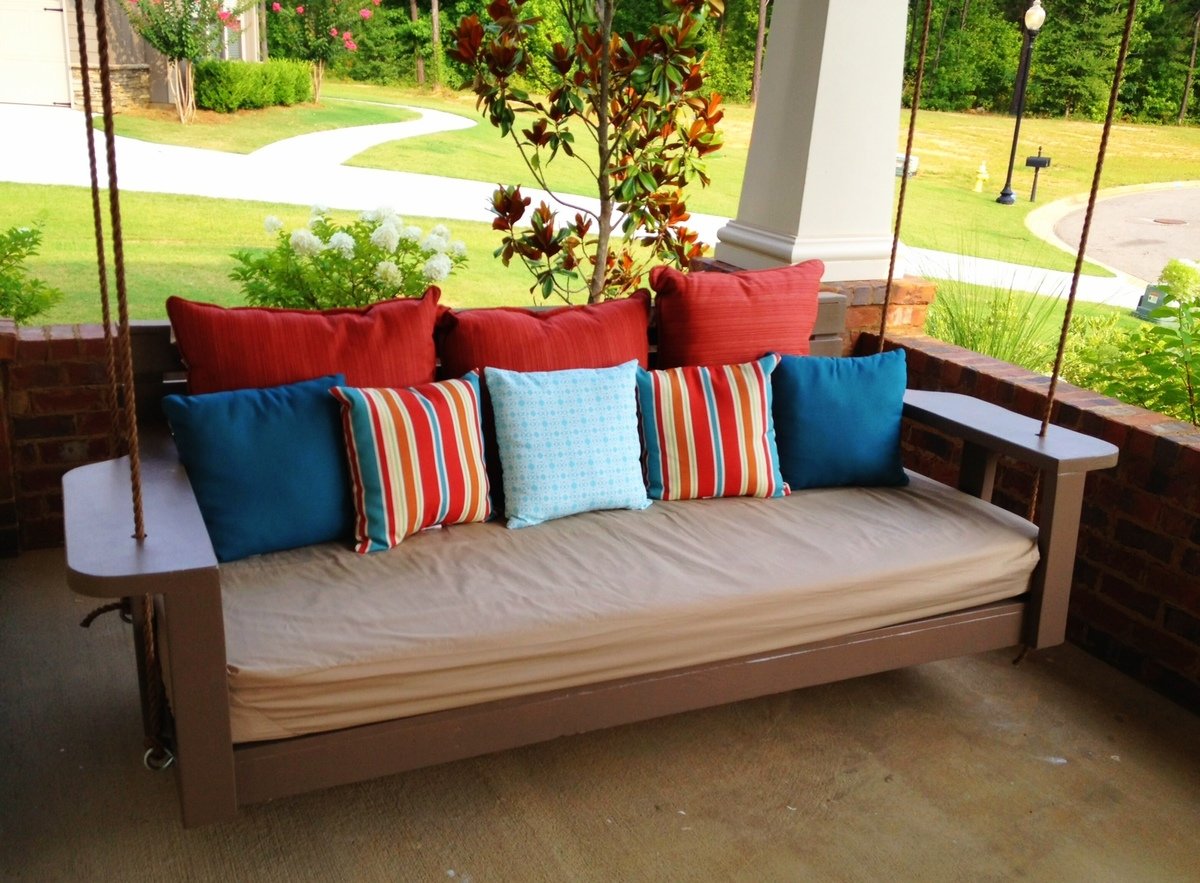
A few years ago our family vacationed in Watercolor, on the northwest Florida coast. We loved the house we stayed in so much when we returned home we put our house up for sale so we could build a home similar to the one we stayed in. One of the features we loved so much was the large covered front porch and most of all the swing bed it showcased. My wife spent every morning and night that week relaxing in that swing. I promised my wife then that I would make sure got her own swing. Thanks to Ana White, she was back in her (new) swing last night.
I began with the "Large Modern Porch Swing" plan and made some changes. I wanted to use a twin size mattress so I increased the size of the swing's base. Also, because the mattress was 6" I lifted the arms and back. The arms are the biggest and best change I think. I had seen someone else do similar arms, but I they used an 1x12 I think. I wanted a heavier look, so I used a 2x10.
Built from Plan(s)
Estimated Cost
$200
Estimated Time Investment
Weekend Project (10-20 Hours)
Finish Used
Glidden Paint - Monterrey Cliffs
Recommended Skill Level
Beginner
Comments

Wed, 07/17/2013 - 13:56
Porch Swing / Bed
Do you use a regular twin mattress? What do you do when it rains?
Kids Easy Bike Rack
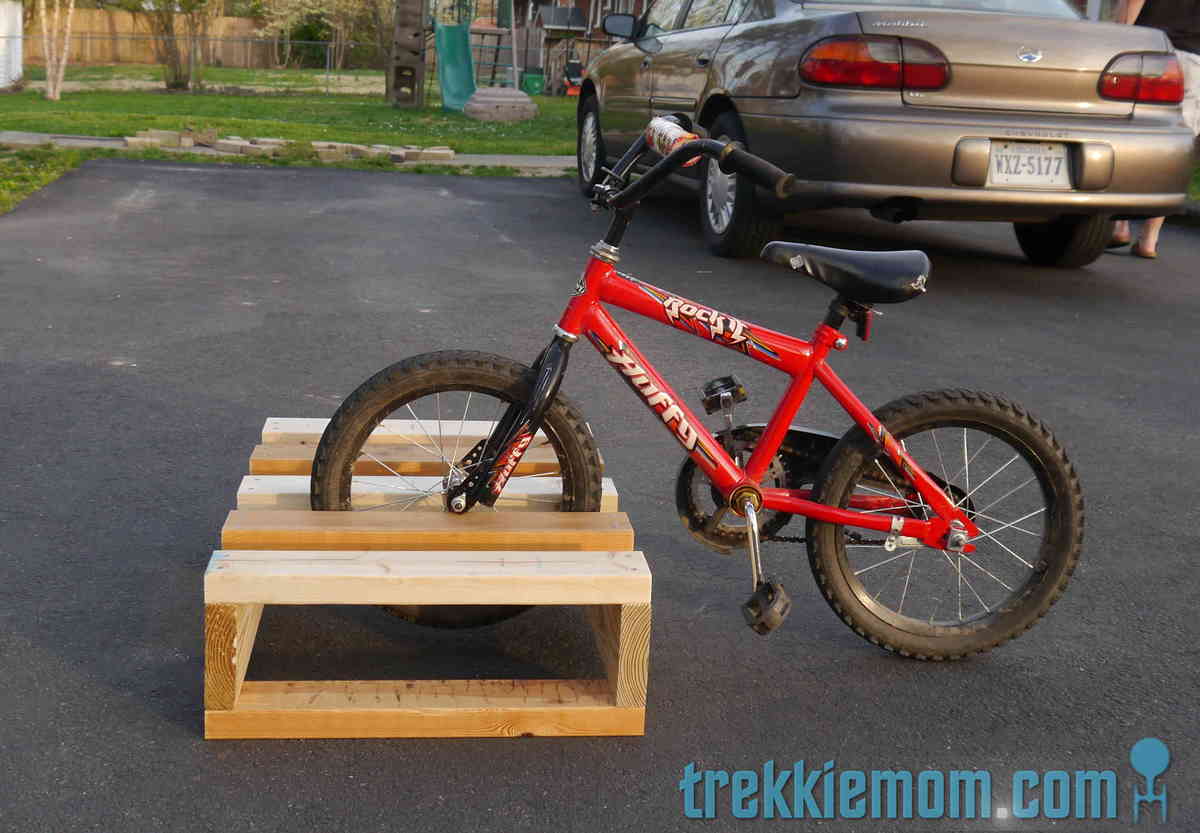
A few weekends ago, I went into our tool house to get my bike out so I could ride to work, and I had to remove so many obstacles, that I was too late to ride to work, and as a result, boiling mad. Several of the objects I had to move out of my way were my kids bikes that don't have kick stands, which my kids just haphazardly dump on their sides on the floor of the shed.
I had had the idea to build a bike rack out of spare 2x4s for the kids' bikes for a while, but this incident cemented my resolve to finish it quickly.
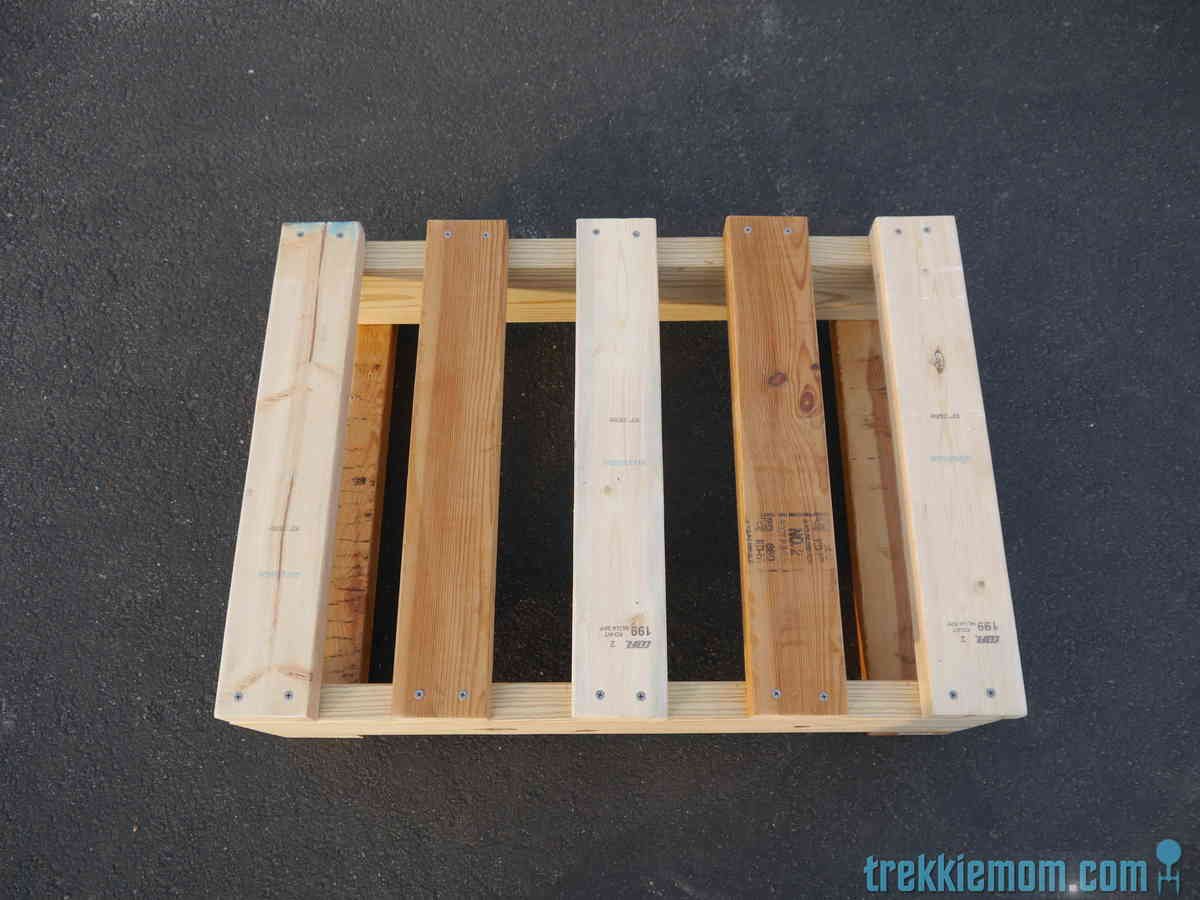
I had some scrap 2x4s and 2x6 wood left over from another project, which I used to compose my bike rack. It has 4 slots for 4 bikes.
I did some light sanding to prevent splinters, but I did not apply any finish because of the way it was going to be used and it would not be exposed to the elements.
It took very little time to put together. If I had more claps, I could have done it more quickly.
If you are interested in making something that looks just like mine, stop by my blog to get the details.
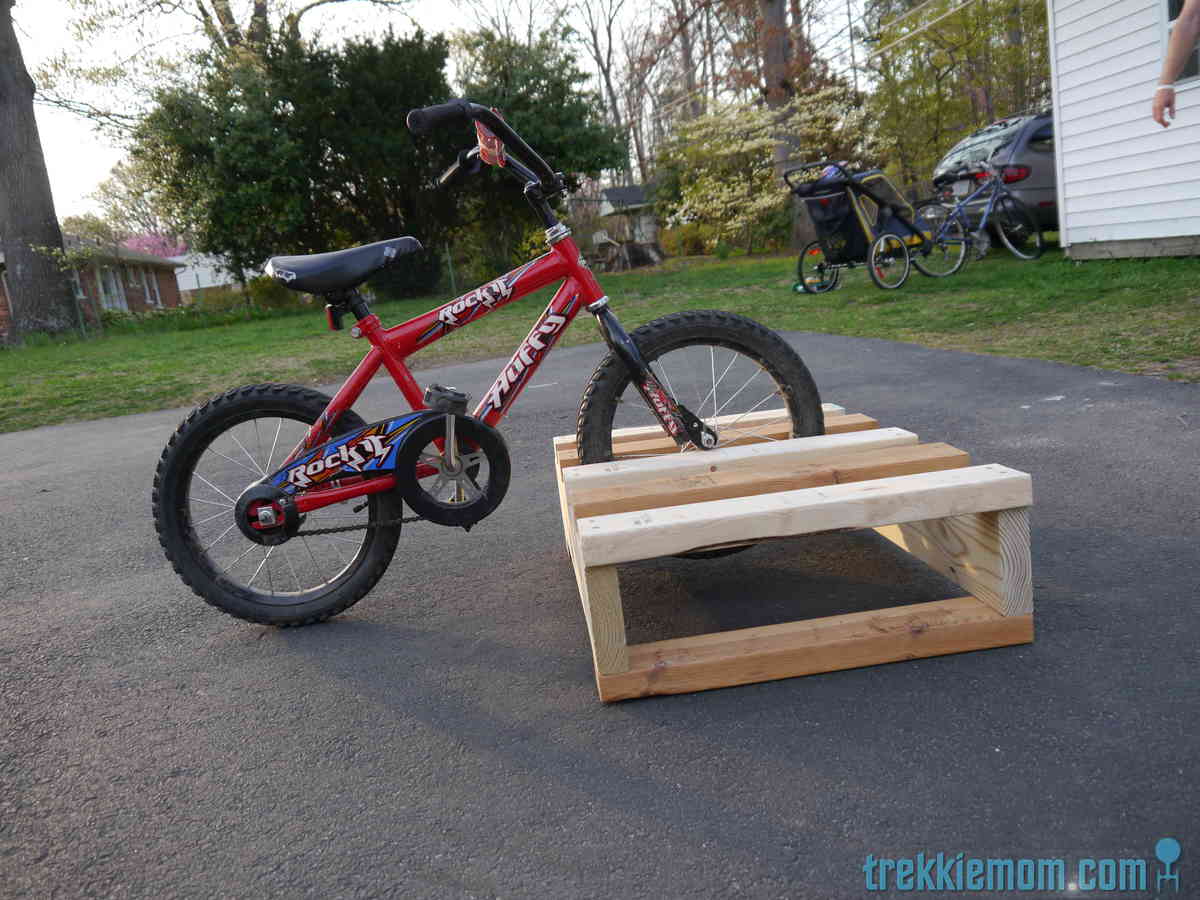
Estimated Cost
$10 - $15
Estimated Time Investment
An Hour or Two (0-2 Hours)
Finish Used
None
Recommended Skill Level
Starter Project