Community Brag Posts
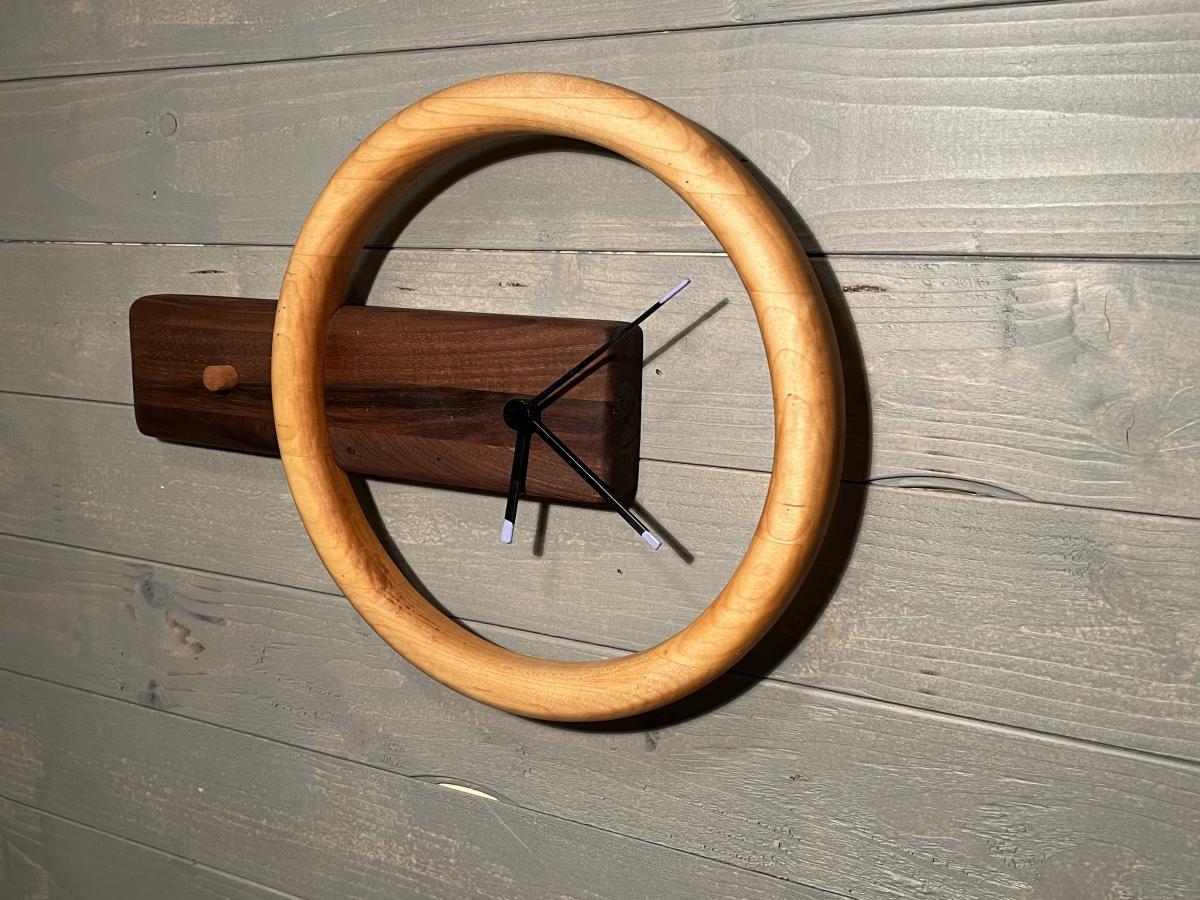
Modern clock
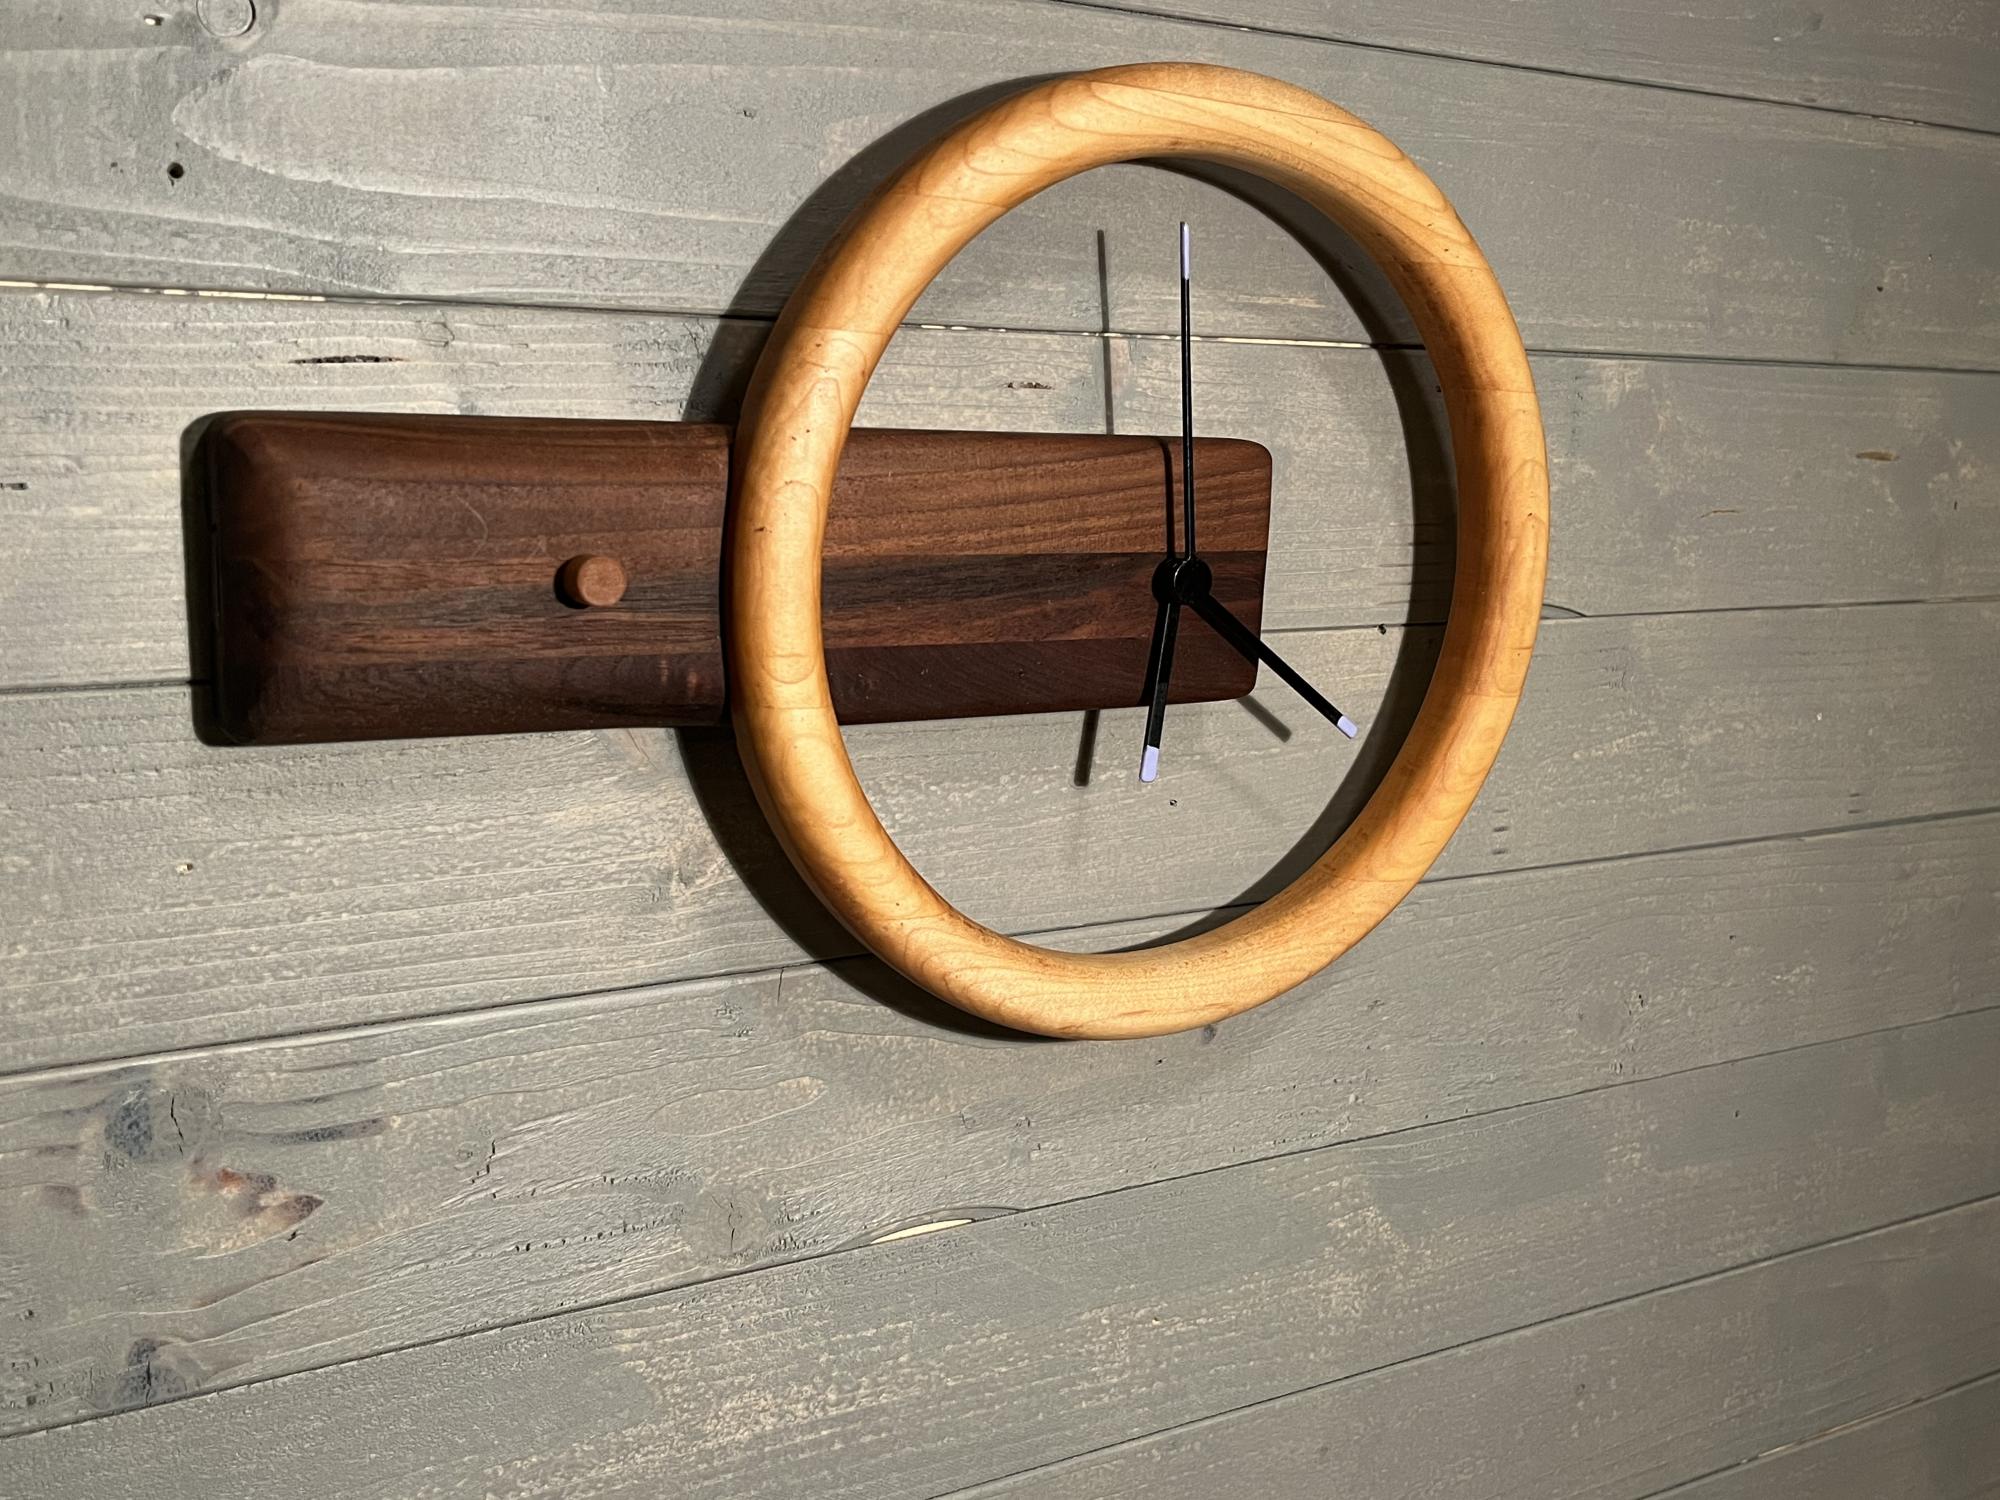
From a picture I found on Pinterest
Comments
Scrap wood shelves
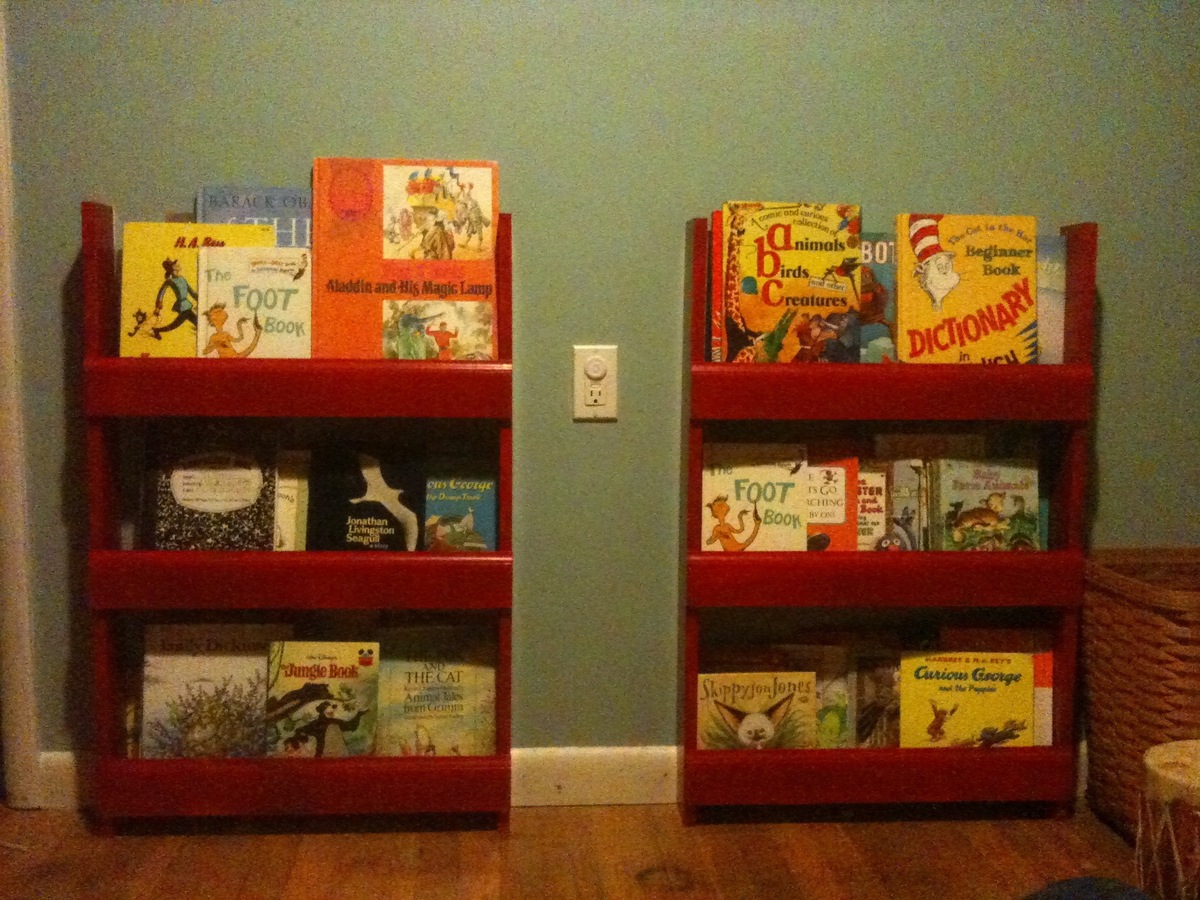
The kids and I worked together to make these shelves from wood I dug up in the scrap pile. I had to be creative to come up with enough wood of the right dimensions, some of the 1x4's started life as 1x6's and the front pieces are baseboard moulding. I didn't use a back piece because it seemed sturdy enough as is. I used removable velcro type hanging strips to attach them to the wall.
Built from Plan(s)
Estimated Cost
Free
Estimated Time Investment
Afternoon Project (3-6 Hours)
Finish Used
Latex paint.
Recommended Skill Level
Starter Project
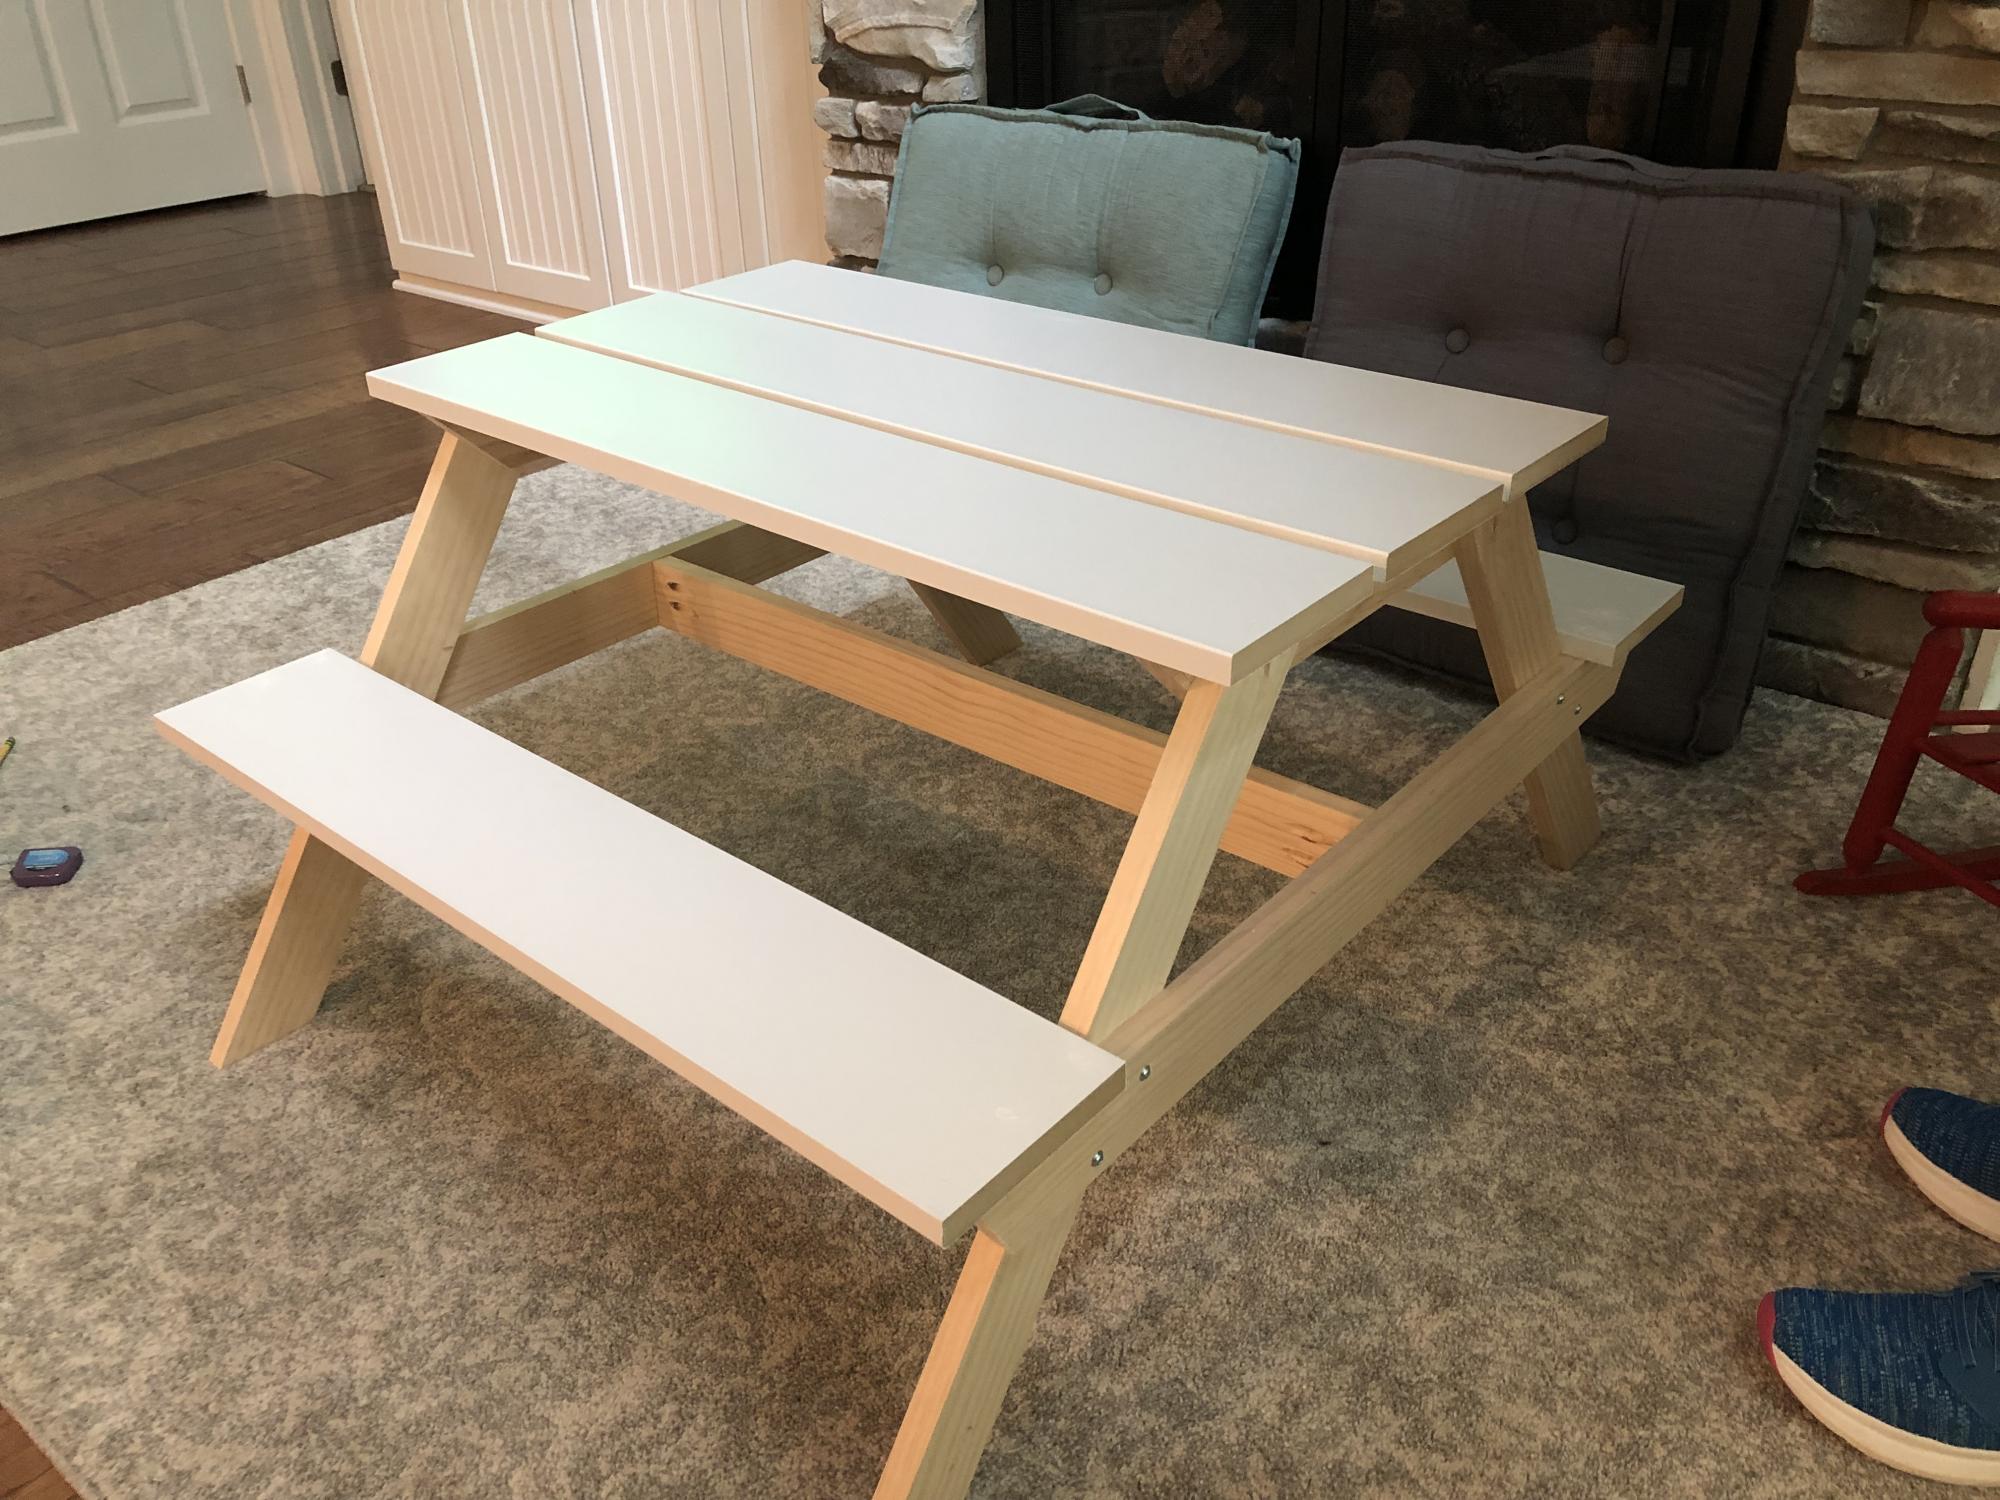
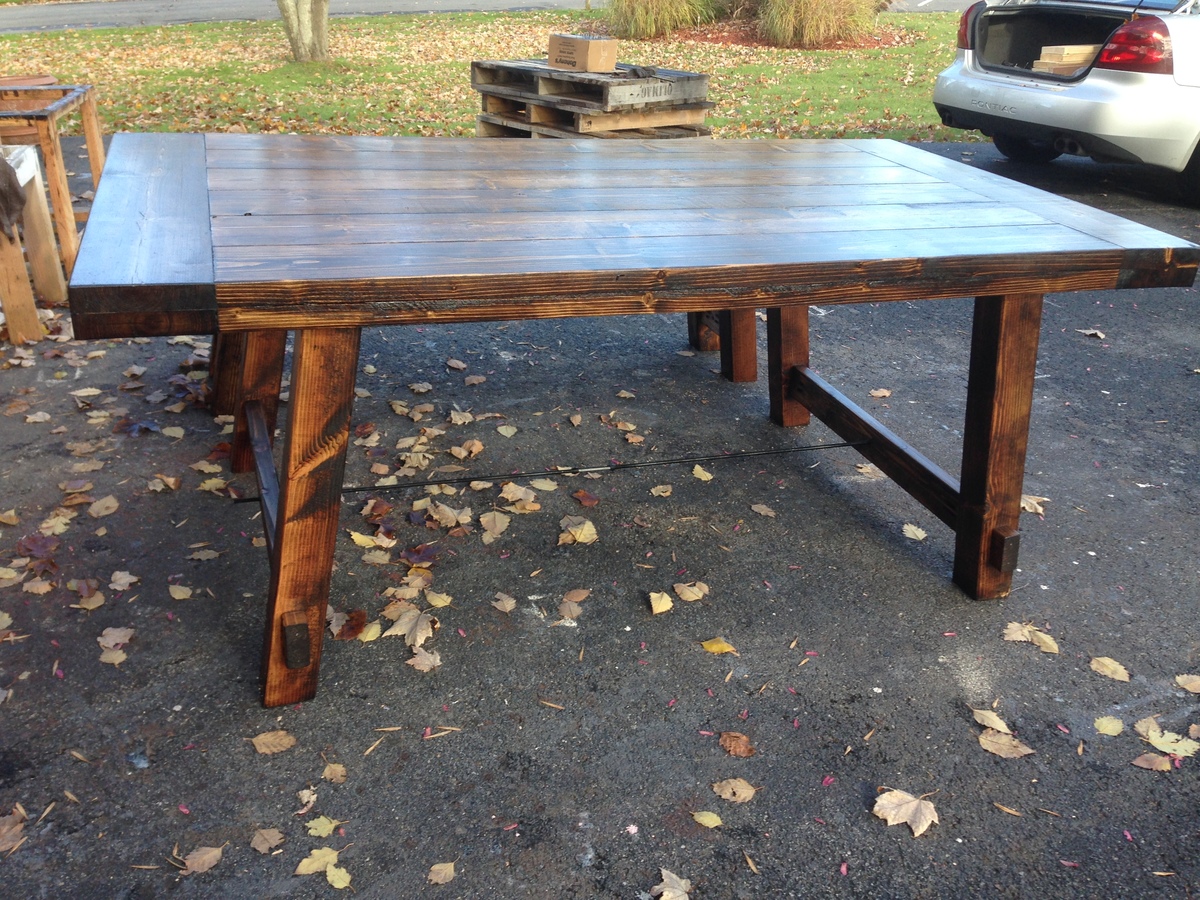
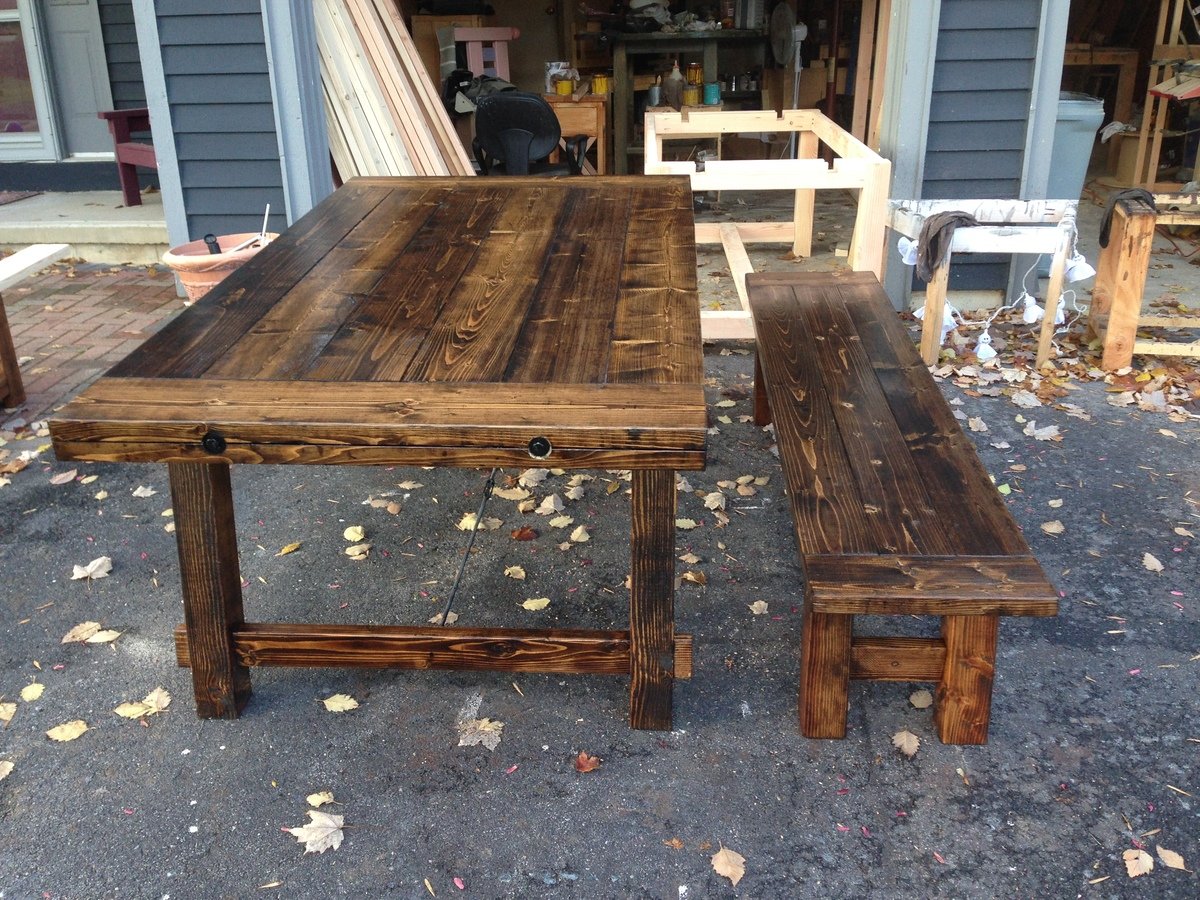
Rustic Benchright Table and Bench
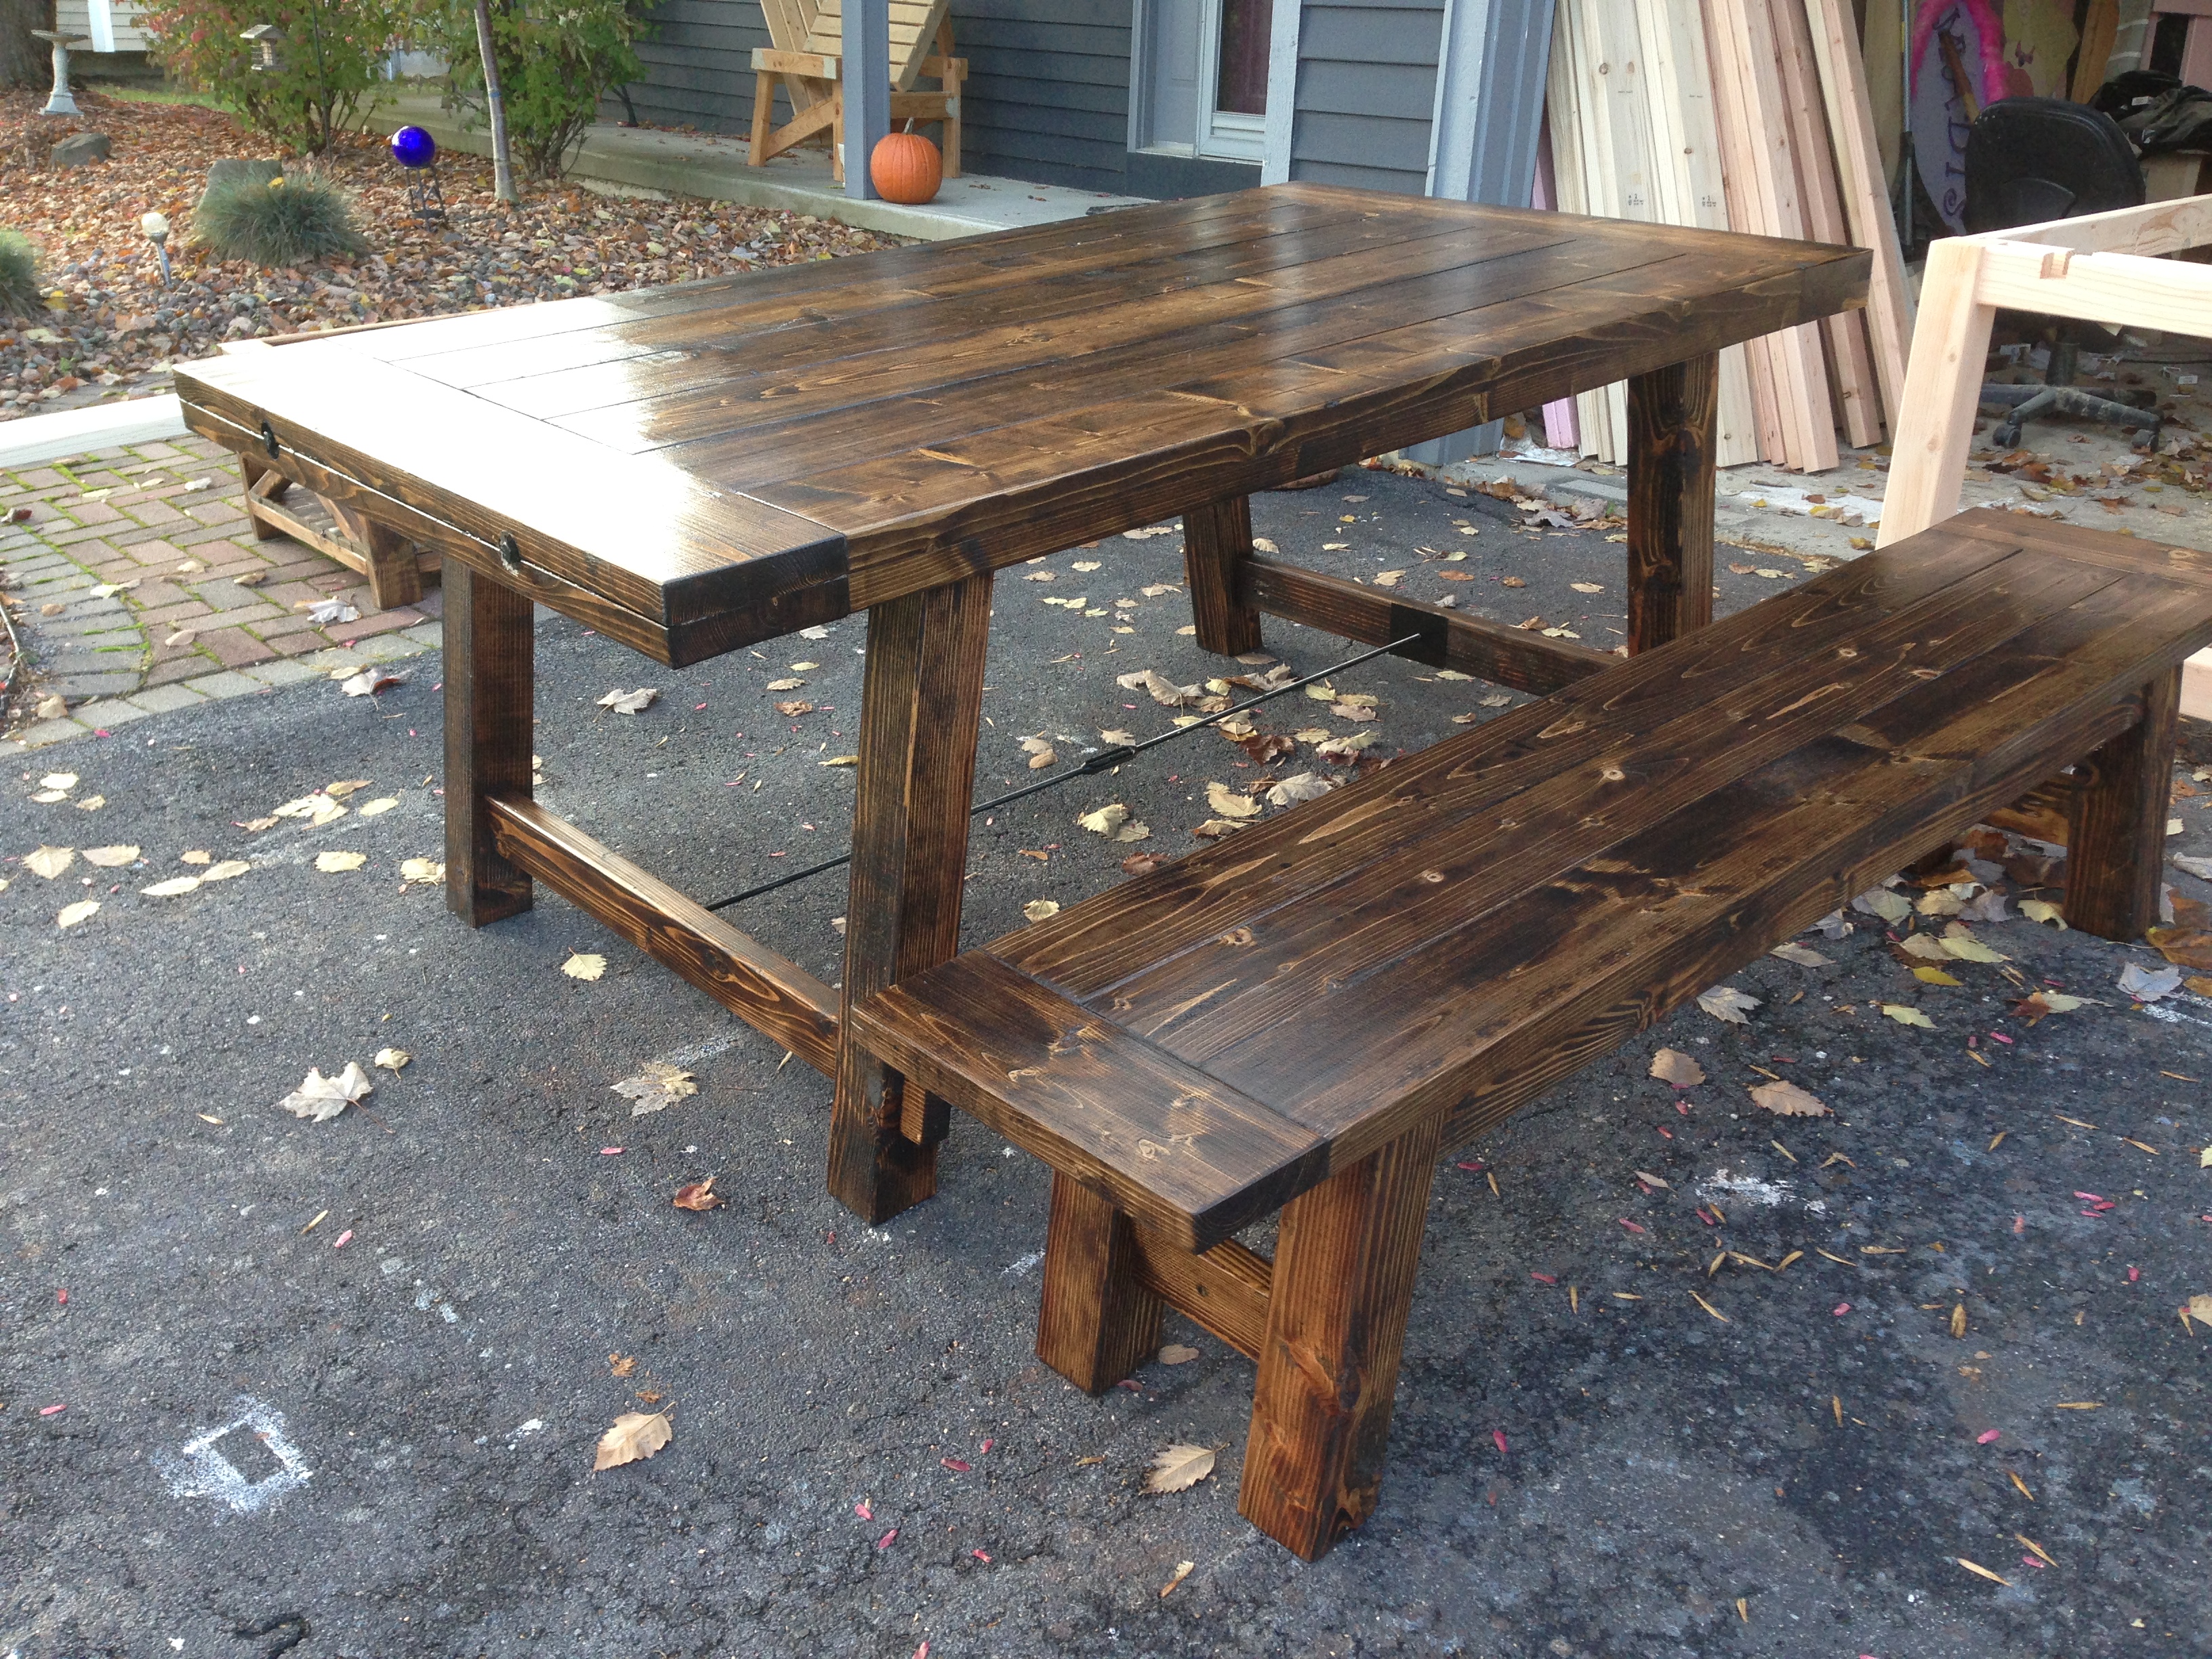
modified plans a bit from on the website. Went with 4 x 4 legs, matching bench. hardware I found the turnbuckles at home depot 3/8 - 16, and picked up the left handed and right handed rods and nuts at grainger.
Built from Plan(s)
Estimated Cost
450
Estimated Time Investment
Week Long Project (20 Hours or More)
Finish Used
Dark Walnut and Minwax paste wax
Recommended Skill Level
Intermediate
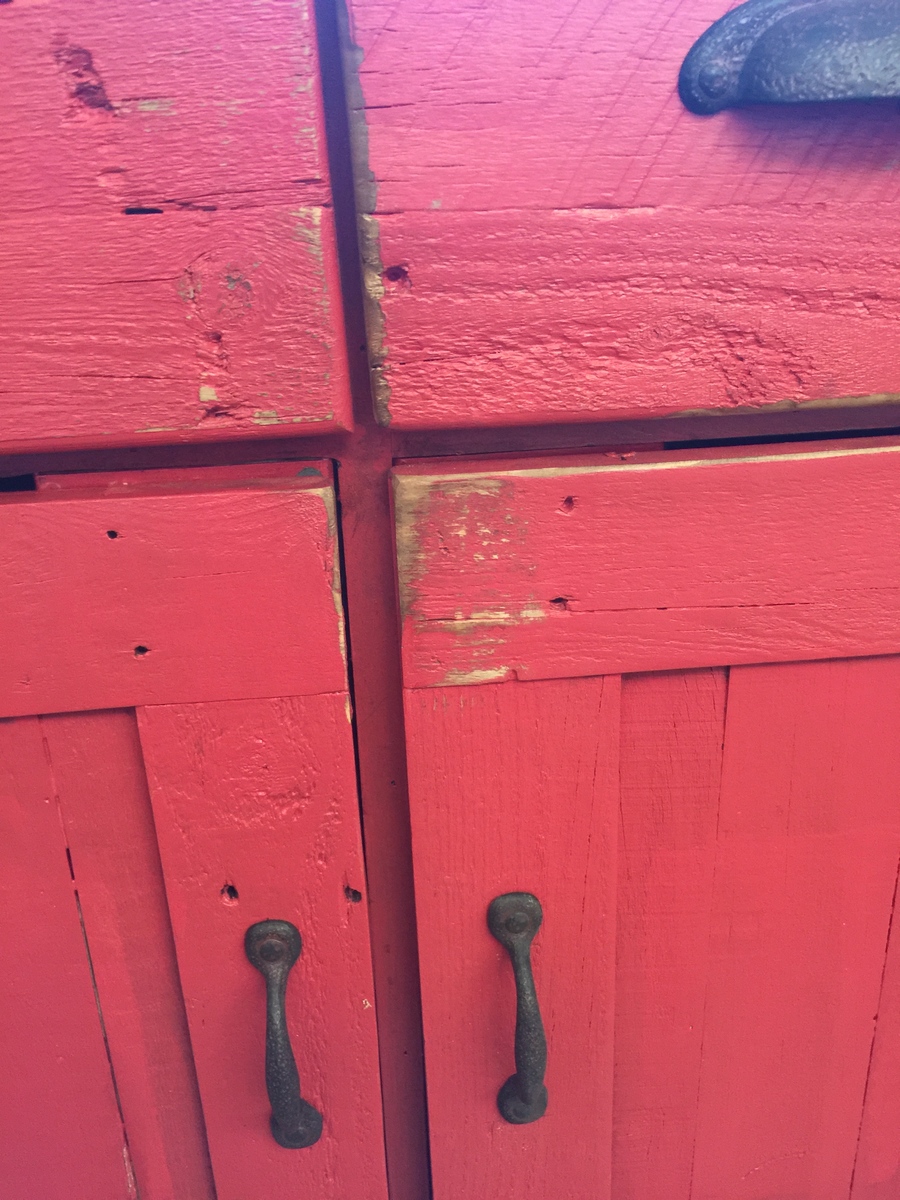
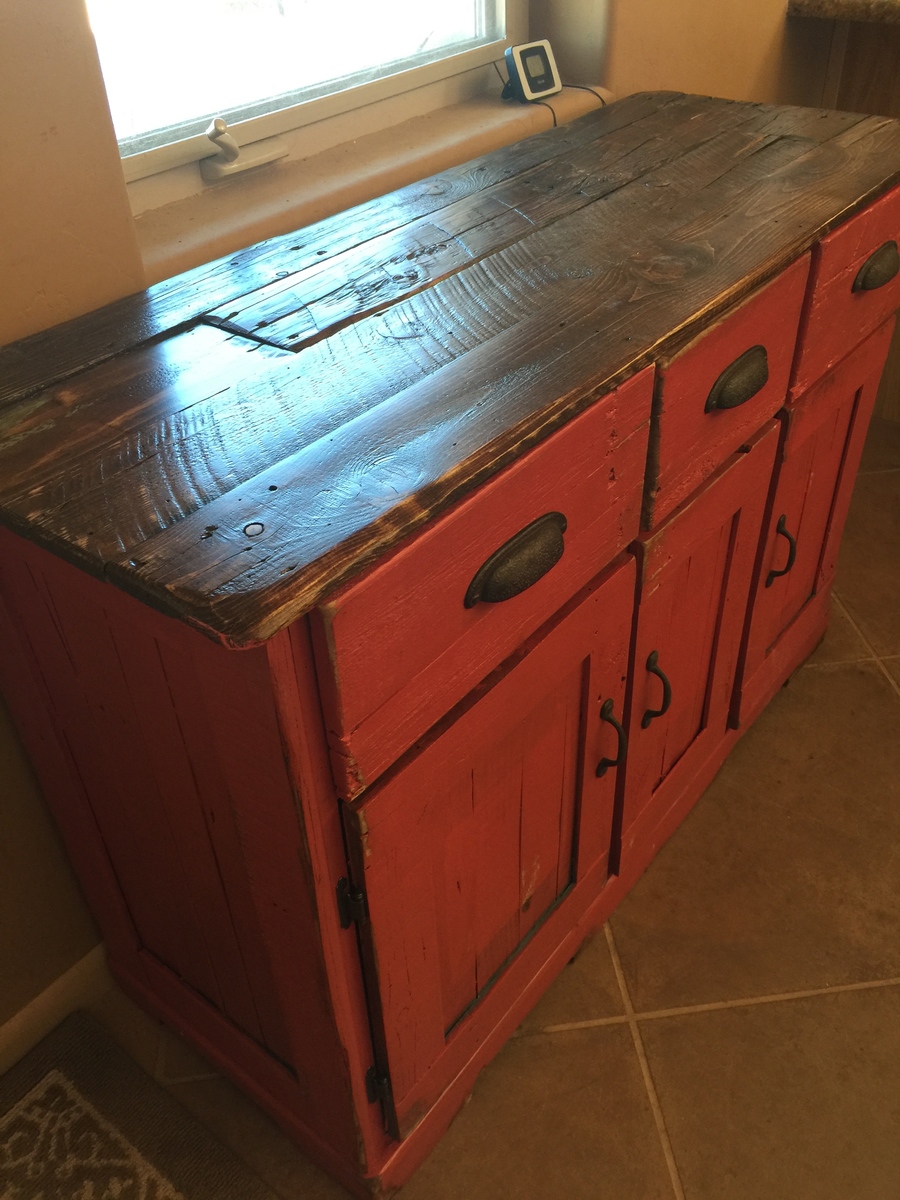
Planked Wood Sideboard

Seeing your planked wood sideboard clicked for us and the cabinet we'd been looking for. We wanted rustic and I chose to make it around a plywood casing instead of using the plans due to the poor strength of the pallet wood. Most of the time was used in deconstructing and cleaning the 40+ year old pallets. Also our space called for a smaller unit. It's used as our coffee cabinet. Since I had a basic structure already in the plywood I was able to be creative in how I used the scraps of pallet wood.
Built from Plan(s)
Estimated Cost
Only the 3/4 plywood case, the hardware, and the paint were costs so it totalled maybe $60. De-constructing old pallets and cleaning the wood was time-consuming.
Estimated Time Investment
Week Long Project (20 Hours or More)
Finish Used
Acrillic paint. Several layers were painted on. I used different colors and painted over them partially to mimic old re-used wood. Many obvious re-used boards were prominent.
Recommended Skill Level
Intermediate
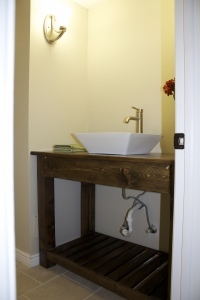
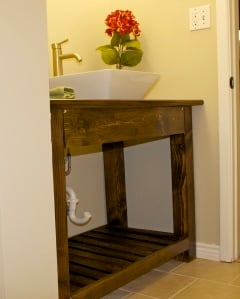
Rustic open vanity
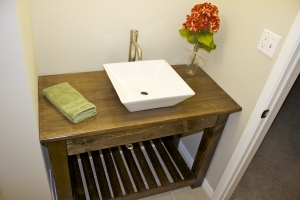
I decided to take on the third bathroom renovation all by myself. No help from the husband. I knew that I wanted a rustic open faced vanity - so I modified some plans that I found here on Ana's site. I used the basic design of the Farmhouse Vanity and added in the spa splatting for the bottom shelf so I could add baskets to hold extra tp and towels, etc.
This was one of the easiest projects I've done and I'm so happy with how it turned out! Total time was an afternoon - and that included the staining and poly!
Built from Plan(s)
Estimated Time Investment
Afternoon Project (3-6 Hours)
Finish Used
Minwax Jacobean stain
Recommended Skill Level
Beginner
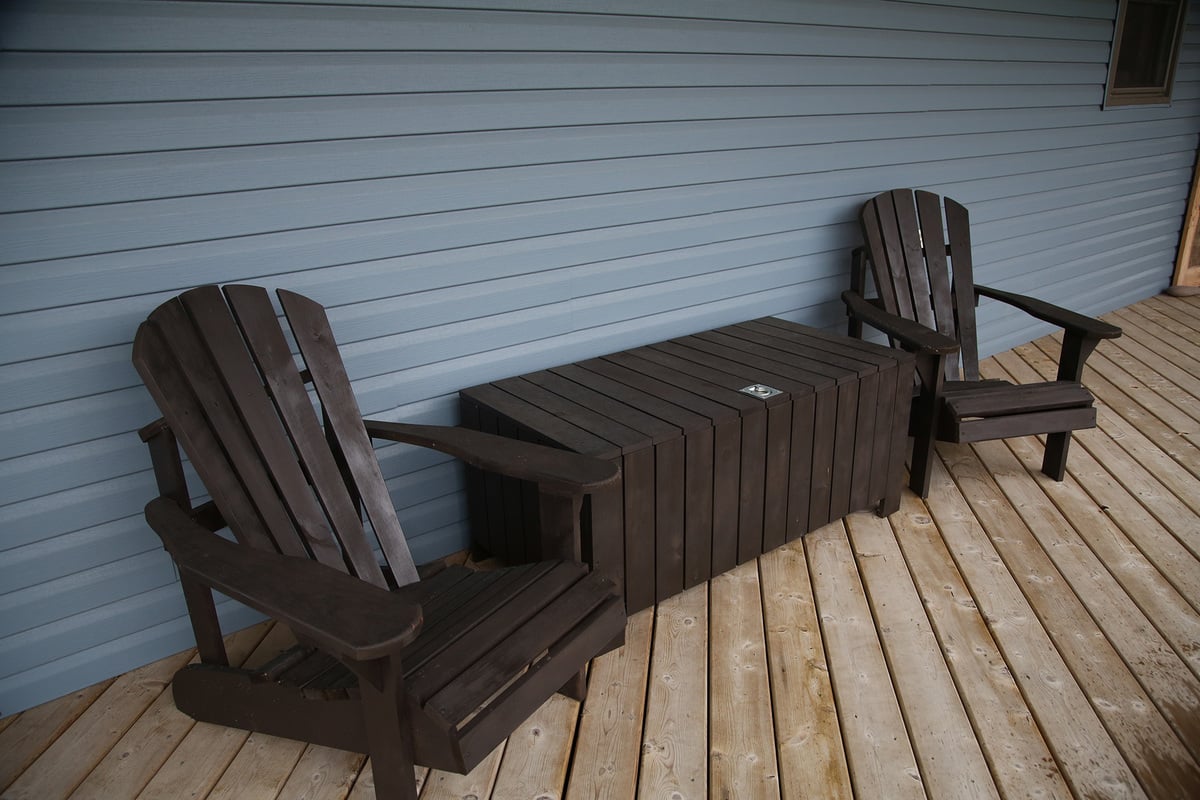
Outdoor Storage Box

I built this to go with my outdoor sectional. It's perfect for storing the cushions and the gardening tools that I like to keep on the porch. It doubles as a table and extra seating in a pinch, so it's a great addition to the space.
I'd recommend either spray painting it or pre-painting the pieces- I wouldn't want to try and brush between all the slats.
Built from Plan(s)
Estimated Cost
50
Estimated Time Investment
Weekend Project (10-20 Hours)
Finish Used
spray painted with rustoleum 2x the coverage in ebony
Recommended Skill Level
Beginner
Mission Style Table - Loved by All - Porcelain (wood look) top versus wood. Benchese also built from this site.
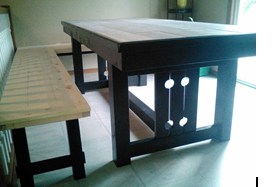
Table was fun to build and put our own spin on it. Great project for my wife and I. Took a few days to complete and begin using. Table dimensions we builst are 7' by 3.5' exactly as we needed for or dining room.

Estimated Cost
$350.00
Estimated Time Investment
Week Long Project (20 Hours or More)
Finish Used
Pine
Recommended Skill Level
Intermediate
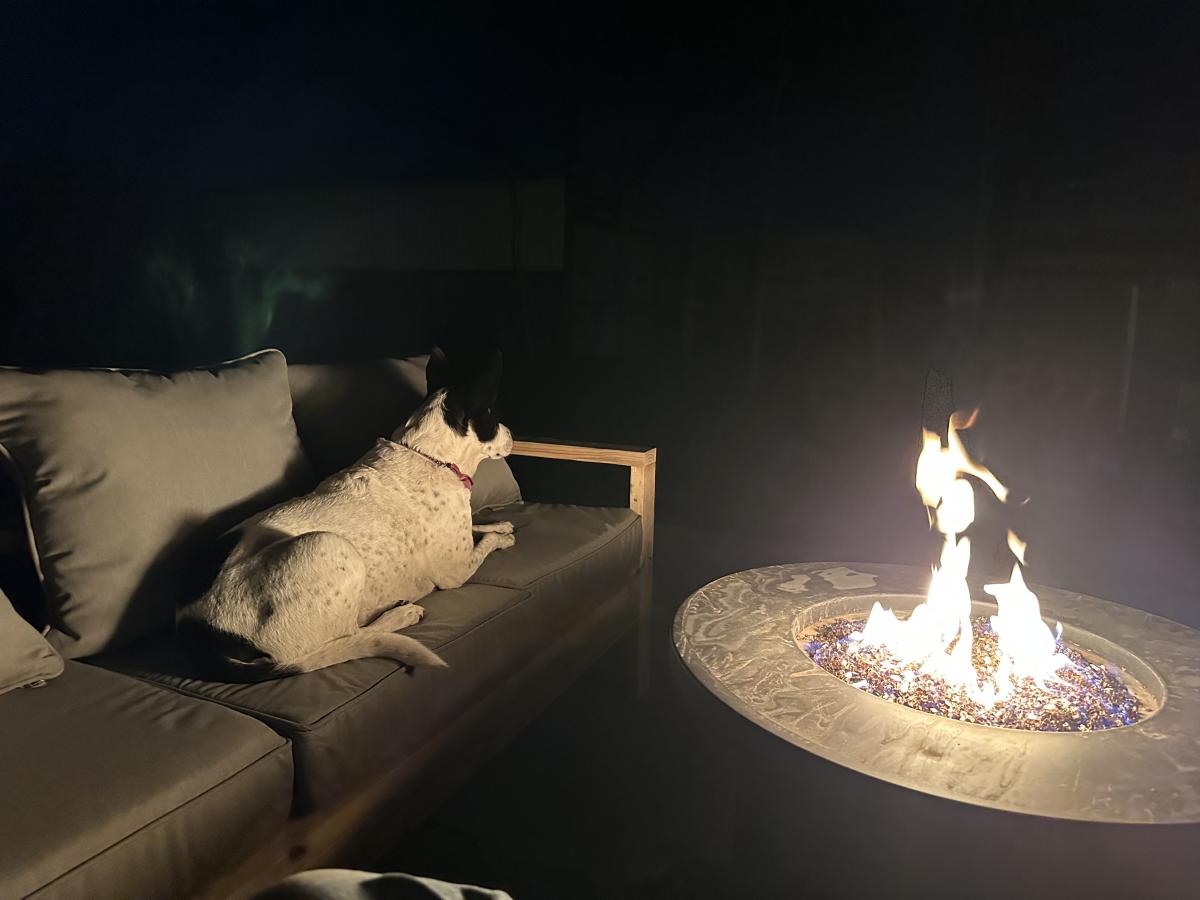
Outdoor 2x4 Sofa
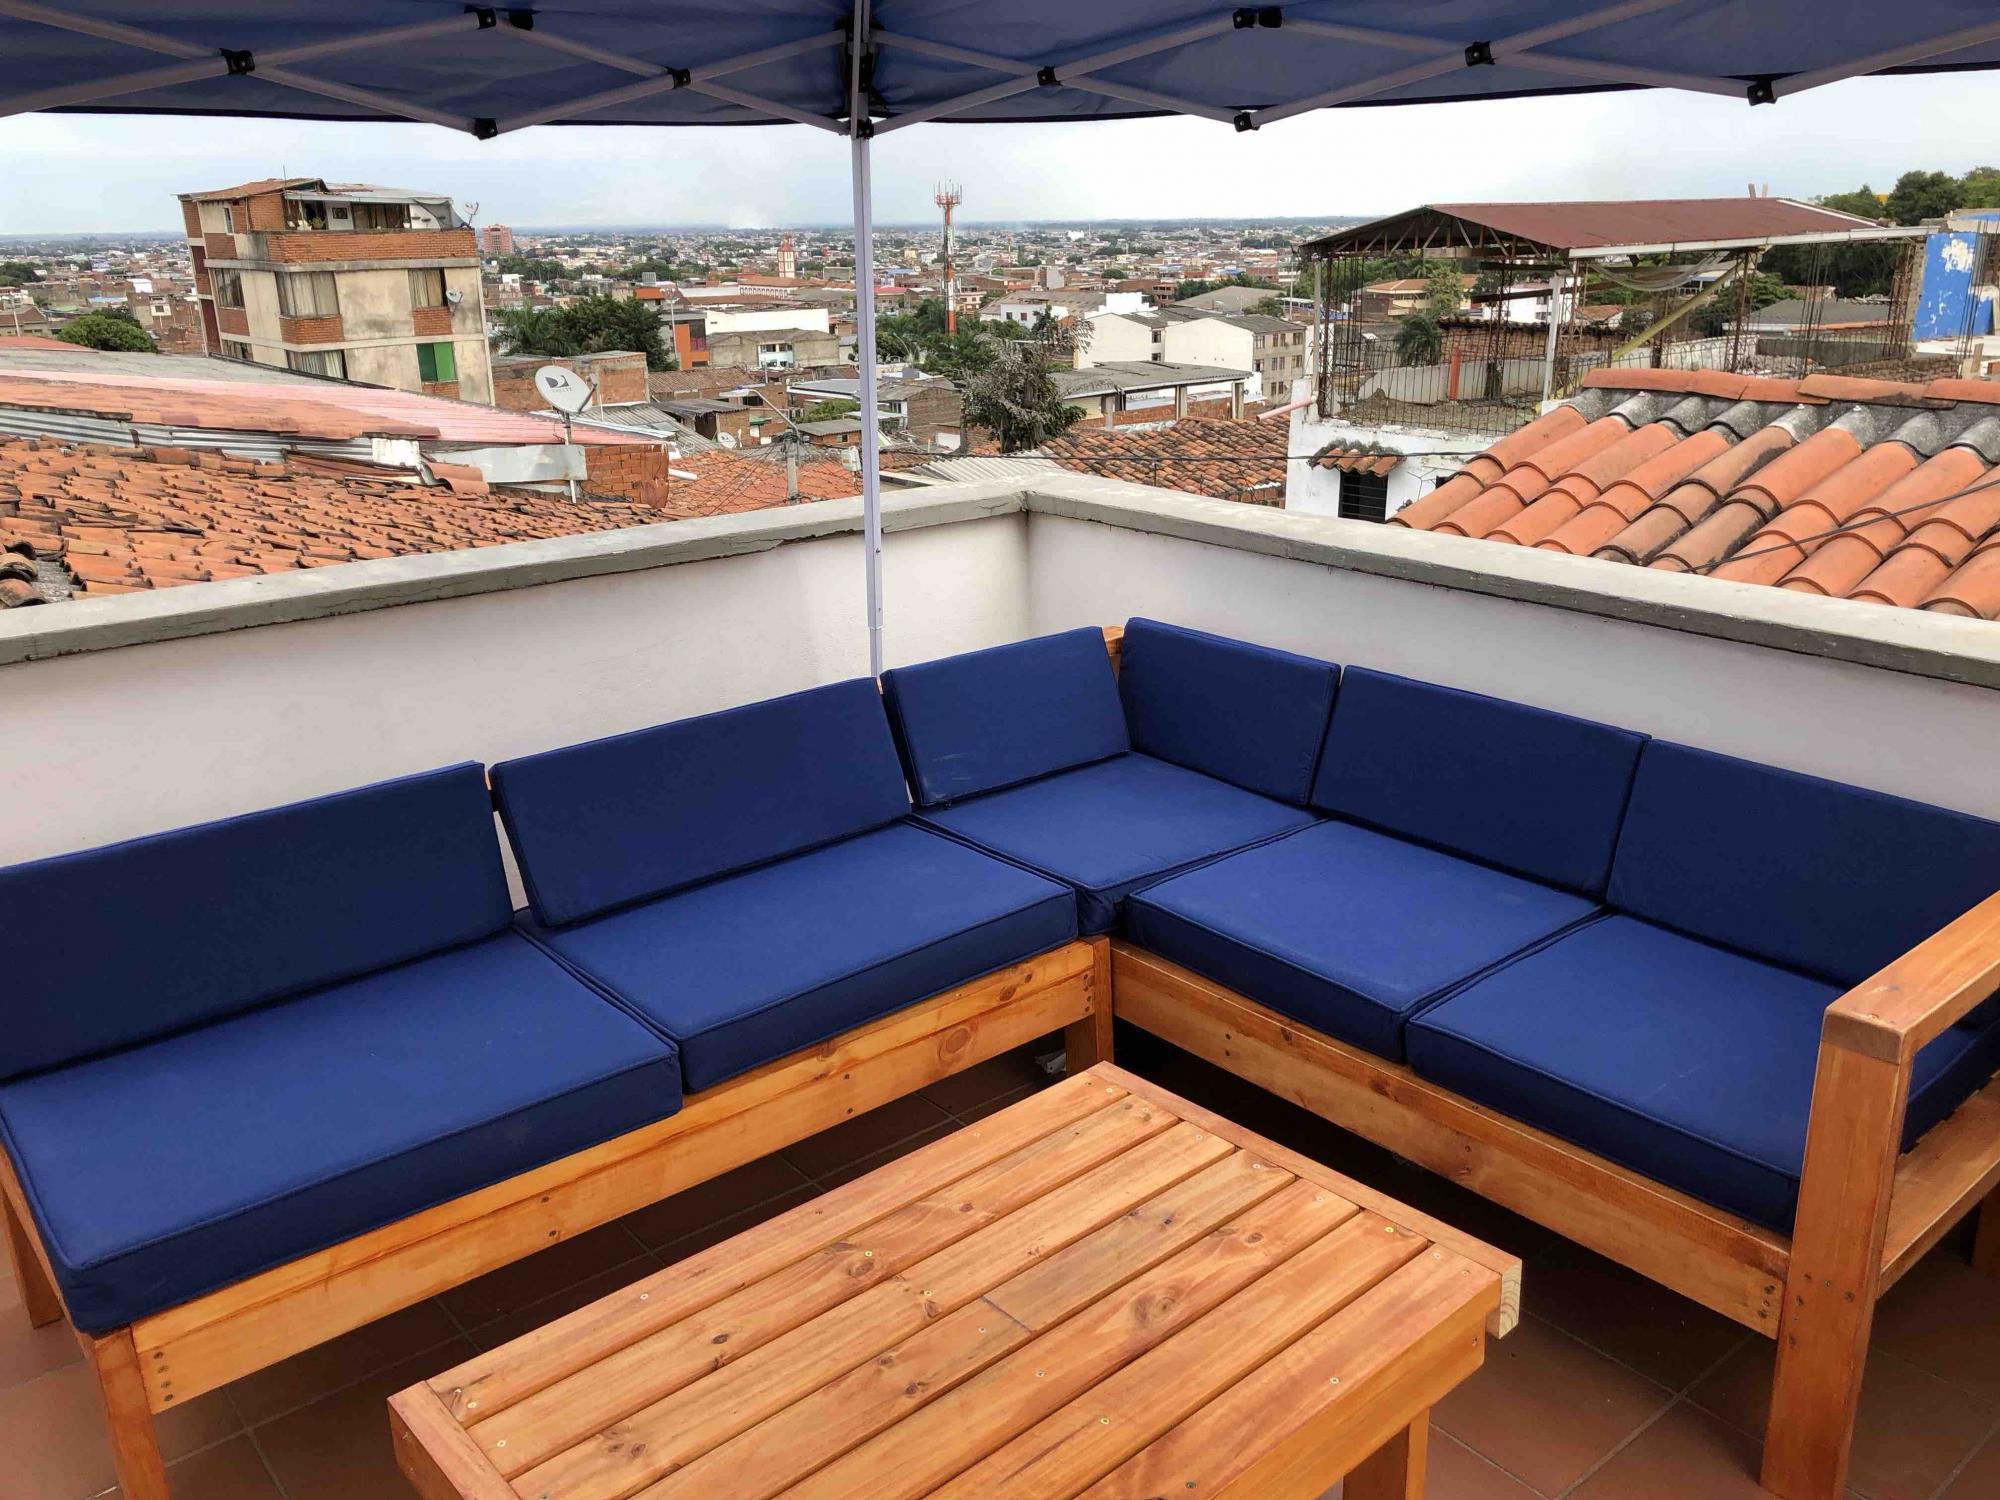
Last summer I rented a home in Cali Colombia that had a roof deck but no furniture. I had a lot of free time so I decided to use the 2x4 sofa plans to build this. It came out great, especially considering i had very few tools to work with.

Built from Plan(s)
Estimated Cost
Including buying the tools I needed for the job and the cushions, it cost about $500 in all. But I had all the cushions custom made. They were the most expensive part.
Estimated Time Investment
Week Long Project (20 Hours or More)
Recommended Skill Level
Intermediate
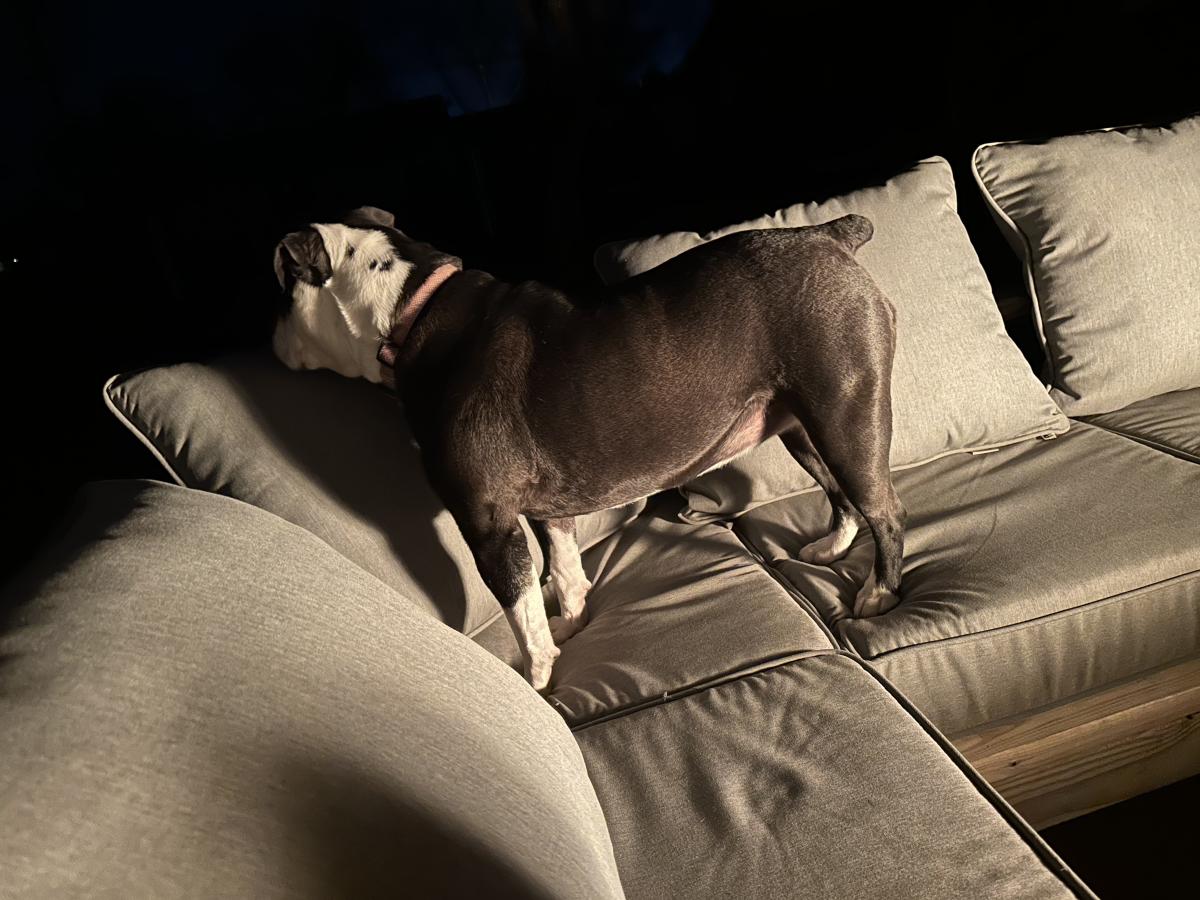
Outdoor escape
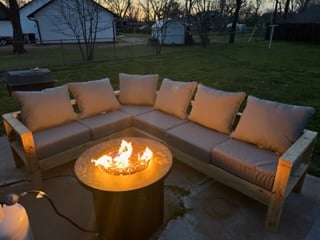
First build ever. Took about 2 days and the most expensive part was the cushions, but Lowe's had a good deal. I did not sanding, painting, or staining. I'm sure I'll do that eventually, or make another sectional later, but I'm in North Texas and loving this set right now.
Comments
Tue, 04/18/2023 - 15:35
Awesome first build!
This looks so great! Thank you for sharing your first ever build, can't wait to see what's next.:)
A Shelf for the Boys
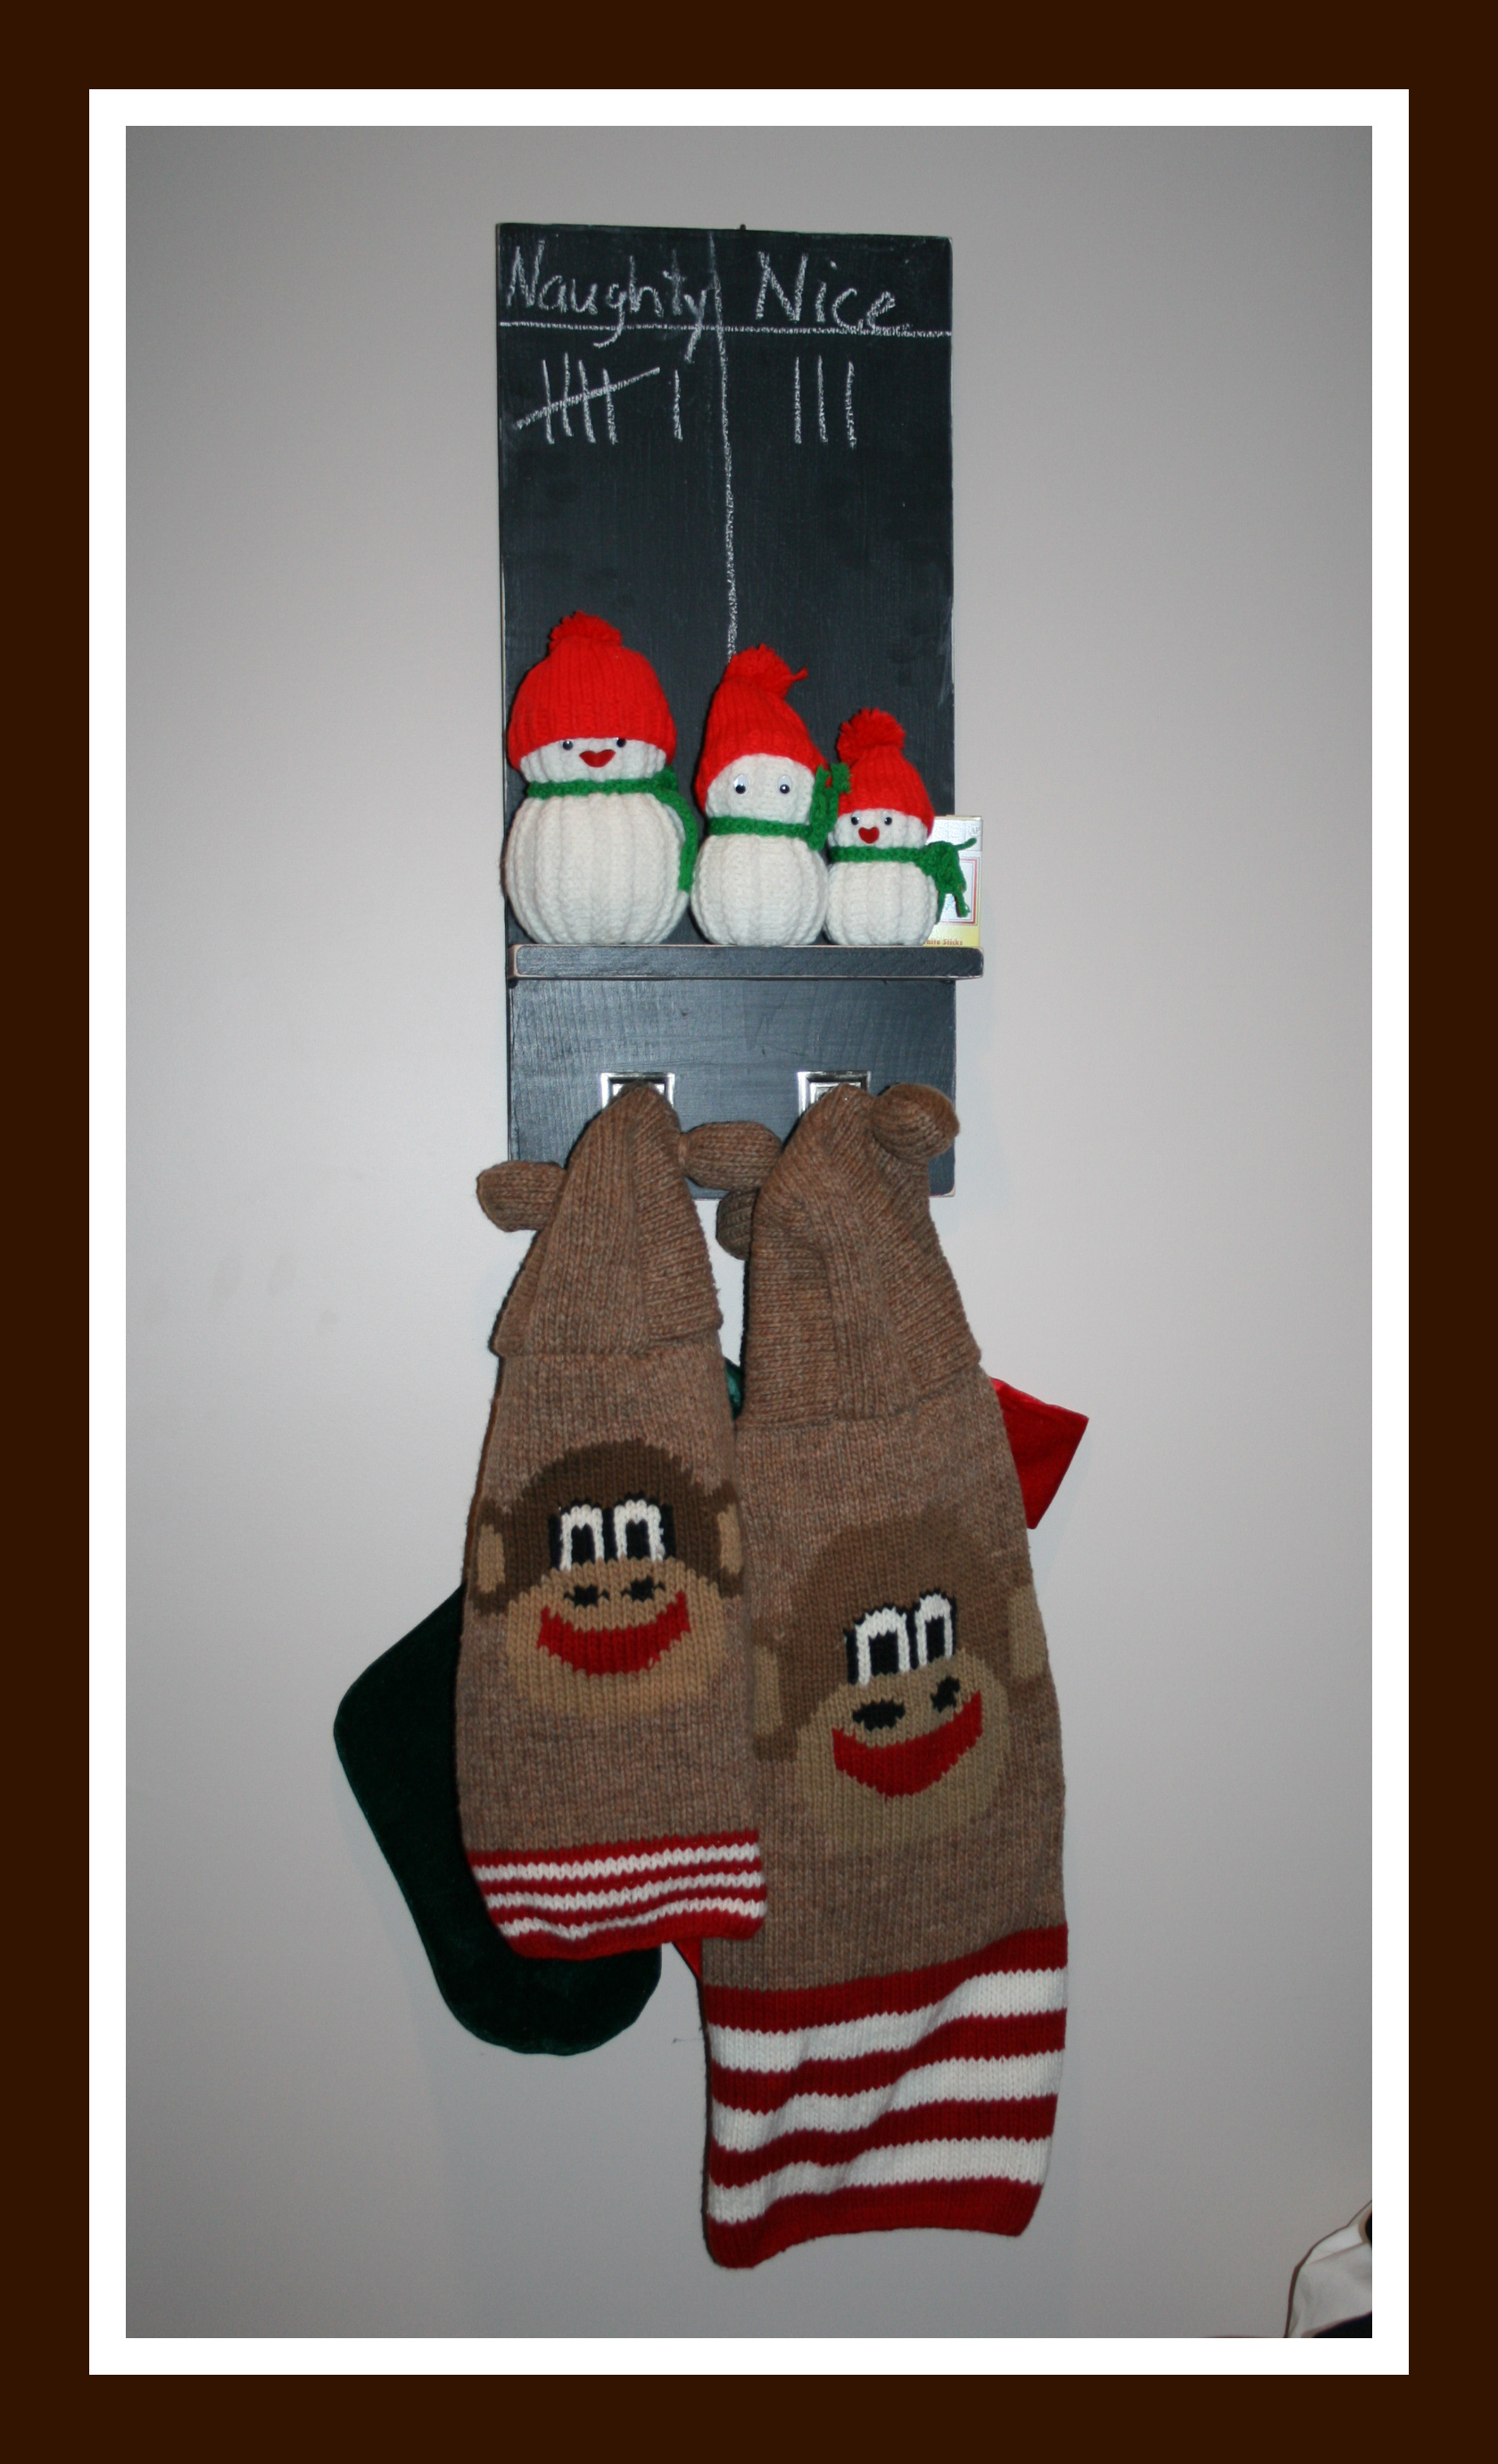
This shelf was such fun to build. My two pugs, Lesterann (3 mos.) and Calvin (13 yrs.) needed a place to hang their stockings at Nana's house. As for the naughty and nice, Lesterann is a little monster right now so he basically is responsible for the naughty. Calvin, on the other hand, is a prince of a old man.
Santa filled those stockings and hung the boys' new sock monkey sweaters on the hooks and it held up quite nicely with no chance of falling.
After the holidays, I'll move the shelf to the kitchen to put my reminders on. Thanks, Ana, for this great plan!
Merry Christmas everyone!
Built from Plan(s)
Recommended Skill Level
Beginner
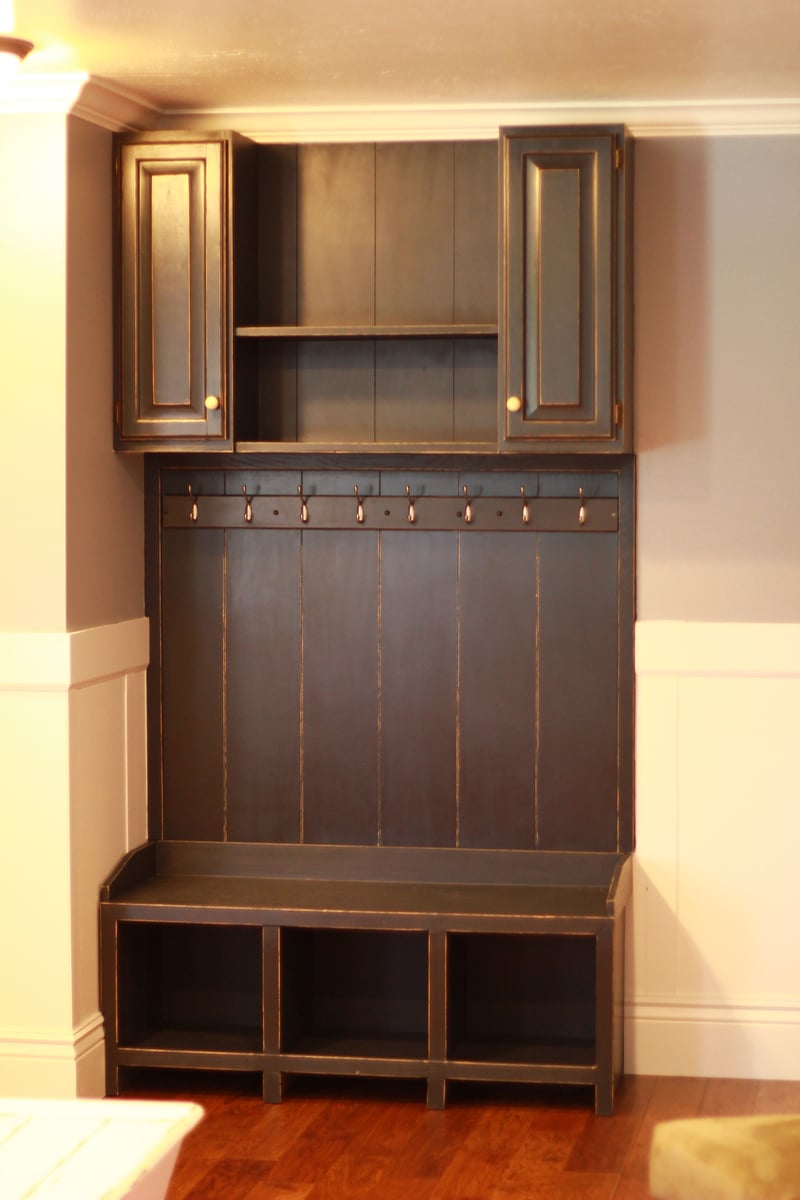
Mudroom Area

Mudroom area by my front door. Perfect for removing shoes, hanging jackets, etc. For the top I used two old cabinets that were on their way to the trash. It was easy to build shelves between them. For the back I used beadboard from Home Depot. It was 1/4" thick and 4x8. The bench pulls out easily, because there is an outlet behind it, and an air register beneath it. (That's why I left the front toe-kick open.) The rail with hooks came pre-assembled from Home Deopt, but I had to paint it black.
Built from Plan(s)
Estimated Time Investment
Weekend Project (10-20 Hours)
Finish Used
I used black chalk paint and minwax paste finishing wax.
After one coat of finishing wax I sanded edges to get the antiqued look. Then I applied a second coat of finishing wax.
For the finishing wax: simply rub on with a rag, wait 10 minutes, then use a clean rag to rub in the direction of wood grain to get a nice polish.
After one coat of finishing wax I sanded edges to get the antiqued look. Then I applied a second coat of finishing wax.
For the finishing wax: simply rub on with a rag, wait 10 minutes, then use a clean rag to rub in the direction of wood grain to get a nice polish.
Recommended Skill Level
Beginner
Comments

Wed, 11/13/2013 - 05:05
Lovely Modern Old-World look!
Form and function! =D Love the black chalk paint with the globe and brown accents - striking modern old world look!

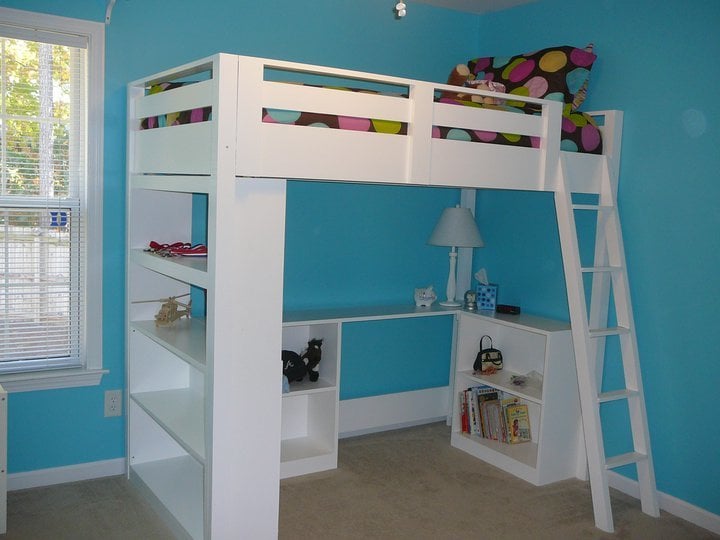
Kentwood bed
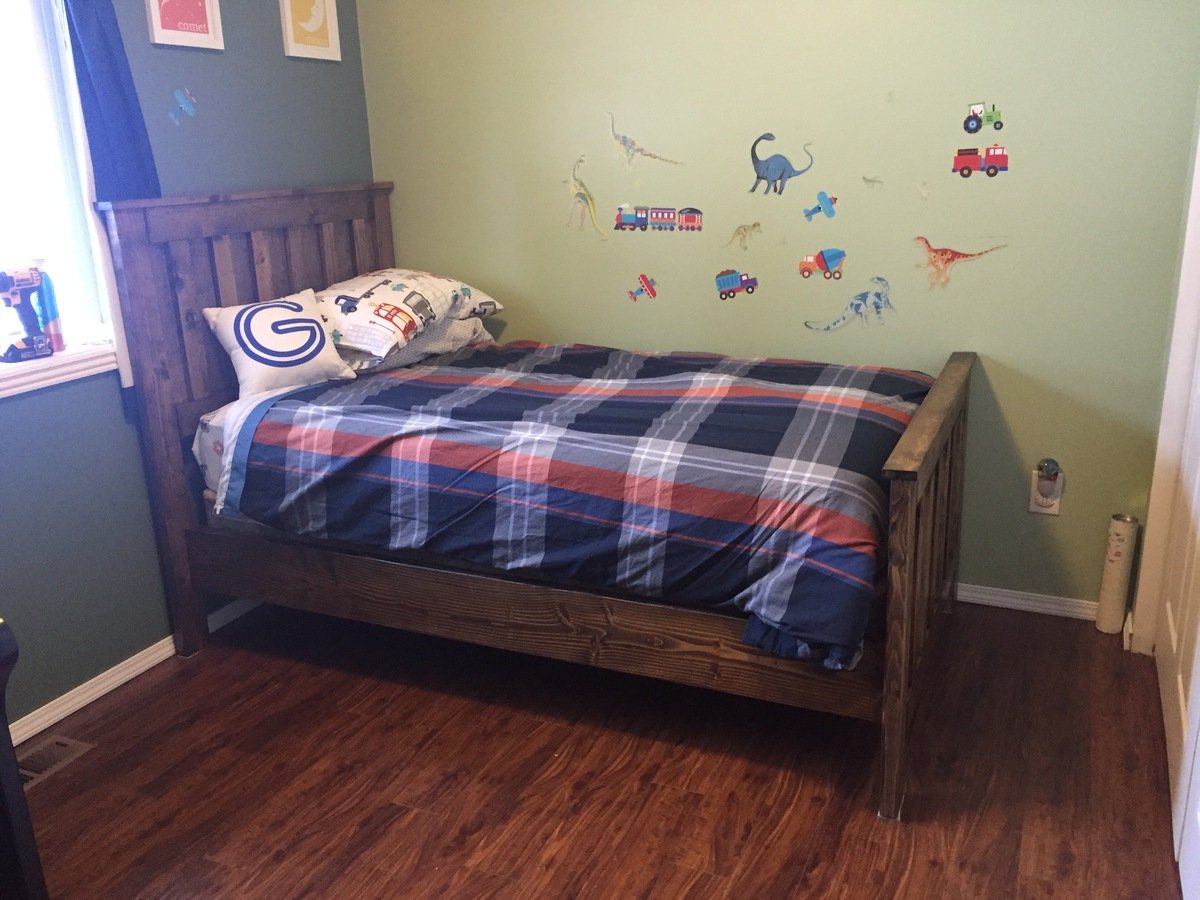
I made this bed for my 4 year old. It was my first project. Took a lot longer than I thought it would, but I'm really pleased with how it turned out!
Built from Plan(s)
Estimated Cost
$125 for wood and stain
Estimated Time Investment
Week Long Project (20 Hours or More)
Finish Used
Minwax dark walnut
Recommended Skill Level
Beginner
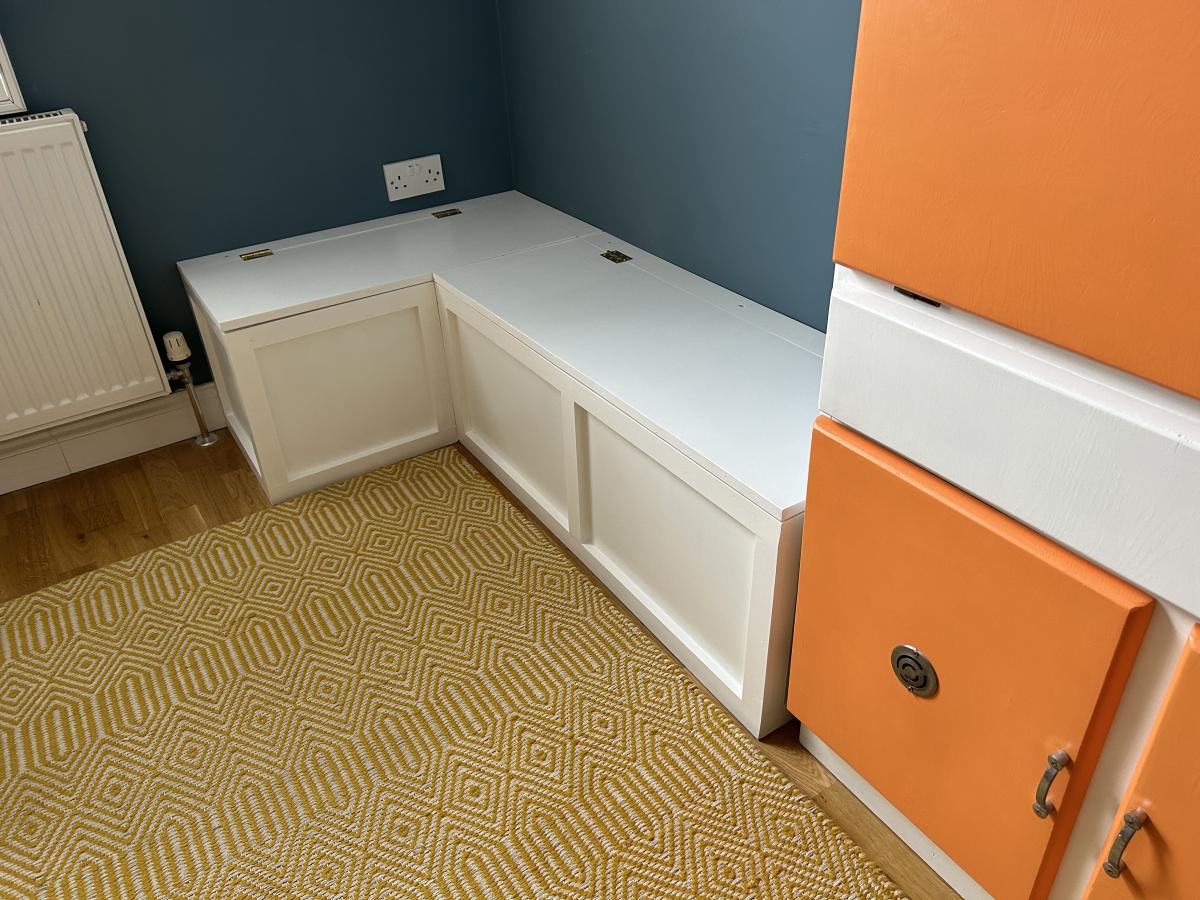
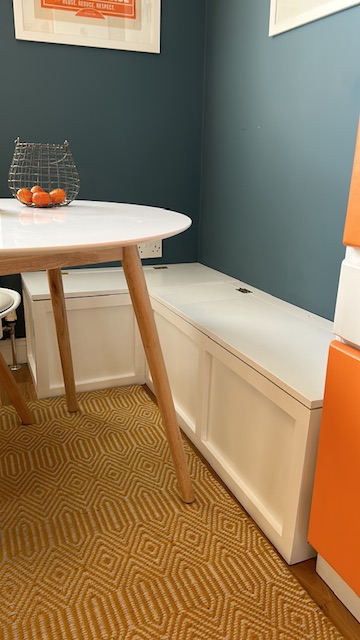
Banquette Bench with Flip Up Storage
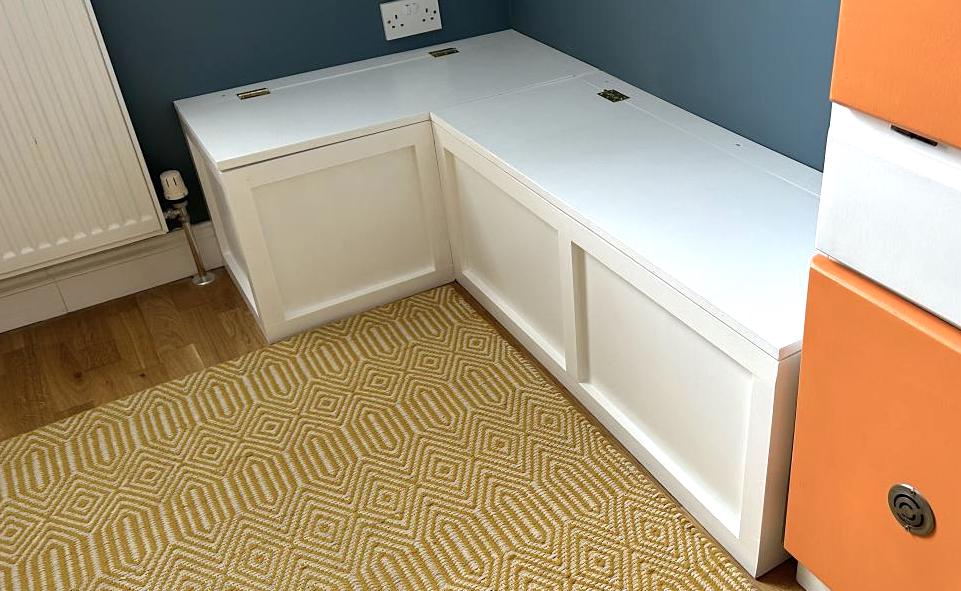
Thank you, Ana, for the banquet bench plan! I’ve never done any form of carpentry before, but with your plans, the right tools and some perseverance, this labour-of-love is my new pride and joy and has added some much needed storage to my small kitchen.
Angela (London)
Built from Plan(s)
Comments
Mon, 04/24/2023 - 10:34
Fabulous banquette!
You did an amazing job and it fits your space perfectly! Thanks for sharing.
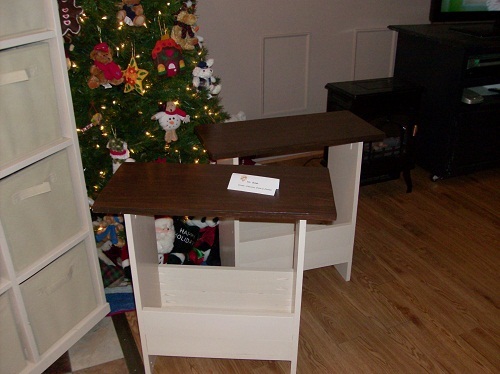
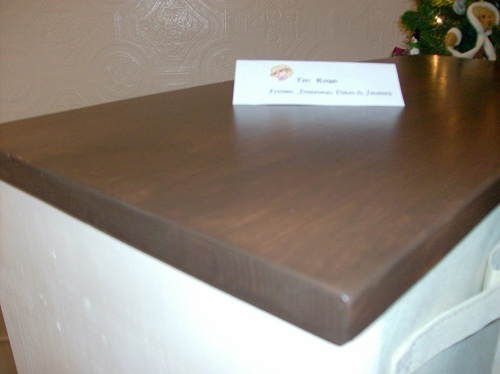
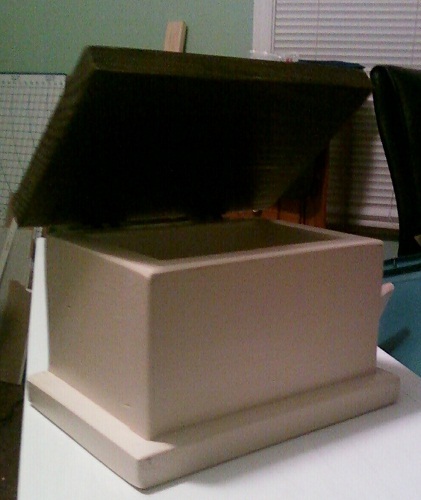
Handmade gifts for Mom
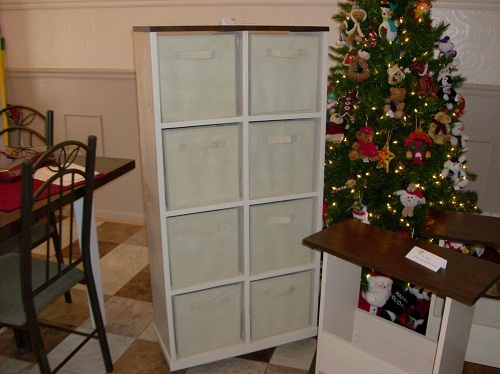
My favorite thing this Christmas was making handmade gifts. Mom's were the most fun. :) The first is the Cube dresser, using the plan from 2x4 console cubby shelf (turned upright), with wheels. Next are 2 recliner side tables, made from the 5 board bench plan, with added shelf at the bottom for books and magazines. The last is the 'trinket box' - which isn't really from a plan, just made up with 1x4 and 1x6 boards. We finished these to match her existing furniture, which we built for her earlier this year. Mom loved her gifts! Thanks Ana!
Built from Plan(s)
Estimated Cost
Total $217: ($120 lumber, $45 paint/stain/poly, $52 cube drawers)
Estimated Time Investment
Weekend Project (10-20 Hours)
Finish Used
Paint is Benjamin Moore Aura satin in Sea Urchin, tops are Minwax Color Express in Walnut, plus 2 coats of clear satin poly.
Recommended Skill Level
Beginner
Comments
Sat, 12/31/2011 - 04:26
You did an excellent job! I
You did an excellent job! I bet she loved it! :)
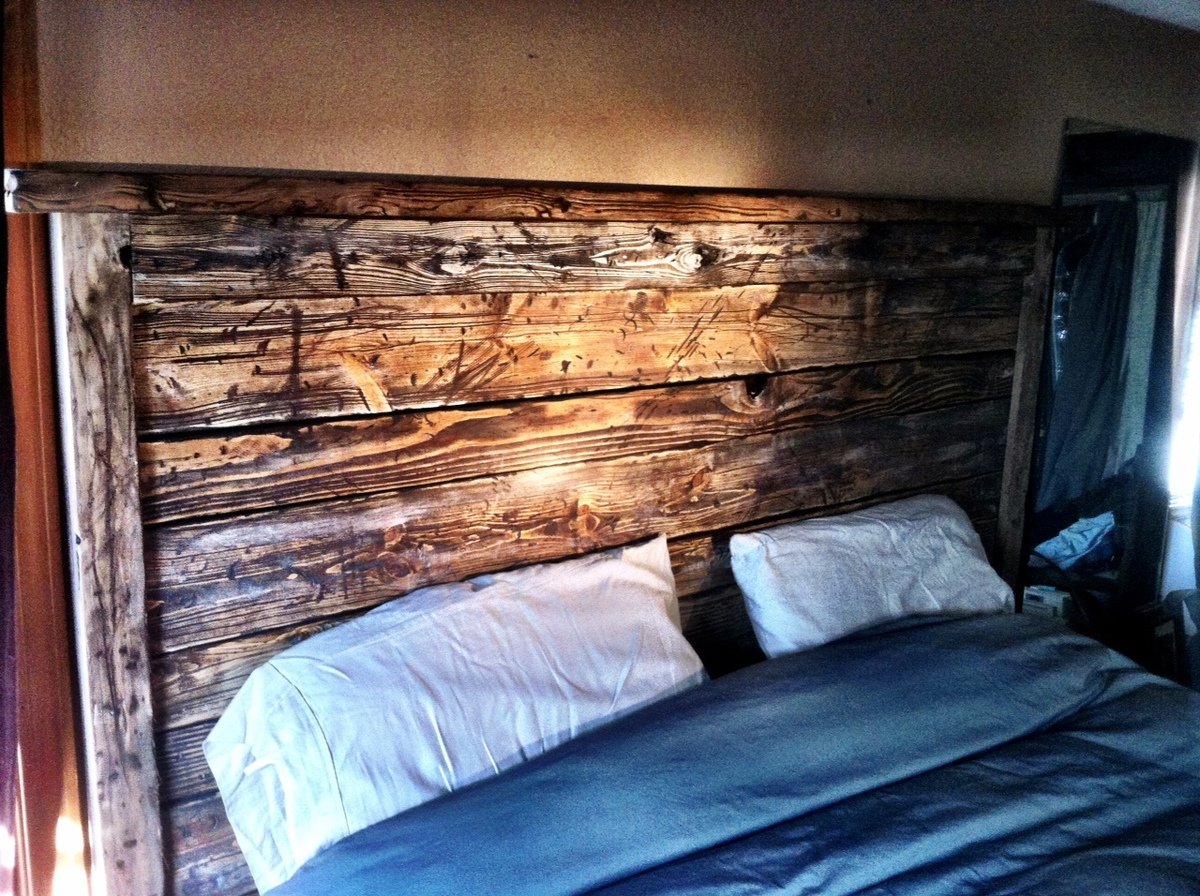
"reclaimed wood" bed.
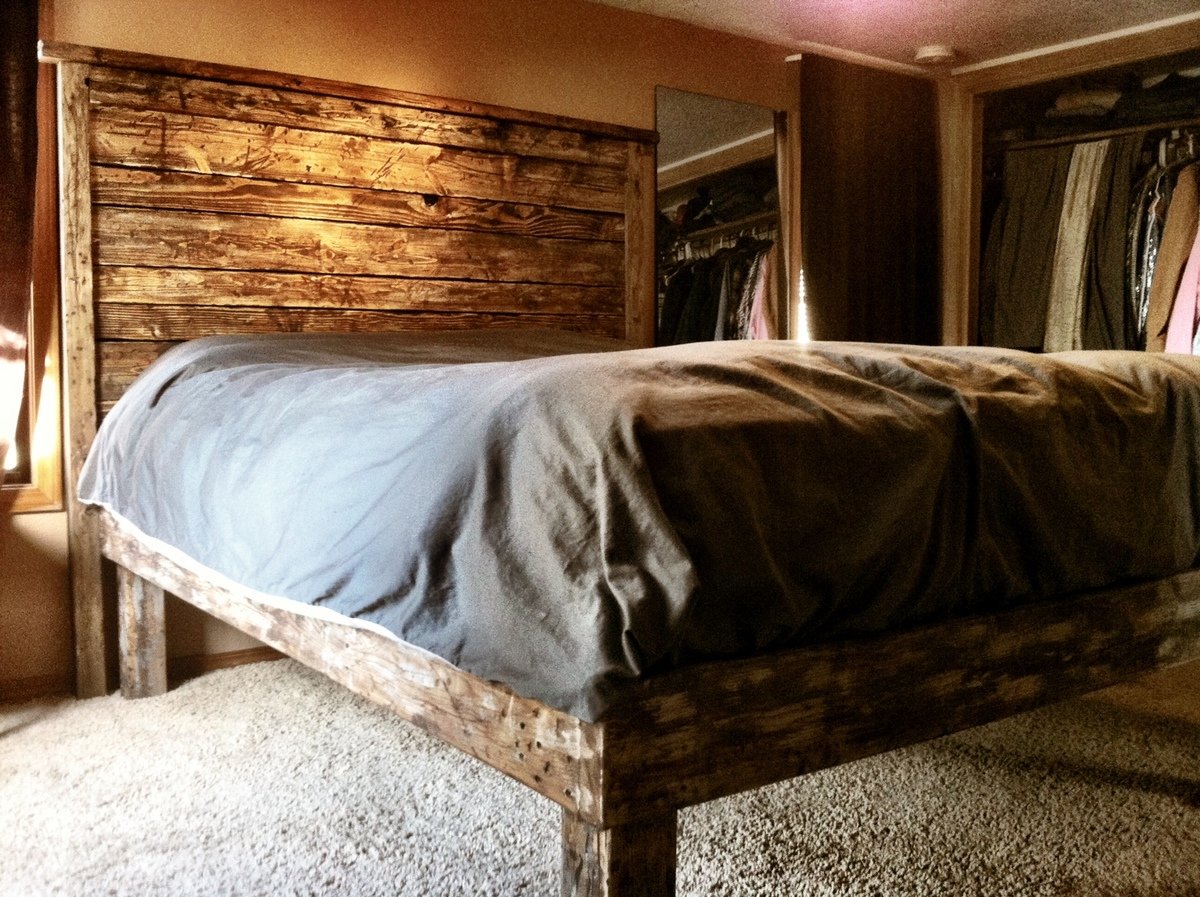
I wanted to make a sturdy bed that was rustic and old looking but still kind of modern... I looked at google images and a photo of Ana's bed popped up. I started with new fir from Home Depot but wanted a good weathered look, so I spent extra time and effort on the distressing. It turned out just like I was hoping!
Estimated Cost
$125
Estimated Time Investment
Day Project (6-9 Hours)
Finish Used
I made stain with vinegar and steel wool, hit it with that then sanded. Light paint strokes with white and maroon, sanding in between, then ebony stain, sand, then a chestnut stain and wiped off. Clear finish.
Recommended Skill Level
Beginner
Comments


Sat, 11/16/2013 - 22:54
Beautiful!
The light and dark variations in your finish make your project very unique! Nice work!
Val
artsybuildinglady.blogspot.ca
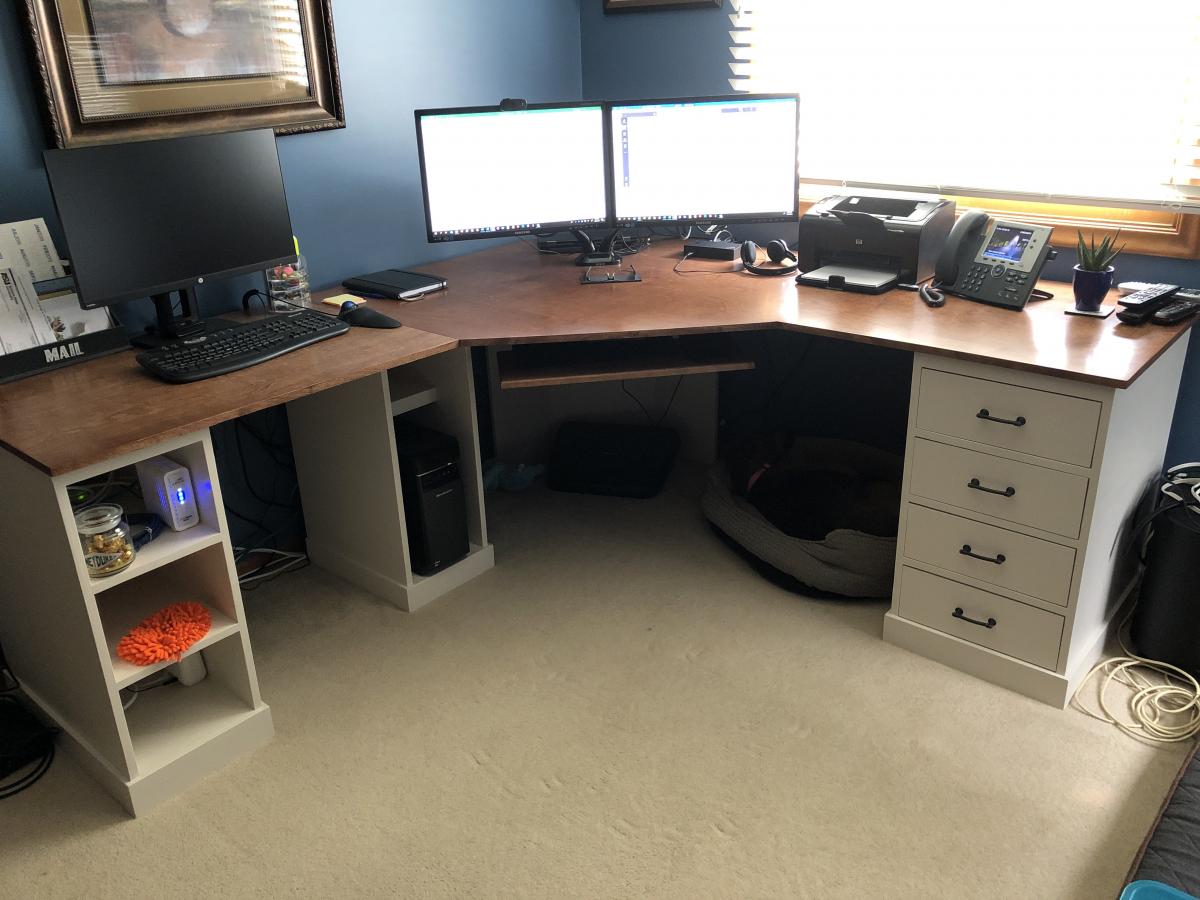
Desk with drawers and open cabinets
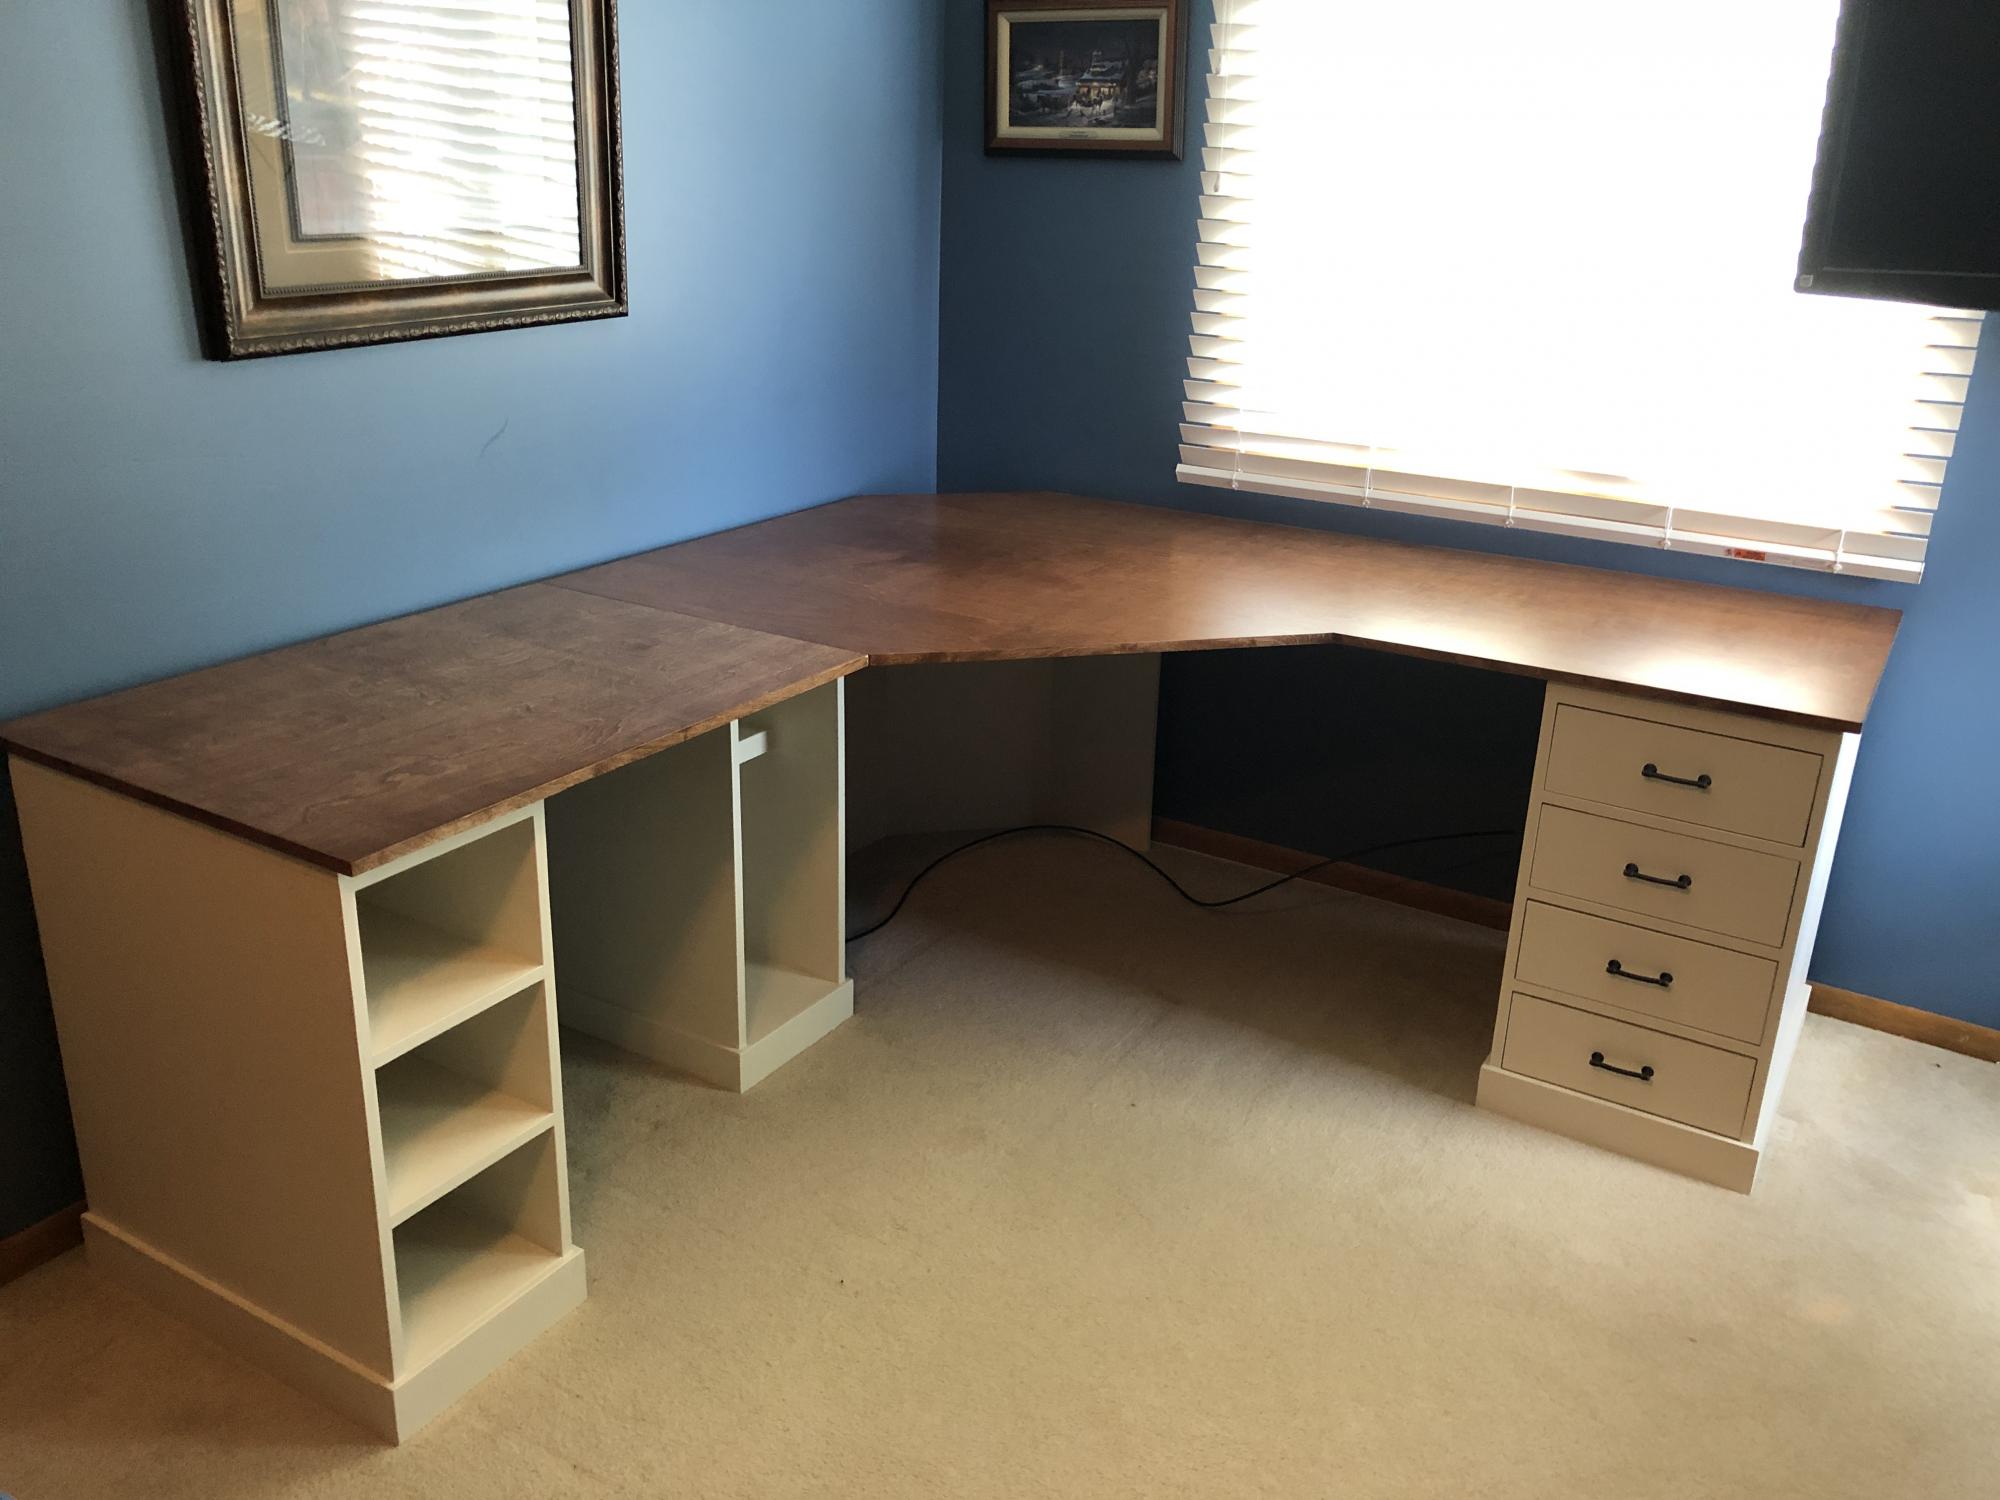
I used a modified version of the narrow drawer unit as the foundation for this desk build. I decided to make wooden drawer guides rather than using manufacturer metal guides. I liked the idea of it having a more traditional wood-on-wood feel and saving a few dollars. I love the simplicity of the base cabinet design and the contrast between the painted base and stained top. Thanks yo all who shared their projects for the inspiration!

Built from Plan(s)
Estimated Cost
About $250
Estimated Time Investment
Week Long Project (20 Hours or More)
Finish Used
Paint, stain, and polycrylic
Recommended Skill Level
Intermediate
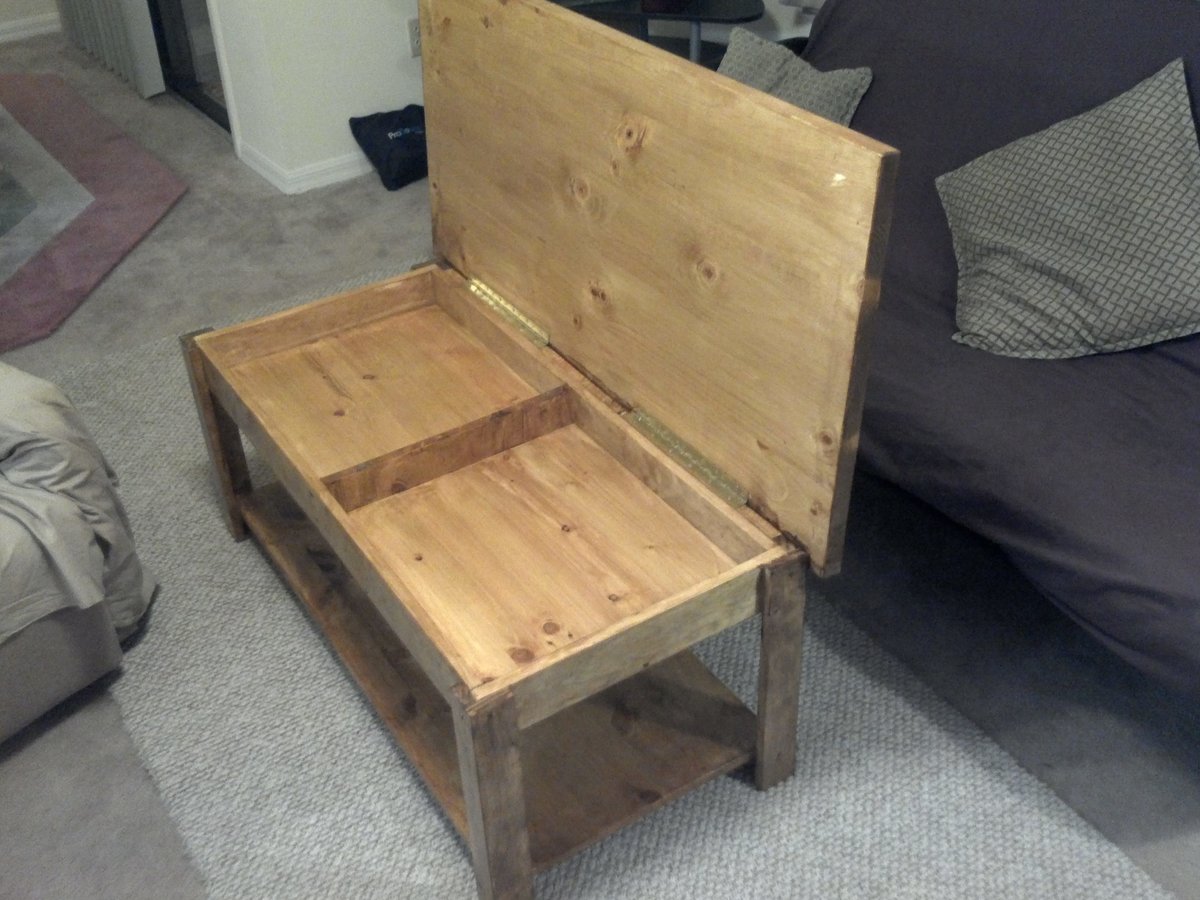
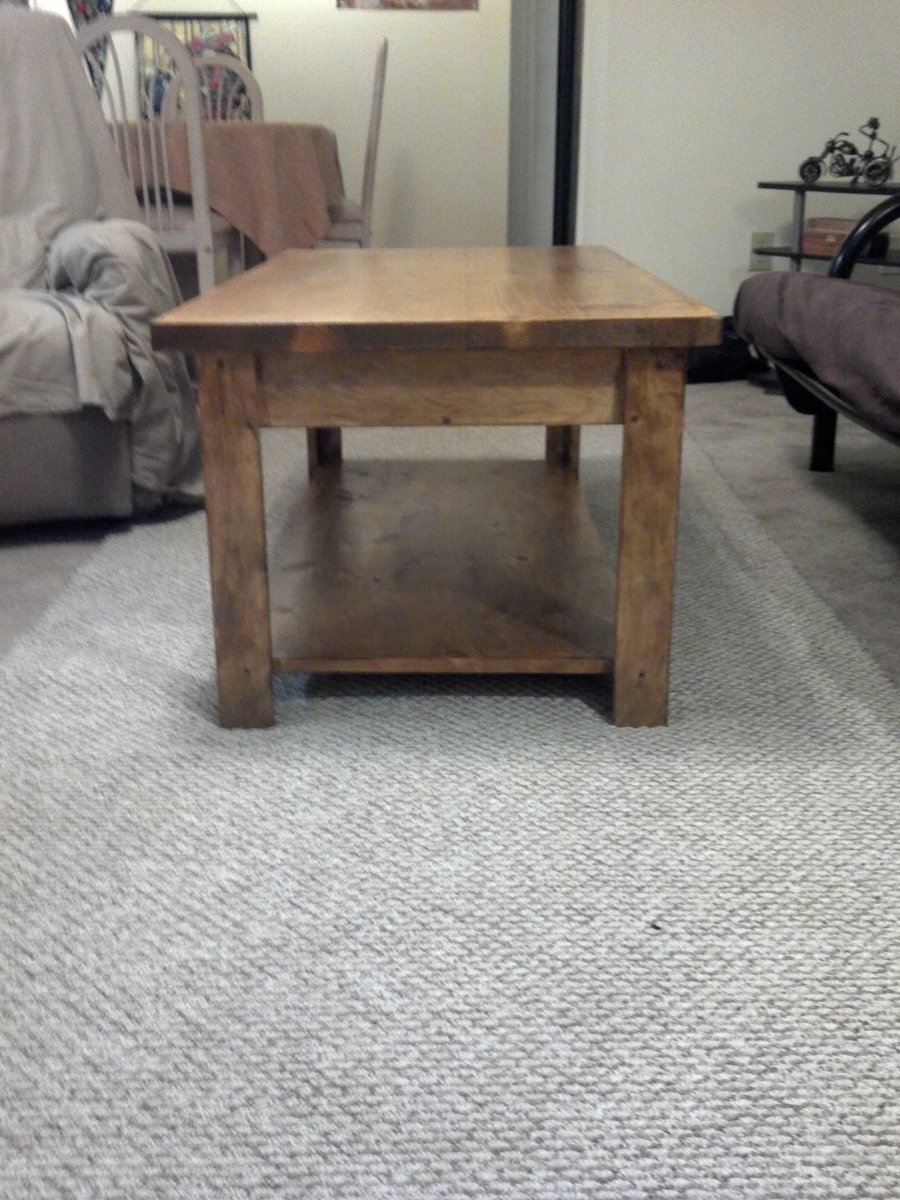
Storage Coffee Table
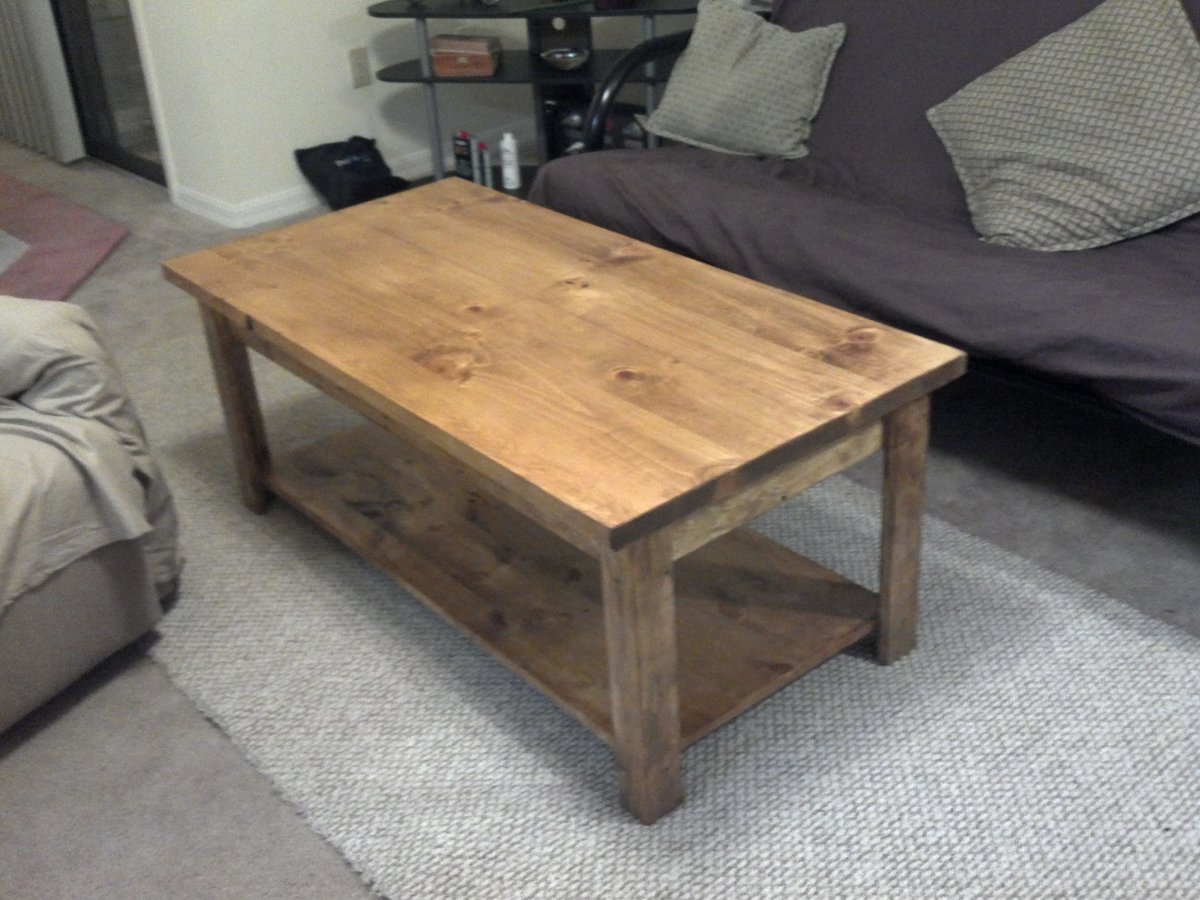
I just was looking for something simple with a top and bottom shelf with storage. Ended up coming out amazing! Very pleased! it only takes about a day of time, but because of all the stain and glaze coating it took over 24 hours.
Built from Plan(s)
Estimated Cost
150
Estimated Time Investment
Week Long Project (20 Hours or More)
Finish Used
Cabot wood stain Golden Oak and Minwax polycrilic satin.
Recommended Skill Level
Beginner
Comments
Mon, 07/09/2012 - 11:20
which plan did you use ??
Great build !!!! can you specify which plan you used and how you modified it ?
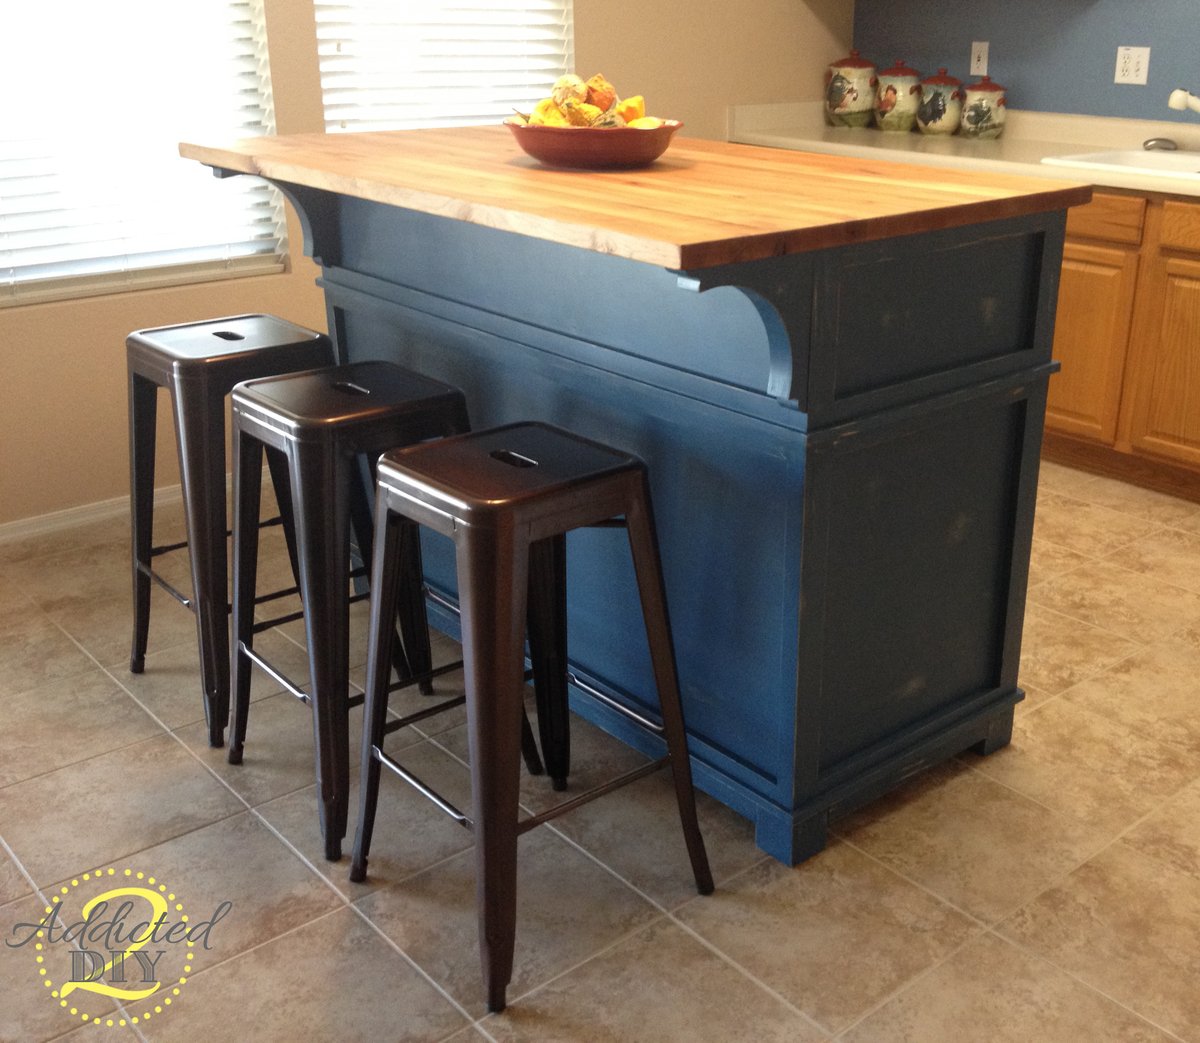
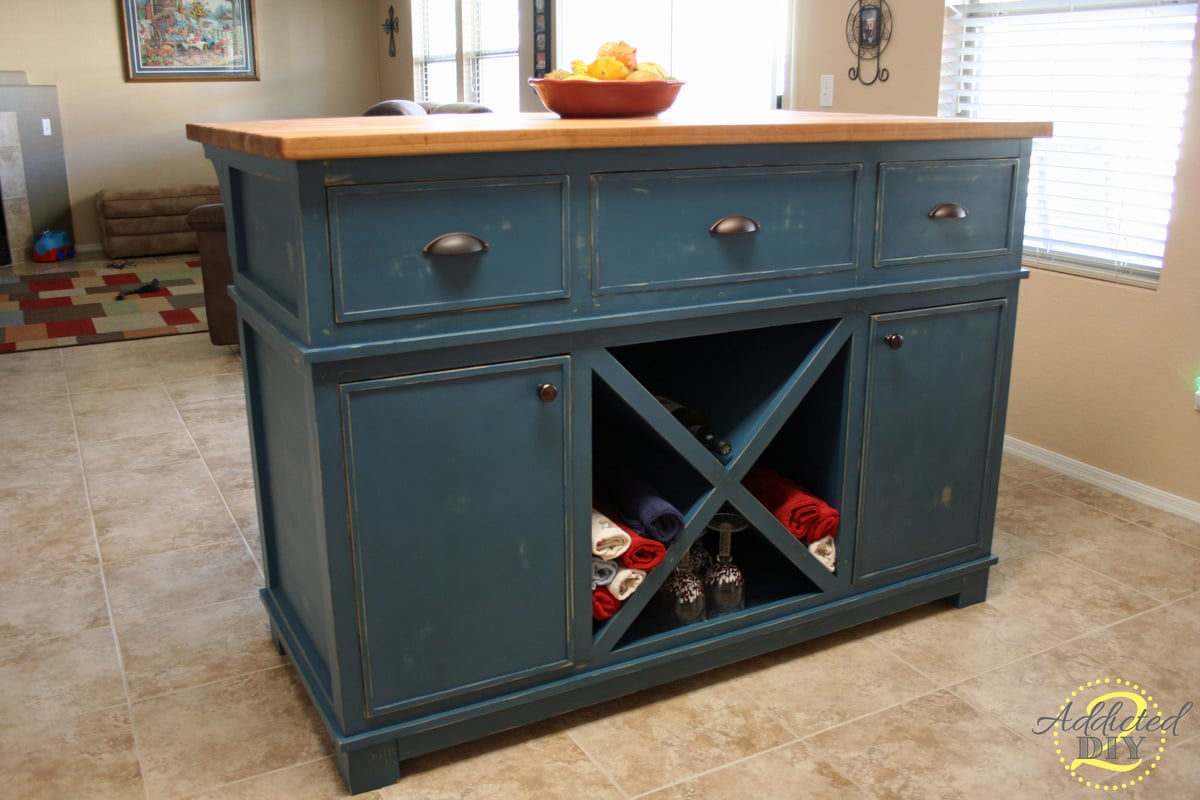
DIY Kitchen Island

This was my second solo project. I built it for my mom's kitchen to replace her old kitchen table. I absolutely love how it turned out. It is big and functional. Come see how I built it on my blog.
Built from Plan(s)
Estimated Cost
approx $600
Estimated Time Investment
Week Long Project (20 Hours or More)
Finish Used
Valspar Paint+Primer in Deep Twilight Blue
Valspar Antiquing Glaze
Minwax Polycrylic Spray
Valspar Antiquing Glaze
Minwax Polycrylic Spray
Recommended Skill Level
Intermediate
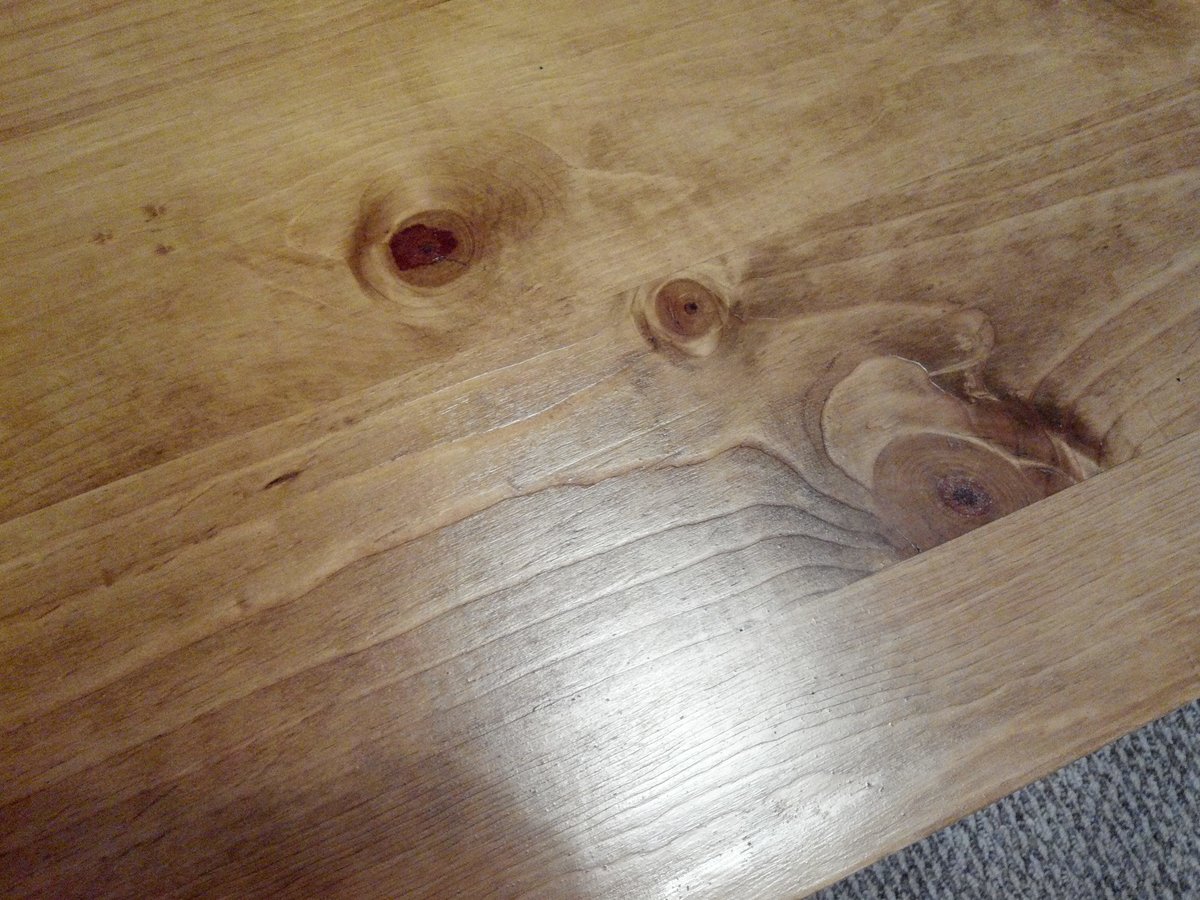
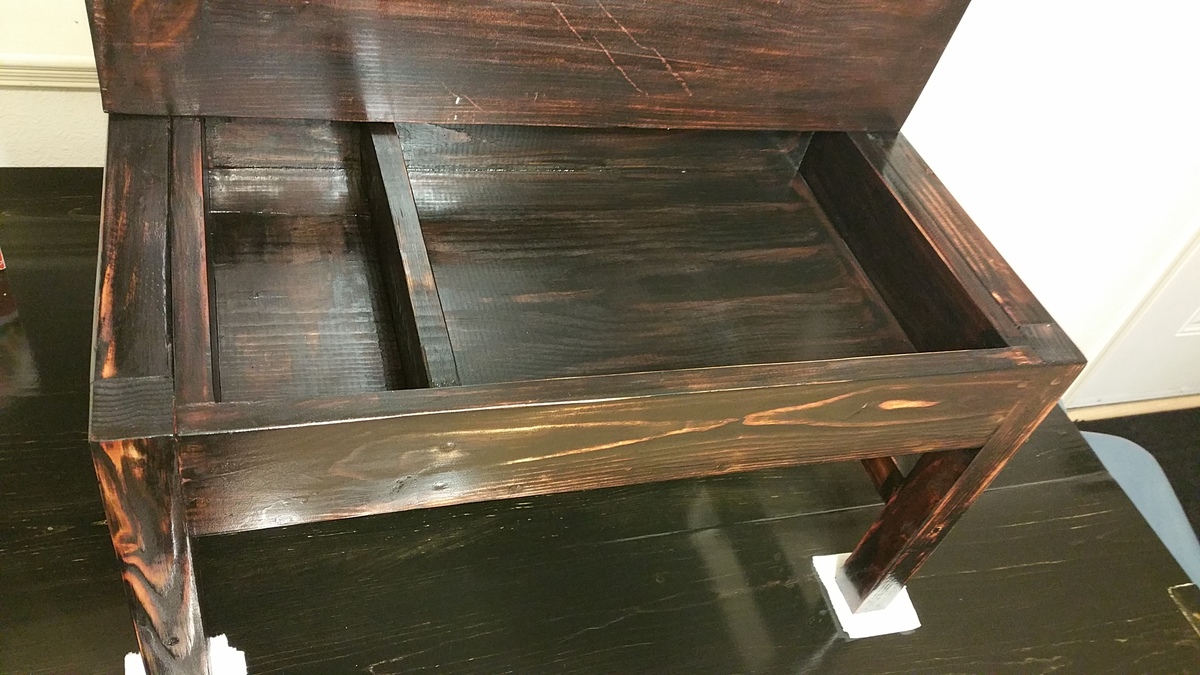
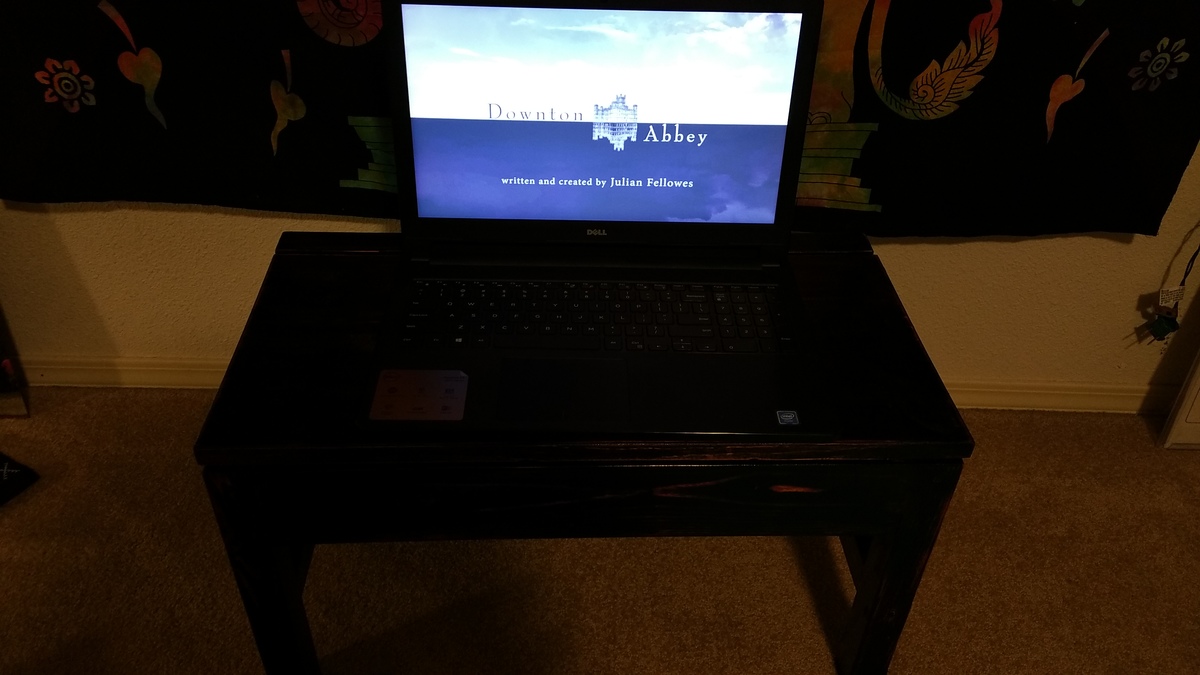
Rustic lap desk
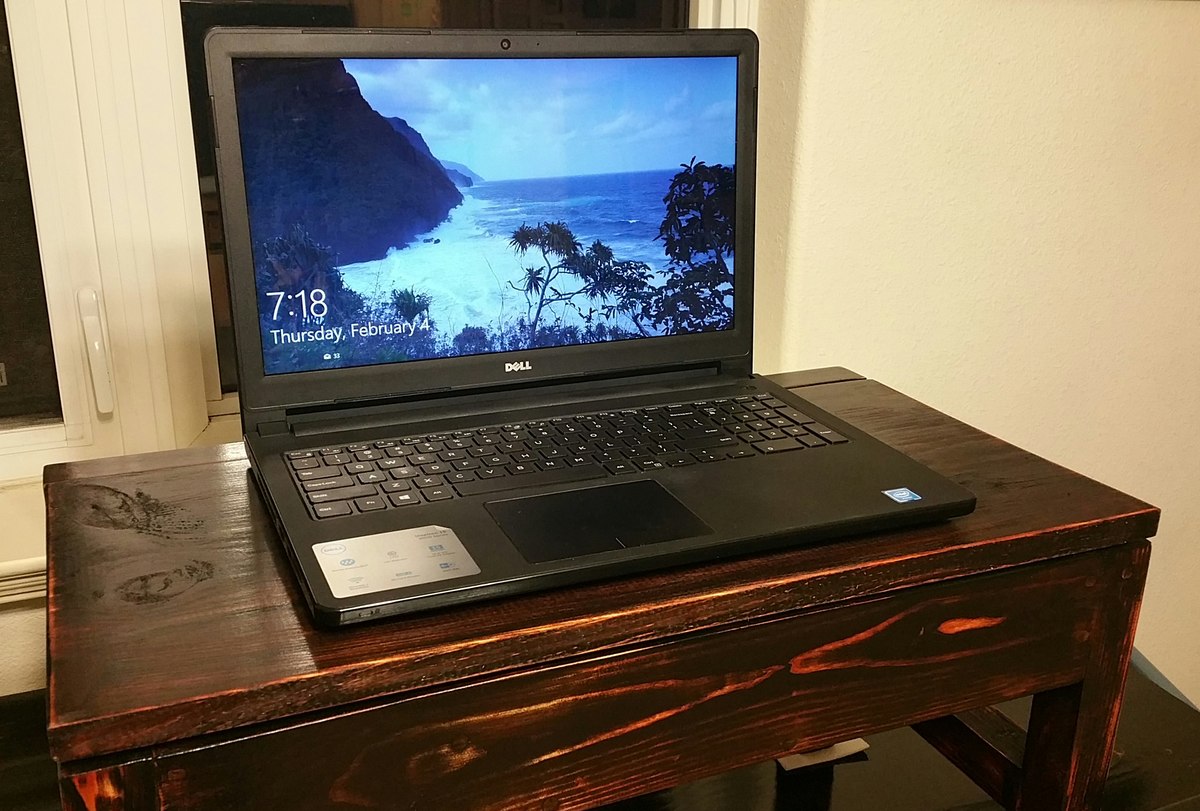
This was a fun afternoon project built almost entirely from materials I already had on hand. I finished it off with a coat of Gunstock stain by Minwax, followed by a coat of Cherry stain. I sanded a little between each coat. Next I applied a thin coat of black paint and sanded gently until the stain started to show through (and bare wood in places). Finally I applied a coat of polyurethane gloss. It took about four days to complete the finish and I made it up as I went along. Super happy with the end result. I opted not to add the side bins, but I did add an extra 2x2 on each side, mostly because the 2x2 I used for the legs was a little bowed and the exta piece ensured that they'd stay where they're supposed to.
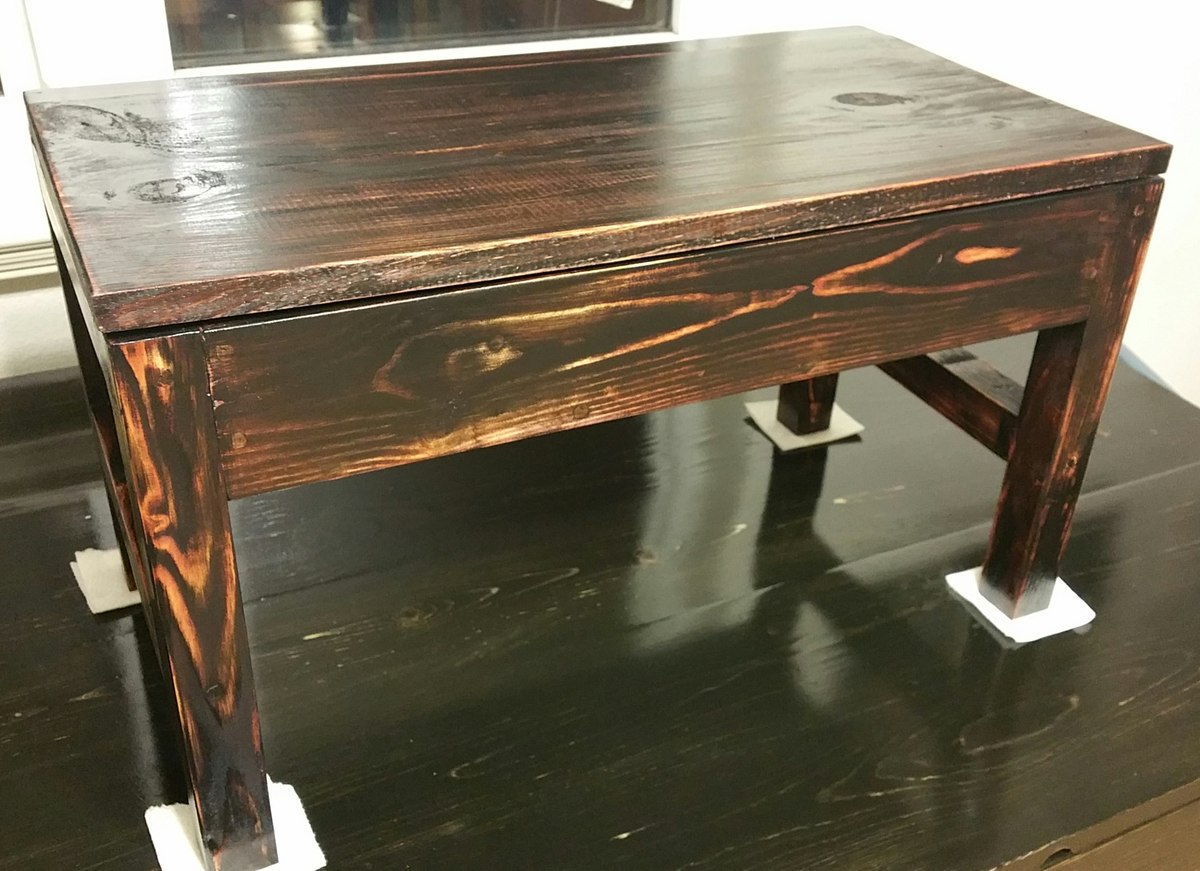
Built from Plan(s)
Estimated Cost
About $12. I had to buy a 1x4 and some hinges.
Estimated Time Investment
An Hour or Two (0-2 Hours)
Finish Used
Minwax stain in Gunstock and Cherry
Rustoleum Gloss Black
Minwax Polyurethane Gloss
(I already had these colors on hand)
Rustoleum Gloss Black
Minwax Polyurethane Gloss
(I already had these colors on hand)
Recommended Skill Level
Beginner
Got my confidence in building back!!!!
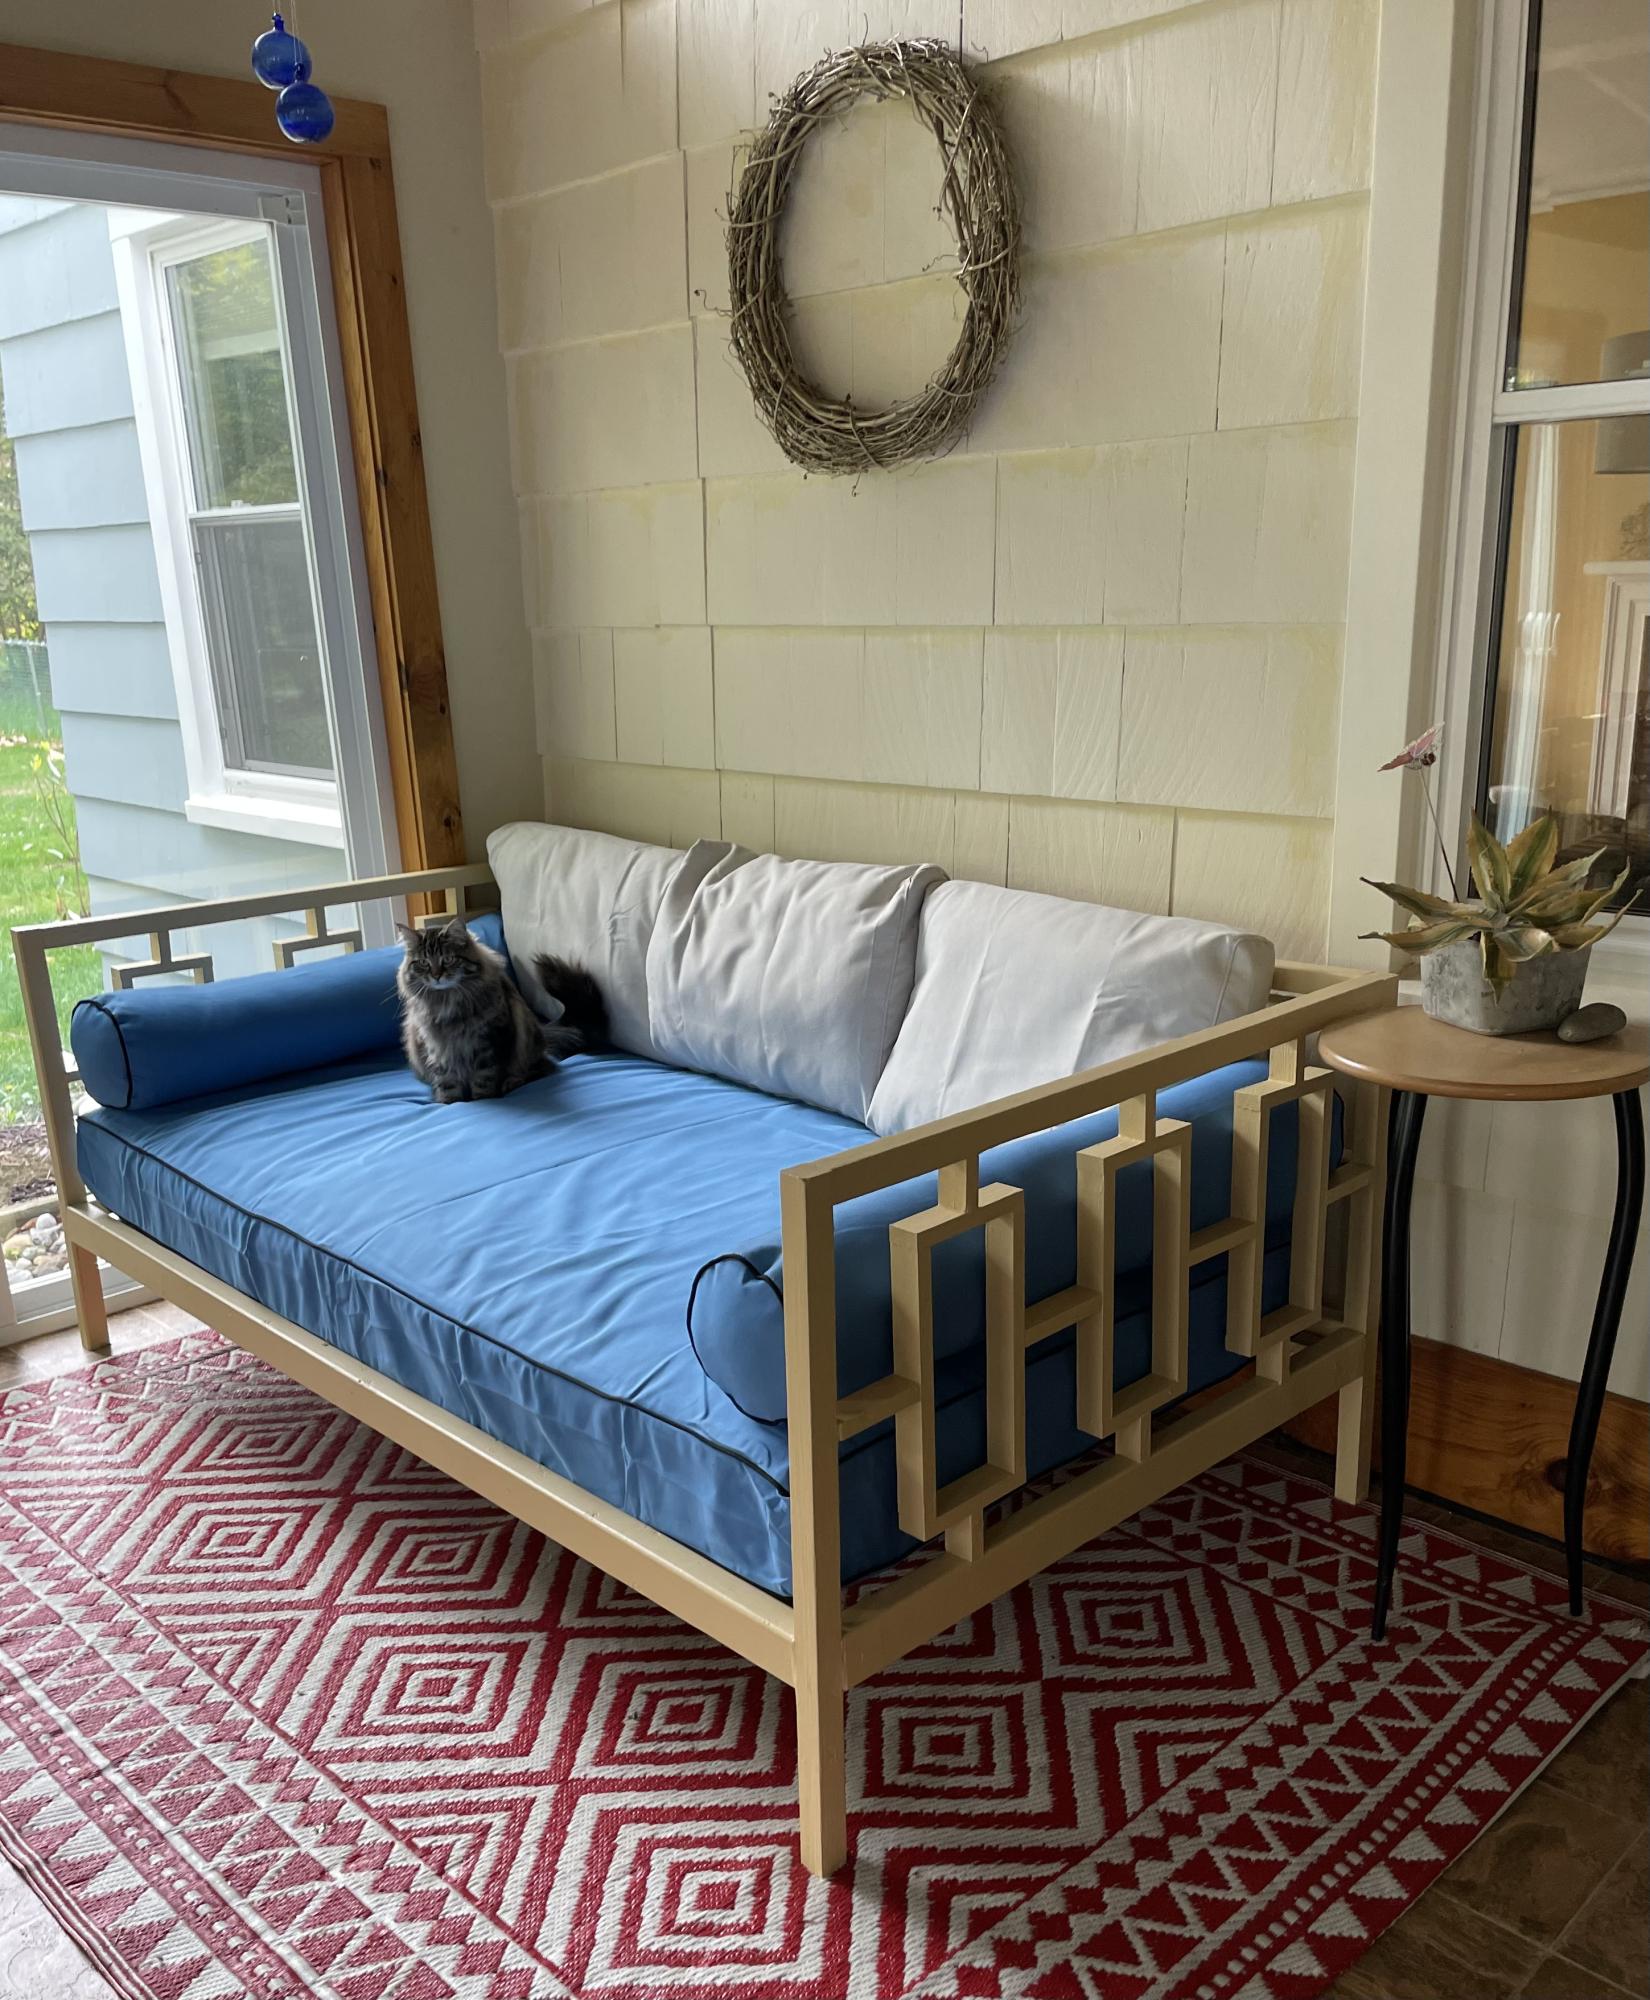
I woke up one morning and decided this space couldn’t go on without a day bed. One week later I am standing tall. This is my first intermediate build. Excited to jump into the next project!
Built from Plan(s)