Castle bed
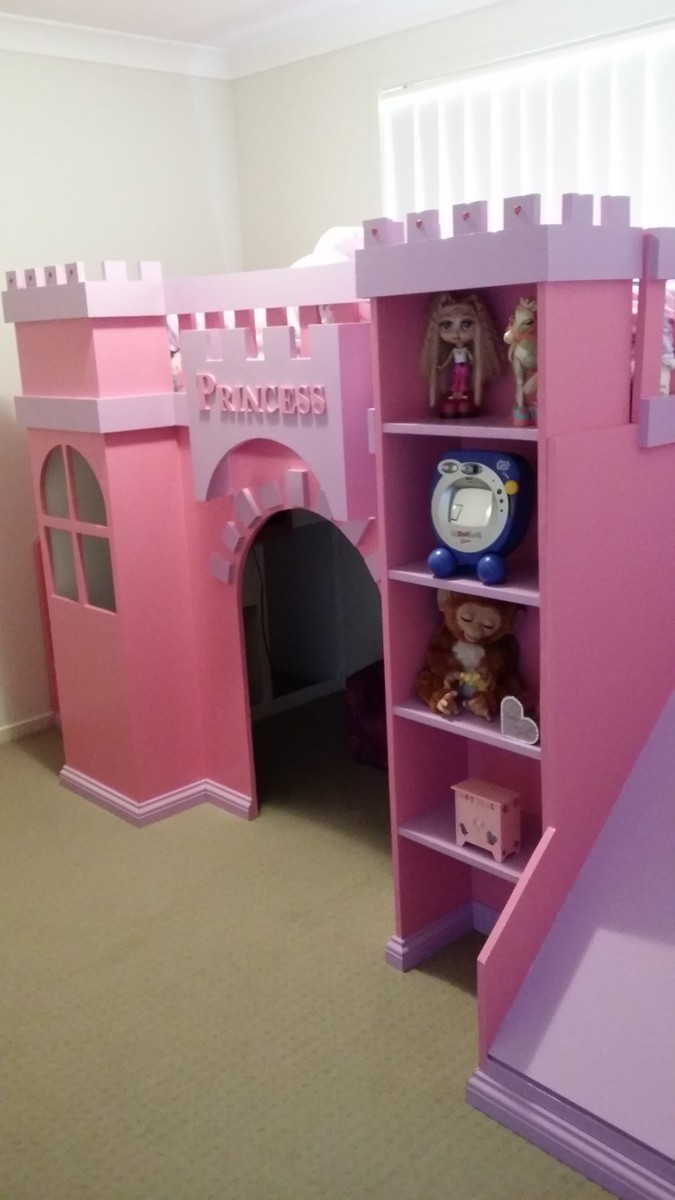
Castle bed

Built from Plan(s)
Recommended Skill Level
Starter Project
Castle bed
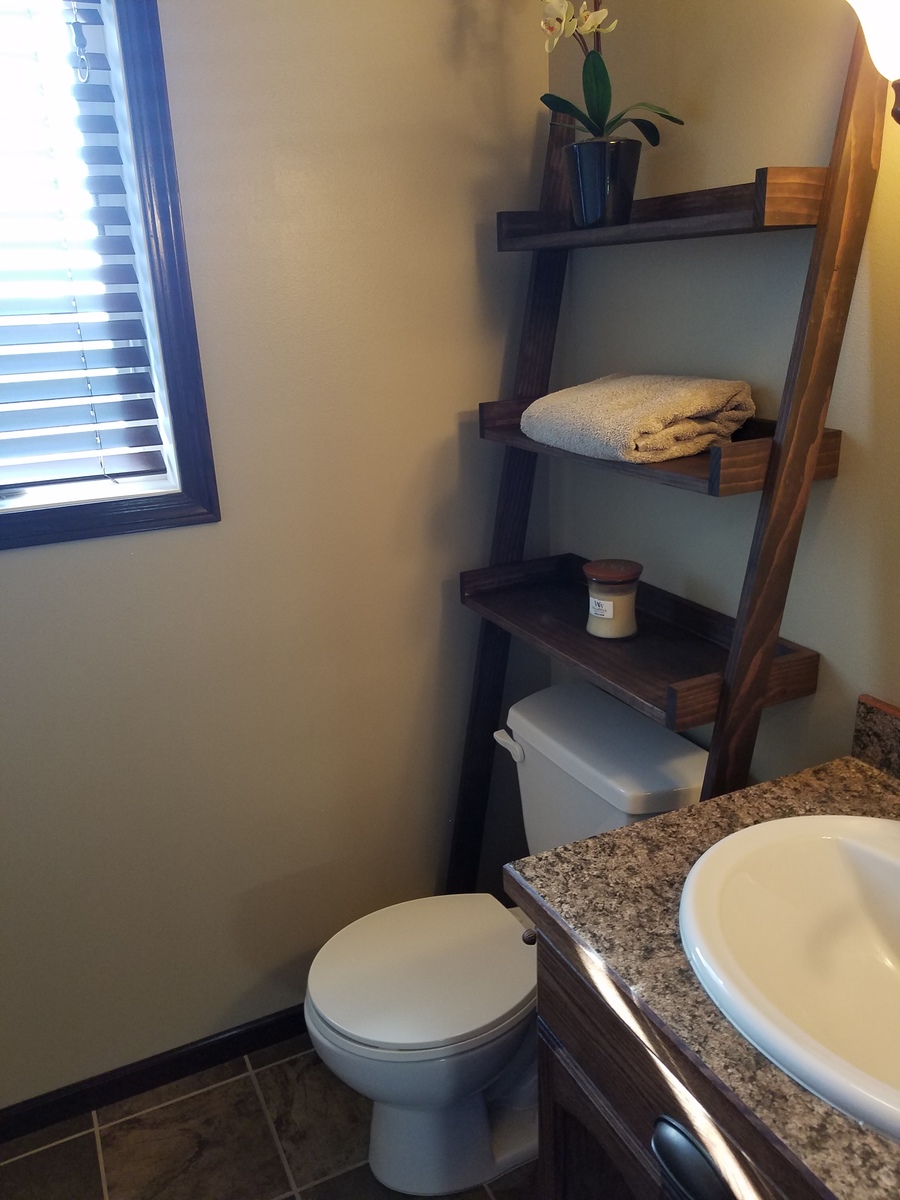
Thanks for the great plan Ana! Super cute addition to our bathroom!
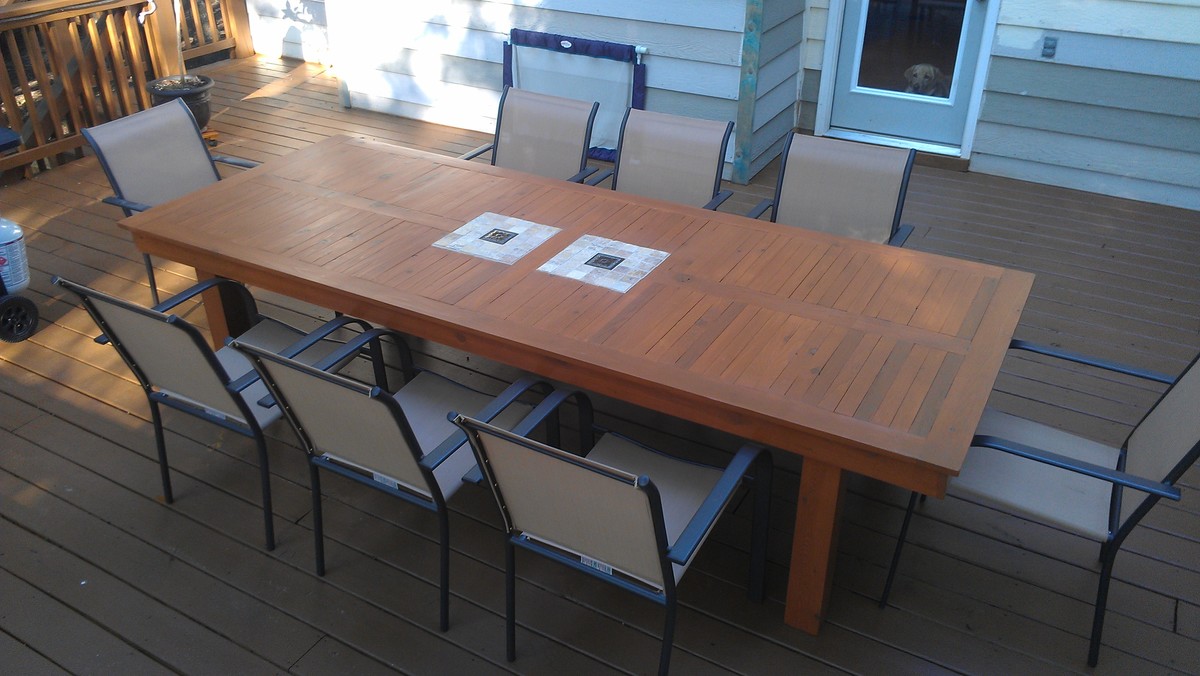
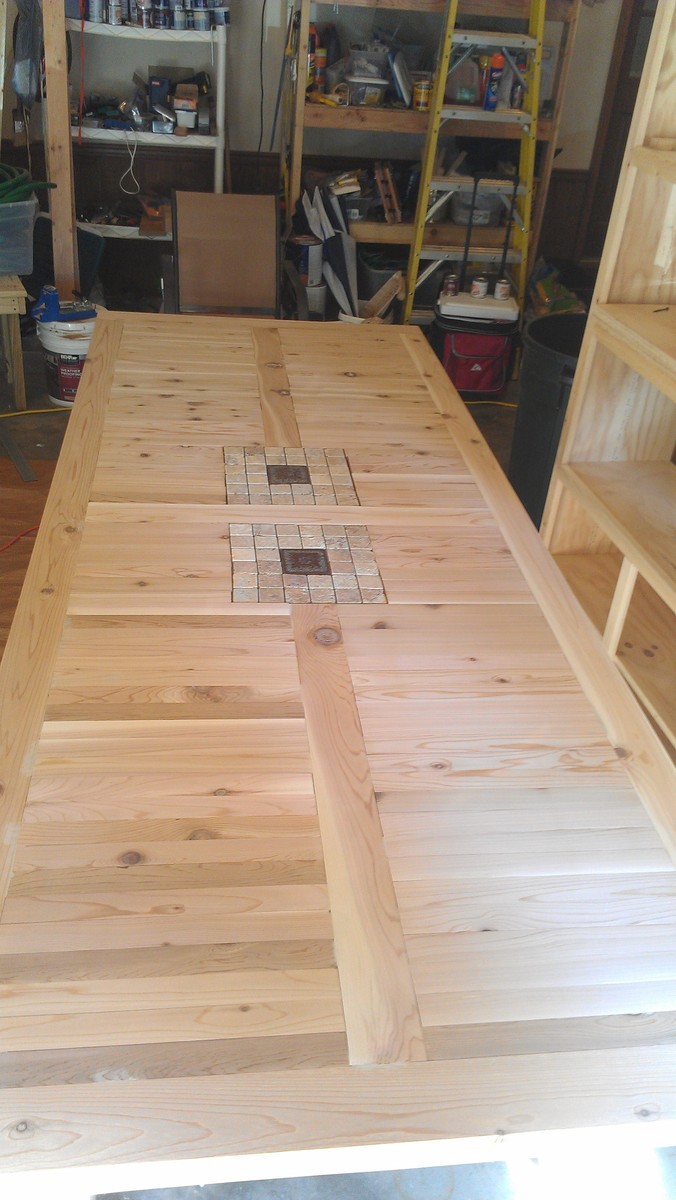
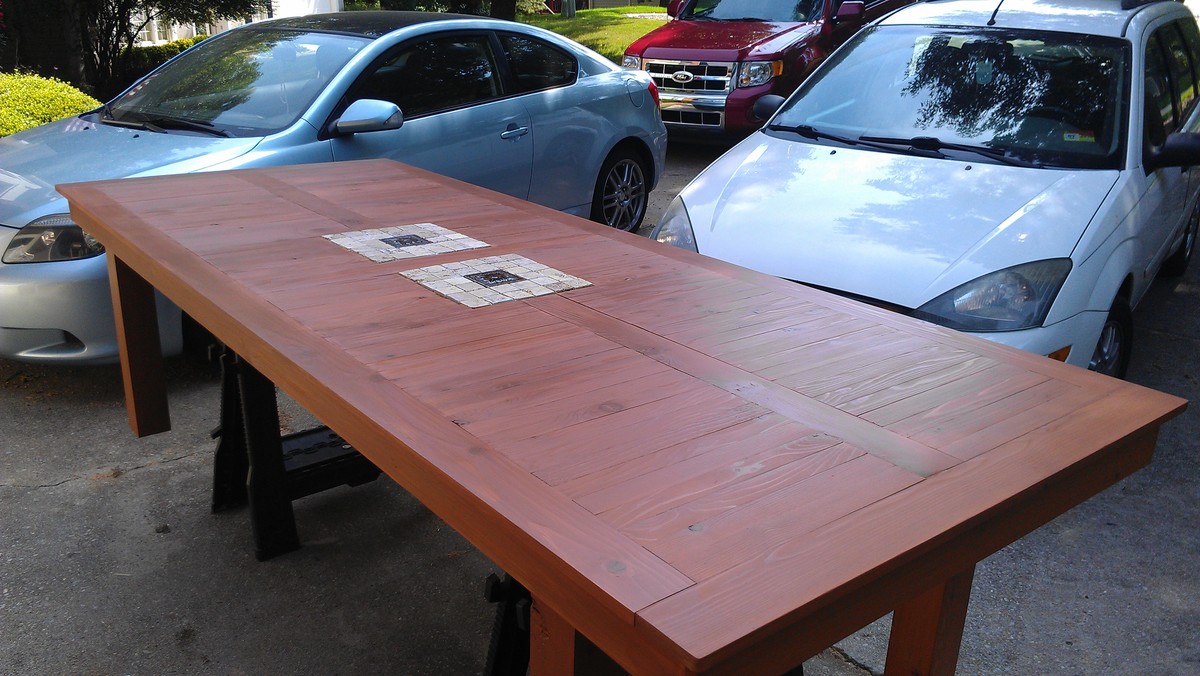
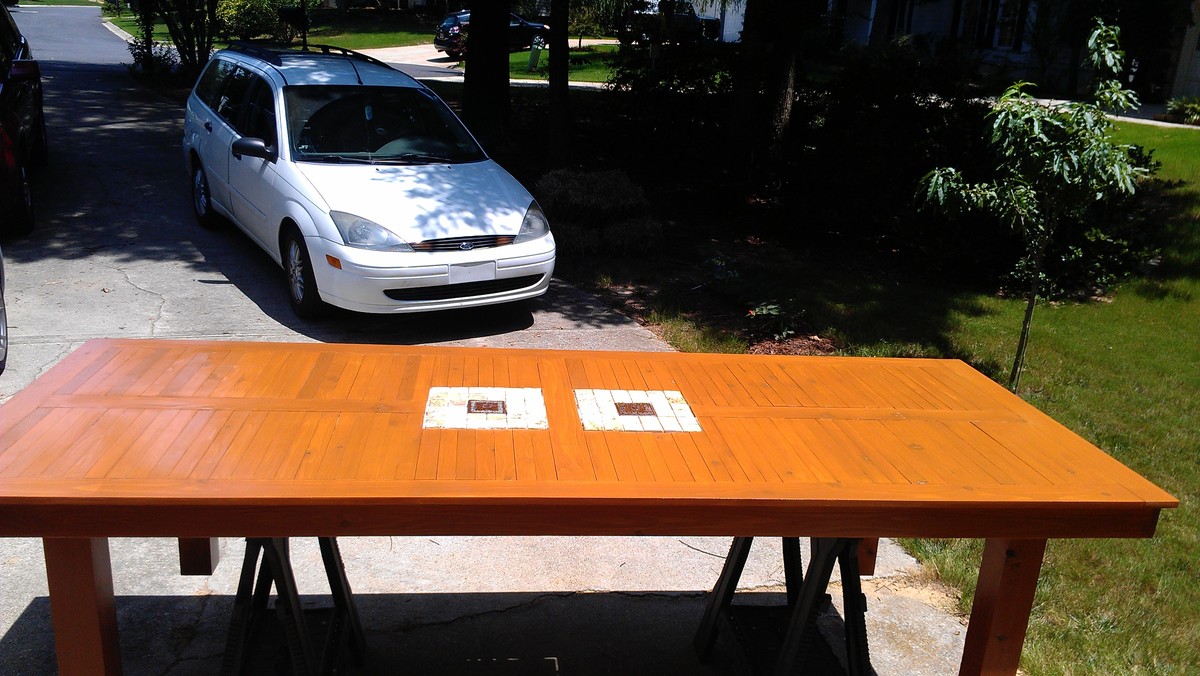
We finished the deck this summer and wanted a large table to put on it. I saw the different versions of the outdoor Ana built. This one seats eight and has a tile inlay. For now...chairs from Walmart provide seating.
Simple project to do with the kids.
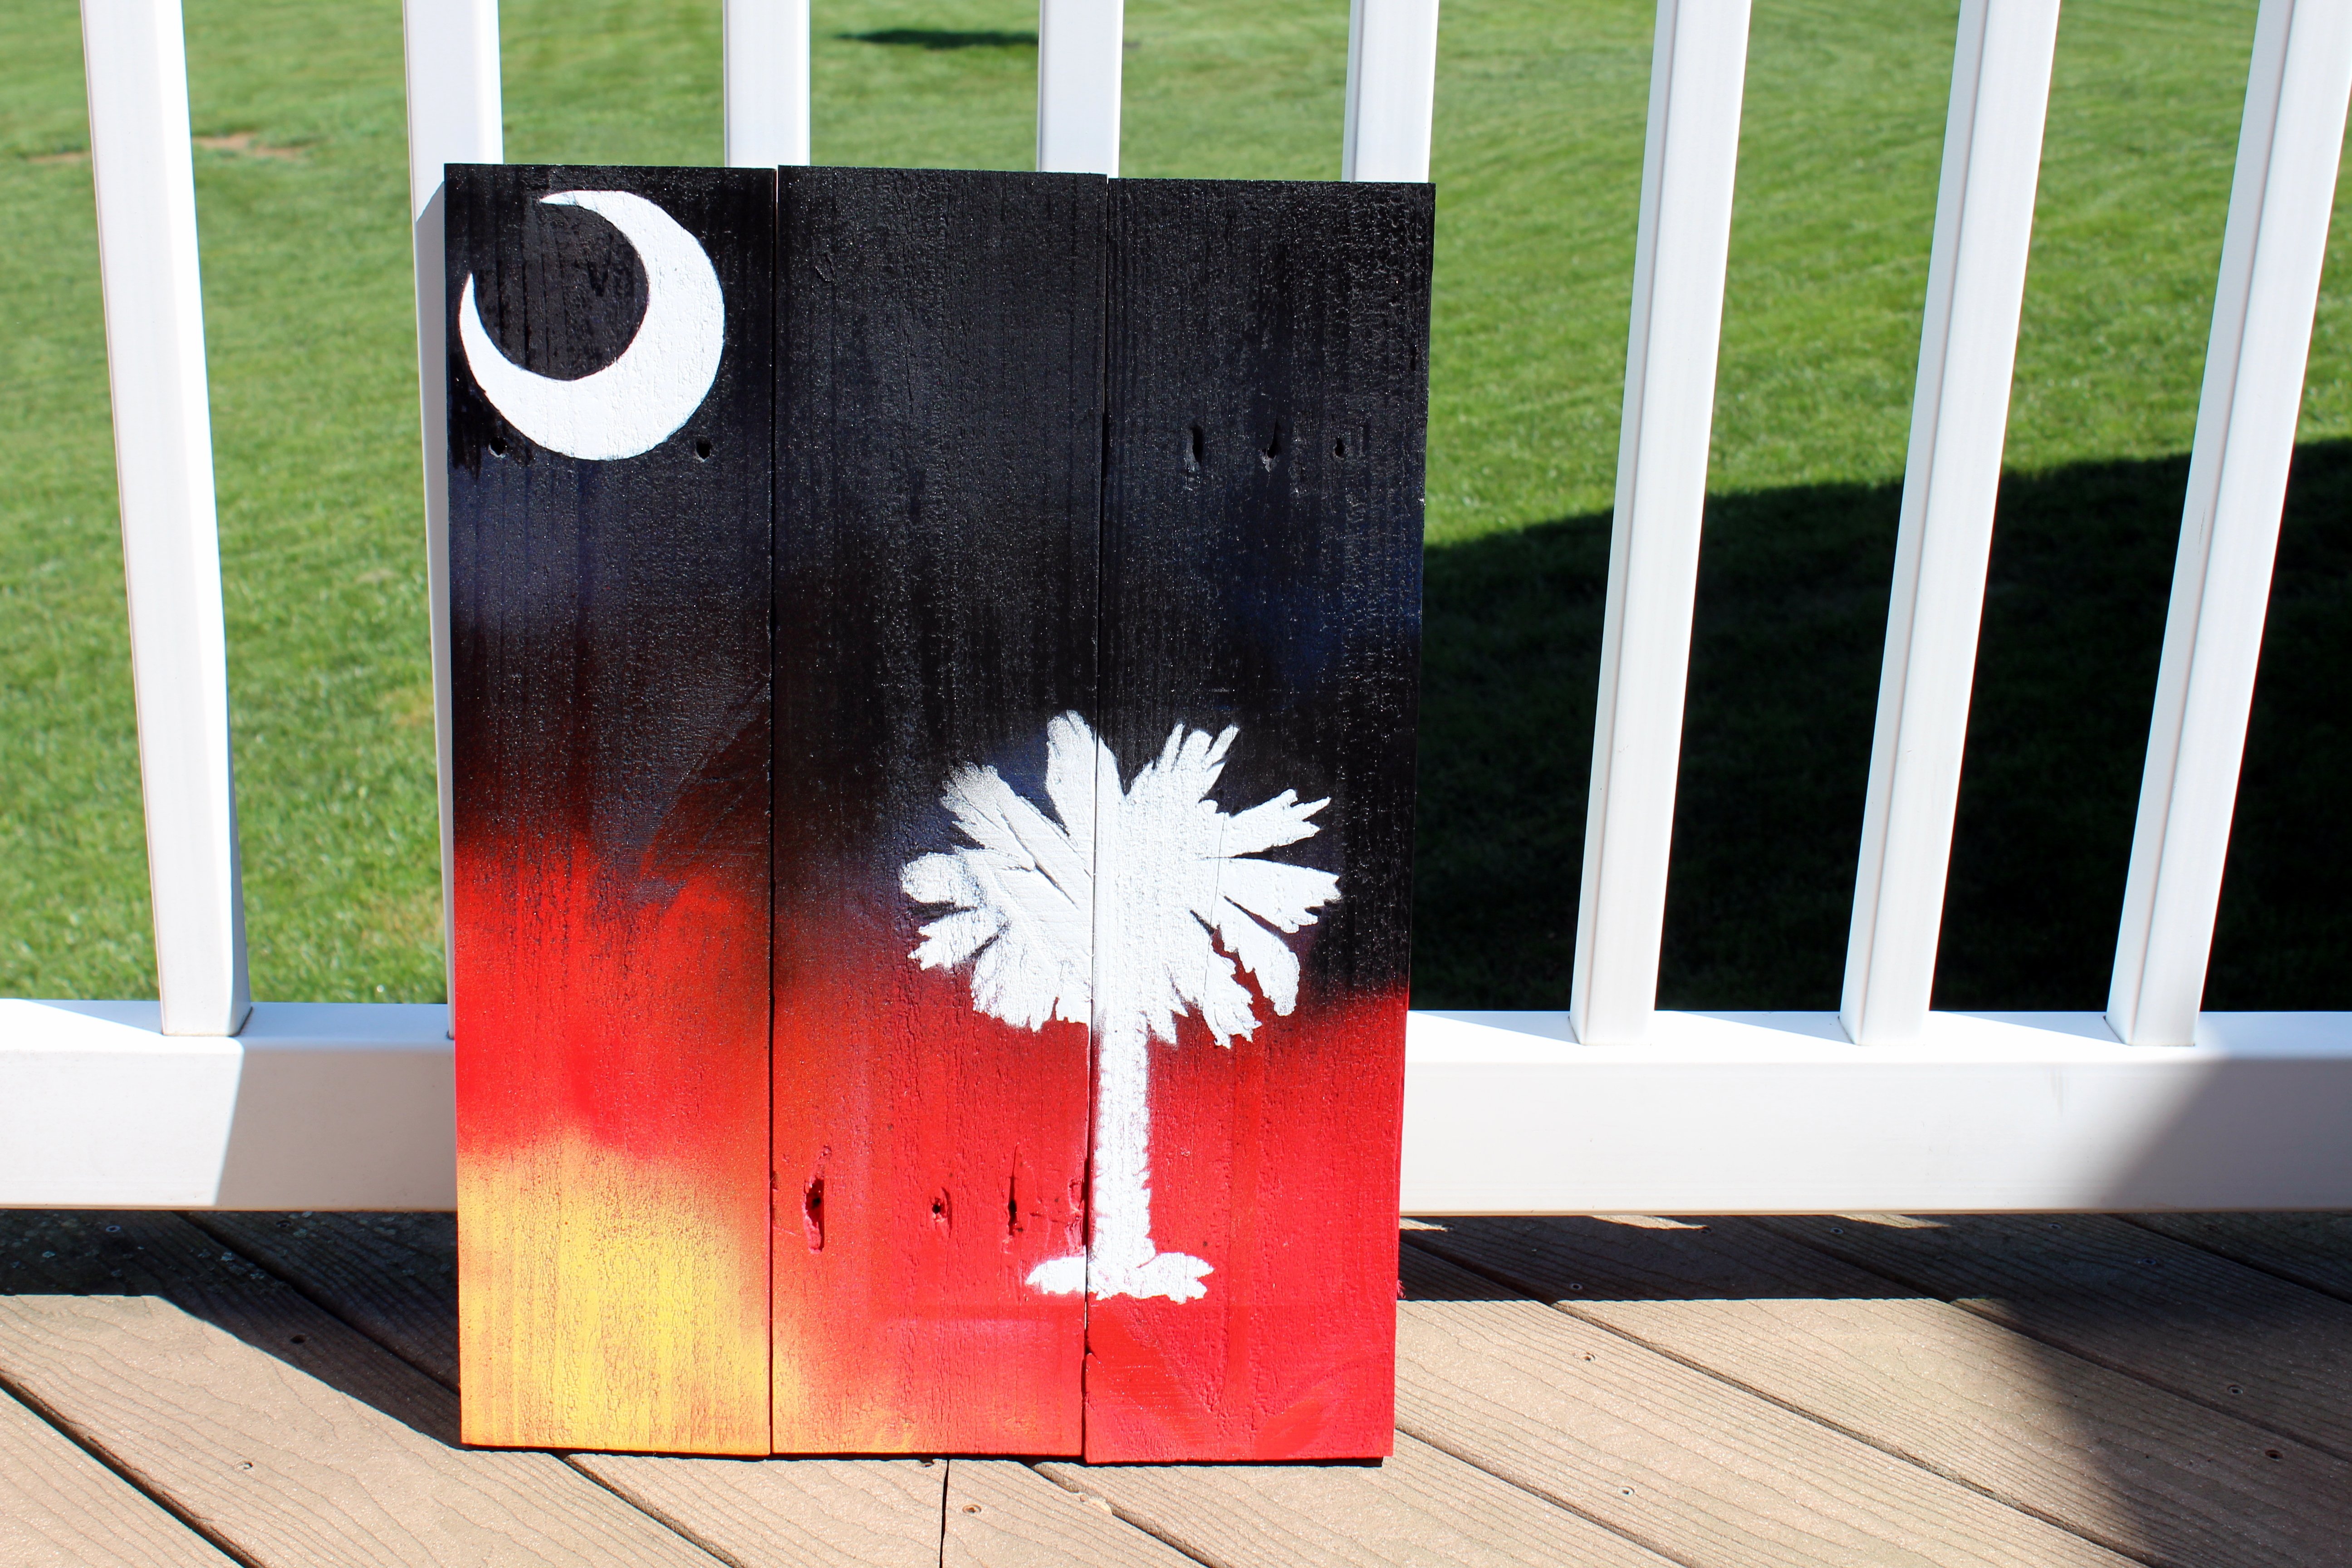
Video:
https://www.youtube.com/watch?v=S4EDpDPf6DI
Instructions:
http://www.instructables.com/id/Pallet-Wood-Painting/
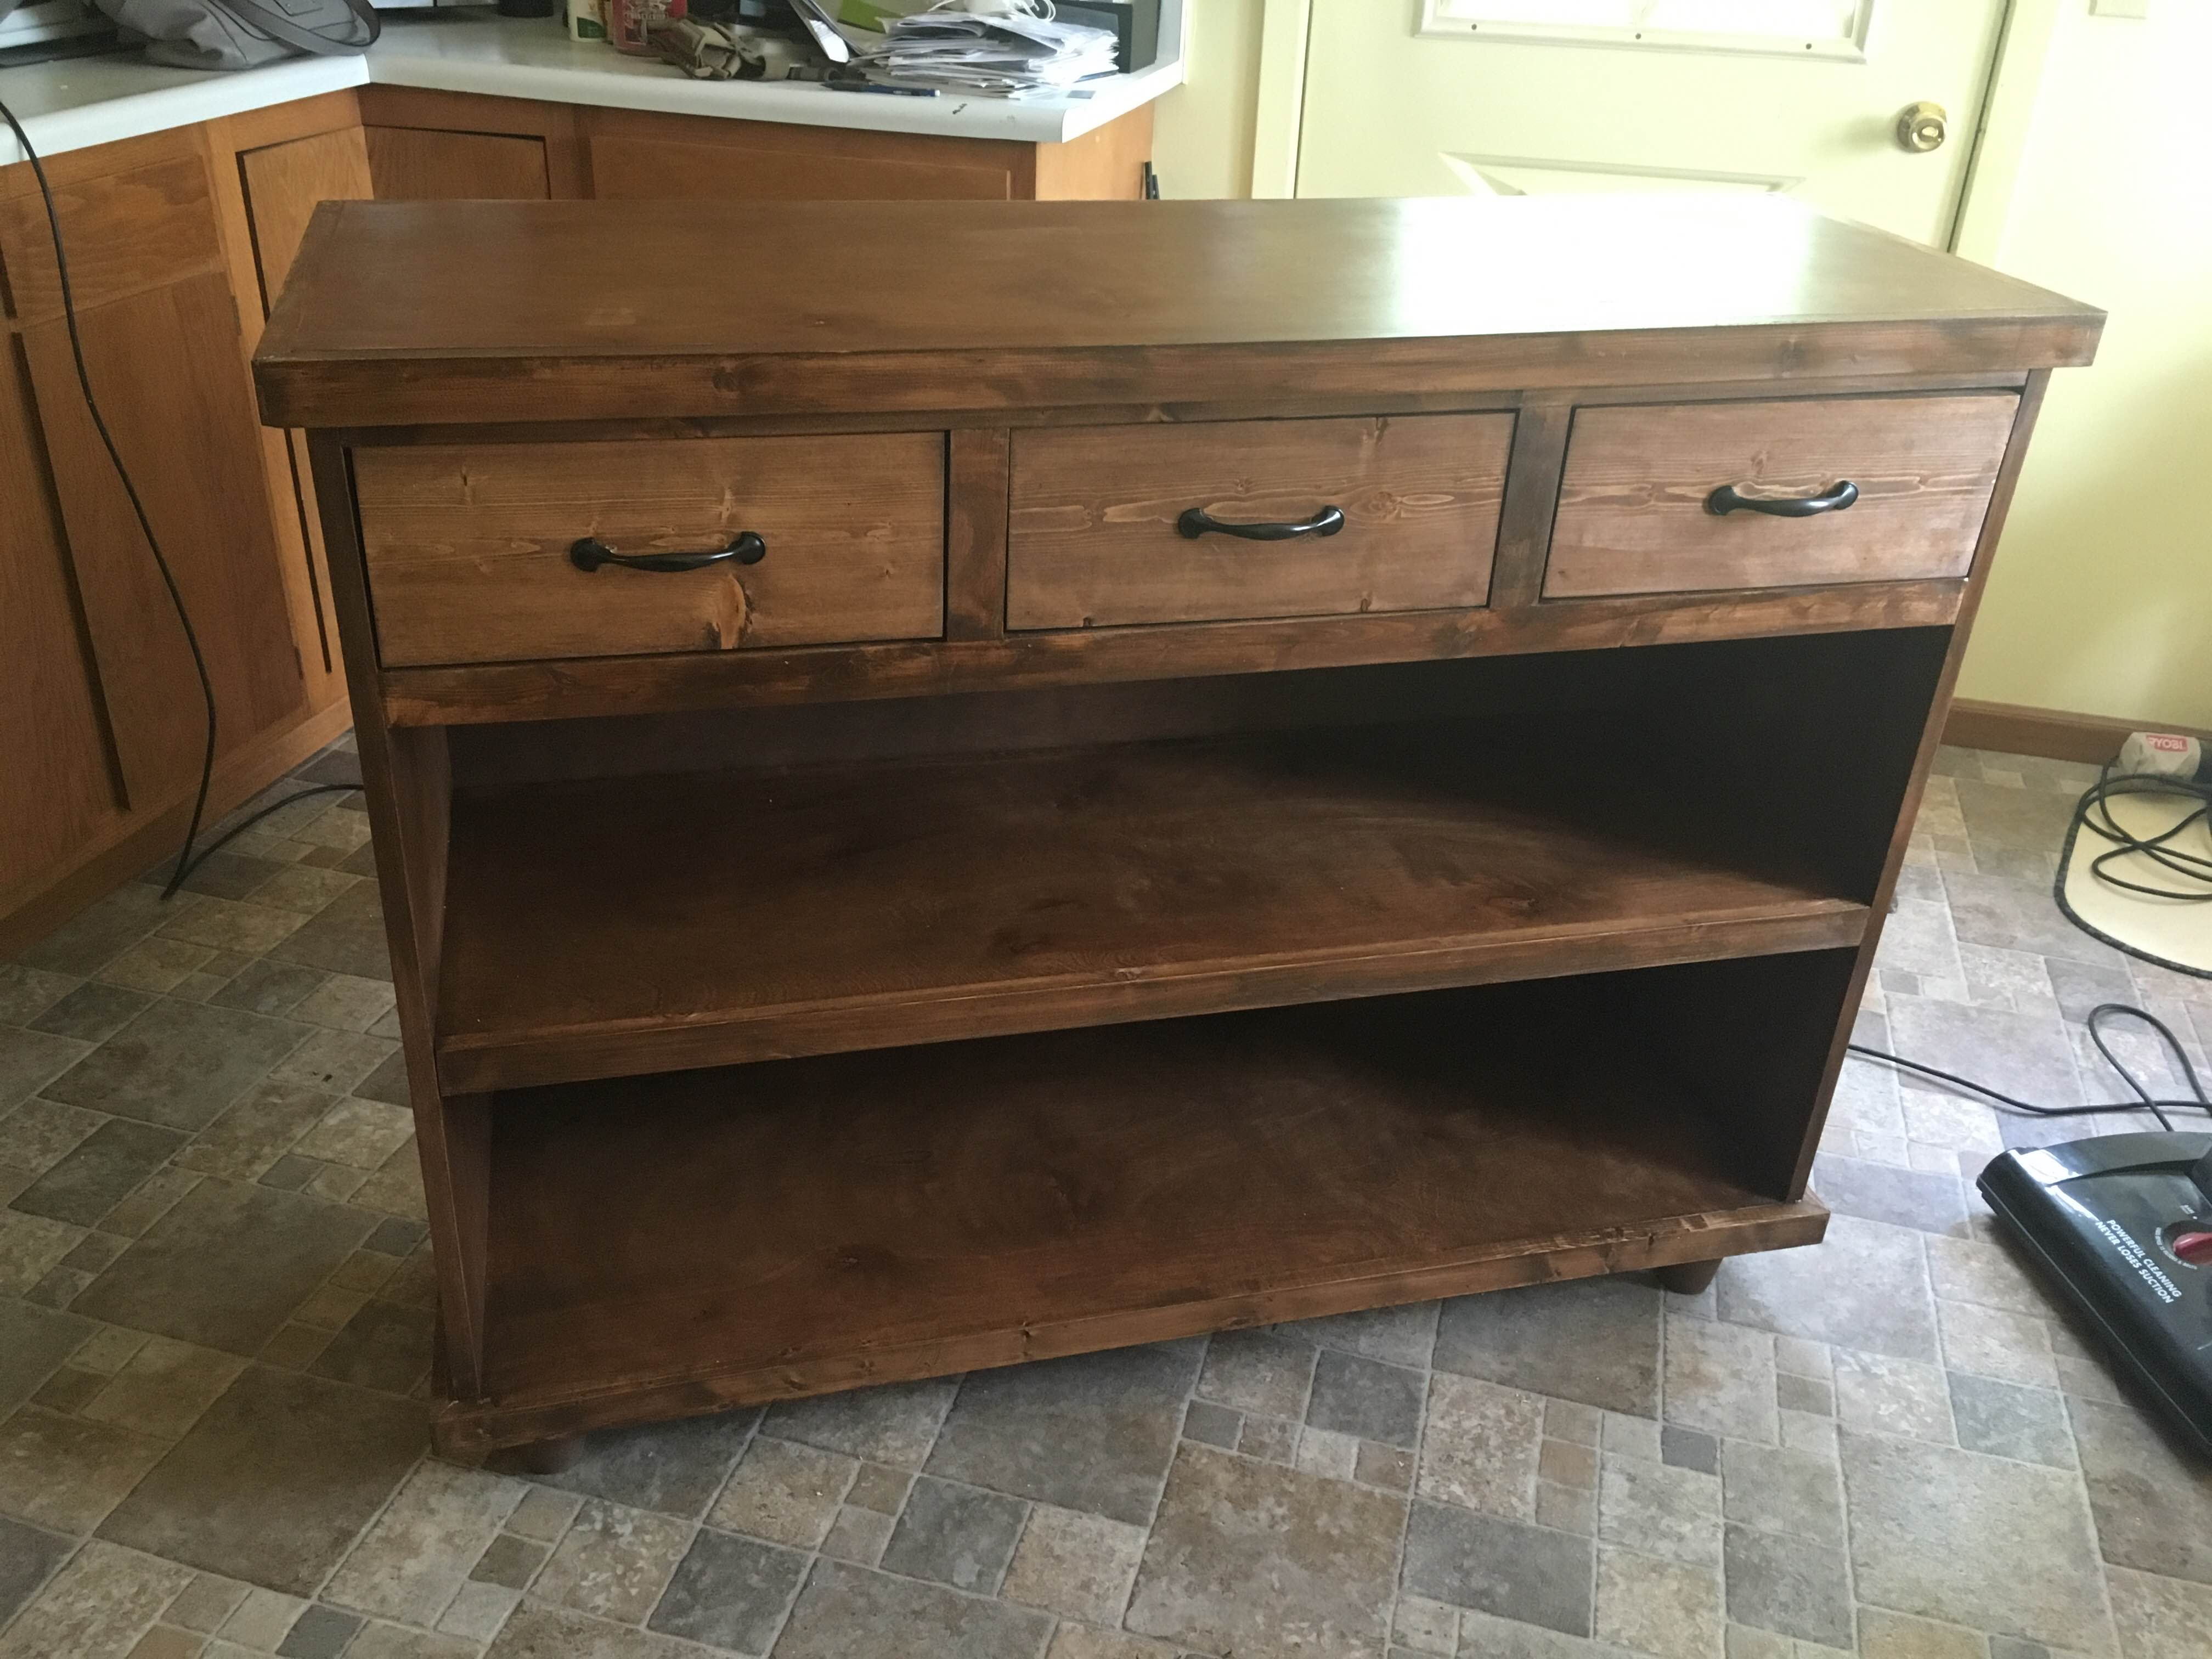
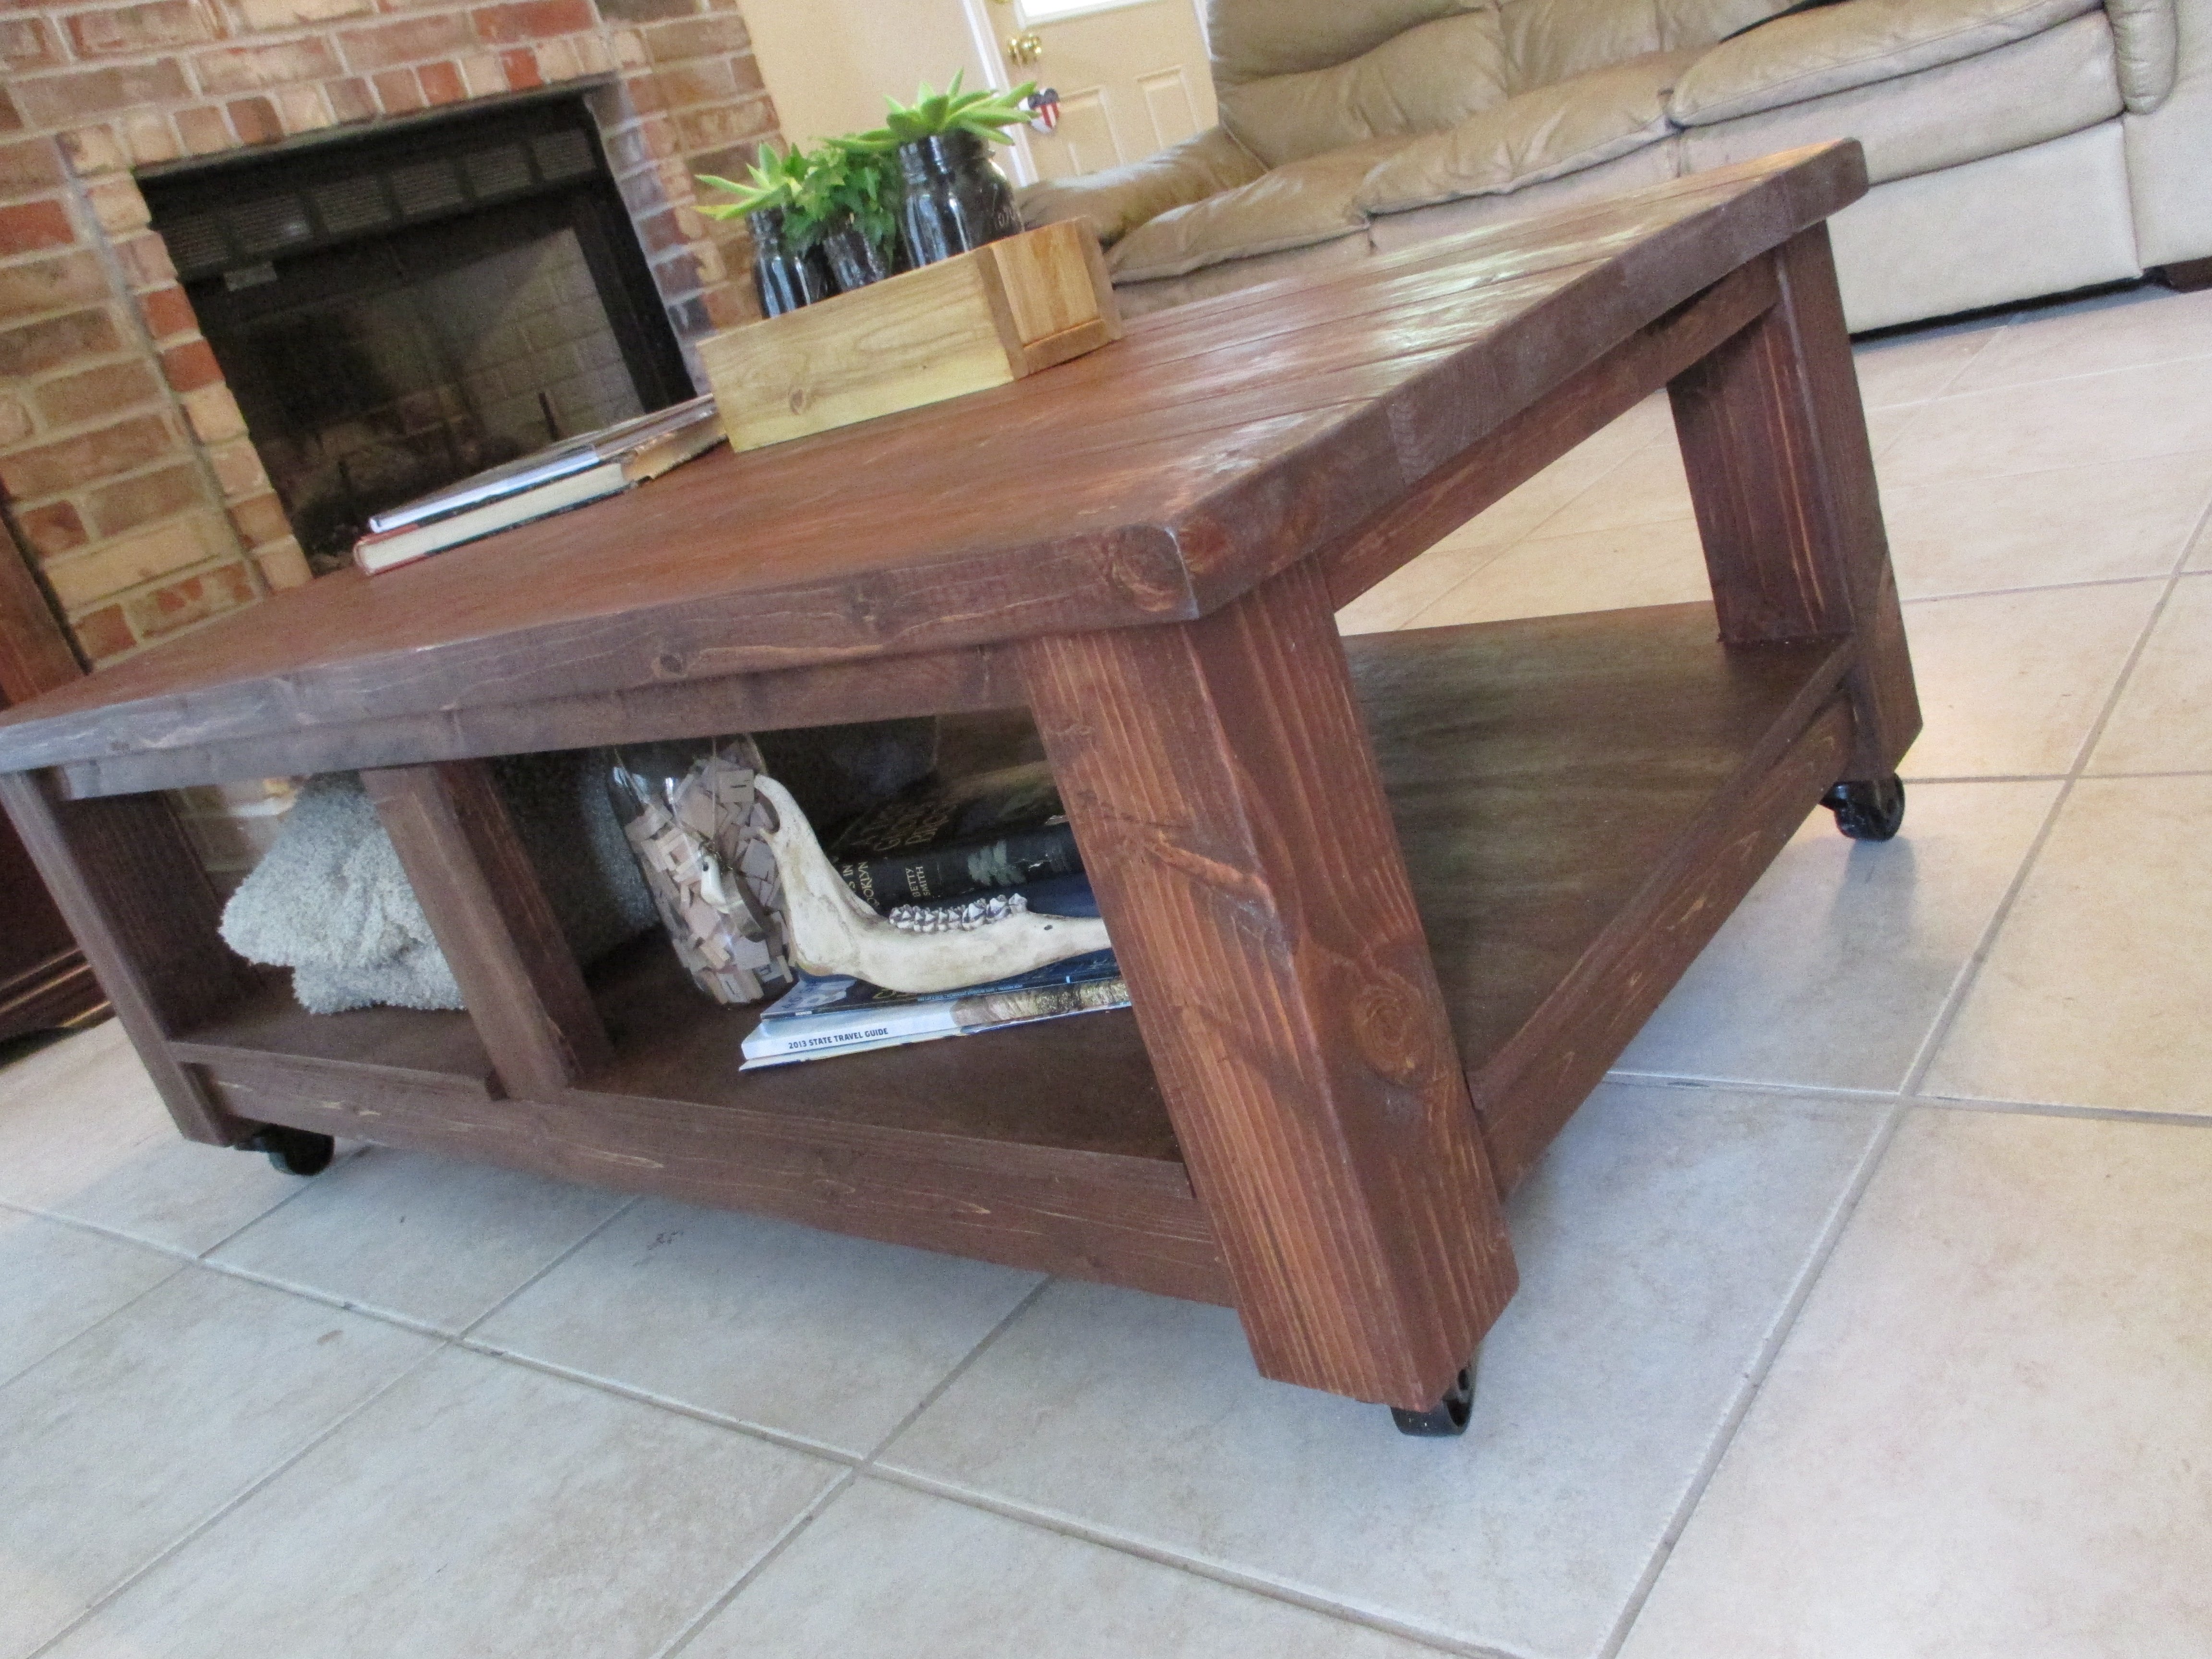
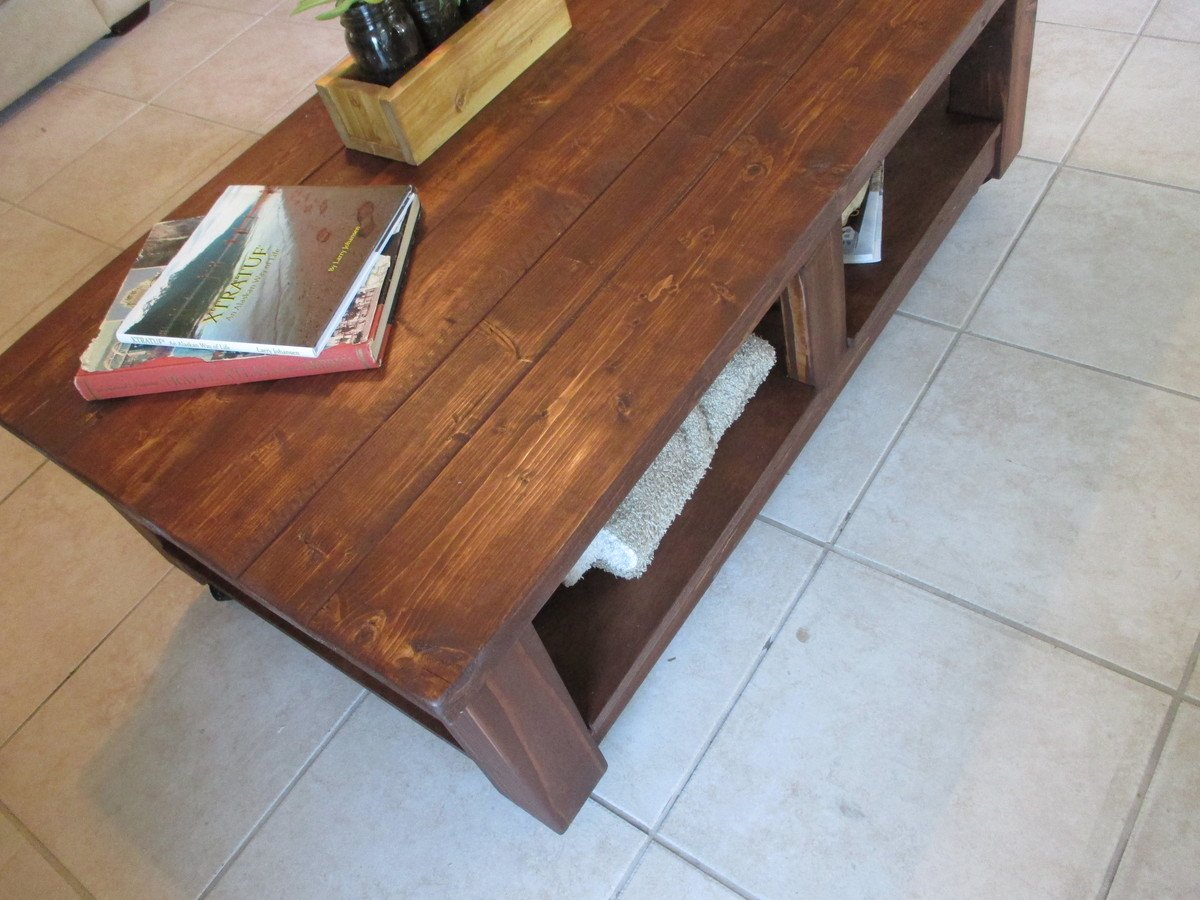
I liked the look of the spacers on the bottom shelf, but decided to leave them out since I just wanted to be done with this project :) I modified the plans to only have one shelf, as well as feet on the bottom (instead of having the piece go completely to the floor). As a result of adding the feet, the bottom is framed with 1x2s instead of 1x4s. I needed to purchase 6 1x2s to do that (but only needed 3 1x4s). I attempted to miter the cuts on those pieces...wood filler came to the rescue in the end. This was a lot of fun to make!
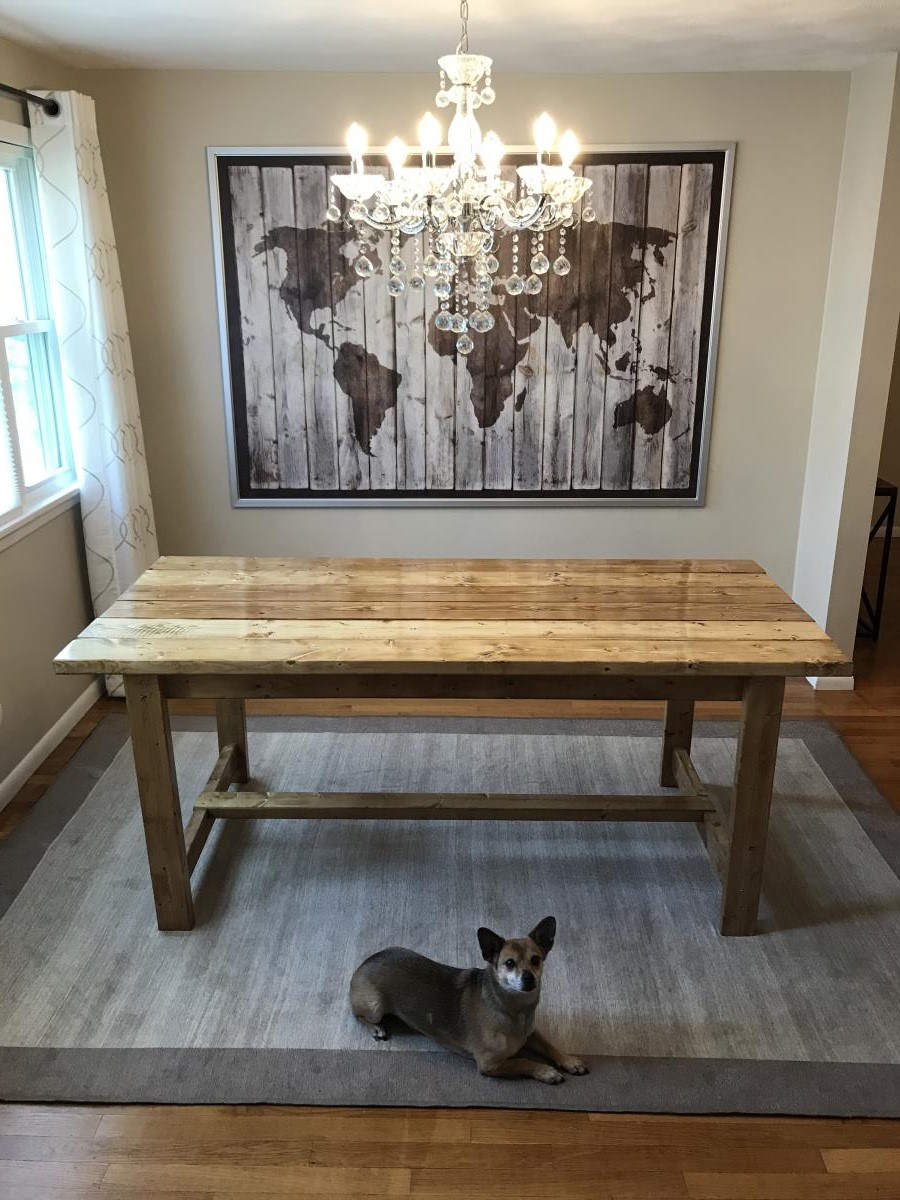
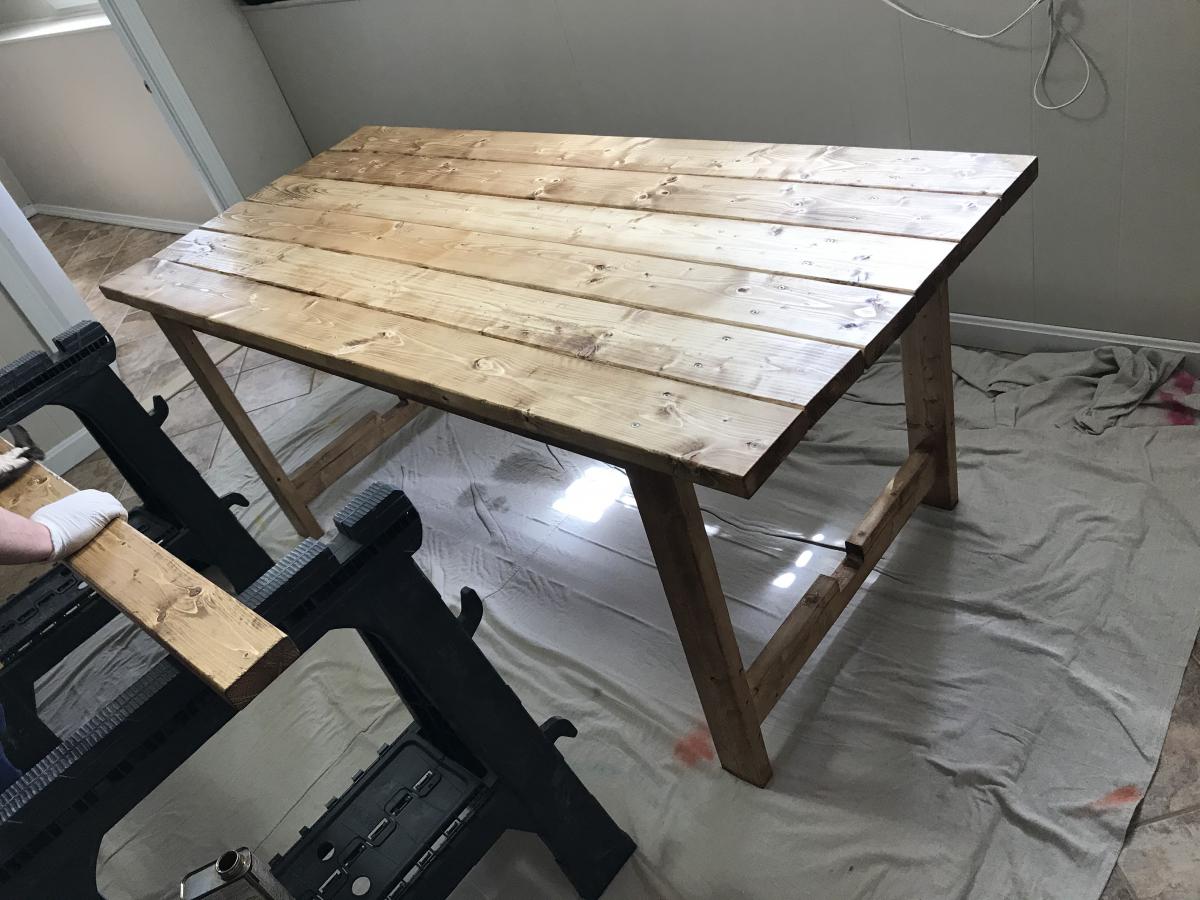
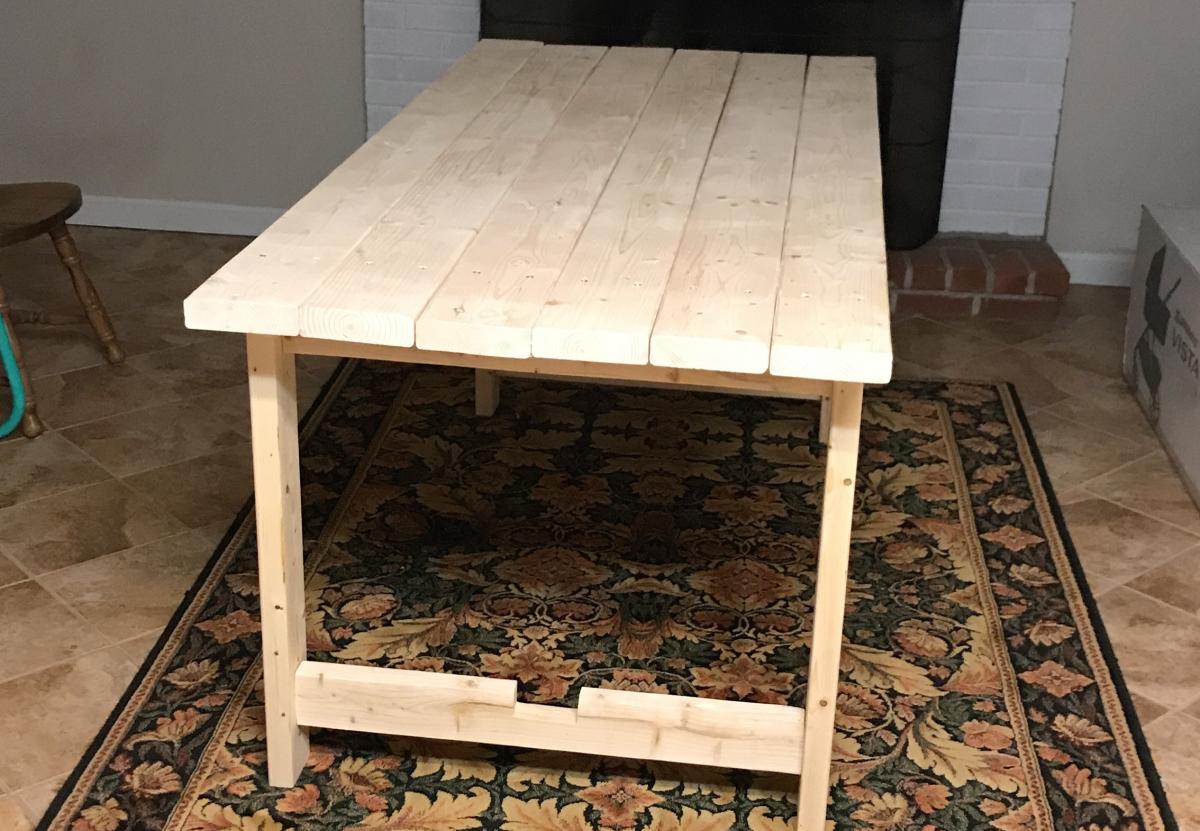
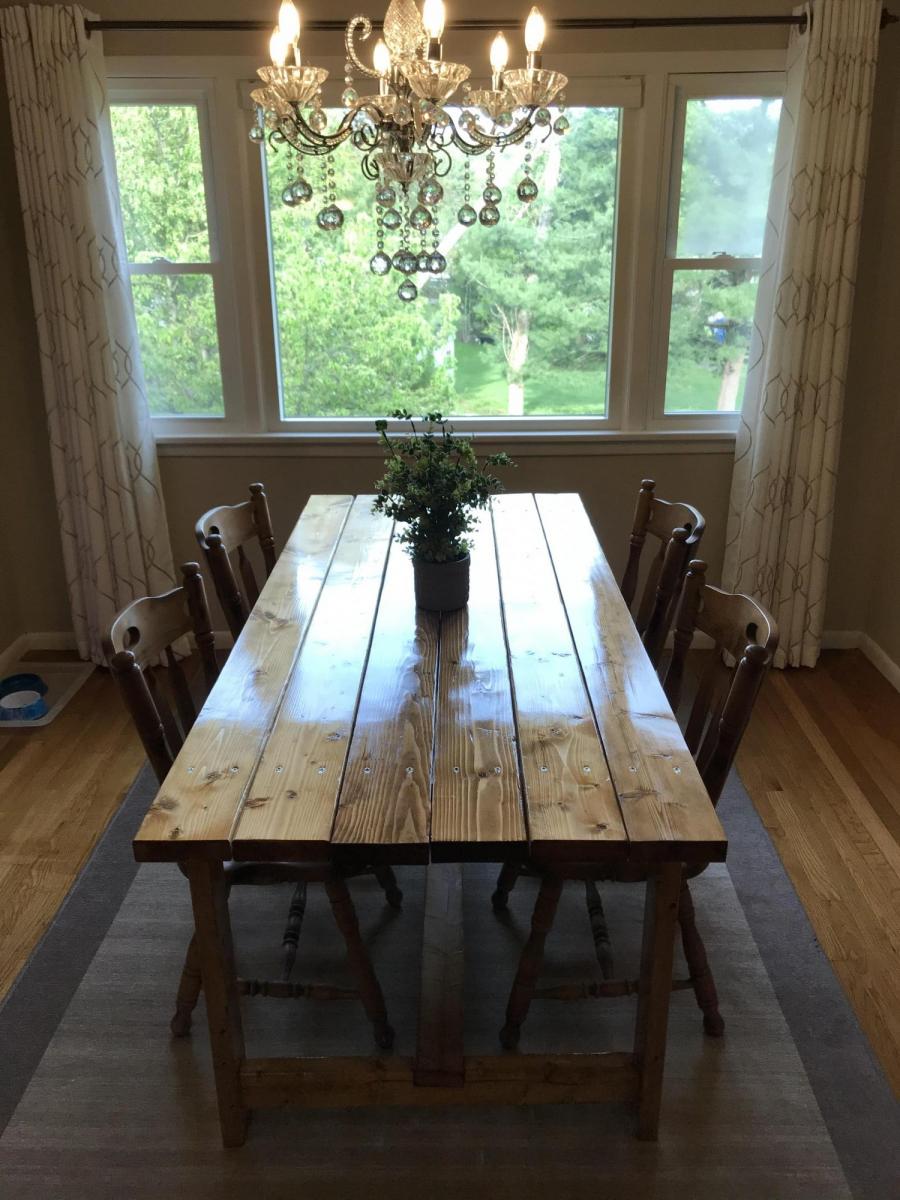
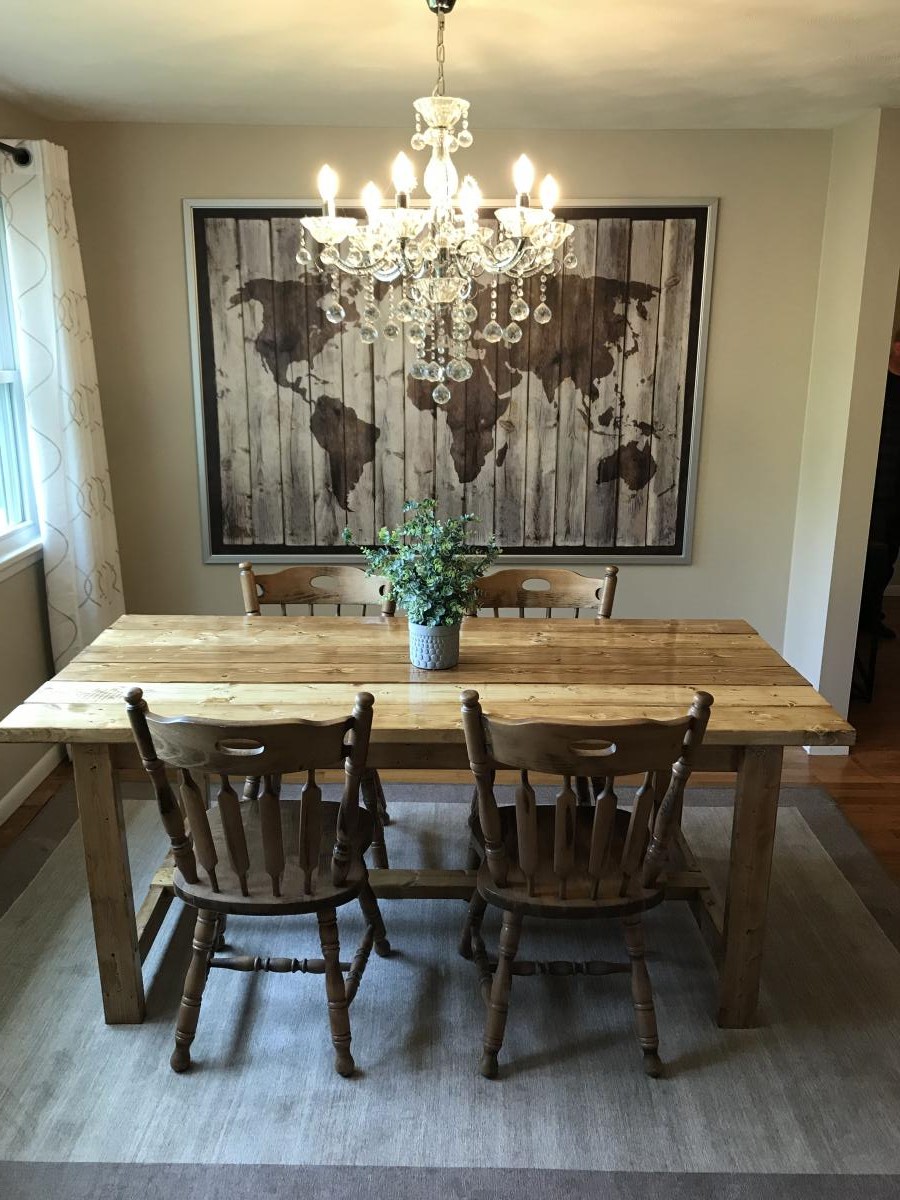
We made a 6'ft version of the beginner plans. We initially made the table 1" higher than the plans originally called for so that there'd be more room under the apron but that turned out to be just too high to comfortably dine at, so at the end of the project I shaved off an inch on each of the legs.
Some issues we had with this table is Pine is rather easy to warp and during the staining and poly process 3 of the top boards warped too heavily for the table maintain a fat surface. I ended up buy 3 new 2x6's and doing the sanding staining process all over again. We also modded the plans so have a notch to fit the bottom cross beam in. This was our first wood working project ever it turned out really nice. We used the Dutch oil, Dark Walnut on the pine for anyone interested.
I'm giving a high estimate on both time and money due to mess ups and just being completely and utterly new at this stuff.

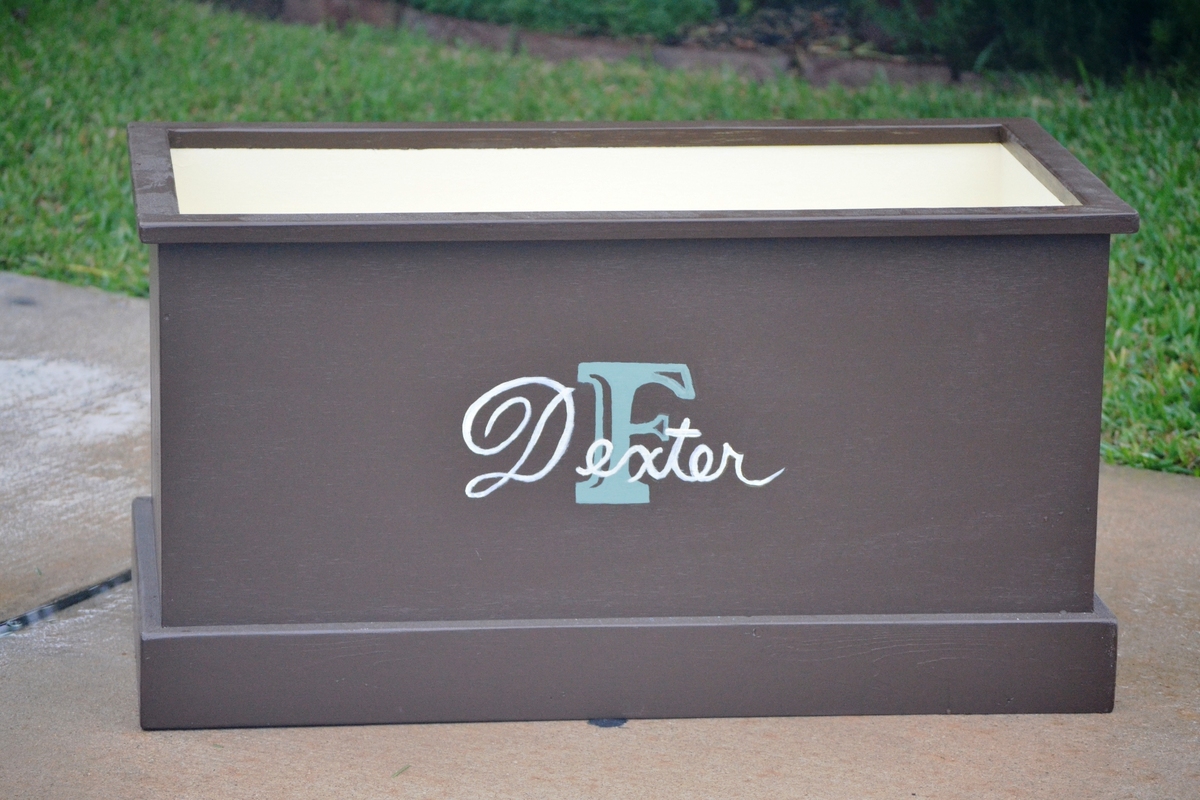
I am in process of making these for my new twin nephews. By reducing the width of the toy box by 1/2", I was able to fit two of the open top toy boxes on one sheet of cabinet grade plywood ($30).
For Two Toy Boxes cut plywood to the following dimensions (see photo for layout):
2 - 32 x 15 1/2 pieces (bottoms)
4 - 33 1/2 x 15 1/2 (front and back)
4 - 15 1/2 x 15 1/2 (sides)
My local Home Depot does not charge for cutting the plywood and the person that was assisting me made absolutely perfect cuts and helped direct me to the cabinet grade plywood (which was located away from the plywood aisle), thus saving me an extra $15.
Boxes took approximately 2-3 hours each to build, another hour to sand and fill screw holes, and several hours to paint.
Photo is of Dexter's toy box. Dante's looks very similar. My 2 year old niece enjoyed taking a nap inside of the boxes as well.
Make sure to purchase non-toxic paint.... I believe one of my nephews may be part beaver!


I've made several of Ana's pieces, but this is my first brag post.
I actually made this for one of my husband's co-workers, but now I want to make one for myself.
I don't know the actual amount of hours it took, but like any project, the sanding was the most tedious part!
This one was built with 4 2x6, and 2 2x4 boards on top, as the friend wanted it a little wider than the original plan. I modified the other dimensions accordingly.
The wheels used in the Shanty2Chic build post were too large for my 4x4 posts. The wheel plates were too wide. They measured about 3.75" and my 4x4's were only 3.5". Also, speaking of the 4x4's, I used untreated Douglas Fir, purchased from my local Lowes. I typically shop at Home Depot, but they did not carry any untreated 4x4's.
The wheels I used were the same style by Everbilt, but the next size down, the 2" wheels. However, their overall height was 3", and so the height of the table ended up being perfect anyhow!
I finished the table in Minwax English Chestnut and used the Minwax rub on satin polyurethane.
I put the time as a week long, primarily because of sanding and finishing. But, I think that if you devoted your time to it, you could do it in a weekend.
OH! Also, Ana doesn't mention it in the plans, but the Shanty Chics do... put the plywood shelf in BEFORE adding the second side. I had to remove pieces which were already glued, and it made that step a bit annoying!
Otherwise, all was well. Enjoy!
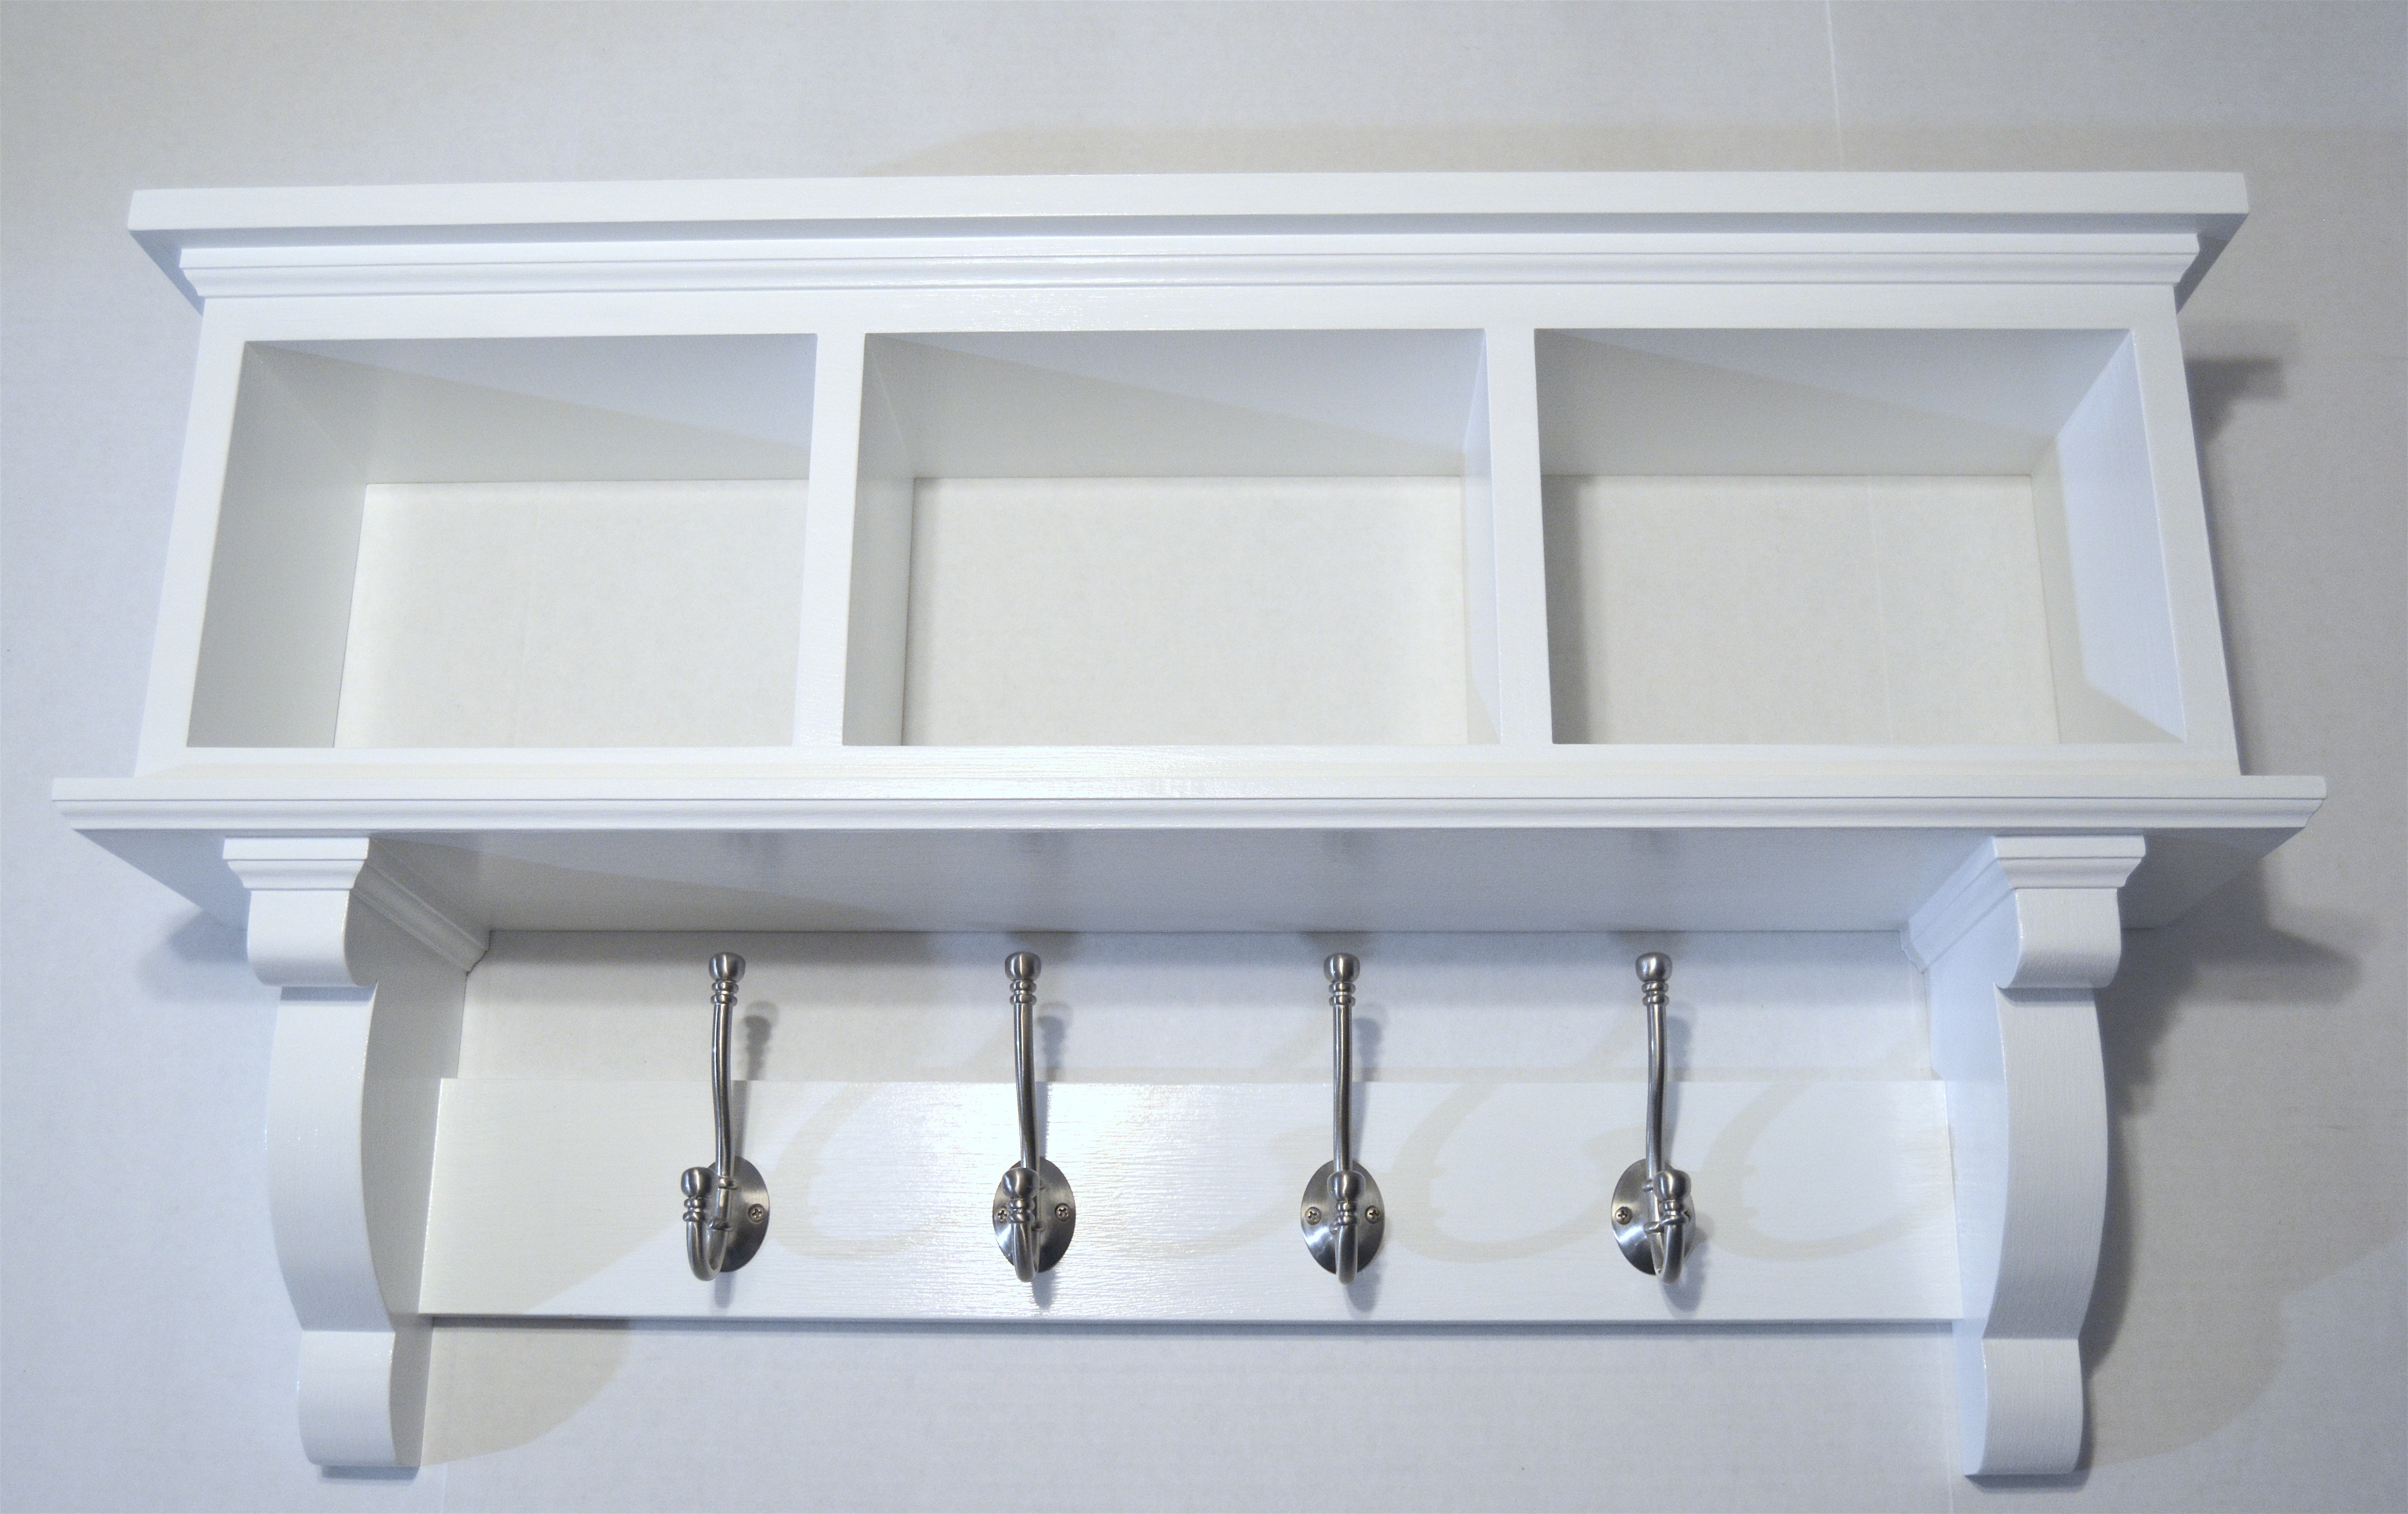
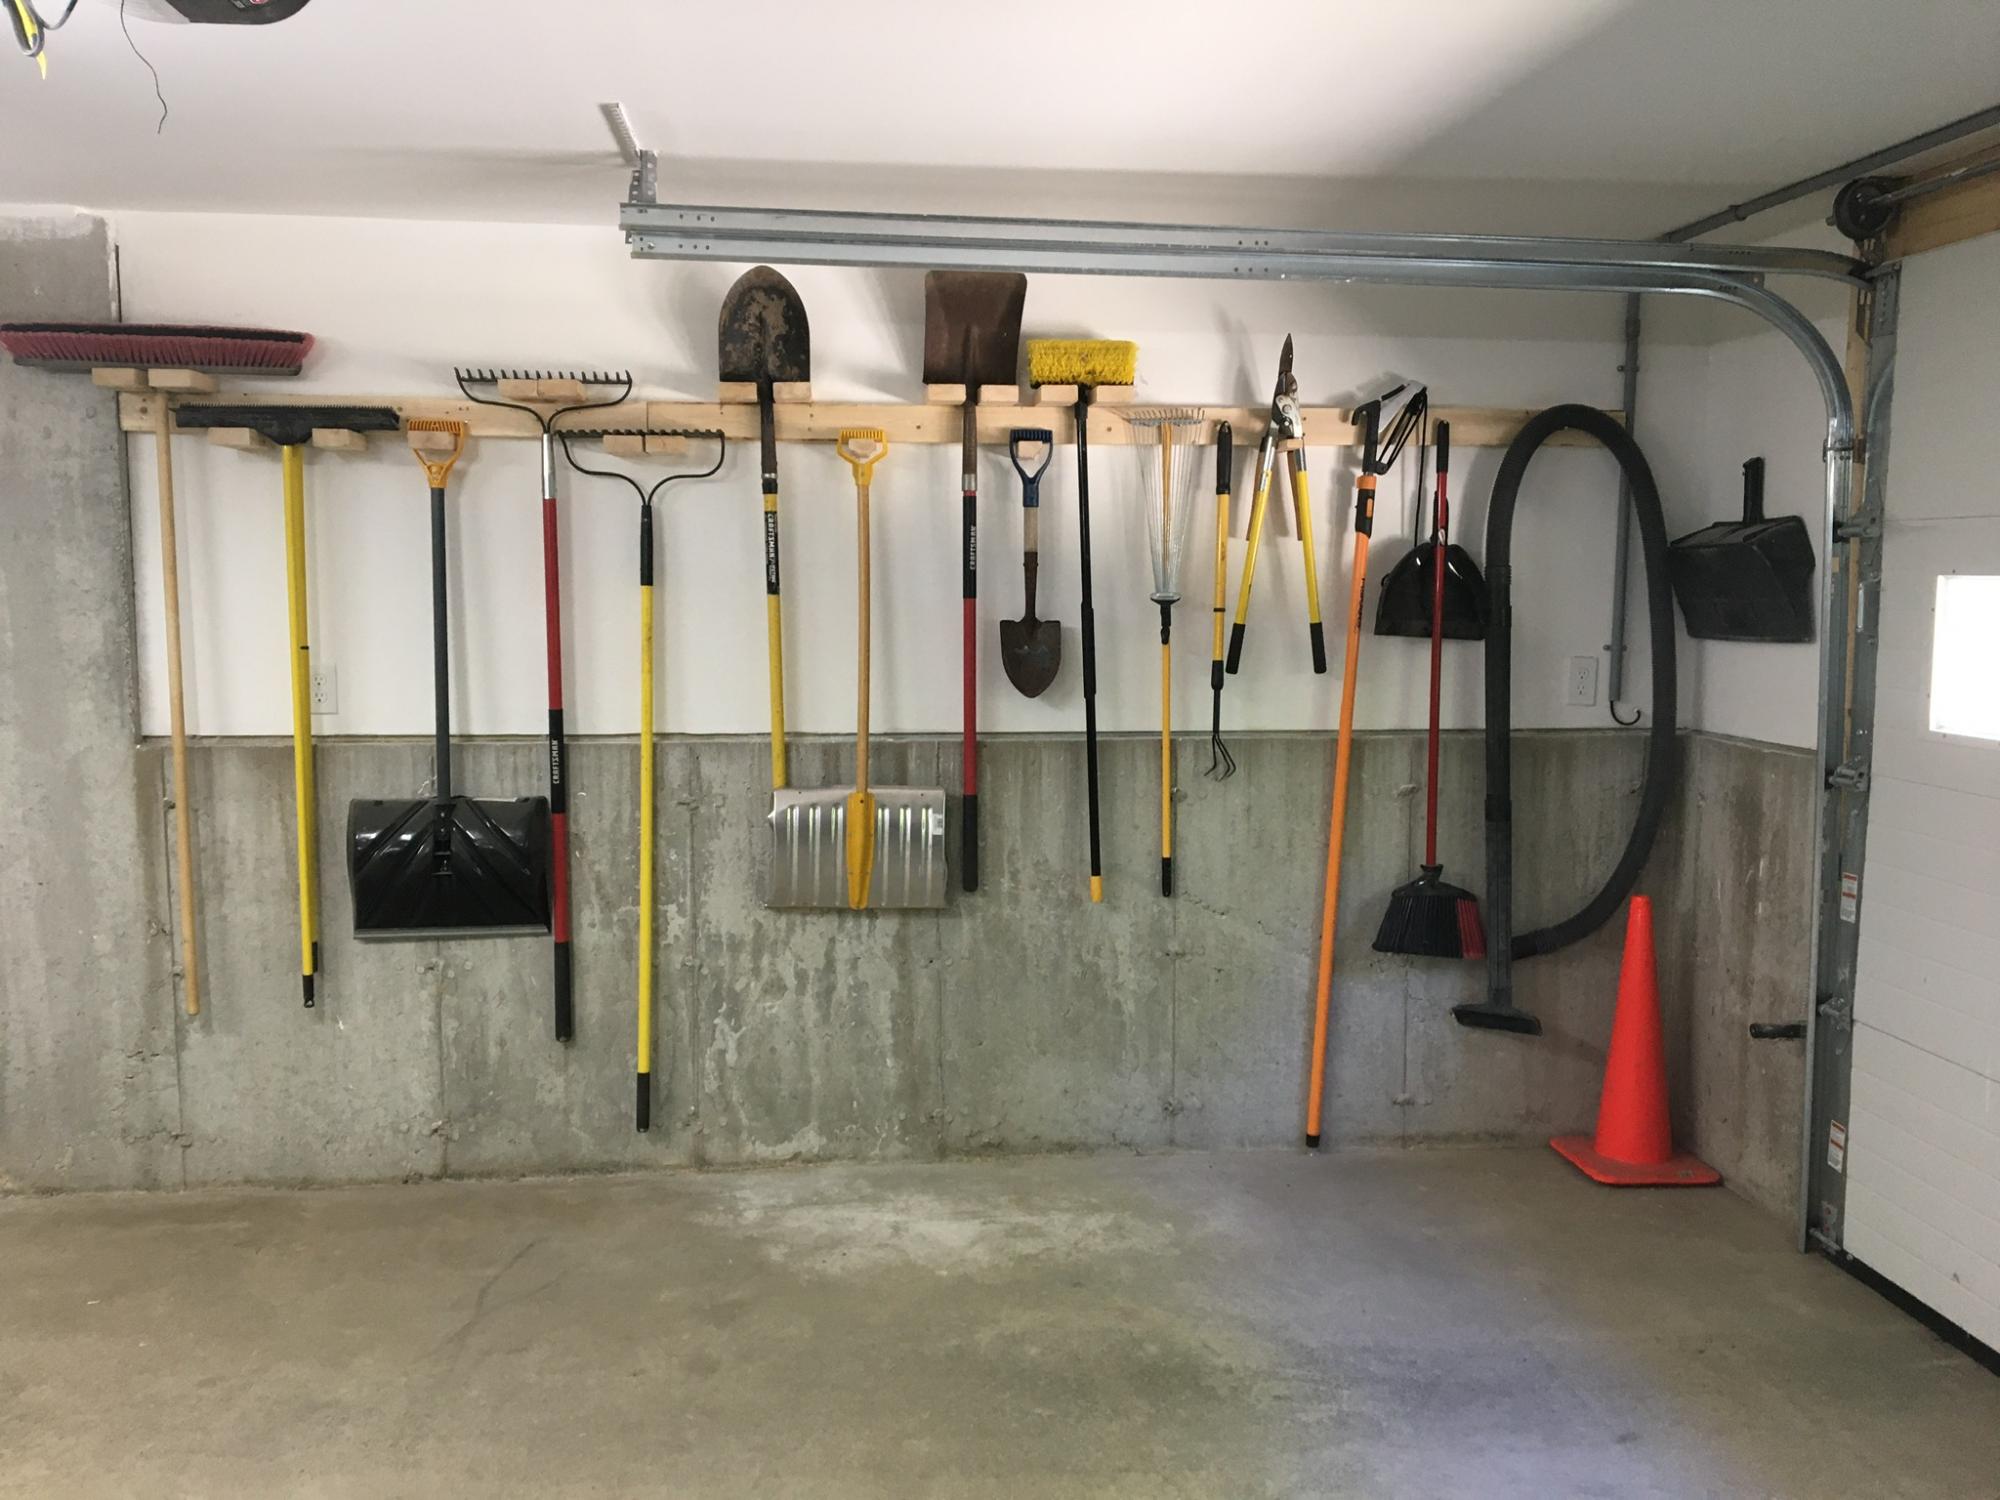
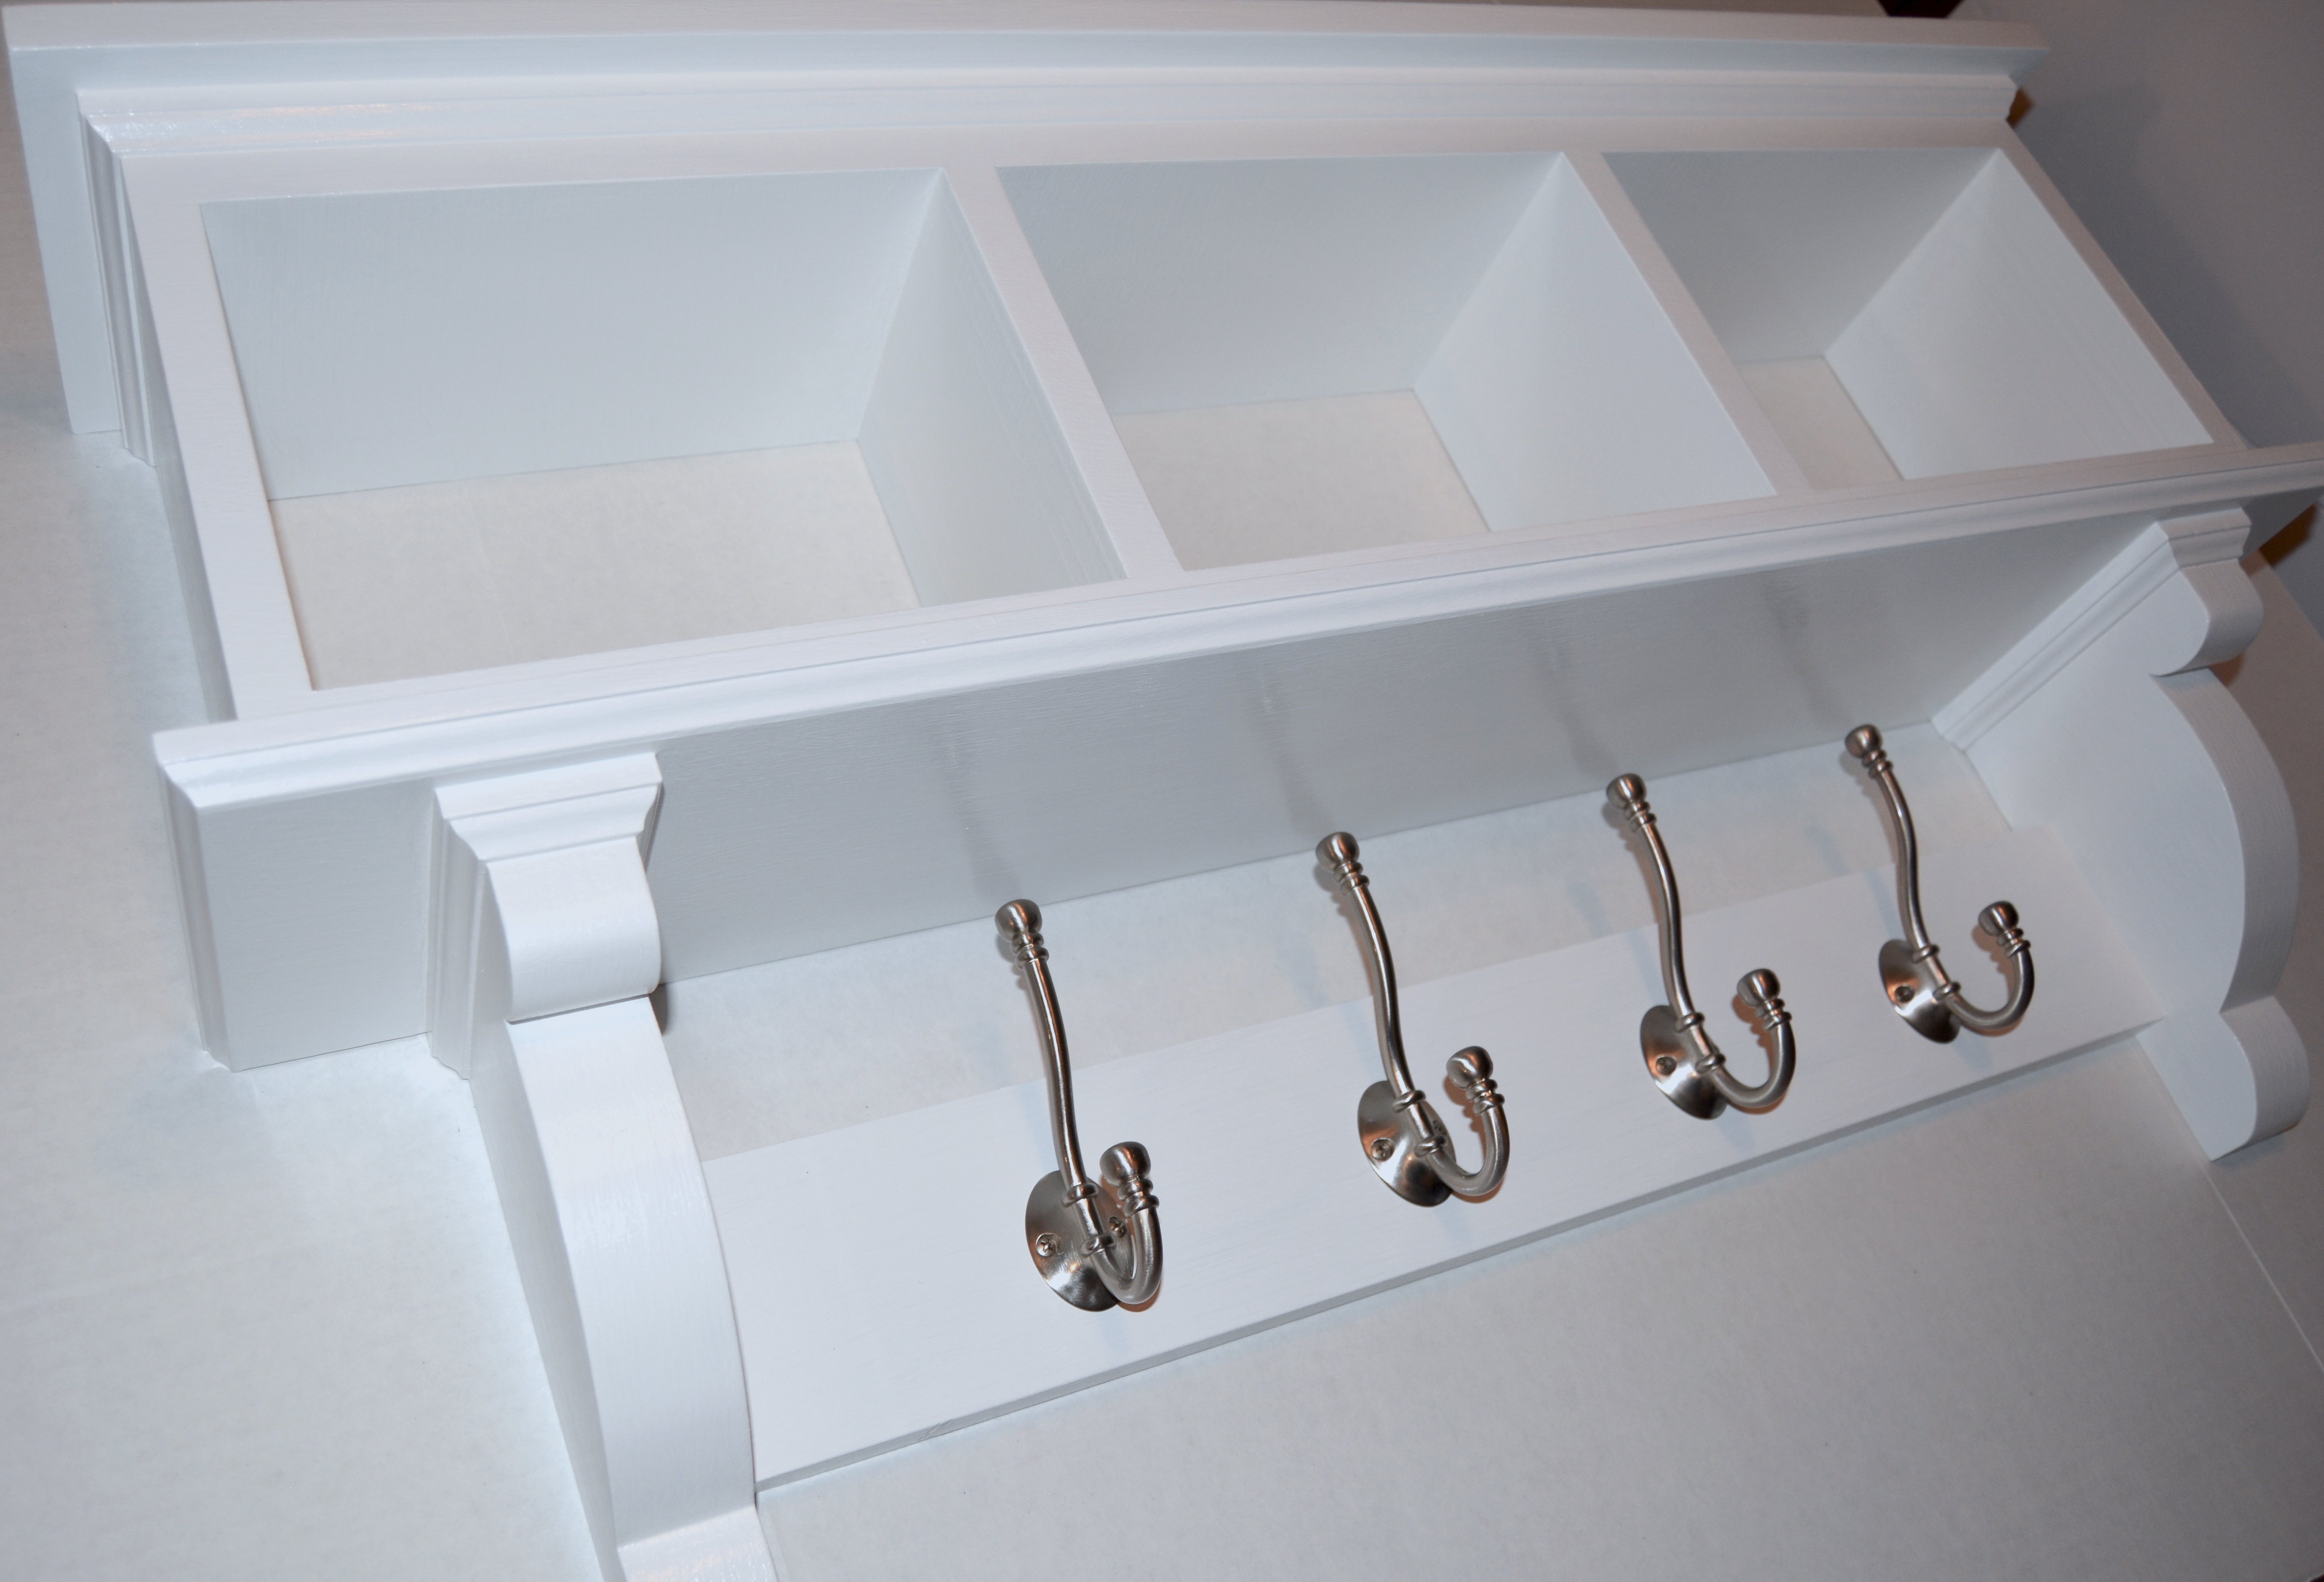
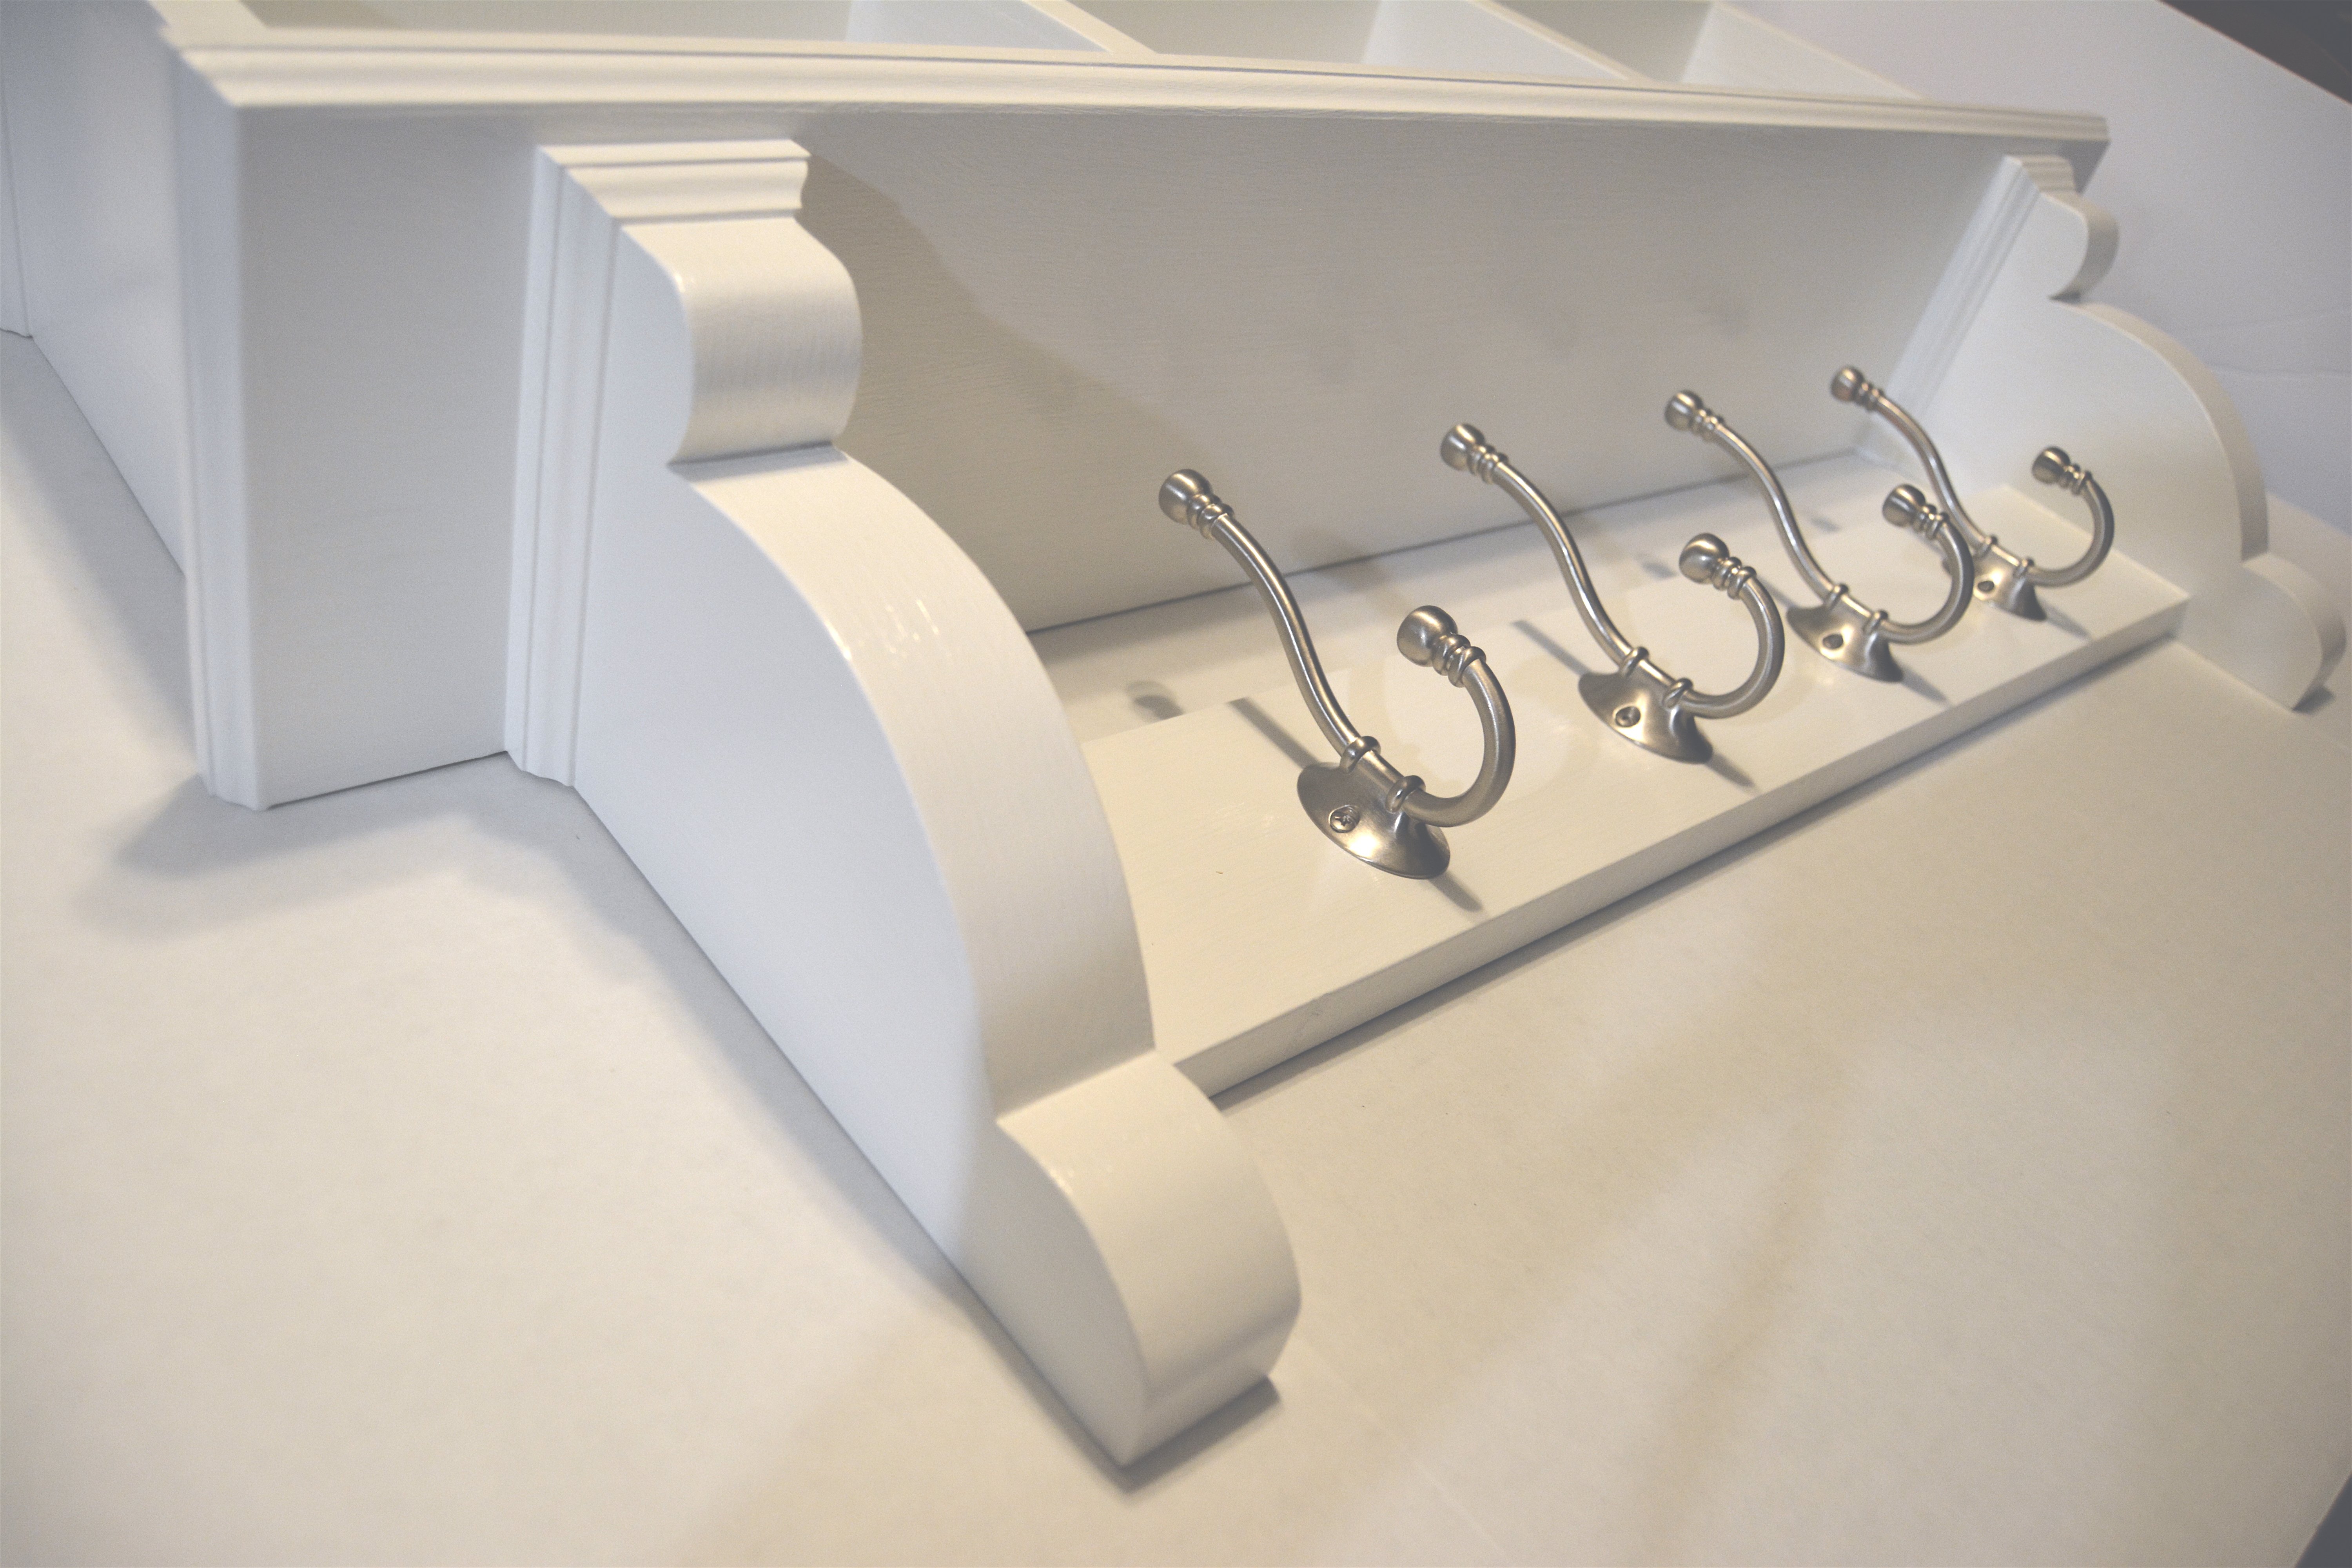
I built this coat rack a couple of years ago for our house when our little girl ripped the one we had out of the wall trying to get her coat off the hook lol. I was actually able to reuse the hooks from the cheap little coat rack that we had bought from the home store. It attached into the wall using drywall anchors so it wasn’t all that secure to begin with. I set out to make one that would look a lot nicer and have some room for storage. The design I came up with works great for storing all our coats and hats, but also the cubby storage at the top is great for storing keys and gloves and whatever else you may need to store.
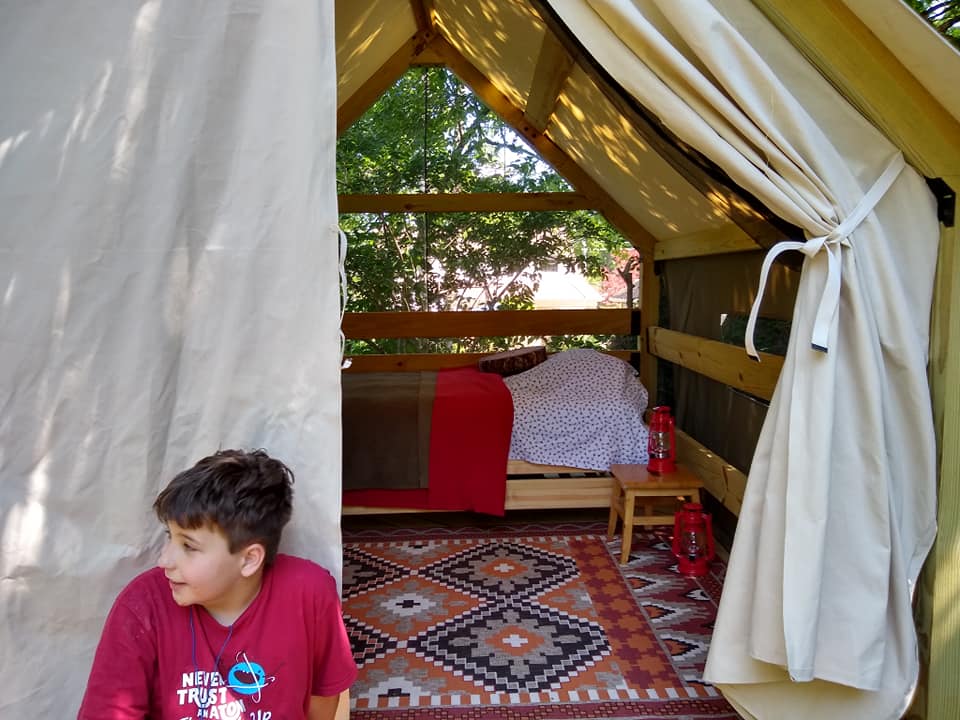
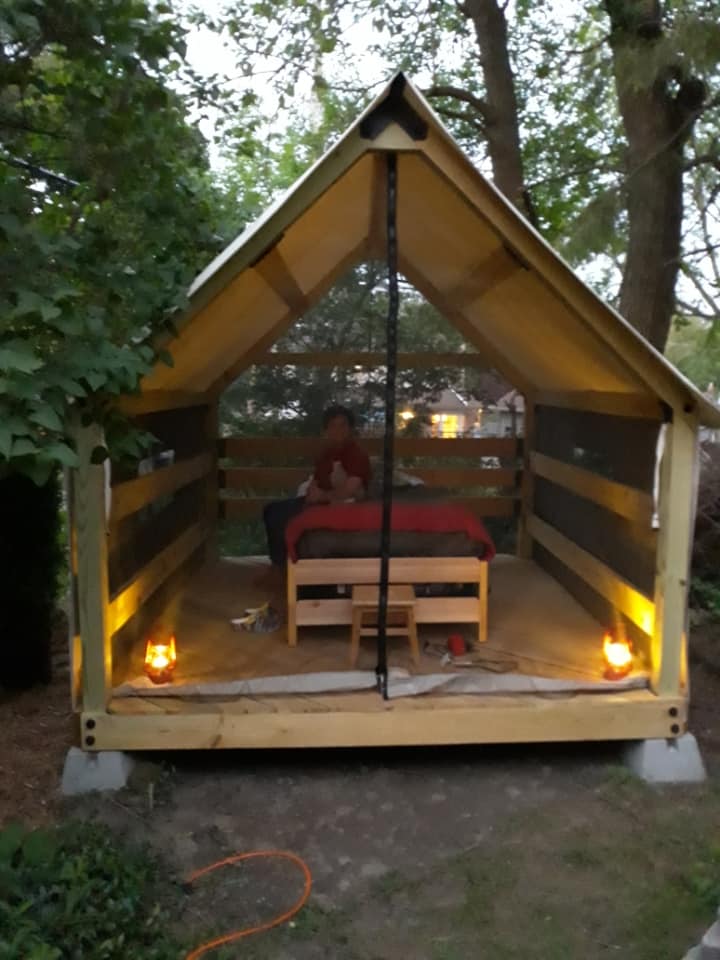
I stumbled across the Cabana design and just fell in love.
Once I decided I was making in tough, I needed to customize it a bit to meet our needs.
1. Needed to be able to sleep in it (so Mosquito proof)
2. If I am sleeping in it I want
a. Privacy
b. Possible rain protection ( I like a dry bed)
3.Need to be able to have a guest
So, We made it a bit larger 9x10
Added screens all around and under floor boards, Zipper entrance in front.
Made Canvas side panels (attach with velcro)
Made front and back canvas panels/doorways.
Chose two stacking twin beds that can be snapped together for a couple or left apart for two guests.
Just for fun, we used timber framing ties (Simpson Strong) instead of the joist hangers and end caps...this gives is big beefy bolt heads and black metal straps across the beams. They do the same thing but give it a more rugged look.
My 12 year old has slept in it for two weeks already and plans to not come in until the snows come this winter!
Thanks so much for the great inspiration and general plan to get us started.

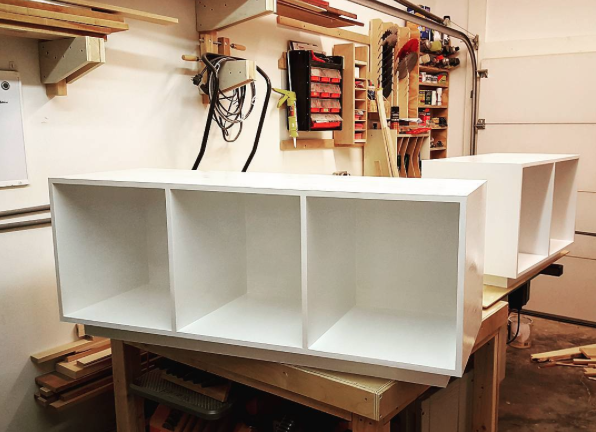
I recently had a workshop built and I have been trying to now work on the furniture for it. My first project was this workbench inspired by the plans "garage workshop workbench". I added drawers on each side and will probably end up adding a shelf in the open area as well after letting my kids finish decorating the top. It's already a nice addition and I may build a smaller version for my garage. I added casters and have the option to roll the table around or have it stationary.
Tonie

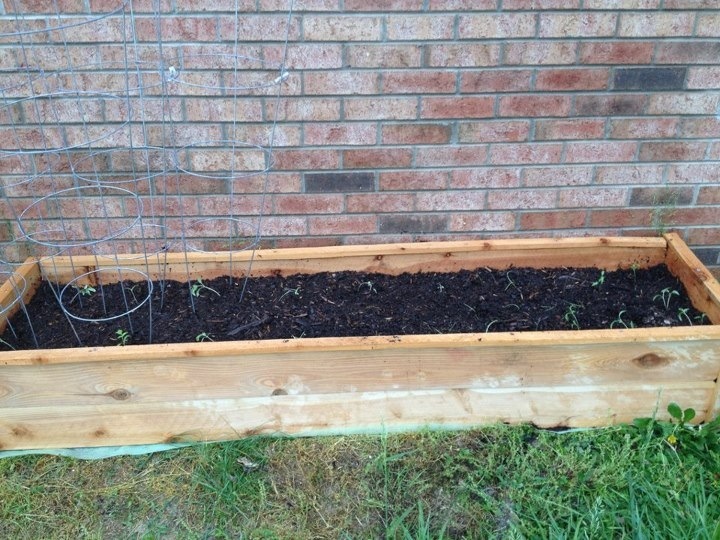
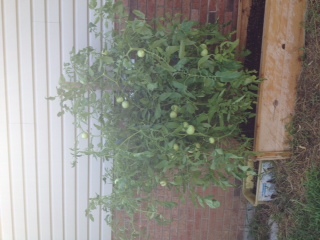
I built this a couple months ago and I'm finally getting around to posting a brag post. This is the second woodworking project I've ever done and my first year gardening! I almost spent over a hundred dollars on one of these raised garden beds and then I saw Ana White's plans and I am so grateful! Hopefully my tomatoes will be ripe soon, but one thing is for sure... this raised garden bed paid for itself with the amount of veggies I'm getting from it! I have big gardening plans for next year! Sorry my second pic is sideways... can't figure it out!
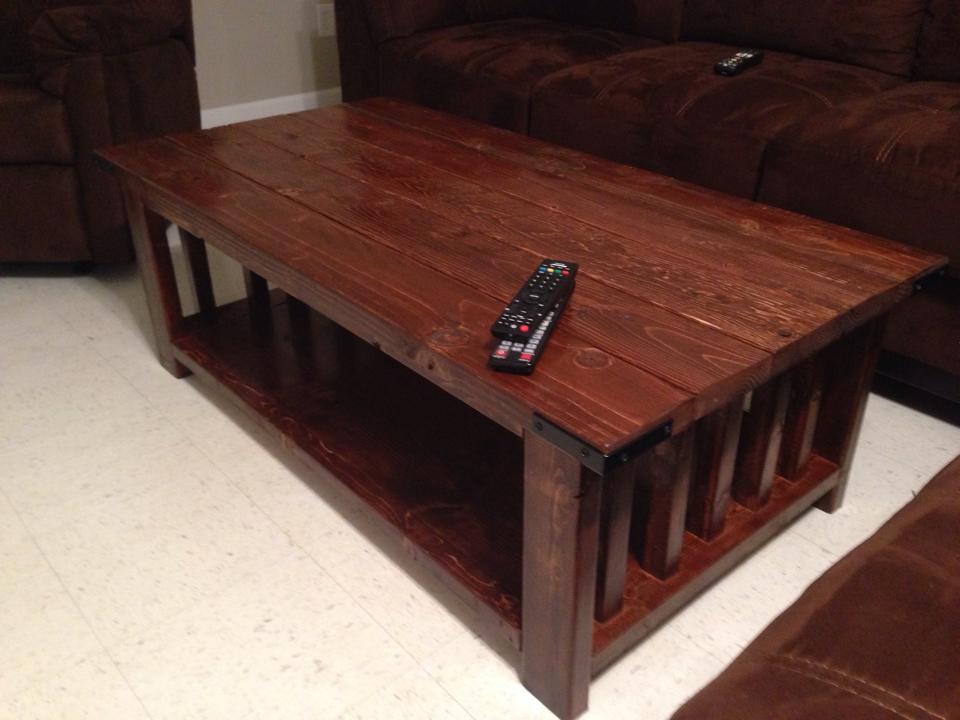
This is the 2nd Rustic X Coffee table I built. This I built as a wedding gift for my Brother and His wife. Instead of the X posts on the ends I opted for a column design on the end. It was actually a little more time consuming but I think it looks great.
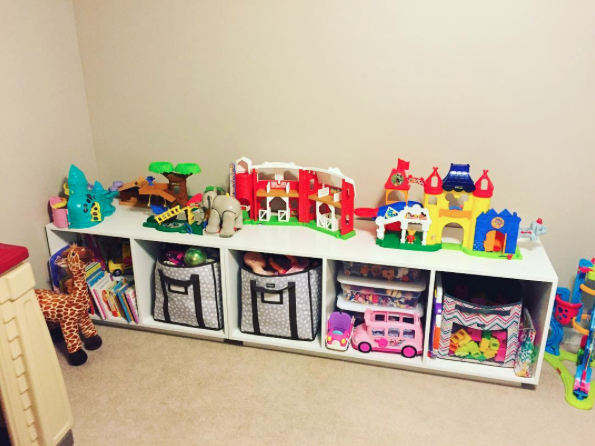
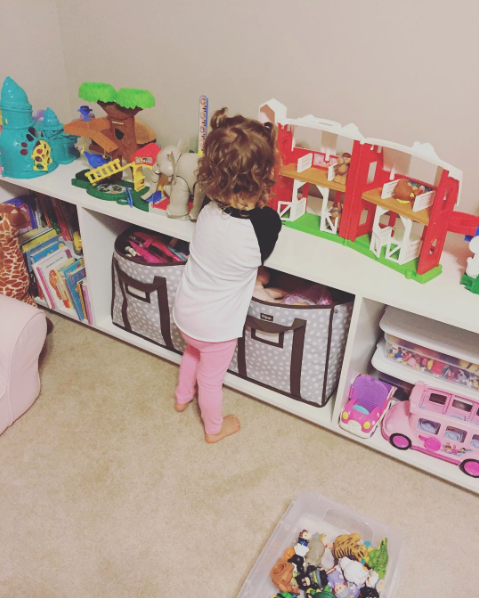
I built these modern storage benches for some friends of ours. They needed some space to store their little girls toys. They planned to use some wicker baskets they had. I took the measurements for the baskets and built the storage spaces around it.

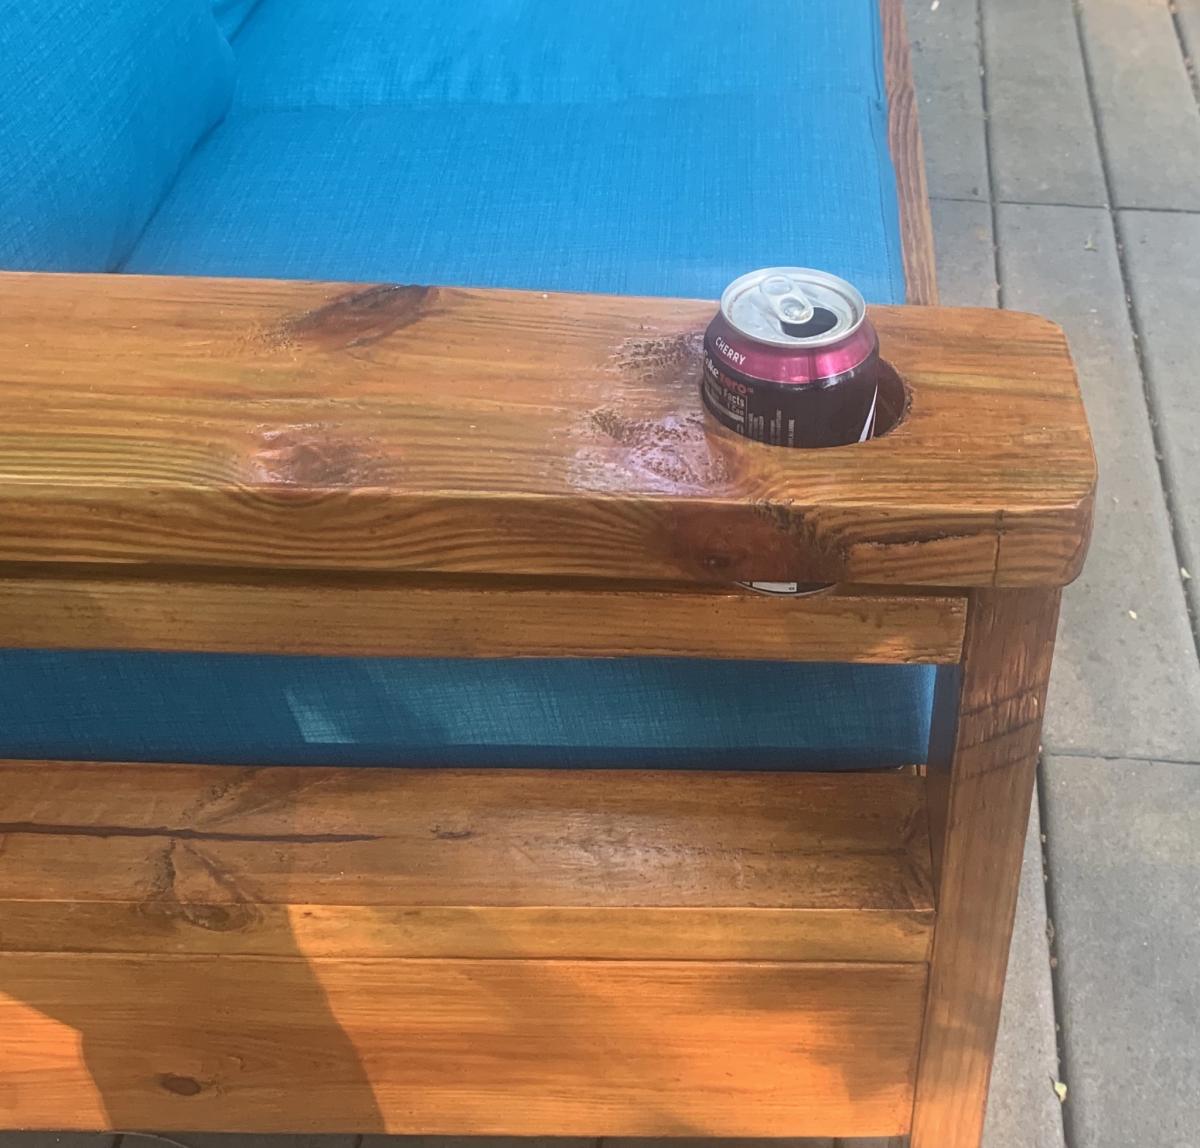
Thanks so much for this plan. I modified it slightly by using 2x6 For the arms so I could cut out a hole for a glass or bottle. I also added an additional 2x4 underneath to keep the glass from falling through.
I spent a lot of time sanding and putting the first finishing coat on each piece prior to assembly to make final finishing easier. Extended elapsed time but I think it made actual time shorter.
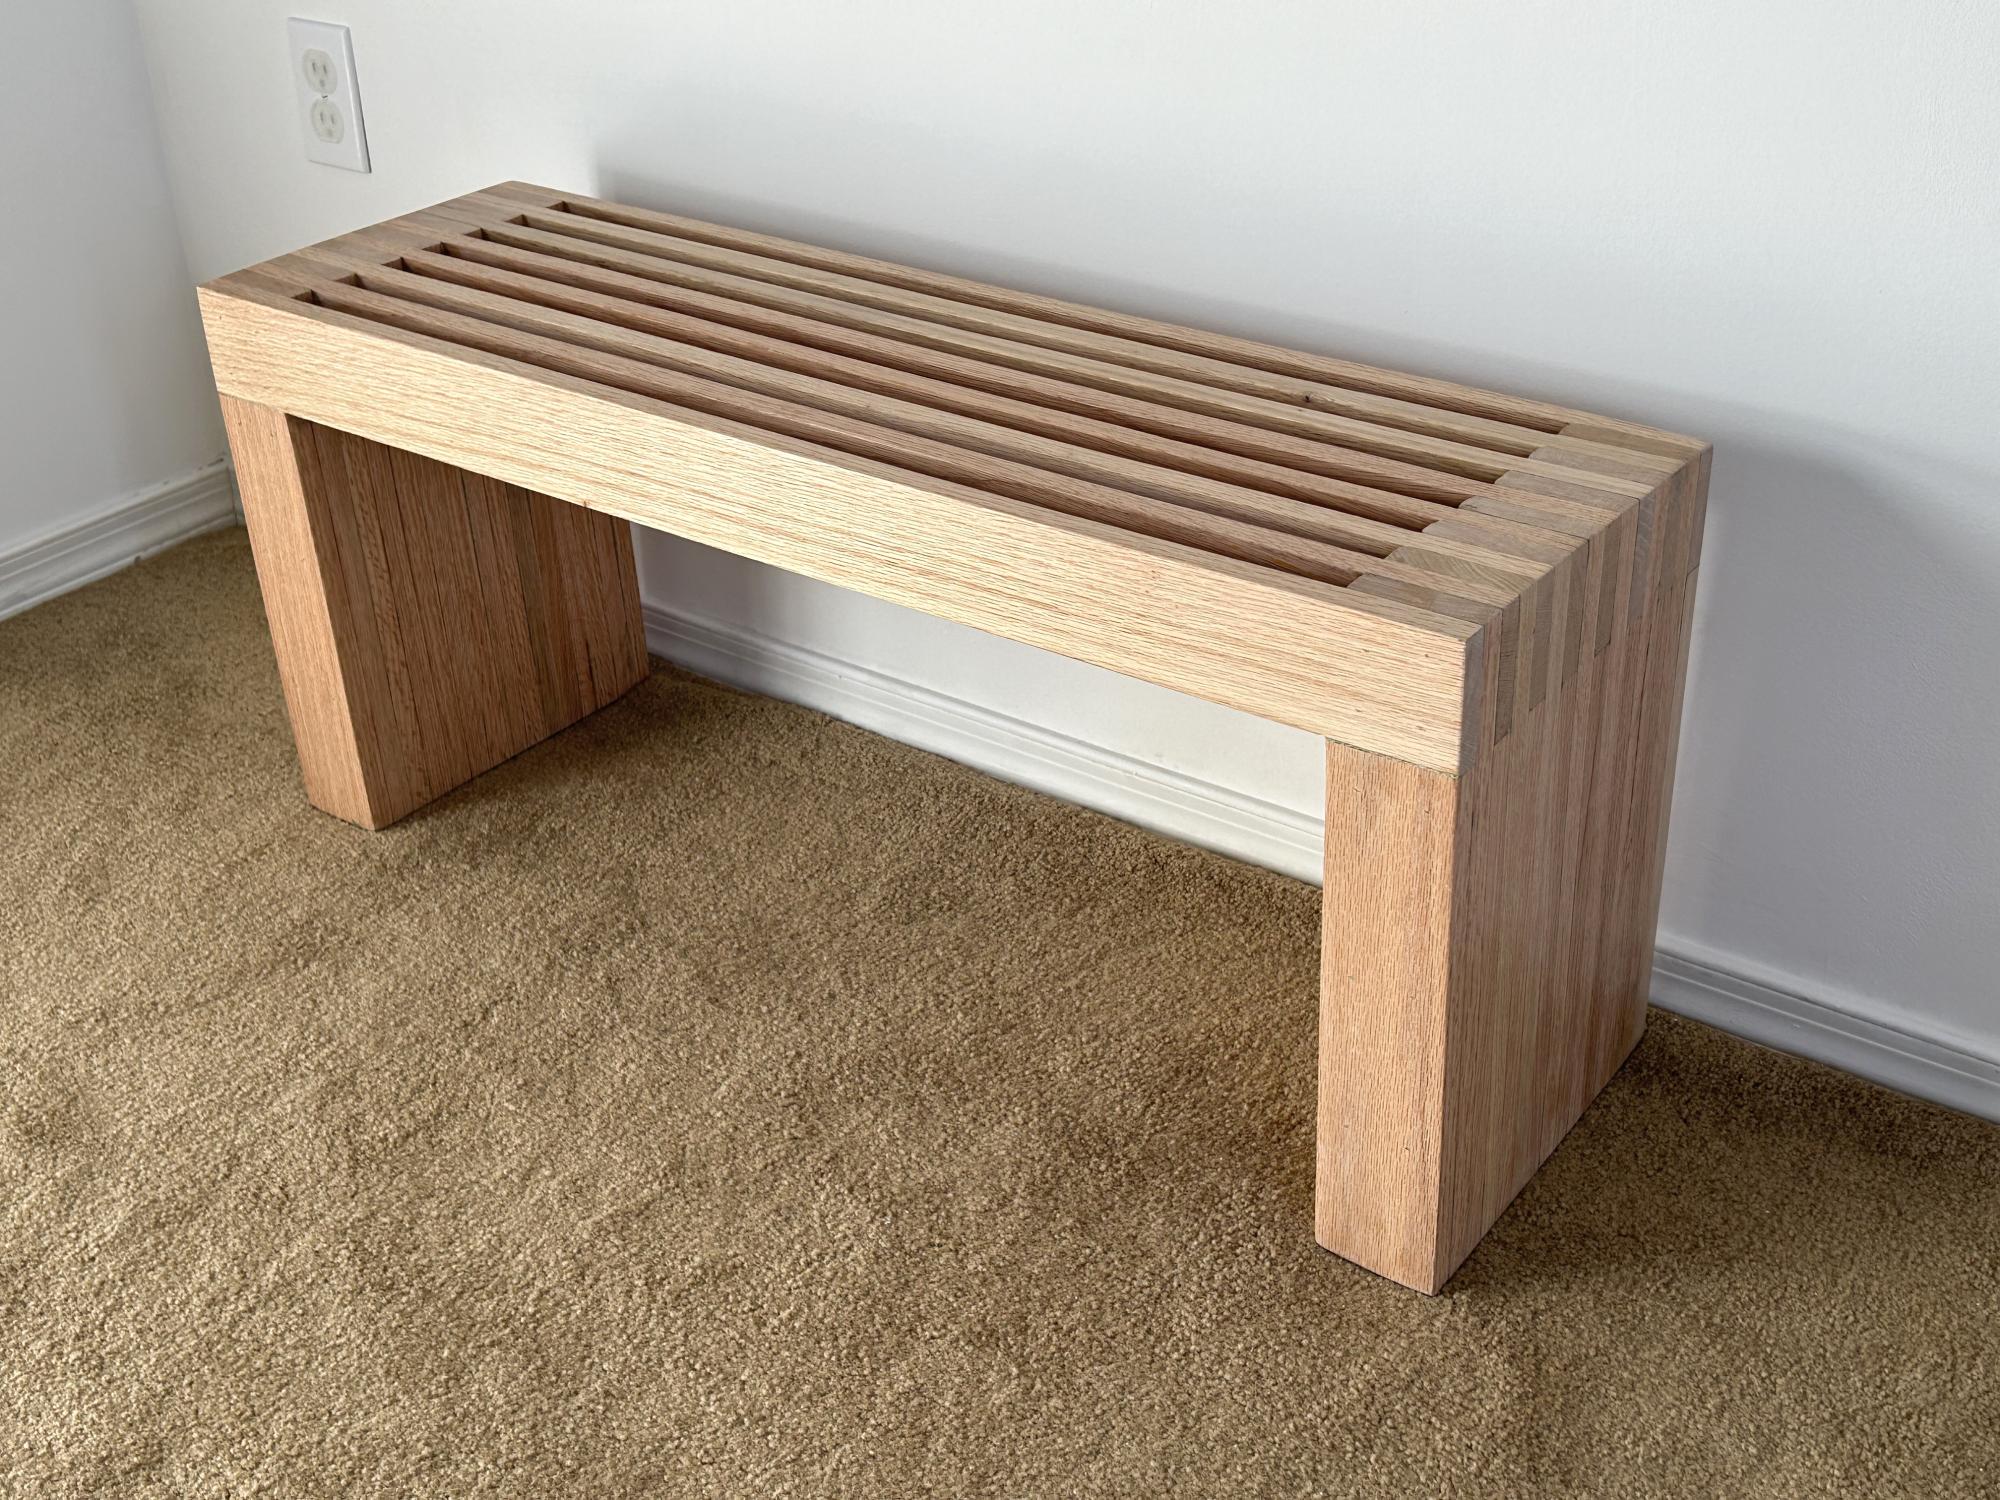
I turned some old oak shelves that I got from an estate sale into a 3' wide Scandinavian slat bench.
Pat Besong
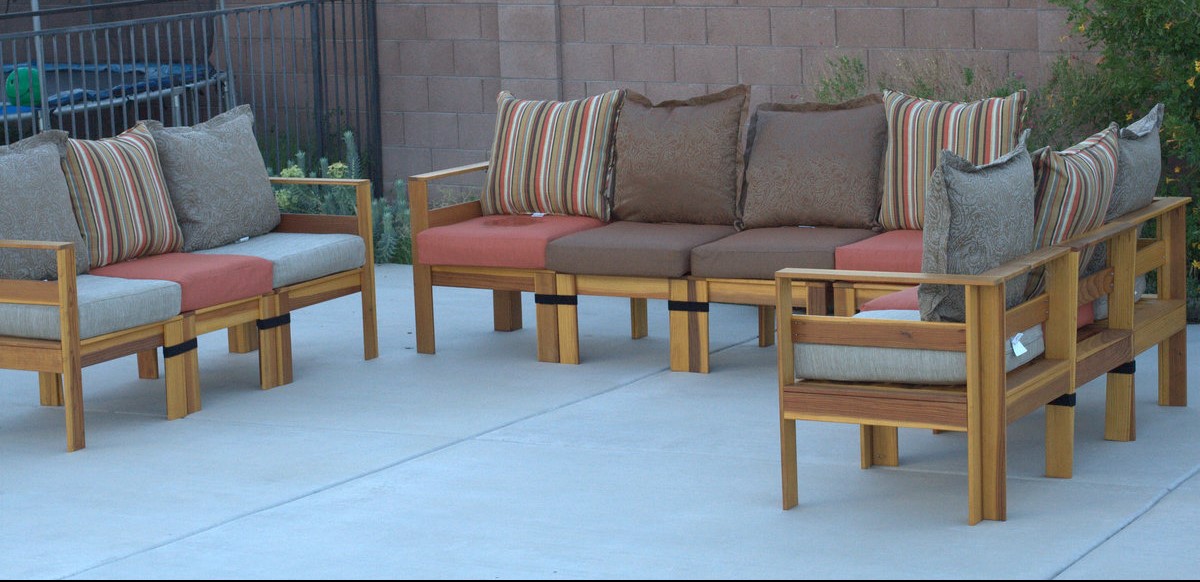
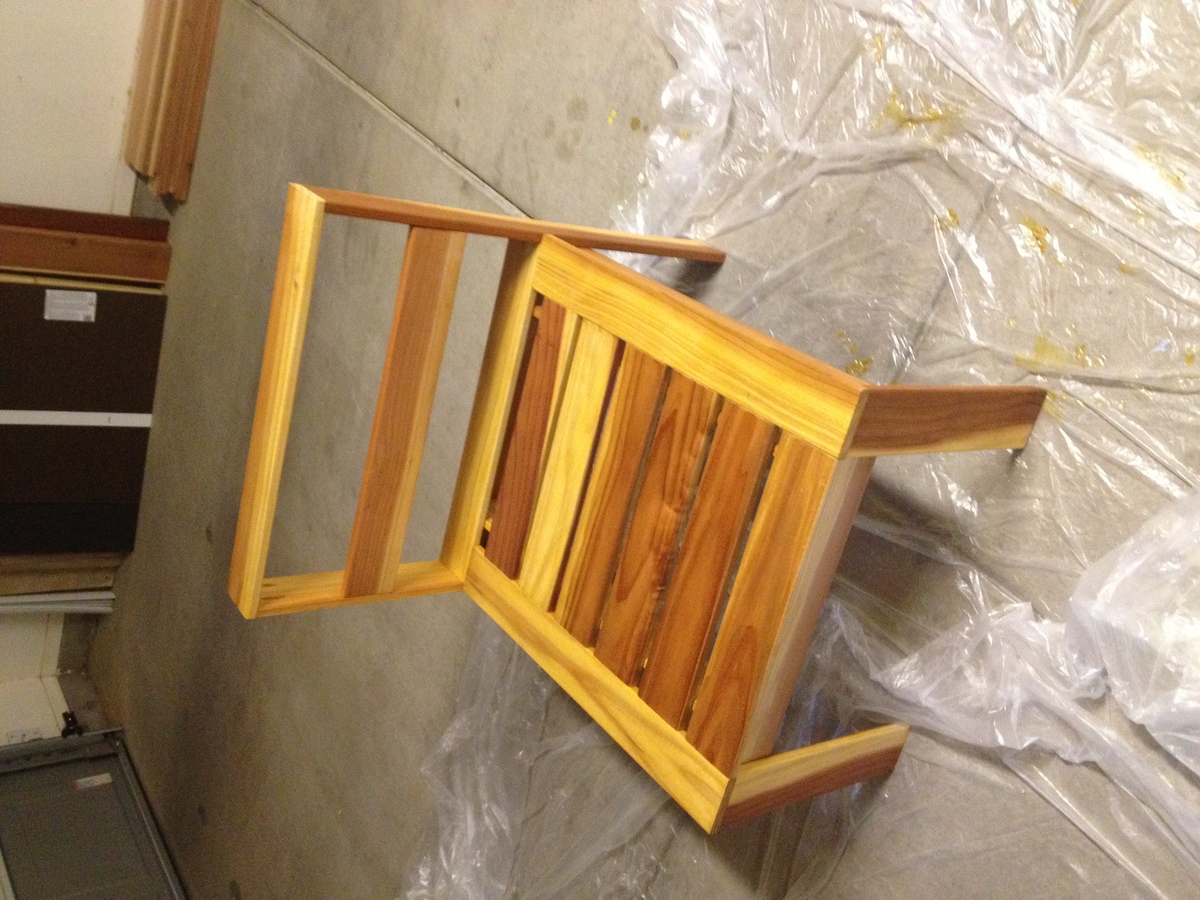
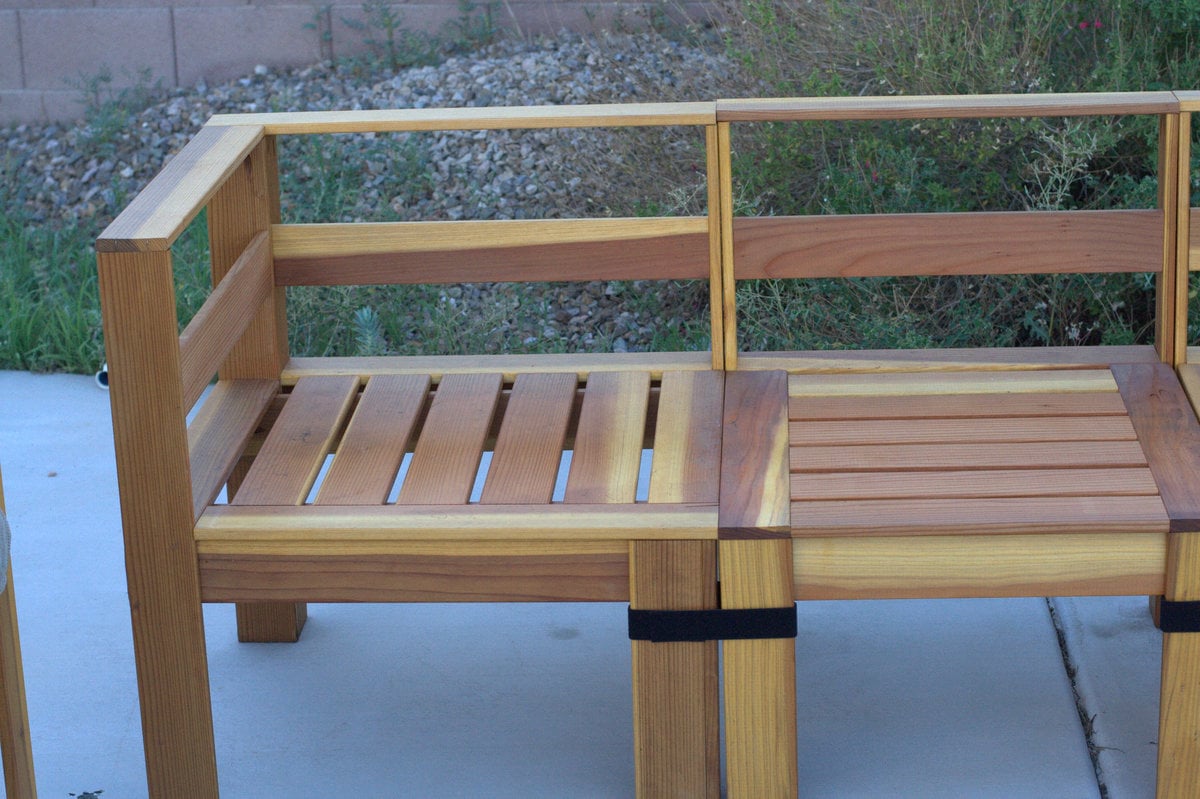
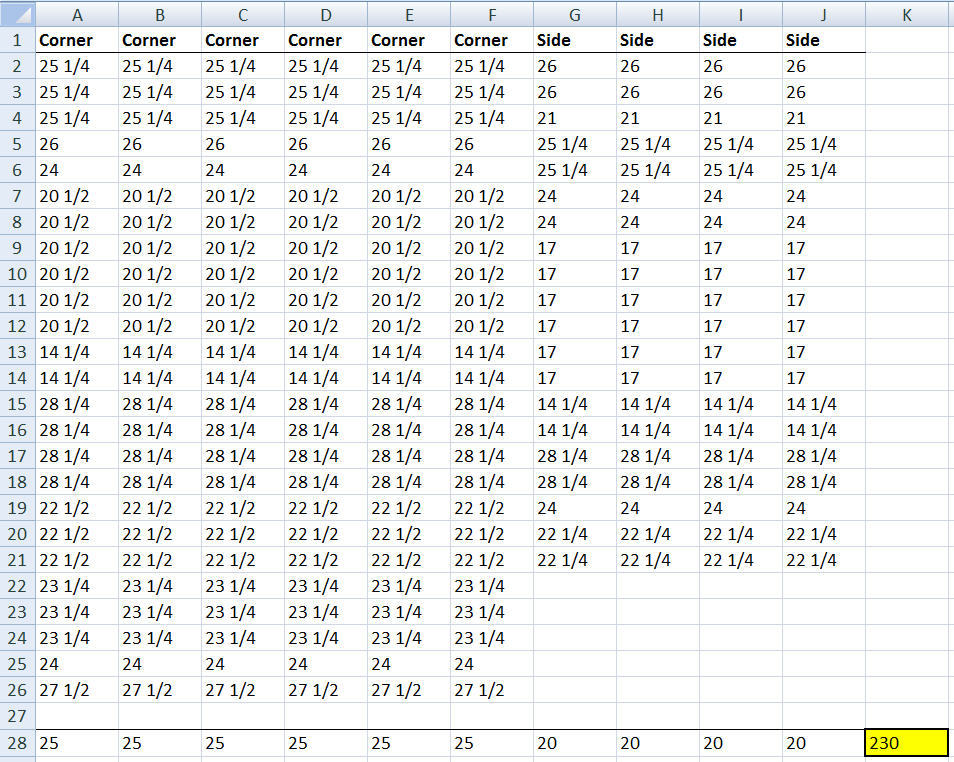
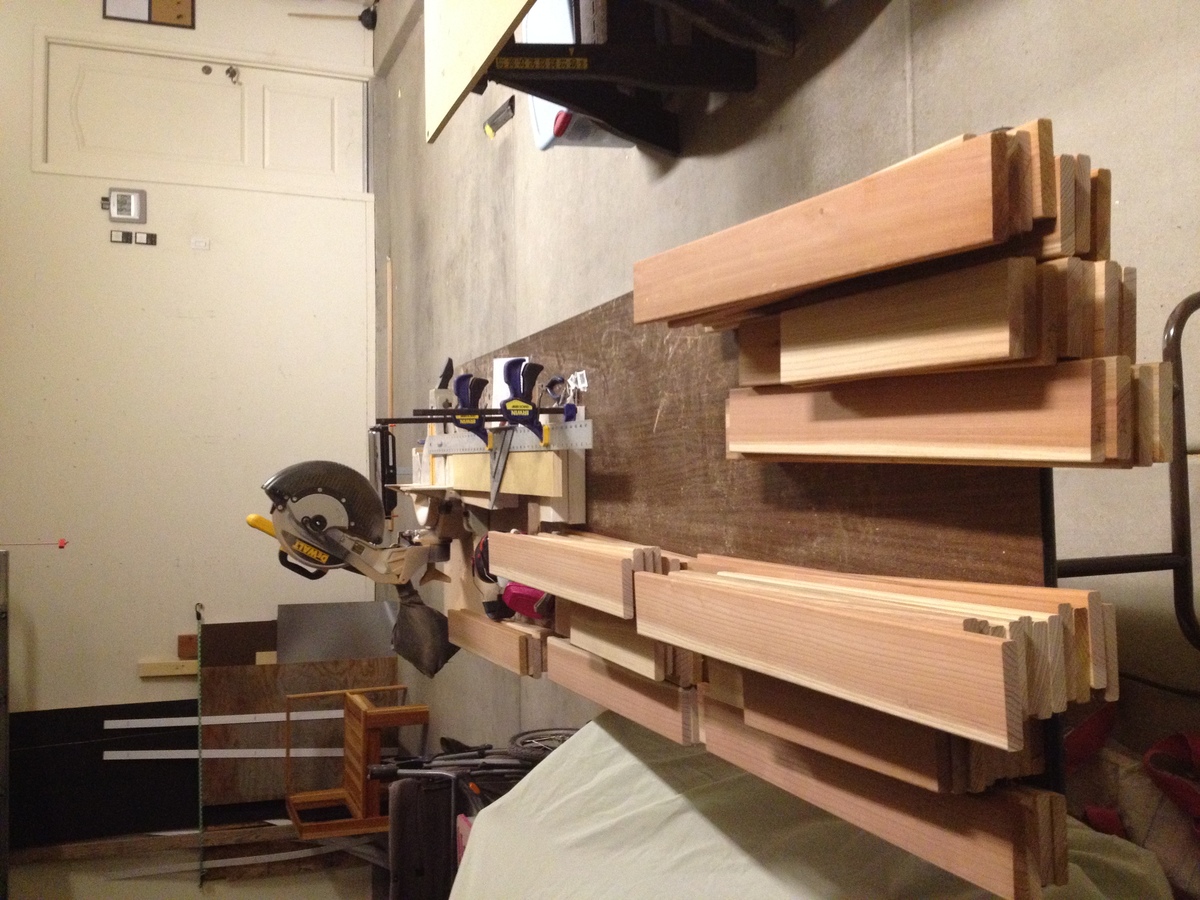
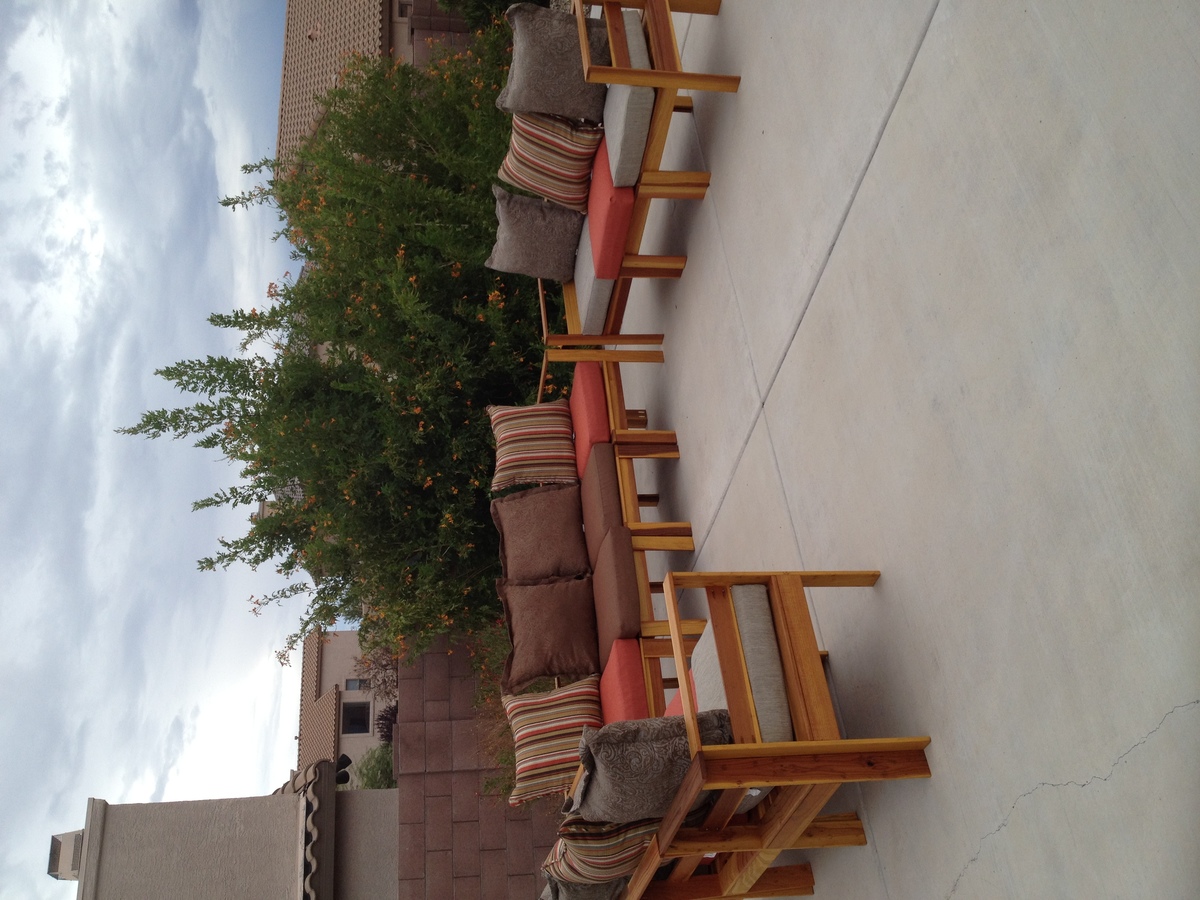
Pocket Screws are my new favorite things! Total of 10 chairs made, 6 corners and 4 sides. Over 230 cuts, and 1000 pocket screws. It took me a while to finish, but I am very pleased with the result. I would not attempt this project without the Kregg Jig or similar product however. It saved me a bunch of time. The plans were detailed and easy to follow. I added a back brace to the design, and decided to make three separate units instead of a u-shaped sofa. This adds more armrests to the unit. I intend to add end tables in the corners and a table in the middle still. Instead of screwing the chairs together I used One-Wrap Velcro so the units can be reconfigured. I purchased the cushions instead of making them. Lowes had some on sale for $50. It added about $500 to the total cost, but it was worth not having to sew.
Sun, 08/19/2012 - 09:03
Just got inspired (Thanks to Ana) and built a deck this summer.
Wanted to do something in the Simple Modern Collection...
Been trying to figure out what chairs and loveseats to put out there. You've given me the inspiration to do it this way!
I think I'll just start it easy -- one sectional at a time.... easier on the budget, too. And I sew, so the cushions will be done at home during the winter -- mix 'n' match.
Am raising the seat height a little (bad knees) and would love to know if there is any way to slant the back? I'm sure I'll figure something out.
Can't wait to show this to my family!!!
Beautiful.... just beautiful...
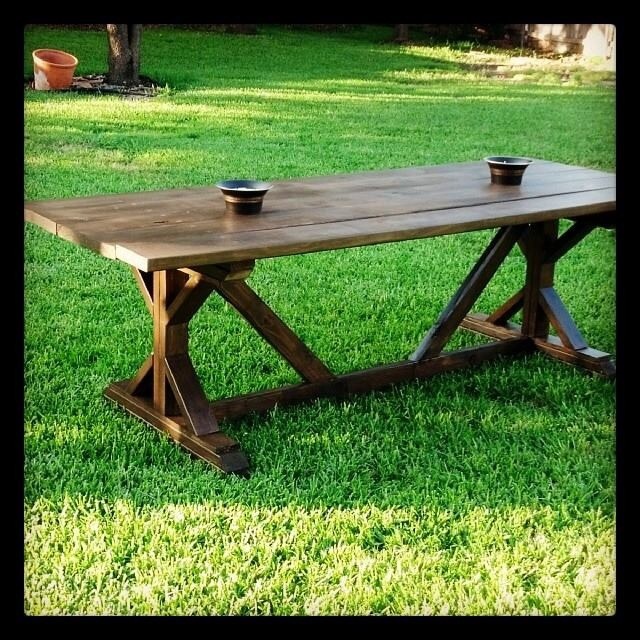
Needed a patio table for this space and decided on this plan. After the build portion, the stain finish really made it complete. Now time for some summer get togethers.