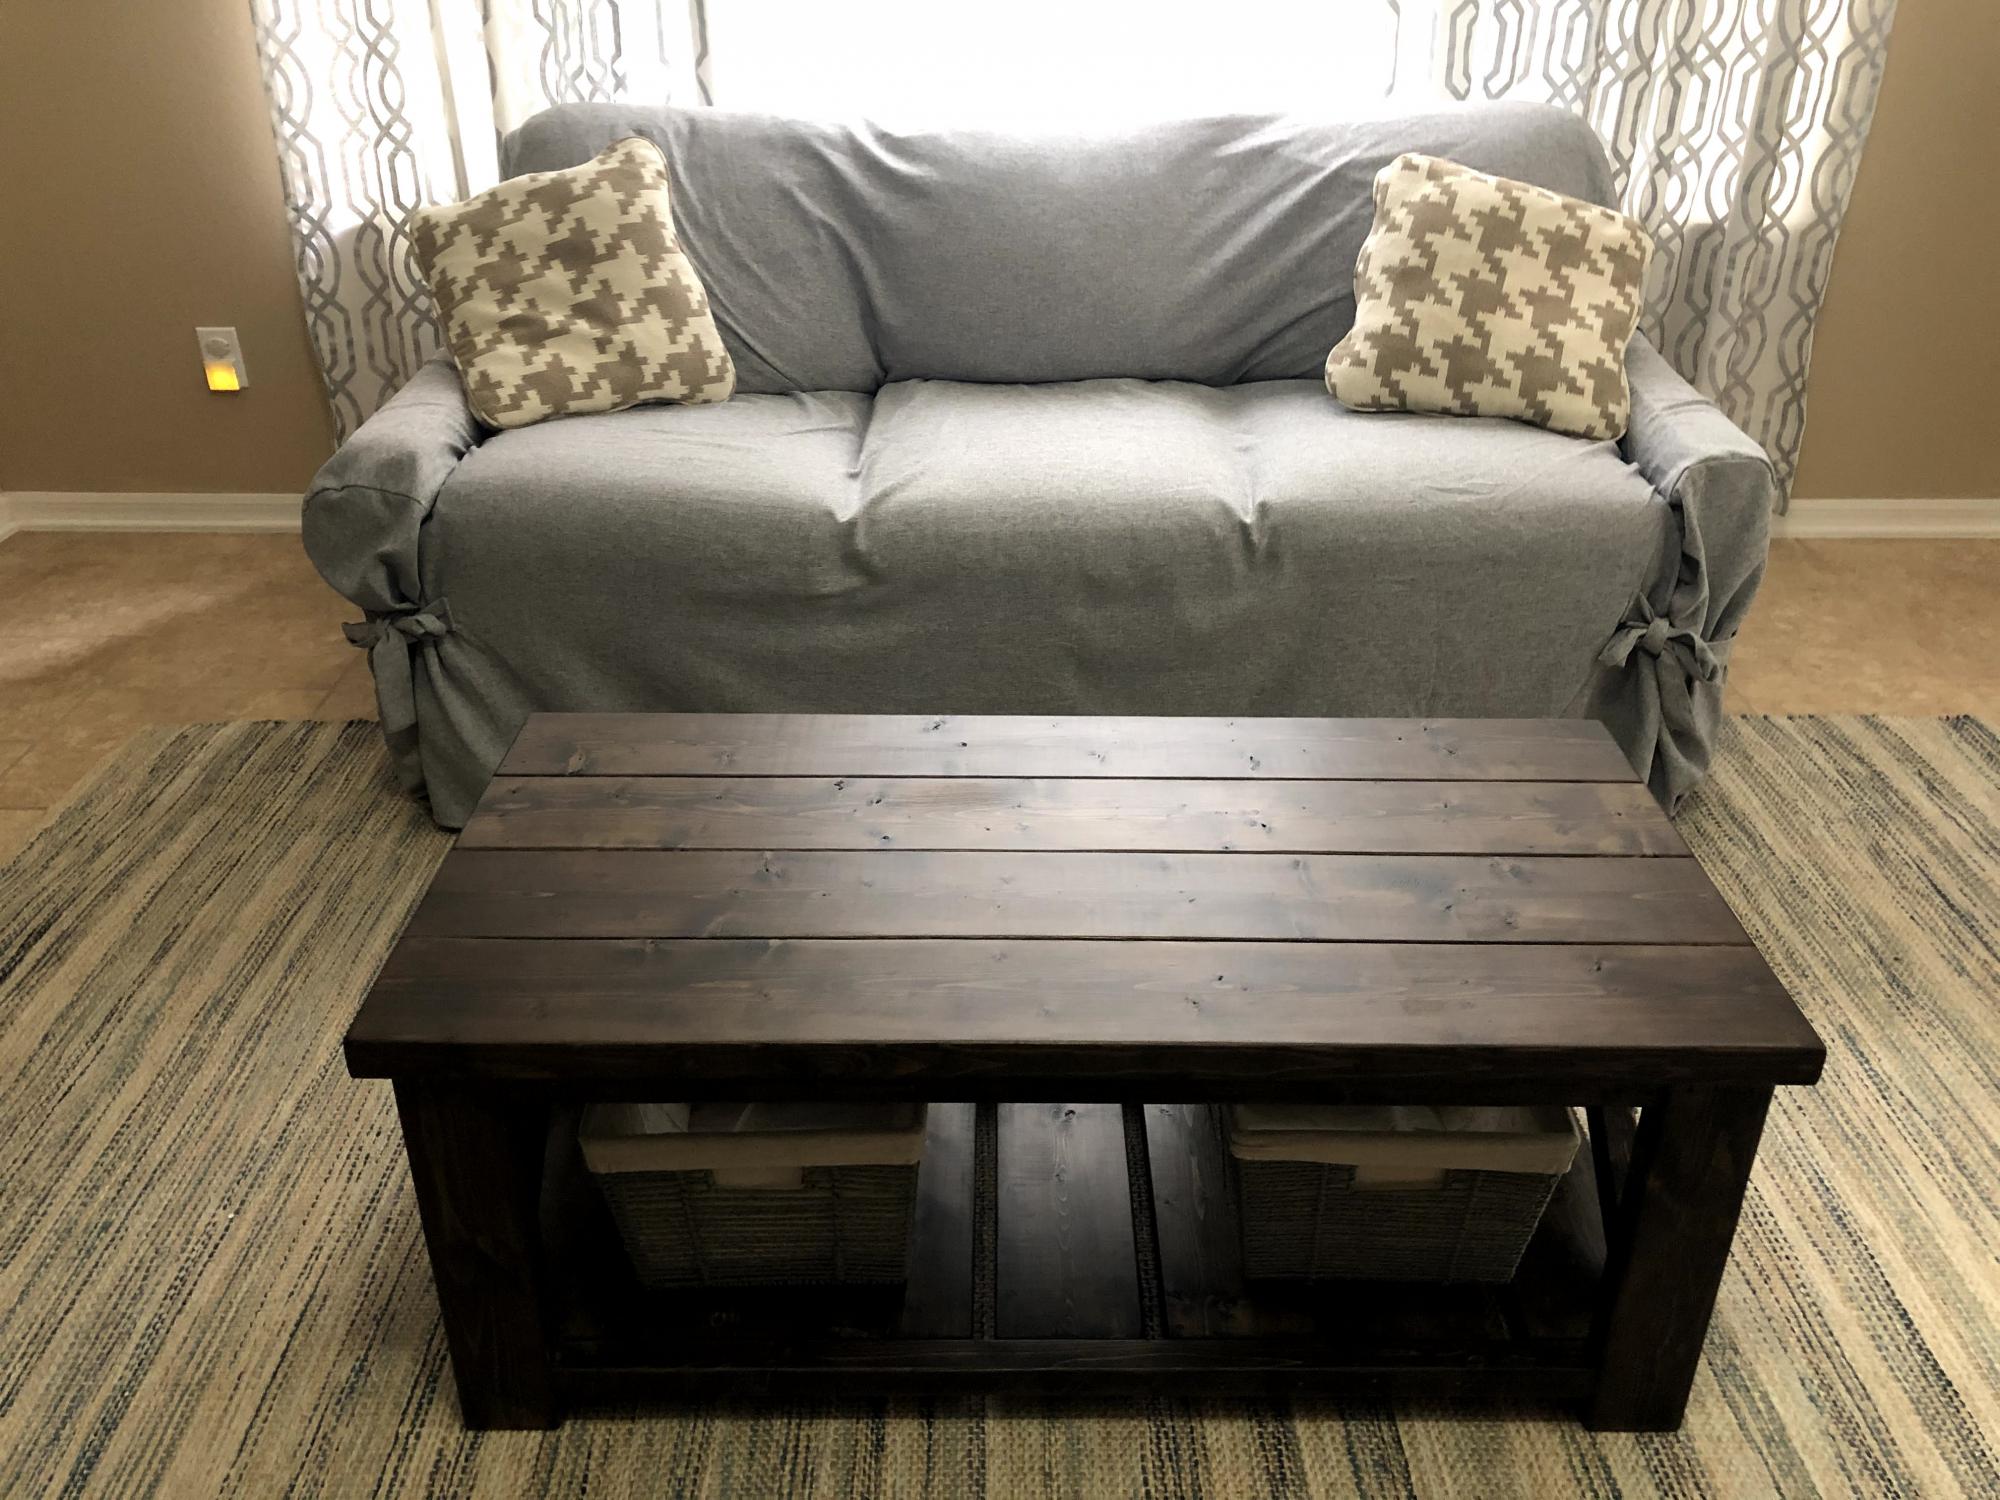
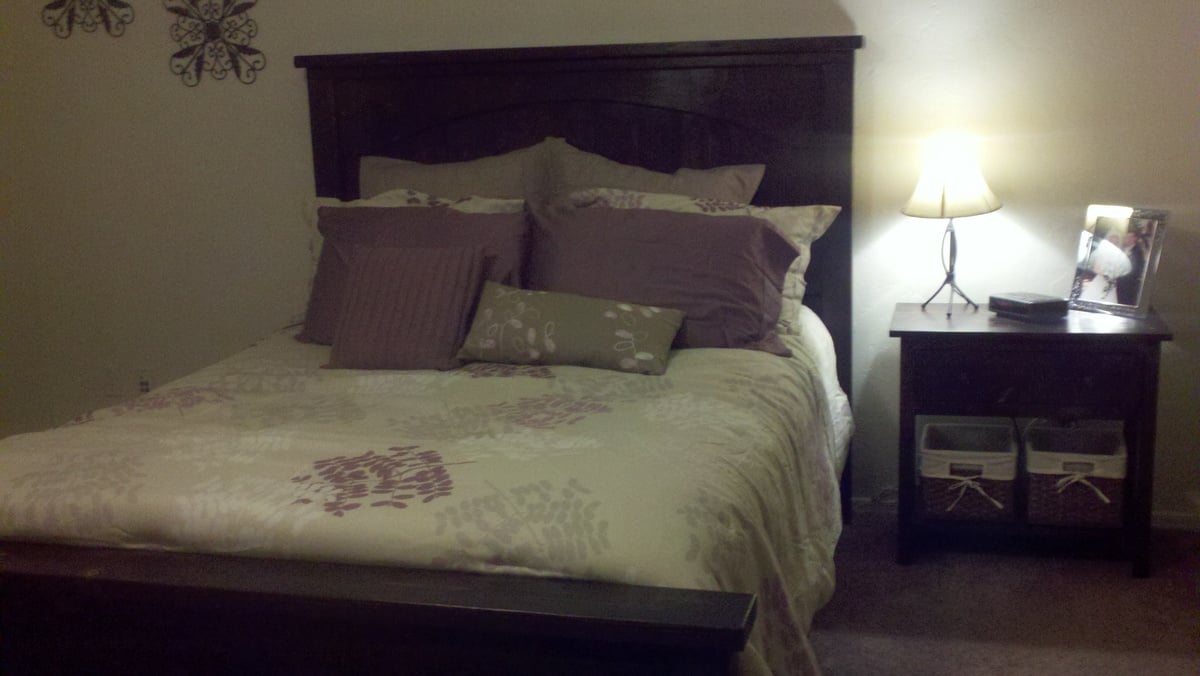
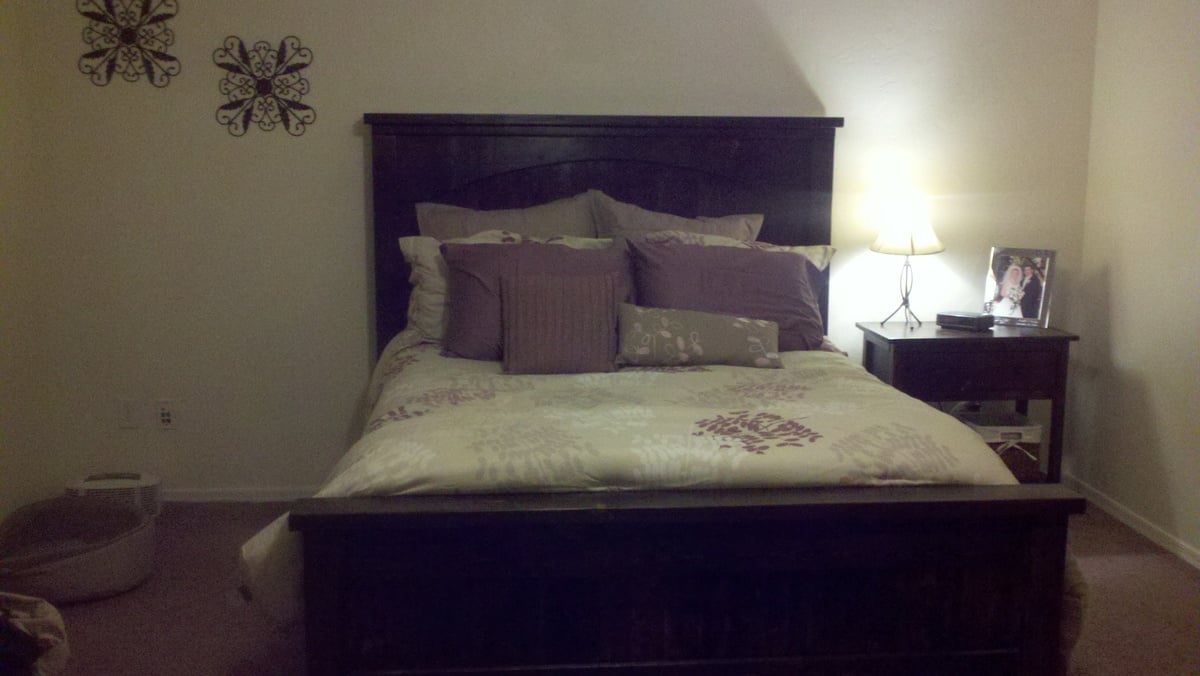
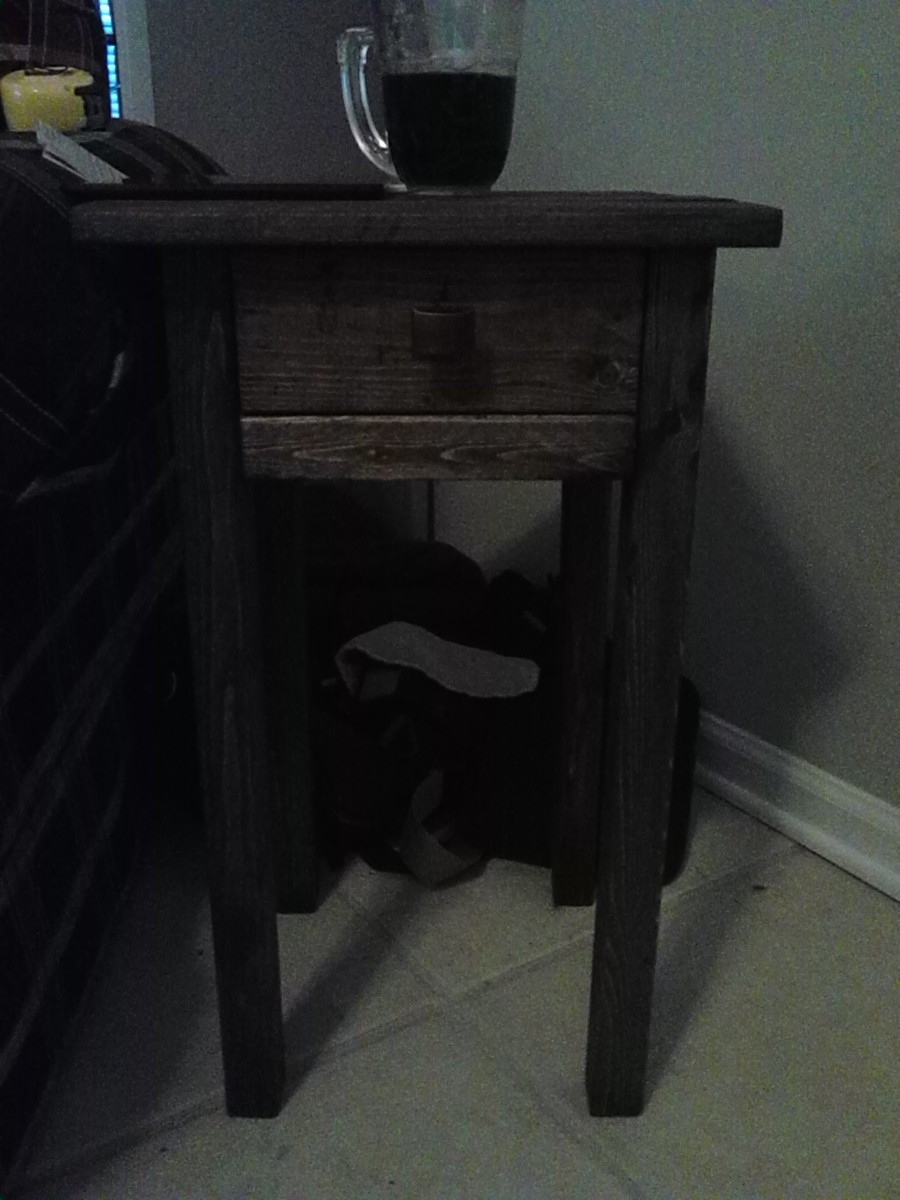
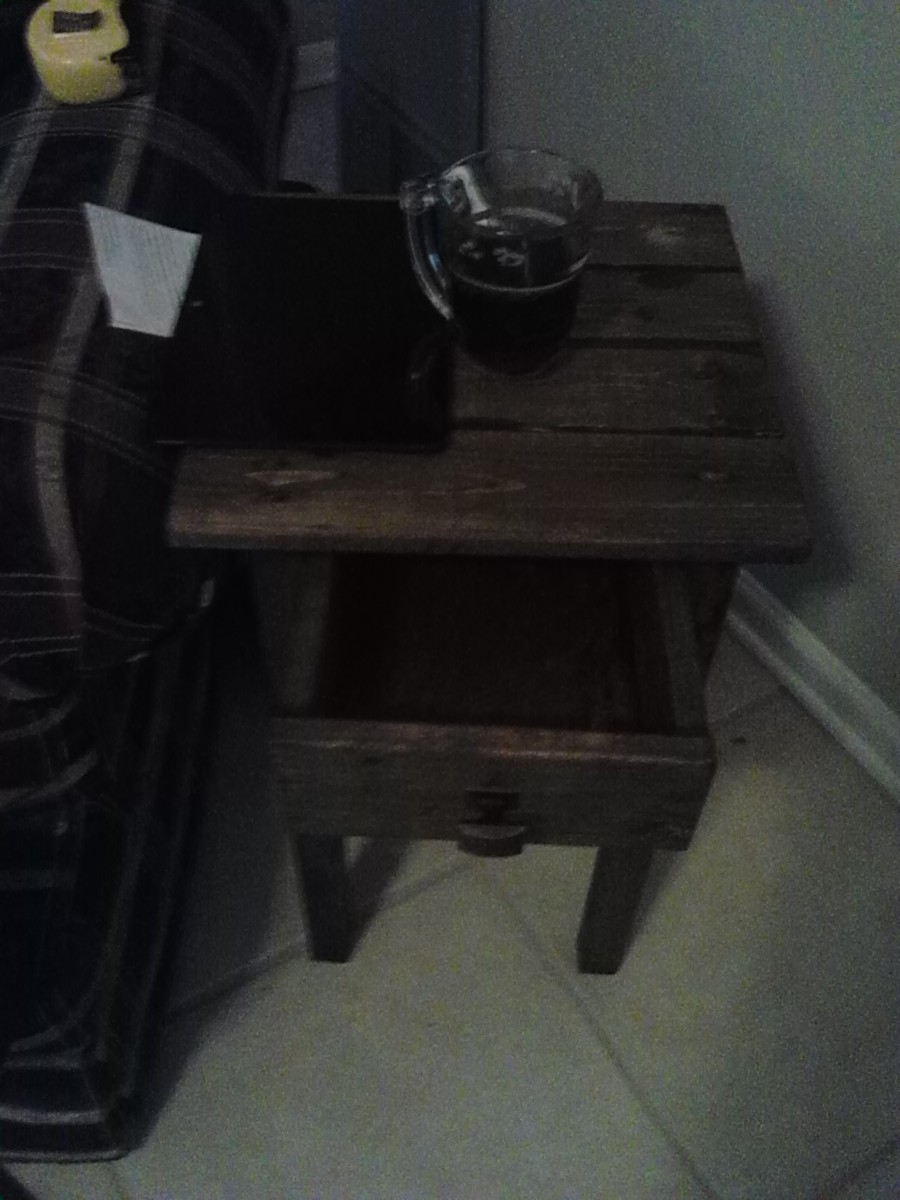
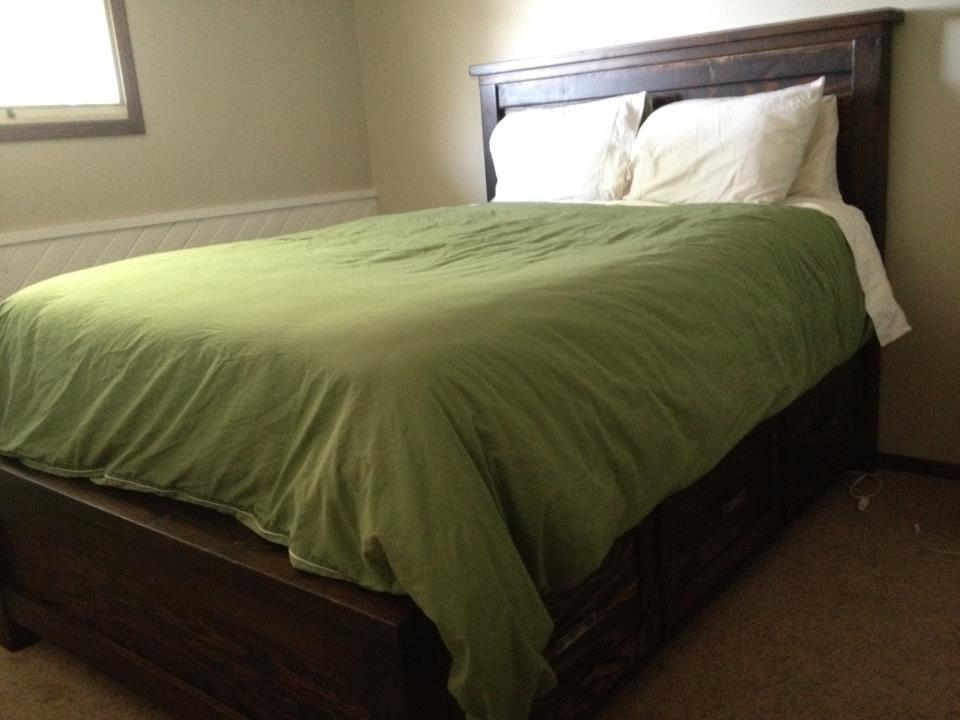
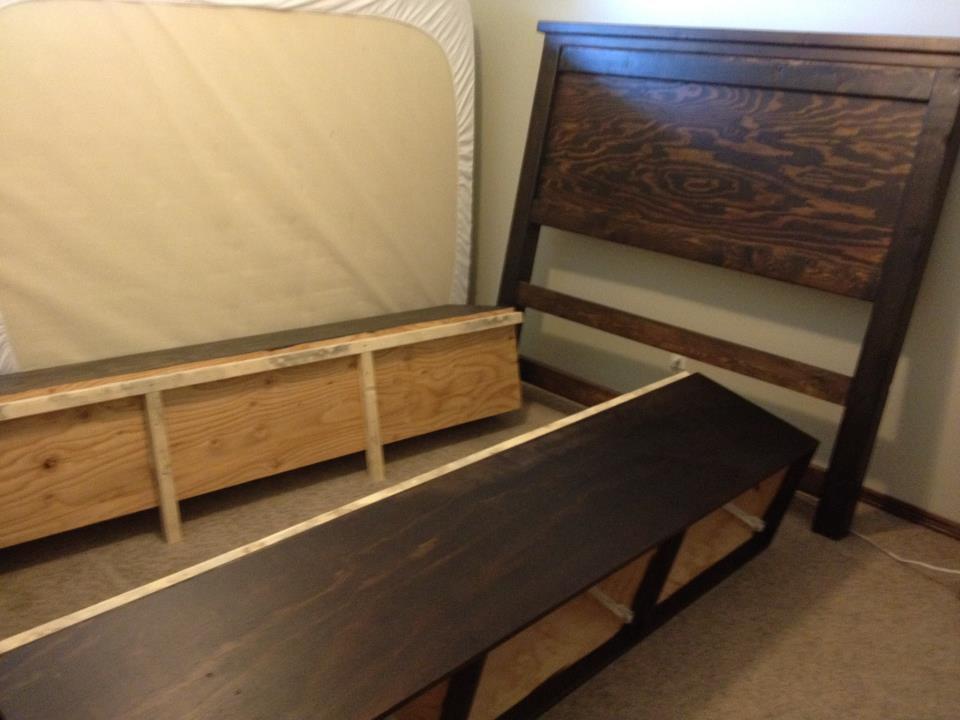
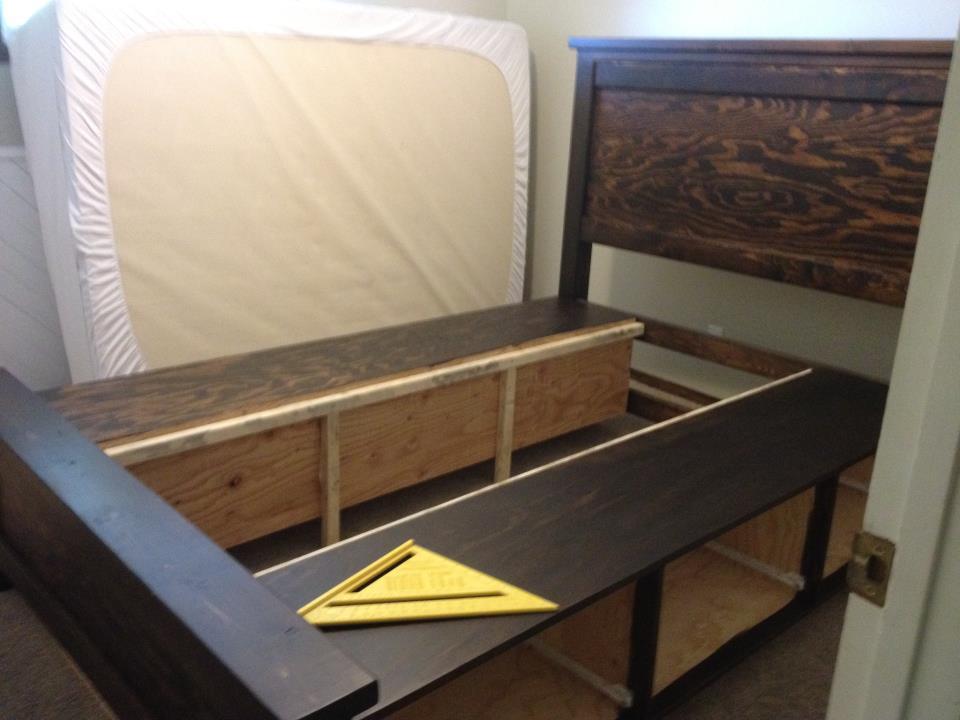
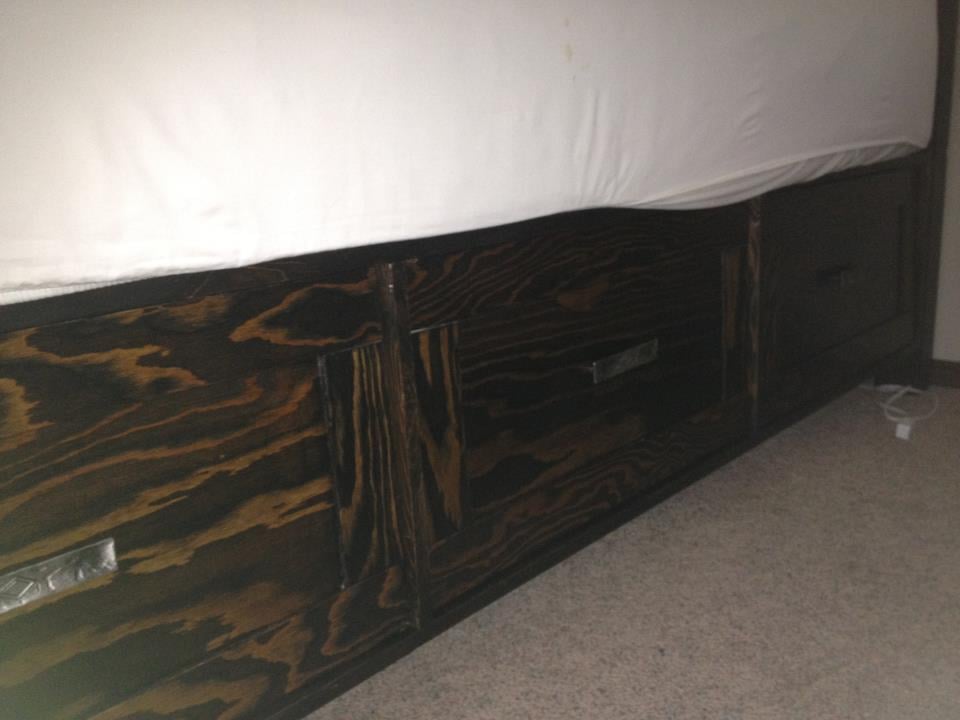
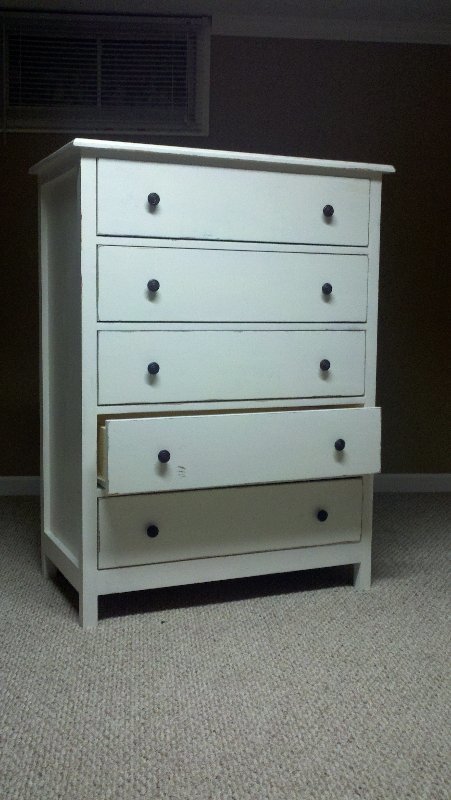
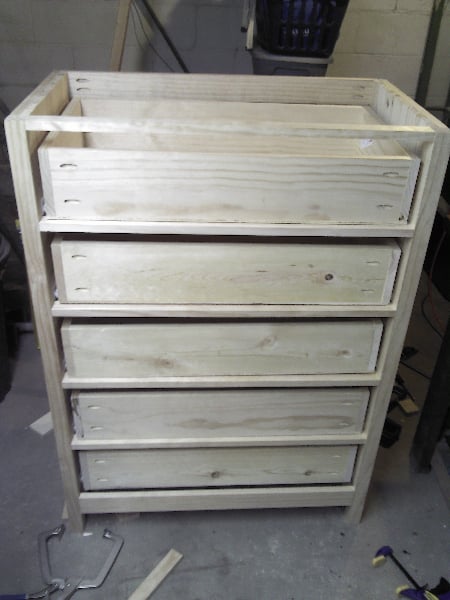
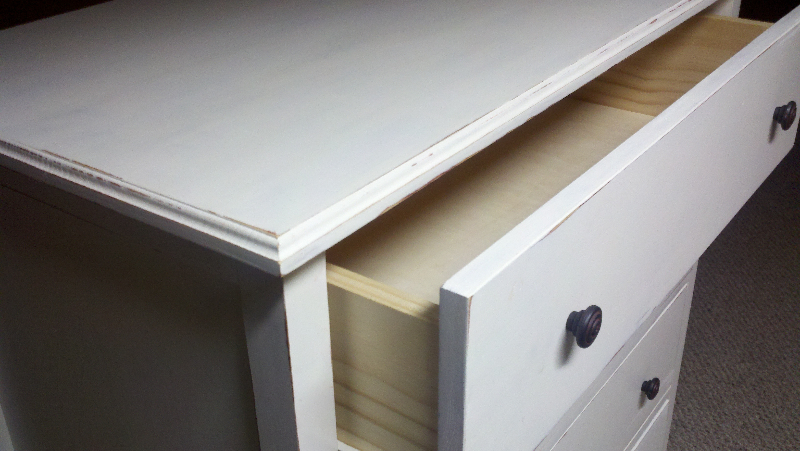
Twin Farmhouse Bed
Got it finished. Took a week exactly, with having to work and a few minor setbacks. We LOVE it!! Can't wait to start the next one!!
This was my first project and there were many starts and re-starts and tearing apart and re-doing but finished product was great! I added the arched doors to original plans and had fun with the whole project!
This was my second project after creating a custom bookcase for underneath our kitchen island. When I saw this bench, I knew it would go well with my dining table. It was pretty easy to do. I sanded and stained each piece before putting it all together and I stained it to try to match my dining table.
Thu, 05/07/2015 - 13:51
I love how you were able to match the bench to the table. By the way, what is the name of your table? I really like it! I wonder if Ana has time to draw up this plan, pretty please Ana.
Fri, 05/08/2015 - 10:19
It's the Paloma I from Crate and Barrel: http://www.crateandbarrel.com/furniture/dining-tables/paloma-i-dining-t…
Fri, 05/08/2015 - 10:35
It's the Paloma I from Crate and Barrel: http://www.crateandbarrel.com/furniture/dining-tables/paloma-i-dining-t…
Our first project using the plans provided on this web site. We couldn't be happier with the outcome. The plans were concise, accurate and easy to follow.
Tue, 09/19/2017 - 21:52
I apologize that the picture is sideways. That is not the way it is saved on my computer but no matter what I try, it rotates to this.
A beautiful housewarming gift for our son and his wife. We added doors with magnetic closures, slats to the back, and a safety feature to the drawer (toddler in the house). They loved this piece, and have many admirers of it. Time: 2 day build, 2 day finish.
This was my first wood working project ever. I followed Ana's plan exactly except for the trim and partitions. I learned a lot from this project such as the correct pre-drilling hole size and the need for countersinks (I had quite a few split boards). I used Pine for the boards and MDF for the shelves but if I had to do it again I think I would go for plywood. All in all it was a rewarding project. The hardest part was the wood putty.
Your plans made this project so much easier. We love it and have gotten a lot of compliments for it.
Fri, 06/12/2020 - 11:05
LOVE the attention to decorating details! This is beautiful. Thank you for sharing!
We finally got our outdoor porch cleaned out and needed some additional seating. Loved all the different designs based on Ana's 2x4 sofa. Used Cedar boards instead of Pine.
I used this wonderful and easy plan to make a leaning hall tree for this awkward space in my dining room. Finally solved an 8 year old problem of what to put in this space! Thanks for the awesome plans!!
I wanted a kitchen table that was bigger than the one we had from Ikea, but the Farmhouse Table was too long. So we modified the length, left off the stretcher, and painted it a bright blue! The major lesson learned in this project was to be sure to store boards carefully. We bought the lumber, cut the boards, and then didn't work on the project for a couple of months. Even though the wood was in our garage, some of the boards warped a bit, leaving us with bends and curves to deal with once we started to build. Luckily, things came together, but there are many more imperfections in this table than would have been there if we'd built it sooner. But we still love it!
I used an all oak wood with a maple inlay on the table top to give it a different grain pattern and stand out a little more than just one type of wood. My wife wanted 3 shelves so she could display all our babies photos in our living room, toys on the bottom and odd storage in the middle. The way I figured to find the height of the second shelve was because we have a scentsy warmer and the basket we use to hold the scents I made to just fit under the table top. I also went with a fancier router-ed edge to the top which has three grooves instead of your normal round over or just square. I used a lot of kreg jigs to put this together and the two bottom shelves are free floating without a support beam. The way I did it made it really sturdy with clean lines on the peace. I sanded the whole project to 400 which made it feel like glass. If you would like to know more ask questions. I love to do this type of stuff.
Fri, 10/18/2013 - 01:46
I just finished a second, smaller version of this one for one of my friends who just got married. I also inscribed their names and date they got married on the bottom. I made it look like a carving in tree. It was pretty cool.
This is project #3 for me. Went together pretty easy. I originally made it for my living room but my teenaged daughter likes it so much she is begging for it to be in her room. She helped me stain it so I guess I will give it to her. I love Ana, I love the plans, I love feeling so empowered!
Built by Richelle Munro
"I love all your plans, and I have made quite a few of them now! This is one of my favourite! I used old barn wood for the top, and ship lap for the bottom and doors!"
60” round 1.5” concrete top.
No modifications to the base.
Used Behr water based stain (Early American)and wood conditioner.
Beyond pleased with the results:)
Mon, 11/08/2021 - 16:06
Thank you!! It turned out better than I had hoped. Now every time I see it, I smile. Thanks for the base plans🍻
This was our first project. My husband and I took the Farmhouse bed plans and modified them to look more like the Hudson Bed from Pottery Barn. This is a King size bed with removable side rails and under bed supports so that it can easily be collapsed for moving.
I love this table. I needed a little console table for my bedroom, and this was a prefect fit. It took me a day (not including buying the lumber), and it was fun to build. This was the 2nd project I have done, and I am really proud of it! (PS i found one on the pottery barn website that looks very similar for $600!) I spent about $50 on lumber, and already had the rest of my materials:)
Mon, 06/10/2013 - 16:05
Great job! I love that stain! How come you did not use pocket holes to attach the board so there would not be any visible screws? I love this table though. I saw the plans last week and want to build one next!
In reply to Great job! I love that stain! by Officer_Dad
Tue, 06/11/2013 - 08:11
Thanks! I like how the stain turned out too:) As for the screws showing...well.. I didn't want to buy any extra tools- and i have no idea how to make pocket holes yet haha. This is only my 2nd project. But I really don't mind the screws showing.
:)
It was a bit tricky putting it together in my limited space closet but I got it all done! Loving it! It also forces me to make up a capsule wardrobe and clean out my closet as there isn't room for everything. Thanks Ana!
A great one board project using some left over cedar that was collecting dust. Using a 1/2" round over bit I eased the outside corners as well as the drawer sides. I find that the drawers will slide easier with a slight round over applied. I left the cedar without a stain and two coats of satin clear.
Sat, 11/04/2017 - 19:29
Great job on this project! The router detail is beautiful, and the unique shaped pulls are awesome!
JoanneS
This was what I built for my daughter during quarantine! I had never used a Kreg Jig before and now I love using it!
I built the Full Storage Bed using Ana's plans! It was very easy and I love the storage space! You can see it and my modifications at our blog http://www.shanty-2-chic.com/2011/03/crates-for-storage-bed.html