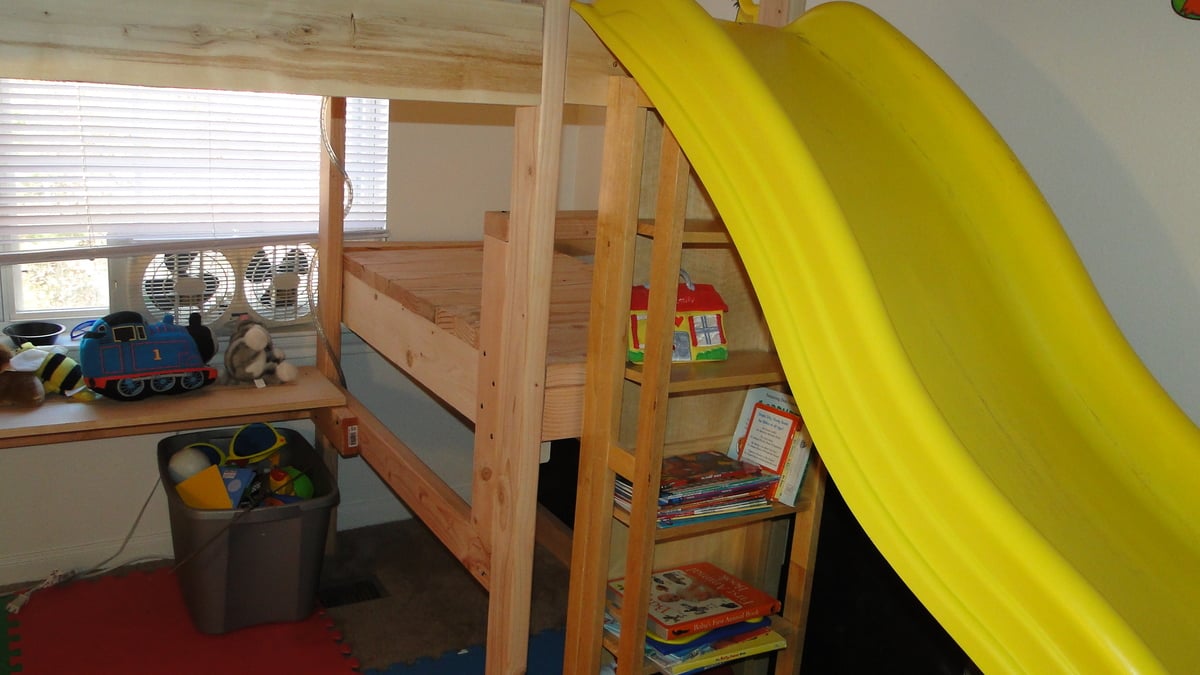
Double Camp Loft bed
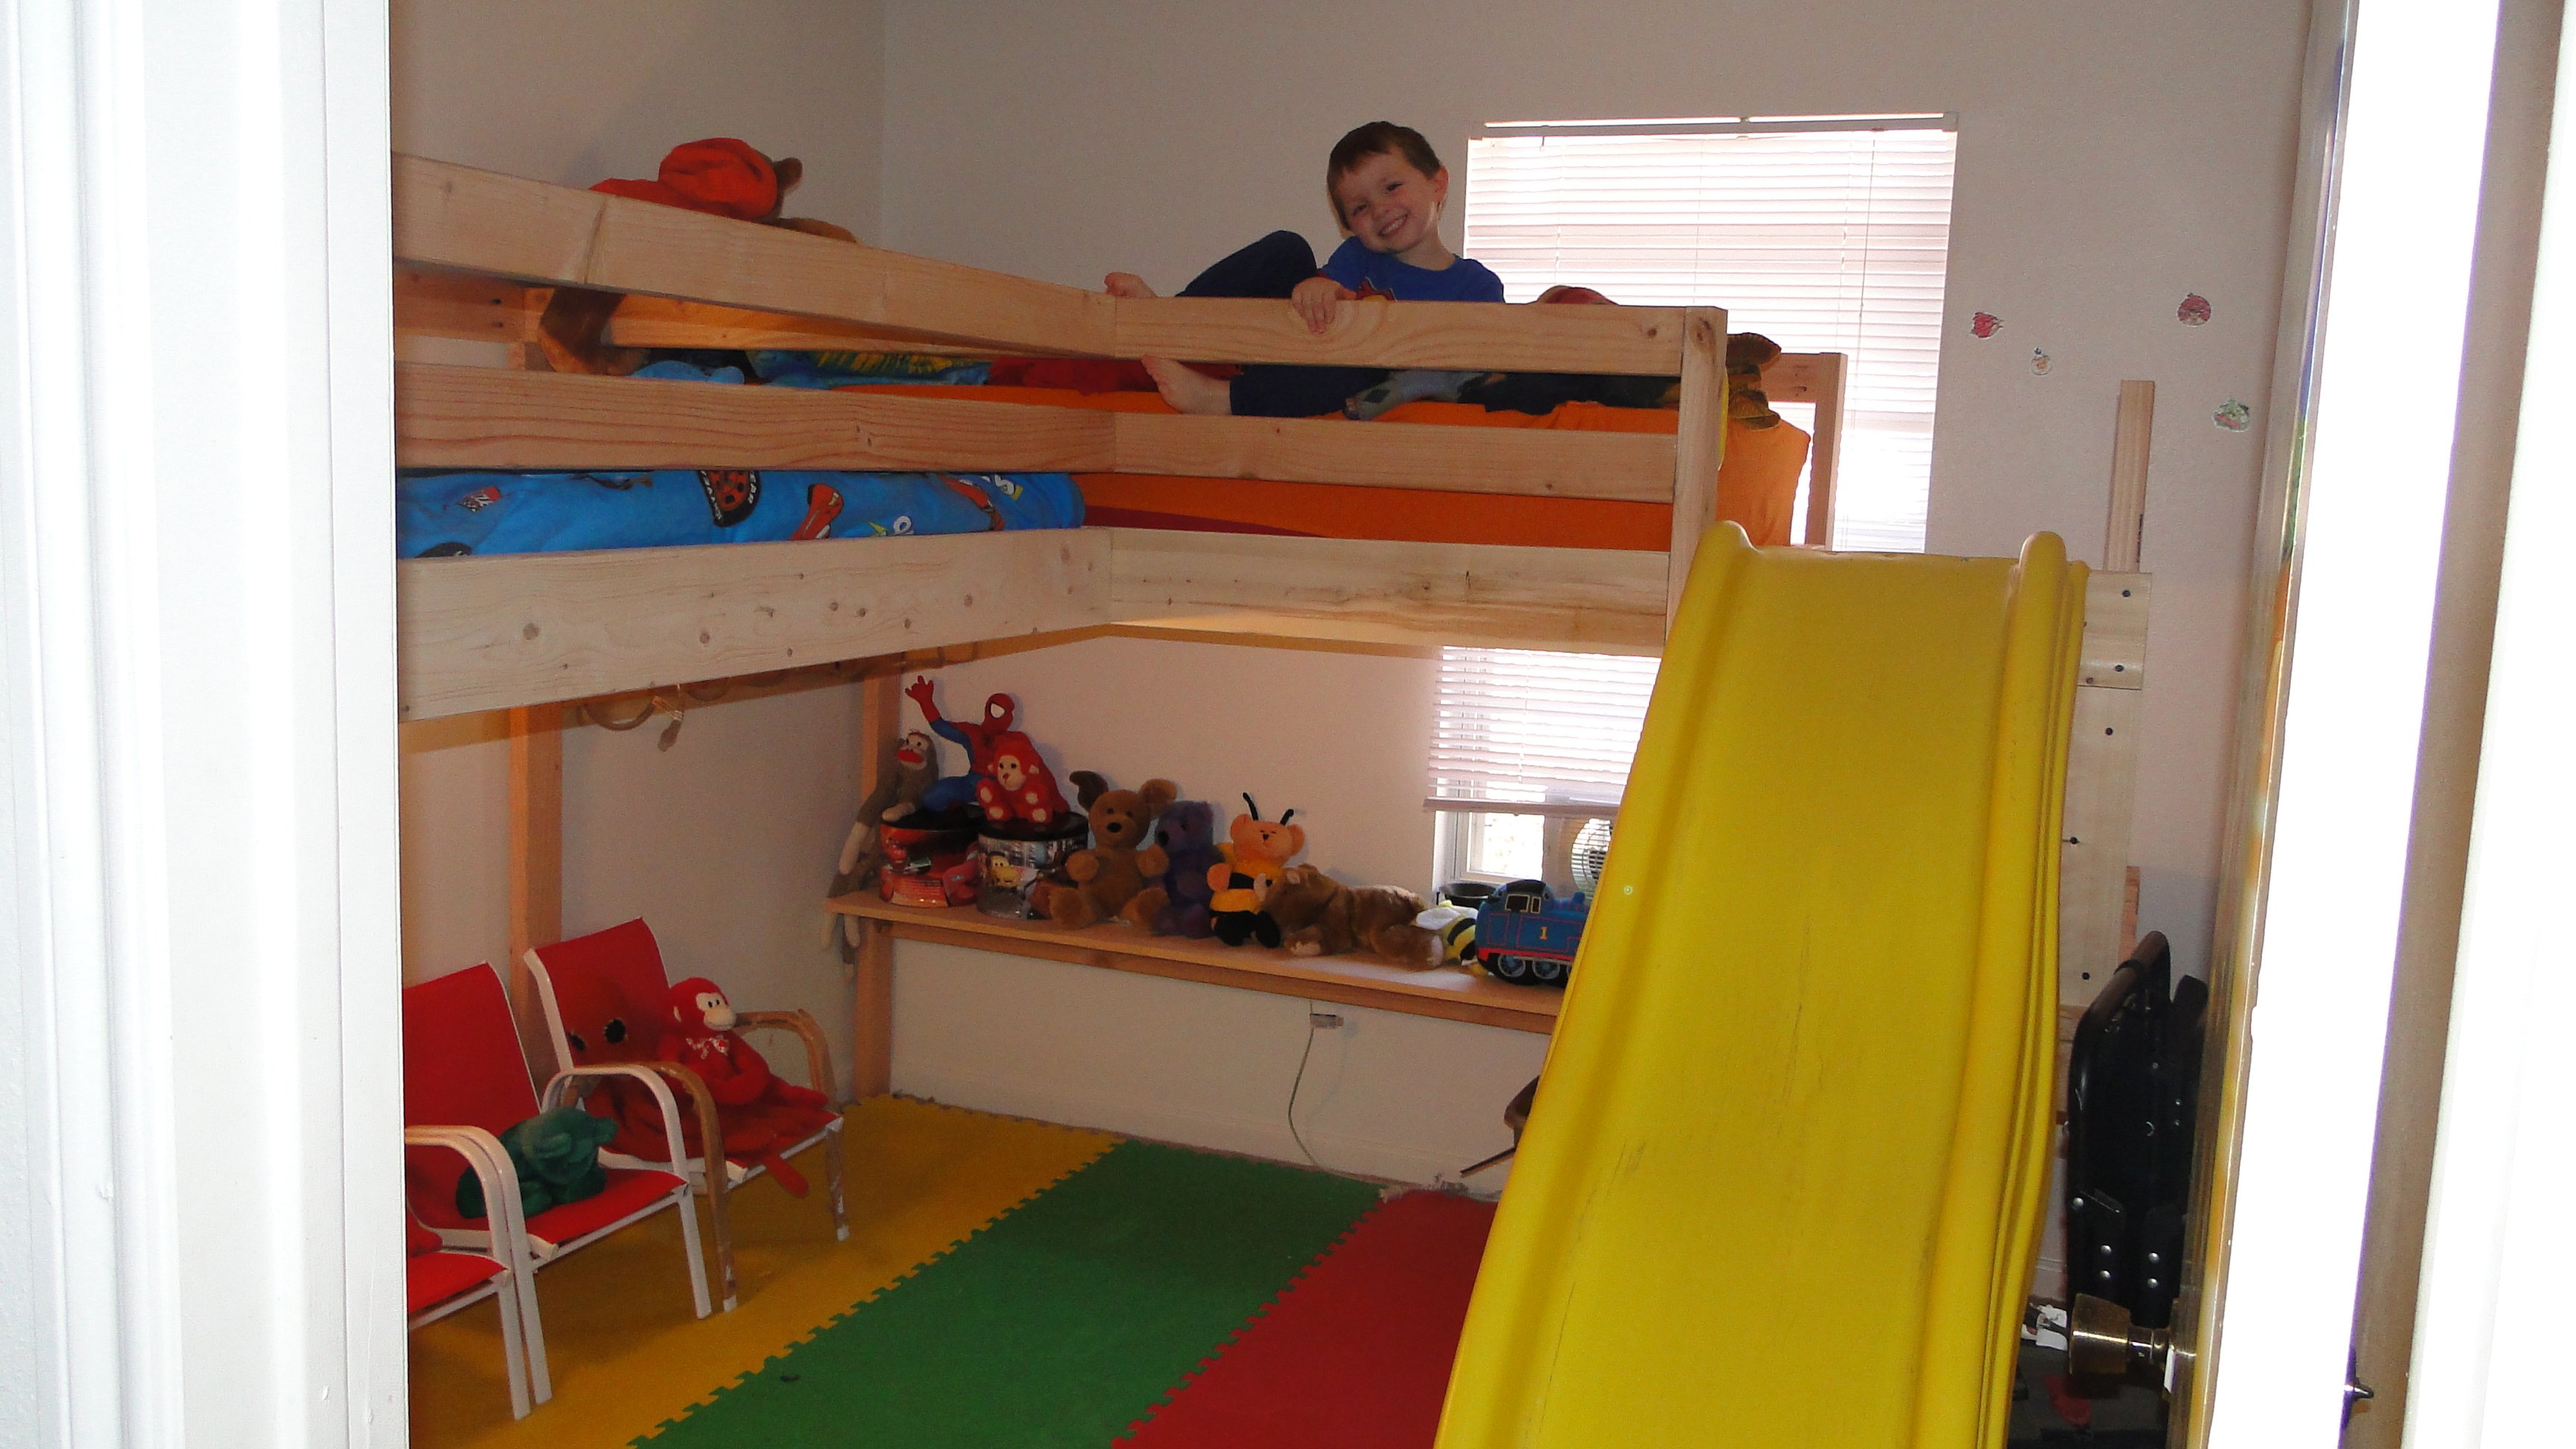
I used the plans from the Camp Loft bed and adjusted to exactly what I needed. Two twin beds in a small bedroom without losing any floor space. I found the slide on craigslist while I was building this and it made the best addition. I also added a shelf along the base of one bed for the boys to have a play table and adds stability to the base of the bed to keep it from rocking.
Built from Plan(s)
Estimated Cost
200-250
Estimated Time Investment
Week Long Project (20 Hours or More)
Finish Used
I have not yet added the finish as I needed the beds up asap. I plan on spending a weekend when the kids are gone by simply adding a coat of poly.
Recommended Skill Level
Beginner


Comments
Lois (not verified)
Mon, 11/05/2012 - 17:38
Double Camp Bed
Great Bed! Can I get the plans the way that they were modified? I am a beginner and definately need the step by step plans. This would be great for my nephew's!
Raye Lin (not verified)
Wed, 11/07/2012 - 14:09
I just made the first bed as
I just made the first bed as the plans had. Instead of doing the stairs I just did an extra 2x4 across the legs so they can get up onto the platform. For the 2nd bed I followed the same instructions as the first but only doing one end and the rails (made a giant L) then flipped and screwed right into the side of the other bed. I used pocket holes all around so it went together very quickly.
Natali (not verified)
Wed, 11/07/2012 - 20:57
How t build double camp loft beds
I really like this bed!my boys will love it! I am a beginner can I please get the plans and tell me how to make the bed with 5 feet high for more space
It will be my first time I can't wait. Thank you !
seeca13
Thu, 05/30/2013 - 18:53
love the slide.
This is awesome! I love the slide idea! Thanks for posting.
theprovocative…
Mon, 06/24/2013 - 10:36
PLANS PRETTY PLEASE!?!
I have scoured the web for this loft for my two youngest girls! As I am terribly untalented at drawing up plans PRETTY PRETTY PLEASE WITH SUGAR ON TOP make your adjusted plans available? I have until the end of next month to build this for my princesses birthday and I'm more than a touch frazzled that I cannot find these plans anywhere. Take pity on the less talented and please post your plans? Or email them? [email protected]
Thank a ton in advance!
SuperDaddy4
Mon, 12/08/2014 - 13:48
Requesting your Info
Great work with the modifications! Can you please share the new plans for the changes you made or let me know what exactly that you did to achieve the finished results. Thanks in advanced!
SuperDaddy4
Mon, 12/08/2014 - 13:48
Requesting your Info
Great work with the modifications! Can you please share the new plans for the changes you made or let me know what exactly that you did to achieve the finished results. Thanks in advanced!
mideastmom
Thu, 06/30/2016 - 20:16
Plans, please???
I know it's been a while, but if you would share your finished plans, that would be great. We have the original camp loft, bought from someone else who built it, and we'd like to modify it to be an L-shape loft.
hienhien718
Fri, 11/18/2016 - 05:22
Plan
Can I have a copy plan ?
Thanks