Bookcase
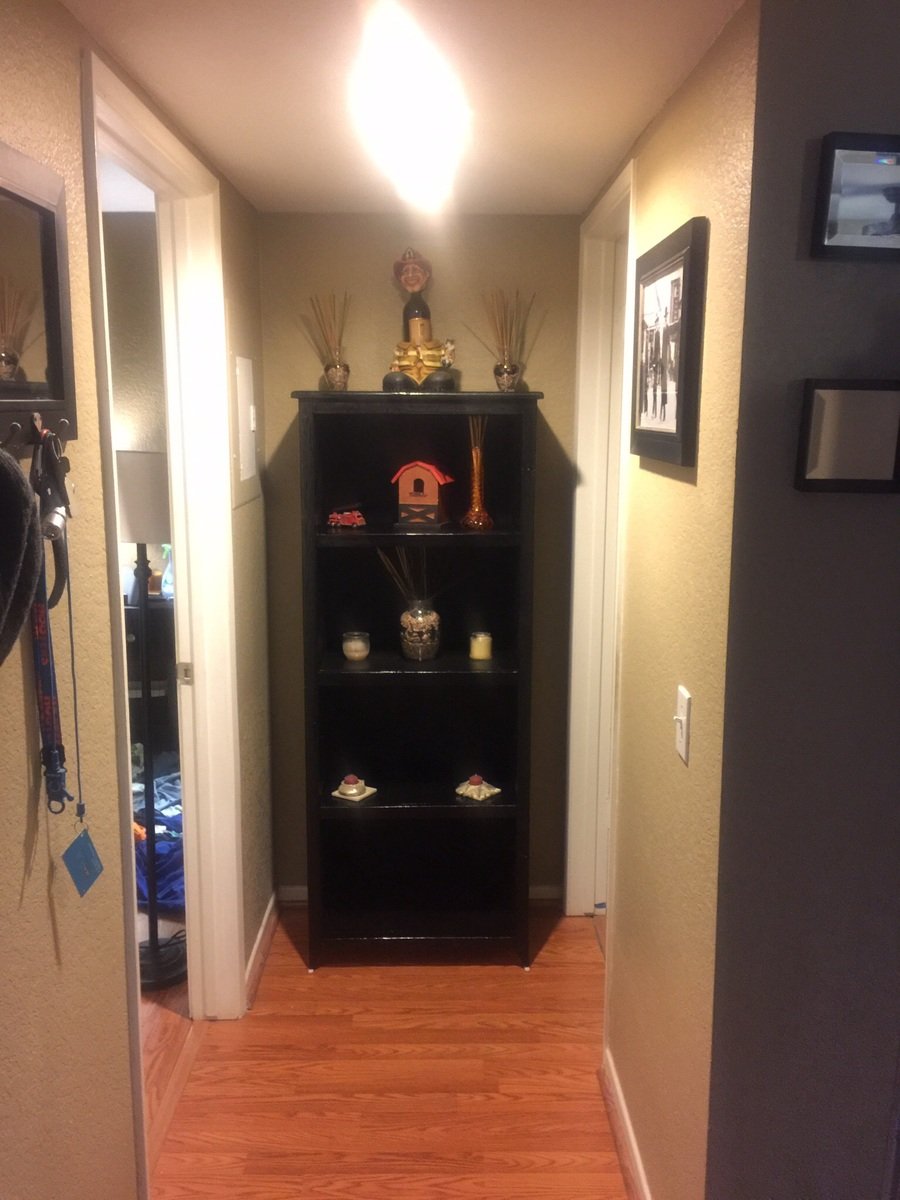
here is my version
Built from Plan(s)
Finish Used
Polyurathane
Recommended Skill Level
Beginner
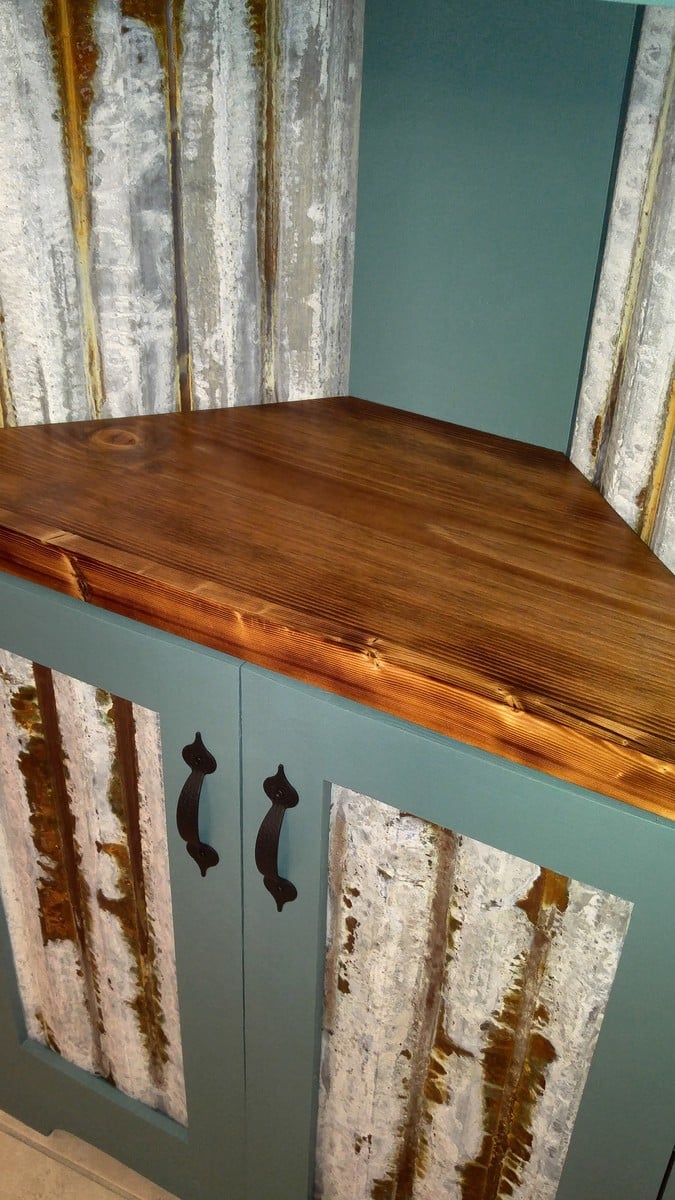
here is my version
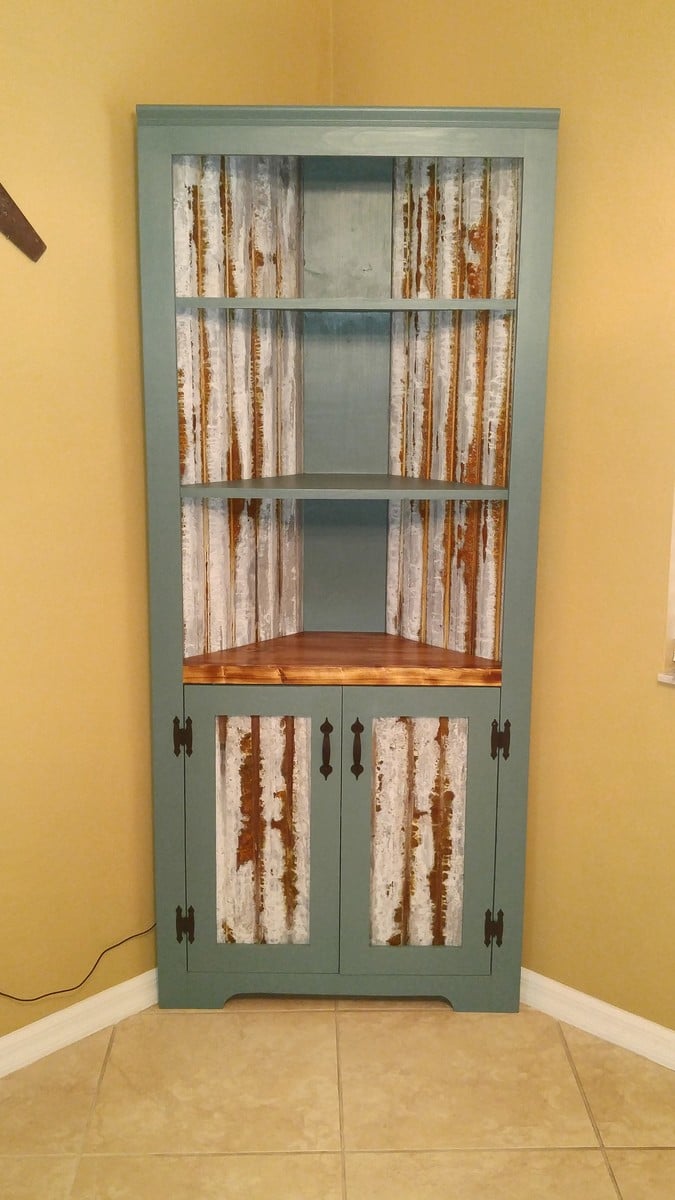
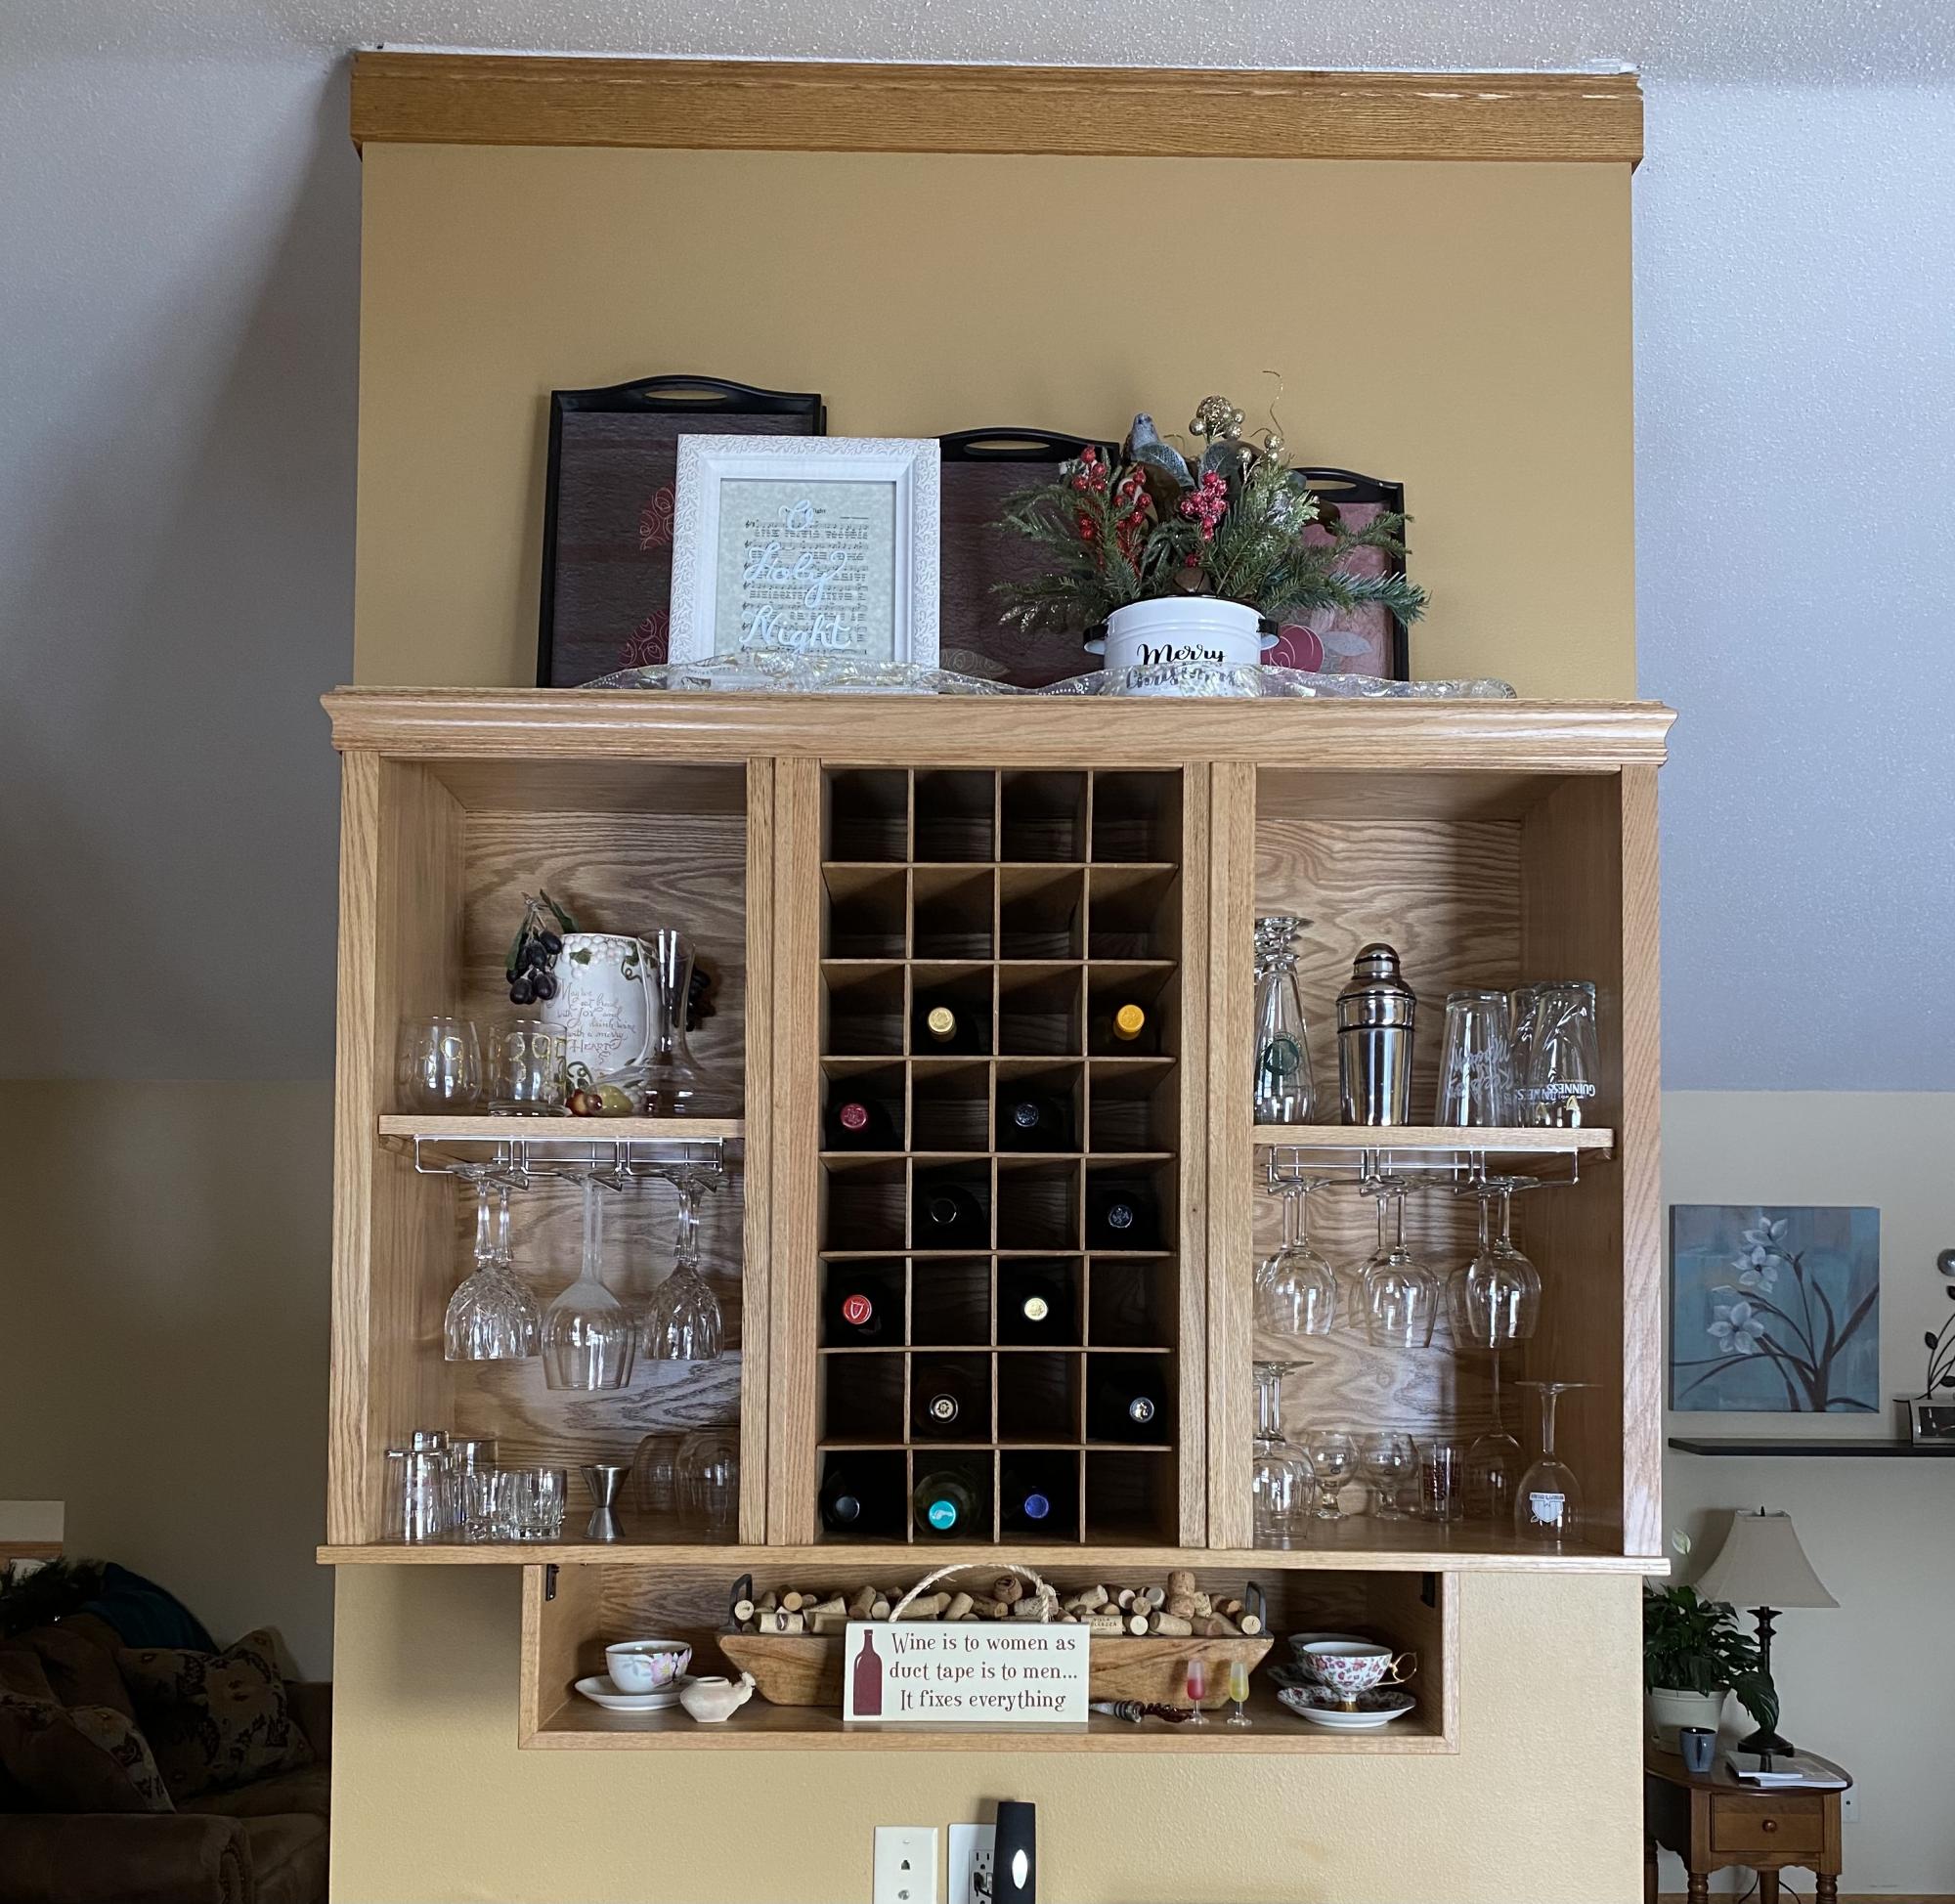
Corner Cupboard built for use as a dry bar with a few mods for a more rustic look.

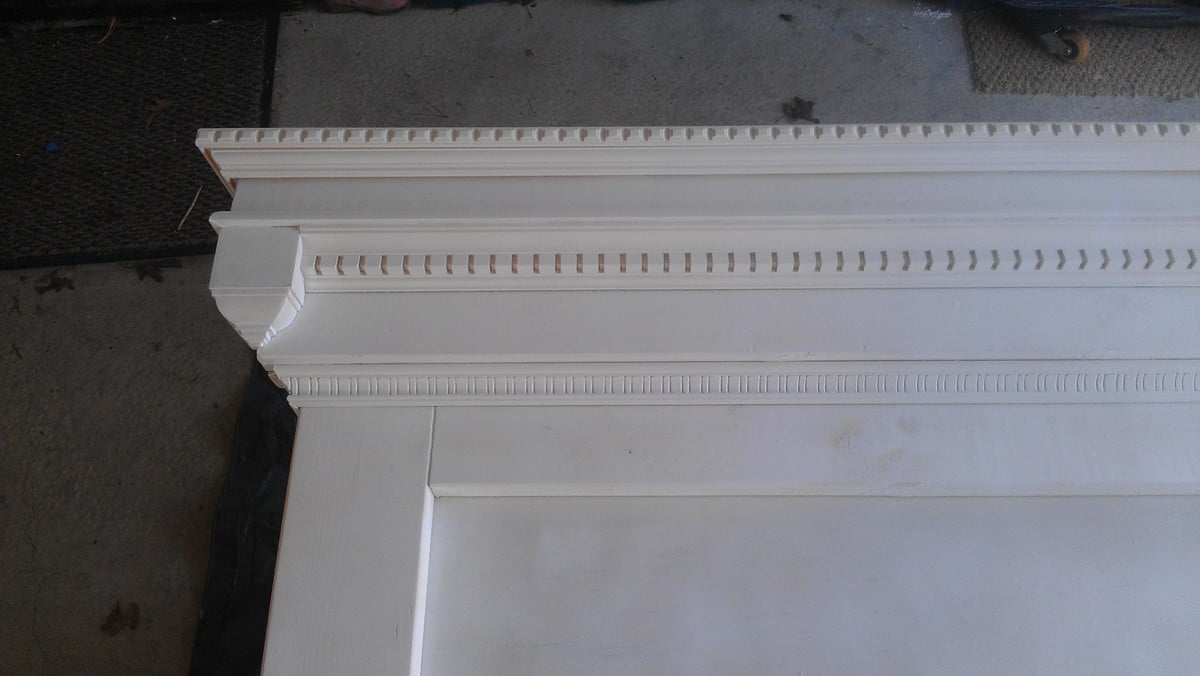
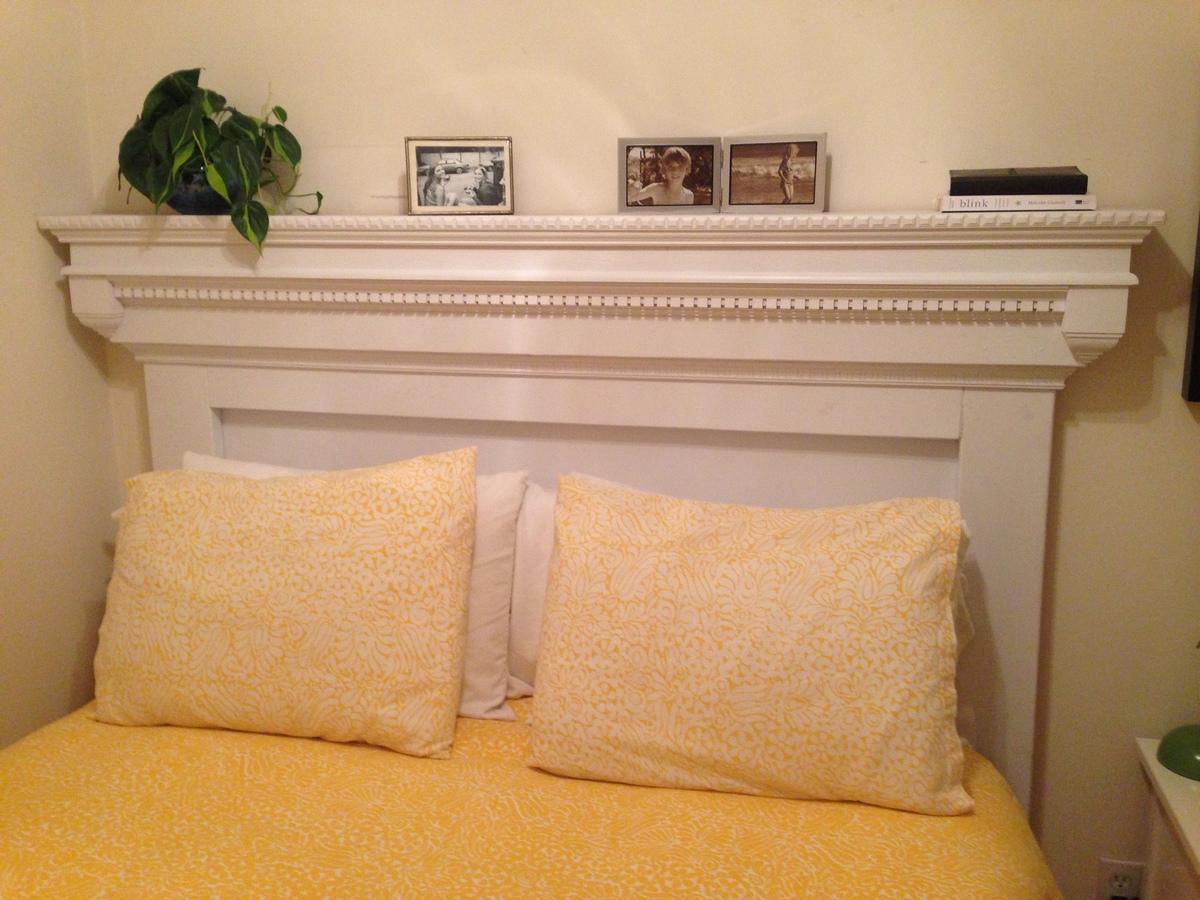
Thank you for the plans! I love the way my headboard came out! I couldn't figure out how to cut the on piece of moulding to get the angles to work, but I think I resolved the issue nicely with the blocks for it to die into.

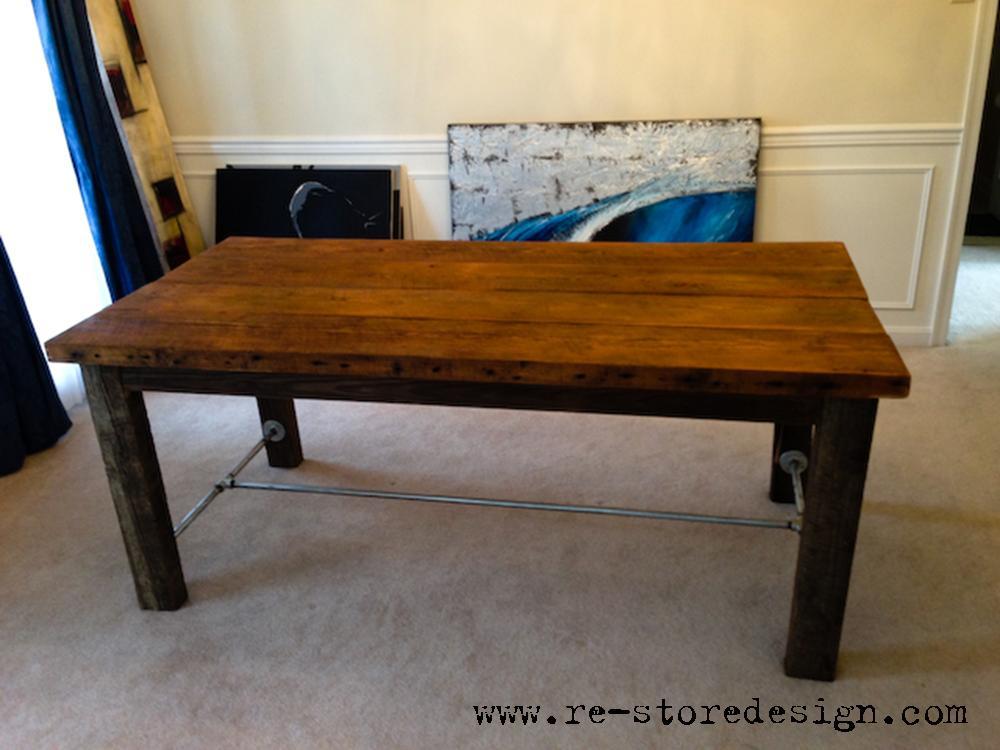
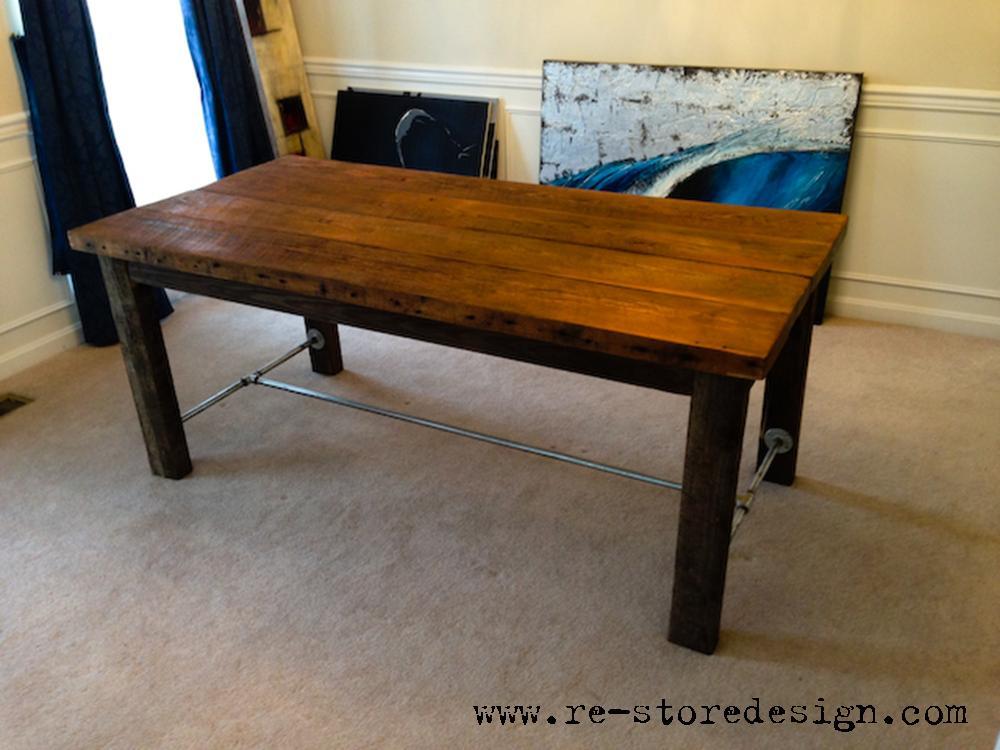
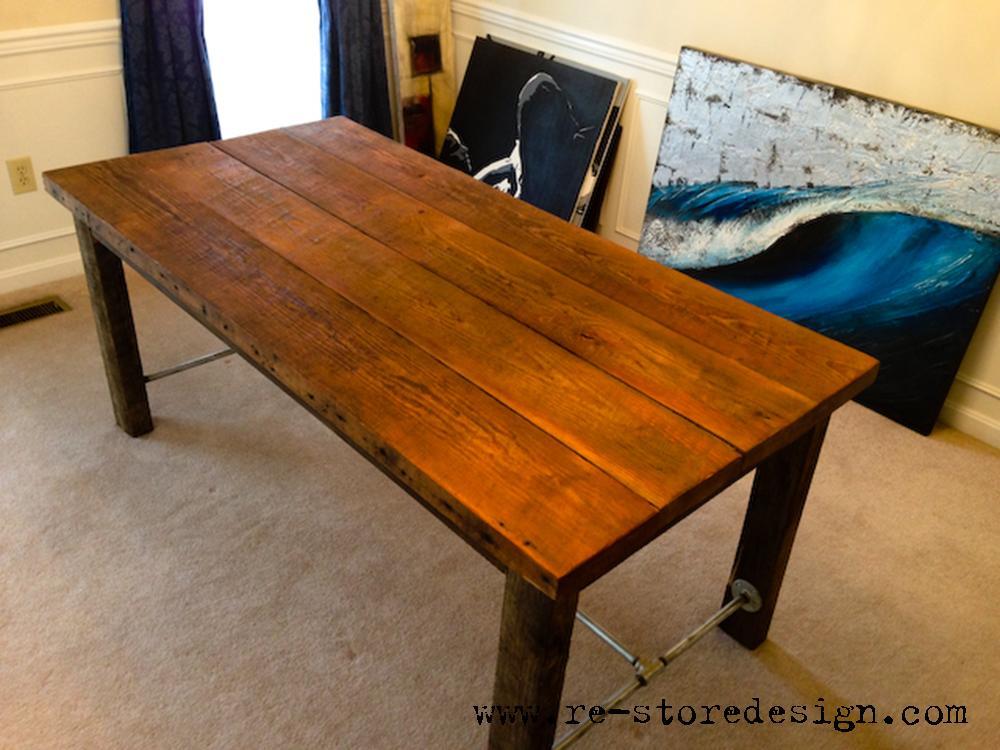
This was a fun project that my Dad and I had the opportunity to work on together. We were able to locate an old barn that and recently been blown over (farmer gladly told us to take whatever we wanted). We salvaged the wood, hit it with a little sand paper that provided the true rustic farm house look. With some modifications and a biscuit joiner we were able to fit this together. All in all I think I spent a total of $6 on the lag blots for the legs.

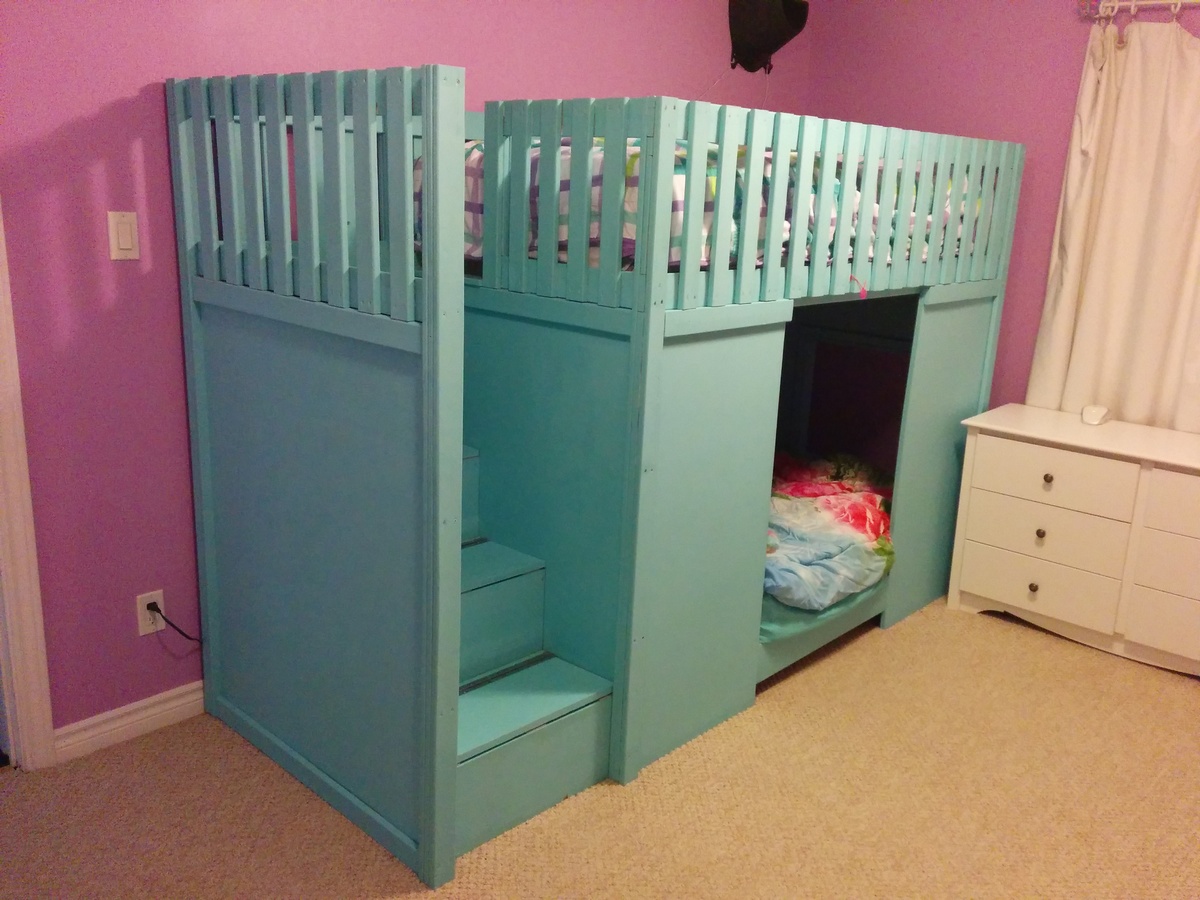
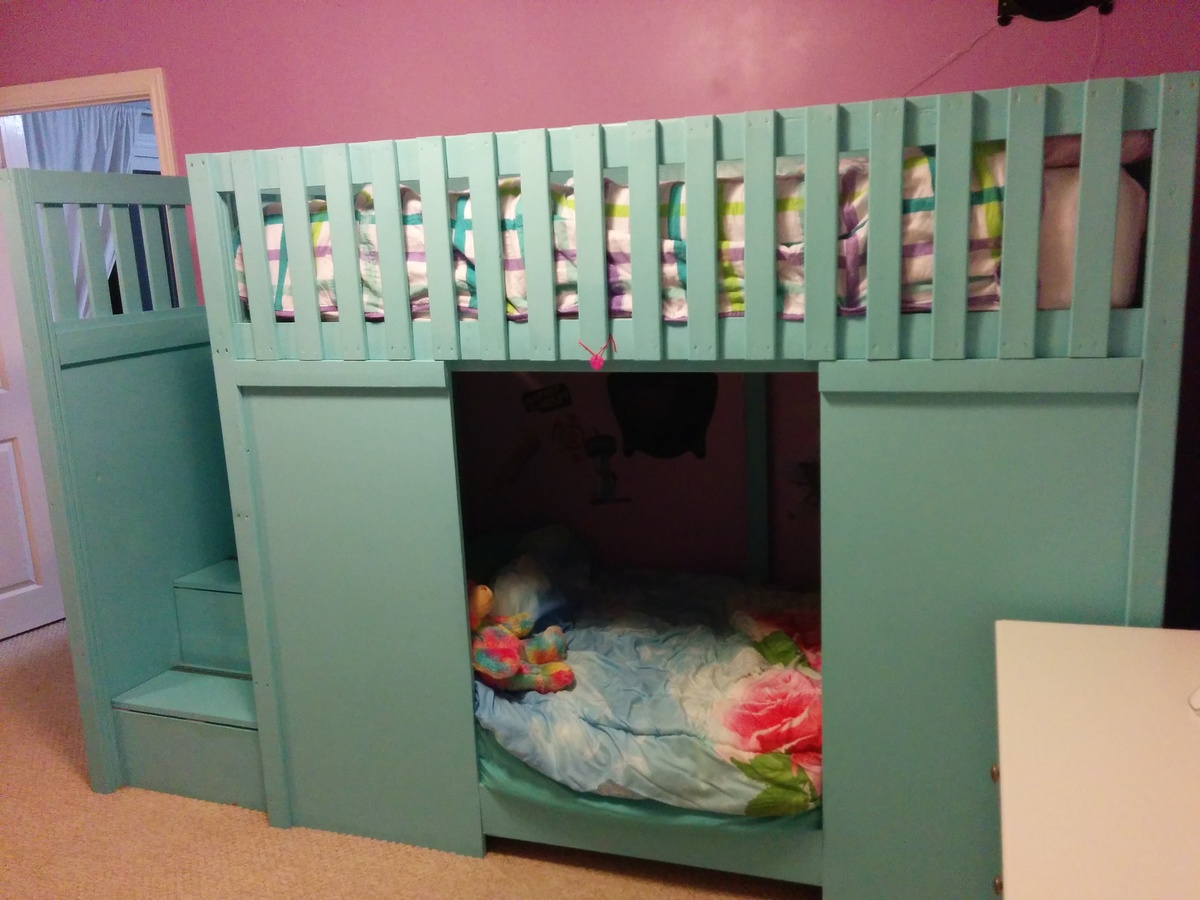
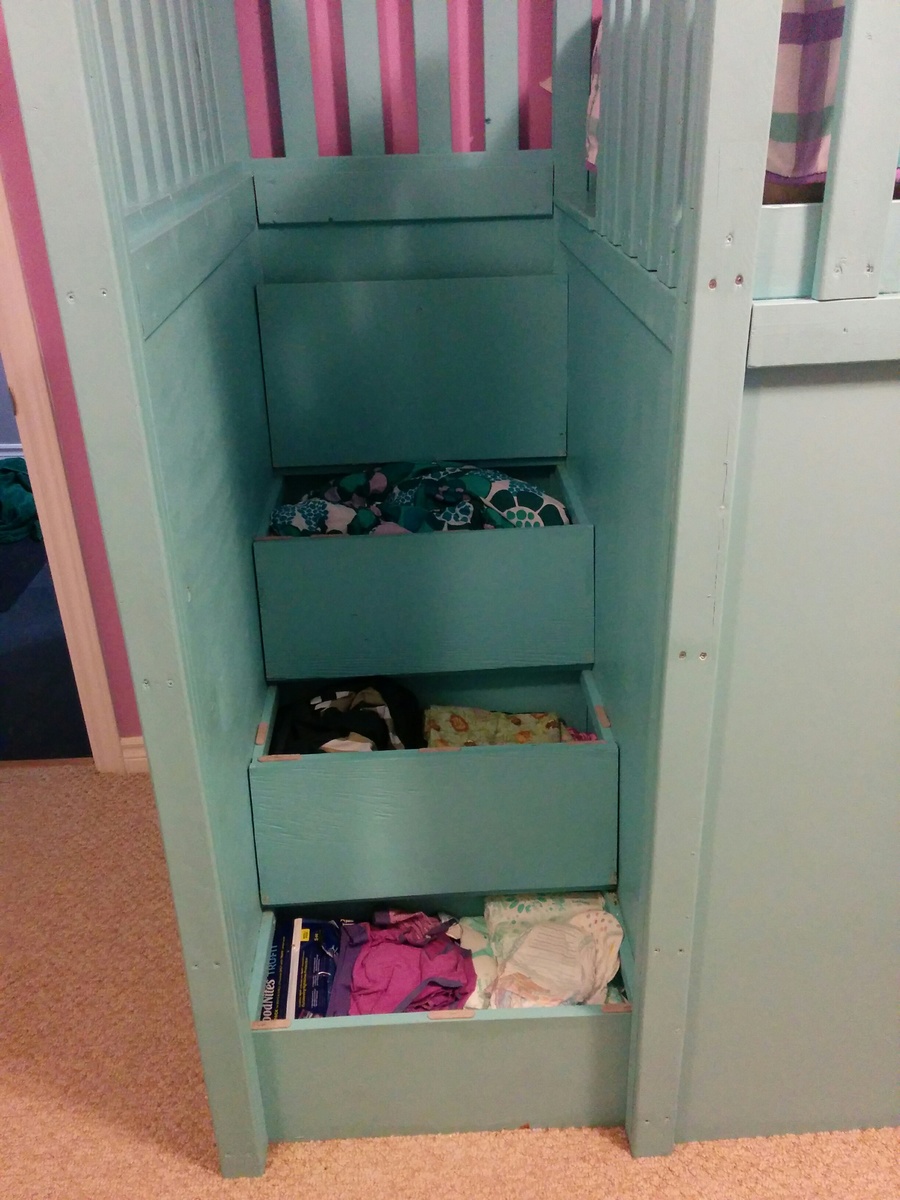
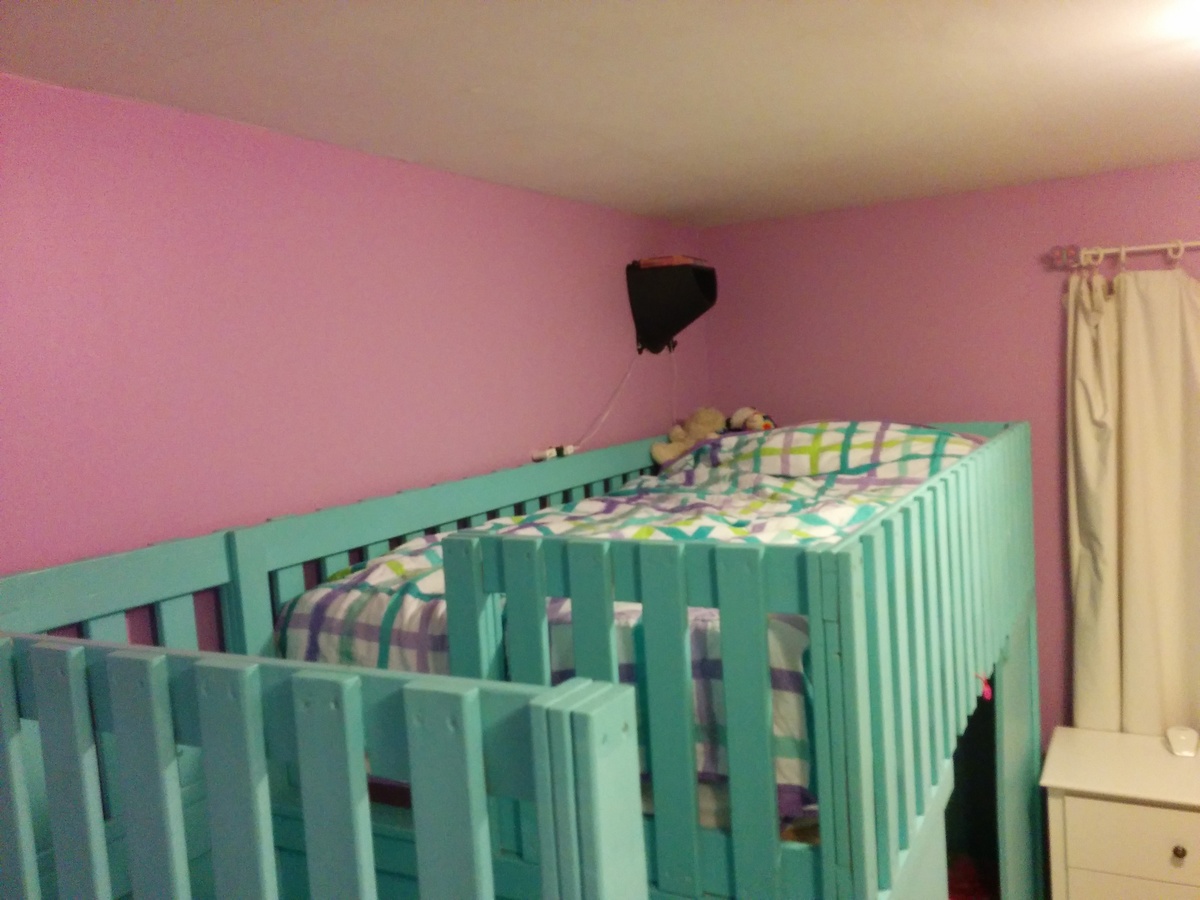
Made in 2014 from the playhouse bed plans with the storage stairs as well.
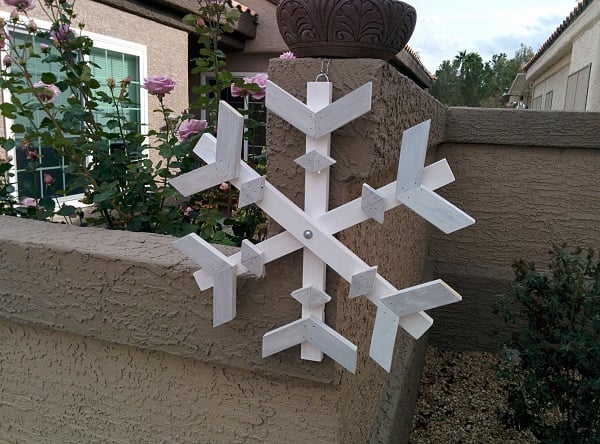
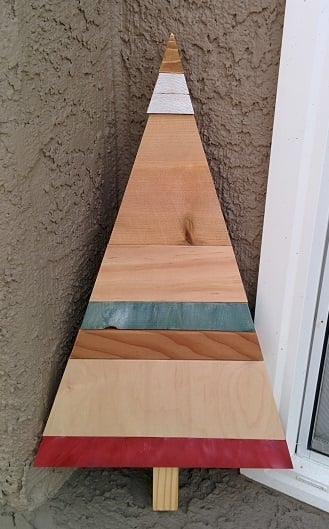
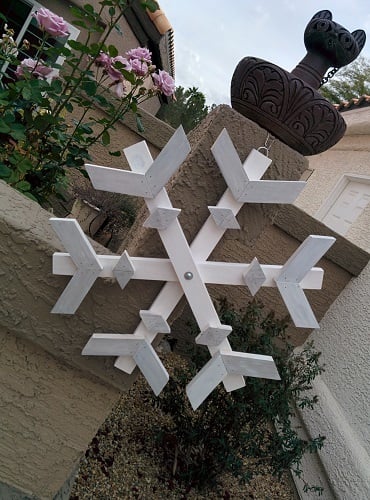
I made a couple of decorations from my scrap wood. On the snowflake, I had some extra parts of 1x2s laying around so sized this down to 20" and used those. The tree is just a bunch of different types of wood I had left over. This was really fun to do.
It took me a little over a day as I had to paint and wait for it to dry before I could assemble.
Thank you for the ideas and plans.

Tue, 12/16/2014 - 19:16
This is beautiful! It's so gratifying to use up scrap and turn it into something like this. :)
In reply to Thanks Pauline by CSaintD
Tue, 12/16/2014 - 20:38
I have a RYOBI giveaway on my blog, you should submit this photo.

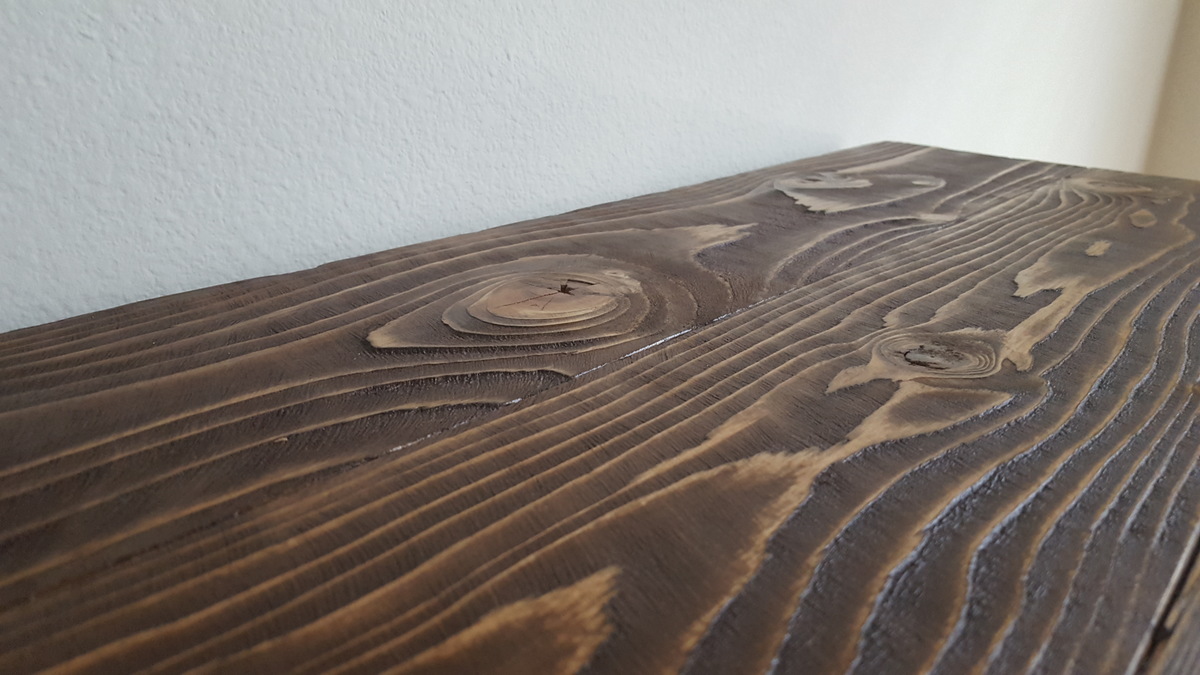
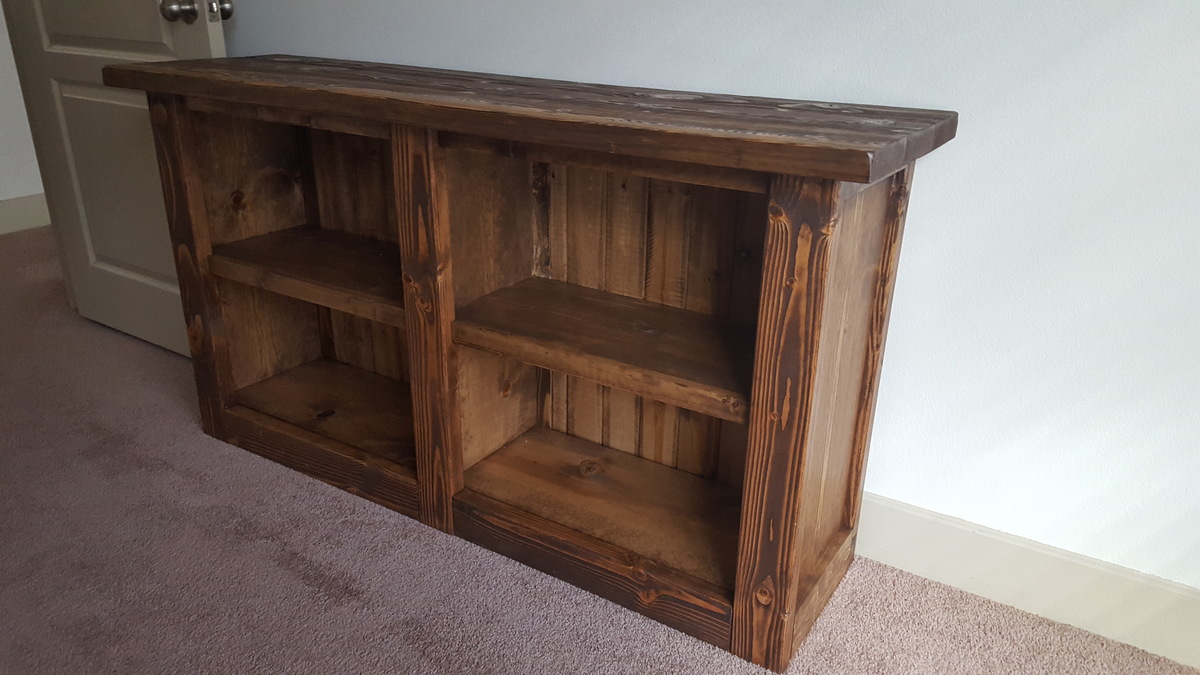
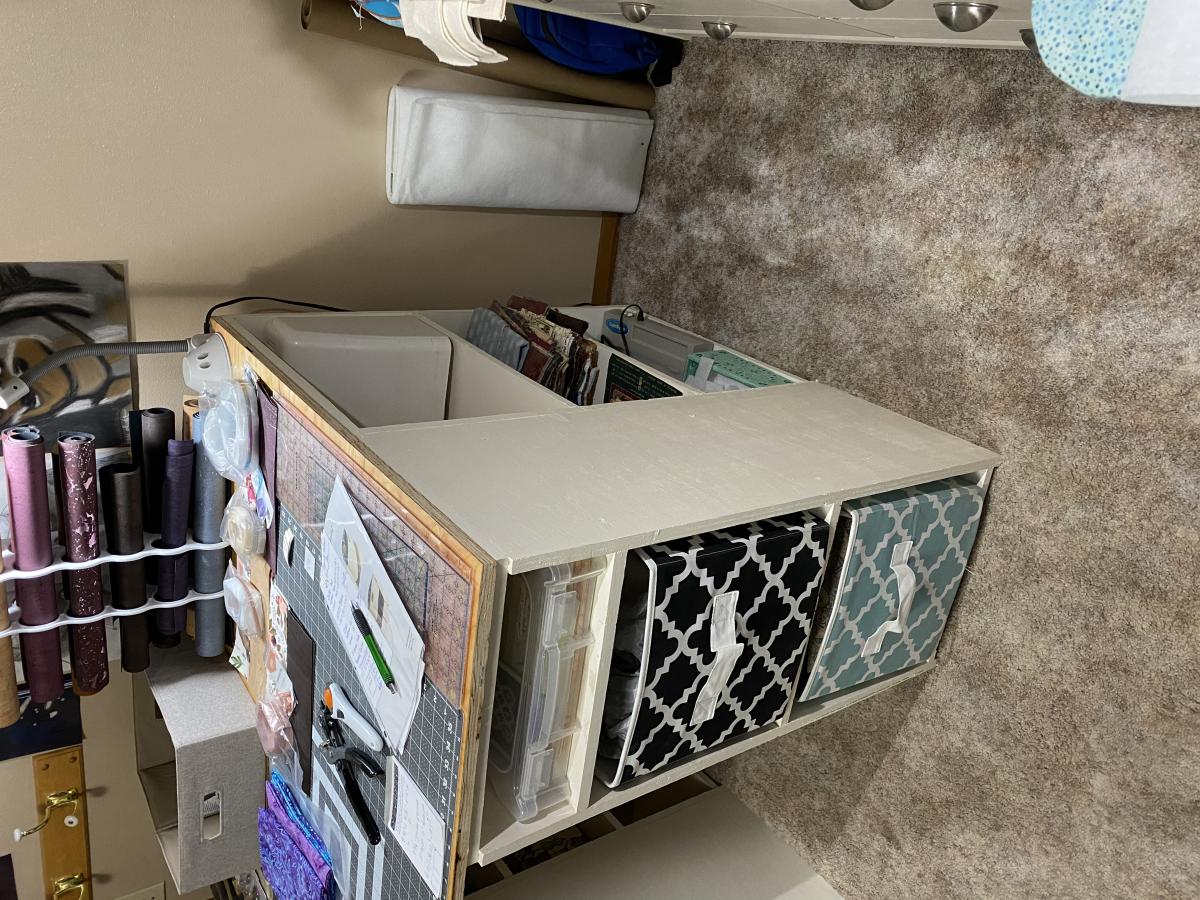
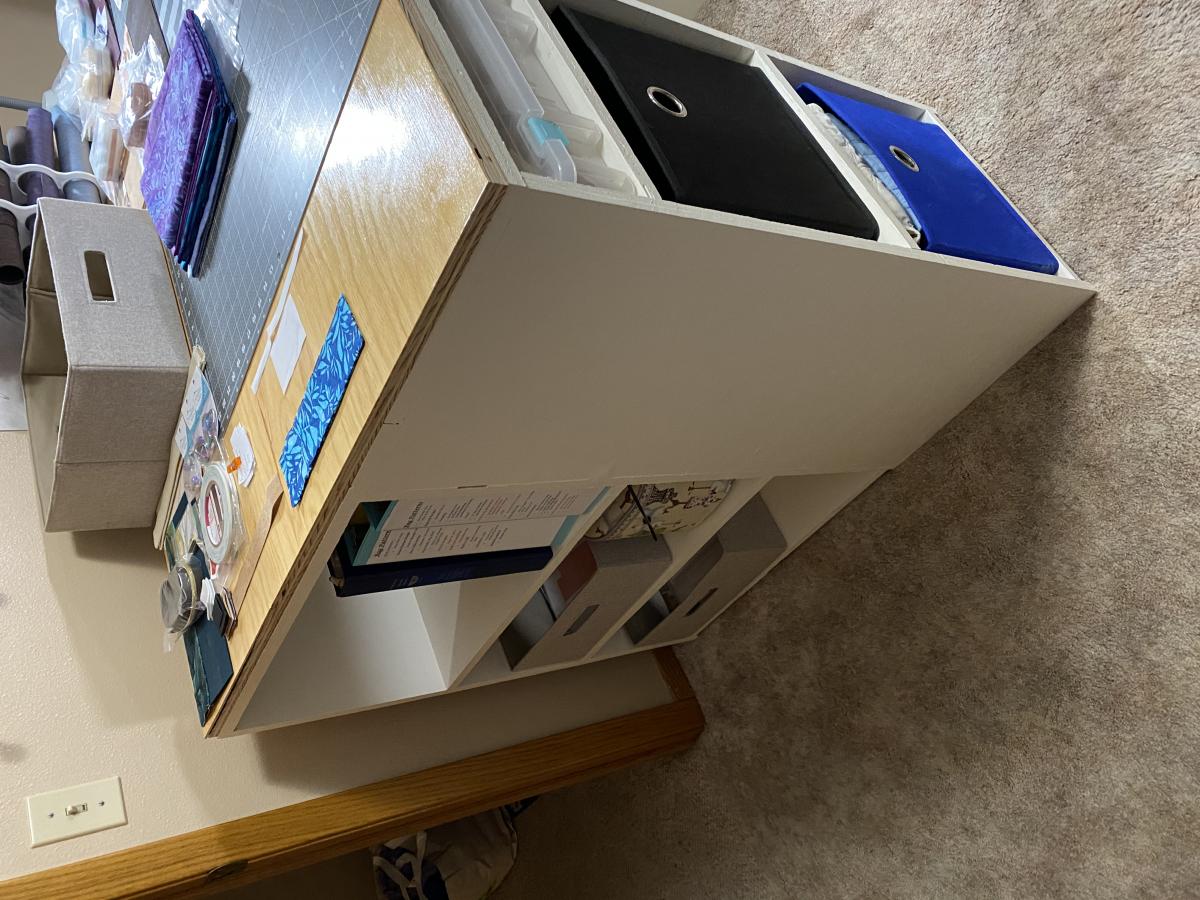
So, after having built the rustic console and rustic end table, I was staring at the blank space in my room and the stack of books and decided that I could fix two problems with just a slight adjustment of the console plans. Basically the structure is exactly the same for the top, "legs" and shelves, but then instead of running 2" x 2" trim, I did 1" x 2" and 2" x 4" at the base (mostly to keep the dust bunnies as bay). The other significant difference is the ends, which I paneled and trimmed out rather than doing the open "X". And then ran tongue and groove paneling along the back to finish it out.
As with my other rustic builds, I left off the metal trim (again, for now at least) and distressed the top and face with a rotary wire brush. The texture on the top of this one turned out really wonderful. I hate to even put anything on top to hide all that grain. Price was a little more too, mainly for the extra 1" x 12" x 6' and the pack of tongue and groove panel boards.
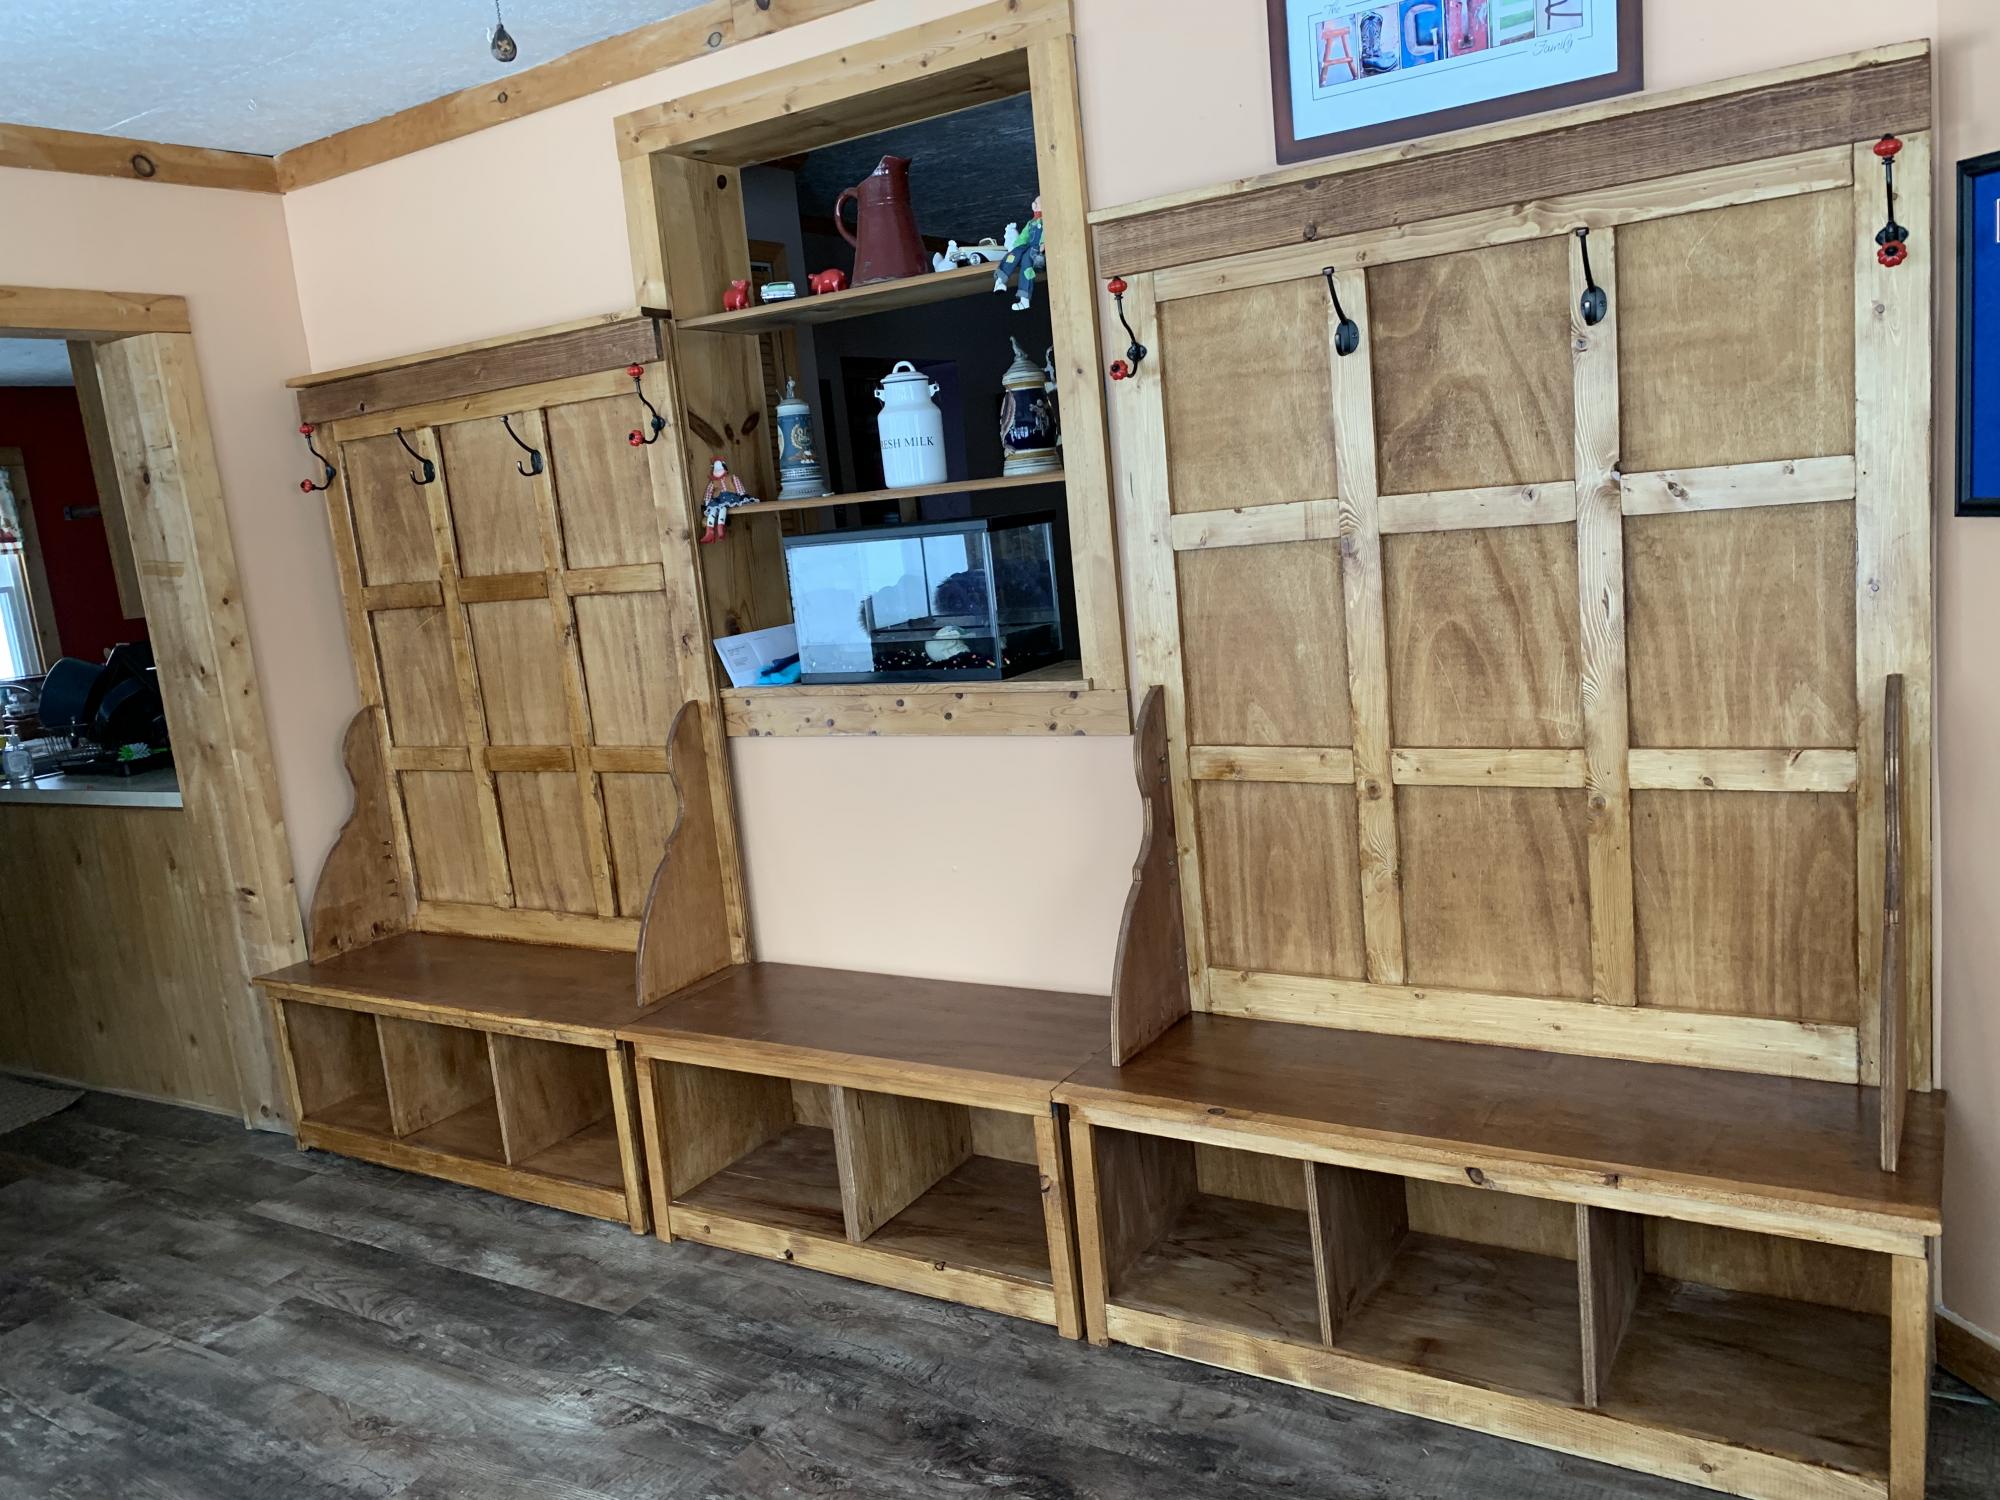
My kids outgrew the original locker I built for them. Plus we have adopted 2 kids through foster care. So my wife asked for a new locker. I found this design on the website and determined we needed 2. Then to make it better we wanted a bench to connect the 2. So I built a 3rd bottom of the locker and adjusted the measurements for the space we had. Turned out amazing.
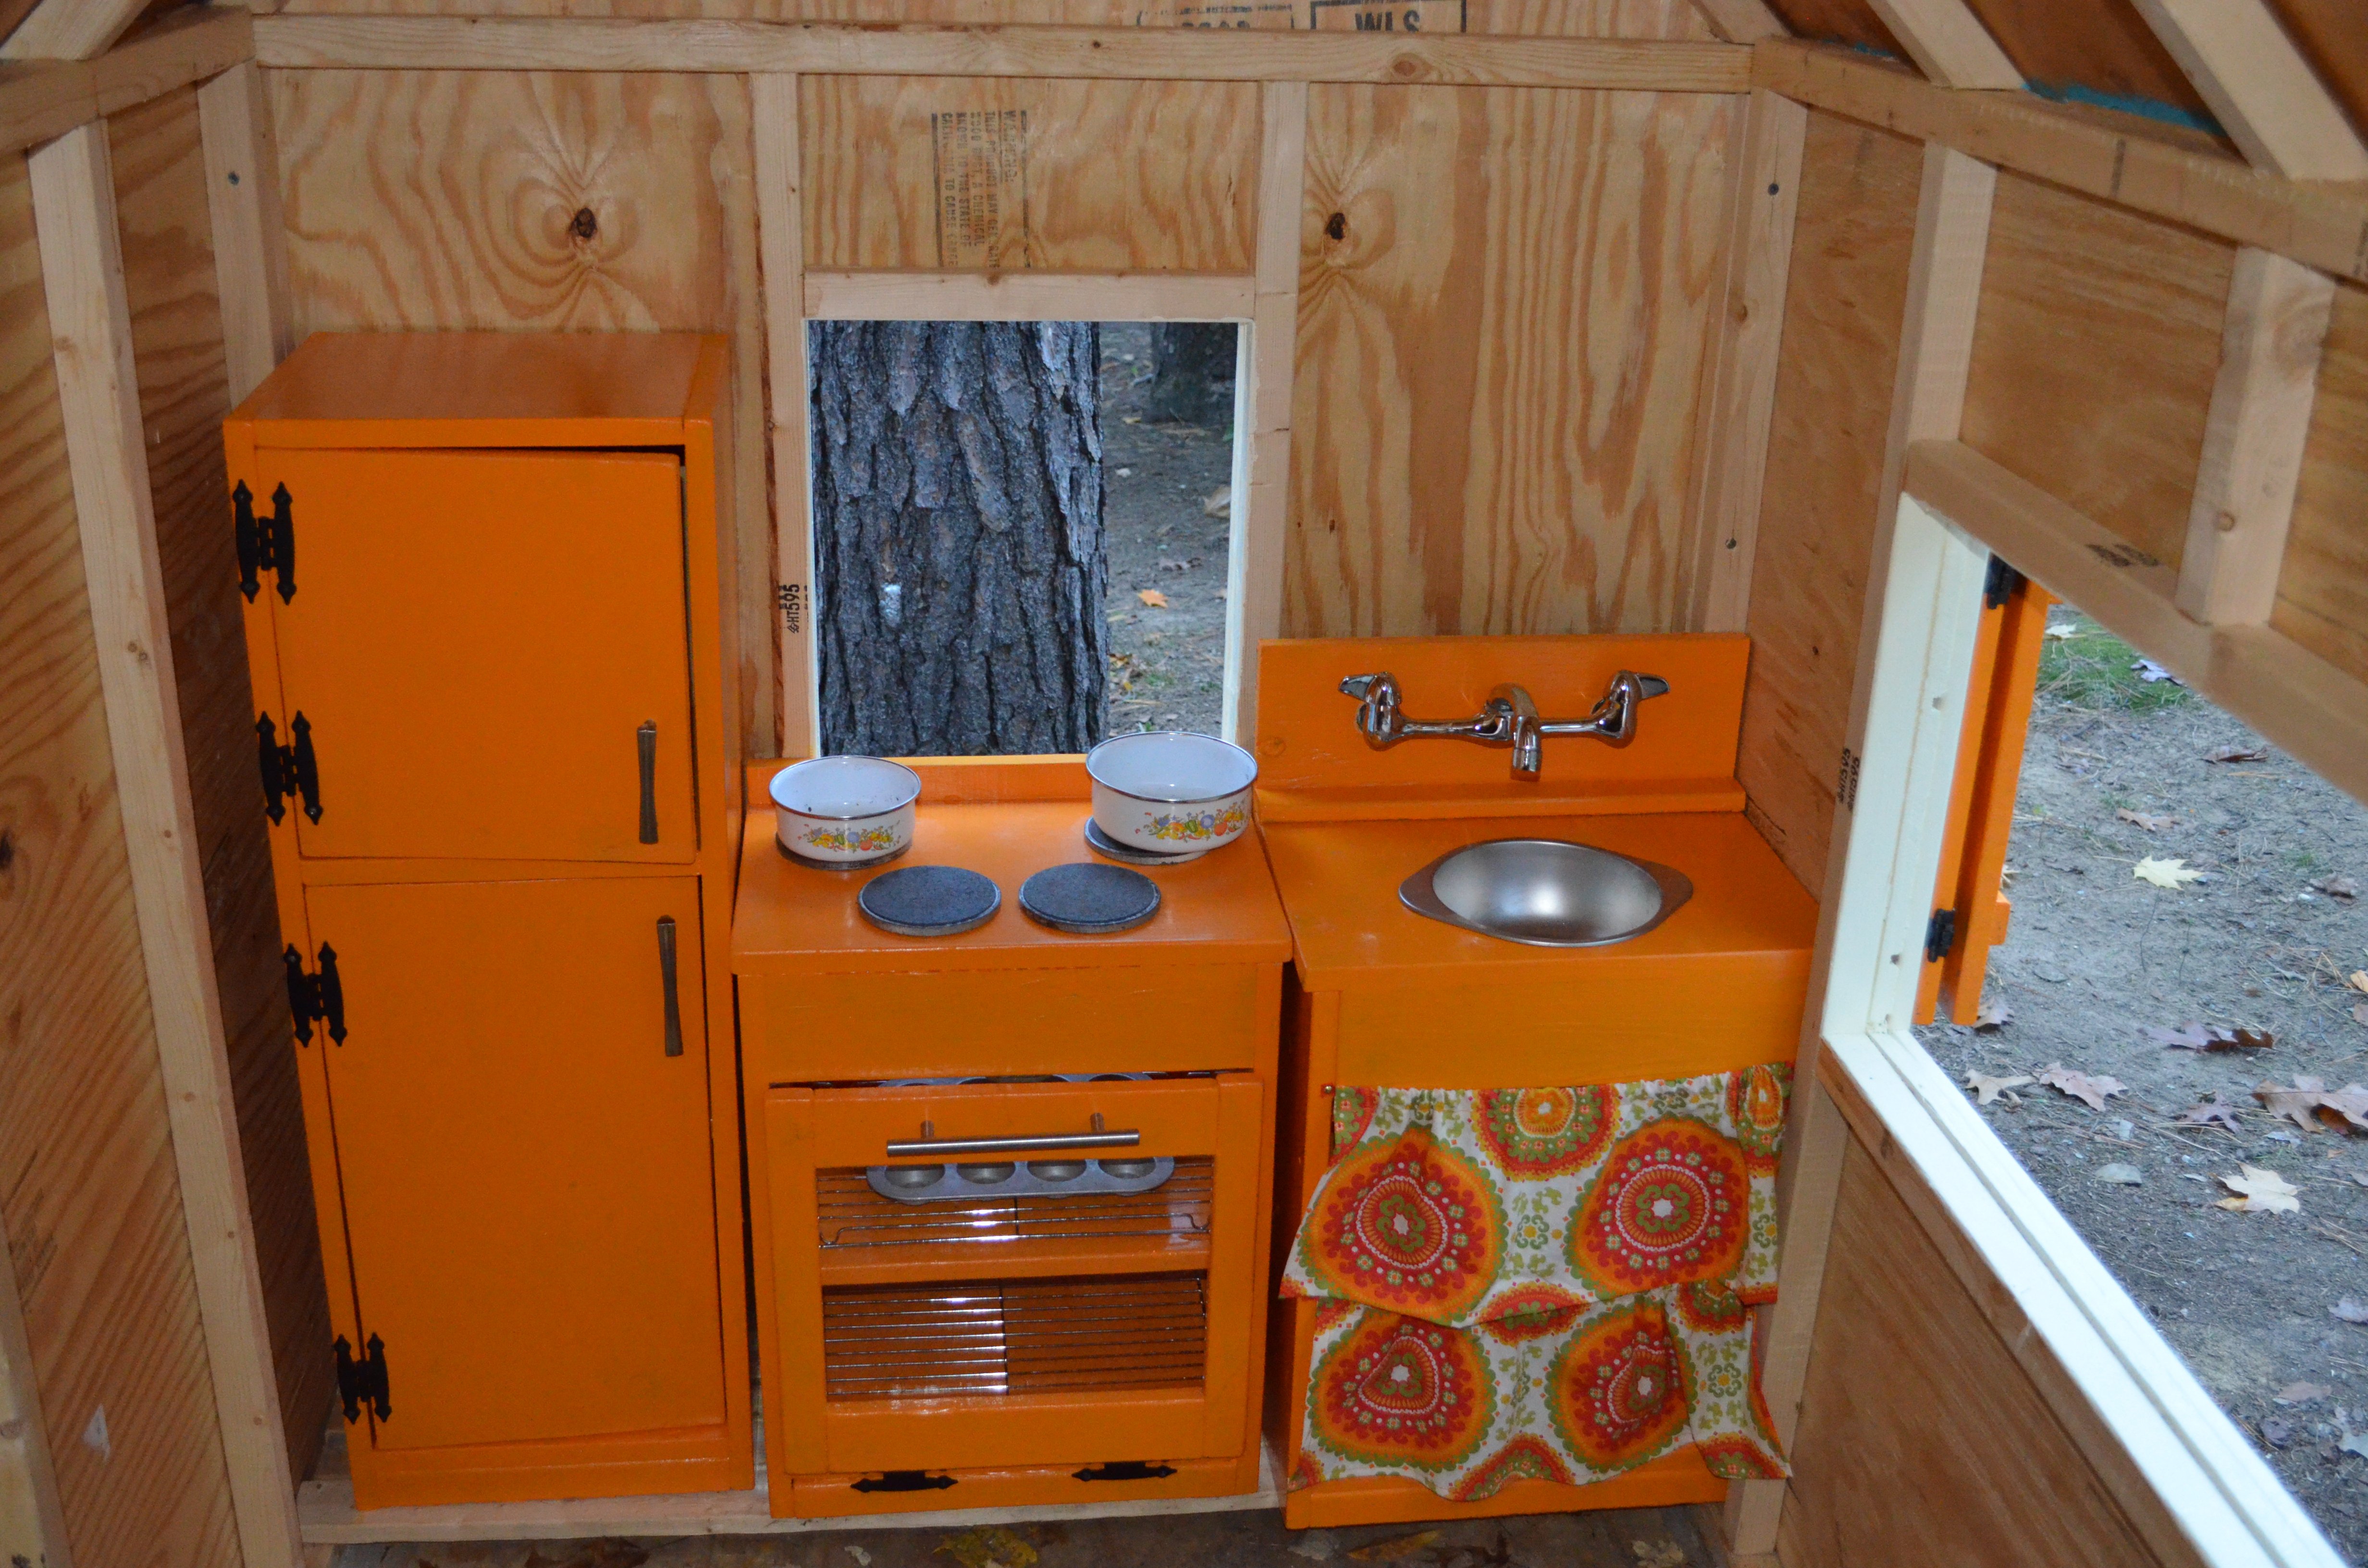
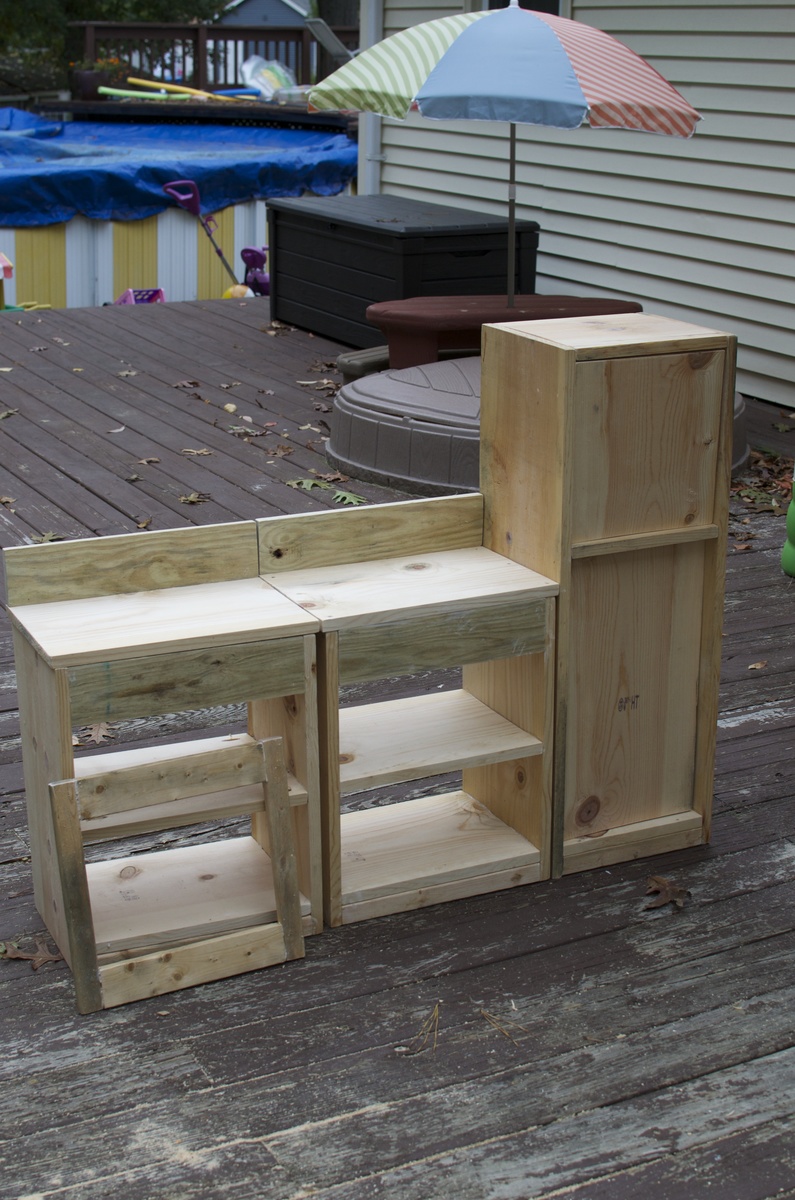
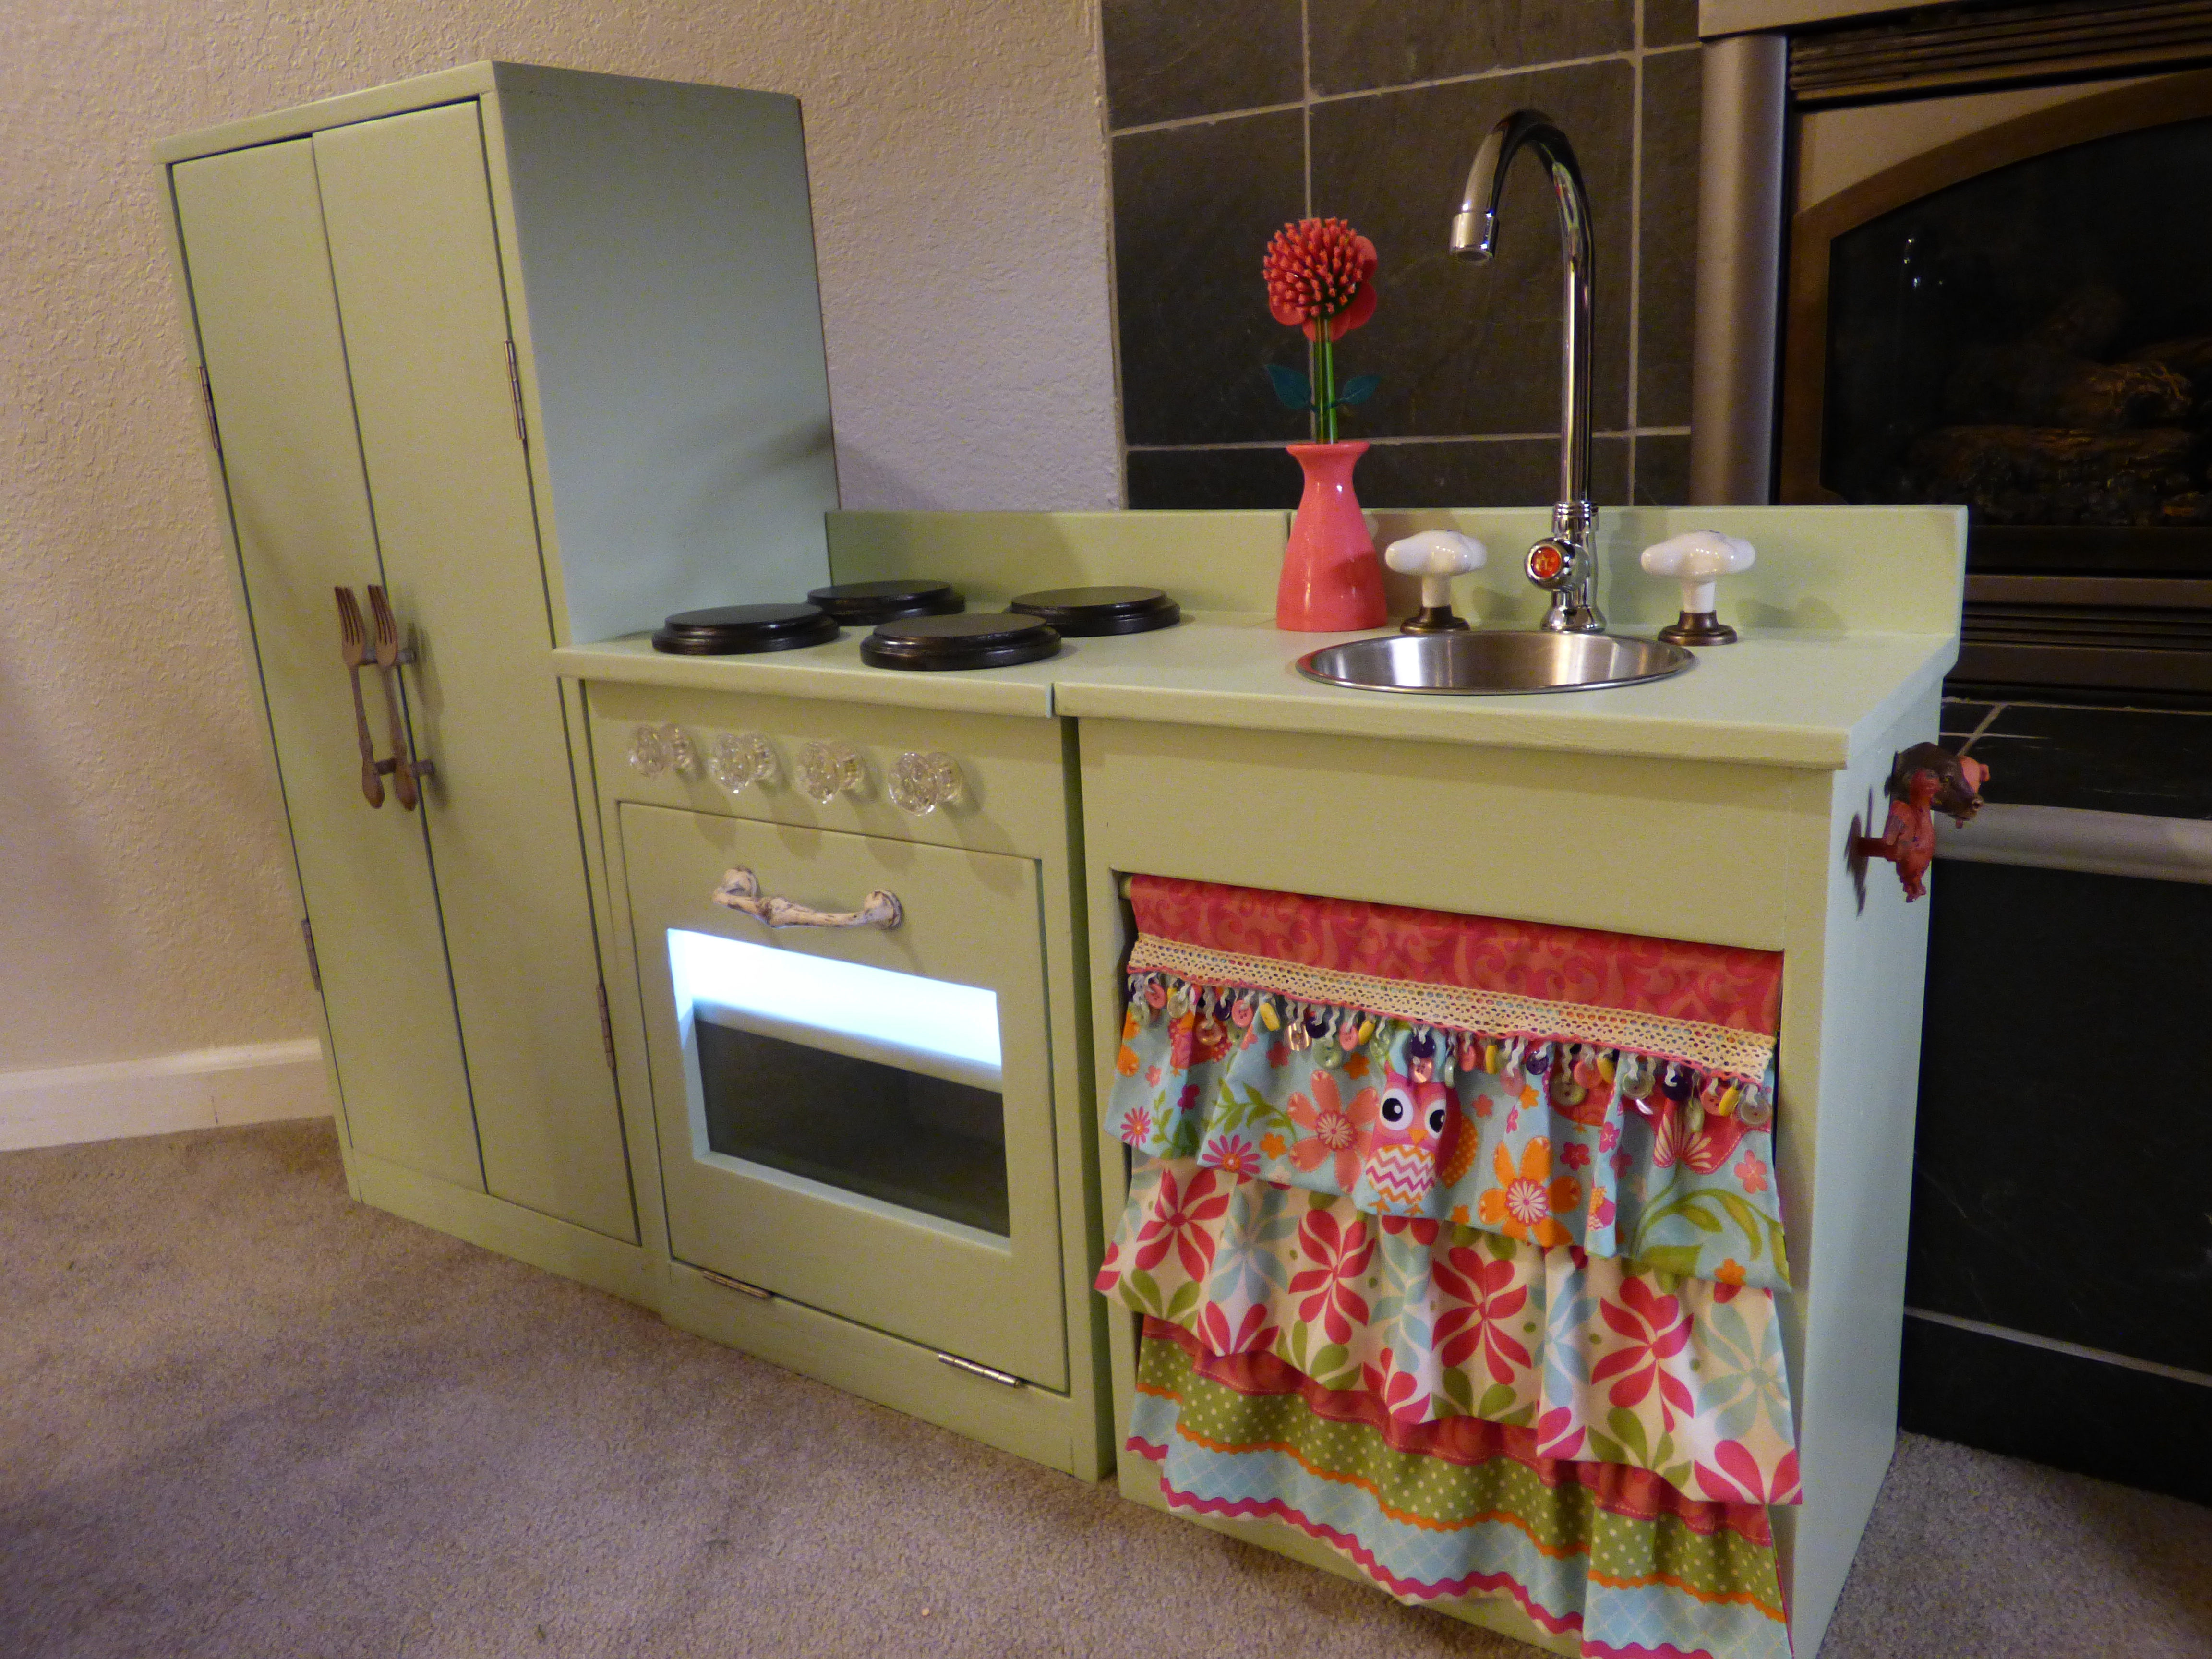
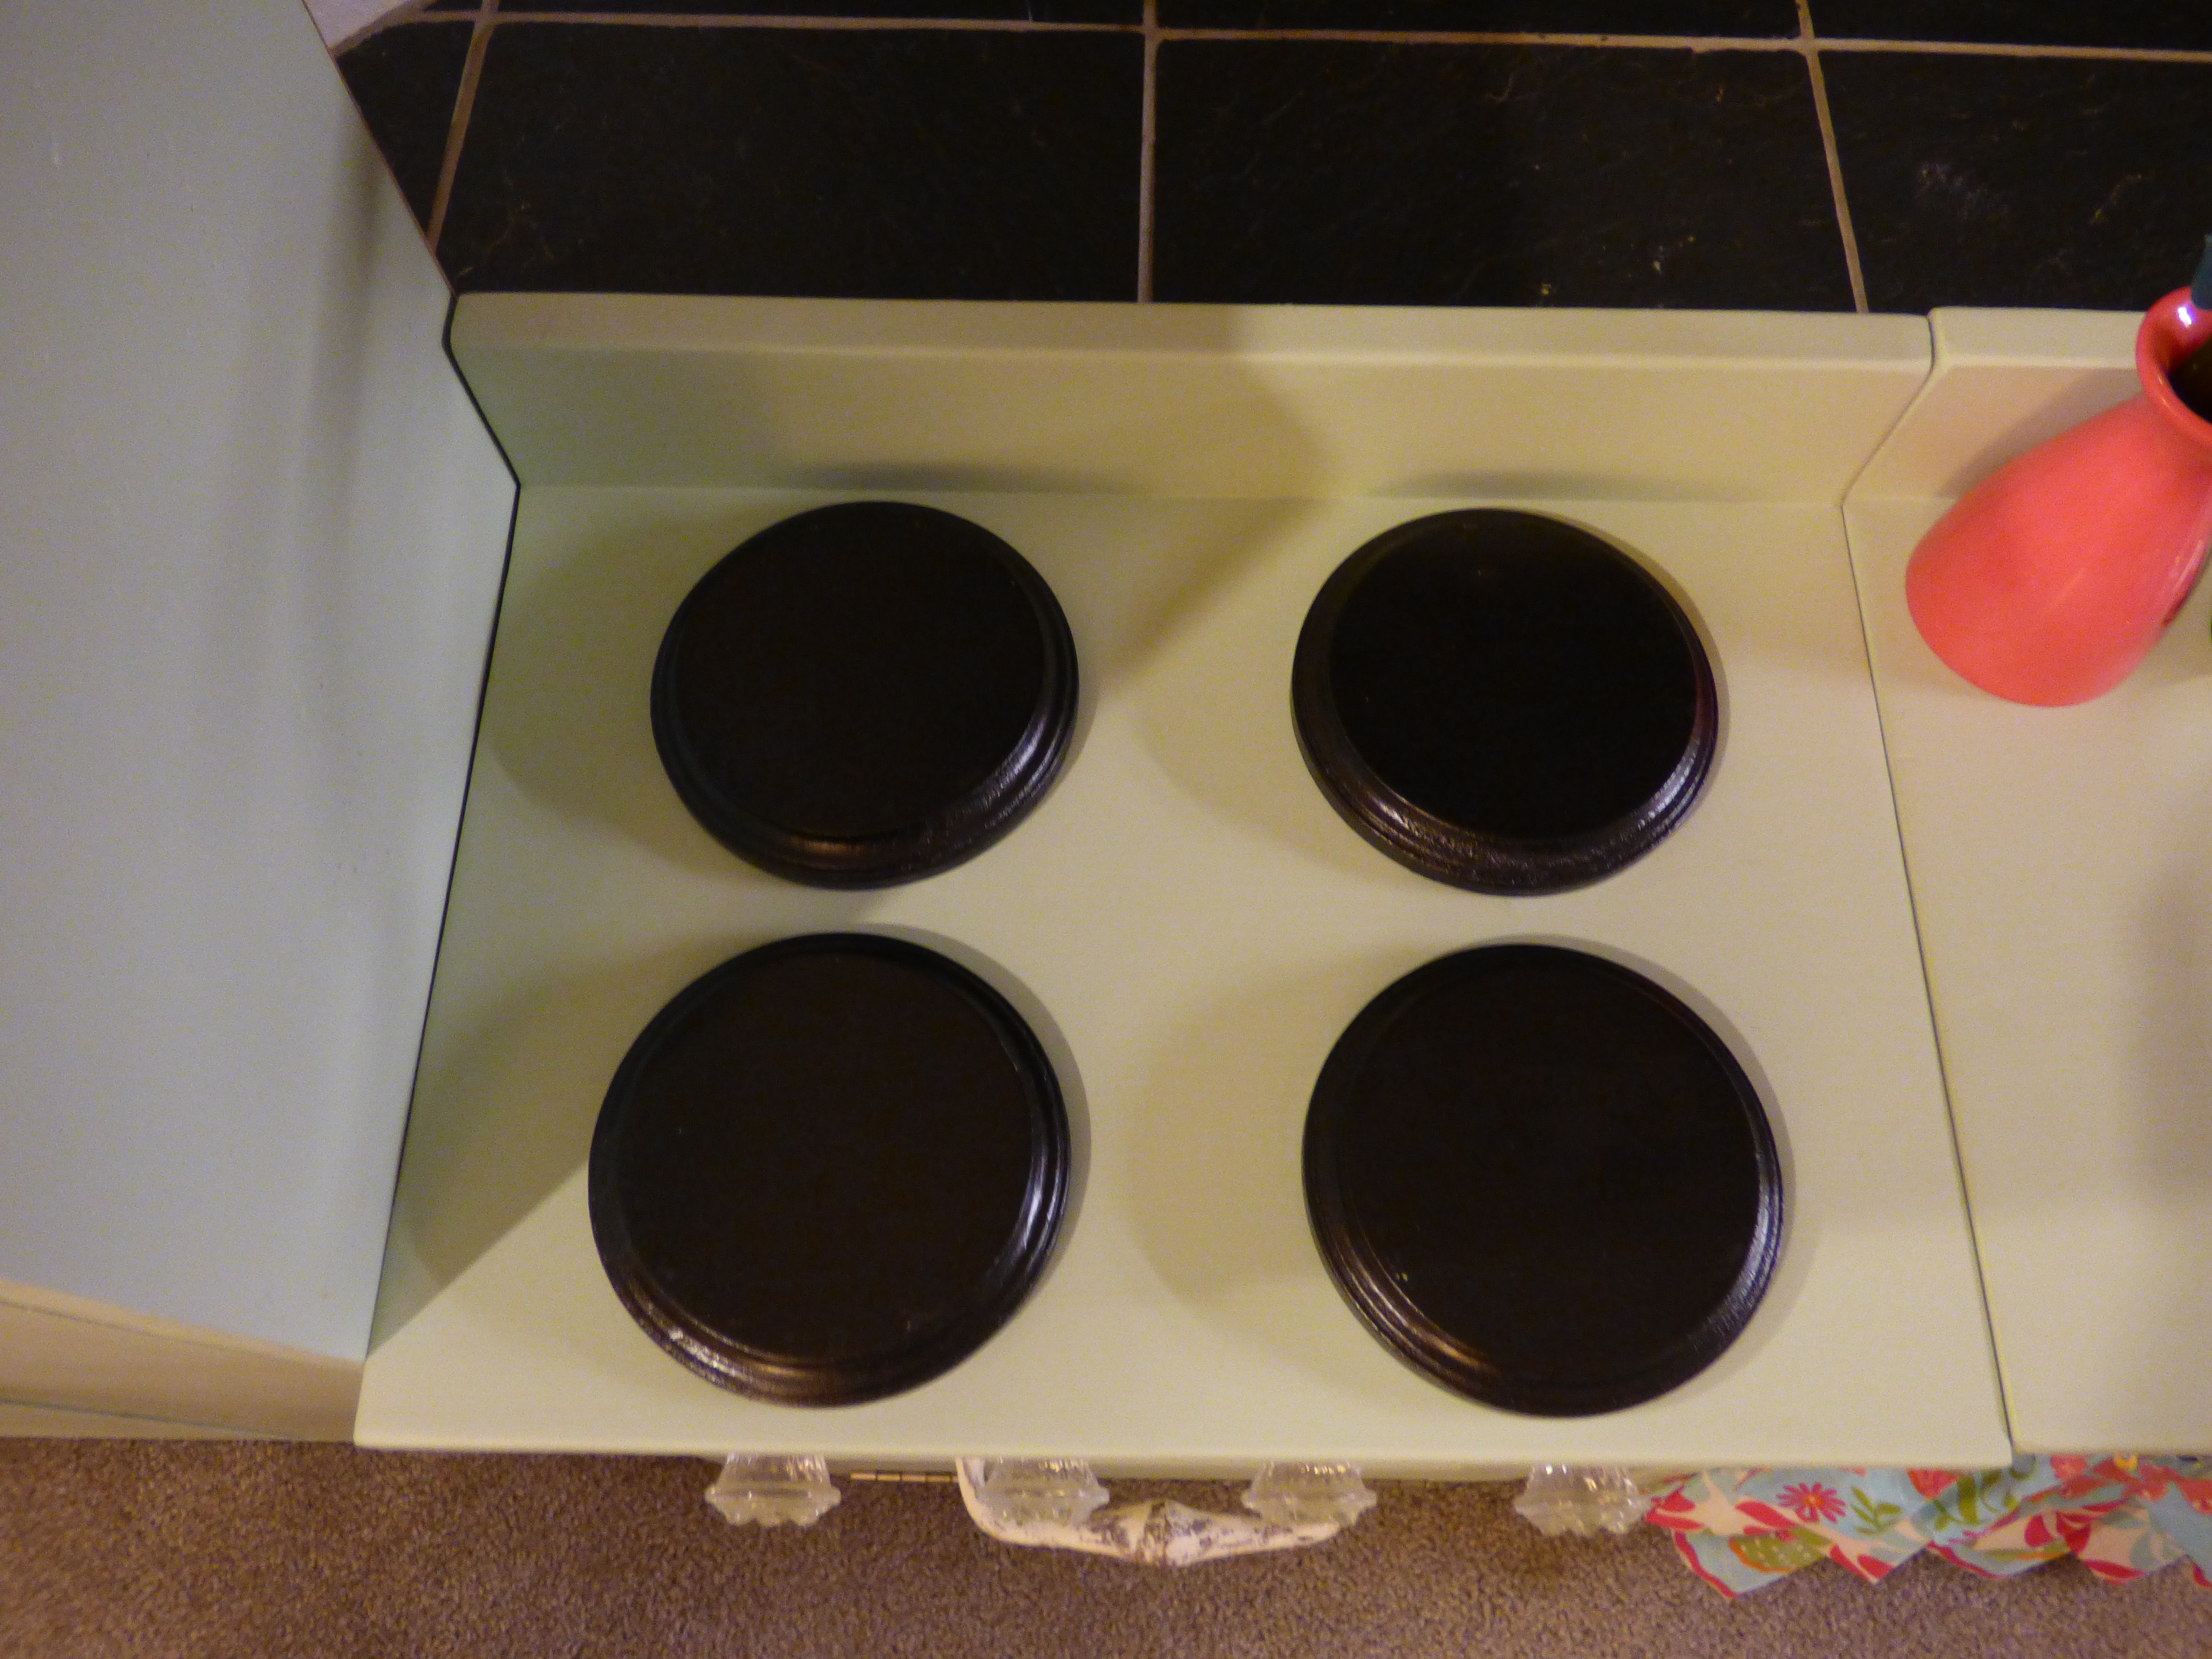
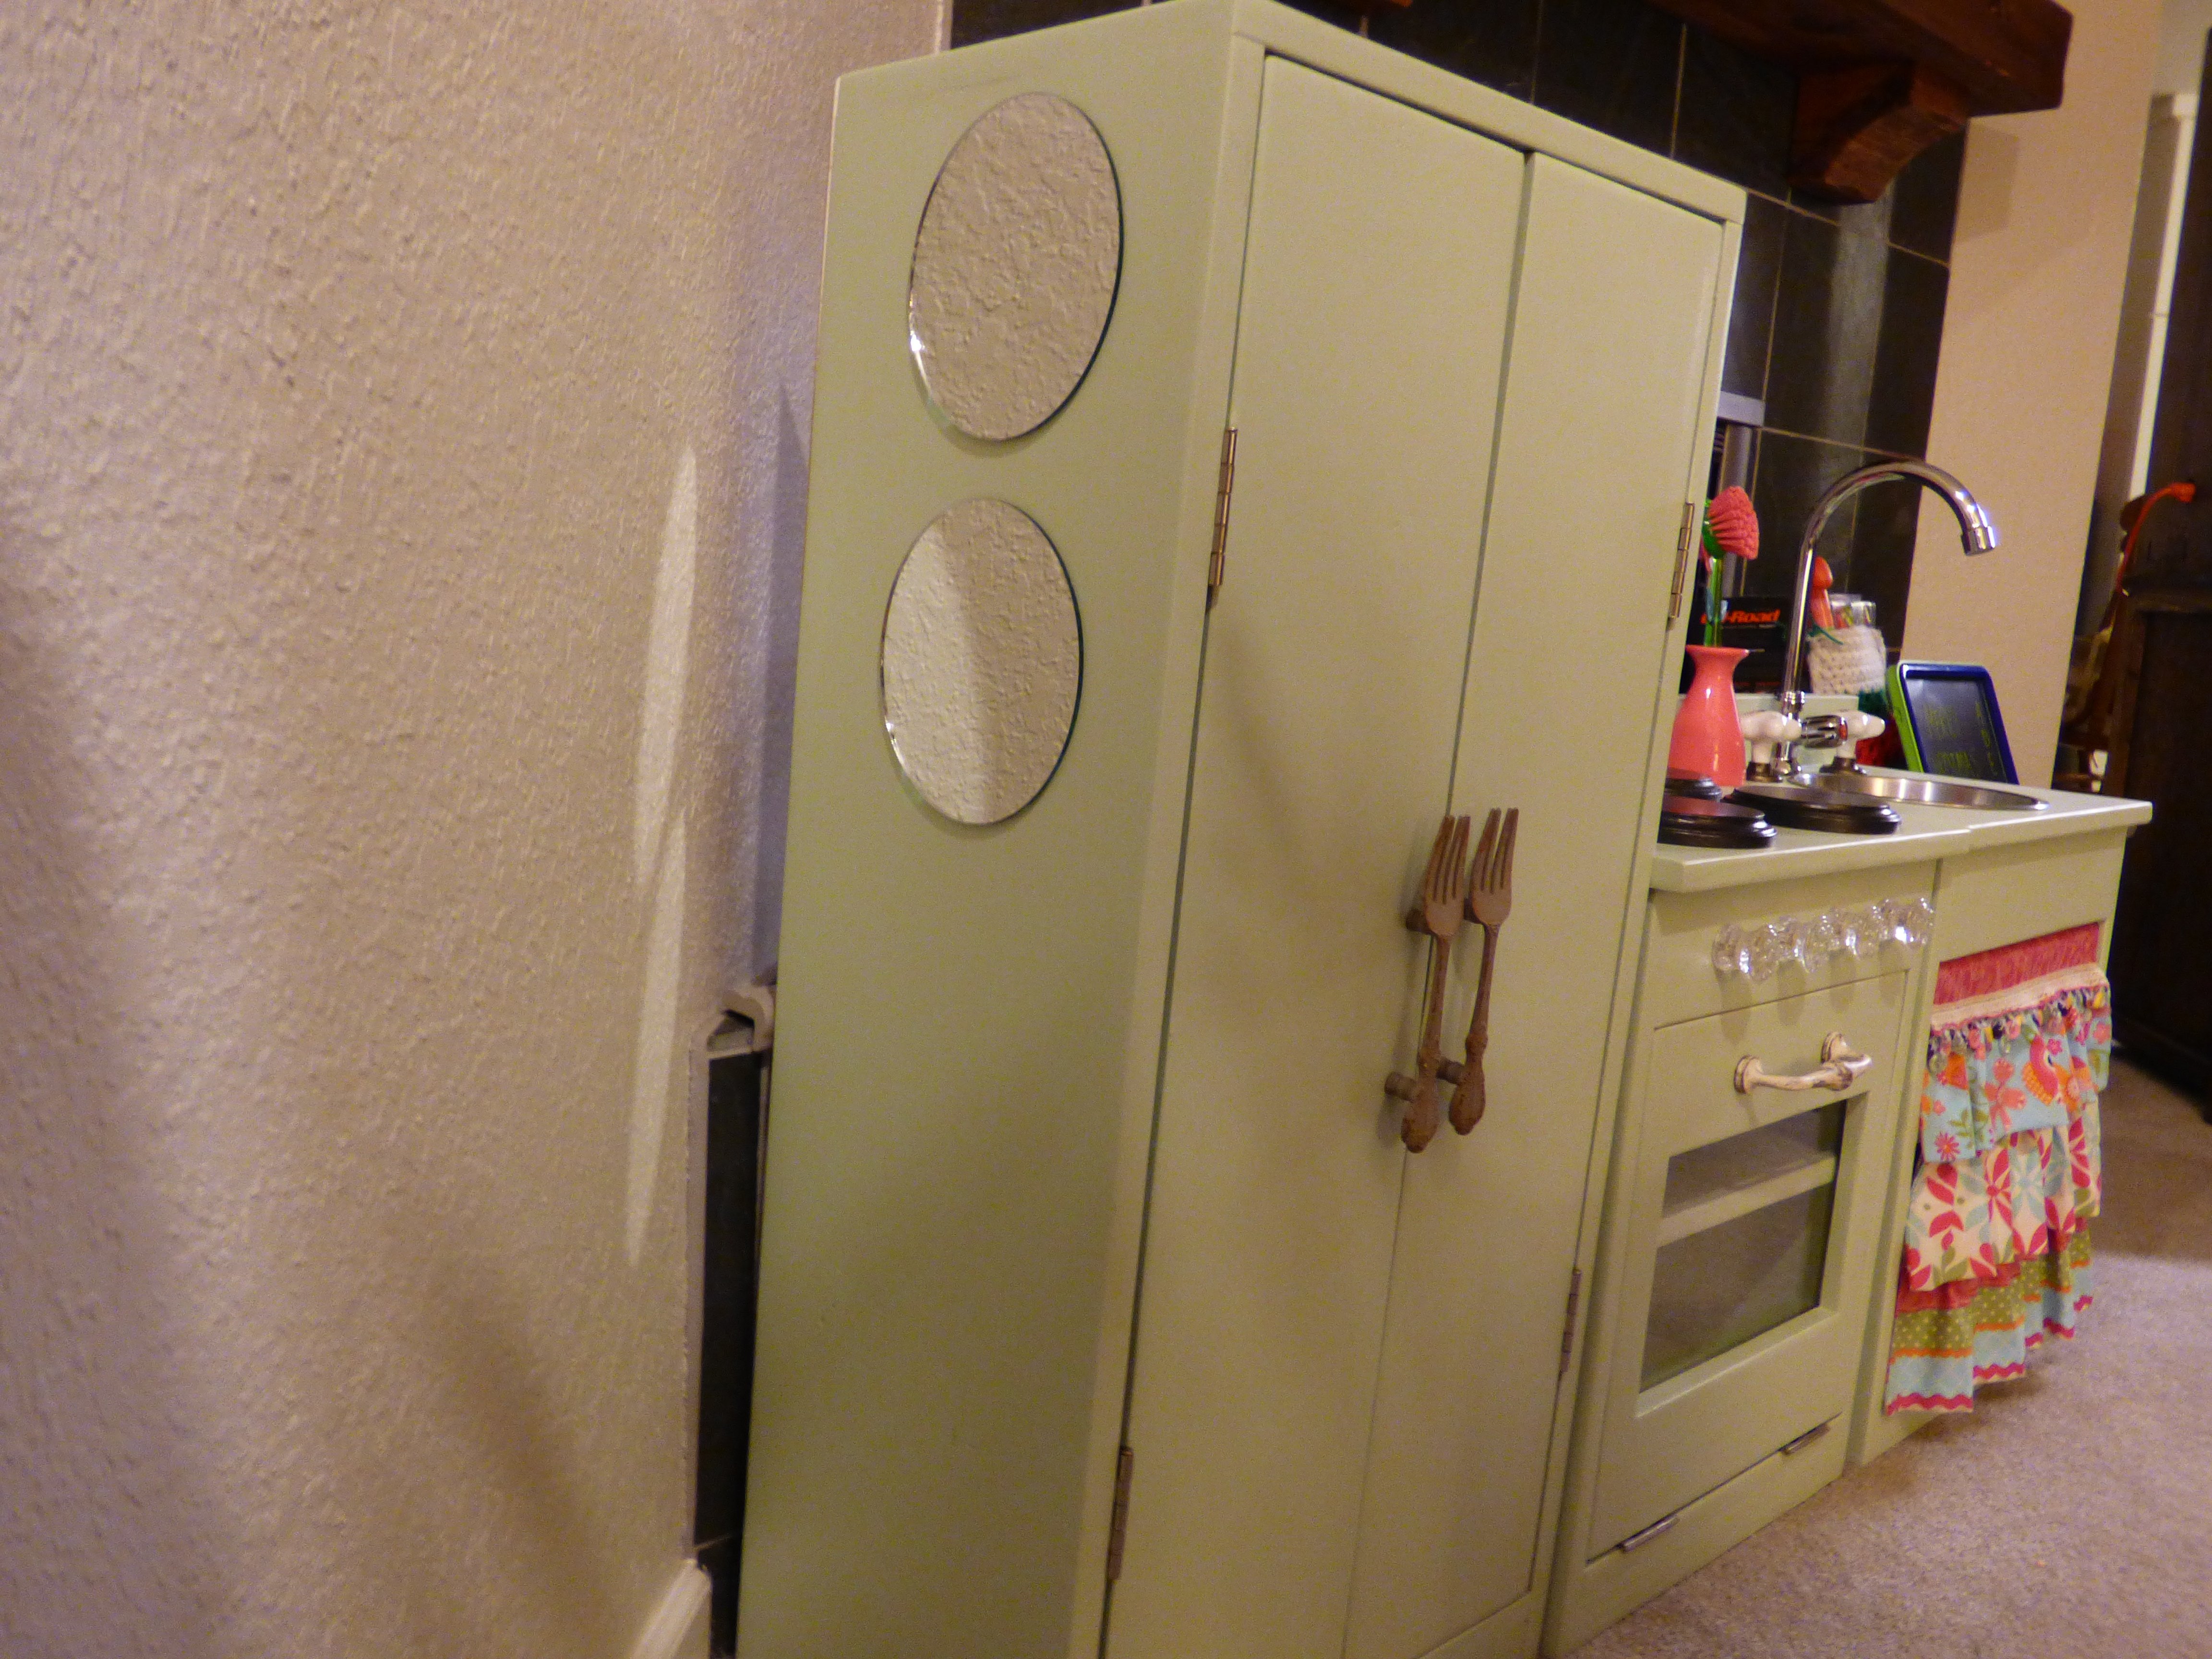
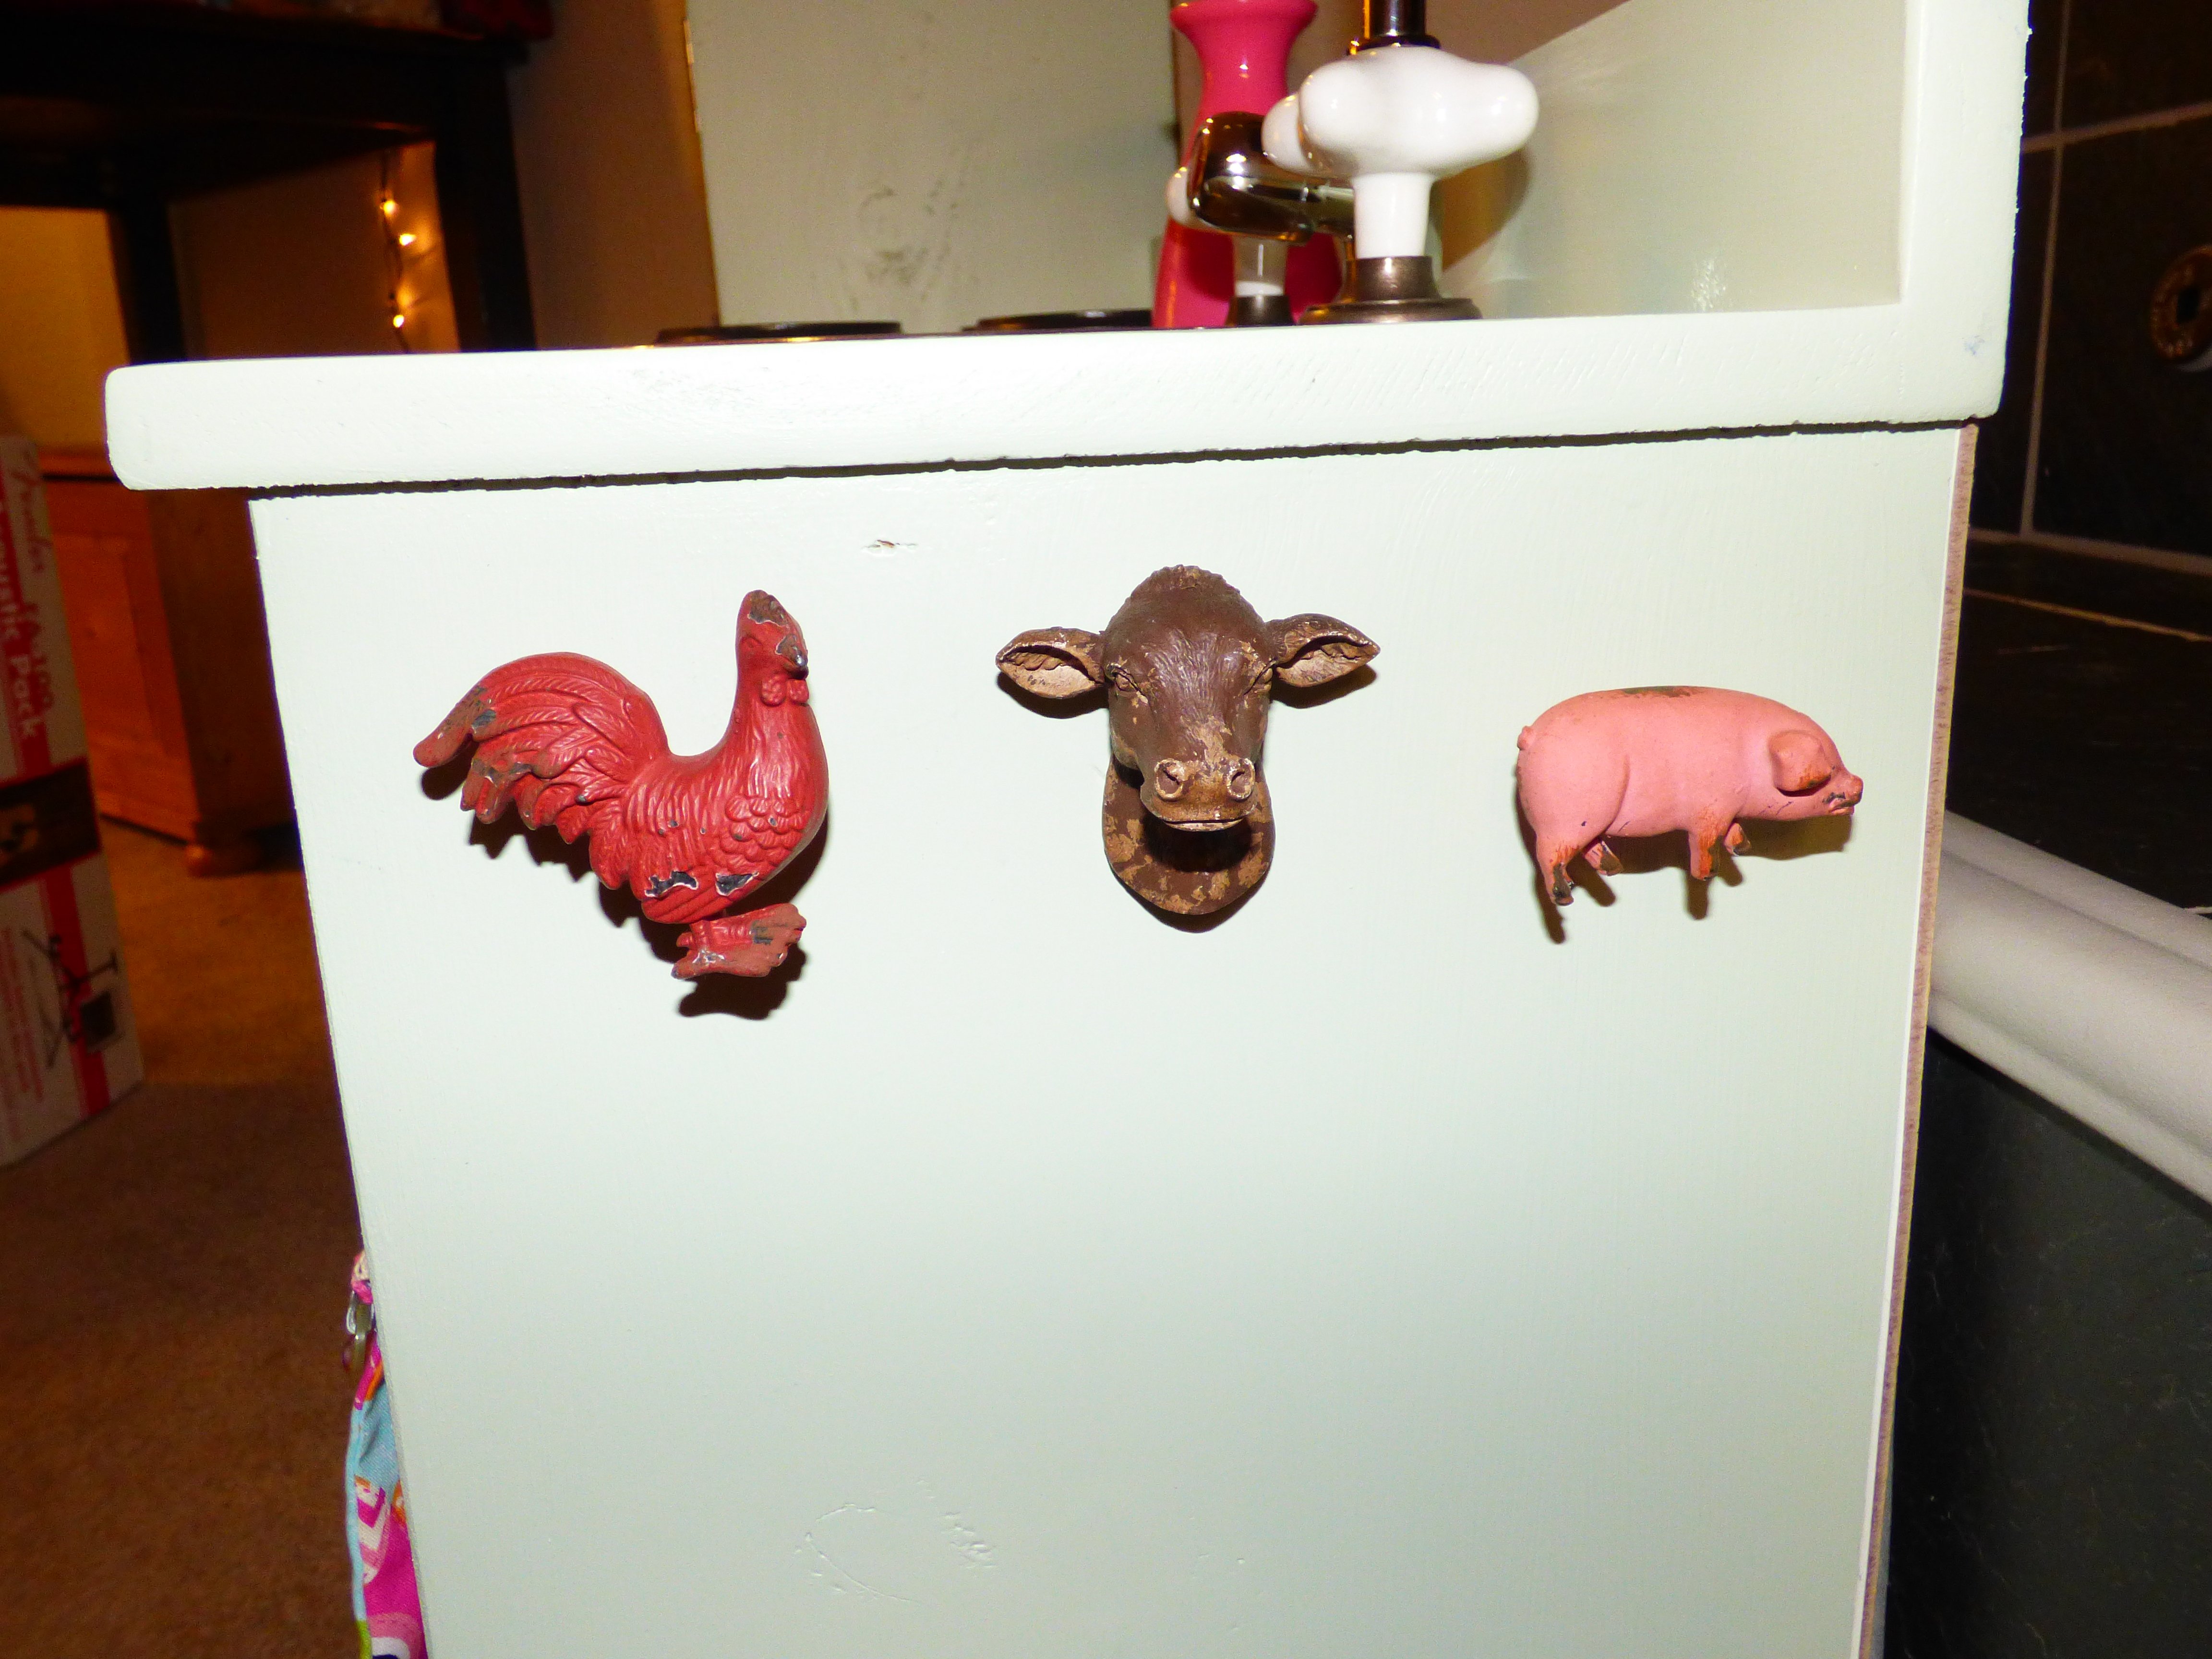
Built this play kitchen to go in Liv's new Playhouse, also courtesy of Ana's plans. It's about 1" too wide to sit on the floor so we raised it up on a plank so it rests on the studs. A co-worker told me I can get replacement knobs for the stove at Sears and plan to make a trip there on my next break. The faucet is a real one my mother found in her basement from their bathroom redo. She loves it! We "bake" cupcakes from the sandbox in her new house everytime we're outdoors. She did, however, request a microwave after we'd finished the whole thing! This spring I hope to make one. I see that Pottery Barn Kids sells them for over $50!! You know that's crazy if you've come across Ana's website :)


Wed, 02/13/2013 - 16:49
This is so adorable! Love the colors. We were thinking of making one for our granddaughter to keep at our house. You've inspired me.
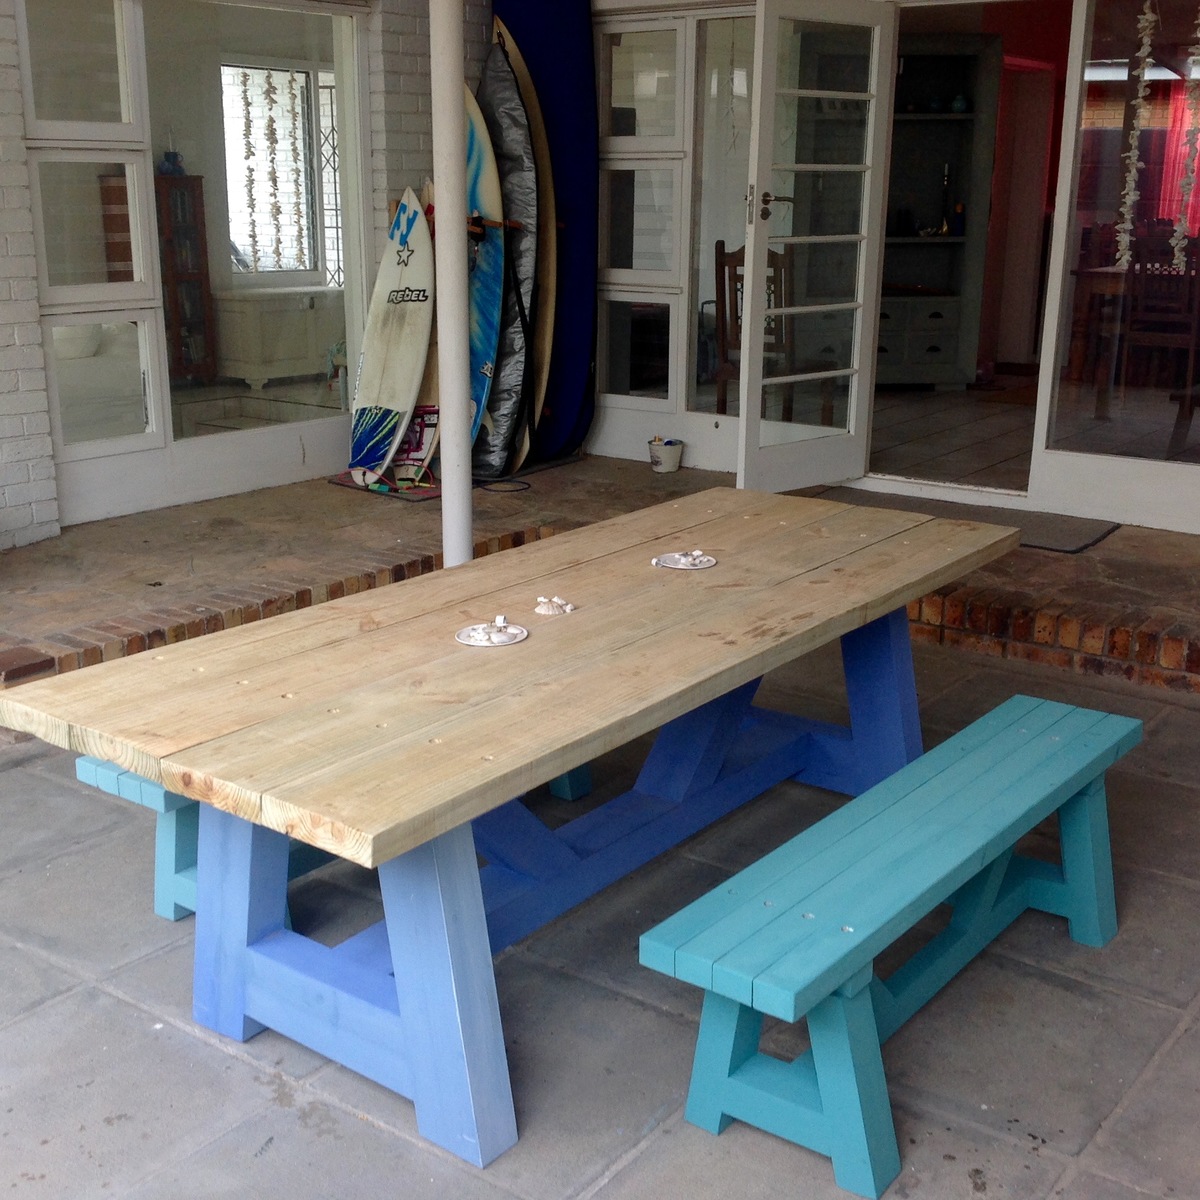
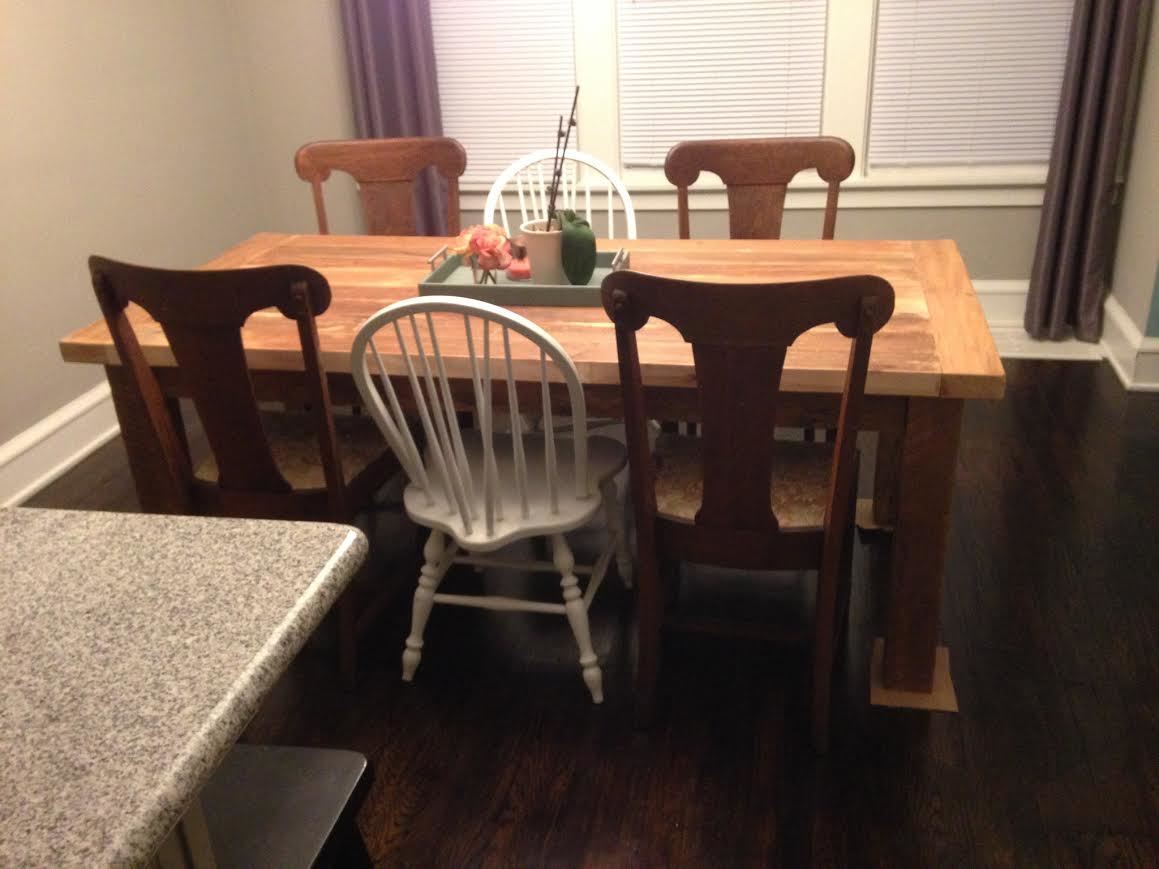
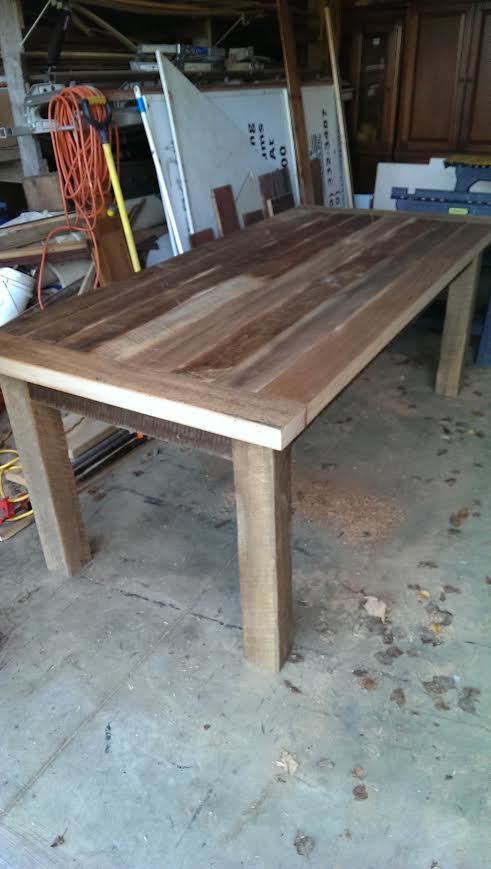
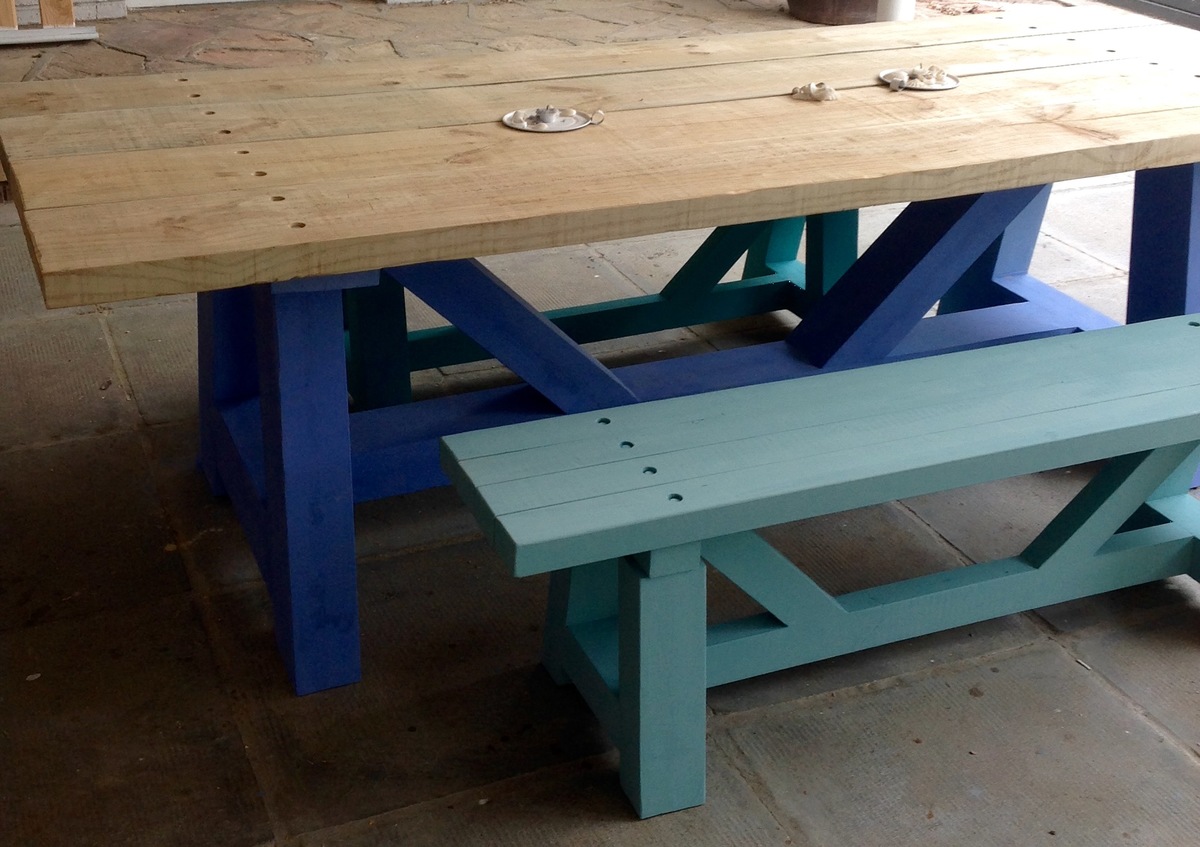
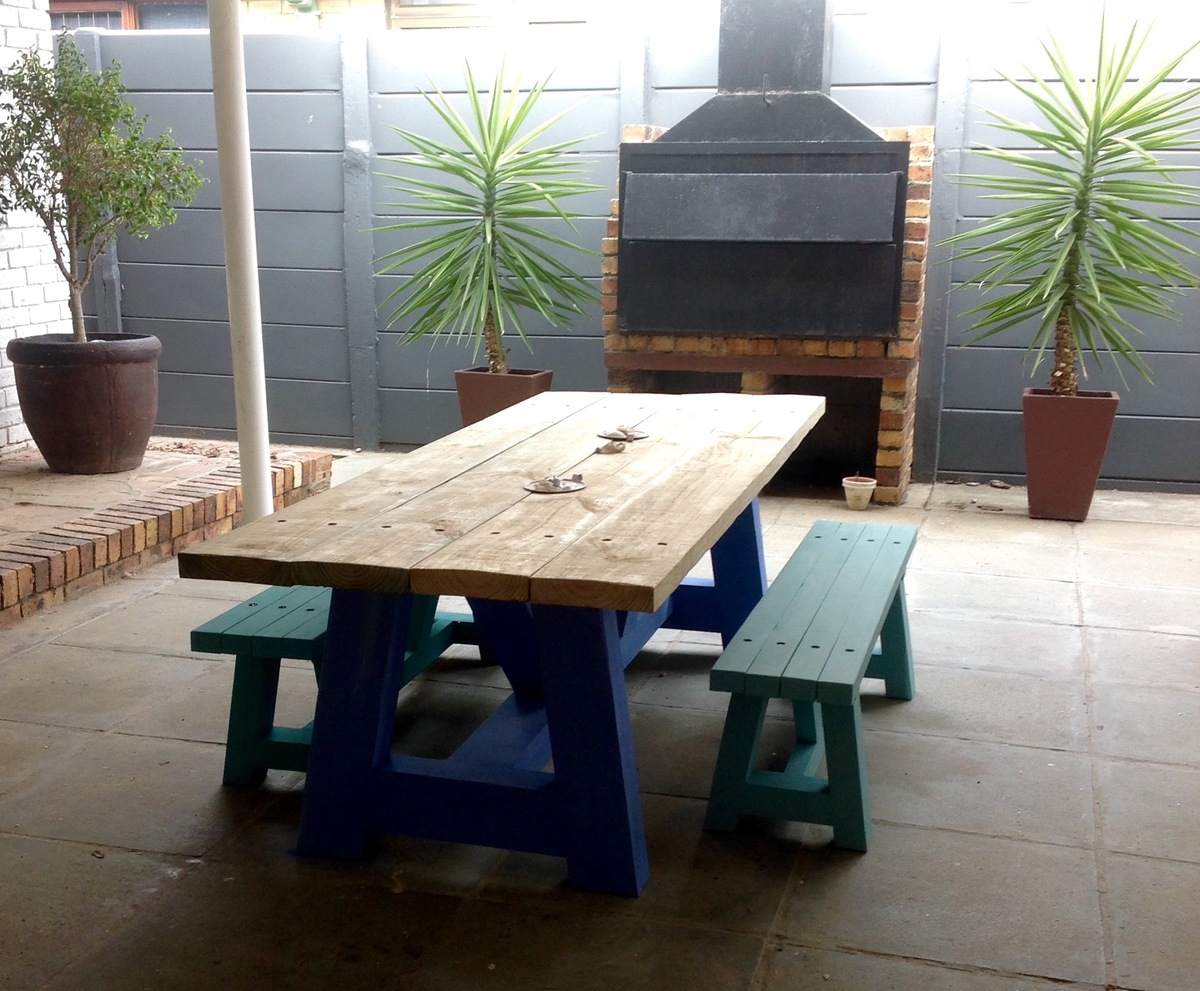
Looking for rustic outdoor table ideas, I came across Ana's website and the Providence Table and benches. When I saw it, I knew this was what we were after. After some more browsing I came across the 4x4 truss beam table and decided to rather go with the chunkier table. Although I’ve done a few woodwork projects, this was the most ambitious to date, especially considering that I only have a few hand held tools.
We live in beautiful Cape Town, South Africa - we work in metric, so all dimensions needed to be converted. Also, our locally available wood sizes are different to timber sizing in the States, i.e. we don't have 4x4 (100mm x 100mm) or 2x4 (50mm x 100mm) available, so it was a bit of a challenge to decide what to go for. In the end I decided to use 75mm x 50mm rough cut treated construction pine. It was cheaper, and I could end up with a REALLY Chunky table if I glued 4 pieces together! In order to do this, I need to amend the plans as if it was made from 6x4 beams.
So I started the process of cutting the 75mm x 50mm timber to rough sizes, gluing the pieces together, sanding the joints, filling the gaps with glue/ sawdust mixture and re- sanding for each member of the table! I took my time with this and did a bit each day after work. It was interesting watching YouTube vids on this build - the guy starts with perfect 4x4 timber pieces, cut them and assemble. For me just to get to the starting point took quite some effort, but I knew I would be very happy with the more chunky look.
Other challenges I did not fully appreciate when deciding on the REALLY Chunky size, was the cutting of these thick pieces of timber using hand held tools and how to join them!! You don’t get very long small drill bits for pilot holes, so ended up using self-drilling screws. Unfortunately the longest length I could find was 120mm (8.66inch) - so I had to counter sink them really deep into the timber - this was quite tricky!
Other things I did were to lower the original design table height as recommended by other builders on this site so I made the table height 750mm (29.5inch). It worked out very well for small children as well for adults (I'm 6ft2). Table length I made 2.4m (approx 8ft). For the table top I used 220mm x 50mm (8.66 x 2 inch) timber, once again due to the restrictions of locally available sizes. I also change the spacing between the legs in order to fit the benches under the table (1600mm opening to fit the 1550mm benches).
For the benches, I once again had to decide what timber sizing to use. I wasn't keen to go through the process of forming 6x4's for each bench member for 2 benches and also felt that it would look just too chunky for the short bench legs. So the design ended up being a hybrid between the providence bench- and the chunkier 4x4 bench design, using 2 pieces of 75mm x 50mm to create 100mm x 75mm (4 x 3.5inch) legs.
Other changes made to the bench design was to make the bench height 450mm (17.7inch), amend the overhangs of the seat, and change the overall length to be able to slide the bench in under the table.
The altered height of the table and benches really worked out well and we sit very comfortably at that table.
We used chalk paint for the finish, but as you can see, we're still deciding on colour choices and final look of the top.
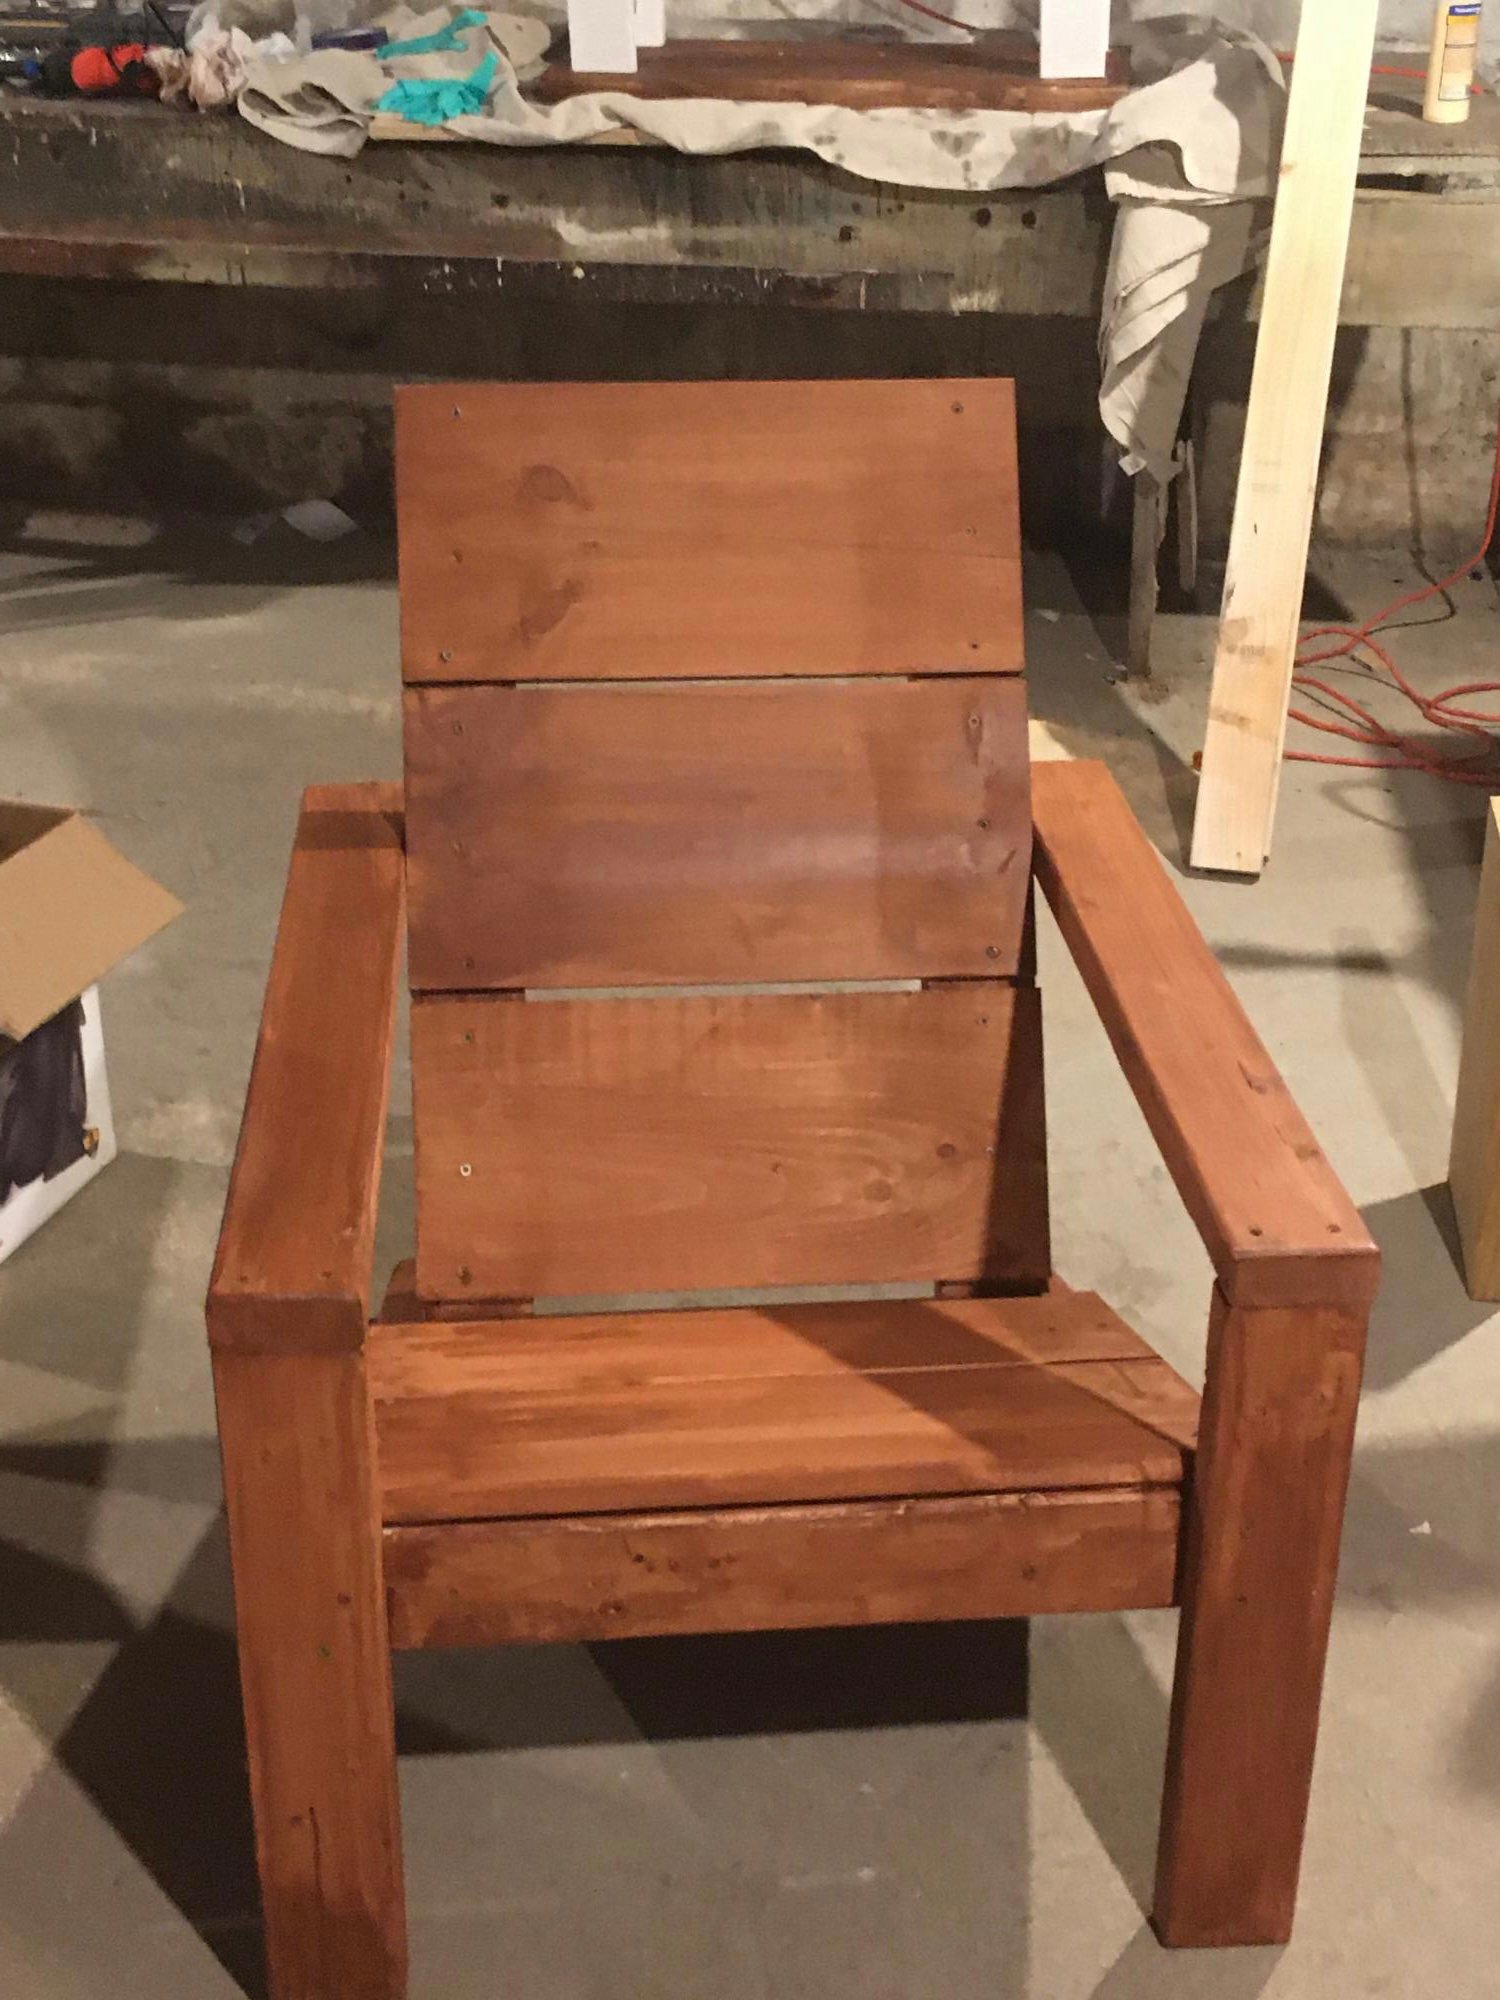
This was my first”big” project beyond doing your blanket ladder and a noodle board. This build was a lot of fun and I have people interested in having me make these chairs for them. Thank you so much for the plans and all that you do. Best wishes for a great New Year
The table took us about 6 hours to cut and put together. The cost was about 65.00. I used the walnut min wood station and did 2 coats. Lots of coats of polycyrlic. Love this table.
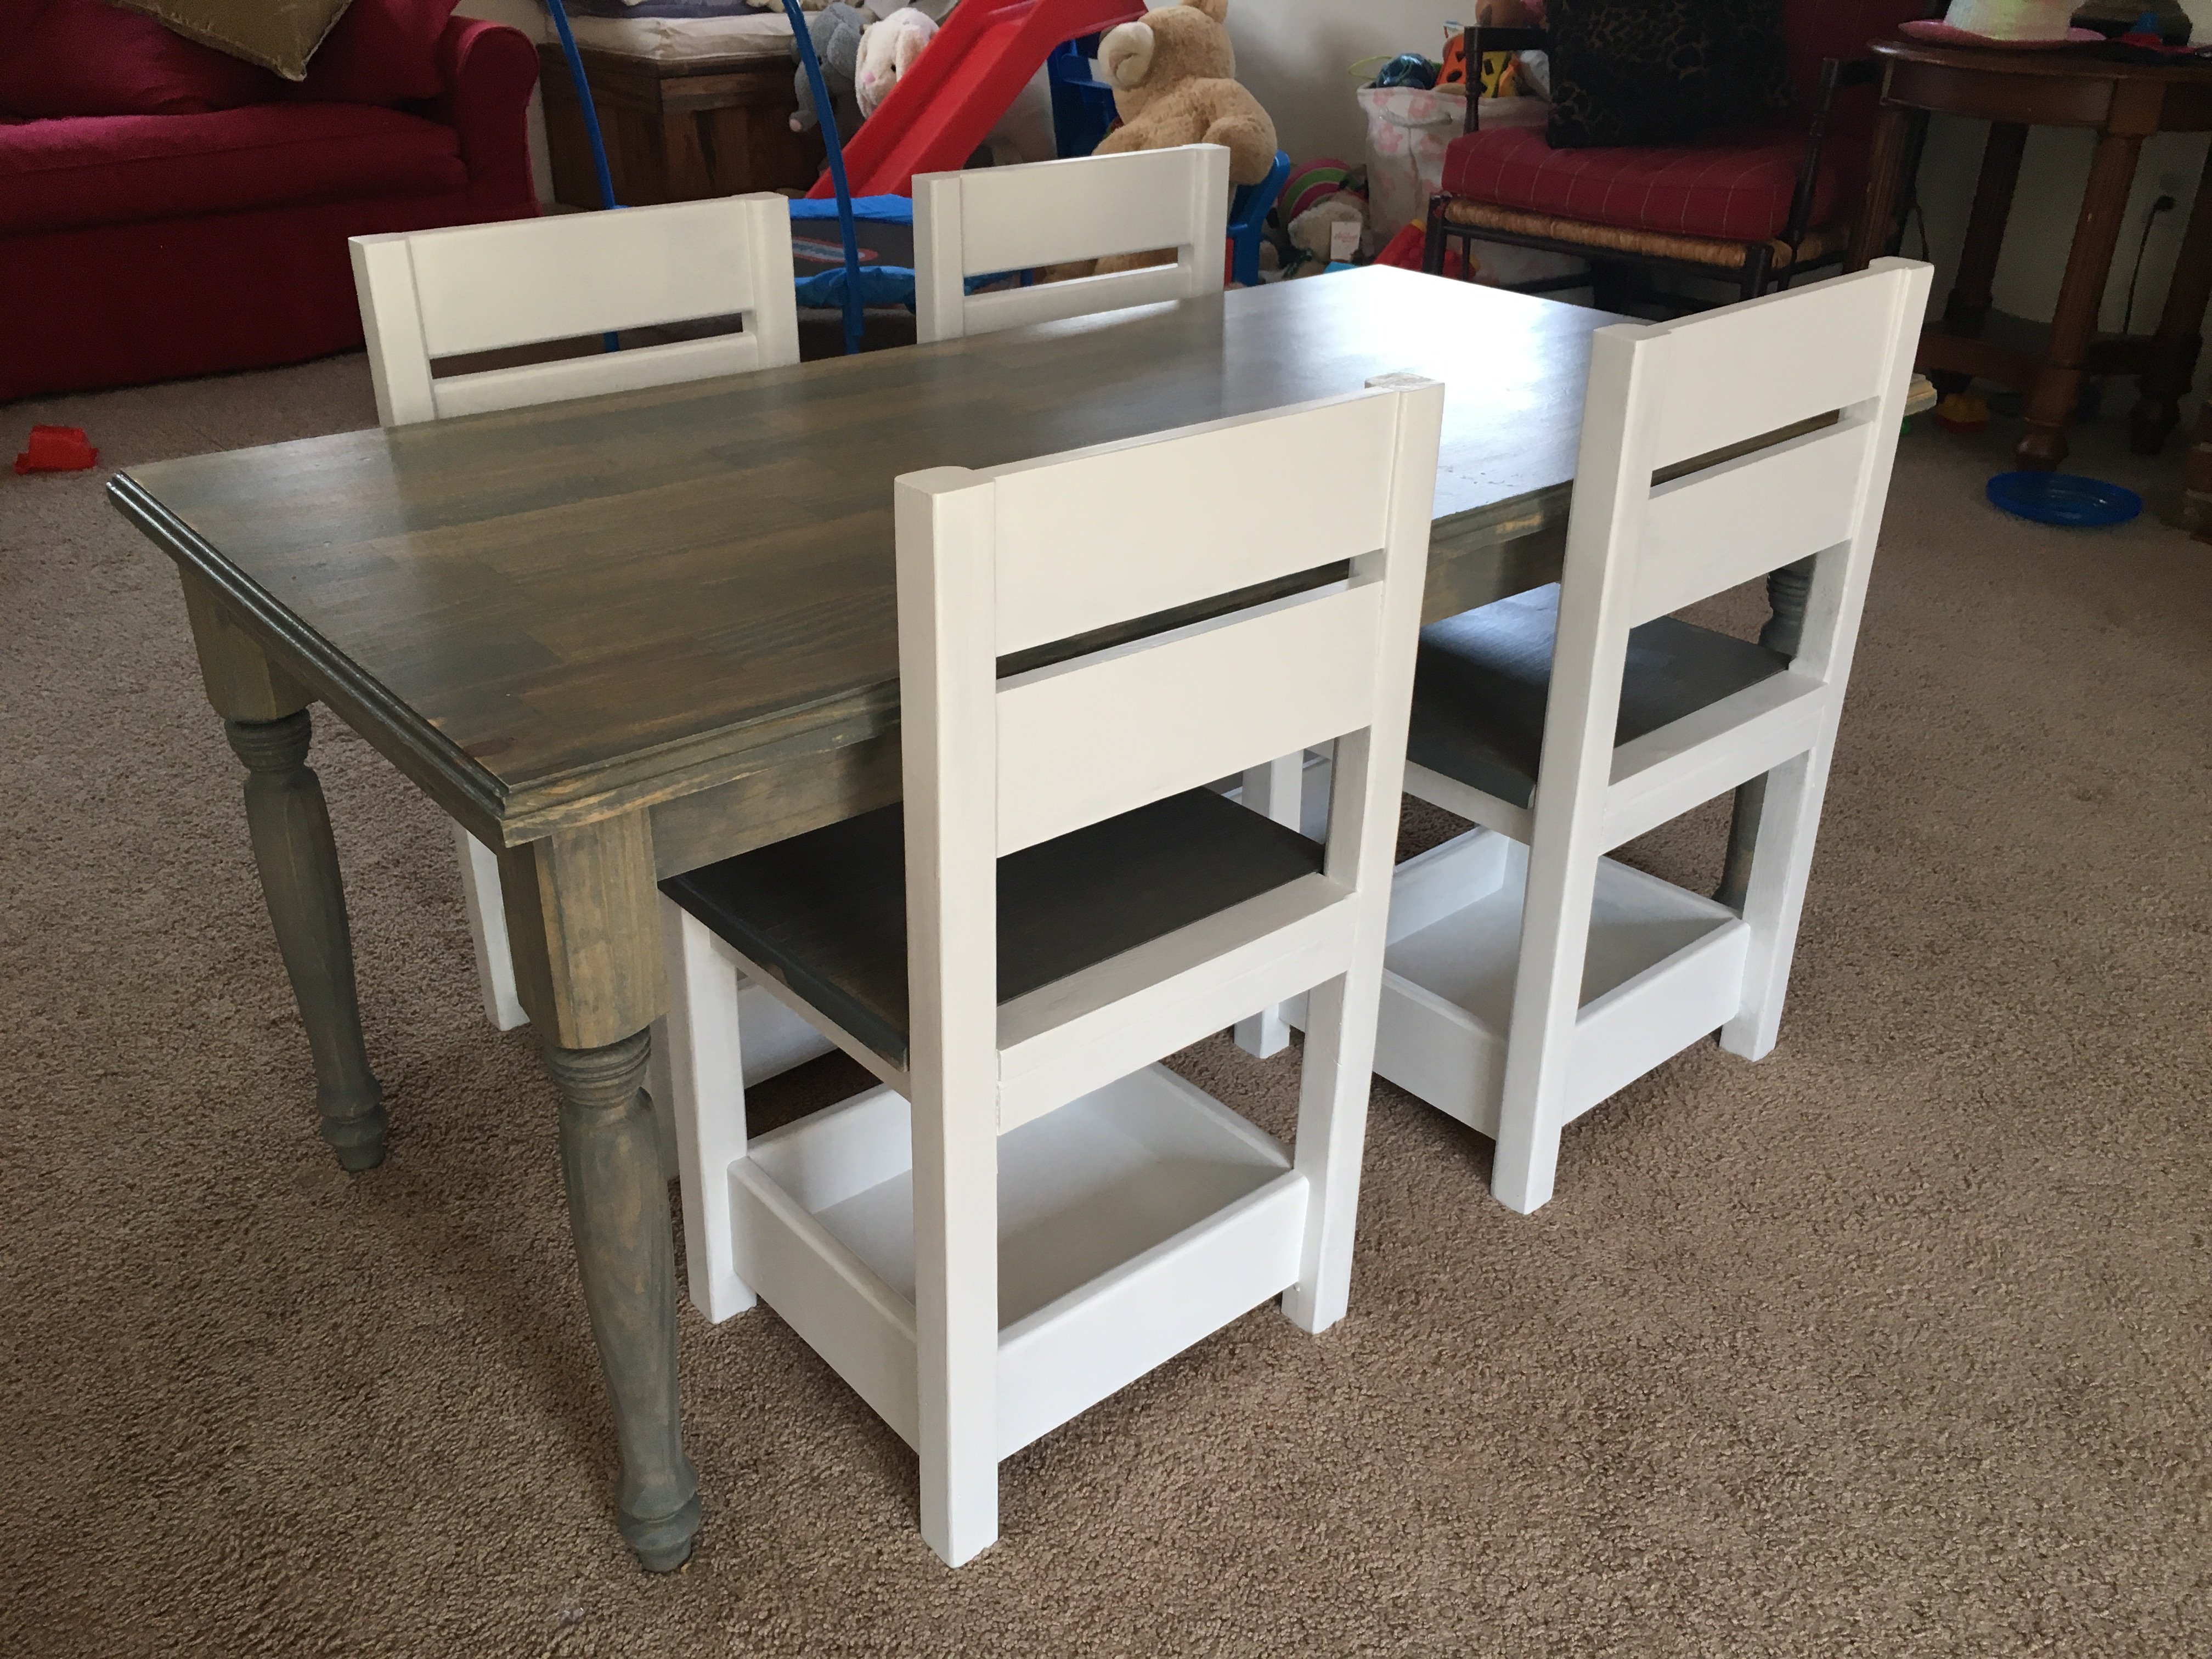
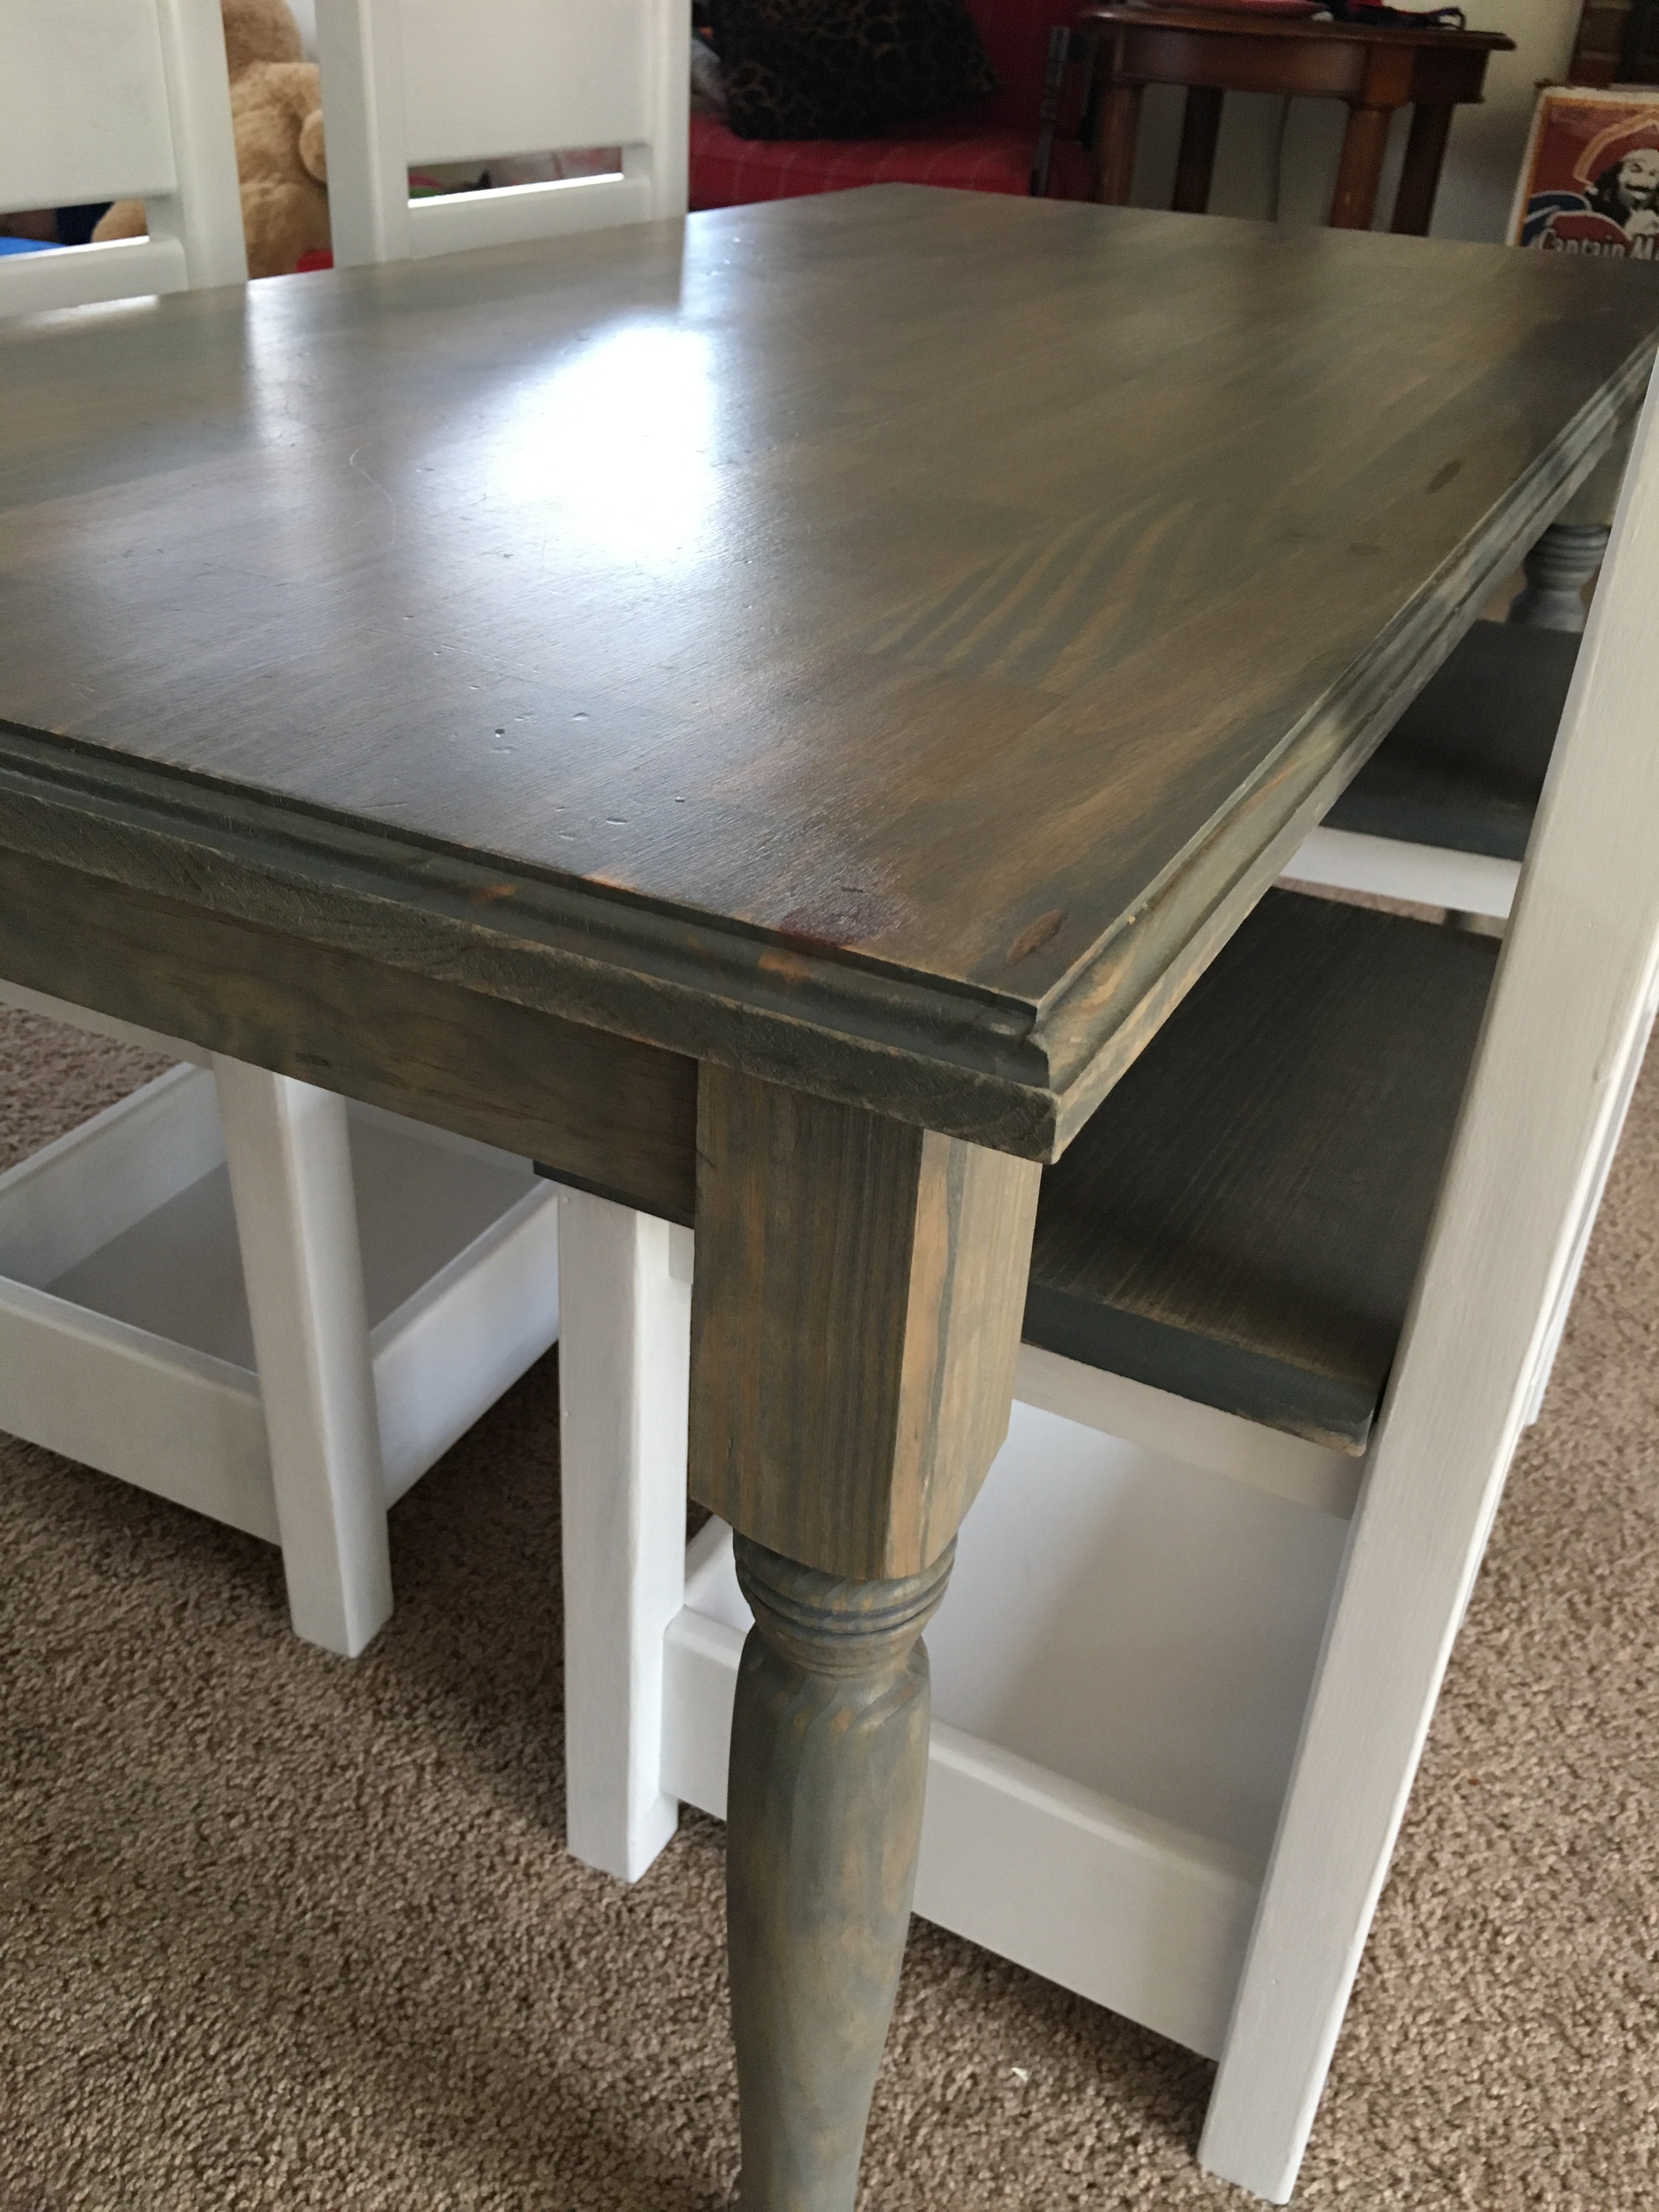
I built the children's farmhouse table and 4 storage chairs for my 2-year-old twins. I followed the plans exactly, except the addition of some minor details using my router: I gave the table top a nice edge using my Roman Ogee bit, rounded the front and side edges of the seats for comfort using a 1.5" roundover bit, and rounded the inner corners of the back on both sides and the top and bottom of the back rests with a 1/2" roundover bit. I bought a roll of drawing paper from Ikea in the children's section, and it will be attached underneath using a removable dowel so we can pull a sheet of paper out from under the table for coloring or to use as an easy-cleanup paper cloth if they eat at this table with their cousins!
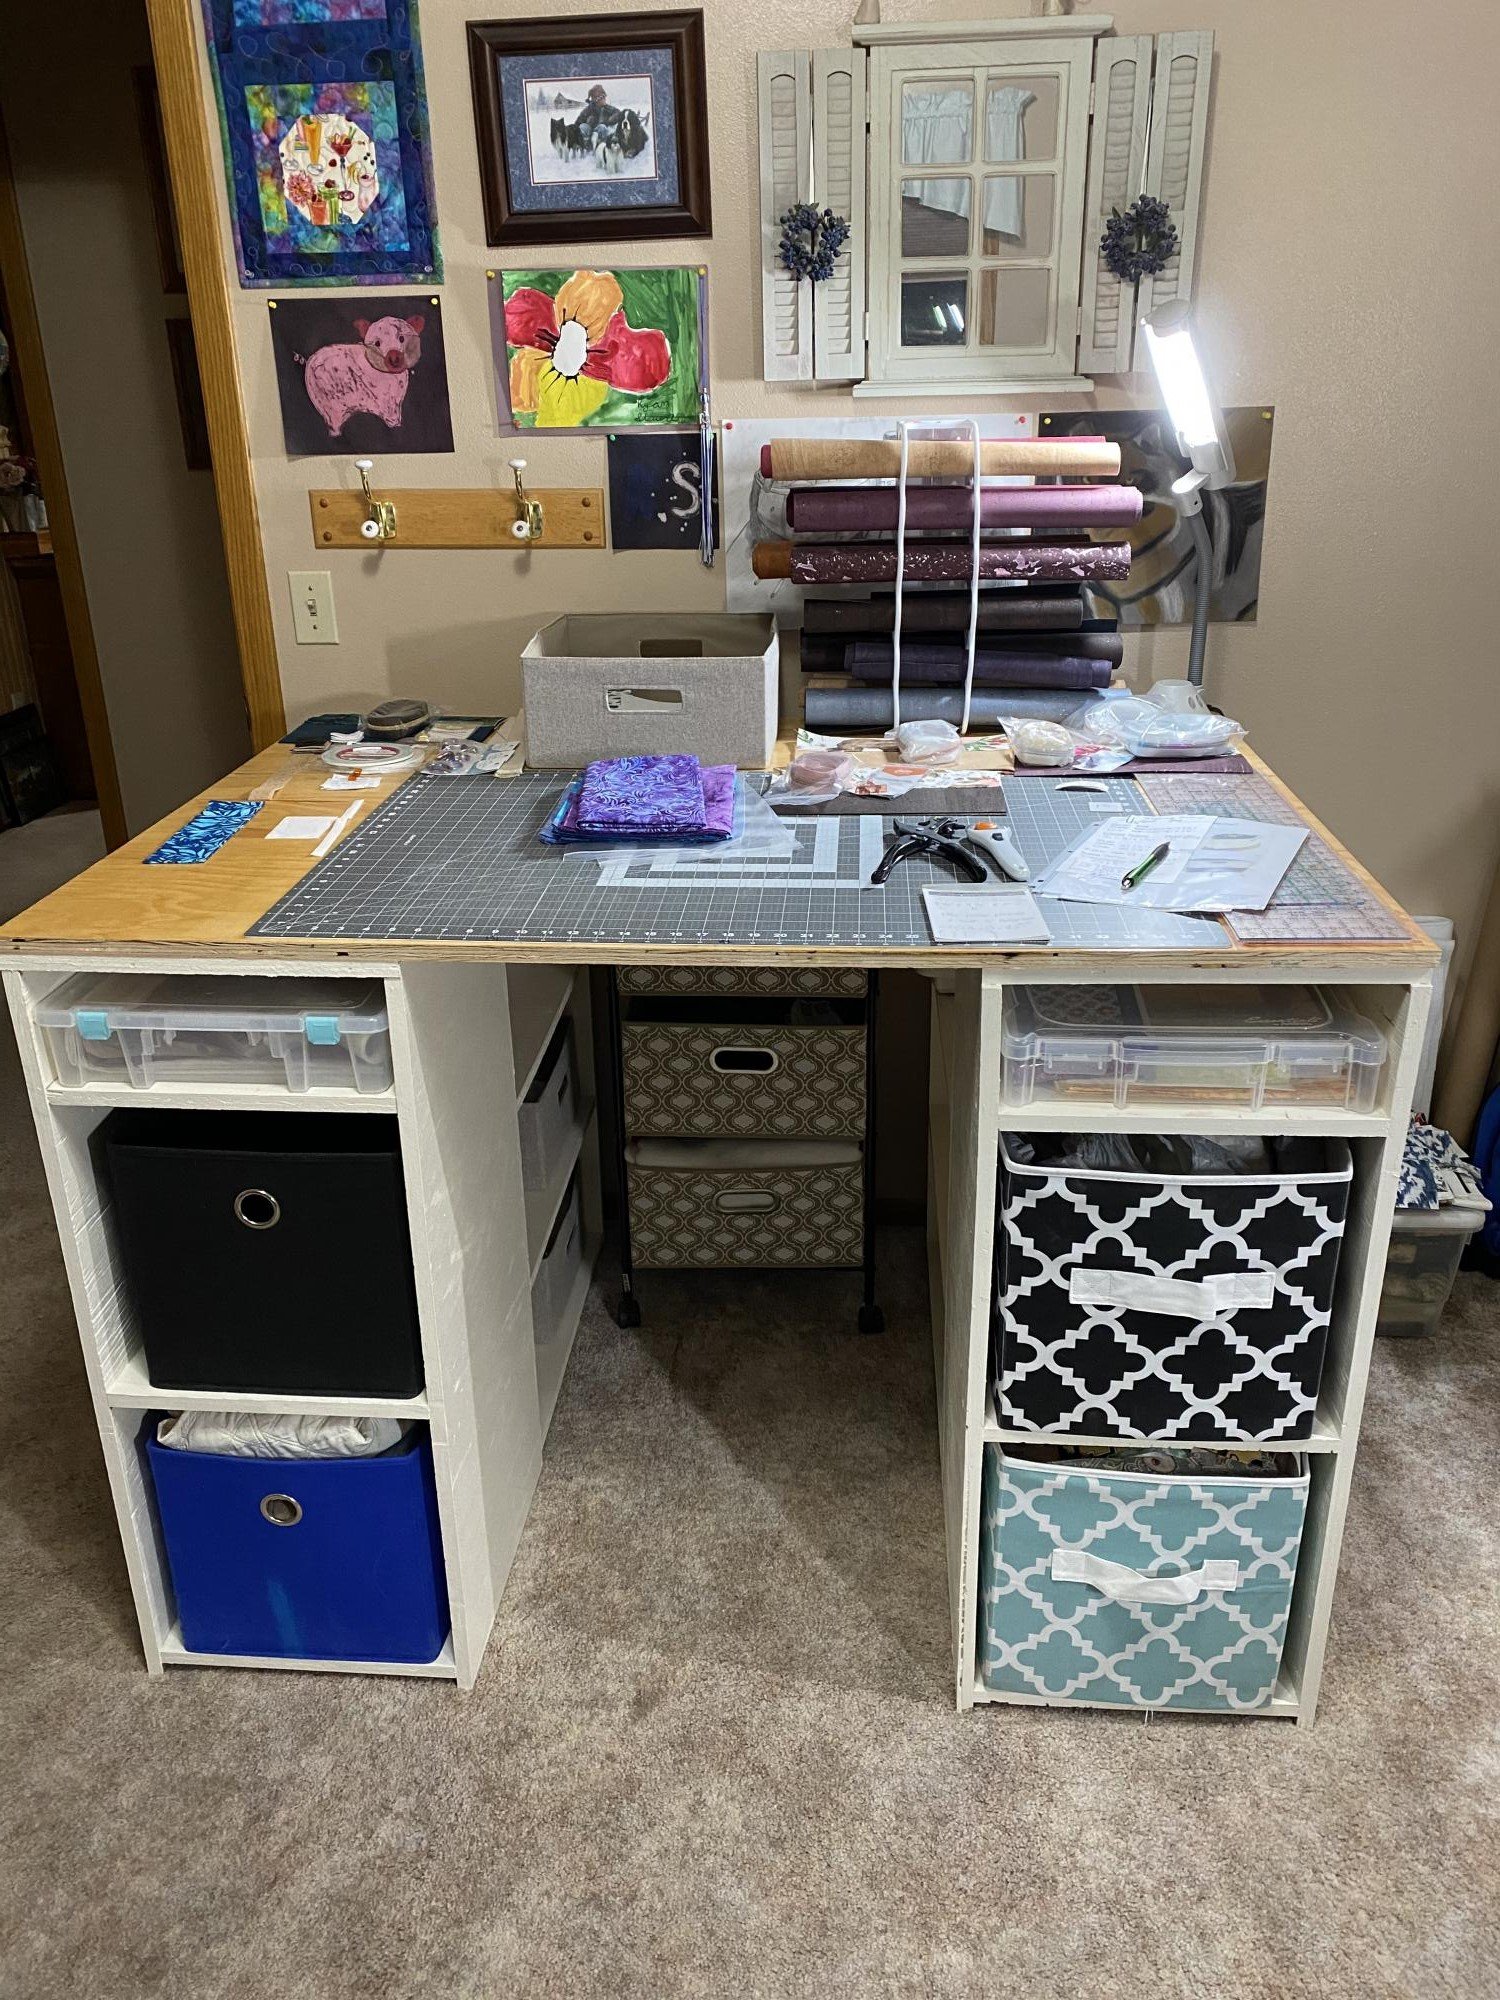
My husband just used Ana’s plans to create my Dream craft table.
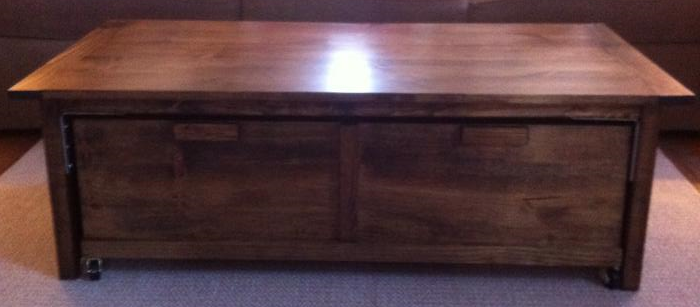
I made this coffee table almost a year ago. It has withstood the use and abuse of my five year old and still looks great!! Thanks Ana for the awesome design!
First "big" woodworking project. A lot of fun and my daughter couldn't be happier
Hi Y'all
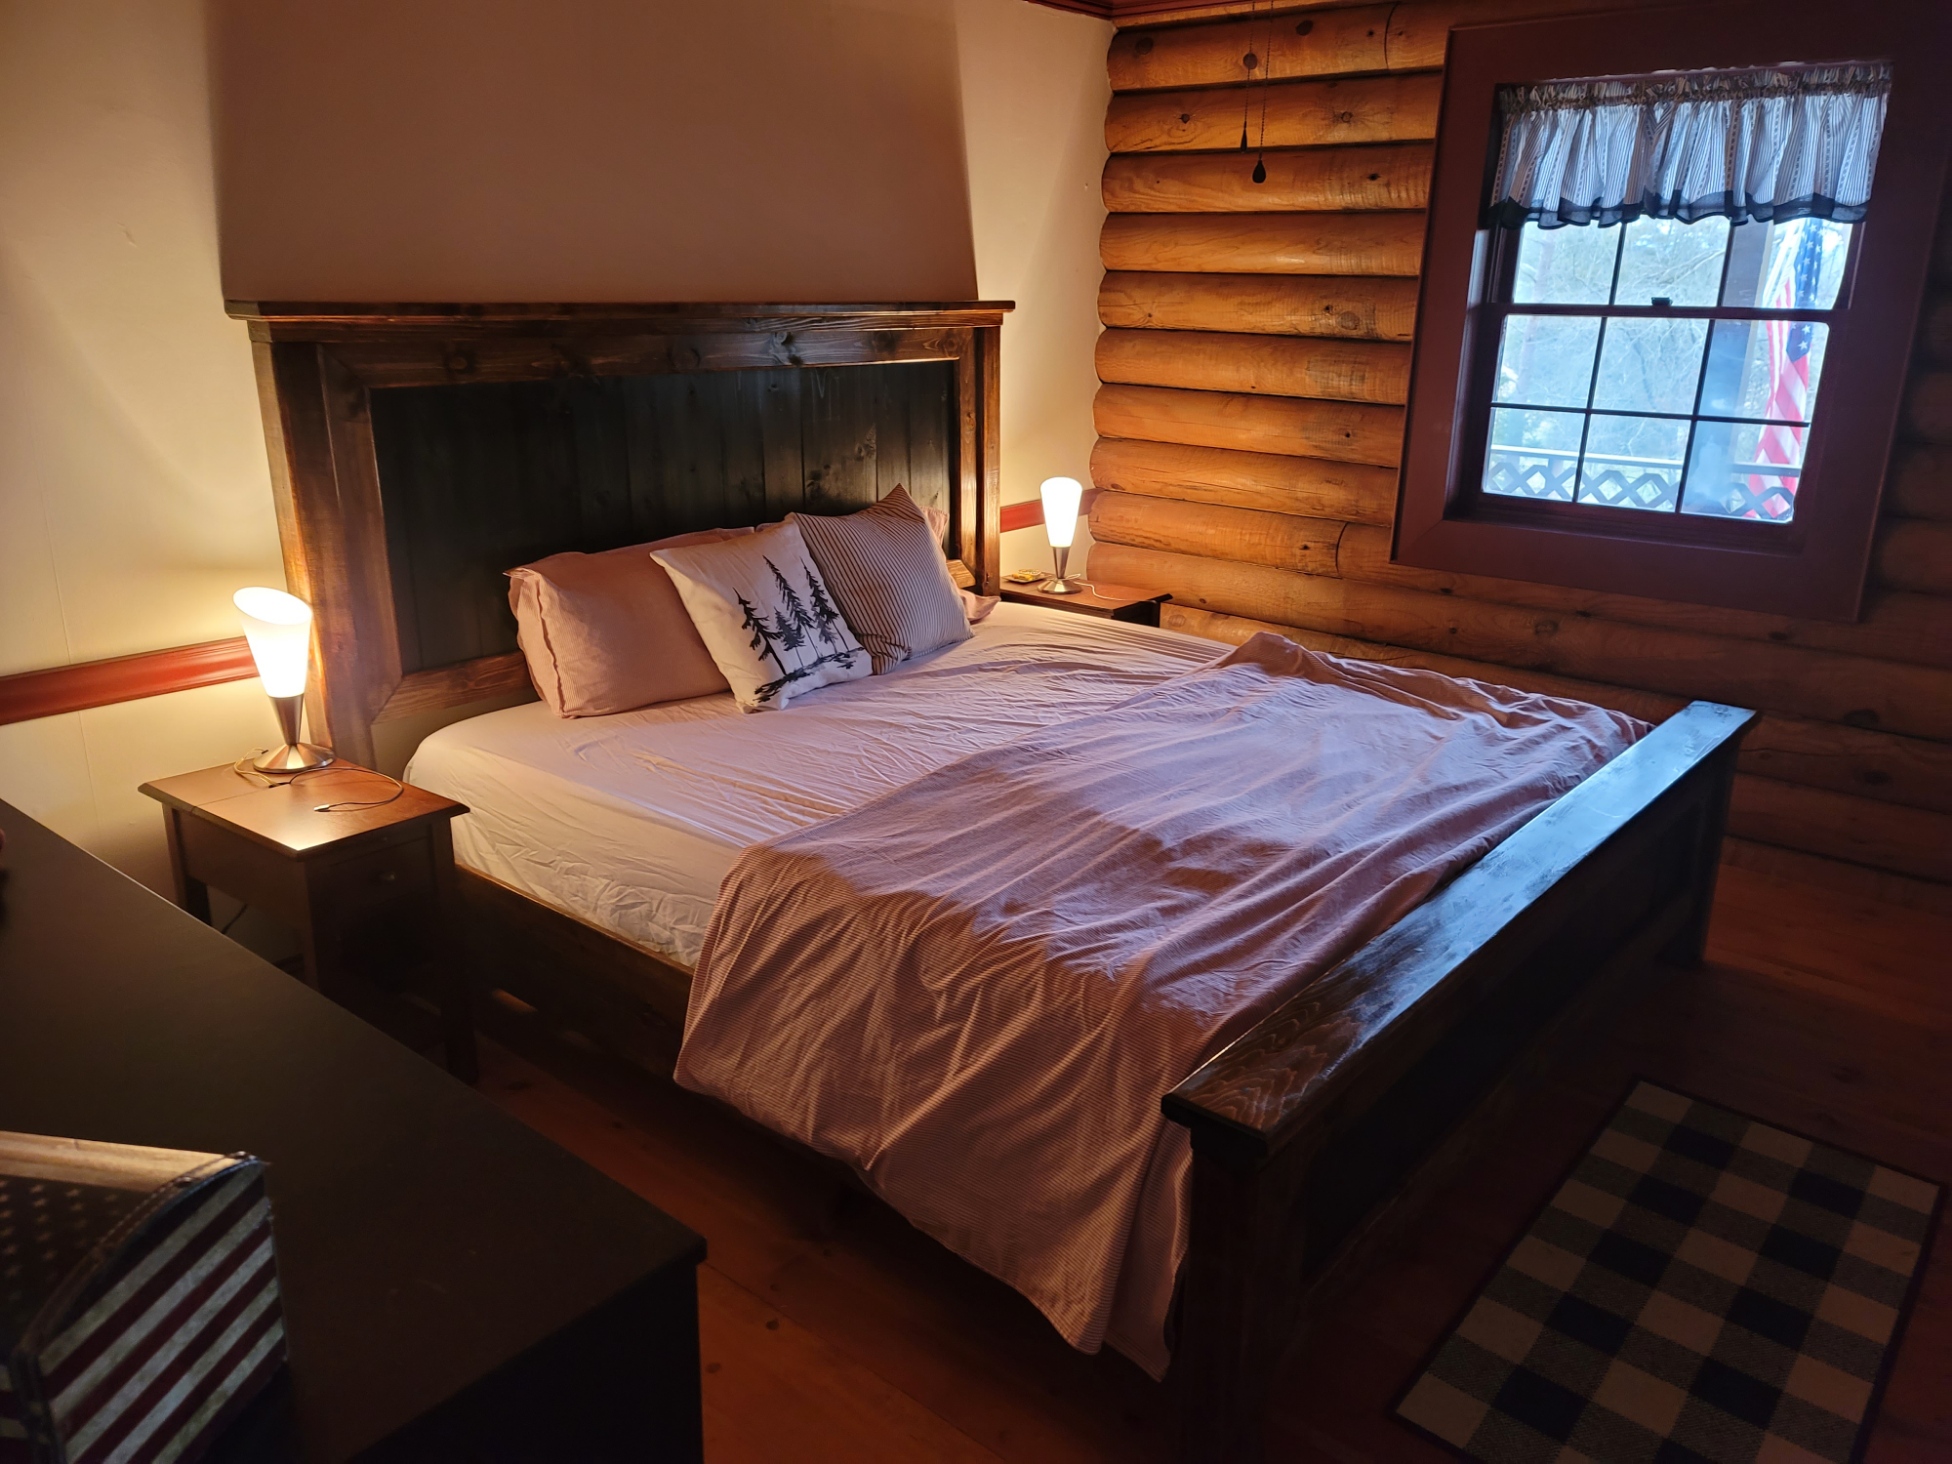
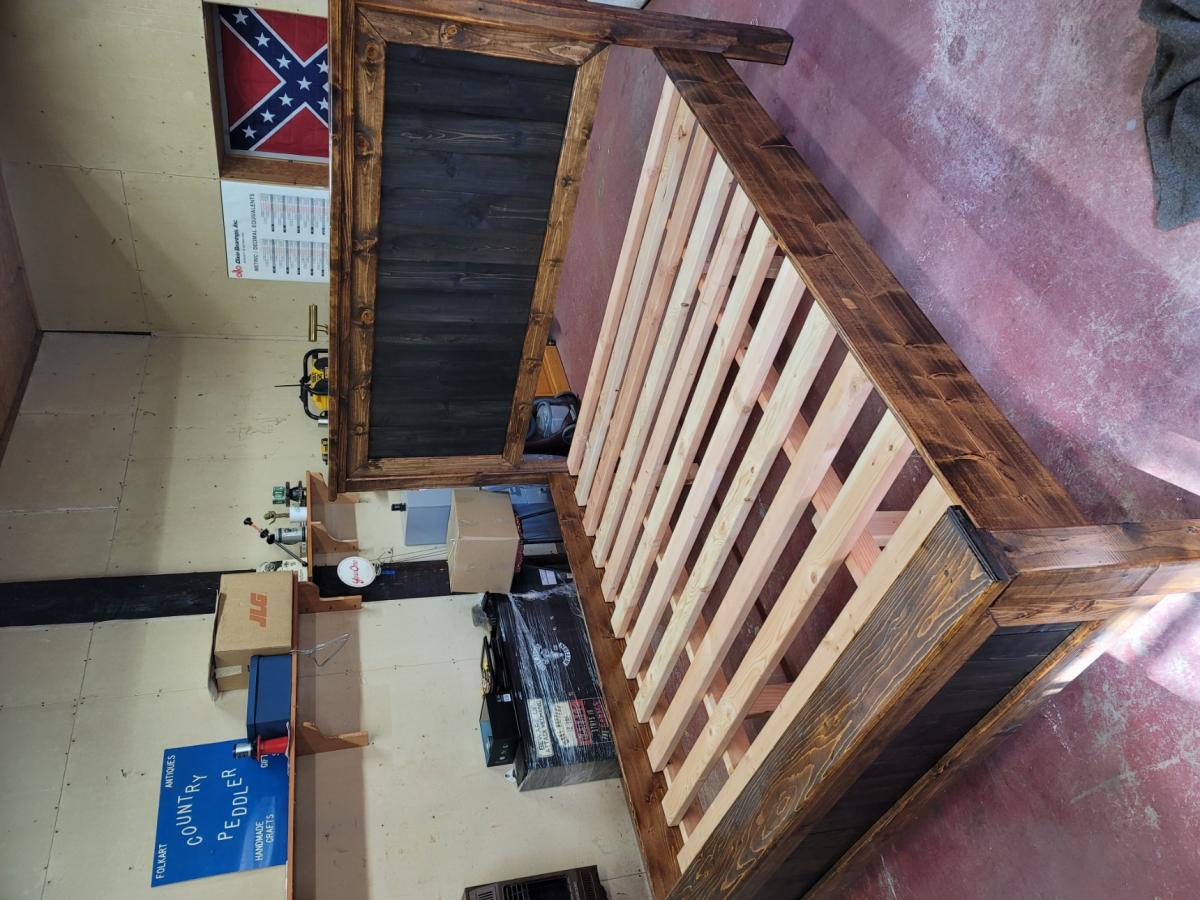
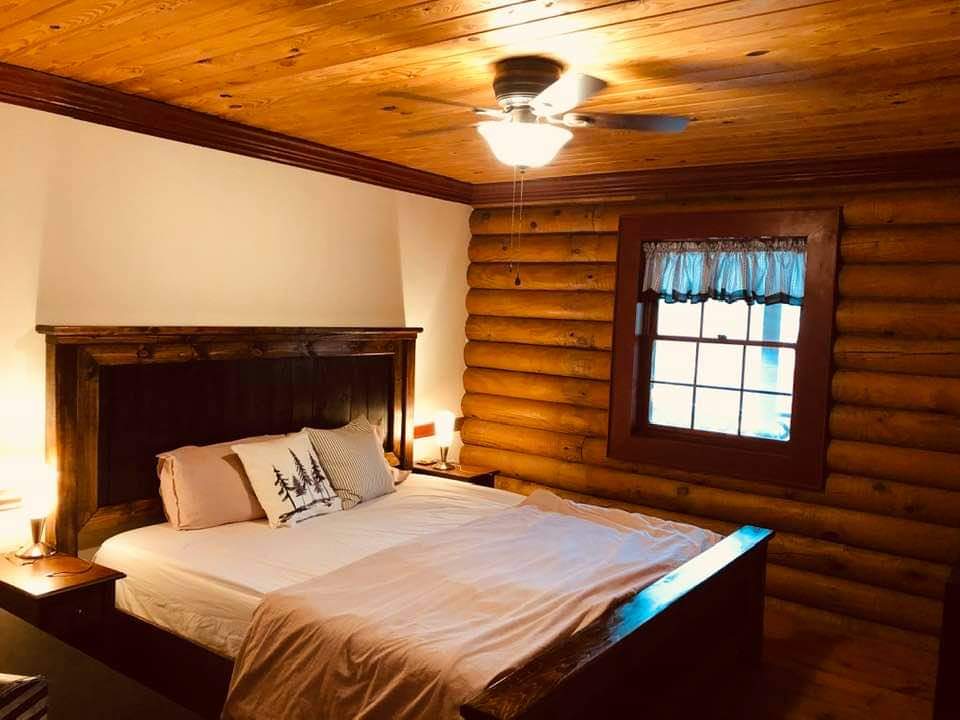
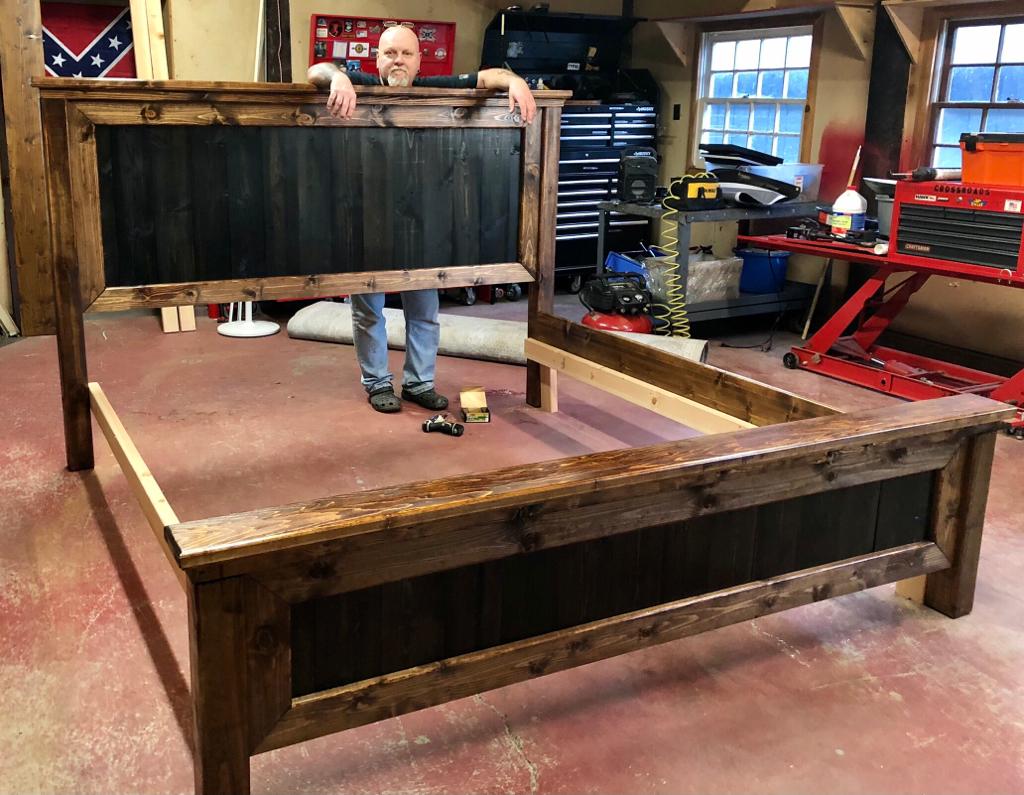
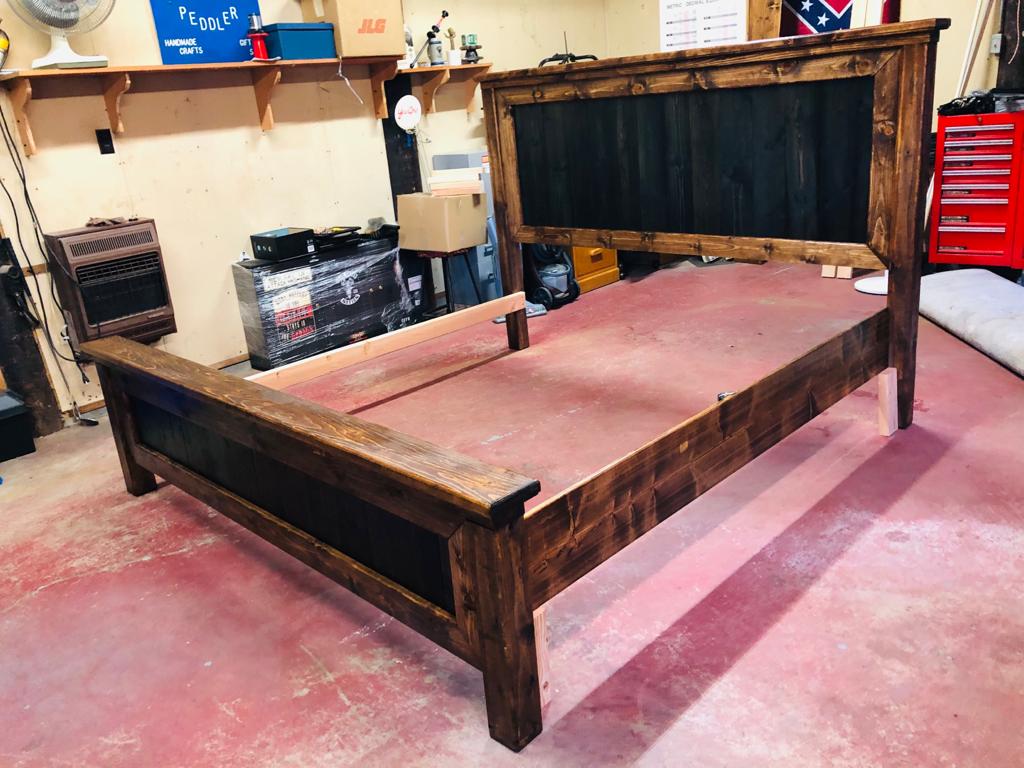
I start using the king size bed plan from Ana.
It turns out great. I change a couple things on the build.
1. Our mattress are 12" high. The mattress frame support from the plan are made for less thinner mattress.
2. I made a nicer insert frame for the Head- and footboard.
3. We stained in a two color tone.
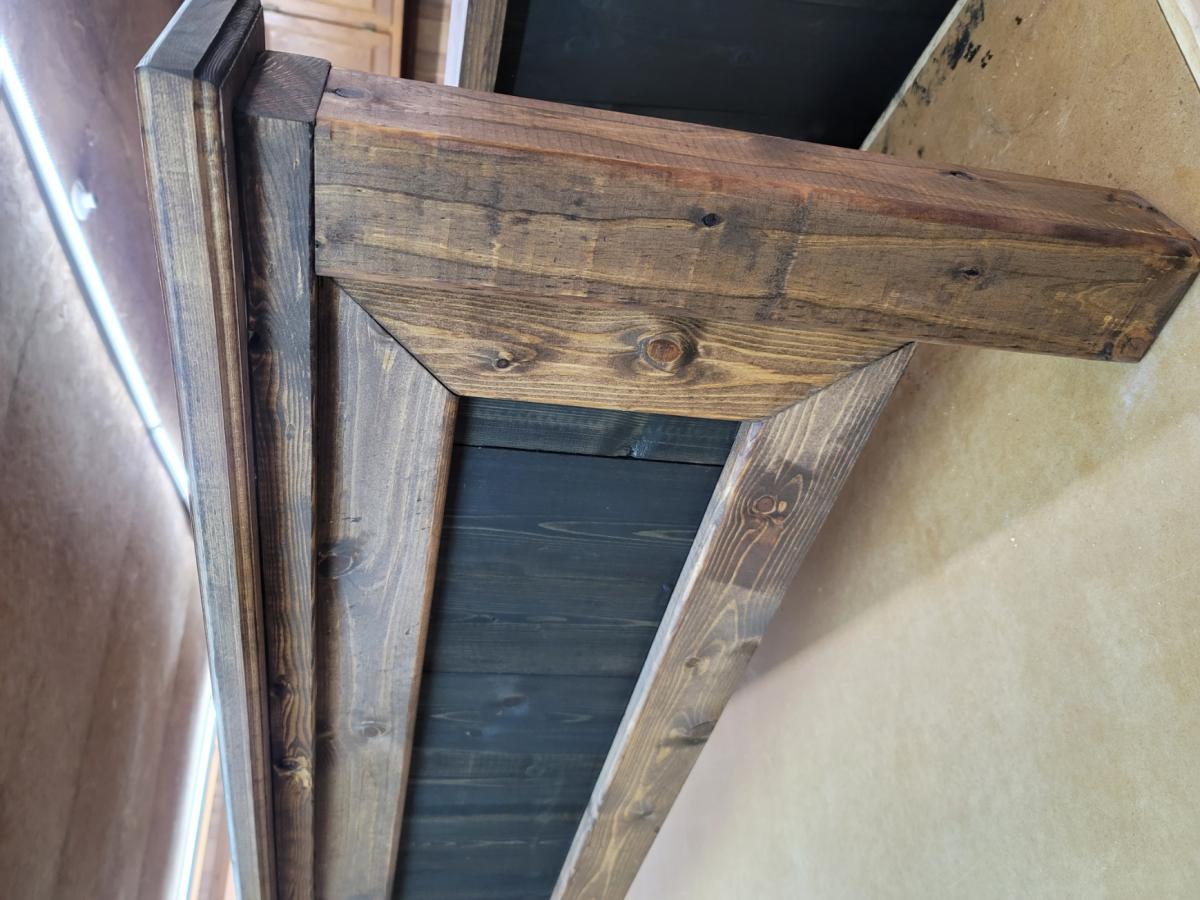
4. Every comer is routed out. See the top board on the Head- and Footboard.
I had a grate time to build it.
Keep building
Volker
Sat, 01/30/2021 - 11:57
Great build, love the two tone finish! Thanks for sharing!

Built this from the plans on this site. I beefed up the top frame with 2 extra 2x4's

Built out of love for my 3 year old and 1 year old daughters. Christmas morning was awesome! We also bought play kitchen pots and pans from IKEA and a couple of play food sets off of Amazon. Had an old push button led light for closets that is inside the oven. It is on a timer set for 30 seconds so the batteries will not drain too fast.
Great plan & project for the kids.

Mon, 12/29/2014 - 08:19
My wife and mom stitched up the kitchen skirt. Fabric found and Hobby Lobby. Thanks Mom!


Comments
Ana White
Mon, 12/15/2014 - 12:22
Wow this is really great! I
Wow this is really great! I love the wall color too! Nice work!