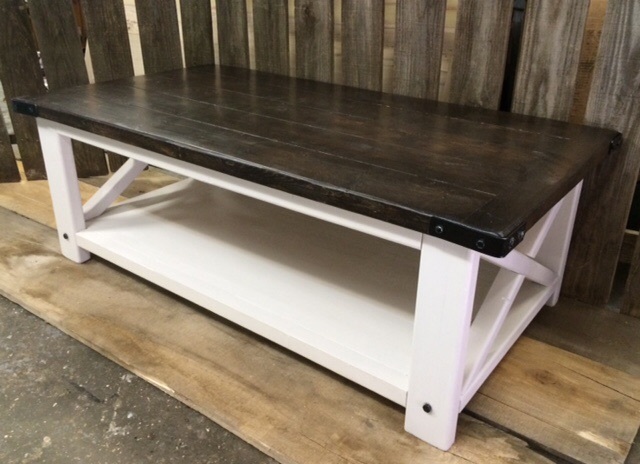
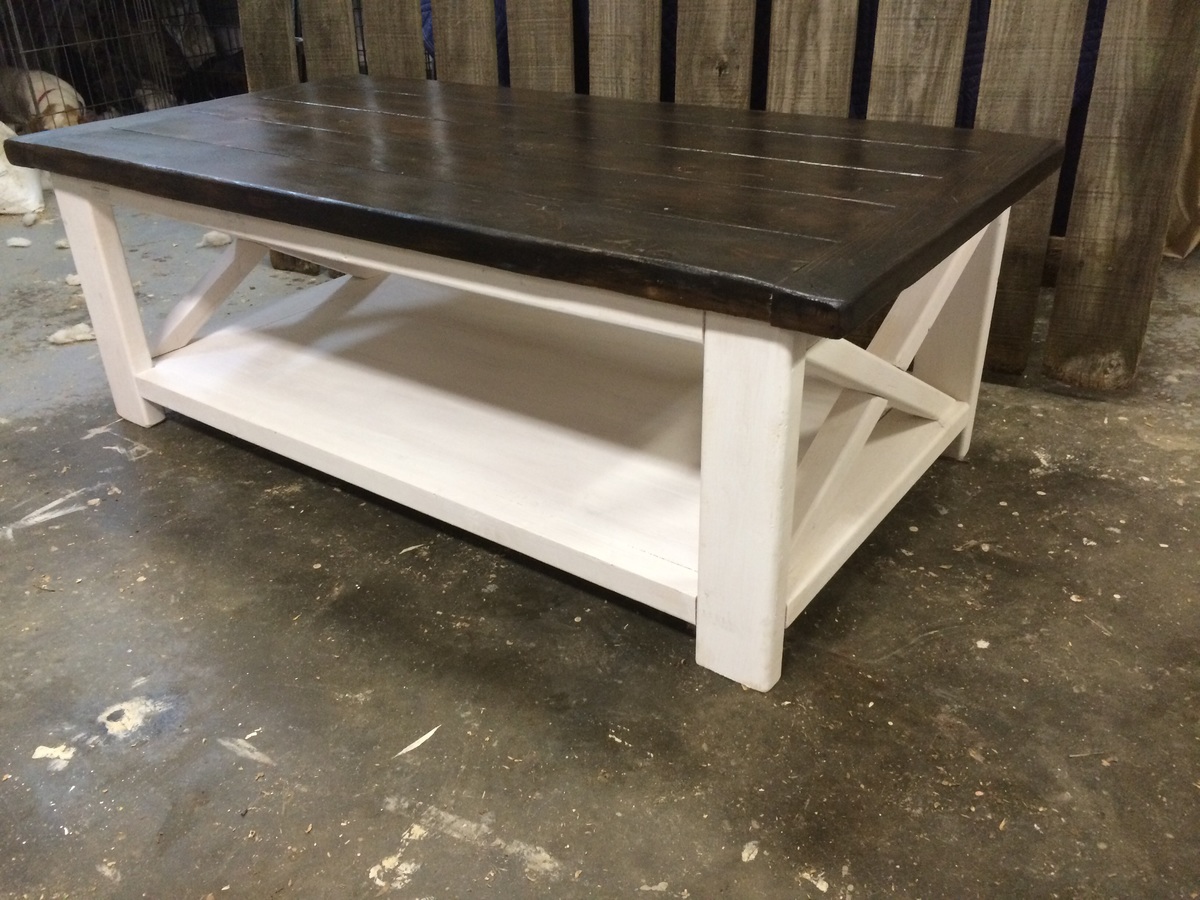
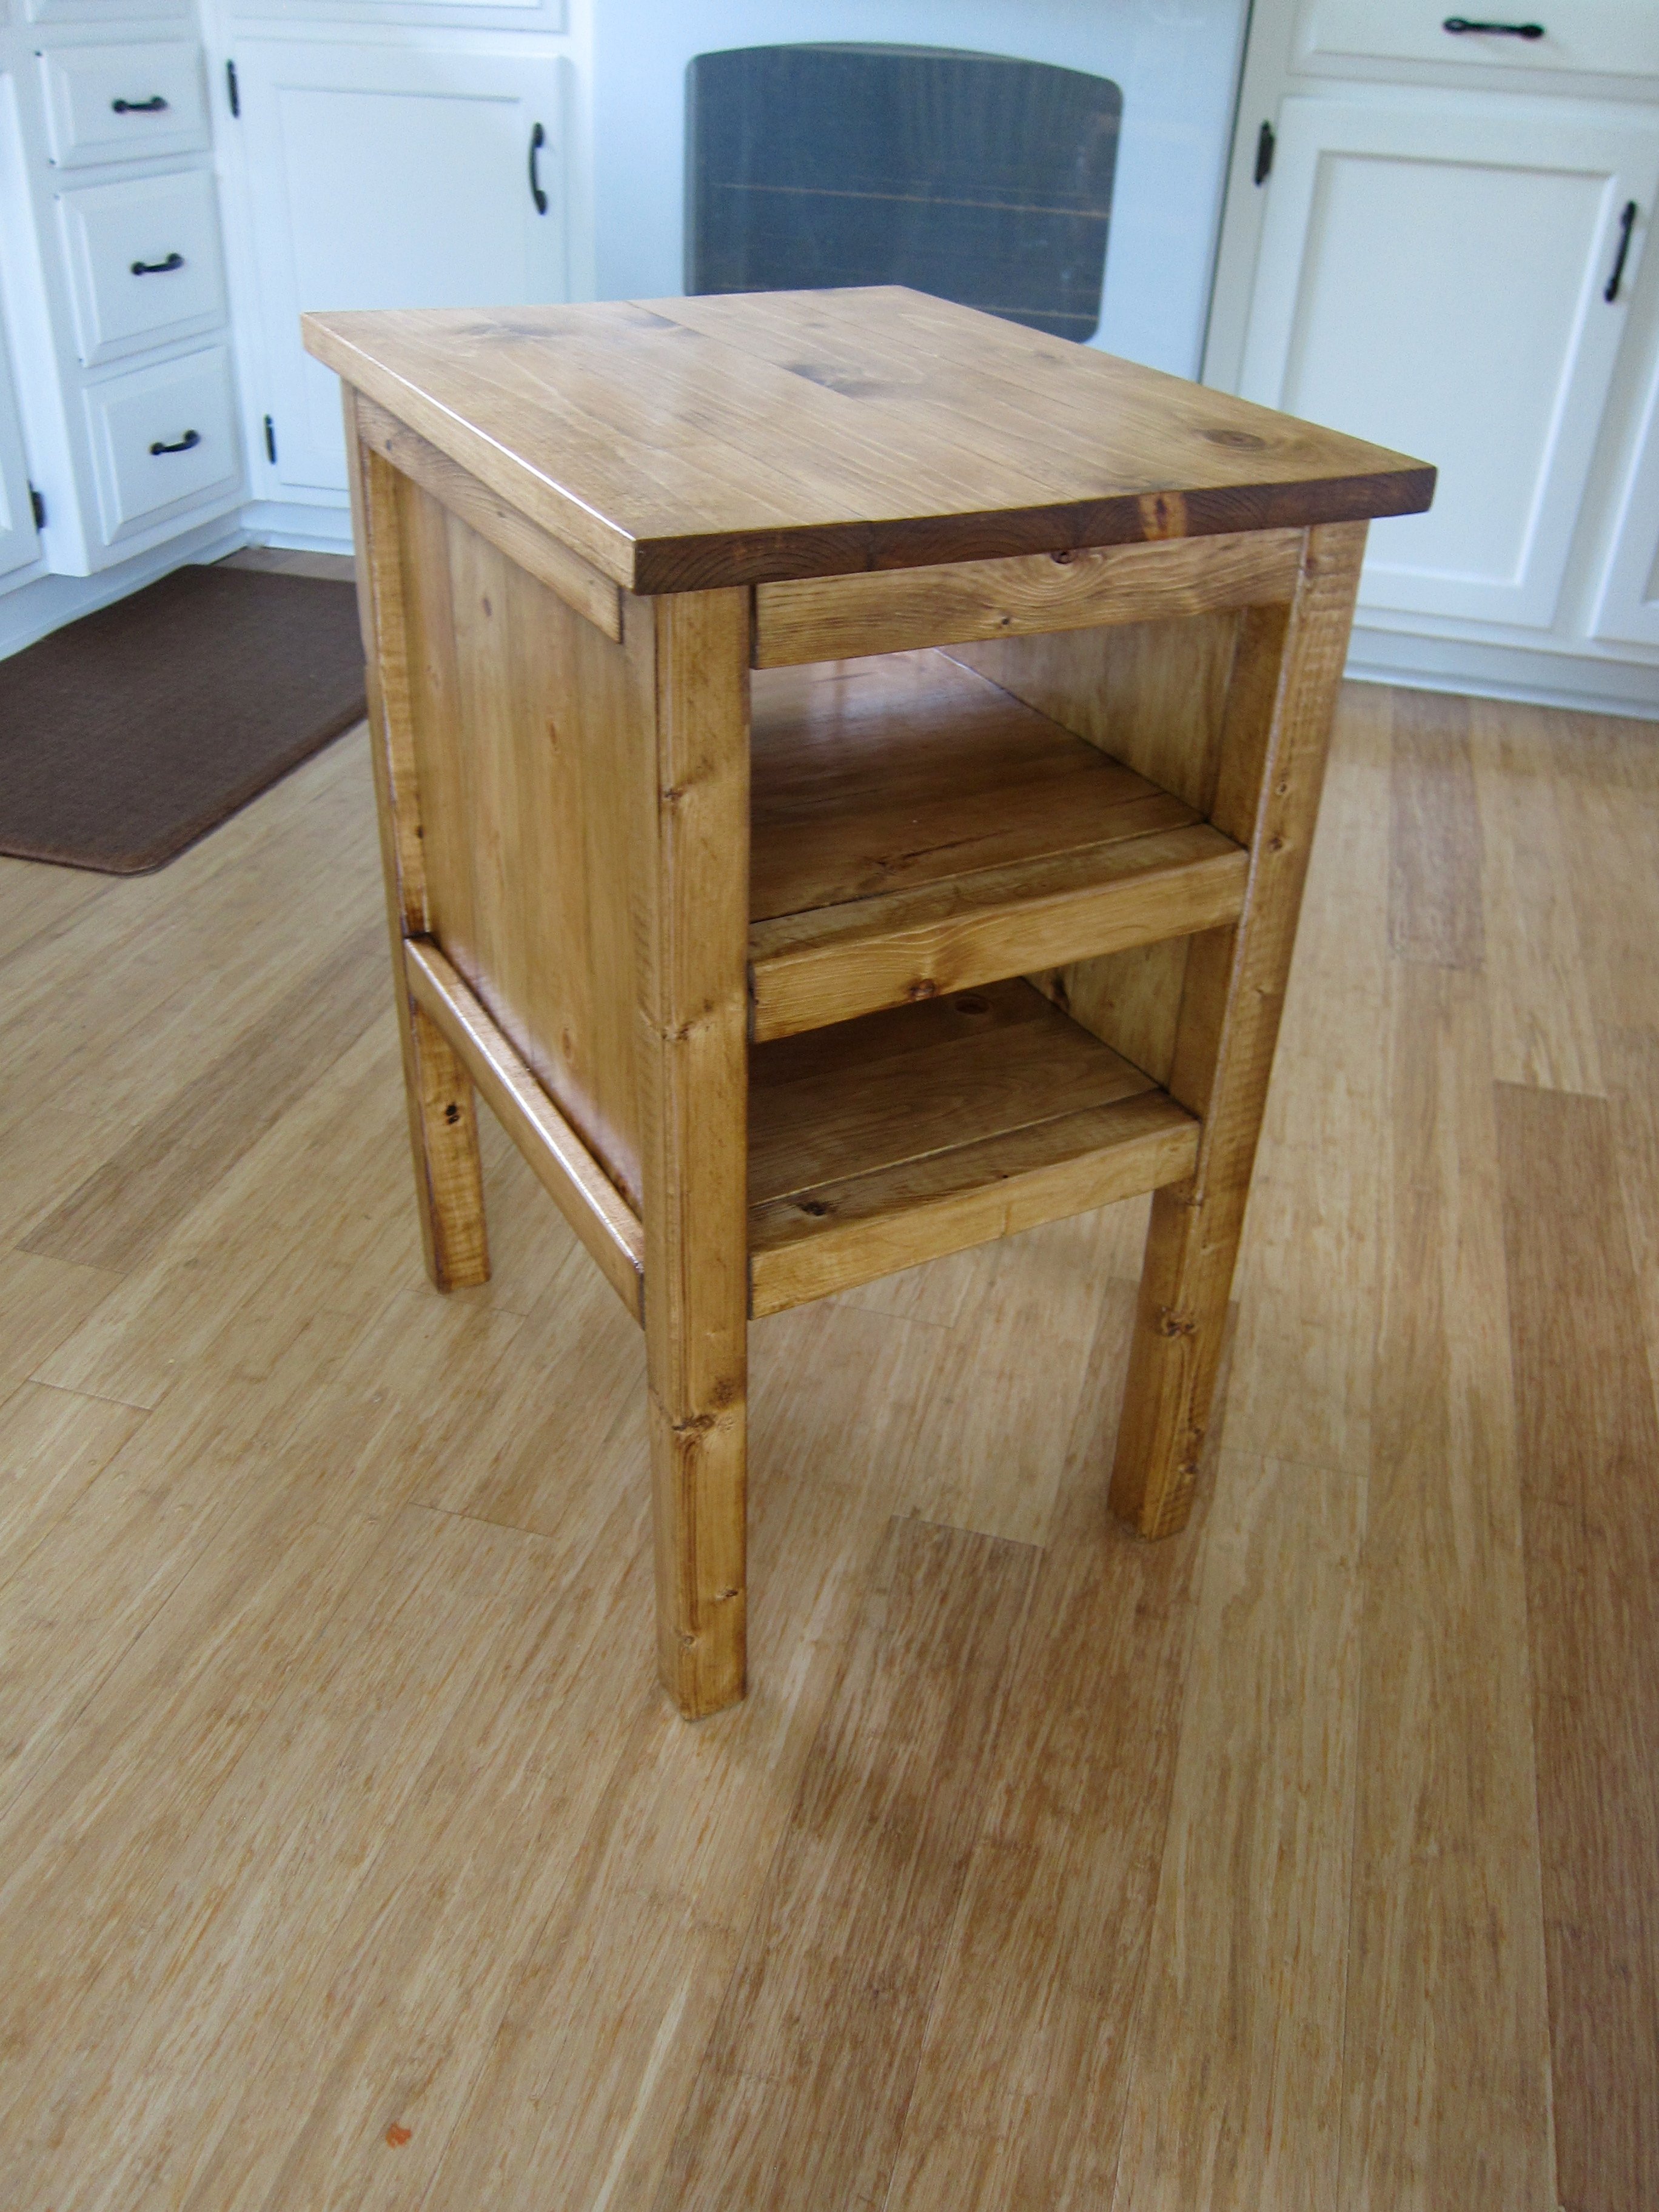
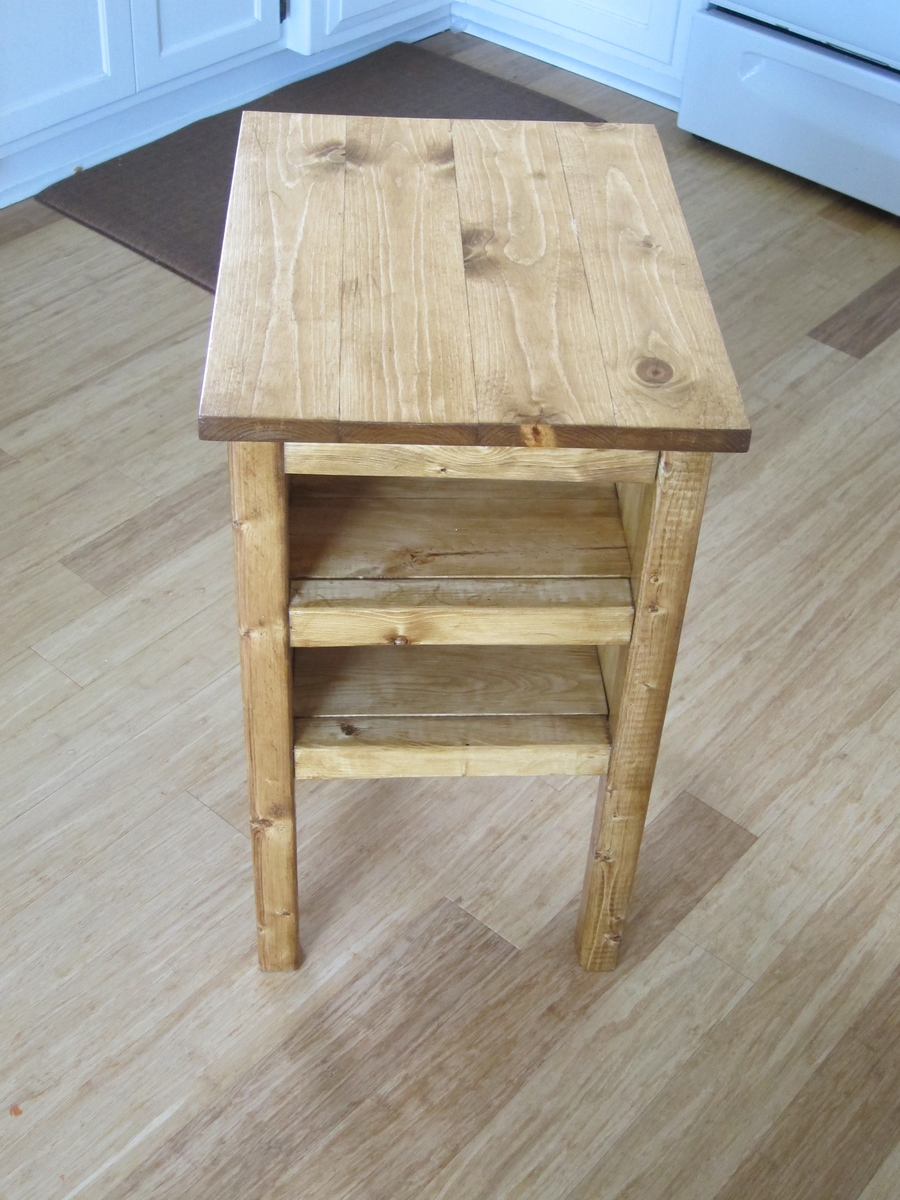
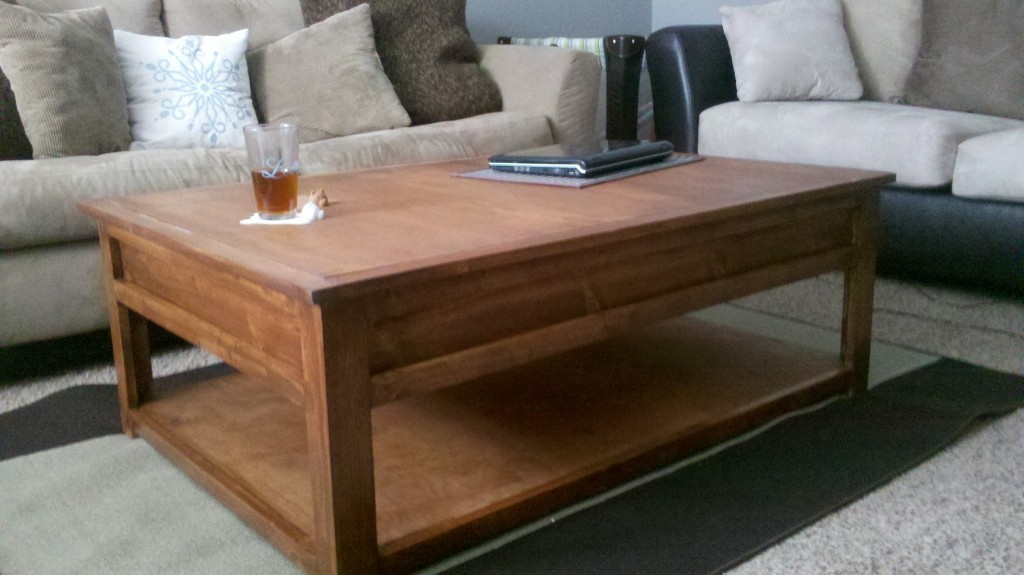
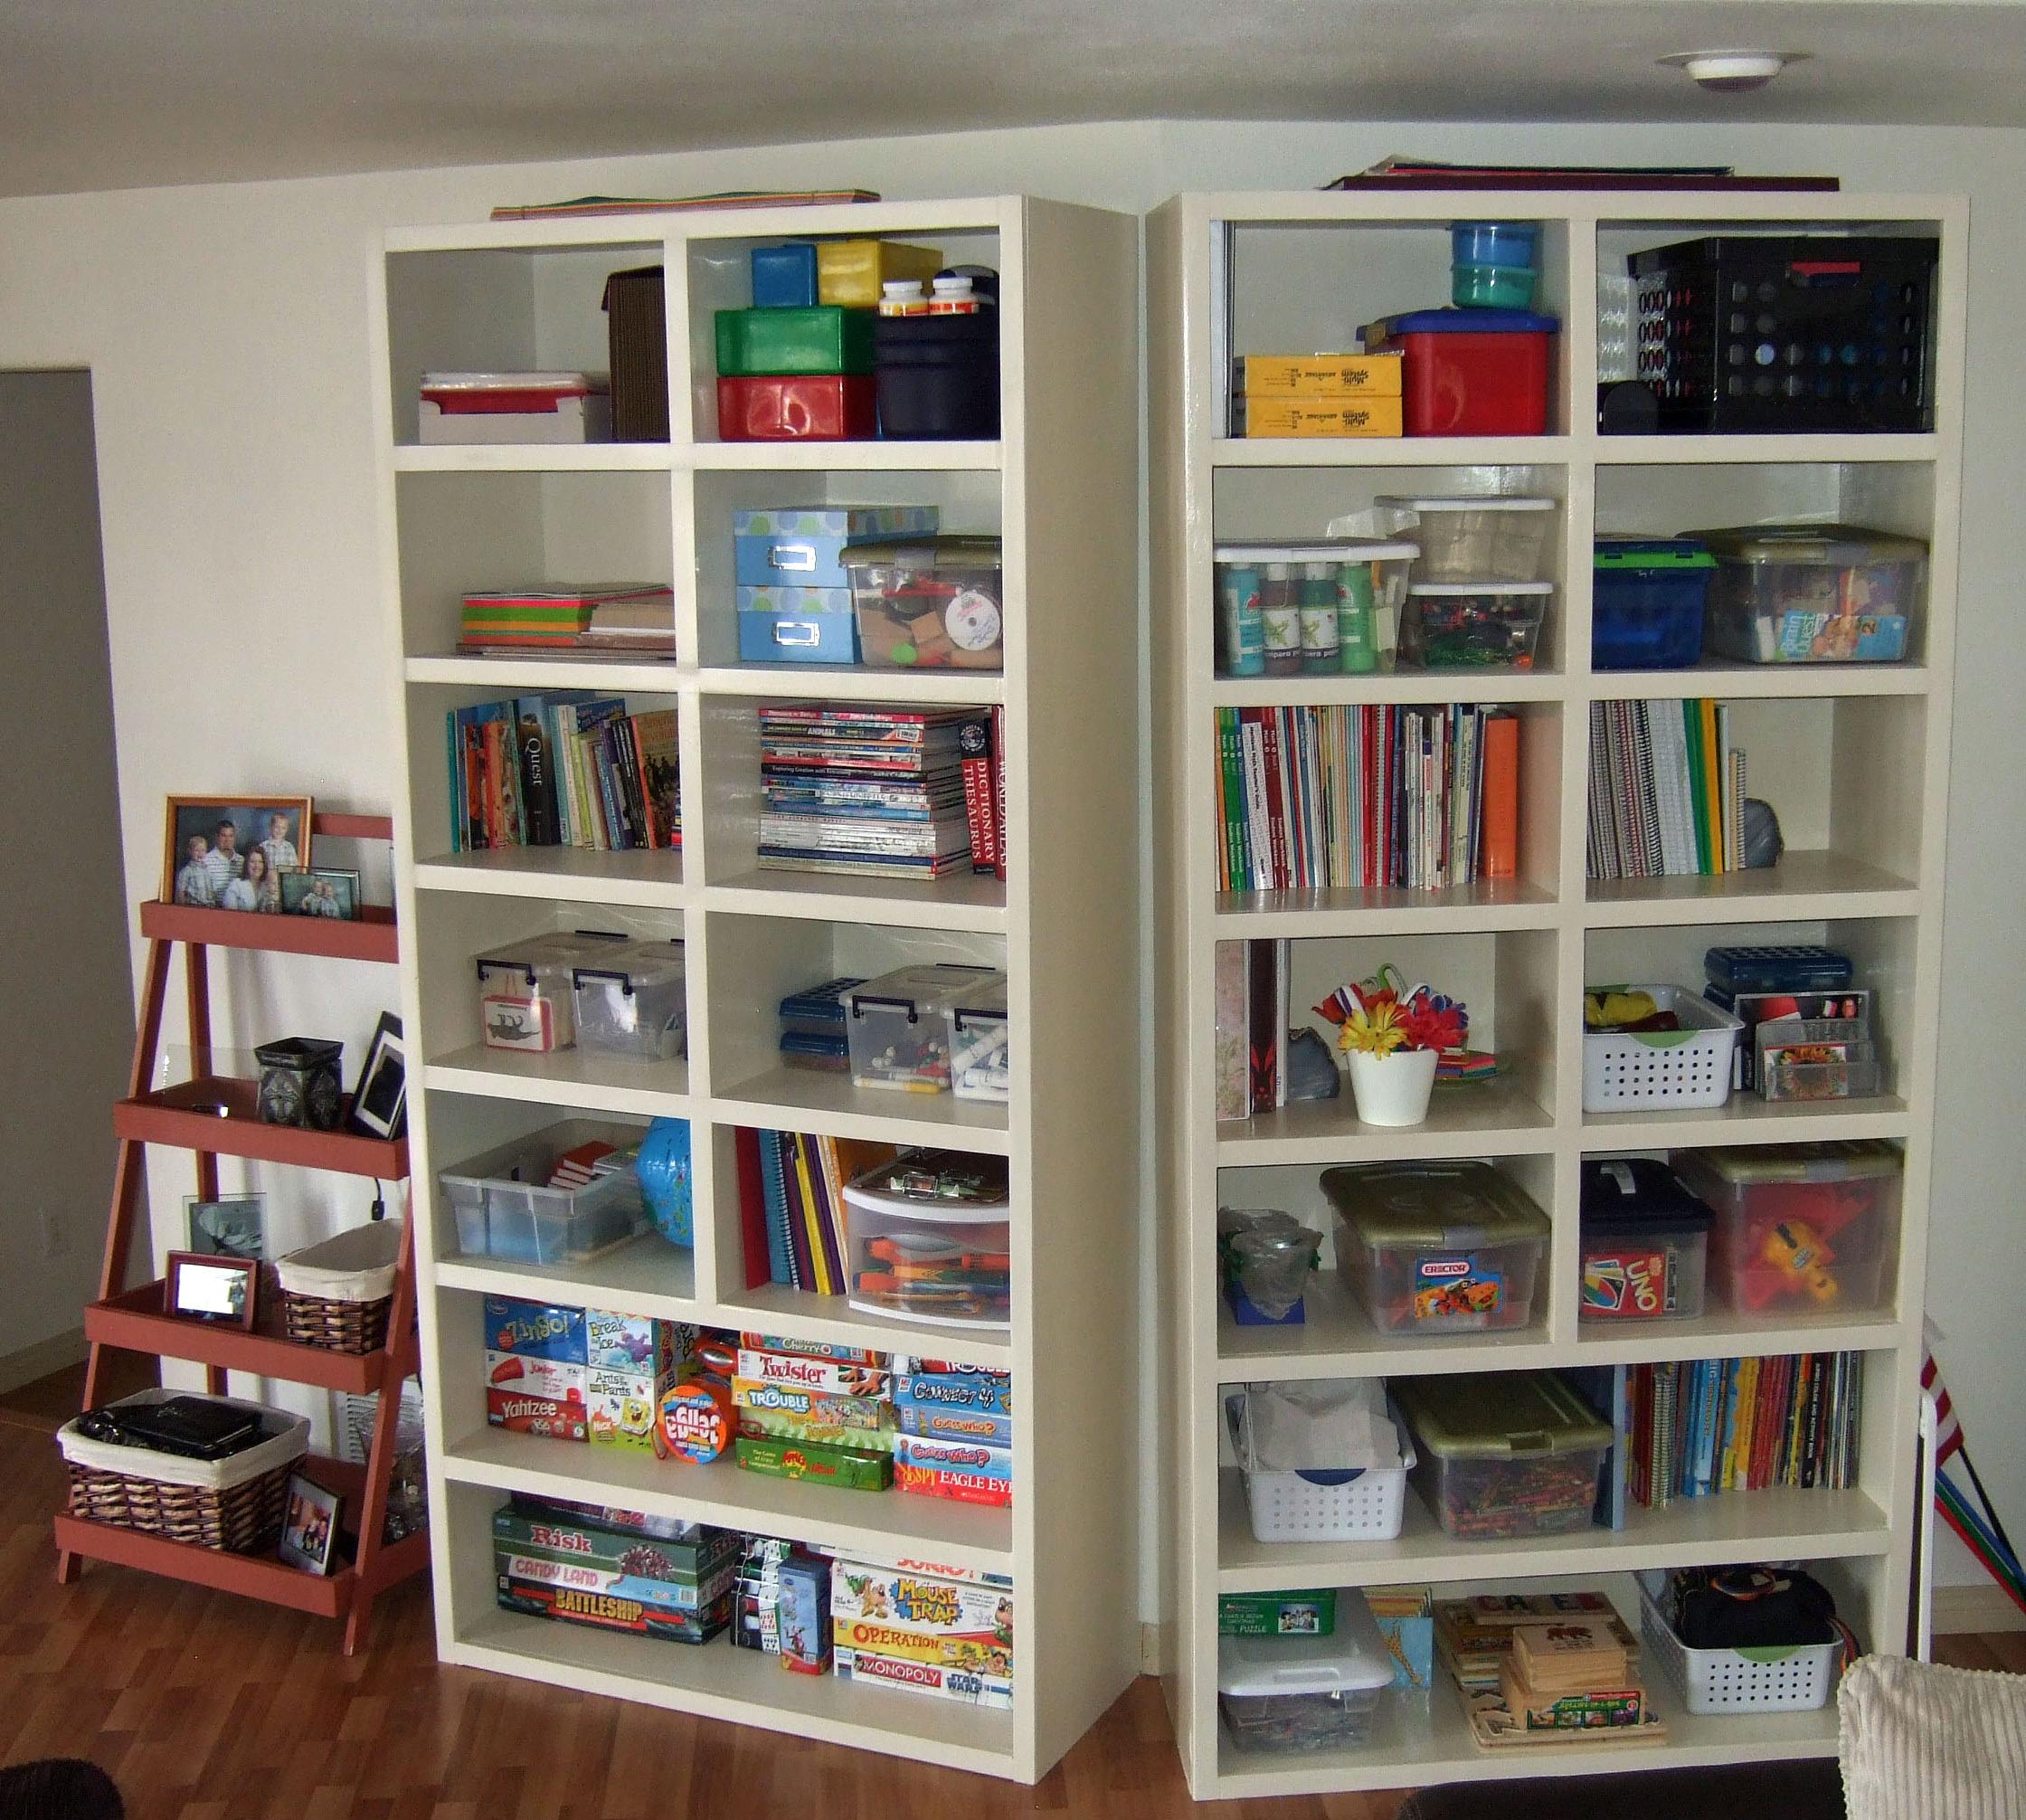
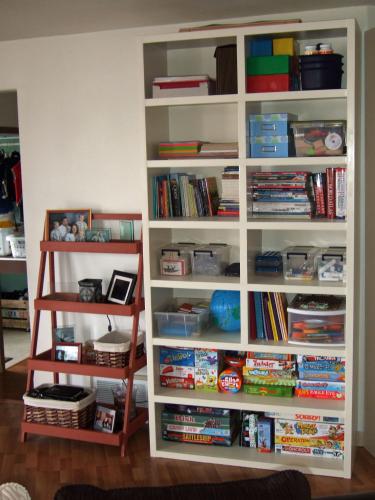
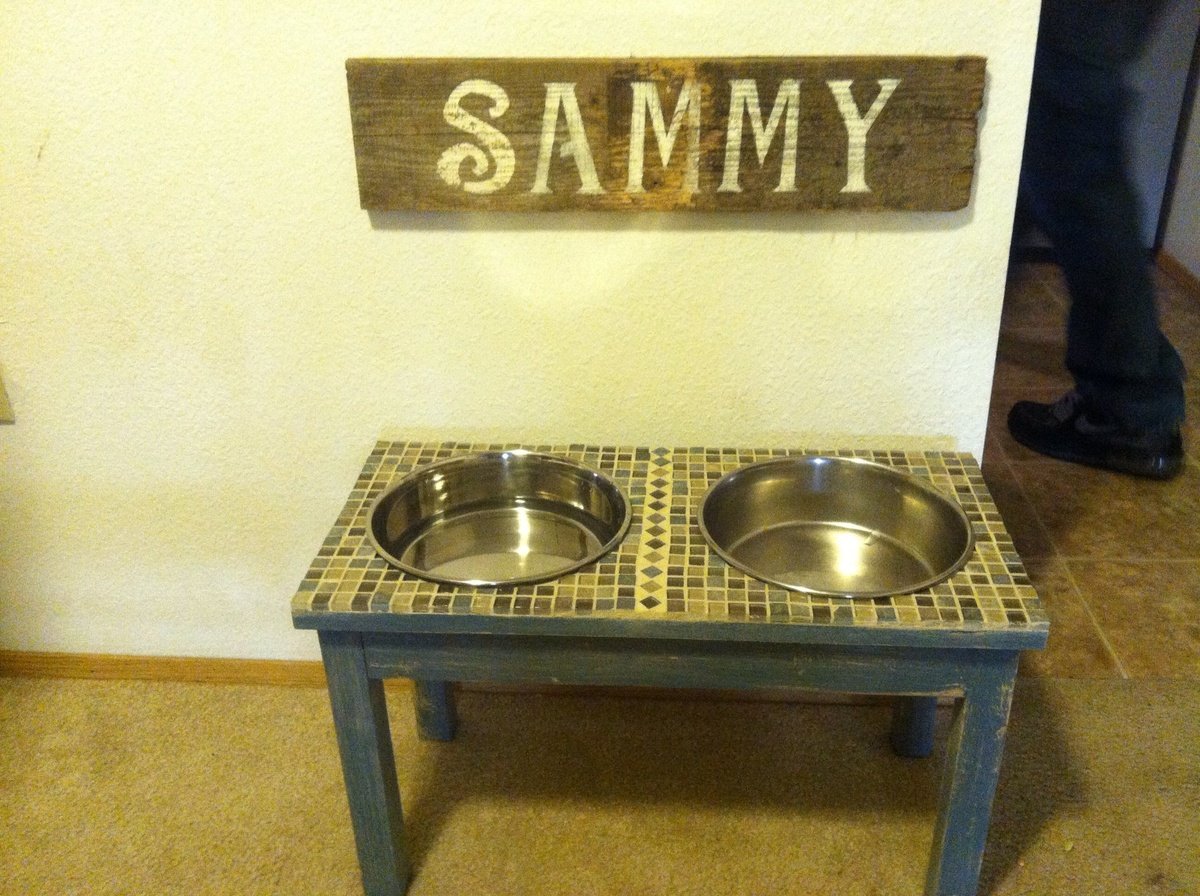
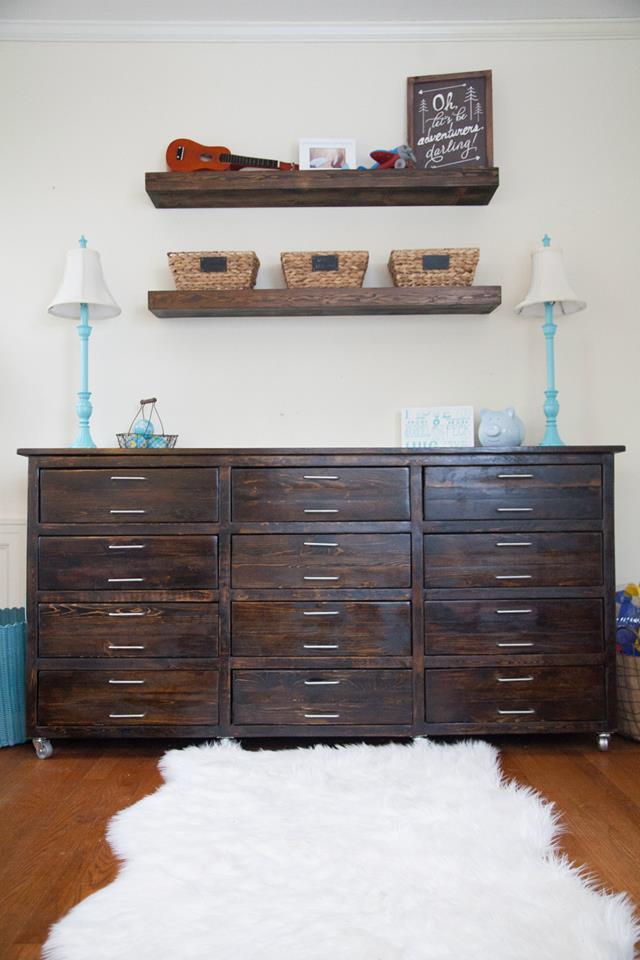
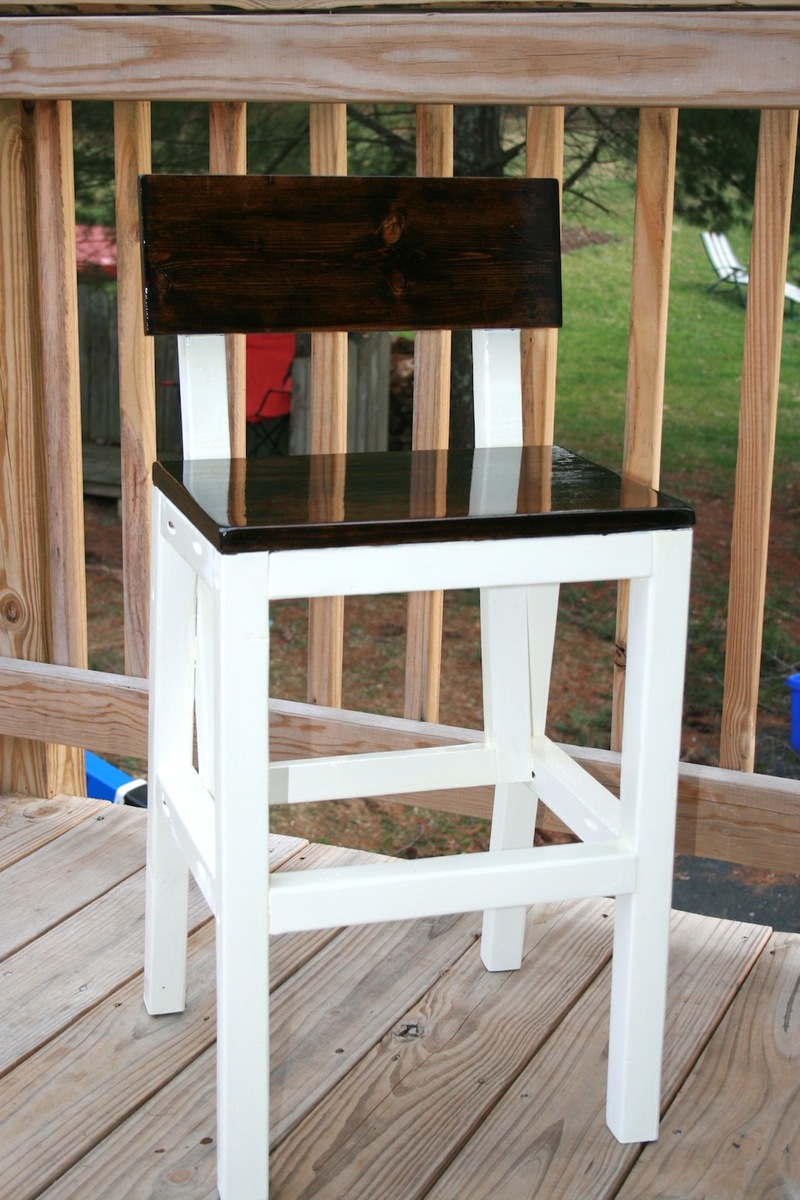
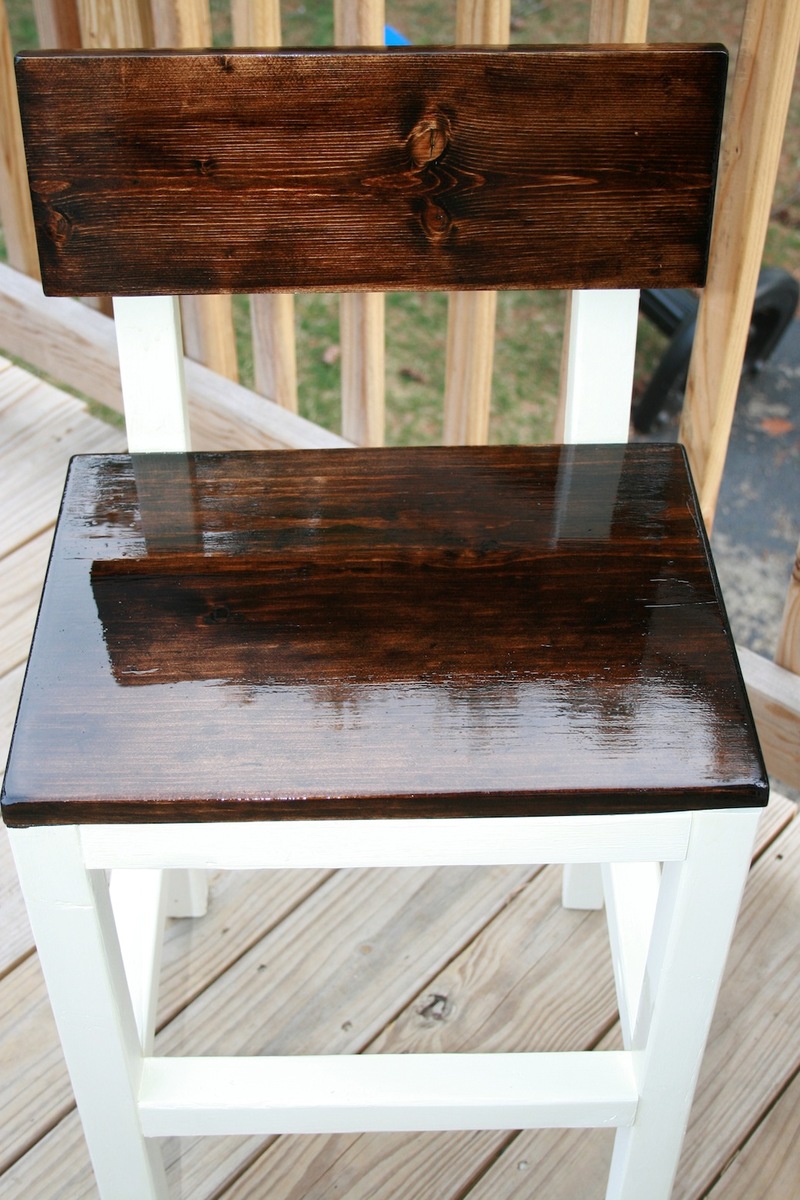
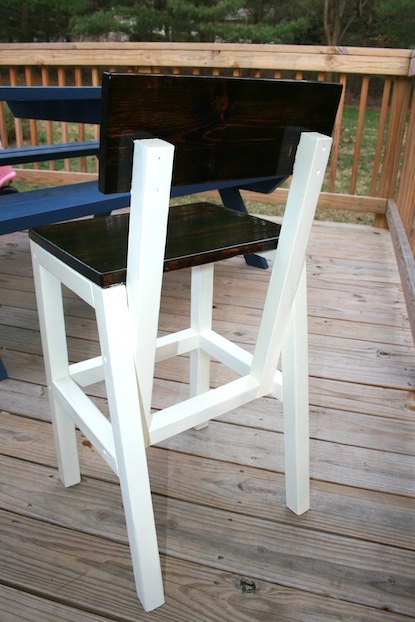
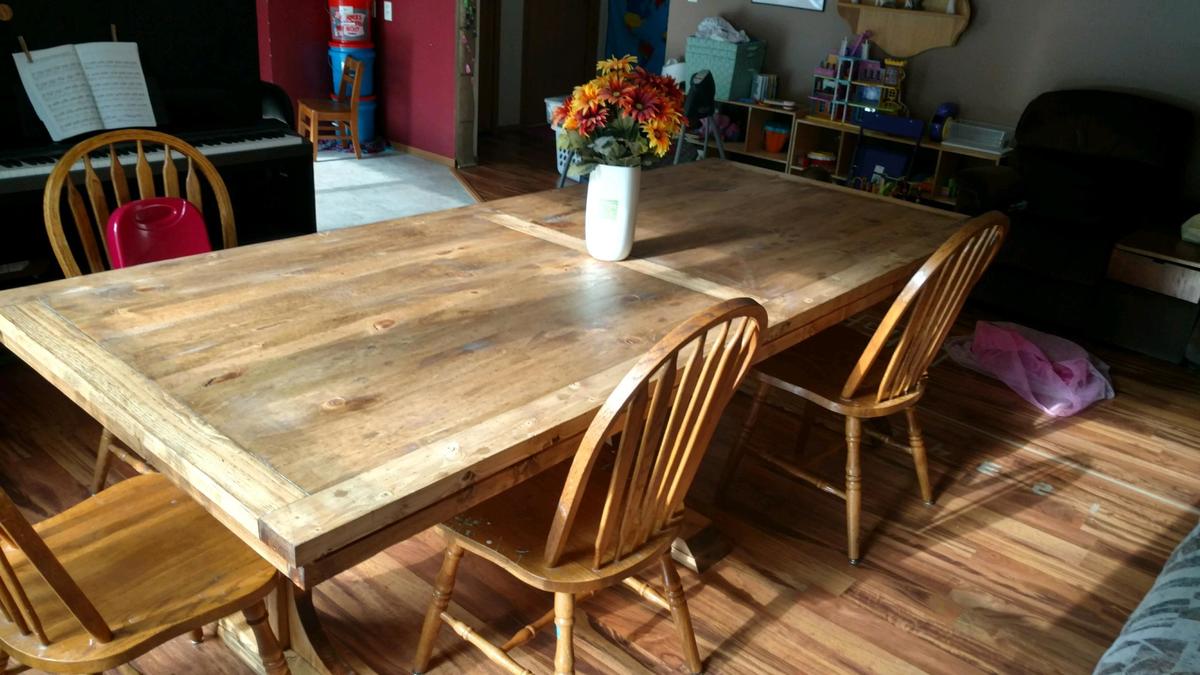
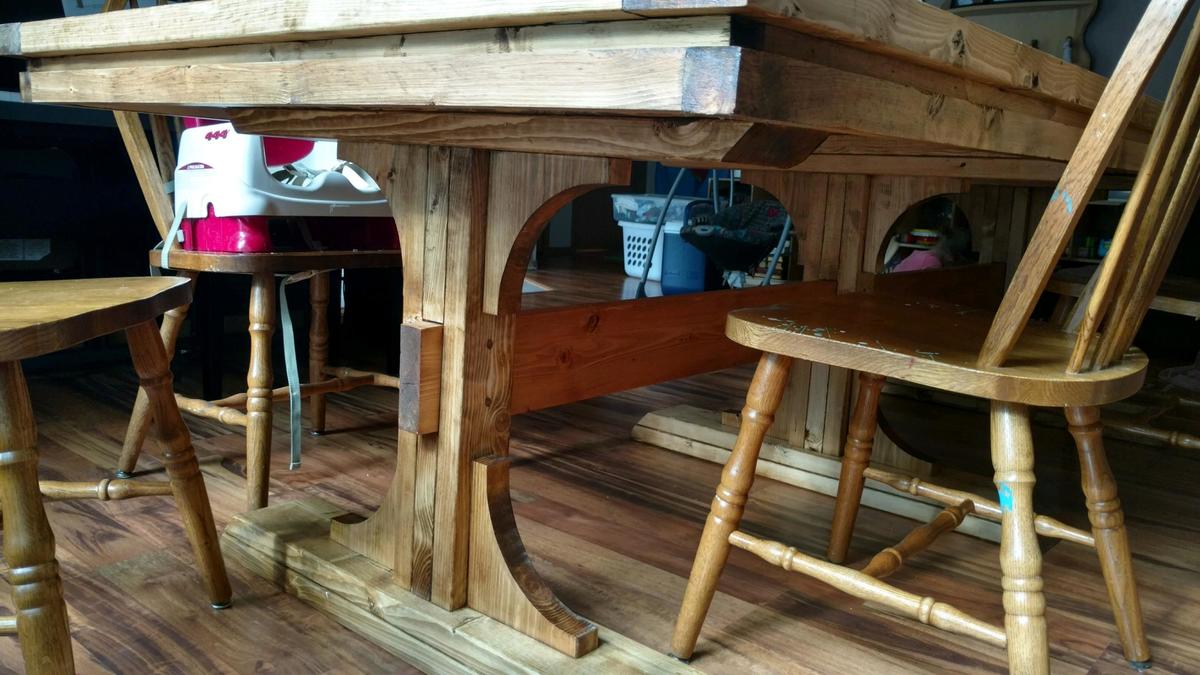
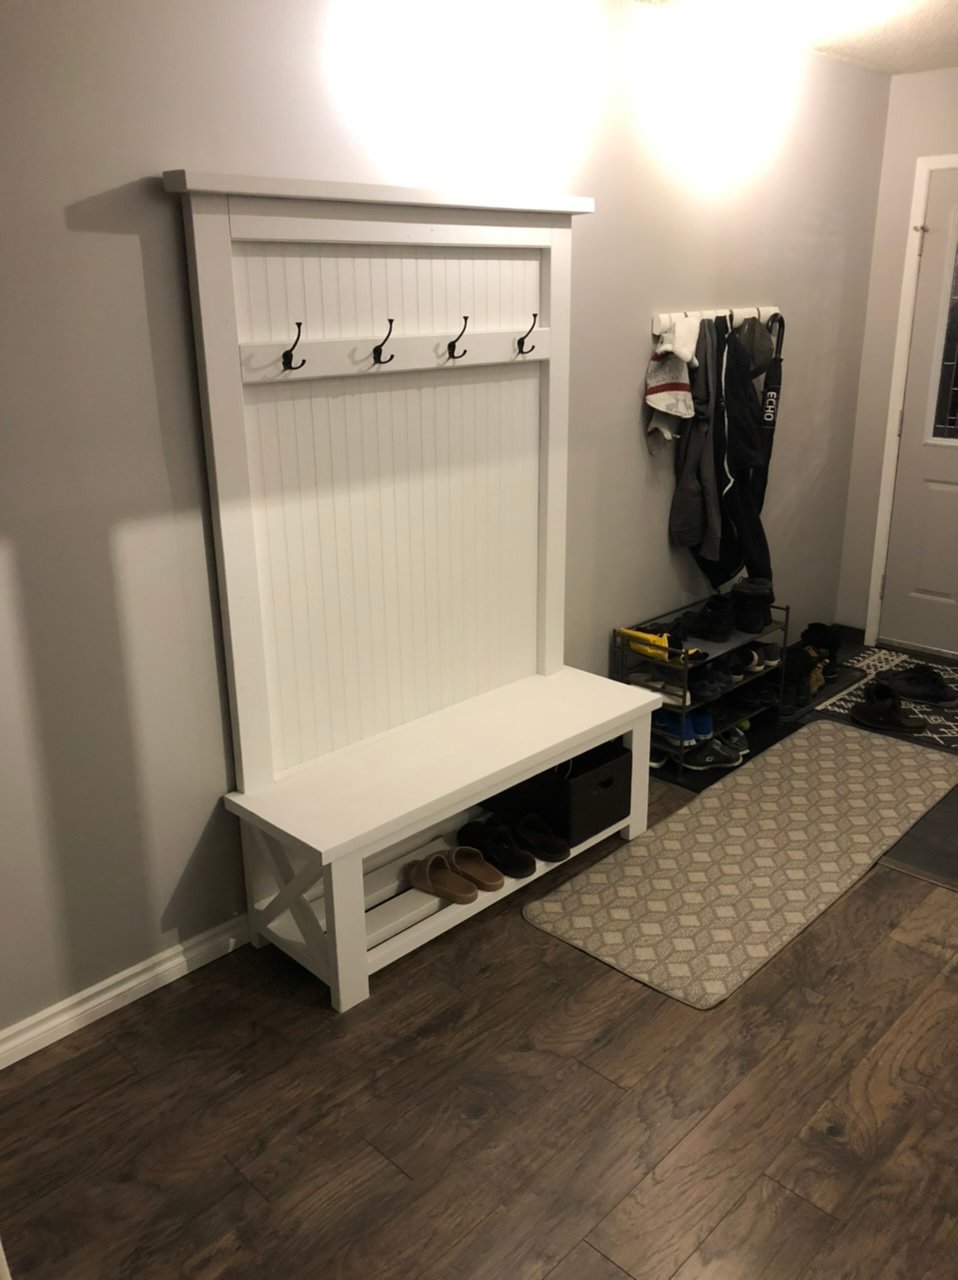
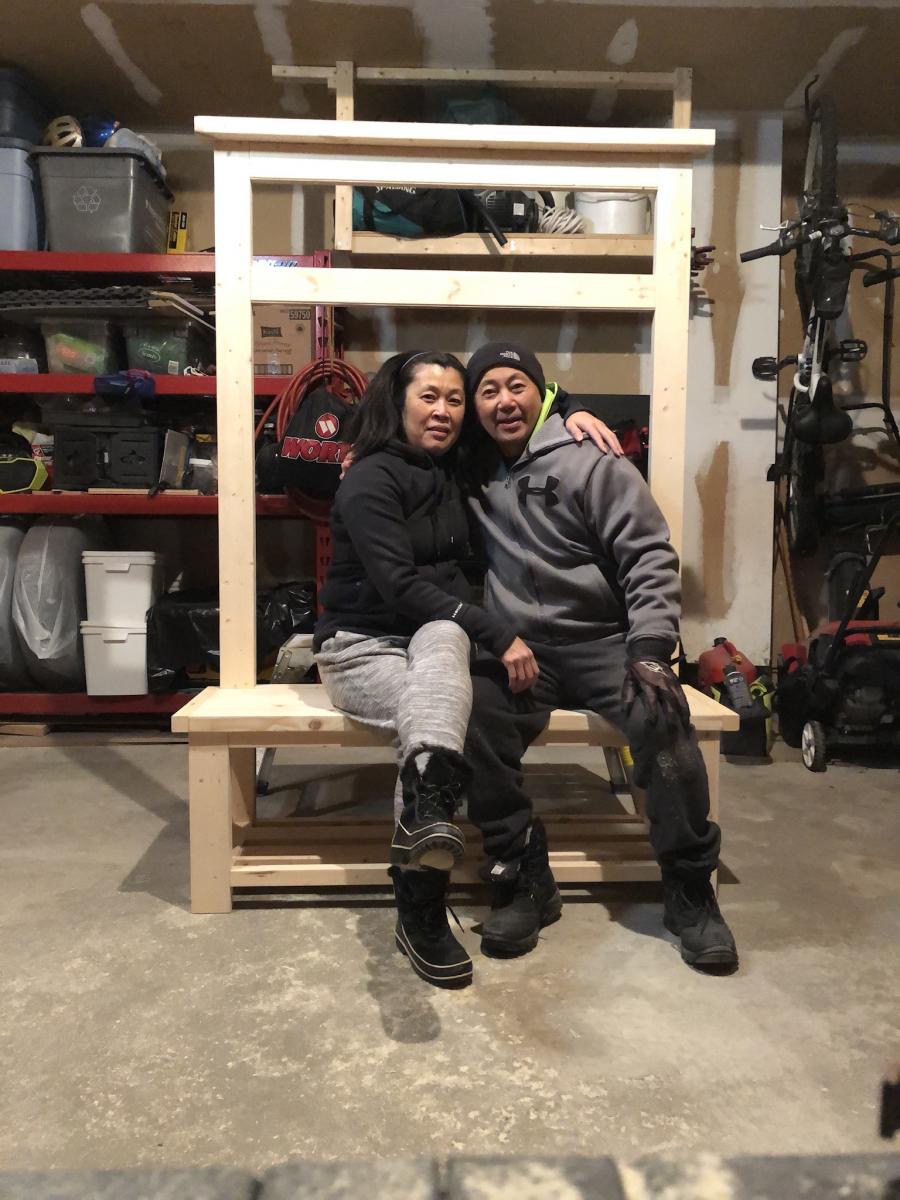
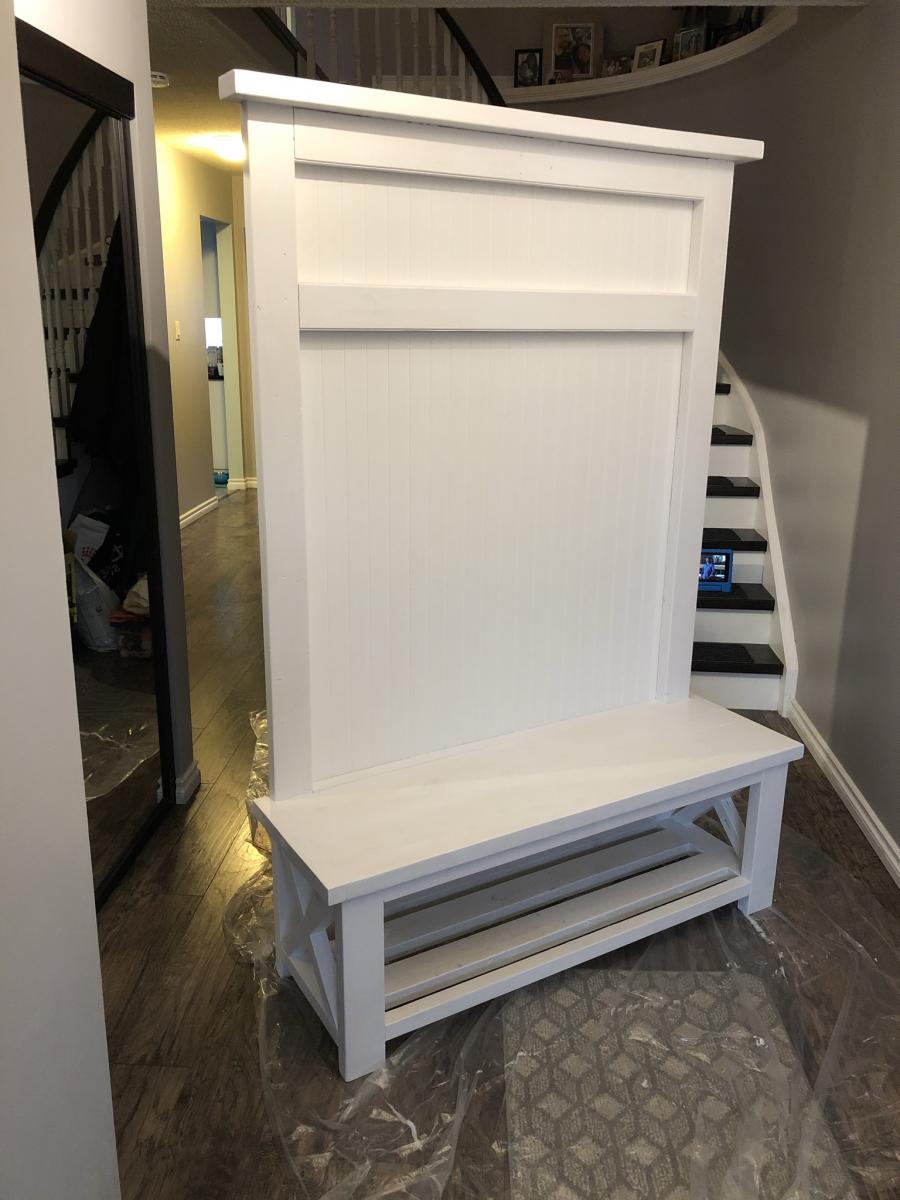
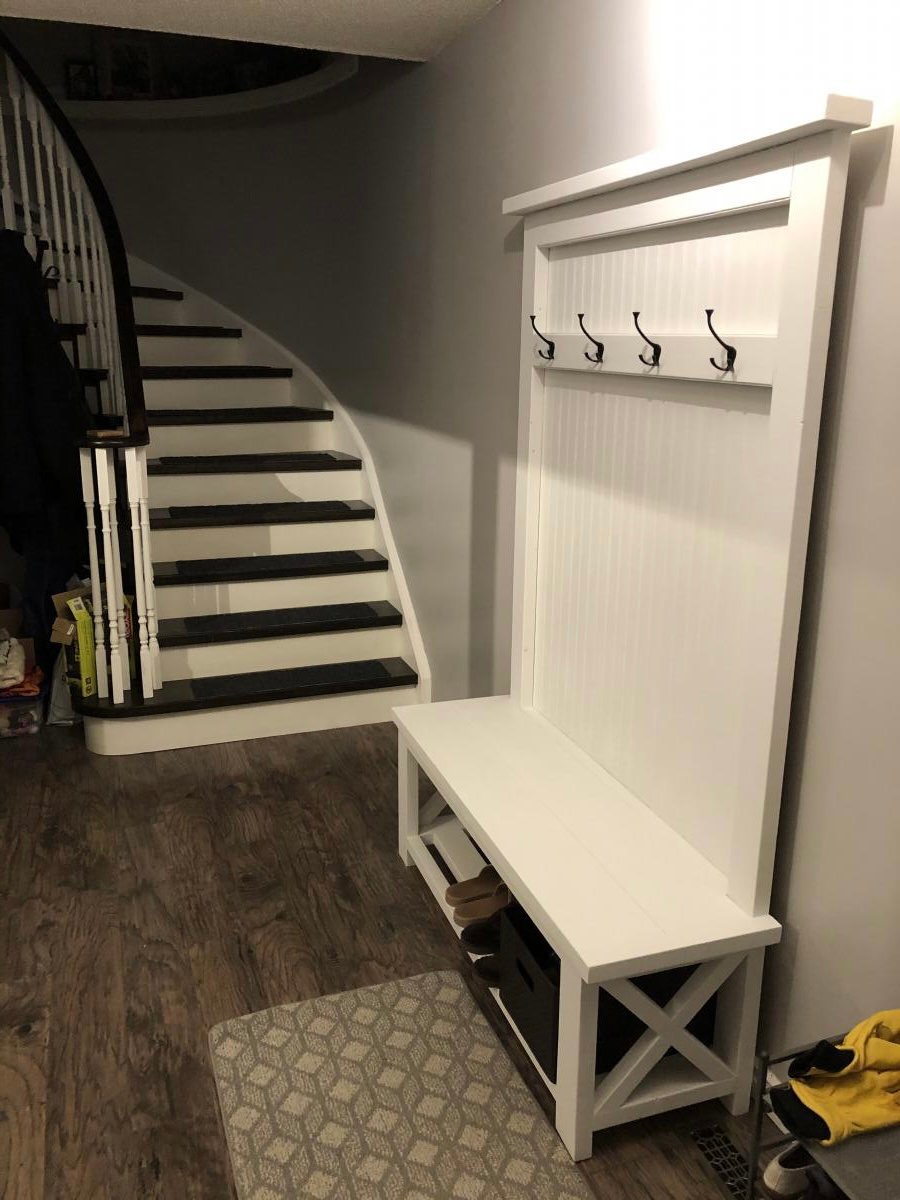
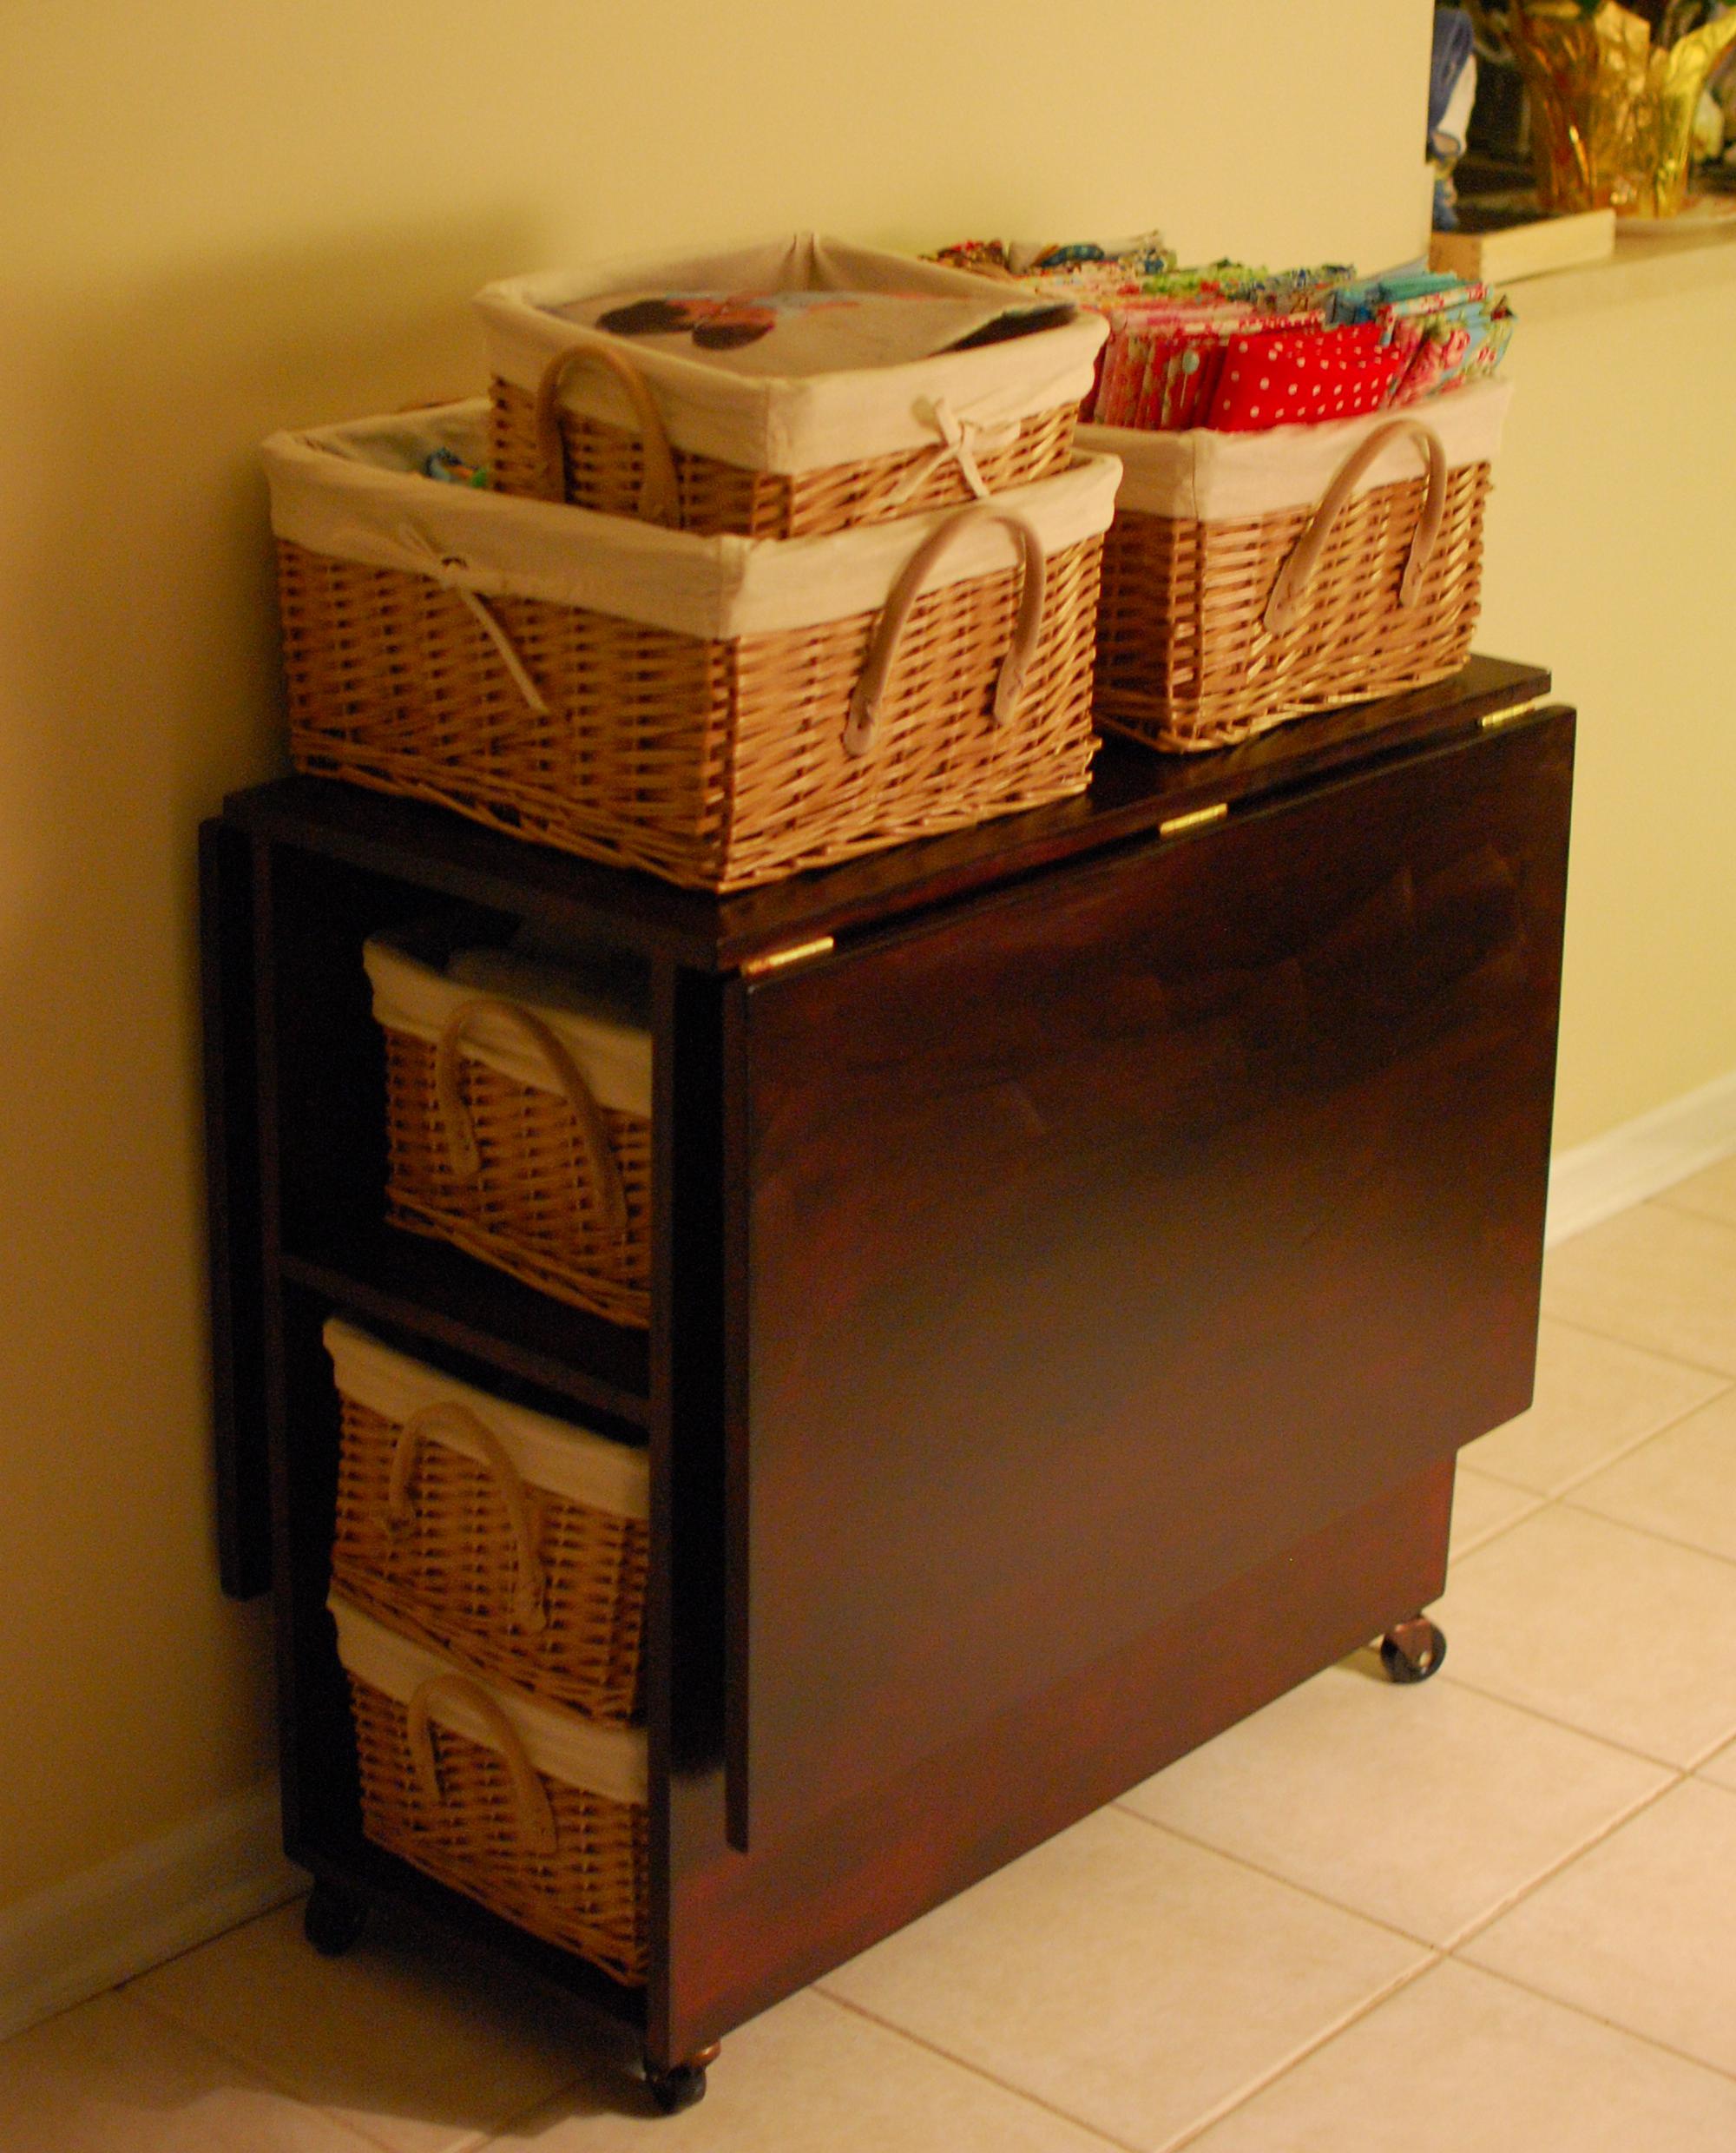
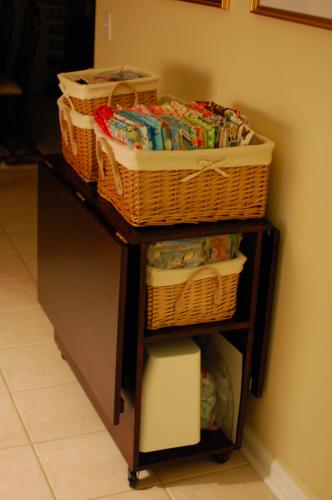
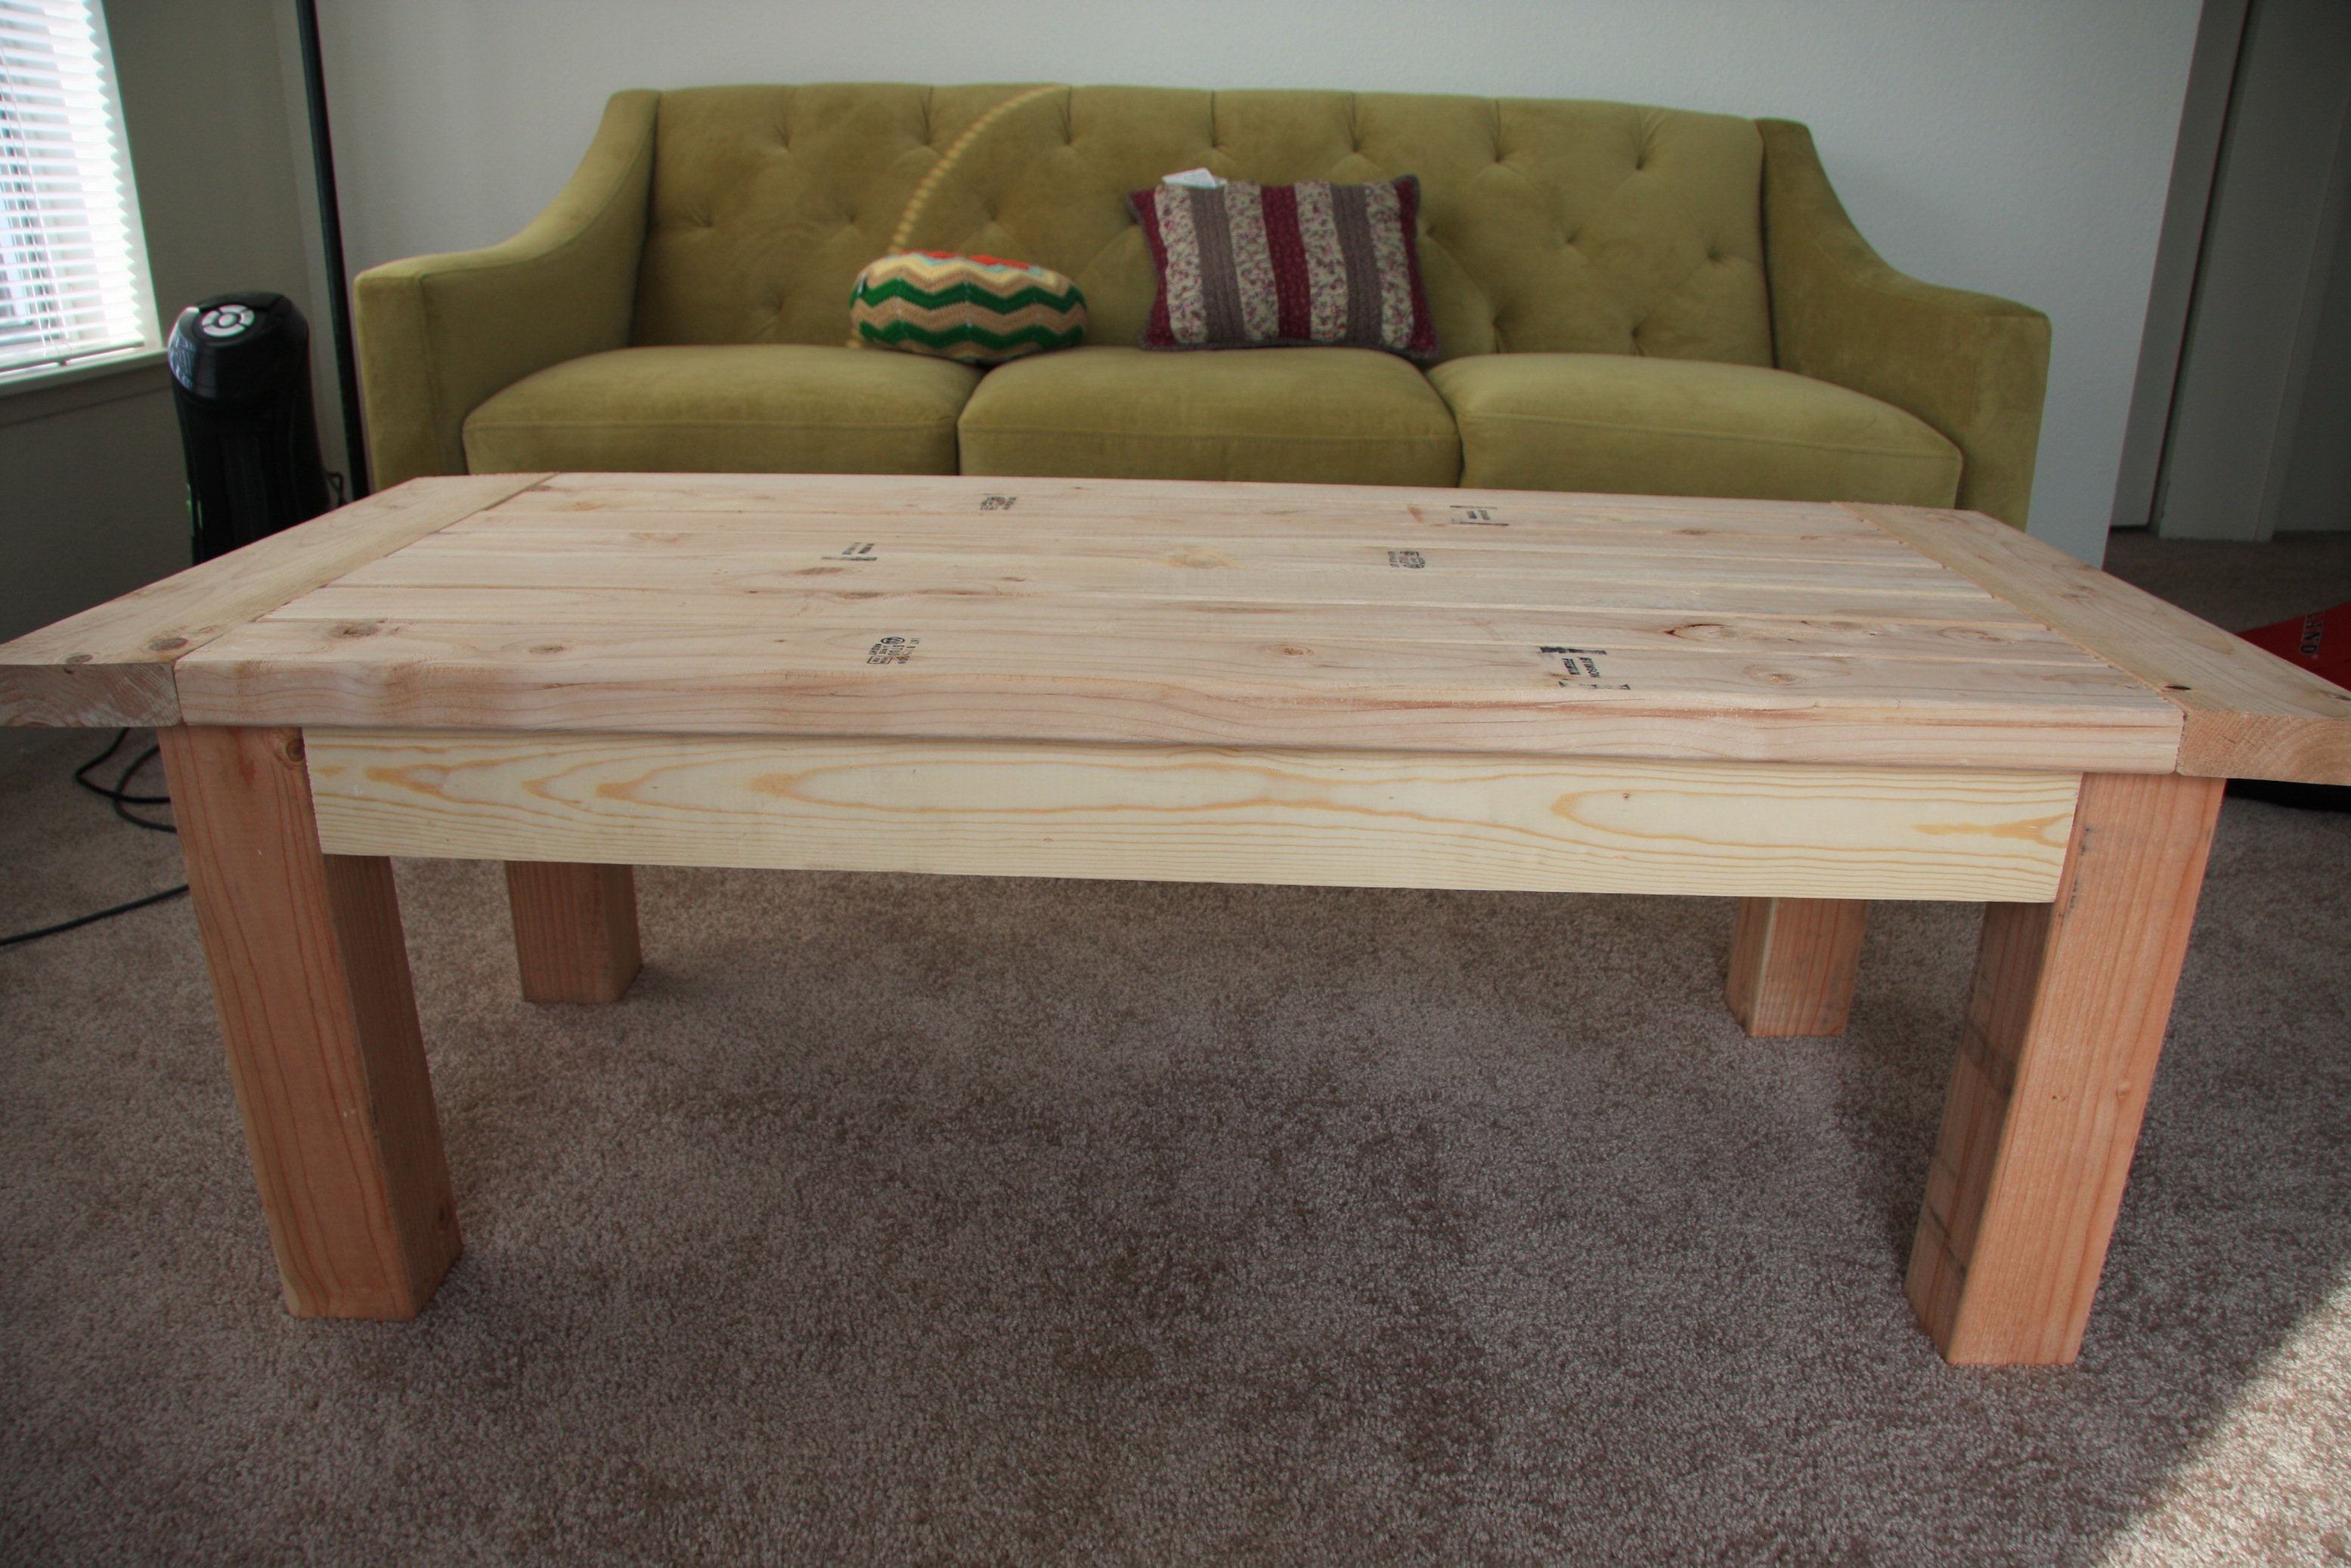
Large Dominoes from Pallets
This is a simple and fun project to make. The black set are 3" x 1.5". The xlarge pieces are 8" x 4".
More Info / Build Instructions:
http://www.instructables.com/id/Large-Dominoes-From-Pallets/
This is a simple and fun project to make. The black set are 3" x 1.5". The xlarge pieces are 8" x 4".
More Info / Build Instructions:
http://www.instructables.com/id/Large-Dominoes-From-Pallets/
My husband and I made the boys a seesaw a few months ago. We had been spending a lot of time working on our chicken coop and I snuck around to make something for the boys as a surprise. They named it Blue Blade and it has been a fun new addition to their playground. It was straightforward to make. I used 2x3s instead of 2x4s since they were so much cheaper, and it worked really well. I love how it has the extra hole so we can make it taller as they grow.
Ok, so I was looking for a new headboard and stumbled on the plans for this Upholstered Bed.
Being without my full compliment of work this winter, I figured, what the heck. I'll try it.
Off I went to Home Depot, bought the supplies and got started.
I should mention that this was my first time doing any sort of carpentry, I have never used a jigsaw, and I had to borrow all the tools.
I found this SUPER easy! I had the headboard support finished in under an hour. Then I took my time cutting the plywood, just to make sure I didn't make any mistakes.
**I should mention right now, if you are planning on using a heavy upholstery fabric like I did, when you cut out the headboard insert, make 2 cuts! I wasn't able to get the insert to lay flush because the fabric was so thick! (I have since taking the picture added decorative trim to hide the little gaps)***
Once I had my plywood cut, I had no problem attaching it to the frame. The upholstery was a 2 person job that took a little time and a lot of staples, but not difficult.
I chose to tuft the headboard insert, and am so happy I did. It was time consuming, but worth it in the end.
All said and done, this took me a little over a week to complete. I had the construction done within a day or two, but the upholstery was very time consuming.
I love my new bed!
This project was wonderfully easy to build and it is a sturdy step stool I feel will last for a long time. I was able to build it very quickly, with minimal assistance. Painting and finishing adds to the time but it's beautiful.
My take on the Grandy Sliding Door Console. I adjusted the size to fit under our 70inch TV and used old wooden windows as my door. I also added wooden furniture feet. Approximate dimensions are 66LX38HX23D.
Just a few of our Fancy X farmhouse tables. Along the way, we where able to put our own spin on the original plans by Ana White.
I built a 15" wide by 8' long outdoor patio bar with locking casters. I modified the stool design on Ana's website and stained both to match. I finished the top with stone tile and grout. This area has become the main gathering point in our backyard when entertaining.
My first project using Ana-white drawings, and also my first project of furniture. I am really happy with the results ! Thanks Ana !
Created my own version out this plan.
This is Ana’s beginner farmhouse coffee table. Was a blast to make and really enjoyed my first project
The twin beds that my boys were using took up way too much space in their small room so after much looking I found the Ana White site and this plan. The bed I made is per plan except for the addition of the side rails that slip fit onto the sides. When we change the sheets on the top bunk we just slip off the rail and stand on the lower bunk. We've had my two boys and three nephews all on the bed playing Xbox and it is rock solid!
This was built from the rustic storage bed plans i just tweeked it a tiny bit
Love this bed plan and design! Spend Friday evening cutting wood (about an hour) and most of Saturday sanding, adding pocket holes and assembling. It looks HUGE when you put it in the room, my hubby was like....ummmm..... ;-) but once everything was put away its perfect. My 4 year old I think said "its so amazing mom" about a dozen times. She ASKED to sleep in. HA! Parent win.
This bunk bed was made out the Camp Loft bed plans. With my daughter out growing her toddler bed, we really needed a "big girl" bed without giving up too much space. This was perfect. It was really easy to add an extra set of 2x6's around the bottom of the loft, and poof, it’s a bunk bed. The kids really love it and it is really strong. I weigh about 250 lbs and it doesn't even move when I get on the top bunk. To accommodate for the lower bunk, I raised it to 72” high. As you can see, I also added extra vertical supports on the top rails. I did this so all the weight on the top bunk wasn’t only supported by the 2x6s, but also the 2x4s as well.
I also painted it white becuase that matched the other furnature in the room better than staining it. To keep the wood from seeping sap all over the paint, I sealed it with BIN primer before painting it with latex paint.
I don’t have much experience building furniture, but this was extremely easy. The wood cost us around $100. Slightly more than the post said, but I added a few extra 2x4s and since comparable bunk beds are being sold for about $800, this was a steal. The plans were great and my son and I had a great time building it. Thanks for posting it
I built this table for our kitchen. Slightly modified the top for 3 - 2x8 and 2- 2x10 ripped down on each side to make the planks sit flush. Breadboard ends are 2x10 to give more room on the ends and the stretcher supports are on the inside to give more room as well. Notching was difficult, not the cleanest but they worked.
Final dimensions are 84.5 x 37 x 31
I decided to add this island to my kitchen as I had a lot of open space in my kitchen. It gave a lot more counter space and when I adjust the pot rack, it will open up an entire cabinet too! The body is painted the color my cabinets are about to become and the stain matches some other woodwork in the house. I applied polyurethane to the stained pieces and plan on using cutting boards to avoid the look of a beat up butcher block as well as the maintenance that goes with them! Wherever I could hide the edges, I used plywood instead of 1x8's as I had leftovers from a bench I made.
I love these chairs. I have made about 10 of them. I have several orders for 16 more. I use old fence planks for the seat and back. I also changed the back supports to 35 in. My husband is 6ft and he wanted to be able to rest his head back when he sits. Cutting the legs is the hardest part. I also changed the arms to jig holes so the Screws would not show.
I have been wanting a banquette for years and when I spied Ana's version in the post about Grace's birthday party, I knew I could do it. I waited for the plans, and yesterday, I got out the tools and in 6 hours (real time - including cooking meals for kids, potty breaks, and life in general) I had my bench done.
I am so pleased with it. I had all the fabric on hand already, and was able to buy batting, foam and pillow forms all 50% off at Joann's, plus 2 zippers for the blue cushions. The woman who was cutting my foam asked me what I was making, and I told her I was building an upholstered bench for my dining room. She said "wouldn't it be less trouble to just buy one already made?" Clearly she has no idea how much this would have cost me. As it stands, I had the lumber and fabric on hand, so my total purchase price was just over $95.00. I would estimate the cost to build to be about $200.00 for everything, depending on how expensive your fabric is.
I love to sew, so I had no problem with the fabric portion of the project, though I did as Ana did and did not upholster the back of the bench. Instead of adding a piece of fabric across the back of the frame, I extended the side fabric by about 6 inches on each side and stapled it to the back. I hope that makes sense. I used a metal cleat to hold the seat back in place. I also used 3 L-brackets to attach the bottom to the frame. I think people will slide into their seat and I didn't want the seat cushion to move.
Not bad for a few hours work!
This project would be an easy starter project for building, though it is a little more advanced when you factor in the sewing. Here is the tutorial I used for the toss pillow cushions: http://sewmamasew.com/blog2/2011/02/add-a-zipper-to-your-pillow/, and here is another from the same blogger for boxed cushion covers (just leave the bottom off of yours for this project, since it will be stapled to the plywood, skip the zipper and handle, and add piping if you want to fancy your cushion up): http://sewmamasew.com/blog2/2008/07/summer-sewing-perfectly-portable-cu…
Thanks Ana for the constant inspiration!
I decided on the Fillman Platform bed, for my daughter. It was a basic and simple style, the plans were well thought out, and the shopping list was a godsend. My daughter picked out a dark stain as well, which made the wood look really pretty. We broke up the platform and the headboard into two different days (so the stain would dry).
Love the bed!