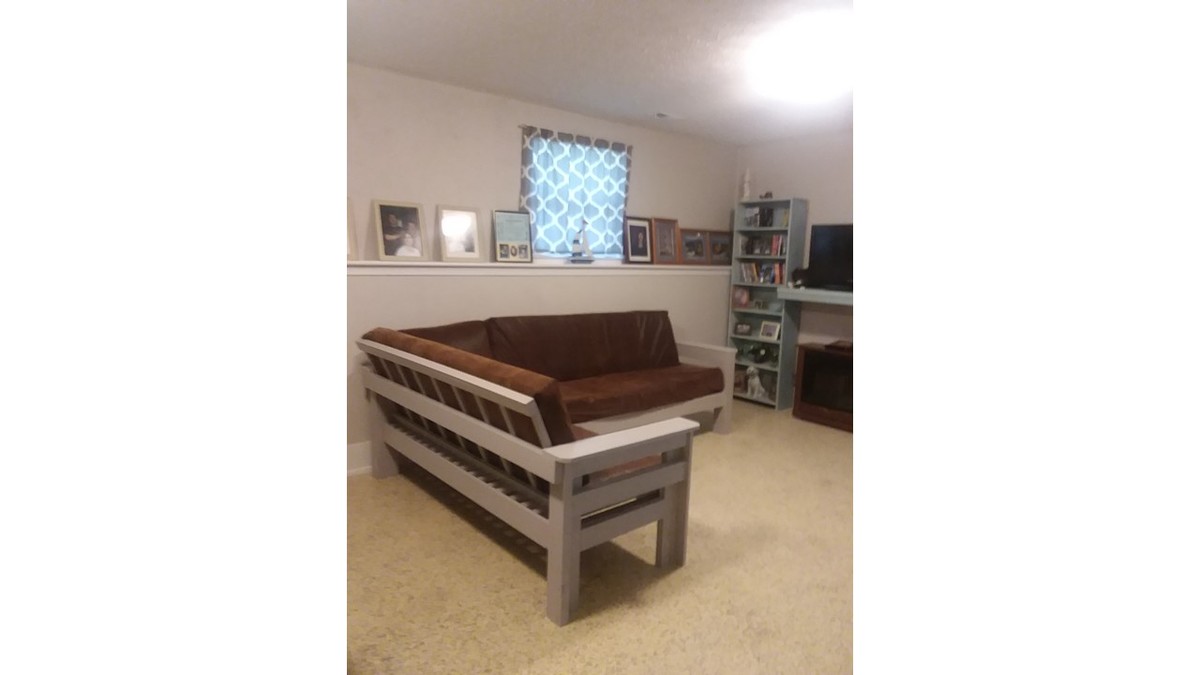
This project evolved from us purchasing the wrong foam to go under 4 area rugs. After it didn’t work for the first rug, we had 3 more rolls of the stuff that we couldn’t take back to the store (we had waited too long to do a return). I originally had intended to buy an inexpensive sectional sofa for the downstairs family room, but with all this foam staring at me, I decided to put it to use and make sofa cushions. There was enough foam to do a whole sectional!
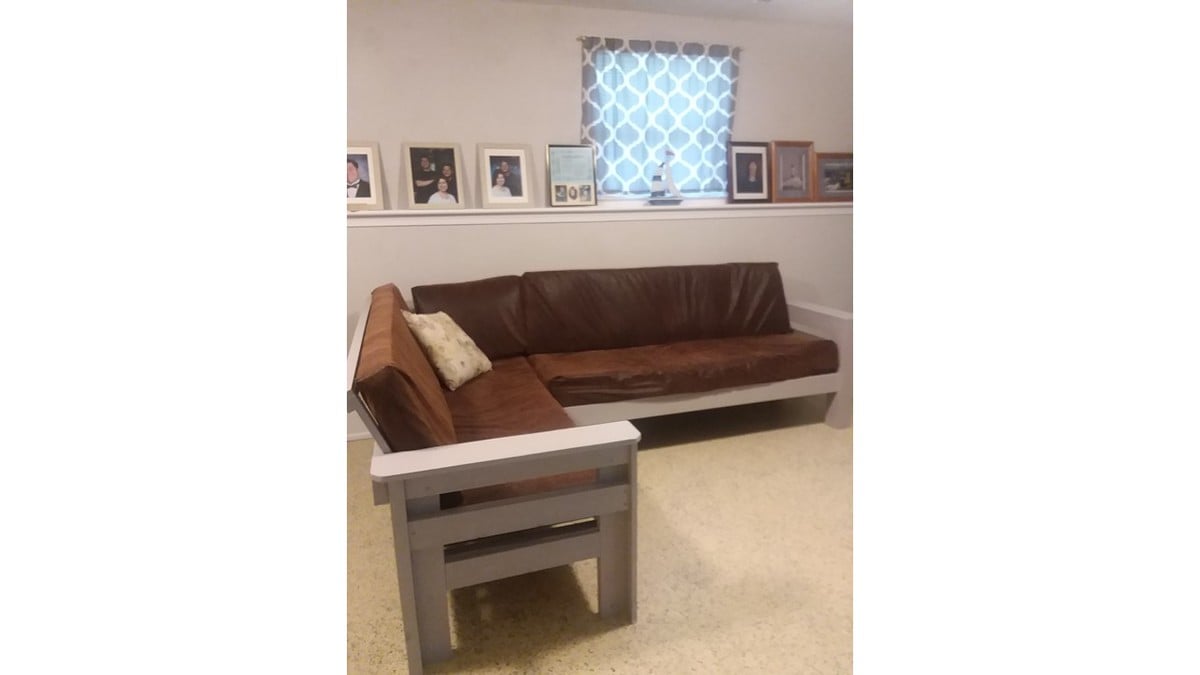
The sofa frame is based on Ana’s Outdoor 2x4 Sectional sofa. I adjusted the size, because the fabric I wanted to use was 54” wide, and that would fit nicely around a 22” deep x 4” thick cushion. Each cushion is 11 layers of the foam (seat cushions: 67 x 22 x 4, backs: 67 x 18 x 4). That length for the cushions fit exactly into the 8 yards of fabric available on the bolt. The next week I ended up going back for some more fabric for the corner cushion and an ottoman that's in work.
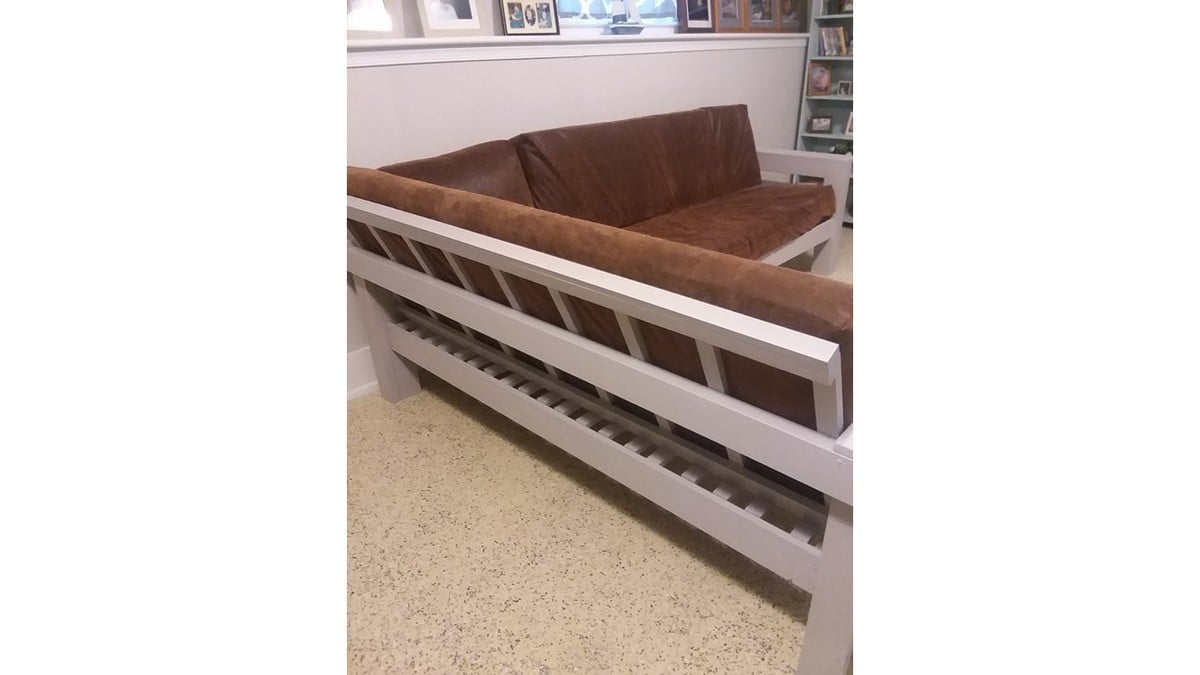
I had the frame assembled and was ready to add the final upper back pieces, when Hubby suggested we give it a slanted back. That required a little re-engineering and a couple of extra boards on the back and armless end. Instead of using 2x4s the full length for the seat, I had used some 1x2 furring strips reclaimed from another project. Also used some of those for the upright pieces for the backs. Added some 1x6 to top the arms and ½ x 3 ½” craft boards to the front to hide the cut 2x4 ends.
The cushions are covered in a polyester faux tooled suede (fabric from Hobby Lobby). The cushion covers are slightly loose on purpose, to give the nice worn squishy look that a real soft leather sofa cushion would have.
It’s surprisingly comfy and we love the look!