Community Brag Posts

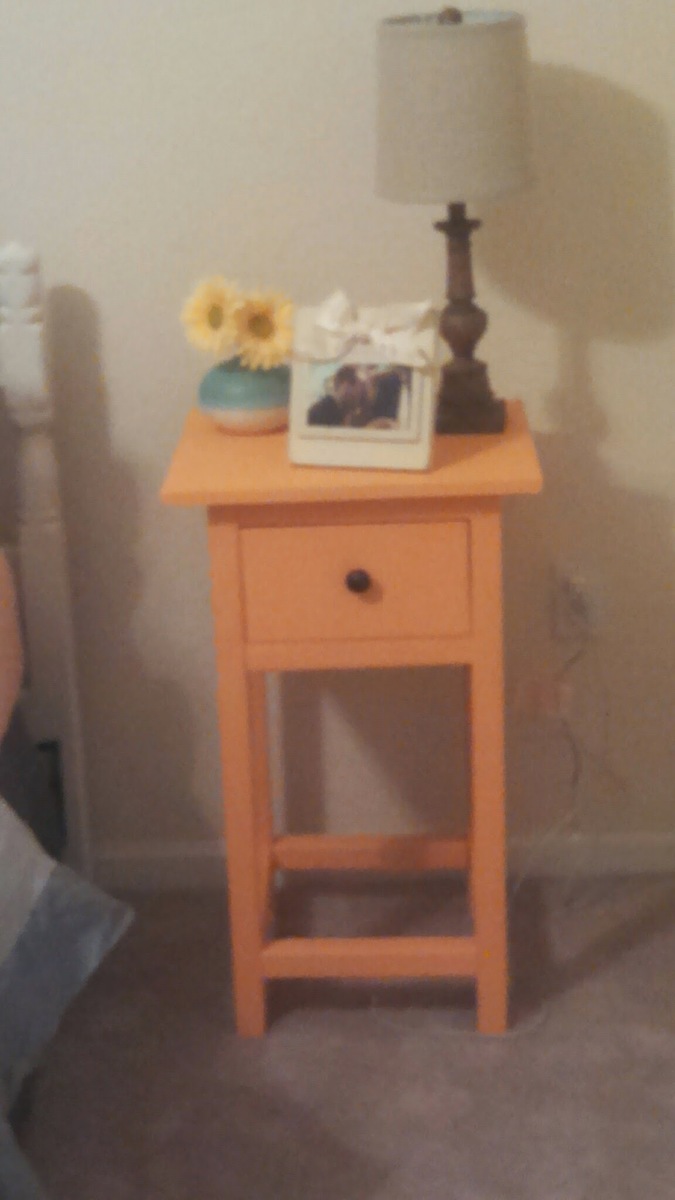
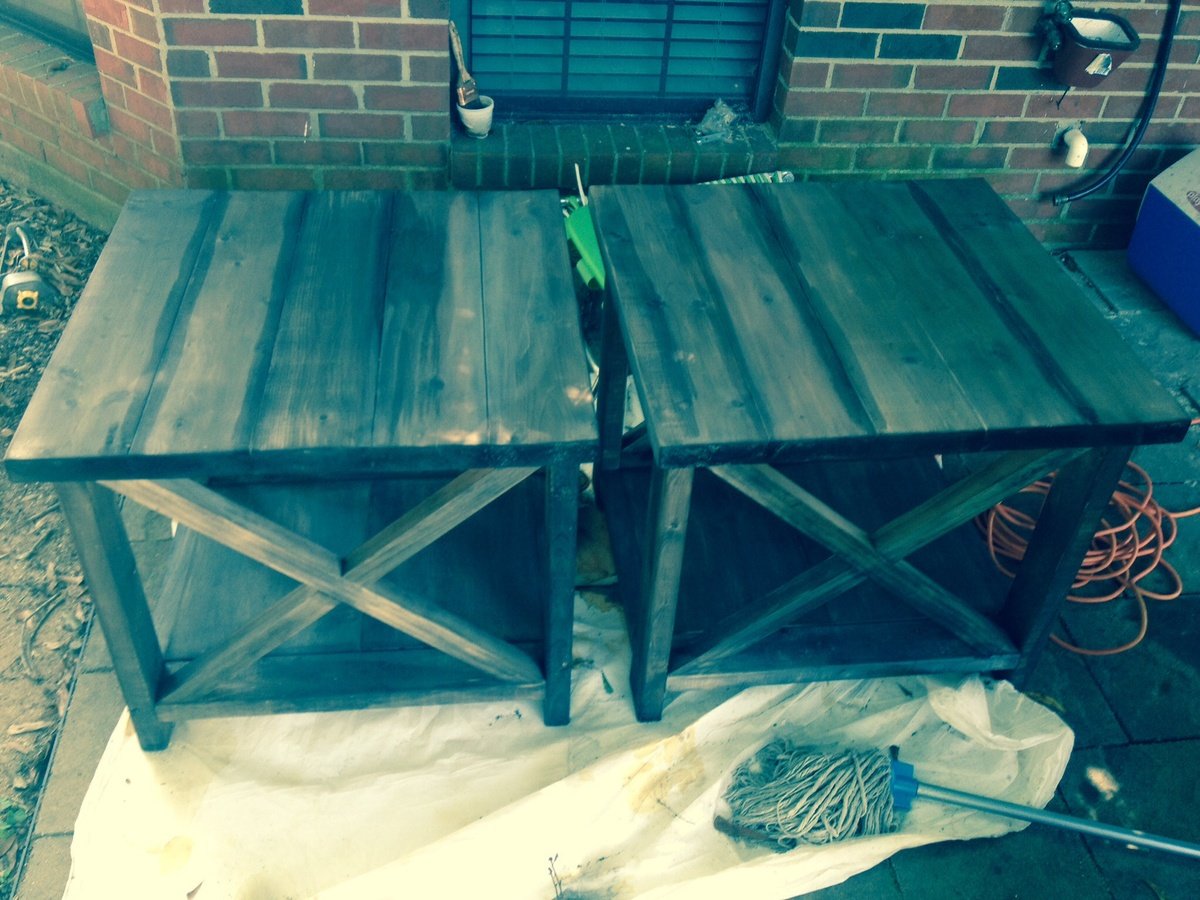
Nightstands Per Daughter's Specifications From Ana's Plans
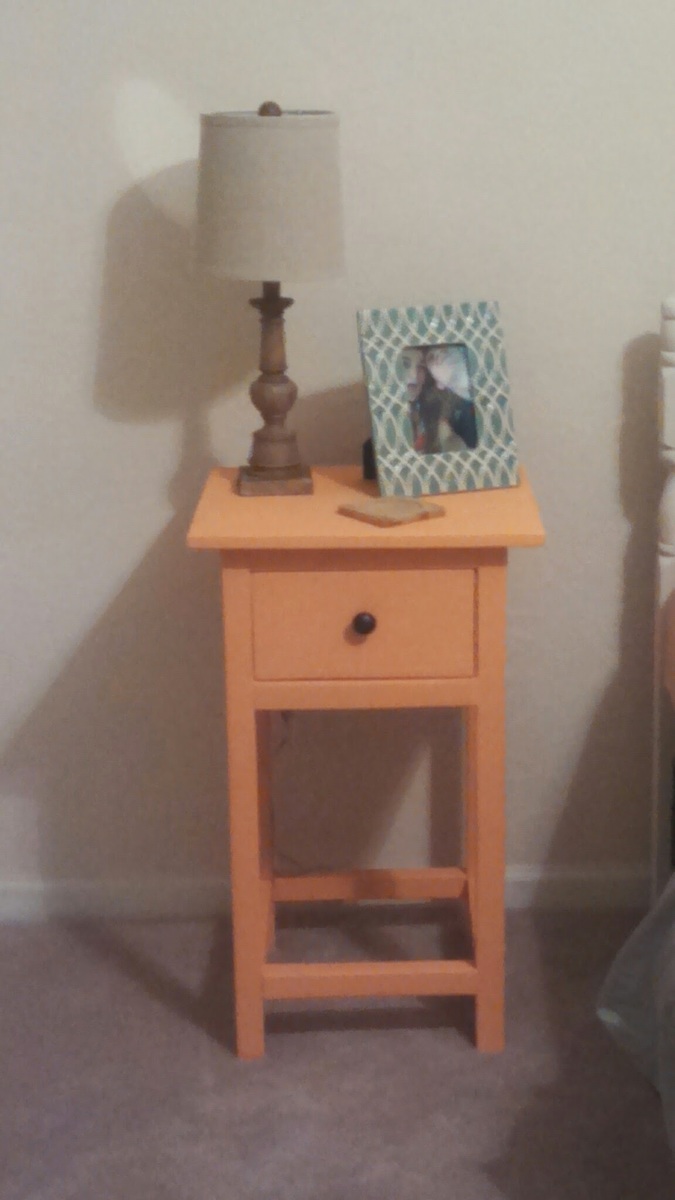
Our newlywed daughter was searching for nightstands for their new home. When we gave her a Daddy gift card for the Ana-White plans Nightstands she accepted as she would be able to decorate per specification and not because of some store color. She also received a superior product to what she was shopping.
Estimated Cost
Estimated cost for both is less than $75.00
Estimated Time Investment
Weekend Project (10-20 Hours)
Finish Used
Painted per our daughter.
Recommended Skill Level
Beginner
Comments


Piano Desk

Step 1
Getcha a FREE PIANO and some help to move that heavy sucker! You can find these pretty easy on Craigslist.
Step 2
Get a hammer, pry bar and a sawzall and start taking this piano apart. Make sure to wear safety glasses and gloves because those strings will pop you good if you're not careful.
Step 3
Sand down the pieces you are going to use. If the piano has laminate on it leave it if at all possible. If it's already curling up then you're going to want to invest in a power hand planer.
Step 4
Assemble the studio station according to your equipment you'll be using.
Step 5
Stain, Paint or just poleyurathane to your liking.
Step 6
Make some music! You can buy my album on Itunes or wherever you download your music. FYI! There are 2 Jonesey's. One uses profanity. This is NOT me. None of my music will ever have profanity in it.
Jonesey-My Favorite Day-EP https://itunes.apple.com/us/album/my-favorite-day-ep/id1087791540


Estimated Cost
$40
Estimated Time Investment
Weekend Project (10-20 Hours)
Recommended Skill Level
Intermediate
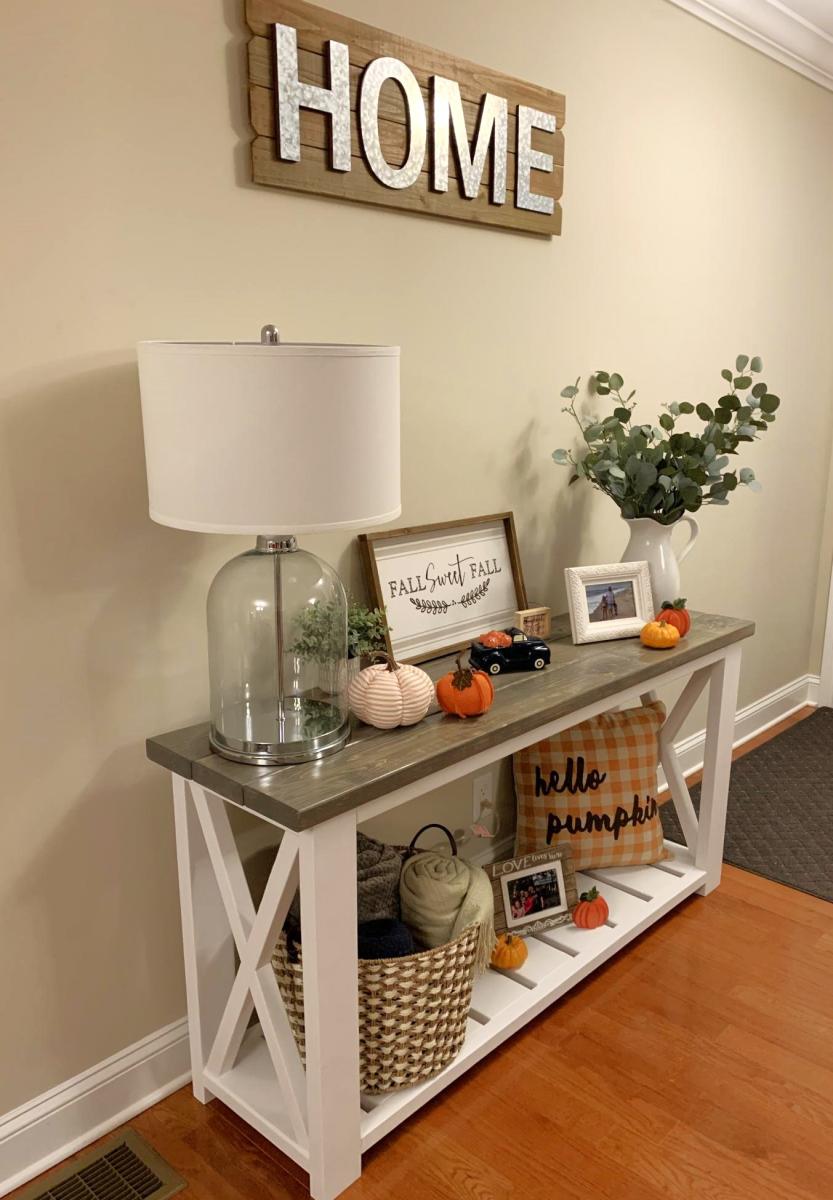
Gray Farmhouse Console Table
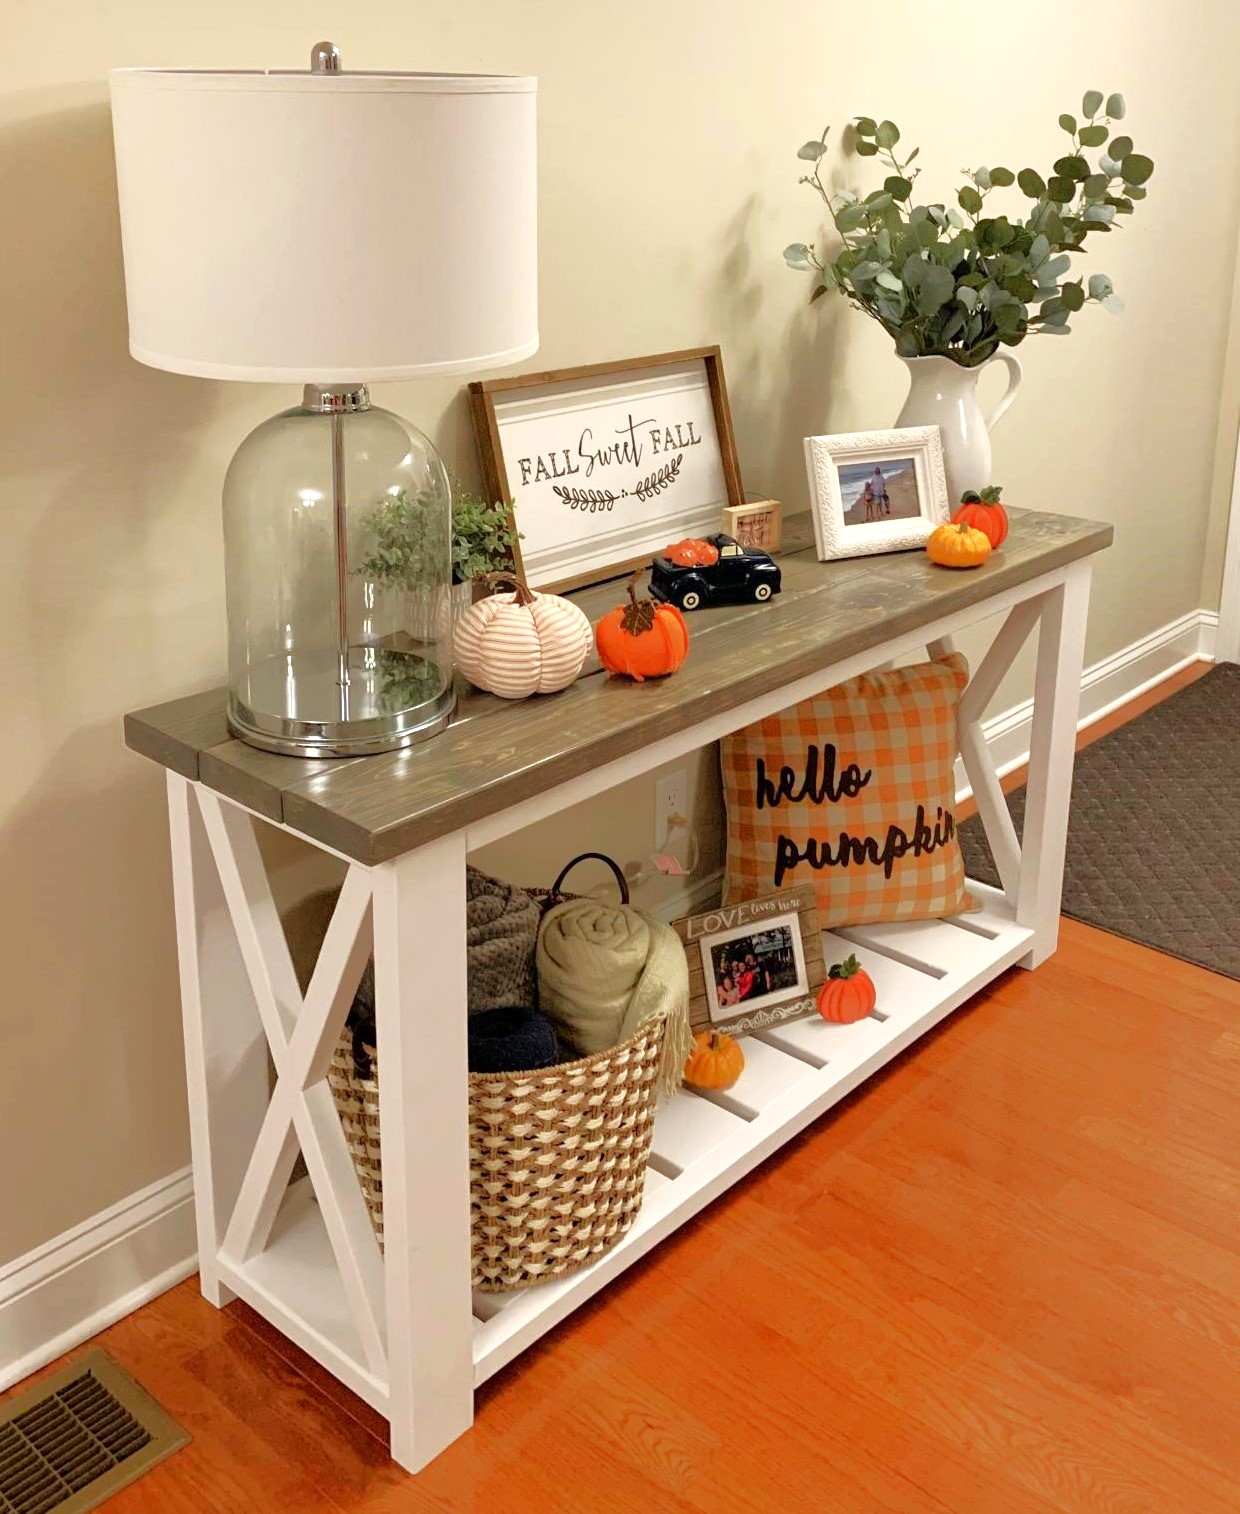
Happy Fall Y’all. Love the Gray / White Farmhouse Colors. I can share the plans I modified for this build if anyone wants to build their own .
Built from Plan(s)
Estimated Cost
$50
Estimated Time Investment
Day Project (6-9 Hours)
Finish Used
Gray Stain, White Paint
Recommended Skill Level
Beginner
Comments
Sat, 08/22/2020 - 08:33
Plans for console table
Hello could you please share the plans for me. Want to duplicate your awesome work.
Sat, 08/29/2020 - 12:33
Perfection!
I believe this is JUST what I came here looking for! Please share the plans and dimensions. :)
Sun, 10/25/2020 - 14:31
Hello! I’d like the plans &…
Hello! I’d like the plans & dimensions for this as well! Thank you so much! Turned out AMAZING!
Thu, 06/17/2021 - 17:40
This is exactly what im…
This is exactly what im looking for. Can you please share your plans 😍
Sun, 08/08/2021 - 15:36
Hi Ana can you please share…
Hi Ana can you please share your plans for this with me? Thank you
Wed, 10/13/2021 - 19:36
Can you please share the…
Can you please share the plans with me? Thank you!!

Mon, 01/31/2022 - 03:50
Plans for Grey Farmhouse Table
Lovely build. I would love to receive the plans for this particular project please? Thank you!!
Wed, 09/11/2024 - 13:07
Absolutely stunning!
I absolutely love this console. Would you please share your plans with me? I'm hoping to build this project with my dad.
Seasonal And Holiday
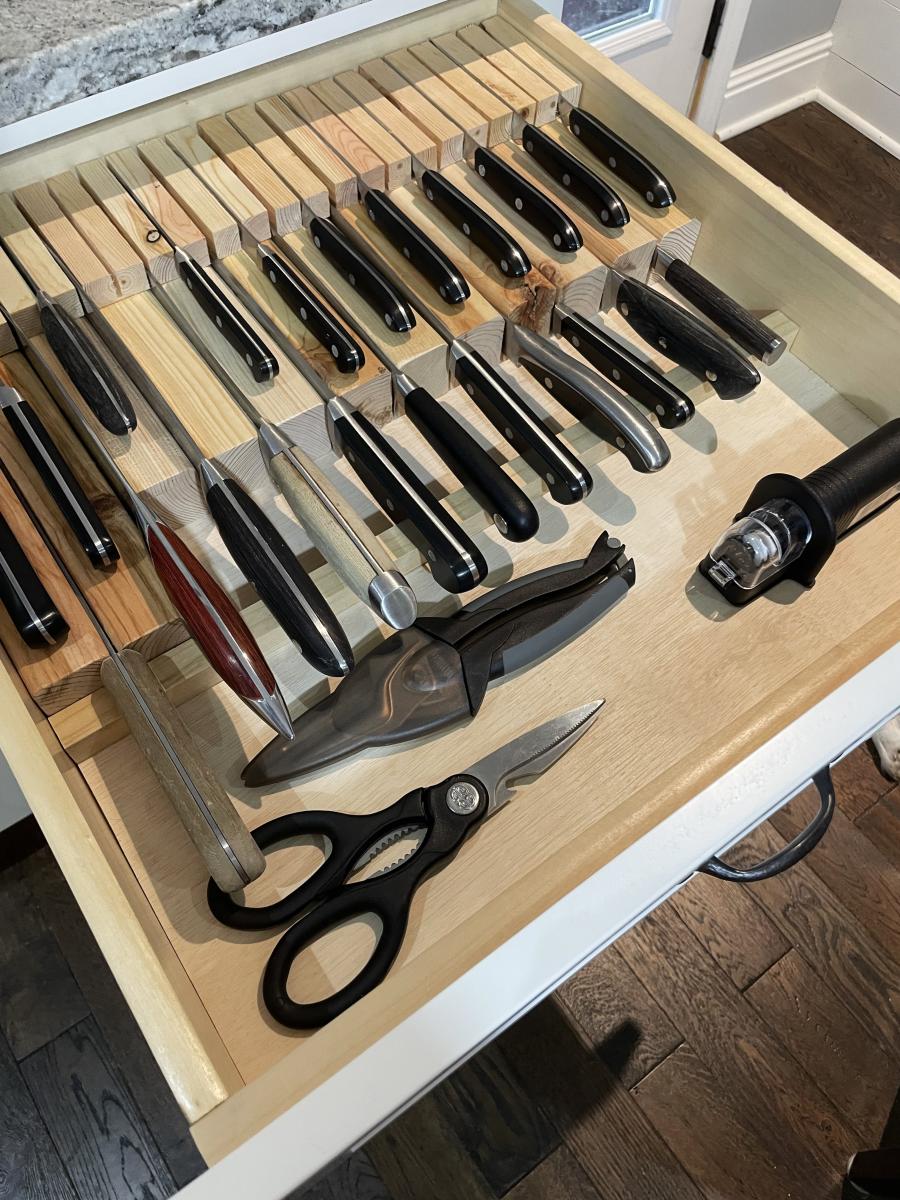
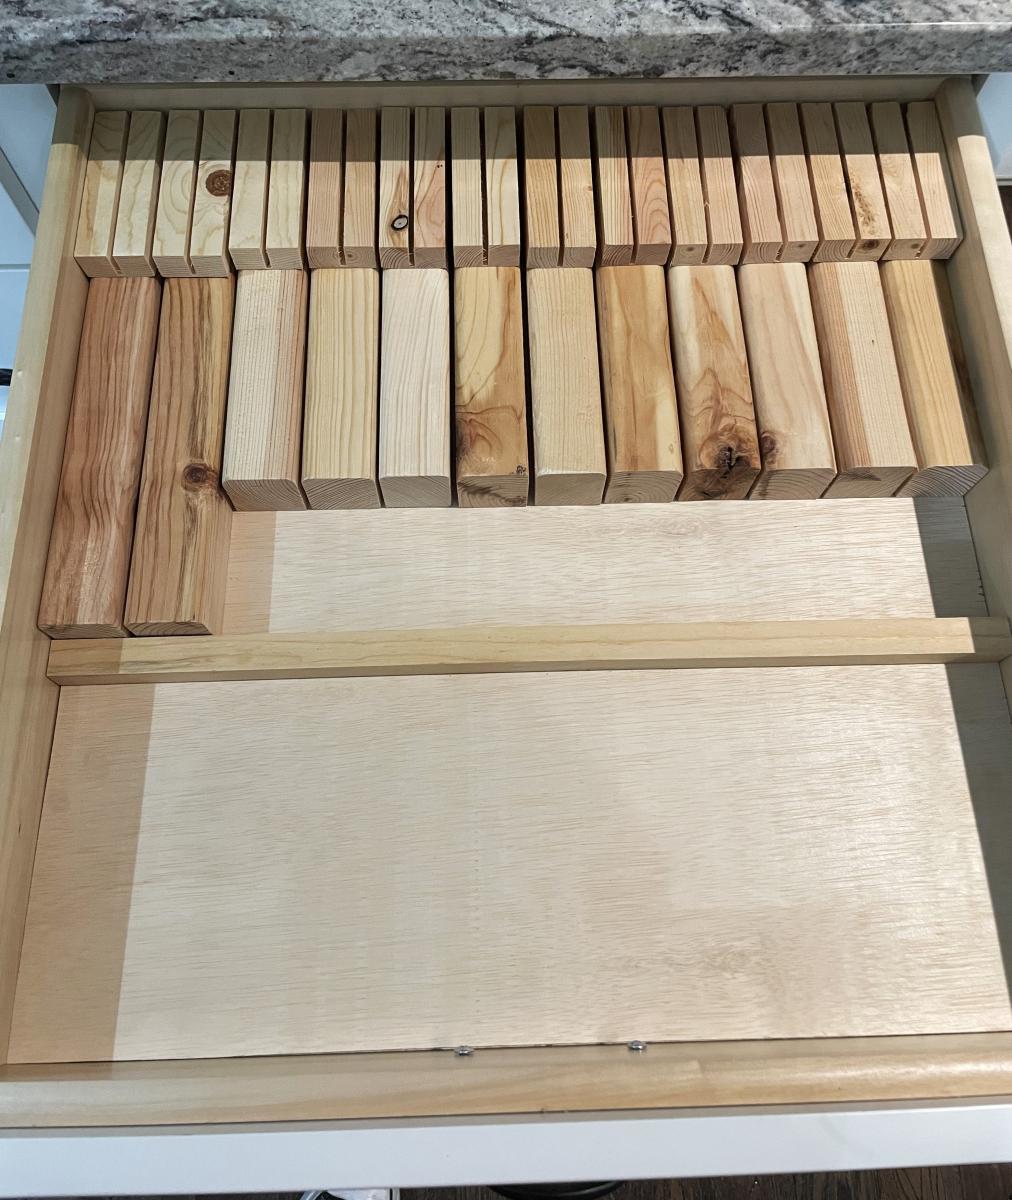
In Drawer Knife Organizer
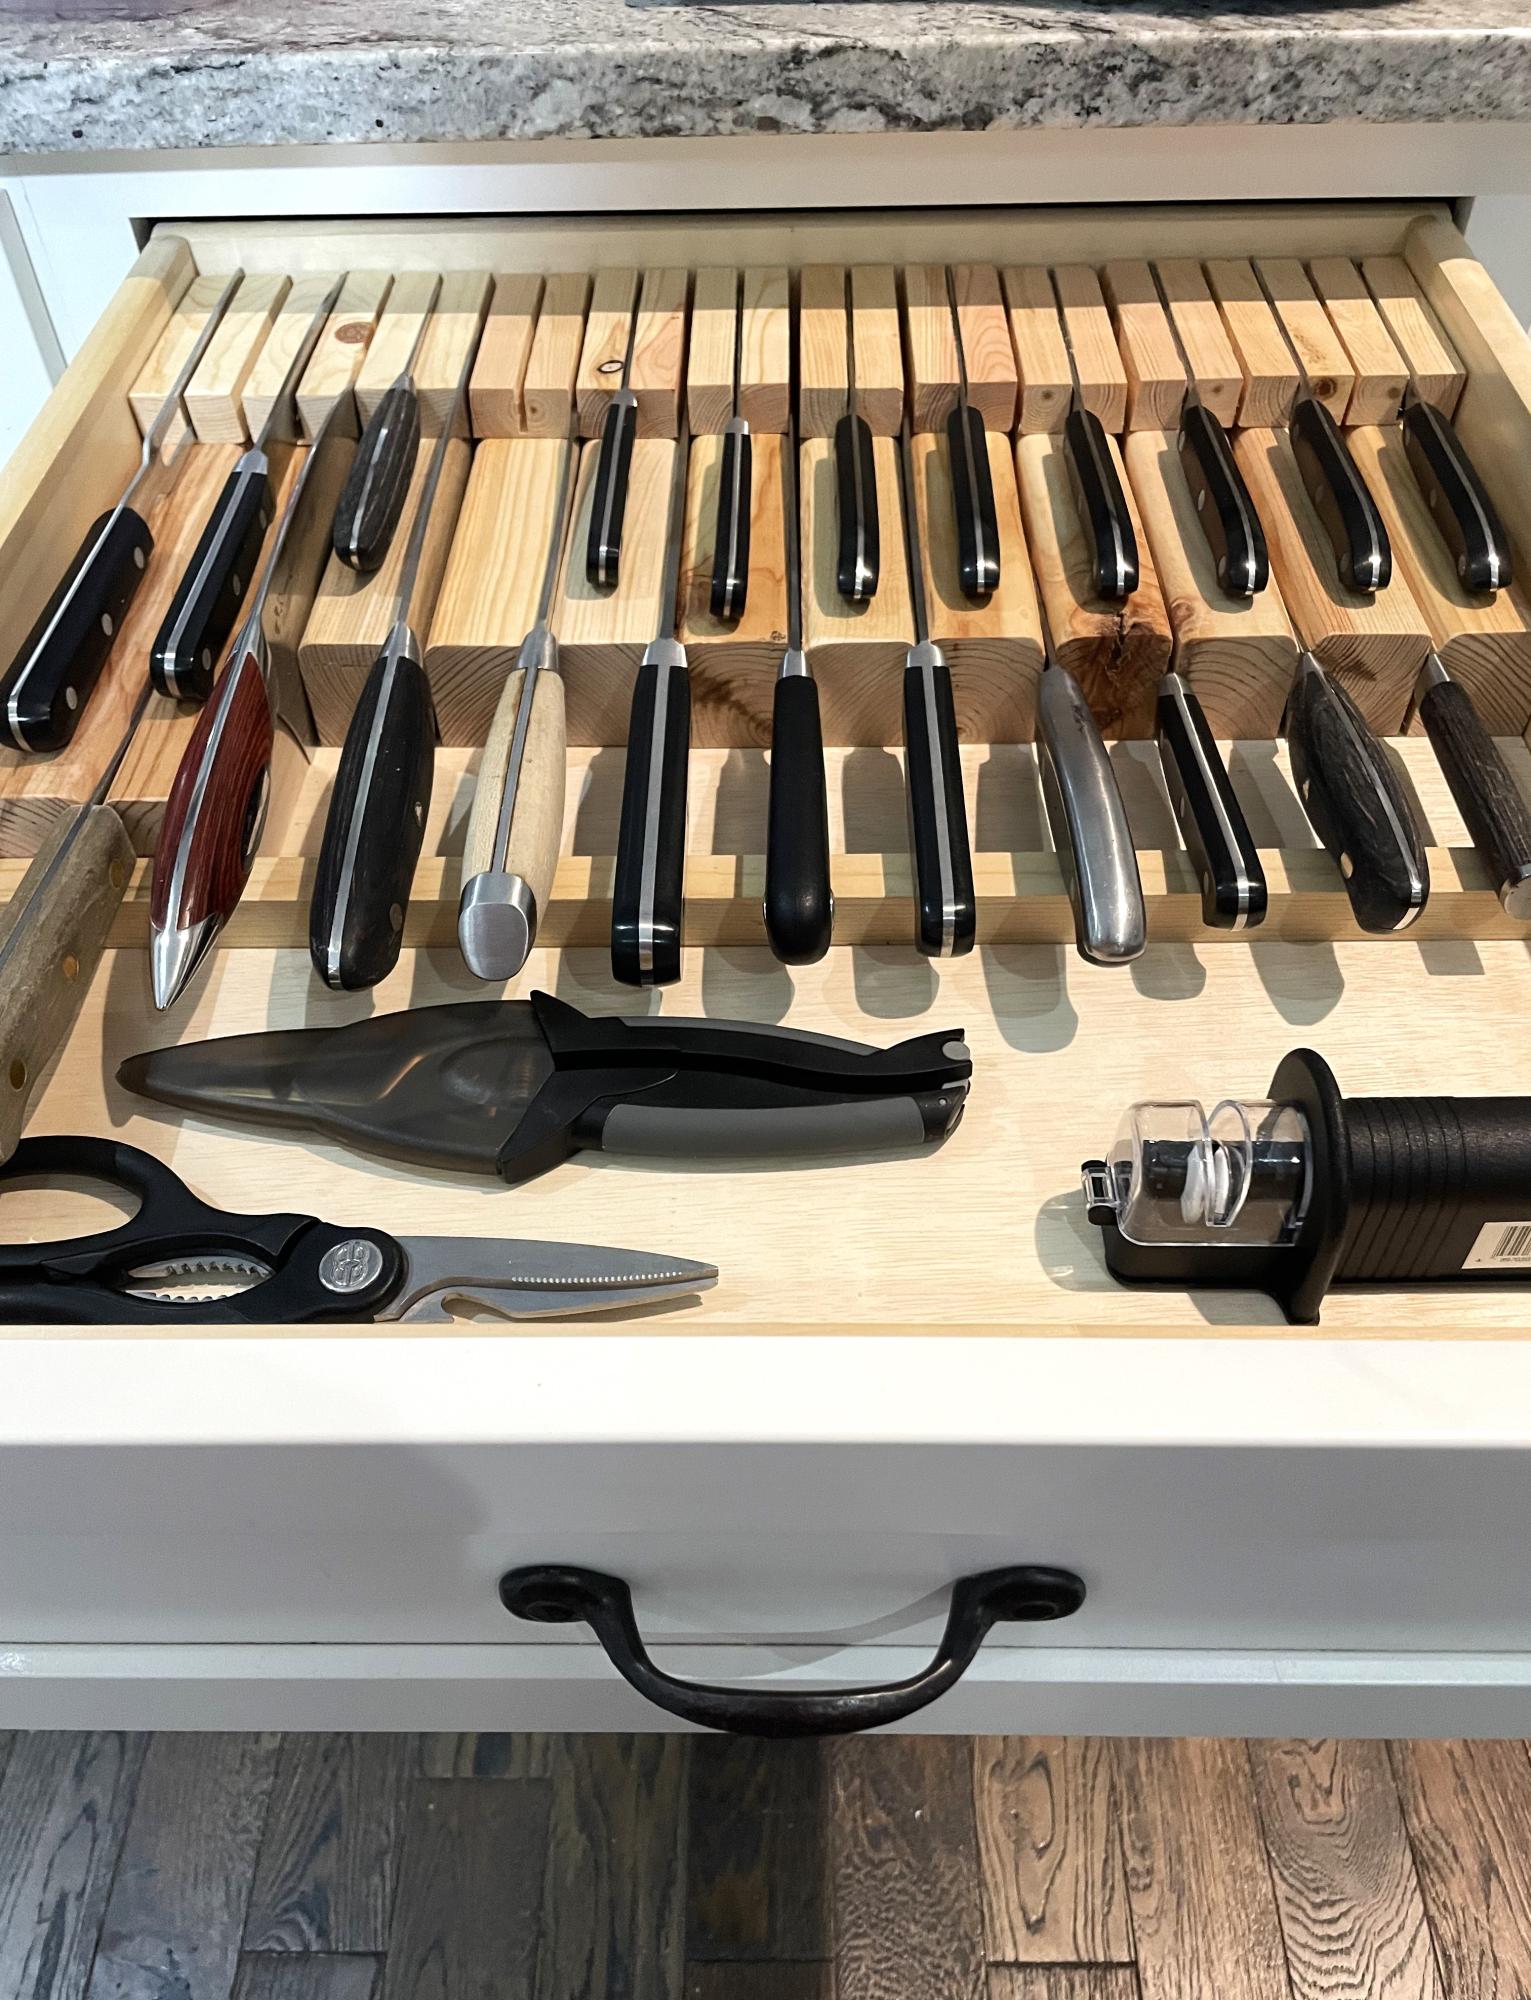
Thank you for another amazing plan! I used another readers tip and notched some 1x2 with my table saw to add steak knife storage. I’m completely in love with this all-from-scrap, done-in-an-evening, organizer!
Andrea F.
Built from Plan(s)
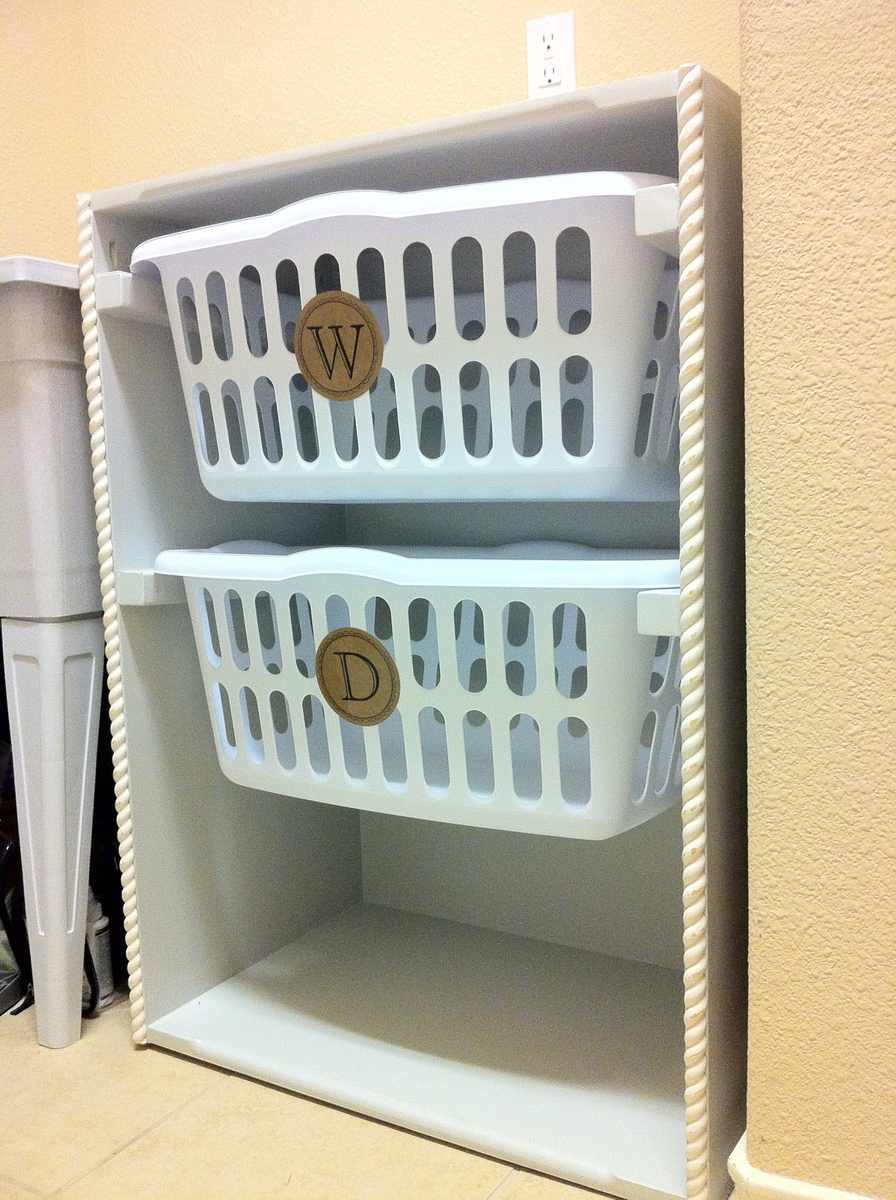
Laundry Dresser
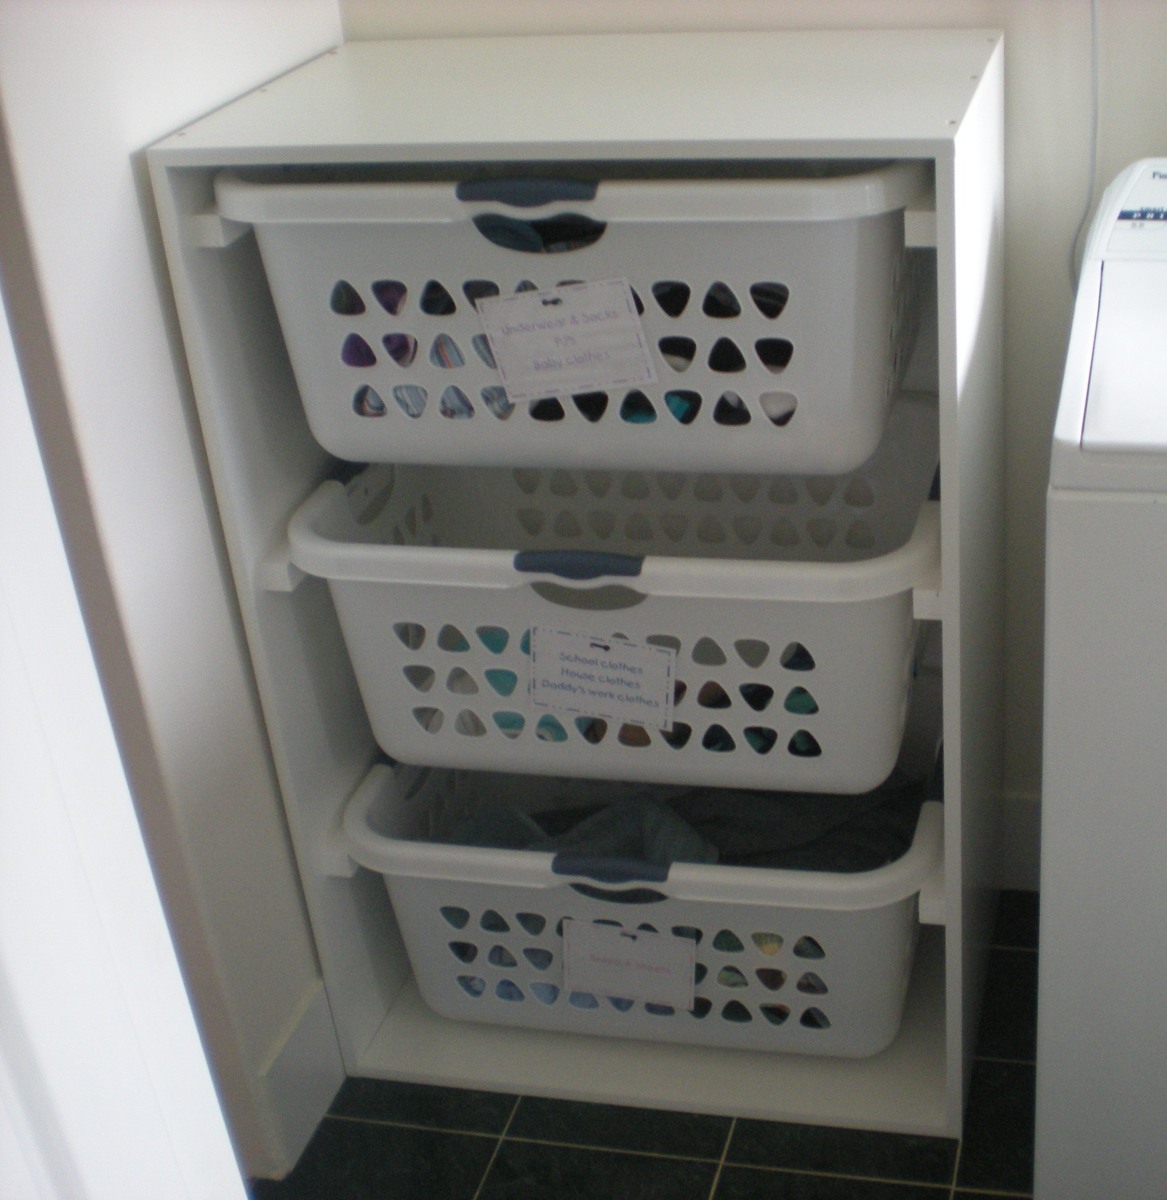
Really happy with the final product and the hubby is glad I have finally finished a project. This project was an answer to the piles of washing crowding our small laundry. I found 3 sturdy family sized (huge) rectangular laundry baskets for $10ea at Kmart and then used Sketchup to adjust the plans to allow for the bigger baskets (Sketchup is so much fun to use). I ended up having to buy an extra piece of wood for the top because I forgot to allow for the thickness of the sides when measuring the top and base. (I know, I know, measure twice cut once...) I used the piece I had cut for the top as the base and then got a new piece for the top. When I finally got all the pieces cut to size it all went together pretty quickly. I used melamine for the box because it was cheap and I wouldn't have to paint it. It did chip a little bit along the edges when I cut it but it's not too bad. I used 30 x 30mm pine for the basket supports and had to countersink the screws 1cm so I could use 30mm screws. I used iron-on melamine edging to finish the exposed edges of chipboard and used paint on the back and supports. Actual construction didn't take long but the painting took about a day by the time I'd done one basecoat and two top-coats.
Built from Plan(s)
Estimated Cost
$40 (AUD) incl. screws. Already had the paint.
Estimated Time Investment
Day Project (6-9 Hours)
Finish Used
Dulux Prepcoat & Dulux Aquanamel White on back and basket supports. The rest was white melamine.
Recommended Skill Level
Beginner
Comments
Sun, 11/04/2012 - 02:17
melamine ... did you get it at bunnings & did they cut it for u?
Yey a fellow aussie ... love the job. i am going to try stetchup yet again, last time i tried it didn't want to play nice, did it take long to get the hang of? & the melamine ... did you get it at bunnings & did they cut it for u?
Mon, 11/05/2012 - 01:06
Thanks for the feedback. I
Thanks for the feedback. I cut the melamine myself. I clamped a straight edge on top of the melamine (allowing for the distance from the edge of the saw to the blade) and then used my jigsaw to cut. My local bunnings didn't seem too interested in cutting specific sizes. They were happy to just cut lengths down so I can fit them in my car but said their saw could be inaccurate up to 10mm from one end of the cut to the other. (Personally I think the guy just couldn't be bothered) Since I wanted my project to be square I figured it was much easier to just do it myself.
With sketchup I just play around and learn as I go. I got the hang of it pretty quickly although I'm still figuring out some of the more complicated stuff like using the protractor tool to do angles etc.
In reply to Thanks for the feedback. I by rosiejane
Mon, 11/05/2012 - 01:38
Thanks for that... very
Thanks for that... very helpful. yes bunnings, all depends on the assistant hey! Definitely going to have another go at sketchup... must conquer it!
Thu, 01/01/2015 - 22:05
I love this. These baskets
I love this. These baskets are very sturdy. Is there anyway you can post the measurements. I have never made anything but this looks perfect. I have never used sketch up. Please let me know if you are able to post the measurements. Thanks!
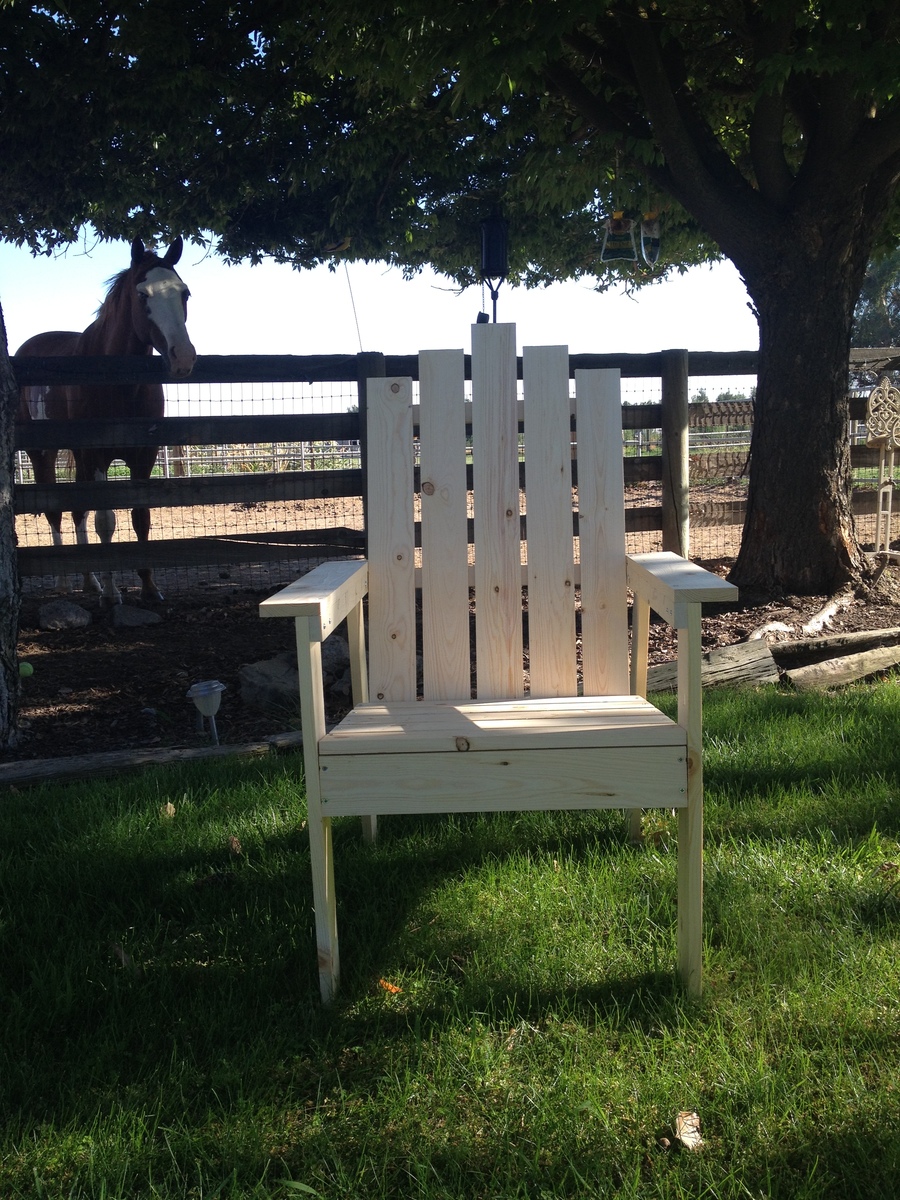
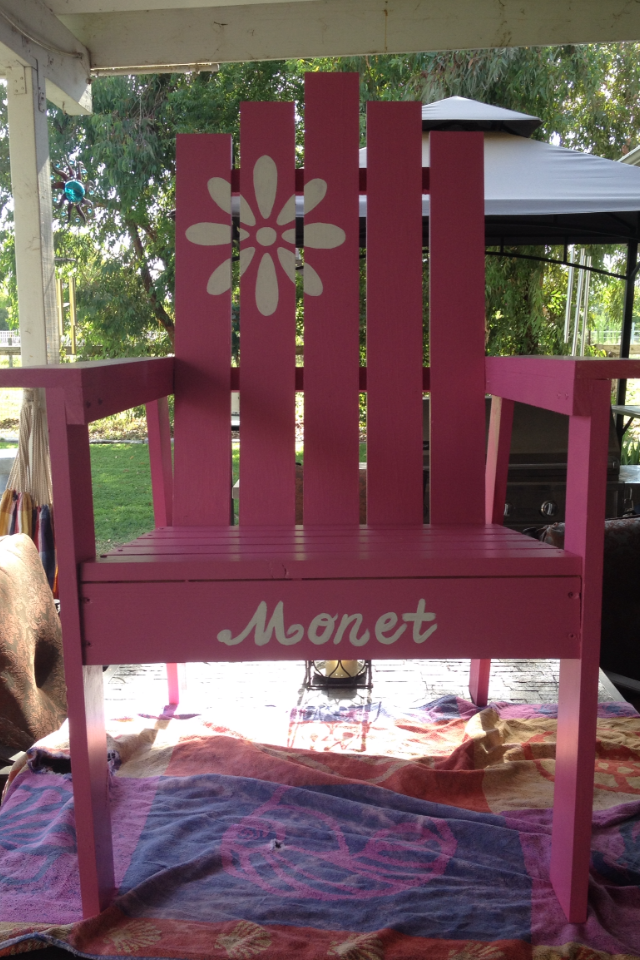
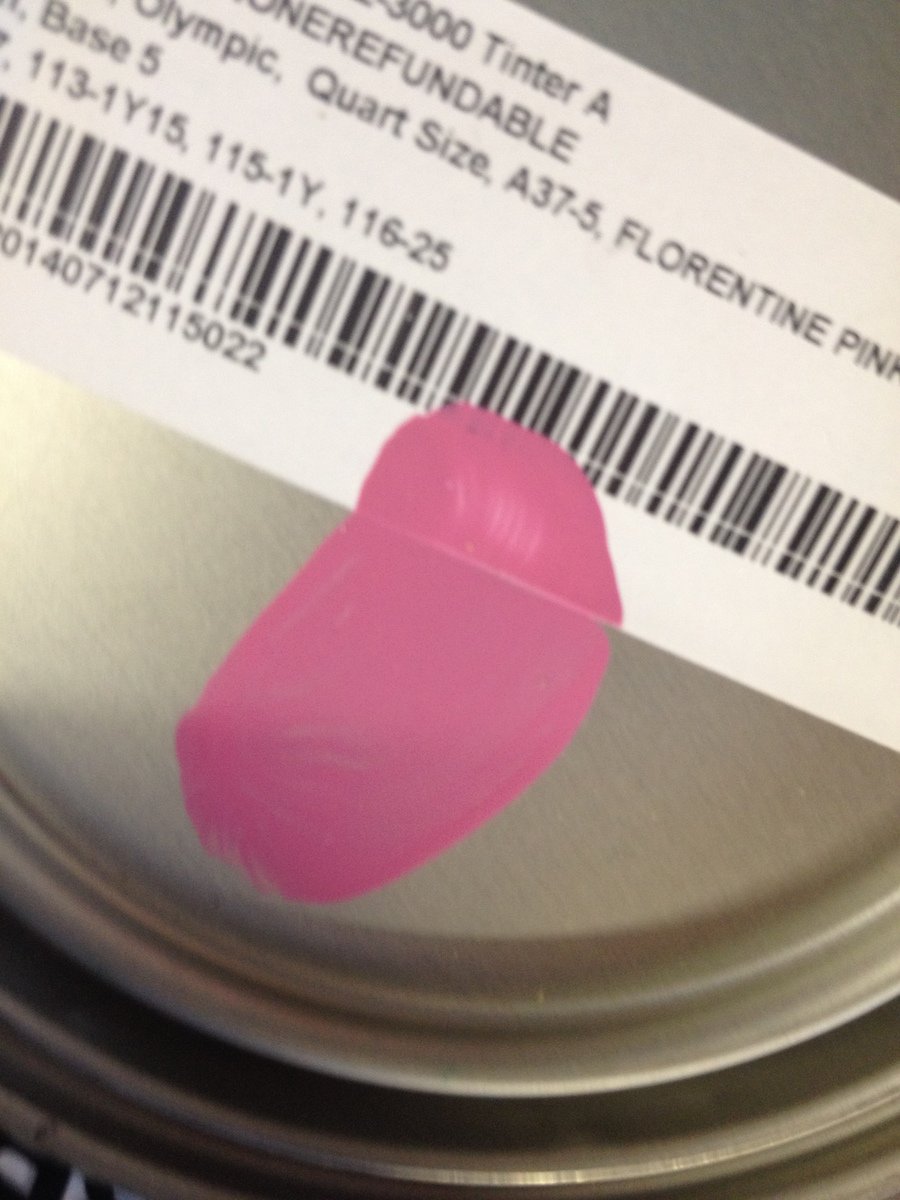
Adirondack Chair
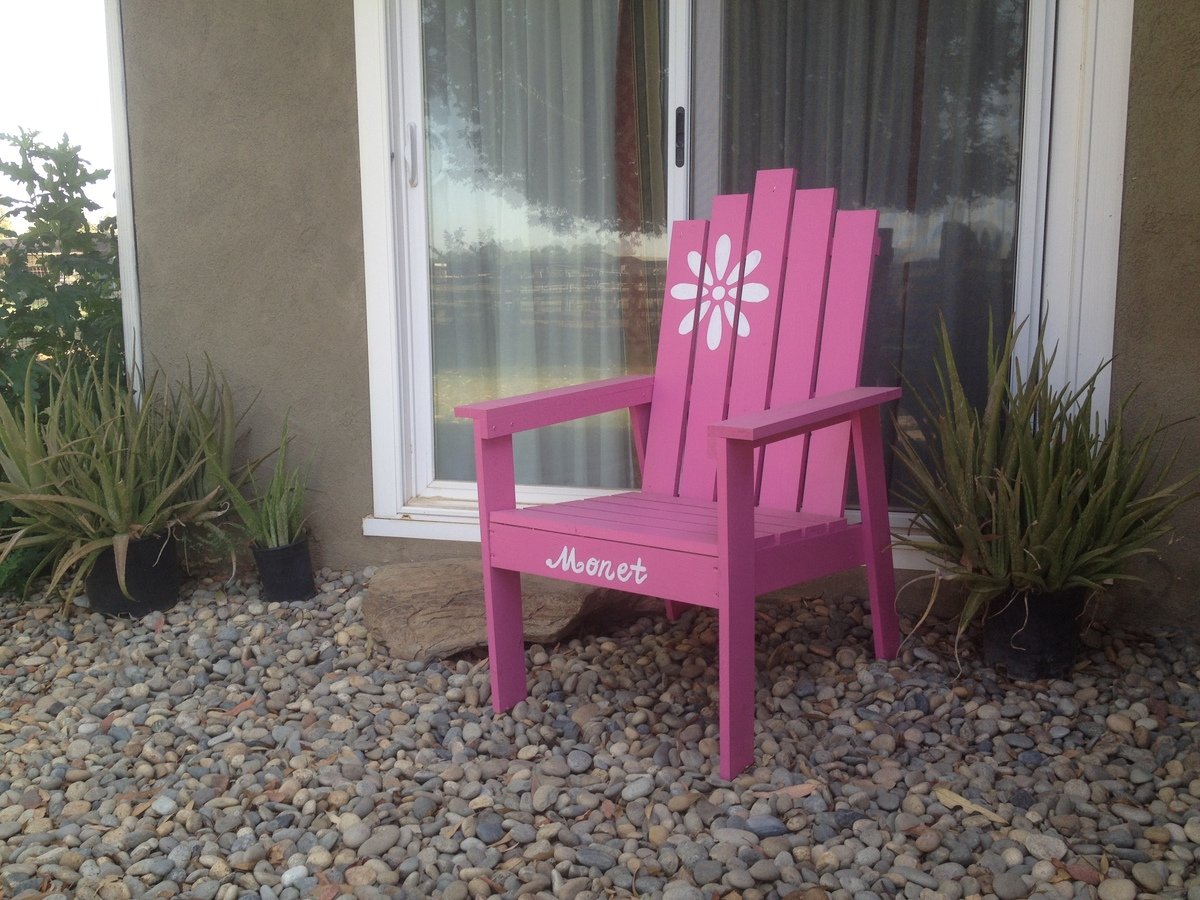
This was my very first build by myself (besides cedar plank planters). I made this for my boyfriends daughter so she could have her own personalized chair to sit by the fire pit. I actually used the plans from Ana's Handbuilt Home book.
Built from Plan(s)
Estimated Cost
32.00
Estimated Time Investment
Afternoon Project (3-6 Hours)
Finish Used
Olympic Paint in Florentine Pink
Recommended Skill Level
Starter Project
Comments


Thu, 08/21/2014 - 08:38
Thank you!!!
I wouldn't mind at all. I just made a stencil out of an 8.5x11 piece of paper. The hardest part was hand painting it in. Brought back memories of coloring!
Modern wood dresser
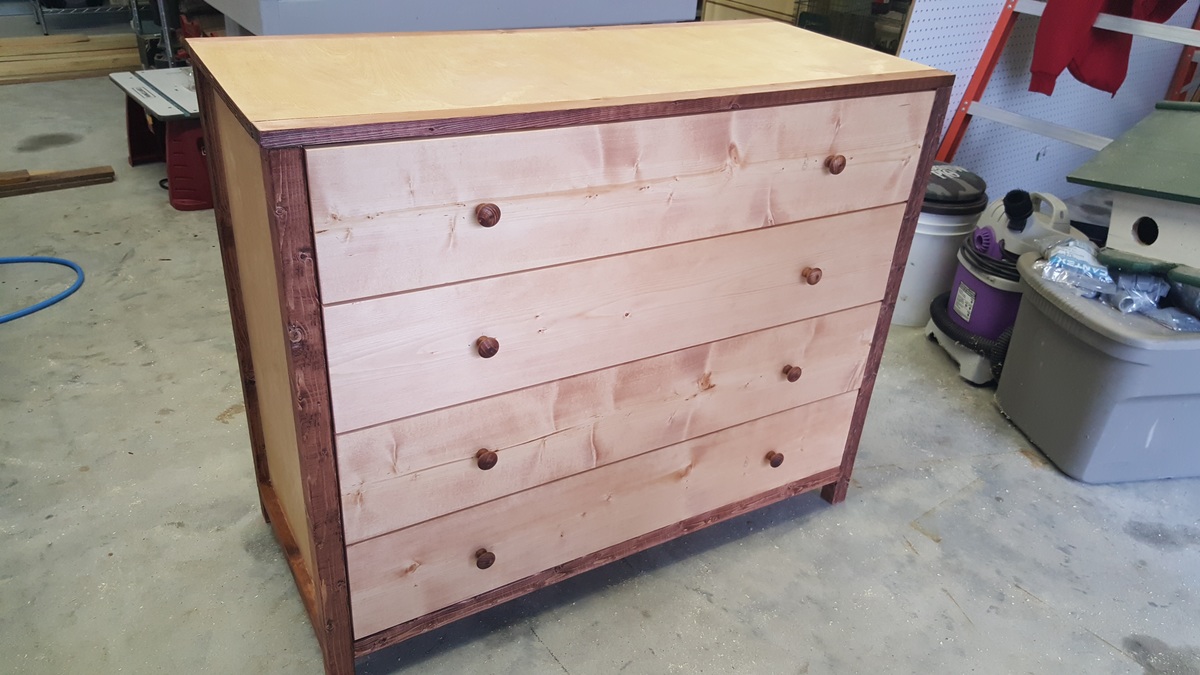
We didn't paint it, but I think it turned out well. We followed the plan almost exactly and it came out great!
Built from Plan(s)
Estimated Cost
150
Estimated Time Investment
Weekend Project (10-20 Hours)
Recommended Skill Level
Beginner
Picnic table
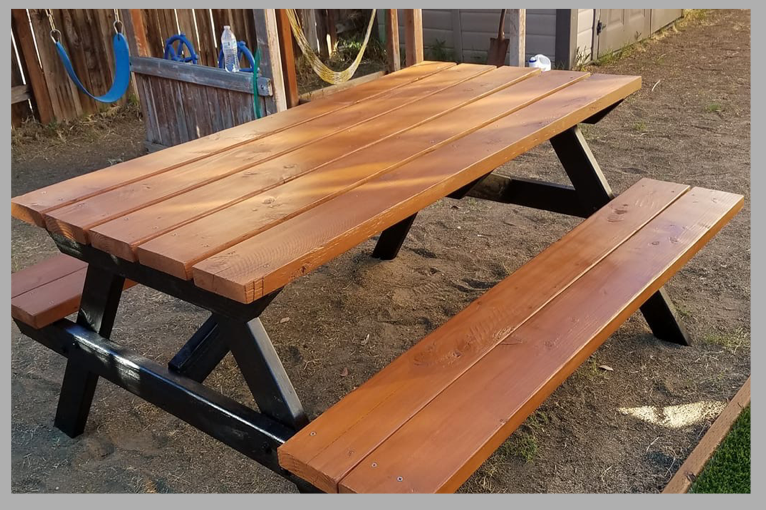
I built this picnic table while I was pregnant with my youngest. It was an addition to our outdoor kitchen. Came out pretty good, thanks to Ana's plan.
Built from Plan(s)
Estimated Time Investment
Weekend Project (10-20 Hours)
Recommended Skill Level
Beginner
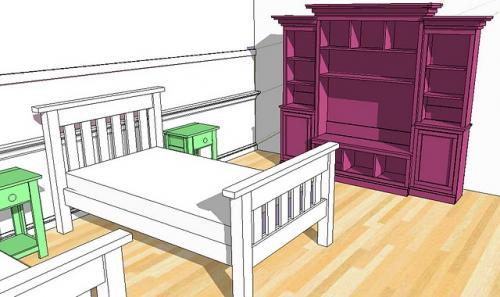
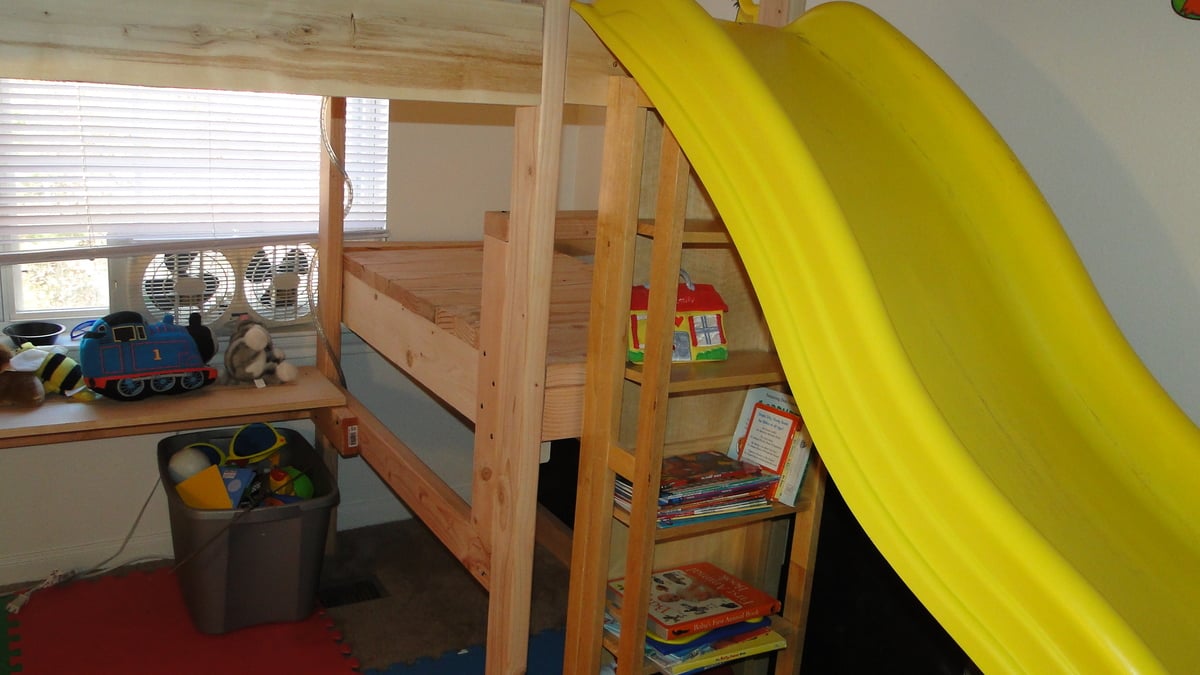
Double Camp Loft bed
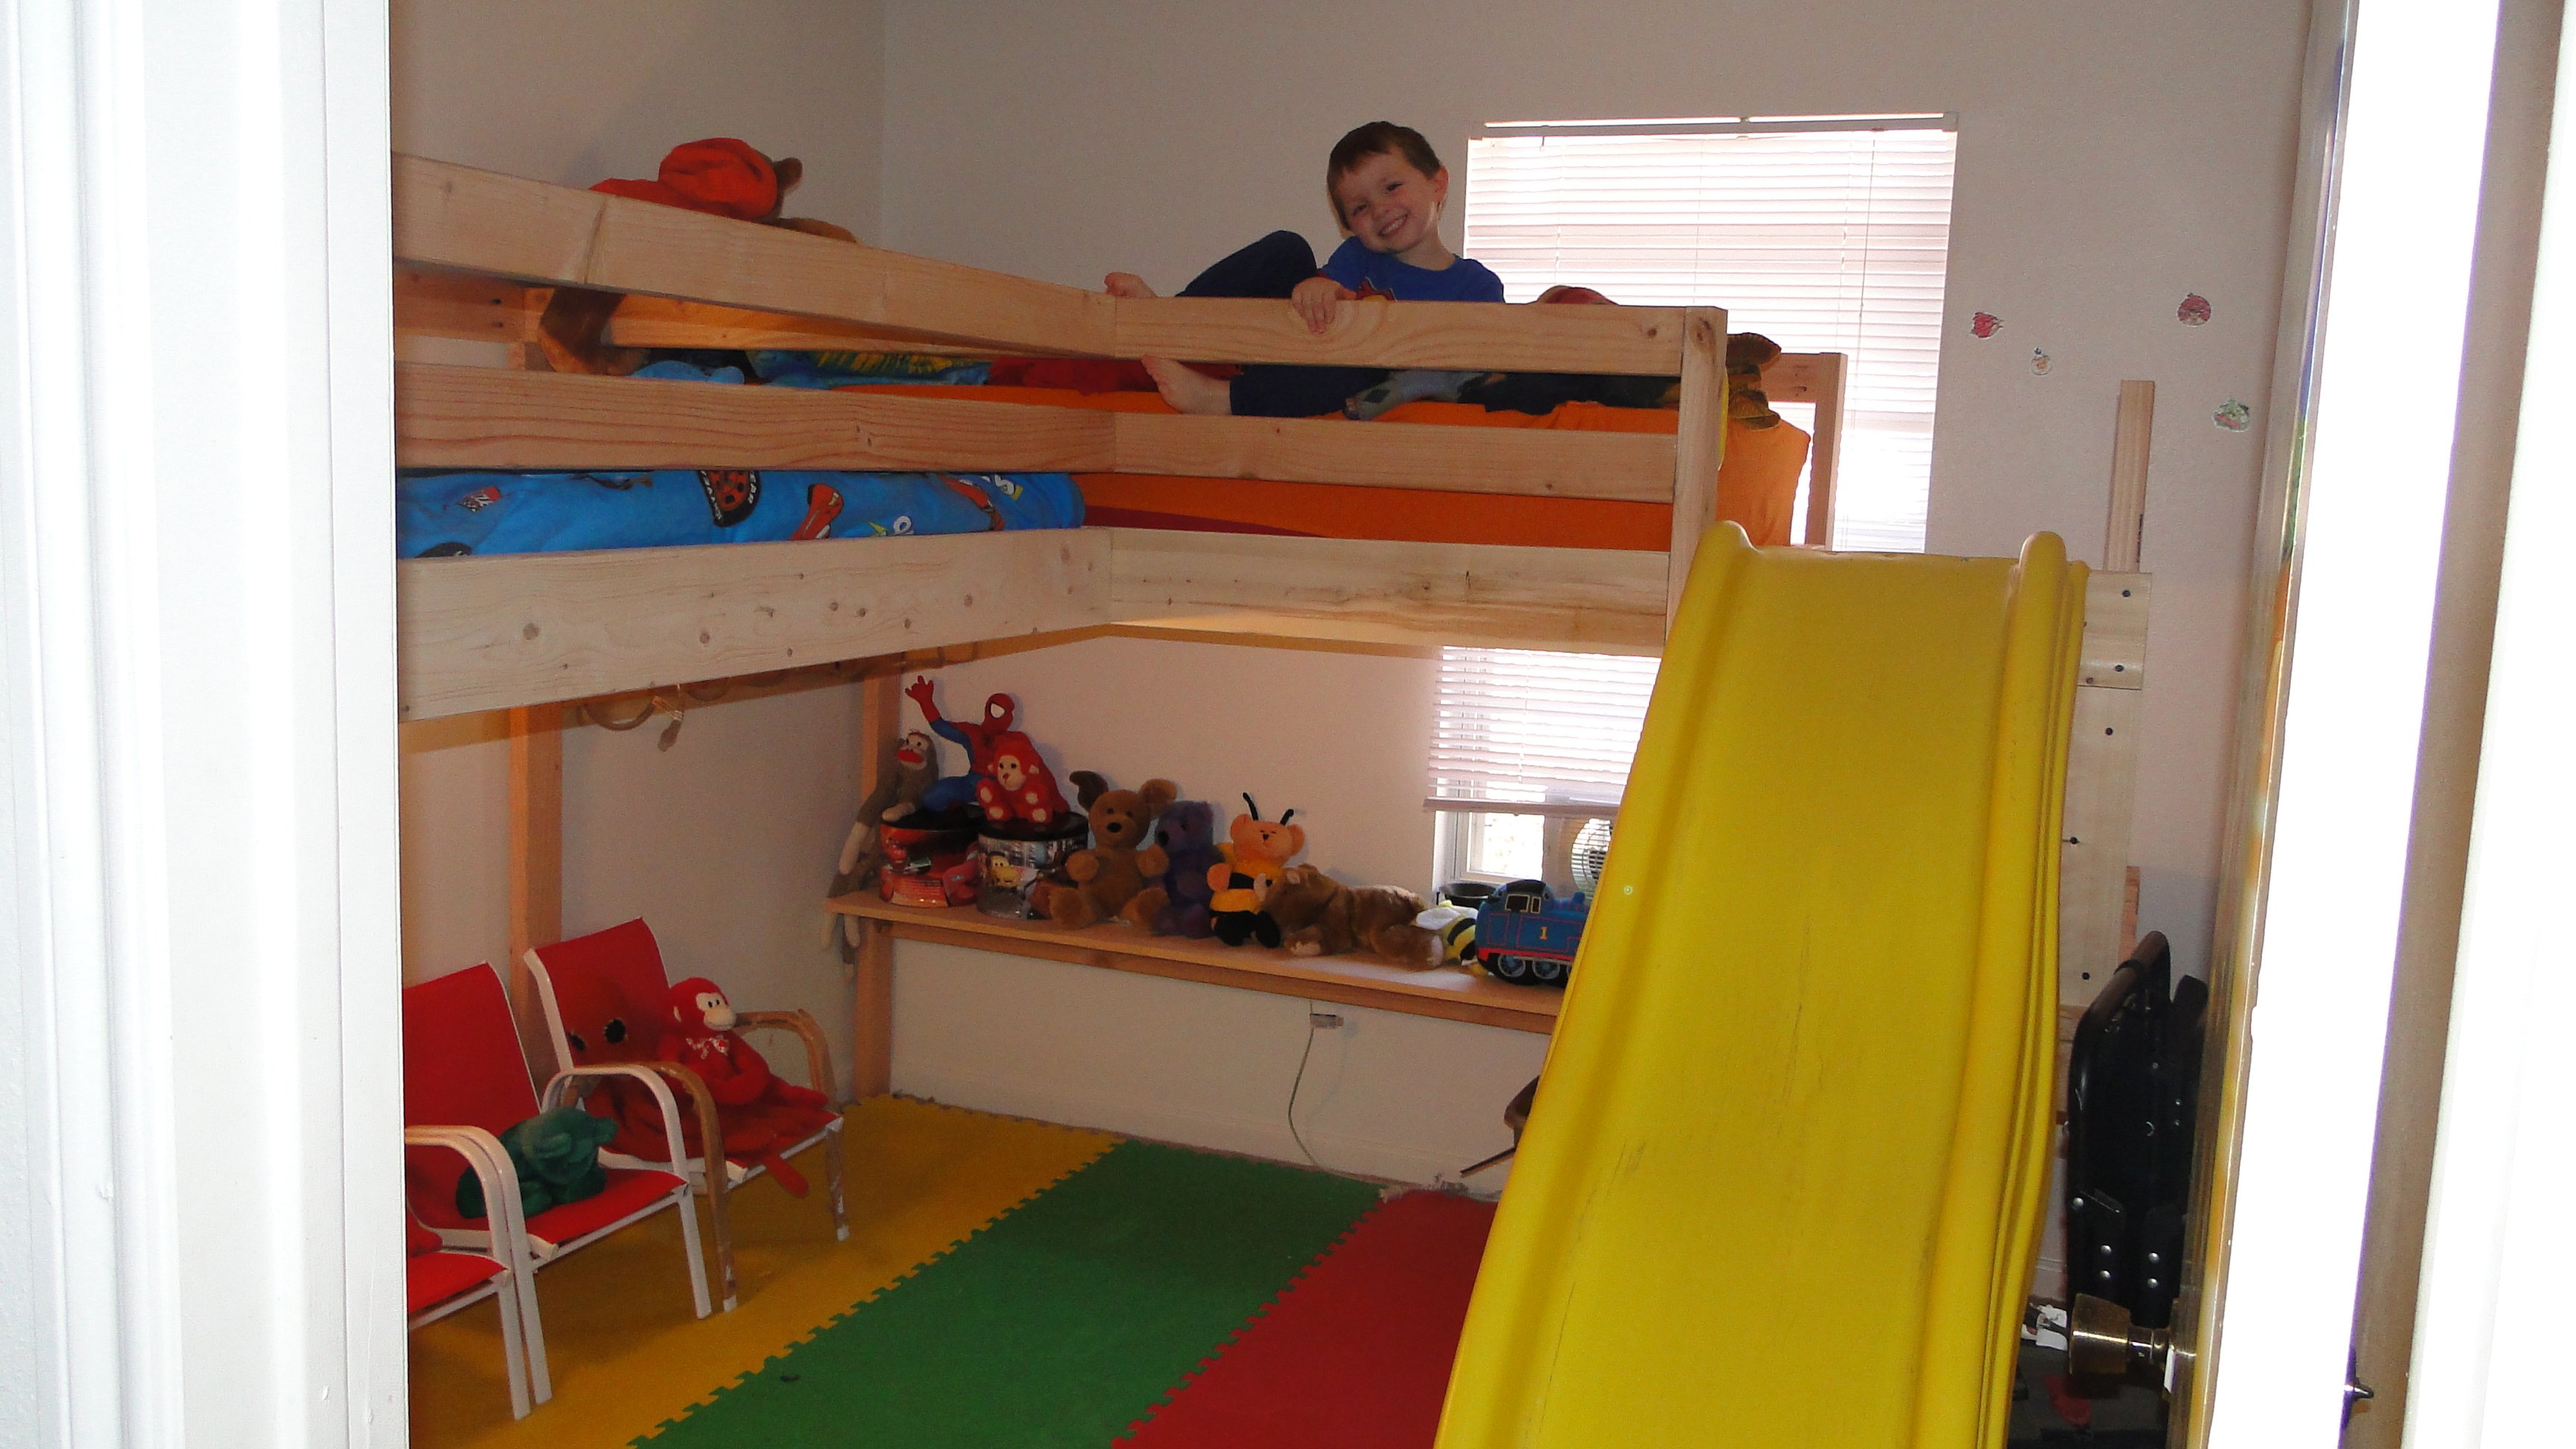
I used the plans from the Camp Loft bed and adjusted to exactly what I needed. Two twin beds in a small bedroom without losing any floor space. I found the slide on craigslist while I was building this and it made the best addition. I also added a shelf along the base of one bed for the boys to have a play table and adds stability to the base of the bed to keep it from rocking.
Built from Plan(s)
Estimated Cost
200-250
Estimated Time Investment
Week Long Project (20 Hours or More)
Finish Used
I have not yet added the finish as I needed the beds up asap. I plan on spending a weekend when the kids are gone by simply adding a coat of poly.
Recommended Skill Level
Beginner
Comments
Mon, 11/05/2012 - 17:38
Double Camp Bed
Great Bed! Can I get the plans the way that they were modified? I am a beginner and definately need the step by step plans. This would be great for my nephew's!
Wed, 11/07/2012 - 14:09
I just made the first bed as
I just made the first bed as the plans had. Instead of doing the stairs I just did an extra 2x4 across the legs so they can get up onto the platform. For the 2nd bed I followed the same instructions as the first but only doing one end and the rails (made a giant L) then flipped and screwed right into the side of the other bed. I used pocket holes all around so it went together very quickly.
Wed, 11/07/2012 - 20:57
How t build double camp loft beds
I really like this bed!my boys will love it! I am a beginner can I please get the plans and tell me how to make the bed with 5 feet high for more space
It will be my first time I can't wait. Thank you !

Mon, 06/24/2013 - 10:36
PLANS PRETTY PLEASE!?!
I have scoured the web for this loft for my two youngest girls! As I am terribly untalented at drawing up plans PRETTY PRETTY PLEASE WITH SUGAR ON TOP make your adjusted plans available? I have until the end of next month to build this for my princesses birthday and I'm more than a touch frazzled that I cannot find these plans anywhere. Take pity on the less talented and please post your plans? Or email them? [email protected]
Thank a ton in advance!
Mon, 12/08/2014 - 13:48
Requesting your Info
Great work with the modifications! Can you please share the new plans for the changes you made or let me know what exactly that you did to achieve the finished results. Thanks in advanced!
Mon, 12/08/2014 - 13:48
Requesting your Info
Great work with the modifications! Can you please share the new plans for the changes you made or let me know what exactly that you did to achieve the finished results. Thanks in advanced!
Thu, 06/30/2016 - 20:16
Plans, please???
I know it's been a while, but if you would share your finished plans, that would be great. We have the original camp loft, bought from someone else who built it, and we'd like to modify it to be an L-shape loft.
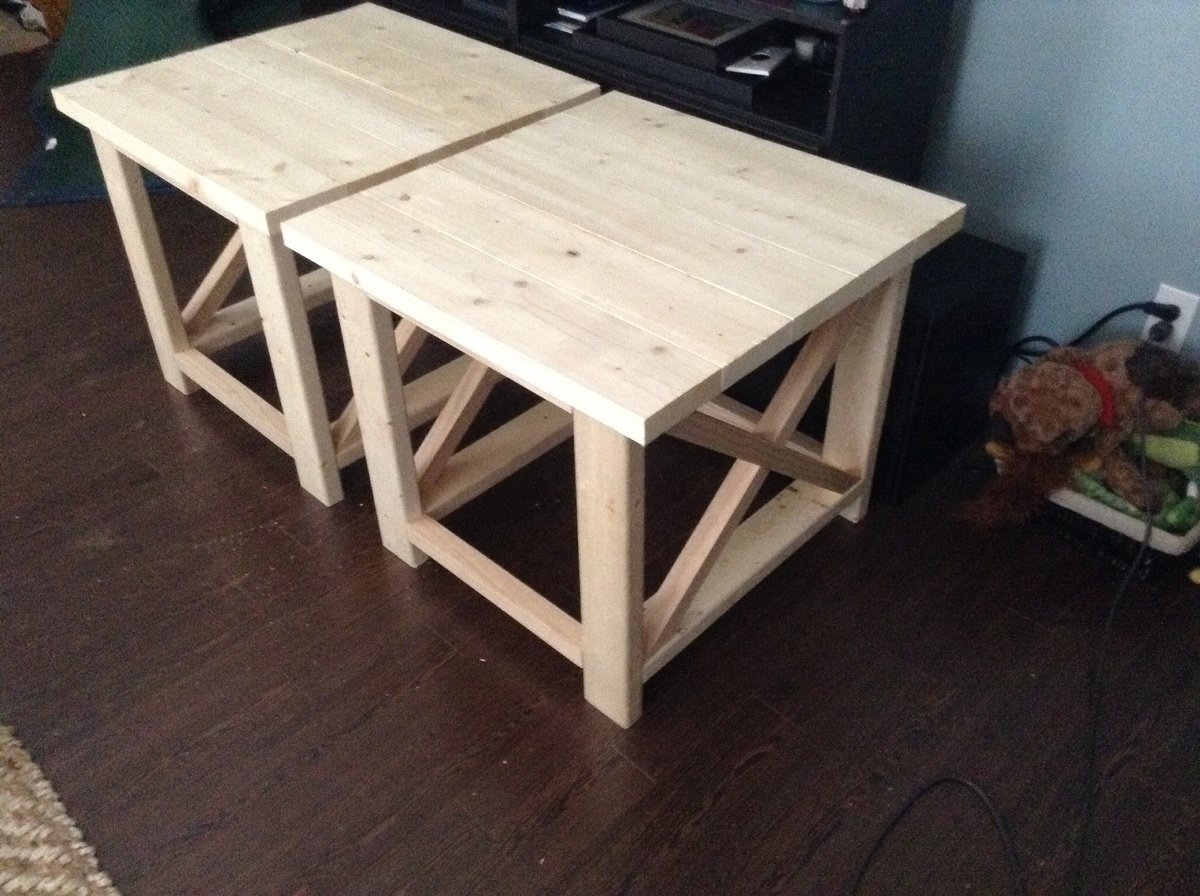
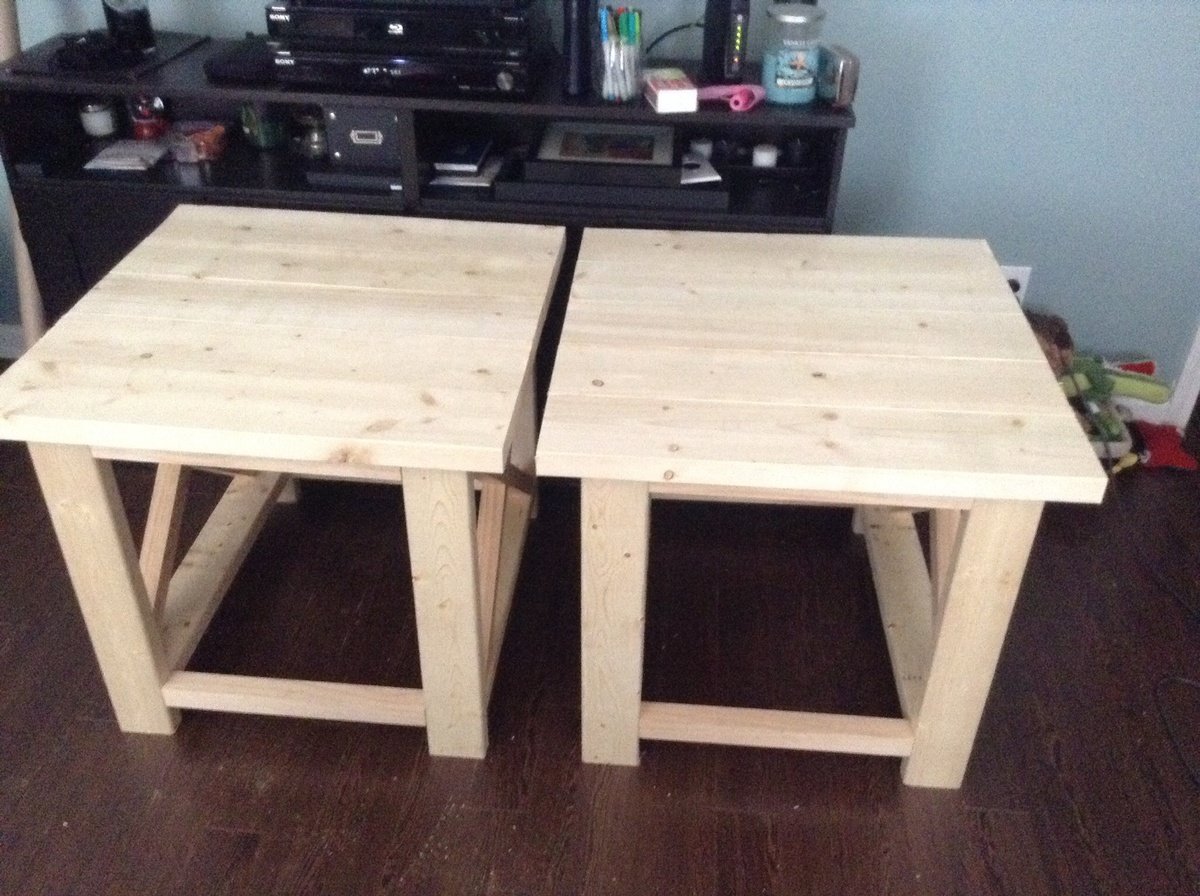
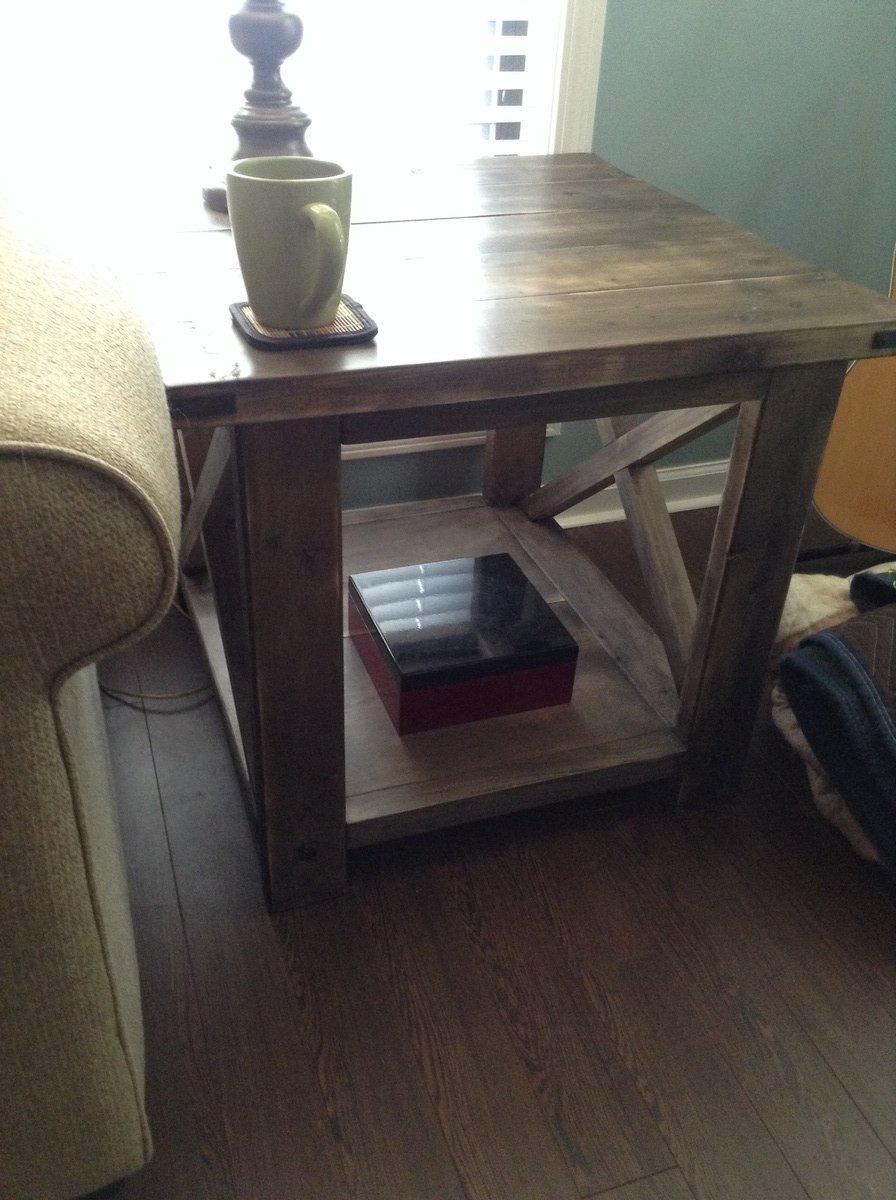
Jordan's Rustic X End Tables
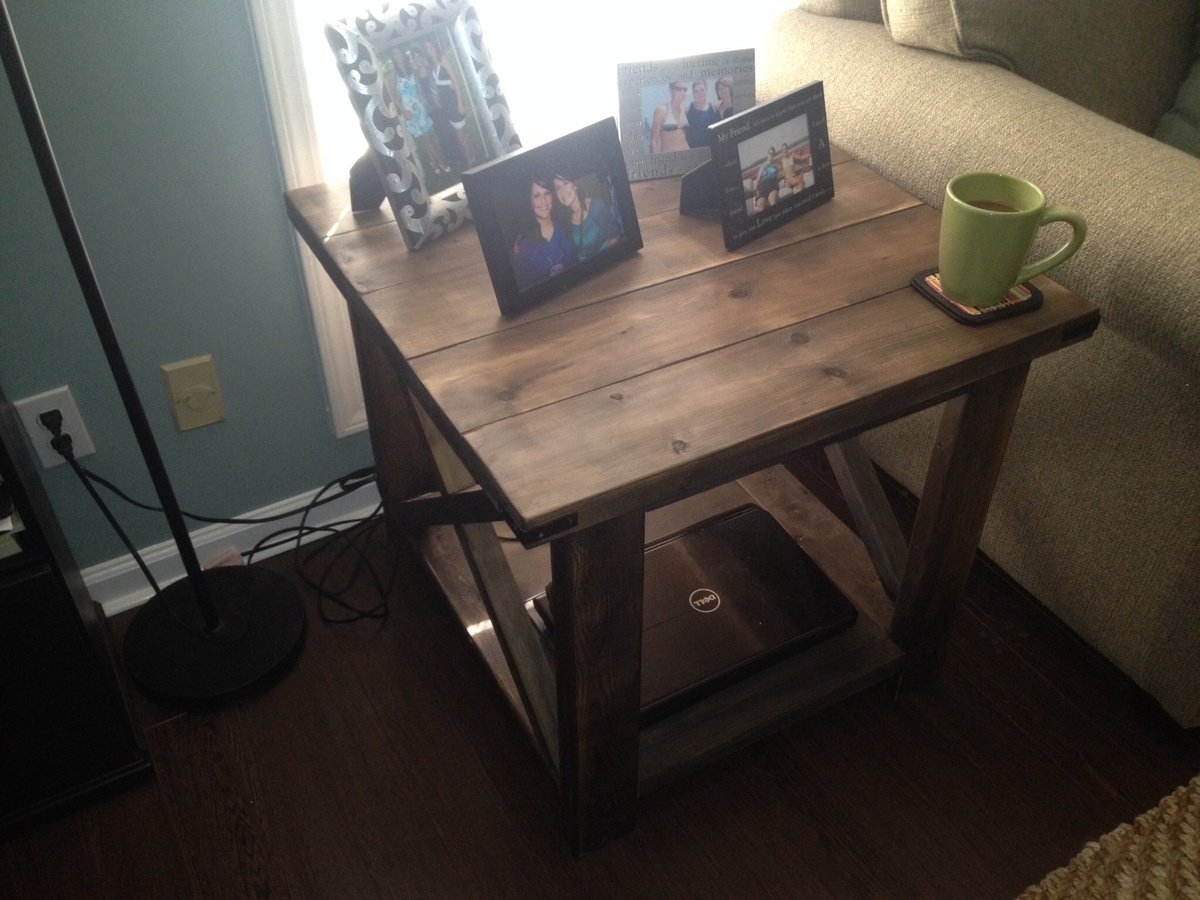
After building the iTable coffee table, I decided the move on to building some end tables. I do wish I had modified the plan so that they weren't quite so wide, but I absolutely love them . I used Hillary's oxidized finish with the steel wool/vinegar solution about 4 days old, and I brewed 12 bags to 32 oz. of water for the black tea.
I just finished off the tables with Minwax Finishing Paste Wax, as it's a little bit more readily available than the items Hillary used. The wax really warmed the wood up; I was debated mixing in some Minwax Wood Stain with the wax because the raw oxidized finish was so gray, but just the clear wax did what I was looking for.
Built from Plan(s)
Estimated Cost
$125
Estimated Time Investment
Weekend Project (10-20 Hours)
Finish Used
Hillary's oxidizing solution followed by Minwax Finishing Paste Wax in Clear
Recommended Skill Level
Intermediate
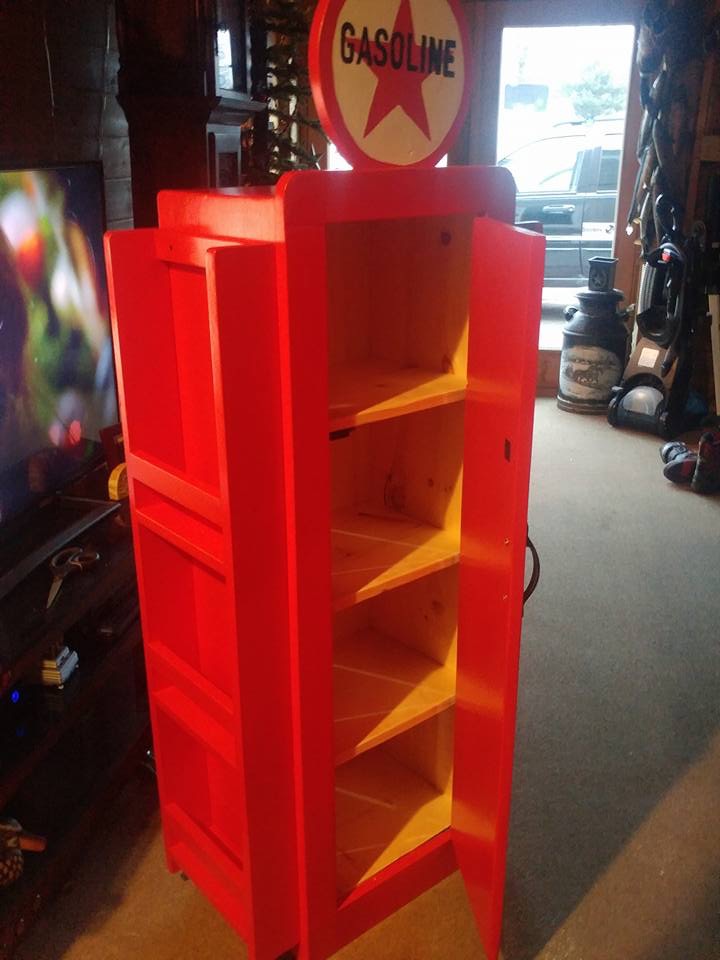
For my grandson's 2nd bday to match his new race car bed
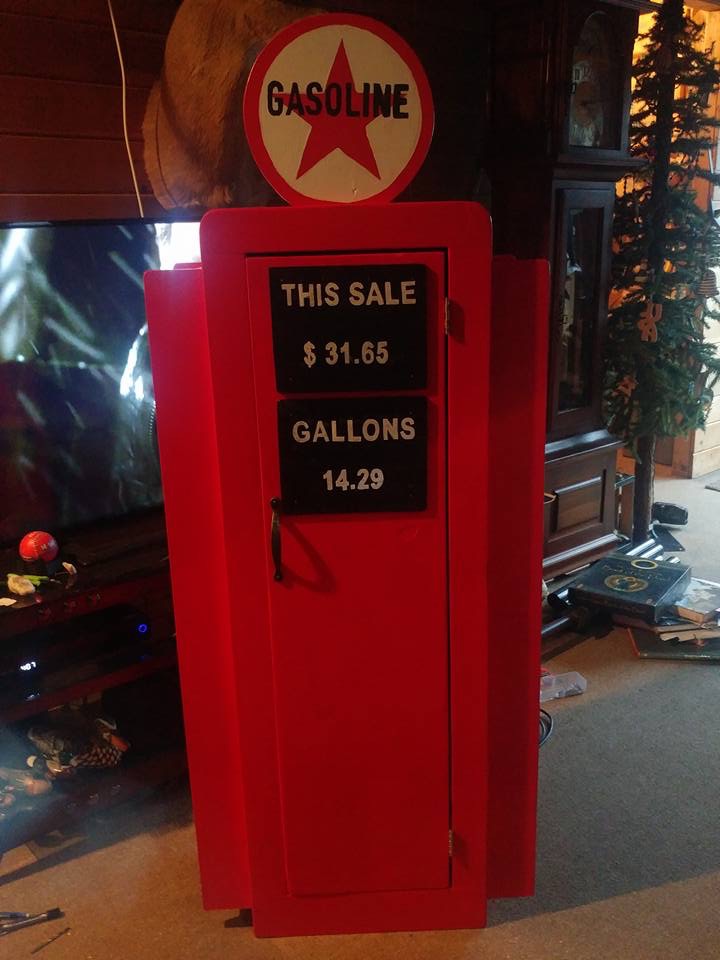
I built this for my grandson for his 2nd birthday to go along with the new race car bed that he got. I left off the pump handle and hose as a safety precaution since he is only 2 and a handful. This was definitely the gift that everyone was talking about! I love your plans Ana...keep 'em coming!!!
Built from Plan(s)
Estimated Cost
$120
Estimated Time Investment
Week Long Project (20 Hours or More)
Finish Used
Kilz Primer - followed by Rust-oleum Painter's Touch Apple Red, Rust-oleum Semi-Gloss Black, and Rust-oleum Semi-Gloss White - the lettering was printed out and traced with carbon paper underneath and then filled in with Elmer's Paint Markers in White and Black
Recommended Skill Level
Beginner
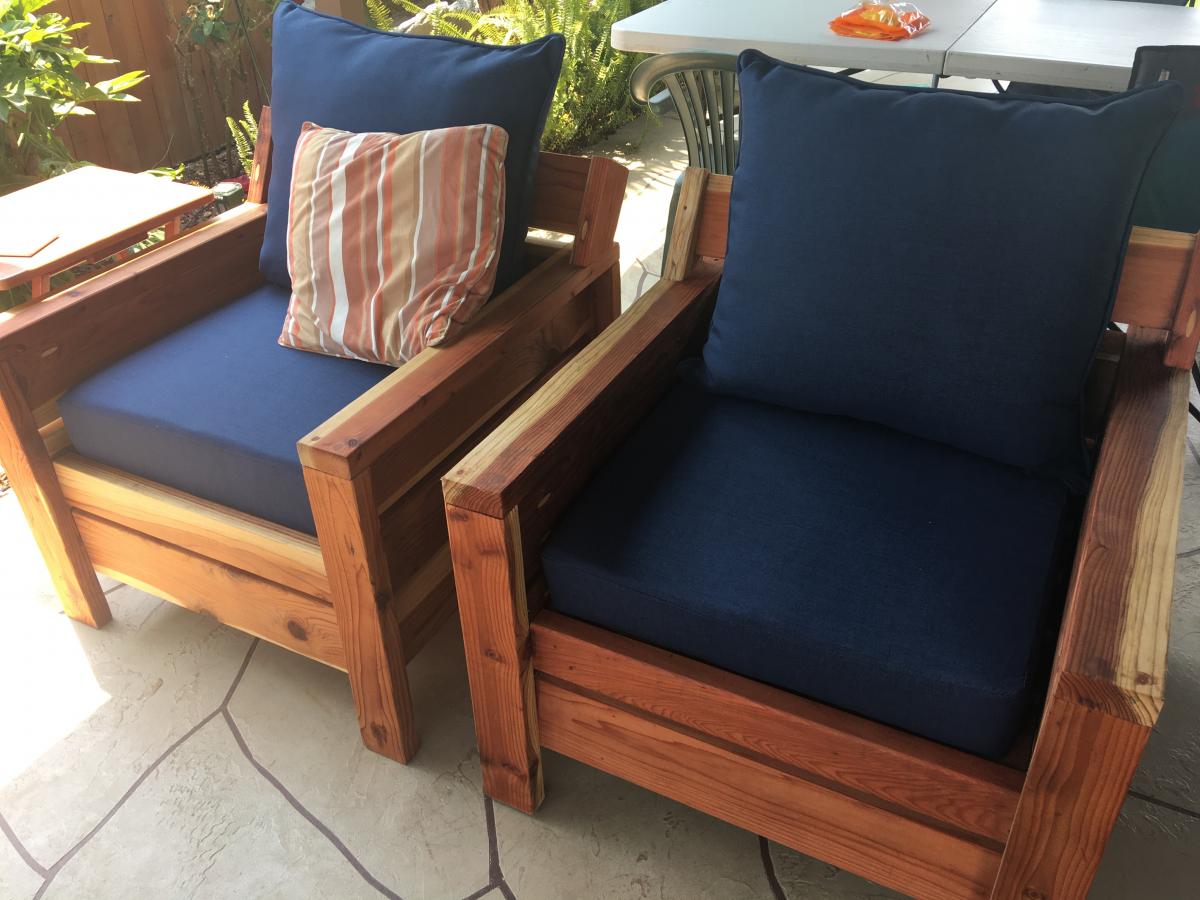
Modern outdoor chairs and sofa
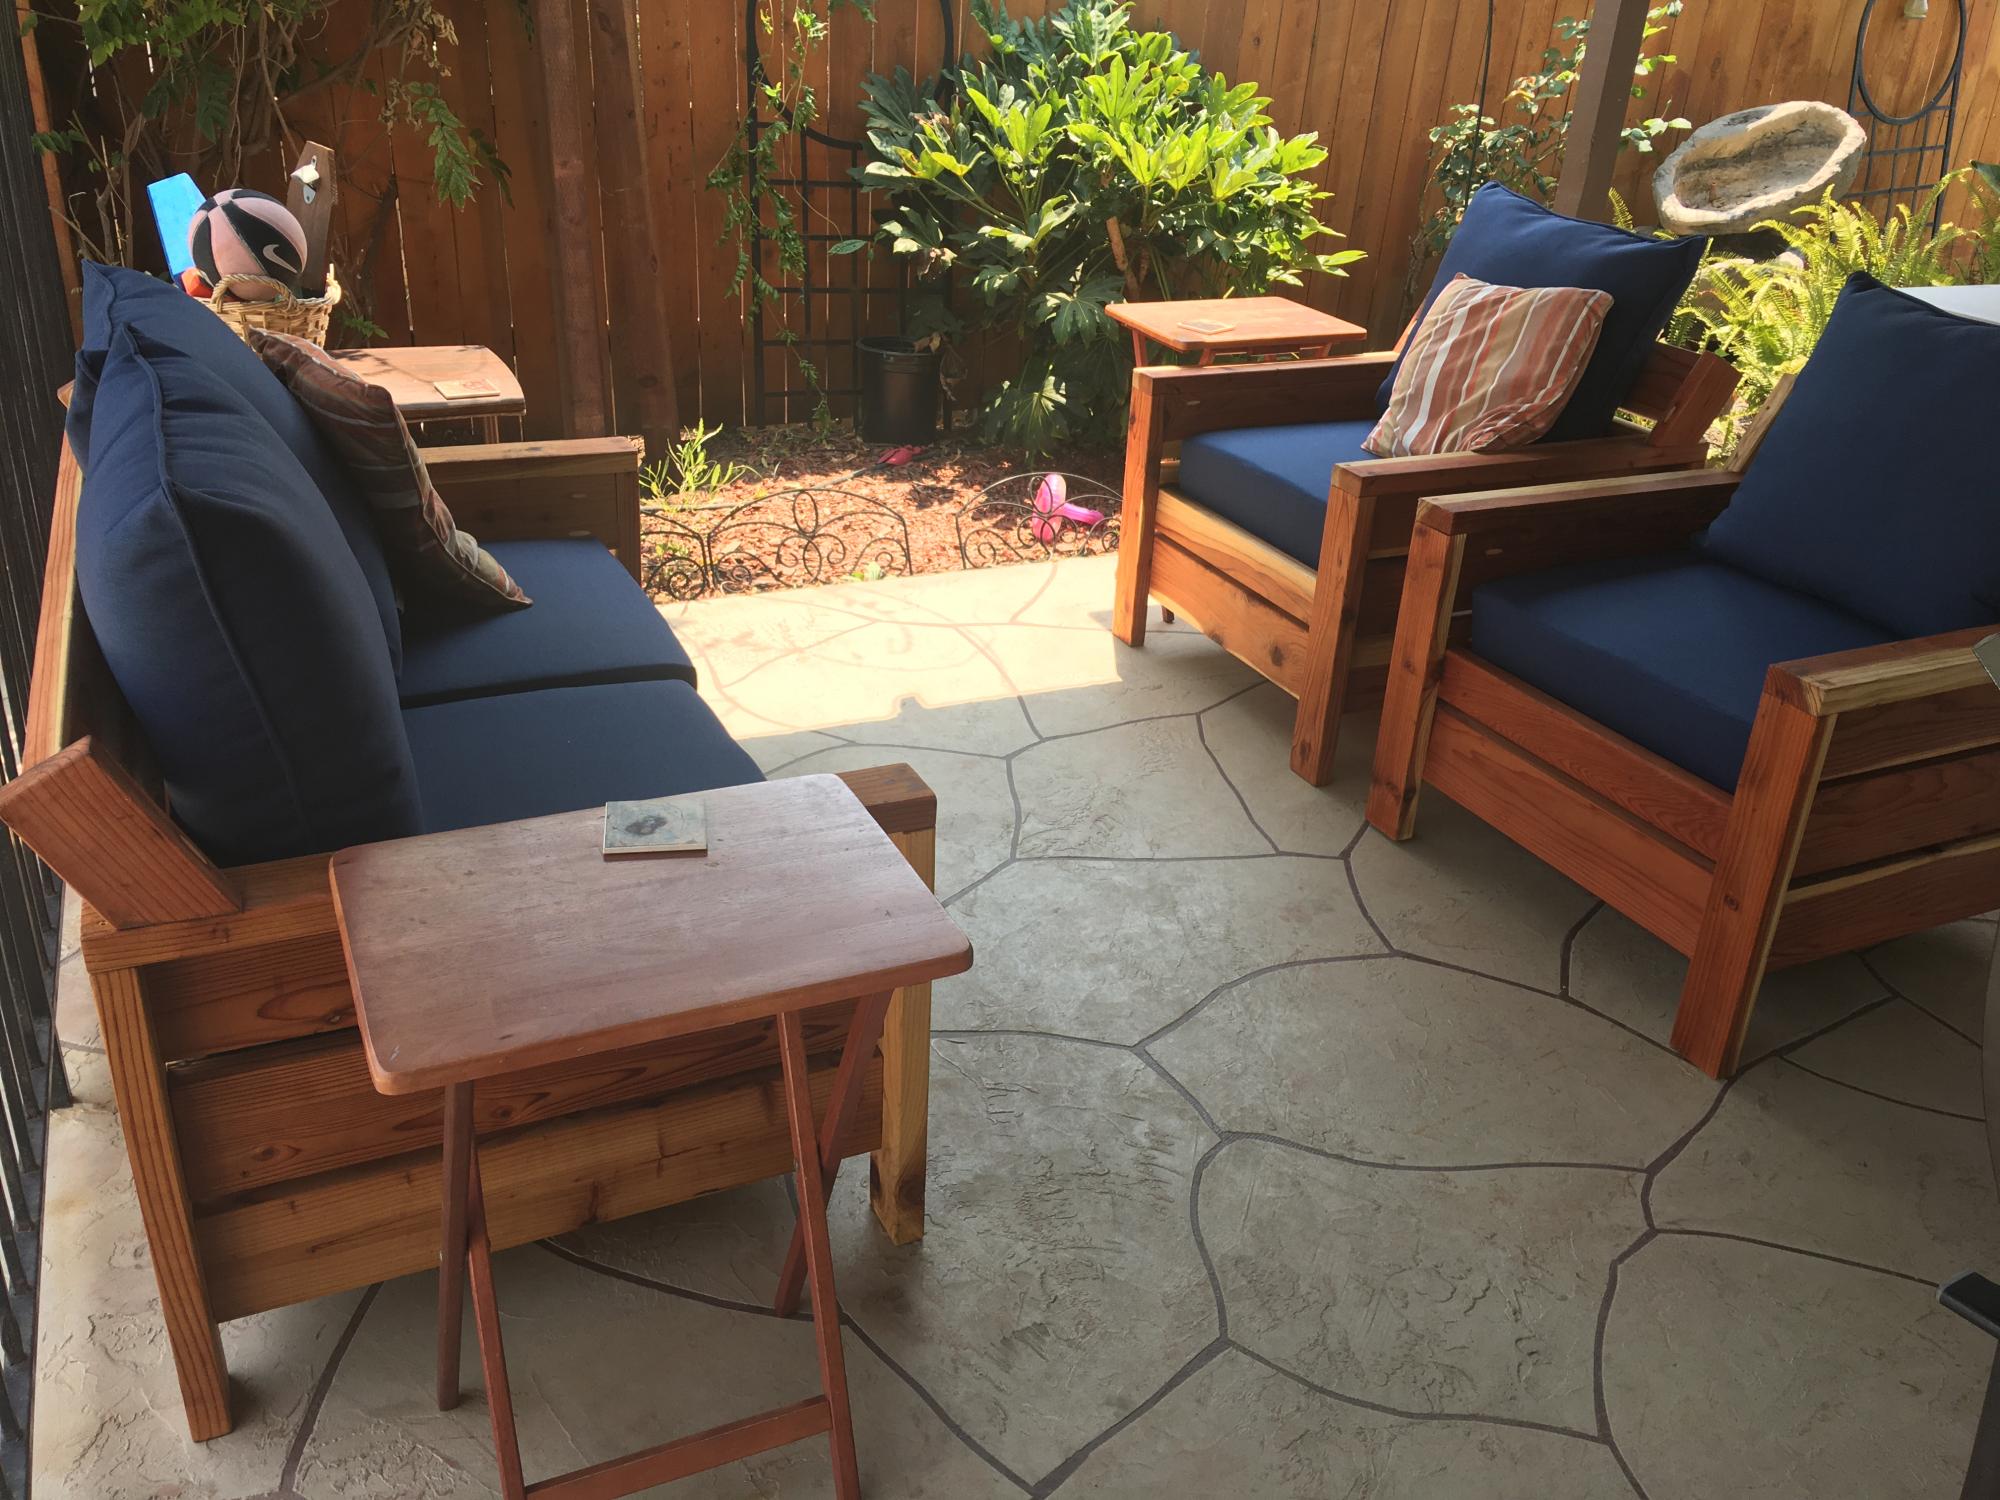
Saw some of the other brags which includes a raised backrest so I incorporated that into my build. There's a 30 degree angle on the backrest (two 2X4's and one 2X6)
Built from Plan(s)
Estimated Cost
$500
Estimated Time Investment
Week Long Project (20 Hours or More)
Finish Used
Thompson’s water seal, clear.
Recommended Skill Level
Beginner
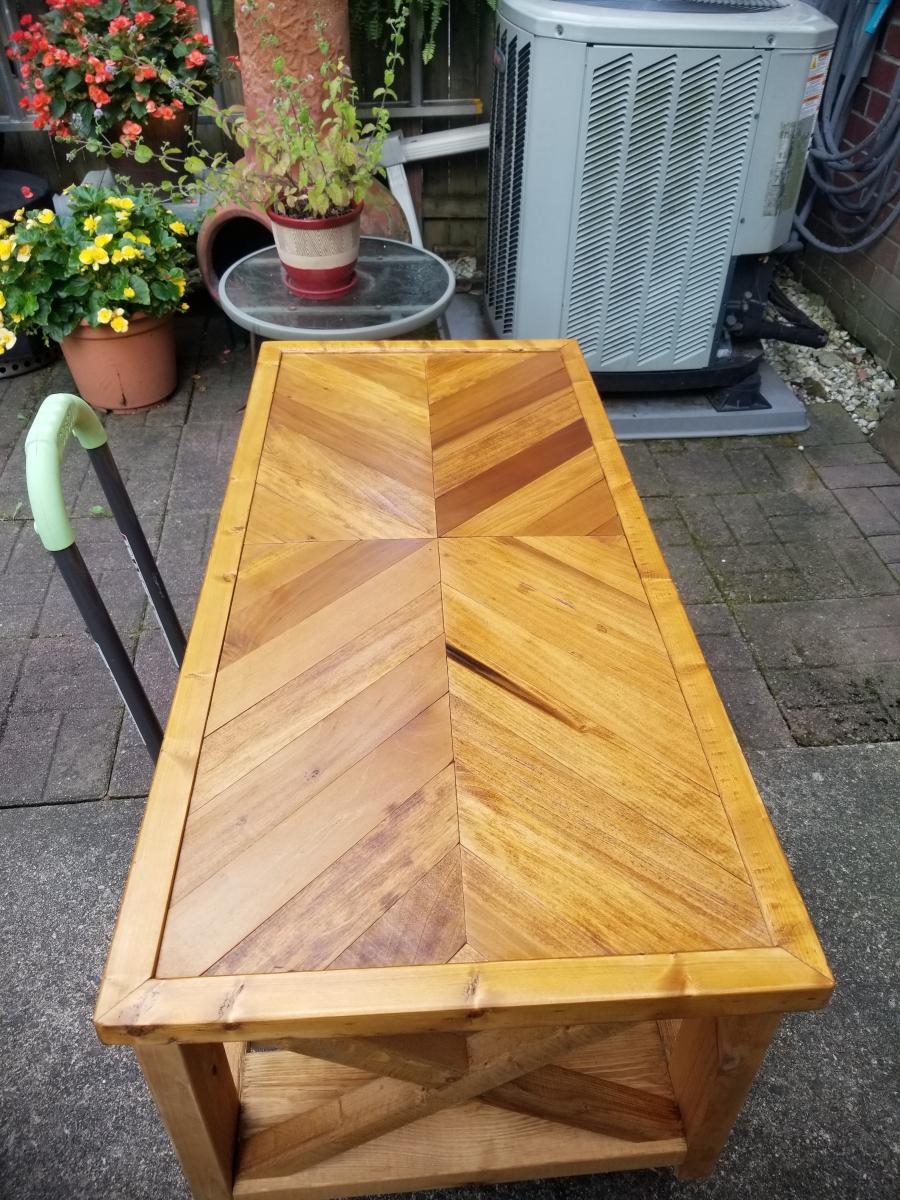
Rustic X Coffee Table with Herringbone Top
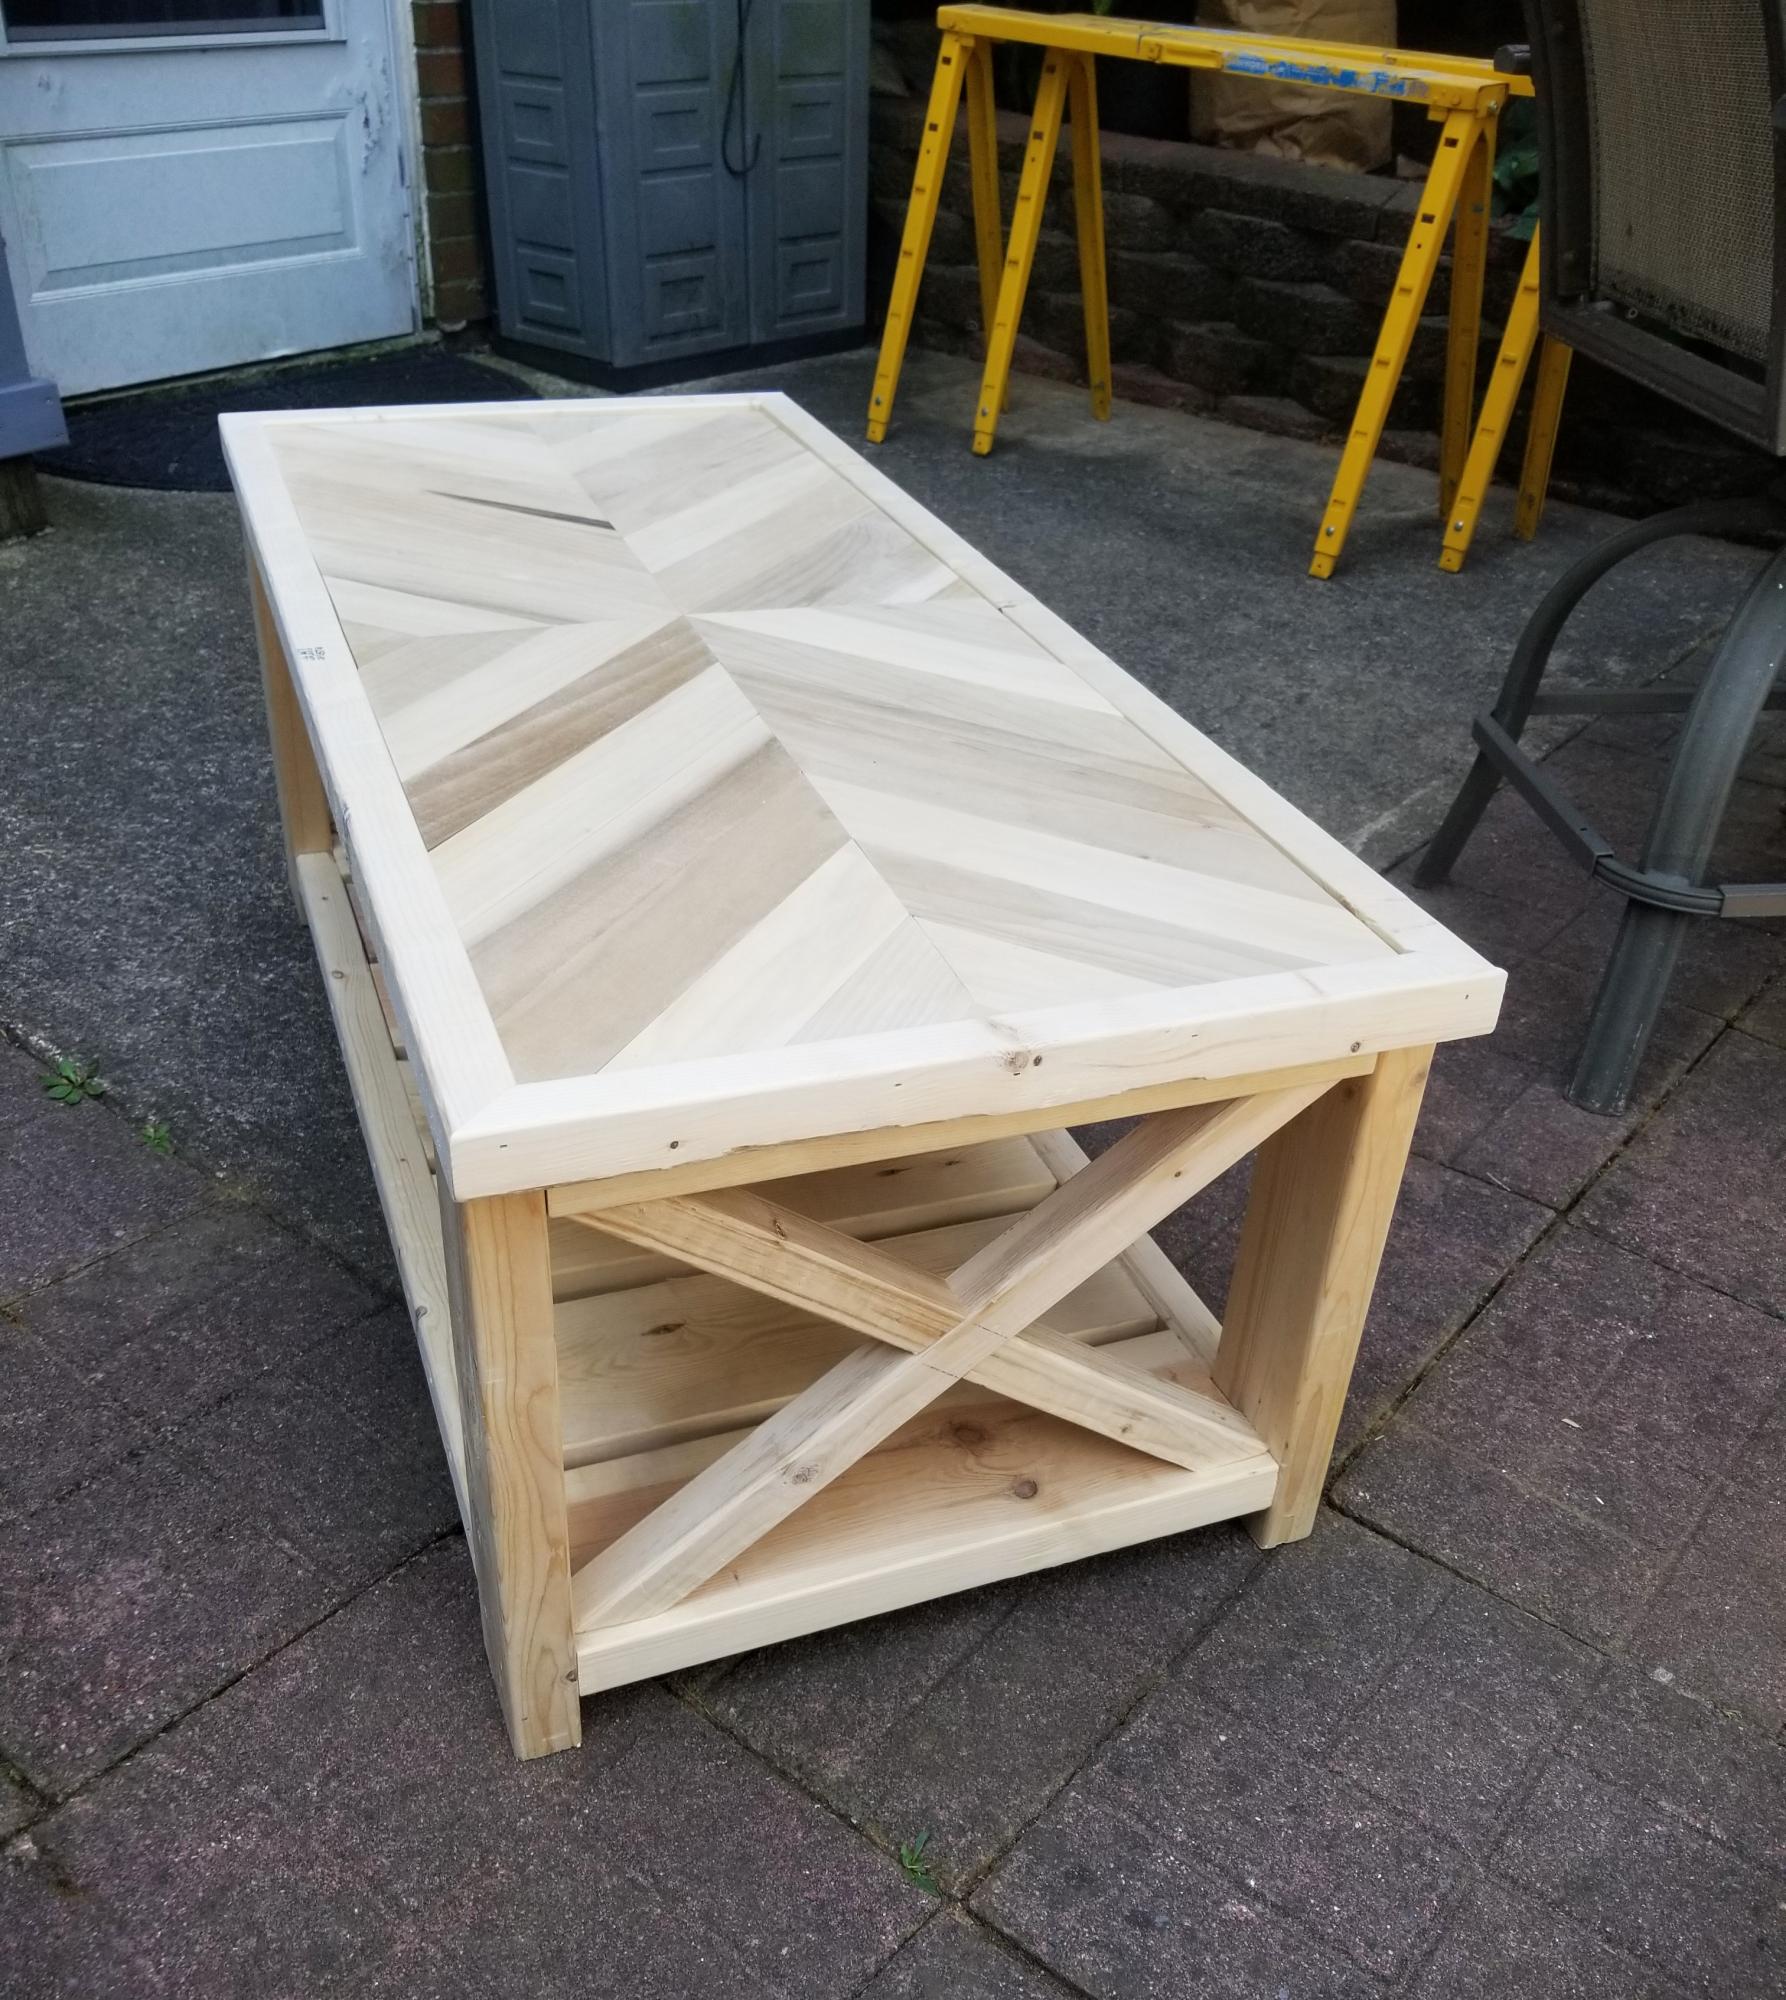
1st time making an actual table that I can use. Its rough but still pleased. Just needs a coat of poly 😊
Becky rlsnjsh
Built from Plan(s)
Comments
Tue, 09/24/2024 - 10:14
I love this alteration! This…
I love this alteration! This is exactly what I had in mind. Did you combine this with another plan to create the herringbone top?
Laundry Dresser

My very first build inspired by the Ana-White.com website. I would declare this as a success. Decided to make two laundry drawers and keep the bottom open for extra supplies. Perfect for our household.
Built from Plan(s)
Estimated Time Investment
Weekend Project (10-20 Hours)
Finish Used
Primer Zinsser 1-2-3, leftover paint sitting around in garage.
Recommended Skill Level
Starter Project
Key holder
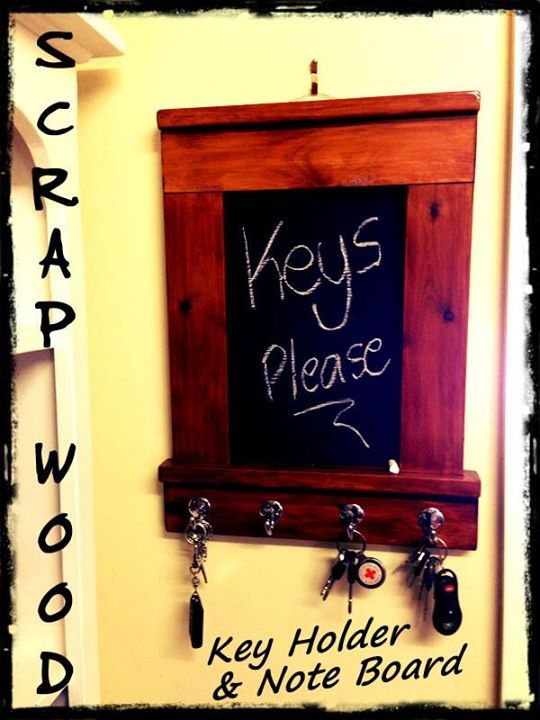
This creation was made using scrap wood, hooks I got from Bunnings and some blackboard paint. Apparently now Brodie doesn't know where the keys are. This was based on Ana White's Craftsman Frame Plan.
Built from Plan(s)
Estimated Time Investment
An Hour or Two (0-2 Hours)
Finish Used
Teak Stain and Blackboard paint
Recommended Skill Level
Starter Project
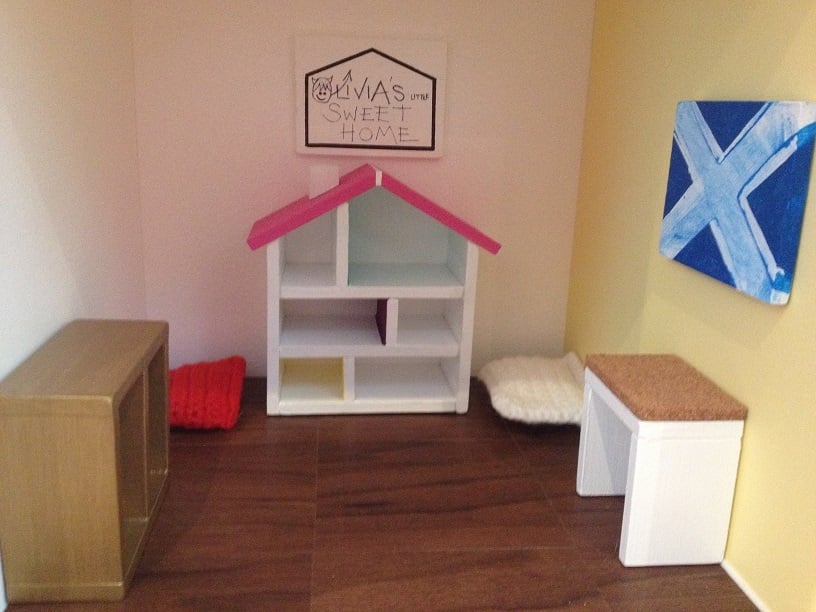
Dollhouse
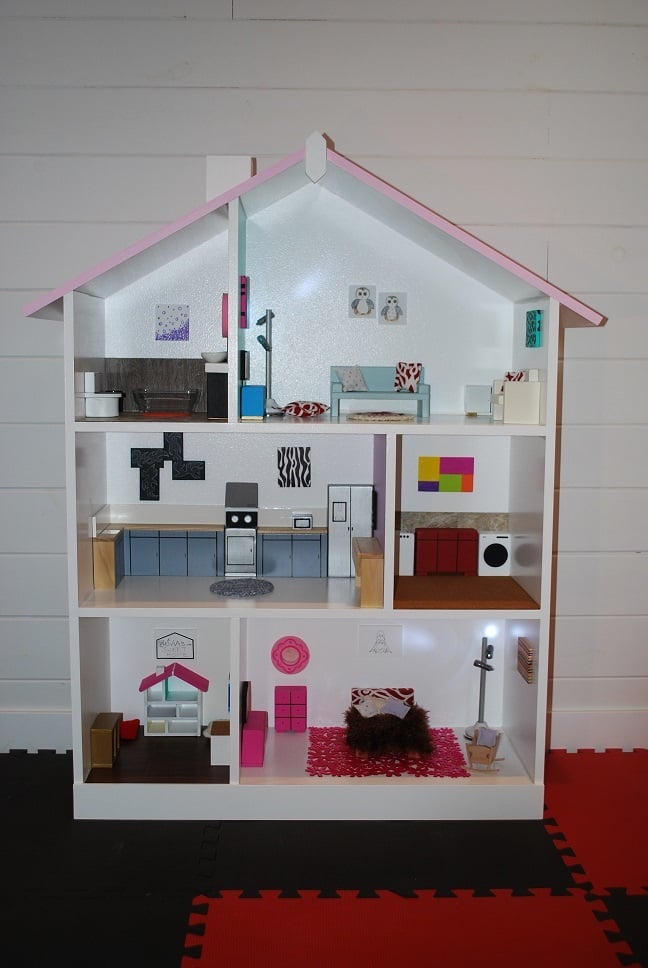
I am not sure what happened first time I posted this as it was posted as Guest (sorry). Anyway....
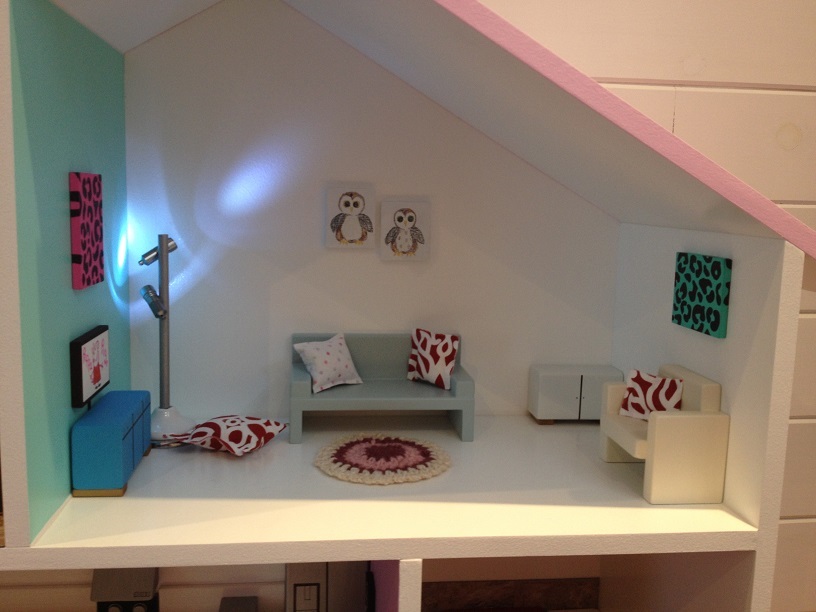
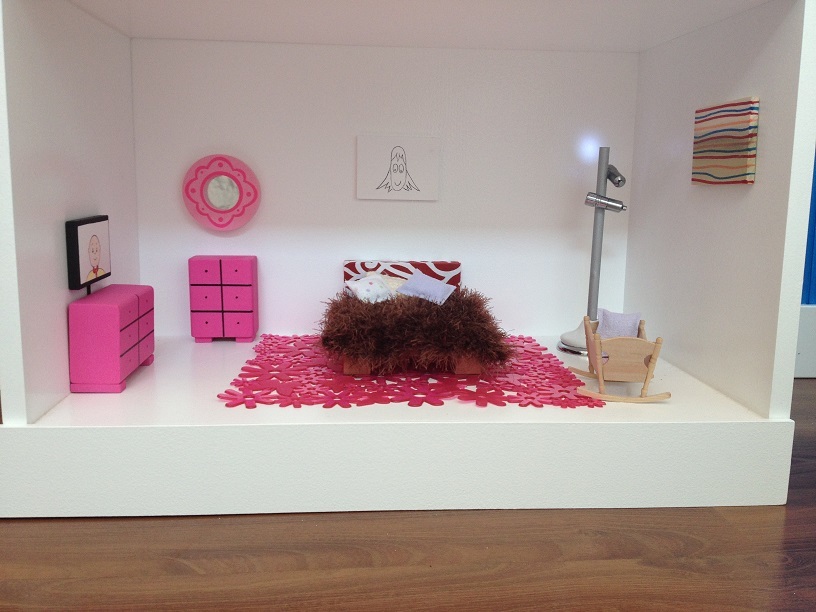
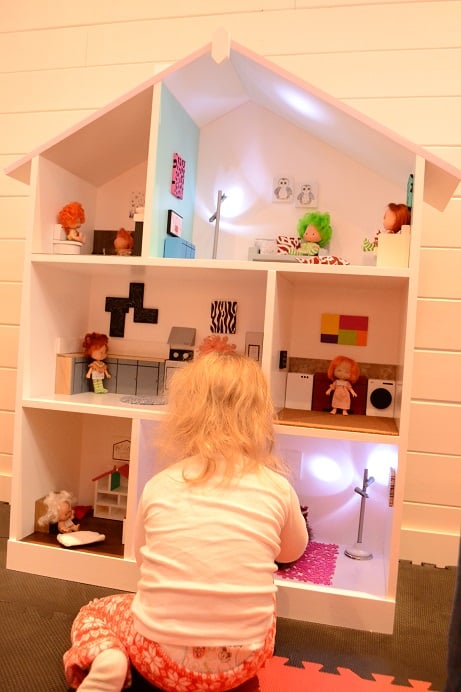
When my daughter was born I promised that I would make her a dollhouse. A few weeks ago I found these plans, and absolutely loved the visual layout of the rooms. I stuck with this layout and tweeked the dimensions according to what worked best for the space it would proudly sit in. It is 46 inches high and 31 inches wide at the walls, and is made from 12 inch wide MDF which I primed with a latex primer and then finished off with a semi-gloss white on the majority of the walls. I also mixed the colors for the roof and also the 3 accent walls to give it an extra wee shot of color.
I was very, very happy with the end result, and having caught what I now know as the "dollhouse bug" I thought "what about if I added a chimney ?". So I added it. I then though what about adding a roof ridge and gable to the roof. The house looked even better. Progressing onto full-blown "dollhouse-flu", I then decided to make a chair for what would later be the living room. That was it, fully addicted now I couldn't stop and found myself obsessively planning, designing, messing up, re-designing, cutting, building and painting until I reached the point where last night I attended my first "DA" meeting.
I found Dollhouse Annonymous very helpful and although not cured, I realise that it is perfectly acceptable for a 44 year old Scotsman to build a dollhouse for the daughter (naughty 2 1/2 year old daughter) that is the love of his life. If she is happy when she unwraps it on Christmas morning, then all of the work shall be worth it.
This site is top of my bookmark list and I love it. !

Built from Plan(s)
Estimated Cost
$90
Estimated Time Investment
Week Long Project (20 Hours or More)
Recommended Skill Level
Beginner
Narrow end table
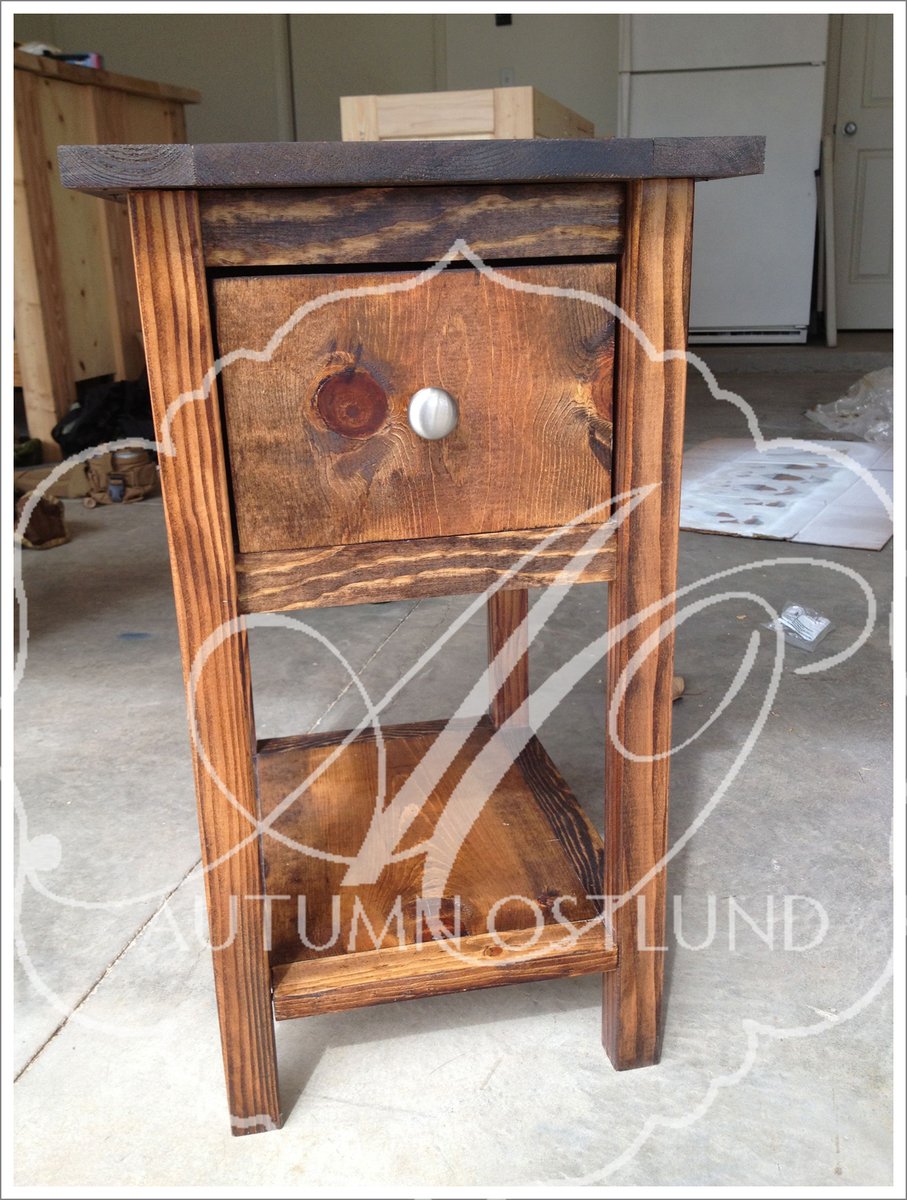
I adjusted the dimensions to fit my space and added a shelf on the bottom. I built it using my Kreg Jig.
Built from Plan(s)
Estimated Time Investment
An Hour or Two (0-2 Hours)
Finish Used
I stained the end table and then polyurethaned over the stain.
Recommended Skill Level
Beginner
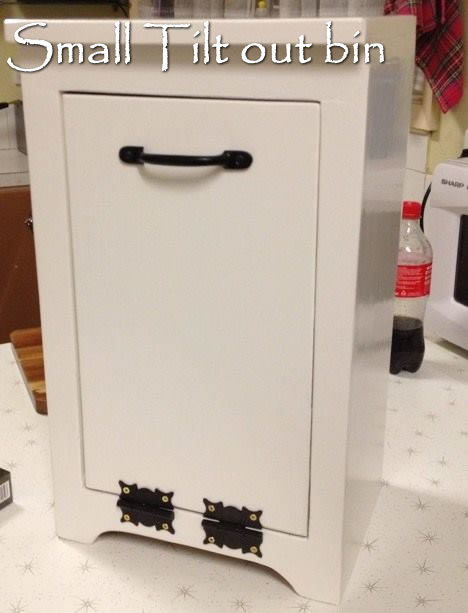
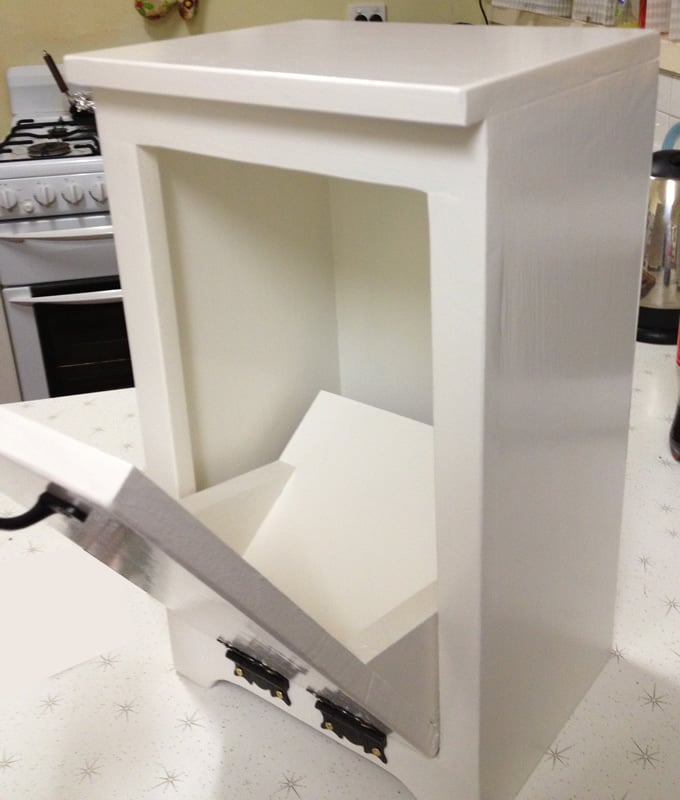
Tilt out bin
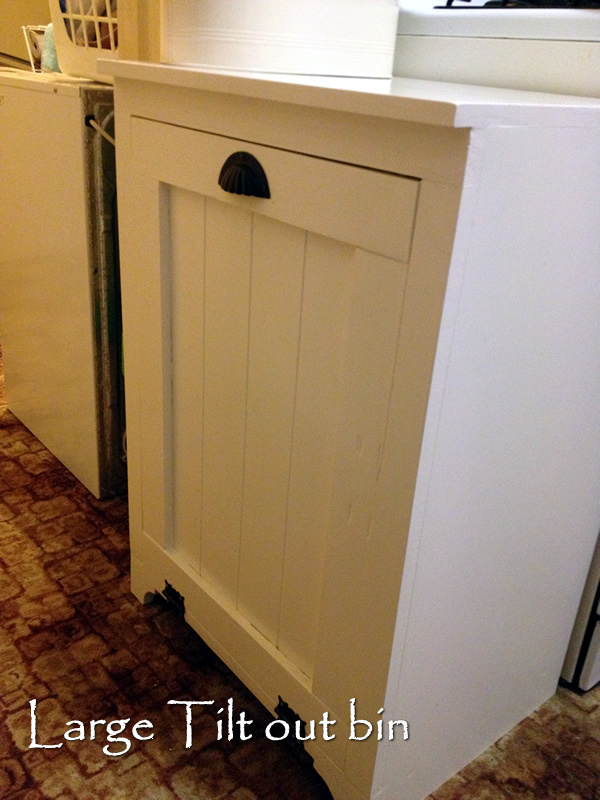
I love this bin so much I built a large one and a small one. The small one is for the bathroom. The large on is for the kitchen. This is actually a rather easy build. I used mdf. I grooved the front panel on the large bin to add character. This was built from Ana White's Wood Tilt Out Trash or Recycling Cabinet Plan.
Built from Plan(s)
Estimated Time Investment
Day Project (6-9 Hours)
Finish Used
White enamel paint
Recommended Skill Level
Beginner
Comments
Thu, 09/11/2014 - 10:17
Front panel
Can you give me a few more details about your grooved front panel...
did you just run the panel thru a table saw?

Tue, 01/24/2017 - 16:03
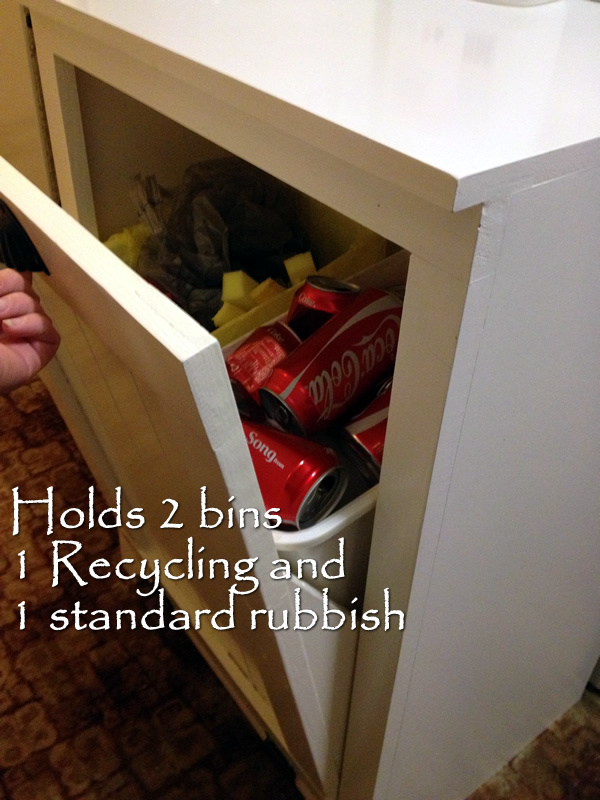
Size for 2
I know its been awhile, however the one you have both normal trash and a recycle bin in.. is that the same dimensions as the ana-white build for a single?
I assume the trash cans are just flipped side ways to hold 2 instead of 1?
looks great, thank you!
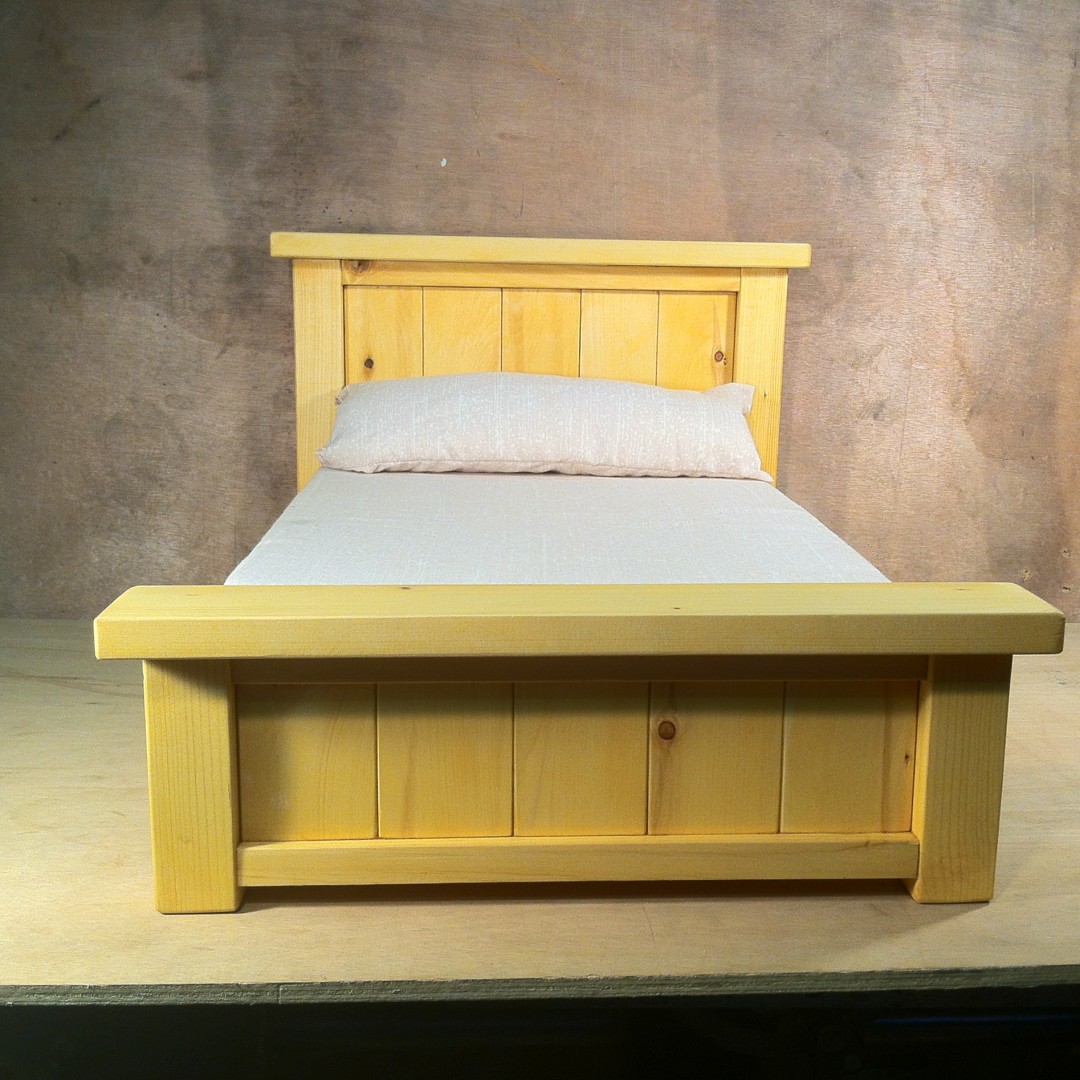
Doll Farmhouse Bed
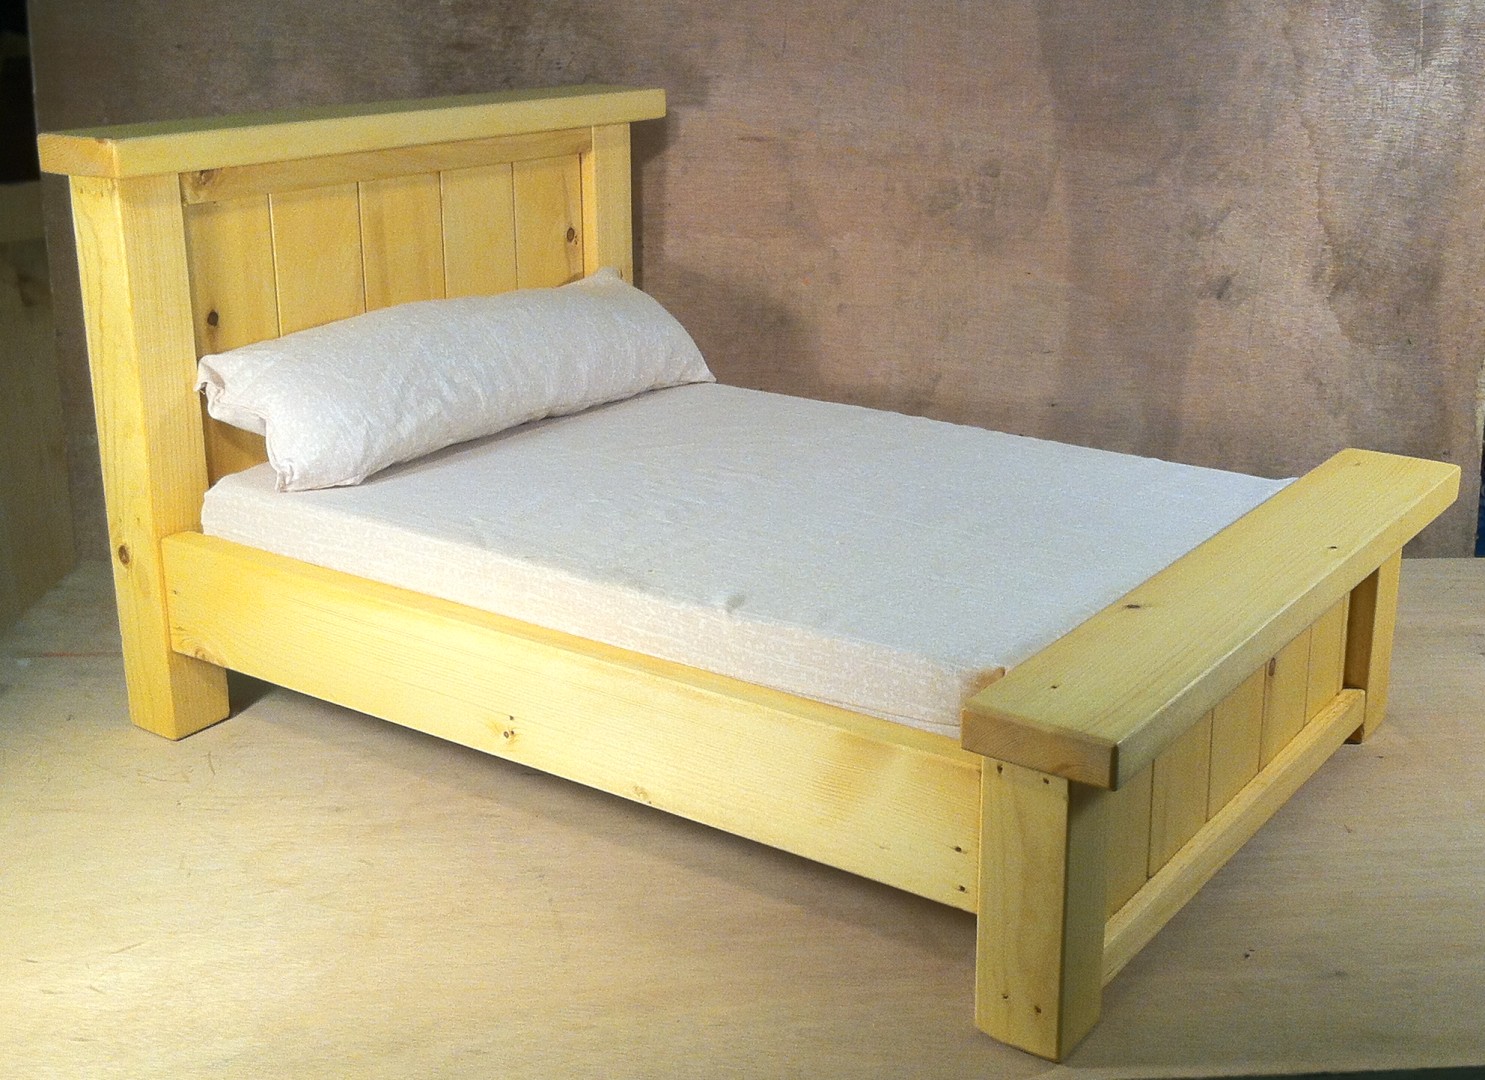
Made for my grand daughter. It was too cold in the shop to use carpenters glue, so I used medium thick, gap filling CA (cyanoacrylate)glue, and brad nails instead of screws.
Built from Plan(s)
Estimated Cost
$10.00
Estimated Time Investment
Afternoon Project (3-6 Hours)
Finish Used
Watco Golden Oak
Recommended Skill Level
Intermediate
