Community Brag Posts

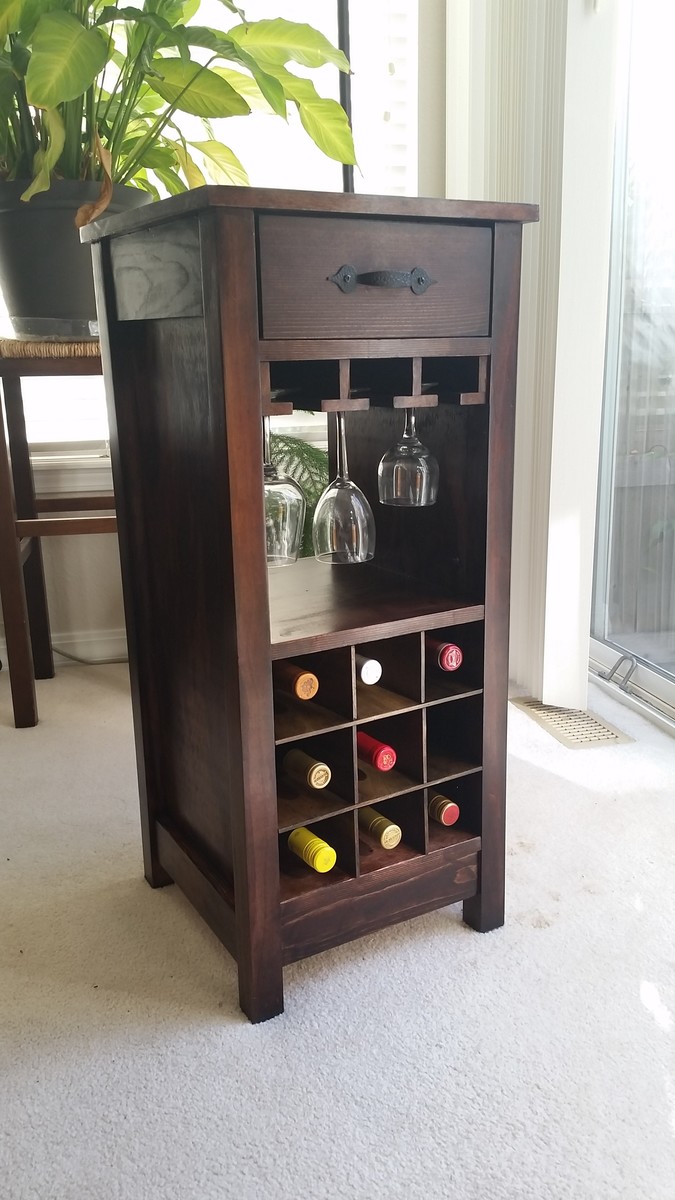
Mini Wine bar

Submitted by ericaf on Sat, 10/18/2014 - 10:41

Be aware: some of the measurements and materials needed in the plan are off. For example, you need 1/8" hardboard for the bottom of the drawer but earlier in the plans it shows 1/4". Also, if you have larger wine glasses, you'll want to plane down your stemware holders so the distance between them is 3 1/8" instead of 3". It would have also been a good idea to pre-stain those before adding them in. Regarding stain, it would also look really good with a light stain. Another really nice thing about this project is that people are really impressed with it though it is fairly straightforward. :)

Built from Plan(s)
Recommended Skill Level
Beginner

Comments

ericaf

Fri, 06/10/2016 - 07:09

Thank you. :) I don't remember exactly, I believe it was regular Minwax wood stain, walnut and/or red mahogany. I will try to find what I actually used.

In love with this!

Submitted by Anonymous (not verified) on Thu, 01/26/2017 - 15:12

This is one of my favorite projects I've done! Very easy and fun! 

Estimated Cost
$140
Estimated Time Investment
Afternoon Project (3-6 Hours)
Finish Used
Antique white paint and semigloss
Recommended Skill Level
Beginner

Rollaway Workbench

Submitted by Indiri on Sat, 10/17/2020 - 18:26

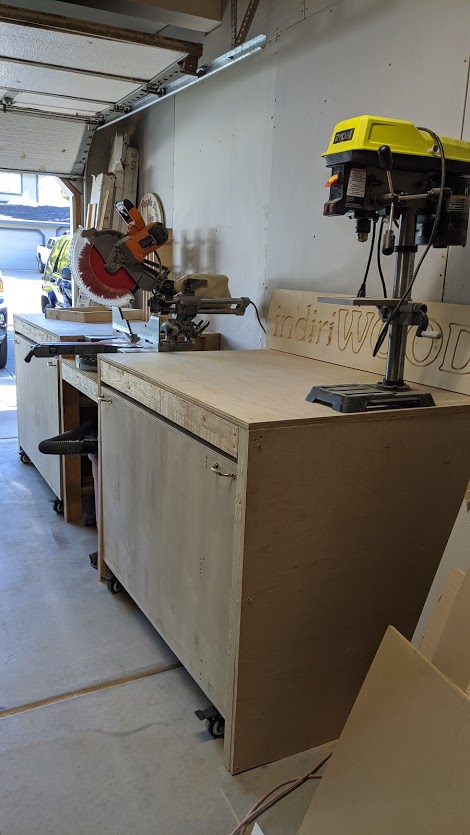
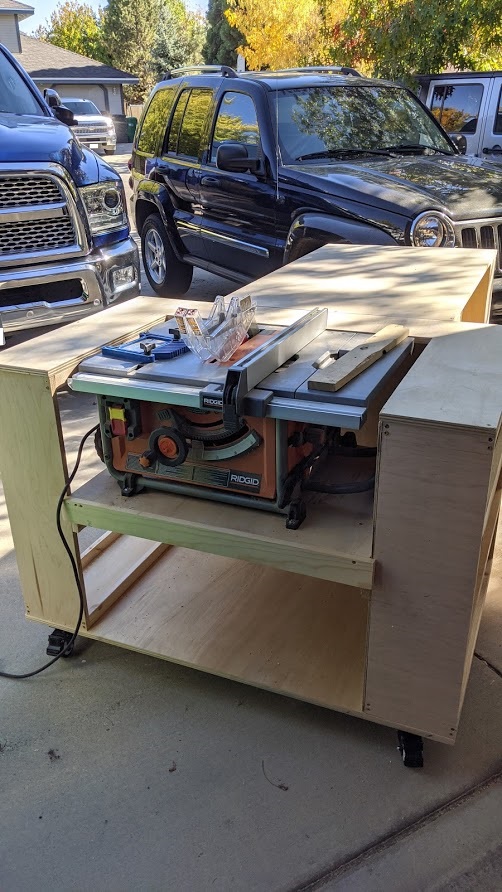
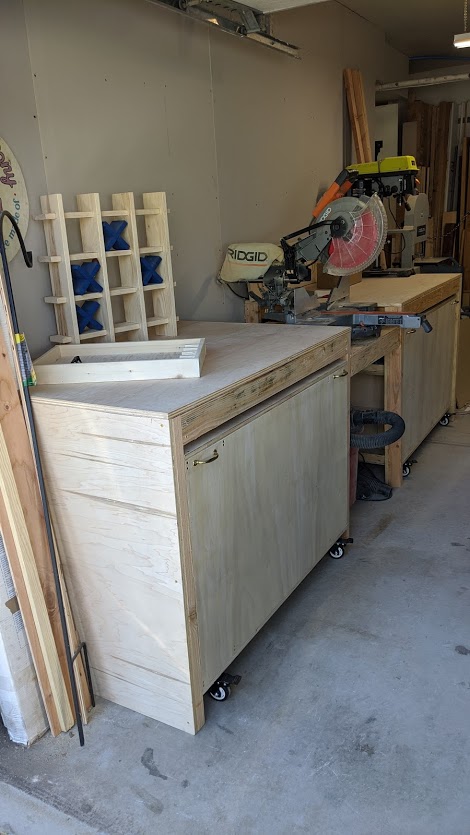
I have a one car garage for my "shop" which means I can be really short on space. This build is perfect for saving space!

I made a few adjustments for the bigger saws (it's deeper and the center part is wider). I also used screws more in places that it called for nails but I wanted to be sure nothing would budge and also I didn't put the shelf backing on the one part where the table saw is in so I have better access to the saw while it's in place. I tried to use leftover wood I had in the garage wherever possible but I still had to buy 2 sheets of 3/4" and 1 sheet of 1/4".

Since I used more screws I may pretty up the front later with trim, I don't know. TBD

Estimated Cost
$150 because I used a lot of leftover wood
Estimated Time Investment
Weekend Project (10-20 Hours)
Finish Used
None
Recommended Skill Level
Beginner

Comments

Twin Over Full Simple Bunk-Bed

Submitted by Ksavtech on Wed, 01/02/2013 - 10:16

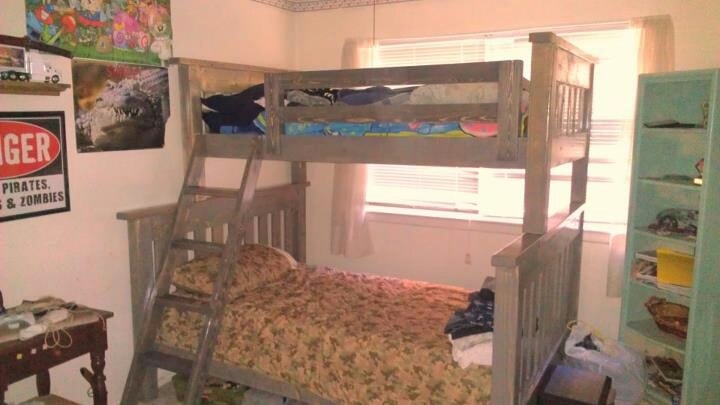
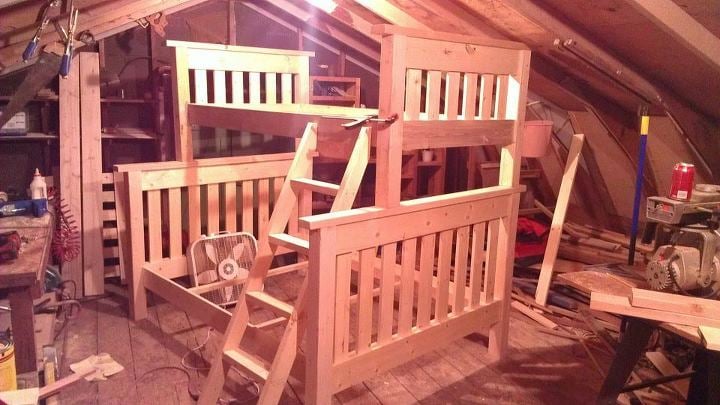
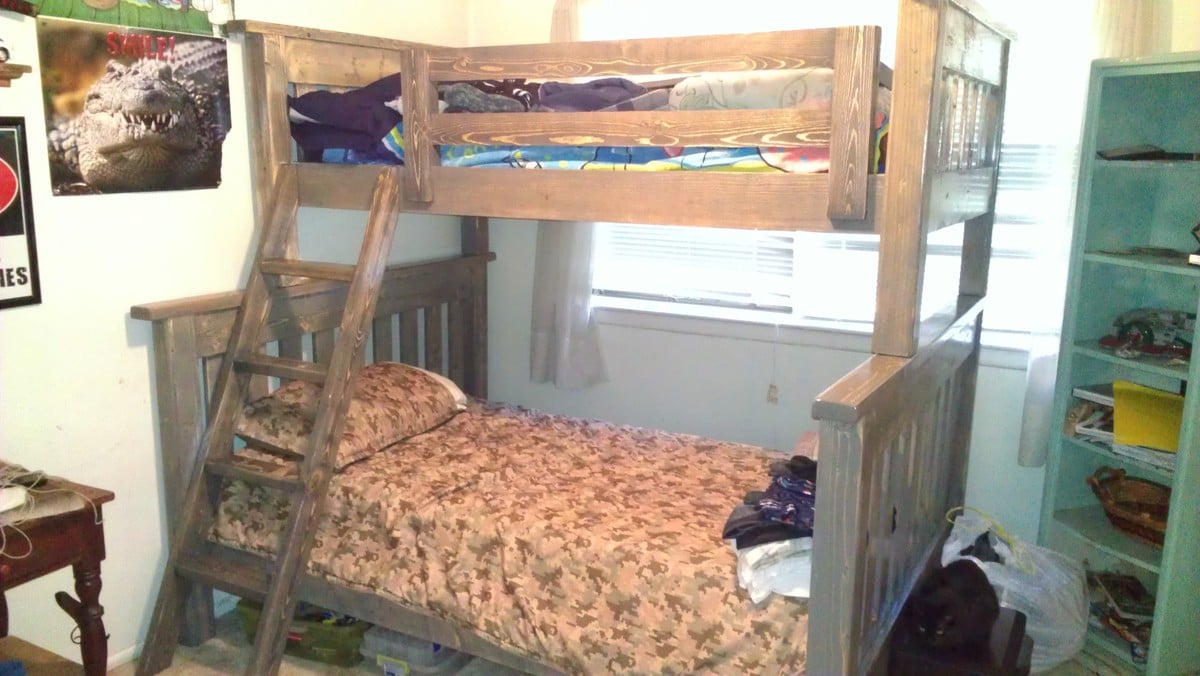
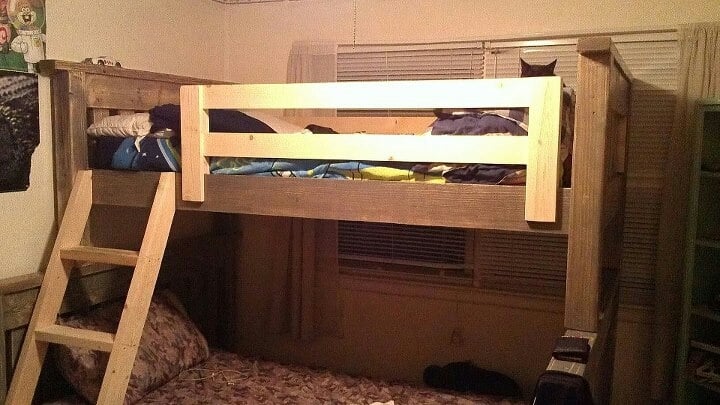
The twin beds that my boys were using took up way too much space in their small room so after much looking I found the Ana White site and this plan. The bed I made is per plan except for the addition of the side rails that slip fit onto the sides. When we change the sheets on the top bunk we just slip off the rail and stand on the lower bunk. We've had my two boys and three nephews all on the bed playing Xbox and it is rock solid!

Estimated Cost
$150
Estimated Time Investment
Week Long Project (20 Hours or More)
Finish Used
Minwax Classic Grey and matte polyurethane
Recommended Skill Level
Intermediate

Loft Bed Tweak

 I added 6 inches to the height to be able to add a twin bed underneath. I also made the platform narrower to fit our room better. Love it. Cant wait to build more.

Estimated Cost
100$
Estimated Time Investment
Weekend Project (10-20 Hours)
Finish Used
None
Recommended Skill Level
Beginner

Fathers Day Gift

Submitted by Anonymous (not verified) on Mon, 01/30/2017 - 06:46

Weekend project for a friend. We built this for her husband for a Fathers day gift.. He is a fire fighter so we decided to paint it fire engine red.

Built from Plan(s)
Estimated Cost
$ 75-100
Estimated Time Investment
Week Long Project (20 Hours or More)
Recommended Skill Level
Intermediate

Christmas Tree Shelf

Submitted by Anonymous (not verified) on Wed, 10/21/2020 - 08:50

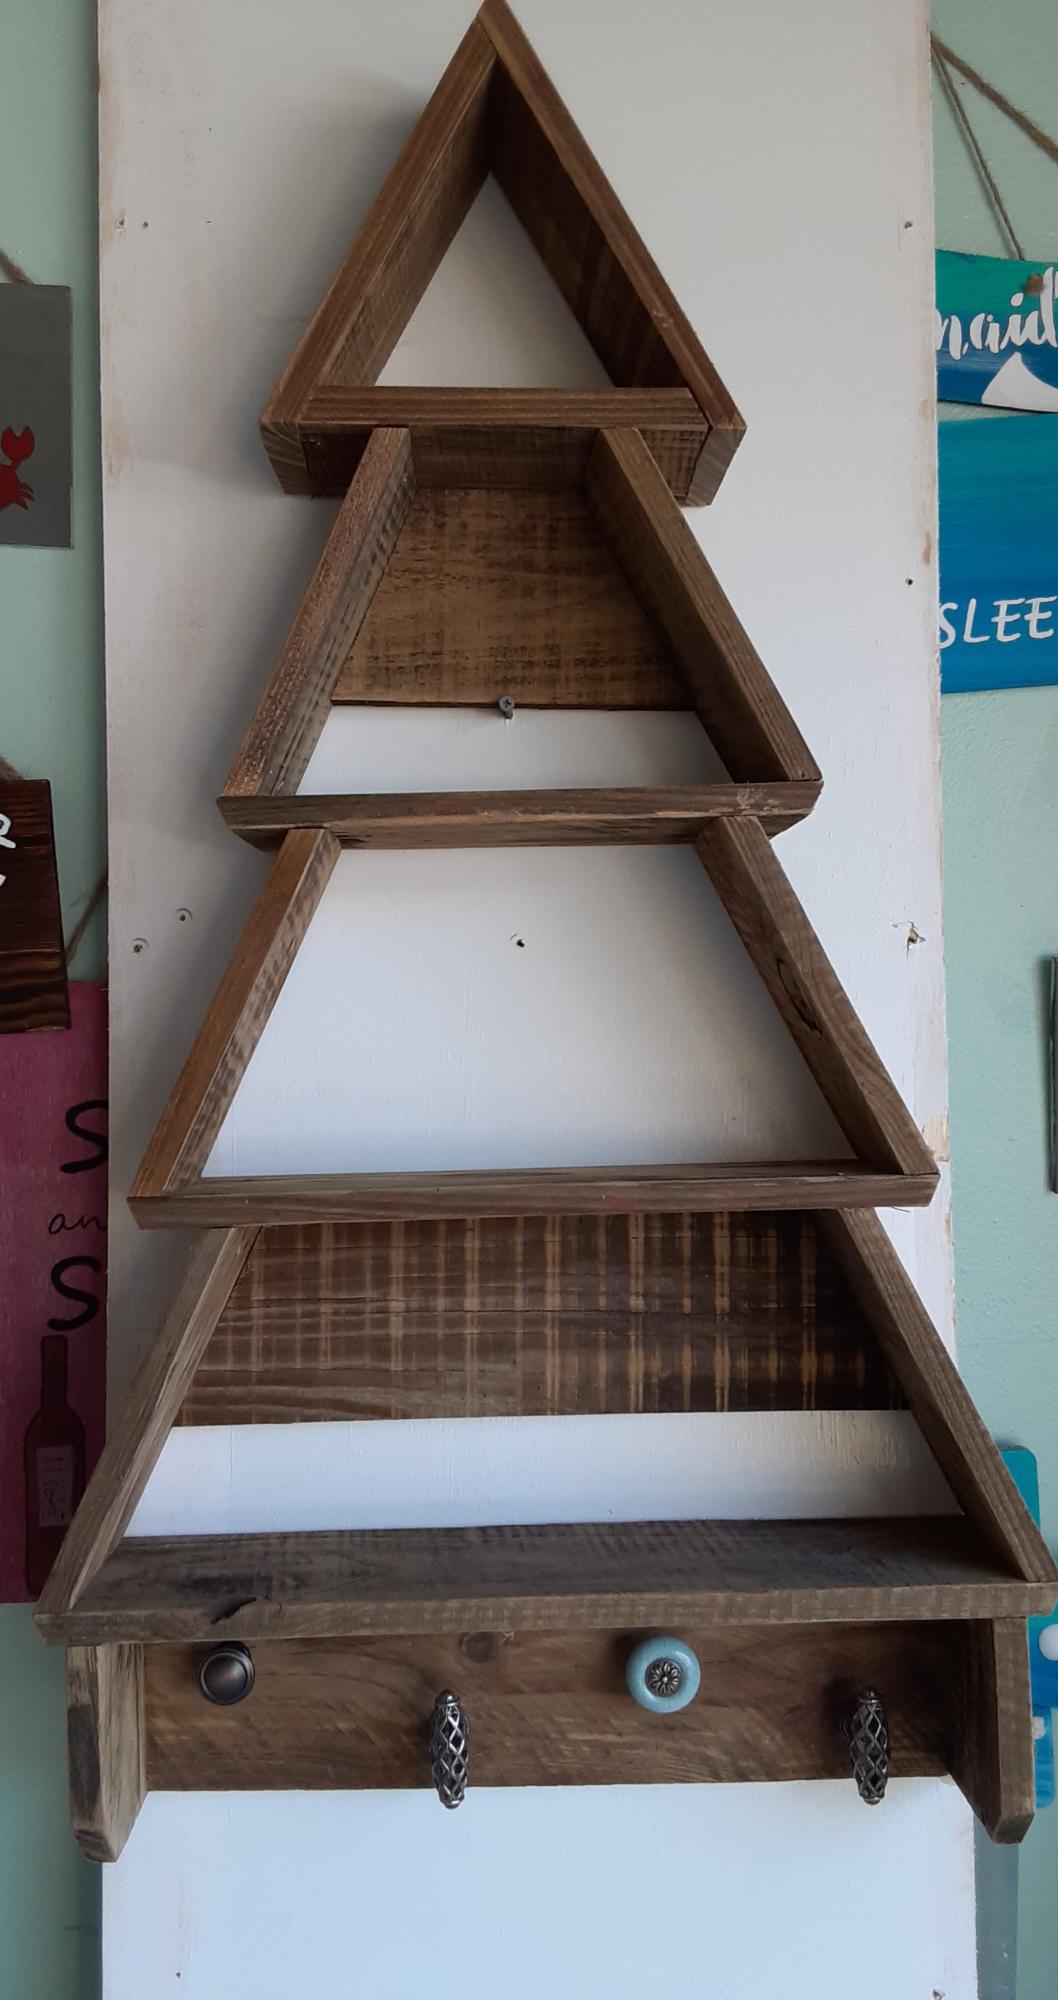
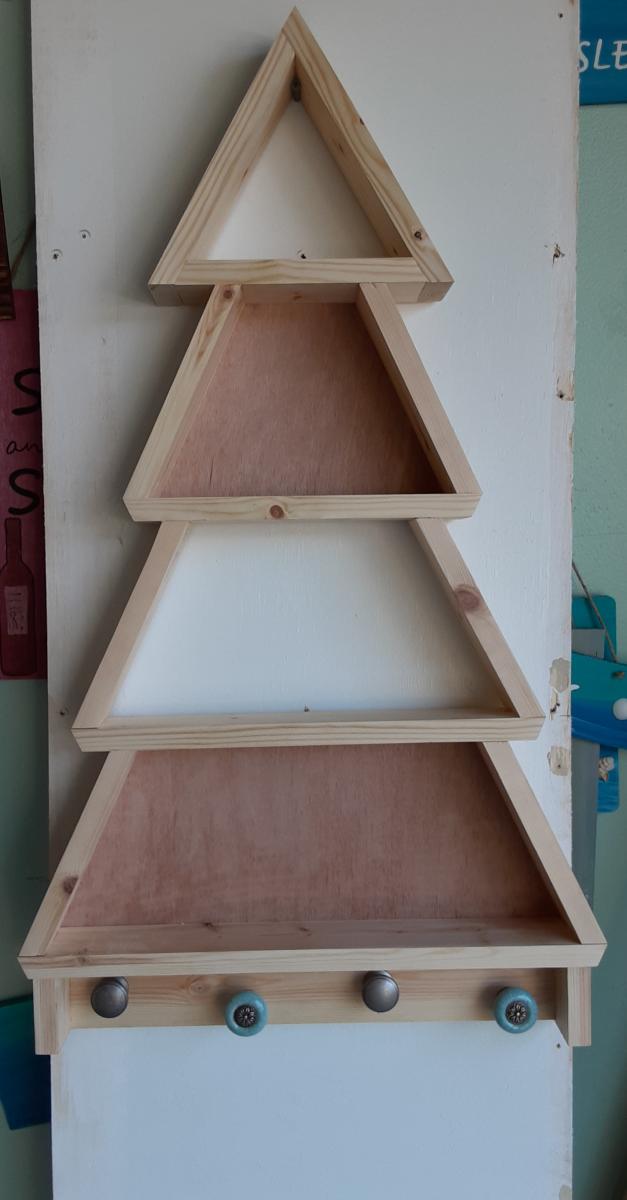
This is my first time using some of the power tools that this required, however, it came out SO CUTE! I put one together and someone bought it raw. I put one together as the video showed, and then did one out of old fence pickets that were cleaned up and planed by a neighbor. They both came out beautiful. We used knobs that we had in the shop and offset them a little to be whimsical.
Vasiliki

Built from Plan(s)
Estimated Cost
$8-12
Estimated Time Investment
An Hour or Two (0-2 Hours)
Finish Used
Entry way to home, by the front door.
Recommended Skill Level
Intermediate

Comments

Bunk Bed From a Loft Bed

This bunk bed was made out the Camp Loft bed plans. With my daughter out growing her toddler bed, we really needed a "big girl" bed without giving up too much space. This was perfect. It was really easy to add an extra set of 2x6's around the bottom of the loft, and poof, it’s a bunk bed. The kids really love it and it is really strong. I weigh about 250 lbs and it doesn't even move when I get on the top bunk. To accommodate for the lower bunk, I raised it to 72” high. As you can see, I also added extra vertical supports on the top rails. I did this so all the weight on the top bunk wasn’t only supported by the 2x6s, but also the 2x4s as well.

I also painted it white becuase that matched the other furnature in the room better than staining it. To keep the wood from seeping sap all over the paint, I sealed it with BIN primer before painting it with latex paint.

I don’t have much experience building furniture, but this was extremely easy. The wood cost us around $100. Slightly more than the post said, but I added a few extra 2x4s and since comparable bunk beds are being sold for about $800, this was a steal. The plans were great and my son and I had a great time building it. Thanks for posting it

Estimated Cost
$100
Estimated Time Investment
Week Long Project (20 Hours or More)
Finish Used
BIN primer (2 coats), latex flat paint, a lot of sanding
Recommended Skill Level
Beginner

Extra Long Bed

Submitted by Lumi on Fri, 10/24/2014 - 16:36

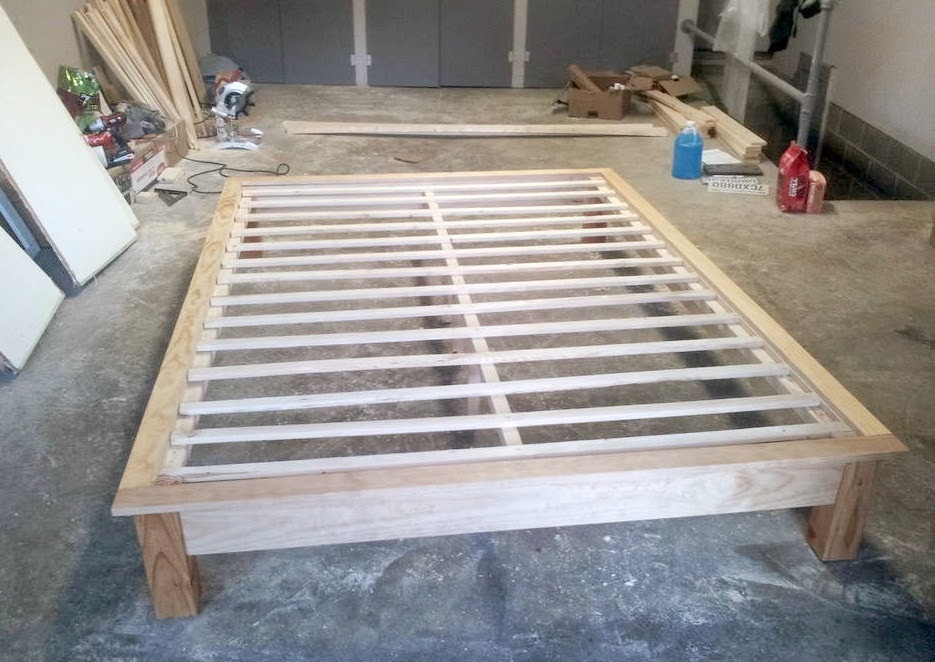
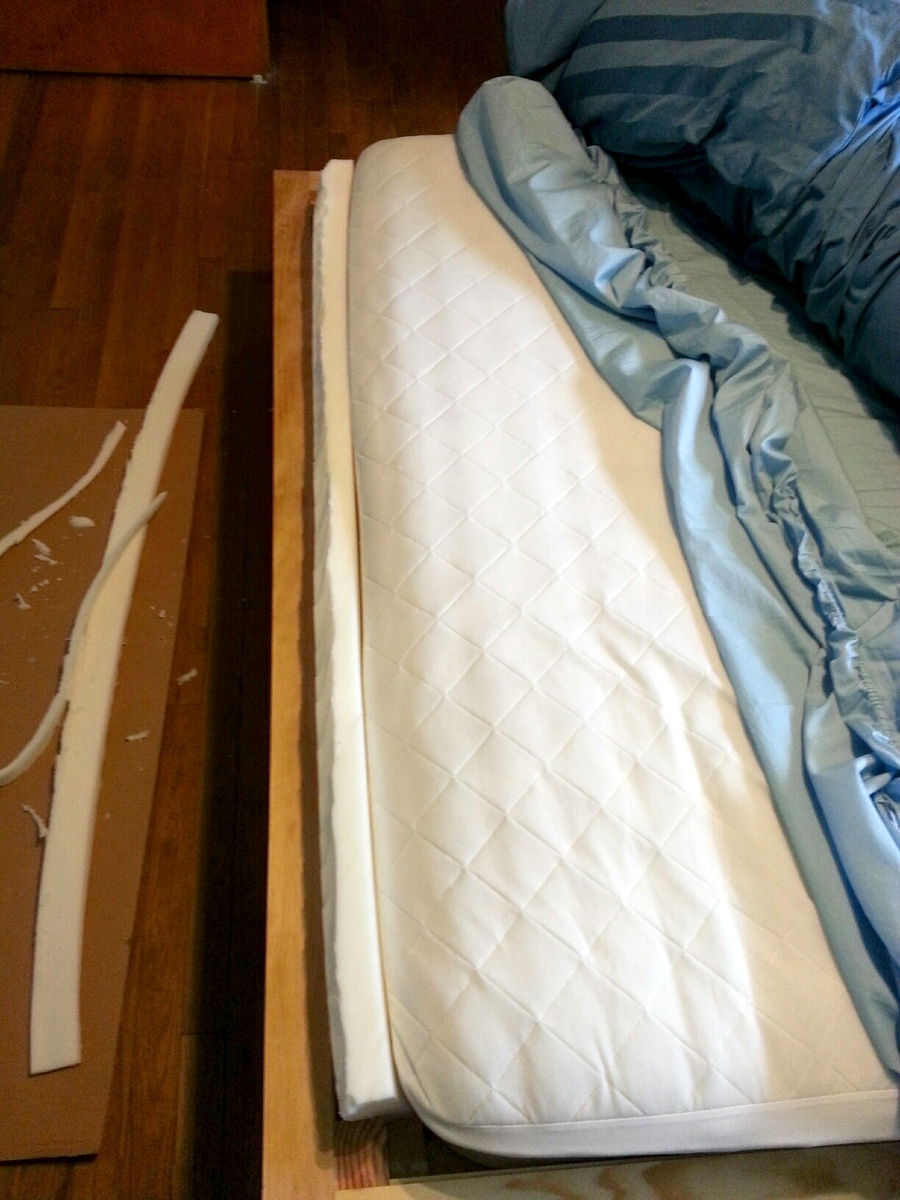
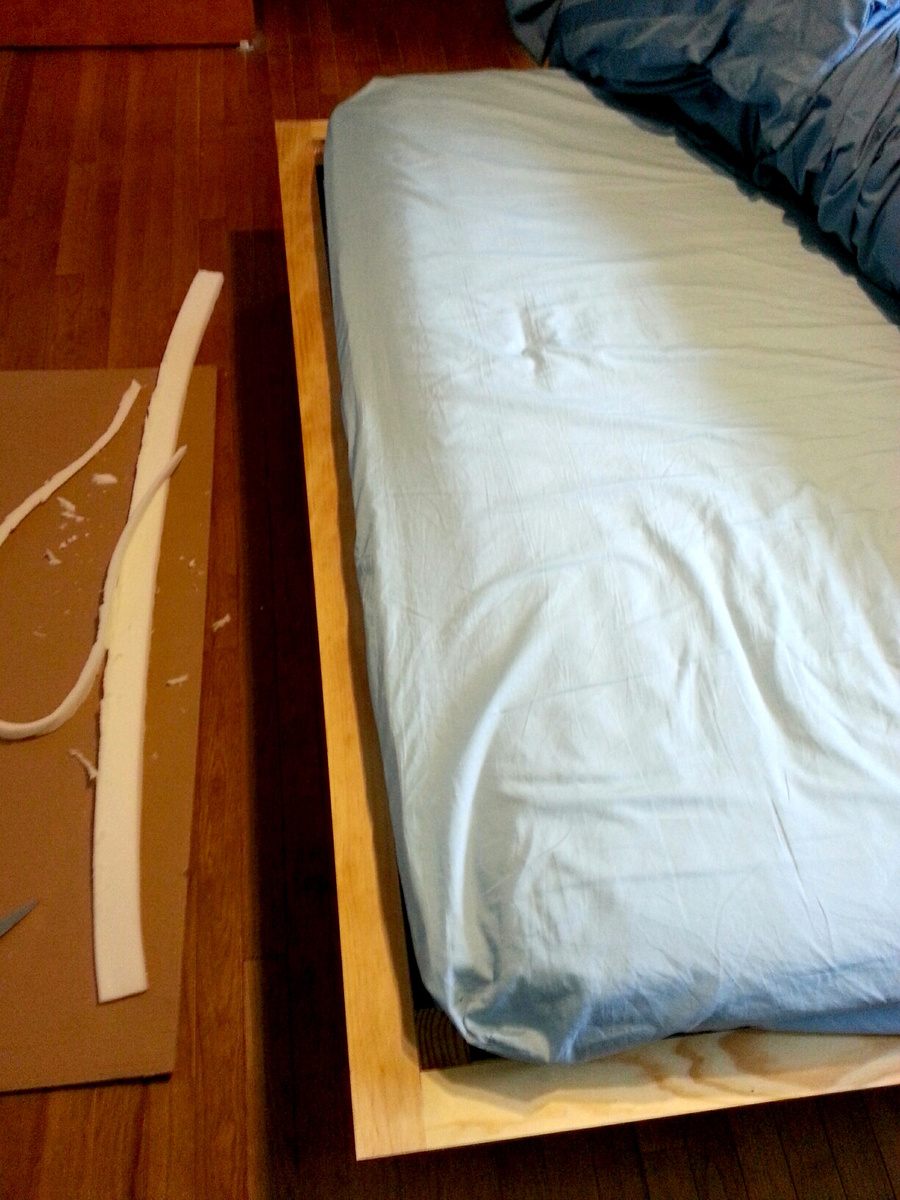
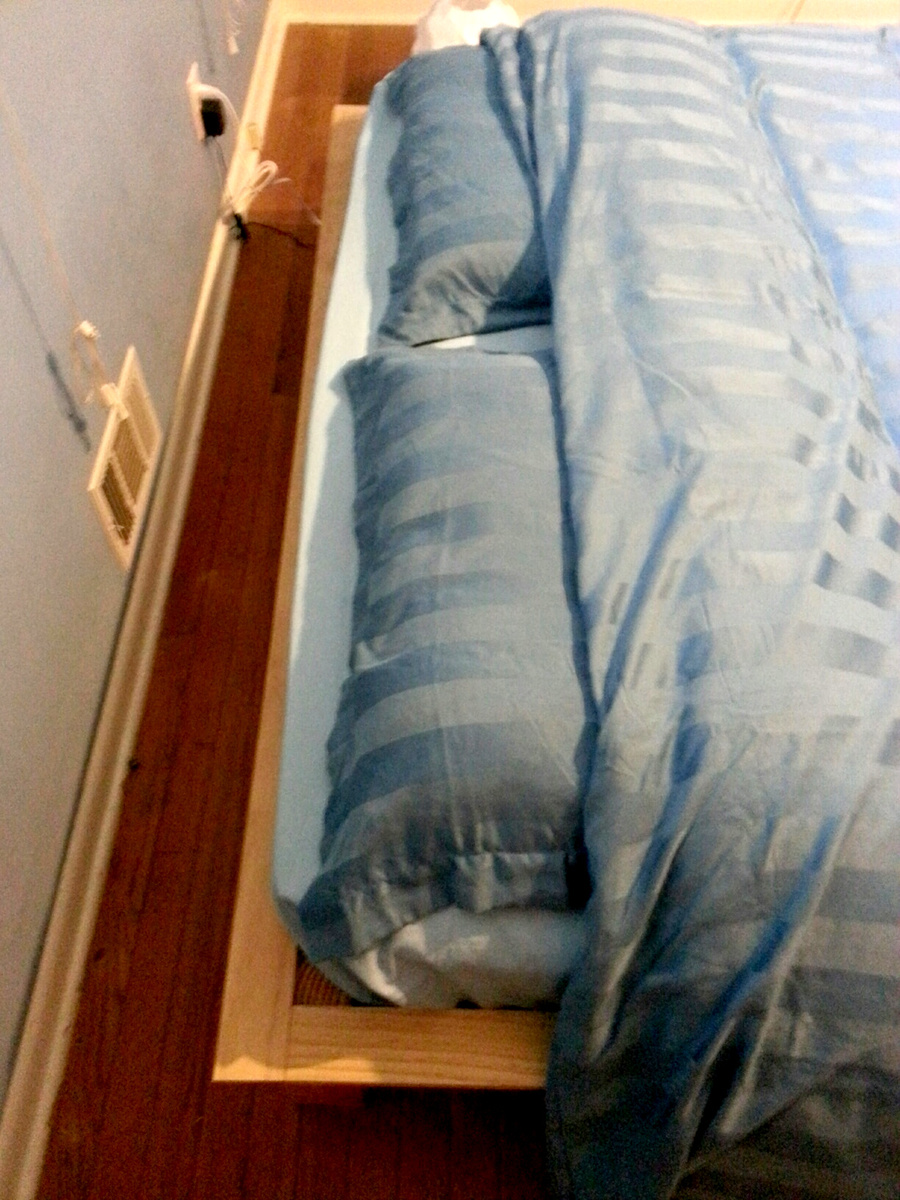
My hubby is 6'5'' tall. Since most matresses are 80 inches long, he mostly ends up with his feet hanging out of the bed (since you don't lay your head down at the very beginning of the mattress, right?). So I tried to solve this problem by making the bed 4'' longer than the plans suggested. I added 2'' of foam on each end of the bed, so now its 84'' long and my hubby fits perfectly!

Thanks for the great plans, I had a blast building my own bed!

Estimated Time Investment
Weekend Project (10-20 Hours)
Recommended Skill Level
Beginner

X console

Submitted by Anonymous (not verified) on Wed, 02/01/2017 - 19:37

X console 

Recommended Skill Level
Beginner

Corner Cupboard Hutch

Submitted by necdice on Tue, 10/27/2020 - 08:53

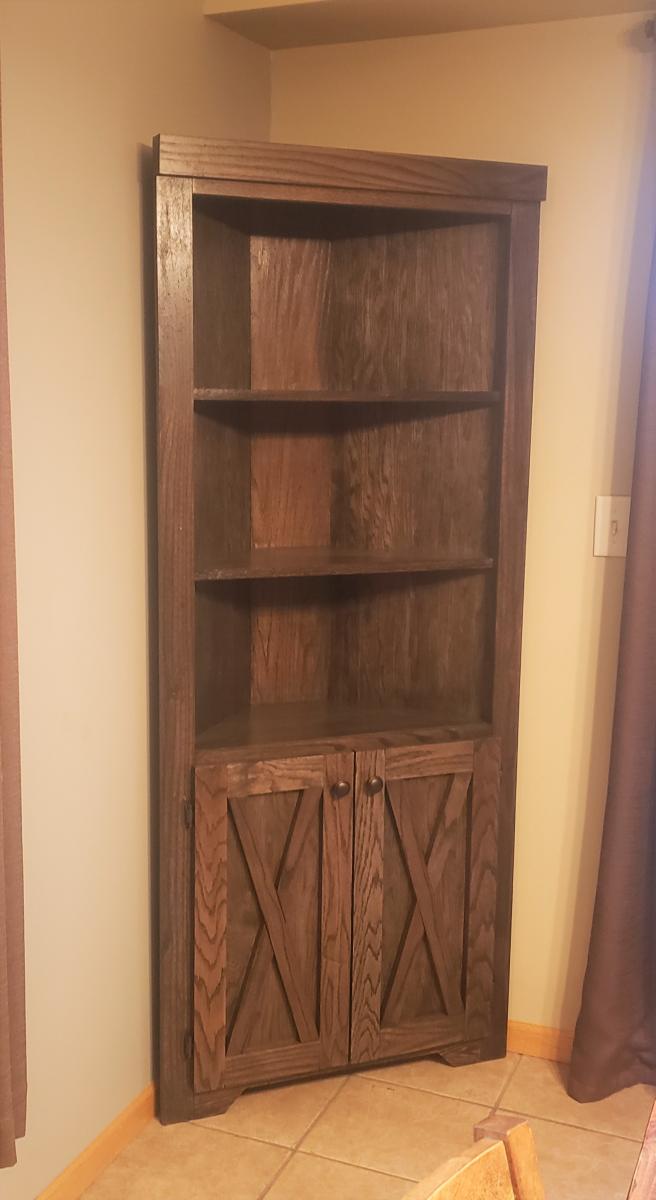
Thanks to Ana for the custom corner cupboard hutch plans! This project turned out great using Red Oak boards and an ebony stain. My customer loved it!!

Built from Plan(s)
Estimated Cost
100
Estimated Time Investment
Weekend Project (10-20 Hours)
Finish Used
Minwax Ebony with a couple coats of poly
Recommended Skill Level
Intermediate

Comments

2x4 Banquette Seat

Submitted by boyledover on Sat, 01/05/2013 - 16:47

I have been wanting a banquette for years and when I spied Ana's version in the post about Grace's birthday party, I knew I could do it. I waited for the plans, and yesterday, I got out the tools and in 6 hours (real time - including cooking meals for kids, potty breaks, and life in general) I had my bench done.

I am so pleased with it. I had all the fabric on hand already, and was able to buy batting, foam and pillow forms all 50% off at Joann's, plus 2 zippers for the blue cushions. The woman who was cutting my foam asked me what I was making, and I told her I was building an upholstered bench for my dining room. She said "wouldn't it be less trouble to just buy one already made?" Clearly she has no idea how much this would have cost me. As it stands, I had the lumber and fabric on hand, so my total purchase price was just over $95.00. I would estimate the cost to build to be about $200.00 for everything, depending on how expensive your fabric is.

I love to sew, so I had no problem with the fabric portion of the project, though I did as Ana did and did not upholster the back of the bench. Instead of adding a piece of fabric across the back of the frame, I extended the side fabric by about 6 inches on each side and stapled it to the back. I hope that makes sense. I used a metal cleat to hold the seat back in place. I also used 3 L-brackets to attach the bottom to the frame. I think people will slide into their seat and I didn't want the seat cushion to move.

Not bad for a few hours work!

This project would be an easy starter project for building, though it is a little more advanced when you factor in the sewing. Here is the tutorial I used for the toss pillow cushions: http://sewmamasew.com/blog2/2011/02/add-a-zipper-to-your-pillow/, and here is another from the same blogger for boxed cushion covers (just leave the bottom off of yours for this project, since it will be stapled to the plywood, skip the zipper and handle, and add piping if you want to fancy your cushion up): http://sewmamasew.com/blog2/2008/07/summer-sewing-perfectly-portable-cu…

Thanks Ana for the constant inspiration!
Built from Plan(s)
Estimated Cost
$200.00
Estimated Time Investment
Afternoon Project (3-6 Hours)
Recommended Skill Level
Beginner

Fancy X Farm House Table

Submitted by Anonymous (not verified) on Sun, 02/05/2017 - 12:24

Great way to turn inexpensive pine into a beautiful piece. Our wood was quite wet so we were extra careful to keep it tight and straight. Once the top was assembled, out came the torch! The torch provided an instant partial drying of the wood causing a great bonding and snug fit. The flame brought out the grain in various colors. We opted to use polyurethane as a finish.

Of course we had to make benches to match! 

Estimated Cost
$120
Estimated Time Investment
Weekend Project (10-20 Hours)
Finish Used
Torch Polyurethane
Recommended Skill Level
Beginner

Playhouse Loft Bed- Thomas

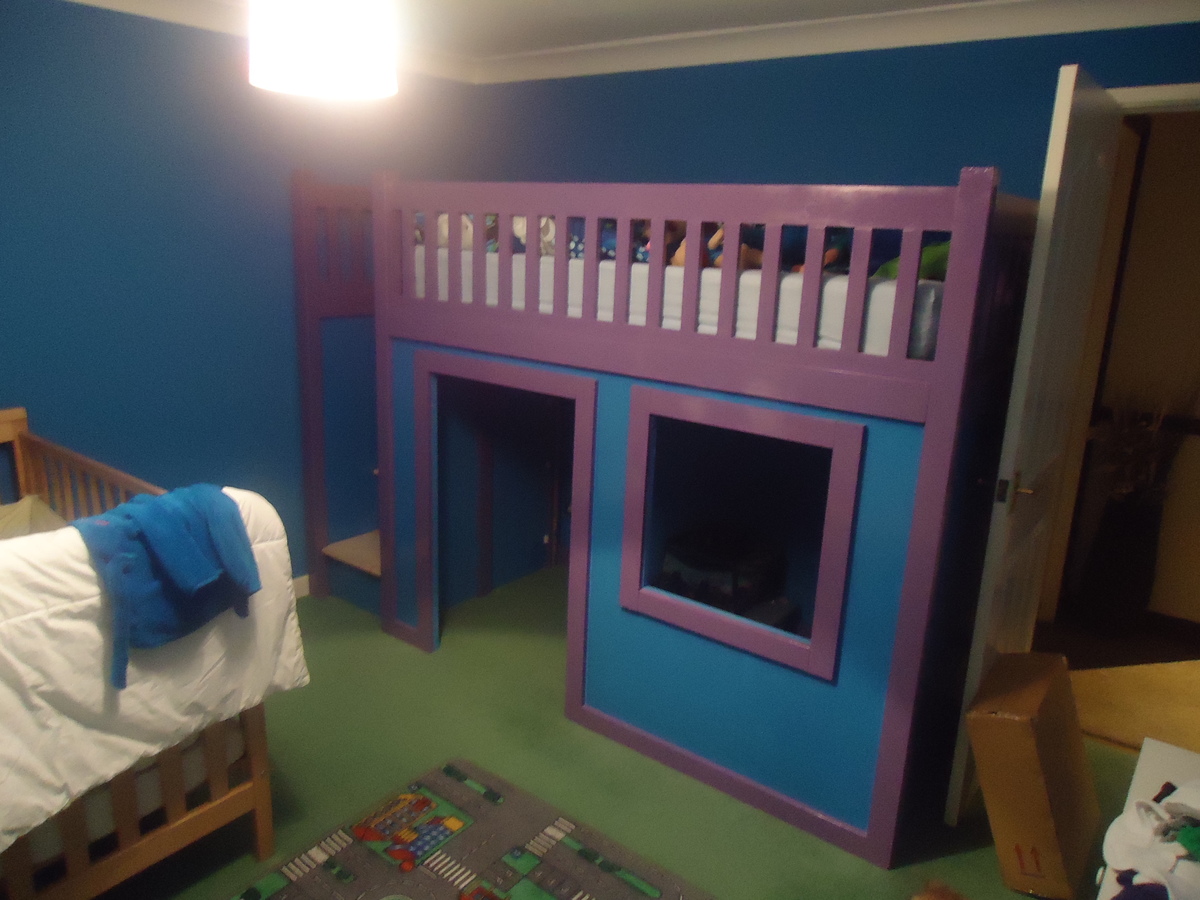
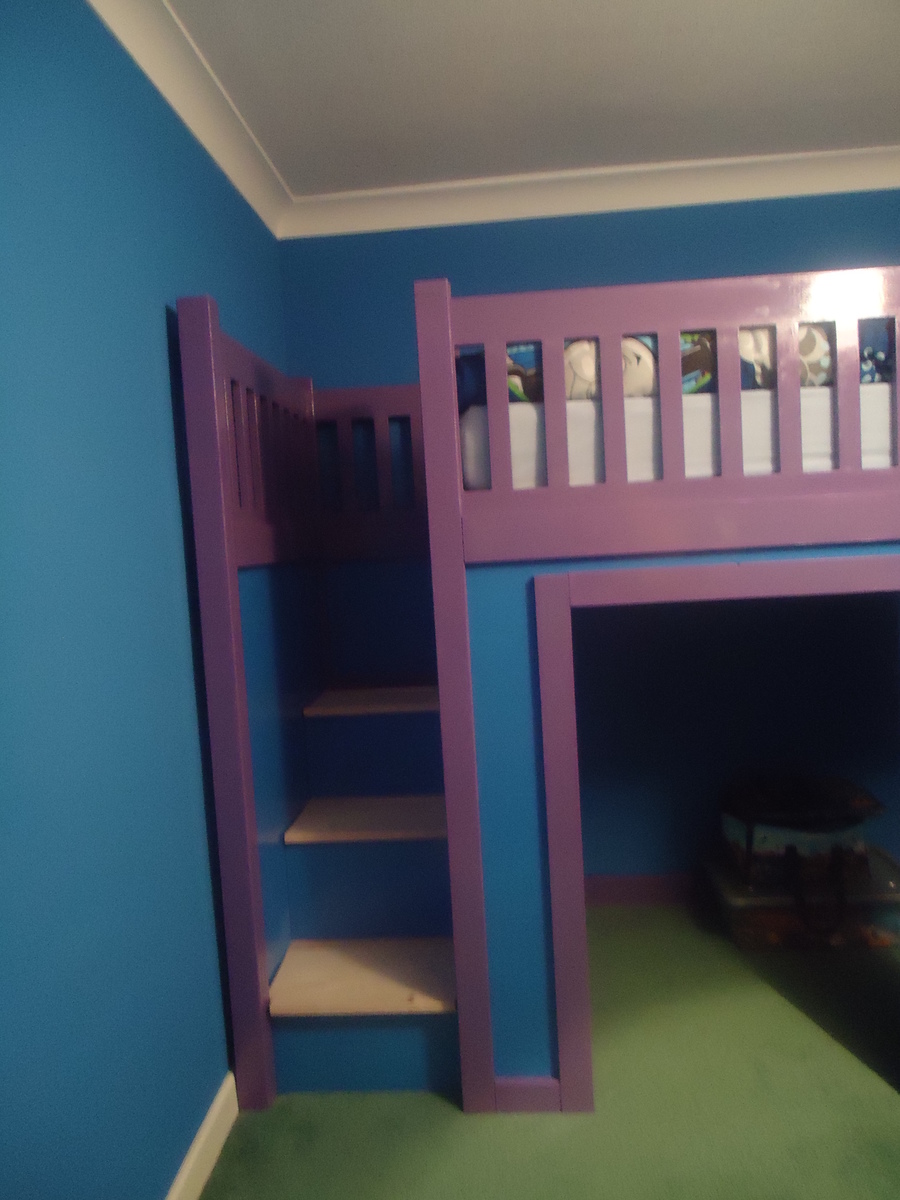
This bed for my middle son (4 years old) was my first project, I enjoyed the build and my son absolutely loves it. He even want to go to bed early now.

I ammended the plans slightly to accomodate a UK size matress and reduced the stair width to fit the room.

Built from Plan(s)
Estimated Cost
£350
Estimated Time Investment
Week Long Project (20 Hours or More)
Finish Used
Gloss on Redwood, Emulsion on MDF with Varnish coat where possible scratces could occur.
Recommended Skill Level
Beginner

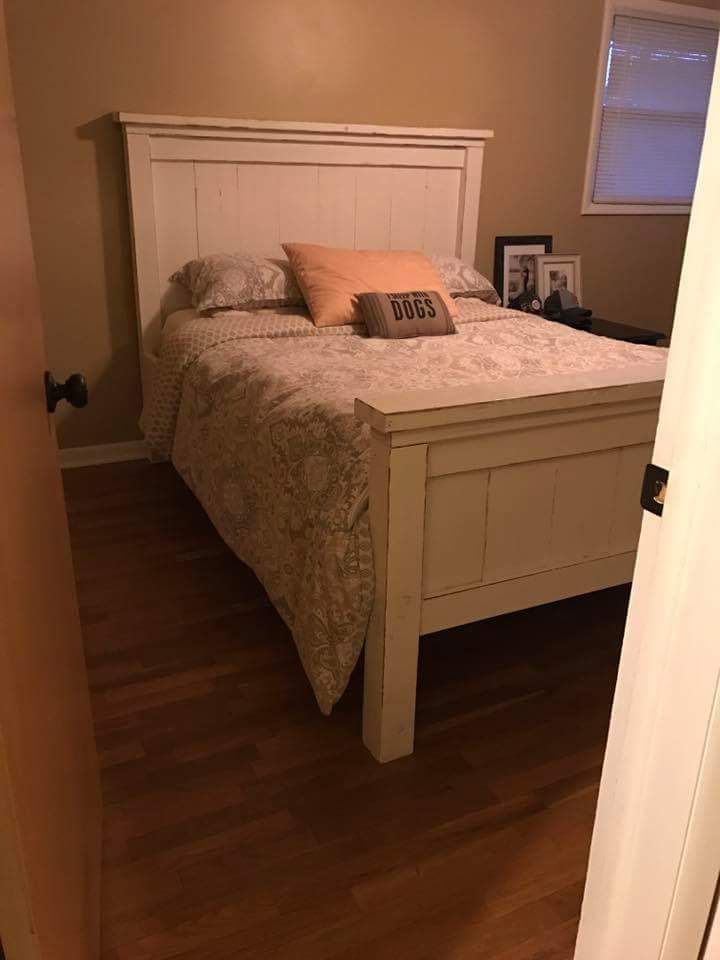
Farmhouse Bed

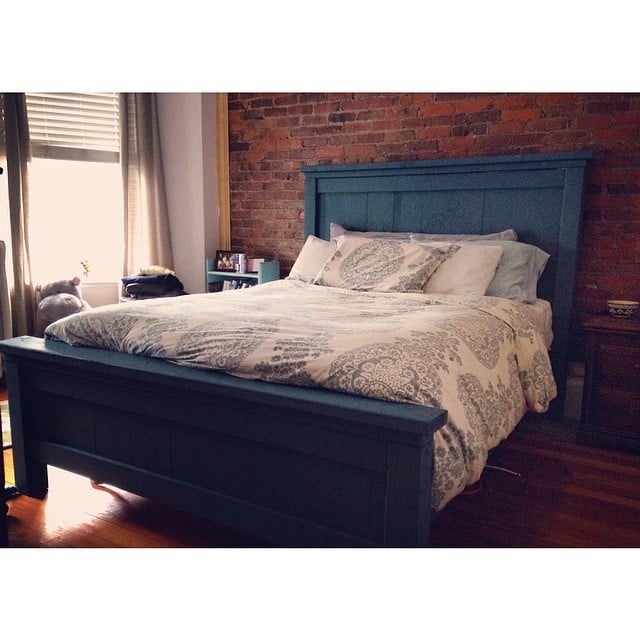
My boyfriend and I made this bed in about six hours on a saturday. The instractions were easy to follow and I am in love with this bed! Its very sturdy and i get tons of compliments on it! 

Built from Plan(s)
Estimated Time Investment
Day Project (6-9 Hours)
Finish Used
blue paint
Recommended Skill Level
Intermediate

Comments

Farmhouse table

Submitted by Anonymous (not verified) on Tue, 02/07/2017 - 18:52

Thanks for the amazing detail in your plans. I was able to make this table for my family. 

Estimated Cost
$120
Estimated Time Investment
Weekend Project (10-20 Hours)
Finish Used
Dark walnut
Recommended Skill Level
Starter Project

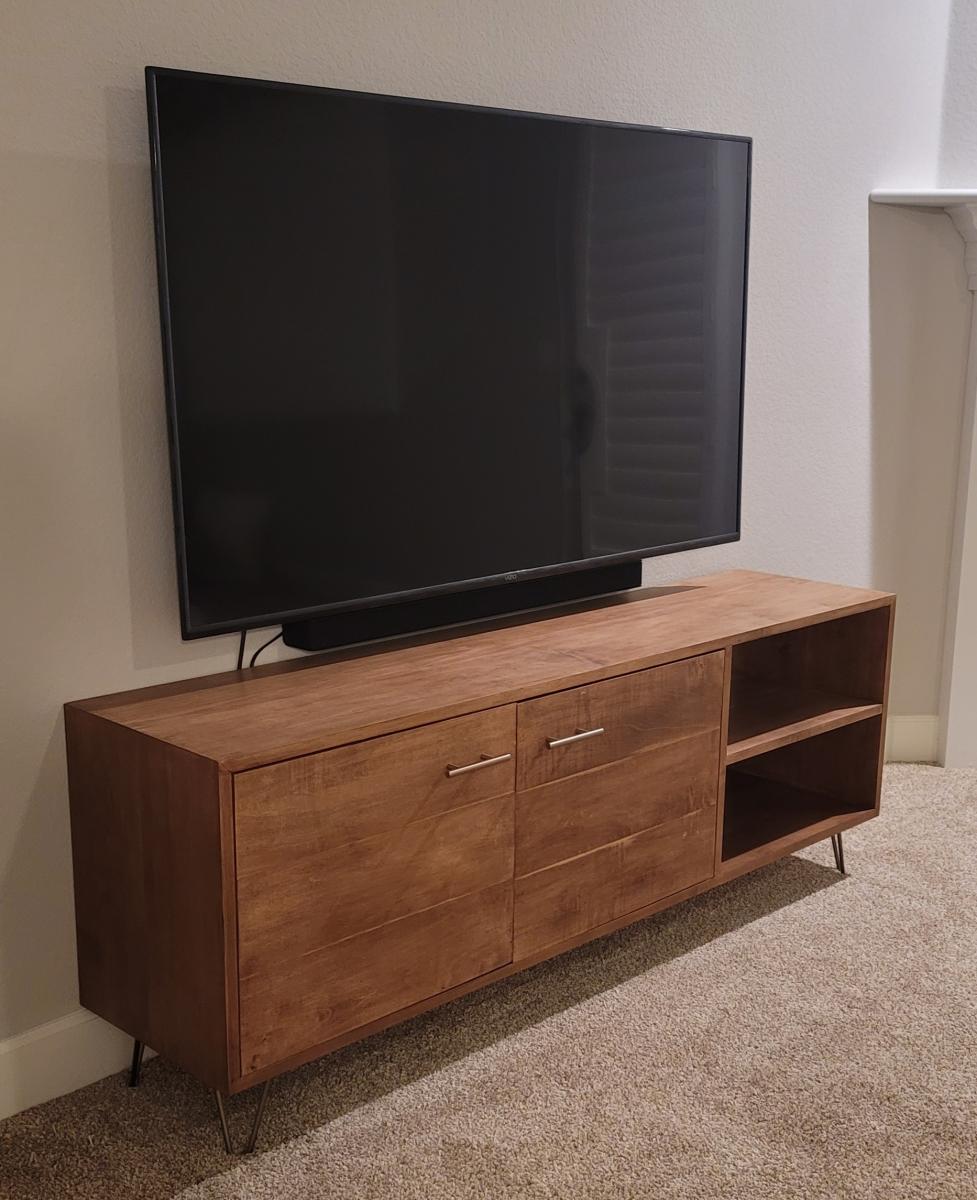
Modern TV console table

Submitted by Anzura on Mon, 11/02/2020 - 16:58

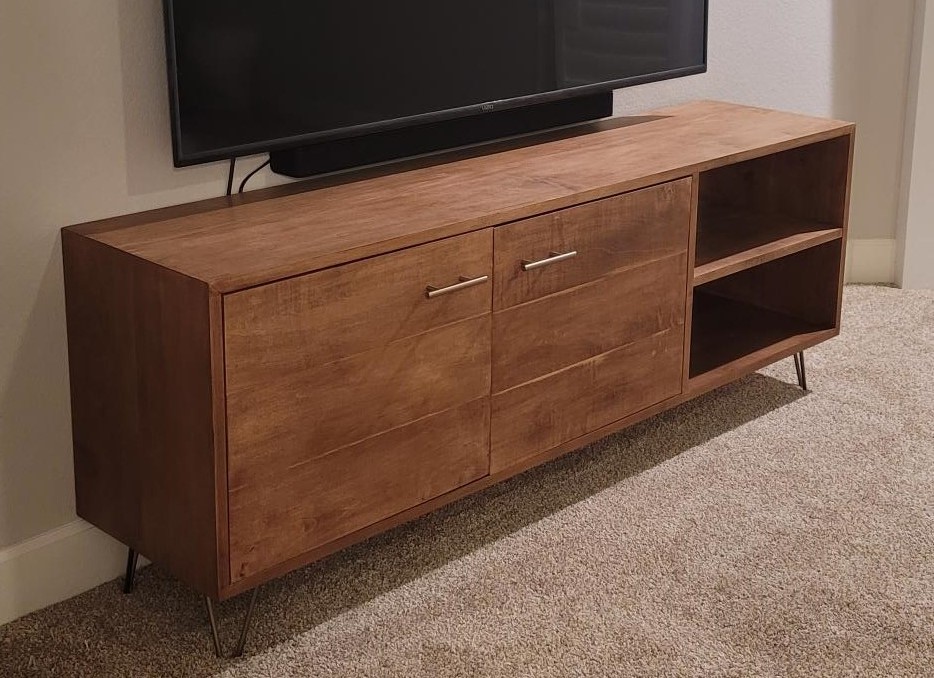
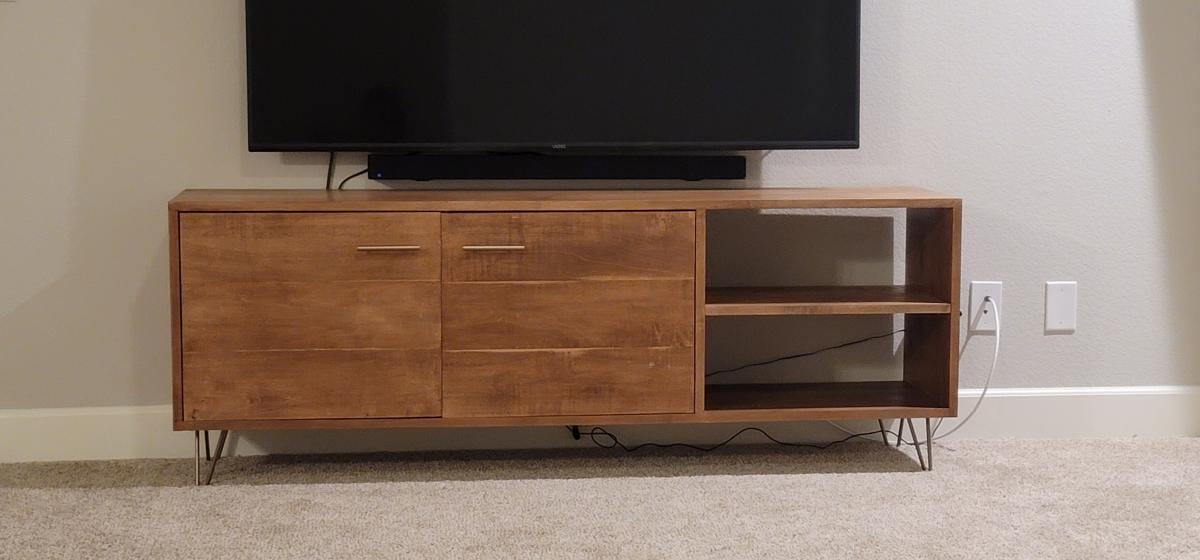
This console table was a pretty easy build and looks great. We had the lumber store rip the boards to the size we needed. We used solid maple boards instead of plywood. We mitered the corners to avoid seeing end grain. Followed the plans pretty close. Used 6" hairpin legs from Amazon painted antique bronze to match handles. Very pleased!

Estimated Cost
$300
Estimated Time Investment
Weekend Project (10-20 Hours)
Finish Used
Behr water based early American
Lots of prestain conditioner
Wax top coat
Recommended Skill Level
Intermediate

Comments

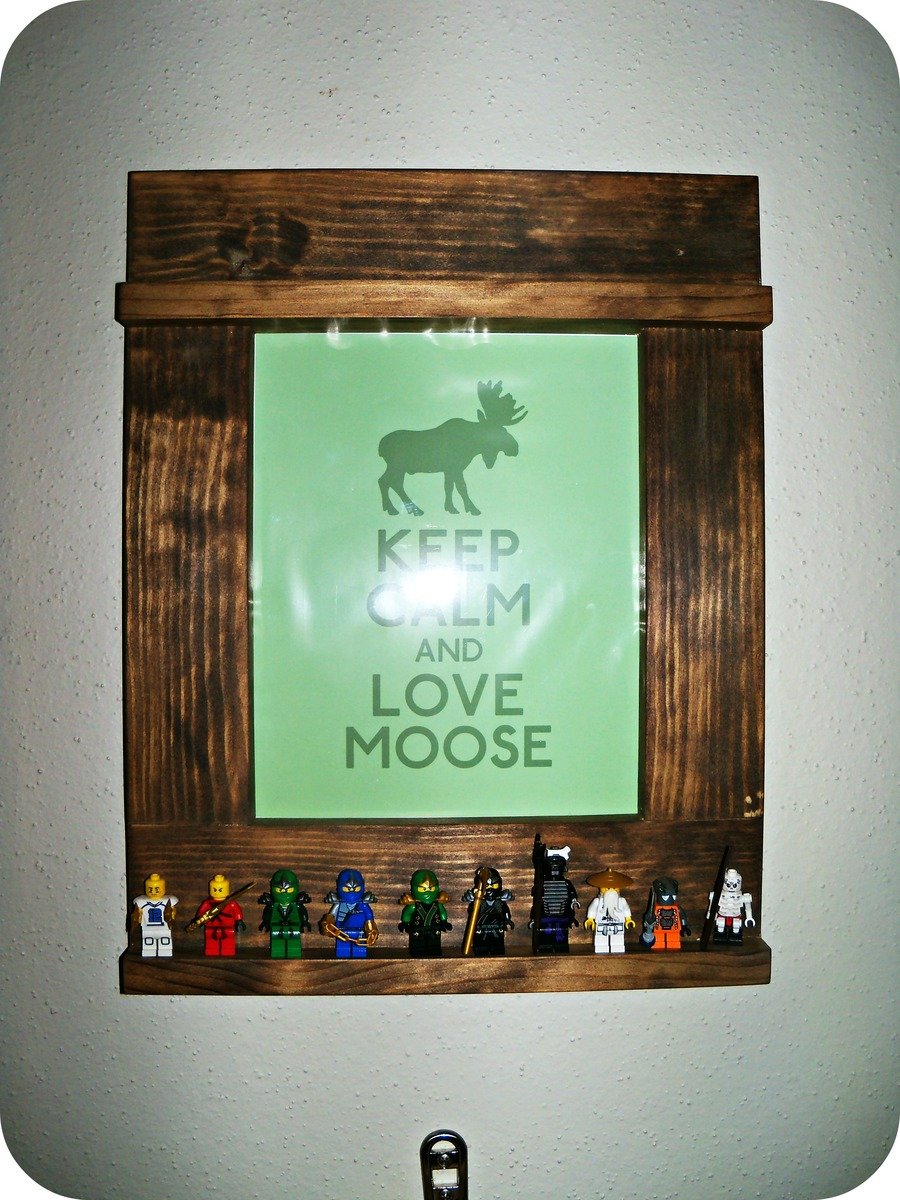
Craftsman Frame

Submitted by Mrsmike on Tue, 01/08/2013 - 15:07

I bought this really cool print from a shop on Etsy, but I was having a hard time finding a frame for it My husband made the bed for his room too, and I wanted the frame to coordinate.

This was a simple project and really looks great in his room. We used an inexpensive pine and the same stain as his bed. I really wanted a green stain, but I couldn't find any like the type Anna used. This frame took just a little over an hour to put together.

Built from Plan(s)
Estimated Cost
$6
Estimated Time Investment
An Hour or Two (0-2 Hours)
Finish Used
minwax Americana and minwax furniture polish
Recommended Skill Level
Starter Project

Comments

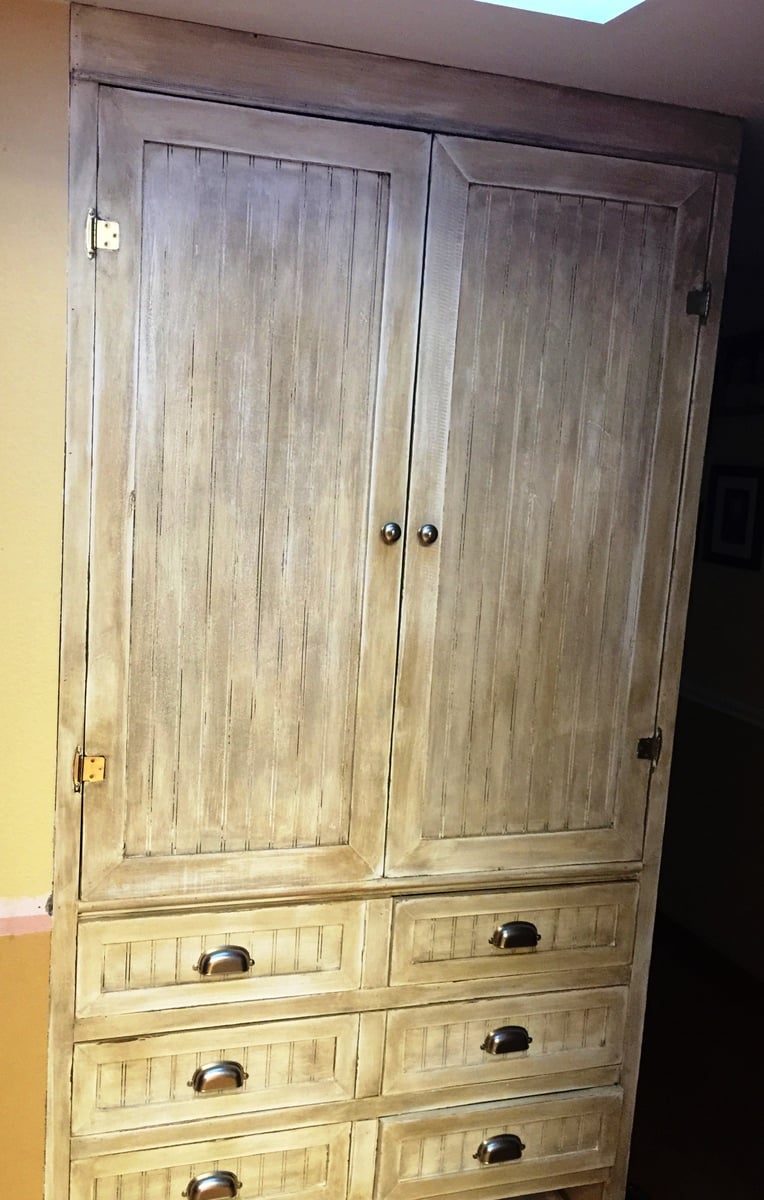
Built in Armoire (linen cabinet)

Submitted by cesqueda on Mon, 11/03/2014 - 08:46

I modified the original plan so that it would fit in the area wher my old linen cabinet was.  I also wanted the drawers to be visible.

Built from Plan(s)
Estimated Time Investment
Week Long Project (20 Hours or More)
Finish Used
Antique: I stained dark, rubbed the edges with wax. Then put two coast of white flat paint. I then put on a faux brown glaze. The last step was to sand down the edges and remove a little of the glaze with a high grit sandpaper.
Recommended Skill Level
Intermediate

Comments

Loft Bed

Submitted by Anonymous (not verified) on Fri, 02/10/2017 - 11:58

Made from the Camp Loft Bed plans.  Added some additional strength with 4x4 legs instead of 2X4 and added some additional supports underneath for the rambuncious kid that was going to be using it.


Also since the room was small, it was made to be dismantled with a ladder instead of the stairs.


Fun little project for a friend who is also expecting another.  So it looks like we will expand this loft bed for future expansion.

Estimated Cost
$100
Estimated Time Investment
Day Project (6-9 Hours)
Finish Used
Wood Stain - Mini Wax Red Oak
Recommended Skill Level
Intermediate

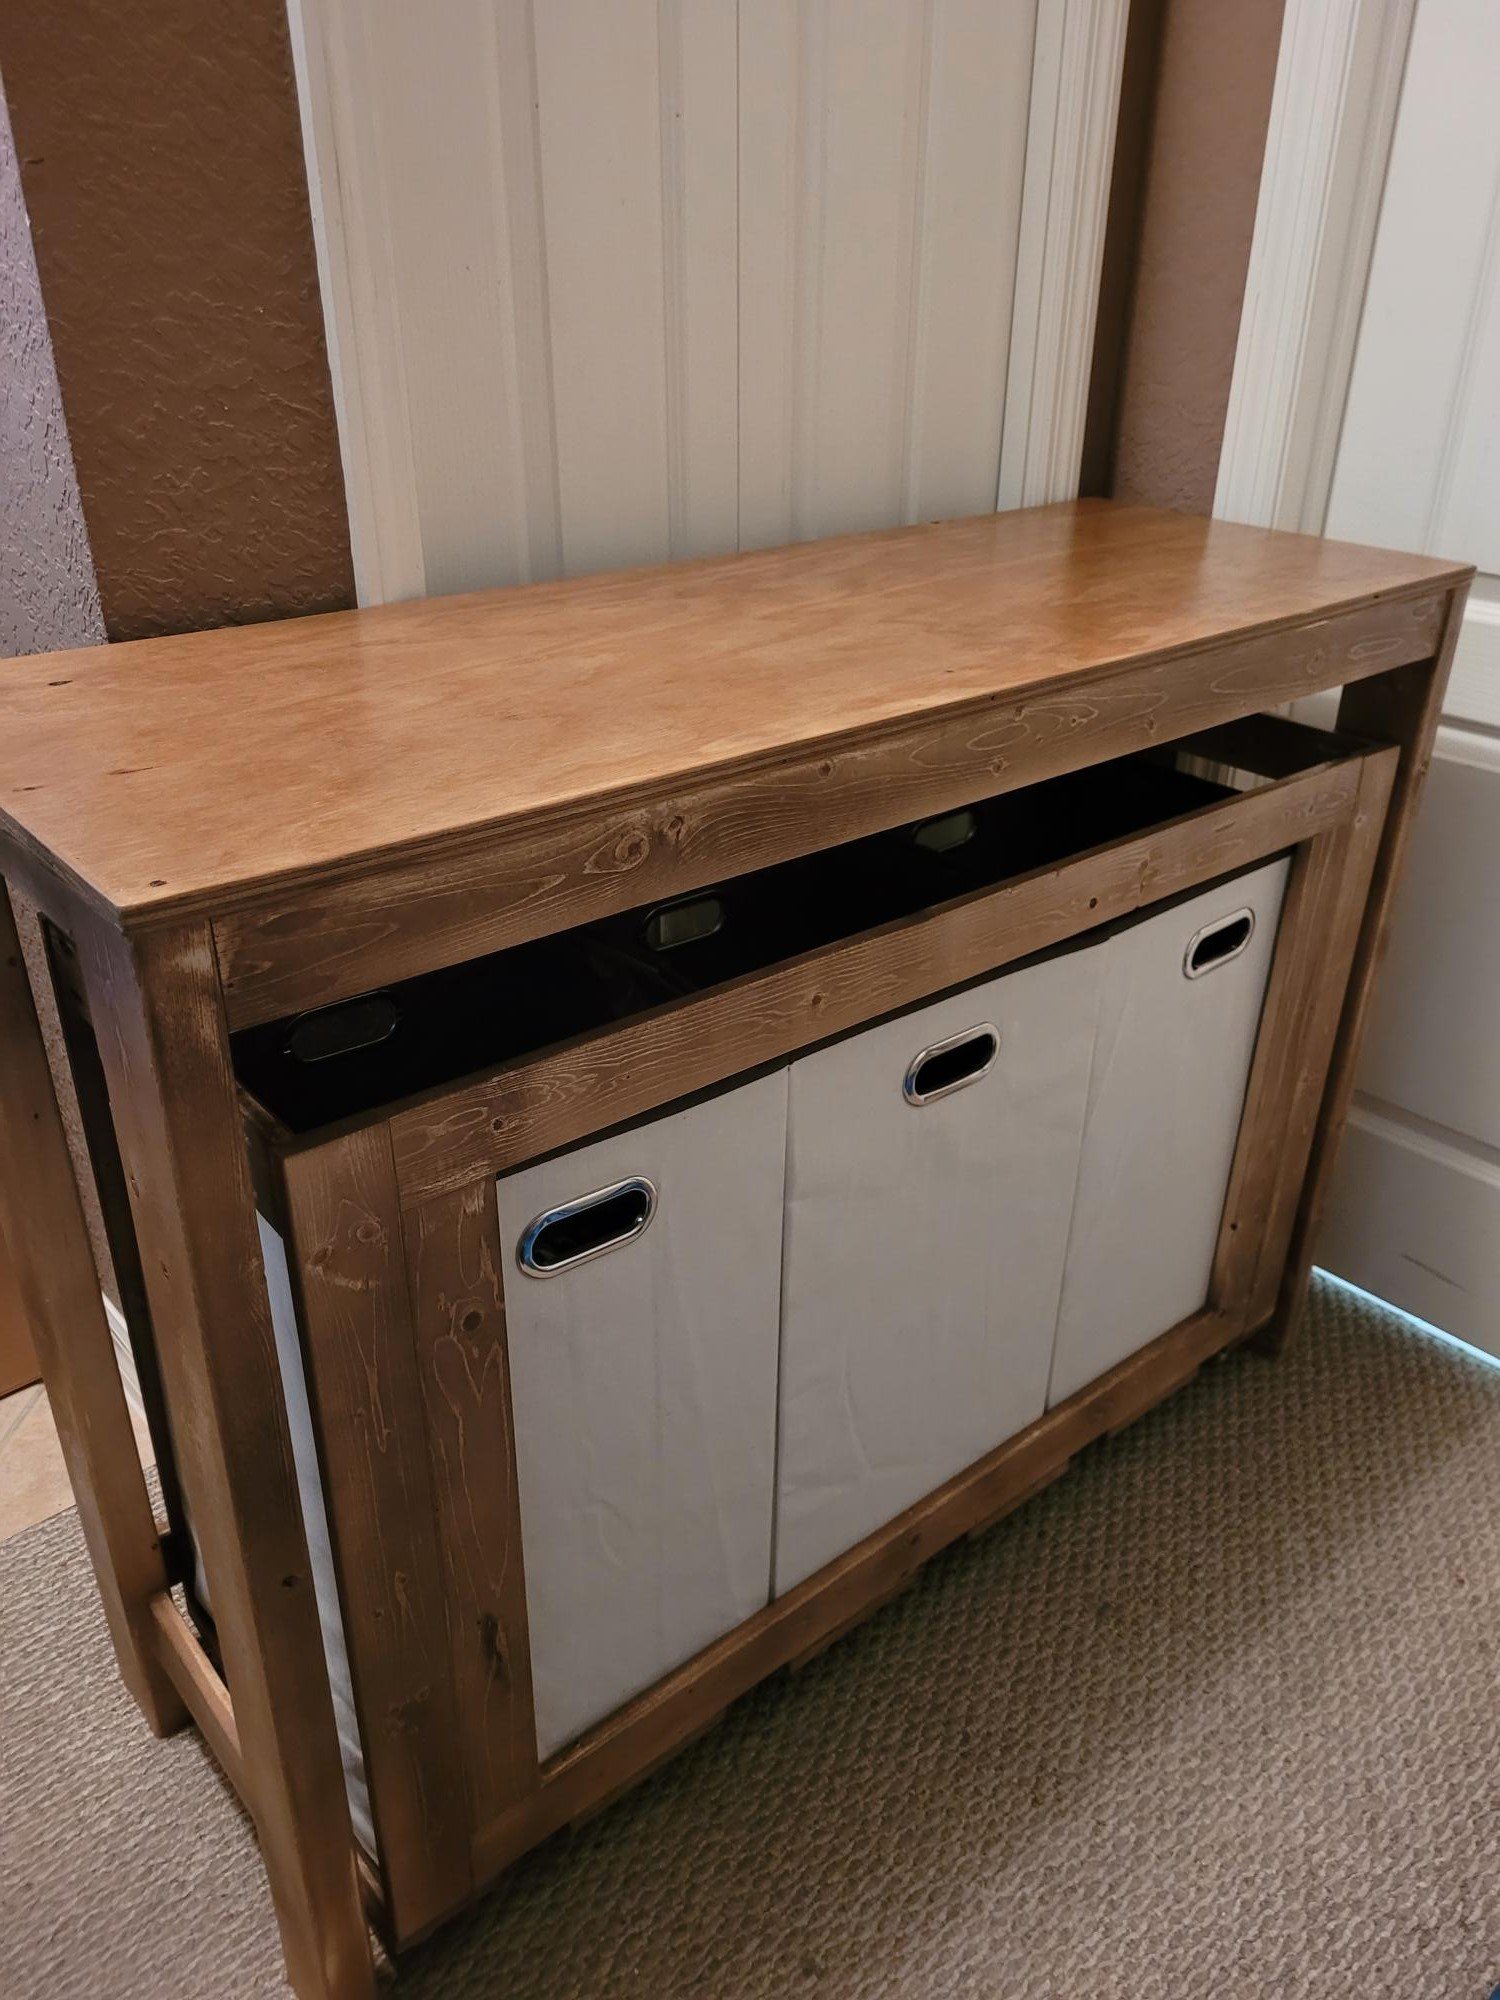
Laundry Station

Submitted by Anonymous (not verified) on Sat, 11/07/2020 - 10:17

My first project, something I took on with my kids. Lots of fun, errors, and lessons learned. Used an hvlp for stain and poly, so much faster and easier than brush or rag staining.

Thanks for the inspiration and instructions.

Built from Plan(s)
Estimated Time Investment
Weekend Project (10-20 Hours)
Finish Used
Minwax Special Walnut
Recommended Skill Level
Beginner

Comments