Community Brag Posts
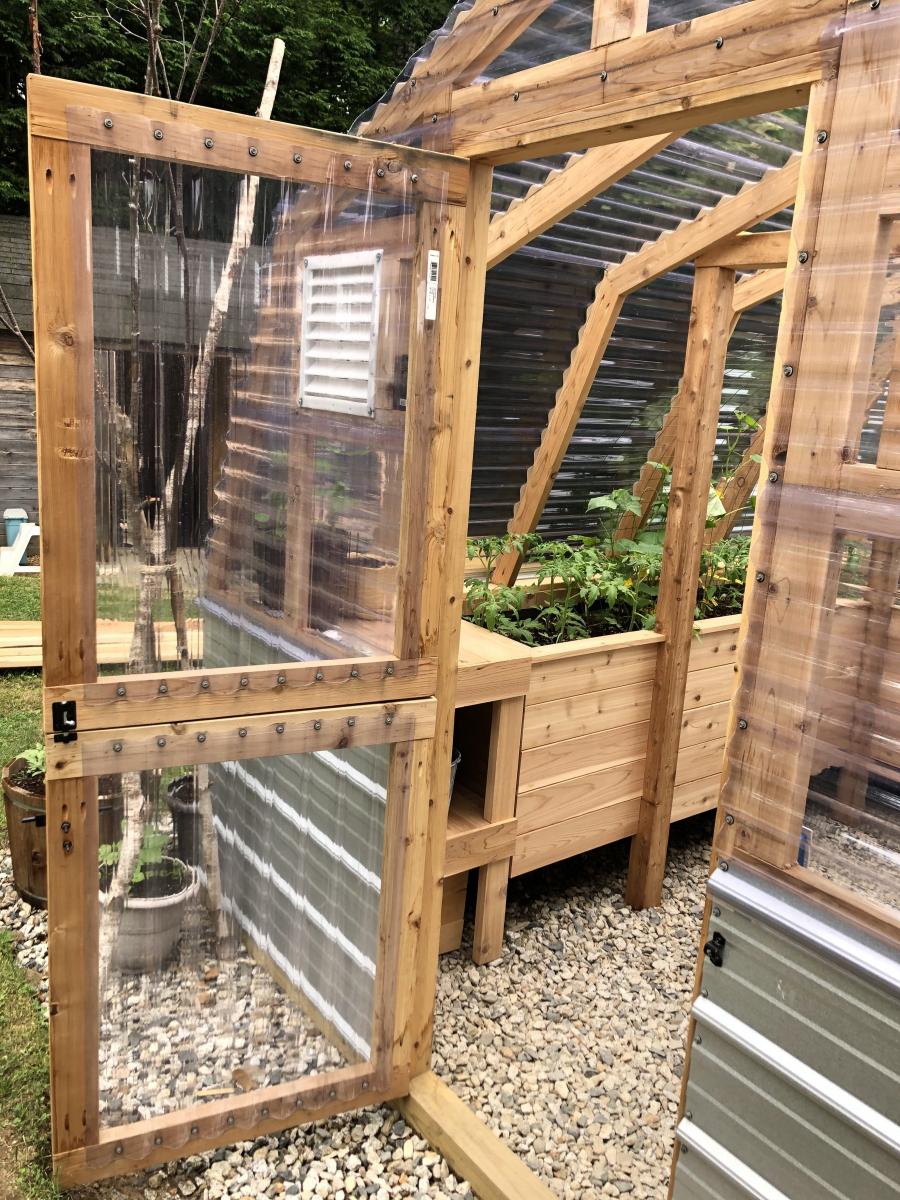
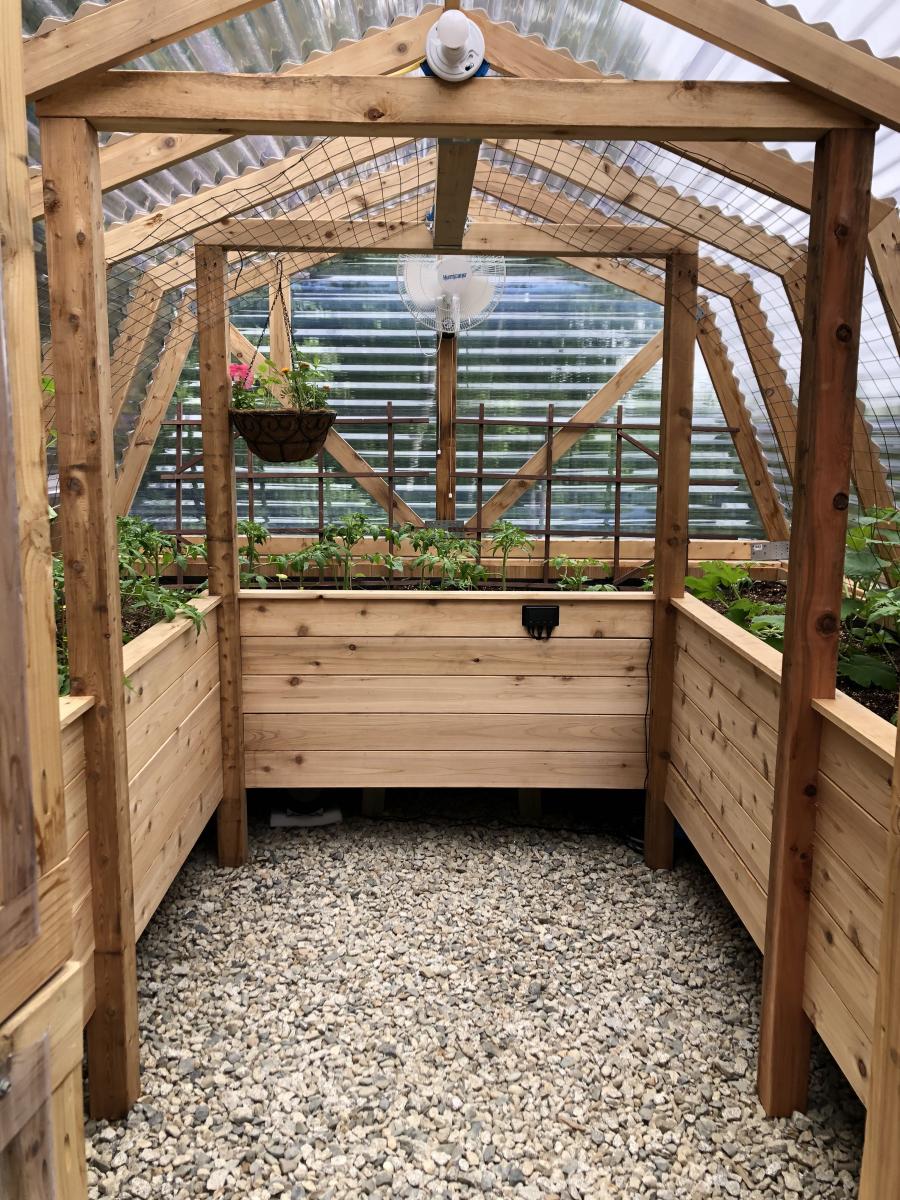
DIY Greenhouse Project -Added elevated raised beds & temp/humidity control
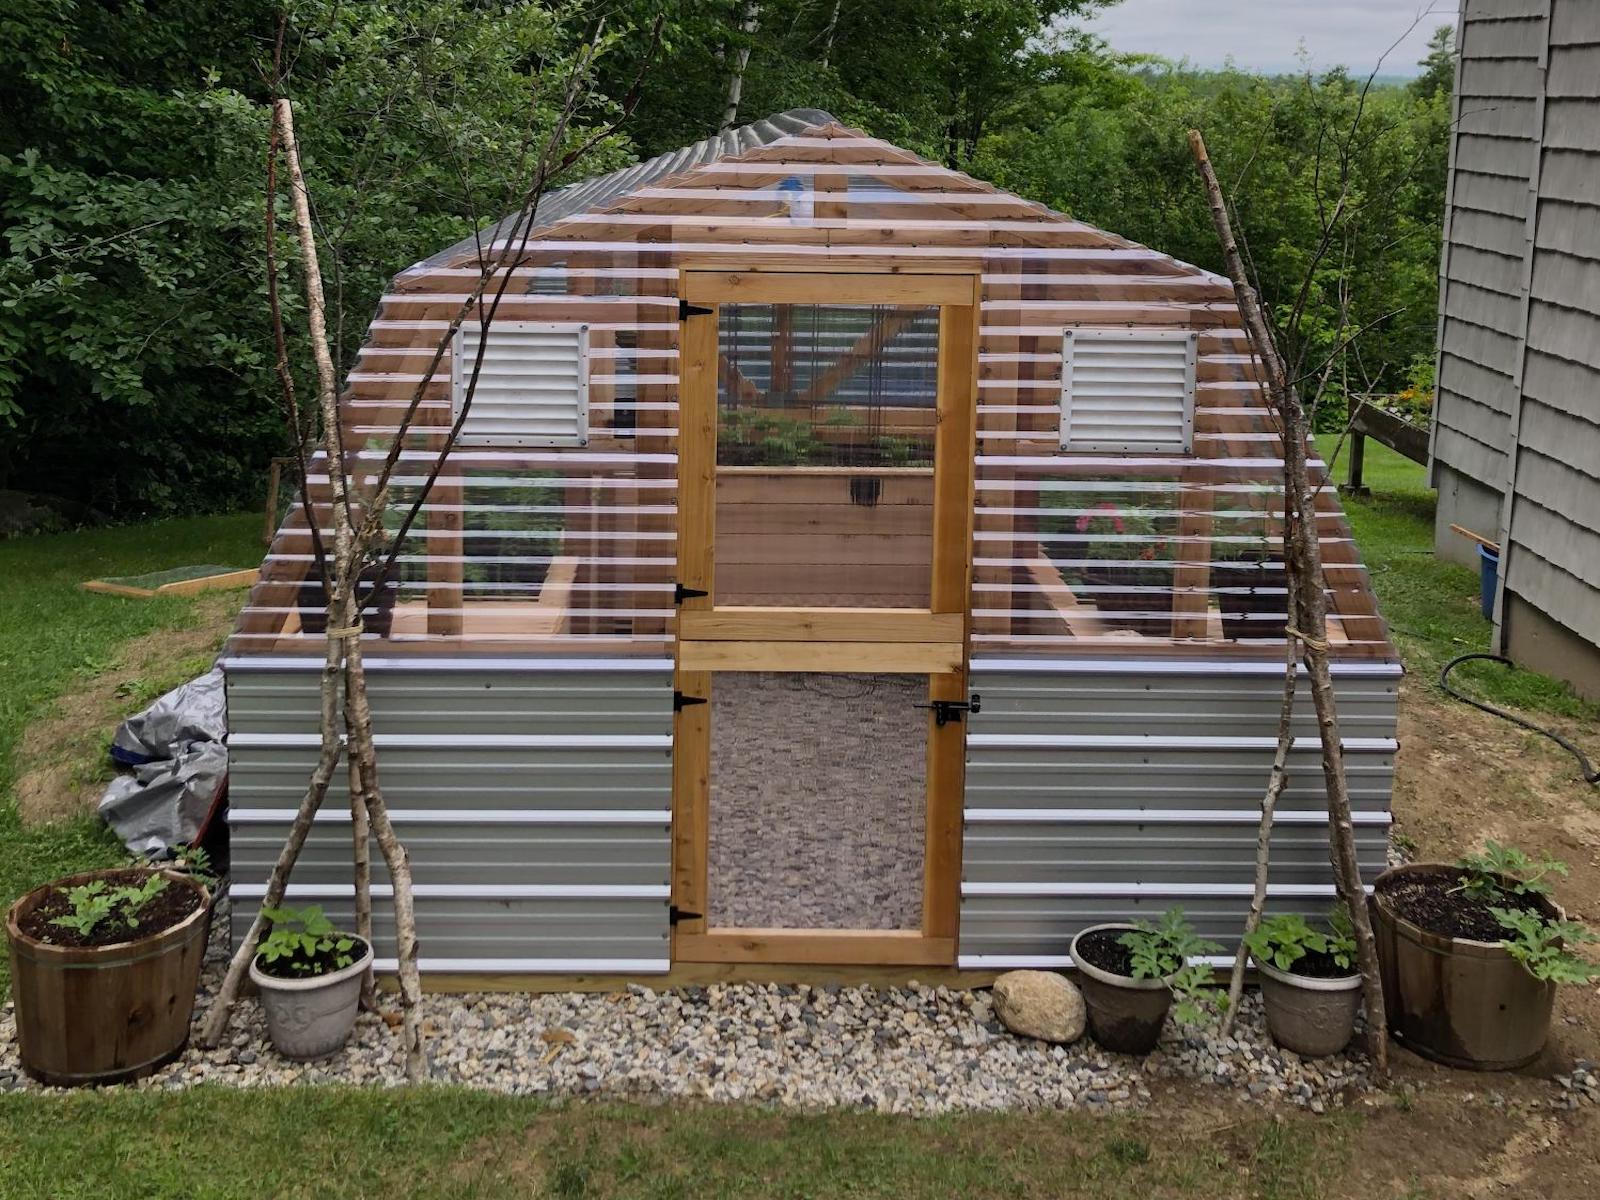
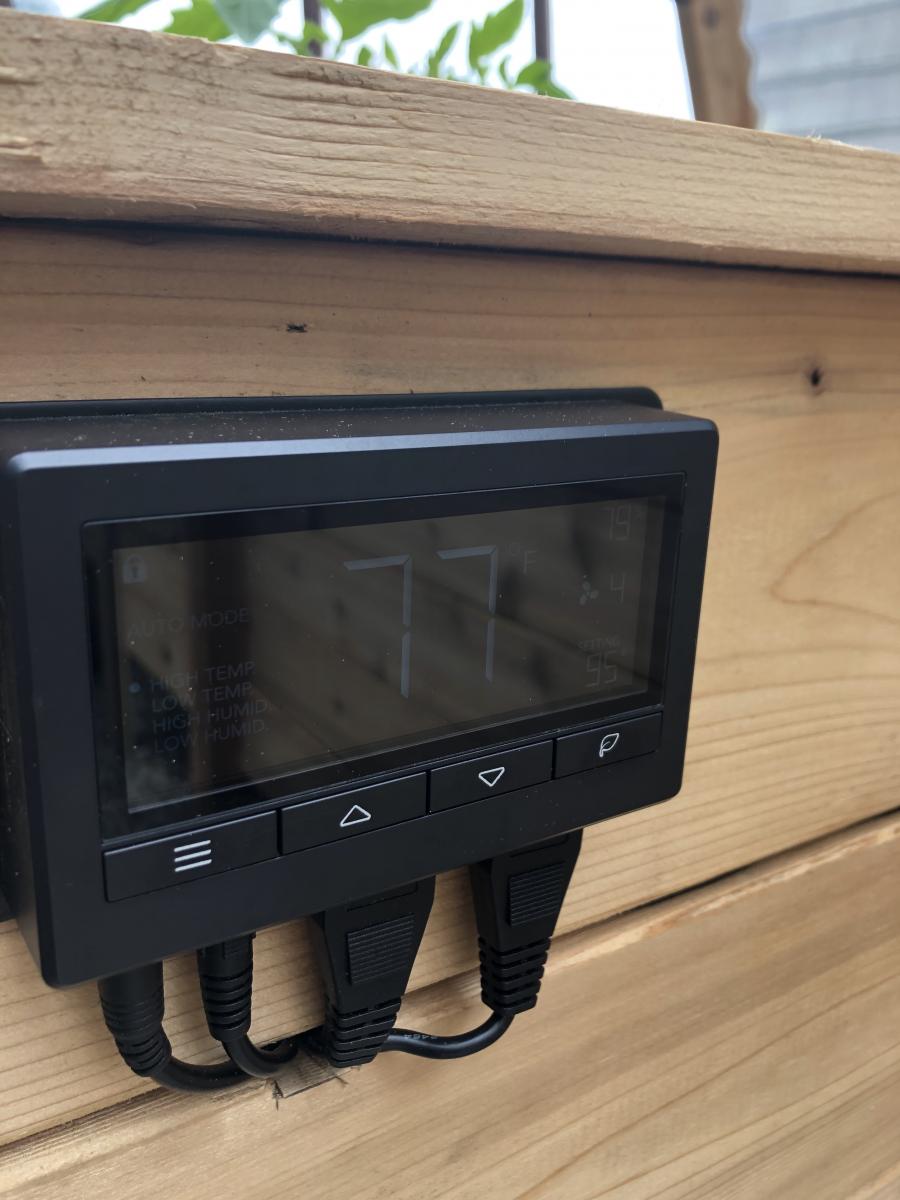
We loved this greenhouse plan from AnaWhite and wanted to be able to grow in 3 seasons so we modified the design to include humidity & temperature control & 18" deep elevated cedar beds inside with 4x4 posts for support and trellis option. We added electricity in order to have a lighted workspace and the ability to put in a circulating fan to control mold and fungus. We added 2 work tables (2x2') on the inside of the door left and right side door in order to do seed trays & store supplies. This was a wonderful project for my husband and my plants inside are doing incredibly well compared to my outside garden beds here in zone 5. Products used:
Foundation
We had a landscape company come and scape/dig a platform and then fill/compact with crushed rock
My husband then used rebar driven into a 4x4 frame in order to secure the frame to the ground and create a base upon which to build the greenhouse
Active ventilation
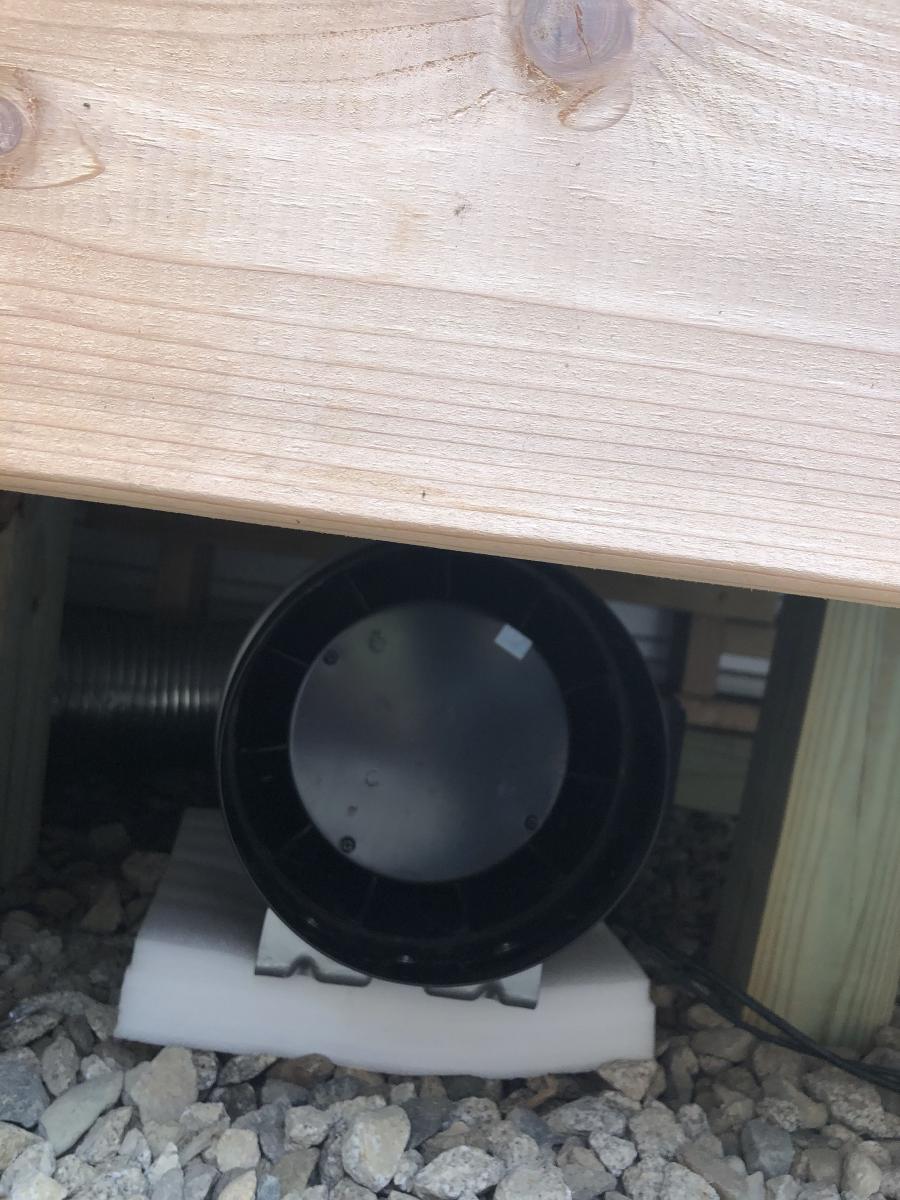
AC Infinity Cloudline T8 Inline duct fan
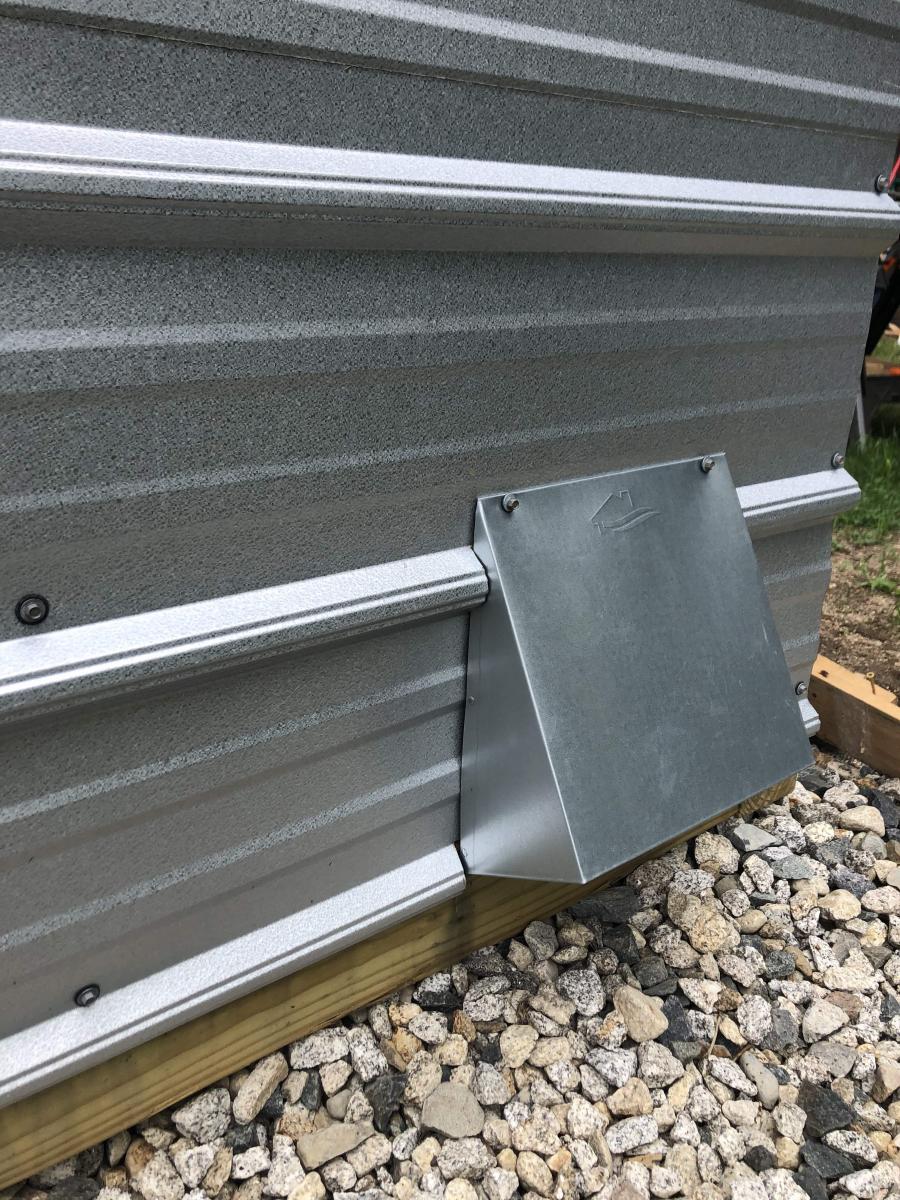
Air king range hood wall cap 8" on the bottom outside of the greenhouse wall for air intake + flex 8" duct to the fan itself
Shelter logic autovent automatic shelter vent kits (1 on each side of the front wall) in order to allow air intake from the bottom back of the greenhouse under the elevated beds to flow to the front of the greenhouse and out
Circulating fan- Hurricane wall mount fan 16" - this fan has 3 speeds with tilt function and small mounting bracket
Soil - sourced 3 yards of 50/50 loam/compost from local landscaping supply
60% loam
30% organic compost
10% organic topsoil + perlite
Soil beds
-cedar frame 2 feet wide along sides, 3 feet wide on the back wall
-galvanized metal roofing with holes drilled into it for drainage
-landscape cloth lined
Built from Plan(s)
Estimated Cost
$2000
Estimated Time Investment
Week Long Project (20 Hours or More)
Finish Used
None
Recommended Skill Level
Intermediate
Comments
Wed, 09/09/2020 - 13:09
Thanks for that update! I…
Thanks for that update! I was wondering how to vent this project, as Green houses need the ventilation. Good to know dollar amount also. Great photos.
Wed, 09/09/2020 - 13:09
Thanks for that update! I…
Thanks for that update! I was wondering how to vent this project, as Green houses need the ventilation. Good to know dollar amount also. Great photos.
Wed, 09/09/2020 - 13:09
Thanks for that update! I…
Thanks for that update! I was wondering how to vent this project, as Green houses need the ventilation. Good to know dollar amount also. Great photos.
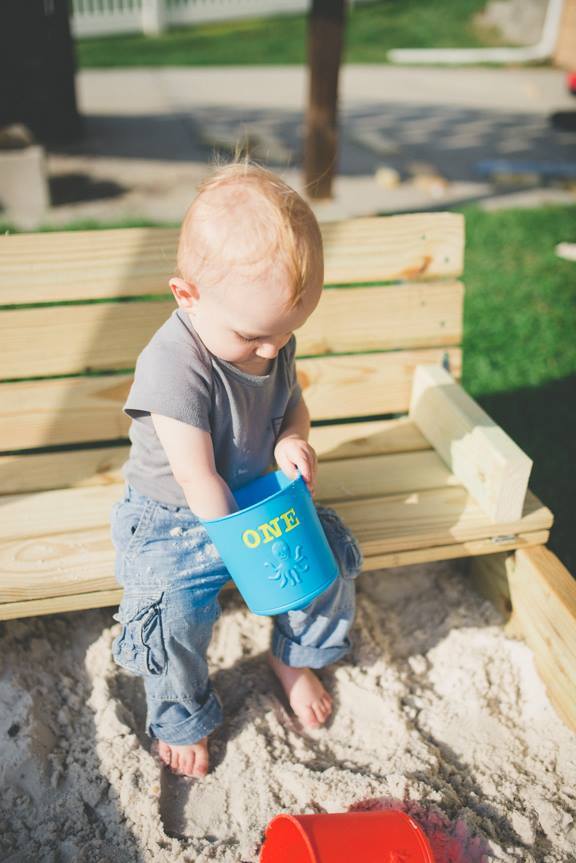
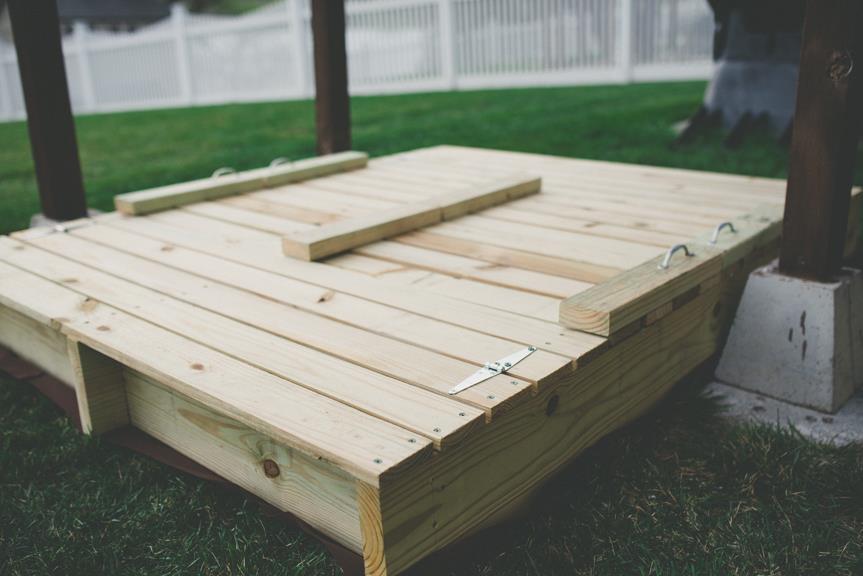
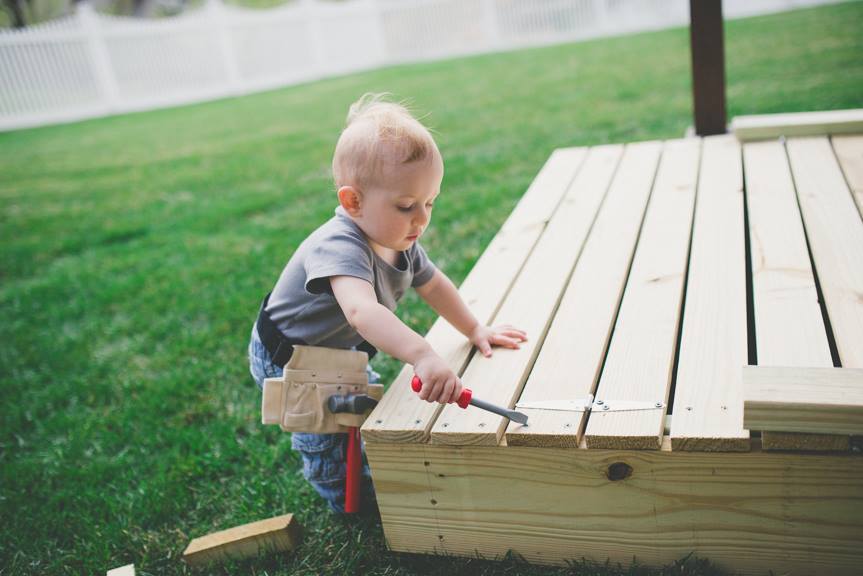
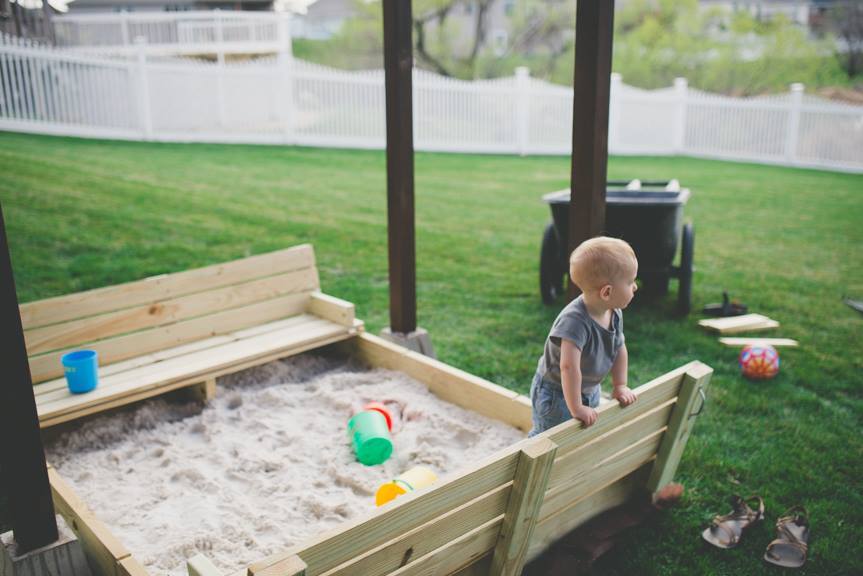
Sandbox with Benches
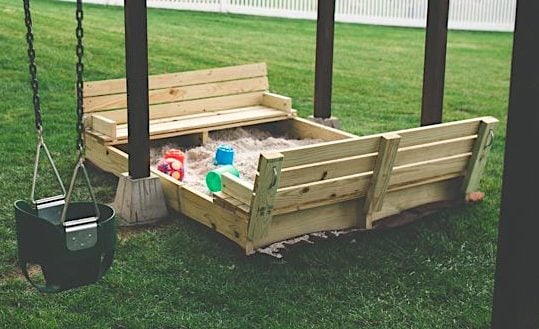
We altered the original plan by enlarging the sandbox (approx 5' x 6') which made for wider benches that can comfortably seat an adult. The benches and back rests are three boards deep instead of two. We added 2x12 supports under the benches for additional support, as well as another 2x4 support in the middle of the backrest.

Built from Plan(s)
Estimated Time Investment
Day Project (6-9 Hours)
Finish Used
None
Recommended Skill Level
Beginner
Comments


Tue, 04/14/2015 - 20:00
Thanks for sharing!
I just love seeing pictures of these built! Makes my heart swell :-)

Double Loft Bed
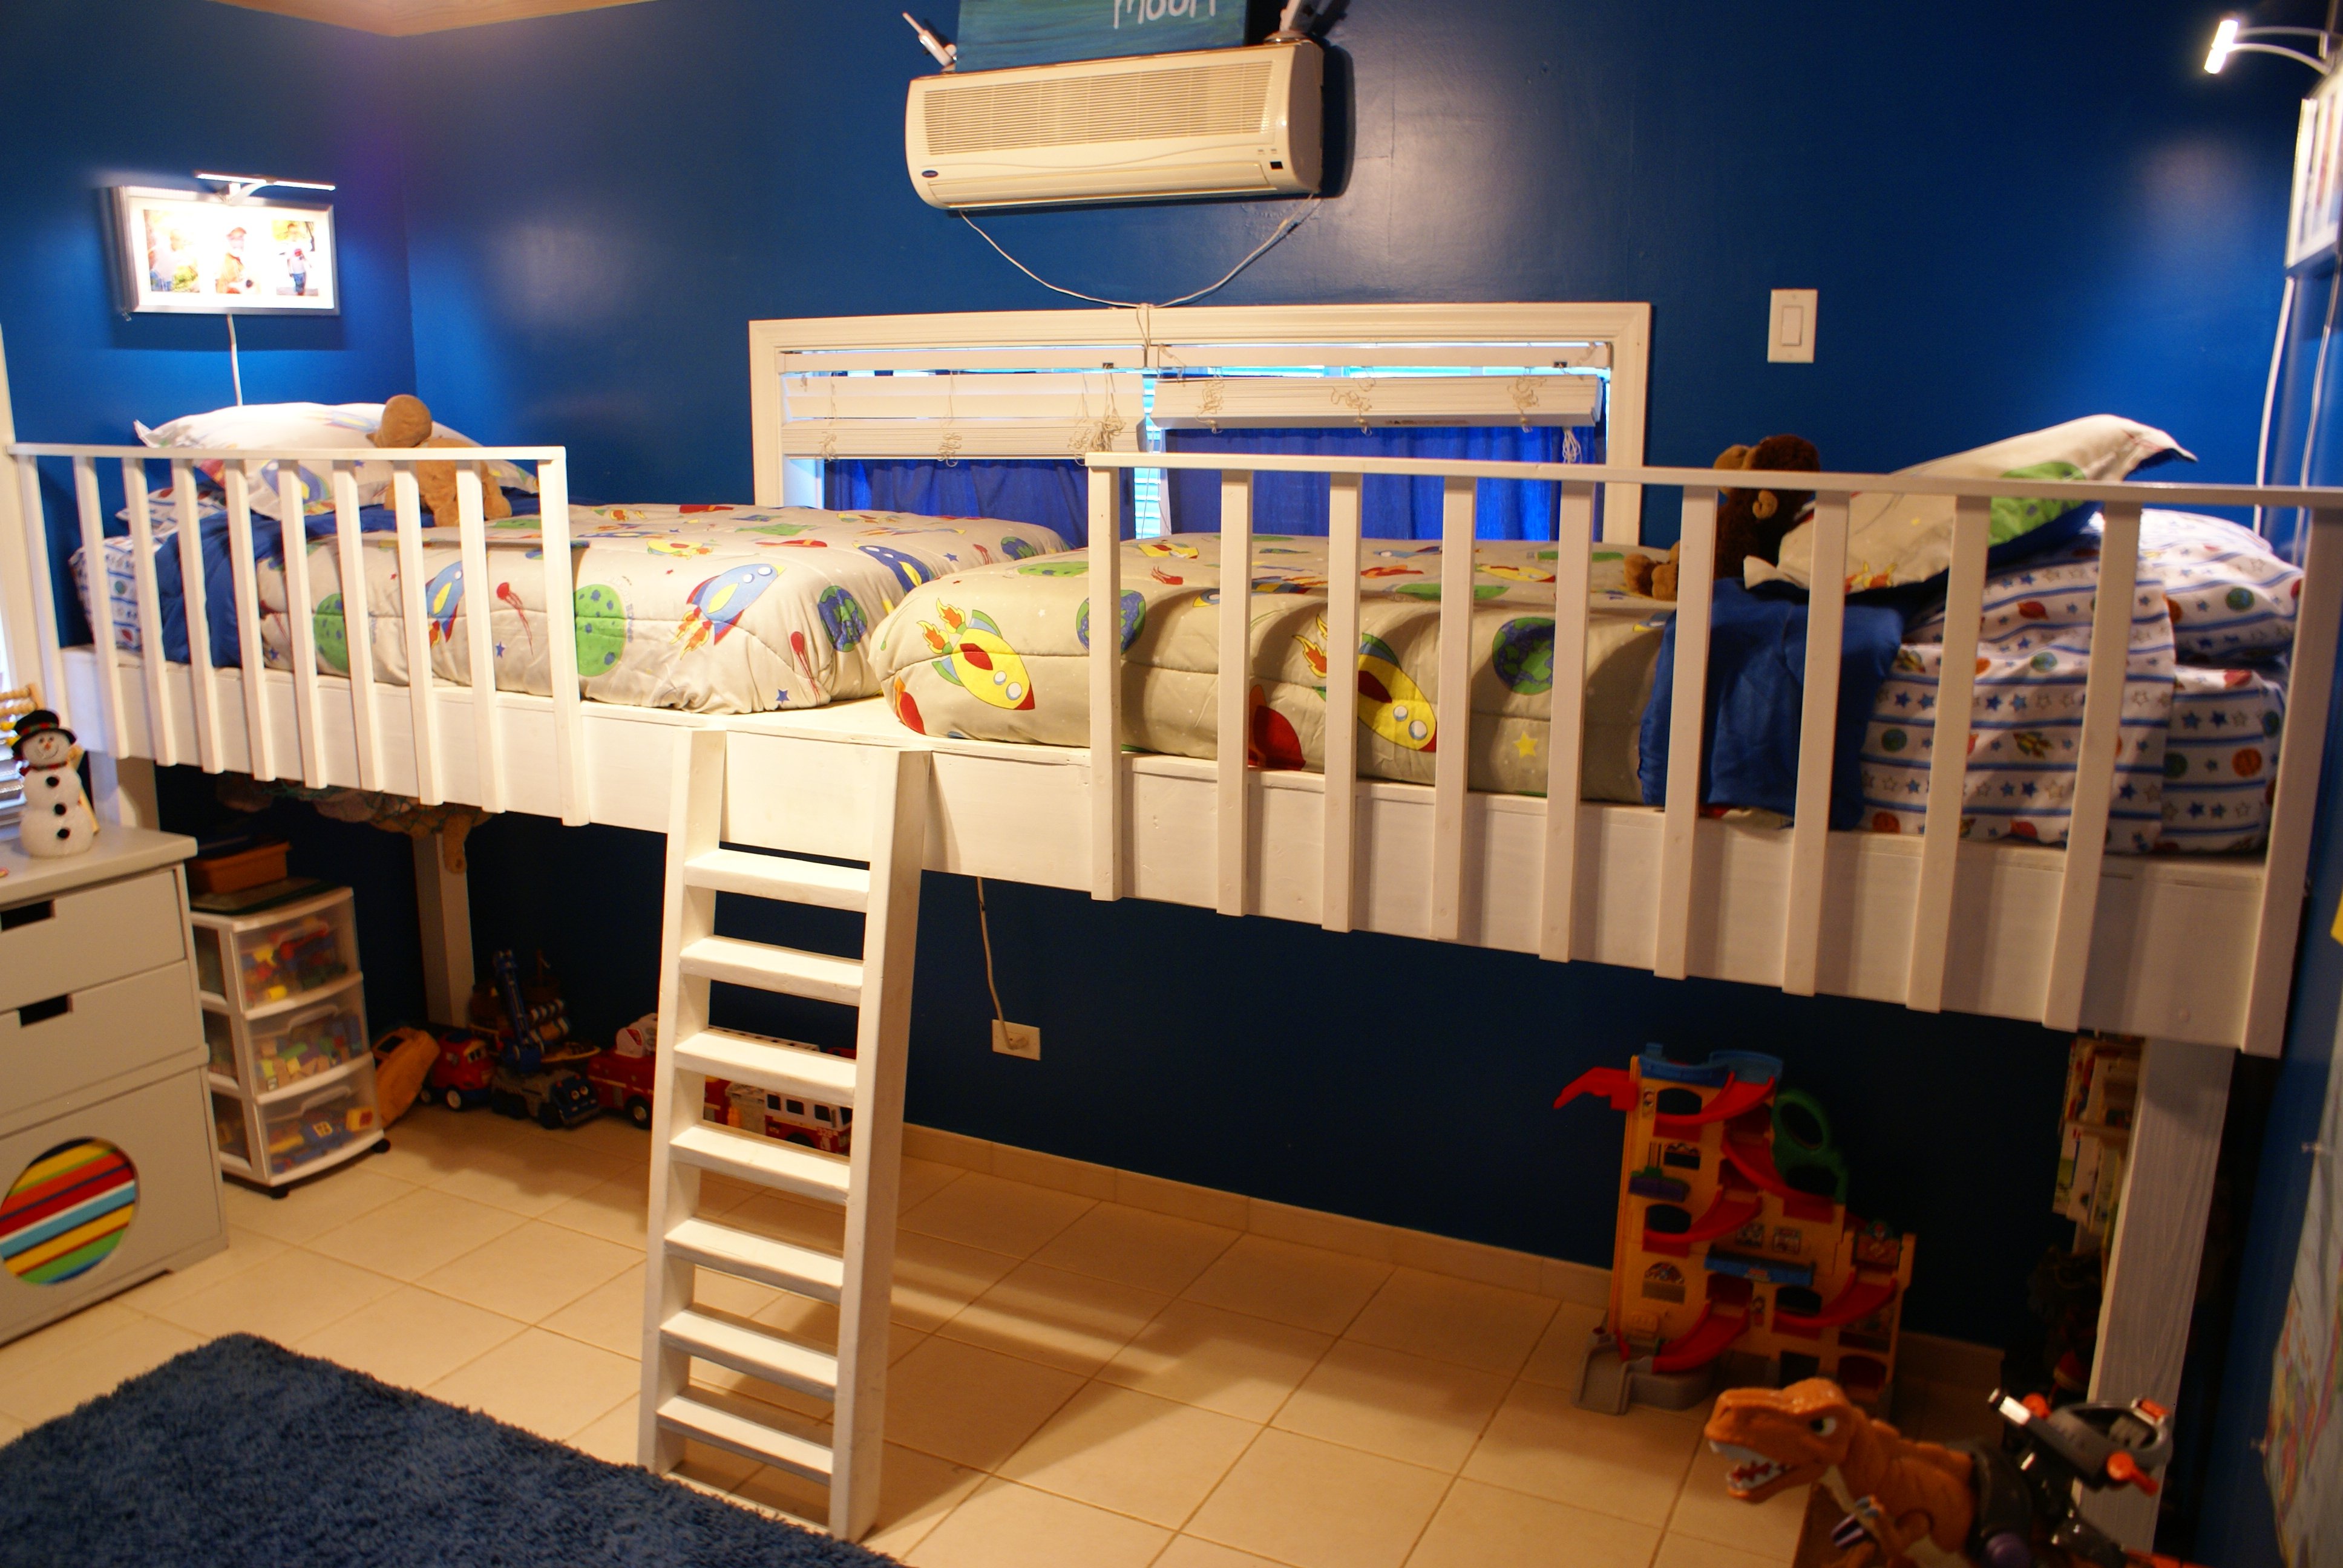
I saw the idea for this bed on Pinterest originally. It linked to a blog that had the step by step plan (http://www.thehandmadehome.net/2011/08/how-to-build-a-loft/). However, I would have never even approached the idea or project without a few of Ana's plans under my belt first. I have gained so much confidence in my building on this site, and will always be a HUGE fan here :) Thank you Ana for all the fantastic plans you continue to share!
I still want to finish out and make the under bed area more fun and creative with curtains and such, but we LOVE having the full floor in the room for our play area. My boys absolutely love their bed!!
Estimated Cost
Less than $150 (a little higher than usual because of where I live)
Estimated Time Investment
Afternoon Project (3-6 Hours)
Finish Used
The hardest part about this project was lifting the bed platform up onto the legs in order to secure them in place. We built it with very little room to spare against the wall, and it made it very tricky to get up into place with some of the window frames and such. Be sure to have friendly neighbors or friends helping out when you get to that part, and lift with your legs...not your back ;)
Recommended Skill Level
Intermediate
Comments
Wed, 10/02/2013 - 13:07
Looks great!
I'll bet the boys are thrilled with this. It's great to have that extra play room!
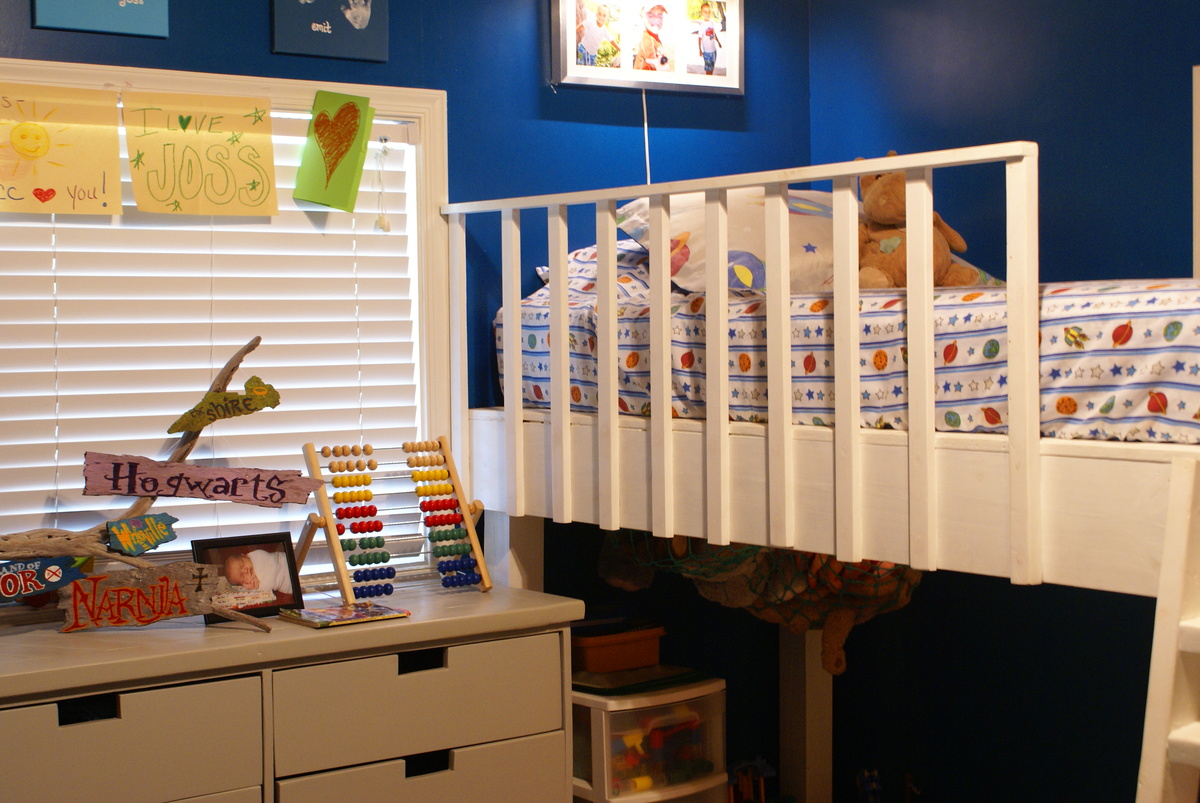
I am curious, though, how the center of the loft bed is supported.
In reply to Looks great! by sgilly
Wed, 10/02/2013 - 18:38
Support
Hey Sue, I went and found the old link to the plans for this and added it to the brag post. Or here it is also: http://www.thehandmadehome.net/2011/08/how-to-build-a-loft/ Underneath is a bunch of 2x4's spaced to support the platform, but the big 2x8's are the main strength. They are monsters! We've had a bunch of kids and adults up there for story time, and never once has it felt unstable or wobbly. Hopefully the link will help. It has way more photos that I have here.
Thu, 07/28/2016 - 15:47
The ladder
I am going to attempt to make this bed in a couple of weeks for my daughters. The handmade home directions only show the rope ladder. We want to make the ladder similar to your pictures above. Could you tell me how you made yours please and thank you?
Loft House Bed
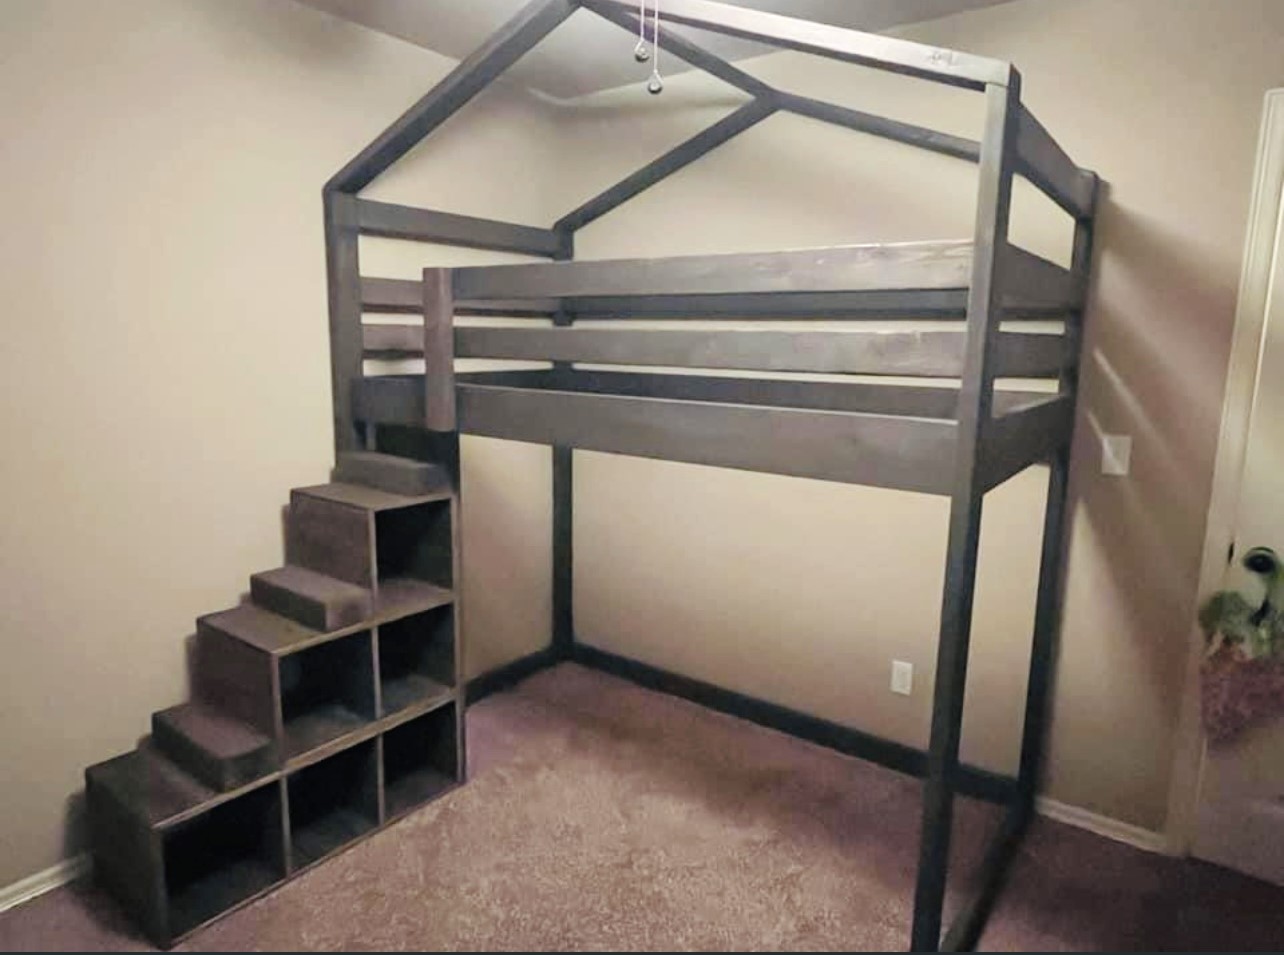
Modified the junior loft plan to add a house design element and storage stairs, by Amy Mott
Built from Plan(s)
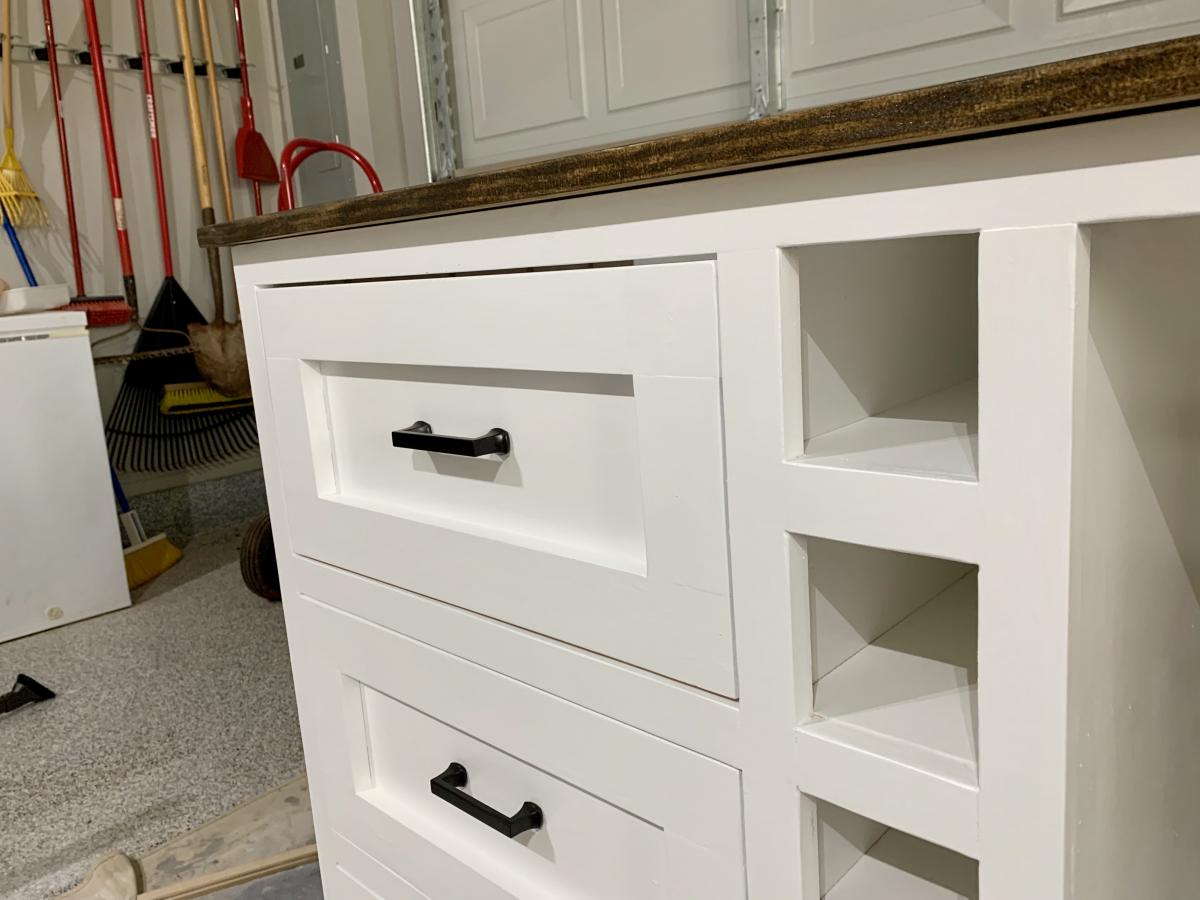
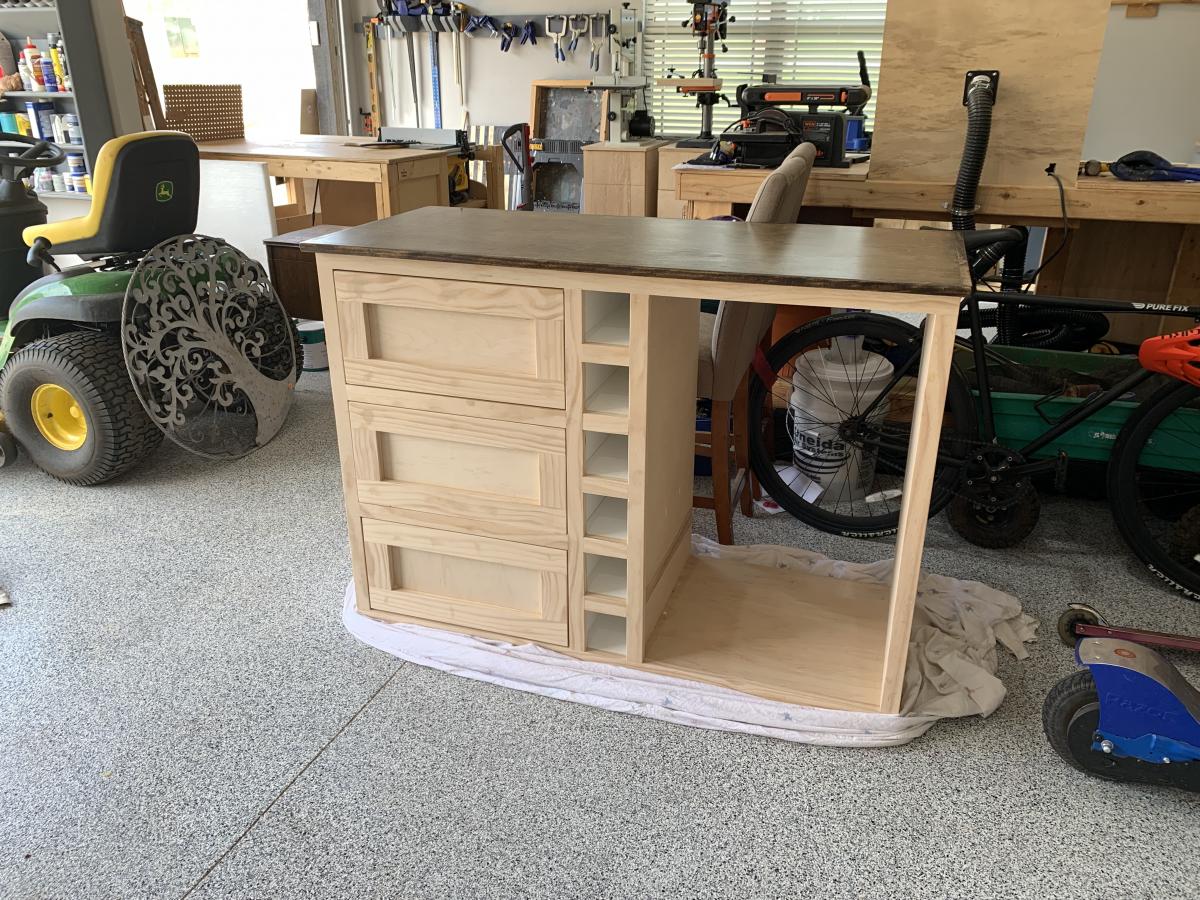
Coffee Bar with Built-In Beer Fridge and Wine Storage
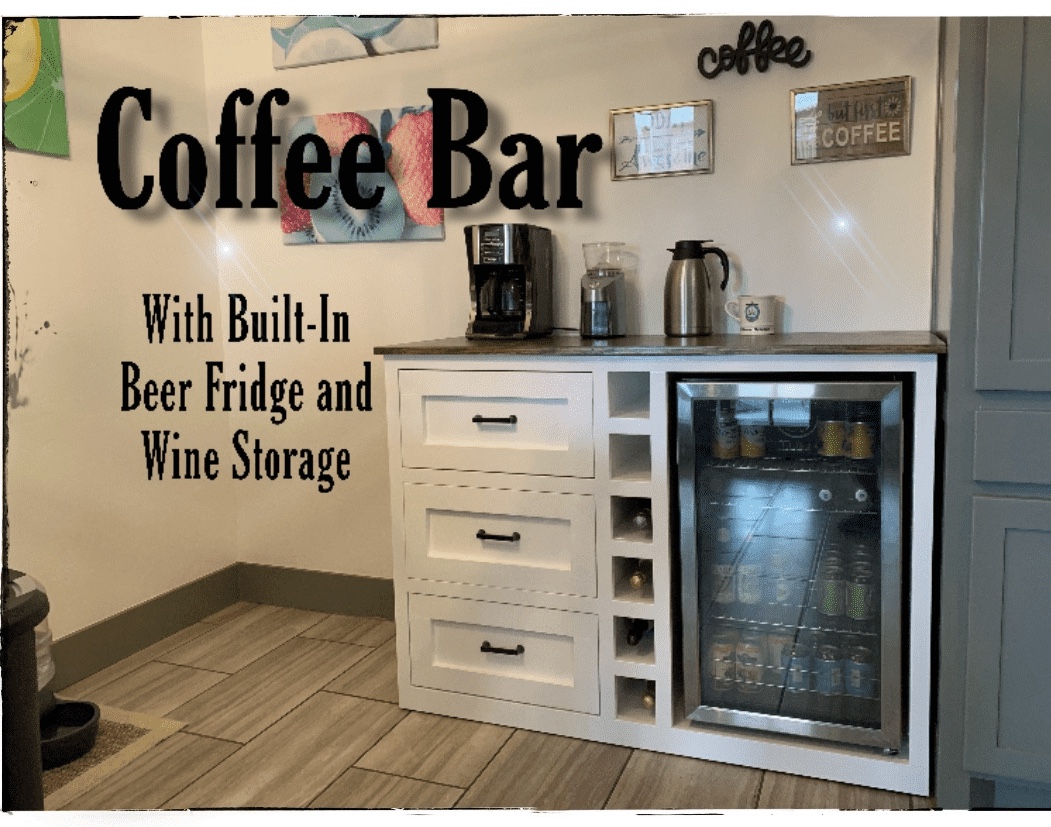
We made a beverage station for the corner of the kitchen!
Estimated Cost
$250
Estimated Time Investment
Day Project (6-9 Hours)
Finish Used
Semi-gloss white paint and Dark Walnut stain
Recommended Skill Level
Intermediate
Comments

Mon, 07/08/2019 - 10:46
We didn't use a plan for…
We didn't use a plan for this but, if someone wants to build it, check out the linked YouTube video.

Tue, 07/09/2019 - 11:11
Amazing! Thanks so much for…
Amazing! Thanks so much for adding a brag post and linking to your video!
Fri, 07/31/2020 - 09:43
Hello! Was looking to see if…
Hello! Was looking to see if this is something you would be interested in building for us? We are in love with this project but don't have the tools or means to do it ourself..
Can talk about pricing / size etc.
Thanks!
DIY Swing Bench
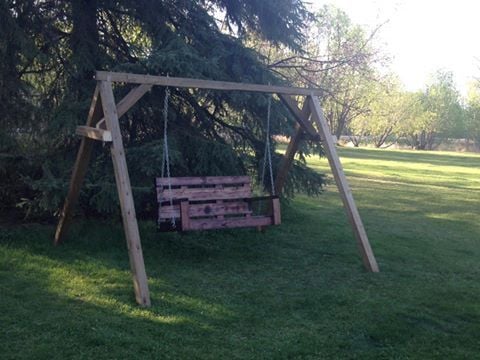
Perfect plan Ana , very easy to make. Swing hung on the A frame bulid with 4X4
Built from Plan(s)
Estimated Cost
swing $60
A frame $120
A frame $120
Estimated Time Investment
Day Project (6-9 Hours)
Recommended Skill Level
Beginner
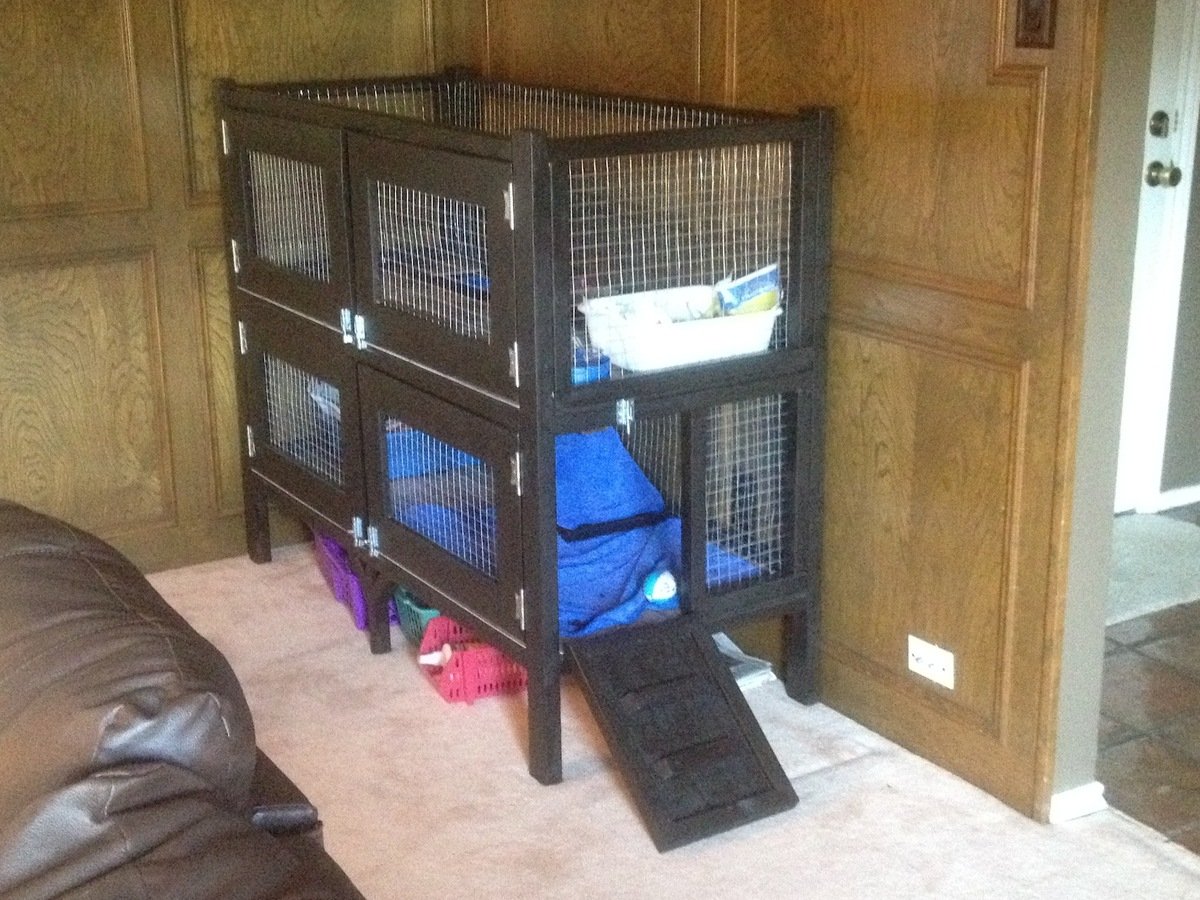
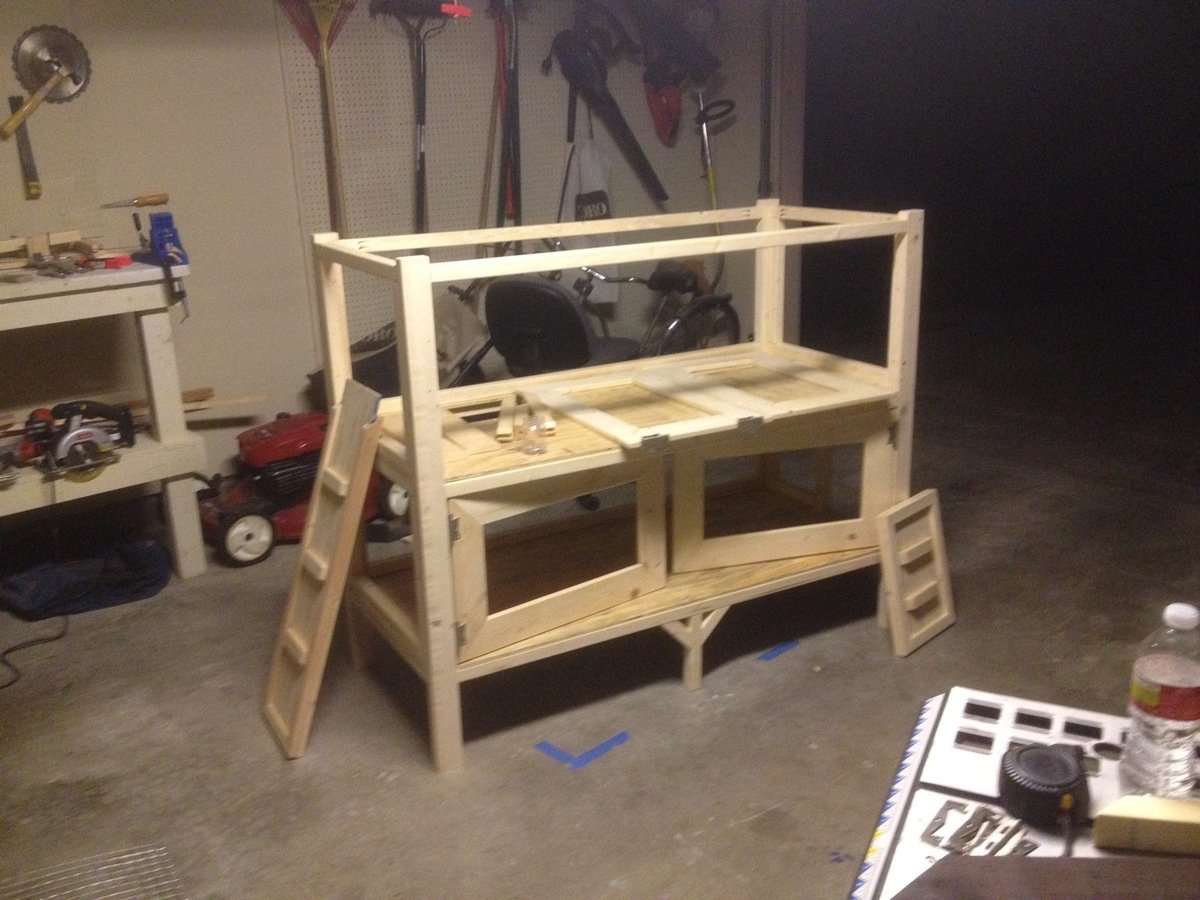
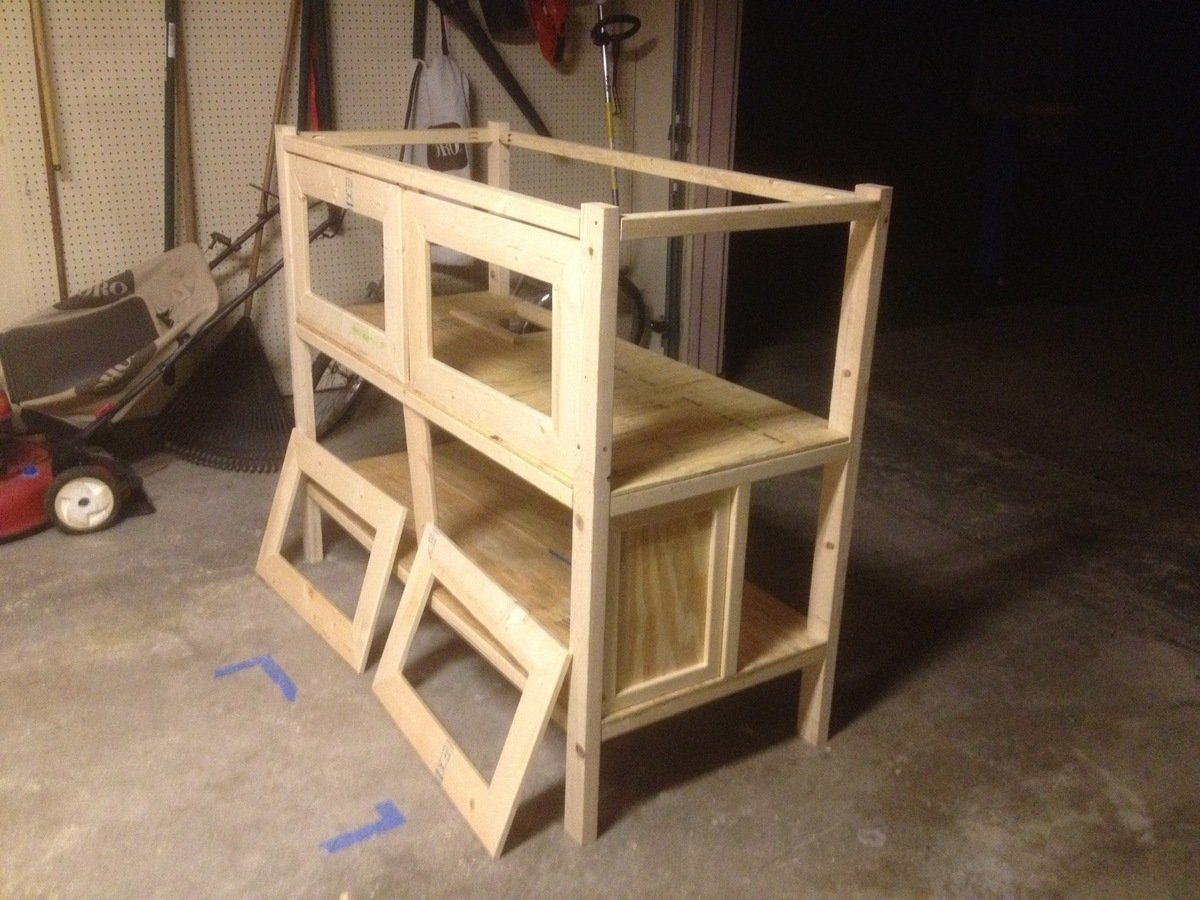
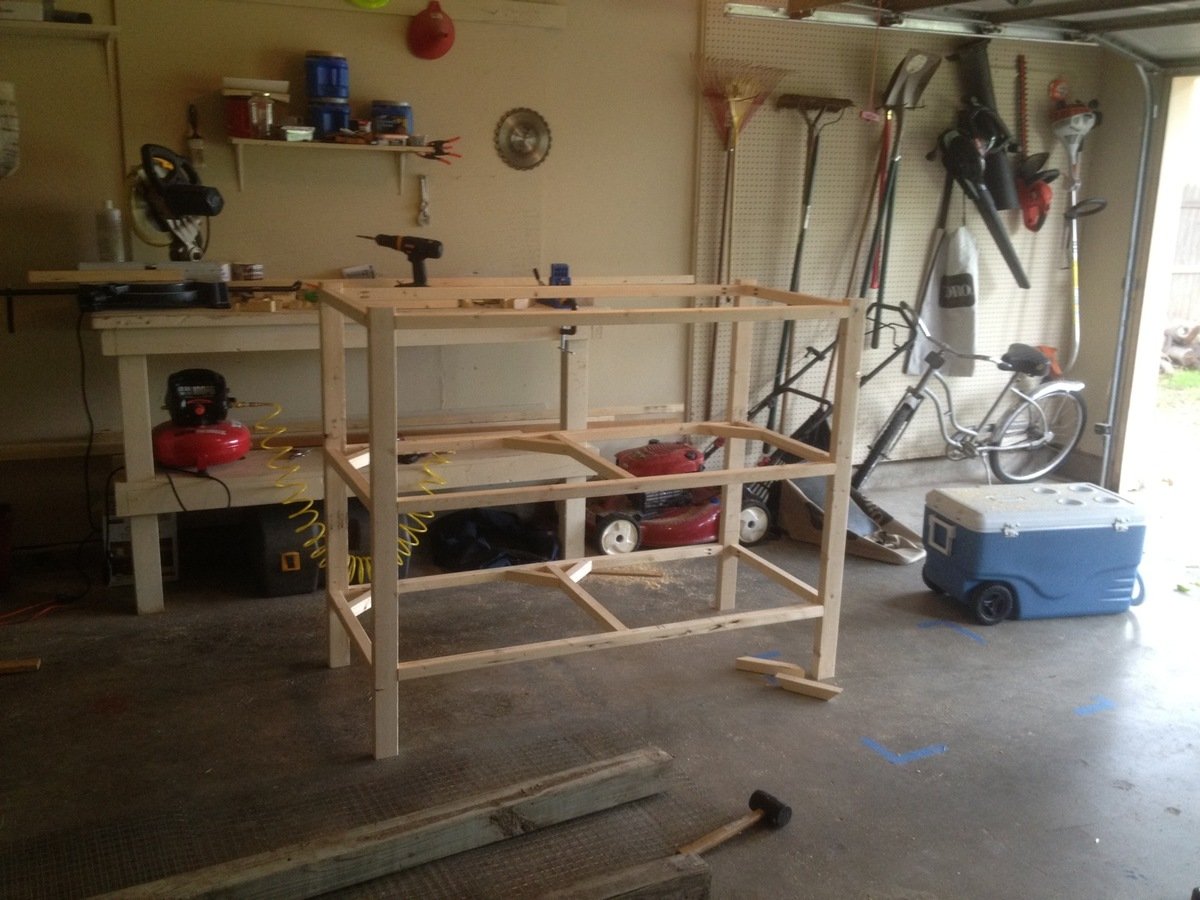
Two Story Rabbit Hutch
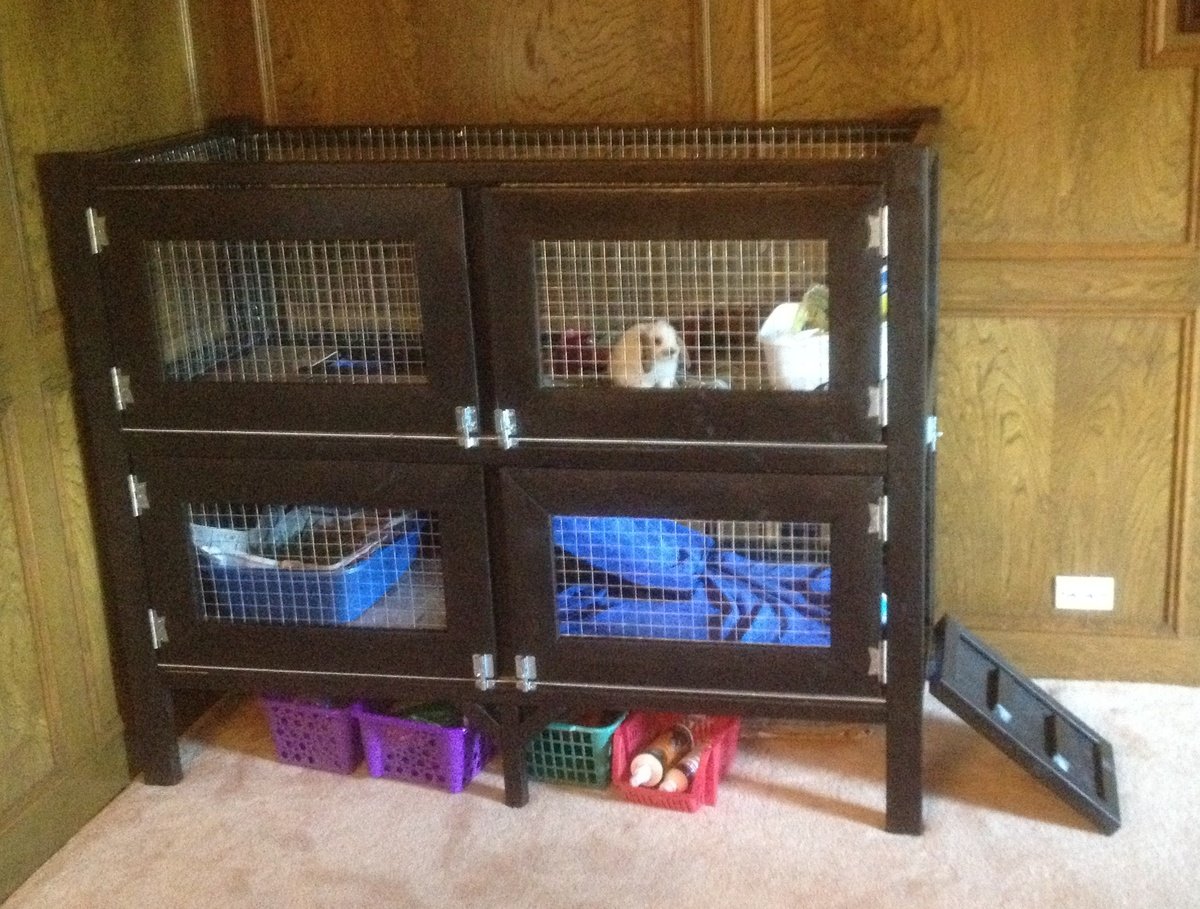
For my first woodworking project, I foolishly decided to build a rabbit hutch without plans for my daughters new Easter Bunny. So I literally scratched some ideas on my wood working bench and started going to work. I did some construction over a decade ago, but never attempted to build any furniture before, so I'm pretty happy with how this came out.
I spent a few days researching various rabbit cages and for our place we needed something that was ascetically pleasing and functional as it was going in our living room. I got some ideas from the web and decided the best thing for us would be to have an entry ramp, 2 sets of barn doors for each level (for easy cleaning) and an open roof. We went with linoleum floors since she's already litter trained. The floors could easily be modified to add 1/2" wire mesh if we decide to change things down the line. Also, we chose an espresso finish with silver hardware to accent the wire mesh
I pretty much crashed and burned on the staining as I've never done that before, but it ended up looking ok after all. I did a light sanding, but will probably invest in a planer and jointer to get my wood in better shape before assembling in the future. Also, I'll probably lightly dab some stain on ends of wood before final assembly as it made it difficulty trying to hide the white pine with the dark stain.
Other cages I saw ran around $200-$350.00 so i don't feel so bad about the cost. It's really the time that it took learning and making mistakes. I'm sure if I had plans I could of cut my time in 1/2.
Total Cost came out to around $150.00 but probably would of been cheaper if I had some plans to go by. I probably wasted a few 2x2s and accidentally mis-cut a scrap piece of 1/4"plywood which added another $16.00 to the bottom line.
Here's a breakdown of my total cost.
Hardware - $30.00
Includes 5 latches, 4 sets of hinges (8 total) and a 3' piano hinge
Stain - $8.00
Linoleum Tile @ ¢.69 sq ft - $16
Brushes, Stain Rags - $5.00
Screws - $6.00
Wire Mesh Roll $30.00
Needed 2 rolls at $15.00 each. I used 1" Wire Mesh measuring 2'x15'
Total Wood $50.00-$60
I used 2x3's for the legs - 2 @ 8' - $2.00 each ($4.00)
probably 15-20 2x2's - $1.52 each - can't remember how many I used to be honest ($30.00)
and a few 1x6's for the Doors - $2.00 each ($6.00)
Sheet of 1/4 plywood - $12.00

Estimated Cost
$150
Estimated Time Investment
Week Long Project (20 Hours or More)
Recommended Skill Level
Intermediate
Comments
Thu, 05/03/2012 - 06:24
I bet your rabbit is pumped!
I bet your rabbit is pumped! What a nice house. Good Job.

In reply to I bet your rabbit is pumped! by Aargh (not verified)
Thu, 05/03/2012 - 06:57
Thanks! The rabbit definitely
Thanks! The rabbit definitely seems happy.
Thu, 05/03/2012 - 08:09
I love it!
I also have been thinking with the idea of building a two story hutch for our rabbit. I love your ideas so now i have a new project to work on. Thanks for sharing!
Mon, 10/08/2012 - 12:46
I LOVE your cage! We have 2
I LOVE your cage! We have 2 rabbits and 2 Guinea pigs which means we have 2 ugly cages in our living room. We are planning something similar, but a bit bigger (but lower if that makes sense). And we'll put a 3rd story on for our Guinea pigs. So we have everyone on the same patch of real estate so to speak. I was going to do 3 solid walls with wire "windows" too keep all the hay, poops and such contained. I am also going to put lockable wheels underneath, so I can move it to my office if I ever need to (parties and renovations).
Is there anything that you can now think of that you would like to change on yours? R my research purposes.. :) It looks awesome, I'm just picking your brain for "hindsight" tips.
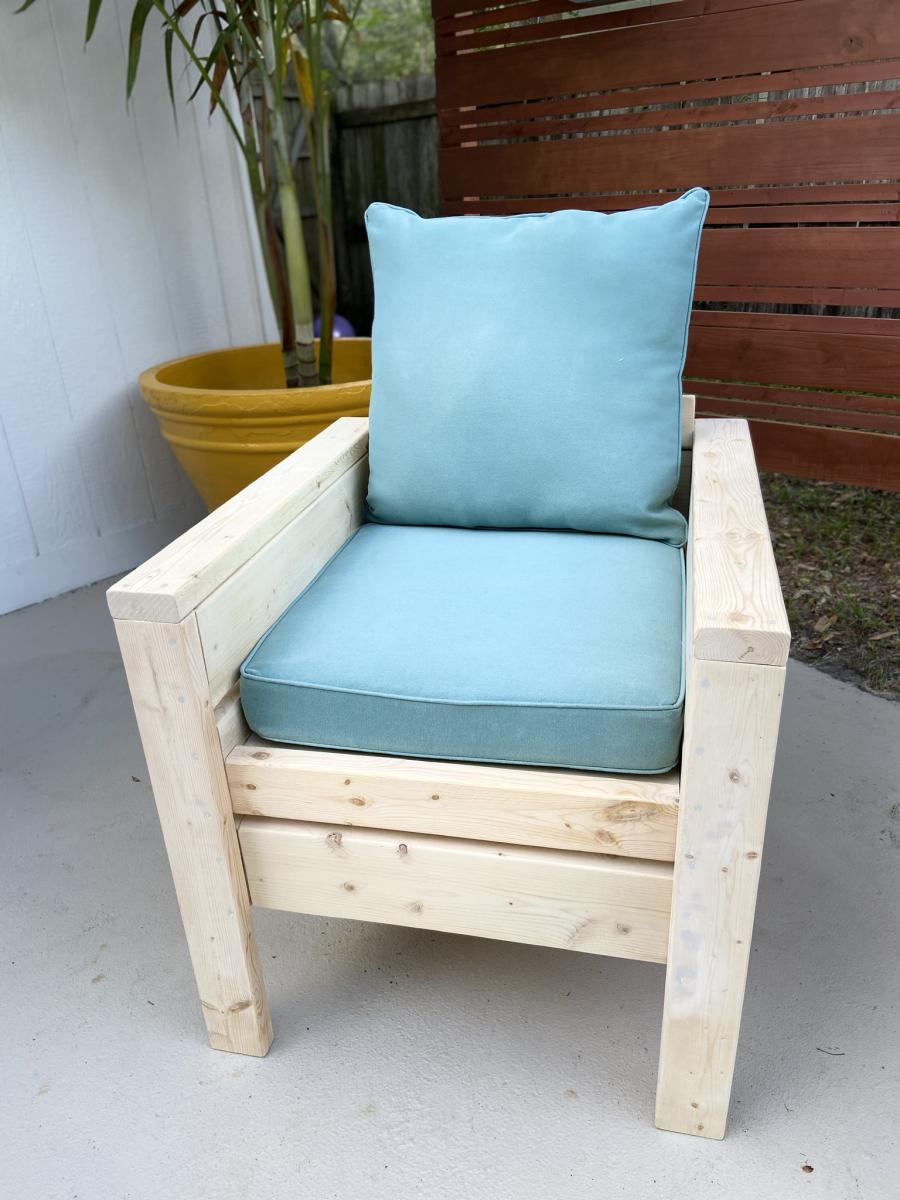
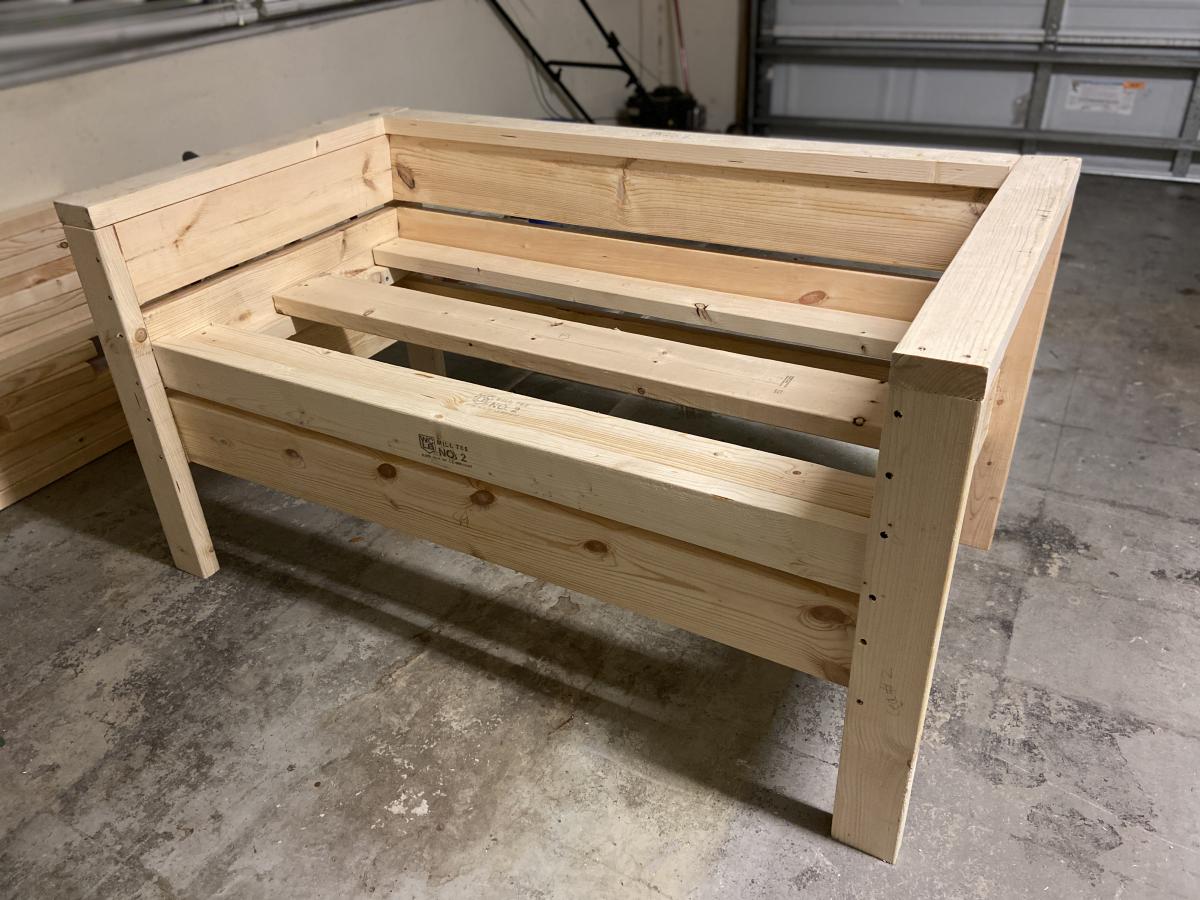
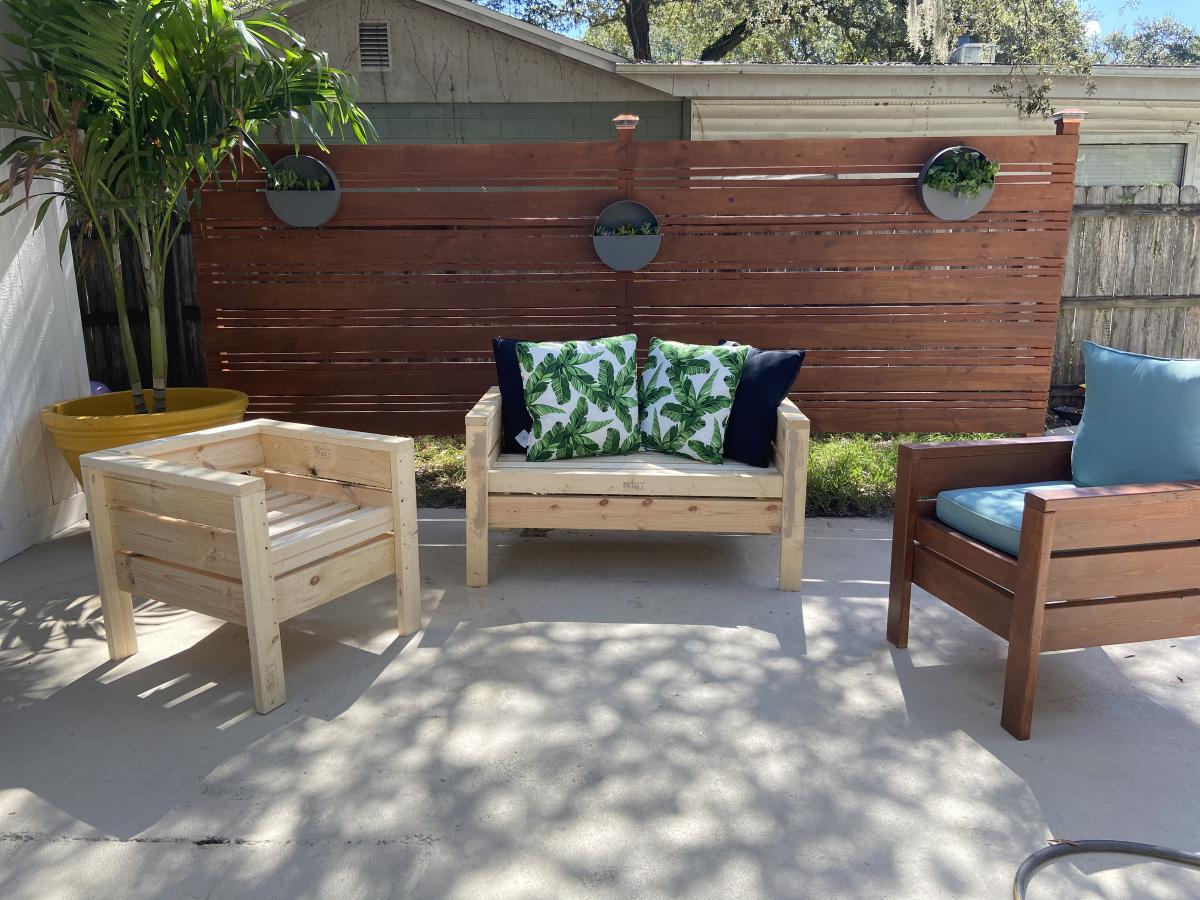
Outdoor Patio Set (Tall People Approved)
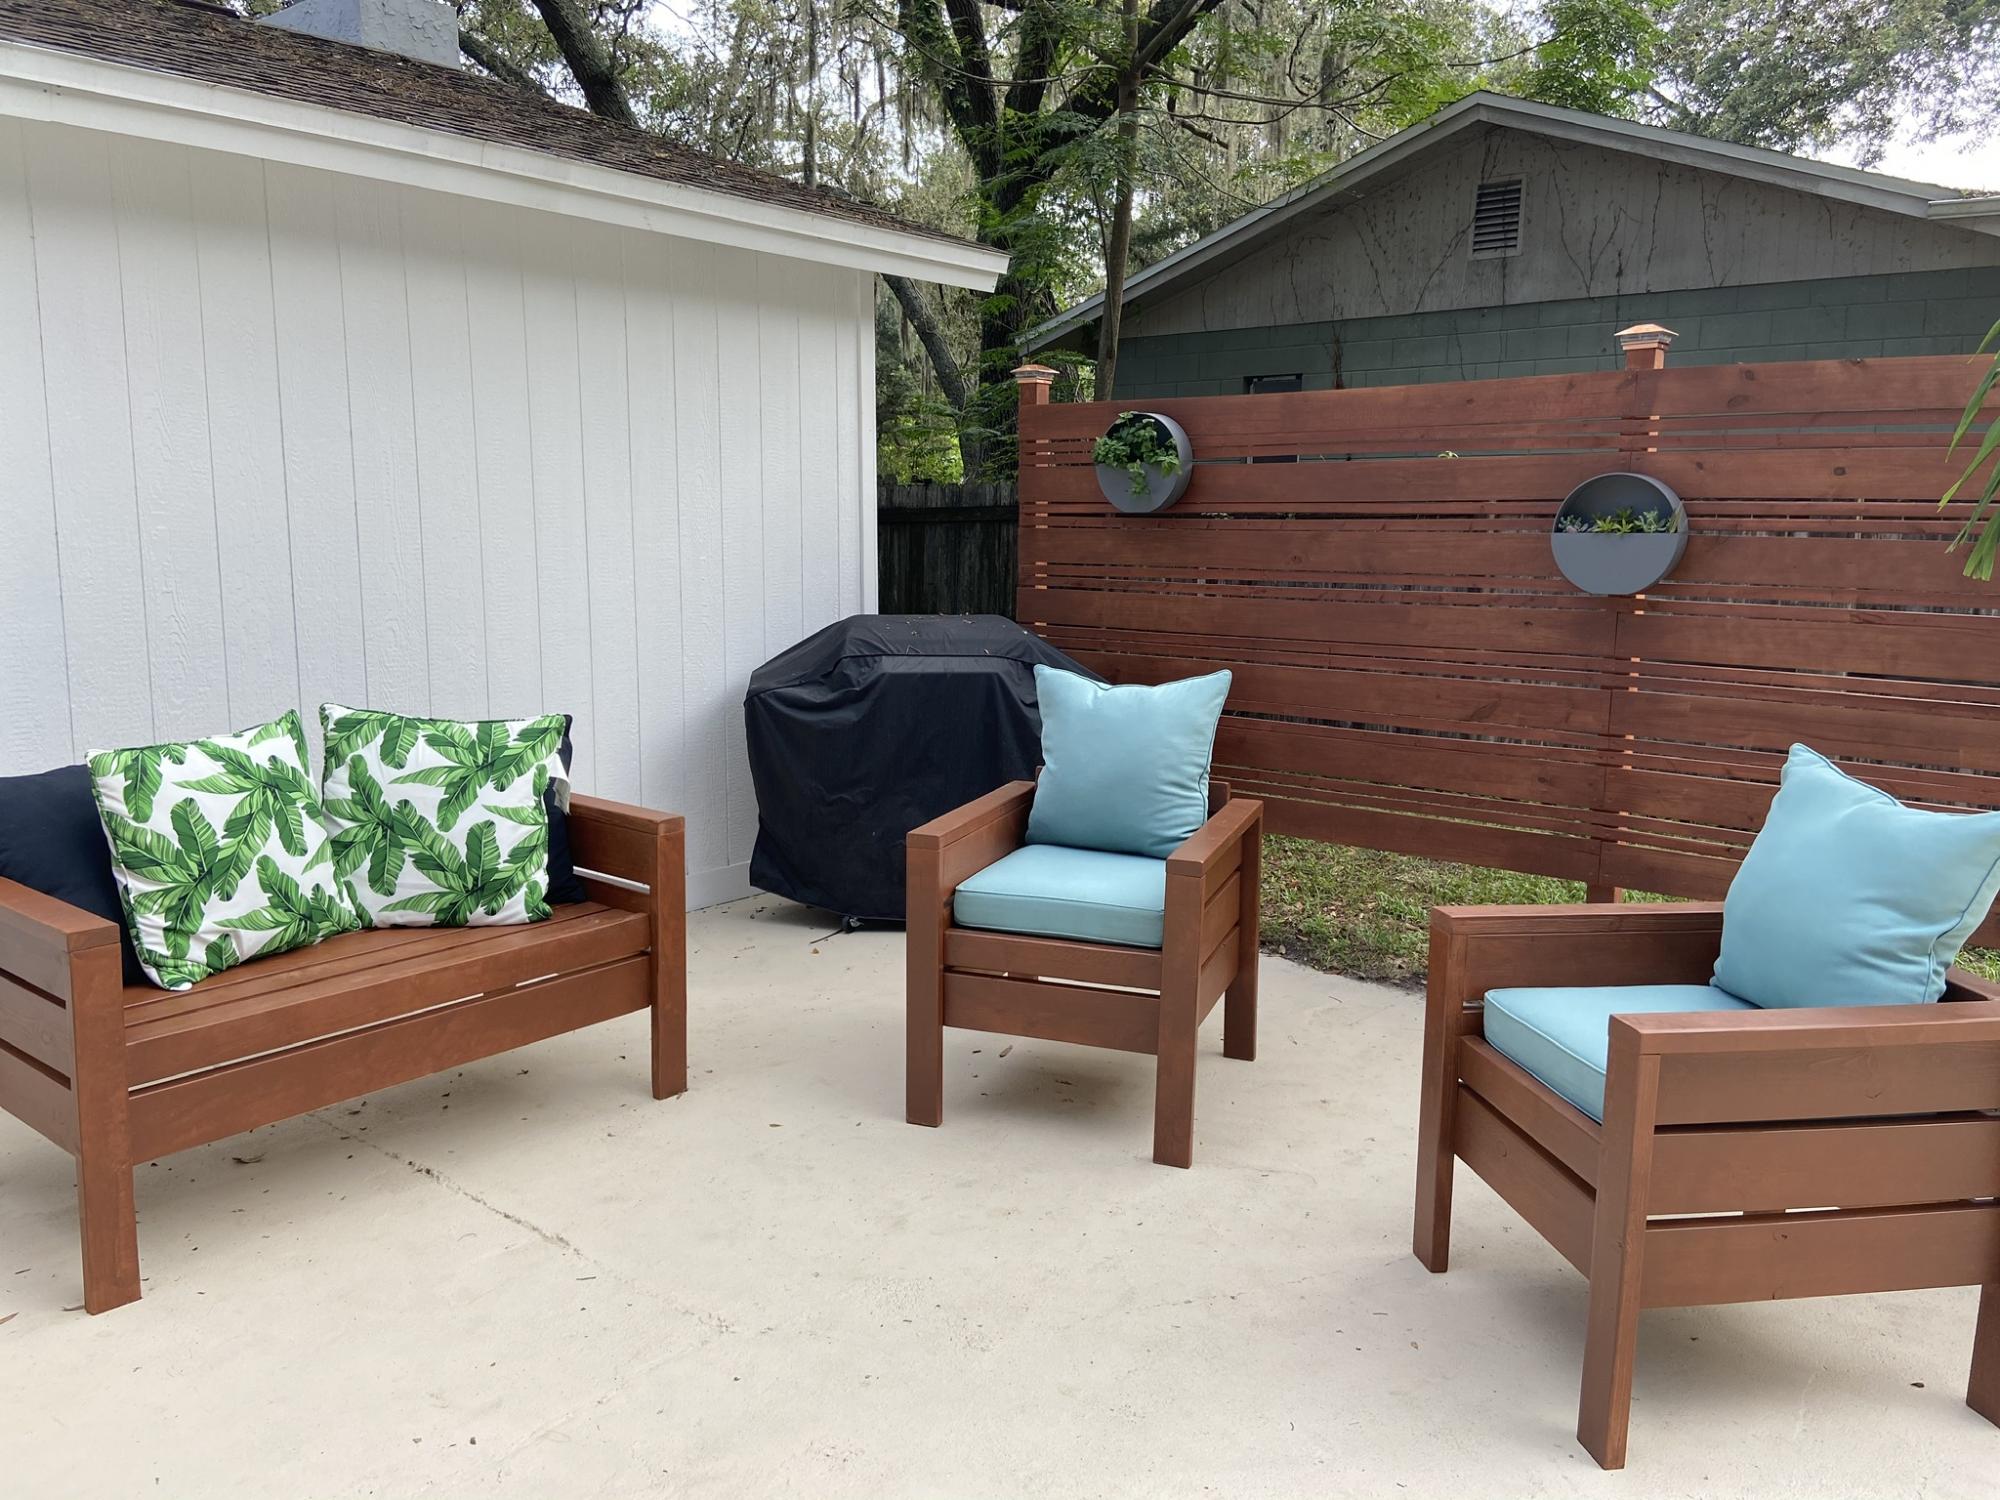
I was so excited to build this outdoor patio set! My husband and I looked high and low to find an affordable,“tall and sturdy people” outdoor patio set. The sturdy pieces we found were in the $600-$1000s... and I’m sorry.... we’re not paying that. Especially, since most of those sets were not built to hold up in the Florida rain and humidity. So my husband suggested... “ just build it!” I modified the leg length to 28 1/4”, since I have tall family. The cushions were found at Pier1 for a steal since they’re going out of business, so the chairs were modified to fit the cushion size 22”x 22”.
Built from Plan(s)
Estimated Cost
$250 with Cushions
Estimated Time Investment
Weekend Project (10-20 Hours)
Finish Used
Thompson Waterseal- transparent- Autumn Brown
Recommended Skill Level
Beginner
Dining Room Table - Dual Trestle and Extension Slides
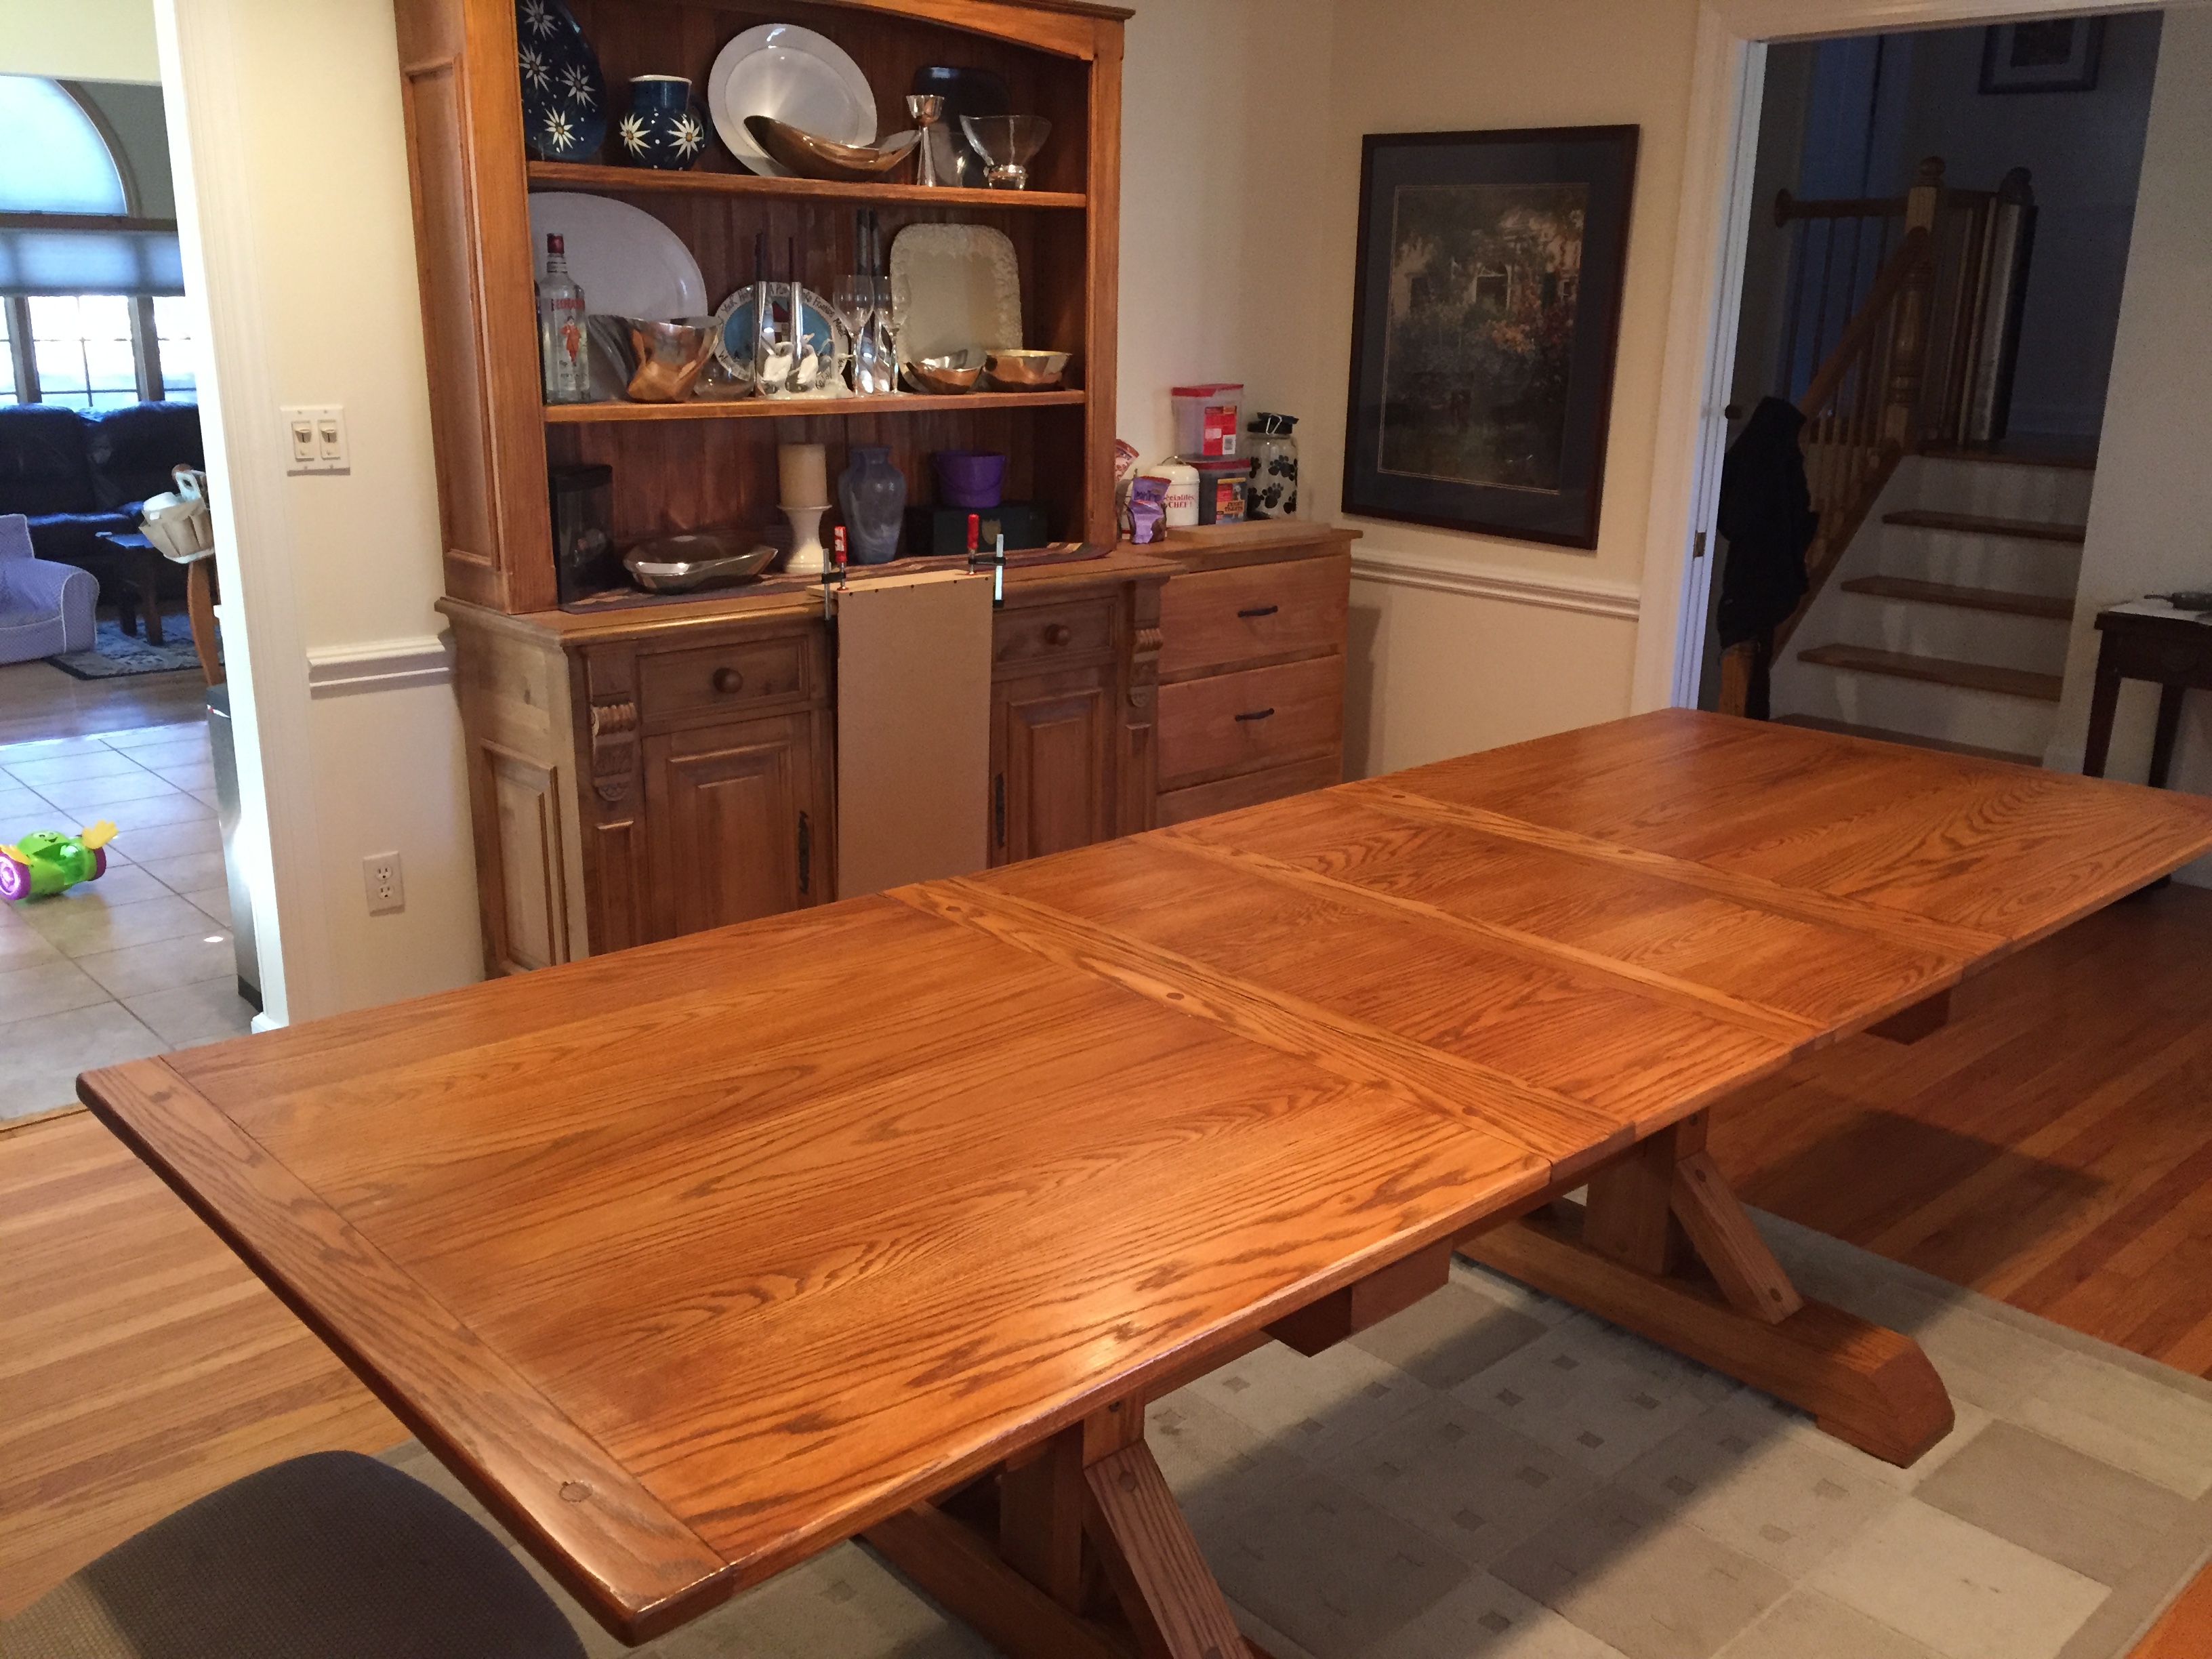
My 40”x80” dining room table with equalizer extension slides that bring it to 110” when both leaves are installed. This was initially inspired by the Farm Hose trestle table. I've got details in some blog posts on my build. It’s not exactly the most complete blog with every detail, but it has a bunch of pictures along the way.
Estimated Cost
$1,200 for wood. Probably around $1,500 total if you add in some tools / supplies I didn't have.
Estimated Time Investment
Week Long Project (20 Hours or More)
Finish Used
Aqua Coat grain sealer. General Finishes Prairie Wheat Gel Stain, General Finishes Arm-R-Seal poly seal coat.
Recommended Skill Level
Intermediate
Comments

Sun, 11/08/2020 - 09:01
This is amazing and exactly…
This is amazing and exactly what I'm looking for.. do you have plans for this table?
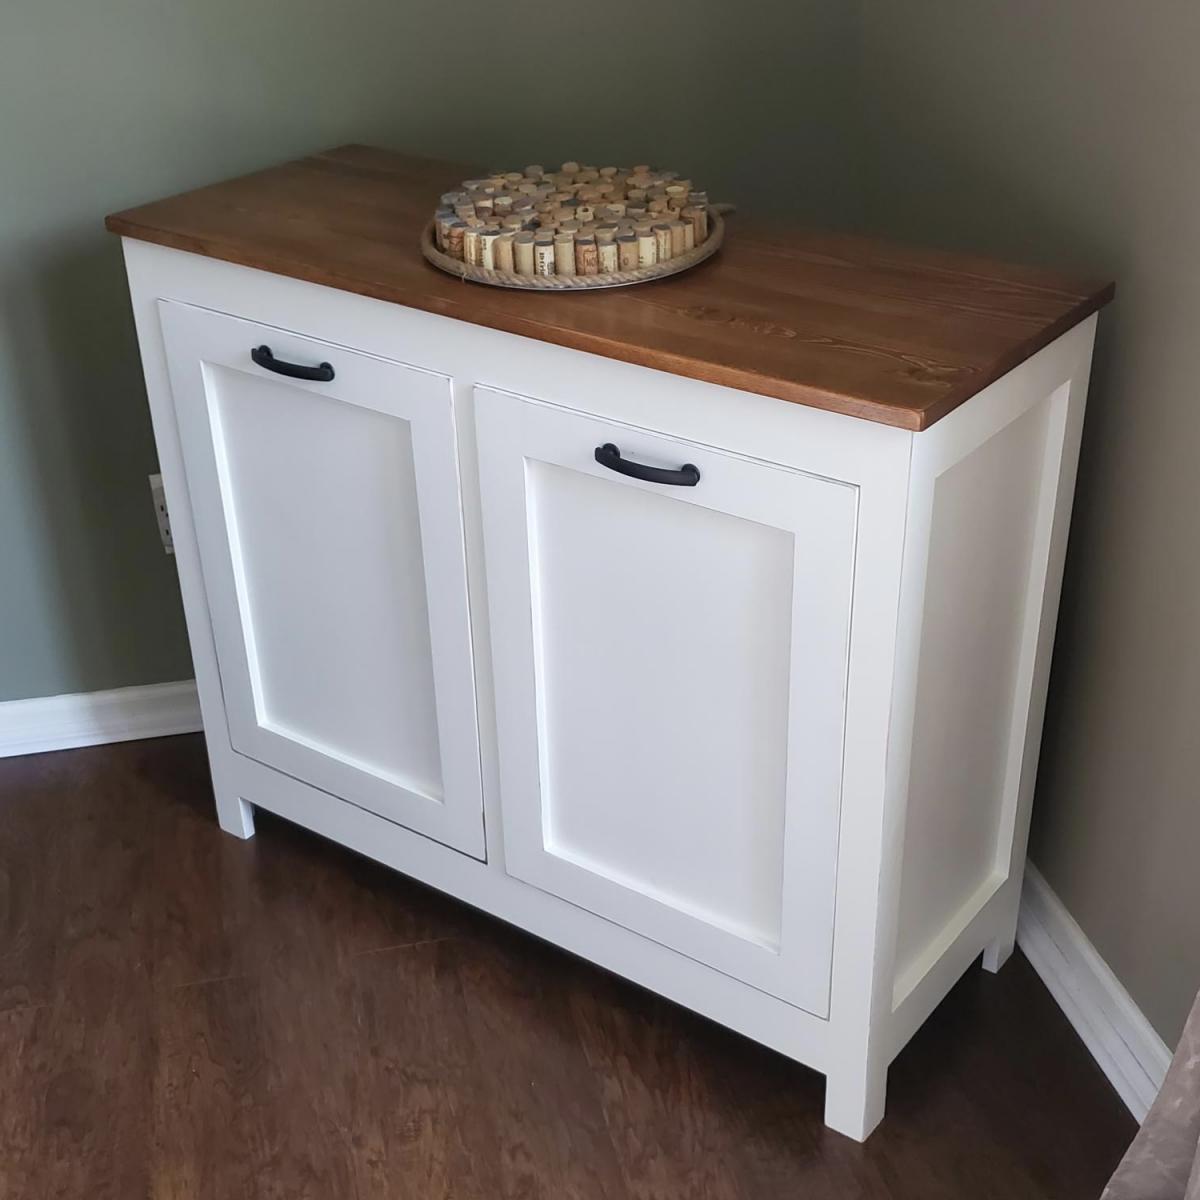
Trash / Recycling Cabinet
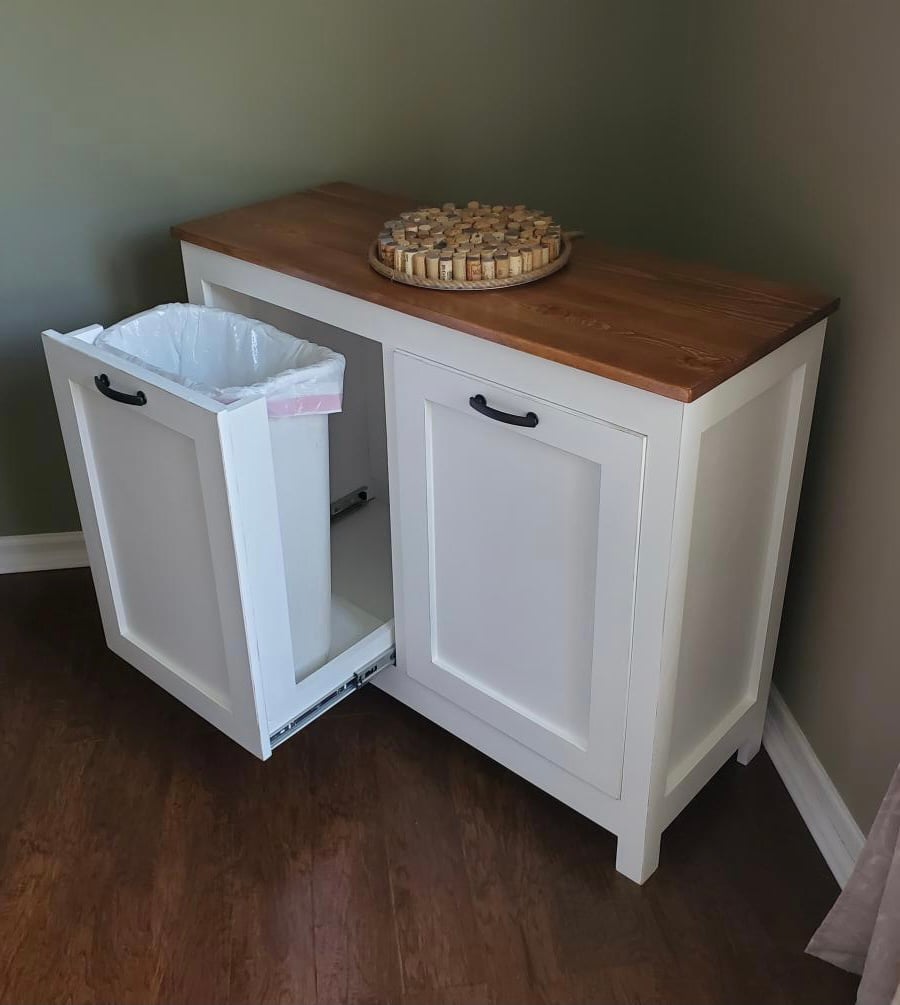
This was a build I was able to check off my Honey-do List. We use it as a Trash / Recycling Cabinet. Basic cabinet build with tray drawers for the trash cans.
Built from Plan(s)
Estimated Time Investment
Weekend Project (10-20 Hours)
Recommended Skill Level
Intermediate
Comments
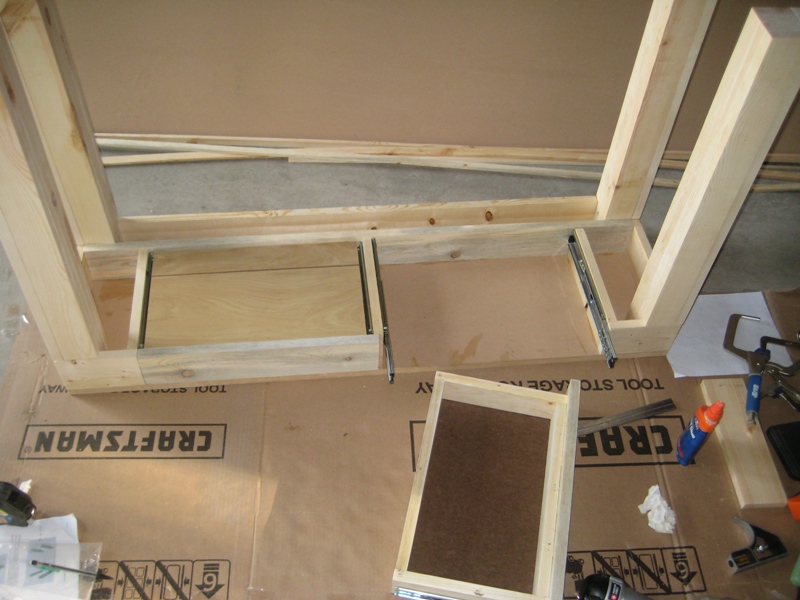
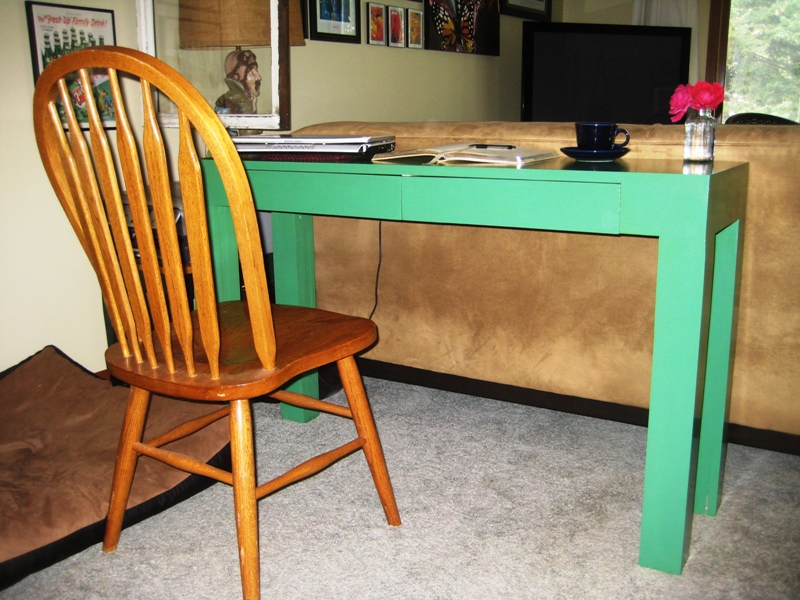
Simple Modern Desk
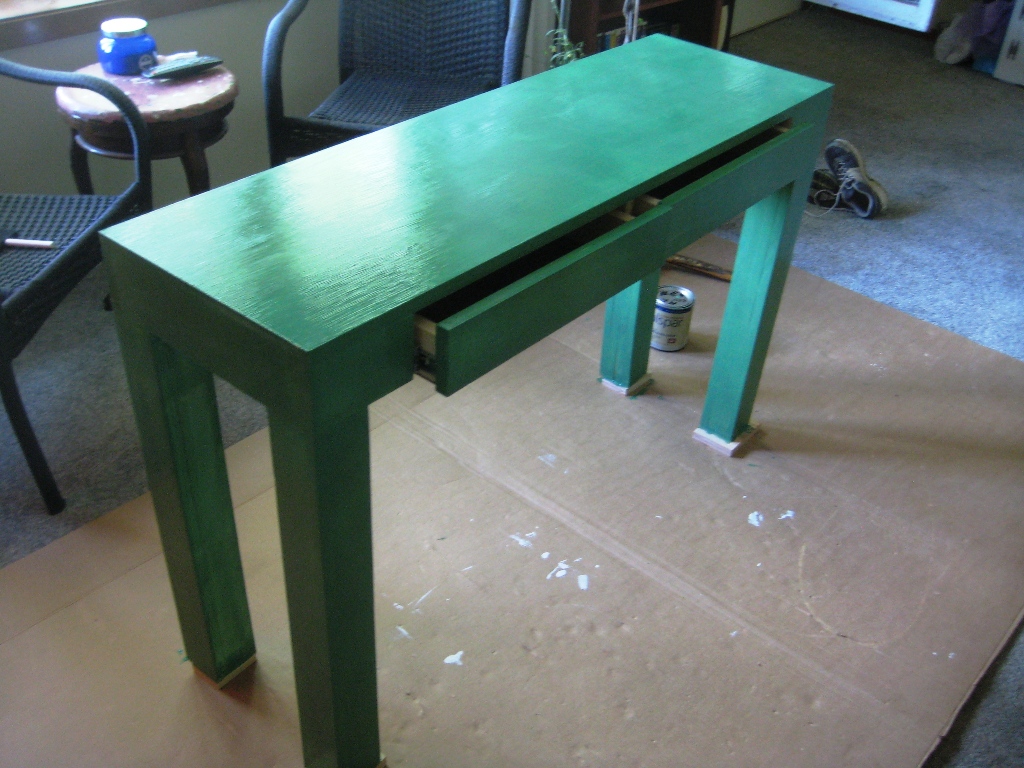
Built this a little smaller - only 15" deep and 42" wide for use behind the couch with multiple functions - laptop desk, dining room buffet table, and behind-the-couch-set-things-on table. Love it!
Tricky parts - the drawers. Because I changed the dimensions, I built the drawer box to fit my new dimensions and installed it. Then, I cut the sides of my drawers 10" deep (the smallest drawer slides I could find and a perfect fit). I laid the Hettich ball bearing drawer slides (from my local lumber and cabinet supplier, not big box) in the drawer box and trimmed down my drawer front/back until they fit nicely. If you're interested, it was 15 1/8" wide.
Nail gun is a must on this project!!! And remember to glue and use 2" nails.
I used the Kreg jig to build my drawers because I'm familiar with building drawers that way and feel comfortable getting them squared. I highly recommend the Kreg jig!
Then, I attacked it with my orbital sander until it was nice and smooth.
Love Ana's great patterns!
Built from Plan(s)
Estimated Cost
$85
Estimated Time Investment
Day Project (6-9 Hours)
Finish Used
lots of sanding, vacuum, wipe with microfiber cloth, spray primer, sand, vacuum, wipe, paint, sand, wipe, poly to finish. Use sponge brush to avoid brush strokes.
Recommended Skill Level
Beginner
Comments

Sat, 06/22/2013 - 13:34
Finally...
I've been looking for a post with dimensions more similar to my sketch and found yours. Thanks! I must say that I'm a bit puzzled with how to attack my drawers. My table's dimensions being 44Lx16D. I am in desperate need of a comp table to fit along a short wall, but need it to be functional, hence the need for drawers. Were your drawer dimensions limited to the length of the drawer slides you found? If possible, I'd like my drawers deeper. However, I'm open to one longer, less complicated, drawer as well, lol. I'm curious. Help!
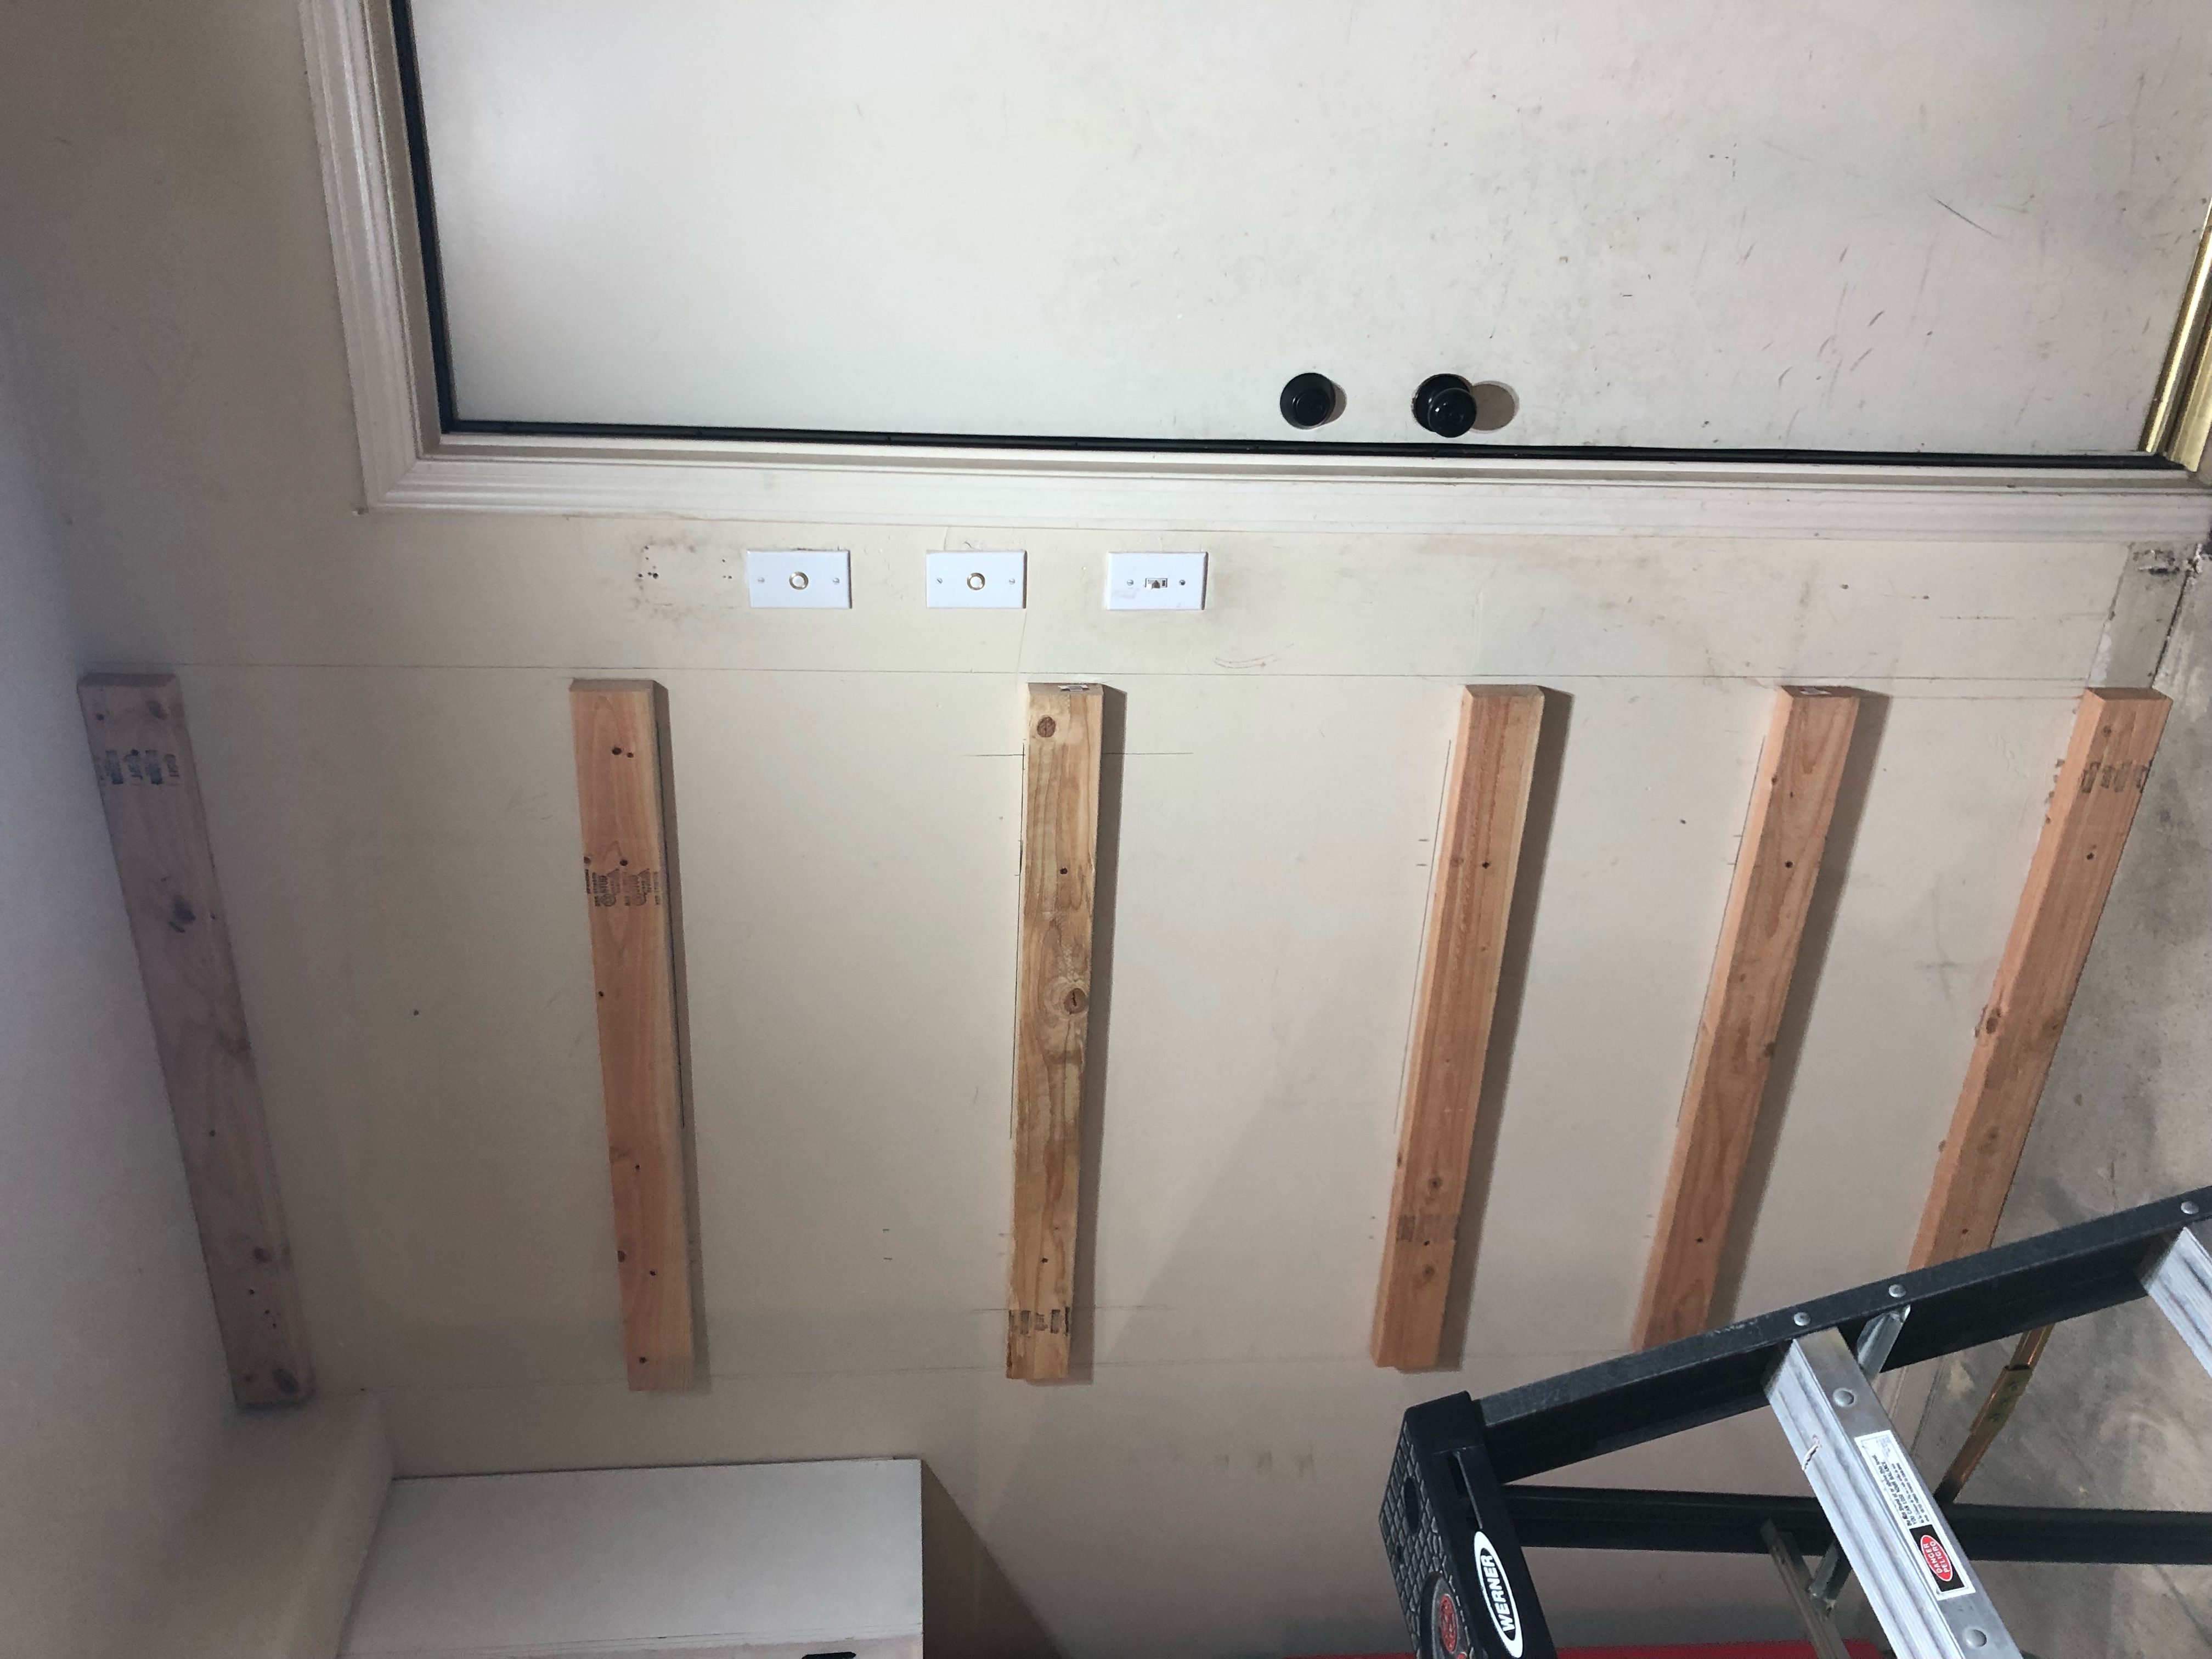
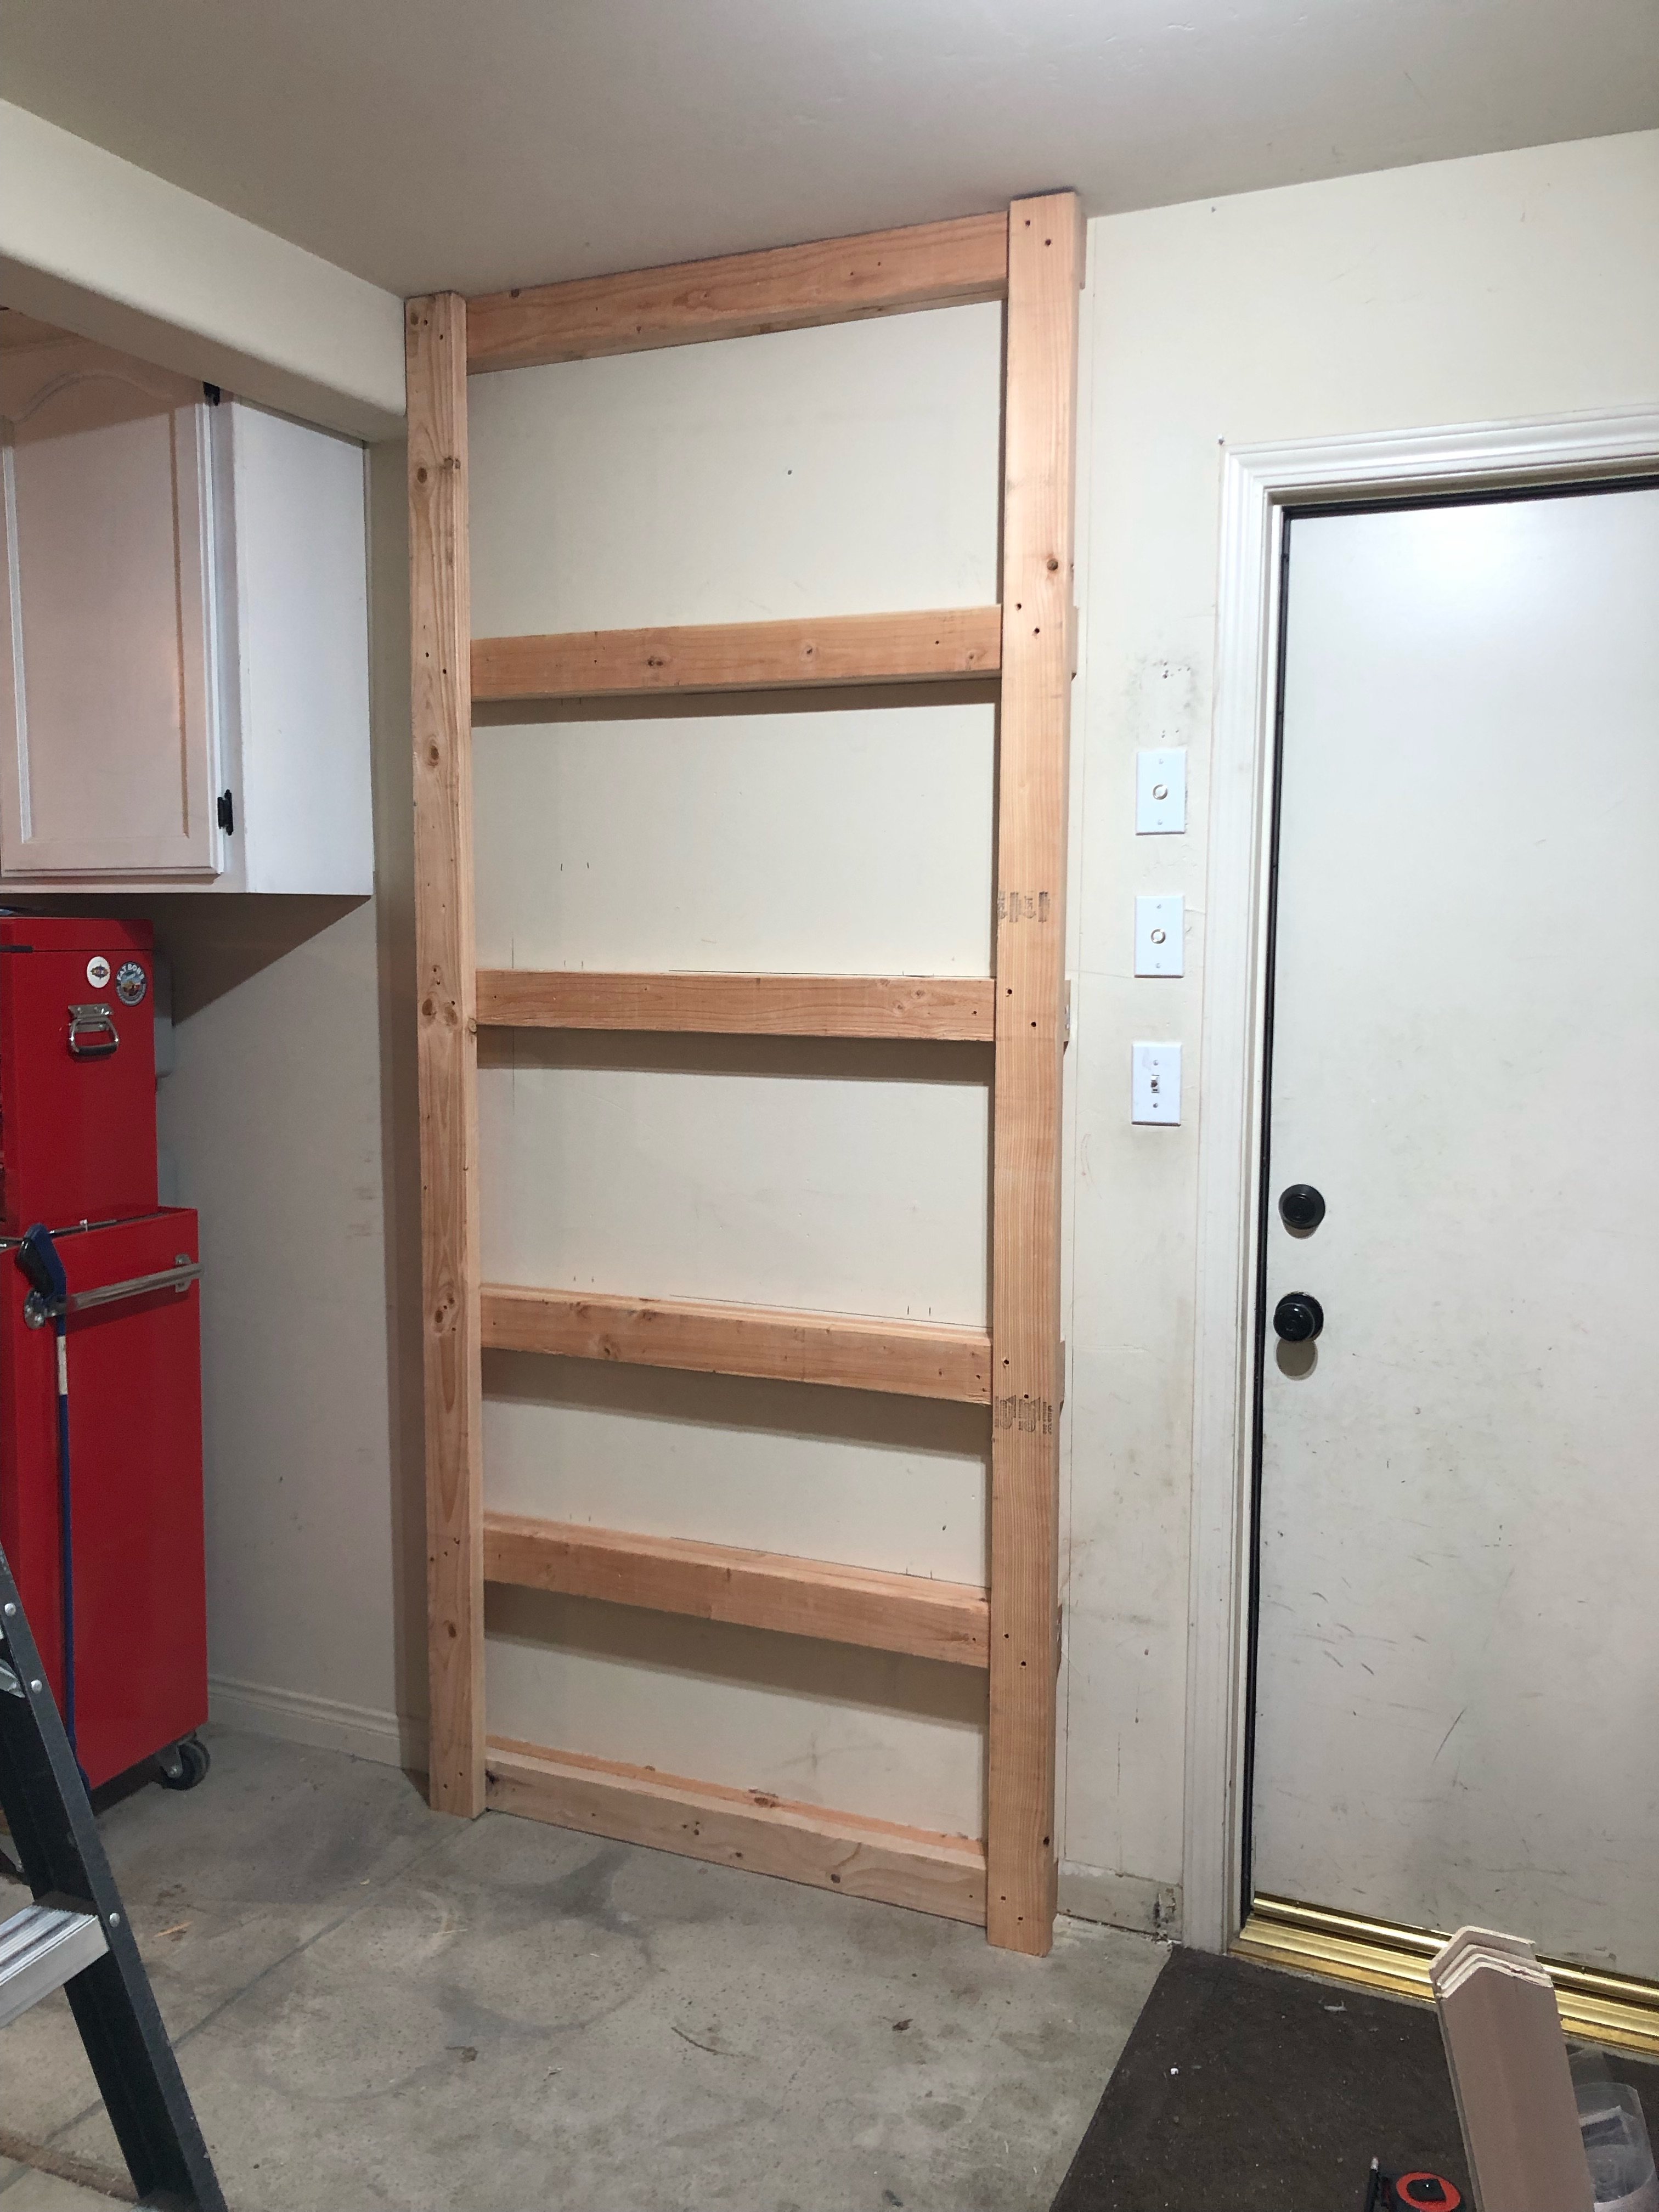
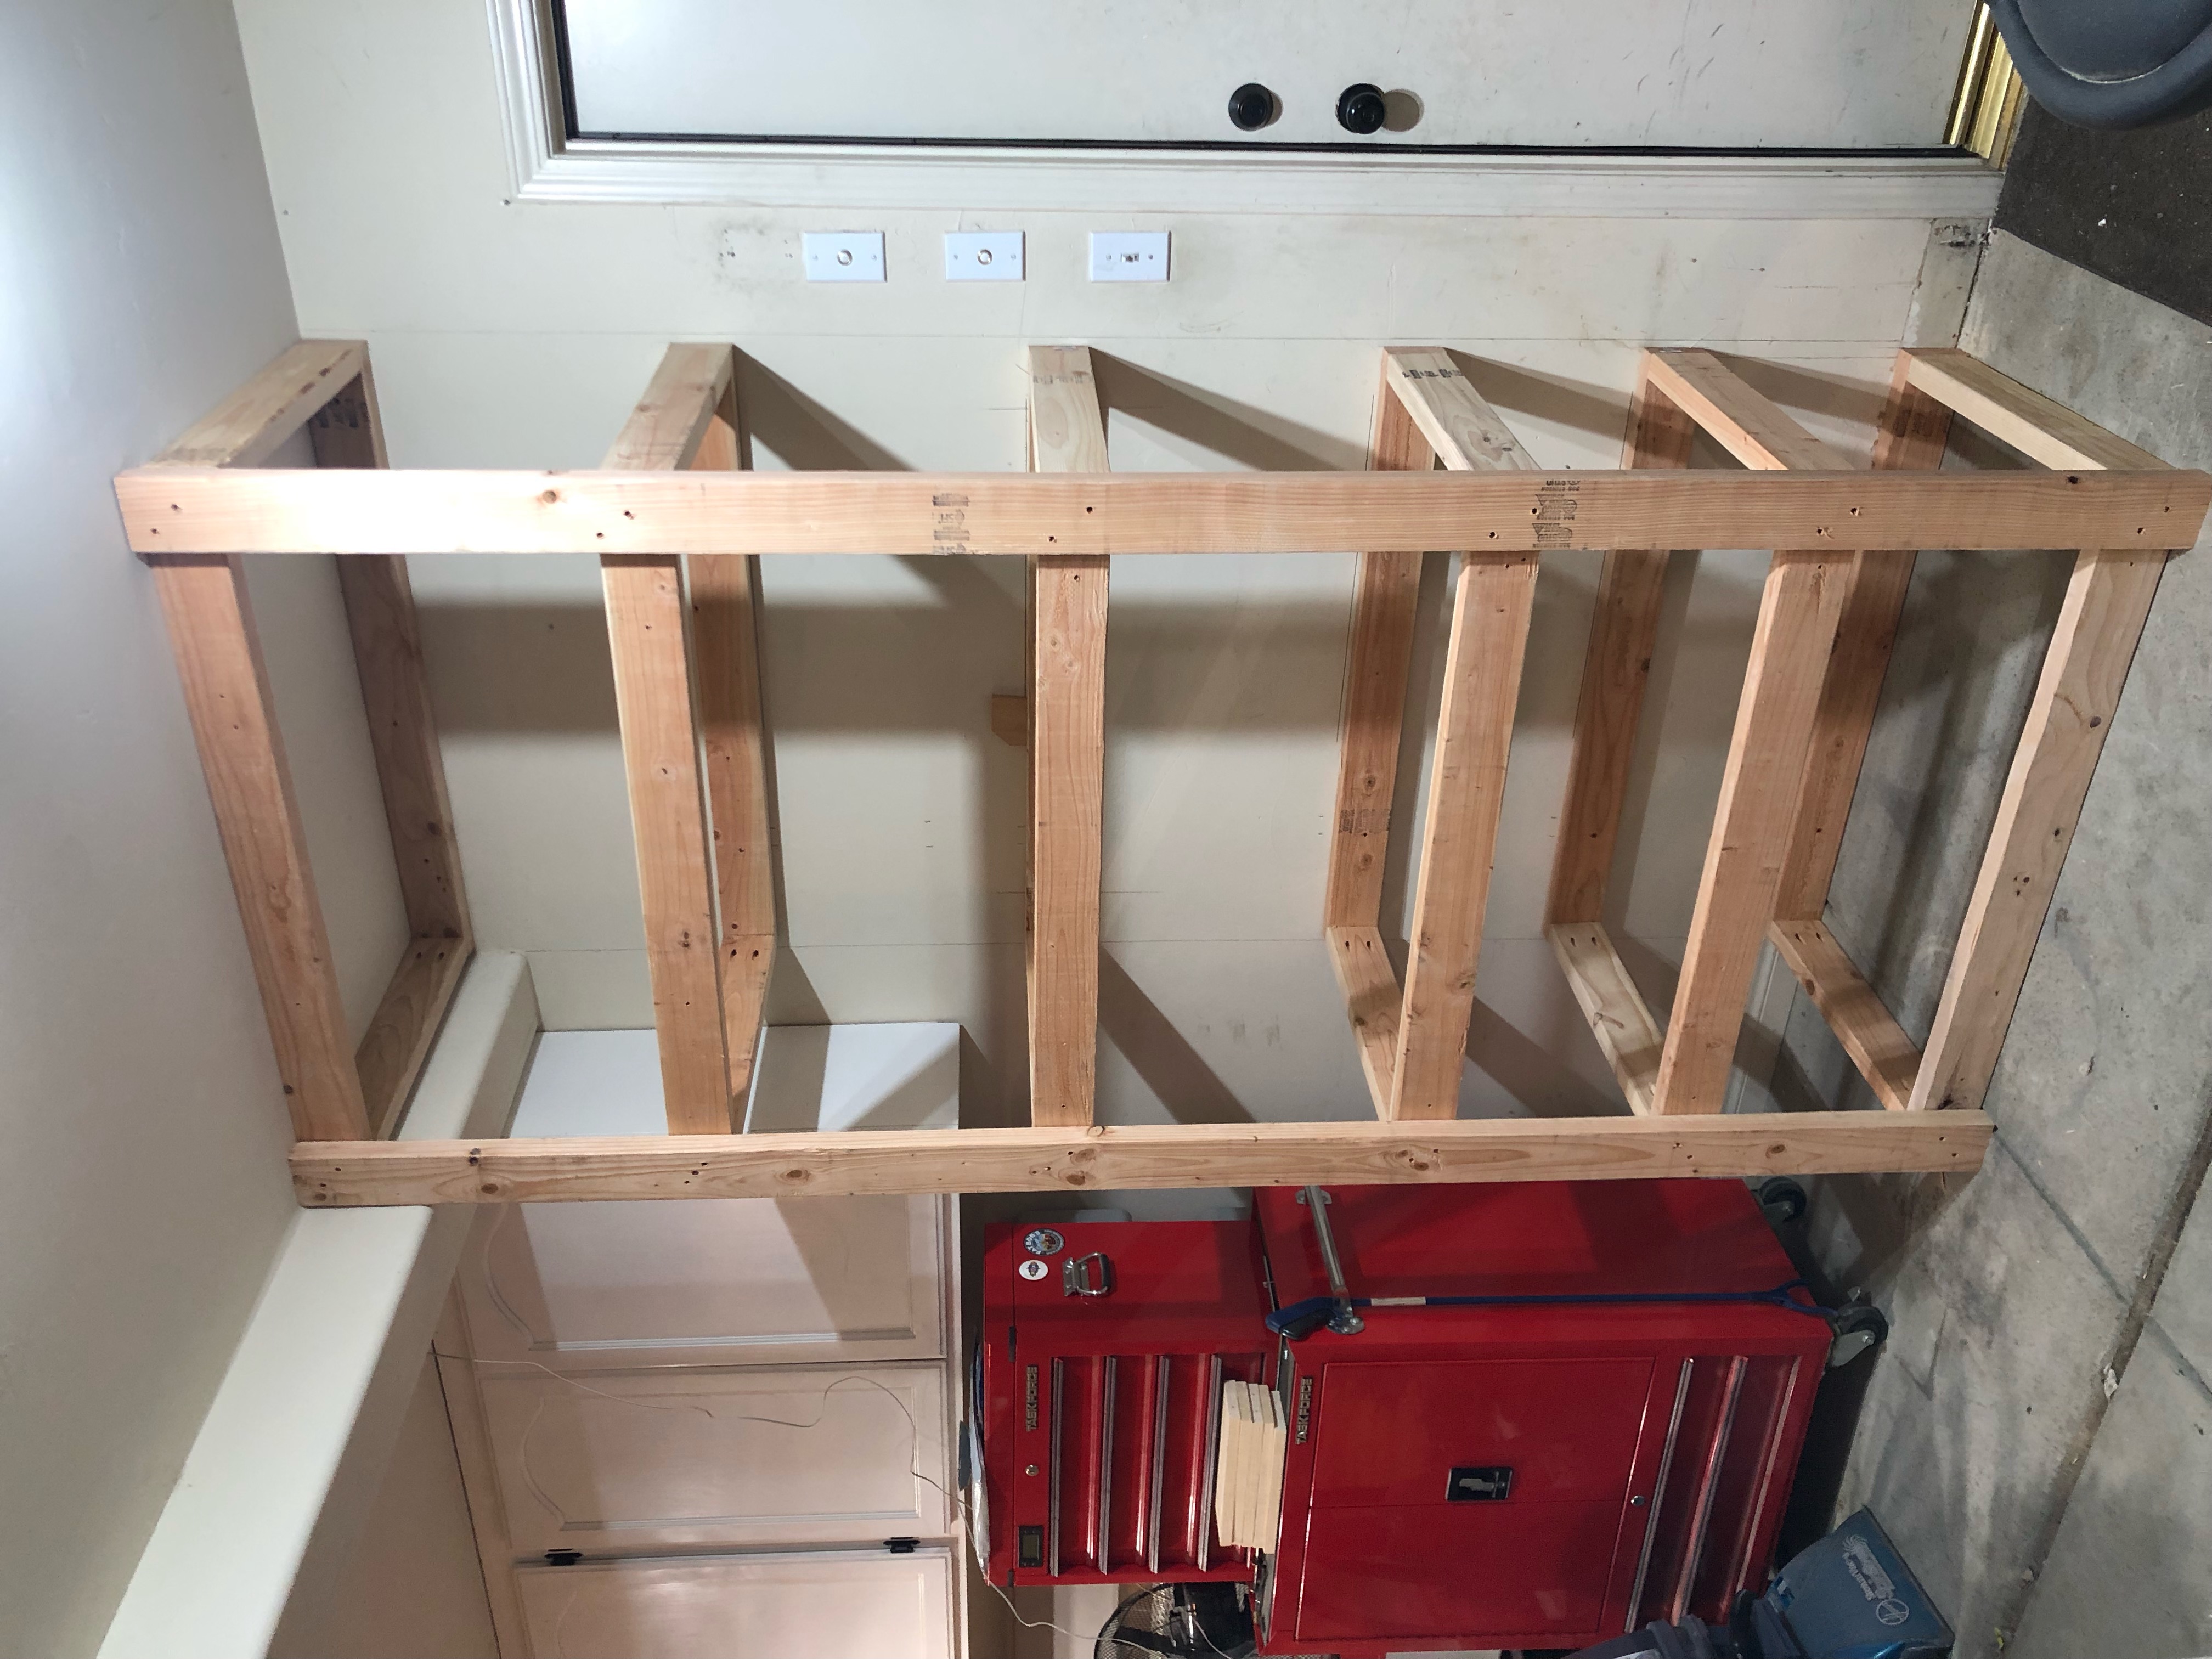
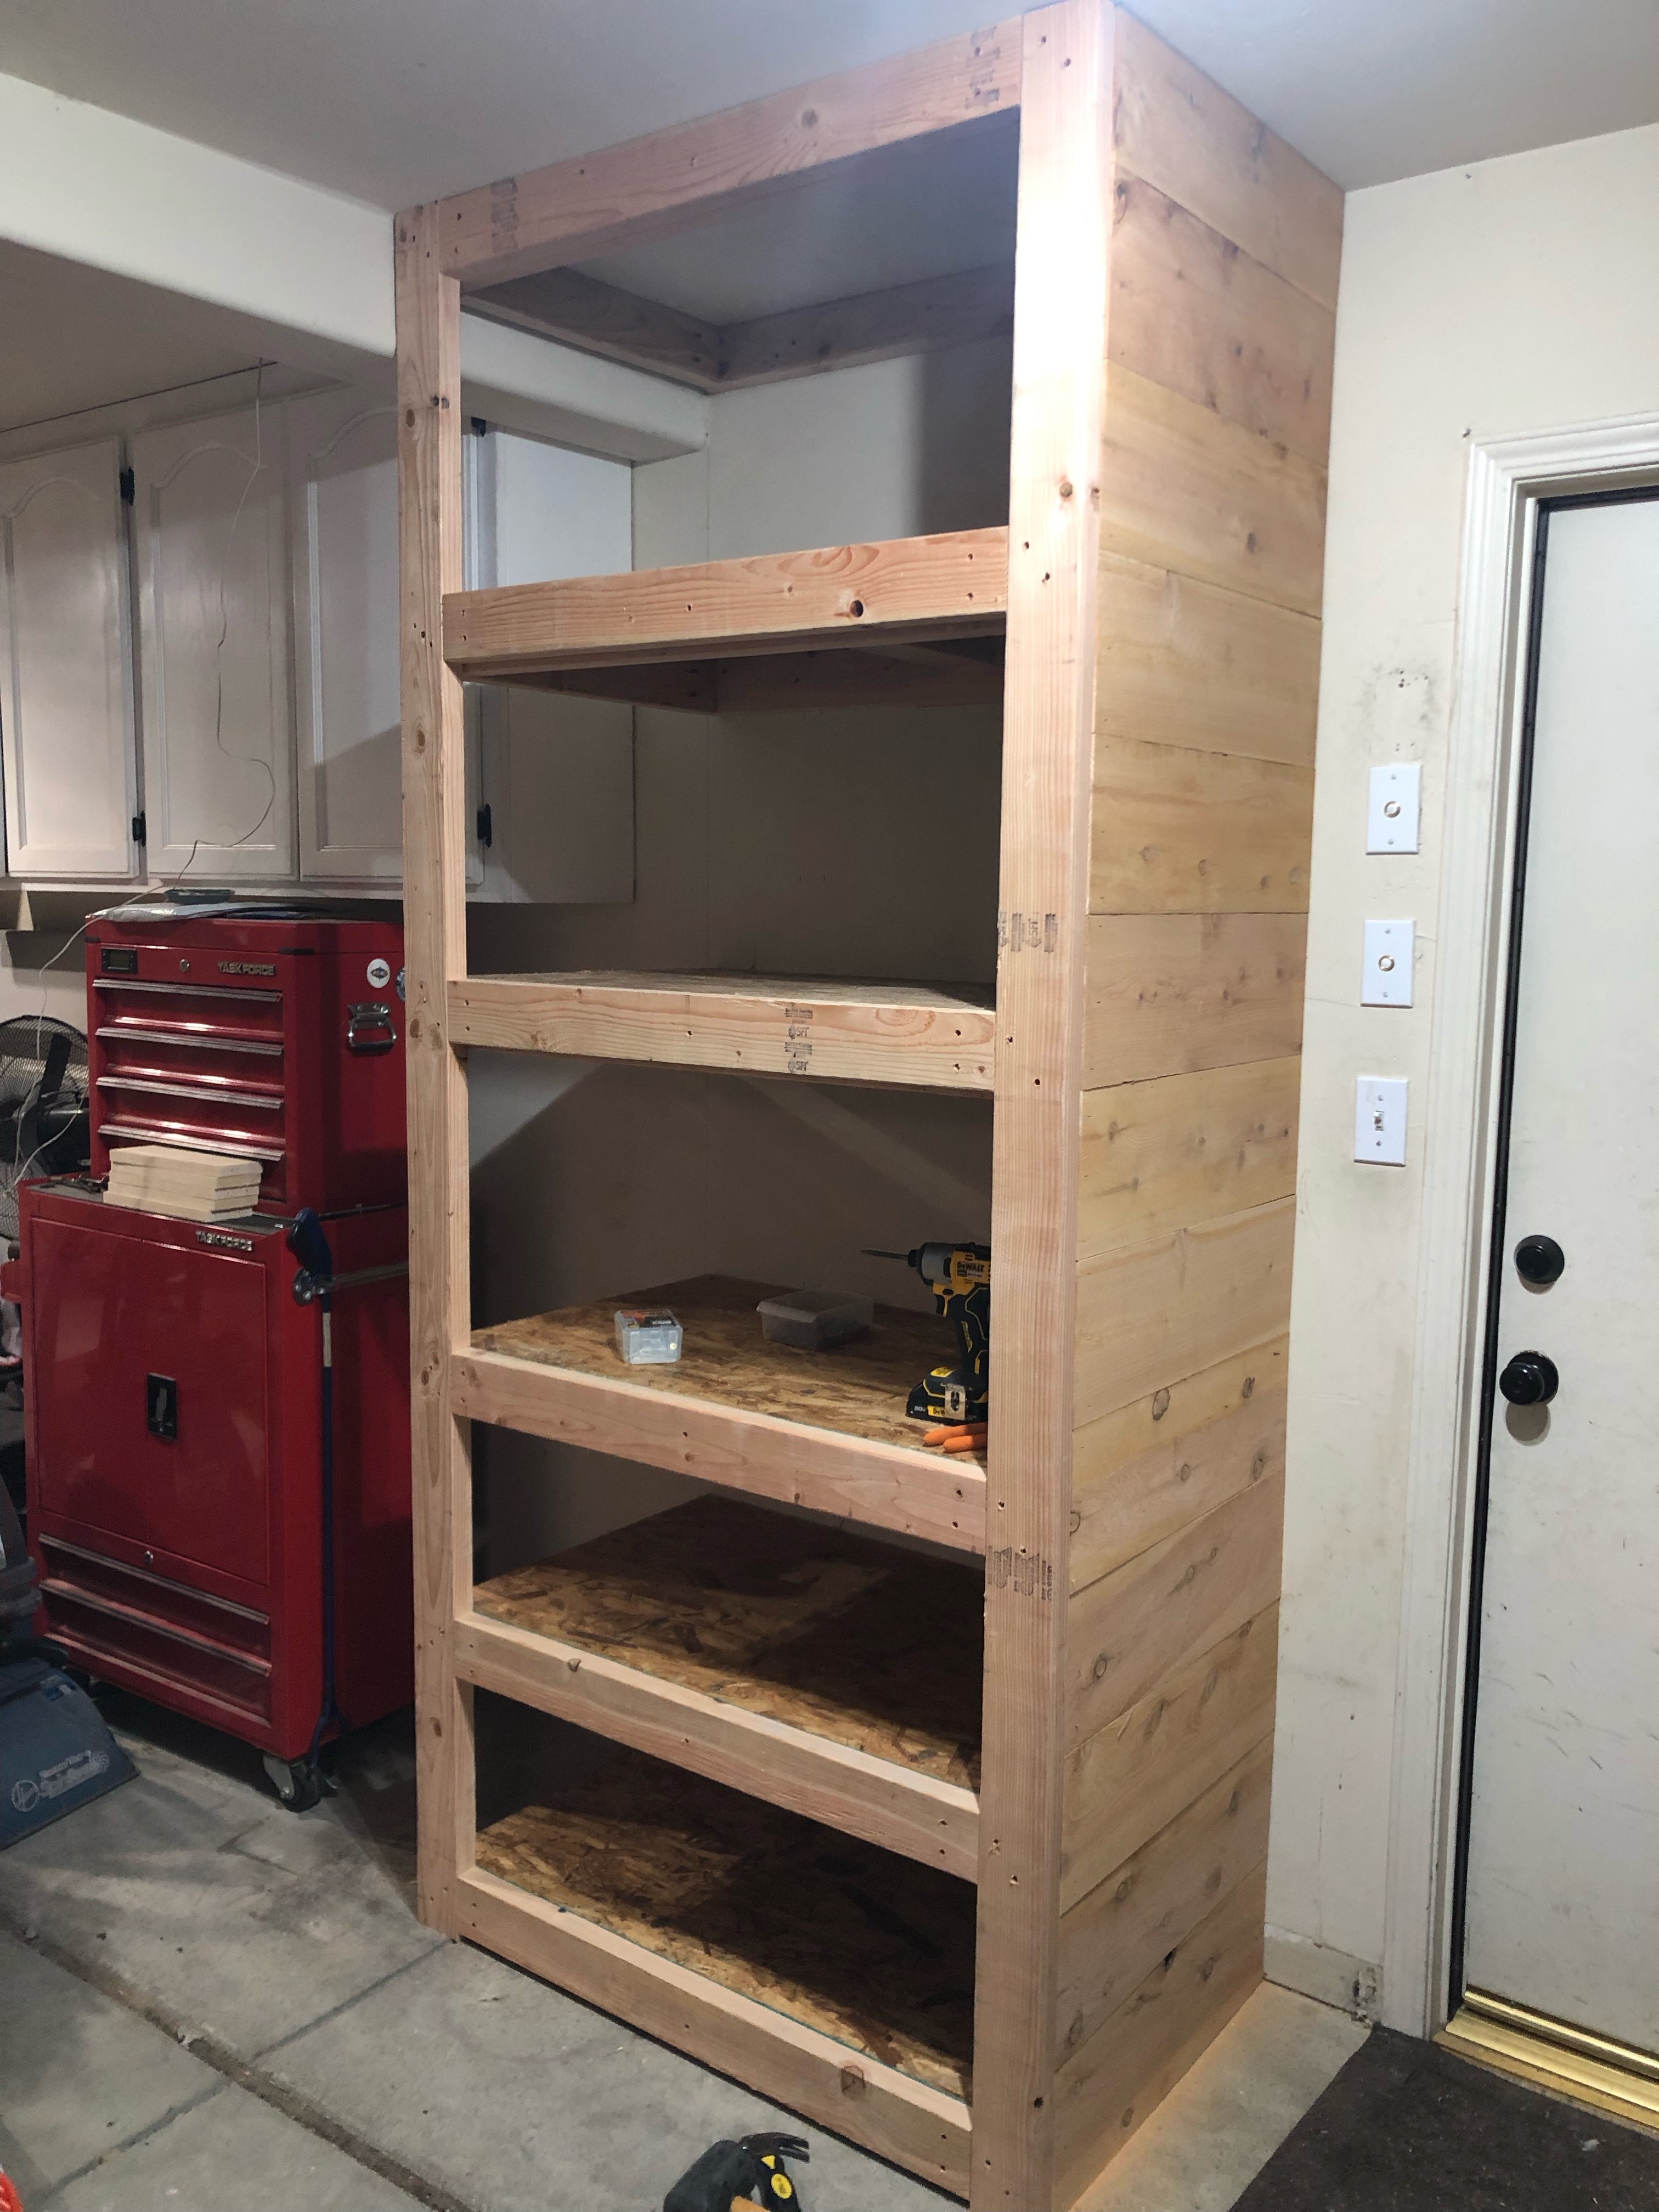
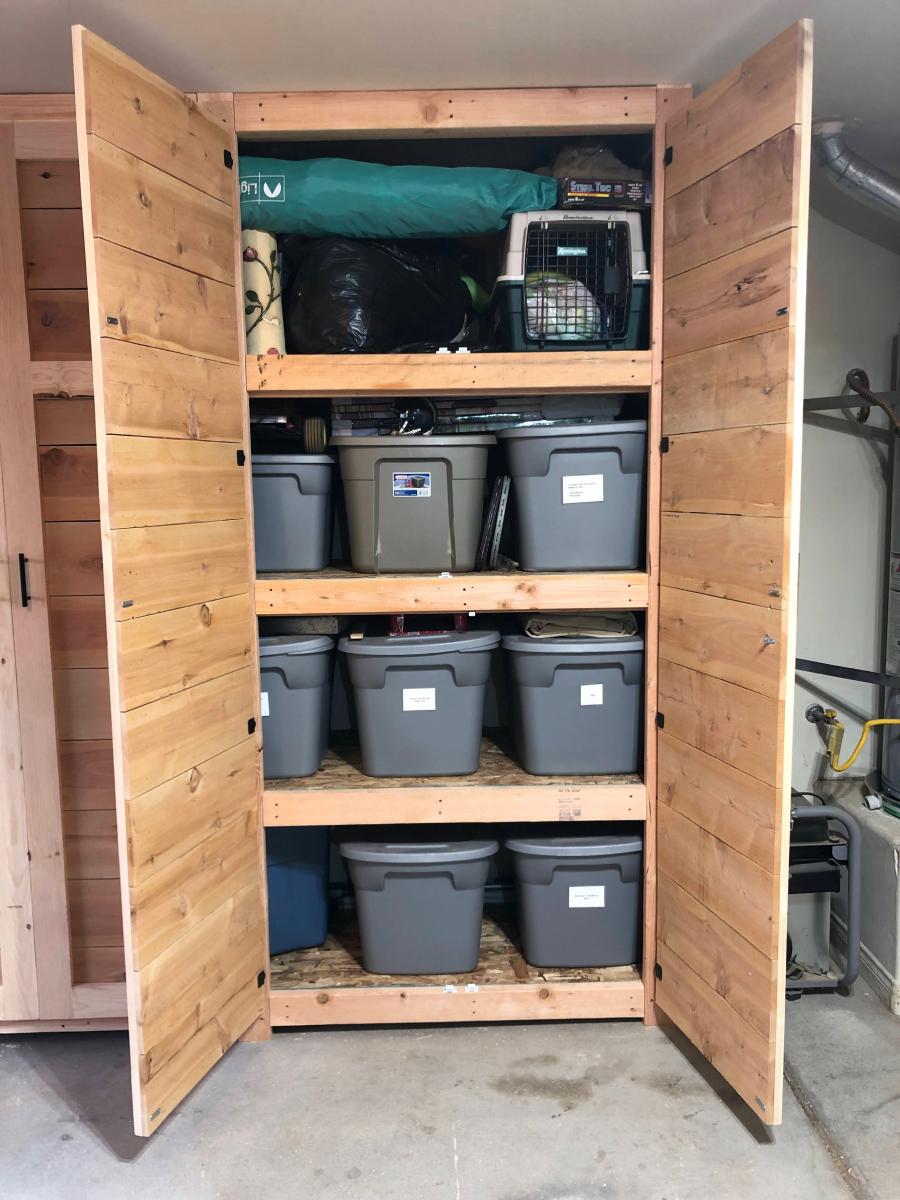
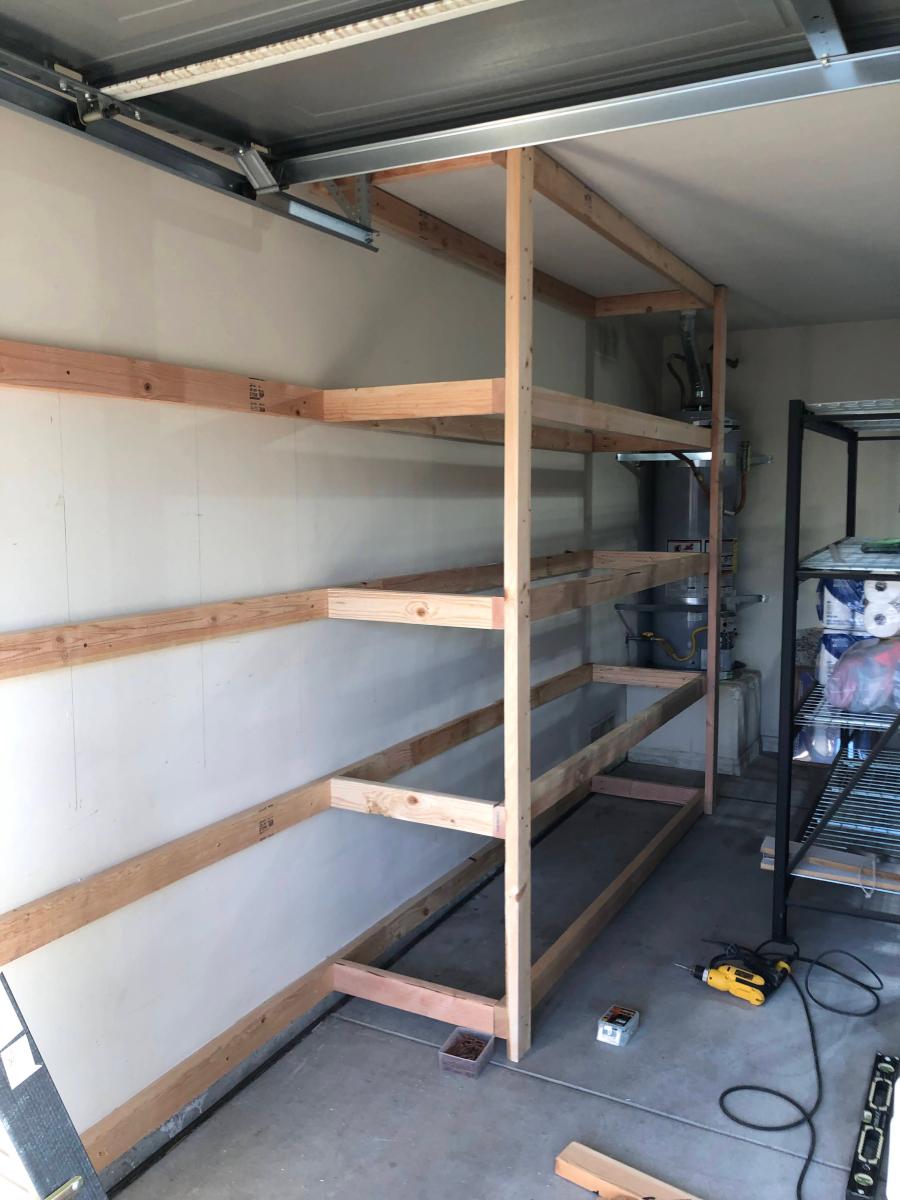
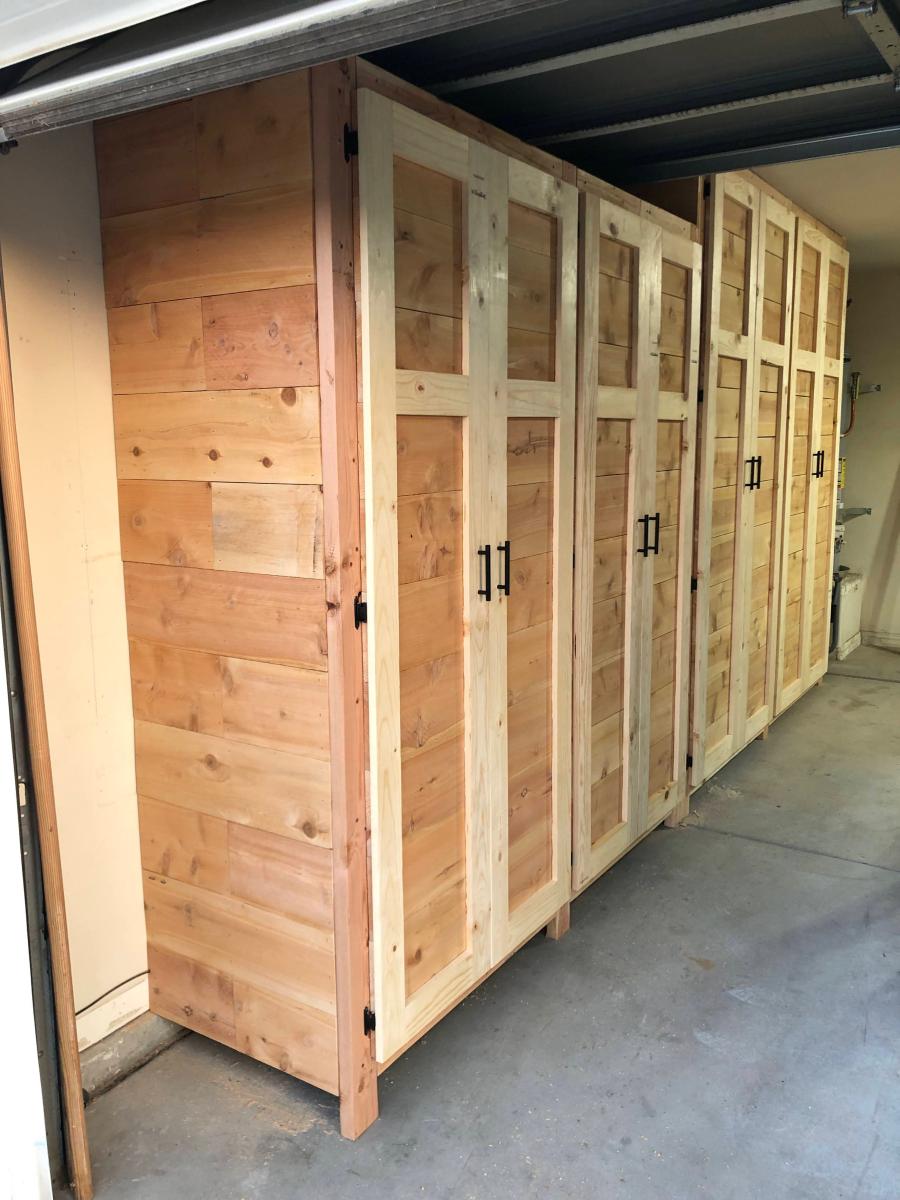
Garage Shelves Plan with Added Doors - Built and shared by Jeremy Doyle
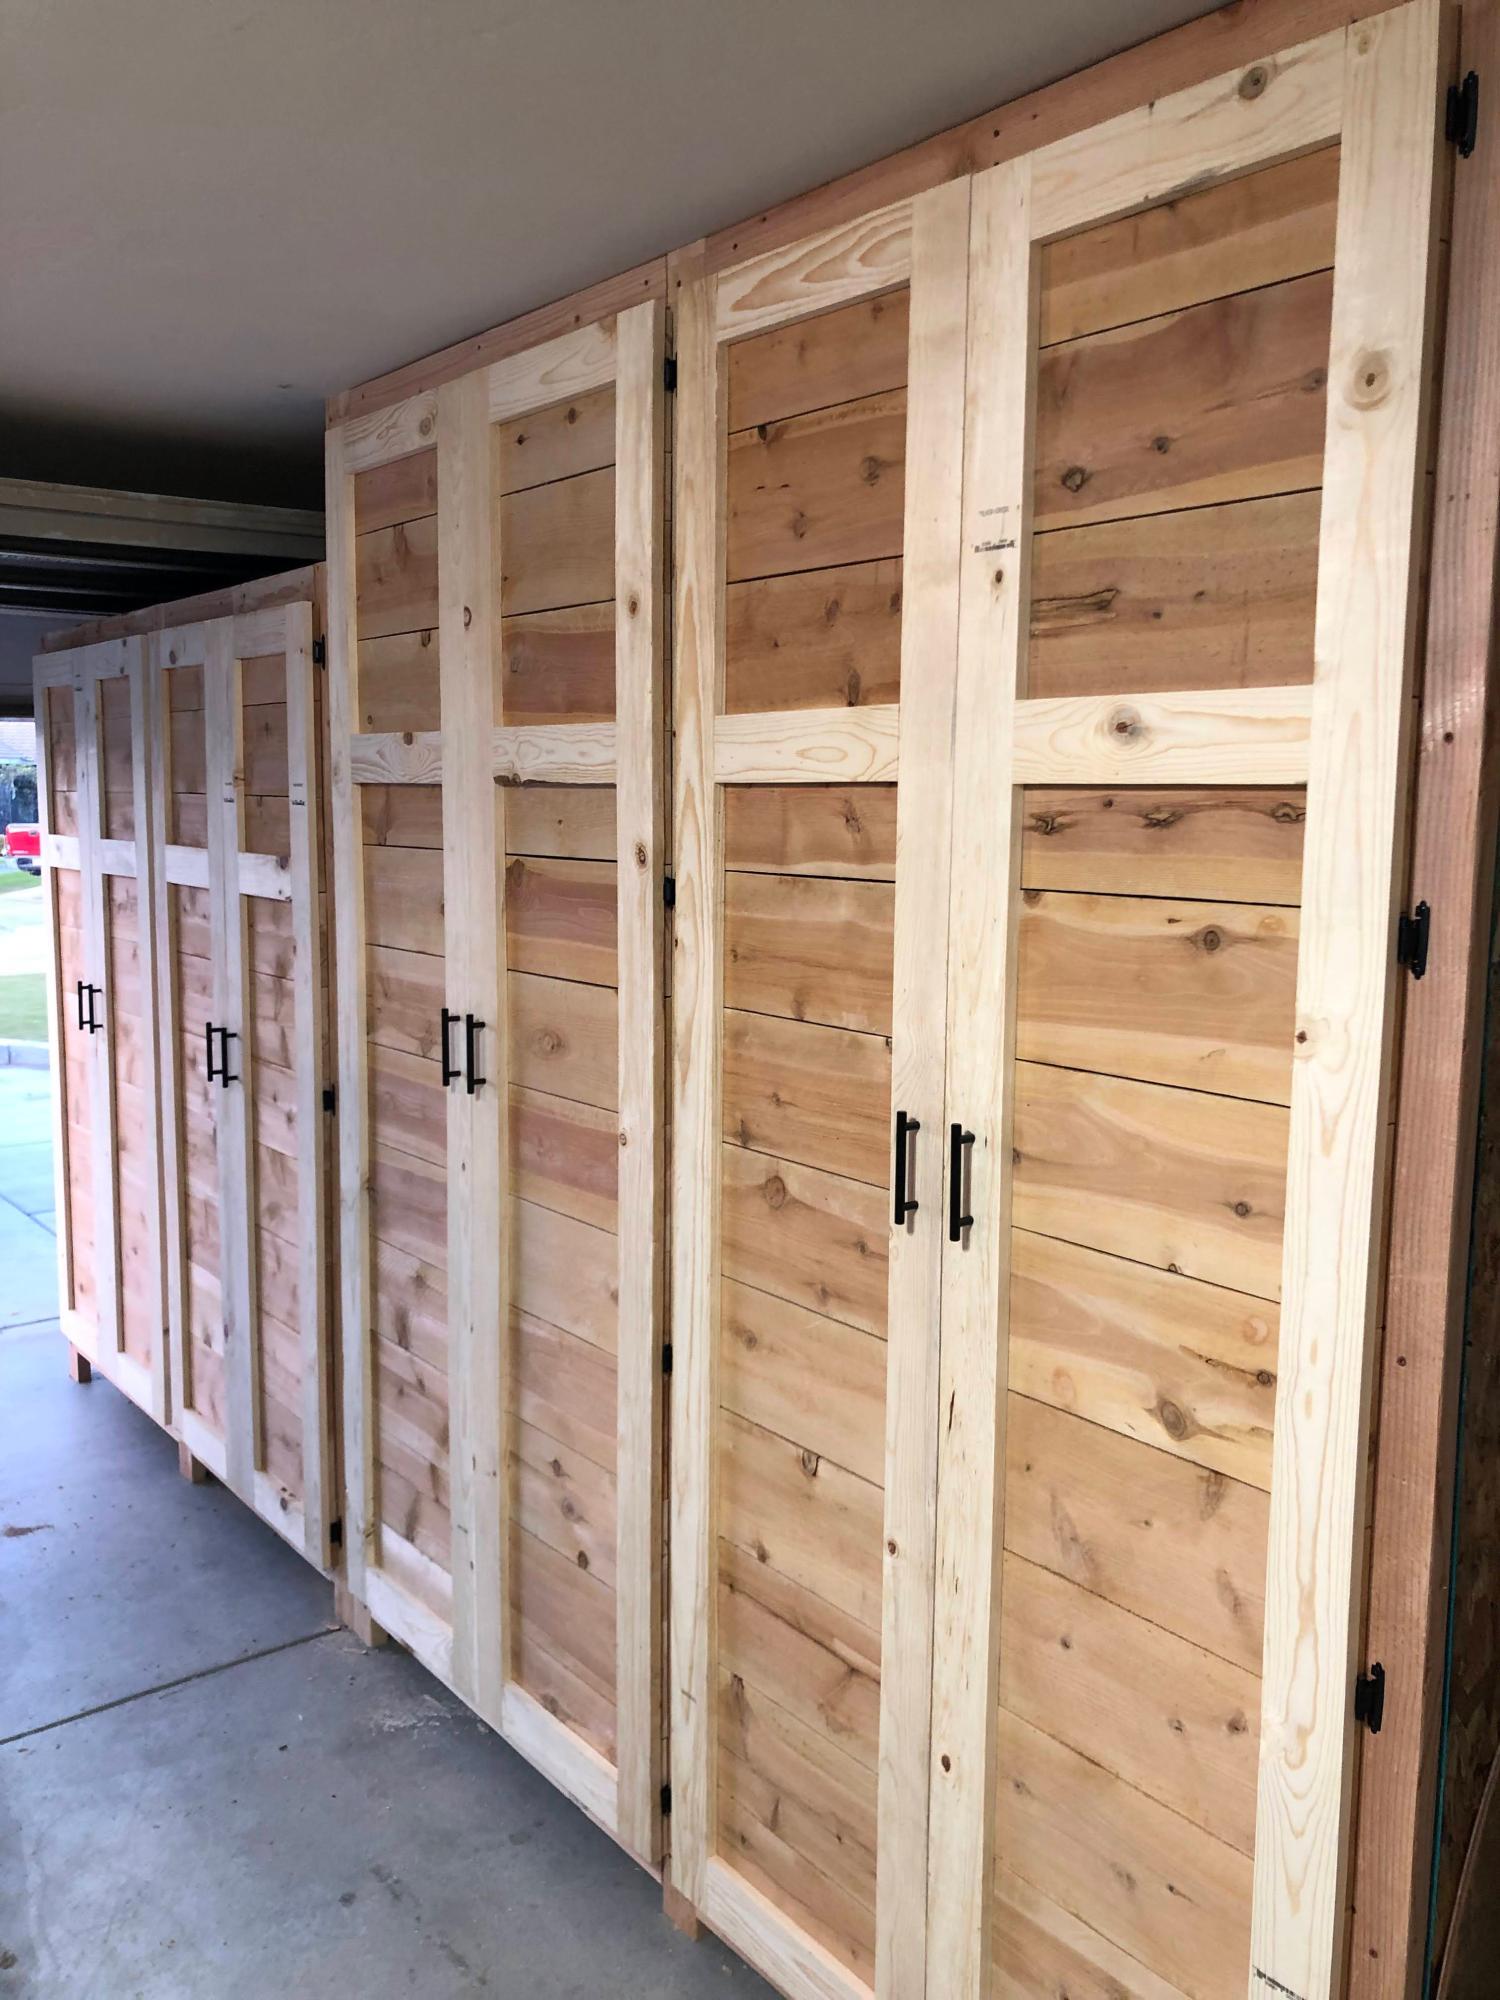
Garage Shelves Plan with Added Doors - Built and shared by Jeremy Doyle
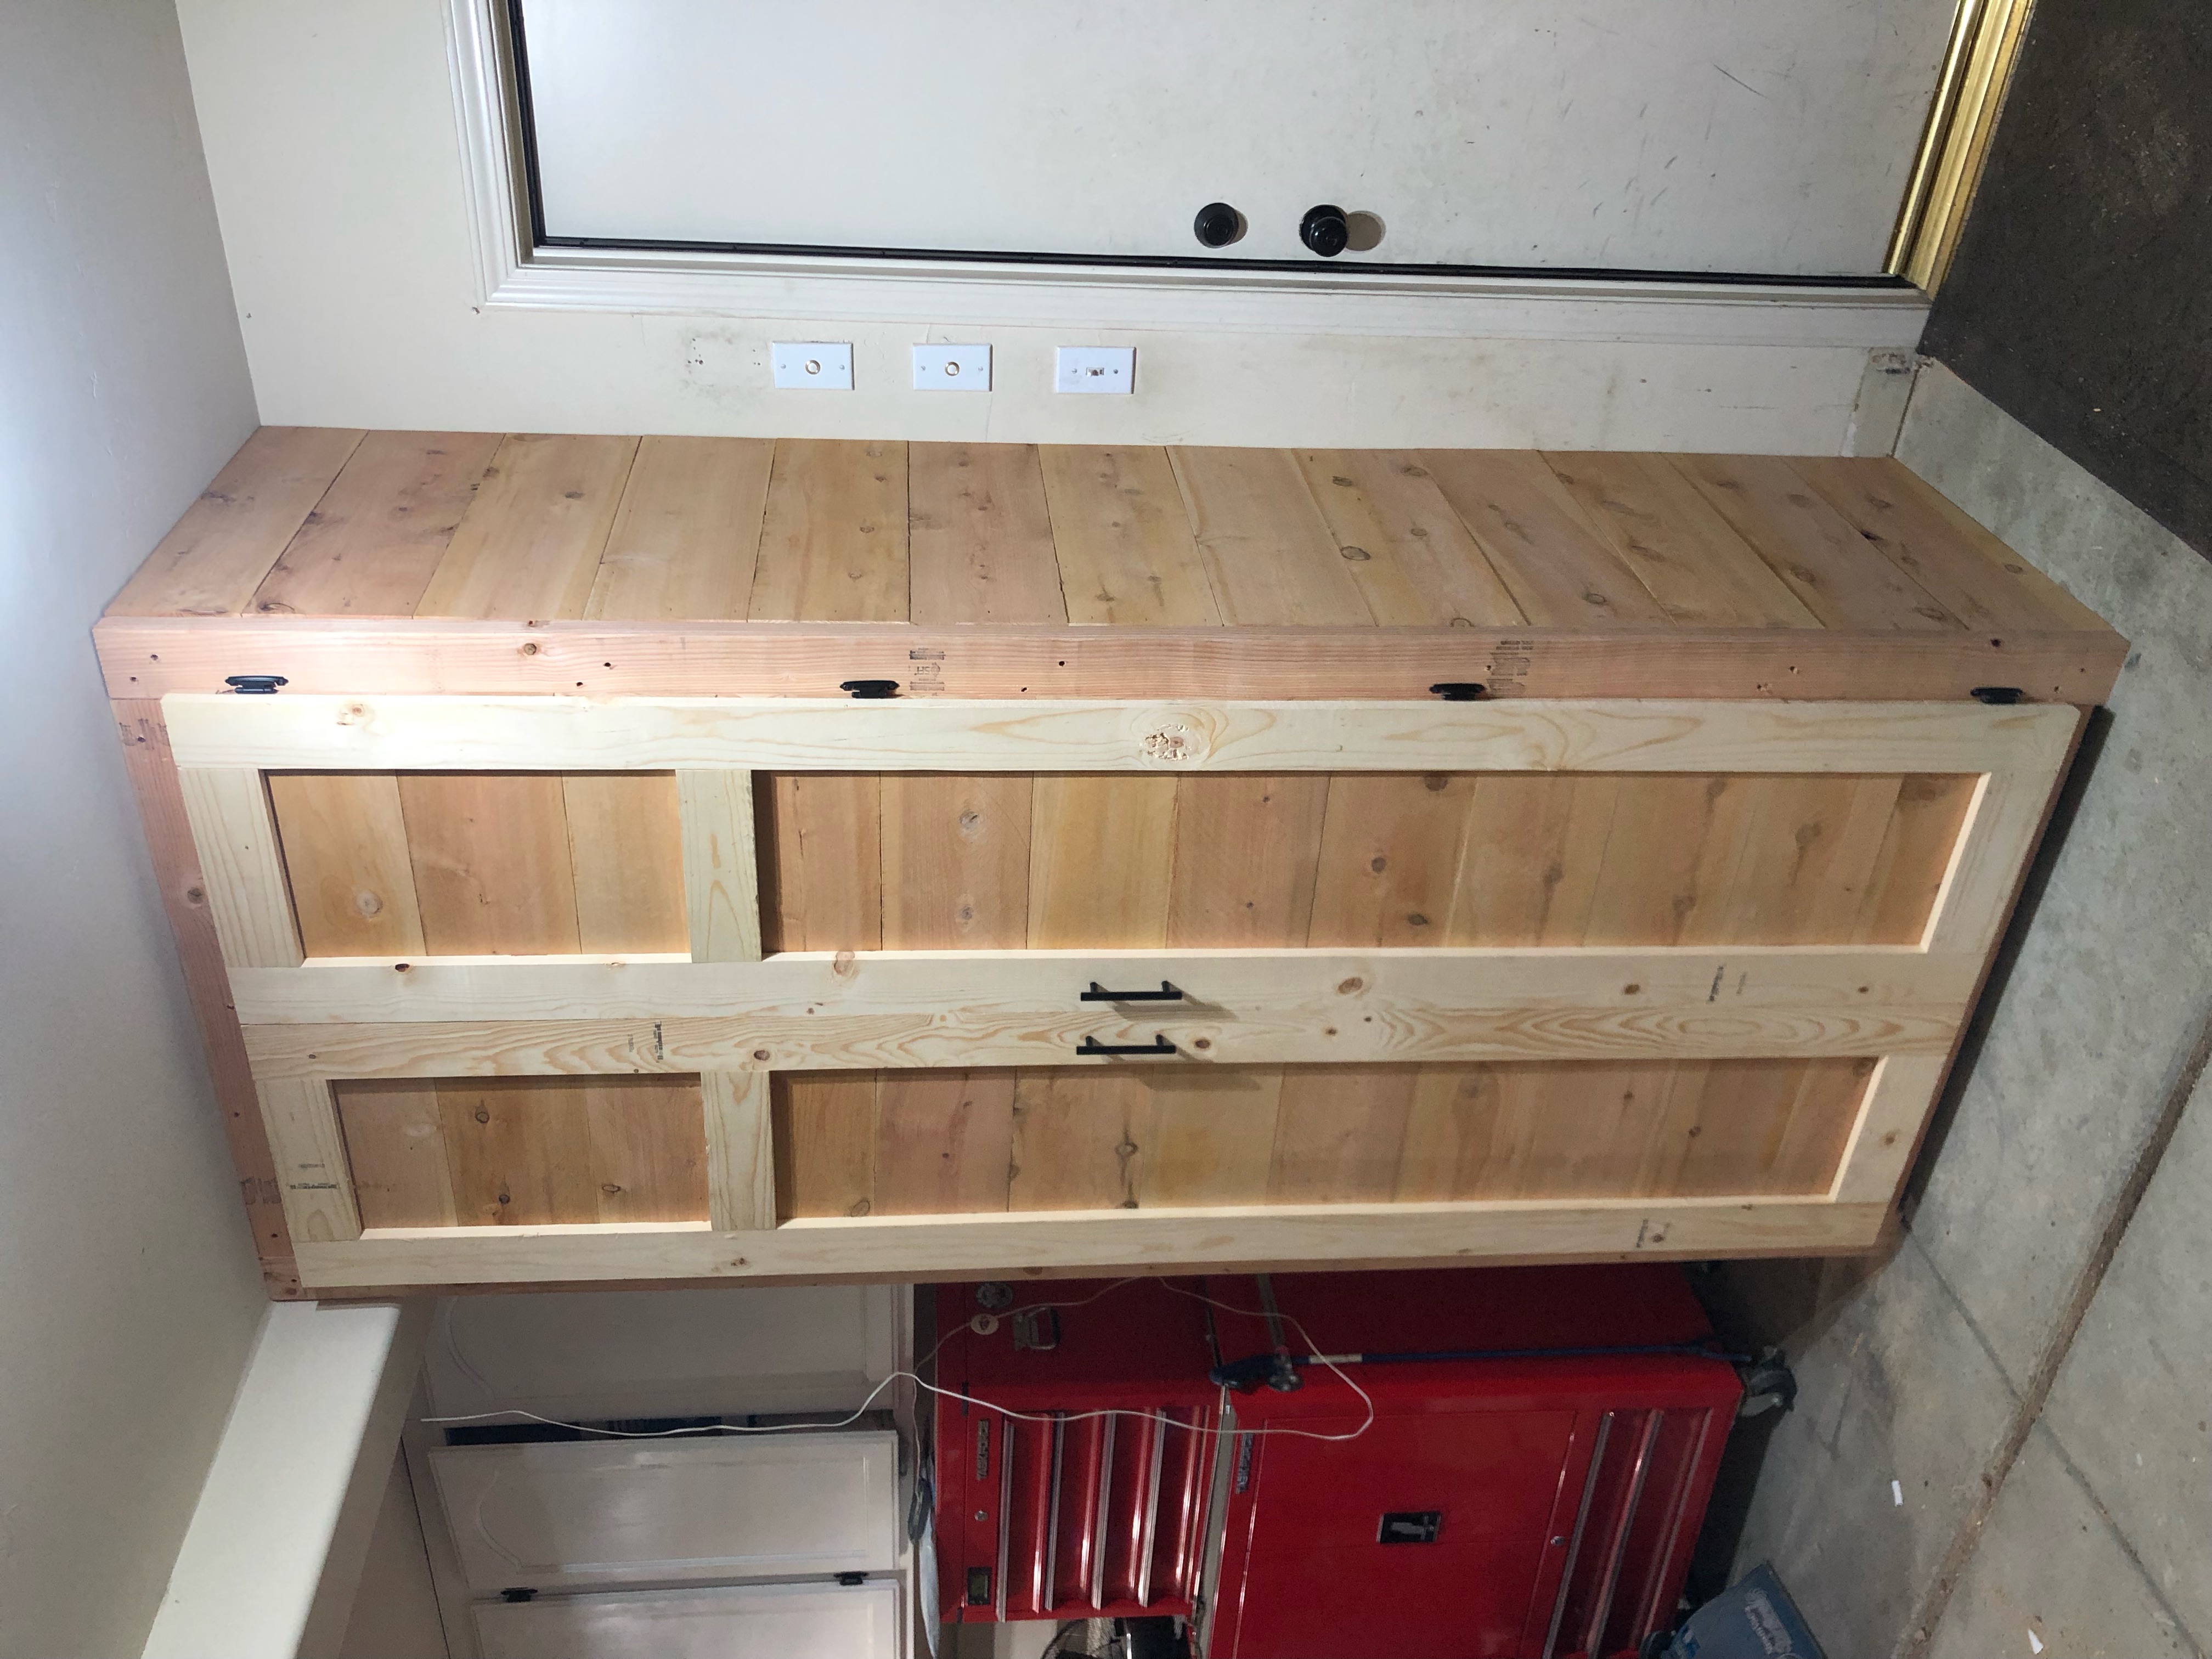
Built from Plan(s)
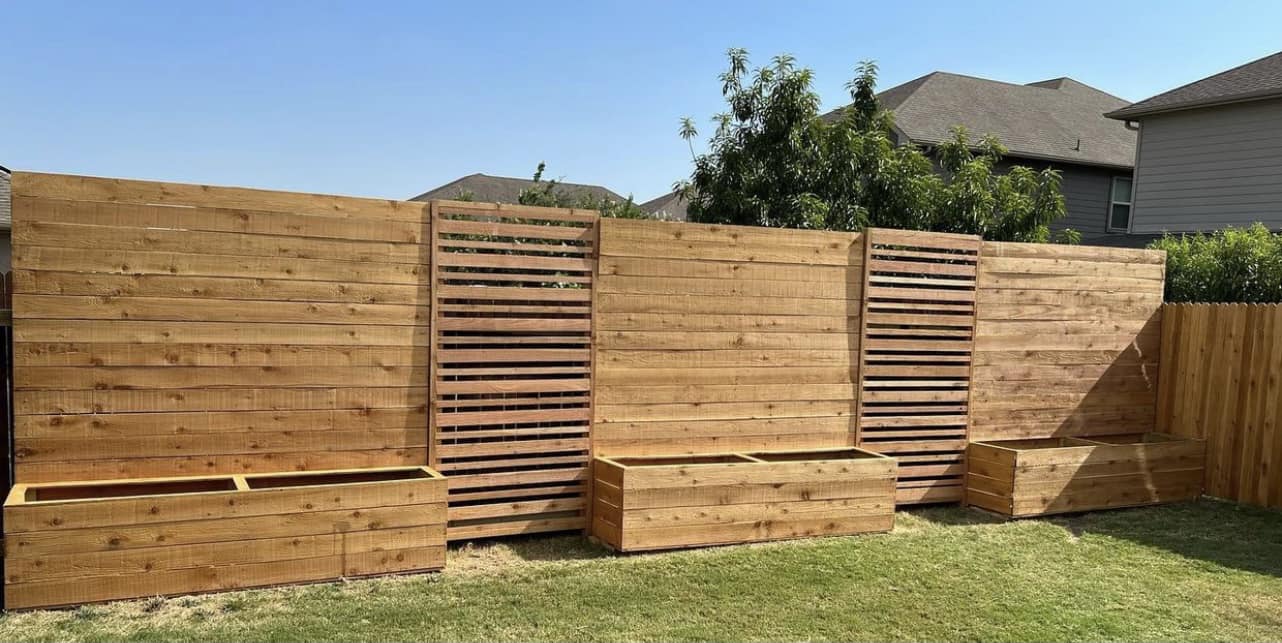
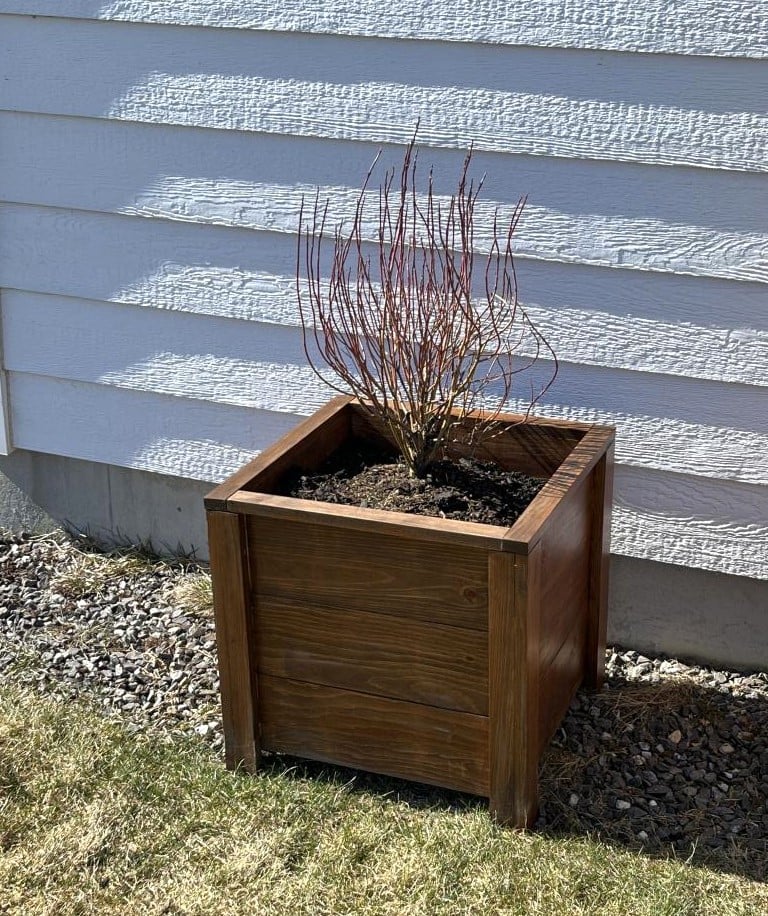
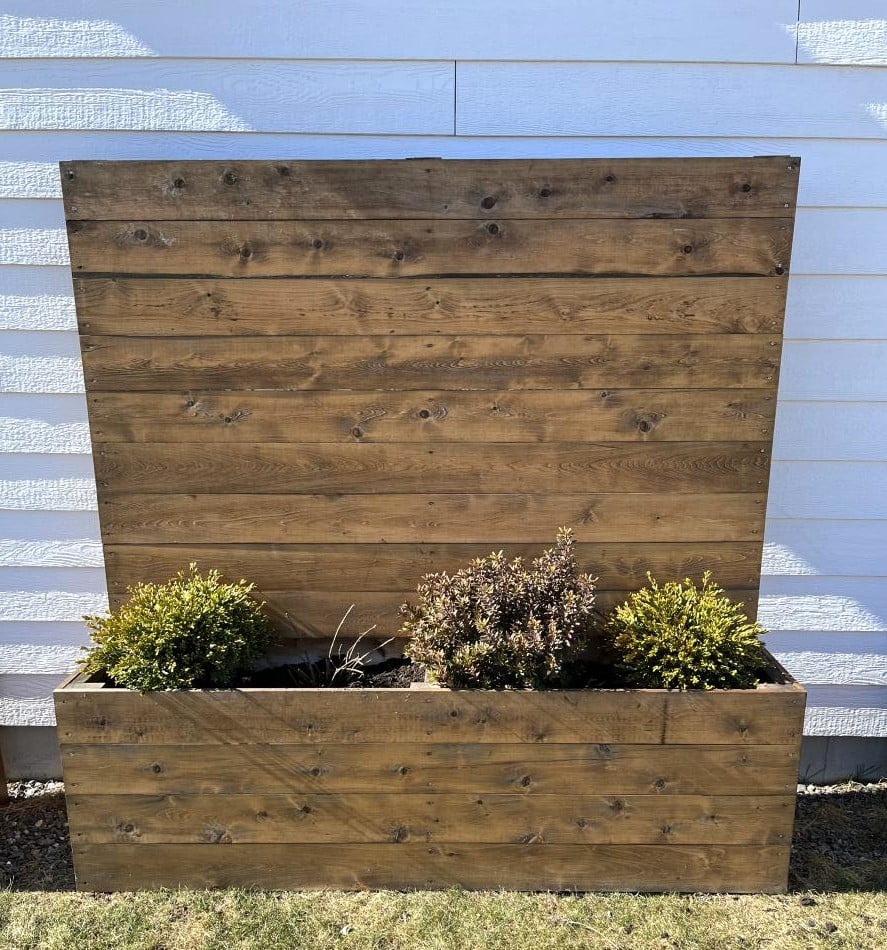
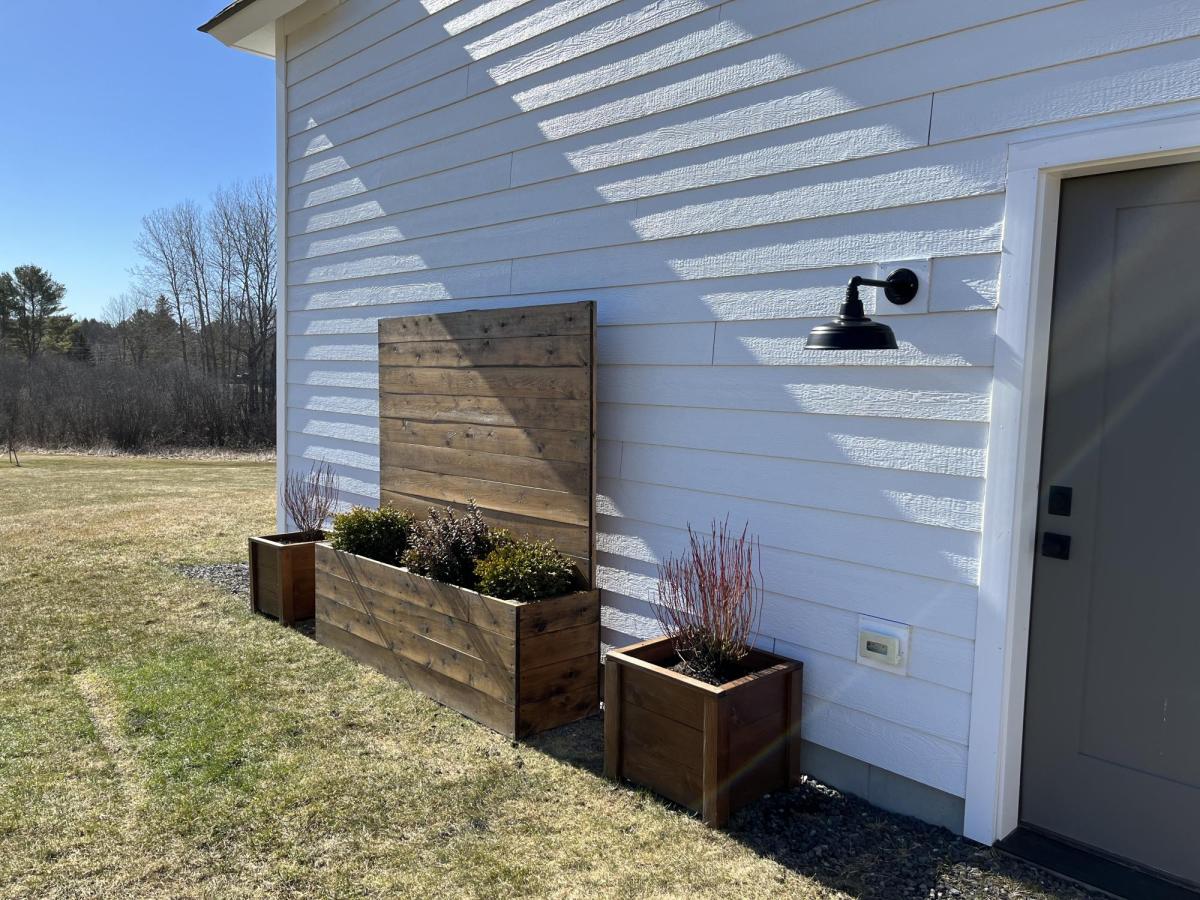
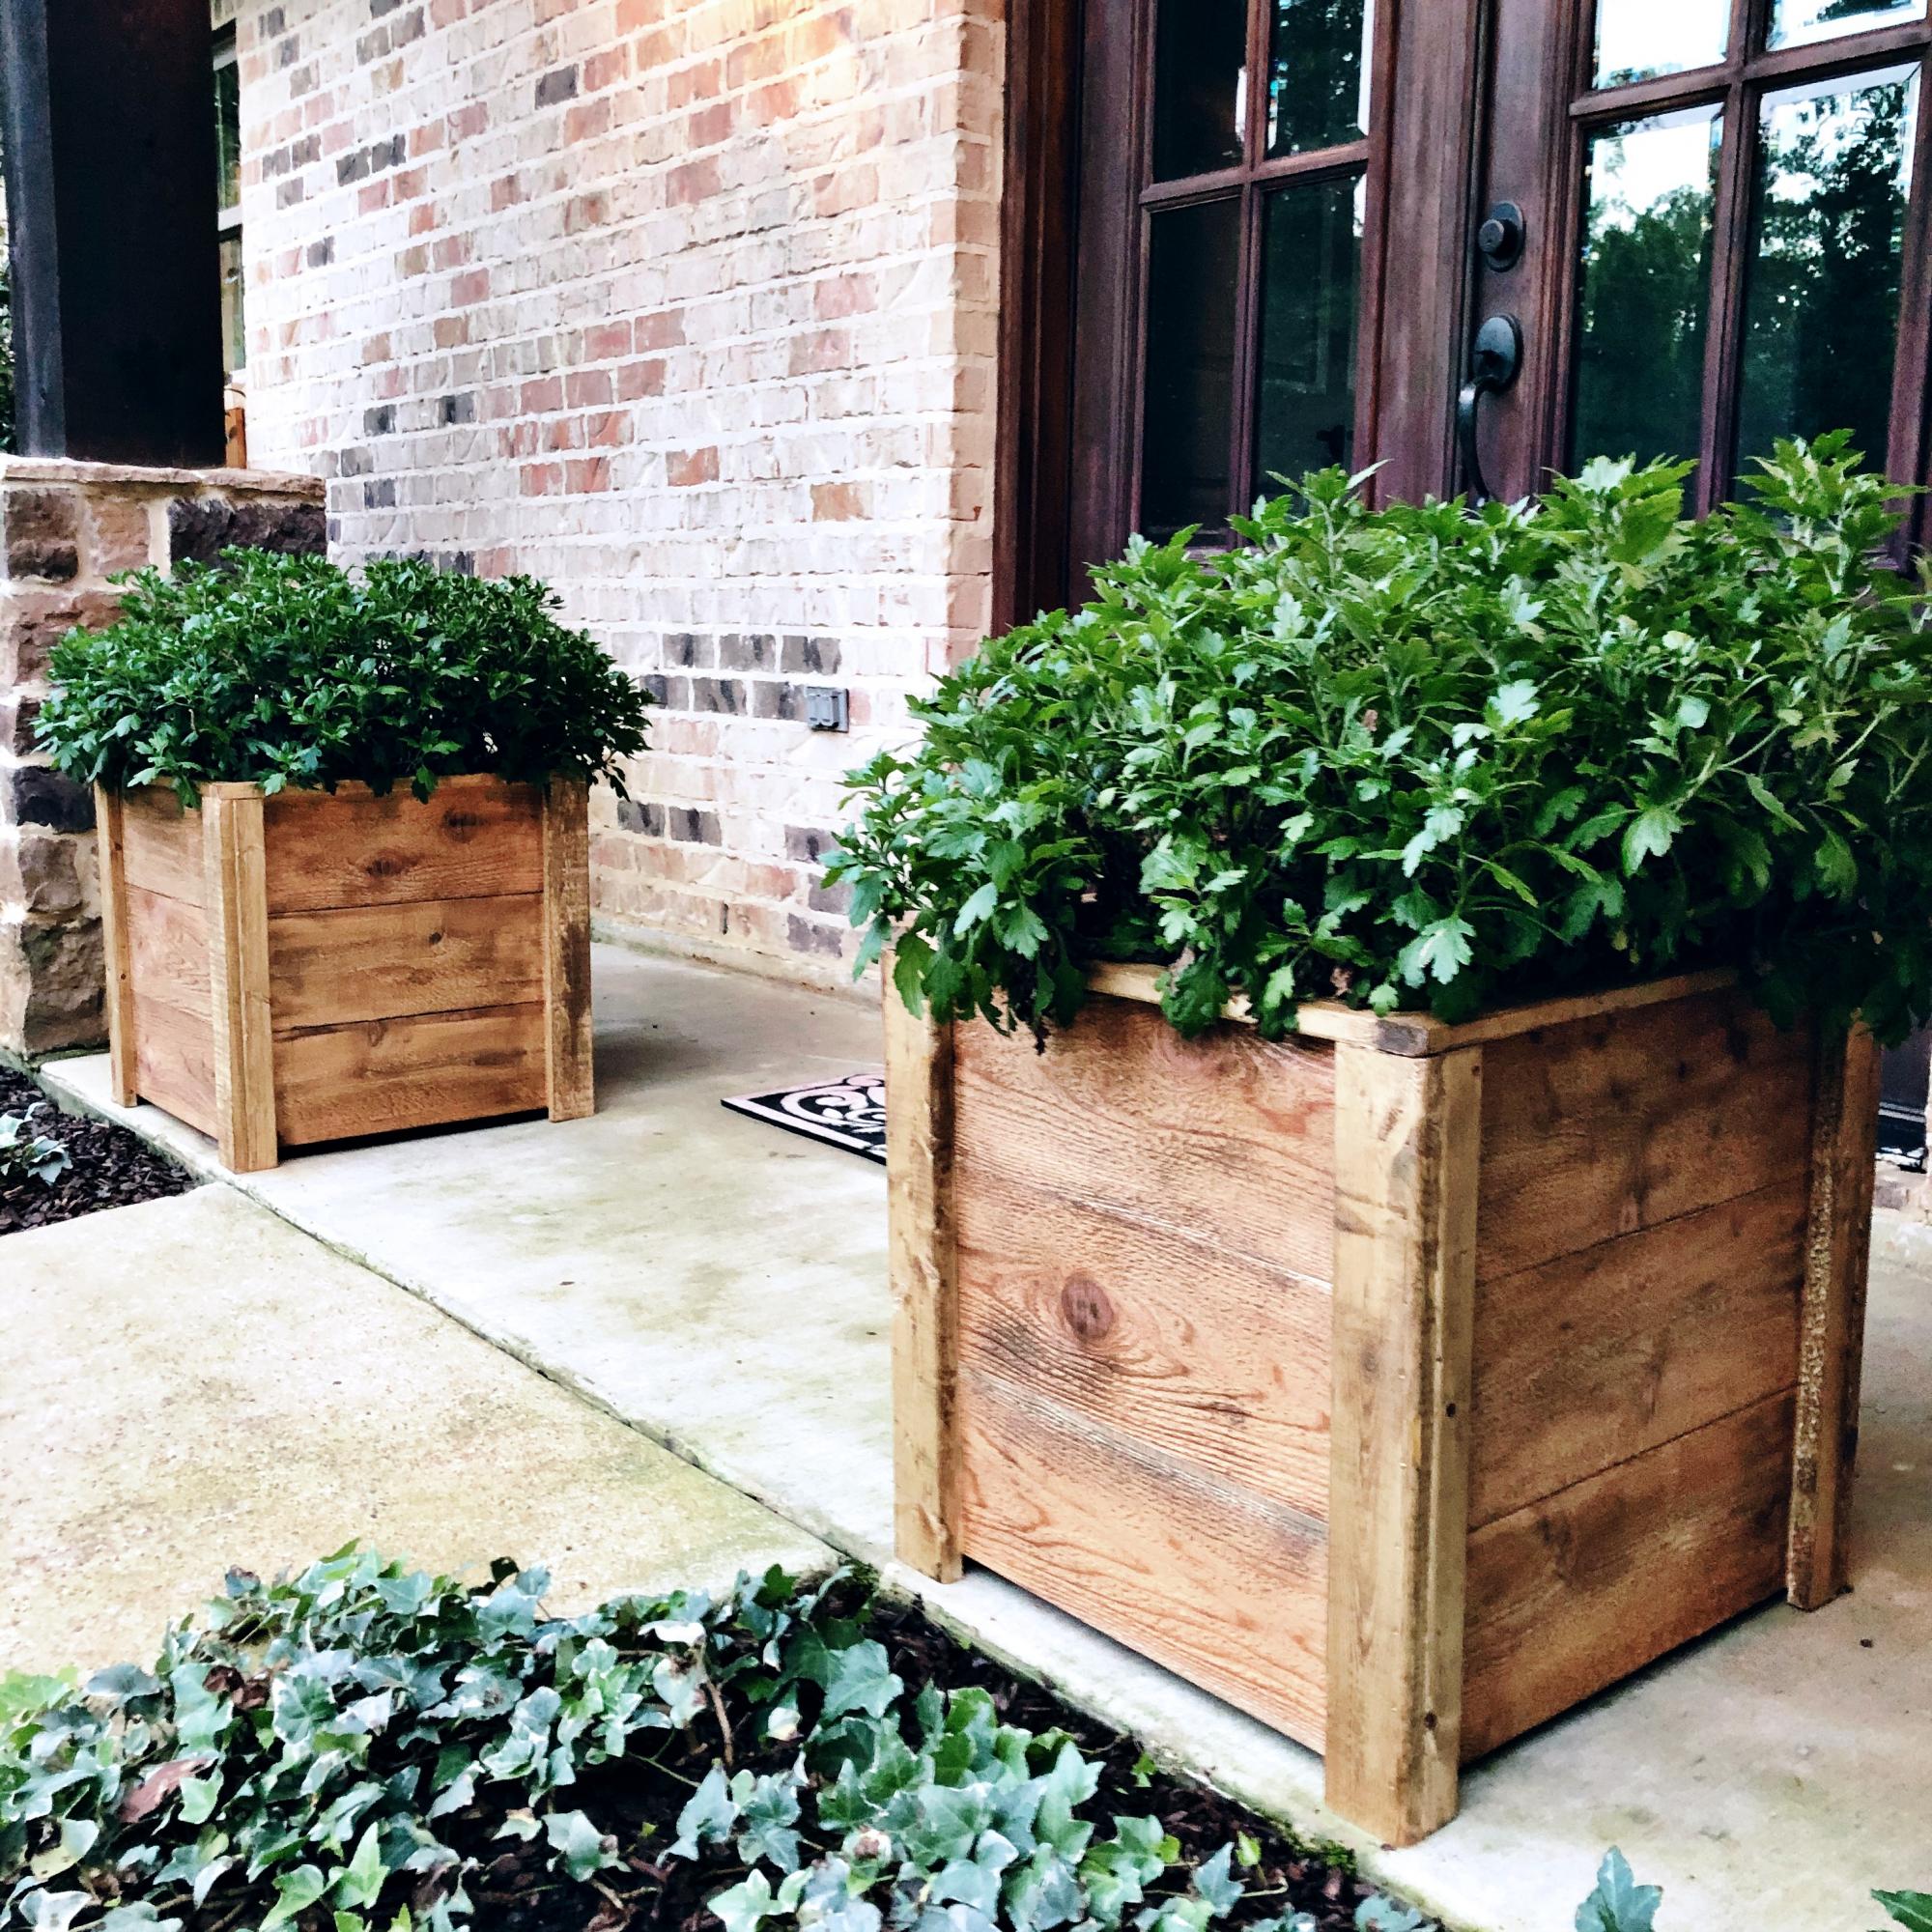
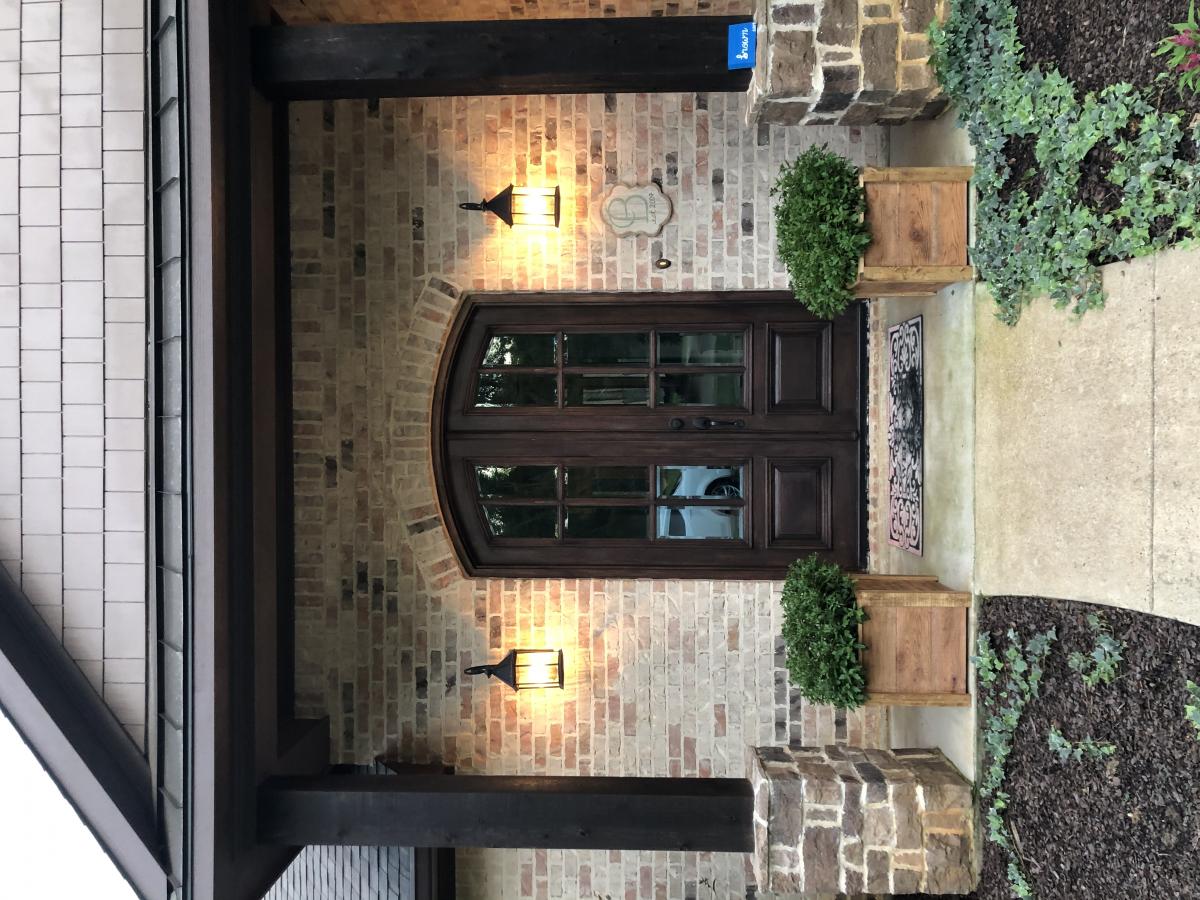
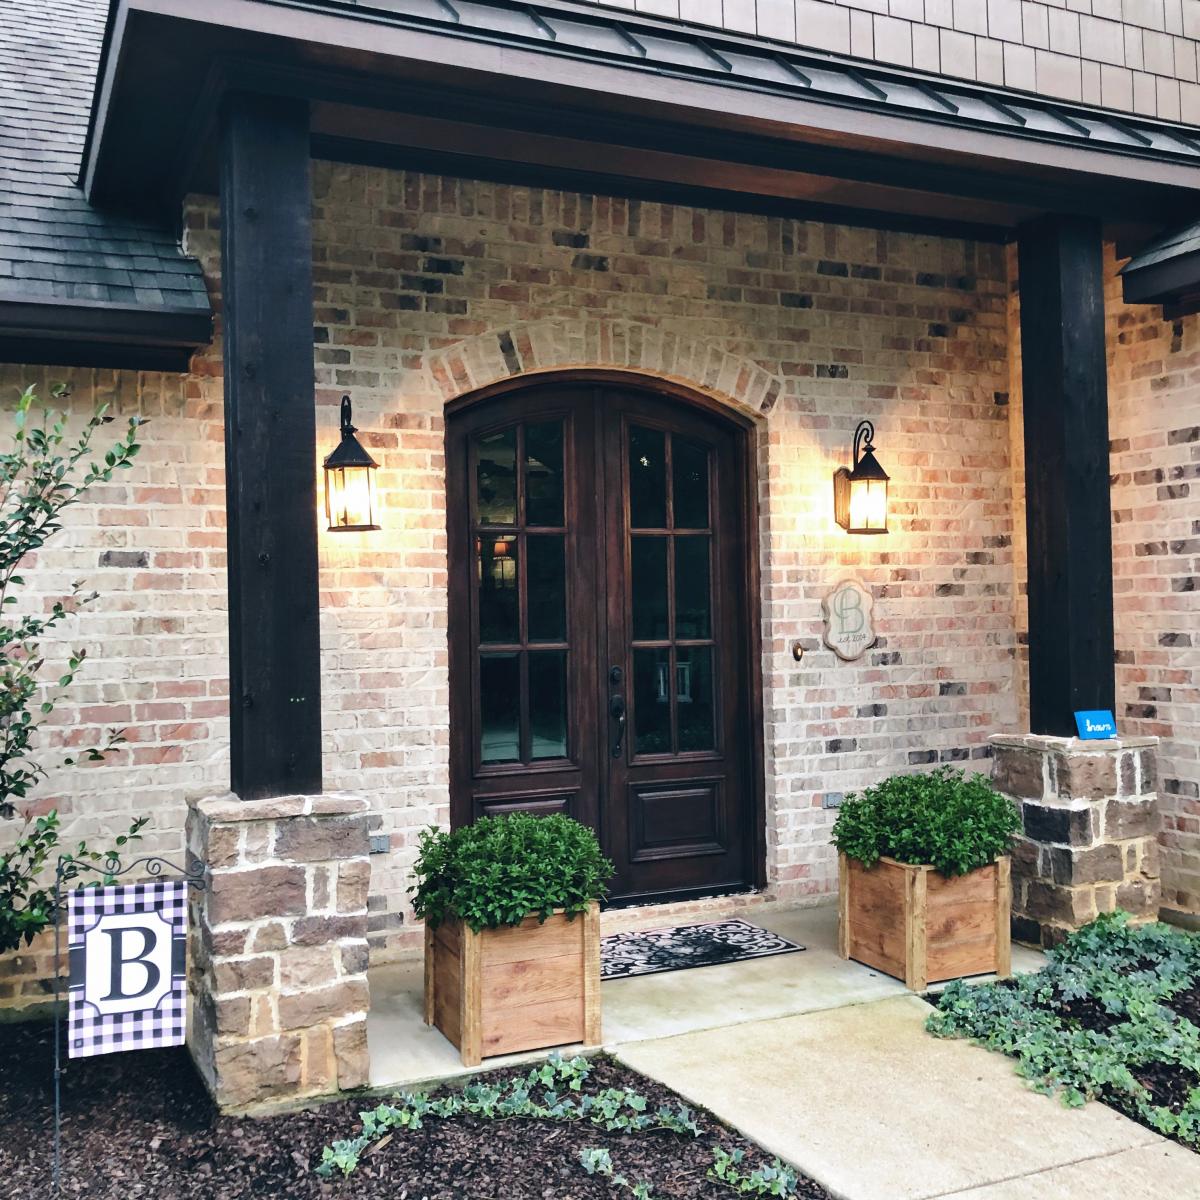
Planters!
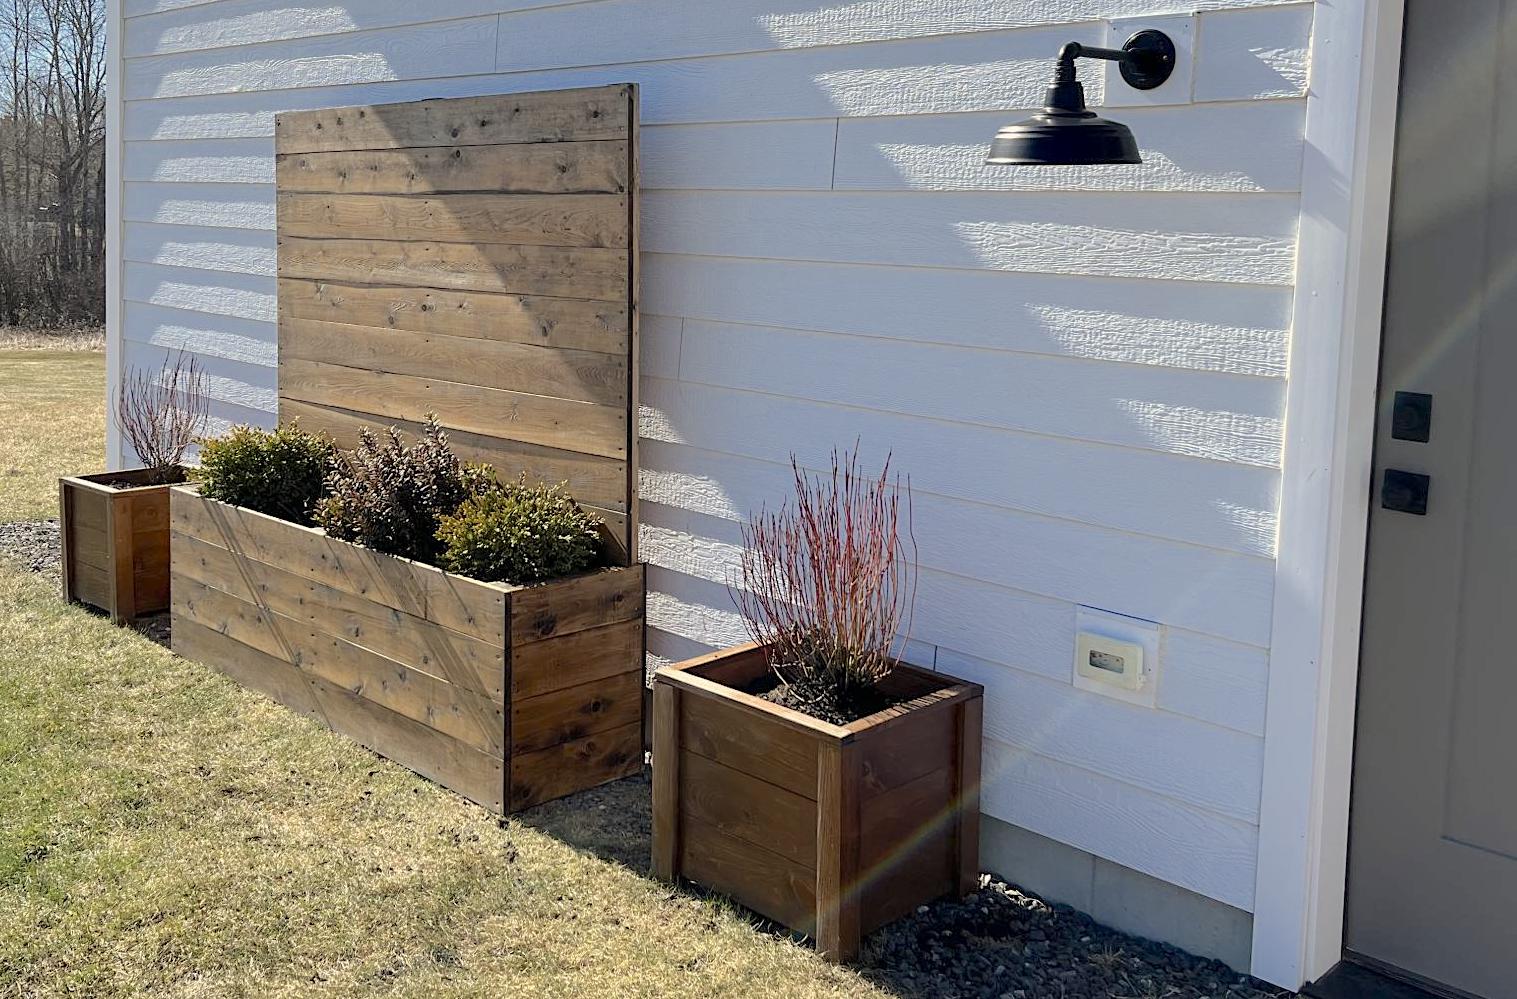
These planters are exactly what we needed to warm up this blank siding! The smaller planters are made from pine, the larger from cedar.
Built from Plan(s)
Comments
Easy Build Fence Picket Planters
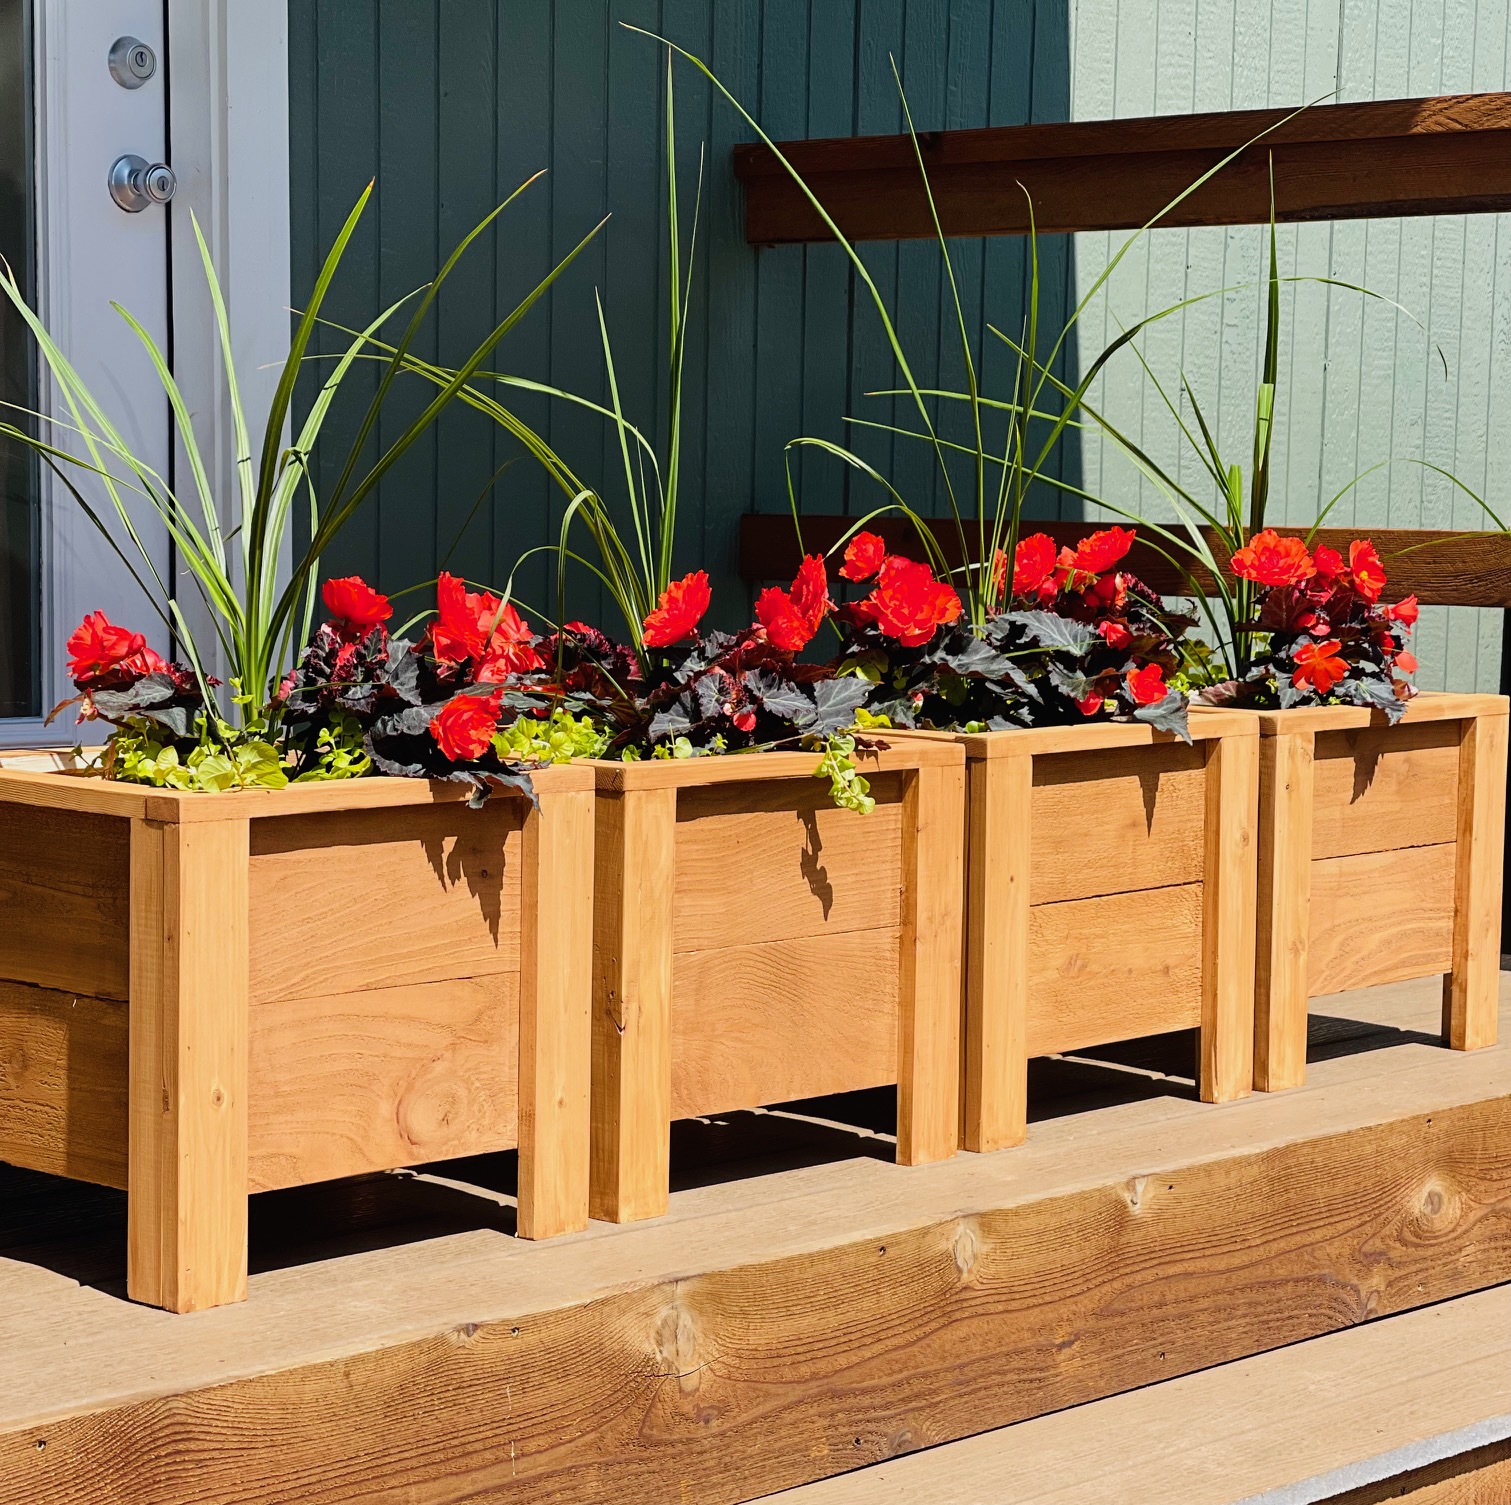
I've been wanting to build this plan for quite some time! Took me about 2 hours to build and 1 hour to finish. Giving these as gifts for Mother's Day! Total cost was about $15 per planter. I scaled down the design after I found the plants I wanted to put in them. Ana has the best and easiest plans!

Built from Plan(s)
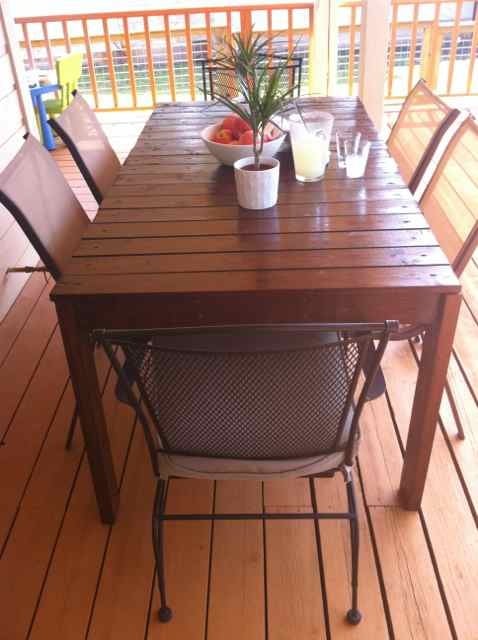
Outdoor Patio Table
I built this outdoor patio table in about a weeks time working on and off. There are mistakes, it's uneven in places and it is not perfect! That being said, the plans for this are very forgiving and nobody would ever know without looking for these things.
You can get the breakdown on the build, the finish I used, chair solutions and other suggestions here:
http://legosecretagent.blogspot.com/2012/07/outdoor-patio-table.html
This beautiful table only cost around $60 total to build!
Built from Plan(s)
Estimated Cost
$60
Estimated Time Investment
Weekend Project (10-20 Hours)
Finish Used
Minwax, specifics at http://legosecretagent.blogspot.com/2012/07/outdoor-patio-table.html
Recommended Skill Level
Beginner
Easy small space side table

This was my first project. It was relatively easy but I did make some mistakes that are now design features


Built from Plan(s)
Estimated Cost
Reclaimed wood
Estimated Time Investment
Afternoon Project (3-6 Hours)
Finish Used
Minwax English chestnut
Recommended Skill Level
Beginner
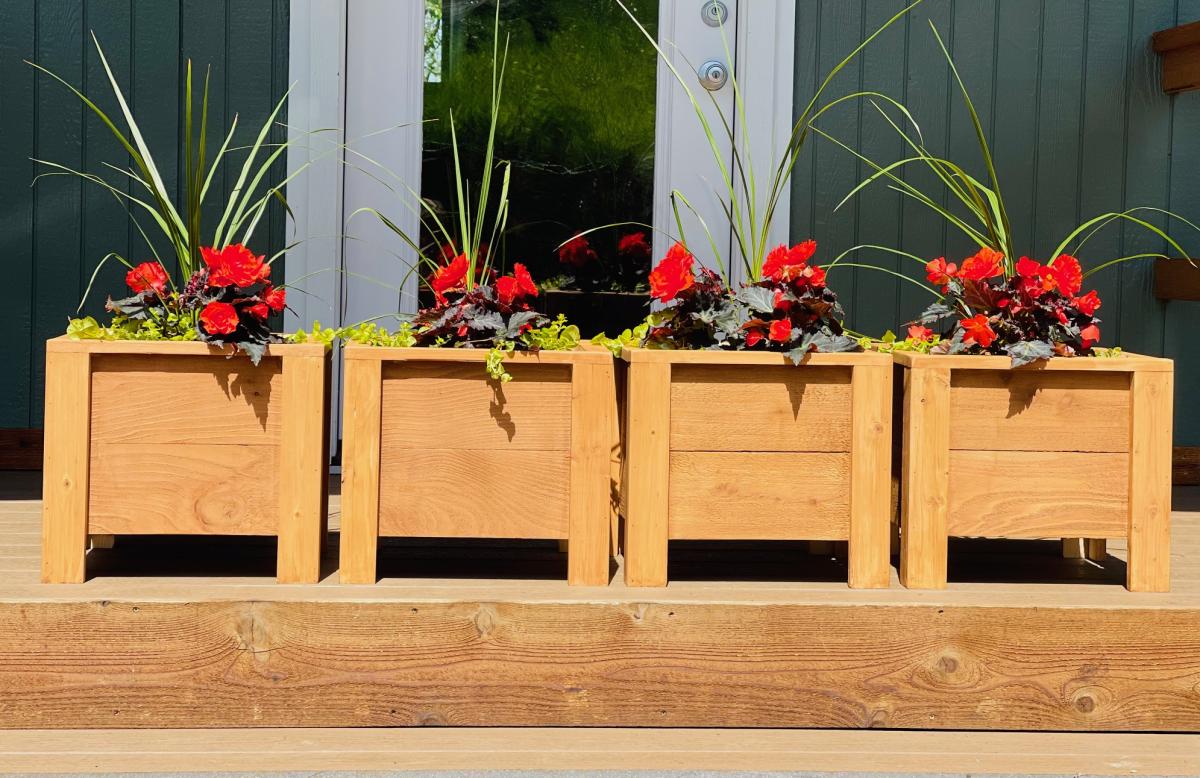
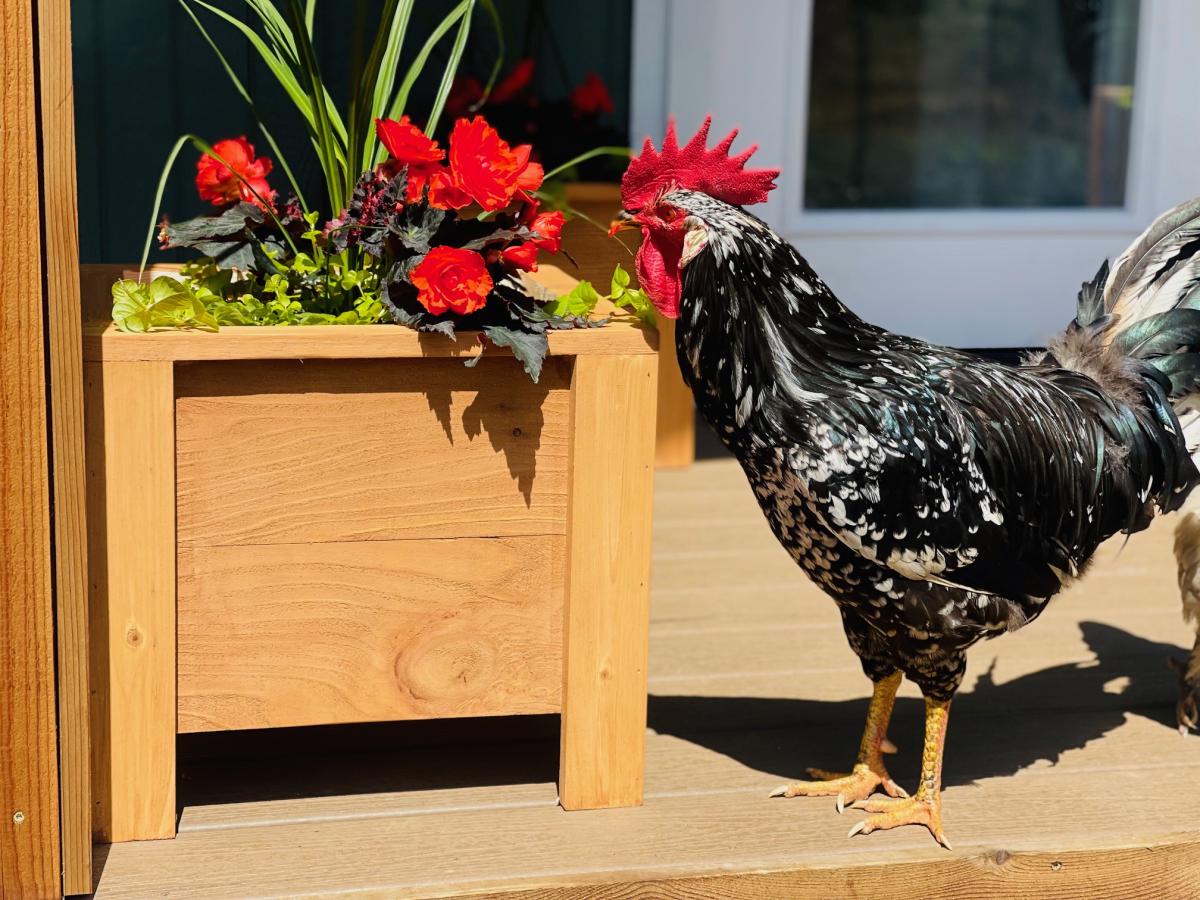
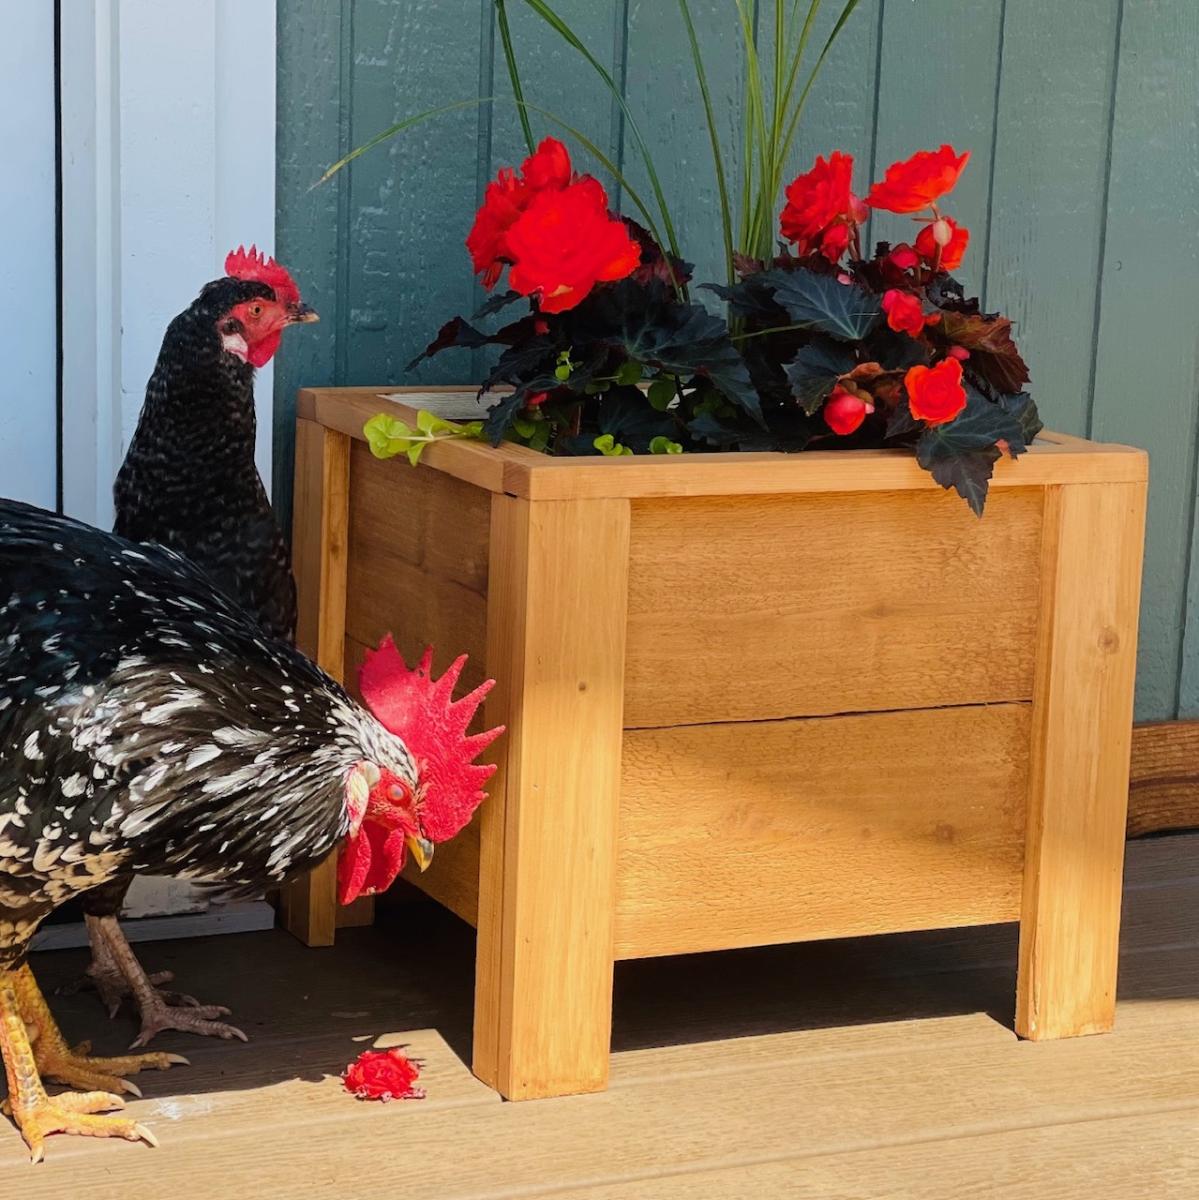
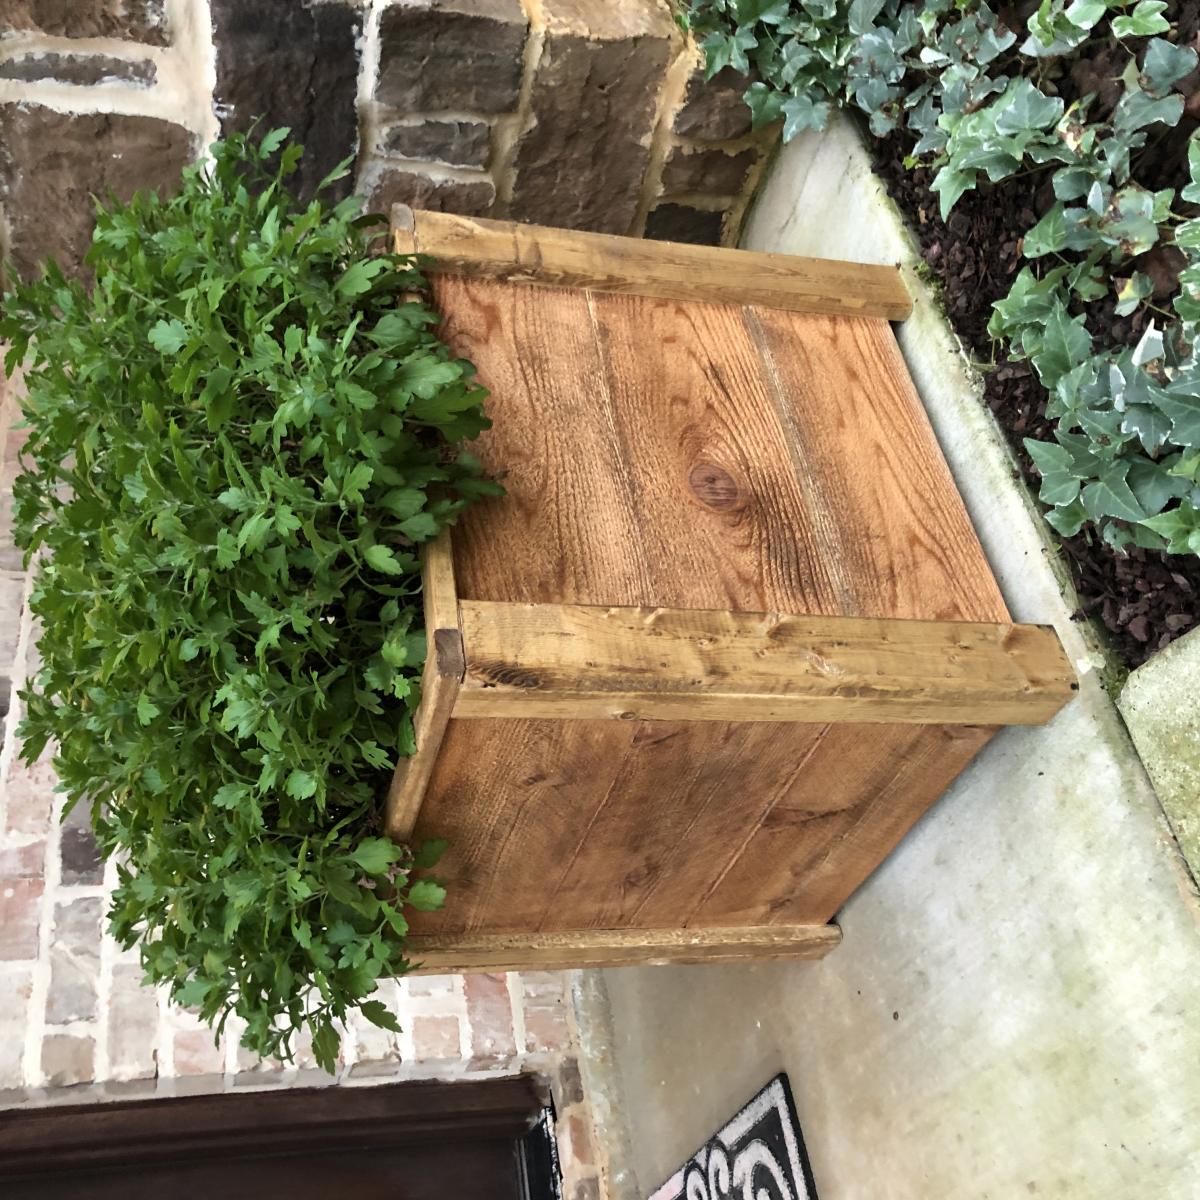
DIY Planter Boxes
These were a quick weeknight build! And.... My very first “all by myself” build! I’m really proud of how they turned out and love how much style they add to my front porch!

Built from Plan(s)
Larger A Frame Chicken Coop

A frame chicken coop with a few modifications- metal roof, insulation and slightly larger second floor.
By Chrystal
Built from Plan(s)
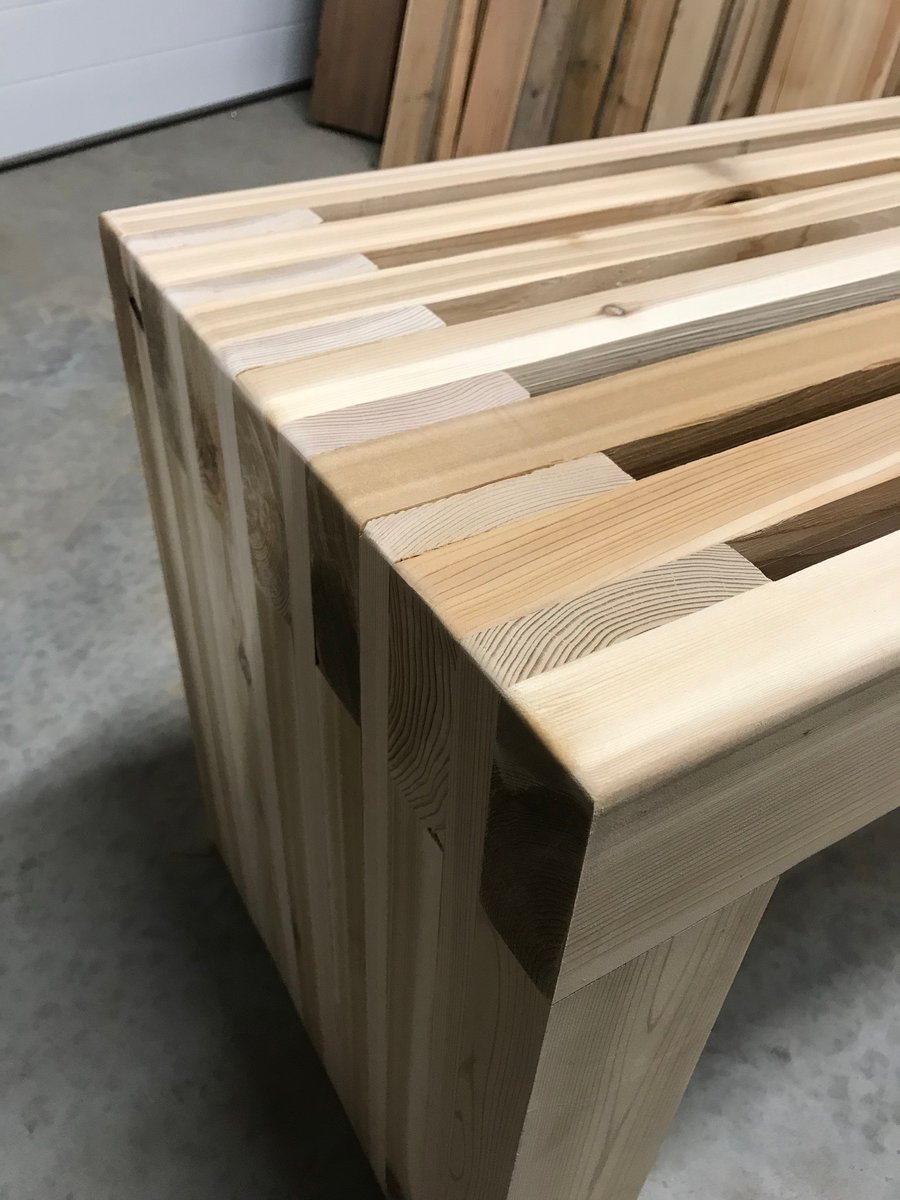
Cedar Slat Top Bench
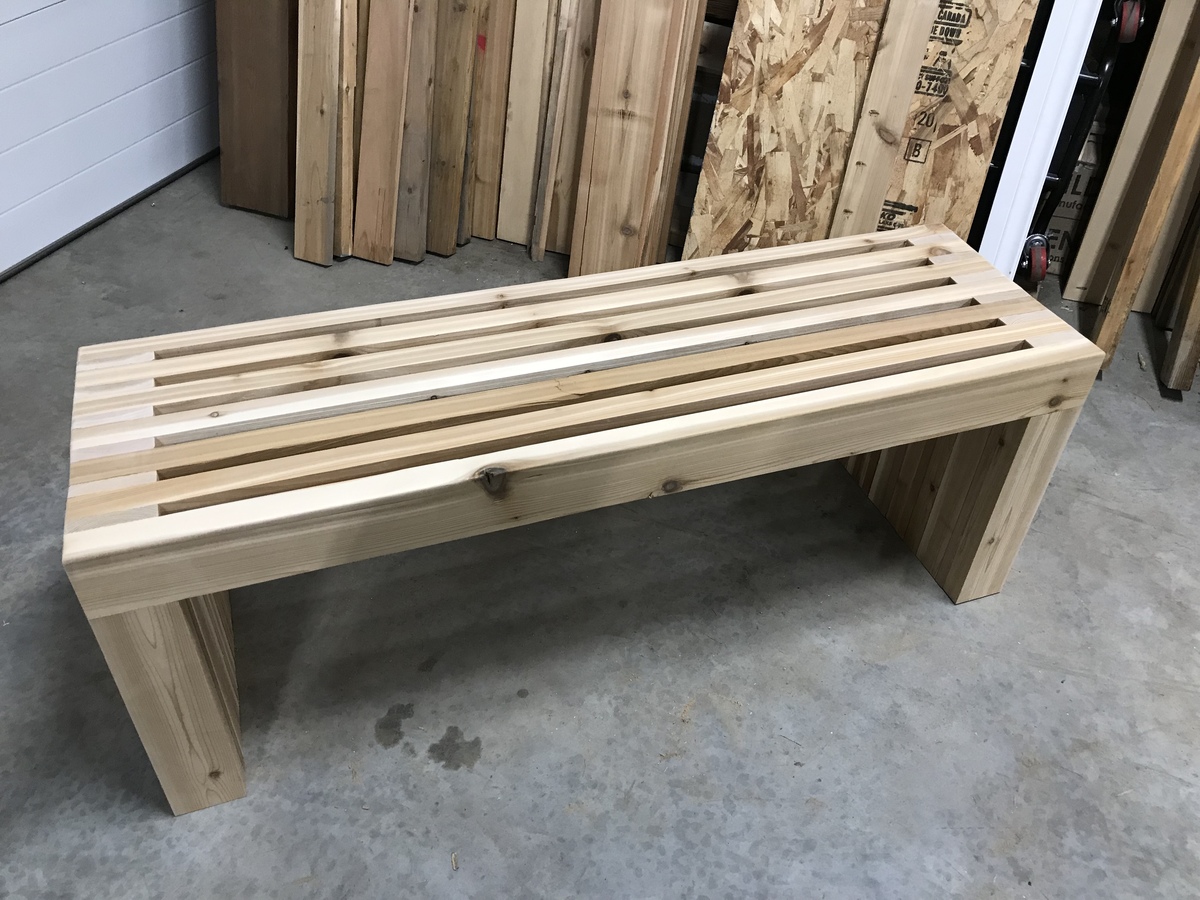
I really enjoy making this bench. I build them out of cedar and vary from 4’-6’. My customers love them. Simple prep work consisting of planing all boards to same dimensions can save a lot of time in sanding. Building 3 more this week.
Estimated Time Investment
An Hour or Two (0-2 Hours)
Recommended Skill Level
Beginner
Comments
Wed, 02/16/2022 - 07:12
Cedar Slat Top Bench - Plans
do you have the plans for the Cedar Slat Top Bench?
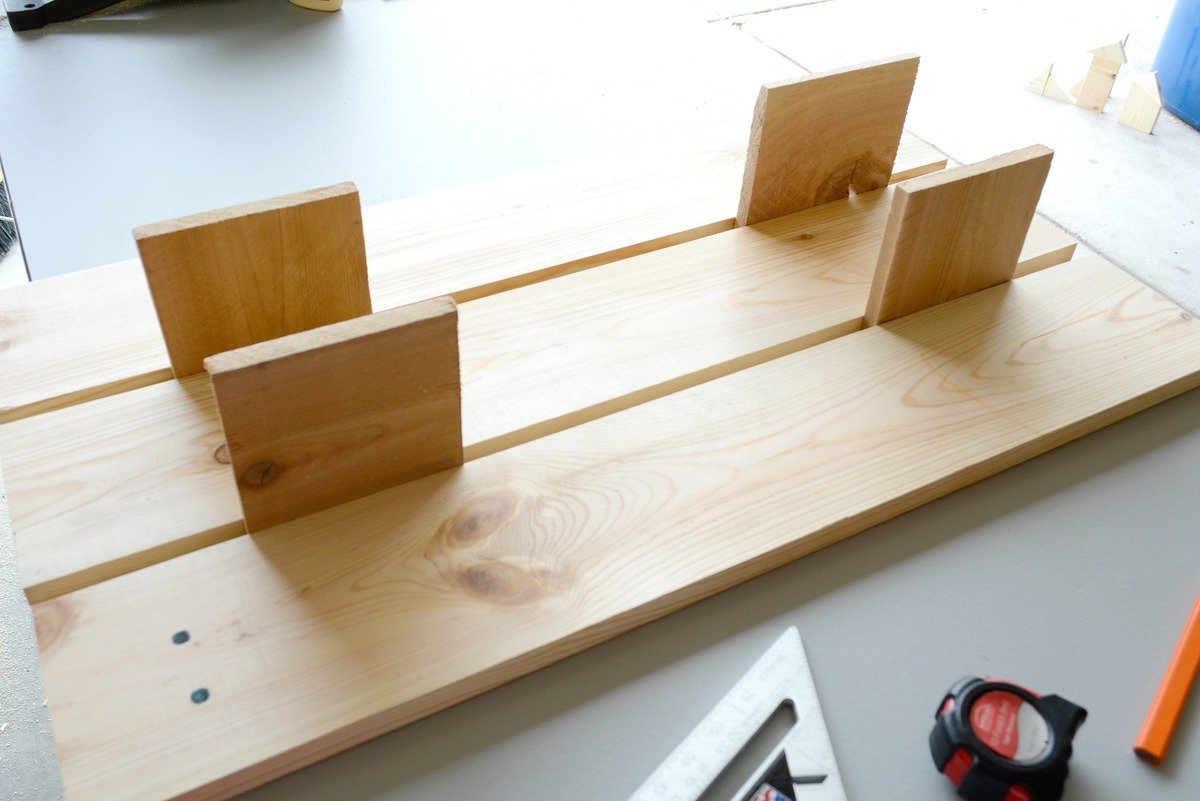
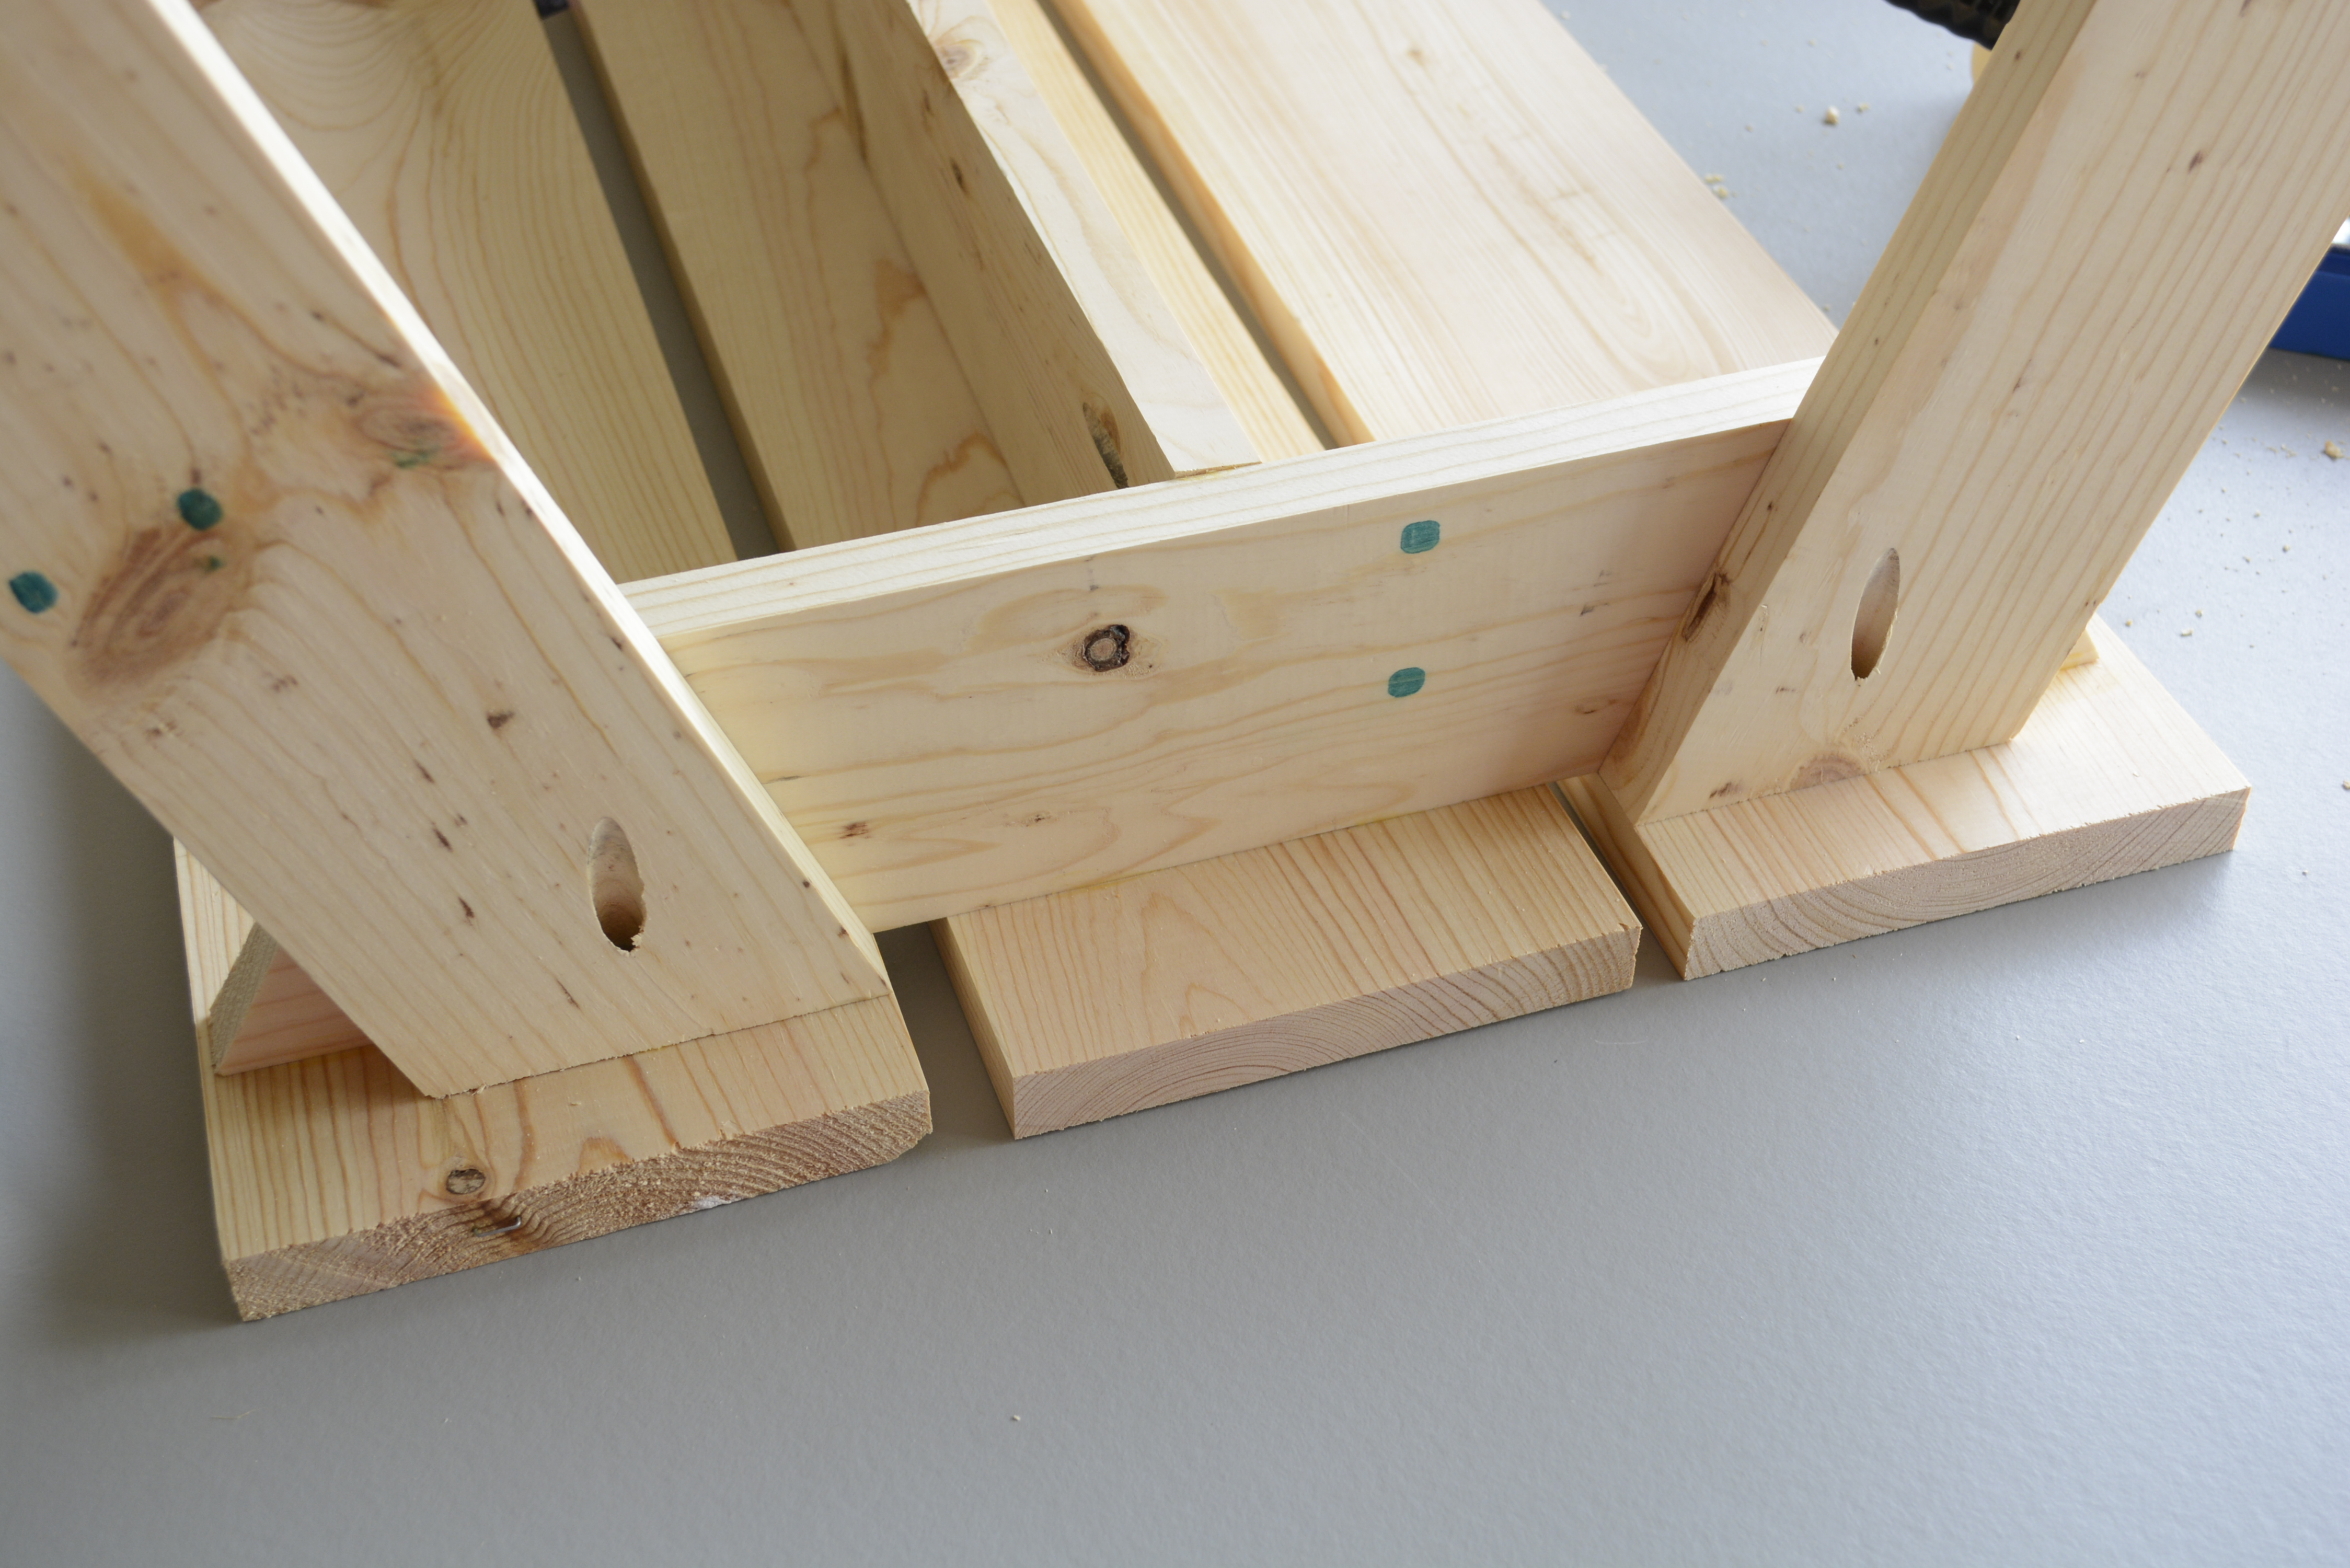
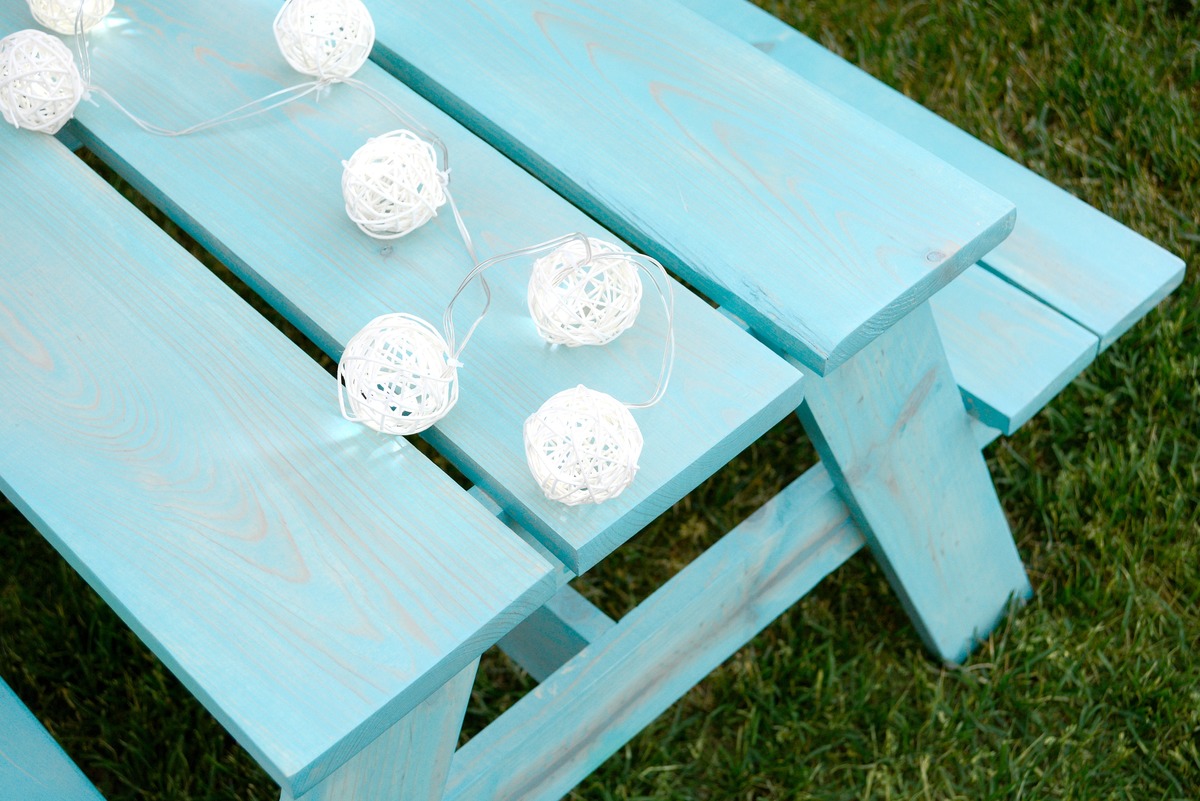
DIY Children's Picnic Table
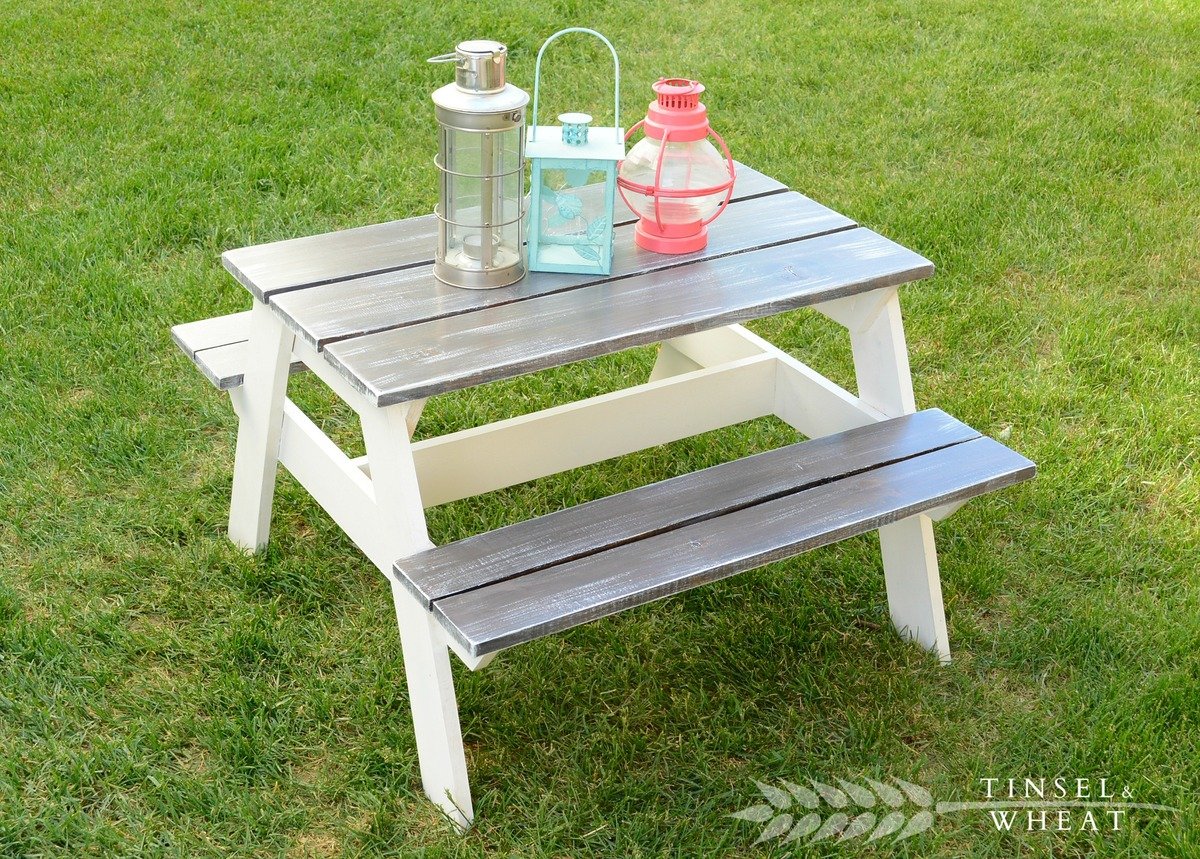
My first truly functional build! I love how it turned out, but even more importantly my kids are loving it - we are literally using it for every possible meal and snack right now. Perfect summer project, and bonus - we get to keep all the eating messes outside!
Built from Plan(s)
Estimated Cost
$22.50
Estimated Time Investment
Afternoon Project (3-6 Hours)
Finish Used
For the first table I sued a combination of stains.. Minwax Jacobean and Weathered Grey with a white latex paint wash. White semi gloss Behr for the legs and bottom half of table.
Second table I used Varathane's Vintage Aqua and I sealed both tables with 4 coats of Varathane's SPAR- Urethane.
Second table I used Varathane's Vintage Aqua and I sealed both tables with 4 coats of Varathane's SPAR- Urethane.
Recommended Skill Level
Beginner