Community Brag Posts

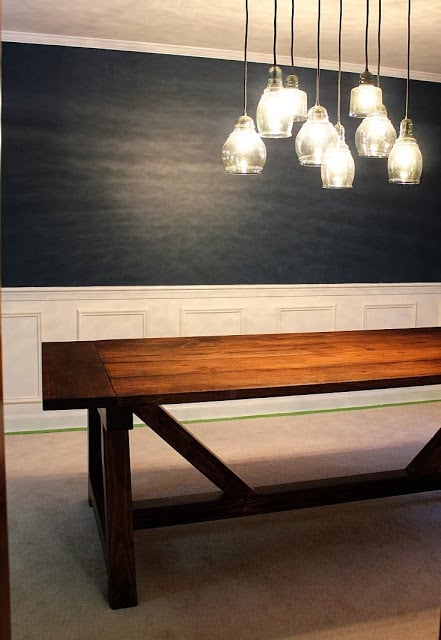
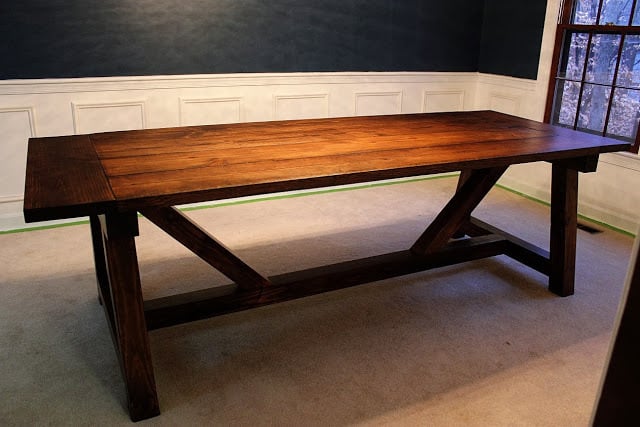
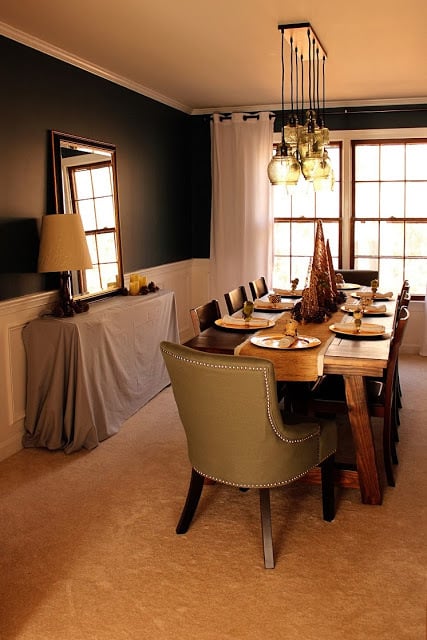
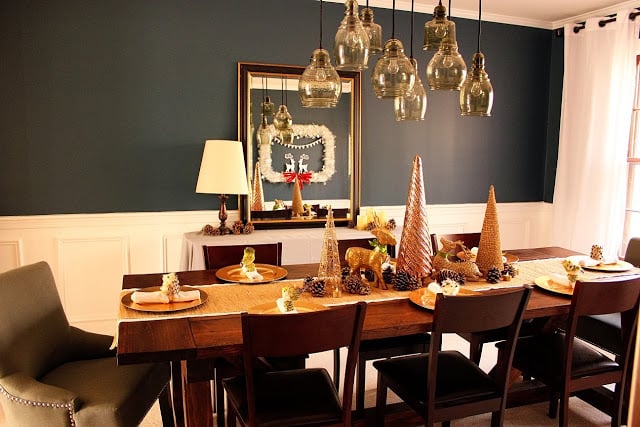
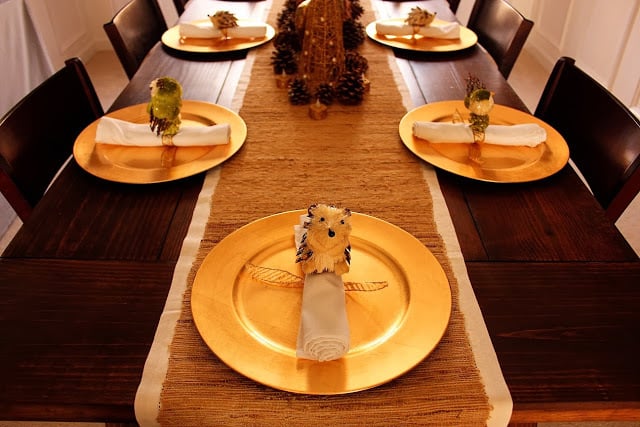
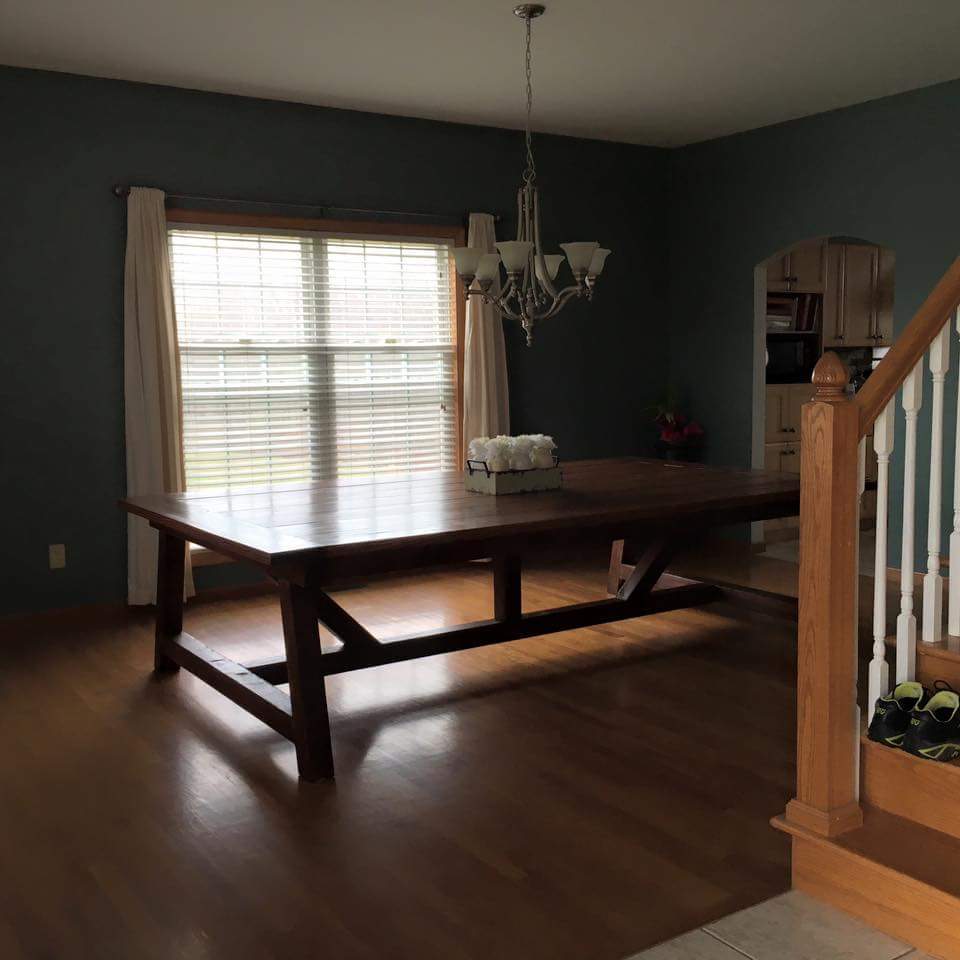
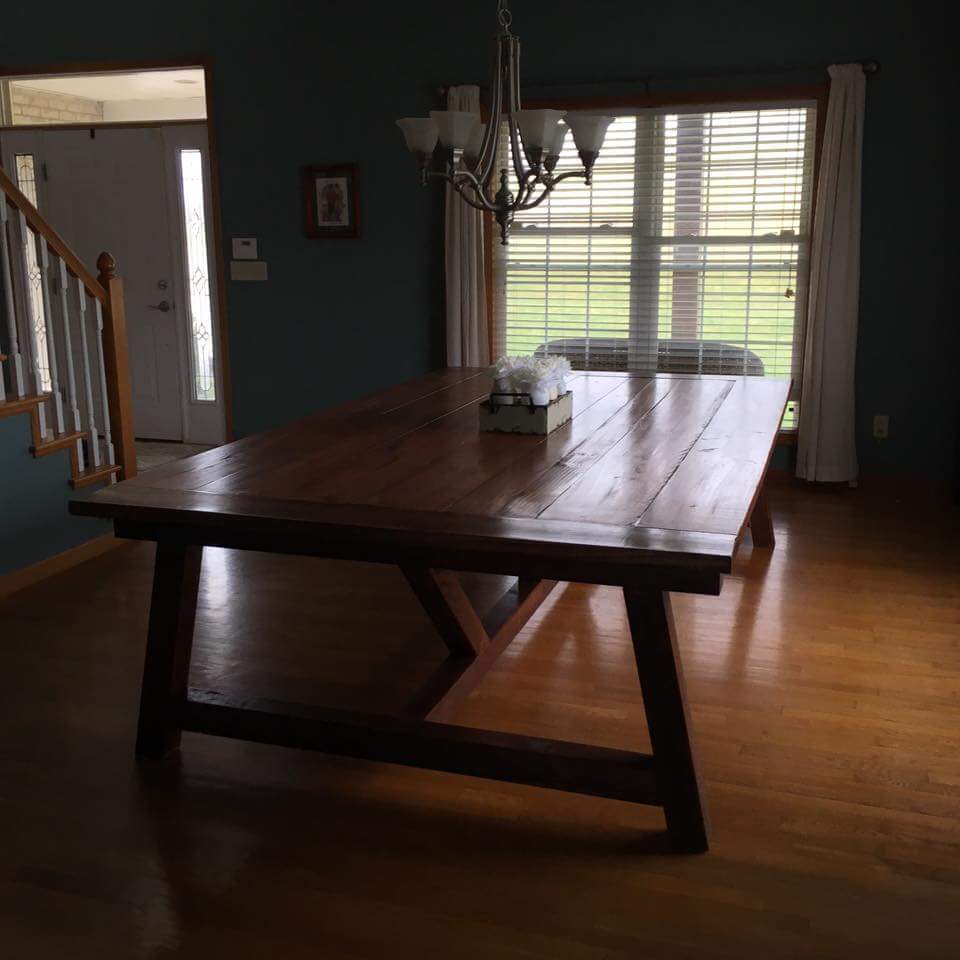
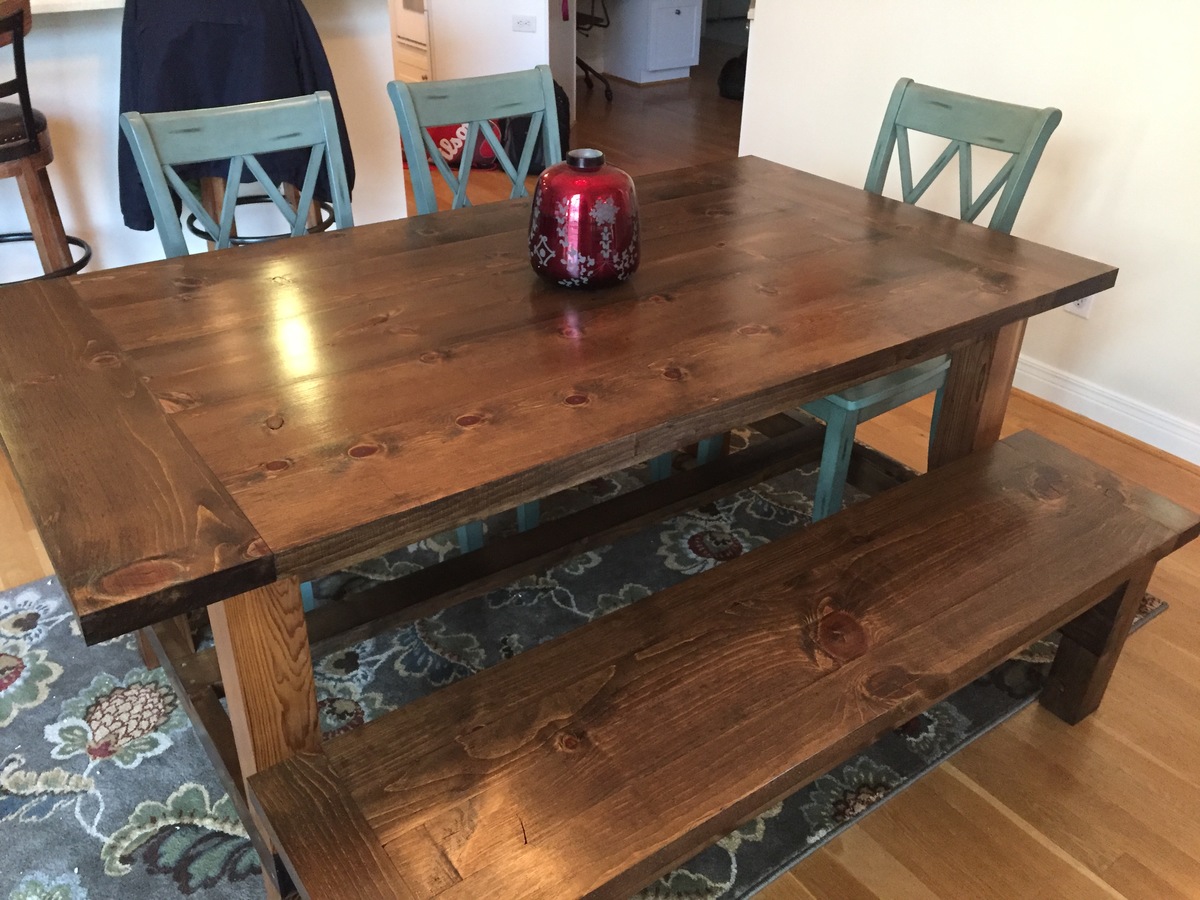
Walnut Truss Beam Dining Table

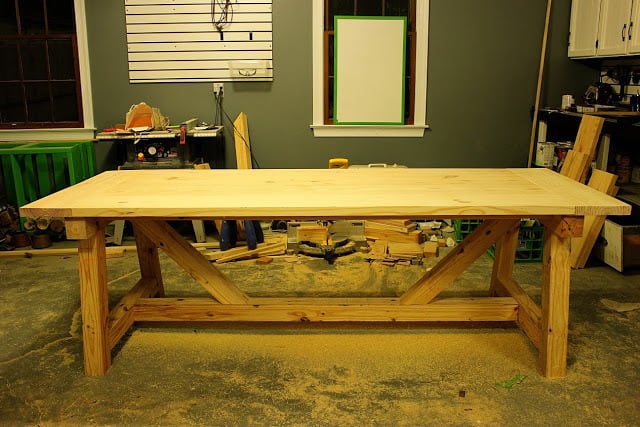
Eight foot Truss Beam Table built out of pine, for about $250 for all of the lumber, pocket screws, stain and poly.

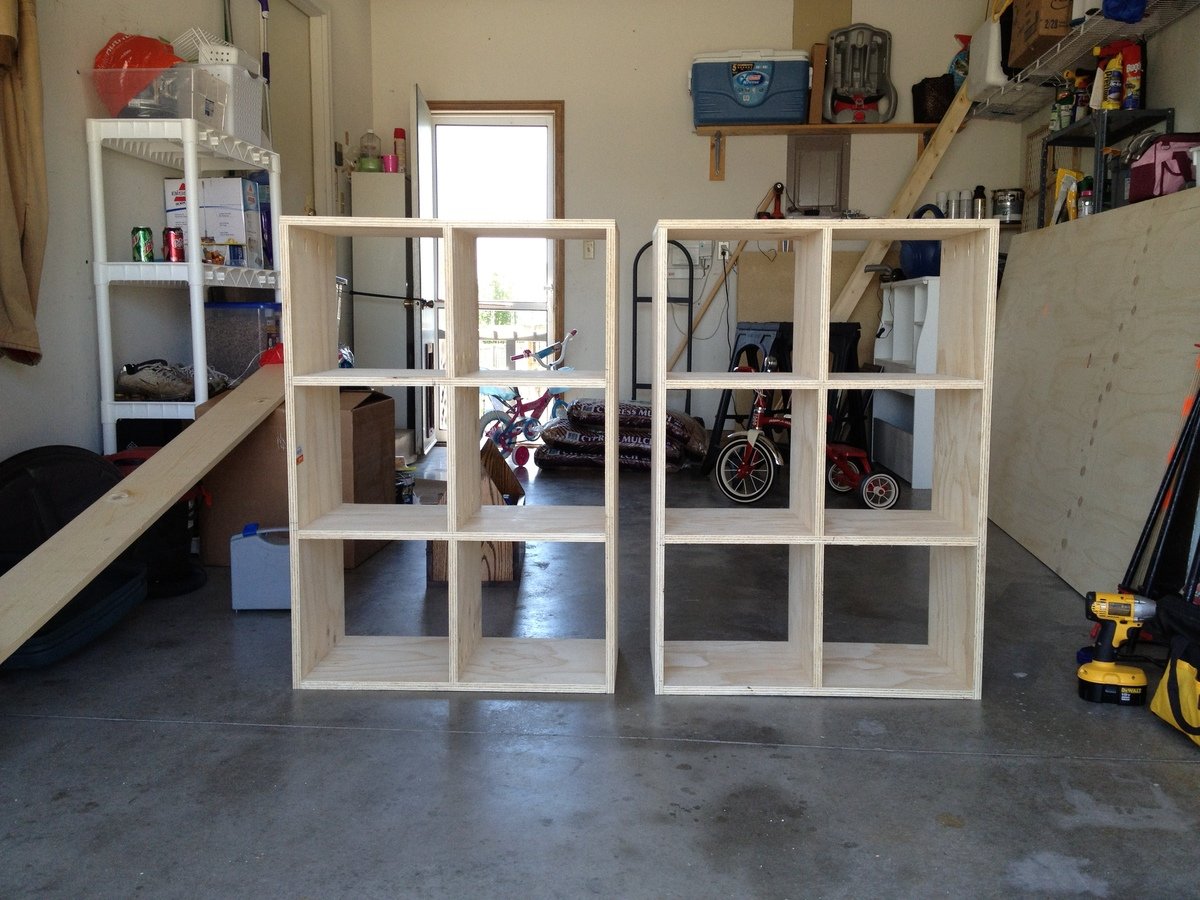
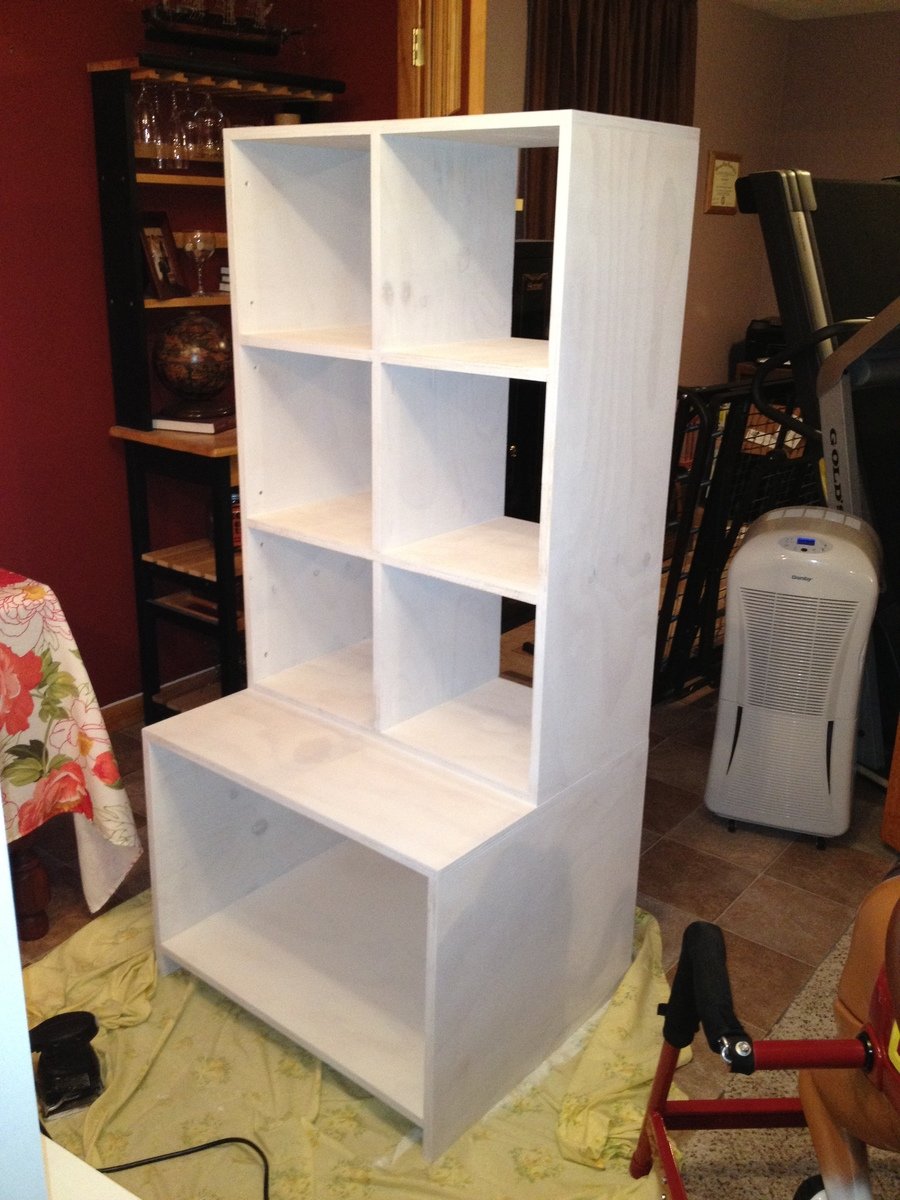
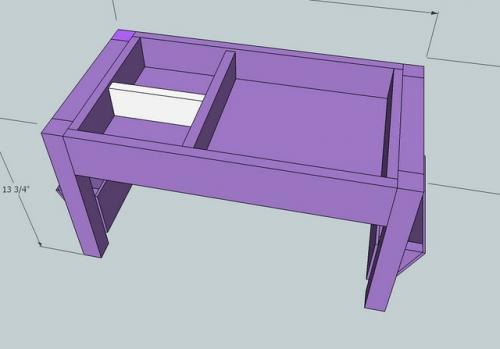
This was my second project, and I found it easier than the Benchright Coffee Table, except for the lifting of the wood. It was so heavy that I needed my husband's help to move the table top after it was pocket screwed together, and we waited until we brought the table inside to attach the base and the table top, due to weight and size.

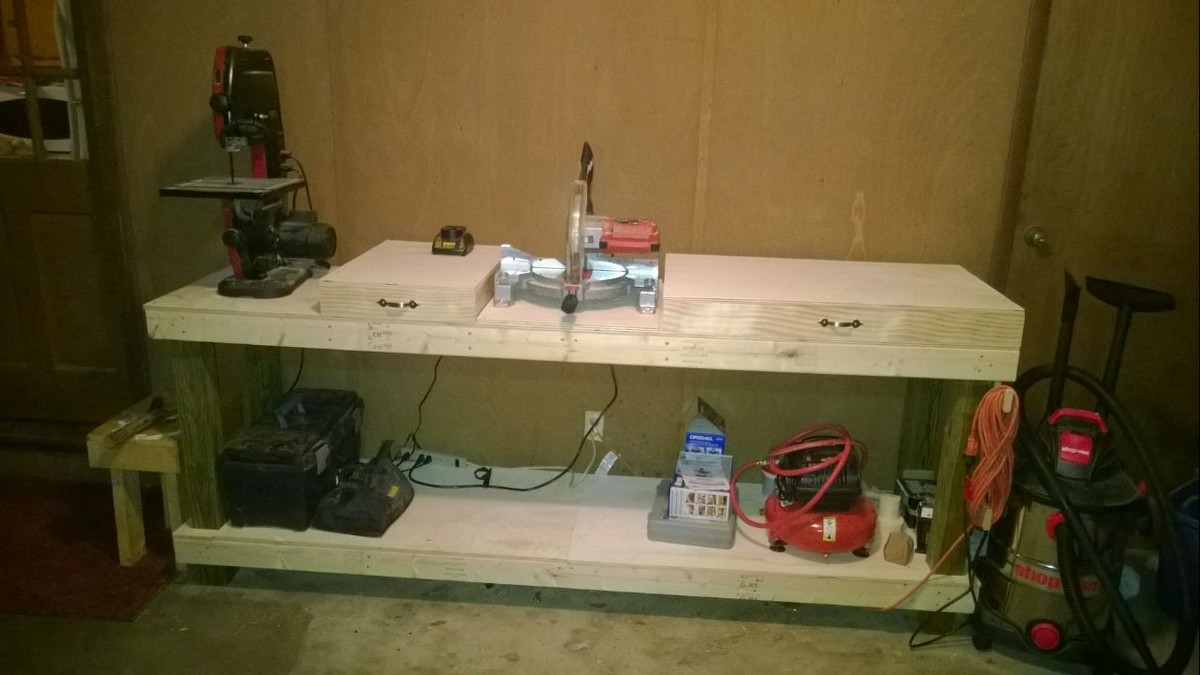
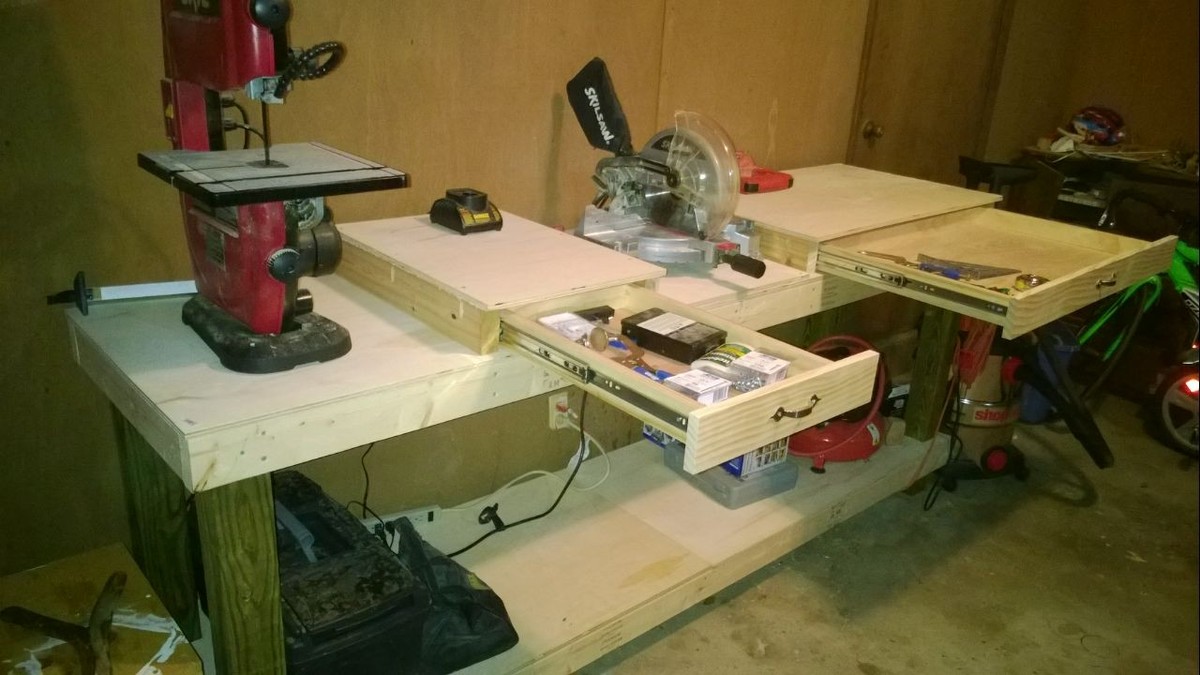
More photos of the build process: http://thehandcraftedlife.blogspot.com/2013/11/dining-room-progress-diy…

Built from Plan(s)
Estimated Cost
$250
Estimated Time Investment
Weekend Project (10-20 Hours)
Finish Used
Rust-Oleum Ultimate Wood Stain in Dark Walnut (one coat, left on for 5 minutes before removing) + Rust-Oleum Ultimate Polyurethane in Satin (2 coats). Looks nice with a little Old English every once in a while.
Recommended Skill Level
Beginner

Comments

Rebecca.Marie

Sun, 01/25/2015 - 16:26

Gorgeous table, and it's now on my to-do list for this summer, but I also love the light fixture! Was this a DIY project as well? I've seen plenty of similar projects using mason jars but I much prefer the variety and shape of the glass covers used in this piece, are they upcycled? Any details I can get would be appreciated!

Workbench

Submitted by cjlaw on Mon, 03/07/2016 - 06:44

I built this to accommodate my miter saw but I also wanted a place for my band saw. I added drawers to make the table level with the miter saw and they add some extra storage space.

Estimated Time Investment
Weekend Project (10-20 Hours)
Recommended Skill Level
Intermediate

Comments

West elm knock off coffee table

Submitted by Anonymous (not verified) on Sat, 10/19/2019 - 00:36

This is the first piece of furniture I have built that I want to put in our house. I used a lot of our tools for the first time. It was really fun and definitely took me a long time but learned a lot in the process. I used all scrap wood from old fencing & old projects. And I had to make an opening for storage on one side! What do you think? :)

Estimated Cost
$50-60
Estimated Time Investment
Week Long Project (20 Hours or More)
Finish Used
Wood stain with a mix of royal blue unicorn spit and polyurethane top coat. I had to use a wood hardener as well because the old wood I used had some dry rot. It worked well but it changed how the stain took to it a bit
Recommended Skill Level
Intermediate

Modern Storage Desk

Submitted by Anonymous (not verified) on Fri, 07/07/2023 - 11:19

I used these plans as inspiration and made some changes per my son's request. I made the base out of maple and changed the board dimensions to 1x2" I also used half lap joints instead of pocket hole screws (personal preference). The top is MDF and I edged plywood and MDF in Maple. Fun Project

Zen

Plane Shelf

Submitted by sidman on Fri, 02/24/2012 - 18:25

Had to build this when I saw it. My coworker just had their first newborn baby boy and wanted hanging shelf's so I built one out of some scrap wood.

Estimated Cost
0
Estimated Time Investment
An Hour or Two (0-2 Hours)
Finish Used
Red and black Paint
Recommended Skill Level
Starter Project

Comments

Bedside Table

Submitted by AndyH on Sun, 12/29/2013 - 07:34

First of your plans I followed and already have two more projects on the go for different tables. Great plans and ideas!!!

Estimated Time Investment
Weekend Project (10-20 Hours)
Finish Used
Minwax Ebony Stain and Satin Poly and then two coats of Minwax Wax to finish.
Recommended Skill Level
Beginner

New Kitchen Cabinet

Had a blast building this project. from printing the plan to first coatings of stain was roughly 10 -14 hours including 2 trips to HomeDepot. I opted to use the PineShop Laminated Pine Shelving / Project Wood It has a really great look when done, and as Im in Canada some prices where a little higher than i had hoped. when purchasing the laminated pine panels, i got 3 panels at 48 inch long by 16 wide (for the top bottom and shelf and 2 panels at 36 inch long by 16 inch wide for the sides. these are actually 16 inch wide so if you need to make them narrower run them through your table saw or have the home depot team trim them to the width you prefer or buy the narrower 12 inch panel . Again it was a blast to build, between the kreg screws needed and the panels and lumber and 1/4 plywood back panel and 3 centre mount drawer slides this project came in at $245 Canadian the Stain i used i have plenty of on hand, but if you don't have any on hand add $10 or $20 to your price

Estimated Cost
$200 - $300
Estimated Time Investment
Weekend Project (10-20 Hours)
Finish Used
Stain on hand
Recommended Skill Level
Intermediate

Bunk bed shelf

Submitted by dkkachik on Tue, 10/22/2019 - 09:31

My daughter asked me for a shelf near her bunk bed to put books, glasses, pen, etc. on.  I found this plan and made it that day.  Self cost less than $15!!  She loves it.  It was super simple to do!  

Estimated Cost
$15
Estimated Time Investment
Afternoon Project (3-6 Hours)
Finish Used
Gloss spray paint
Recommended Skill Level
Starter Project

Outdoor TV Lift with Electric Fireplace

Submitted by Anonymous (not verified) on Sat, 07/08/2023 - 10:27

I built a TV lift with an electric fireplace cabinet. It’s 5x2 with casters for easy mobility. It goes perfect out in my bar area. I used siding all around in and the top is pinewood with a lacquer coating for long lasting.

DIY Bathroom Fan Vent Cover

Submitted by lbrown on Tue, 02/28/2012 - 04:56

The plastic cover that came with the fan looked cheap and flimsy and really didn't fit in with the vintage style of my bathroom. I searched around to try and find something else that would work but was unsuccessful so I decided that I needed to make something myself.

For details on how to build it: http://www.homeandawaywithlisa.com/blog/2012/2/28/diy-bathroom-fan-vent…

Estimated Cost
$5
Estimated Time Investment
An Hour or Two (0-2 Hours)
Finish Used
Spray paint primer followed by two coats of my ceiling paint
Recommended Skill Level
Starter Project

Comments

Steven (not verified)

Tue, 02/28/2012 - 06:38

Thanks lbrown, you just gave me an idea. We are painting our entire upstairs and hate those industrial looking air return vents. This would be a great replacement for them. Thanks for the inspiration.

Toy Storage

Submitted by bridge318 on Mon, 12/30/2013 - 14:17

Half of the spare bedroom in our basement is our toy room and I wanted to be able to host visitors without them being overwhelmed by our toys. The units on top are three separate units. We didn't divide the middle unit so we could use as book shelves. The open units on the bottom are tall enough for car elevators, etc. I like the half units on top for the plastic storage boxes where I have craft/art supplies (I don't want my kids getting that when I'm not in the room!). We used white paneling on the back of the shelving. We used a piece of trim on the bottom to cover up the legs, but I wanted to show you that the entire unit does not sit on the carpet. The totes are Martha Stewart brand from Home Depot. (I apologize for the blurriness of the last photo.)

Estimated Cost
$350
Estimated Time Investment
Weekend Project (10-20 Hours)
Finish Used
Kilz Primer (1 coat) and High-Gloss White paint (2 coats)
We waited to paint until it was all put together, but if I could do it over again, I would paint the boards before assembling and touch up what was needed. I sanded in between each coat.
Recommended Skill Level
Beginner

Loved this plan! made ours 6x9

Submitted by Anonymous (not verified) on Mon, 03/14/2016 - 19:00

this project turned out better than I hoped

Built from Plan(s)
Estimated Cost
200
Estimated Time Investment
Week Long Project (20 Hours or More)
Finish Used
minwax english chestnut
Recommended Skill Level
Beginner

A Toy Chest for my Daughter!

Submitted by Anonymous (not verified) on Mon, 10/28/2019 - 13:02

I used these plans to build a toy chest for my daughter: https://www.ana-white.com/woodworking-projects/simple-modern-toy-box-lid

I skipped the lid and a few of the extra details, but I think it turned out alright! It was probably my second project ever, and my first at this size. Being so new to woodwork, I was unsure of a lot of my cuts, or even if I could find the proper pieces of wood at the store, but your plans helped me through a lot of it!

Built from Plan(s)
Estimated Cost
$200
Estimated Time Investment
Day Project (6-9 Hours)
Finish Used
Basic ebony stain
Recommended Skill Level
Starter Project

Twin farmhouse with trundle

Twin farmhouse bed with trundle. Slightly modified to make foot board a bit taller.

Estimated Cost
$350
Estimated Time Investment
Weekend Project (10-20 Hours)
Finish Used
Minwax Red Mahogany stain, with Minwax fast-drying polyurethane.
Recommended Skill Level
Beginner

Comments

staci (not verified)

Thu, 09/06/2012 - 19:19

I would love to get blue prints if u still have them please

Farmhouse daybed

My son plays games while sitting on his bed, we love the farmhouse style, but for room sake and looks, making it this way turned out perfect. Took the basic layout added some thicker boards top and bottom and additional surface boards to give it depth. Since there was no footboard I built a free standing frame, and attached it to the headboard.

Estimated Cost
140
Estimated Time Investment
Weekend Project (10-20 Hours)
Finish Used
Minwax dark walnut and satin poly
Recommended Skill Level
Intermediate

Comments

JoanneS

Wed, 01/01/2014 - 06:35

What a fabulous daybed! You did an awesome job! The finish is absolutely gorgeous. And it's so timeless, it will last for generations. :)

Daviddickey

Sun, 01/05/2014 - 16:12

Thank you so much!! My wife helped sand and did some of the finish, it was a fun project... Super heavy, I'm hoping that leads to a lifetime of use.

Linda7

Tue, 01/07/2014 - 10:22

Joanne's comments are spot-on! Love this...and the finish is stunning!

Daviddickey

Tue, 01/07/2014 - 12:08

Thank you Linda!! Just used the wood conditioner, a coat of stain, 3 coats of poly, with a sand in between. I made a kitchen table using the same stain, it really is a beautiful color that my wife picked out.

Kburrell

Tue, 12/22/2015 - 07:42

This is the perfect playroom bed for a boy! I'm looking to build two of them. Every other bed I've searched that is farmhouse style is boarded on three sides. I LOVE this playform style for the same reason you mentioned....they can sit all around on the bed and it's much easier for kids to change bed linens.  I love the "chunkyness" and masculine appeal of this bed! You mentioned using thicker boards on the top.  Would you mind shag what yo used? Also, what did you use to make your "feet" on the bottom? I would appreciate any tips

Farmhouse table and bench

We loved the farmhouse table plan and the bench. We modified a bit to make it 6ft. We just loved how it turned out. We used cedar for the legs. We wanted something to contrast a bit. I didn't stain the legs just coated with poly.

Estimated Cost
$200
Estimated Time Investment
Week Long Project (20 Hours or More)
Finish Used
Minwax dark walnut and semi gloss poly
Recommended Skill Level
Beginner

Modern Adirondack chair

Submitted by Anonymous (not verified) on Tue, 10/29/2019 - 12:43

Finally built my daughter a chair and she loves it

Built from Plan(s)
Estimated Cost
40.
Estimated Time Investment
Weekend Project (10-20 Hours)
Finish Used
Patio sitting area
Recommended Skill Level
Beginner
Seasonal And Holiday

Big Kids Picnic Table

Submitted by Anonymous (not verified) on Fri, 07/14/2023 - 12:54

Thank you Ana for your work and making your plans available for free!
My table is based on your Big Kids Table, modified to use available free scrap wood.

tcphillips

Built from Plan(s)

baby changing station

Submitted by nermin on Mon, 03/05/2012 - 19:34

Thx for the plan Ana. I modified it slightly to make it a bit different but realy loved you plans.

Built from Plan(s)
Estimated Time Investment
Week Long Project (20 Hours or More)
Recommended Skill Level
Beginner

Comments

dama

Tue, 08/14/2012 - 16:29

I would like to know where did you get the instructions for the HUTCH on the Madeline changing table plan I can not find it on Ana Whites plans

Sewing Table

We built this cart for my mom, and she loved it! Already having other people asking us to build one for them too. We're going to try and modify the design a little and make a cart for the kitchen, should be fun!

Built from Plan(s)
Estimated Cost
$60
Estimated Time Investment
Weekend Project (10-20 Hours)
Finish Used
No finish, just used Satin Clear Coat
Recommended Skill Level
Intermediate

Comments

Back