Community Brag Posts

Modified to a 3 ft square table from this plan!

Submitted by herzo1852 on Wed, 07/31/2013 - 10:13

I am currently making the matching 2 seater Loveseat (making 2 of them) so I wanted a square table to go in the middle of the 2 sofas to make it look nice, so the rectangular table was not quite what I needed.

I used 2x3's for the legs and adjusted the side measurements of the square table for the extra width.

I didn't want to paint it, so this is Rustoleum Kona stain with polyurethane (clear semi gloss) over the top to protect it from the rain - which you can see was exactly the kind of weather I had about 10 minutes after it was put outside!

Estimated Time Investment
Weekend Project (10-20 Hours)
Finish Used
Rustoleum "Kona" stain (from Lowes), and a clear Minwax polyurethan in semi gloss - applied the stain with a foam brush and the clear polyurethane with a good quality brush (less hairs fall off the quality brushes!).
Recommended Skill Level
Intermediate

Pecan top dining table

this was the second table built using Anna's fancy x plan. The first used regular 2x6 pine boards for the top and was given to my son for a housewarming gift. This second I built for my wife and changed up the top by using 1x6 pecan we had milled and then I planed down myself. The outer edges were left with a live edge to give it more rustic character. I used slotted "L" shaped metal about 6" long to secure the top of the table to the supports underneath, to allow for any expansion in the boards. I recently made a new kitchen island to match.

Built from Plan(s)
Estimated Time Investment
Week Long Project (20 Hours or More)
Finish Used
Semi gloss black paint for legs and support. Minwax semigloss polyurethane on the top.
Recommended Skill Level
Intermediate

Comments

AlexO

Tue, 08/25/2015 - 16:53

I love working with Live edge stuff!  Not this talented though!  Very Nice

Rustic X Table

This was my first ever attempt at making something real out of wood. I've only made some really basic floating coat hangars and docorative rustic pieces to set around peoples houses and a spice rack. I really wanted more of a challenge and this was a perfect place to start. I had to purchase the Kreg Jig and a couple of large clamps but once I got the hang of drilling and filling pocket holes it was smooth sailing. 


The Mrs then finished it off with some lovely rustic baskets and a serving tray with all the latest Southern Living magazines.

Built from Plan(s)
Estimated Cost
$39.97 - Kreg Pocket Hole Jig Model R3

.

~$60 - various cuts of wood, Home Depot made this easy and cut it all to size for me when purchased. (other than the angled cuts)

.

$7 - Speed square (for the angled cuts)

.

$10 -100 count pack of 2 1/2" pocket hole screws & 100 count 1 1/2" pocket hole screws

.

$7 - Foam brushes
.

__________________________________
Total: $123 w/some spare wood
Estimated Time Investment
Weekend Project (10-20 Hours)
Finish Used
5 layers of stain are applied in the following order:

1st - Miniwax Dark Walnut
2nd - Varathane White wash Pickling
3rd - Miniwax Classic Gray
4th - Miniwax Dark Walnut (Wiped off almost as fast as it was put on)
5th - 2 coats of clear gloss.
Recommended Skill Level
Intermediate

Mini vanity for a mini bathroom

Submitted by Anonymous (not verified) on Sat, 04/23/2022 - 04:54

We are setting up a small bathroom In our dry cabin. We will have a water container on the sink top and a bucket collecting grey water below. None of the commercial vanities had the right combination of price/sturdiness/shelf configuration/style I was looking for, so I made my own!

Modifications:
-no top
-lower shelf
-used 1x2 (not 2x2) on front shelf support to maximize shelf space
-wider and deeper than plans to fit sink top just right! It took a lot of math and trial and error on plank width combinations.
-added a door, which turned out to be the hardest part for me

Comments

I am in Love

Submitted by Marisol on Mon, 06/20/2011 - 19:09

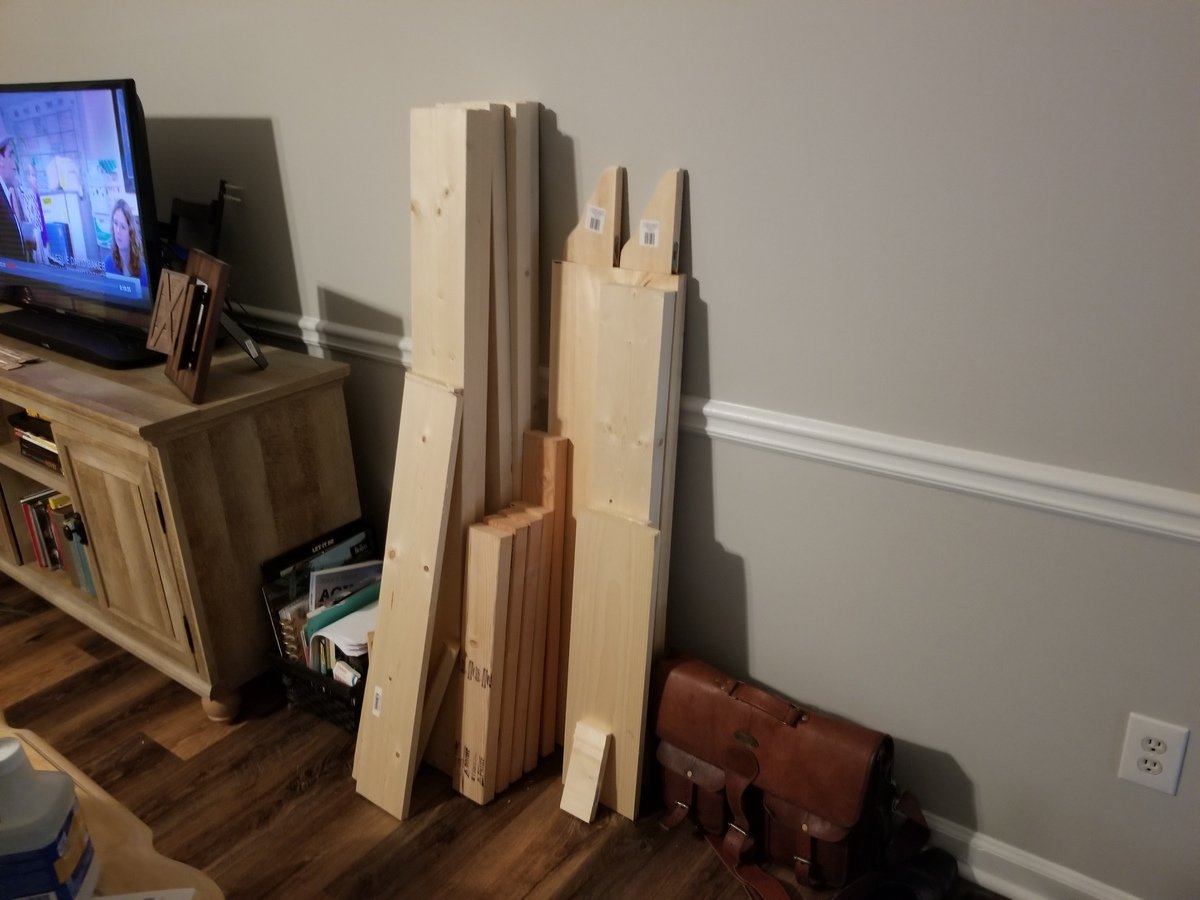
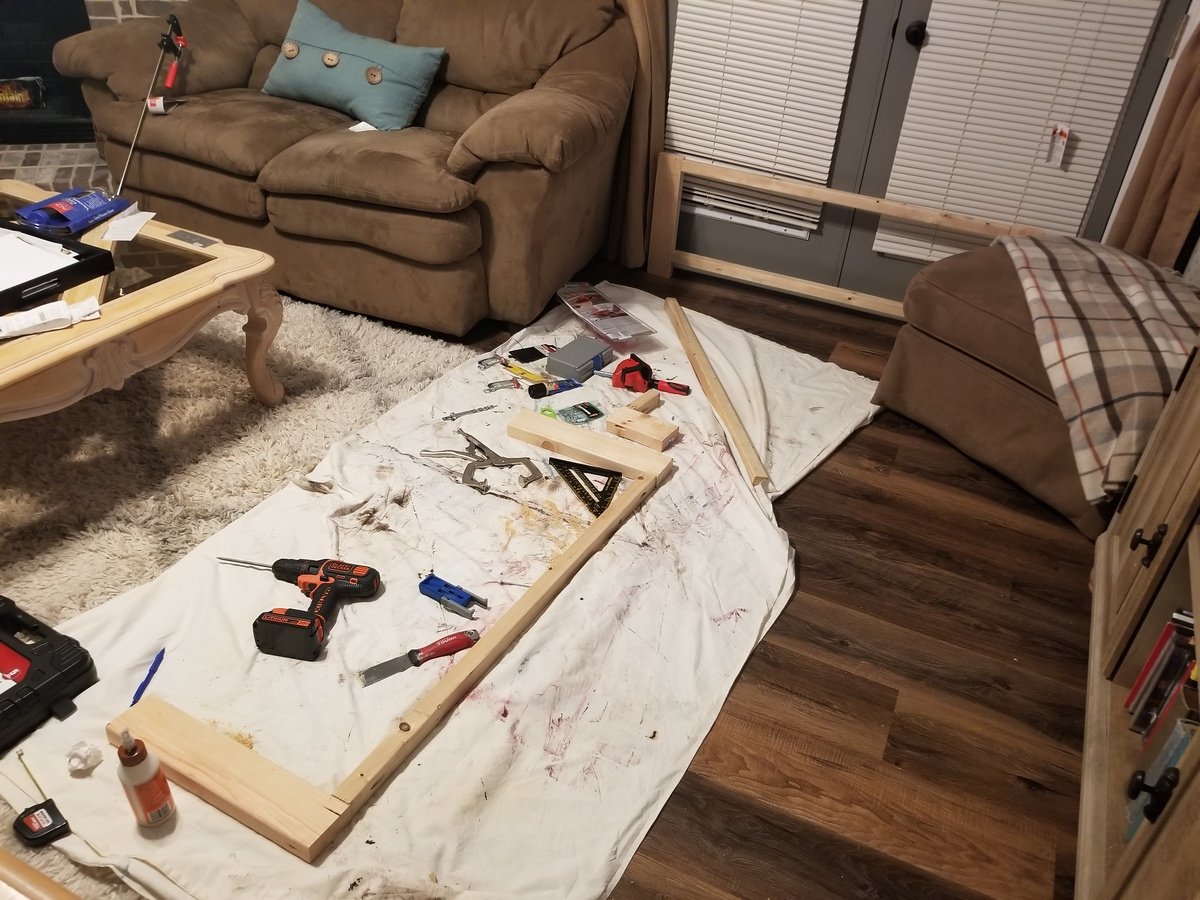
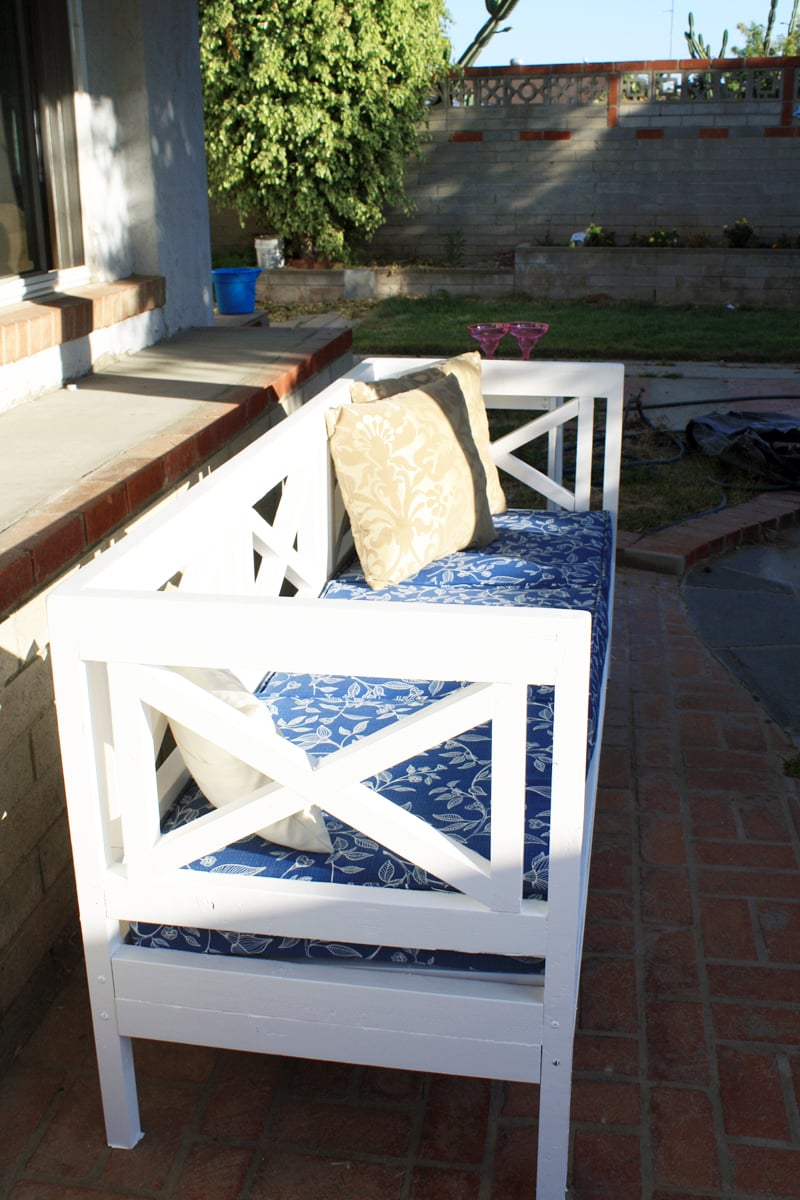
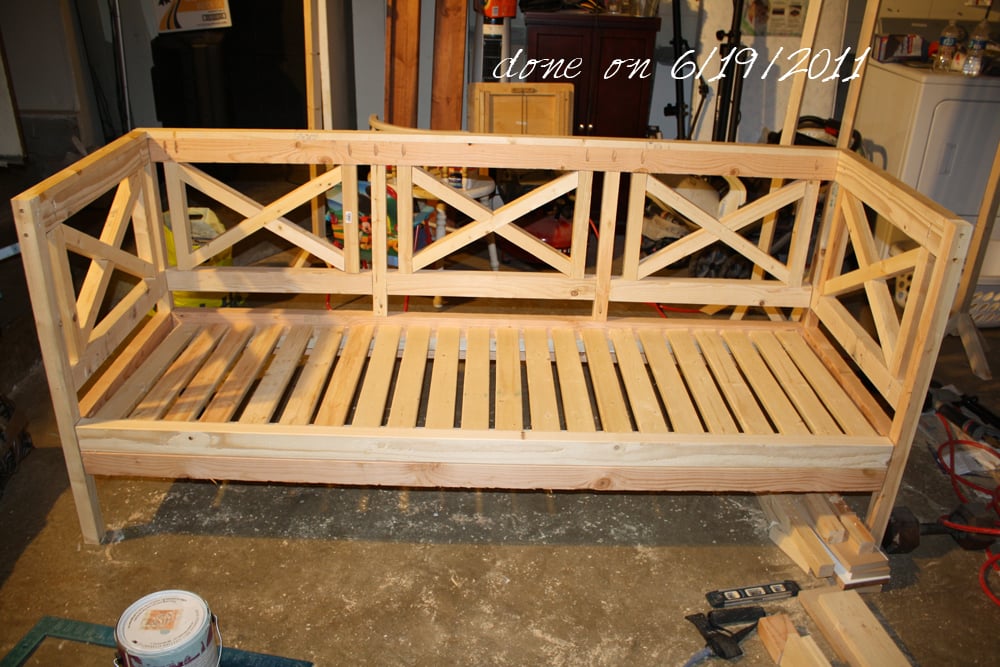
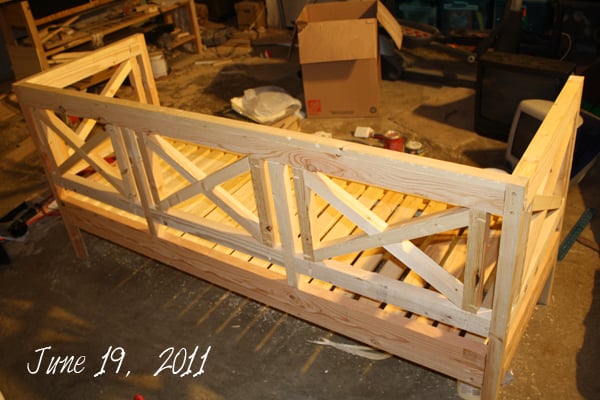
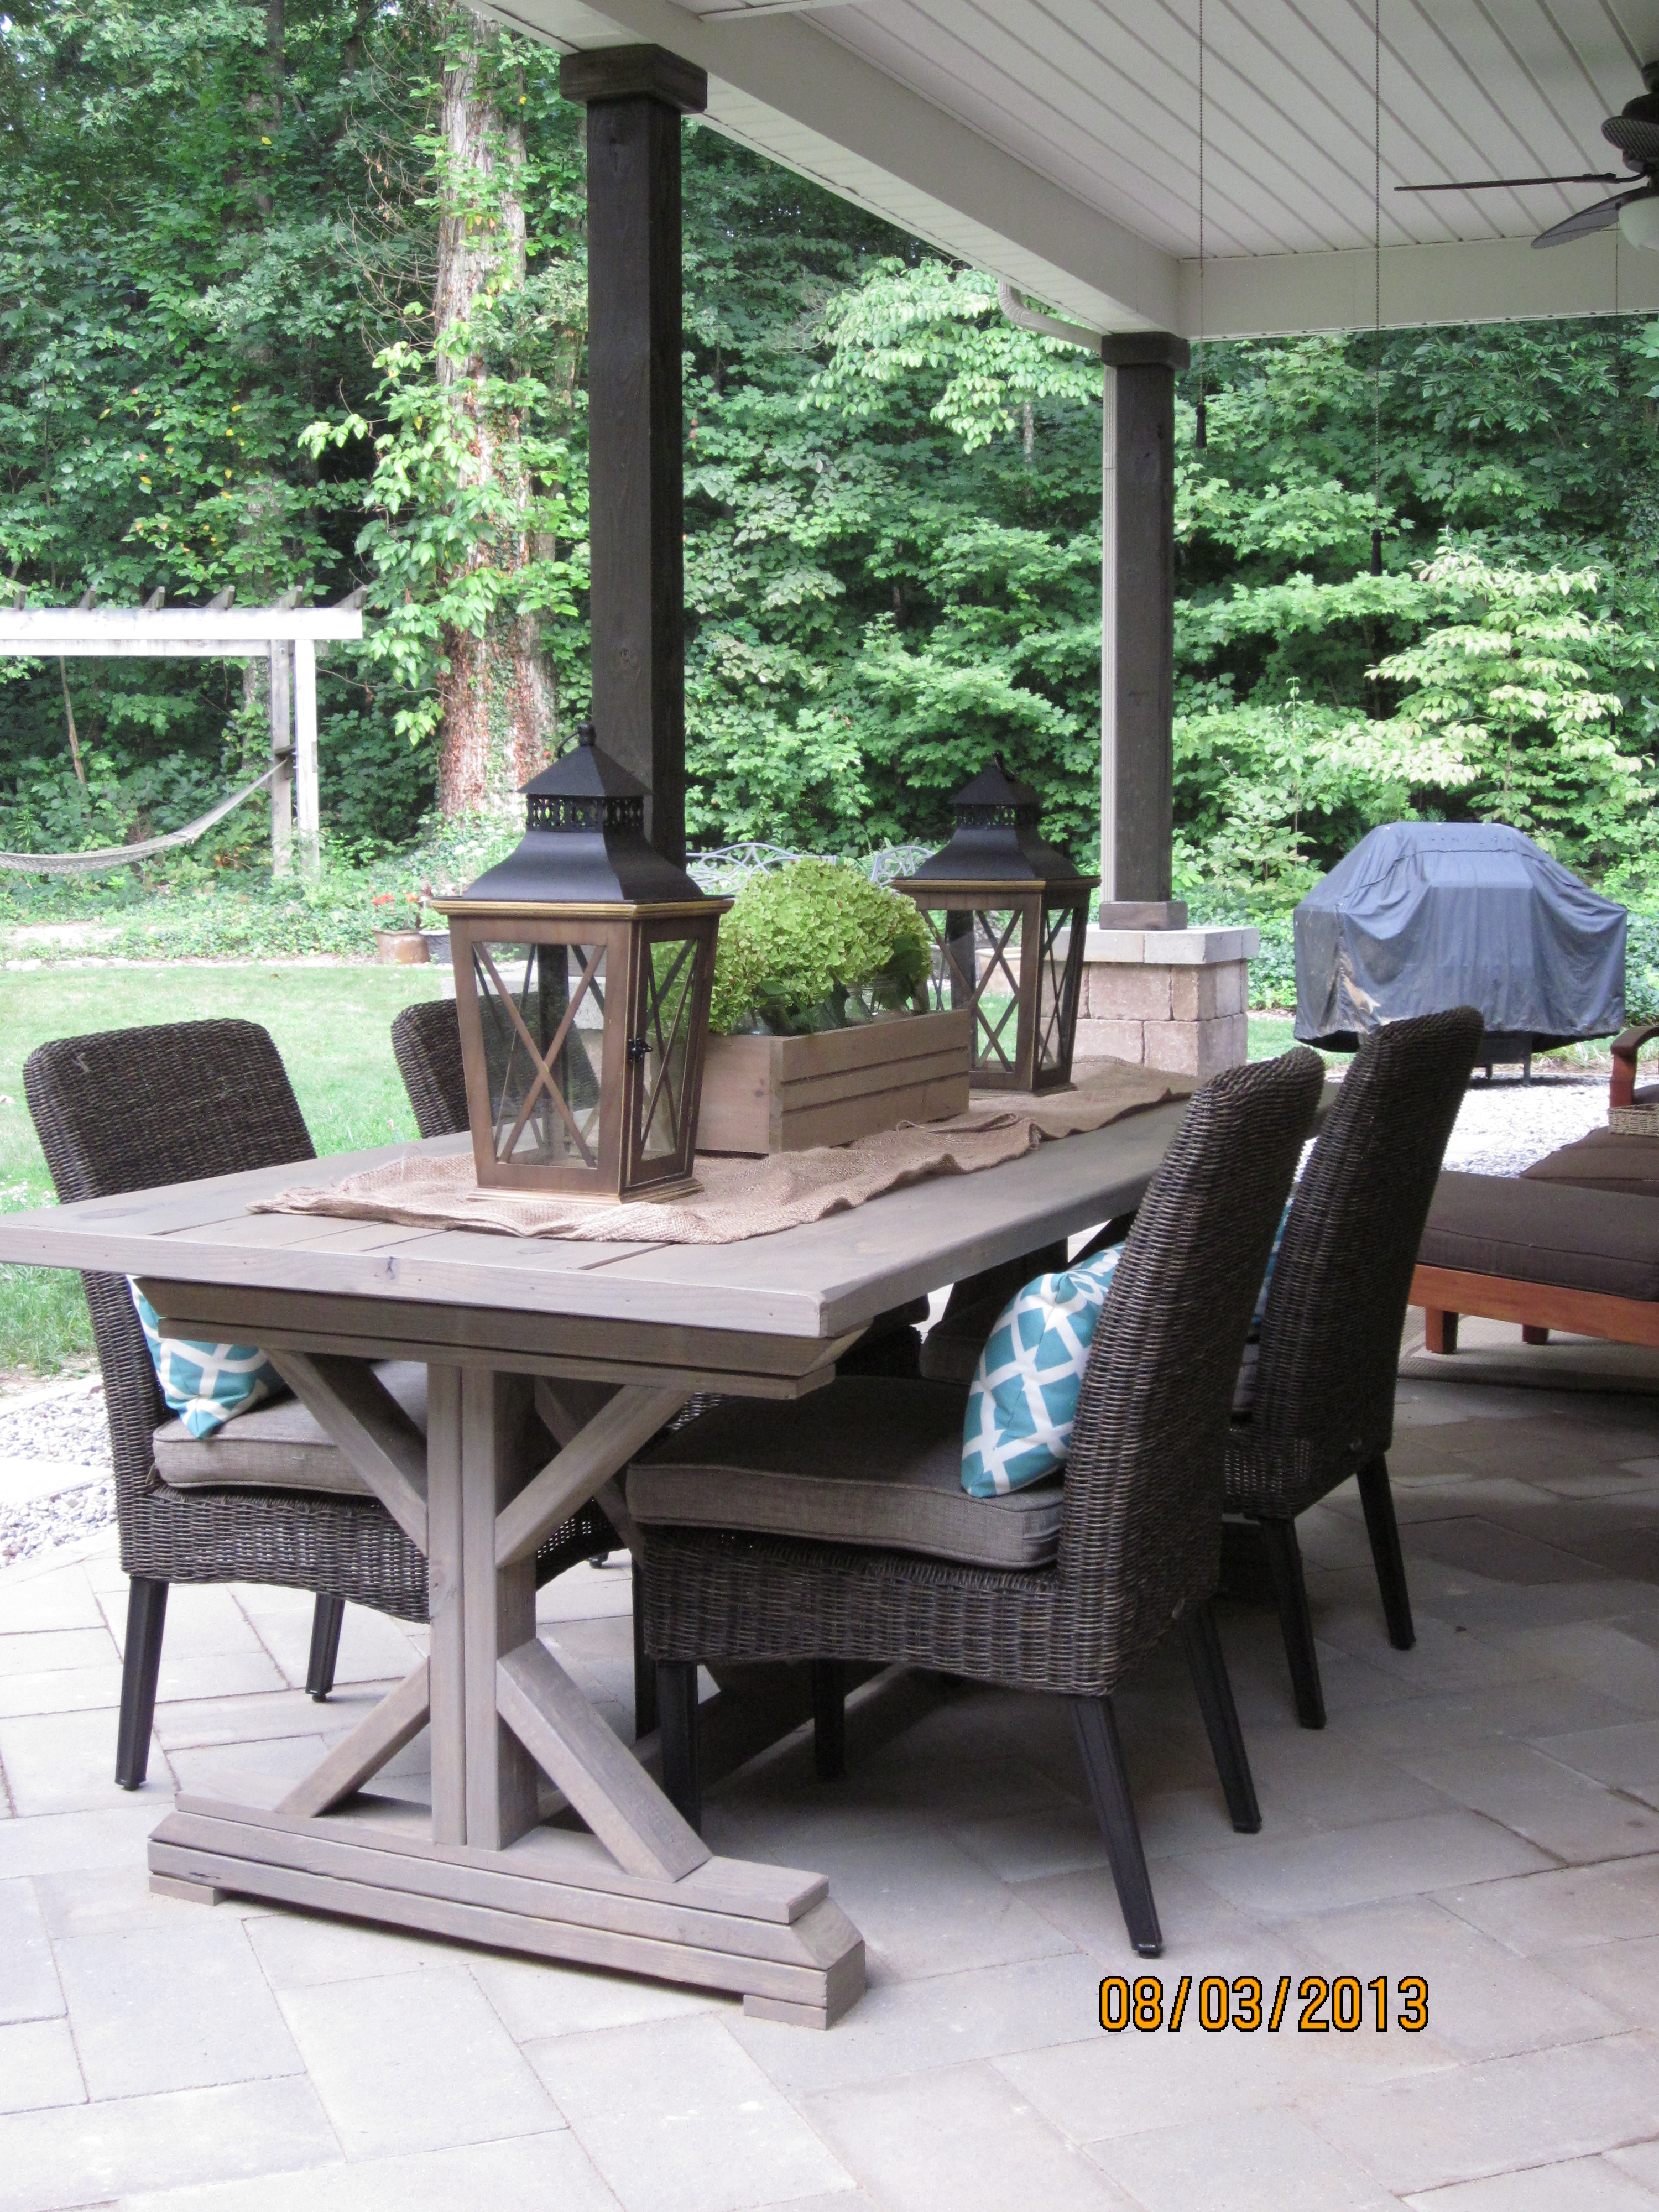
I am more excited about building now. I started this project Saturday, started on the cuts, almost immediately and assembled later that afternoon. By Sunday Morning the whole thing was done. I have 2 Children (2 yr.old and 10month old) so breaks were VERY frequent in between. I am so exciting about building now, my husband has even offered to help in the near future for more must haves! We are planning my very first Birthday Party ever! (including childhood) so I wanted to have comfortable and beautiful seating, I’ve been drooling over these plans since Ana posted them up and thought to myself, there is no way I could do it. But…I was wrong, with hardly any help I was able to do it all on my own. The only problem I came across was the small end X pieces, I am not sure what I did, but I needed to make the cuts at 9 15/16 instead of 10 3/8 in order for the 1x2’s to fit in the center, I thought it would affect the rest of the plan, but it didn’t. Another little hiccup I did was at the HD- I went alone, I couldn’t carry the 2x6 by myself, so I got 2 2x3’s instead, I think it still looks exceptionally well. What am I saying?! I LOVE THIS THING!

My husband and my live in brother were impressed, as was I! My mother even made a comment that my grandfather’s spirit is in me! (He was a carpenter) So, with all these compliments it only motivates me to continue and build! Build! Build! My mother wants one for her Birthday as well, so I will be making another beautiful Weatherly Sofa for her, she deserves it! She takes care of my little angels while I work…the least I could do is make one for her. As many of us who started building due to income deprevation , I am living pay check to pay check, so the little wiggle room we have will be 1 project + scraps. I don’t care how long it takes to get the material, this hobby/love is going to be a long beautiful relationship.

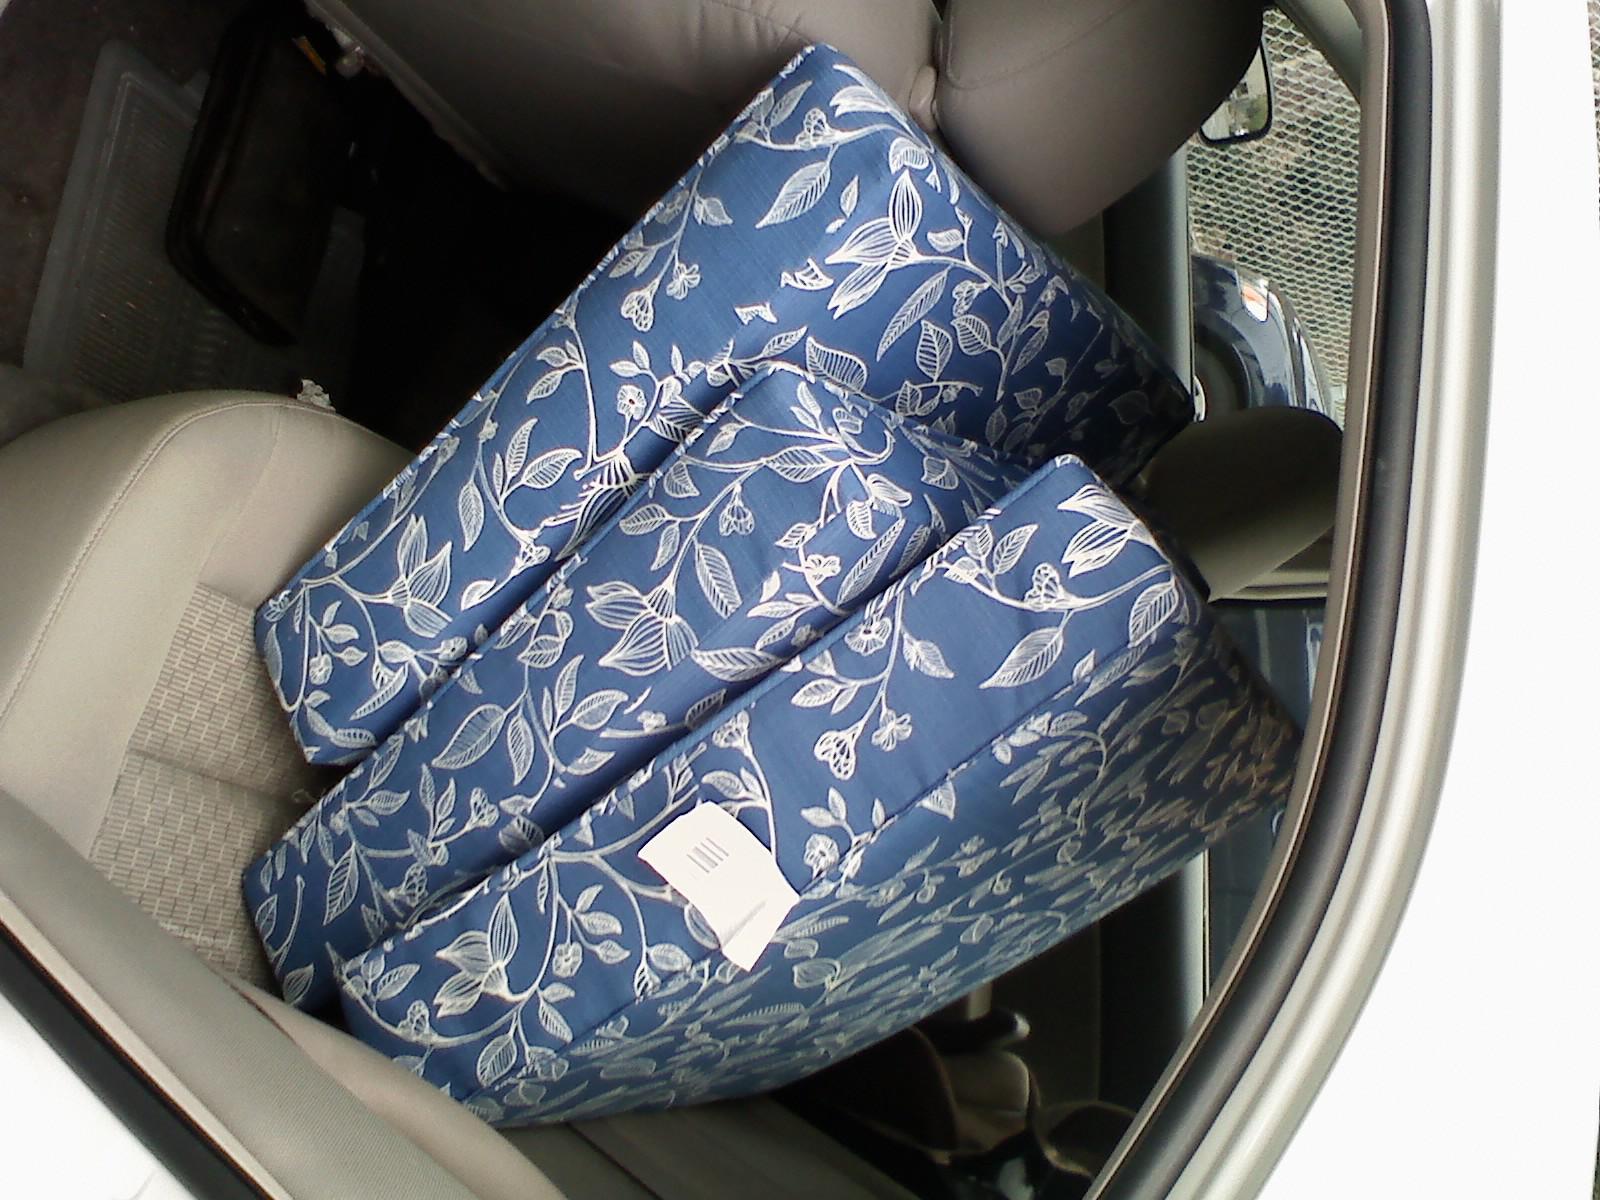
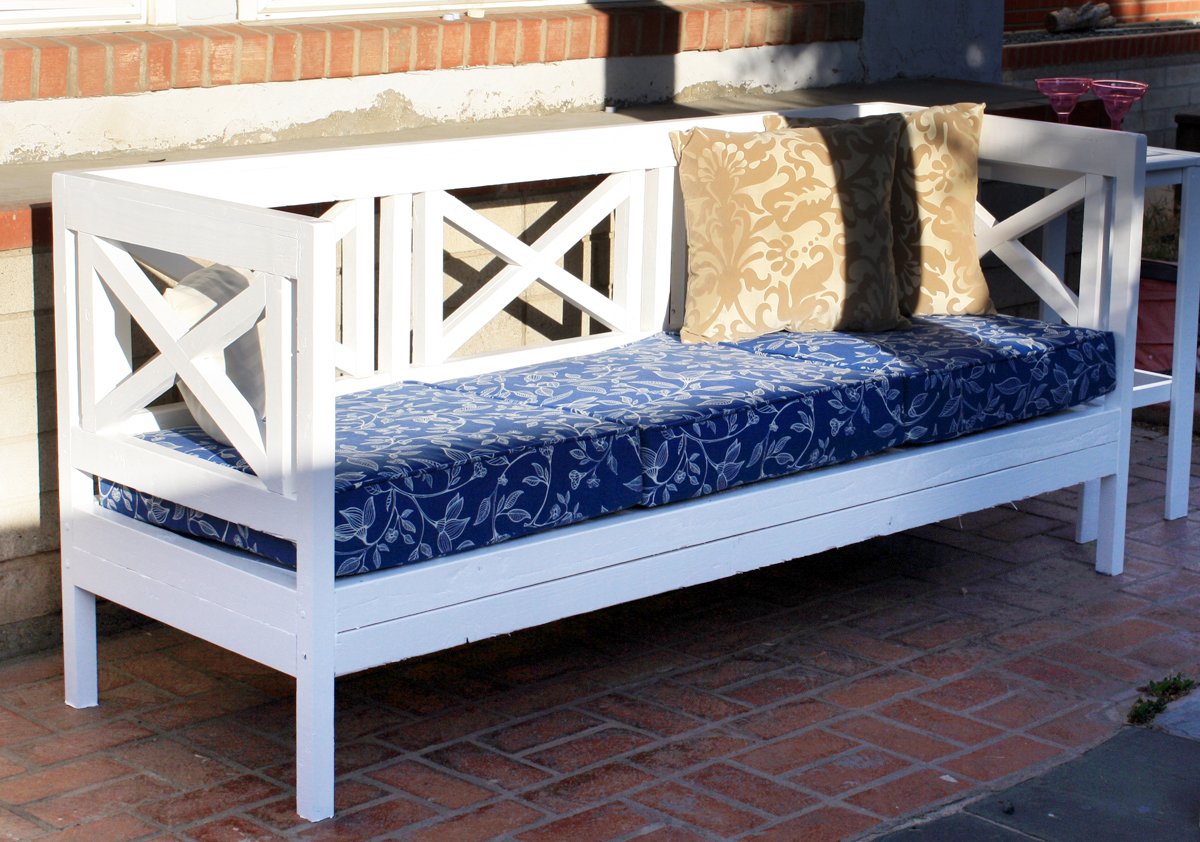
Cushions, the lipstick on this outdoor sofa…so hard to pick!!!
I’ve been eyeing beautiful cushions online that I could afford, and Walmart was the only place that had reasonable prices, although $20+ dollars is always a stretch for me, the ones I settled for were $24.00 each, and I cringed when I stepped to the register…but, if I were to go anywhere else to purchase and outdoors sofa as lovely as this one, I am looking at $500 easy!!! So, that helped me out in purchasing them. I love the pattern on them and I was debating on another set, which were red, beige and white with wide stripes, I loved it…but the Blue one, won…husband had to vote too.

Built from Plan(s)
Estimated Cost
$40 or less
Estimated Time Investment
Weekend Project (10-20 Hours)
Finish Used
unknown yet- any tips on finishing for outdoors will be greatly appreciated.
Recommended Skill Level
Intermediate

Comments

angie b (not verified)

Tue, 06/21/2011 - 01:50

Walmart has a big sale on outdoor cushions, and they're surprisingly beautiful. i just picked up red ones, comparable to the more expensive ones for sure,.
great job, it looks absolutely beautiful

JES

Tue, 06/21/2011 - 05:51

This is so lovely. You did a wonderful job on this! Oh- and Happy Birthday! :) Cheers!
J

LisaBMA

Sun, 06/24/2012 - 19:01

You did an amazing job! This is a piece that you and your family will treasure forever :)

Queen loft bed

We built ours for a queen sized mattress. We used the plans for the stair case since our son is only two and can't handle a ladder. We decided to go with stain on the trim instead of paint and feel this makes it look a little nicer. The inside has Christmas lights hung from the ceiling and a "secret hiding spot" under the stairs.

Estimated Cost
$300-$350
Estimated Time Investment
Week Long Project (20 Hours or More)
Recommended Skill Level
Intermediate

Husky Farmhouse Table

My brother and I built this table in about 4 hours over two days (finishing took longer) shortly after I purchased my first house. We needed a dining room table, and everything was super-expensive that we liked, so I luckily came across Ana's site and found this bad boy. I had never built anything in my life, but my brother had a little woodworking experience and, very importantly, some tools, so I ordered the legs from Osbourne Wood, got the rest from Home Depot and got building! We've gotten so many compliments on it. Thanks, Ana!

Built from Plan(s)
Estimated Cost
$400 (the legs were the majority of that)
Estimated Time Investment
Weekend Project (10-20 Hours)
Finish Used
Minwax dark walnut stain and Helsman spar urethane on the top and Benjamin Moore simply white on the bottom
Recommended Skill Level
Beginner

Comments

Table Pedestal Bases

Here are two table pedestal bases I made for a friend.  These are made from standard 2x8s (I could have used 2x6s, but I wanted enough extra to cut off the rounded corners), 1x6s and 1x3s.

More pictures are available on our blog here: http://famousartisan.com/hand-made-table-pedestal-bases/

Built from Plan(s)
Estimated Time Investment
Weekend Project (10-20 Hours)
Finish Used
chalk paint and wax
Recommended Skill Level
Intermediate

Leaning Bookshelf - Narrow

Submitted by jigganancy on Fri, 06/24/2011 - 23:03

I was in Home Depot one day and found a large piece of MDF & straight 1x4 in the "scrap bin". Because my to-do list is longer than any christmas list, I knew I could find a use for it. I ended up buying a quality piece 1x4 for the legs. The remainder were scraps. My total cost of the wood for this project was approximately $20.

My living room space is narrow and awkward, so I subtracted 4 inches from every horizontal measurement. This plan was very easy to adapt for your space.

To round the edges, I traced with a circular piece of tupperware, cut with my jigsaw and sanded. To build, I used a nail gun and kreg jig on some parts. I also stained before putting it completely together.

I'm very happy with these plans and how the finished project fits right into my space. This project was easy to follow and easy to adapt. I would recommend it to anyone starting out

PS: I could use some help with my shelf styling. Recommendations welcome :)

Estimated Cost
20
Estimated Time Investment
An Hour or Two (0-2 Hours)
Finish Used
Miniwax early american (1st coat) and miniwax ebony (2nd coat)
Recommended Skill Level
Beginner

Fancy x farmhouse table... my version!

My version is a 7' table. I made the distance between legs 60" with a 8" overhang on each side. The stain is Olympic Driftwood. I also added 1 x 2 pcs on the ends for a more finished look & to secure the 2 x10's. One last thing, I used a router to round out all the outer edges of the table top and the legs.

Highly recommend....

I used some T braces/plates on the bottom of the table to connect legs with 60" pcs. Otherwise there is nothing to keep the legs square with the table.

Love the look...thanks so much for the plan!

Other notes: I used treated lumber so it's VERY heavy.

Built from Plan(s)
Estimated Cost
$130 ($100 lumber, $30 stain)
Estimated Time Investment
Day Project (6-9 Hours)
Finish Used
Olympic Driftwood
Recommended Skill Level
Intermediate

Comments

stepdiva

Sat, 08/30/2014 - 19:33

hi there..your table is great! can i ask if u think there is enough room at ends of table for a chair with the 8 inch overhangs that u did? i would like to do the same. thanks so much!!!
Tanya

King Farmhouse Storage Bed

Submitted by emtrahan on Mon, 08/24/2015 - 11:57

We were looking to make a king size storage bed in the farmhouse style, but couldn't find anything that was exactly what we wanted, so we stole pieces from several plans and ended up with this! 

Estimated Cost
$300 for everything, lumber, paint, you name it!
Estimated Time Investment
Weekend Project (10-20 Hours)
Finish Used
Sherwin Williams escape grey and dover white, over a coat of kilz.
Recommended Skill Level
Beginner

Tryde Side Tables

Submitted by sooz122 on Tue, 06/28/2011 - 11:36

Made these for my guest bedroom!

Built from Plan(s)
Estimated Time Investment
Day Project (6-9 Hours)
Recommended Skill Level
Beginner

Comments

Patchwork Reclaimed Wood Headboard

I used the Reclaimed Wood Look Headboard plans to make a headboard out of found, discarded wood. The only new wood is the vertical 1x3s and 1x2s that form the sides of the headboard. The bed is also made of reclaimed wood, using a modified version of the Hailey Platform Bed plans.

The plans are modified to create a patchwork look using scraps of wood in different sizes and thicknesses. The wood scraps were cut so that when put together they make up the total length and width of the horizontal planks in the plans. I glued and nailed all the patchwork pieces to a piece of MDF board I found, and added a vertical 1x2 for added support down the middle of the back.

The top 2x4 is made up of two pieces glued end-to-end with dowels in between, because I didn't find any long 2x4s I could reclaim. I didn't put the top and bottom trim on the back side, because it was already quite heavy and sturdy.

Estimated Cost
30
Estimated Time Investment
Weekend Project (10-20 Hours)
Finish Used
The original finishes have been sanded off and the wood sanded to 240 grit before assembly. The finish is two coats of Cabot's water-based stain and varnish in Sutherland Teak, applied with a varnish brush and then re-brushed with a dry brush to remove the excess.

The sanding took a long time - it would have been a shorter project if I left the original finishes.
Recommended Skill Level
Starter Project

Comments

Bathroom Mirror

Submitted by AndyH on Thu, 08/27/2015 - 19:31

Bathroom mirror made from 1 by 6s and a 24 inch by 20 inch plain mirror.

Estimated Cost
$25
Estimated Time Investment
Afternoon Project (3-6 Hours)
Finish Used
Minwax Jacobean, then vaseline on the bits you want to show through the wood. Extra white satin paint sanded slightly and then another coat and sanded smooth by hand with 400 grit sandpaper.
Recommended Skill Level
Starter Project

Sliding Barn Door Loft Bed

Hi friends!

Jen Woodhouse here, super excited to share our latest DIY project with you - a Sliding Barn Door Loft Bed! We built this full-size loft bed for our 7-year-old daughter because we wanted to make the most of her small bedroom. And as an Army family, we move around every two years or so, so I drew up the plans so that the bed can be easily disassembled. We all love it so much and hope you do too! I'd love to see you build one for your kiddos (or yourself - no judgement!). Be sure to tag me @jenwoodhouse if you share photos of your build on social media!

And because some people have asked:

  • Our ceilings are 9 feet high.
  • Plans are for a full-size mattress, but I'll be drawing up plans for a twin size shortly.
  • Changing the sheets and making the bed is super easy because we use Beddy's (affiliate link) - Beddy's is an all-in-one fitted/flat sheet/blanket/comforter bedding set that zips up. It really is a game-changer!

Get all the details and the plans on JenWoodhouse.com!

Estimated Cost
$550
Estimated Time Investment
Week Long Project (20 Hours or More)
Finish Used
Benjamin Moore's Simply White latex paint, Varathane's Golden Oak wood stain, General Finishes Arm-R-Seal
Recommended Skill Level
Intermediate

Flat Wall Bookholders - Small Size

Submitted by cdswhite on Sat, 07/02/2011 - 17:38

We really needed a place to organize my daughters books in the living room. These were fairly easy to make - my husband built them and I did the finishing.

I HIGHLY recommend the water-based poly. It is almost twice as expensive but it isn't near as smelly and it has a much lower VOC level.

Estimated Cost
approx $10 for both (not including paint & poly)
Estimated Time Investment
Afternoon Project (3-6 Hours)
Finish Used
Black flat paint (2 coats) and Water-based Poly (2 coats).

We used black paint because I found a $5 gallon at HD from the discount shelf. I couldn't resist saving a ton of money and not having to pick a color and then wait around for a can to be mixed.
Recommended Skill Level
Starter Project

DIY Dollhouse

When my daughter asked for a dollhouse for her 3rd party I decided to just make her one and this Dream House plan was just perfect. I got a little carried away and added an extra floor. I also made some furniture out of scrap wood and I plan to add an elevator. This was a very fun project and my little one is already making requests for more furniture, pillows, blankets and a TV and video game room for the house.

I only spend about $50 total but that was using the cheapest wood I could find. The floors were made using plywood that was pre-cut at 24" x 24" . This project was a big hit with my little one. Thanks for the plans Ana.

Estimated Time Investment
Weekend Project (10-20 Hours)
Recommended Skill Level
Beginner