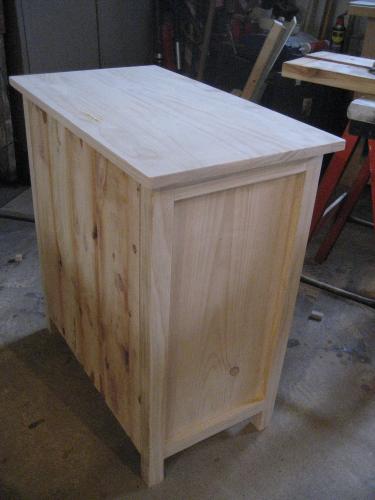
DIY Baby Changing Station
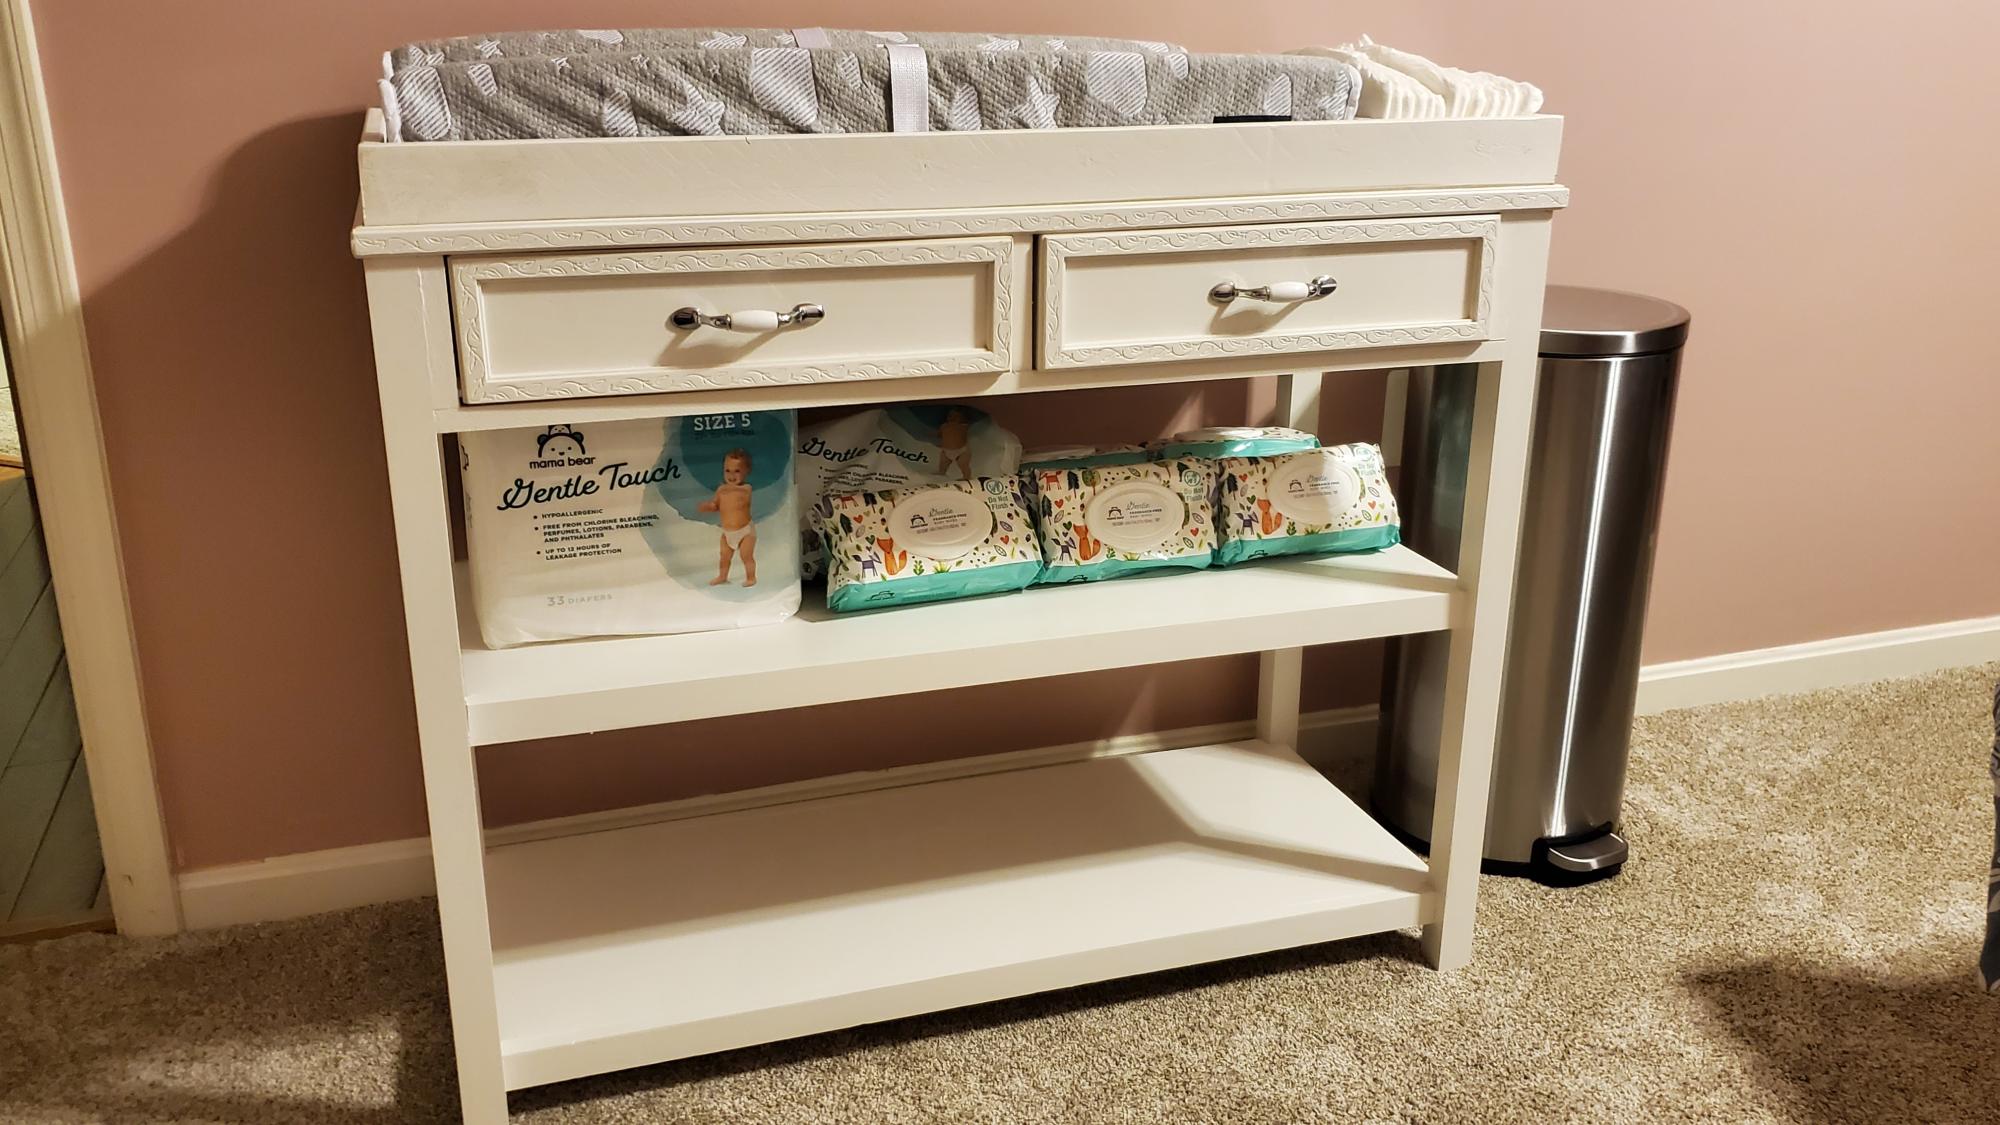
Ultimate baby changing table. Made for new granddaughter who just return from Germany with her soldier daddy and mommy. Thanks to Ana and Jen for plans and emails.
Built from Plan(s)
Ultimate baby changing table. Made for new granddaughter who just return from Germany with her soldier daddy and mommy. Thanks to Ana and Jen for plans and emails.
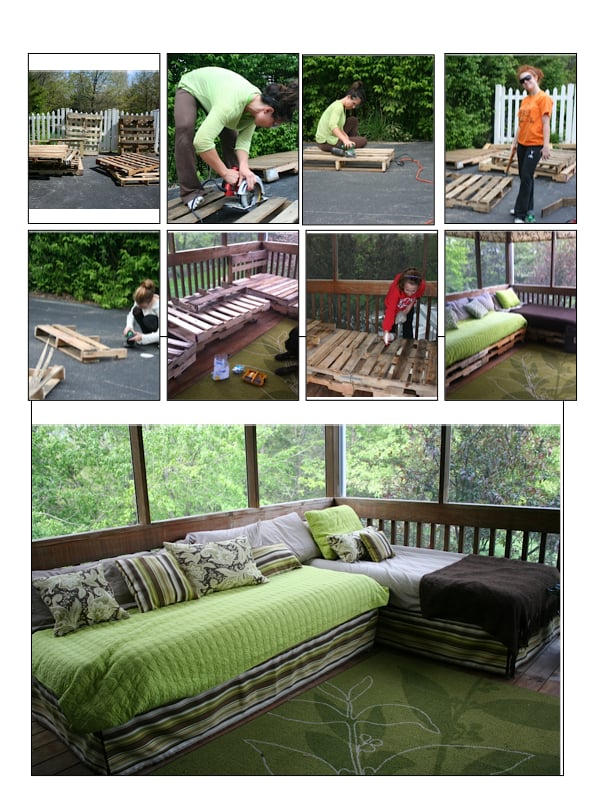
These are just a few of the photos we took while we built our first project. My daughters and I did it over a weekend.
We got 8 pallets from Lowes for FREE, and cut them down to fit two twin sized air mattresses (standard size) from Wal-mart ($15 each). We used about 1.5 pallets for the length, but stacked them two high for a total use of two full pallets, two half pallets, and then the remaining half pallets were used as back supports.
We sanded them after we removed any bad boards or nails.
Then, we used a circular saw to cut them to the appropriate length, added casters to the bottom pallets.
Secured the pallets together with brackets. Secured the back supports together with brackets.
Treated the wood, hated the stain we got at a special price from Menard's, so I decided to cover them with outdoor fabric.
Make the daybed skirts out of a flat sheet and outdoor fabric I got half off at Joanne Fabrics. Haven't sewn in 25 years!
Pretty happy with the first project. Still need to get cuter blankets, but I used what we had in the house.
Pricing:
Pallets free
Brackets and screws came to about $25
I didn't have the circular saw or sander so I had to purchase ($120 with some extra sanding pads)
Fabric $75
Air matresses $32
Sheet sets $20
Total: $275ish but I had sold some of my old patio furniture for $275, so it was a wash! And now, I have a circular saw and an orbital sander! Also, the fabric was optional. Had the pillows at home. Just recovered or took from the storage closet.
Now, onto other pallet projects! I have more pics if needed.
Fri, 05/04/2012 - 09:52
What a great job and so creative. I think it's awesome that you and your daughters did this together. Now, I'm going to go collect pallets.
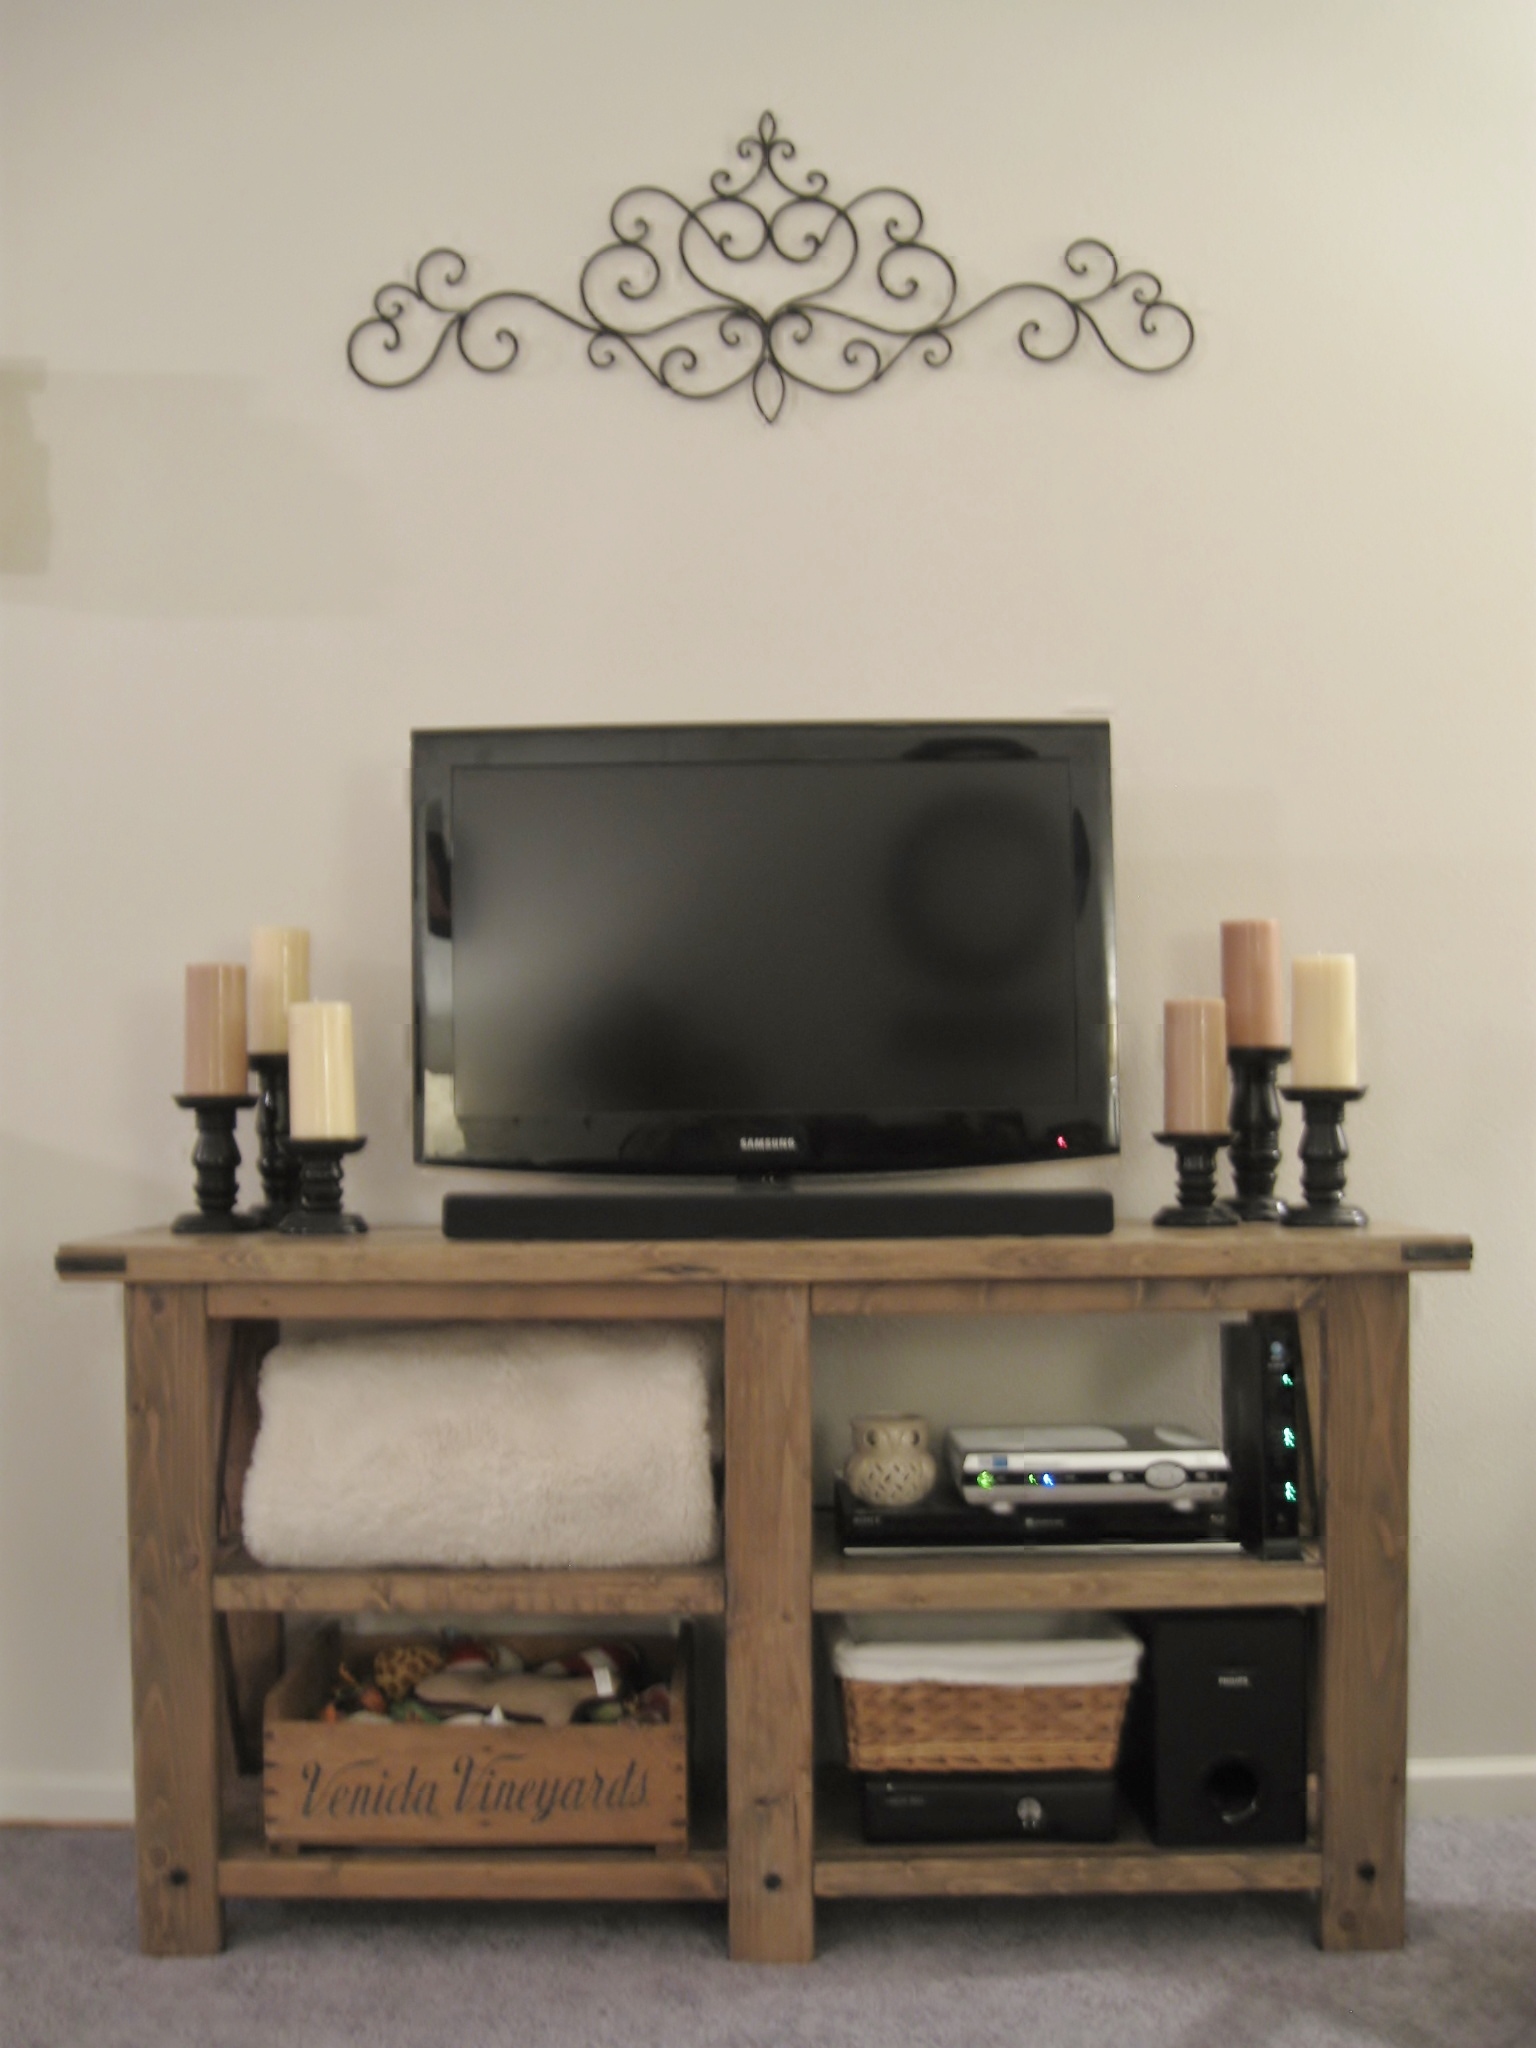
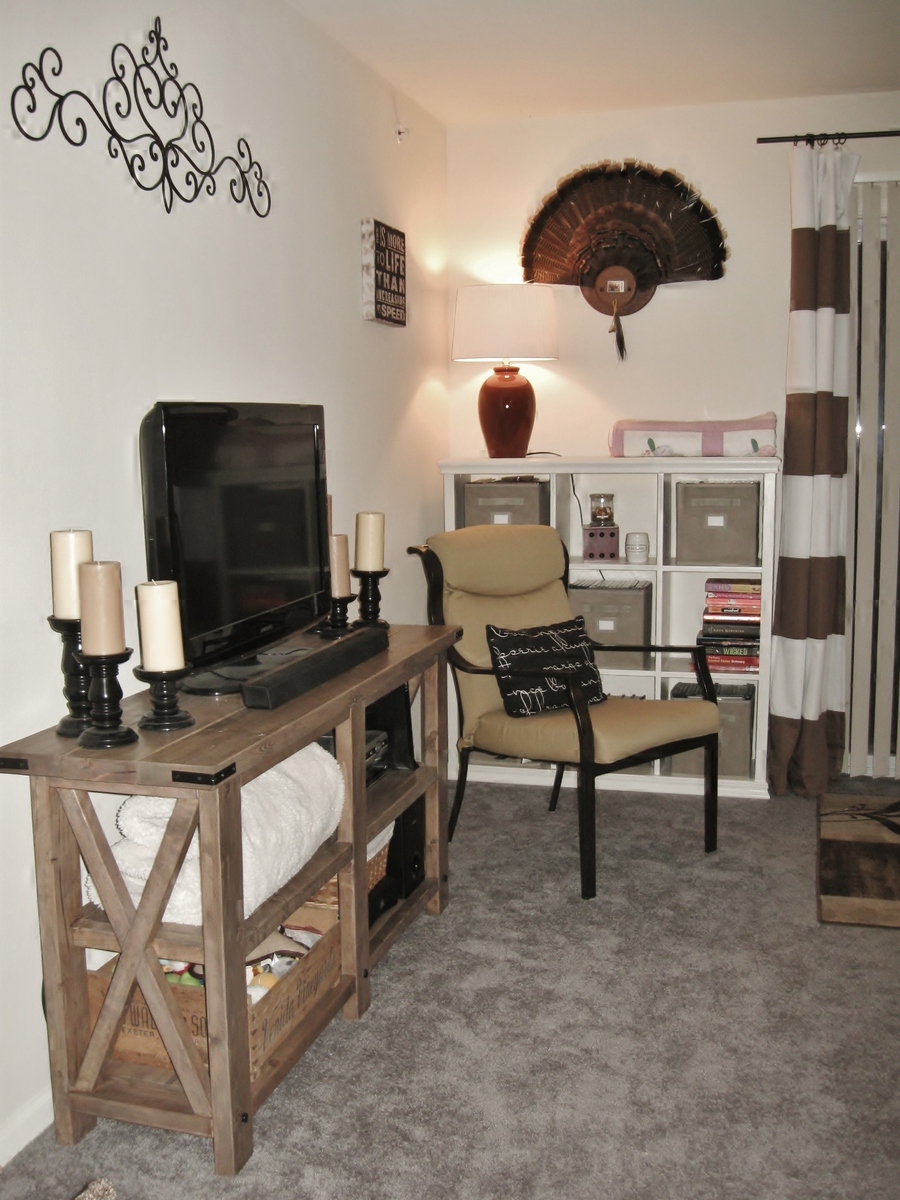
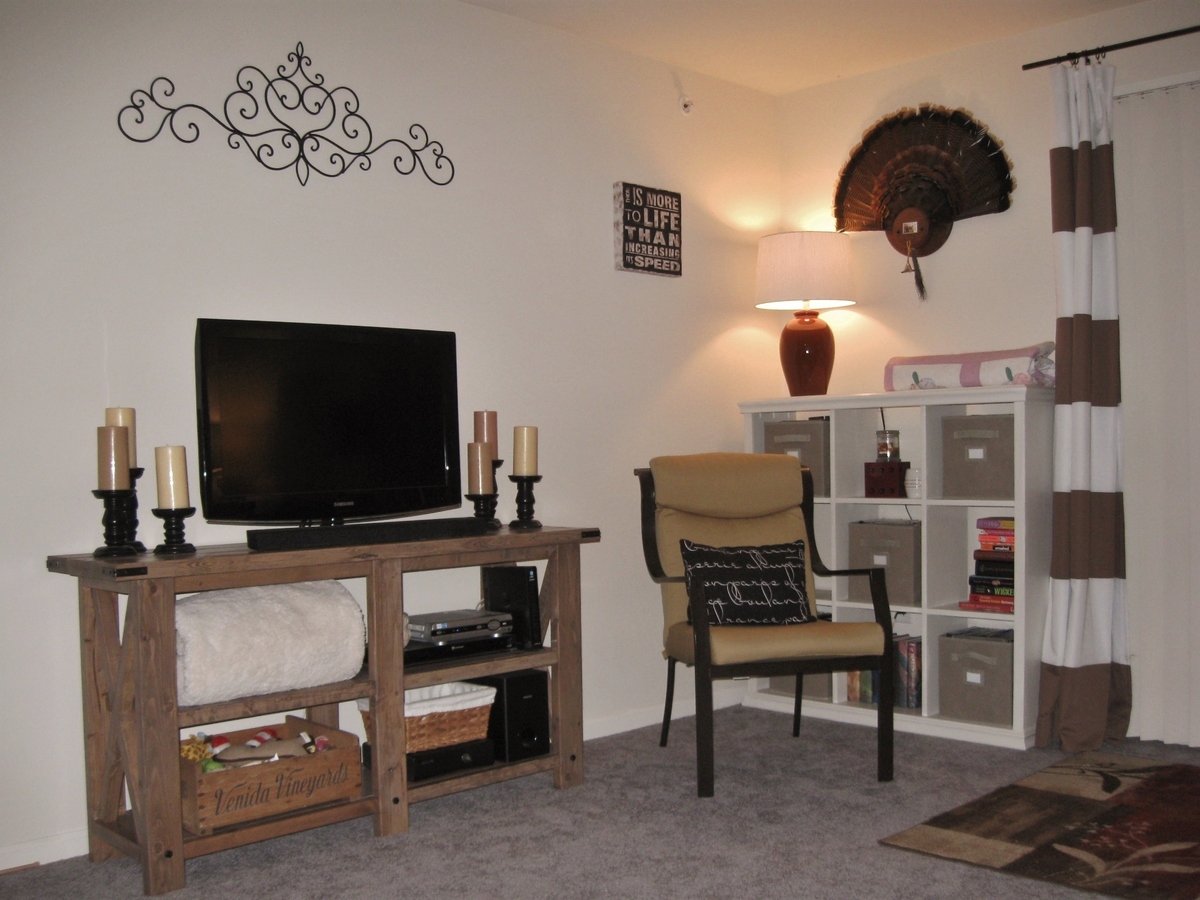
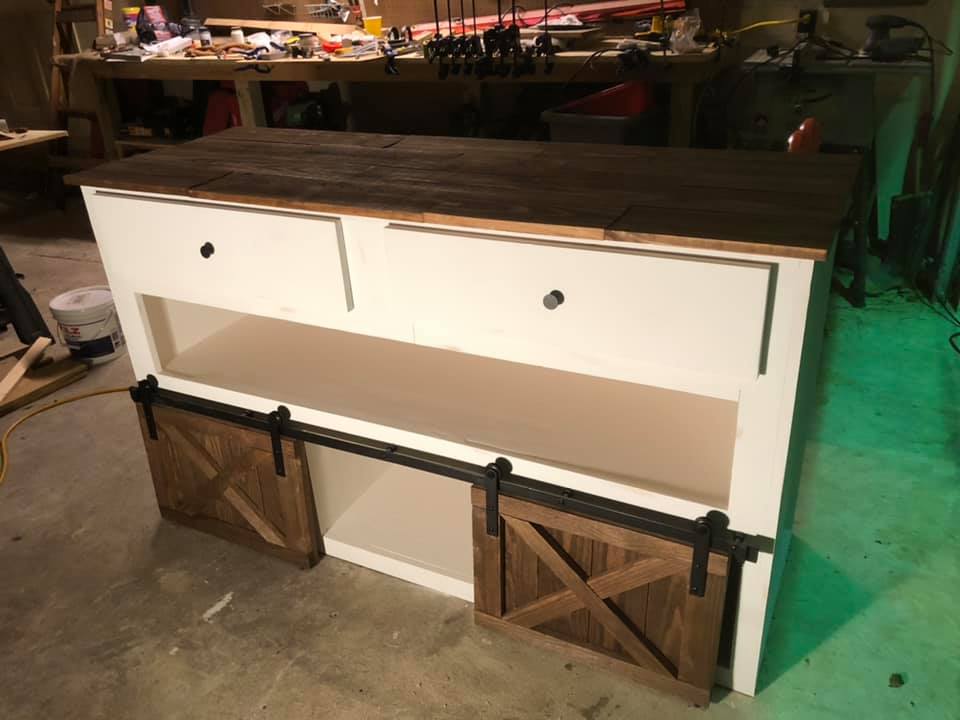
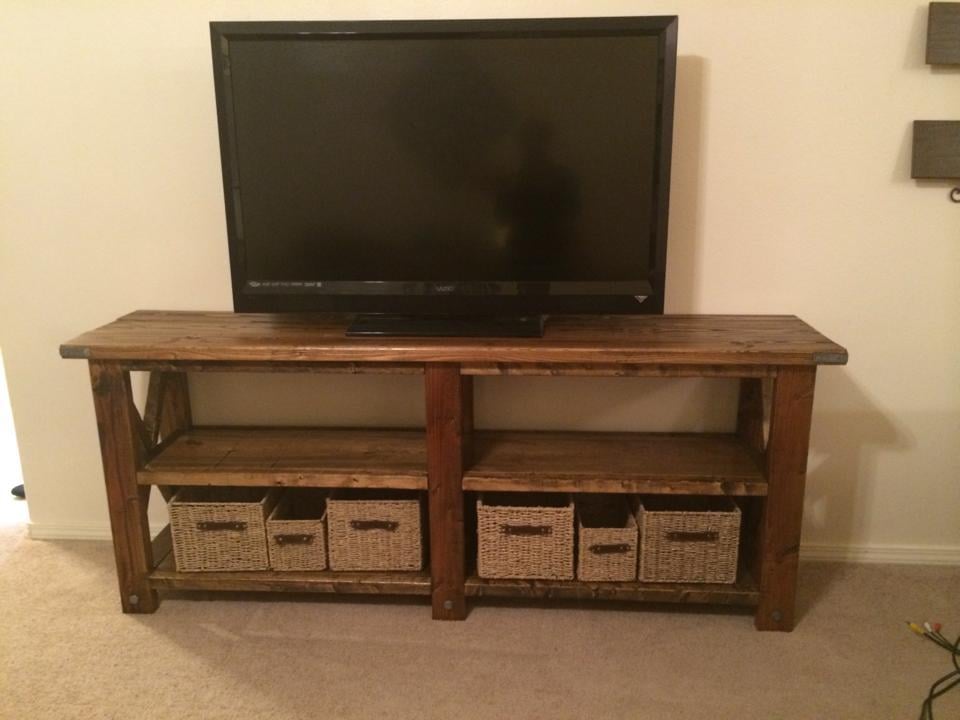
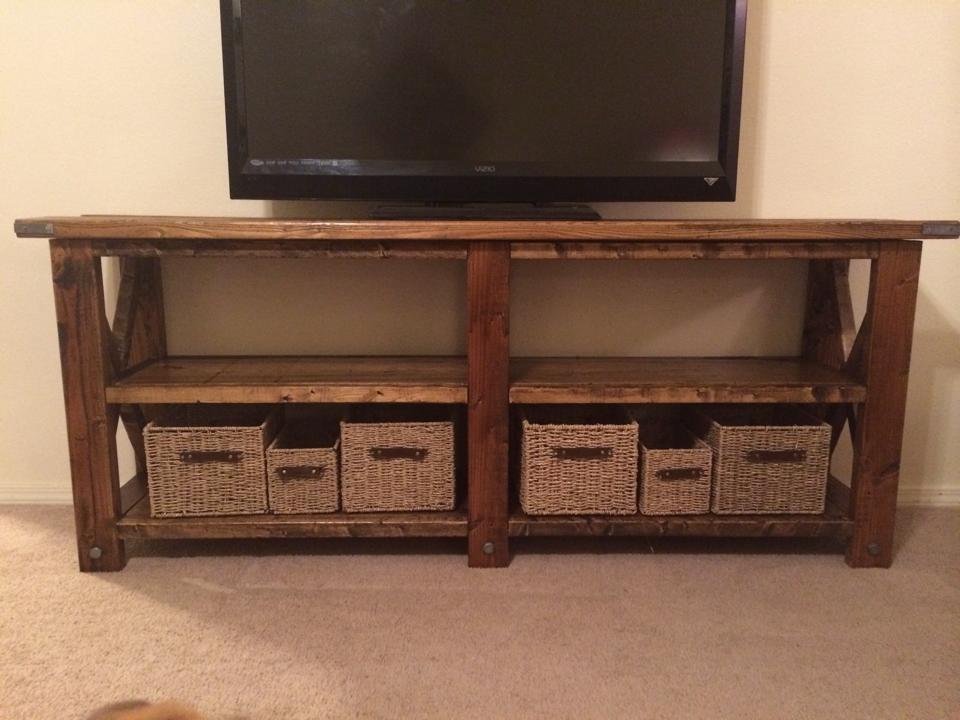
This is a modified version of the Rustic X Console, it isn't as long as the original.
I created this, with a little help from my Fiance, as a TV console. We have made furniture in the past, with plans from Ana White, but this is my favorite piece so far.
We looked for months for the right piece of furniture that wasn't extremely expensive or made of cardboard. Instead we found the plans for the Rustic X Console and thought it would be the perfect fit. I also created a cubby bookshelf at the same time to store my hundreds of movies.
Eventually our entire living room will be homemade, the next project on our list is the matching coffee table!
Wed, 04/16/2014 - 14:21
Beautiful. We are planning on building this as well and wanted a smaller version. Can you by chance share your measurements? What size TV do you have on the console? Thanks!
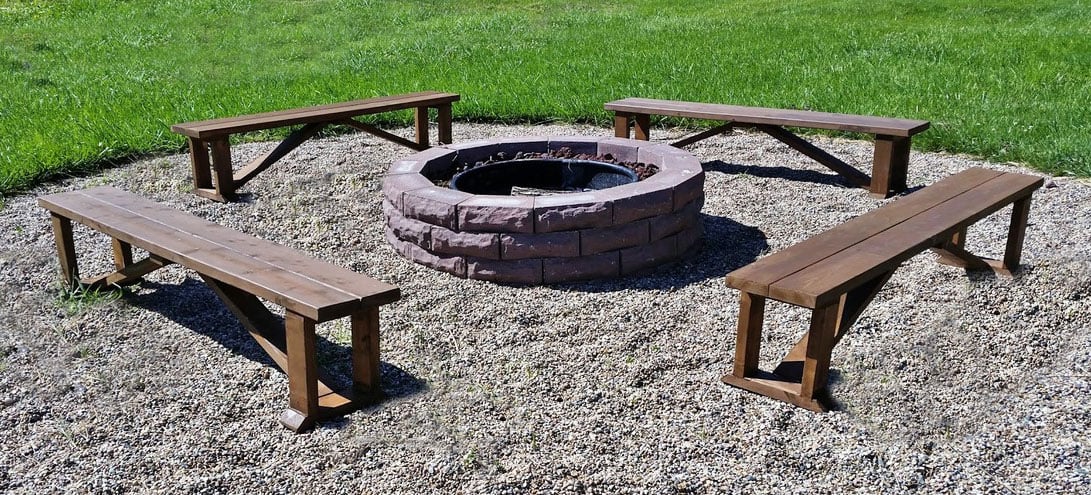
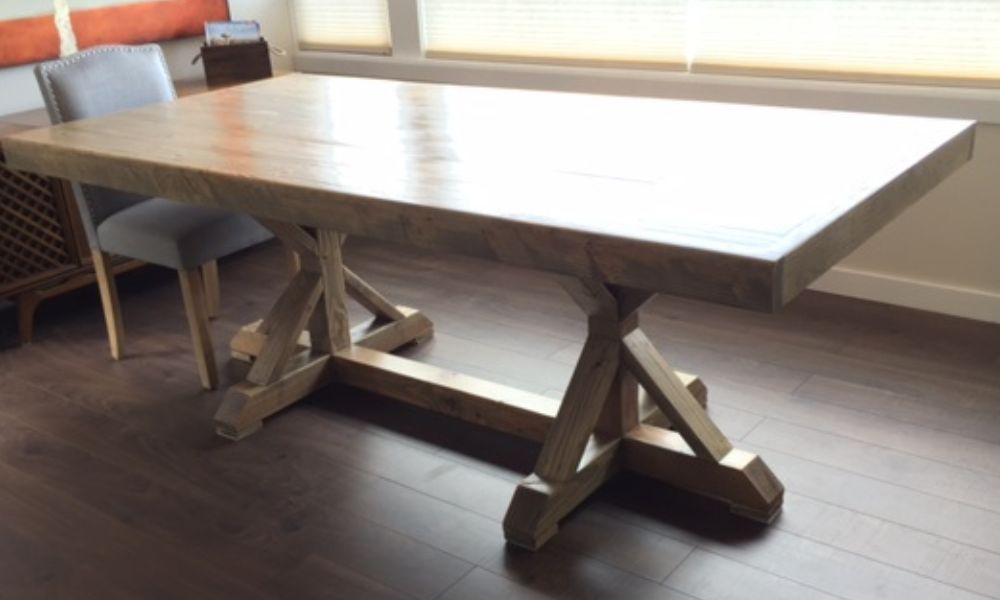
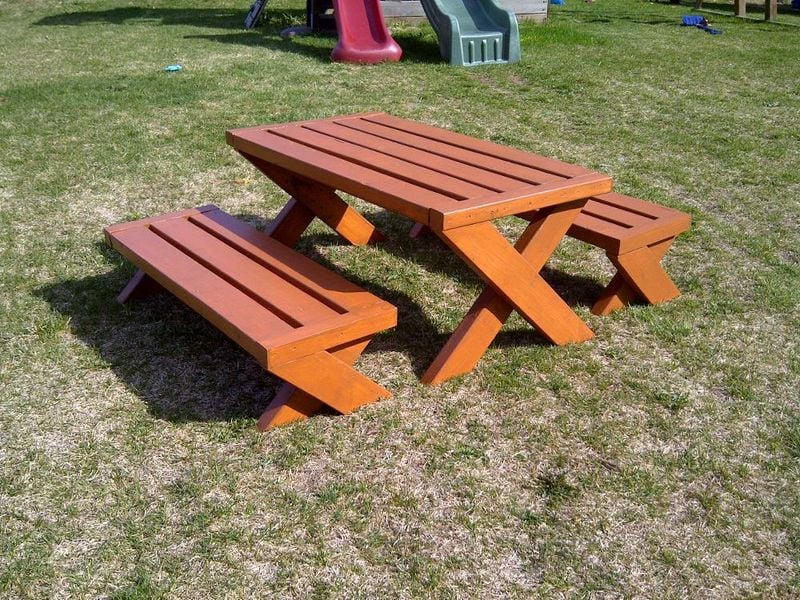
I built these benches out of cedar, which added considerable cost to the job. The total cost for four benches (including stain) was about $240. I used clear cedar and Sikkens outdoor stain in chocolate brown. I also modified the plans slightly to create stronger joints, using rabbet and mortise joints and Titebond III (waterproof) glue. This only slightly changed the dimensions, but I think it will make the benches last for years to come. It did add some time to the plans, as I think butt joints would've taken only 2-3 hours total before sand and finish.
Built by Christ Rutledge

Built this for my girlfriend and my apartment. Used a method of painting and sanding and finished with a stain. Still plan to put some sort of protective top coat to give it a more even finish.
Mon, 12/16/2013 - 15:43
Do you remember what color of paint or stain you ended up with? I love the color and am going to be making this piece in the morning.
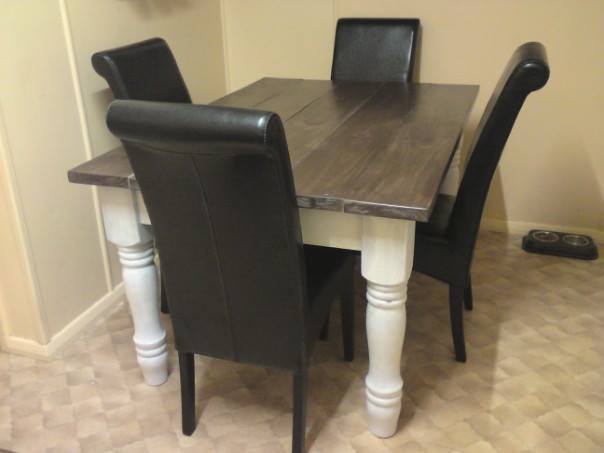
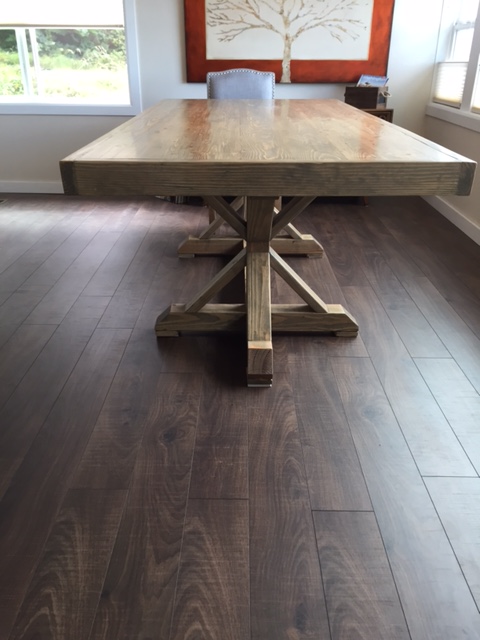
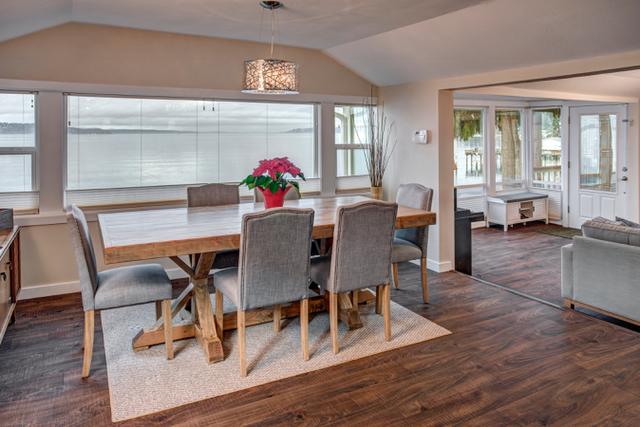
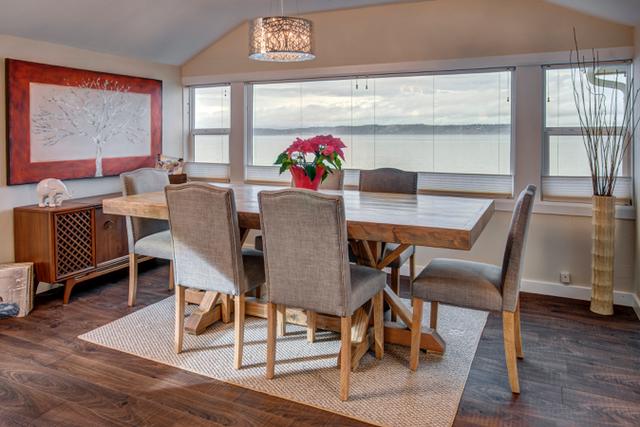
loved the husky dining table on Ana's website so sort of followed the plans this is how mine turned out :-) still in the process of distressing the legs and then varnishing
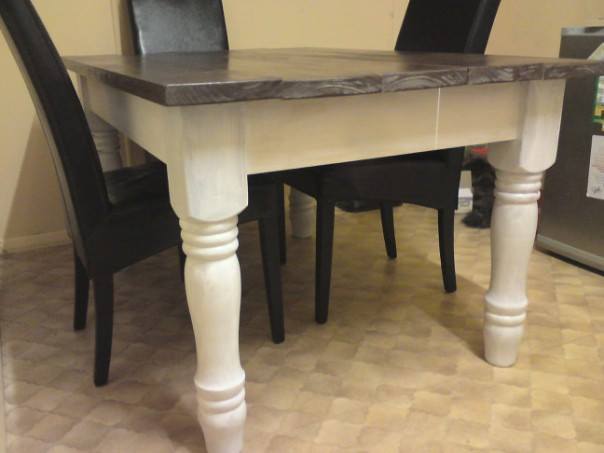
Needed a classy table...
Purchased the chairs separetely. Sanded the legs from black paint back to wood, and stained them to match the table.

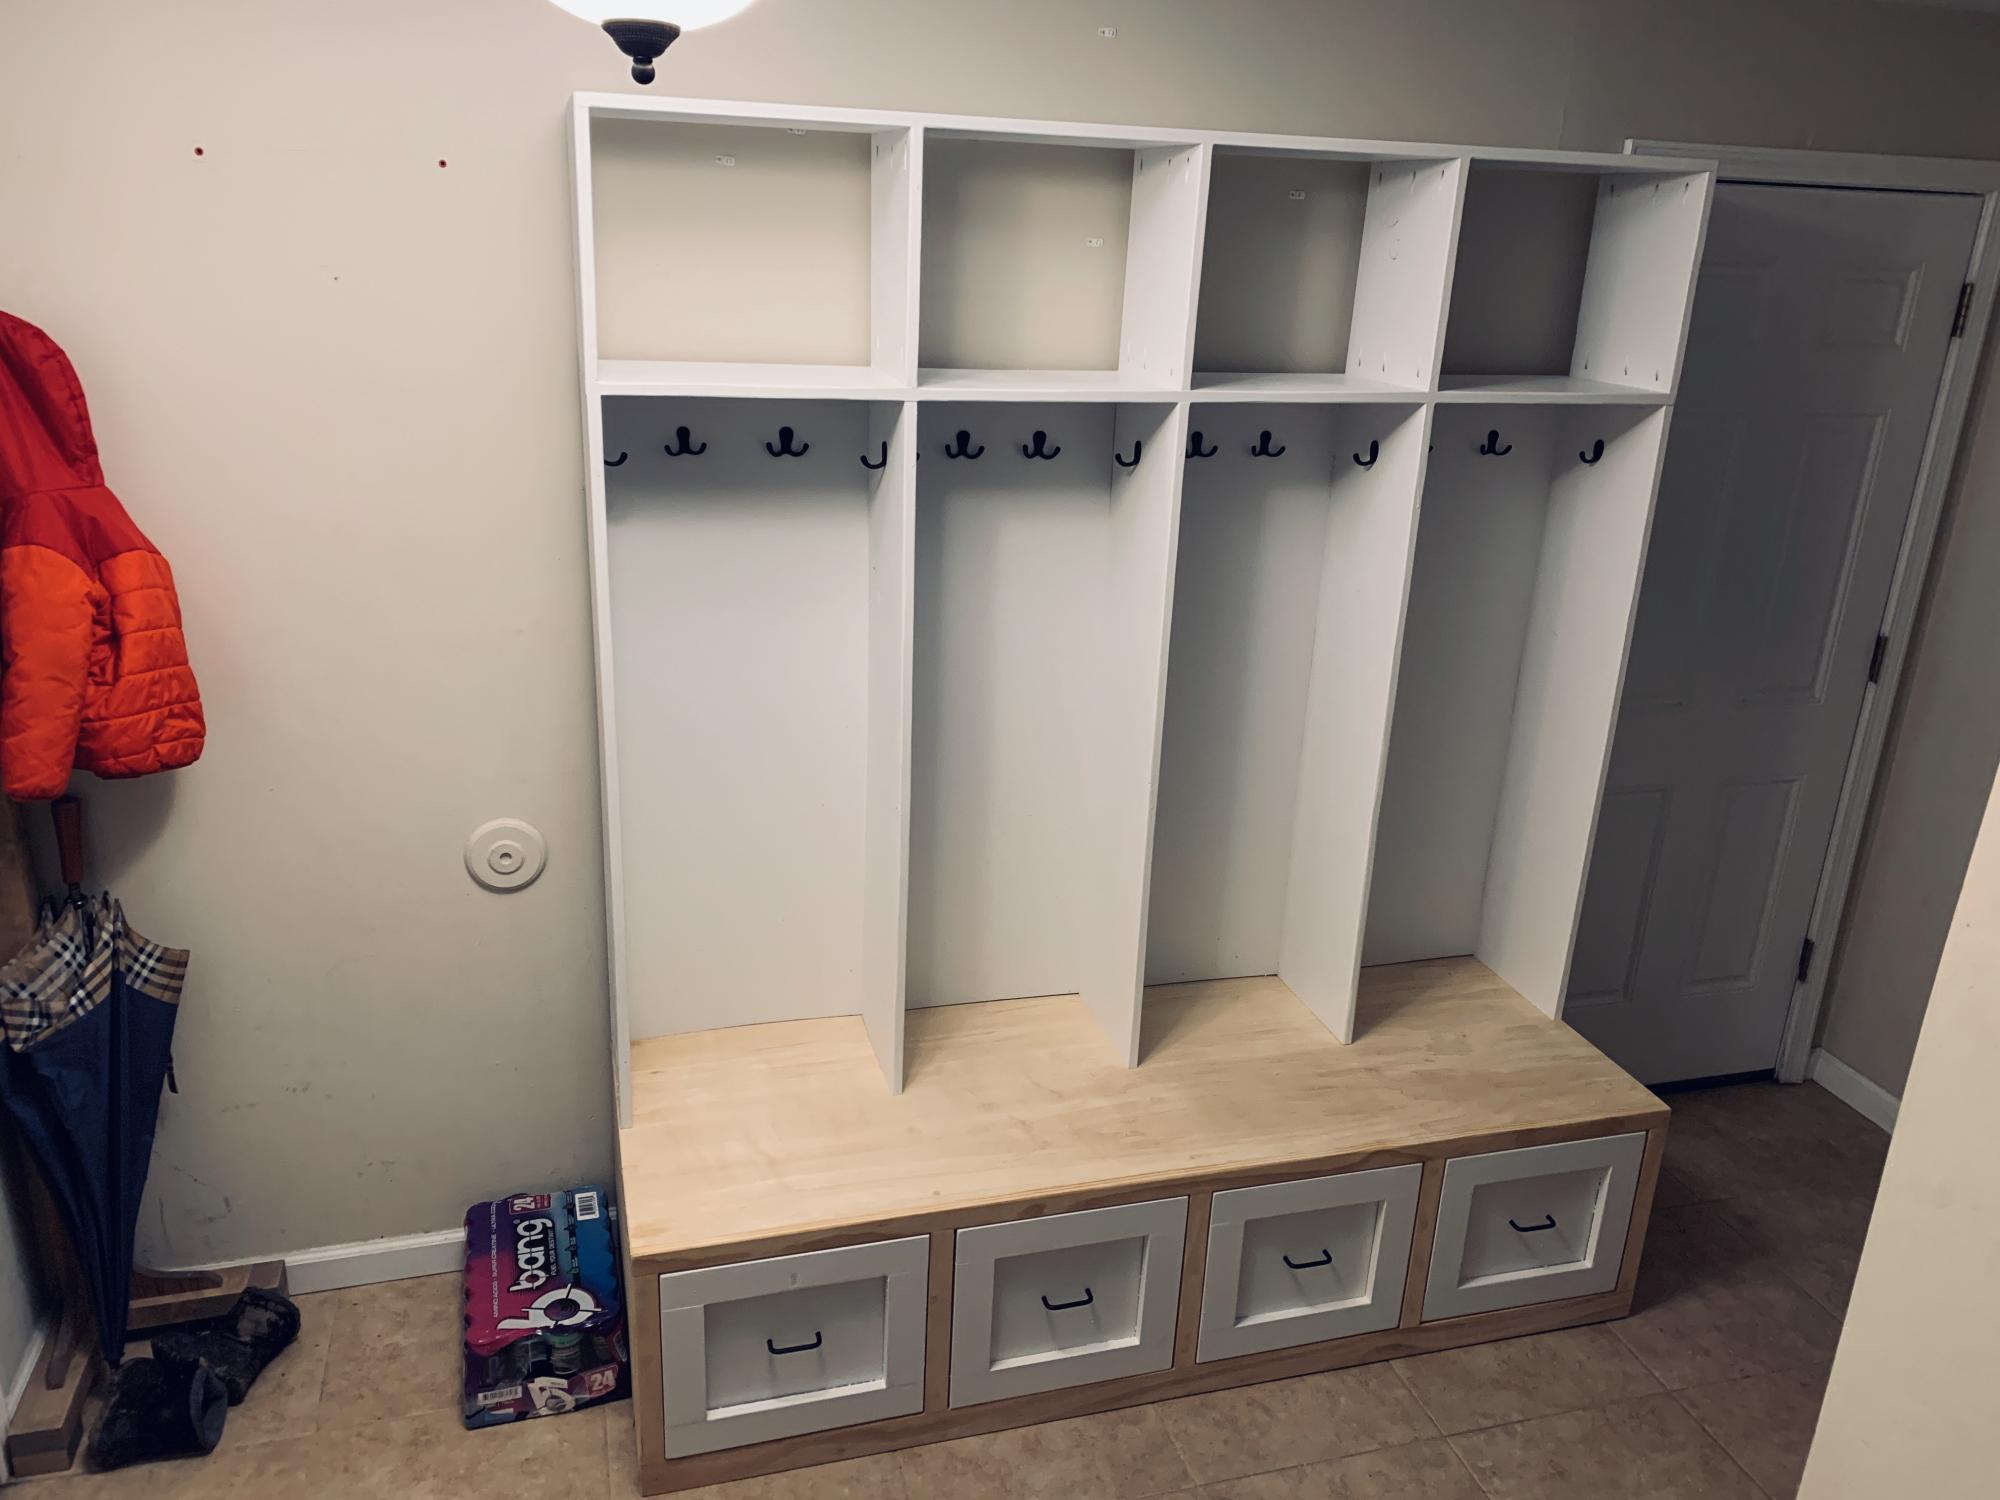
I kept the lockers super simple, but the drawers / bench followed me the plans. Thanks as always for the plans!
My first project on my own!
Wed, 05/14/2014 - 00:46
For the end pieces at either end of the top of the bench and table, how did you secure them to the legs? It doesn't look like you cut the extra pieces to fill in the legs so that they are level with each other to make the base. I like how this version looks but it seems like half the 2x2 is barely attached to the legs. I'd love to hear how you did that so I can copy, thanks!
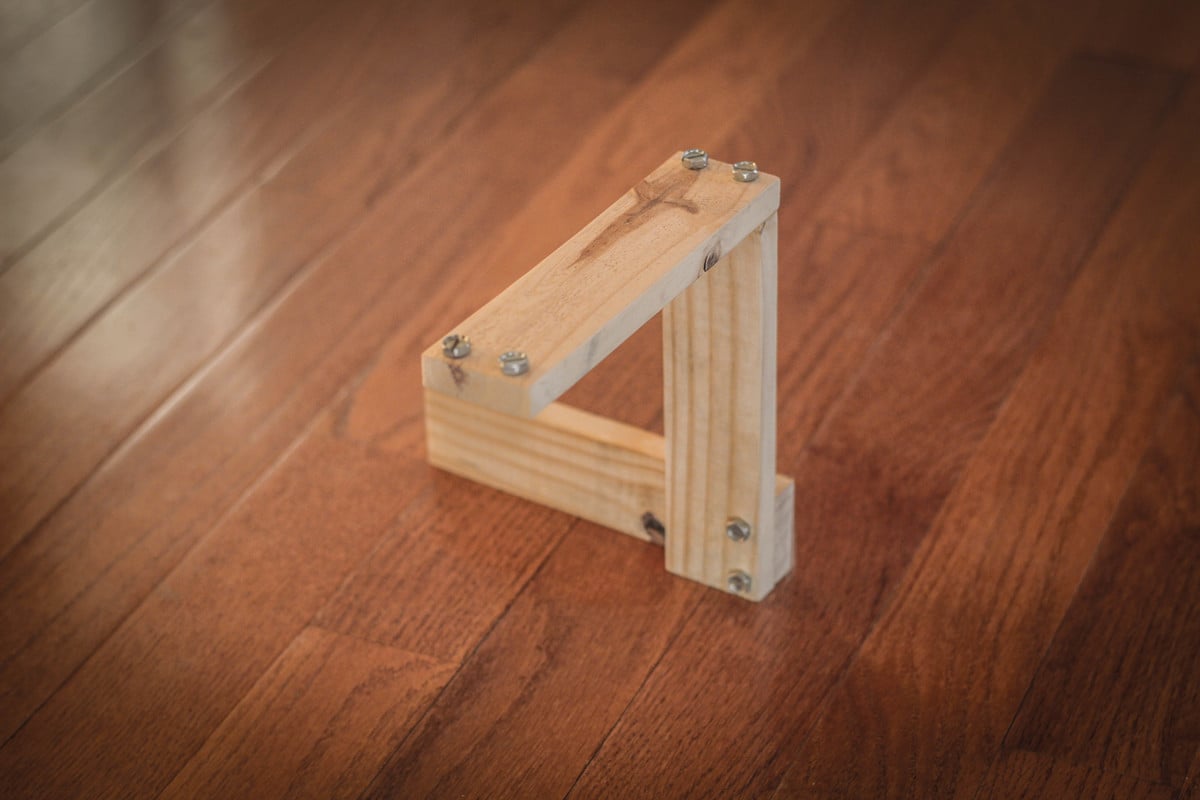
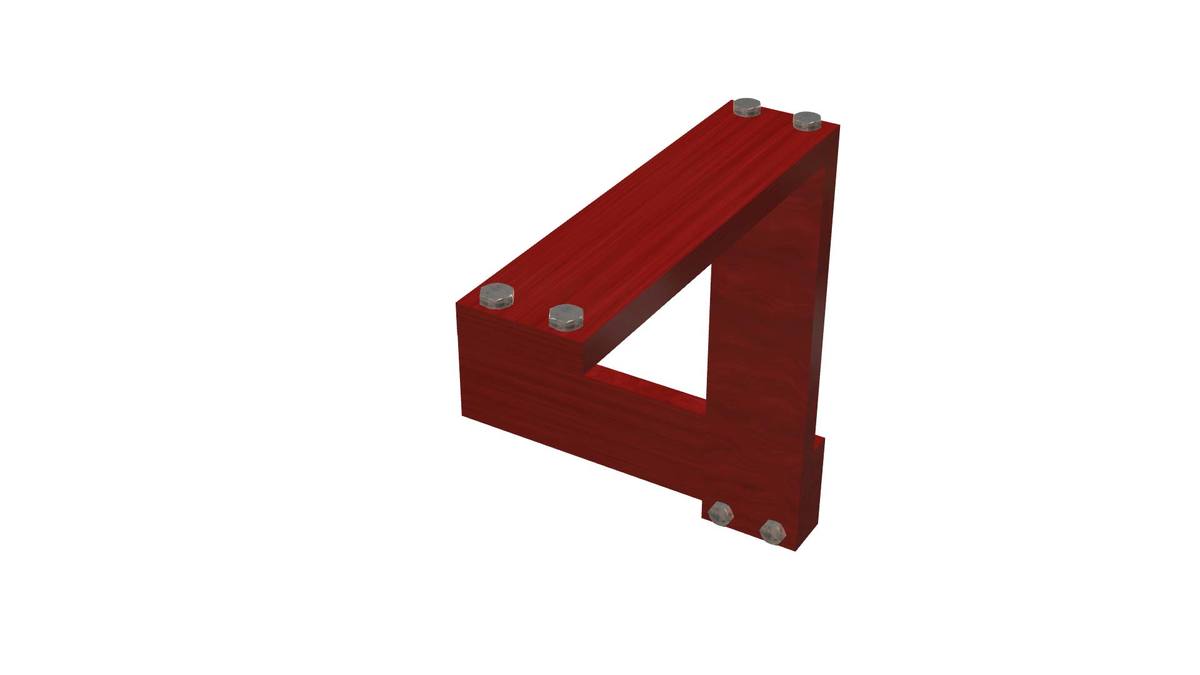
This is a modified version of the Penrose “Impossible” Triangle which is an interesting example of how the brain can be fooled. The main difference in this version is the use of hardware to simulate the triangle side connections. Watching the video is the easiest way to see how it works.
https://www.youtube.com/watch?v=_B2D5h74mMA
Please check out my other woodworking videos as well. Each video has a PDF drawing of the plans in the description.
https://www.youtube.com/playlist?list=PLcLIJdluqiyiI7J9qp5VAXrALMOftr0RT
My daughter and I built it together. We had great fun. She is totally into the Kreg Jig and the brad nailer now. I'm sure we'll find something else to build. What a great father daughter activity. Thanks for the plans!
This was the first thing me and the hubby ever built. We had lots of fun and even got the kids involved. Pretty sure we got the building bug now! Thanks Ana for inspiring families to build better lifestyles one board at a time. :)
First project attempt. Instructions were really easy to follow. The X's were quite challenging at first, because I only had a Miter Saw. After many trials and errors, I found that building and attaching a 90 degree fence on the saw and then cut the 60 degree angles at the 30, gave beautiful 60 degree cuts. I used Min Wax Special Walnut Stain. I didn't do a lot of sanding because I wanted a gritty rustic feel to it. I used common pine boards. For the hardware, I bought zinc plated L brackets and Large bolts. I used a blow torch to melt the zinc to give it a great look.
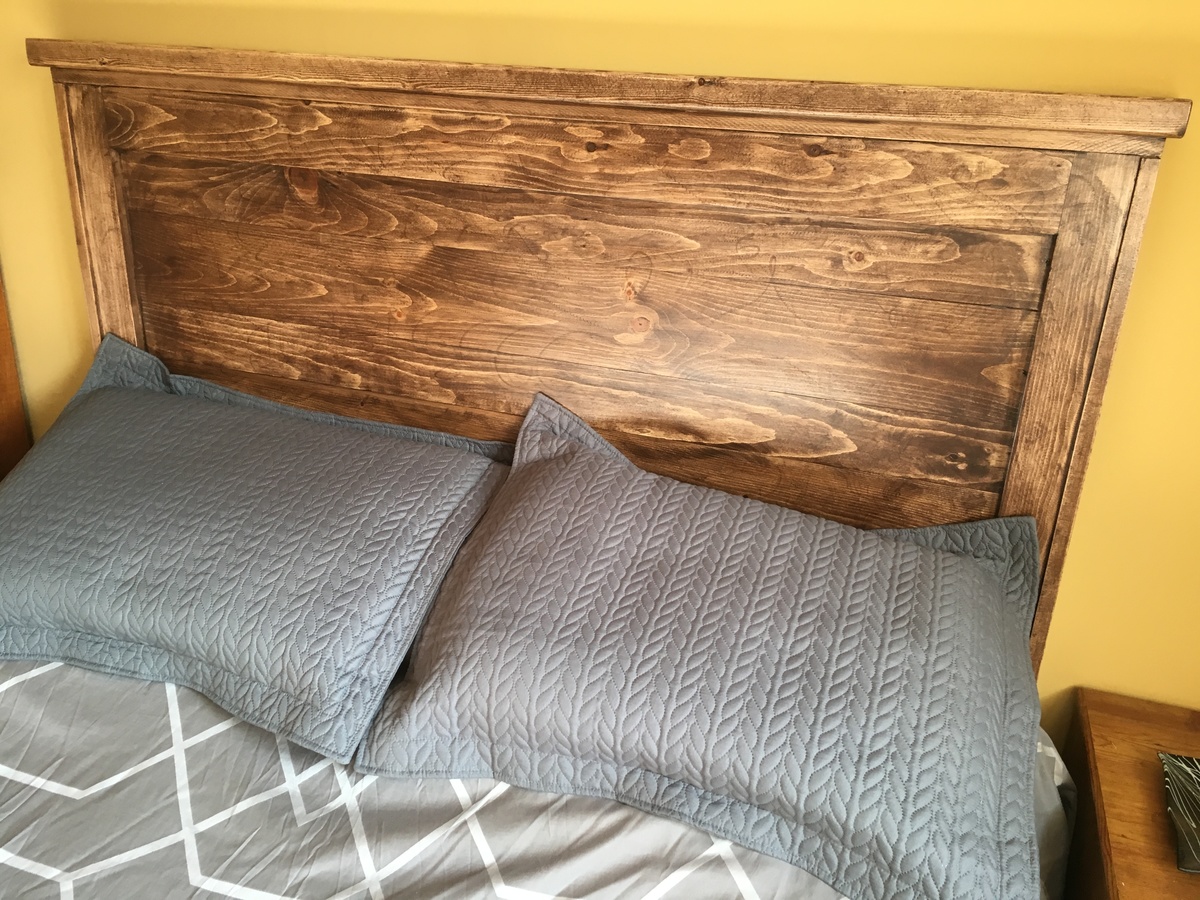
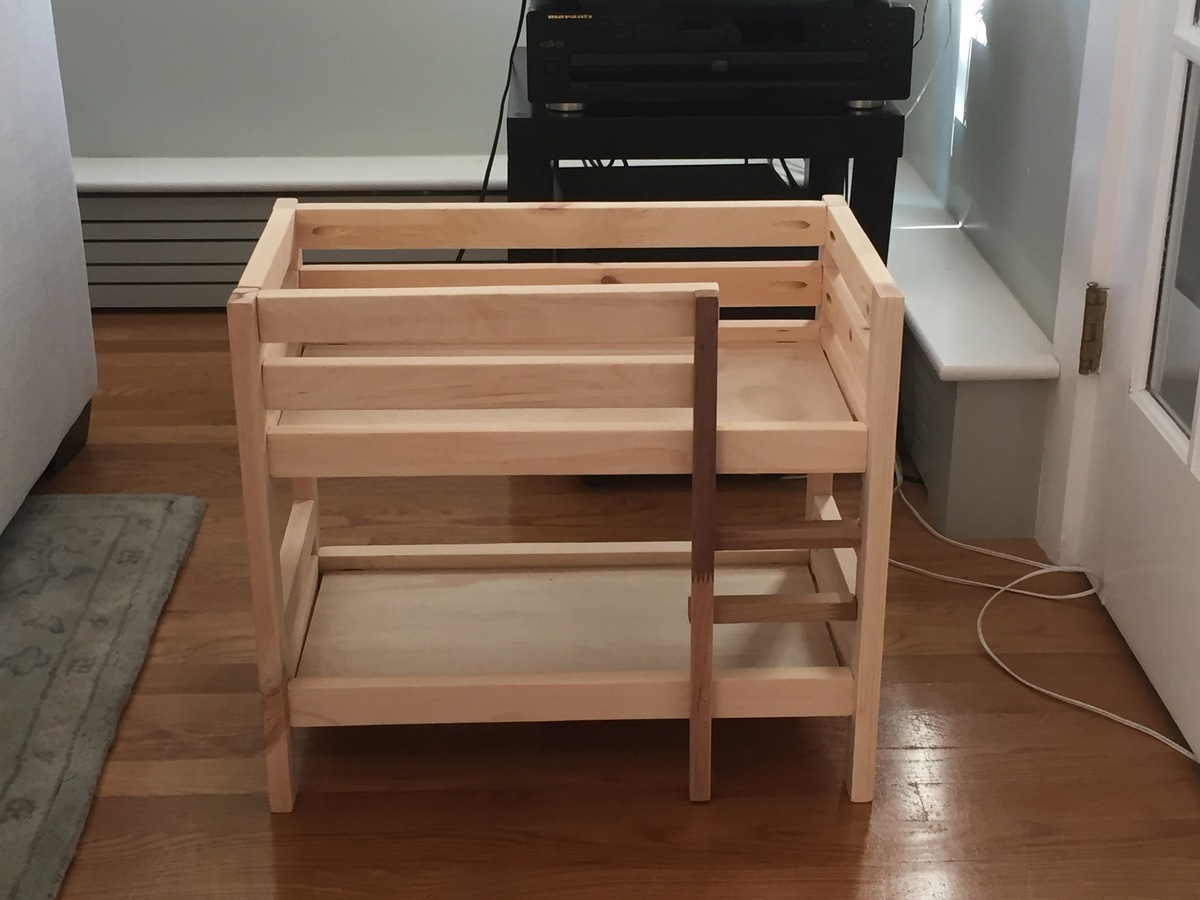
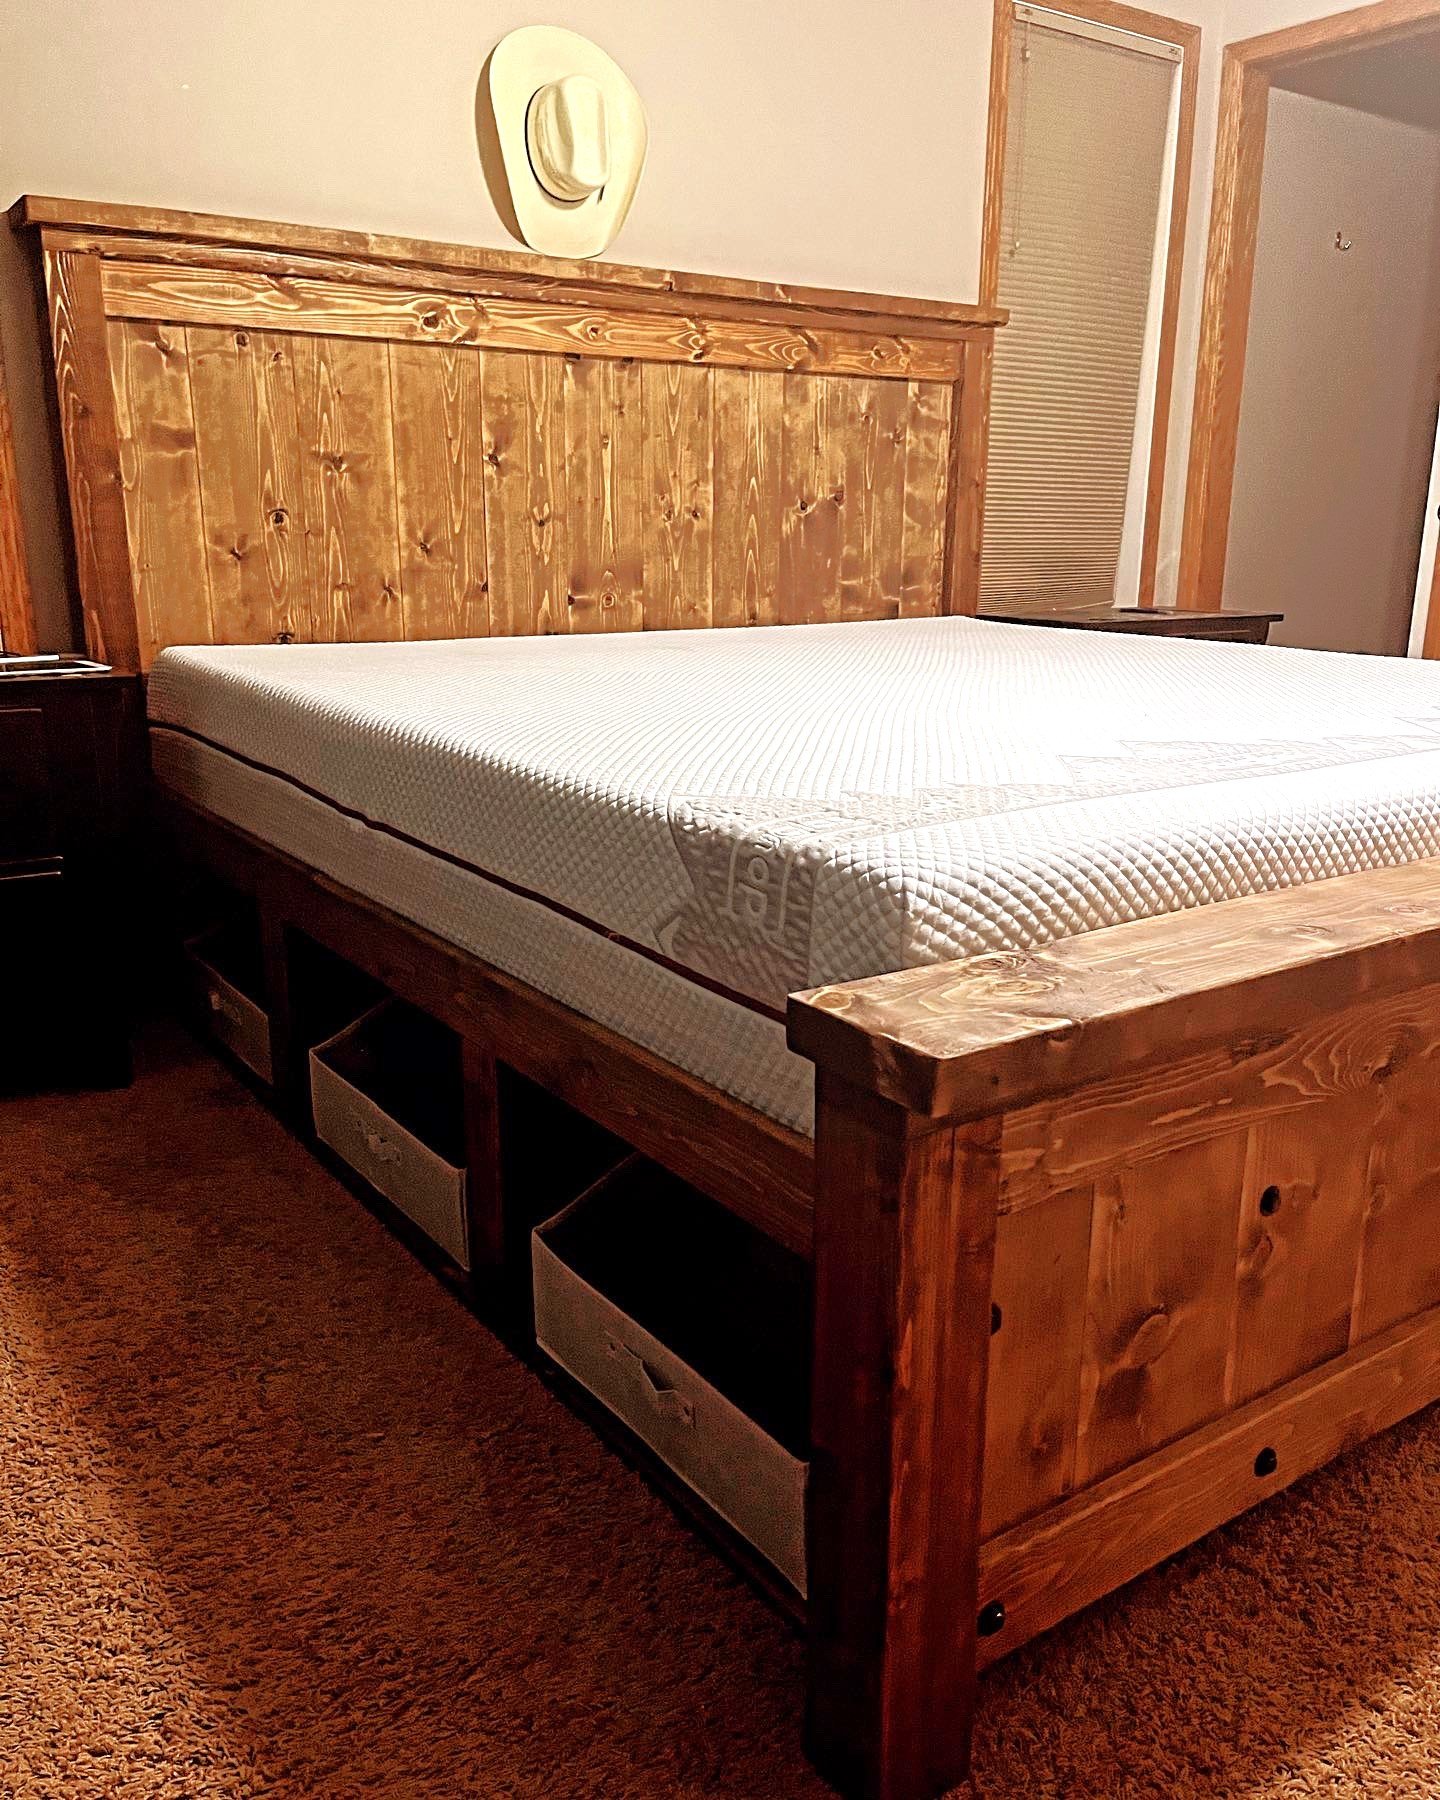
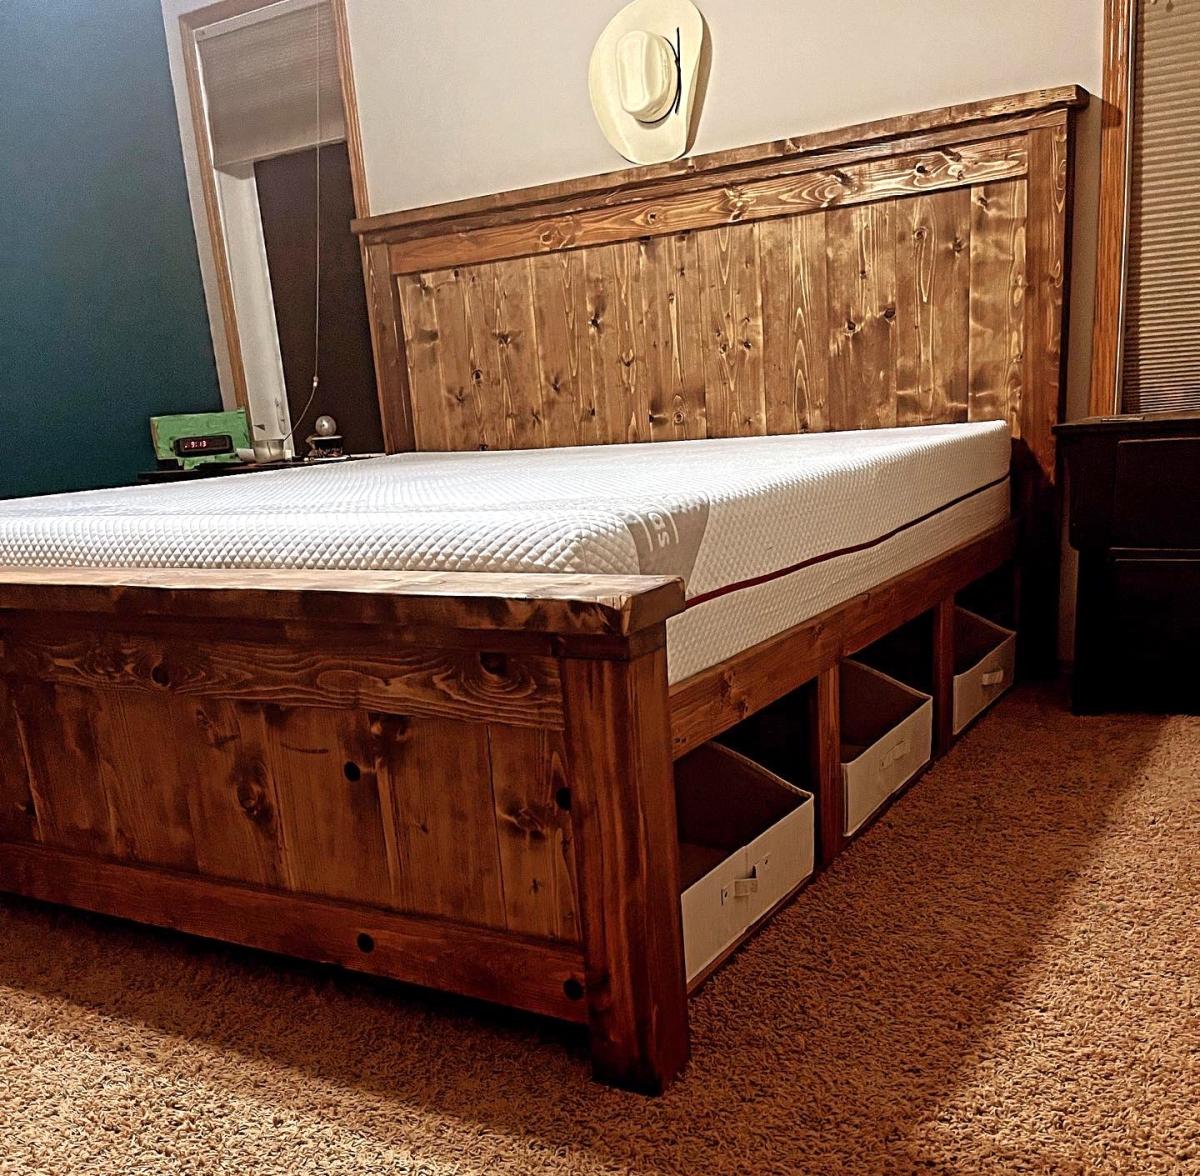
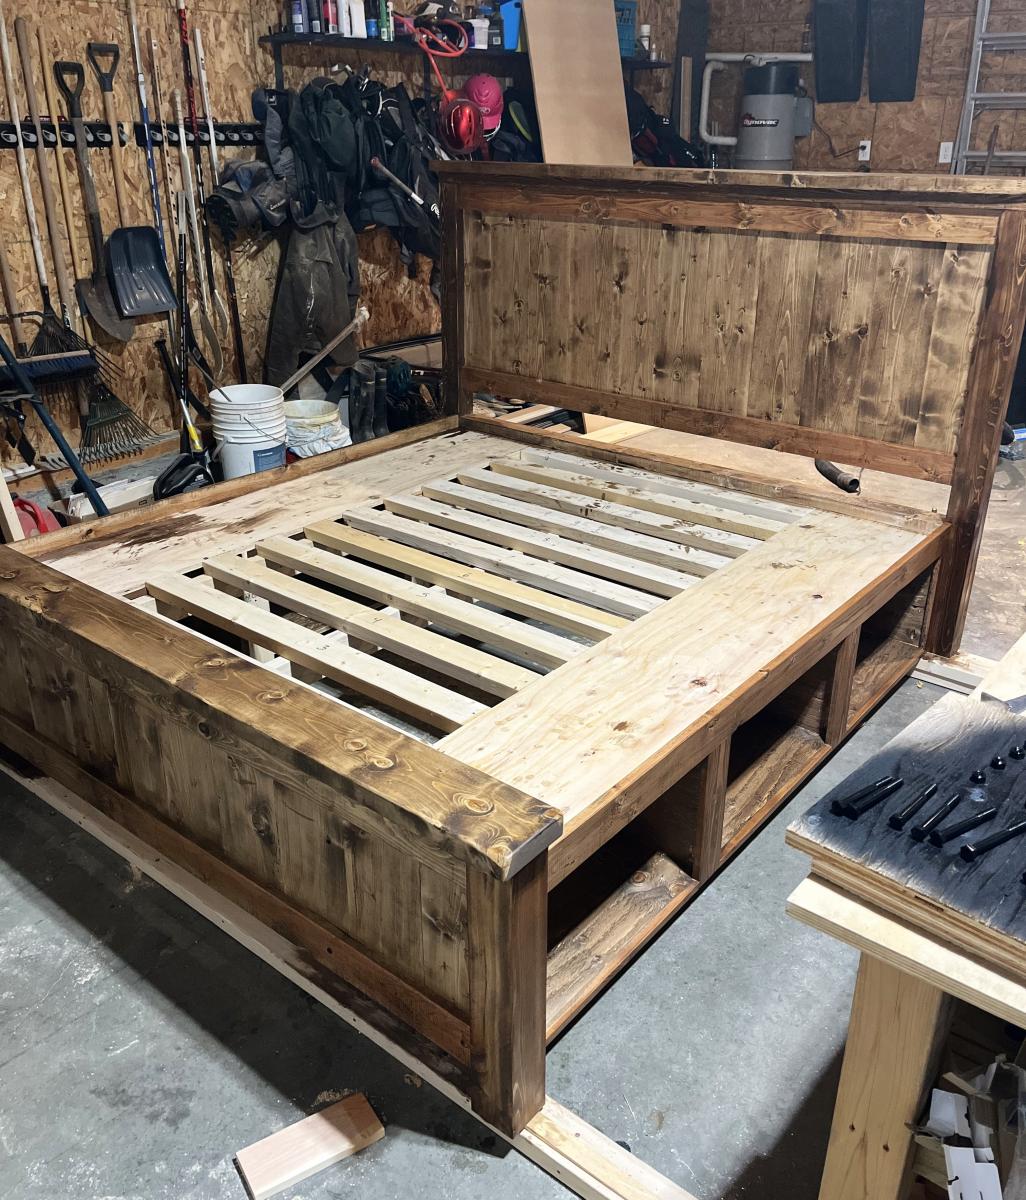
so I tweaked this plan and made it a double bed for our spare bedroom.
Wed, 06/24/2020 - 13:58
Can u get the measurements for double size bed please?
Thanks
I made 2 of these beds this weekend. It was pretty fun - I made a video of me making it and put it on my youtube
I made these for a friend and just loved how they turned out. I liked the stained and black combo it turned out pretty good. I will be making some more for my son and and friend of his along with the sofa as an addition.
@kurt_lansing
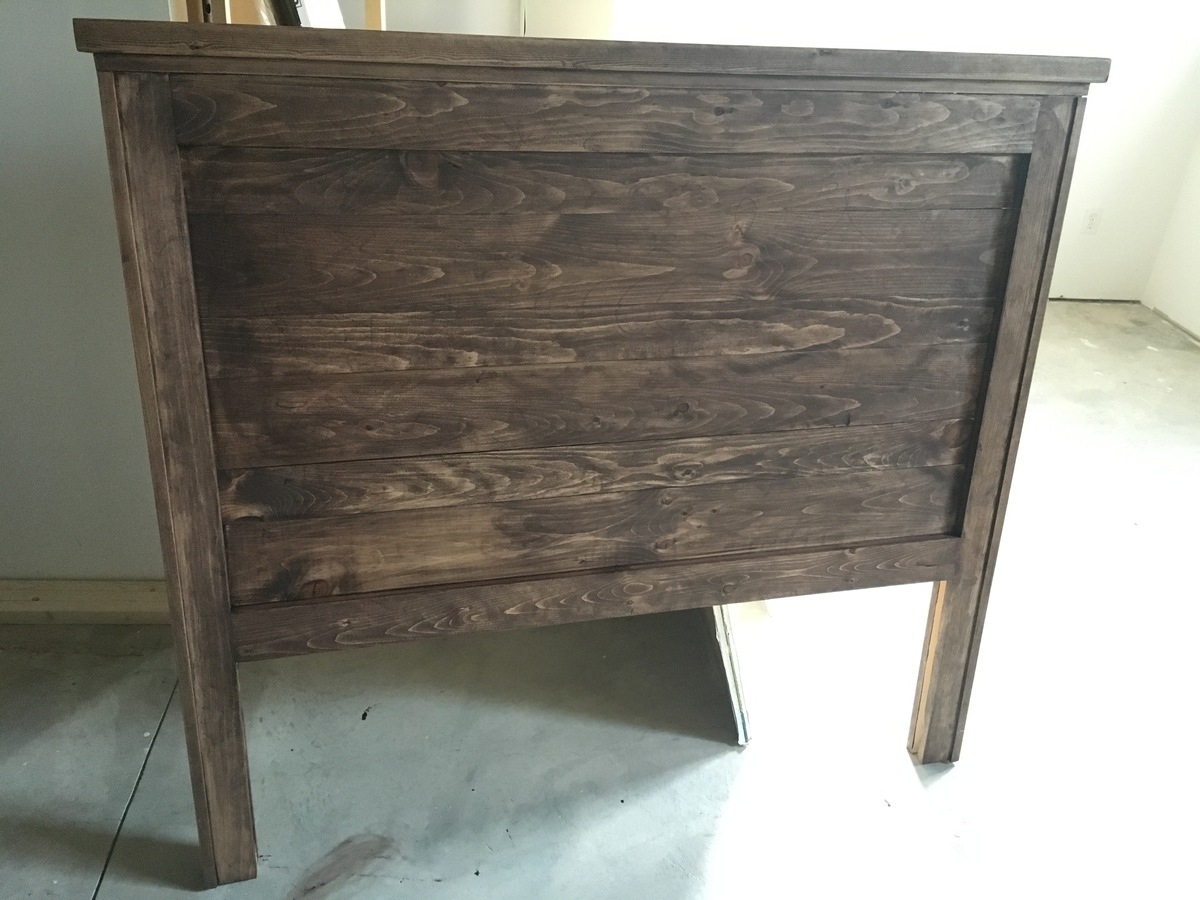
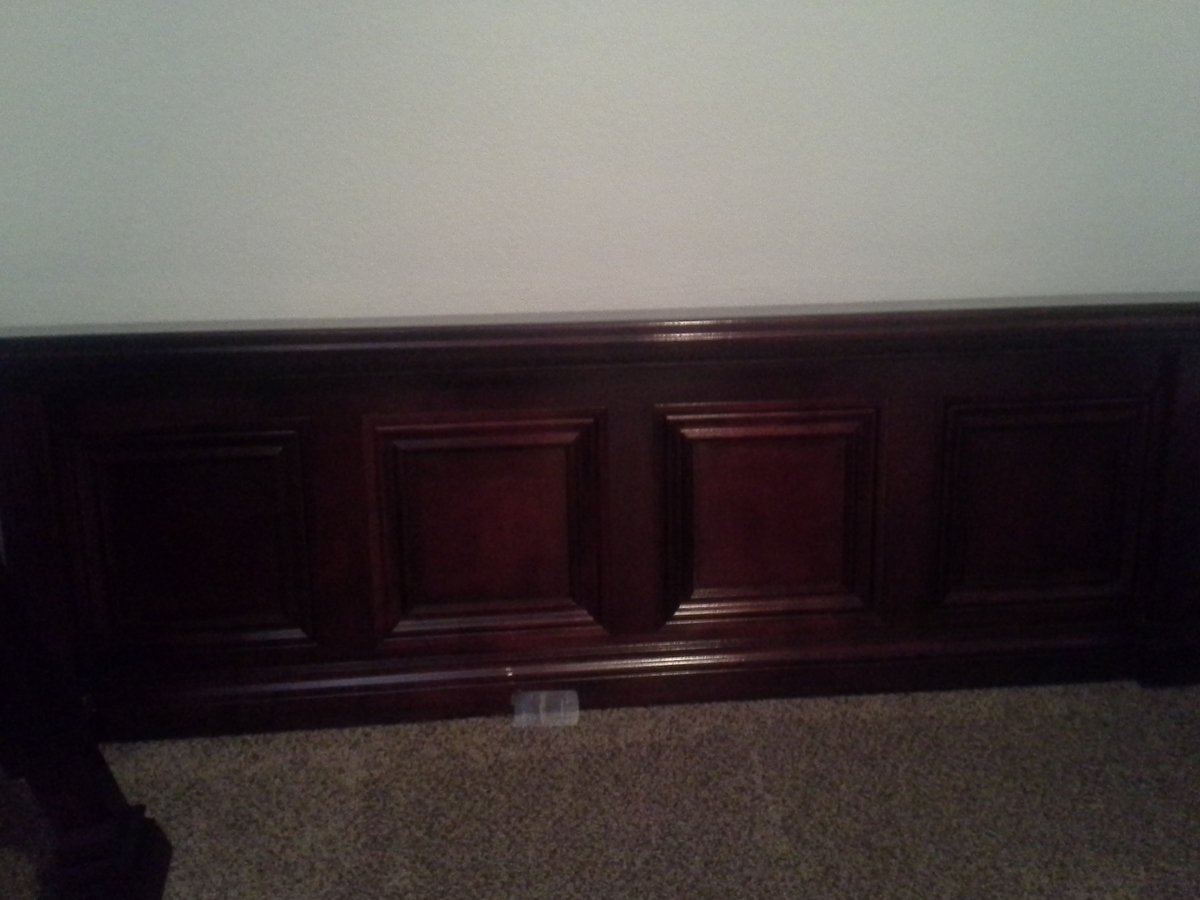
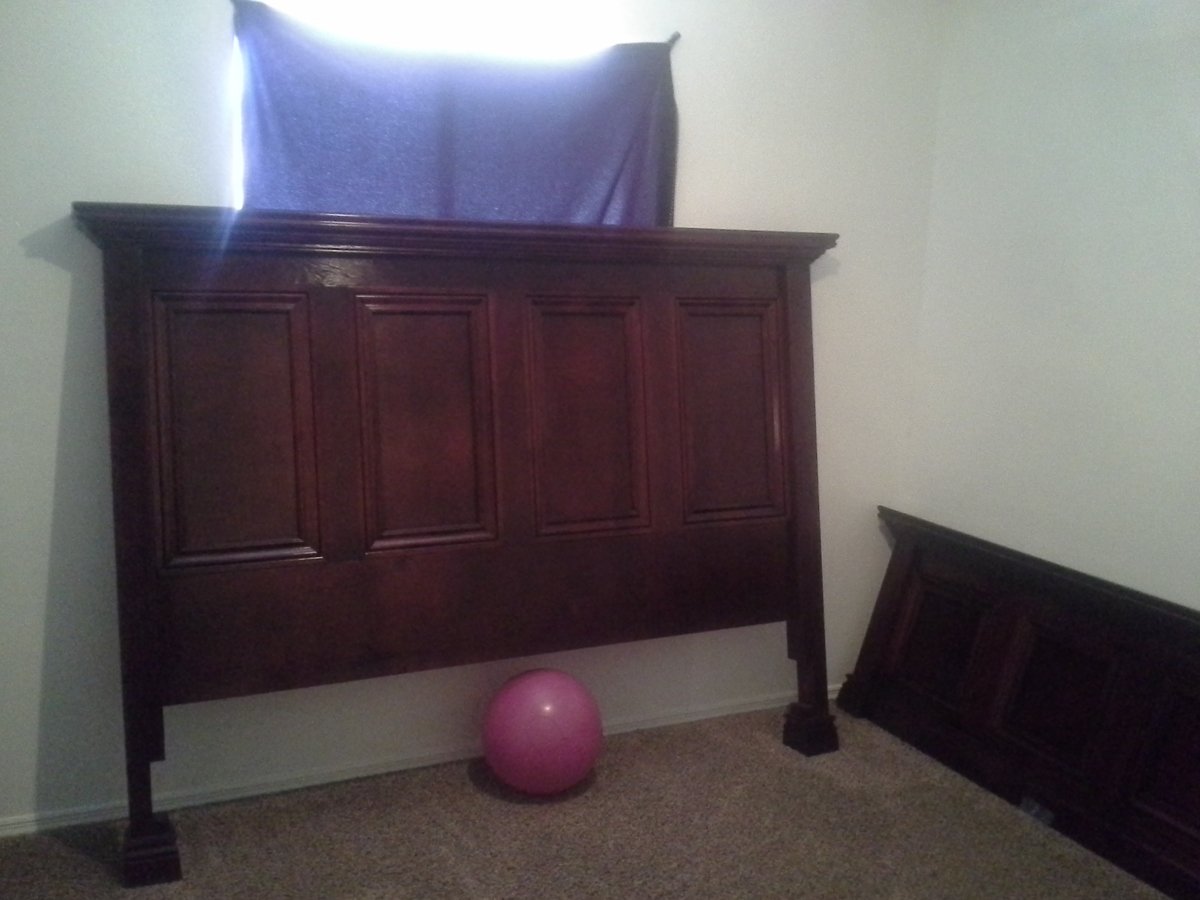
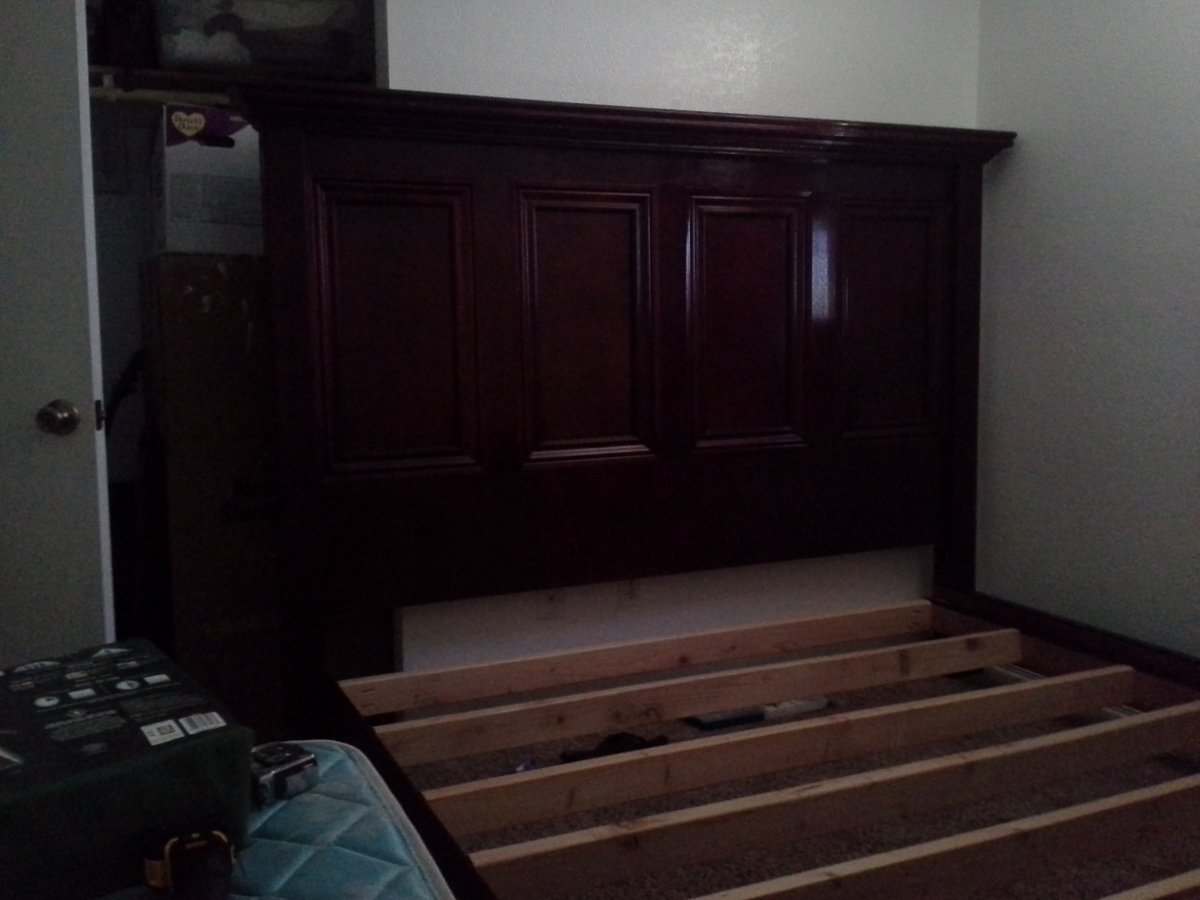
Sorry the the photos were taken from my phone so the lighting is making it look darker than it really is.
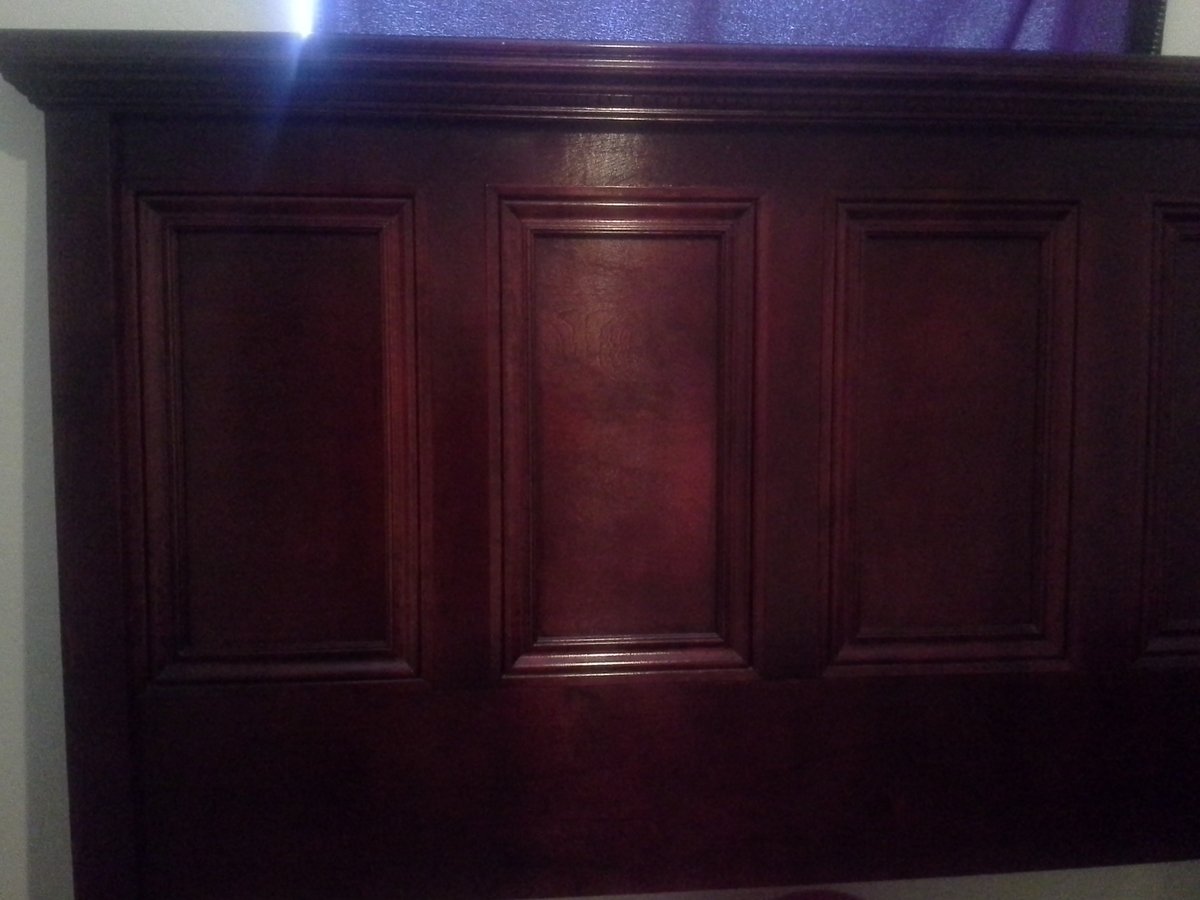
Basically I followed the plans to a T other than the poplar trim and crown molding.
For the head board I Used 3/4" red birch ply and made some stiles with excess from the sheet and then just trimmed it with poplar molding. instead of stacking 2 2x4 for the sides i just used a solid 4x4 and cut the spot out to old the rails on. I was afraid how the stain would react or how it would look since 2x4 have rounded edges. Thats pretty much it. The finish was a tricky process. since I used red birch and white poplar I had to find a way to get everything to stain evenly. So basically I
Dyed all the wood then sealed then stained then toner then glaze then a little more toner then when i got the color i wanted i put 2 layers of top coat.

Wed, 05/16/2012 - 06:11
That's simply stunning. That WAS a tricky finishing process, but obviously well worth the effort.
Thu, 05/17/2012 - 03:41
That is one of the most beautiful finishes I have ever seen on this site.
Thu, 05/17/2012 - 11:38
I'm doing a bed very similar to this... but i'm only doing 2 larger panels rather than 4 like you have. How do you the insides of the panels? Quarter round and then crown molding? I was thinking I would attach the trim on top of the plywood and then just attach some quarter round on the inside to round it and make it stand out a little more.
Thu, 05/17/2012 - 17:00
I didn't use any round(but that is the idea to hide the ugly plywood layers that are exposed when cut). Its just 2 3/4 x3/4" whitewood/poplar casing that I had left over from a project i was working on. the frame of the squares was 3/4" birch ply so the casing laid nice and flush with it so it looked nice. the trick is to get the stiles(the frame of the squares to lay flat against the plywood backing other wise the casing won't lay even all the way around.
heres a link to the casing i used
http://www.lowes.com/pd_105664-81562-OML14-7FTWHW_4294801993_4294937087…
heres the link to the crown that i used on the top
http://www.lowes.com/pd_105626-81562-1069-8FTWHW_4294801991_4294937087_…
the trim stuff at the box places are considered paint grade and don't take stain very well. its easiest to paint if you don't have the right setup to finish things. and if you are going to stain I recommend a product called timbermate its stainable wood filler its hard to get but its amazing stuff it blows the minwax stuff out of the water.
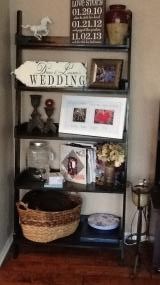
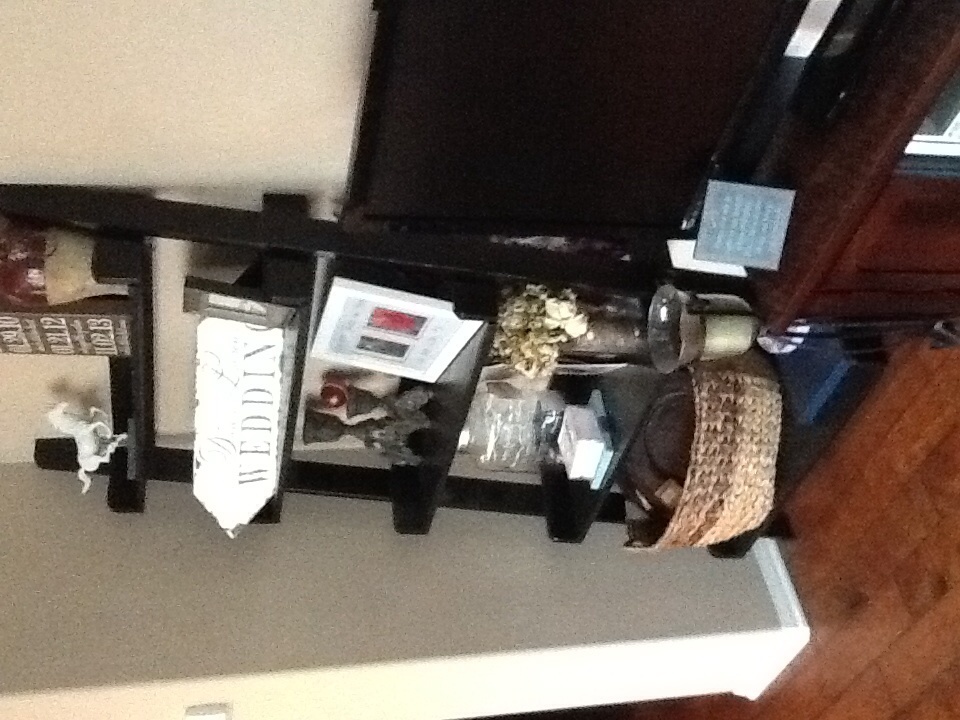
Pottery barn Ladder Shelf
Wed, 12/10/2014 - 13:55
When I click the pdf or printer friendly it does not give the how to instructions....