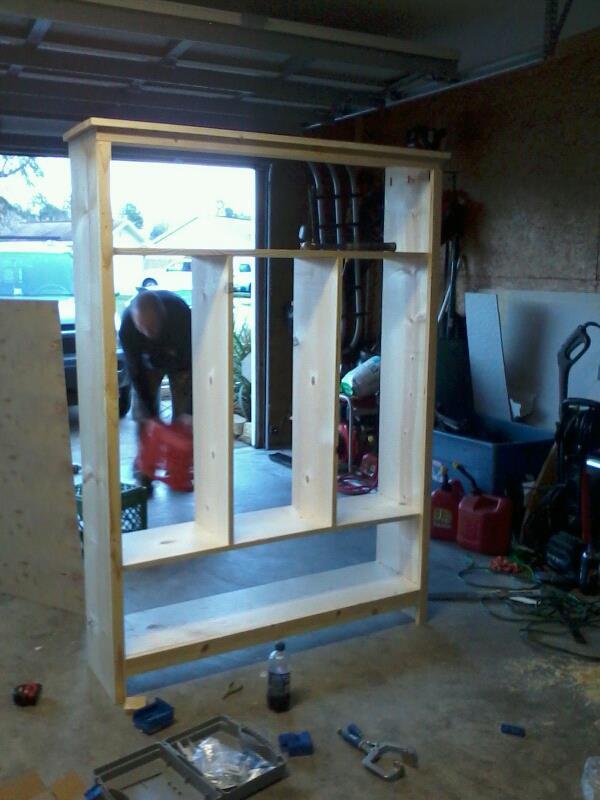
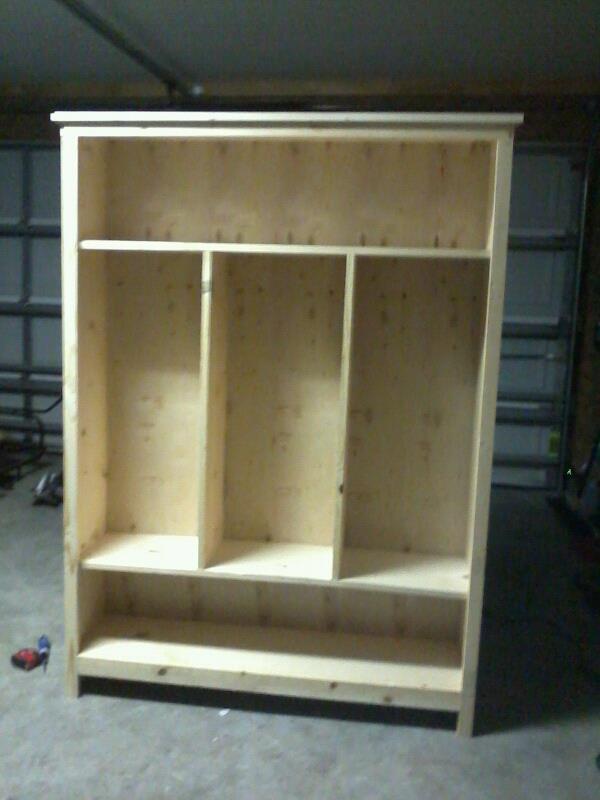
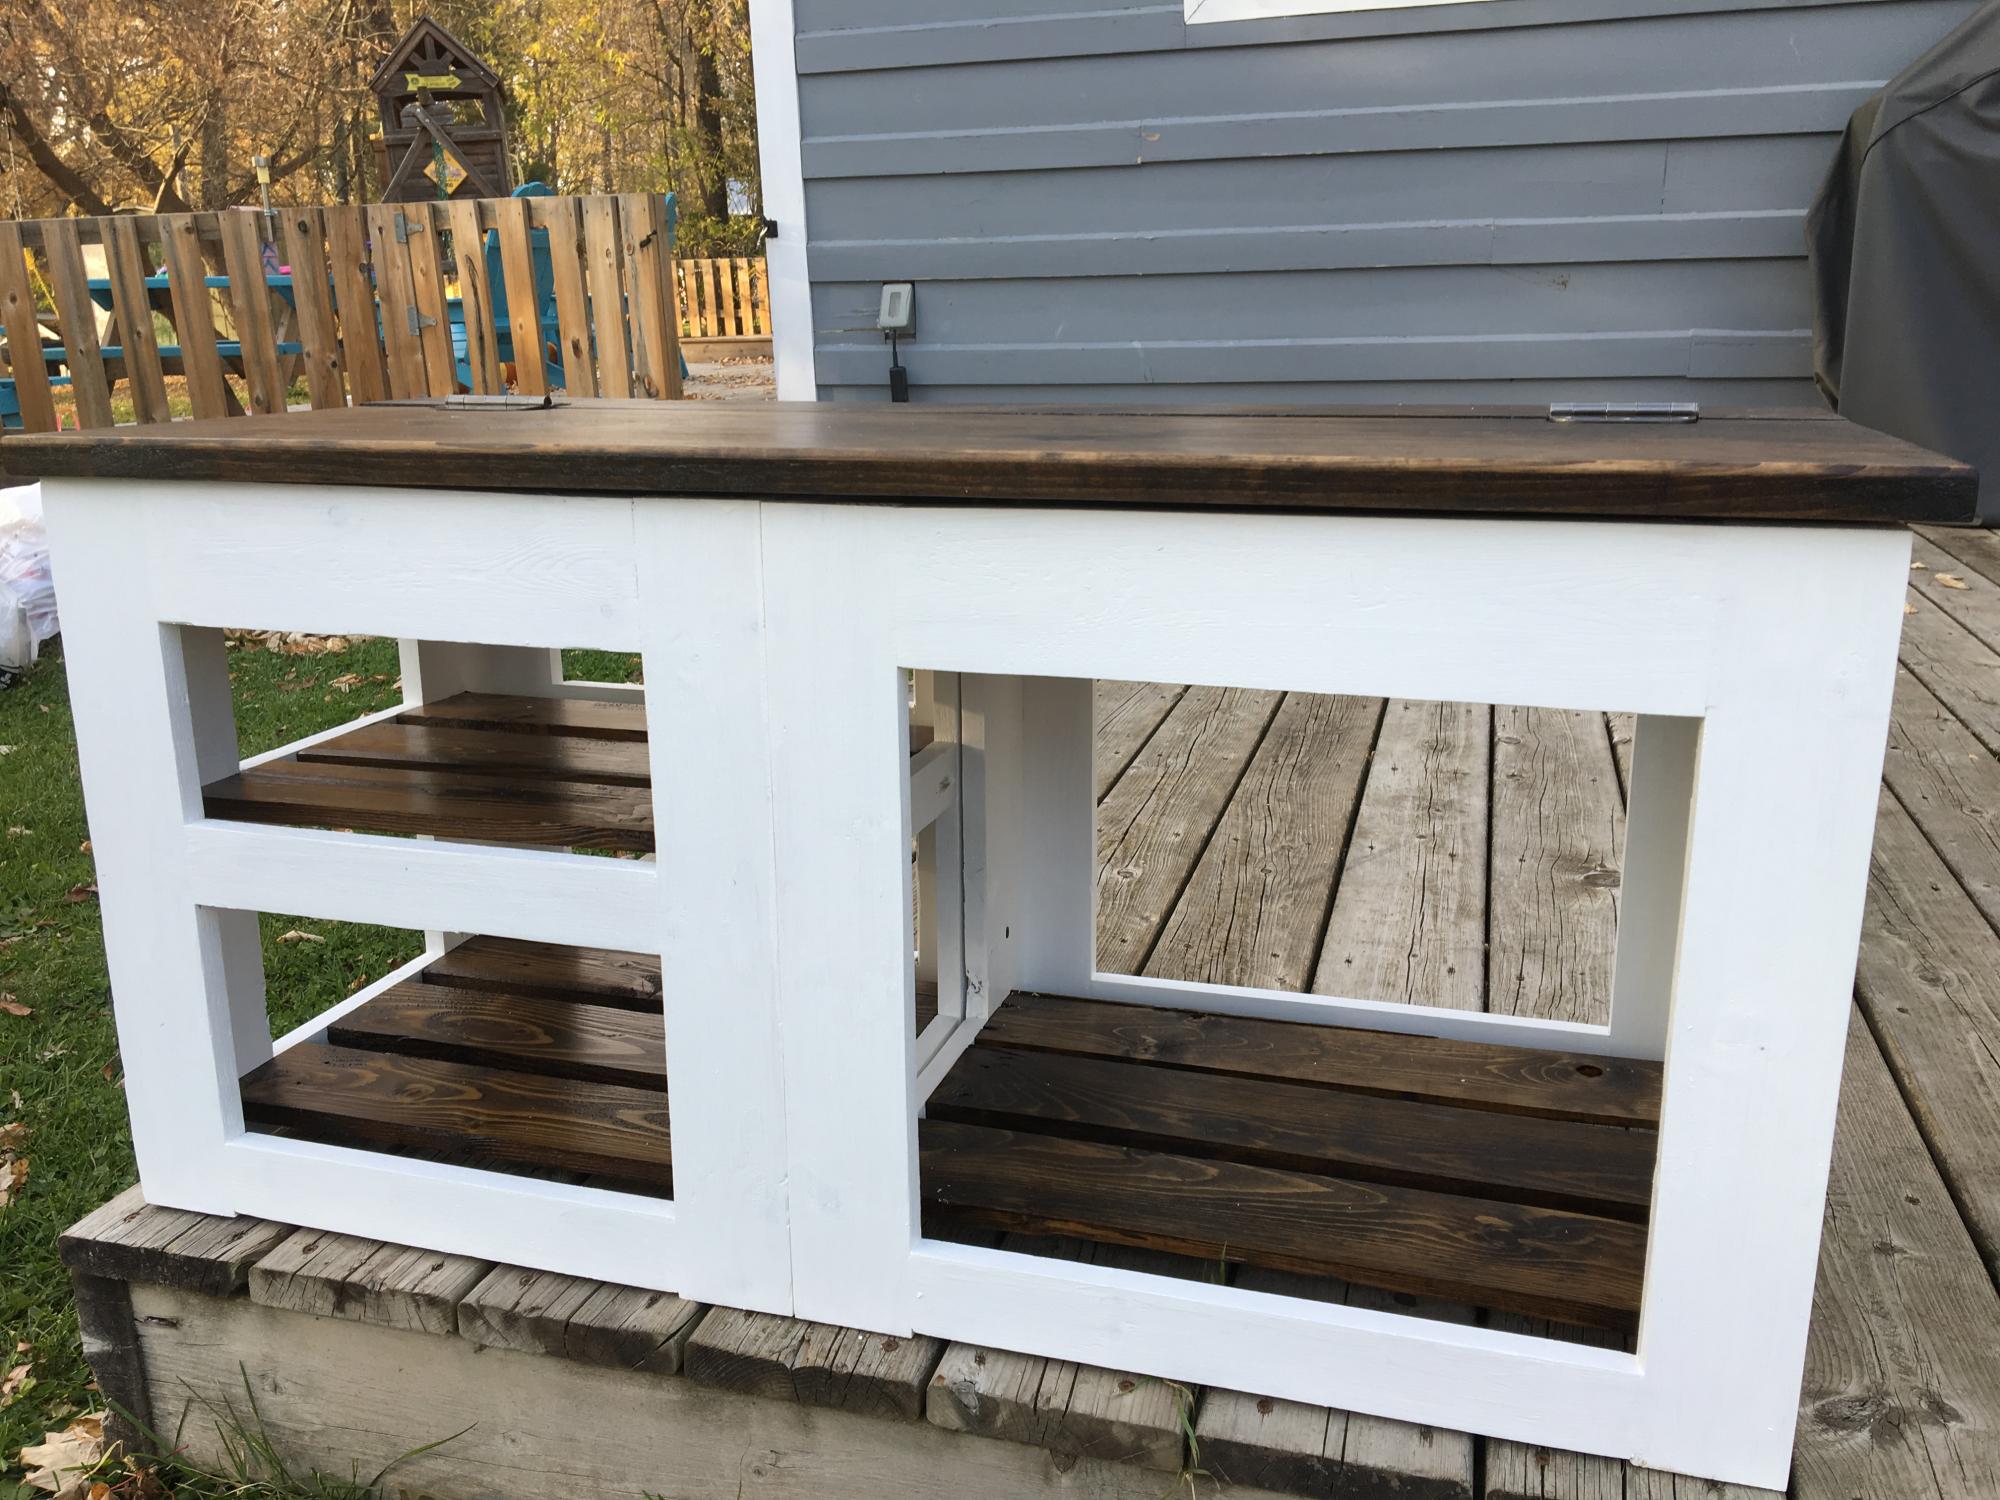
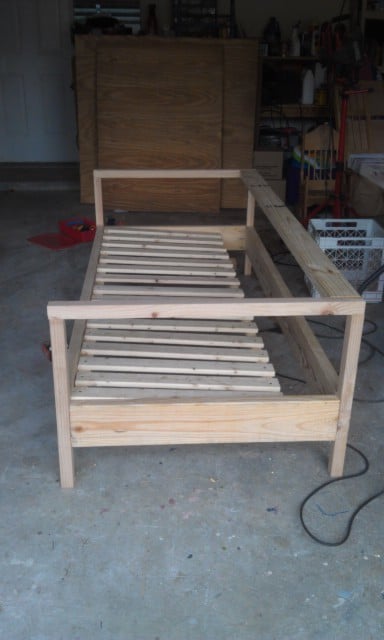
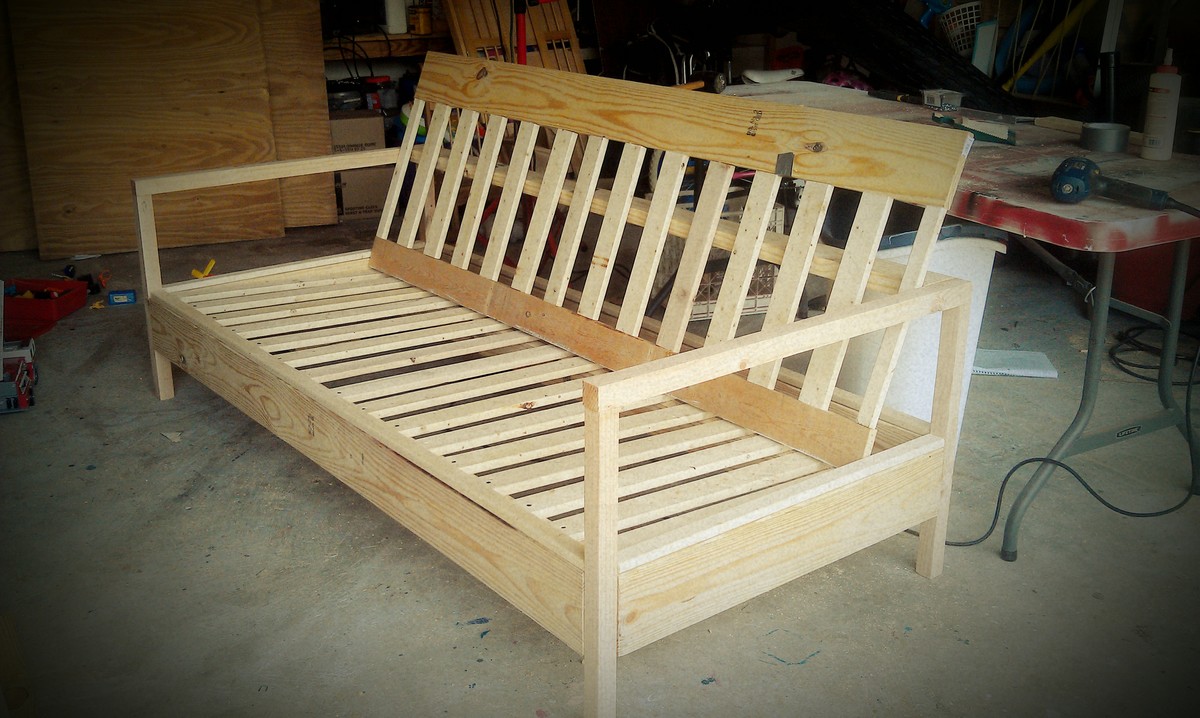
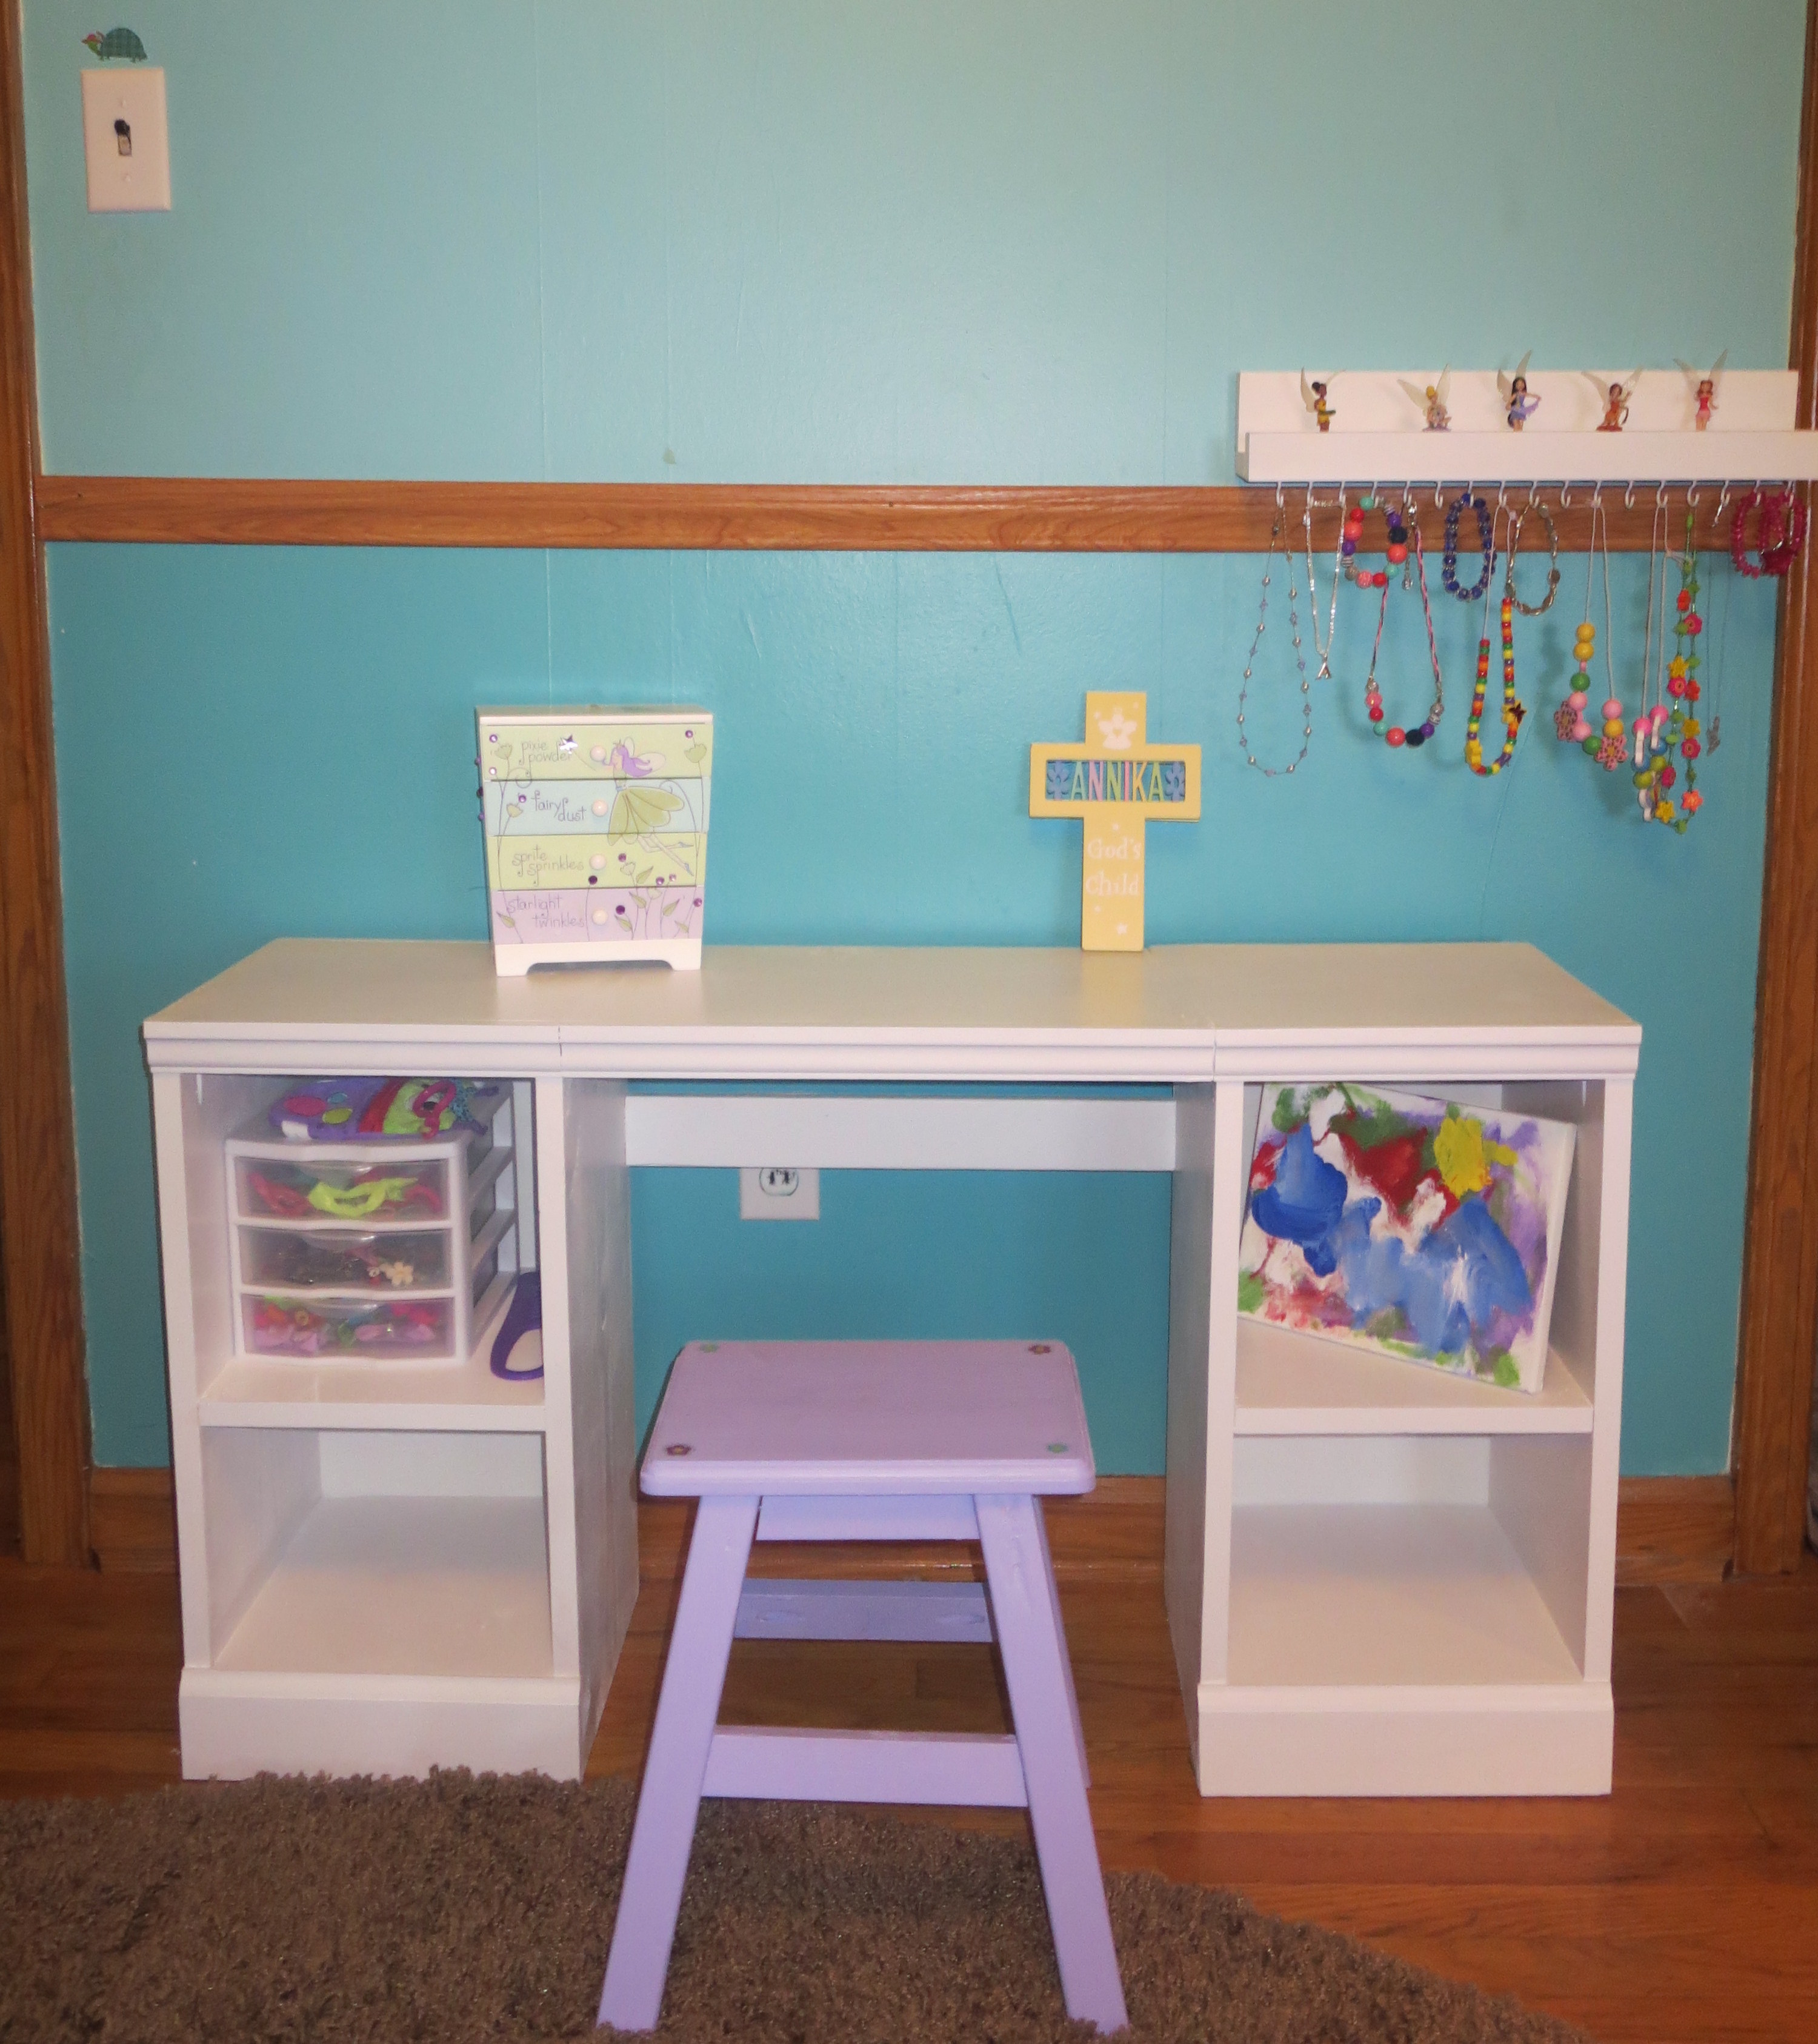
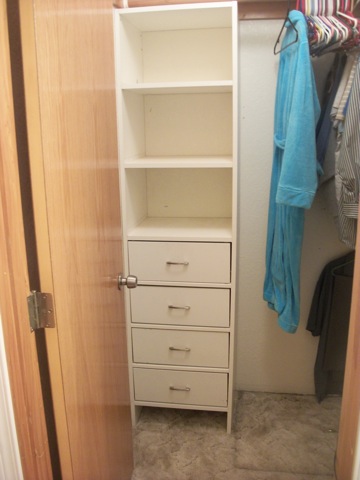
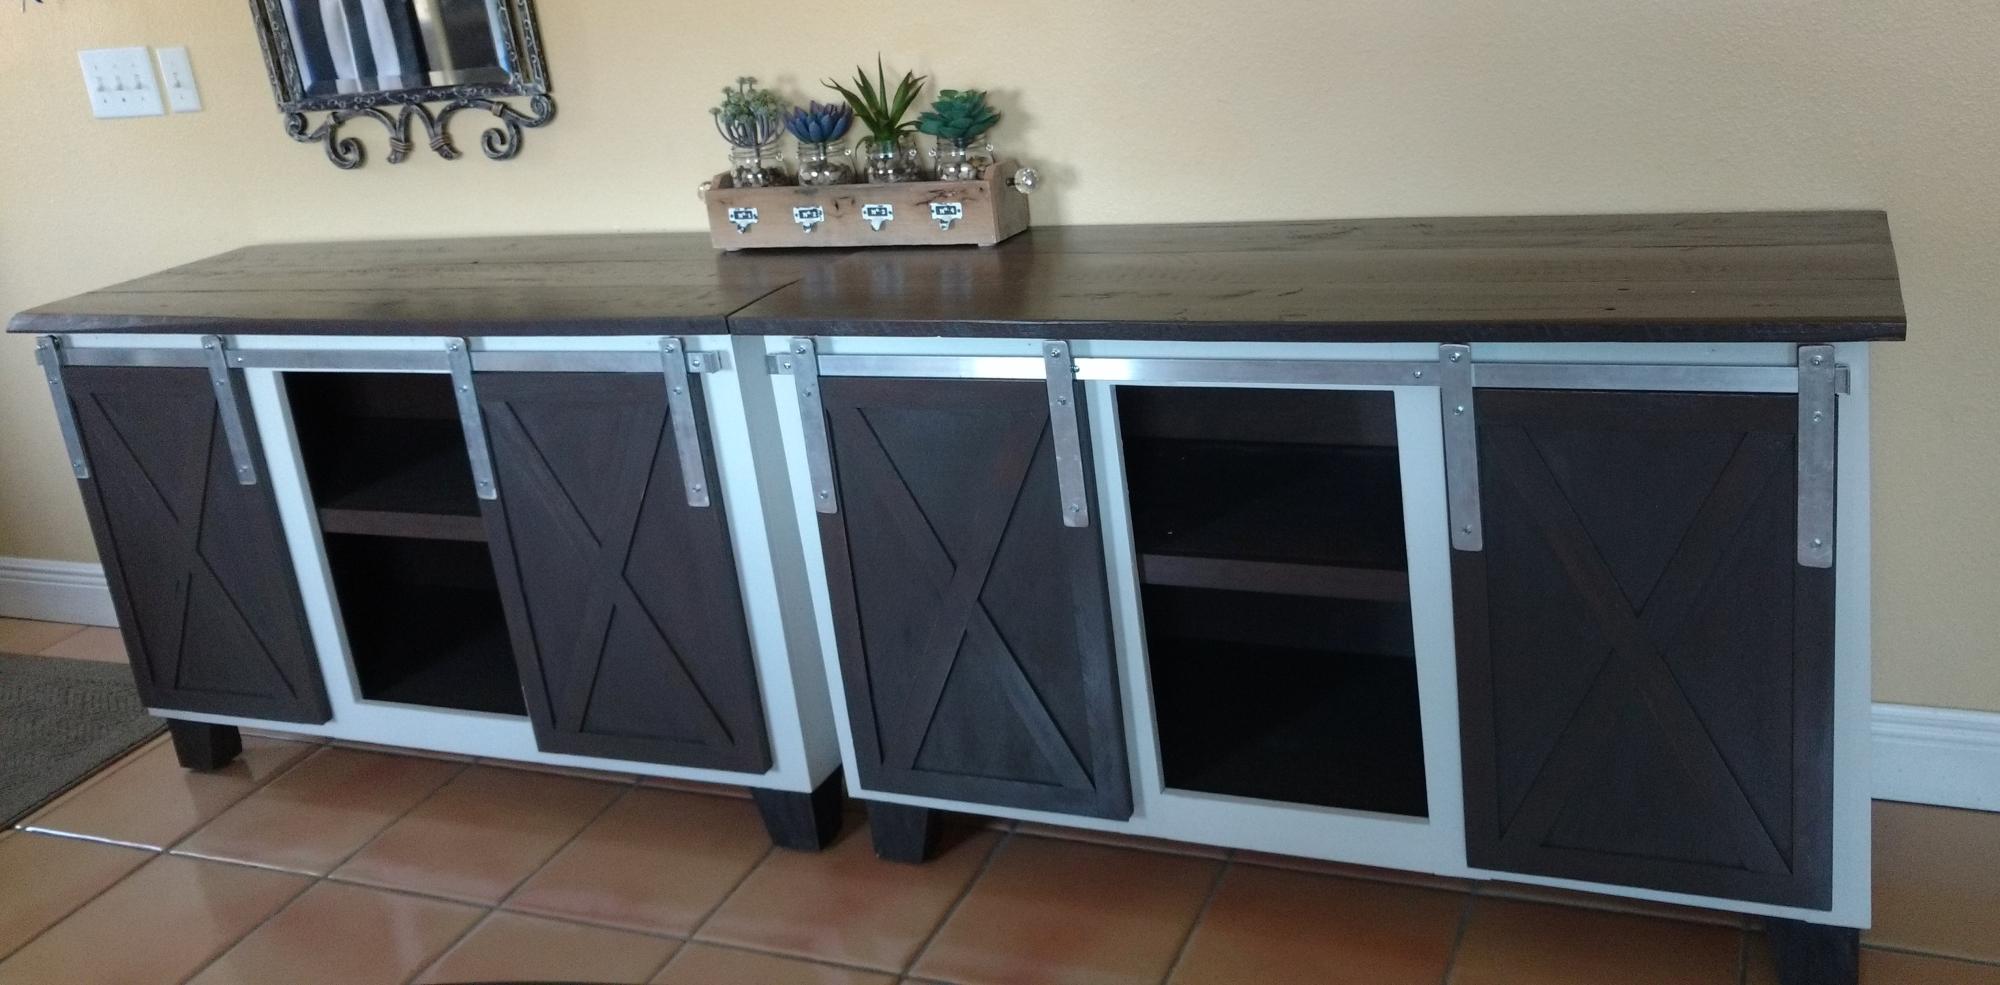
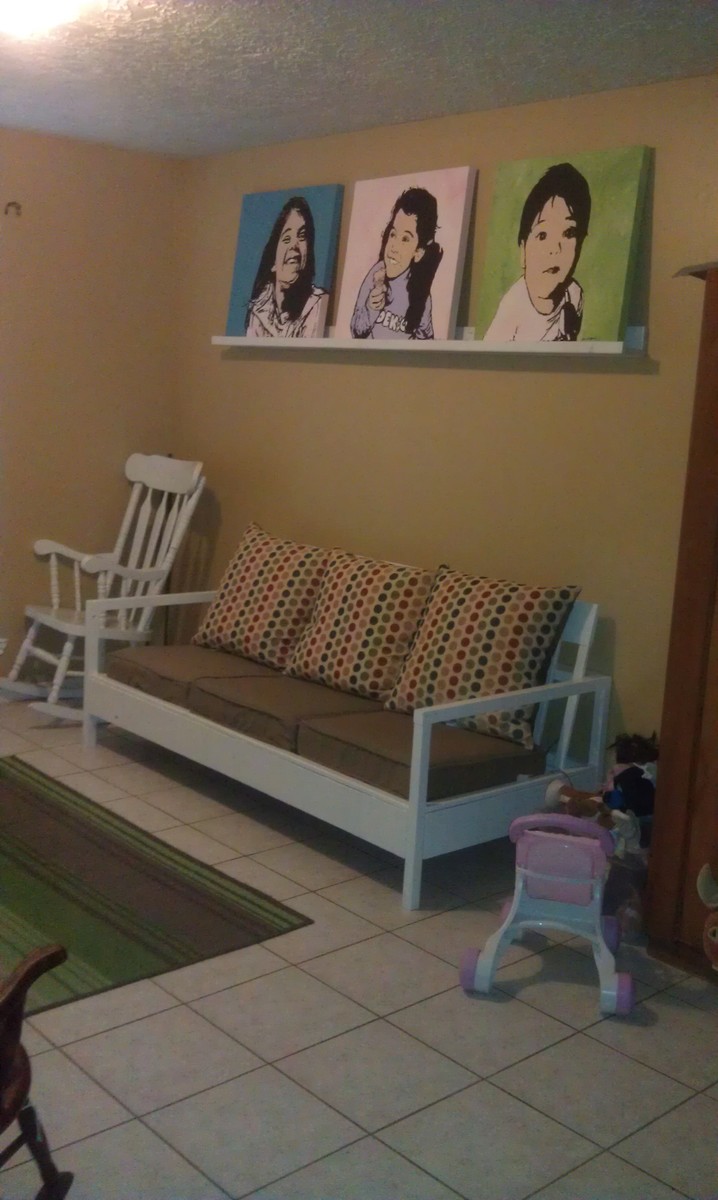
Community Brag Posts

Built in dresser

Submitted by dmather82 on Sat, 09/21/2013 - 09:04

This is my favorite build so far! My two younger daughters share a room with an inevitable shortage of floor space. What they do have is a fairly large closet for 1 and 3 year old. I removed the crumby sliding doors and filled the bottom third of the space with the dresser, leaving plenty of room for kids clothes to hang above. I combined two separate plans and adjusted the measurements to fit the space. What I ended up with is a monstrous 6 drawer dresser that I would never have room for in the bedroom otherwise. The drawers are enormous (a must for a house with three little girls. They have more clothes than their mother and father combined).

I took the frame concept from the Shanty2Chic rustic rolling dresser and the drawer concept from the Madison dresser from Old Paint Design. (Thanks Ladies!) It took me some significant math adjustments (I'm not a math guy) in order to alter the drawers for wood slides, alter the frame to fit that, and alter both to fit the 70 3/4" x 24" space.

The finish took the most time with a bizarre mixing of Rustoleum Dark Walnut and Rustoleum Classic Cherry. I love the color now. Clearly I have not fixed the wall paint yet :)

The wood is big box pine as I am still working up the confidence to work with more expensive wood. The top is 1x12's and 1x2's. The sides (hidden) are 3/4" plywood. The hardware is from Lowes.

My daughters were nice enough to decorate the dresser during the build with crayon requiring a 40 grit sanding Grrrr.

Estimated Cost
$250
Estimated Time Investment
Week Long Project (20 Hours or More)
Finish Used
Rustoleum Dark Walnut
Rustoleum Classic Cherry
Rustoleum Ultimate Polyurethane
Recommended Skill Level
Intermediate

Comments

JW

Sun, 09/22/2013 - 12:40

Built-in closet dresser - genius! I am already thinking about how I can make this work for my daughter's room. Looks great, too. Good job!

Console table

Submitted by Bpcreel on Sat, 11/28/2015 - 18:43

Loved building this table. This was my first time building anything! I have a lot to learn but I think it turned out great!

Built from Plan(s)
Estimated Cost
$60
Estimated Time Investment
Weekend Project (10-20 Hours)
Finish Used
Mission oak stain on top and chalk paint in kid gloves color
Recommended Skill Level
Intermediate

Master Bedroom Closet from mess to the best

Submitted by Anonymous (not verified) on Sat, 01/19/2019 - 11:03

We took the original plans and made them work for our 5’6” x 11’ closet. We added a ft to the top because we have tall ceilings. We made 5 towers to create a u shape with shelving on the top. I also left one small bar long to hang dresses and the rest we double hung. We adjusted cubbies and drawers based on where we needed them. We were able to save by using old drawer slides from a falling apart ikea dresser. (We cut them down with a grinder).  We had an overflowing closet mess and now we have a beautiful closet. I wish the directions had a little bit more detail like average clothes hanging heights and bar distance from the wall. There was also no link to the suggested drawers or cubbies but we found them with a simple search. 

Estimated Cost
$400
Estimated Time Investment
Weekend Project (10-20 Hours)
Finish Used
I used a satin paint in the color trim of our home. I used satin I stead of gloss because that’s what I had on hand but It created a great sealed cleanable surface.
Recommended Skill Level
Intermediate

Modern Adirondack Chair

Submitted by Anonymous (not verified) on Sat, 11/19/2022 - 03:24

Easy build, turned out great. Our first project like this. We built 4!

Comments

Farmhouse Bedside Table

My take on the farmhouse bedside table. I found it difficult to get this square, and I think it suffers because of that. Also, I found that the drawer is much harder than I thought it would be; with that being said, it looks great and is sturdy; I enjoyed the challenge of this project.

Built from Plan(s)
Estimated Cost
$50
Estimated Time Investment
Weekend Project (10-20 Hours)
Finish Used
I used 2 coats of Minwax English Chestnut stain and 2 coats of Minwax Gloss Polyurethane. I used a simple brush for all 4 of these.
Recommended Skill Level
Beginner

Comments

Poolside lounge chairs and umbrella stand

We just moved to Texas three weeks ago and really needed some poolside furniture to help us enjoy the last bit of summer. We immediately jumped into Ana's projects. It took us about two weeks on-and-off, probably entire project completed in about six days (two days for each piece of furniture). We caught a sale at Lowe's and BBB and finished the project with the cushions and umbrella respectively. Now we can start enjoying the pool to its fullest!

Estimated Cost
$100-125 (just wood and screws)
Estimated Time Investment
Week Long Project (20 Hours or More)
Finish Used
After sanding, we used the brush vacuum to clean it off. Apply wood conditioner. Then two layers of dark walnut stain, and finally a single layer of semi-gloss clear coat.
Recommended Skill Level
Starter Project

Comments

Wooden Slat Entry Closet

As the days have gotten shorter and the nights have grown colder I’ve found myself breaking out the winter coats and boots. The problem is, I didn’t have any place to store my coats or shoes. My house doesn’t have a coat closet. And in the past I’ve had a problem with scarves, shoes and winter gear clogging my front entryway. So I set out to come up with a solution. I needed inspiration. I needed guidance. My entry closet needed to be aesthetically pleasing because it would be near the front door and visible from the great room. So I went to Pinterest to search for a solution. I found these plans for an Industrial Style Wood Slat Closet System with Galvanized Pipes by Ana White.

Estimated Cost
$20 - I used wood I had in stock. So the only thing I purchased were the wooden dowels and screws.
Estimated Time Investment
Weekend Project (10-20 Hours)
Finish Used
Use what you have and make it work. Sometimes you can create the look for less by recycling items found within your workshop or home.
Recommended Skill Level
Intermediate

Douglas Fir live edge slabs supported by industrial black iron pipe

Submitted by Anonymous (not verified) on Tue, 01/22/2019 - 19:42

I began the project by ripping 6” strips of sanded pine plywood. I attached those to the walls using brad nails and wood glue. Filled the holes with glaziers putty and sanded lightly once dry. Primed and painted to finish.  

I then had a local mill rough cut the lumber for the shelves. I stripped the bark (except one which I loved so I left it on) and sanded at 120, 180 and 220. I drilled 1 1/4” holes to fit the pipe through and finished the wood with 4 coats of Varathane Diamond Finish clear coat. 

I used Varsol and some elbow grease to remove the black coating on all the gas  pipe. 

Finally i pieced it all together! 

Estimated Cost
$800 CDN
Estimated Time Investment
Week Long Project (20 Hours or More)
Finish Used
Varathane Diamond Finish
Recommended Skill Level
Intermediate

Crib size mattress bunk beds

I used crib size mattress instead of twin to make this bunk bed. I wanted more stabilty so I modified it with more rails at the top and didn't make a brake in the front rails.

Built from Plan(s)
Estimated Cost
$65
Estimated Time Investment
Day Project (6-9 Hours)
Finish Used
None
Recommended Skill Level
Beginner

Comments

LifeofChaos

Sat, 12/31/2011 - 18:41

No I don't. Not off the top of my head, it has been a few months and I am afraid I would miss something. However, it does appear I put everything except the screws (1.5 inch, I think) in the drawing.

Double daybeds.

Submitted by MaryMurray on Wed, 09/25/2013 - 18:15

For my first 'Ana White' project I built two Lydia daybeds for the guest room. I added beadboard for a cozy feel. I LOVE them and so does everyone else.
Thank you Ana, for these easy to follow plans. I have discovered a wonderful new interest and I BUILT THEM ALL BY MYSELF!

Built from Plan(s)
Estimated Time Investment
Week Long Project (20 Hours or More)
Finish Used
I tinted the primer with some brown paint then added a coat of red paint, Valspar 1011-3 Quite Red, for a warm,cozy feel.
Recommended Skill Level
Beginner

Office shelf

This took about 7 hours over the week after work. 

Estimated Cost
Had the extra wood already.
Estimated Time Investment
Day Project (6-9 Hours)
Finish Used
Stain “Provinicial”
Recommended Skill Level
Intermediate

Comments

Farmhouse Coffee Table

Submitted by Anonymous (not verified) on Mon, 12/19/2022 - 08:04

Working a full time job, I was still able to finish each table within a week (taking a couple hours a day to cut, build, sand, burn, stain, ect). These are my second and third tables that I’ve ever built and looking forward to making more.

Comments

Martina Bath Wall Storage

This is the second building project I made. I really like that it's small, but there's a surprising amount of room in it for towels and stuff. And easy to build, too!
Thanks Ana!

Estimated Cost
$20
Estimated Time Investment
Afternoon Project (3-6 Hours)
Finish Used
Leftover CIL Smart3 Trim and Door paint
Recommended Skill Level
Beginner

Kentwood Bed

Submitted by jbolson21 on Mon, 12/14/2015 - 07:30

Kentwood bed 

Built from Plan(s)
Estimated Time Investment
Weekend Project (10-20 Hours)
Finish Used
cabinet coat white paint
Recommended Skill Level
Intermediate

Kid's play kitchen

Submitted by Anonymous (not verified) on Mon, 02/04/2019 - 18:54

Play kitchen I made for the grandkids 

Estimated Time Investment
Day Project (6-9 Hours)
Finish Used
Burned wood and stained with golden oak Minwax
Recommended Skill Level
Beginner

Family Art Center

So, so happy with this table! I've always been a fan of the Pottery Barn Bedford Project table, but even if I had the $1,200 to spend on a craft table I doubt I could ever justify it. When I saw these plans I knew my dream table was within reach!
This is my second build using Ana's plans. I worked carefully and used the Kreg Jig, and it came together easily. I added an extra trim piece here and there. I painted the whole thing with Valspar color "Storm At Sea", which is a gray. It took forever for me to choose the color, too many choices! Then I used some wipe-on Poly to protect it.
Now my kids and I have a dedicated art station stocked with all the supplies, I can see us spending many hours creating at this table.

Built from Plan(s)
Estimated Cost
$150
Estimated Time Investment
Week Long Project (20 Hours or More)
Finish Used
Valspar paint and Poly
Recommended Skill Level
Beginner

Works well painted too!

Submitted by Anonymous (not verified) on Fri, 12/18/2015 - 04:21

Came together so well. Thanks to Ana and pneumatic addict for tips and plans

Estimated Cost
$500
Estimated Time Investment
Week Long Project (20 Hours or More)
Finish Used
Paint varathane
Recommended Skill Level
Intermediate

4X4 Truss Table and Bench

Submitted by Anonymous (not verified) on Sat, 02/09/2019 - 14:46

My daughter moved into her first apartment and asked me to make her a dining room table. I used the plans found on Ana's website and made a slight modifcations. I used 5/4" pine boards to build the tops and regular douglas fir 4x4s and 2x4s for the bases. All screws are hidden exept the lag bolts I painted black and used to bolt the end trusses to the center truss which gives it kind of a industrial type accent. Thanks to Ana White and Shanty 2 CHIC for the great plans. My daughter loved the table and bench and she is going to find chair for the other side of the table. 

Estimated Cost
Approximately $275 for the table, bench and misc stain, screw, sandpaper etc.
Estimated Time Investment
Weekend Project (10-20 Hours)
Finish Used
Varathane Stain and Poly Mission Oak in Satin. Two coats on the bases and three coats on the tops. Used a pre stain conditioner prior to applying the Stain and Poly.
Recommended Skill Level
Intermediate

Kids Adirondack Chair

Submitted by Kassidy_D on Sat, 01/07/2023 - 21:12

Turned out okay, still have some learning to do!

Built from Plan(s)

Comments

My Table

Submitted by AlHoward on Fri, 09/23/2011 - 18:09

I have waited ten years to get the table I wanted for my back porch. I have 6 kids and wanted a LONG plank table. When I found Ana's page I knew I had what I wanted. It was so easy and exactly what I wanted. I extended the top to 10' and added a middle leg to accomidate the length. This was so do-able following Ana's plan. Don't be intimidated! It is AWESOME!

Estimated Cost
$200
Estimated Time Investment
Weekend Project (10-20 Hours)
Finish Used
Two coats of Water seal on the top, One coat of green paint on the base then sanded with a sander.
Recommended Skill Level
Beginner

Comments

Debbie Christianson (not verified)

Wed, 09/28/2011 - 20:02

I can already see the memories being made . . . . Great job!

Entry Mirror (from The Handbuilt Home)

Submitted by Linda7 on Tue, 10/01/2013 - 14:48

My sister and brother-in-law recently moved to Albuquerque and purchased a home with a wonderful view of the Sandia Mountains. I built them the mirror from The Handbuilt Home (p. 36), and they hung it in the entry hall. The reflection in the mirror is a gorgeous view of the mountain range out of their large living room windows. Because this was not a rustic build, I used better pine boards, sanded very smooth.
Thank you to ANA for the great plan (and book!). Also a great big hug to JOANNE and TRACY for responding so quickly to my query regarding attaching the mirror to the frame. I ended up having the mirror company attach the mirror with silicone because I was afraid mirror clips would mar the smooth, shiny surface of the wall. We also covered the back of the mirror with craft paper, contact cemented to the frame to protect the mirror silvering.
This was a fun build, and my sister and b-in-law are very pleased with it.

Built from Plan(s)
Estimated Cost
Around $75.00
Estimated Time Investment
Weekend Project (10-20 Hours)
Finish Used
Minwax Express Color "Crimson", two coats, followed by four thin coats of gloss poly, sanding between coats with fine grit.
Recommended Skill Level
Beginner

Comments

JoanneS

Tue, 10/01/2013 - 18:11

Linda, your mirror looks fabulous! The finish is just gorgeous, and I love the hardware you used. Beautiful build! :)

Linda7

Tue, 10/01/2013 - 18:20

Thanks for the nice complement, Joanne. I really do appreciate your help!