Community Brag Posts
Stained Shiplap Fireplace

Rustic Fireplace Build by Becky Roque
Built from Plan(s)
Seasonal And Holiday
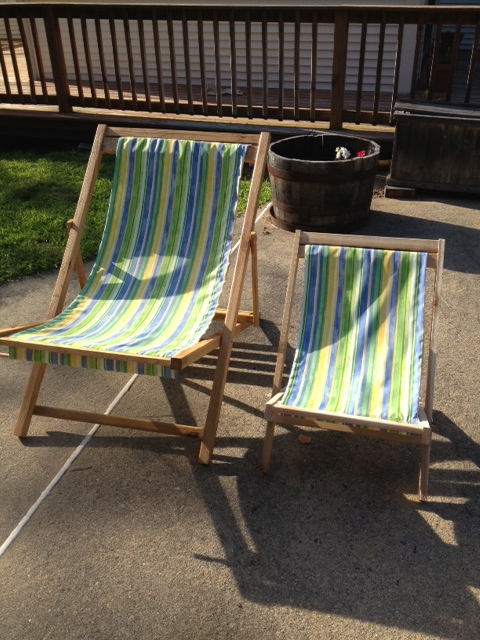
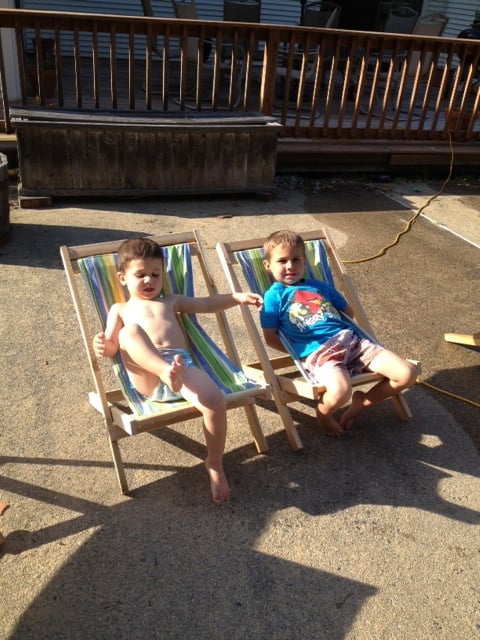
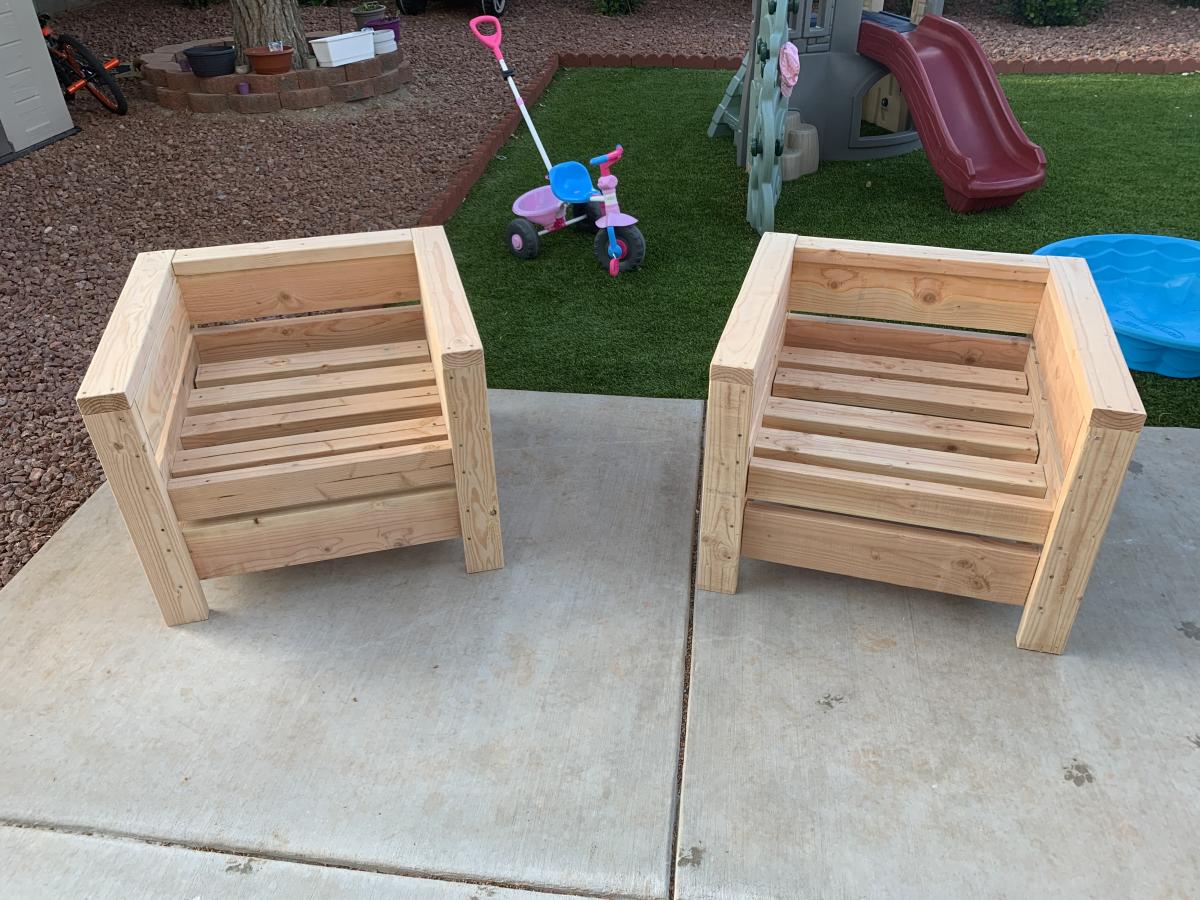
Sling Chair

I'm really happy with how these chairs came out. I did go through several failed attempts at first. I've put all the details on my blog.

Built from Plan(s)
Estimated Cost
$25
Estimated Time Investment
Afternoon Project (3-6 Hours)
Finish Used
Stain and varnish
Recommended Skill Level
Beginner
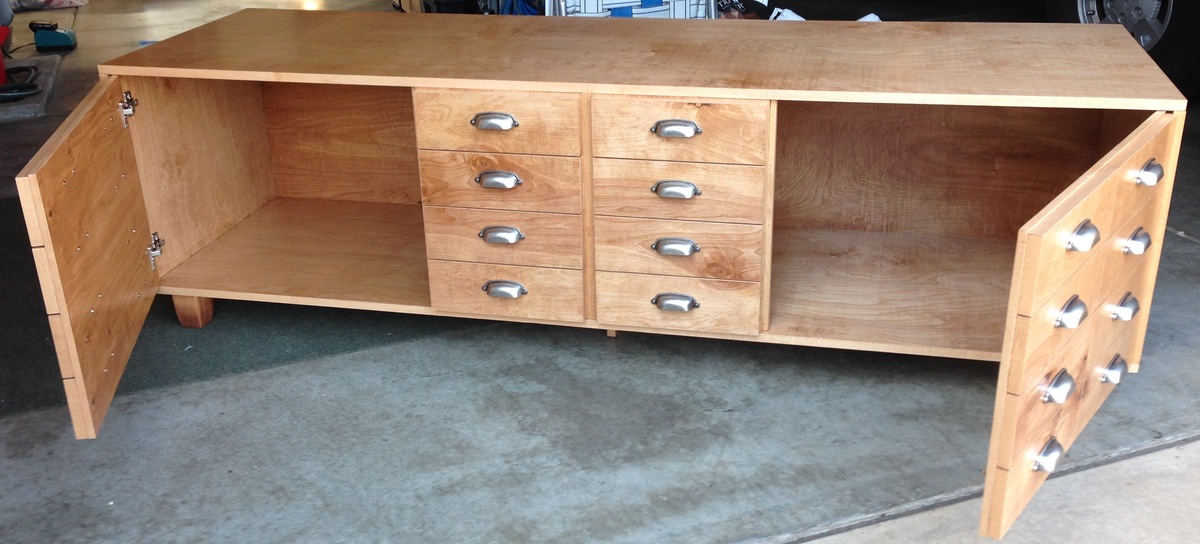
Cabinet with storage

A friend of mine pinned this on Pinterest and gave me the dimensions she wanted. The wood I used is Birch. The cabinet she pinned is actually a cabinet full of drawers. She wanted the same look, but doors instead, for storage.
Built from Plan(s)
Estimated Cost
$250
Estimated Time Investment
Week Long Project (20 Hours or More)
Finish Used
Cherry stain and clear semi-gloss Polyeurethane
Recommended Skill Level
Advanced
Norma's house
Almost done :)
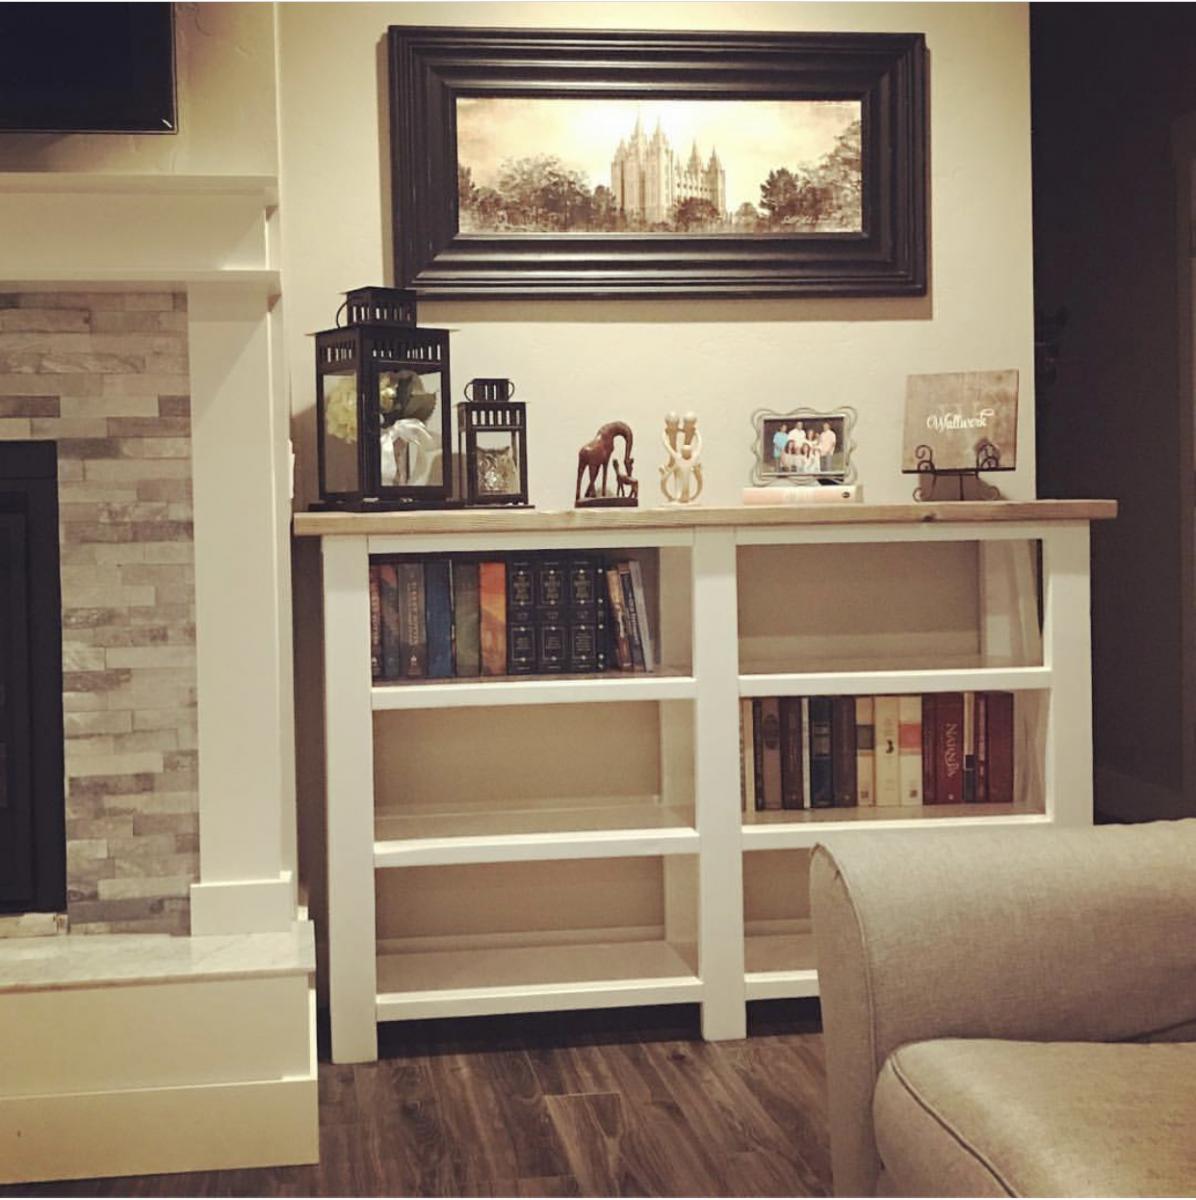
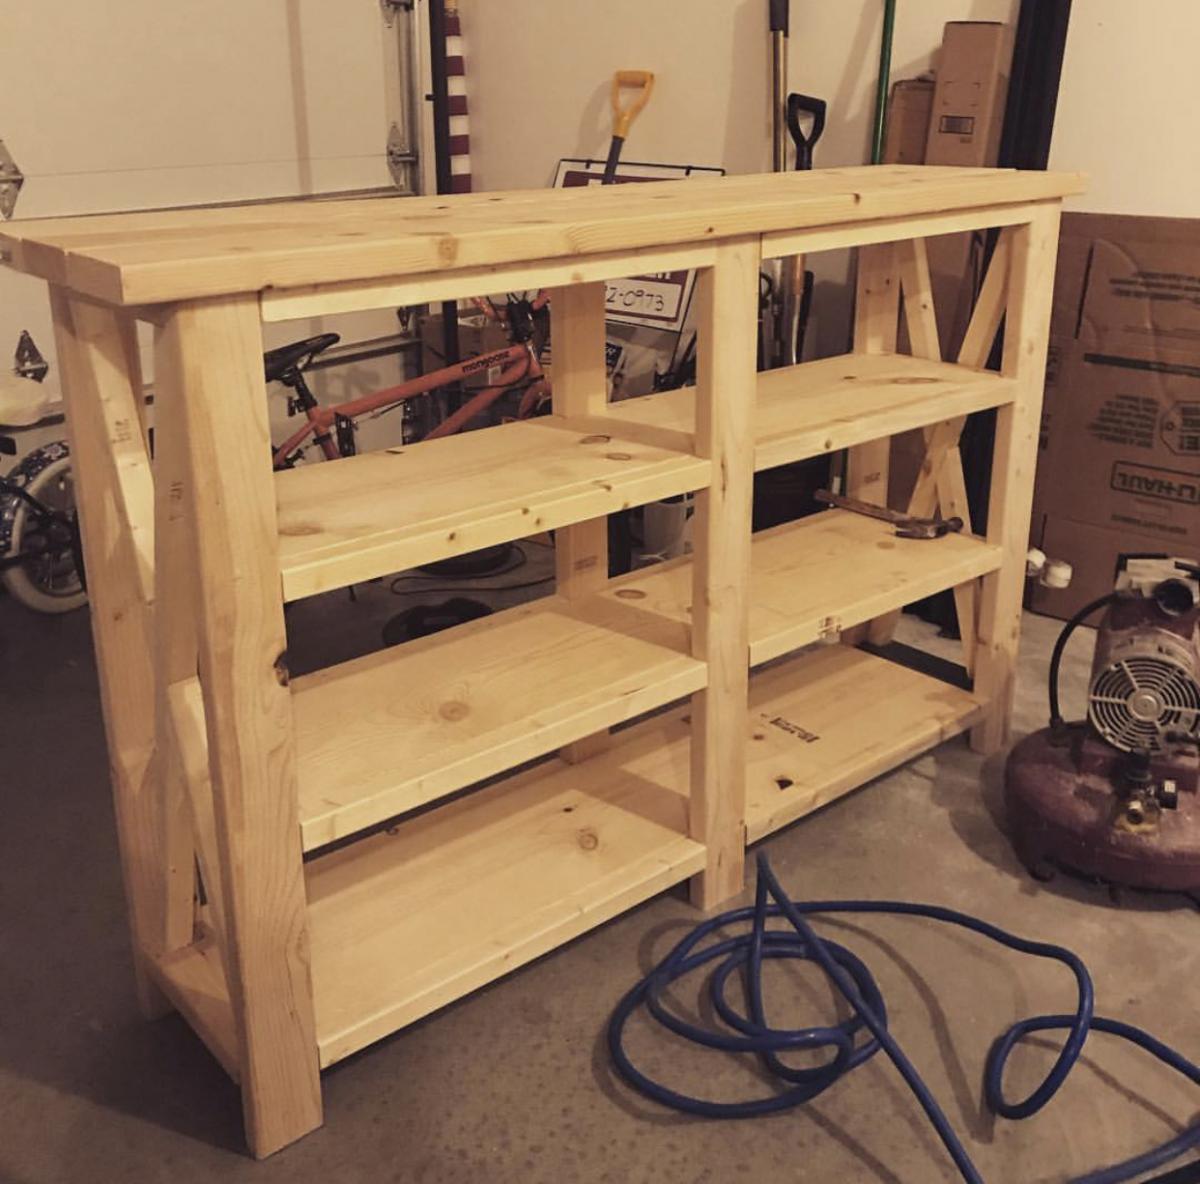
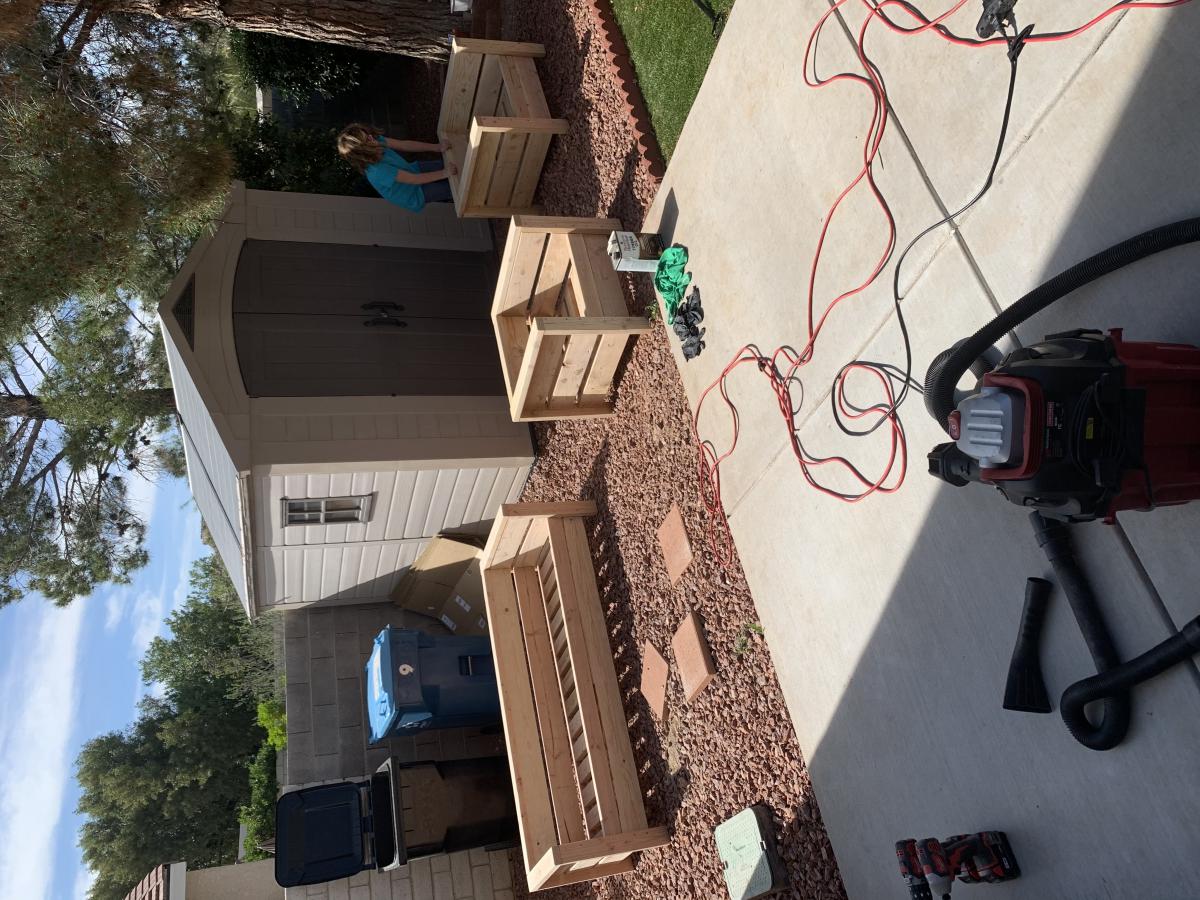
Rustic X Console with changes
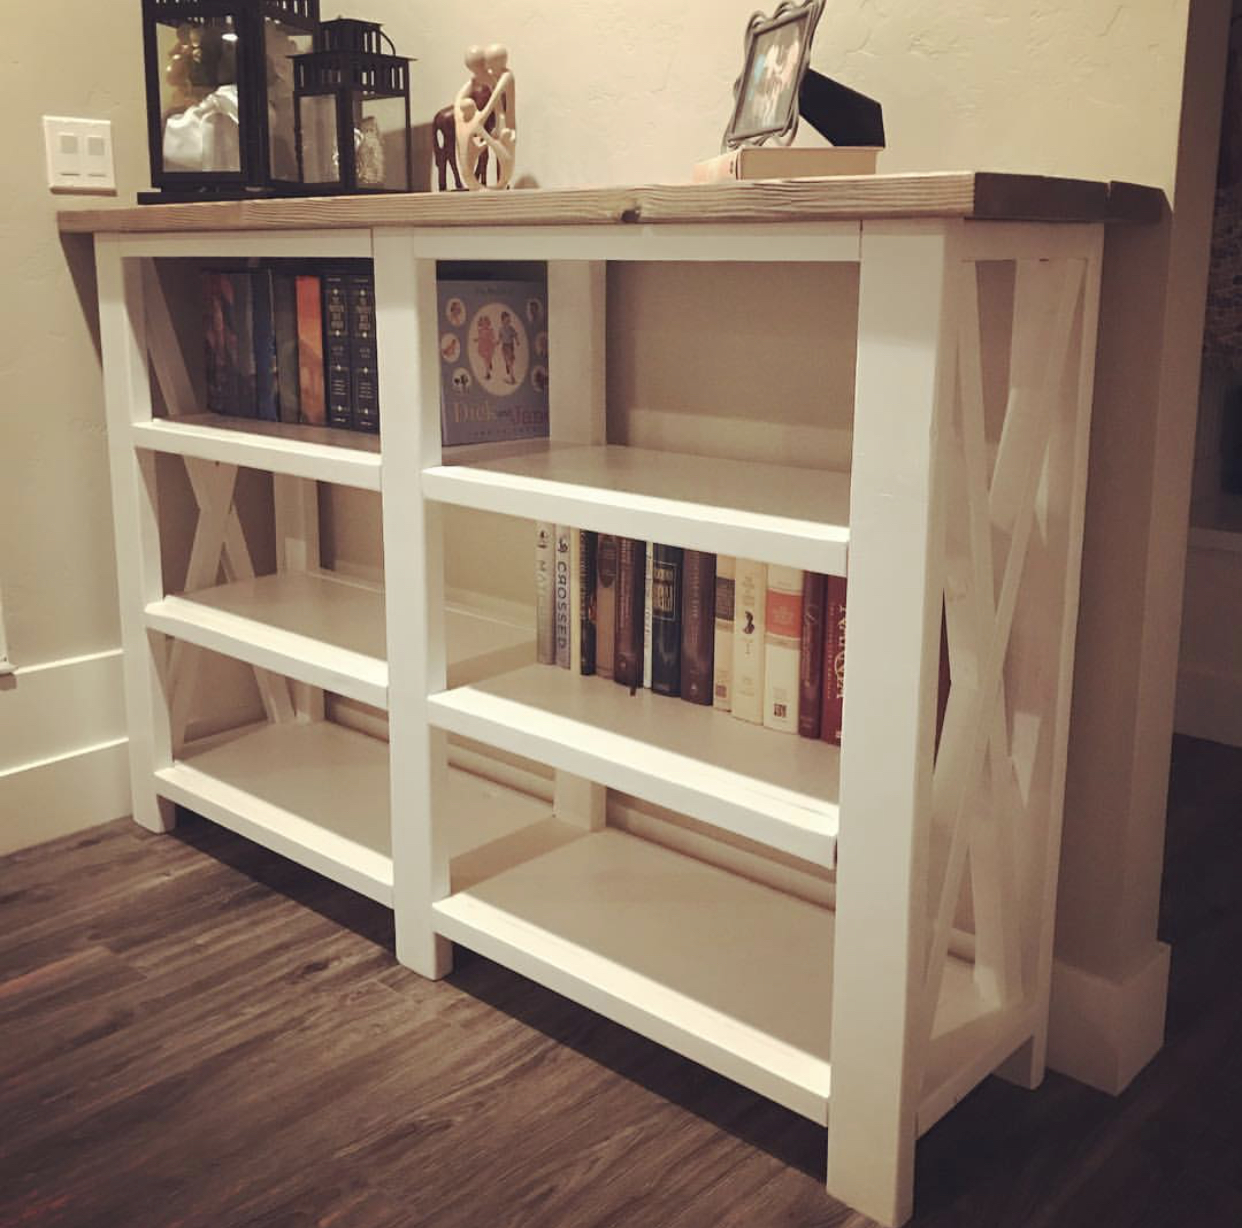
Wanted to make shelves to put on both sides of our fireplace but had to alter the dimensions. So I added another shelf and made it shorter in length. I was a bit nervous because I’ve always just built per the instructions. It turned out perfect! Just don’t look too closely at the X’s!
Built from Plan(s)
Estimated Cost
$80
Estimated Time Investment
Day Project (6-9 Hours)
Finish Used
Minwax Classic Gray
Paint-some leftover white I had
Paint-some leftover white I had
Recommended Skill Level
Beginner
Repurposed Wood Hall Tree
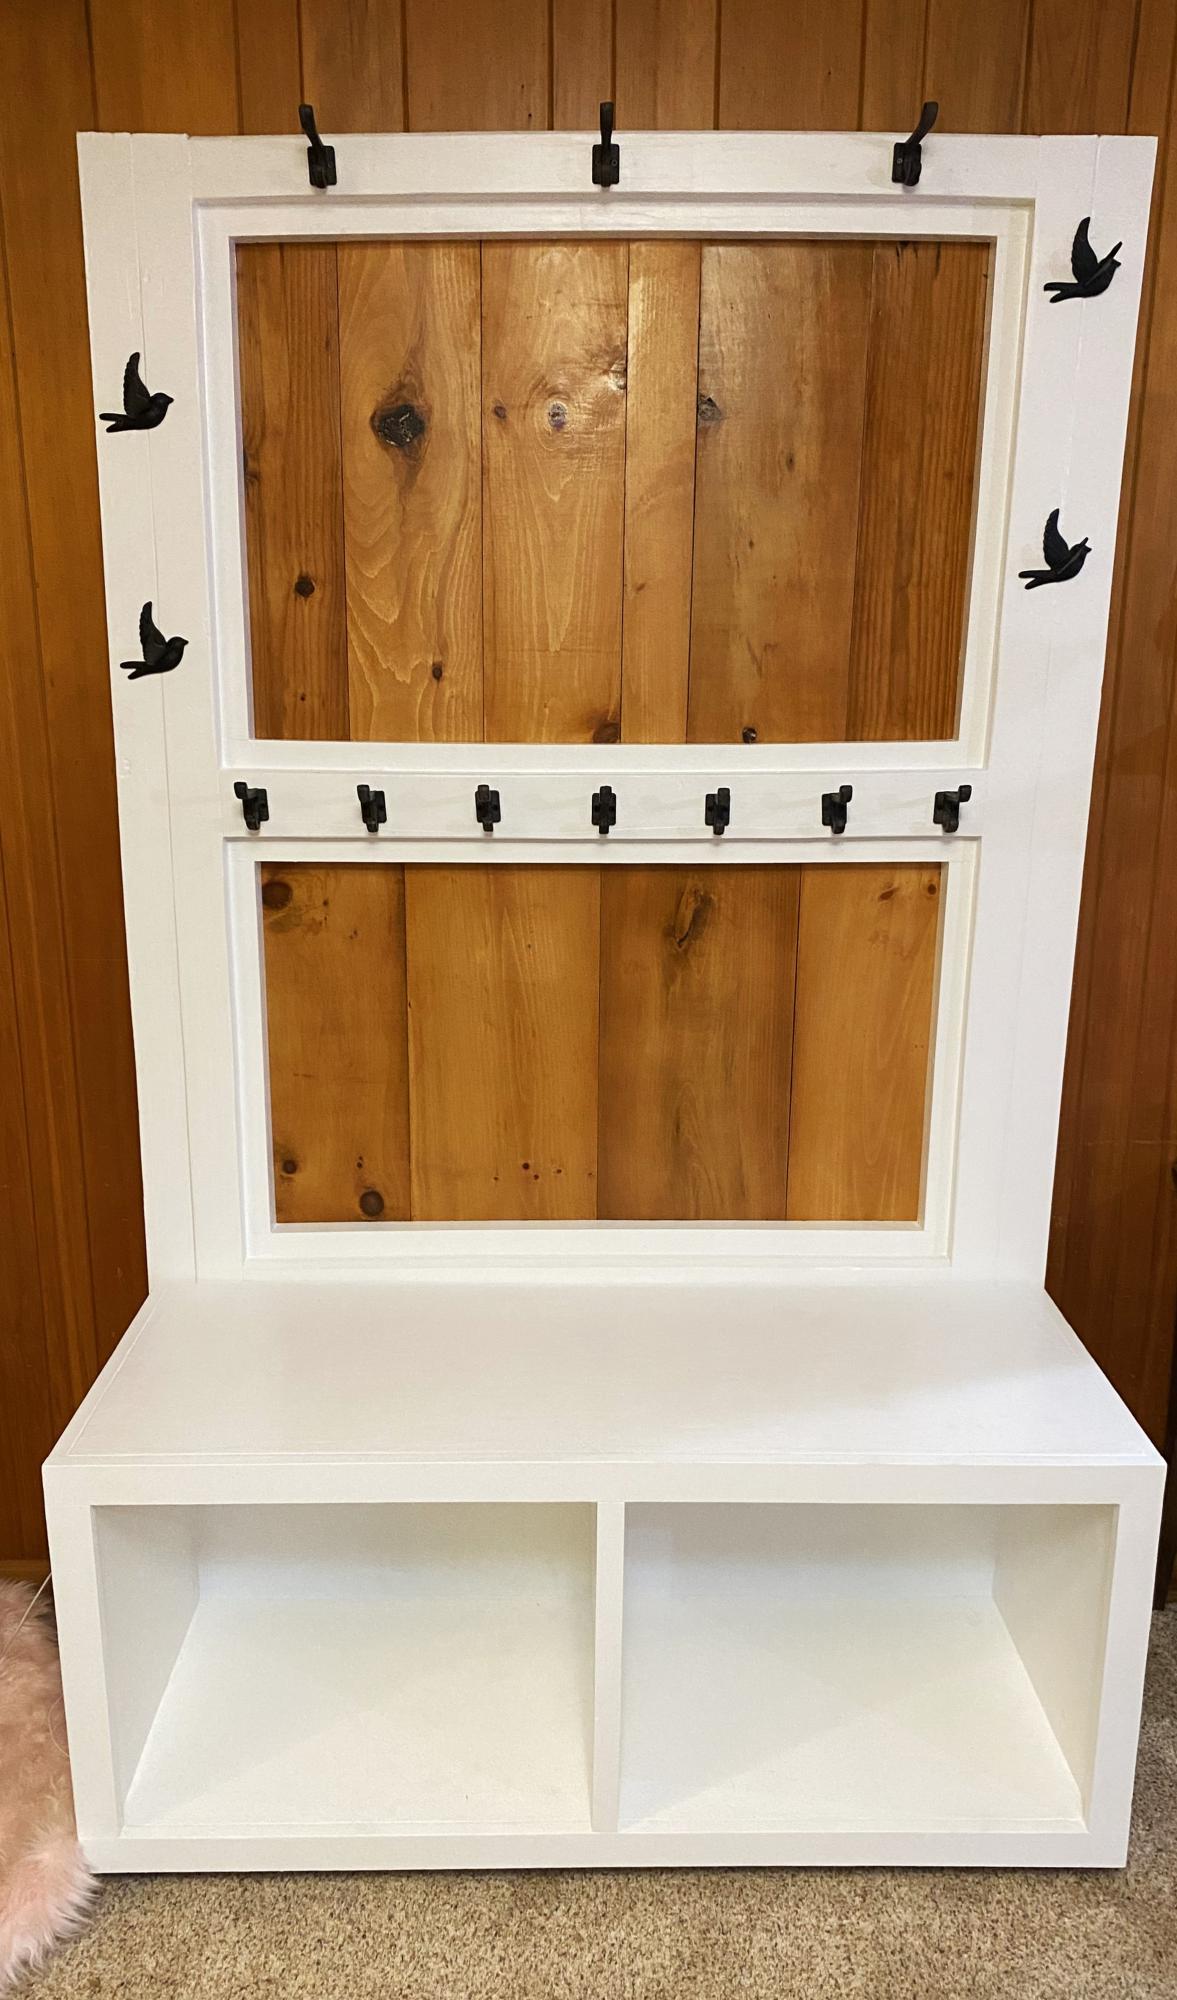
The family needed a safe place for backpacks, shoes, jackets and everything else needed for school. I modified Ana's plan since this project was made with recycled shipping pallets. Rather than struggle with warps, twists and other imperfections I embraced them with glossy white paint. I added the waxed pine panels to absorb the daily use and abuse and be readily buffed when necessary.
Built from Plan(s)

Changing Table

This was actually the second changing table I made based off this set of plans. The first one was a painted pine piece that went to the church nursery. I made the shelves deeper and the wider to accommodate the changing pad and have extra room for a wipe warmer and a lamp.
Neither of the big box stores had oak trim (I guess it's a regional thing?), so I had to spend some extra money on a nice piece of trim from a custom shop. I had quite a bit of oak plywood left over from a previous project, so the cost of the project all evened out in the end (kind of).
I also didn't make the top "removable." I figured if I want a book shelf in the future, I'll make a bookshelf instead of having an old changing table with holes on the top from screws.
Just like all of my projects, there a few blemishes, but all in all I was pretty pleased with the way this one turned out. Thanks for the plans, Ana!


Built from Plan(s)
Estimated Time Investment
Week Long Project (20 Hours or More)
Finish Used
Minwax Red Oak (2 coats) and Minwax Polyurethane - Gloss (2 coats)
Recommended Skill Level
Intermediate
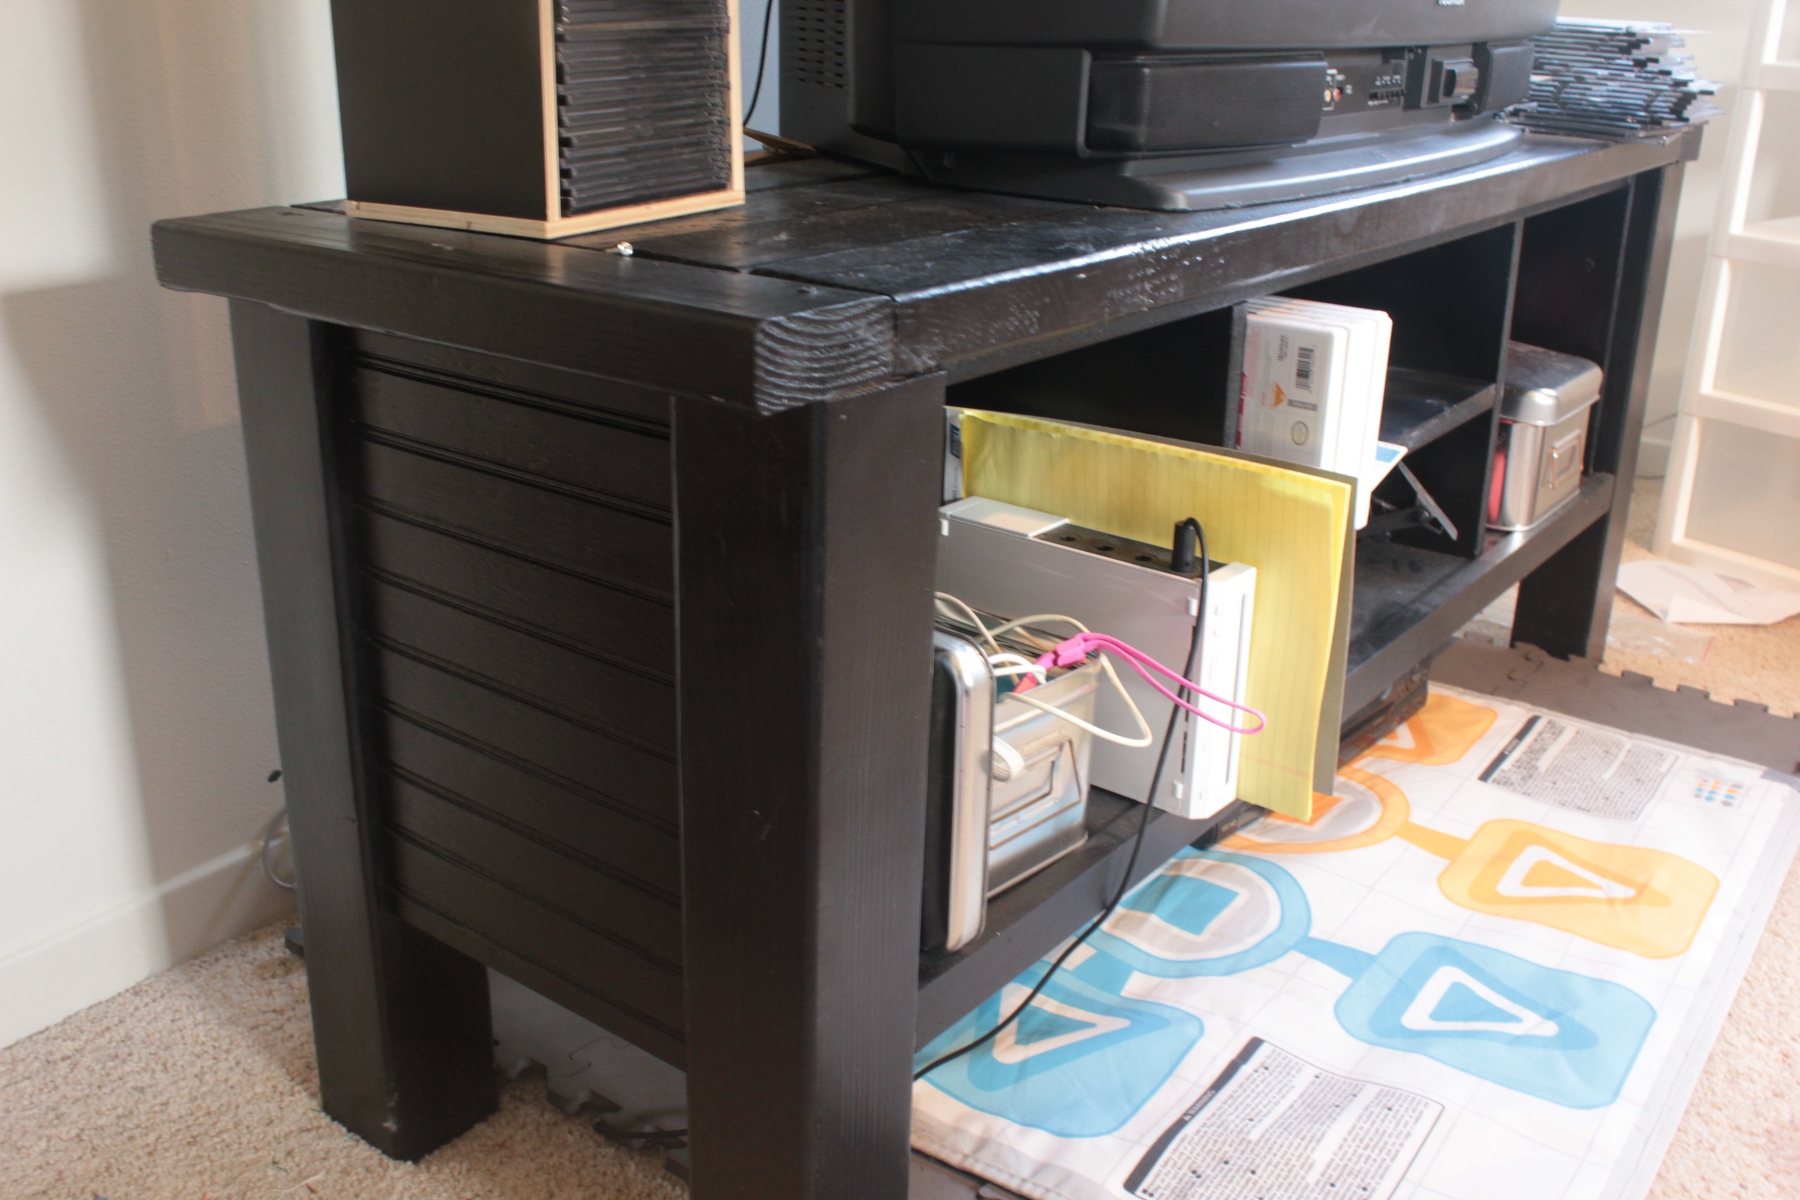
Emerson console with adaptations

I adapted the Emerson console plans pretty extensively. I constructed the cabinet out of low grade playwood, and then clad it on all surfaces with faux painted cheap furring strip lumber of various widths. I changed the base and made it sit completely on the floor so that I would not be chasing dog fur dust bunnies that seem to accumulate under everything! I made the open storage wider to fit my componenets and added holes to pass the wires through the back.
It was very helpful to have the plans as a jumping off point. It takes me forever in the planning stage. I try to figure out my dimensions to hide as many raw edges as possible in every project. I also want to work with the widths of lumber avaialble to me since I have a fear of a tablesaw (which is still in the box after 3 years). Give me a chop saw and a circular saw and I'm your girl!
Very proud of this project. Thanks Ana!

Built from Plan(s)
Estimated Cost
$300
Estimated Time Investment
Week Long Project (20 Hours or More)
Finish Used
Painted the boards BEFORE construction. Used five different colors of latex paint (samples) using 2 or three colors on each board. Used a mustard yellow, red, black, dark and light gray. First coat completely covered the board with one of the colors (alternating which colors). Put one or two additional coats of other colors of paint on each board with a VERY dry brush attempting to only put color on a few places. After fully dry, rubbed a dark oak gel stain over every board to add patina and dull down the colors. After dry, sealed with a satin water based polyurethane.
Recommended Skill Level
Intermediate
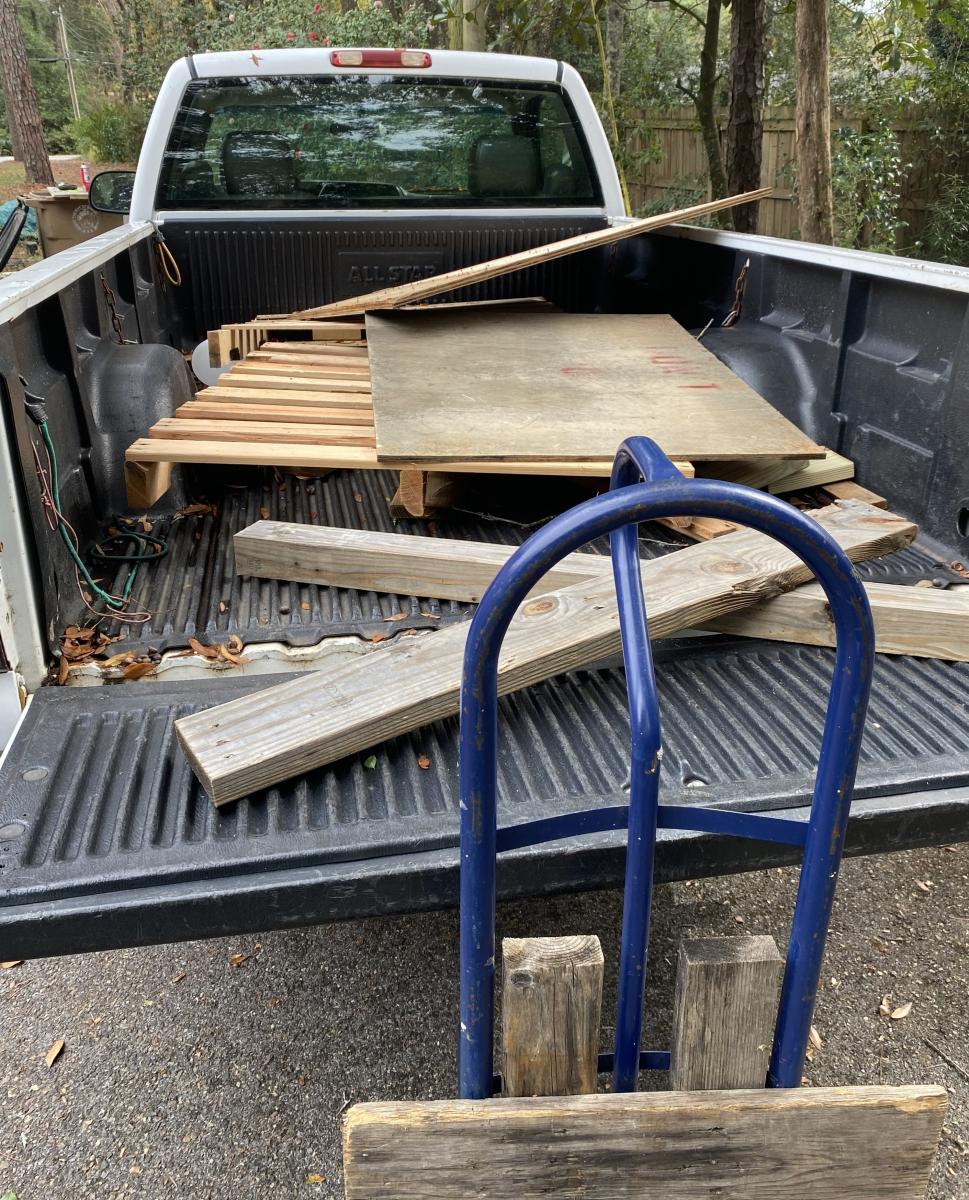
2x4 and 2x6 Chairs and Couch
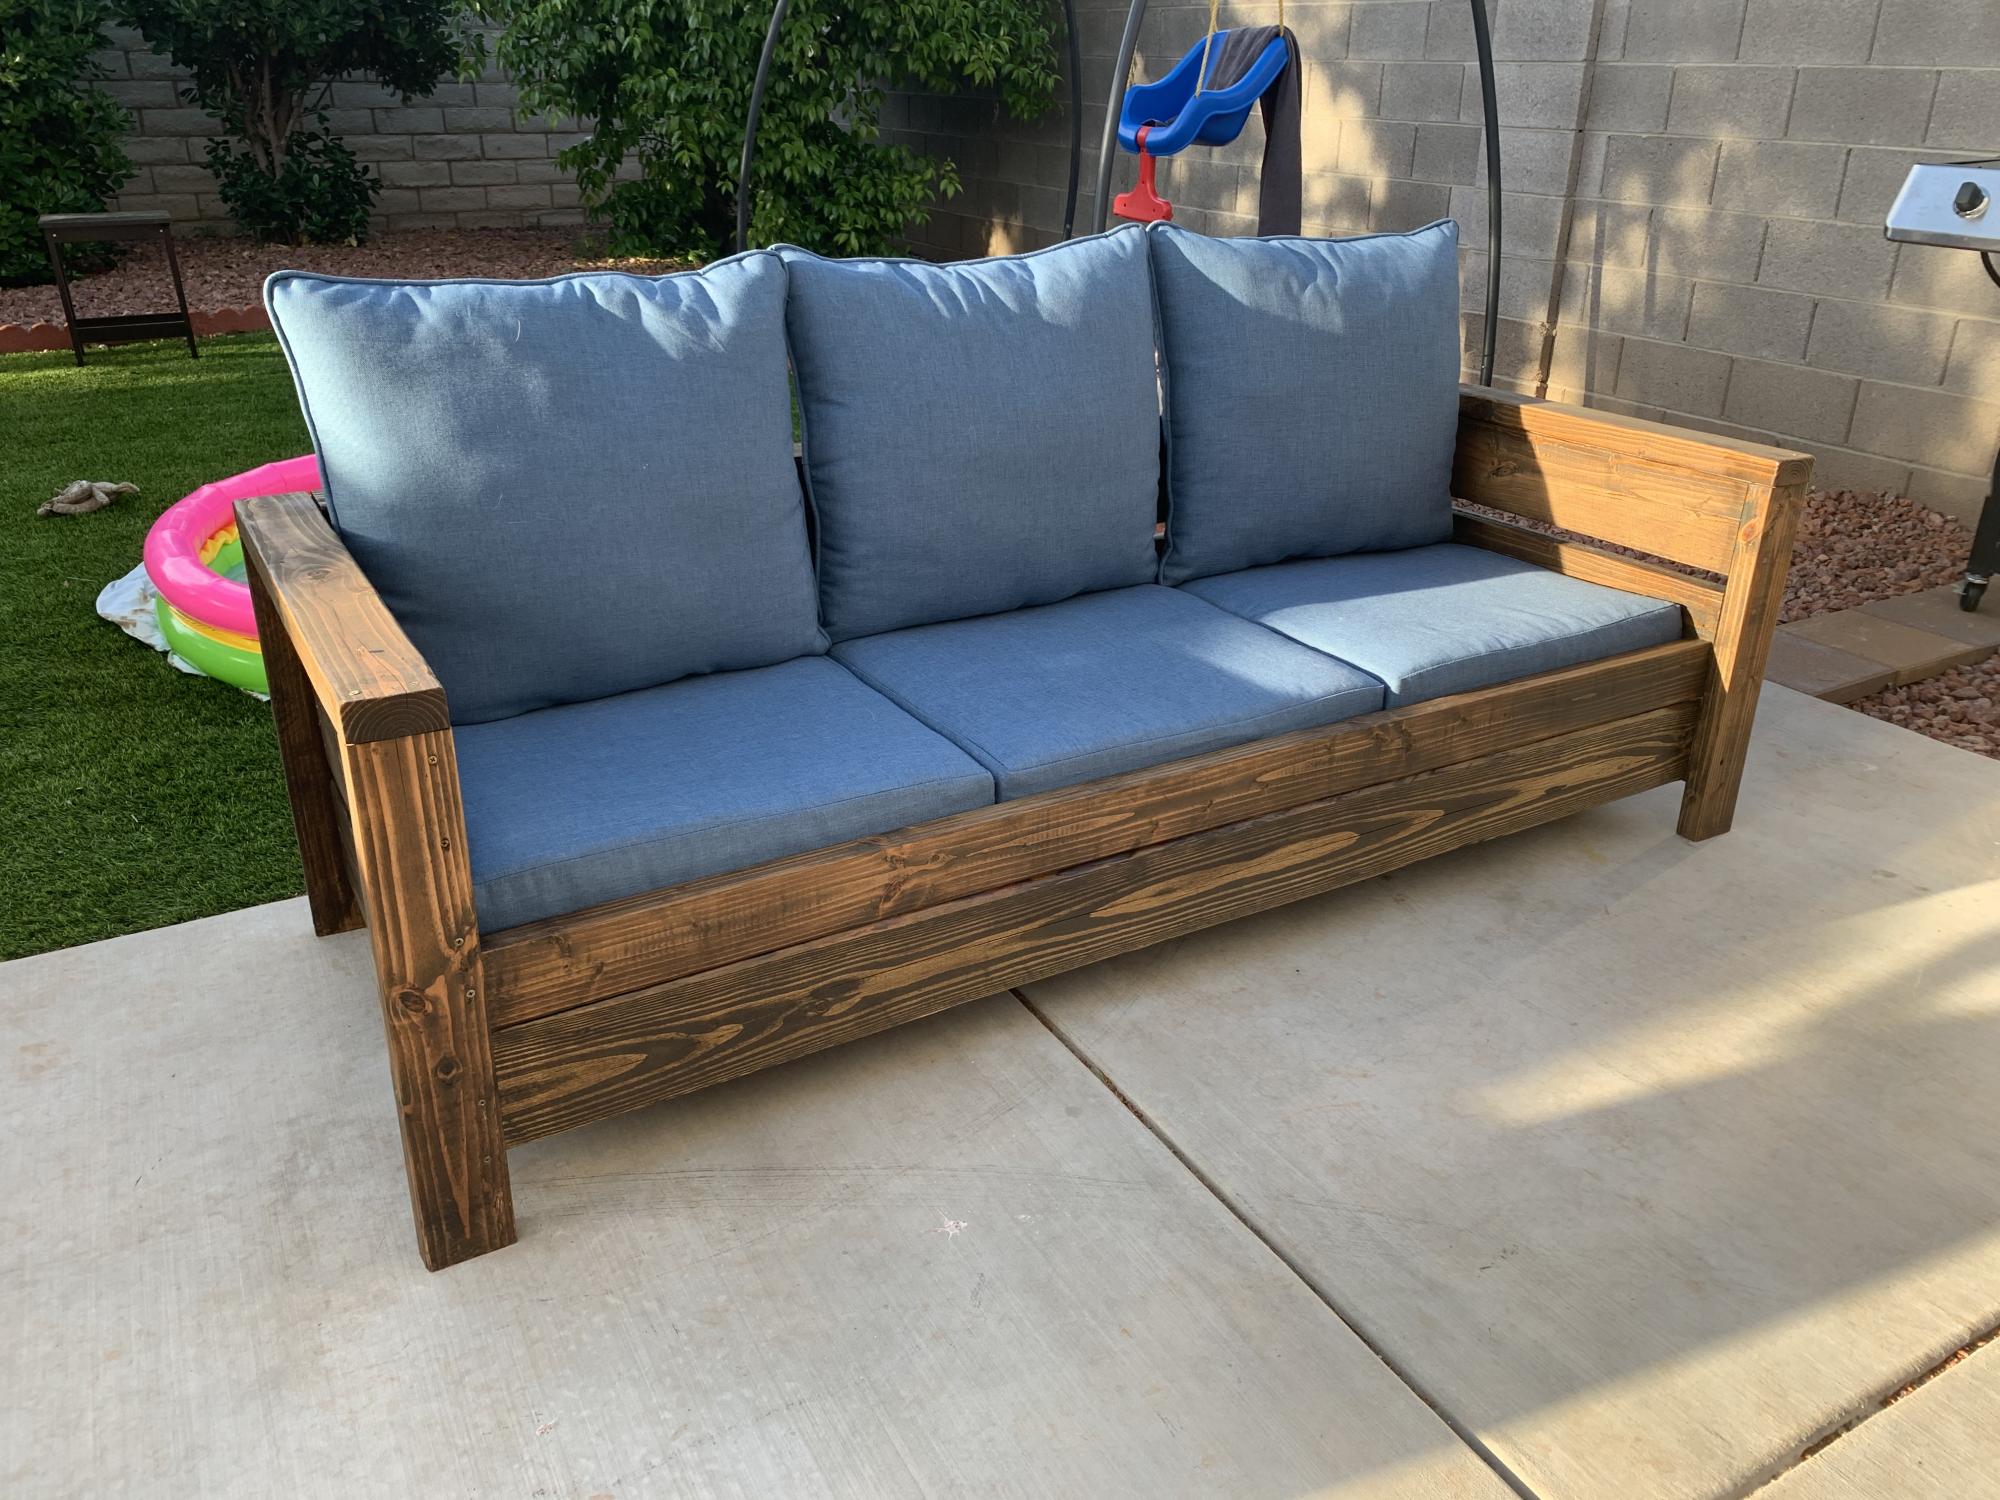
I used the Modern Outdoor Chair from 2x4s and 2x6s plans and slightly modified then to make a 3 seater couch. My cushions(most expensive part) were 24 in x 24 in and purchased from Lowes for $40 per seat. The couch is 79 inches in total length. I also dropped the seat down to the lower level to allow more room for my cushion backs to sit further down into the seat.

Built from Plan(s)
Estimated Cost
$400
Estimated Time Investment
Weekend Project (10-20 Hours)
Finish Used
Thompsons Waterseal Teak Oil Walnut Semi-Transparent
Recommended Skill Level
Beginner
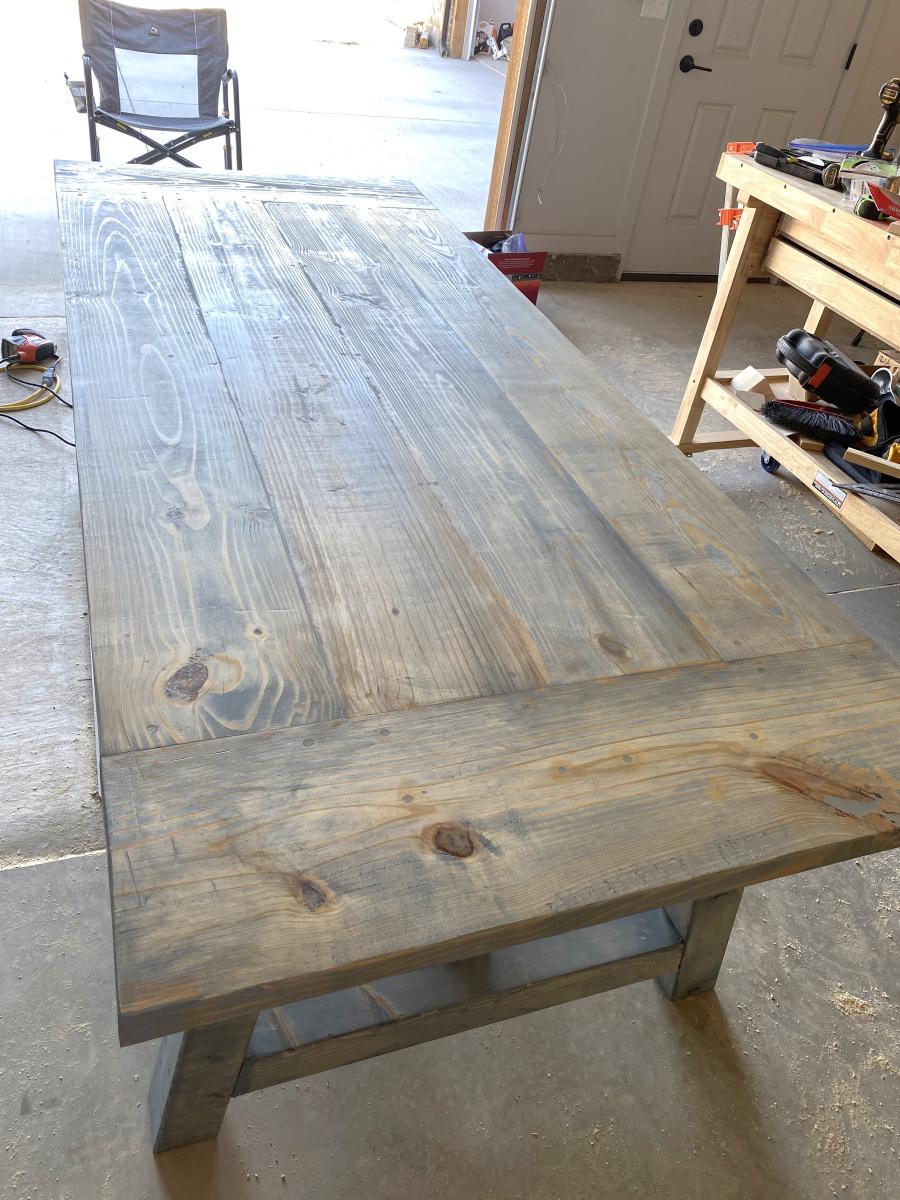
Truss Table
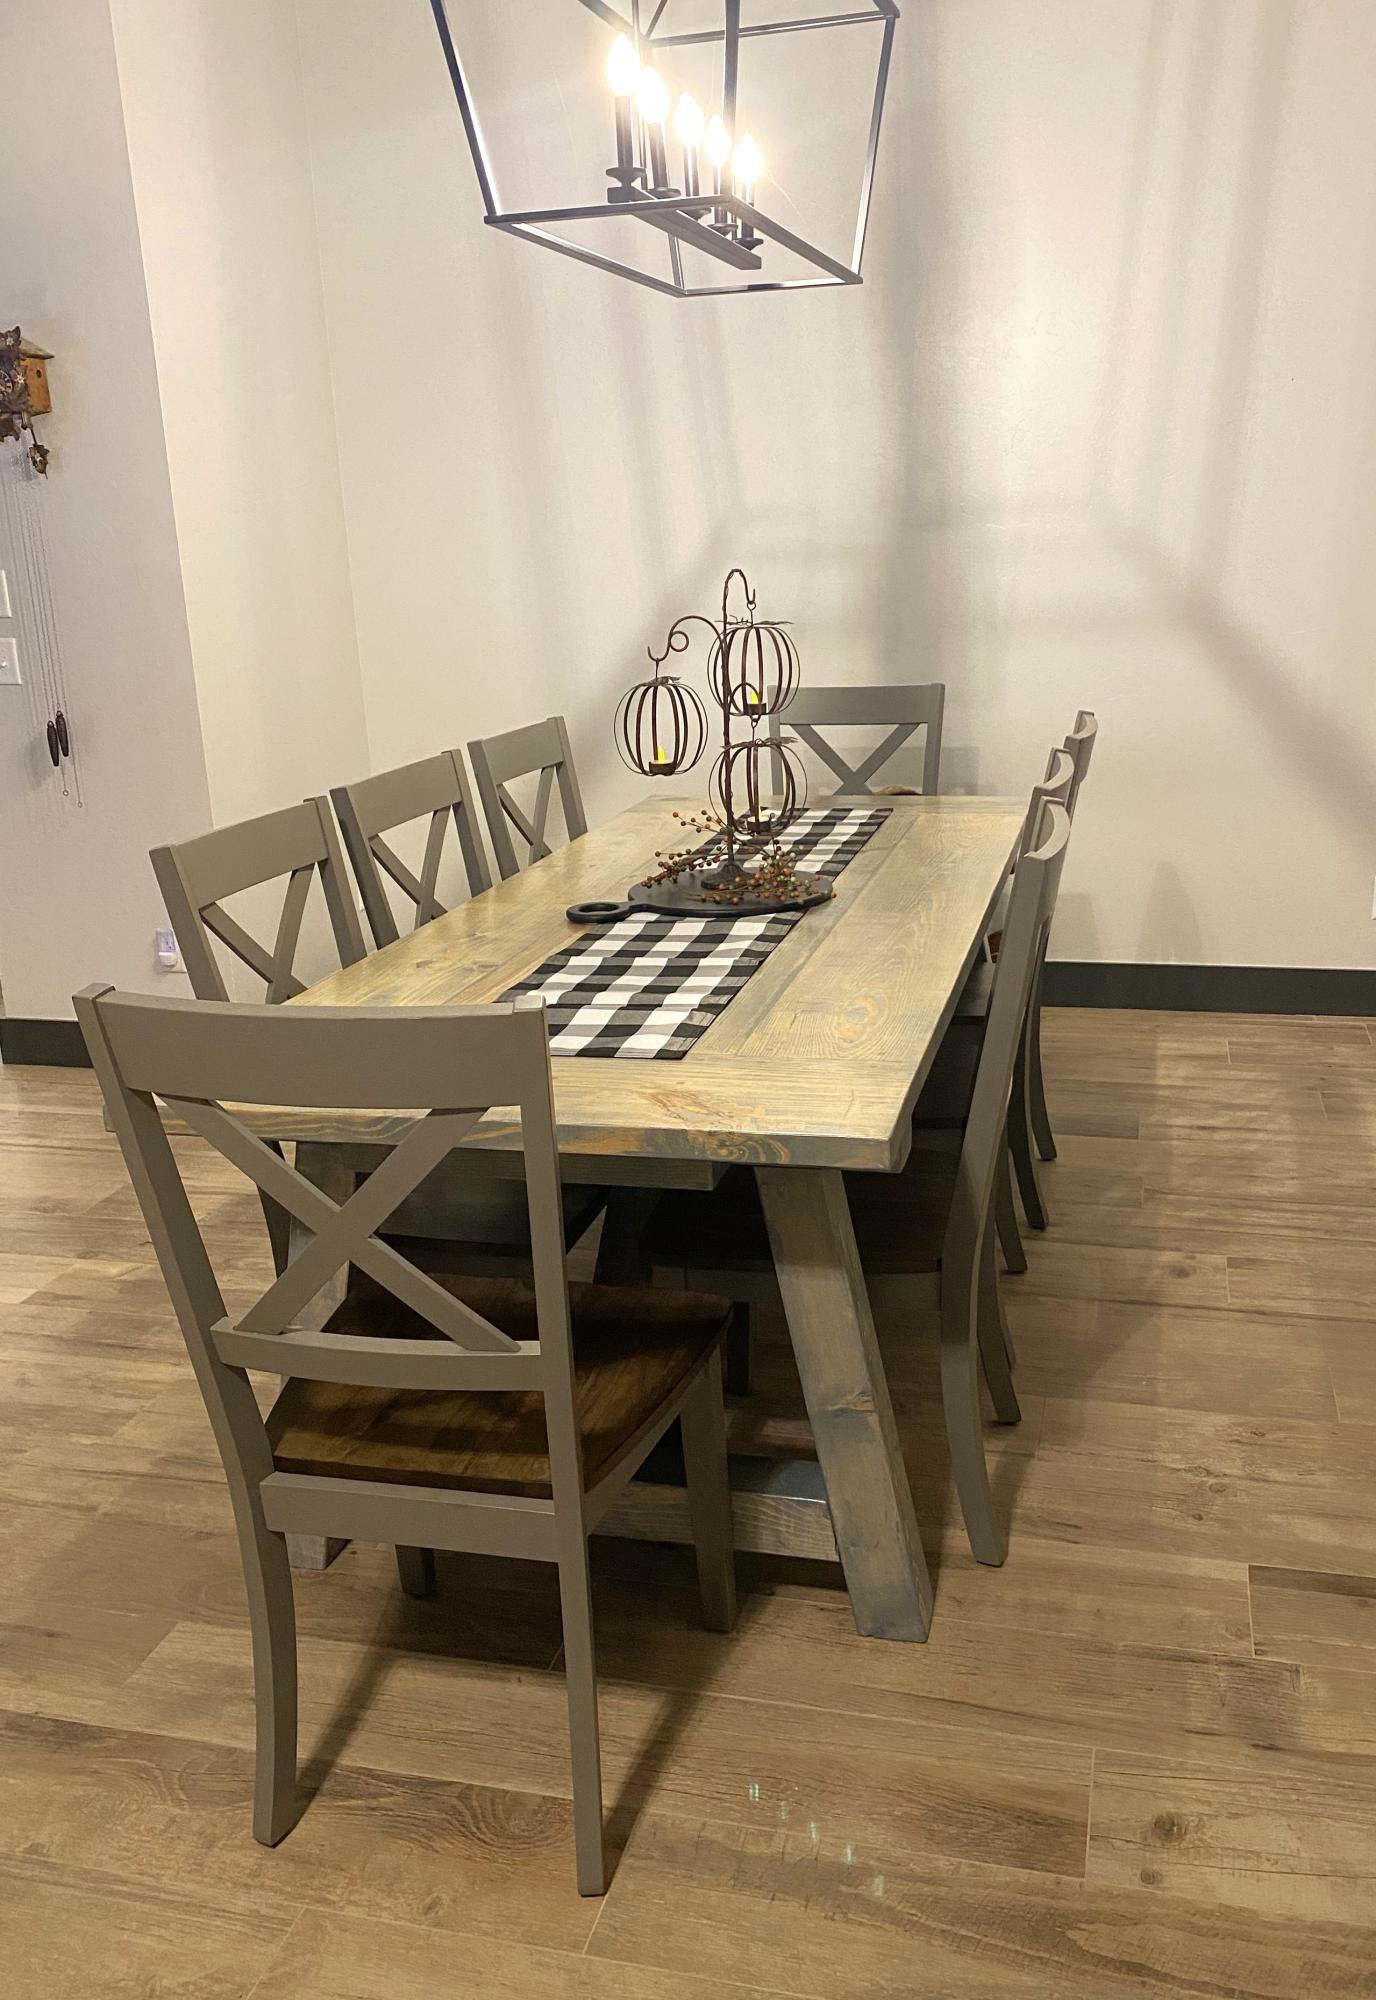
Our 4x4 Truss Beam Table made by my husband for our new house. Stain is Minwax slate gel stain.
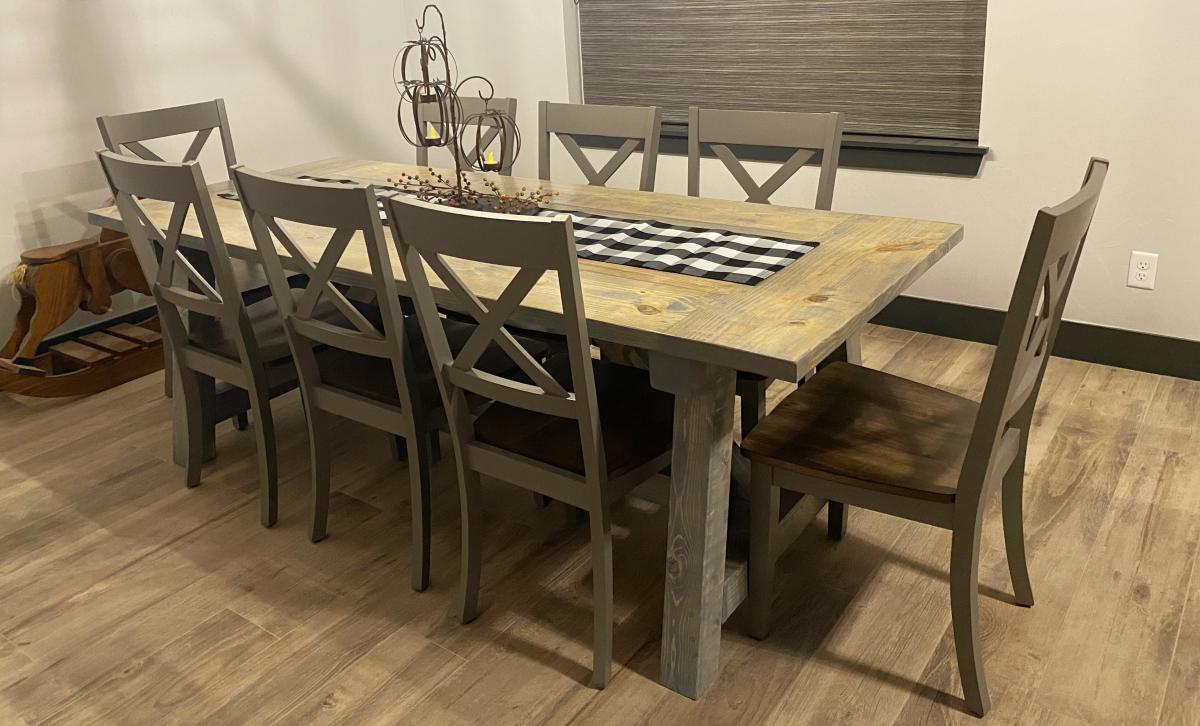
Built from Plan(s)
Comments
Simple White Outdoor Sofa +Love Seat + Coffee Table
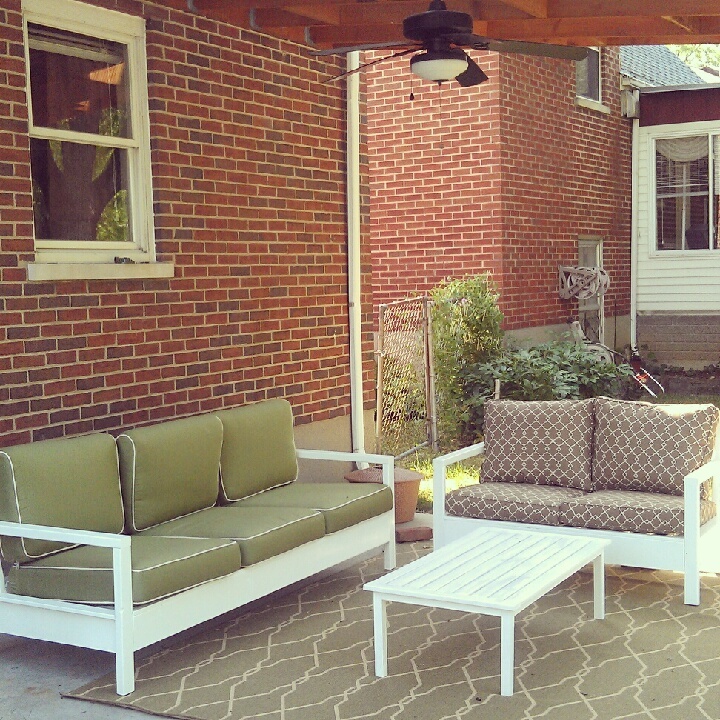
Love the way these turned out! I would definitely recommend buying the cushions prior to making the furninture. Also we ran into trouble assembling the back of the furniture to the base, but managed to make it work by diassembling a side.
Overall wood was $90 for all pieces (we made the table out of scraps). We used exterior white paint, 2 coats, I am interested to see how it will hold up.
Cushions came from Frontgate and Ballards outlet. It took some hunting but finally found some I liked, and that fit the dimensions.
Now the temperature needs to go down in Kentucky so we can actually enjoy our new furniture!
Thanks for the plans Ana!
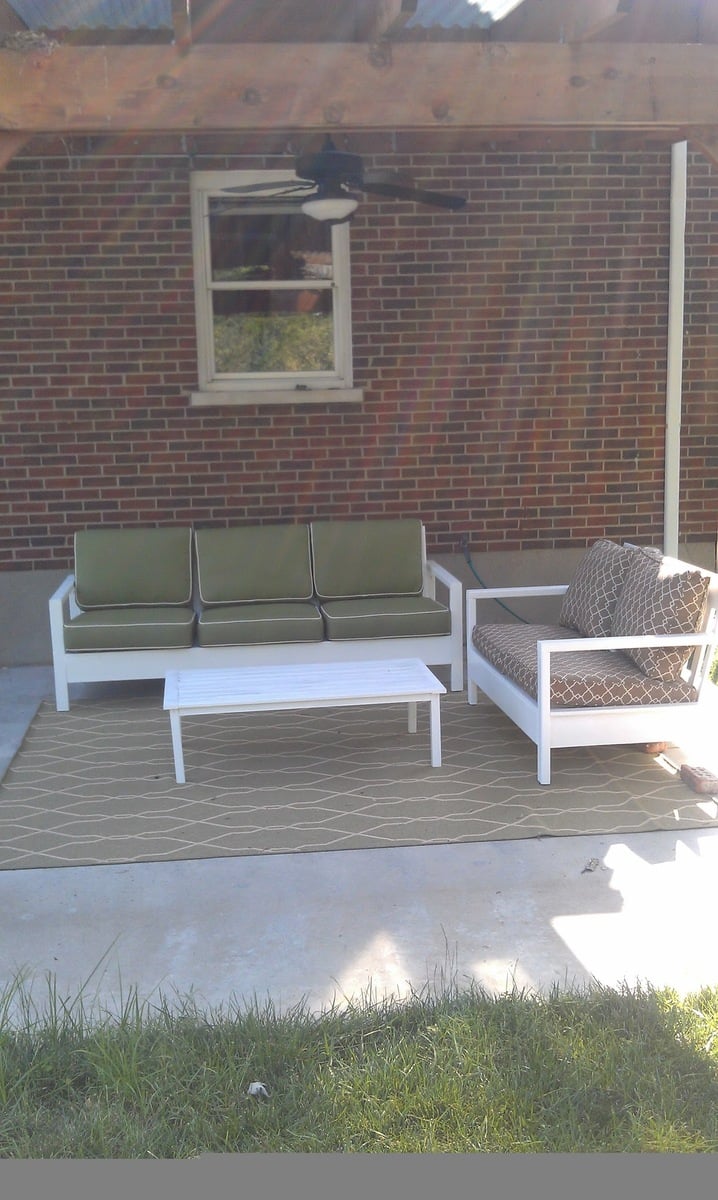
Built from Plan(s)
Estimated Cost
$90 for wood materials
Estimated Time Investment
Weekend Project (10-20 Hours)
Finish Used
Behr exterior, semi gloss
Recommended Skill Level
Beginner
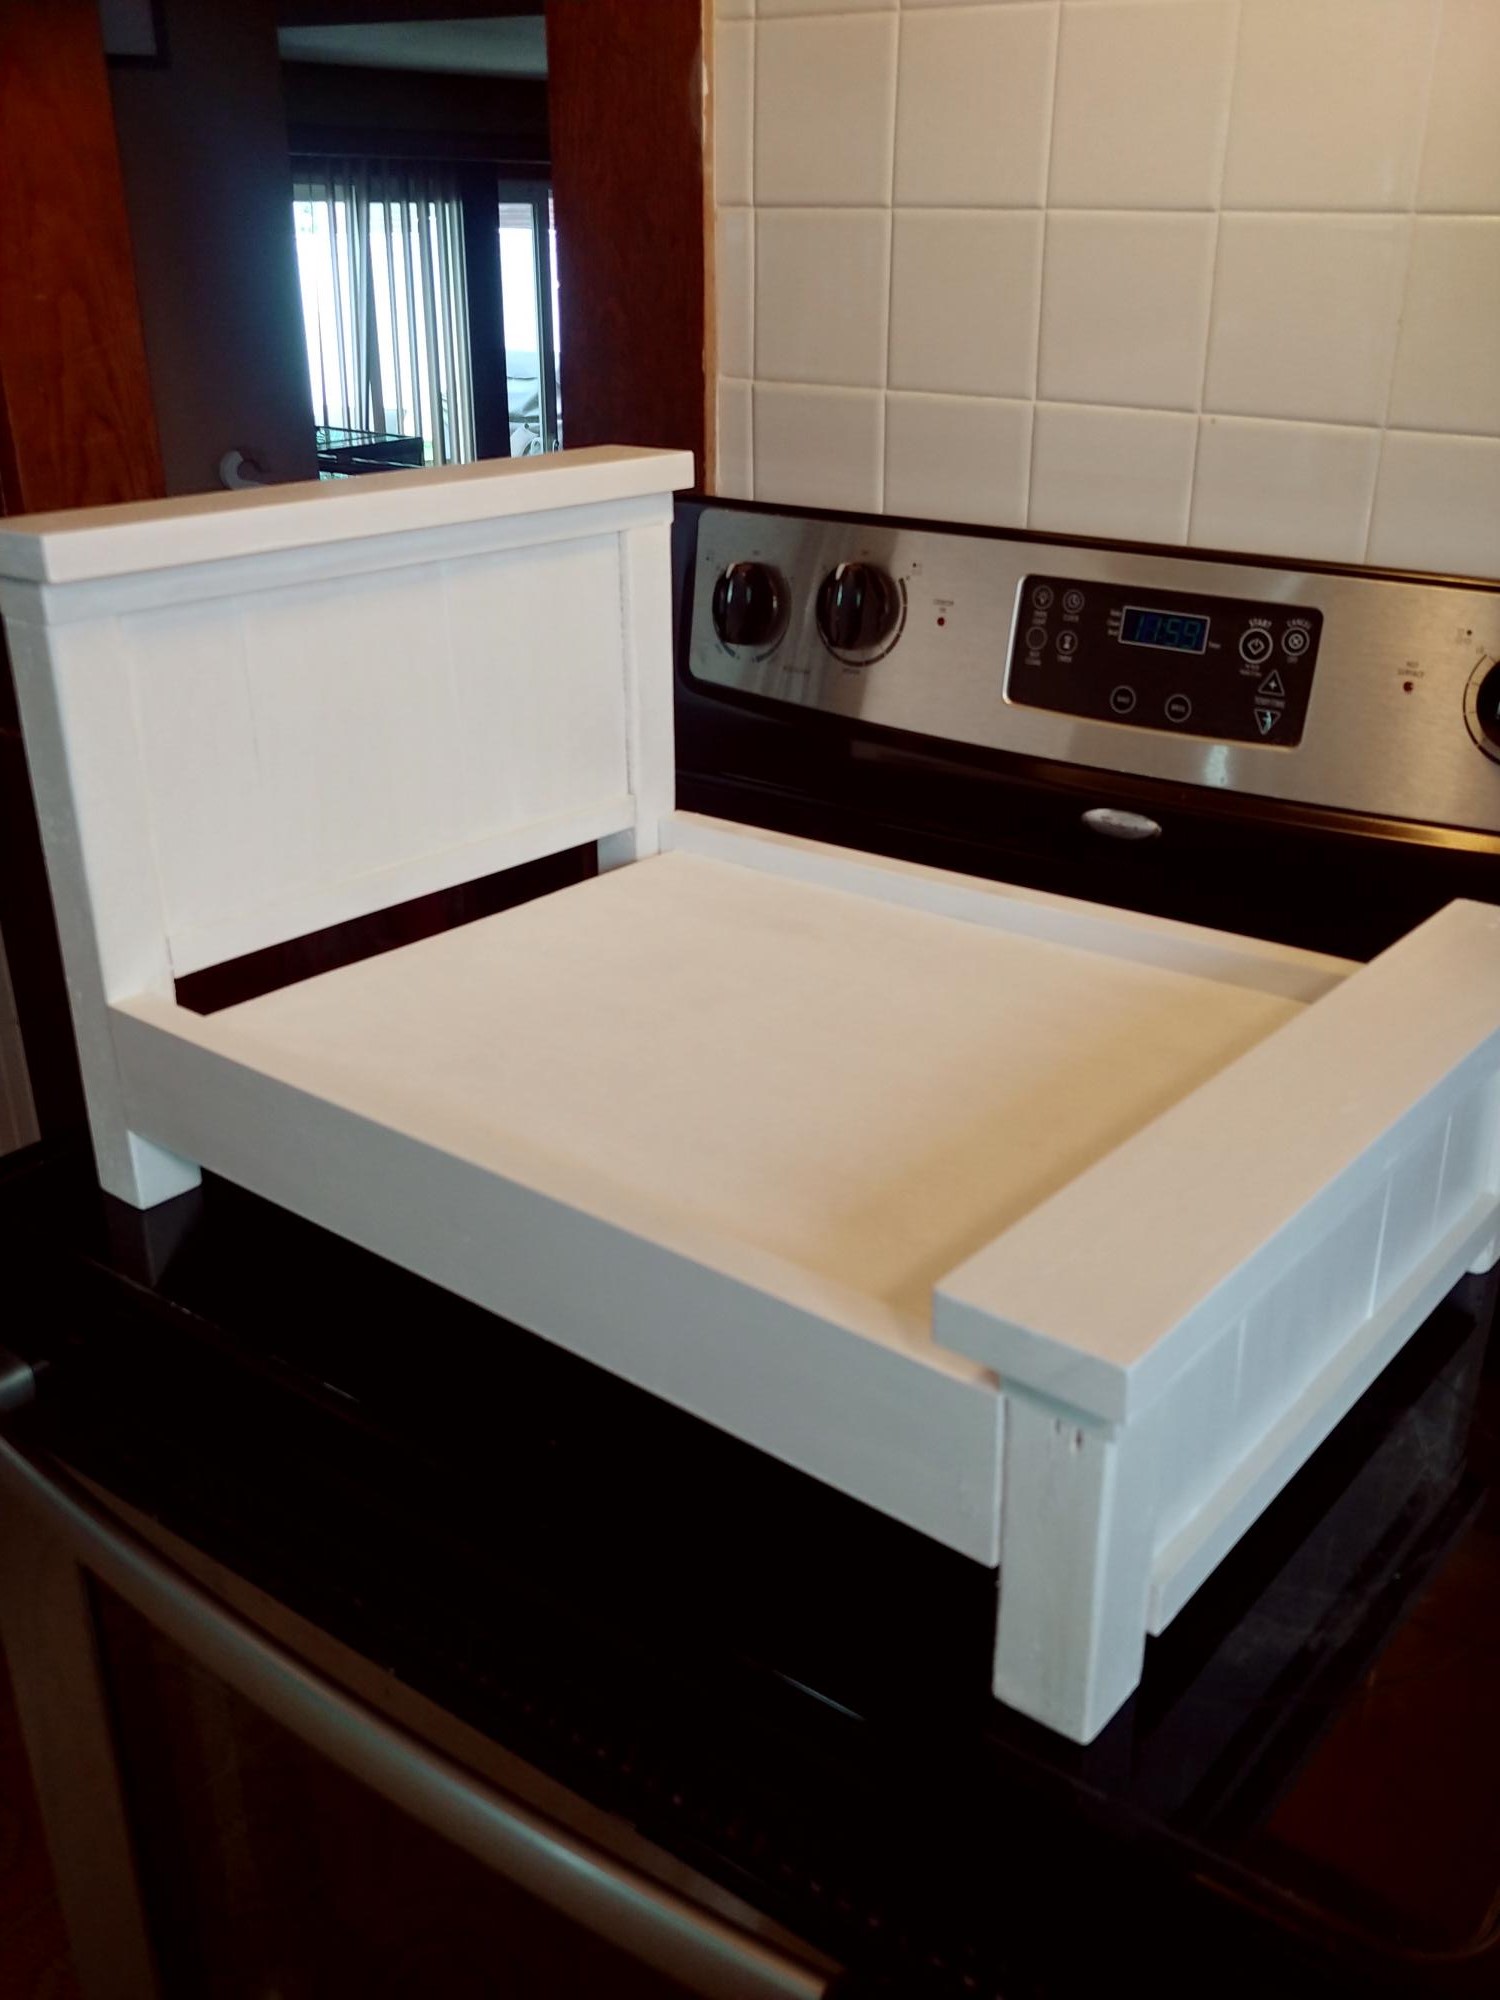
Loft Bed
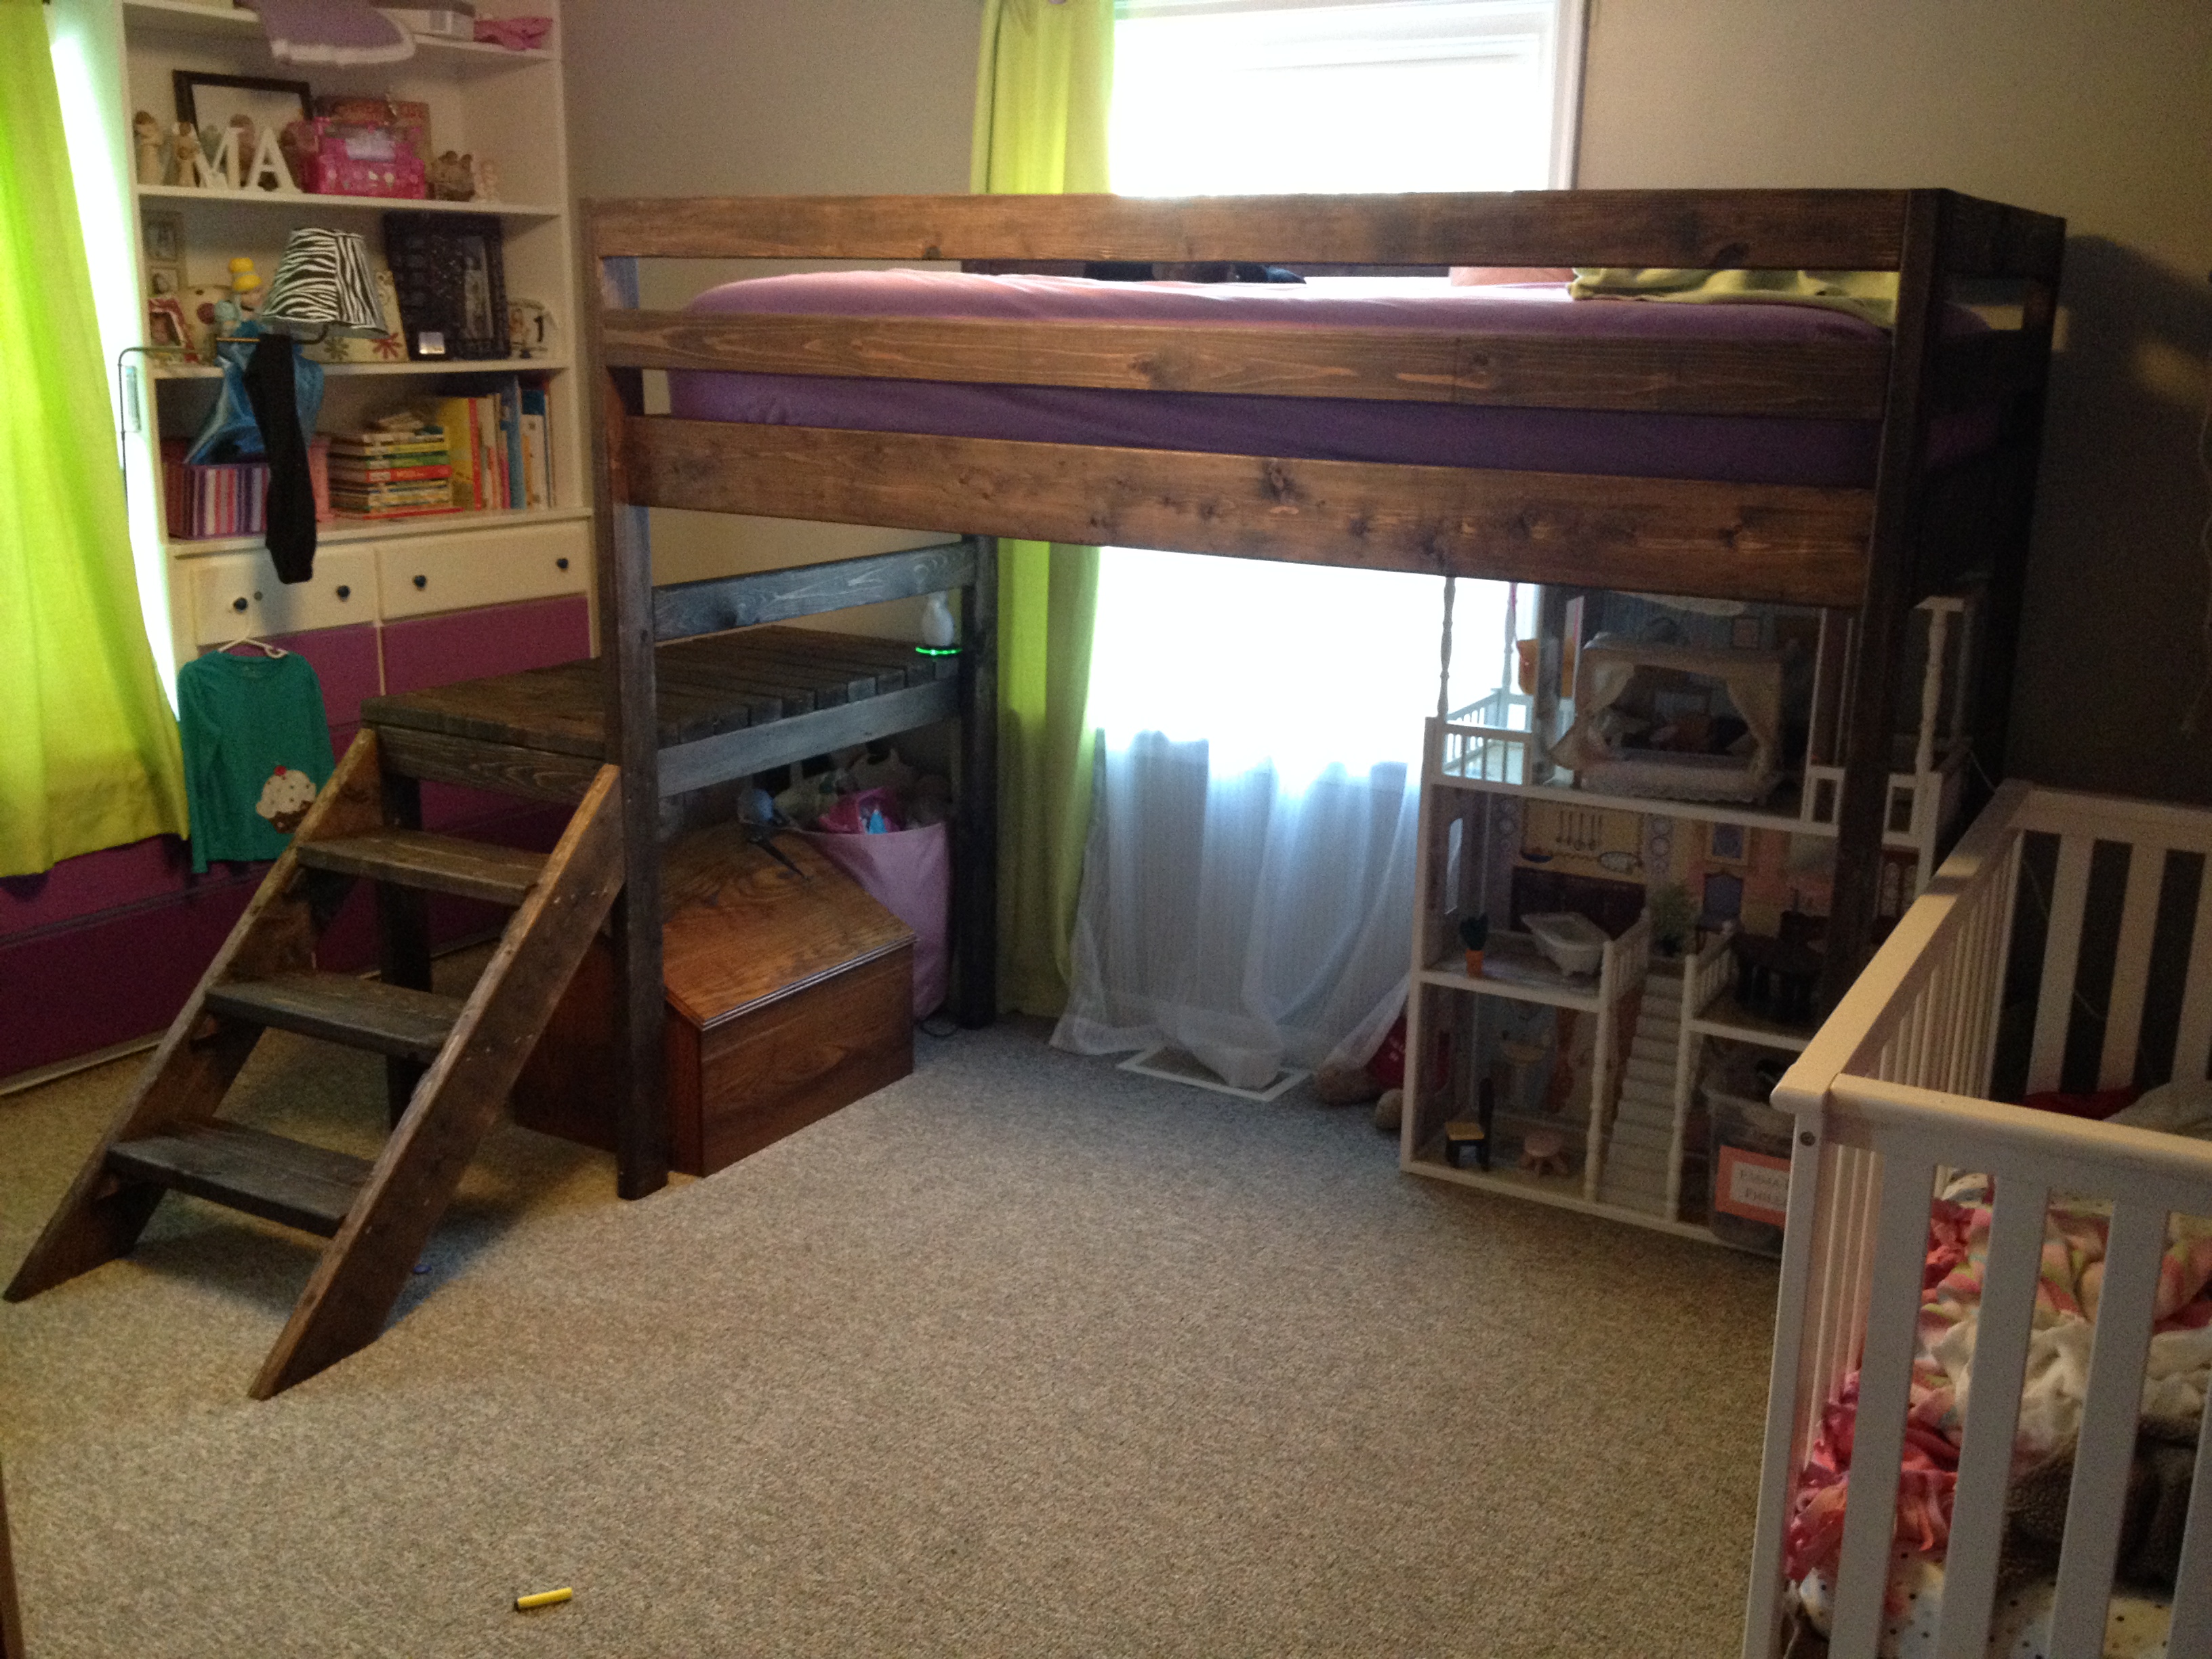
This was a fun project and I would say that between my husband and I we are intermediate end of the skill level. Took a few weekends only because we were not able to devote a whole weekend to it so our time on the project was broken up. The bed came together quite easily, which was great since we had an excited and impatient 5 year old on our heels. This my daughter's bed and she loves it!!! Especially since she can hide from her little brother up there. She loves that it's fun and we love that it is safe and provides the kids with a lot more play space. Now if they could just keep the space clean!! HA!
Built from Plan(s)
Estimated Time Investment
Weekend Project (10-20 Hours)
Recommended Skill Level
Intermediate
DIY Bailey Console
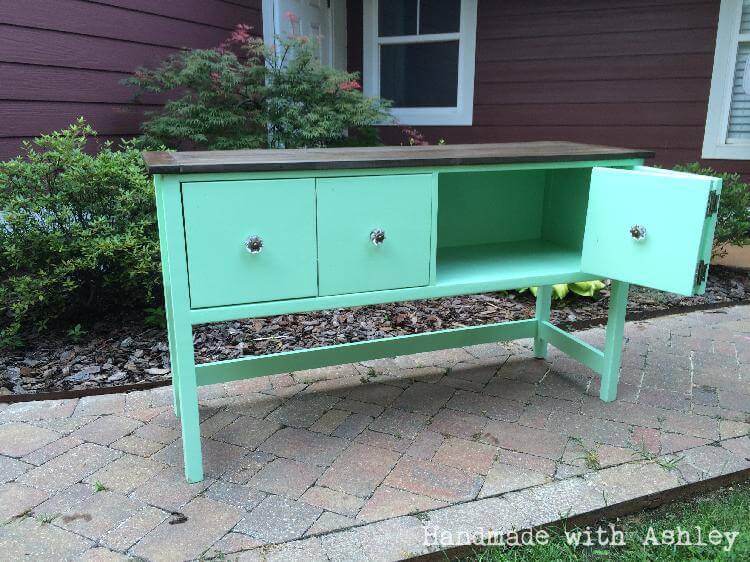
I had so much fun participating in the Instagram Builders Challenge! I look forward to participating in future challenges. :)
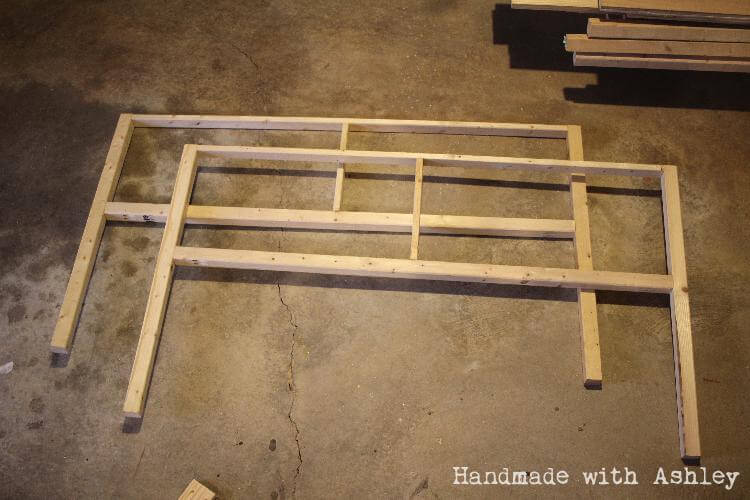
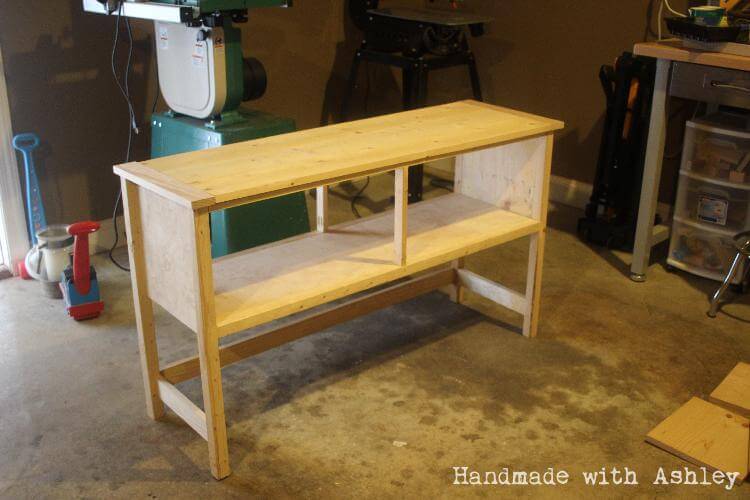
Built from Plan(s)
Finish Used
ECOS Paints Woodshield - Special Walnut, Behr Mint Parfait
Recommended Skill Level
Beginner
Cedar planter box

Just waiting on some flowers
Built from Plan(s)
Estimated Cost
$20
Estimated Time Investment
An Hour or Two (0-2 Hours)
Recommended Skill Level
Beginner
DIY Bathroom Storage Ladder
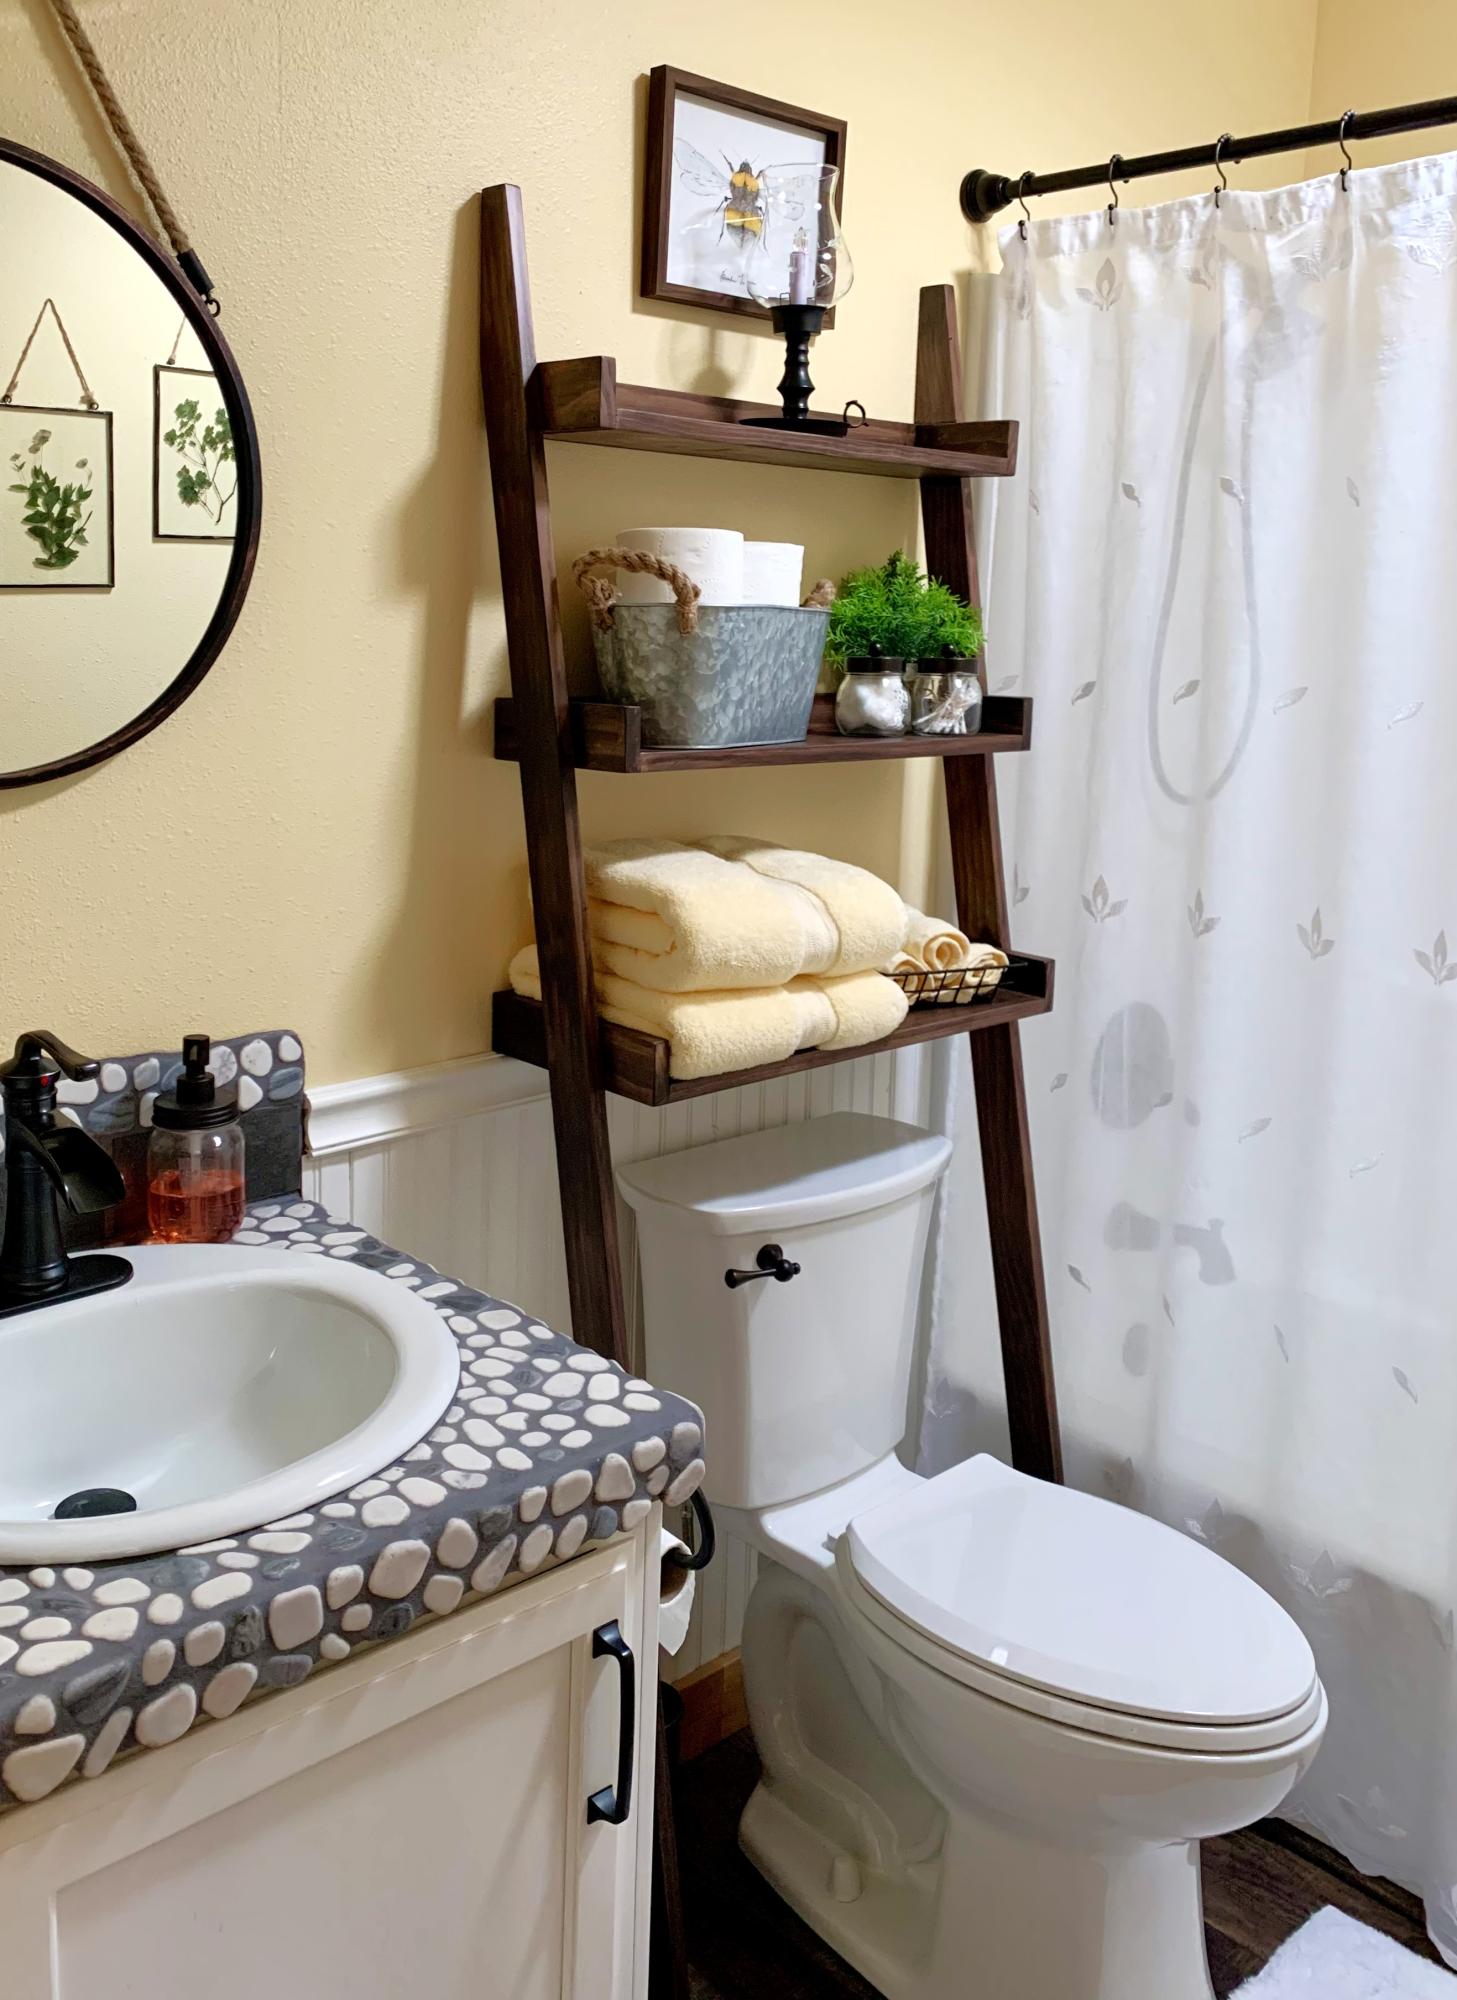
We have received so many compliments on these. Hub built 2 of them. Such a great look!
DShelby
Built from Plan(s)
Tryde Media Console
This was my second build. Sorry for all the crap on it. Straightforward and no drama. I learned from this build to paint as much as you reasonably can before assembling.
Built from Plan(s)
Estimated Time Investment
Day Project (6-9 Hours)
Finish Used
Valspar black latex in gloss
Recommended Skill Level
Beginner
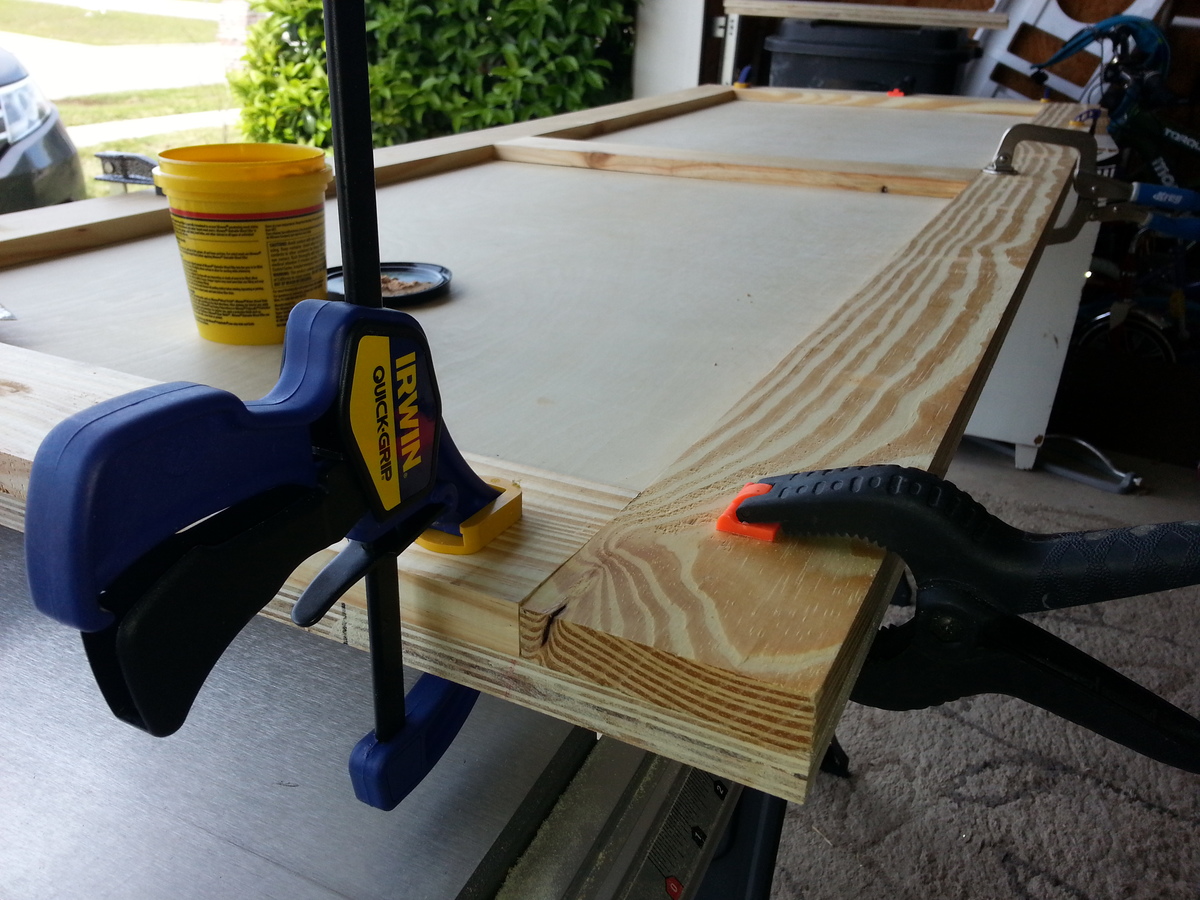
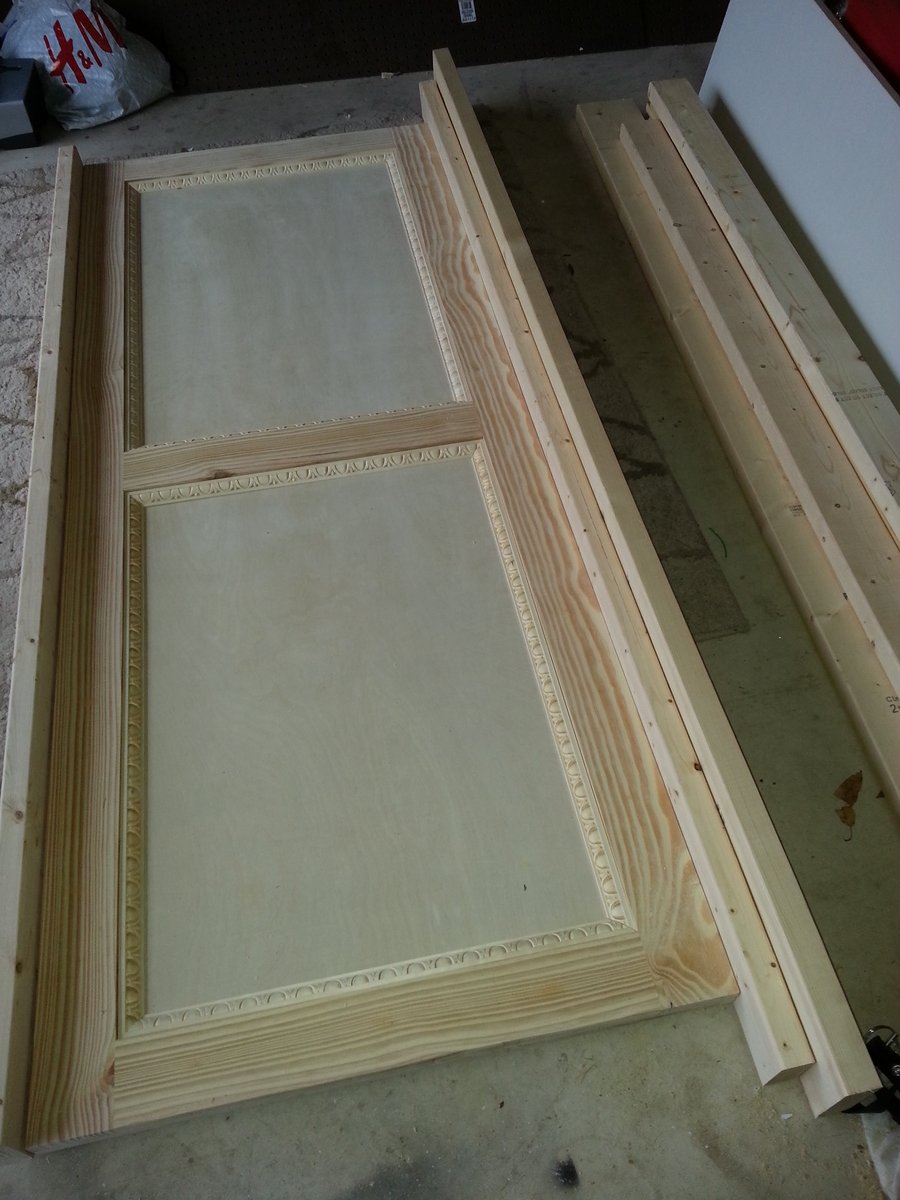
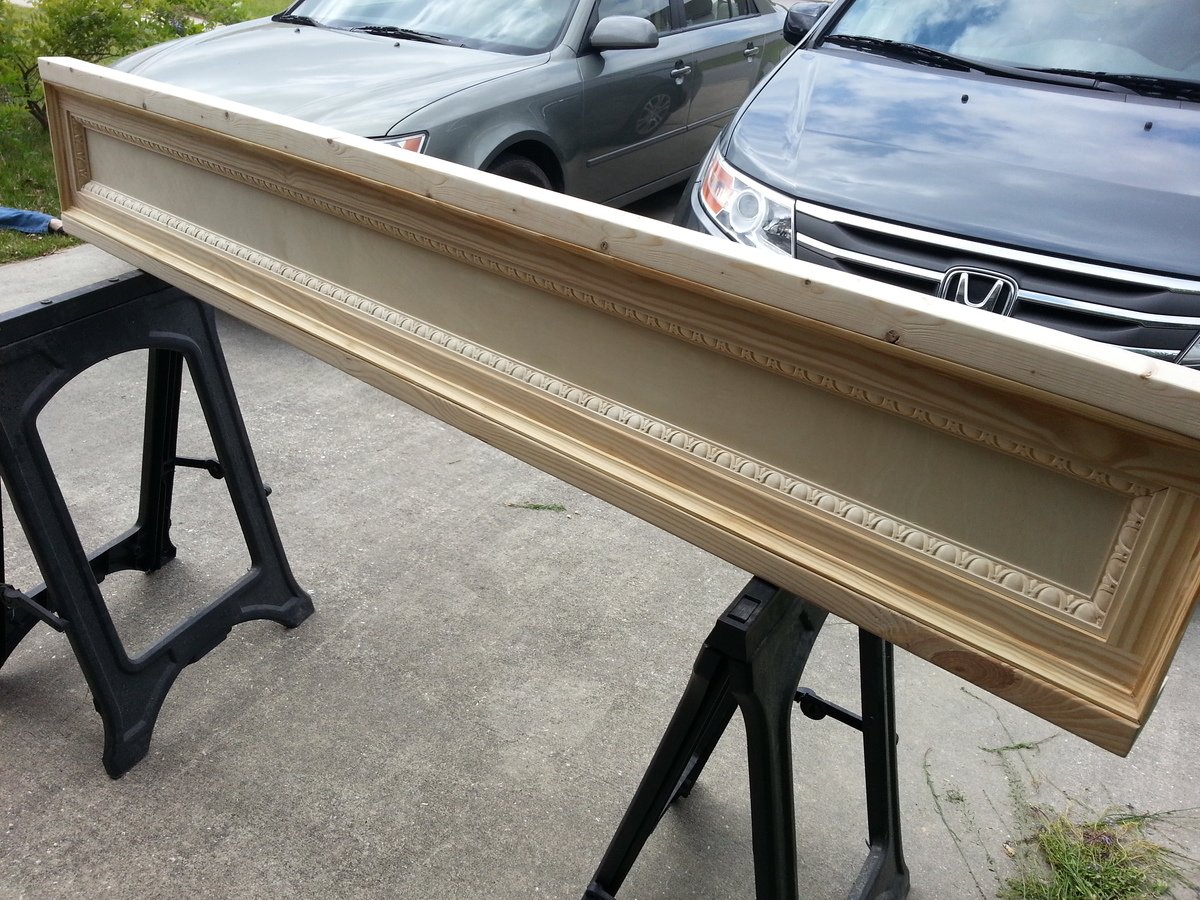
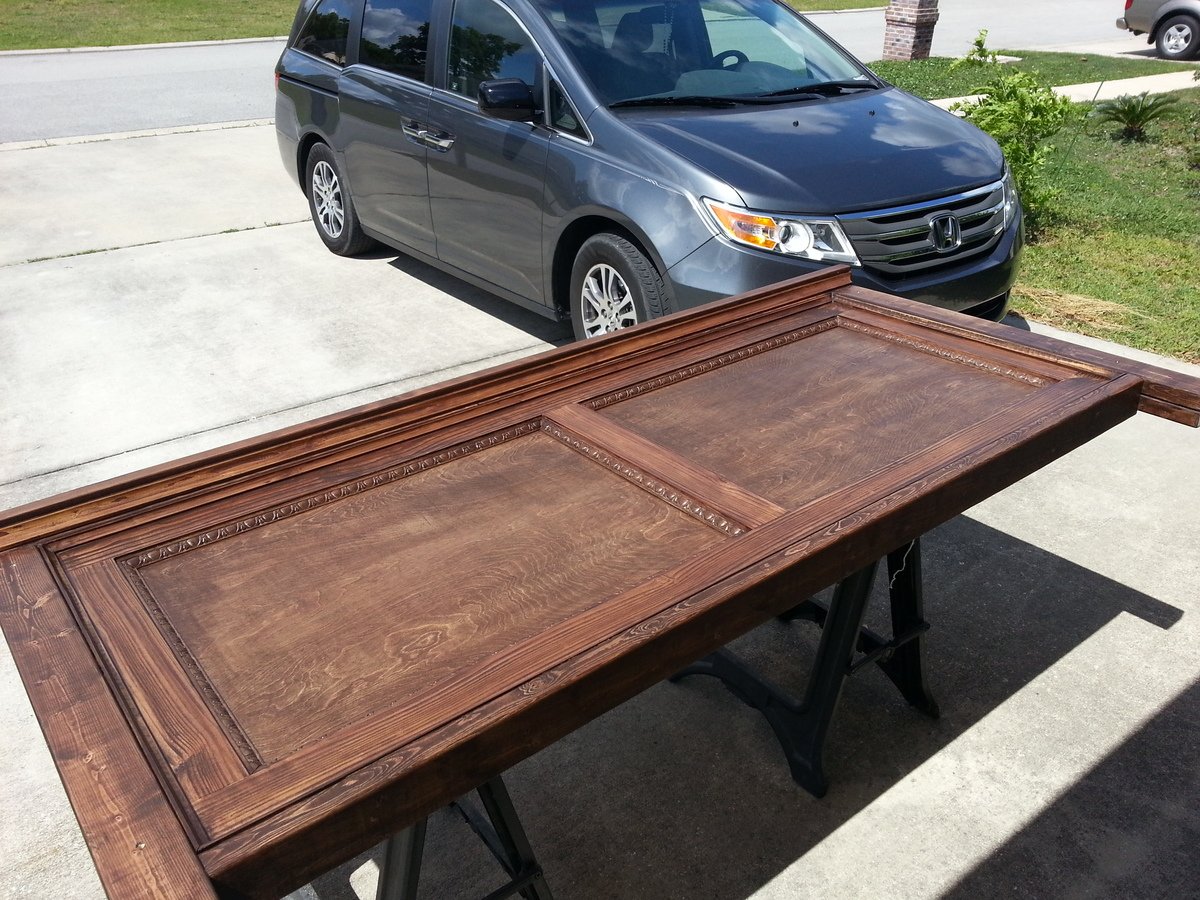
King Farmhouse Bed (modified)
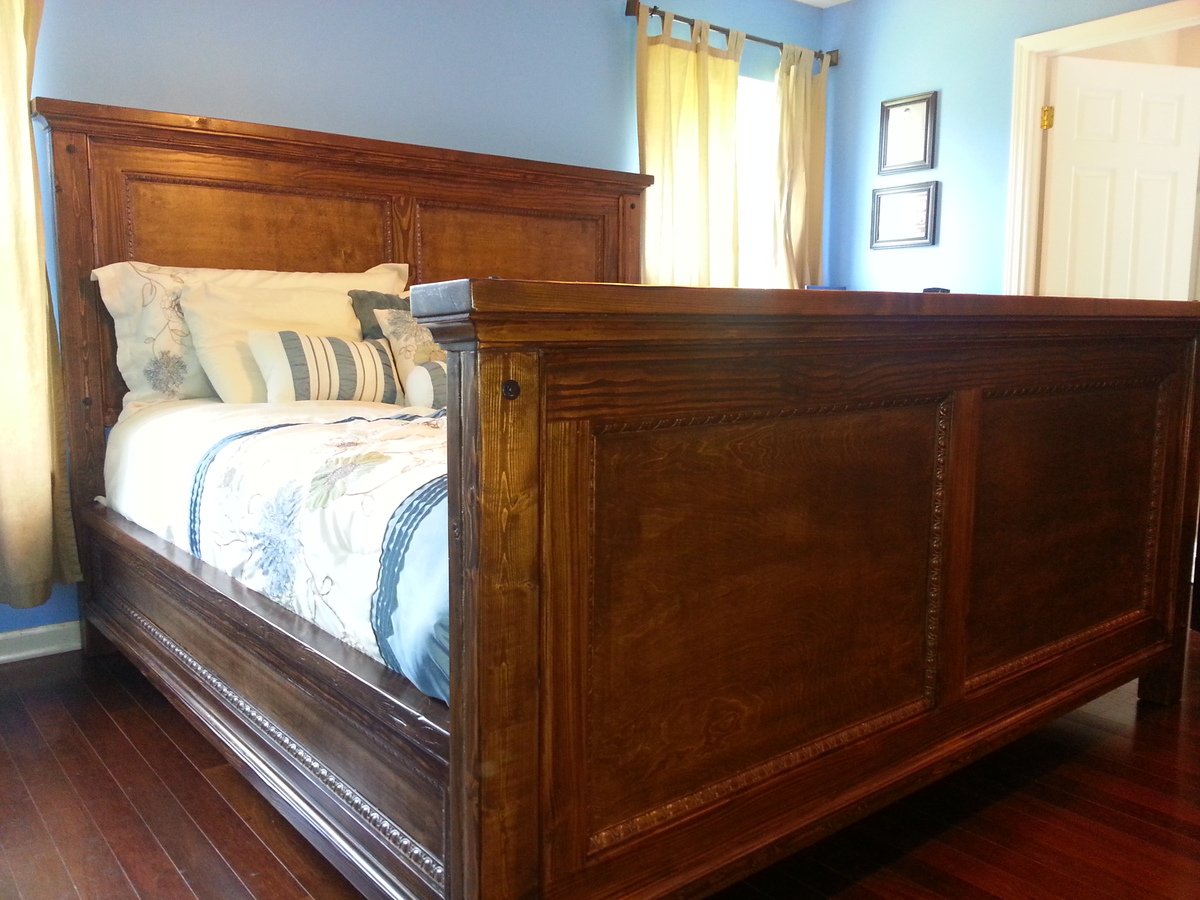
My wife and I recently upgraded from a queen to a king bed, so we needed a new bedframe. I came across this website and saw the plans for the farmhouse king. After looking at everyone's brag posts, I set about making plans for our bed based upon what Ana had provided and what I (meaning my wife) wanted.
While I had sketched out a plan and bought all my lumber based on that plan, I ended up modifying things as I progressed along...which meant additional trips to the store! There was some lumber that I didn't like once I put it together and had to start over (at least this happened in the very beginning!).
Basically, the head and foot boards are identical with the exception of the length of the posts attached. Since I couldn't find any 4x4 posts that weren't treated lumber, I had to make my posts by gluing two 2x4's together and then securing them with screws.
I spent quite a bit more money that intended, but that was because instead of using boards to line the head and footboards, I chose to use 3/4" sanded plywood. And since my wife wanted a large footboard to go along with the headboard, I ended up having to buy two sheets at around $50 a sheet. I trimmed that with 1x4's and then added a nice molding to the inside edges. It was that molding which was the single most expensive part. I think I bought 12 pieces for a little over $12 bucks a pop (I added it to the head/footboards and side rails). The funny thing is, that adding this was an afterthought and wasn't in the original plans, but I believe it's what makes the bed!
As far as getting the bed in the box, I incorporated a ledge on each of the side rails, footboard, and attached a ledge the bottom of the headboard. I also have a floating support that sits in the middle of the frame. Since this is a king, I've got two box springs and they're both well supported. I don't think any of my pictures show it, but I ended up getting bed rail hooks to attach the side rails to the head/footboards. I had to chisel out a spot for these 5 inch long hooks and receptacles on each end of the side rails and head/foot board. So, the bed comes together and apart very easily and quickly.
It took me a month and a half to build this, but that was off and on. I'd work on it for a few hours after I got home from work if I had time and I'd pick a day on the weekend. If I worked on this straight through, I would say it would have taken me a week and a half.

Built from Plan(s)
Estimated Cost
$500+
Estimated Time Investment
Week Long Project (20 Hours or More)
Finish Used
I used a water based dark walnut stain and finished it off with a satin polyurethane.
Recommended Skill Level
Intermediate
Comments
Thu, 04/24/2014 - 12:10
Love this bed. My sister is
Love this bed. My sister is moving near me and I told her about this site so we could refurnish her home (and give me more things to build). The 1st thing we talked about building is a king size bed and I knew the plans would come from Ana's farmhouse bed. But I wanted it different and use plywood instead of the boards, like yours. I saw your bed and new it was the one. What won me over was the molding. It looks like a bed from a furniture store. Great job.
Thu, 04/24/2014 - 14:02
Thanks!
Thank you! I got the molding at Lowes and while it put me over my initial budget, I can't imagine the bed without it now! I just glued them down and put in 1" finish nails. I countersunk the nails using a small hammer and a punch. This way, I didn't damage the molding. I wish I could put up more pictures to show how it all went together.
The bed is quite heavy, so I'm glad I installed steel bed rail fasteners. It make it easy to tear down and put together without too much help.
Thu, 04/24/2014 - 13:28
the moulding does make it
This turned out great! They're great looking head/footboard but that moulding really does take up another notch...definitely worth the extra investment. The finish turned out very nice as well. great job!
Fri, 04/25/2014 - 16:53
Thanks!
Yeah, I was really pleased with how the molding turned out! I liked the bed unstained just as much as it is stained. I lost some of wood grain color variations when I stained it that I was hoping would show through, but oh well. My family, as well as the neighbor across the street, have put in bed/headboard requests! I might try some other molding variations and I'll post pics of those of course!
Tue, 09/13/2016 - 10:57
Beautiful Job!
Your bed turned out beautiful! I love the modifications you made. I am wondering what size boards you used for your topper? From the pictures I am guessing maybe a 2x6 on top of a 2x4, both routered?
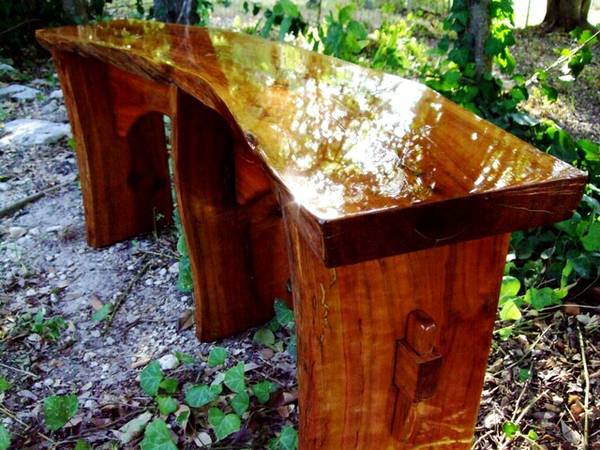
Solid Cherry Live-Edge Garden Bench

Live-edge garden bench made of solid black cherry. Bench top is made from a book-matched pair of 1-1/2 inch thick slabs. Leg and support pieces are made from the same log and feature pinned mortise & tenon joints on each end. The entire bench was treated with hand rubbed teak oil, and is finished in four layers of weather resistant oil-based polyurethane. Two round 1-1/4 inch chrome furniture glides are attached to the base of each leg.
Estimated Time Investment
Week Long Project (20 Hours or More)
Finish Used
Teak Oil, Polyurethane
Recommended Skill Level
Intermediate
Modern Geo Twin Platform Bed and Headboard
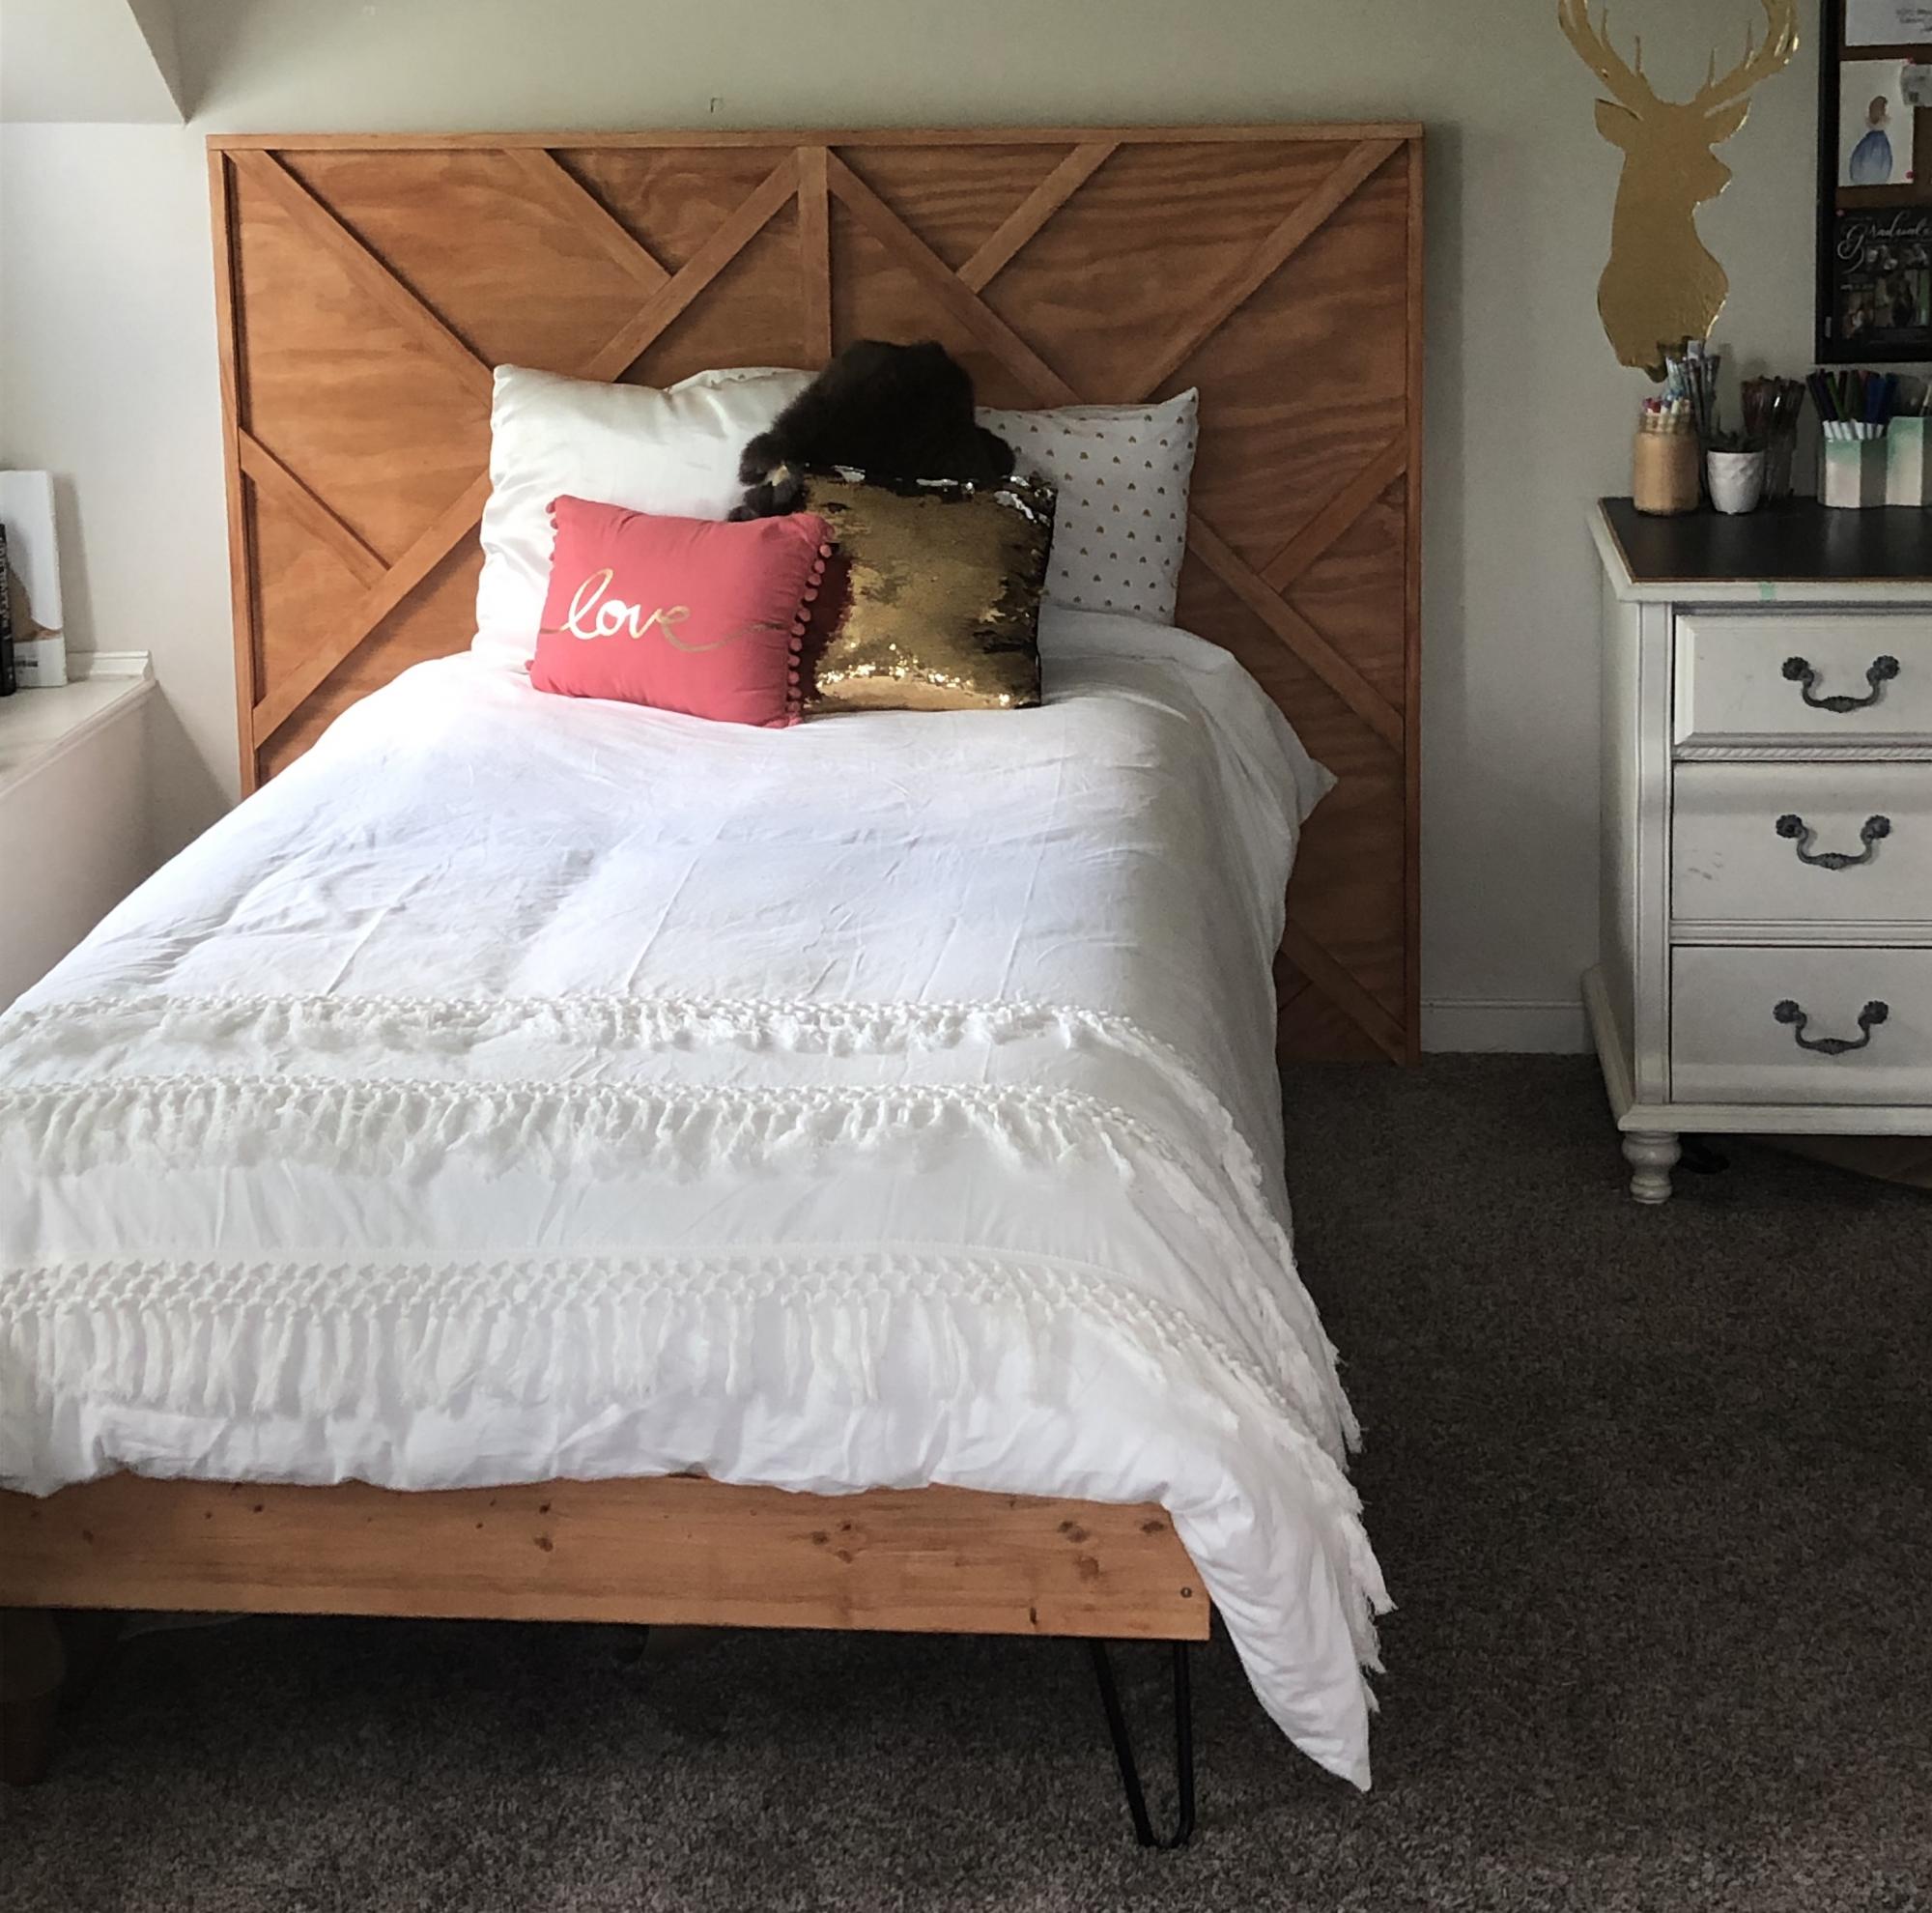
This was a fun build. I let my daughter design the slats on the headboard, and as long as all slats are either 90 or 45 degrees, the cuts and application are simple. Thanks, Ana!
Built from Plan(s)
Estimated Cost
$100
Estimated Time Investment
Day Project (6-9 Hours)
Finish Used
Miniwax Pecan
Recommended Skill Level
Beginner