Community Brag Posts
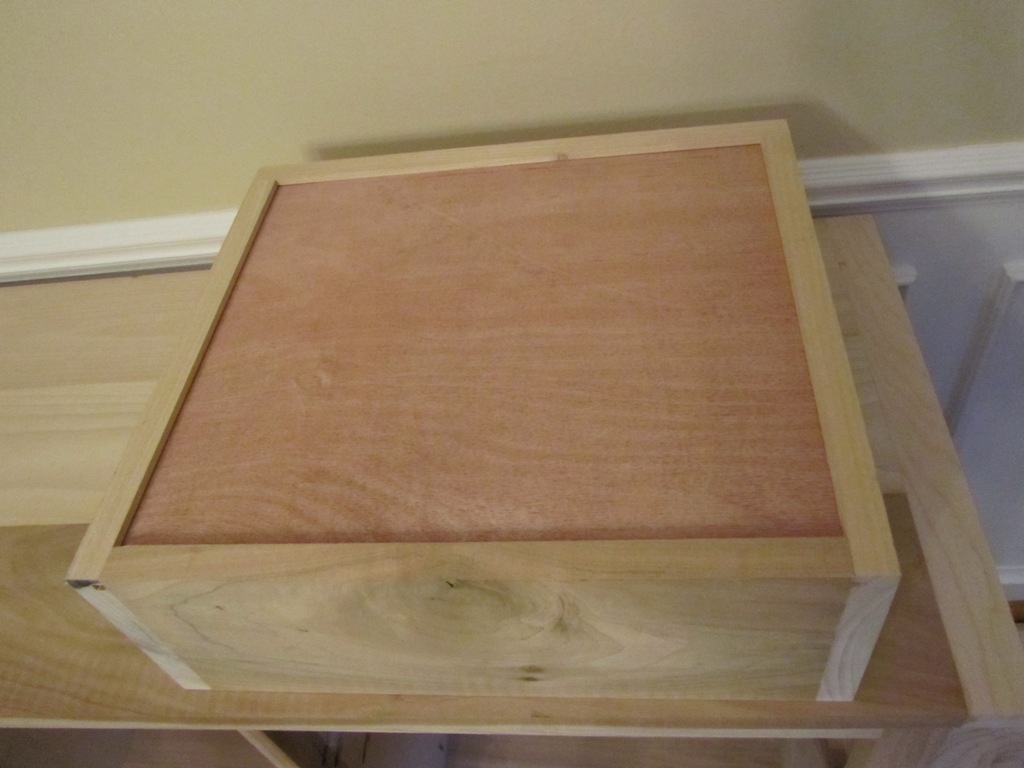
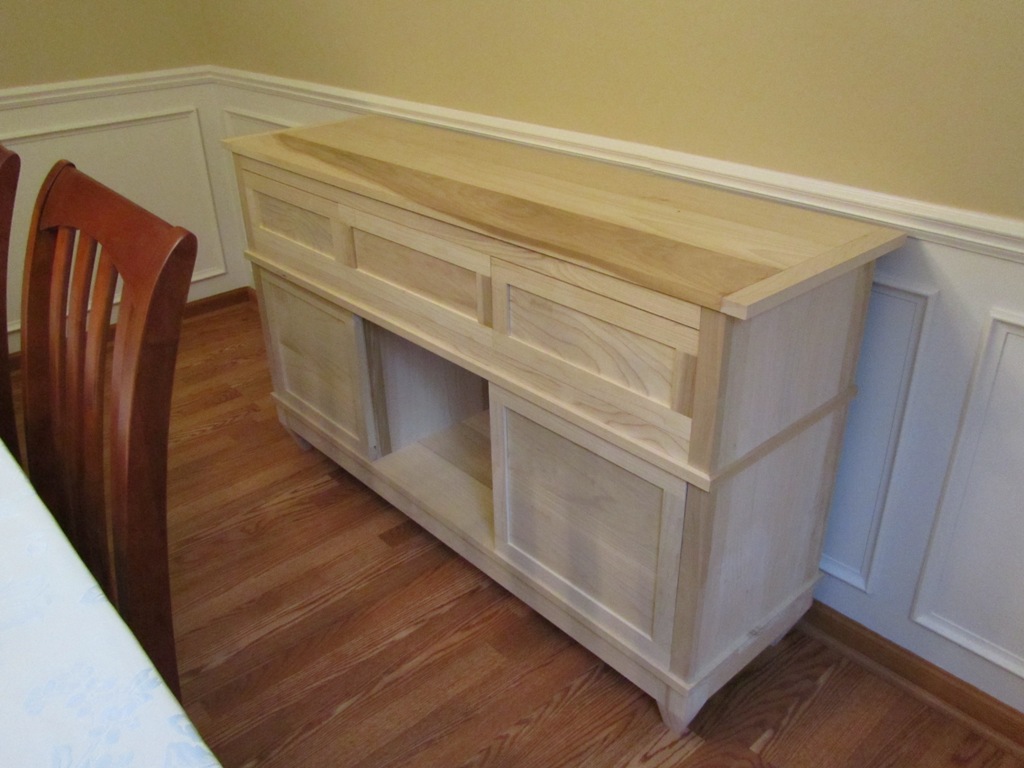
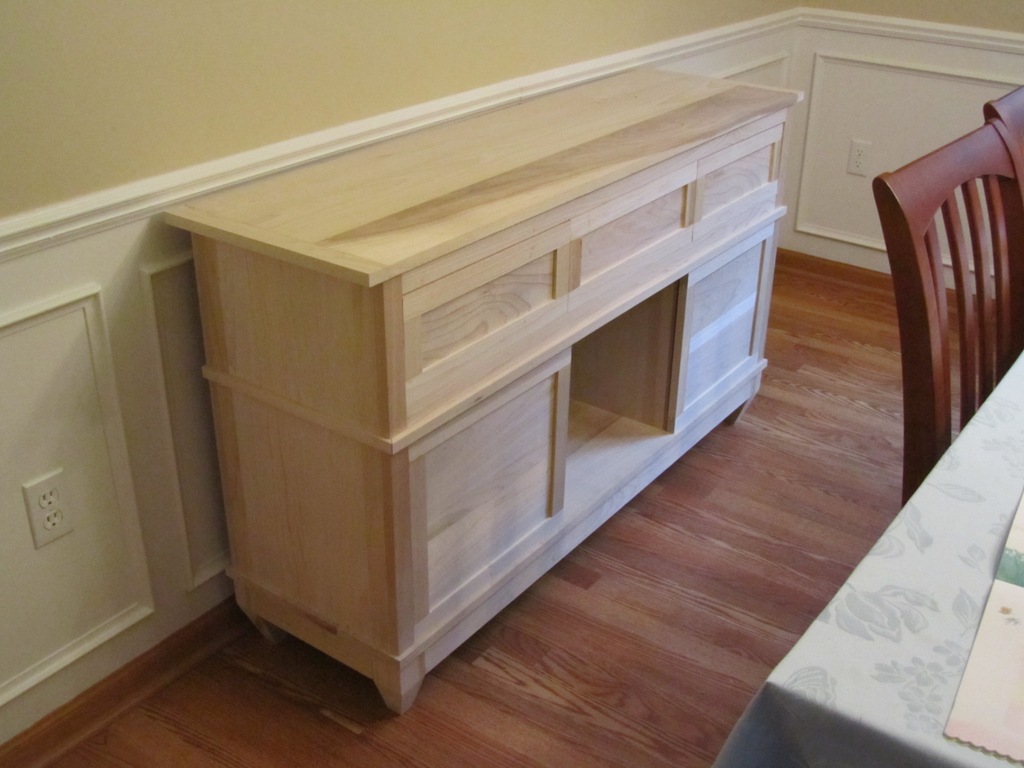
Sliding Door Console
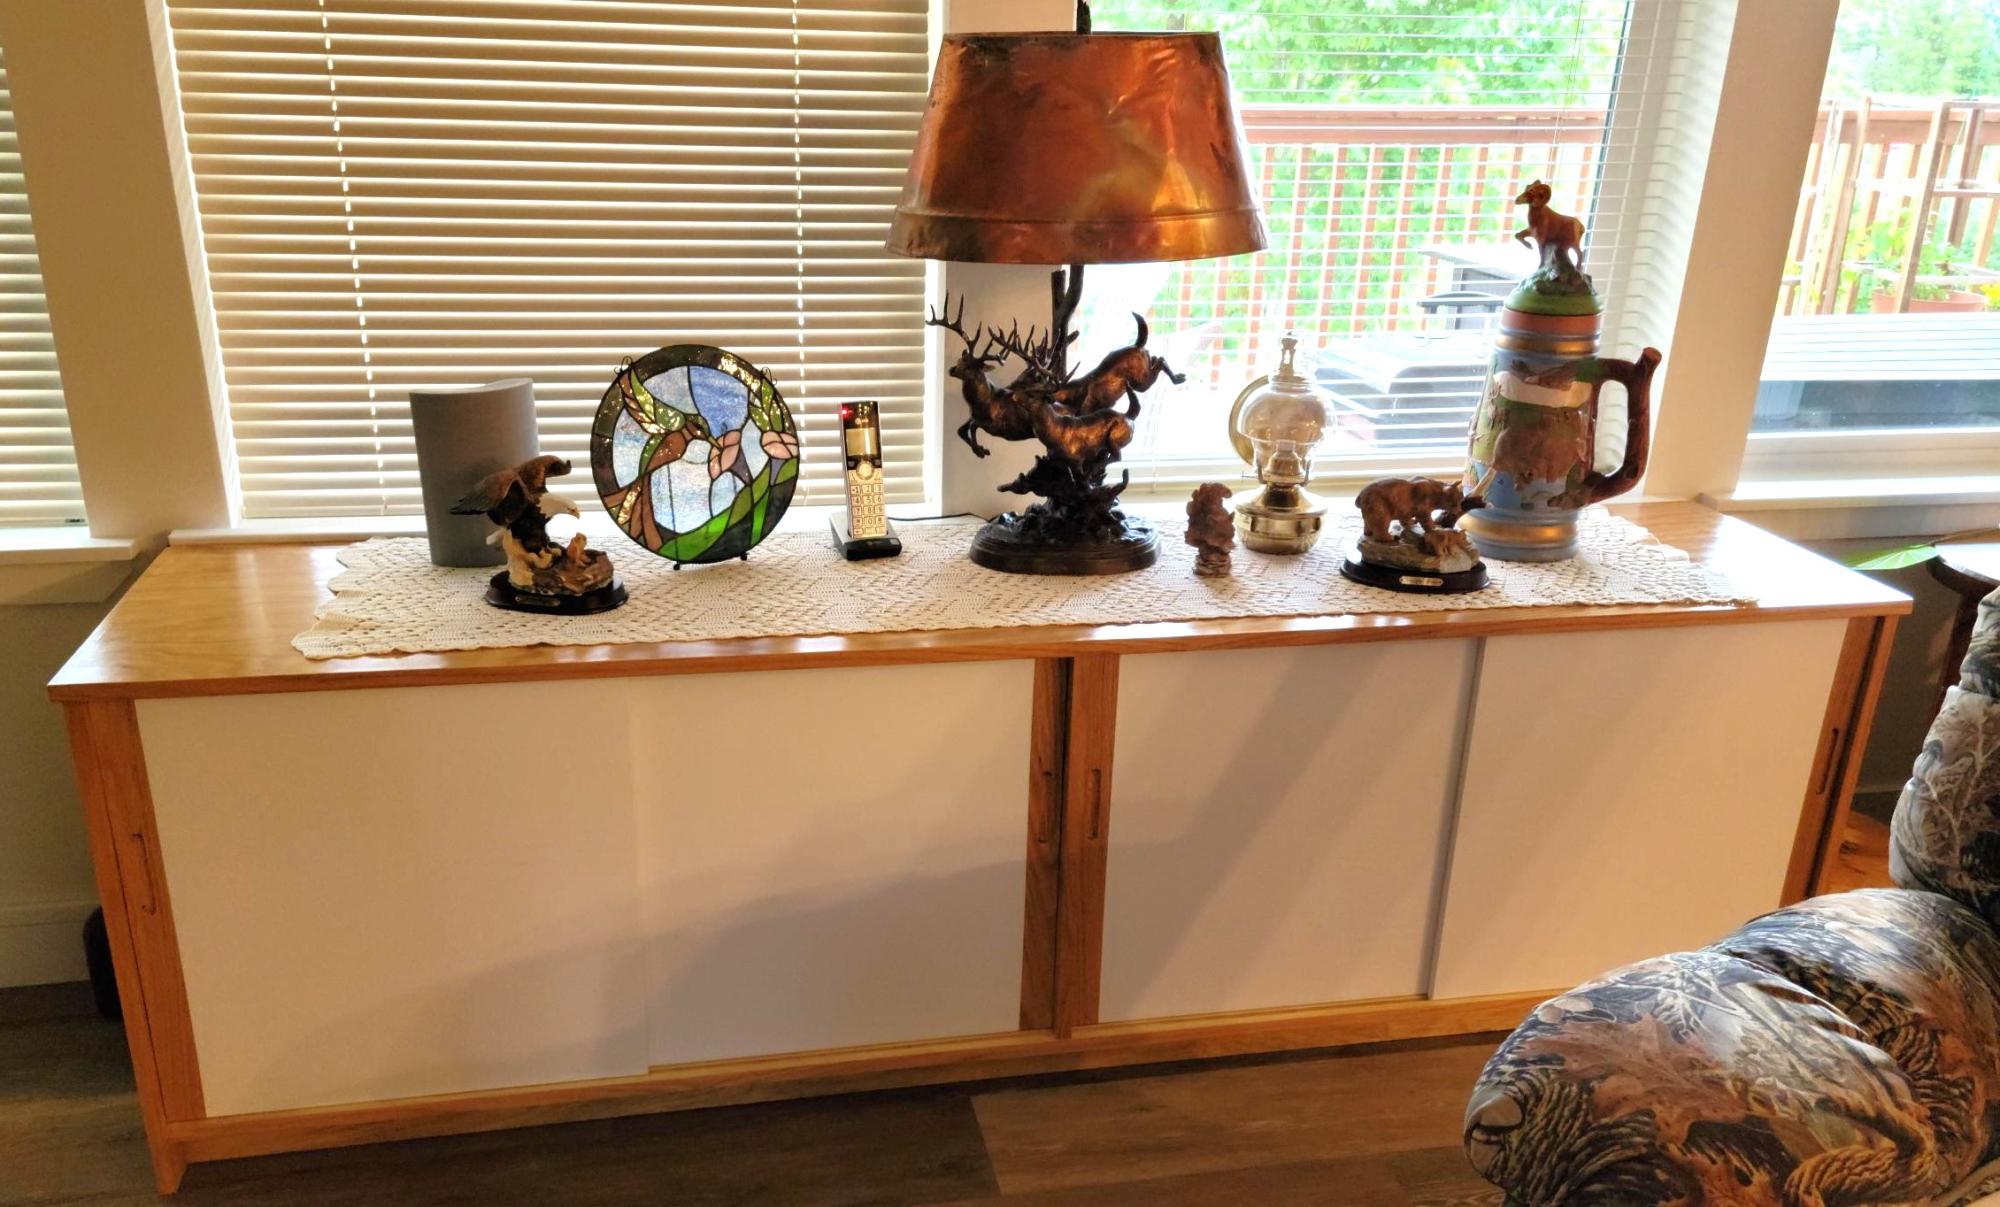
This cabinet was inspired by an Ana White project. My wife wanted more storage in our new home, and we had a sofa table at this location. But it was just a top, no shelves. I custom fit it to be flush with the window sills at the top and ends so it takes on a bit of a built in appearance. The top and bottom are oak faced plywood, all edges covered with iron on oak facing. As I was short of the expensive plywood, the ends, shelves and kick are doug fir plywood with a light oak stain; while not a perfect match gave a pleasing result that guests have not caught. The doors are 1/2" MDF, with a 2" solid oak end glued on where I routed the slots to open them. Slots are 1/4" +, 3/8" apart, and the top and bottoms of the doors routed to leave a 1/4" rail. The bottoms of the bottom slide slots have a slick poly tape in them, which really helps the doors to slide easily.
Sides and interior are brush finished with 3 coats of semi-gloss polyurethane, while the top has 5 coats. The MDF on the doors has one sprayed coat of white primer (oil based to avoid bringing up the MDF) with a final sprayed coat of mat finish enamel. I need to do one more step, light sand with 320 grit and paste wax the top to get that really fine finish.
While not as easy as Ana makes it look, it turned out pretty well. That hard part on a piece this size is getting all the pieces cut precisely, and I mean with less than 1/32nd difference, to provide a good fit. As it was I had to custom cut the oak opening ends on the doors to account for the small differences in widths at the top and bottom to obtain a nice fit against the sides. Next time I'll triple check all finish dimensions to make those small adjustments in parts before assembly, then triple check again for placement during assembly.
While I'll always see the small "errors", my wife is very pleased with the finished cabinet.
Al King, www.KingTechnologics.com
Built from Plan(s)
One piece kids kitchen
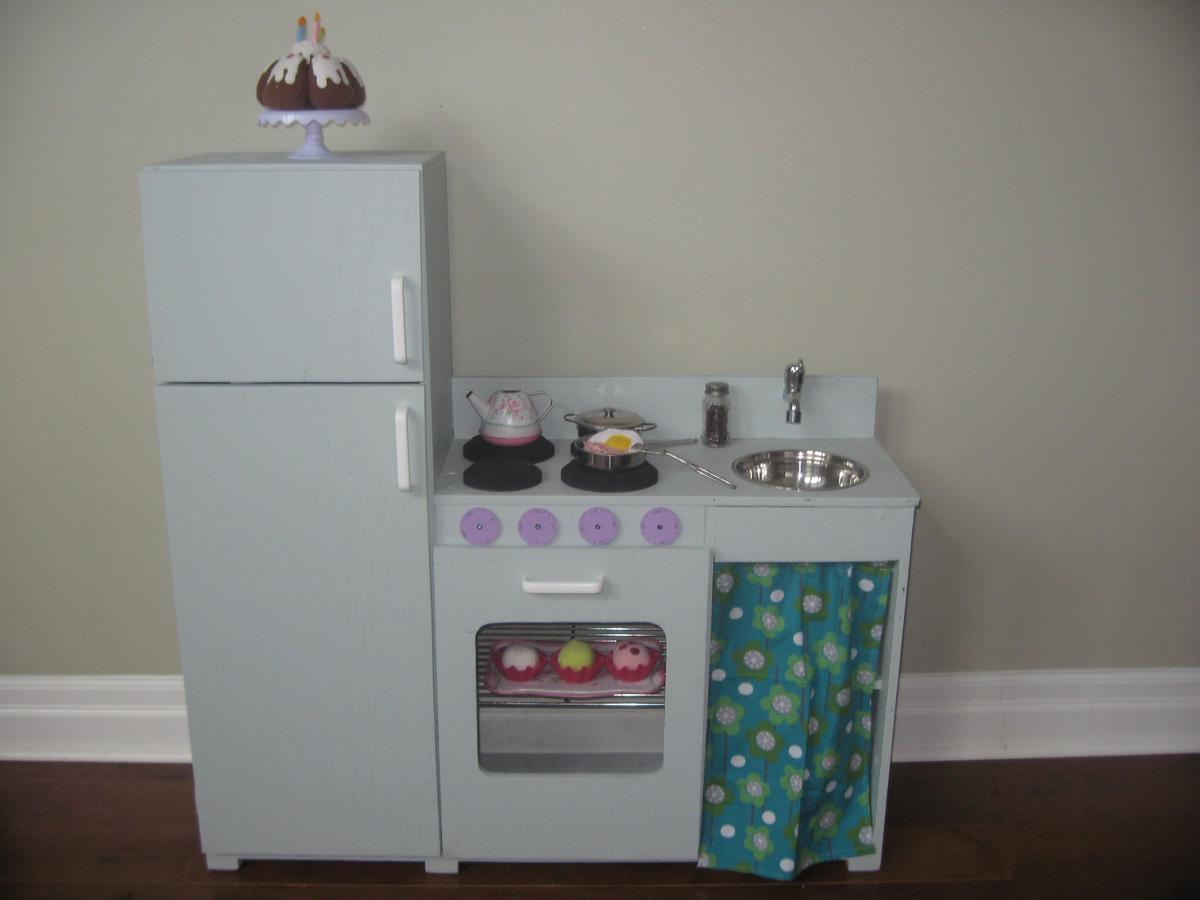
I actually used Ana's "Grace's kitchen" plans and modified them to make a single unit kitchen that was smaller to fit my space, after I was done this new project plan was posted! My kids love this kitchen and I love it's smaller size. I used all plywood scraps to make it, so the cost was minimal.
Estimated Cost
$15 for the accesories (tap, bowl, burners, dials, drawer pulls etc)
Estimated Time Investment
Afternoon Project (3-6 Hours)
Finish Used
2 coats of leftover eggshell latex paint.
Recommended Skill Level
Beginner
Comments
Thu, 05/24/2012 - 09:30
hi i like the diy fridge.
hi i like the diy fridge. i've been wanting to get one for my son soo bad
Wine rack

First project for me. Easy to do even with limited tools. Now I realize I need more tools to do bigger and better. It was a nice stress relief to go to garage and build something. My wife wanted something so it made sense to do this.
Estimated Cost
$48
Estimated Time Investment
Afternoon Project (3-6 Hours)
Recommended Skill Level
Starter Project
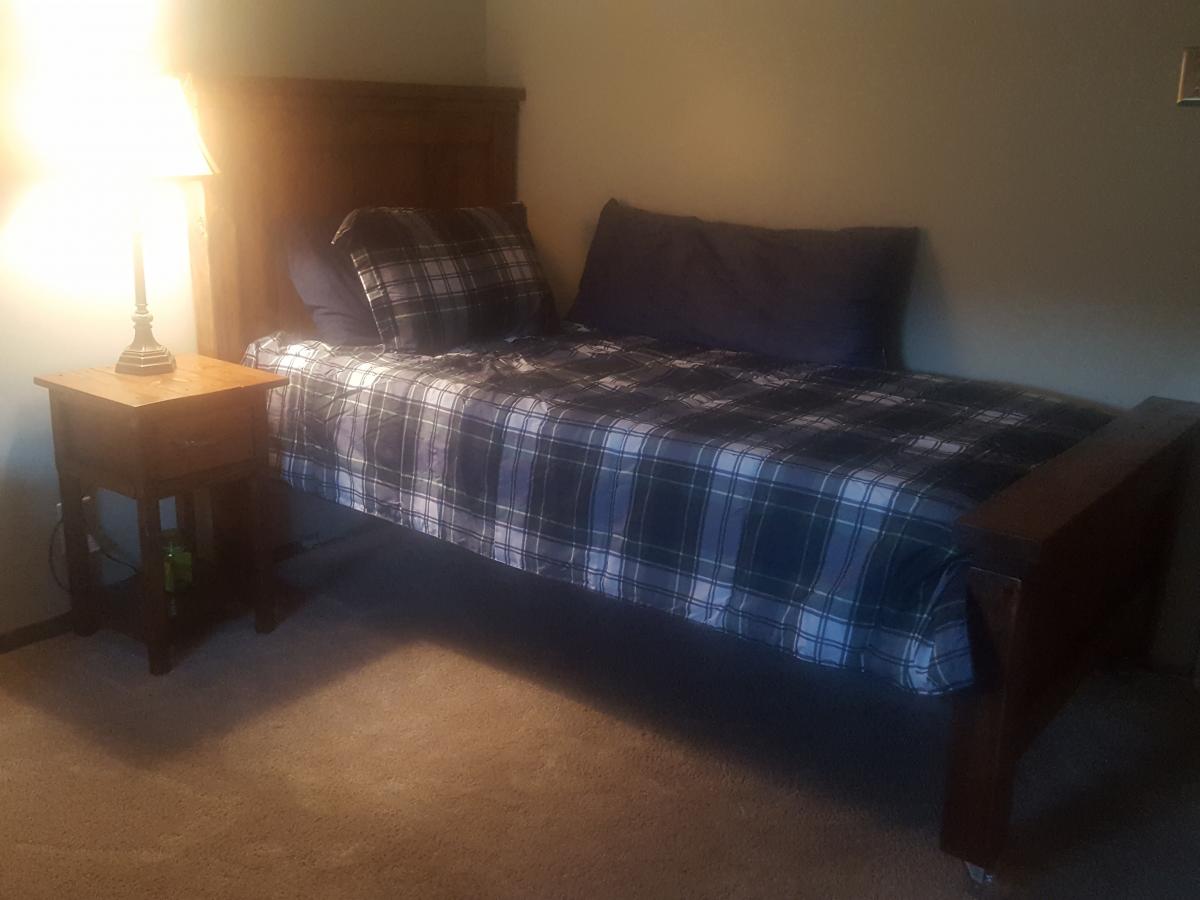
Poster bed
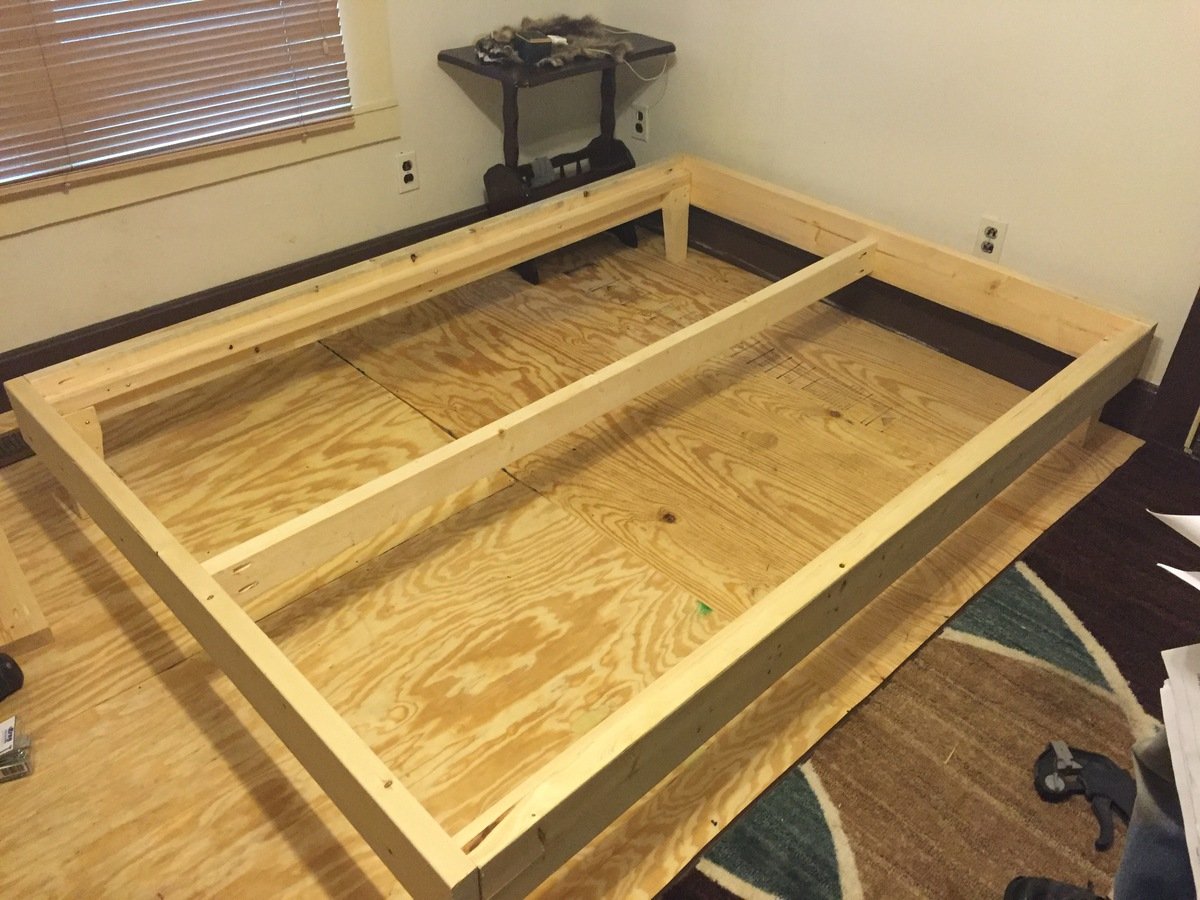
Built this
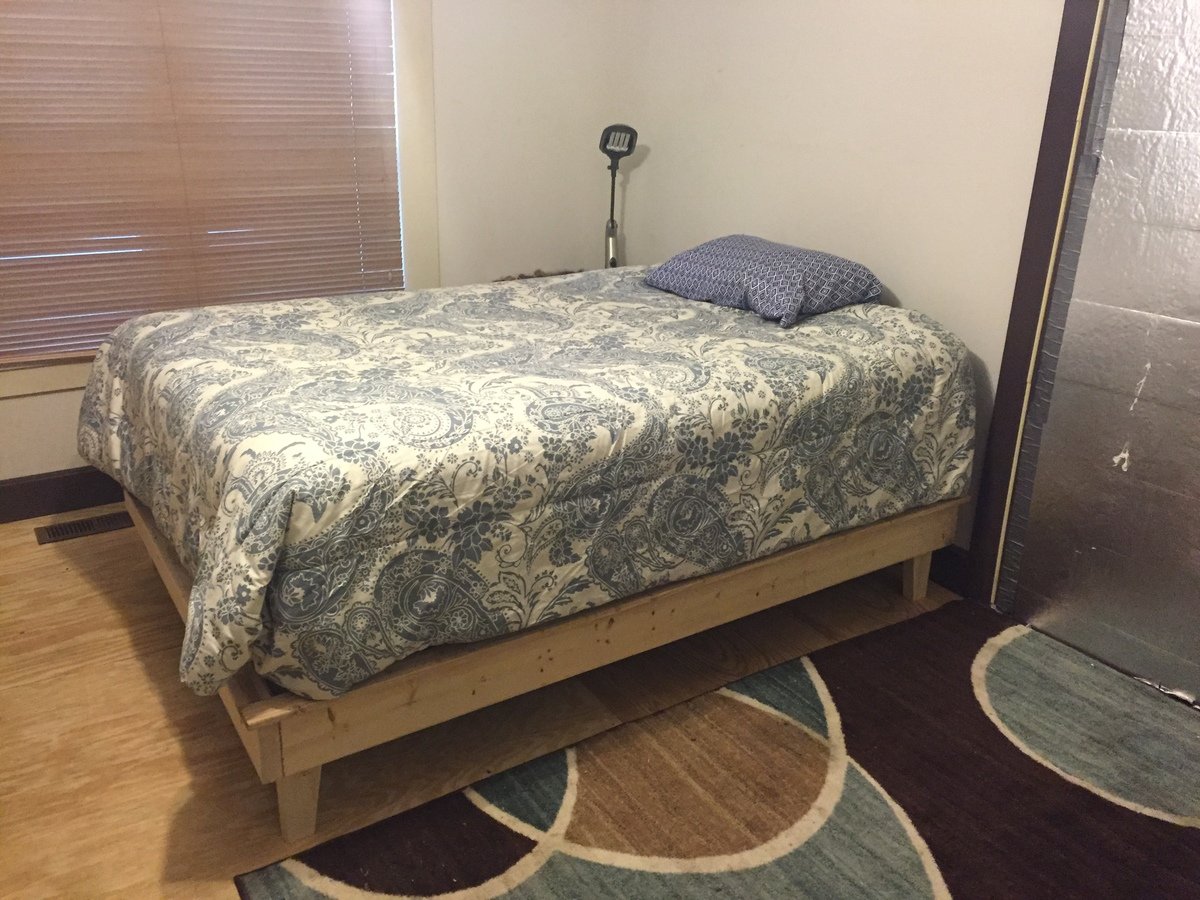
Built from Plan(s)
Estimated Cost
$40
Estimated Time Investment
An Hour or Two (0-2 Hours)
Finish Used
None yet
Recommended Skill Level
Beginner
Comments
Thu, 03/03/2016 - 12:18
it's a platform bed, I accidentally typed poster bed
it's a platform bed, I accidentally typed poster bed
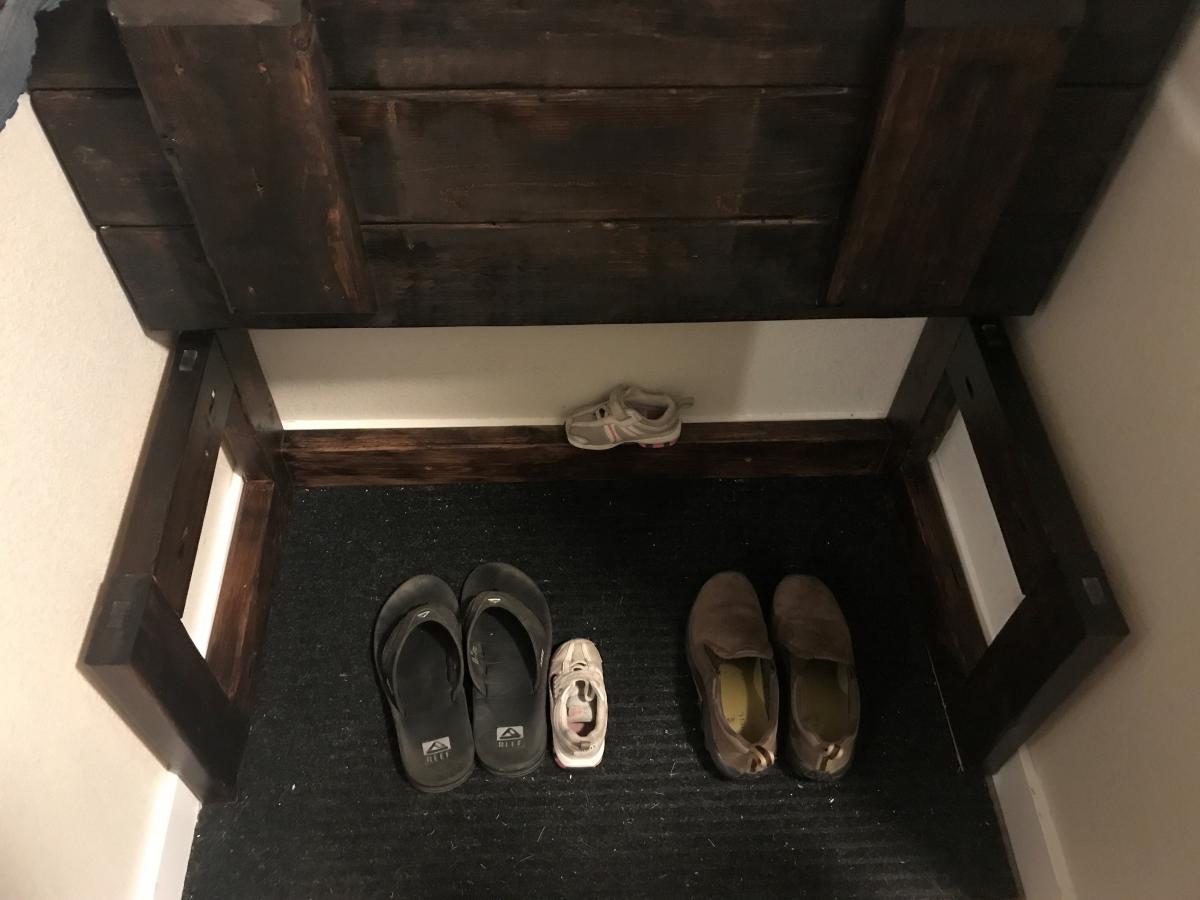
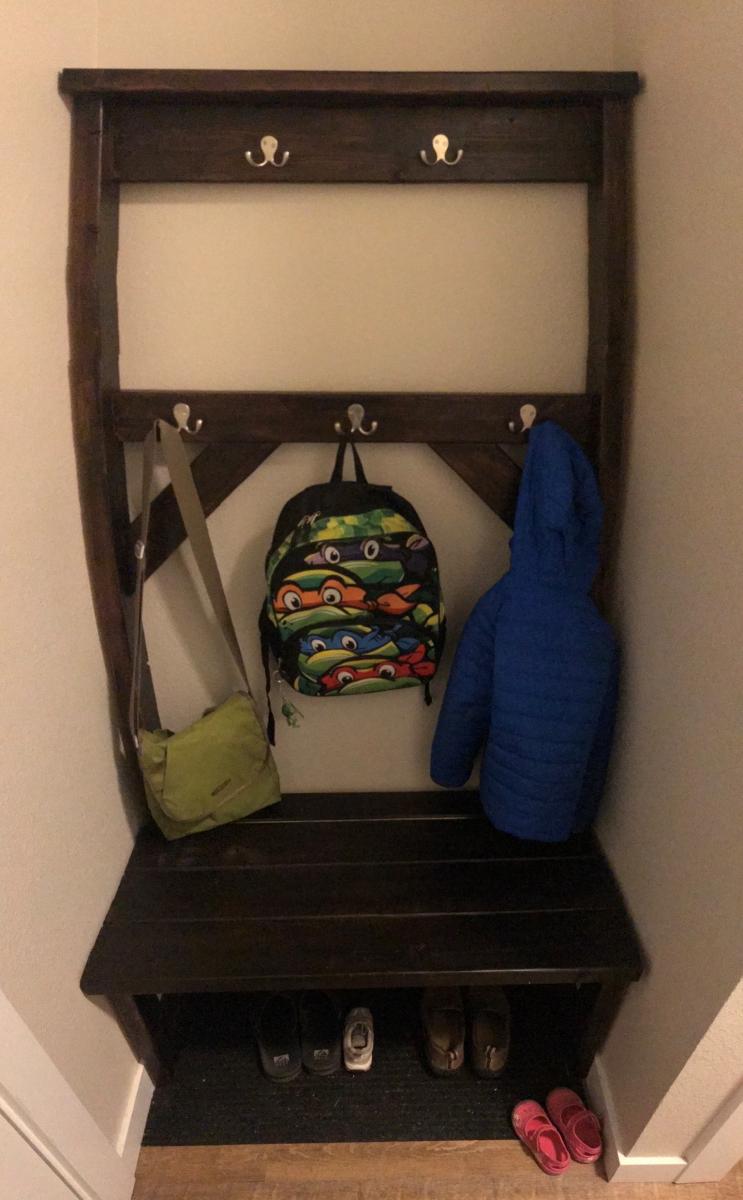
Entry Nook Tree and Bench
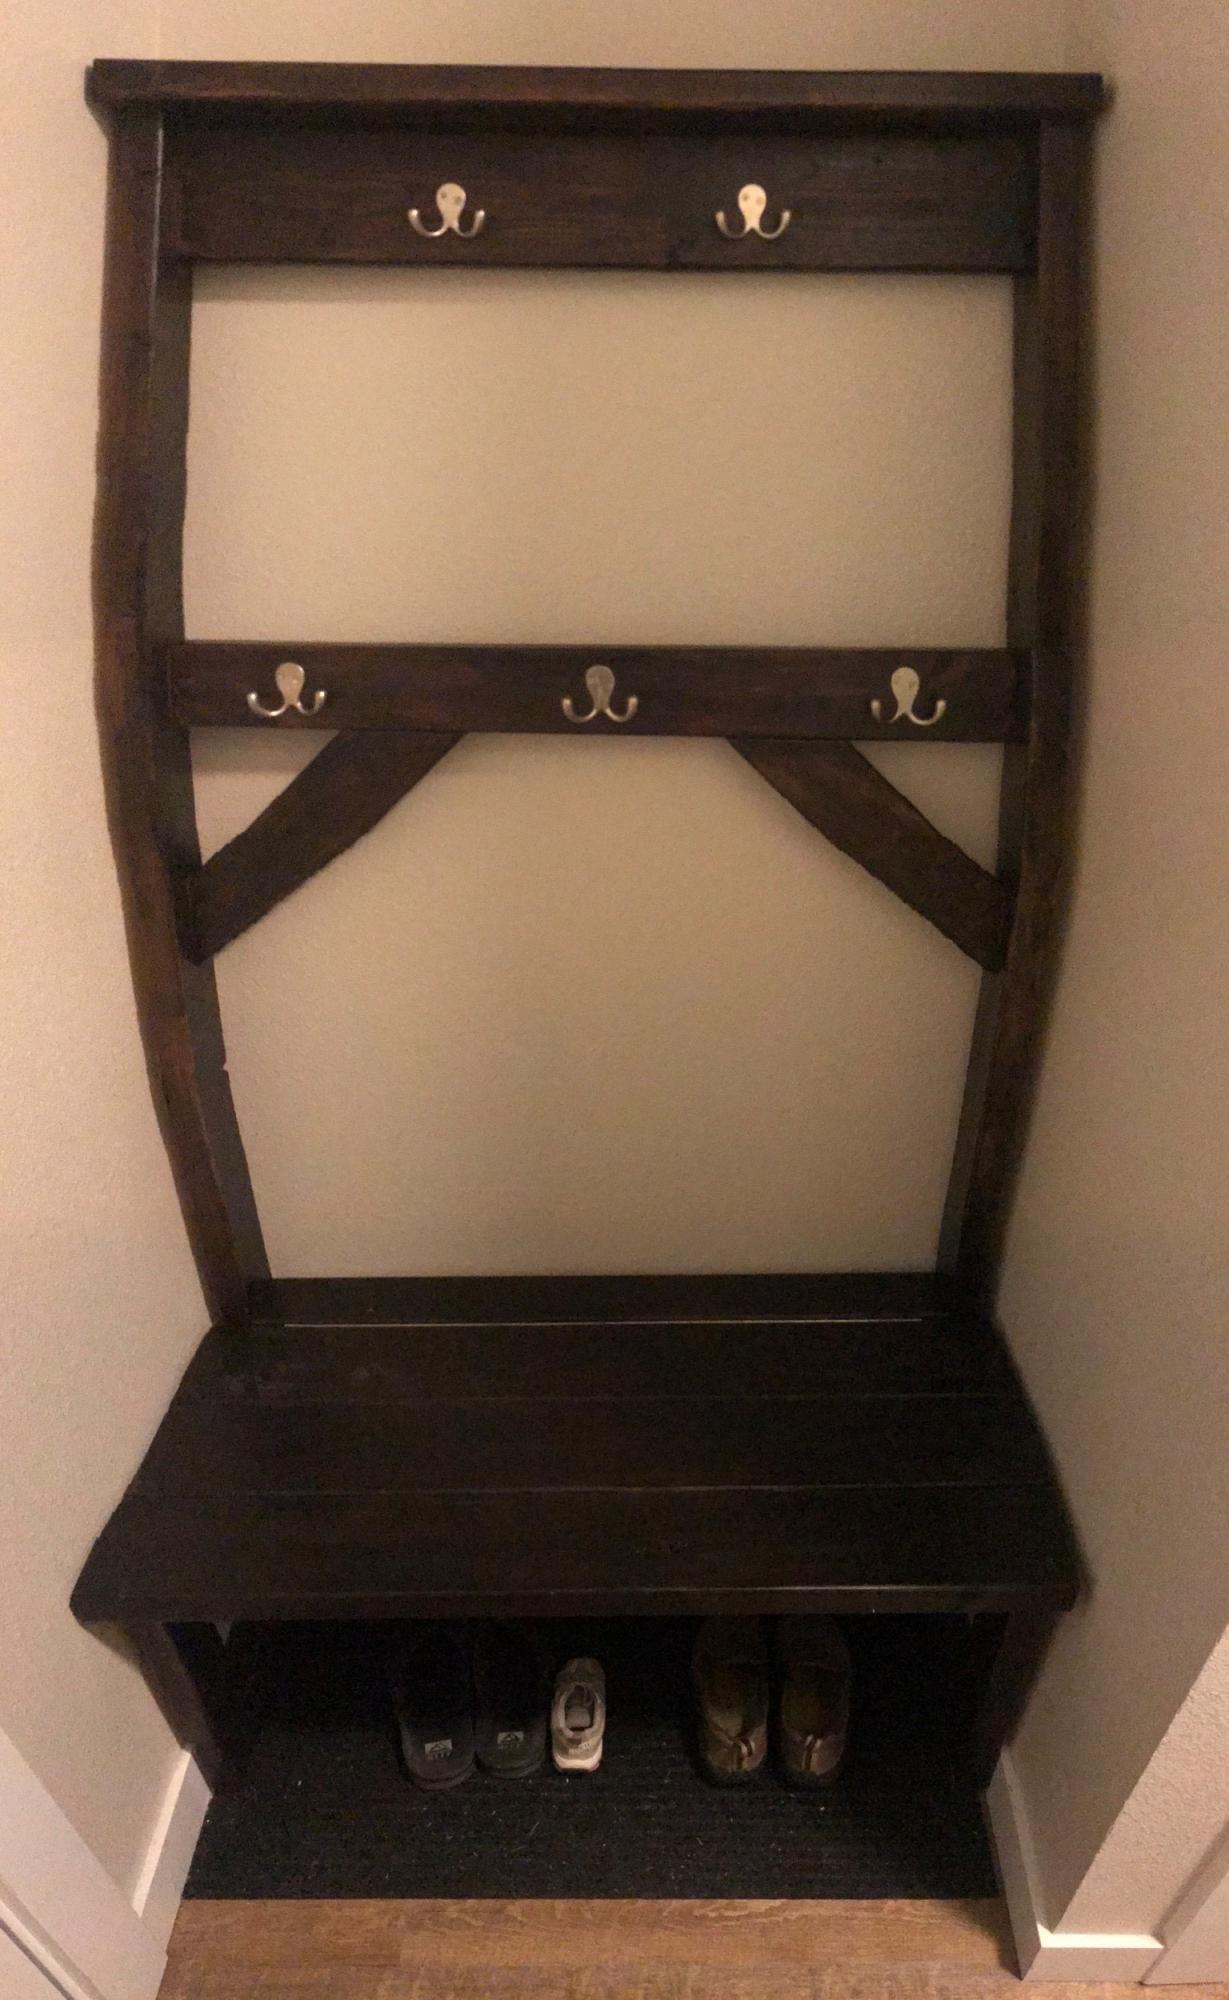
Modified version of the $40 Hall Tree
Had to reduce the width to 36" to fit into this specific nook that is just inside the door from our garage. We've used it as a kick off place for our shoes. Having nothing else there was a waste of wall space that could be additionally utilized. We have a closet just up the hallway for most of our coats, but with winter coming and struggling with our oldest finding his coat and backpack every morning to leave for school, we wanted to designate a spot for him to use.
With that said, the space still had to be functional for all of us, and having to crawl under and find the lil girl's 'lost' tiny shoe/s way in the back under the bench was going to be a no-go for my knees. To remedy that, I decided to modify the bench to lift up to find those lost items (see pics). This required removing the front cross beam and creating squared off supports on each side instead of just 'legs'.
Before hooks, stain, and the 30" piano hinge, this project came in just under $25.
Total completed project was closer to $65 for all materials.
{Apologies if the full length shots look a little wonky/bowed. Getting a full shot was tough with my back against the wall, literally. :) Had to use the pano mode.}
Built from Plan(s)
Estimated Cost
$65
Estimated Time Investment
Day Project (6-9 Hours)
Finish Used
Varathane
1 qt. 'Espresso' Satin Oil-Based Interior Stain and Polyurethane (project consumed about half the quart)
I gave the bench top and front edge a "pretty good" sanding knowing we'd be sitting on it and such, so we didn't want it catching/snagging clothing, but I didn't go too crazy. Otherwise, left the rest pretty much as the lumber came from the store, just a light scuff to pick up the stain better.
Recommended Skill Level
Intermediate
Letters to Santa Bin

Ana, you're the BEST!! Thank you so much for sharing these plans. This was a very simple build ... my problem was trying to decide how to paint and decorate it. There's a lady in our little town that cut out the letters for me. I think it turned out so cute. I'm working on a Christmas collection for our church auction next April and thought it would be fun to have Christmas in April :-). Thanks again Ana!!!
Built from Plan(s)
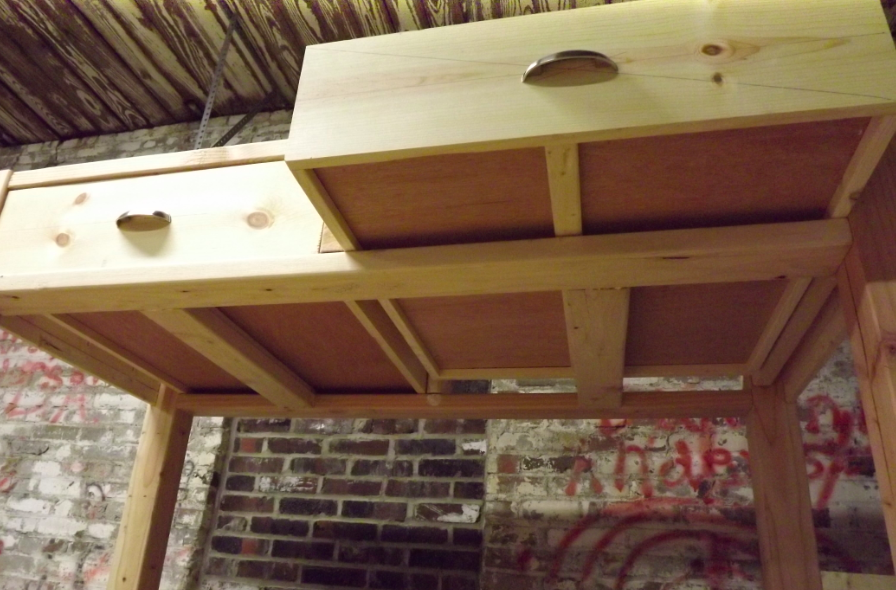
Salsa Console
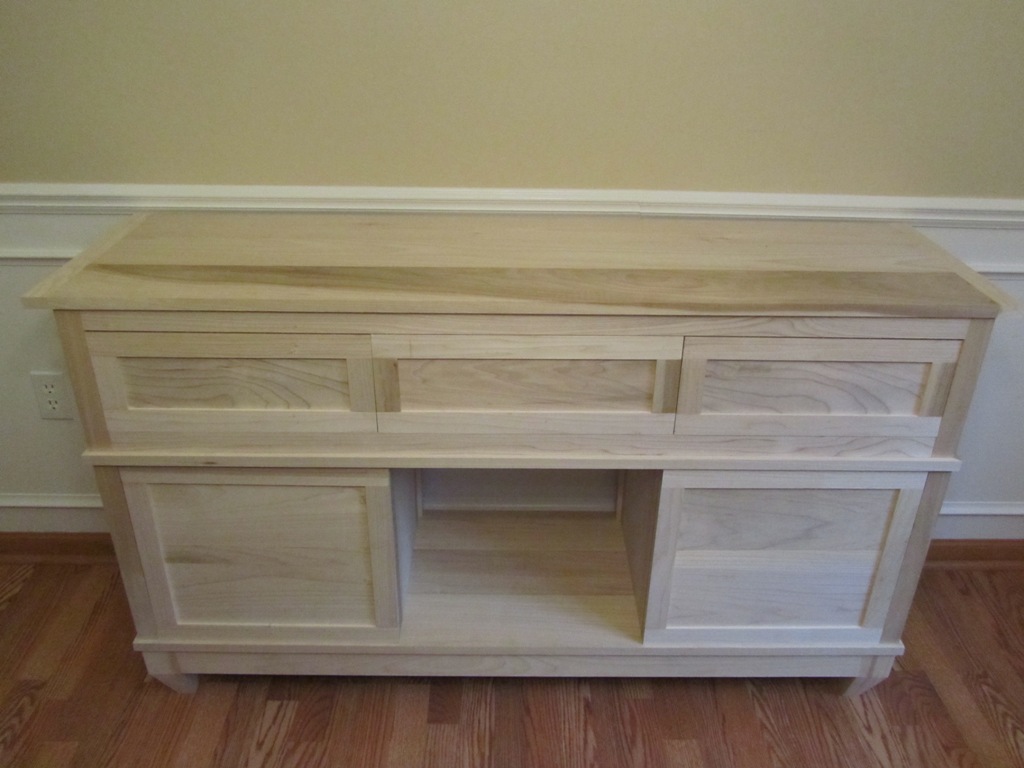
I modified the Salsa console table plans a little for my version. Assembly is pretty much the same, just added more detail like making 5 piece doors and draw fronts, adding back brackets to allow for cedar paneling behind the doors and recessed the middle walls so the doors close on them instead of inside the opening. The center will remain open for now.
the whole table and parts are poplar, minus the drawer bottoms which are beech ply. Because its made out of poplar, it jacked the price quite a bit. However, i wouldn't consider using anything less then select pine to make this table which is only slightly less that poplar. The #2 pine is total crap and not suitable to build a piece of furniture out of. Anyway, I've got about $300-$350 in building supplies (wood, screws/plugs, finish), and about $80 in hardware (hidden euro hinges and bearing drawer slides).
Hope you like it, as i am quite proud of it!
One other thing, if you plan on building this table, double check the material & cut lists. I found discrepancies.
Built from Plan(s)
Estimated Cost
$350+/- with upgraded wood
Estimated Time Investment
Week Long Project (20 Hours or More)
Finish Used
Minwax polyshade to try and match dining room set stain.
Recommended Skill Level
Intermediate
Comments
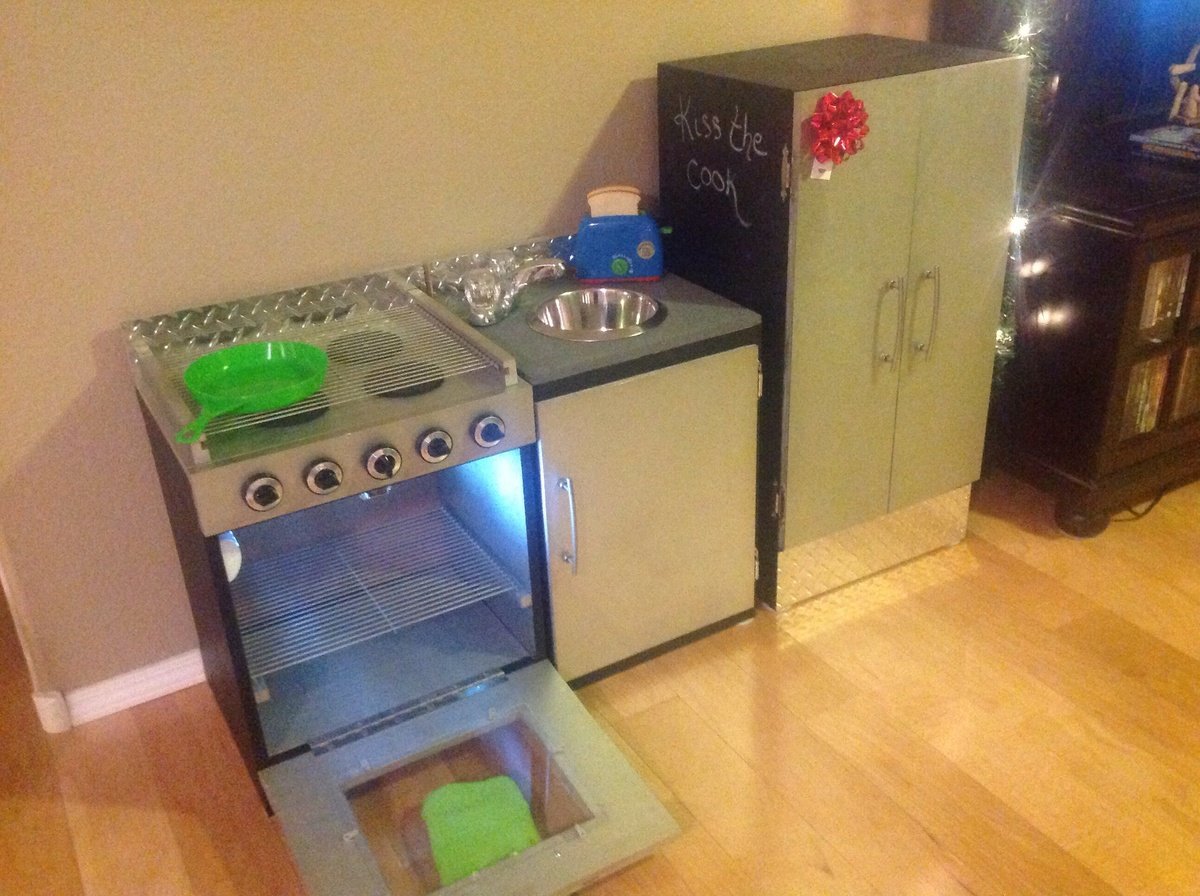
Kitchen Play Set
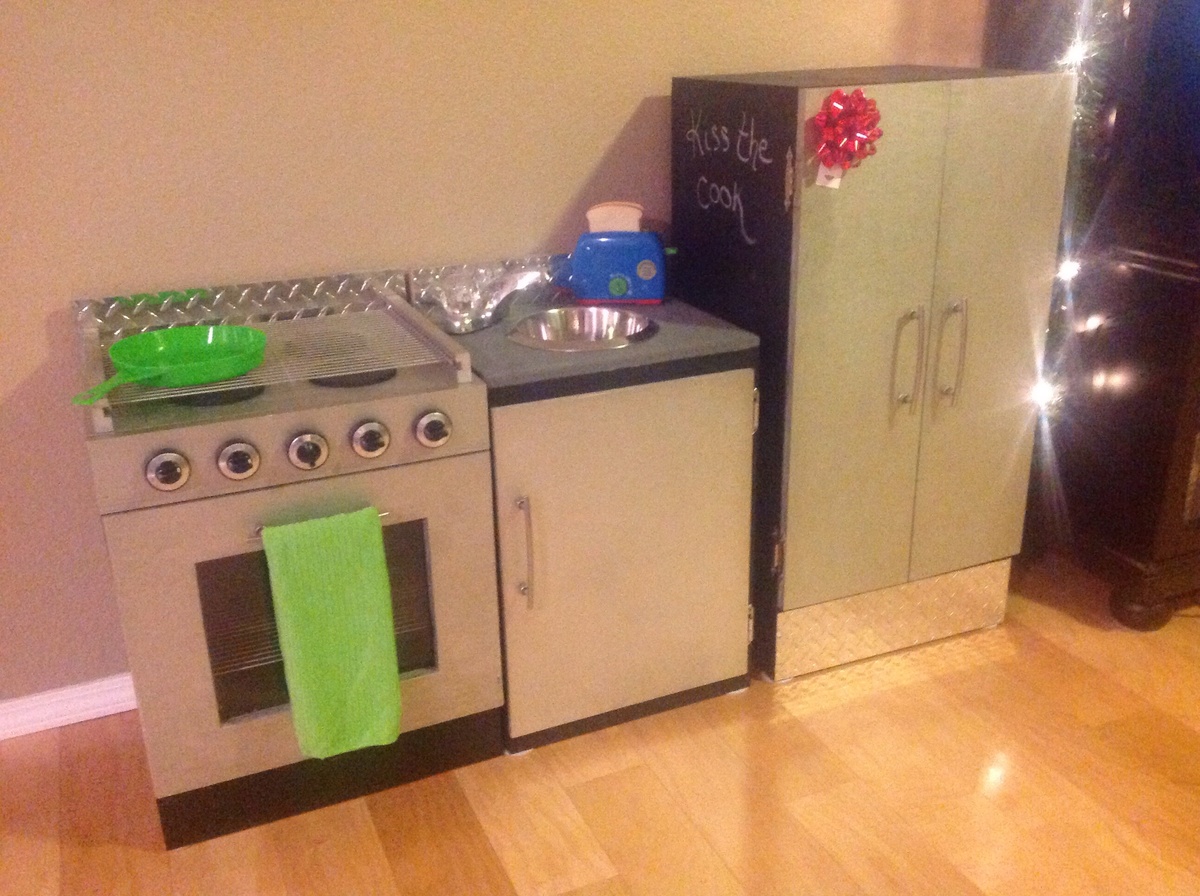
My husband and I built this for our son for Christmas. We had so much fun doing this and all the detail that went into it. Both the fridge and stove have battery operated motion sensor lights & the backsplash is diamond plating. Very cool!
Estimated Cost
$200
Estimated Time Investment
Week Long Project (20 Hours or More)
Finish Used
Chalkboard paint, brush nickel paint and stone texture paint
Recommended Skill Level
Beginner
Rob's X coffee table
took me prob 6 hours to build 2 hours to oxidize 1 hour to oil. No bolts are brackets yet, I really love it without! This was my first piece of furniture and first time oxidizing & oiling!
Estimated Cost
75
Estimated Time Investment
Weekend Project (10-20 Hours)
Finish Used
Danish oil after vinegar & steel wool oxidizing mix
Recommended Skill Level
Intermediate
Absolutely Awesome!
I LOVE LOVE LOVE this site! I basically made this bed in one weekend. My first furniture build. I'm a 51 yo female and did this all by myself! Instructions clear. Buy and cut sheets are the best! The bed turned out so great, I an absolutely thrilled! PS, the nightstand I did by myself too. The plans are here on Ana White as well!!!
Built from Plan(s)
Estimated Cost
$200
Estimated Time Investment
Weekend Project (10-20 Hours)
Recommended Skill Level
Beginner
Wood Potting Bench
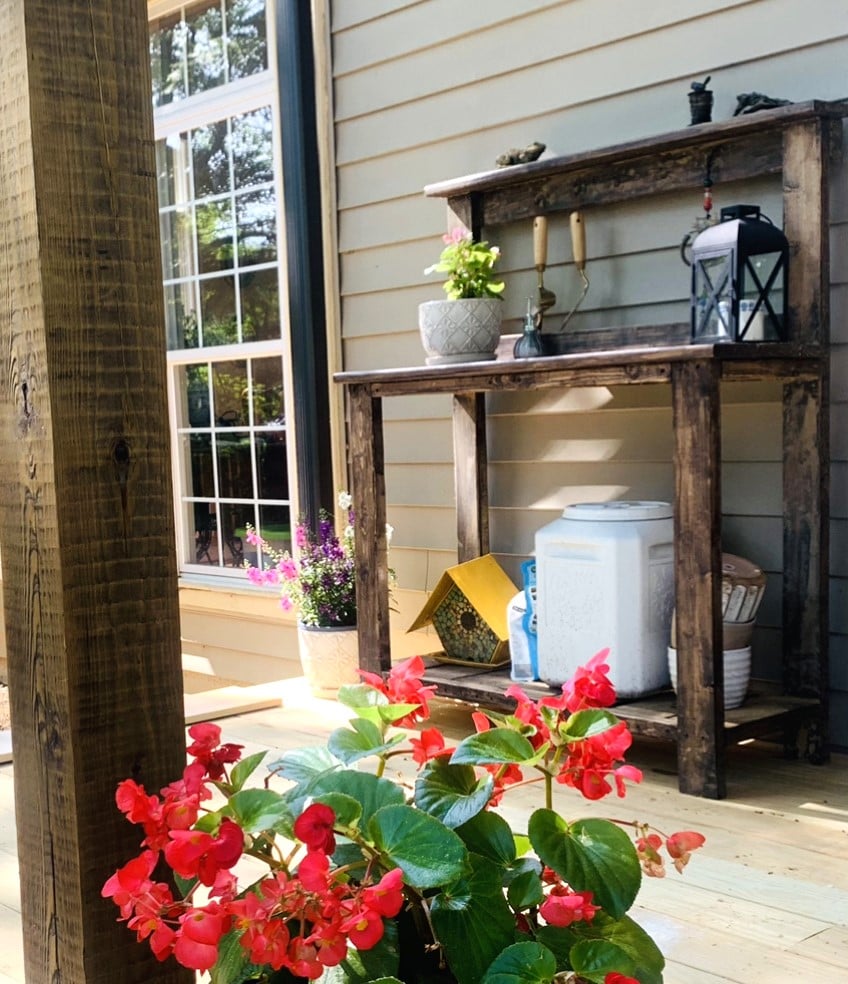
Flower potting bench for the front porch.
Mar
Built from Plan(s)
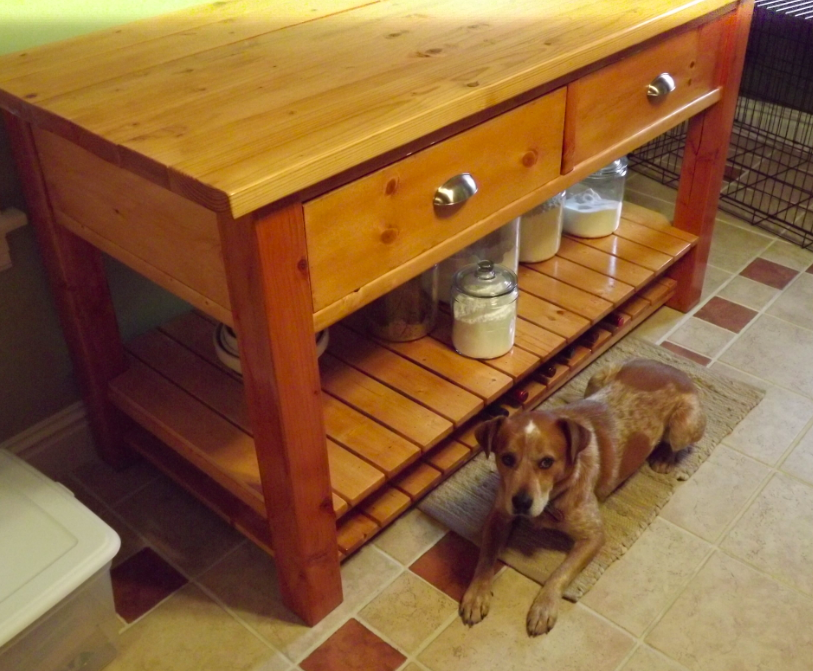
Kitchen Shelf
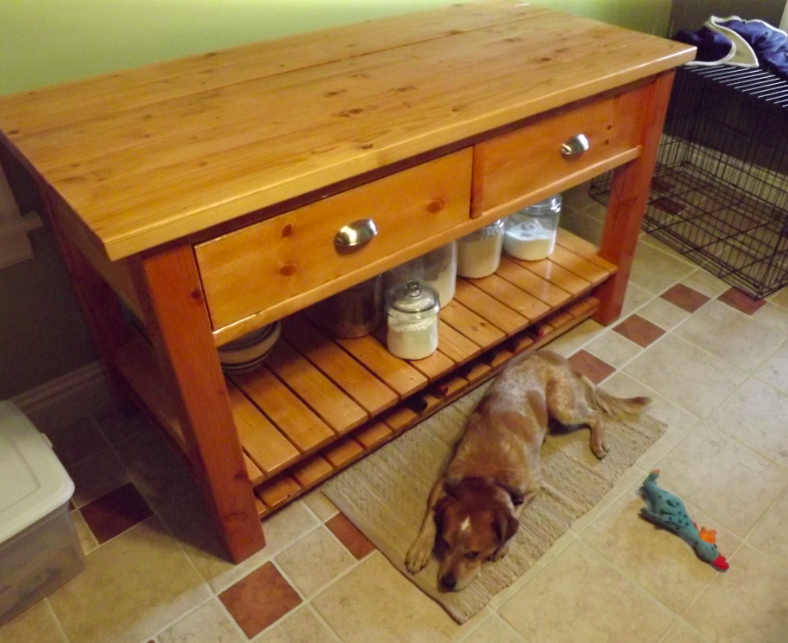
I needed something to fill an empty wall in my kitchen. I wanted something for both baking and wine storage so I modified a couple of things I saw on this website. Wine storage on the very bottom (the slats are wide enough apart that the wine bottles sit in the cracks and stay snug) with baking stuff above that. I think I'll build a matching shelf or two for the wall above it
Built from Plan(s)
Estimated Time Investment
Weekend Project (10-20 Hours)
Finish Used
Minwax Polyshades Classic Oak Gloss
Recommended Skill Level
Intermediate
Comments
Fri, 07/06/2012 - 15:17
very nice!
I want to build a kitchen island and yours is very nice. Great Job!
Mon, 02/25/2013 - 11:22
What kind of material did you
What kind of material did you use for the table legs? Looks like 4x4?
Step stool
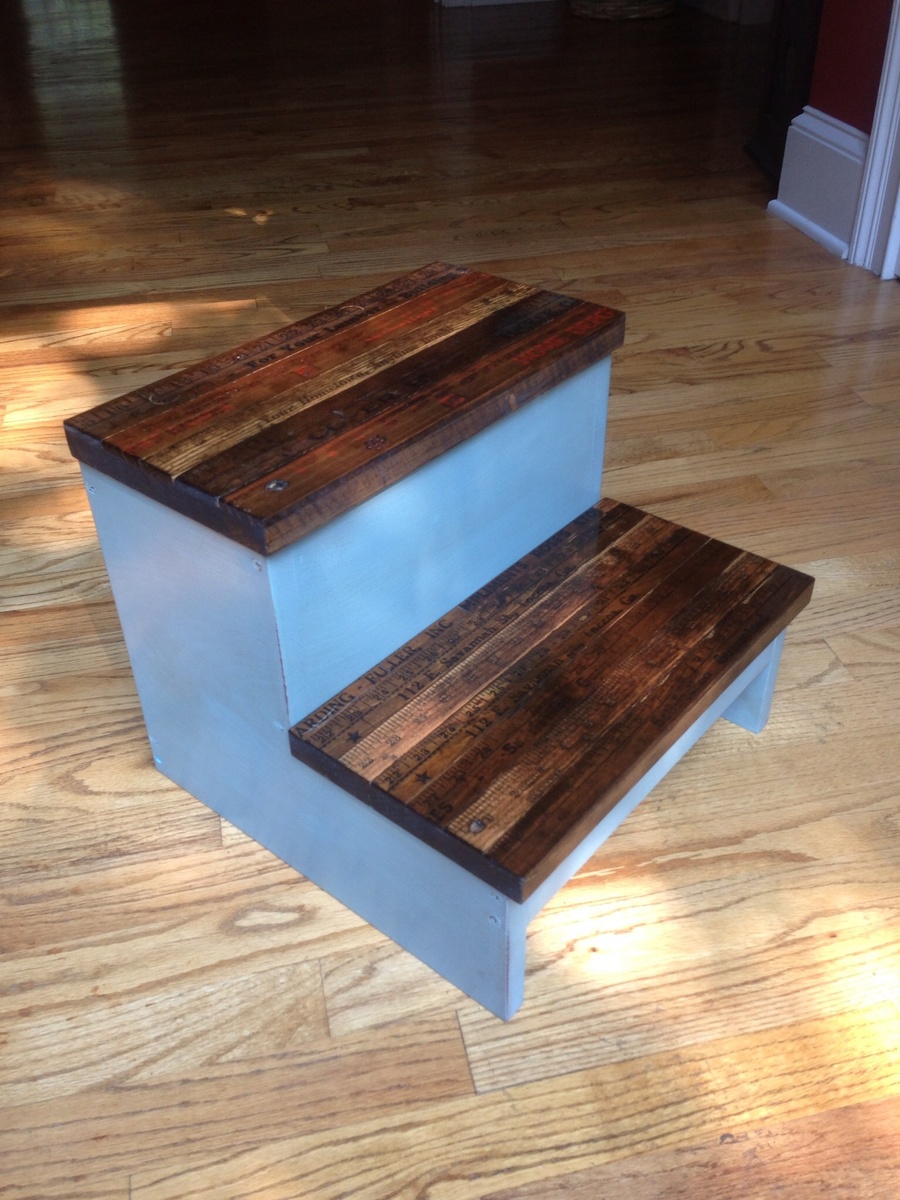
I built this stool for my 2 yr old grandson. Added yardsticks to the top of the steps for a different look, and painted the stool, then sanded randomly, added stain and wiped off for an aged look.
Estimated Cost
$7.00
Estimated Time Investment
Afternoon Project (3-6 Hours)
Finish Used
Acrylic paint and stain
Recommended Skill Level
Beginner
Patio Swing
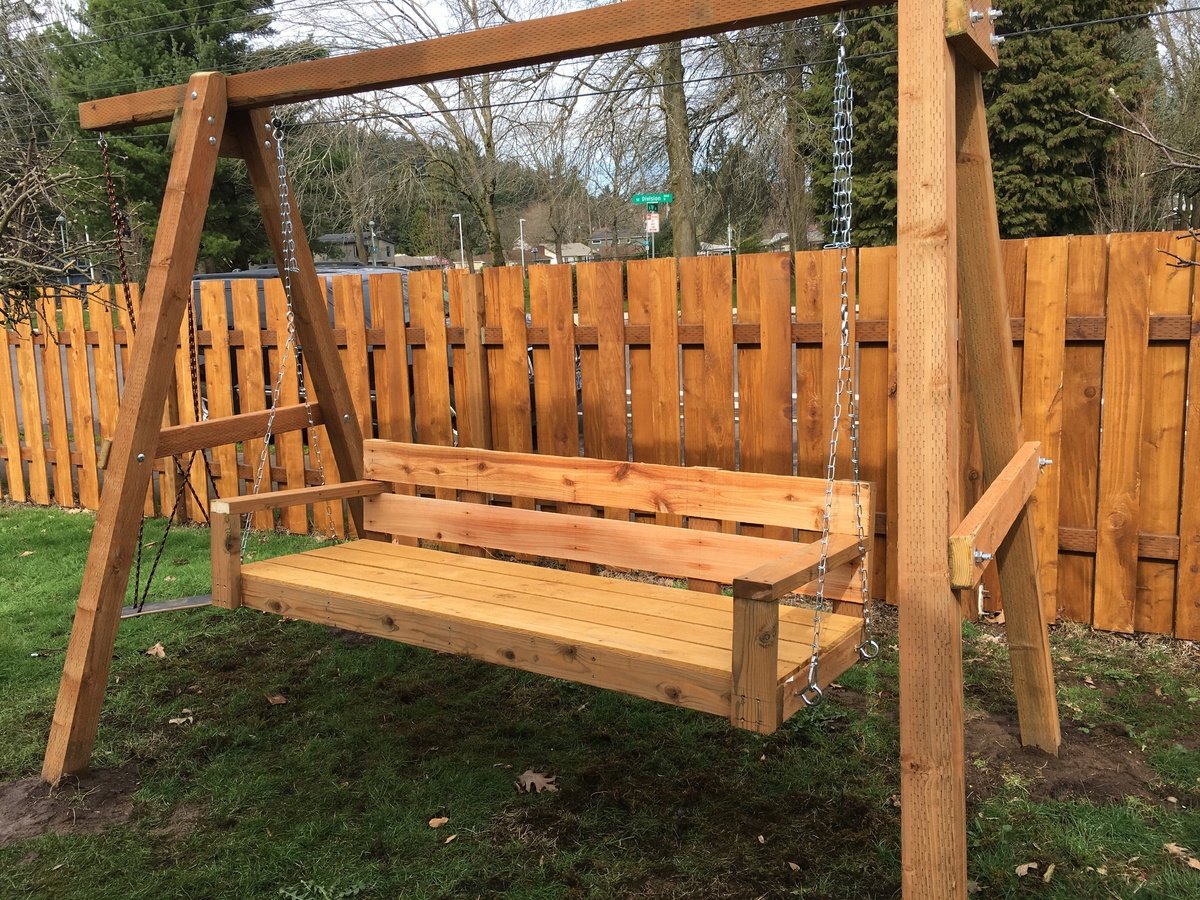
Quick build for the garden swing.
Built from Plan(s)
Estimated Time Investment
Afternoon Project (3-6 Hours)
Finish Used
Unfinished, we are still waiting for some sun in Portland.
Recommended Skill Level
Beginner
Yard Swing Pergola
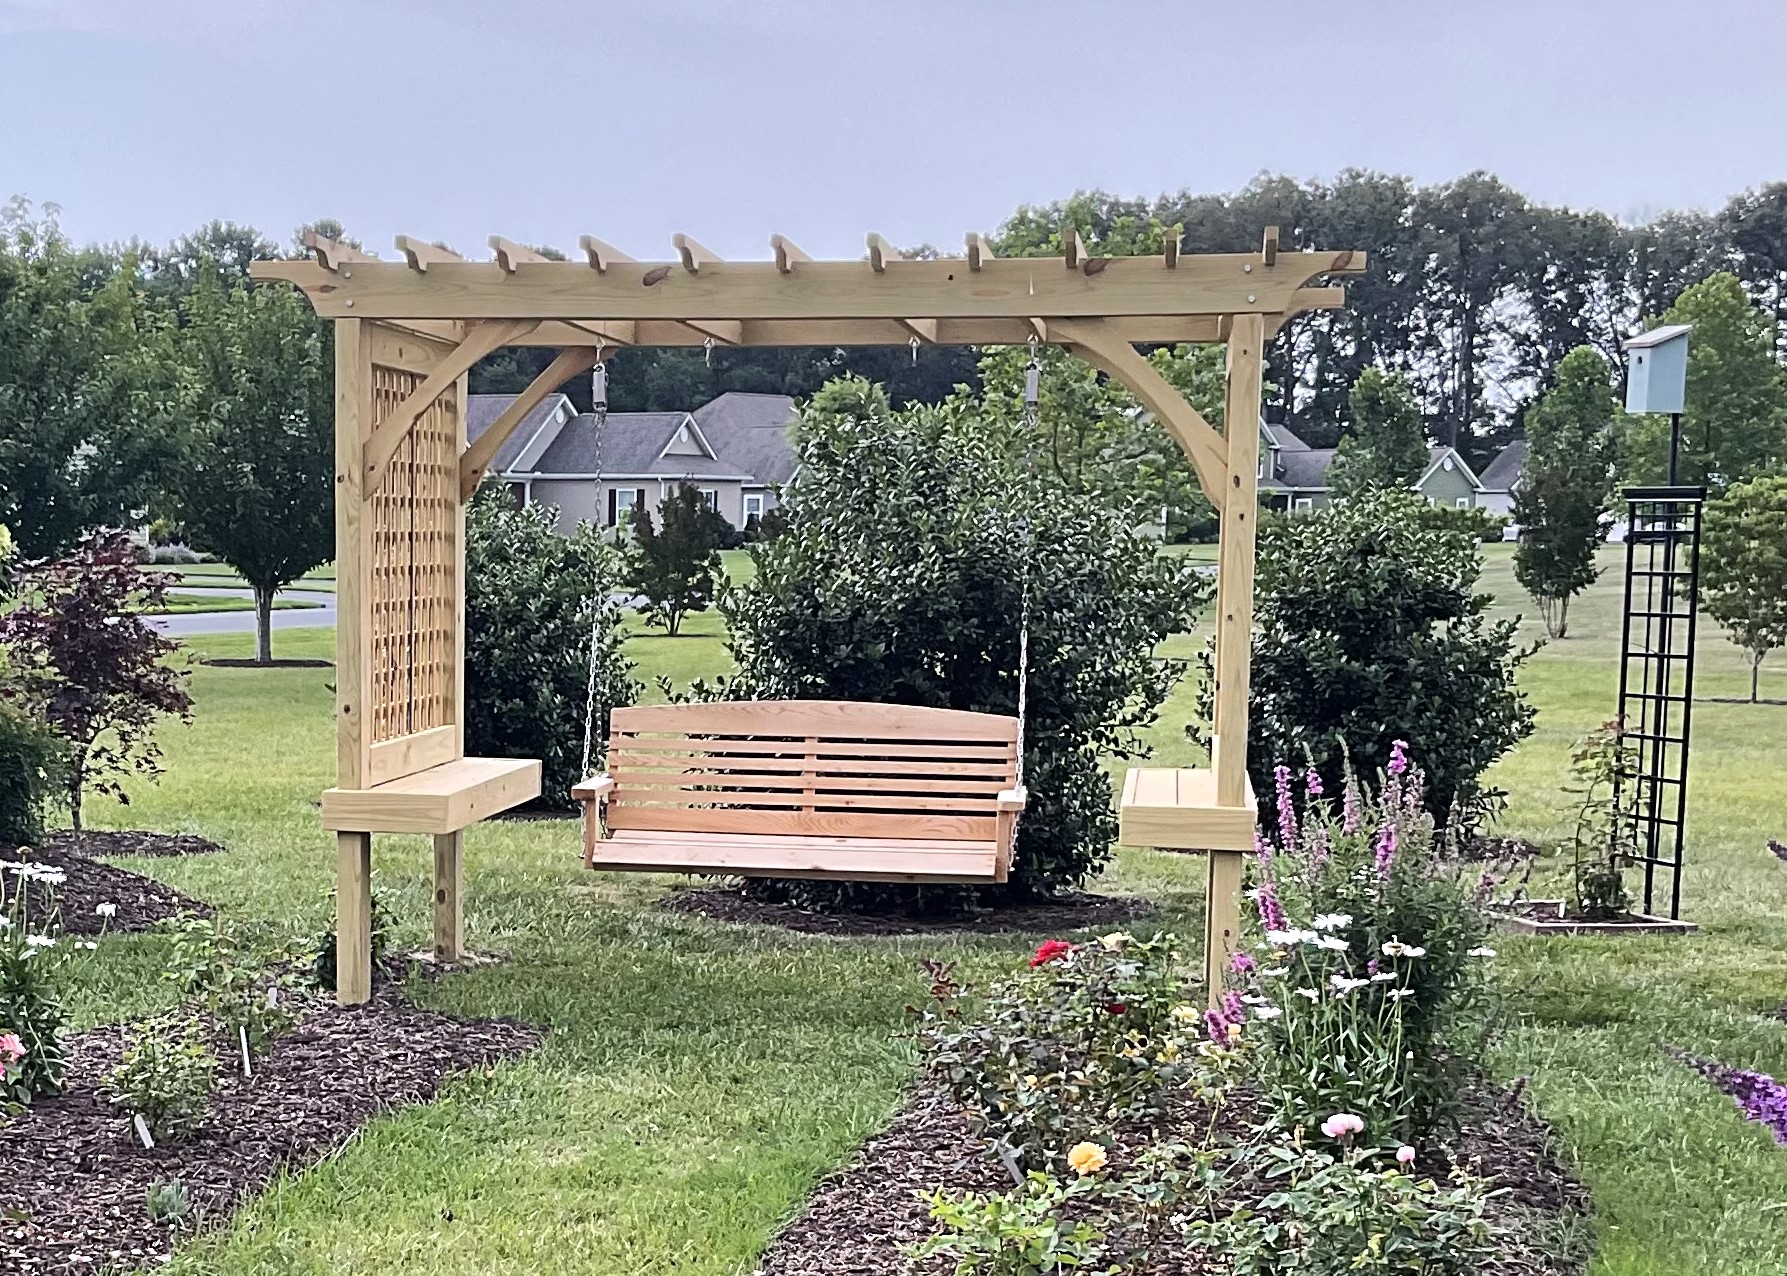
Just saw on instagram that no one bragged about this plan yet. We did order the swing online, but built the outdoor room from your plan. We did put our support posts in concrete, very windy here. Just waiting for the roses to grow up the sides. Thank you for making it easy with your plan.
Bill and Maryann Tate
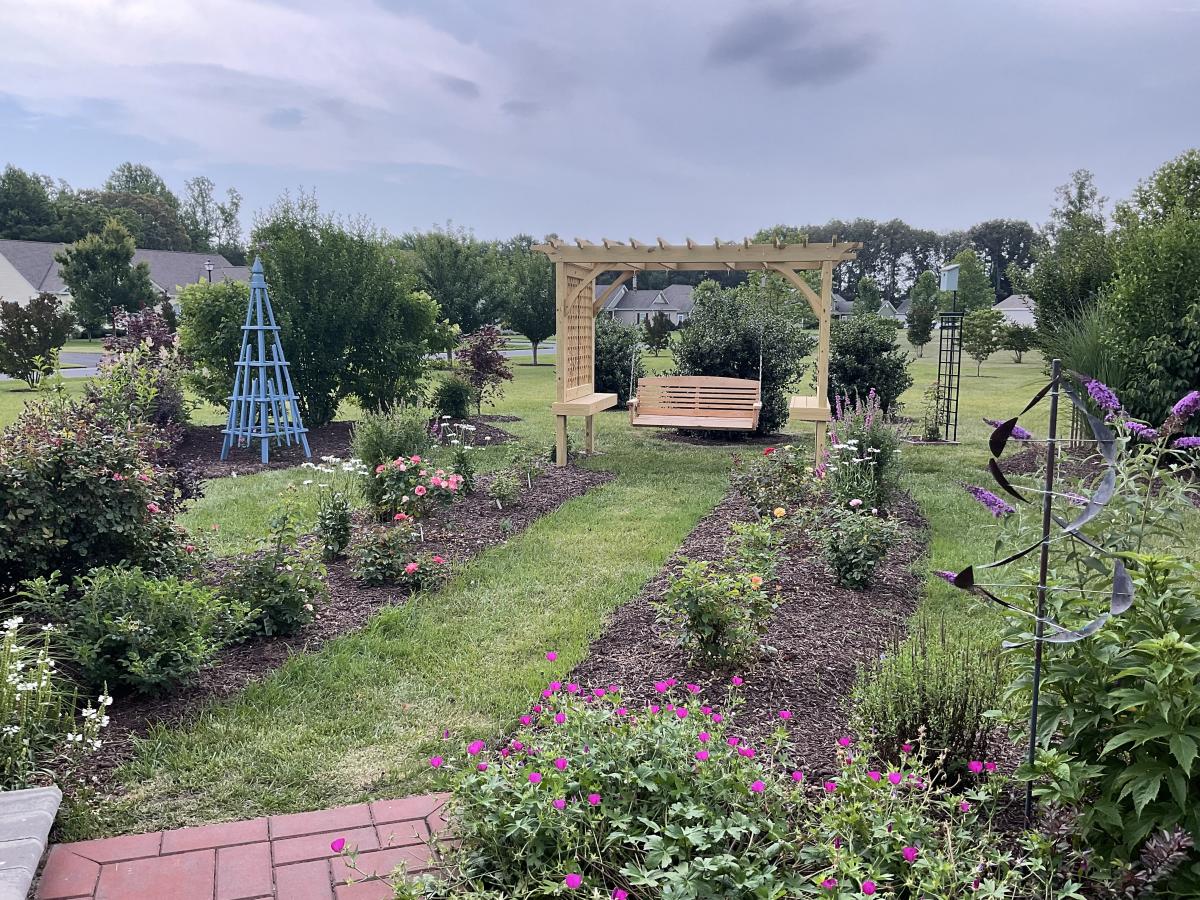
Built from Plan(s)
Comments
Wed, 08/02/2023 - 16:18
Great outdoor project!
Thanks so much for sharing and adding this project to our brag board, it looks so great!
Display case with 1920's window for the door

I really don't know where I got the inspiration for this shelf. We went to a primitive collections store a couple of weeks ago and I found this cool window off of a 1920's house. A couple of issues you run into with this is: 1. Windows from this time used leaded paint to paint there windows, so make sure when you sand you are in a well ventilated area. 2. Finding a window with no broken glass. Once you get all this the it's pretty easy to build. This is pretty much a backwards version of the media shelf with the door up top and the shelf on the bottom


Built from Plan(s)
Estimated Time Investment
Afternoon Project (3-6 Hours)
Finish Used
Glidden primer/paint Teal and Glidden primer/paint off white
Recommended Skill Level
Beginner
Comments

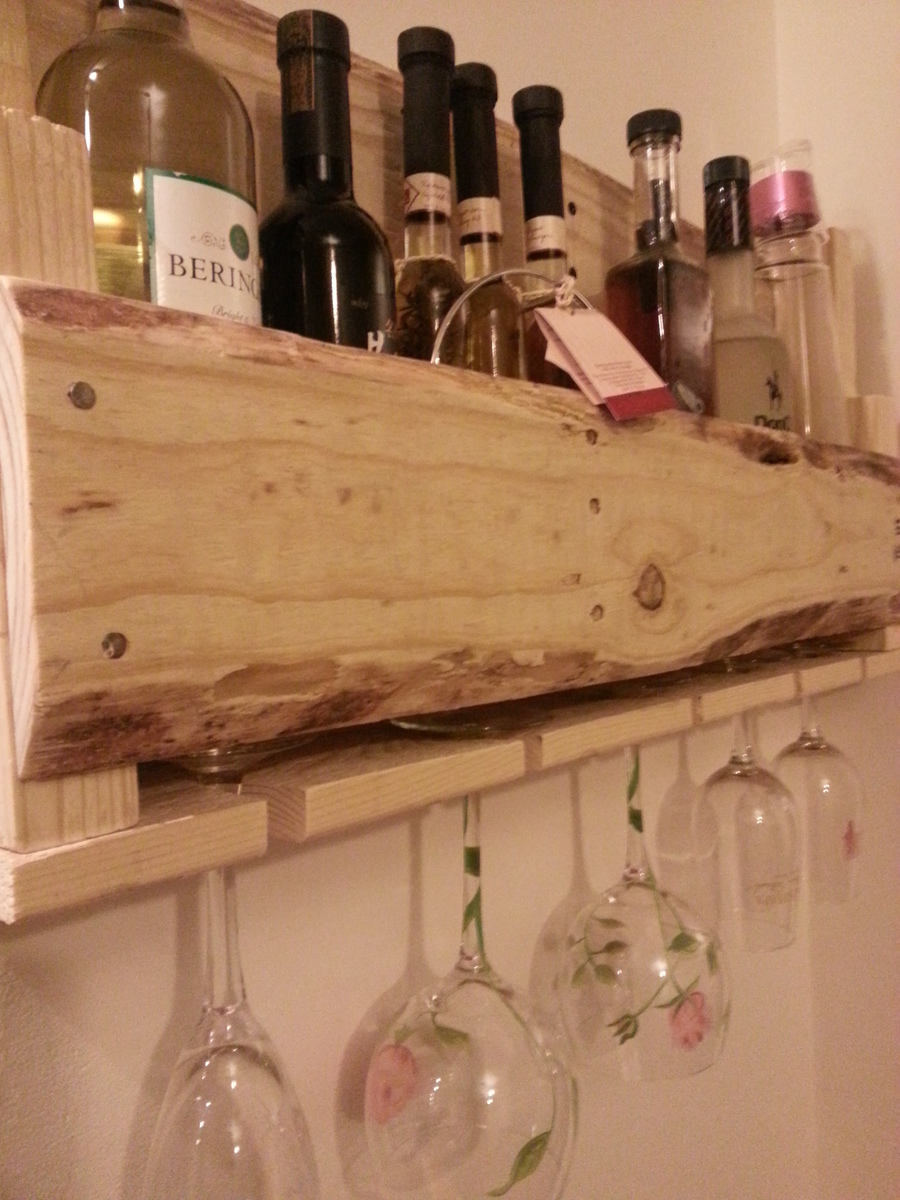
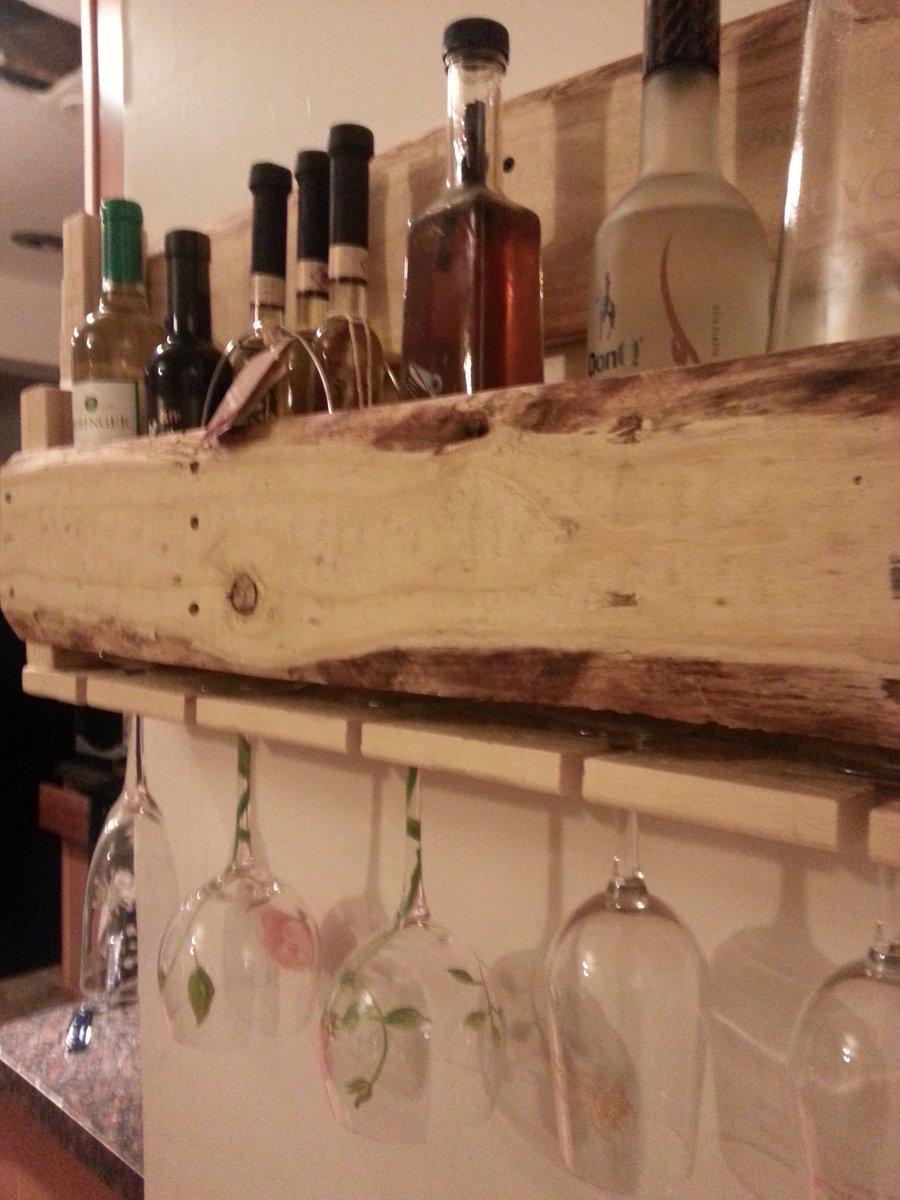
Wine Rack with Wine Glass Holder
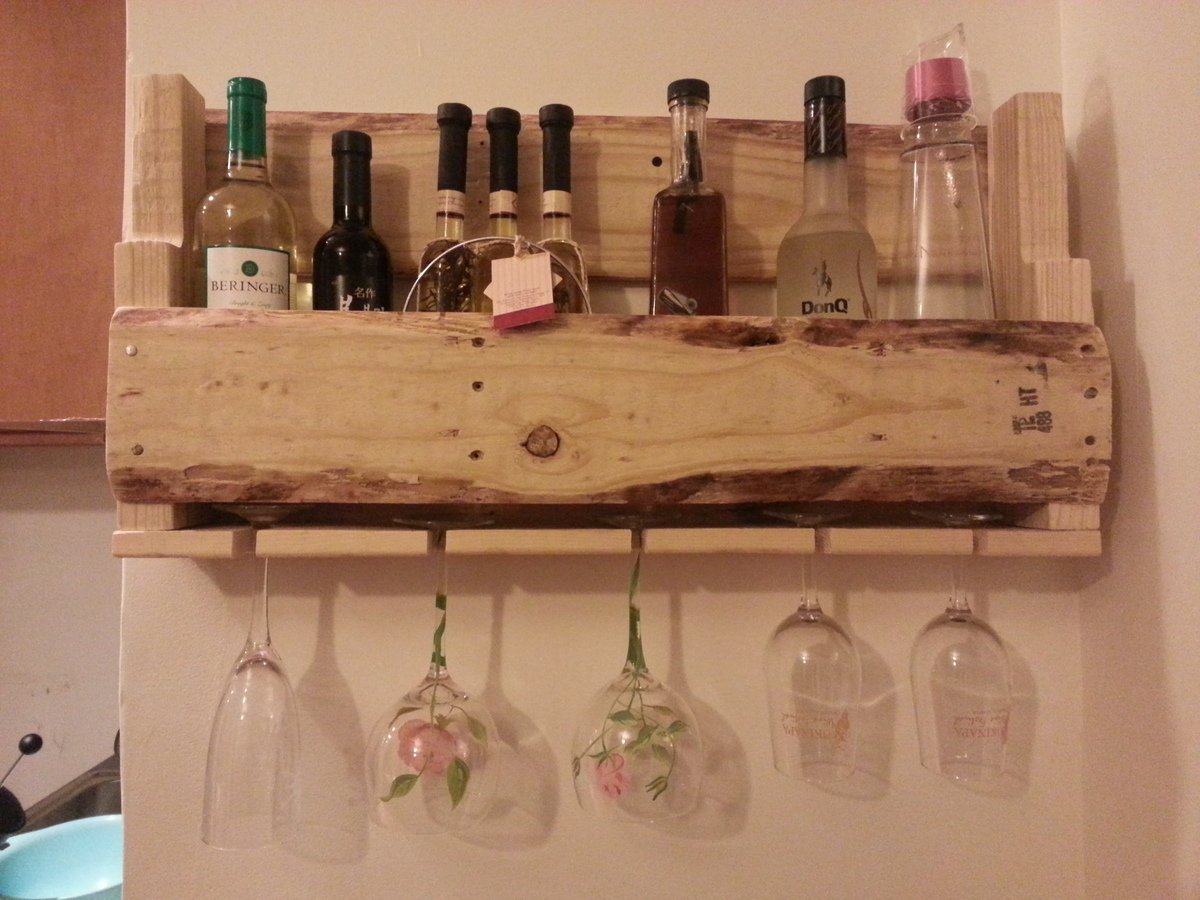
My first project! Dragged home some pallets and out came this. Theoretically, you could really do this in less time than I did but I had to customize it to fit it in the space that I wanted. I also took a lot of time sanding, as I was deathly afraid of getting splinters!
Built from Plan(s)
Estimated Cost
$0
Estimated Time Investment
Afternoon Project (3-6 Hours)
Finish Used
none
Recommended Skill Level
Beginner
Comments

Mon, 01/13/2014 - 23:43
this is exactly what I want
this is exactly what I want to build! thank you for idea!
The original built by Soulful Haven
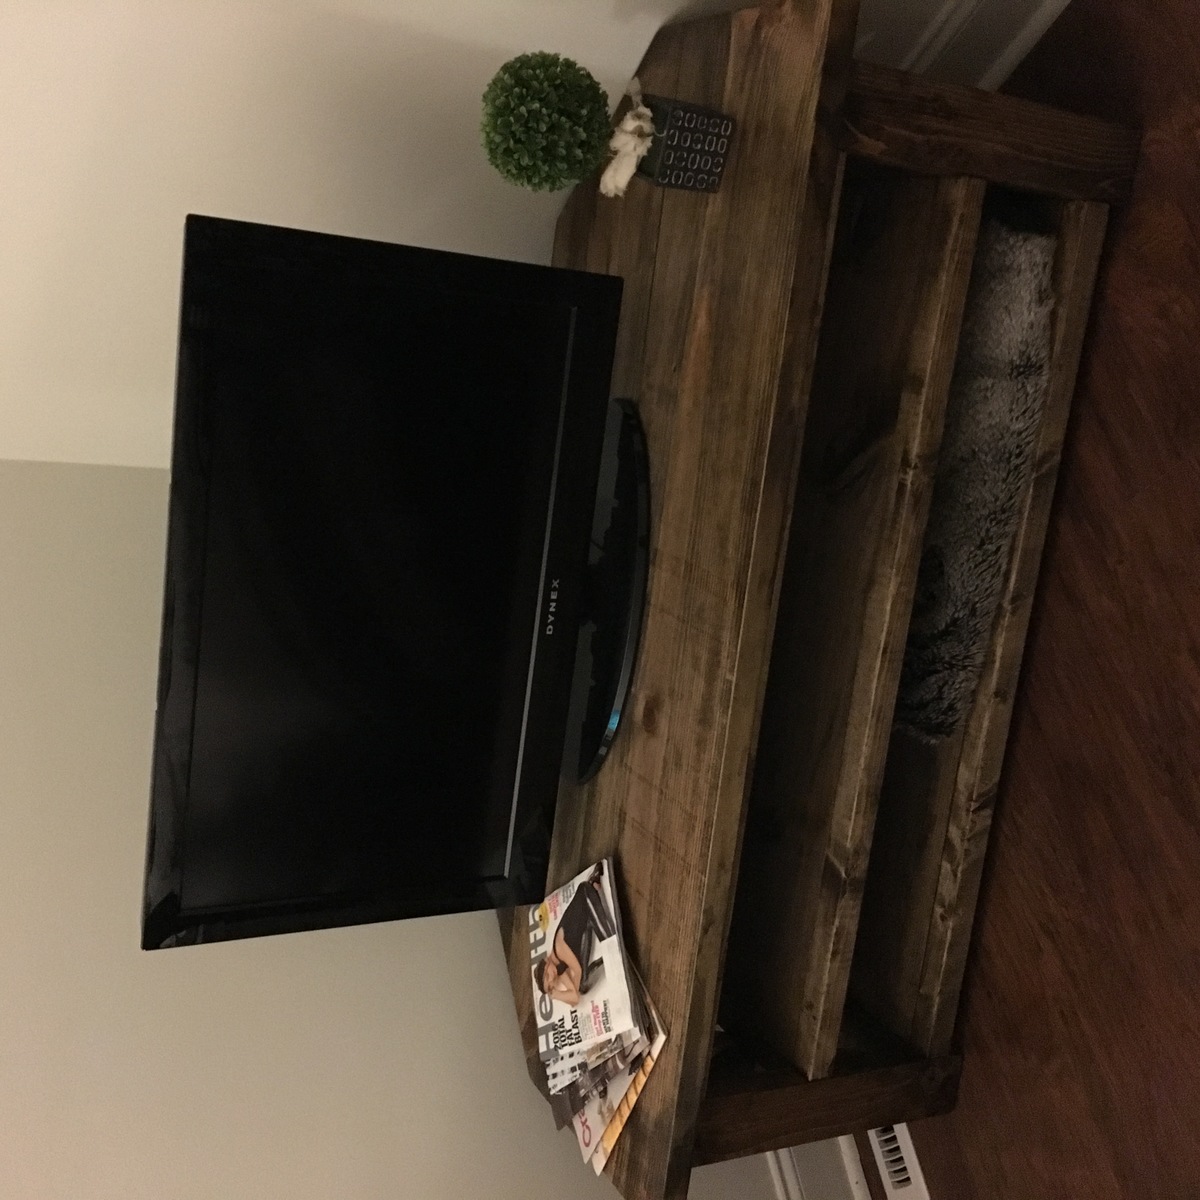
We love Ana White plans. One of our customers wanted the end tables and coffee table and a similar tv stand but to fit in a corner. I took the Rustic X concept and started creating! My Friend RogueEngineer liked it so much that he reverse designed it and made plans. Such talent out there in the DIY world!
Built from Plan(s)
Estimated Time Investment
Weekend Project (10-20 Hours)
Finish Used
Jacobean stain
Recommended Skill Level
Intermediate
Reclaimed Hurricane Micheal X style Farmhouse design
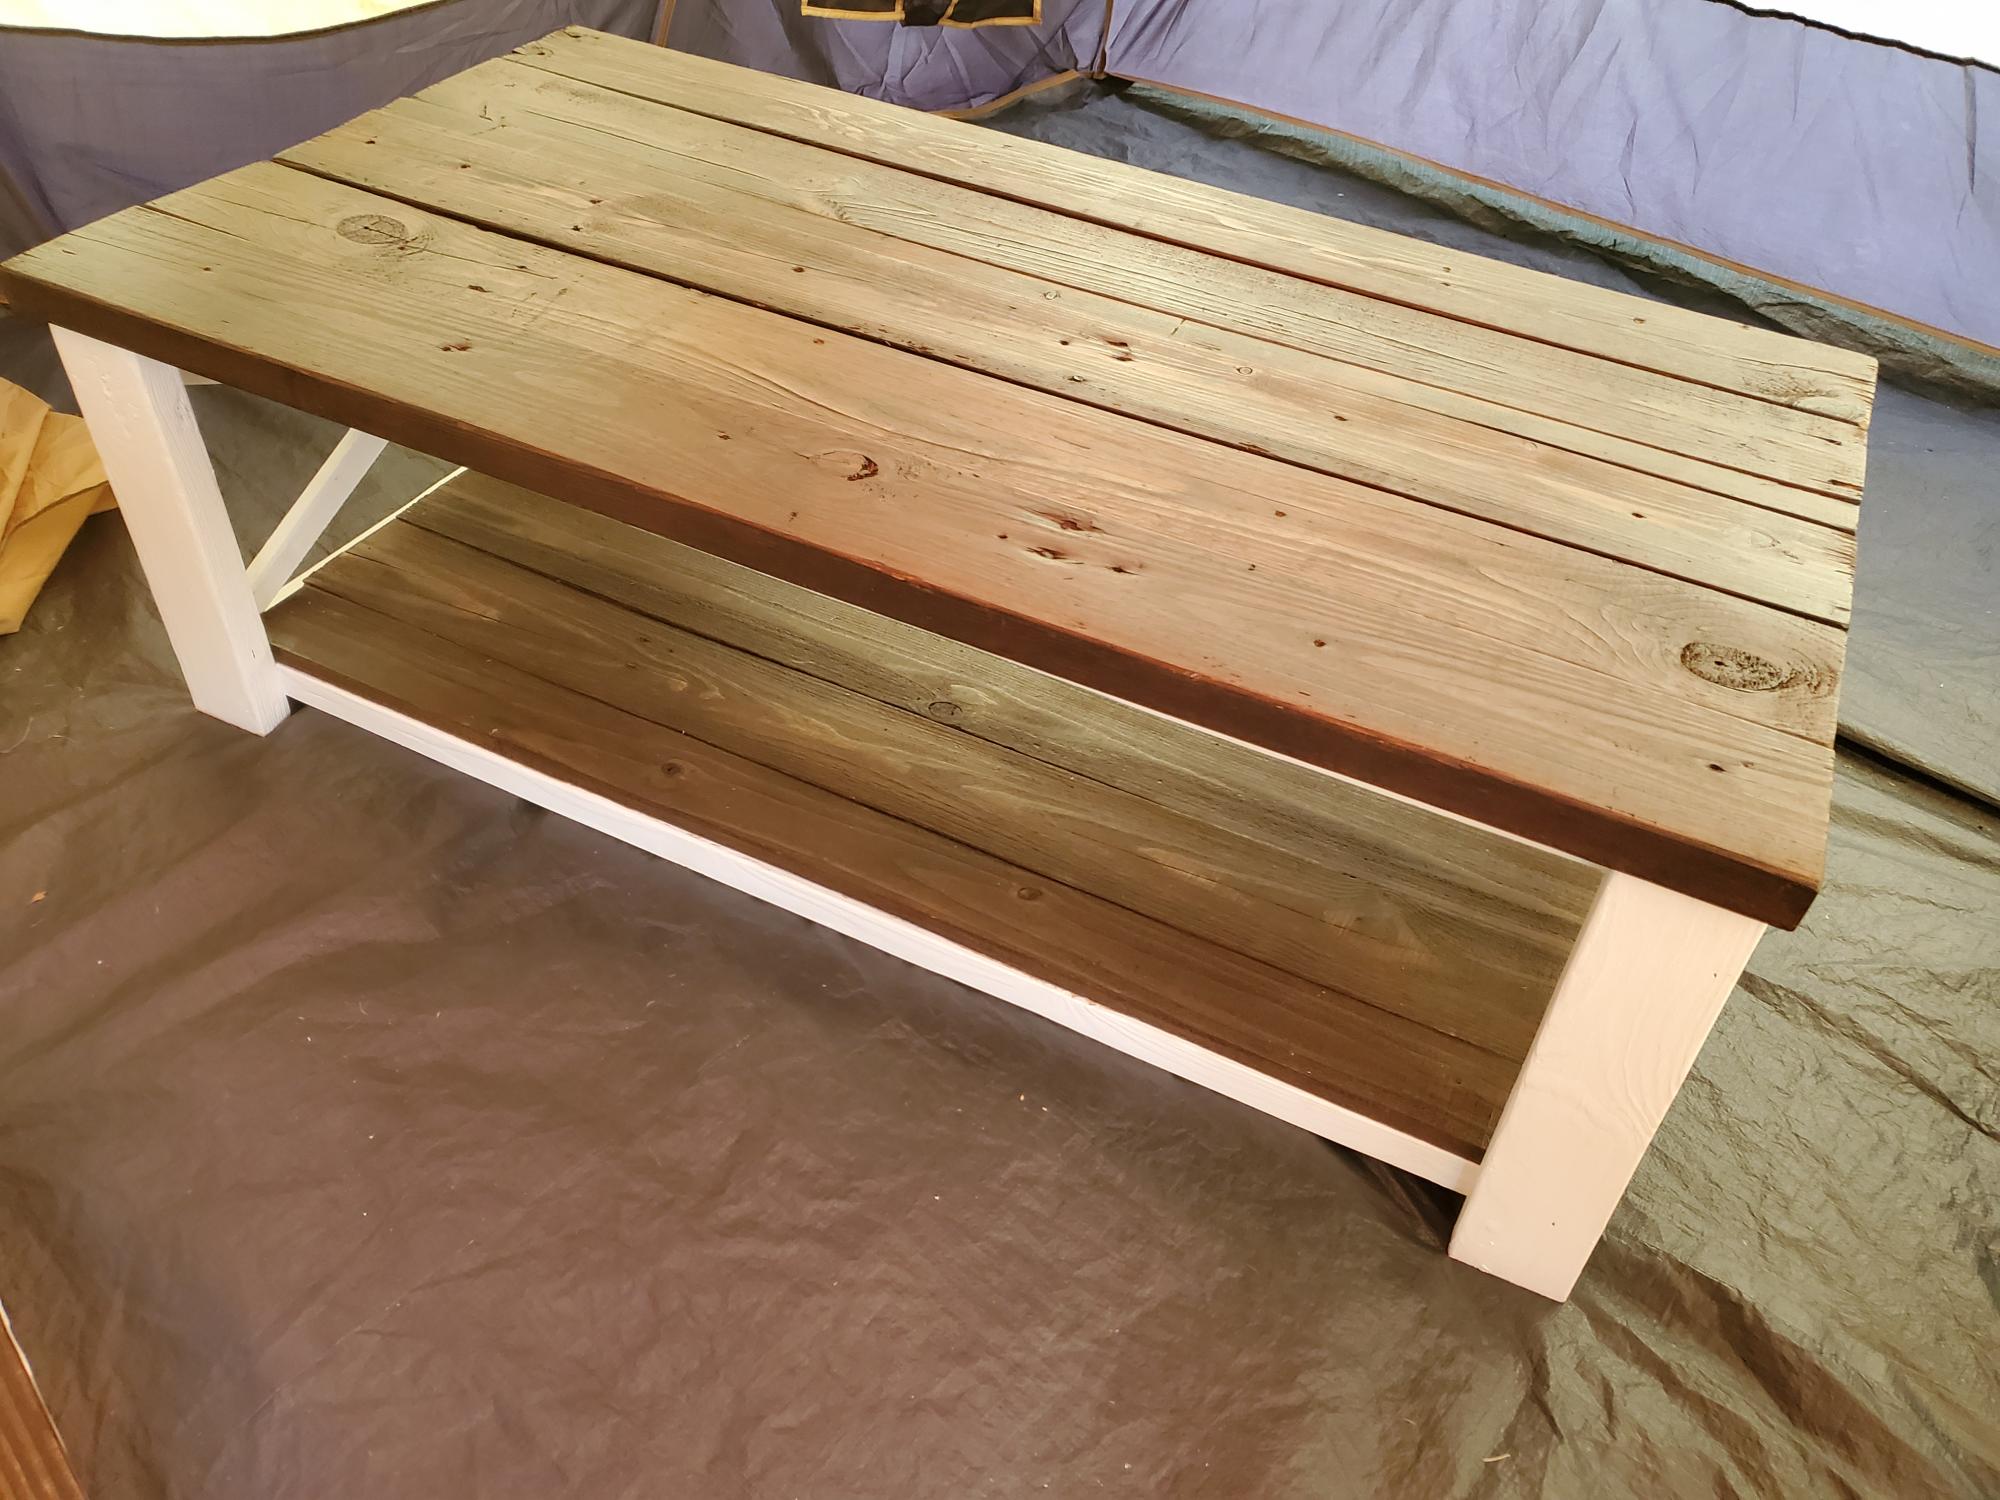
On this project which I use from Ana White designs, I learned how to cut at an angle and I learned what wood too use to get the look you want. I also just wanted to say thank you for showing us diyer how to feel confident about building and using our hands. It is a good therapy, woodworking and creating.
The wood is all made from reclaimed Hurricane Micheal timbers that I cleaned, sanded, detailed, sanded again, painted, stained, and clear coat.
Even though the wood was used and free, it still has a process upon completion
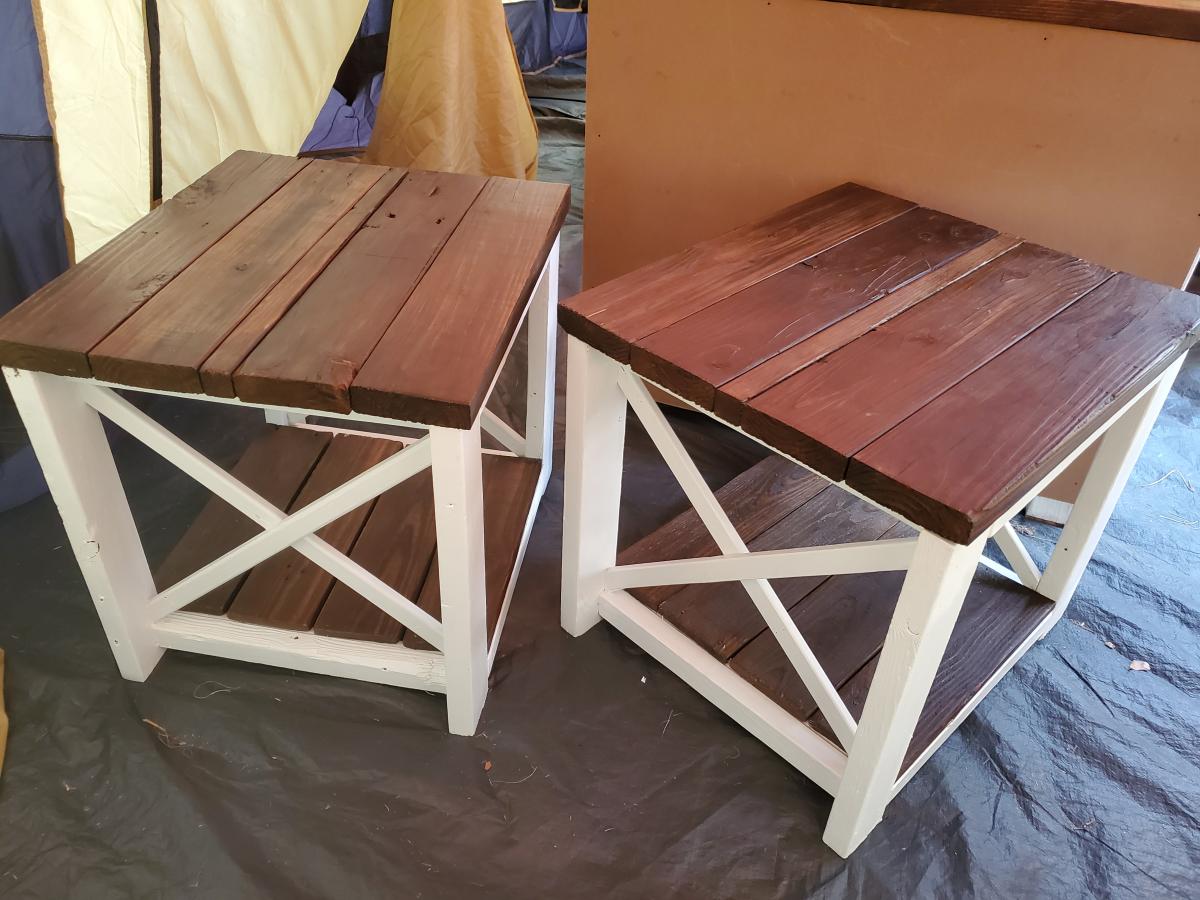
Built from Plan(s)
Estimated Cost
50 In total cost
Estimated Time Investment
Afternoon Project (3-6 Hours)
Finish Used
I used Minawax English Chesnut Stain for the tops and a Valspar Latex Paint with a polycrylic semi gloss for easy cleaning. Sand paint I used 60, 100, 220, and 400 grit.
Recommended Skill Level
Intermediate
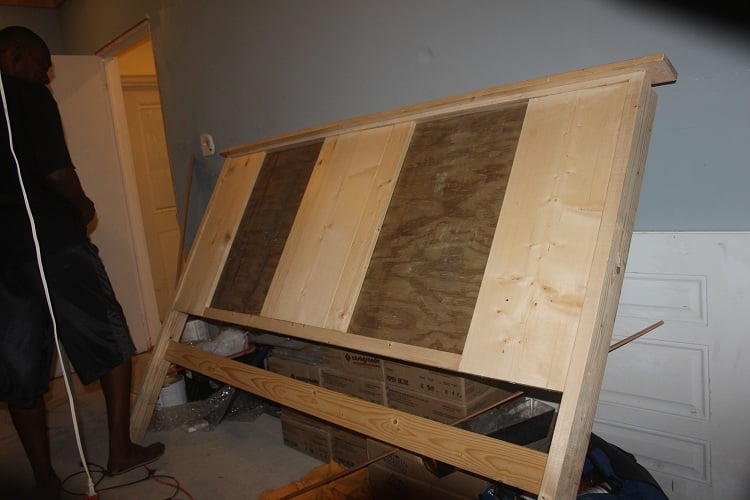
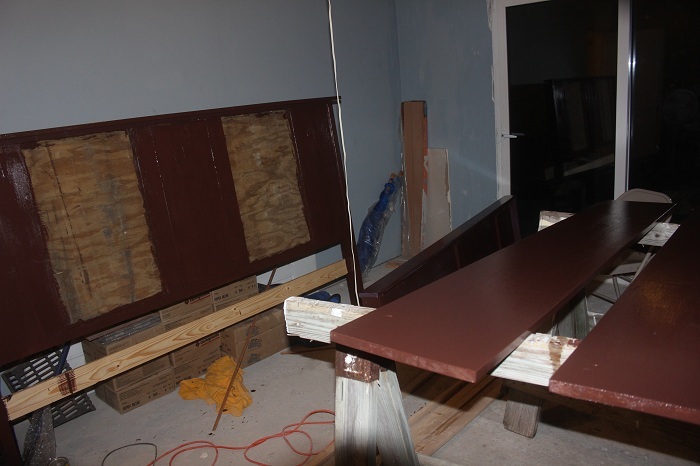
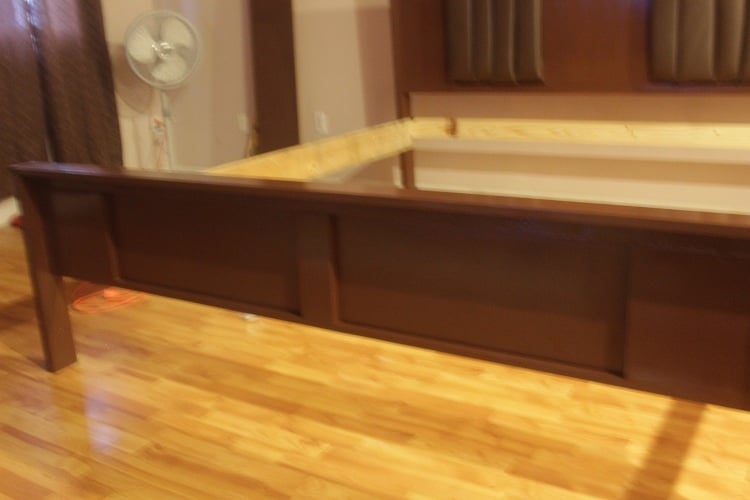
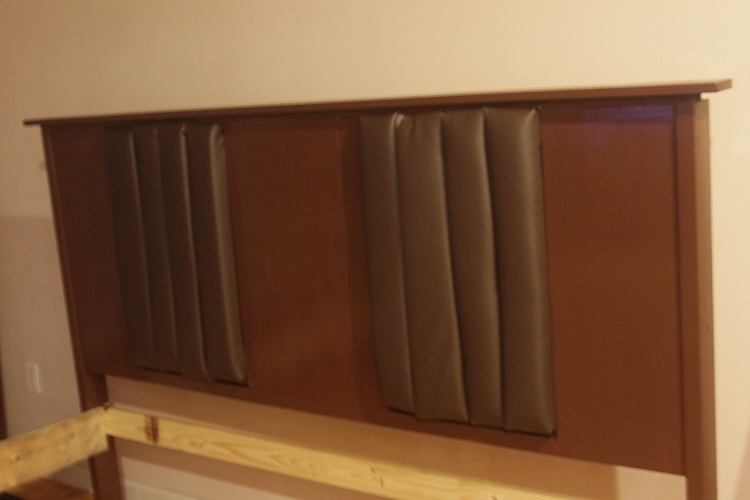
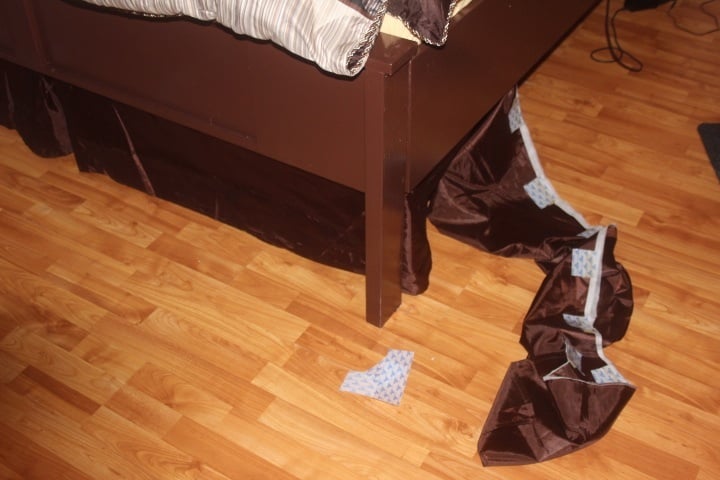
My Leather Accent King Size Bed
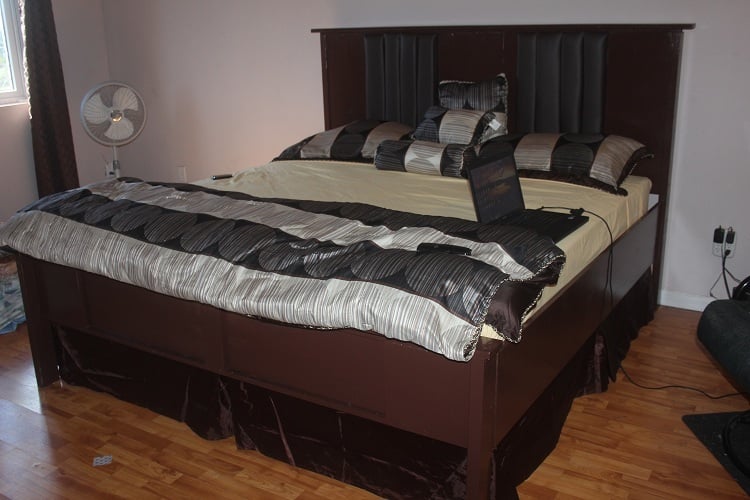
We modified the plans because I had a specific idea of what I wanted and we needed a king size bed. We are so proud. We used left over foam from a previous project and covered it with the faux leather for the back rests. Because I love the look of dust ruffles but couldnt use it because of the slats to support the bed I cut out the material from which the dust ruffle is sewn and attached velcro to it and then to the bed and I got the look I wanted. Ana is awesome!
Built from Plan(s)
Estimated Cost
196.00
Estimated Time Investment
Weekend Project (10-20 Hours)
Finish Used
Expresso Paint and waterbased poly urethane to protect it
Recommended Skill Level
Beginner