Community Brag Posts

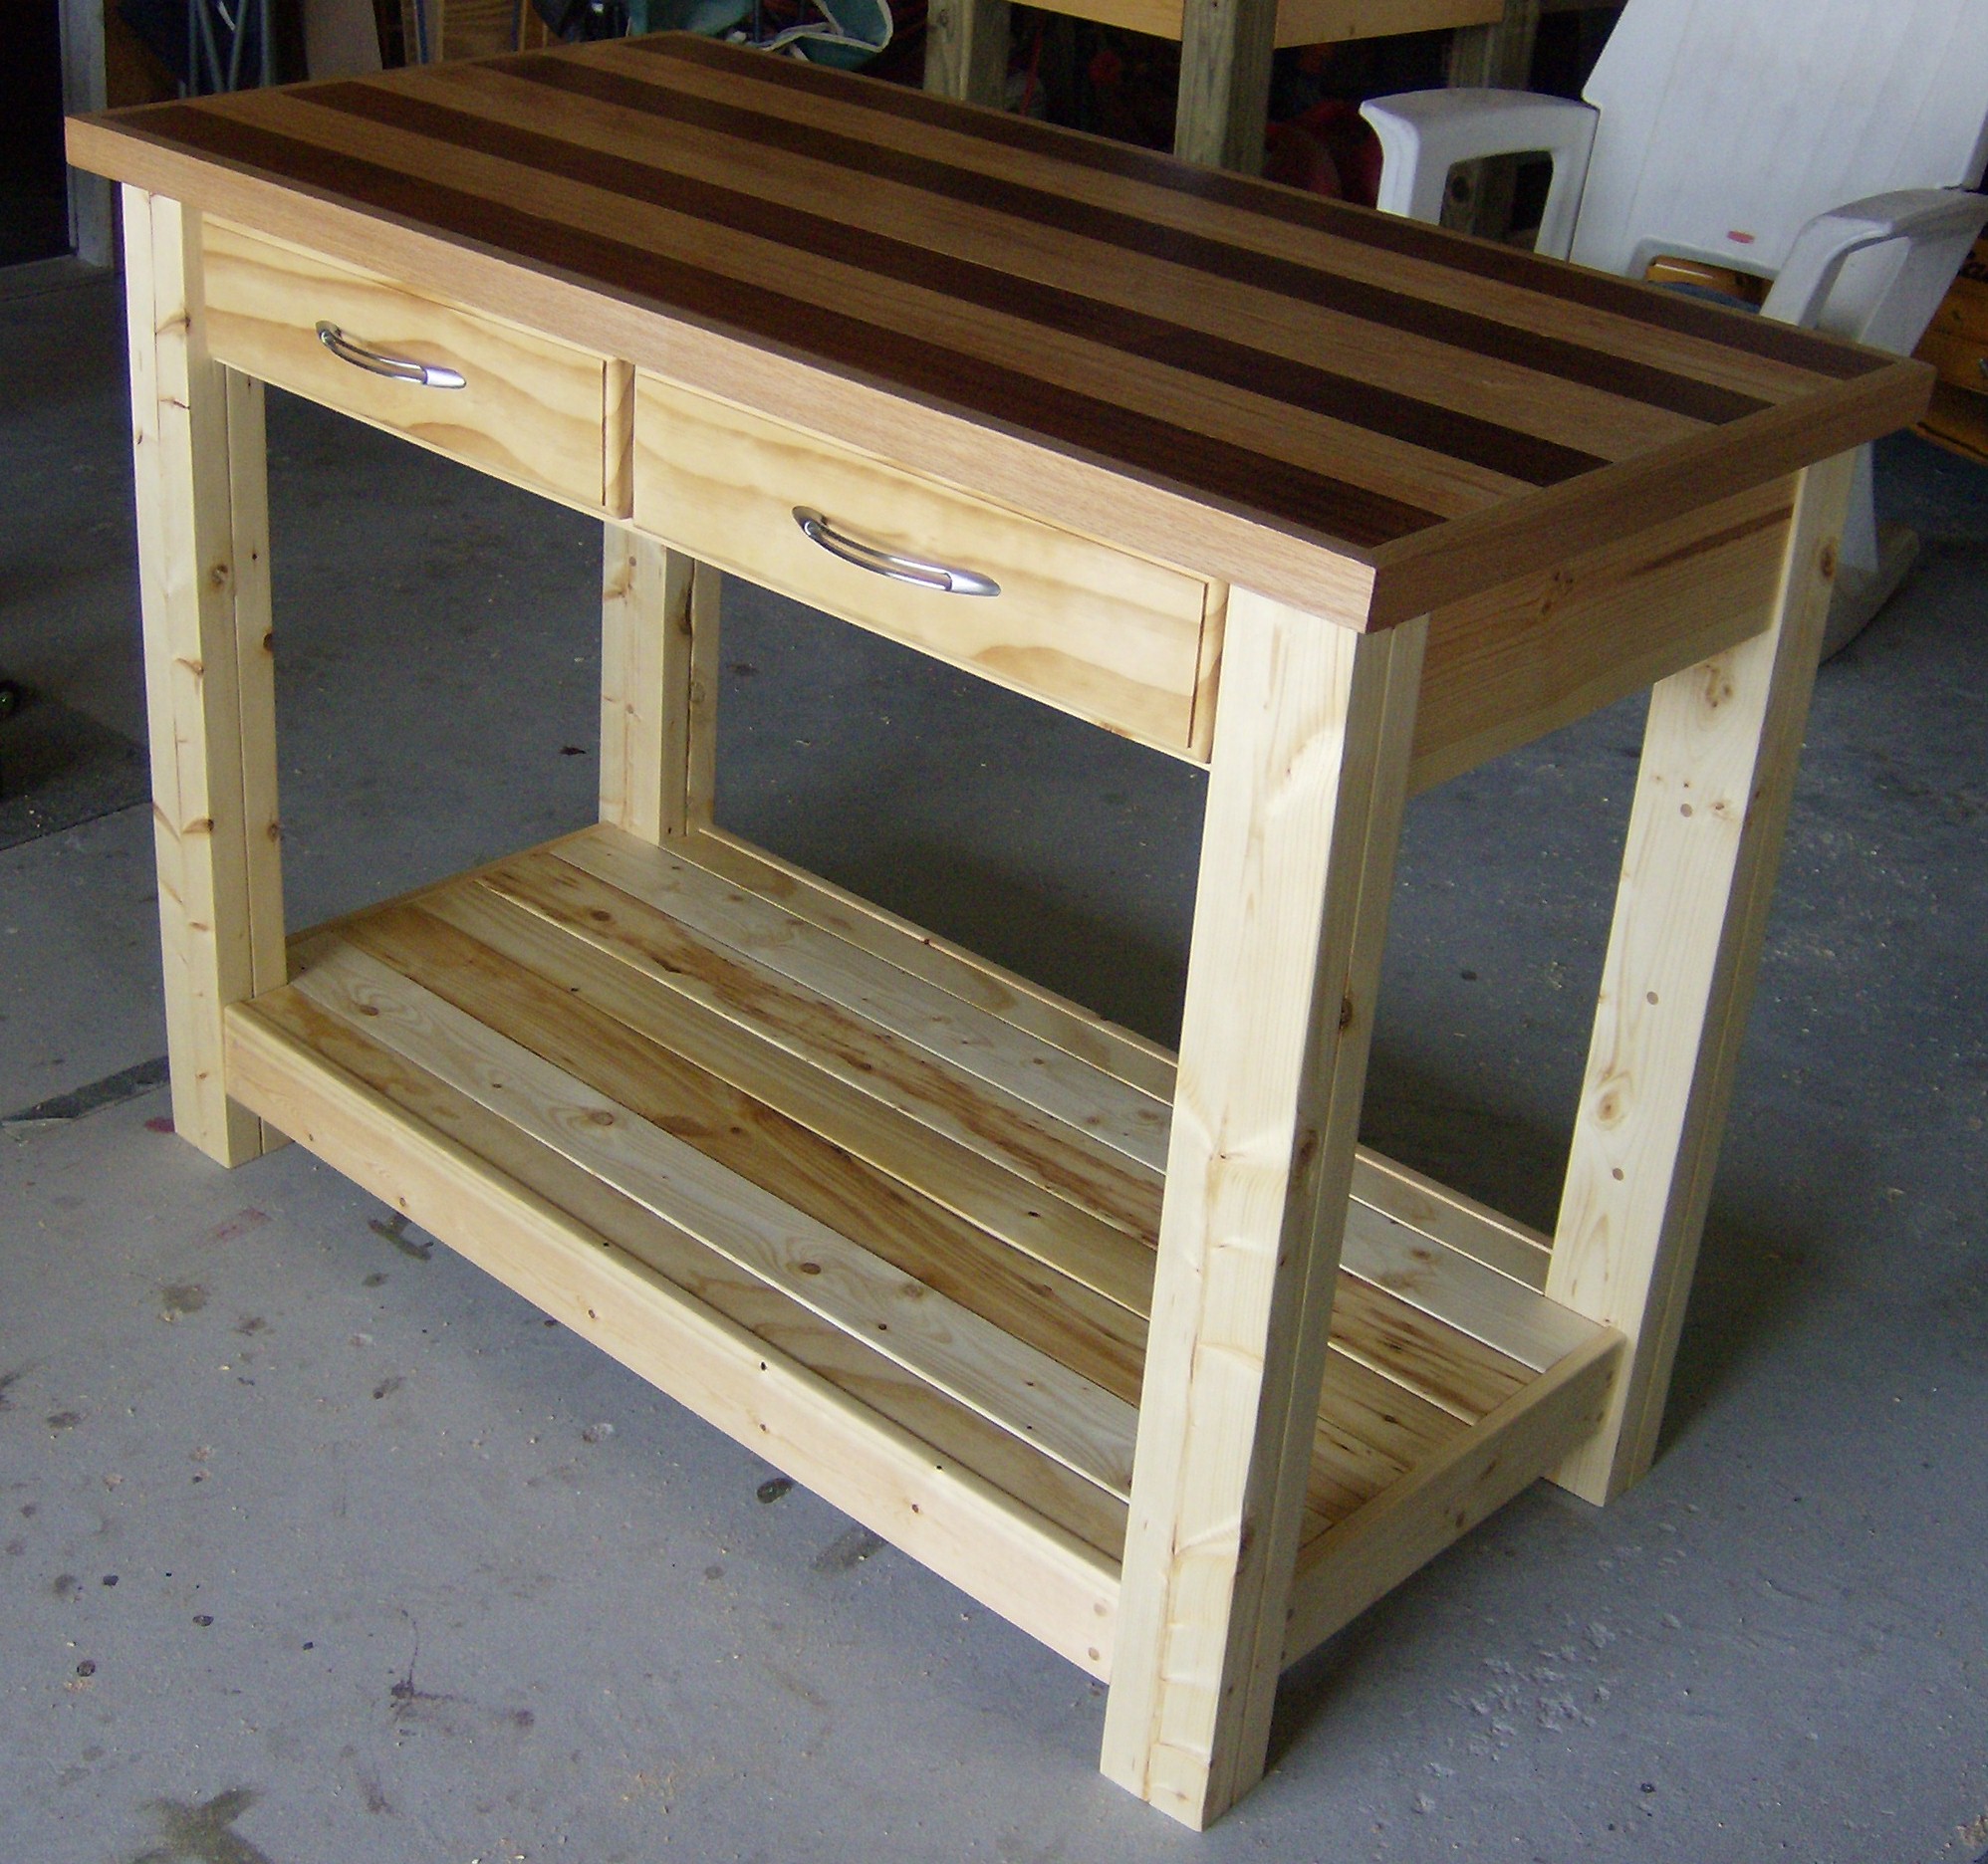
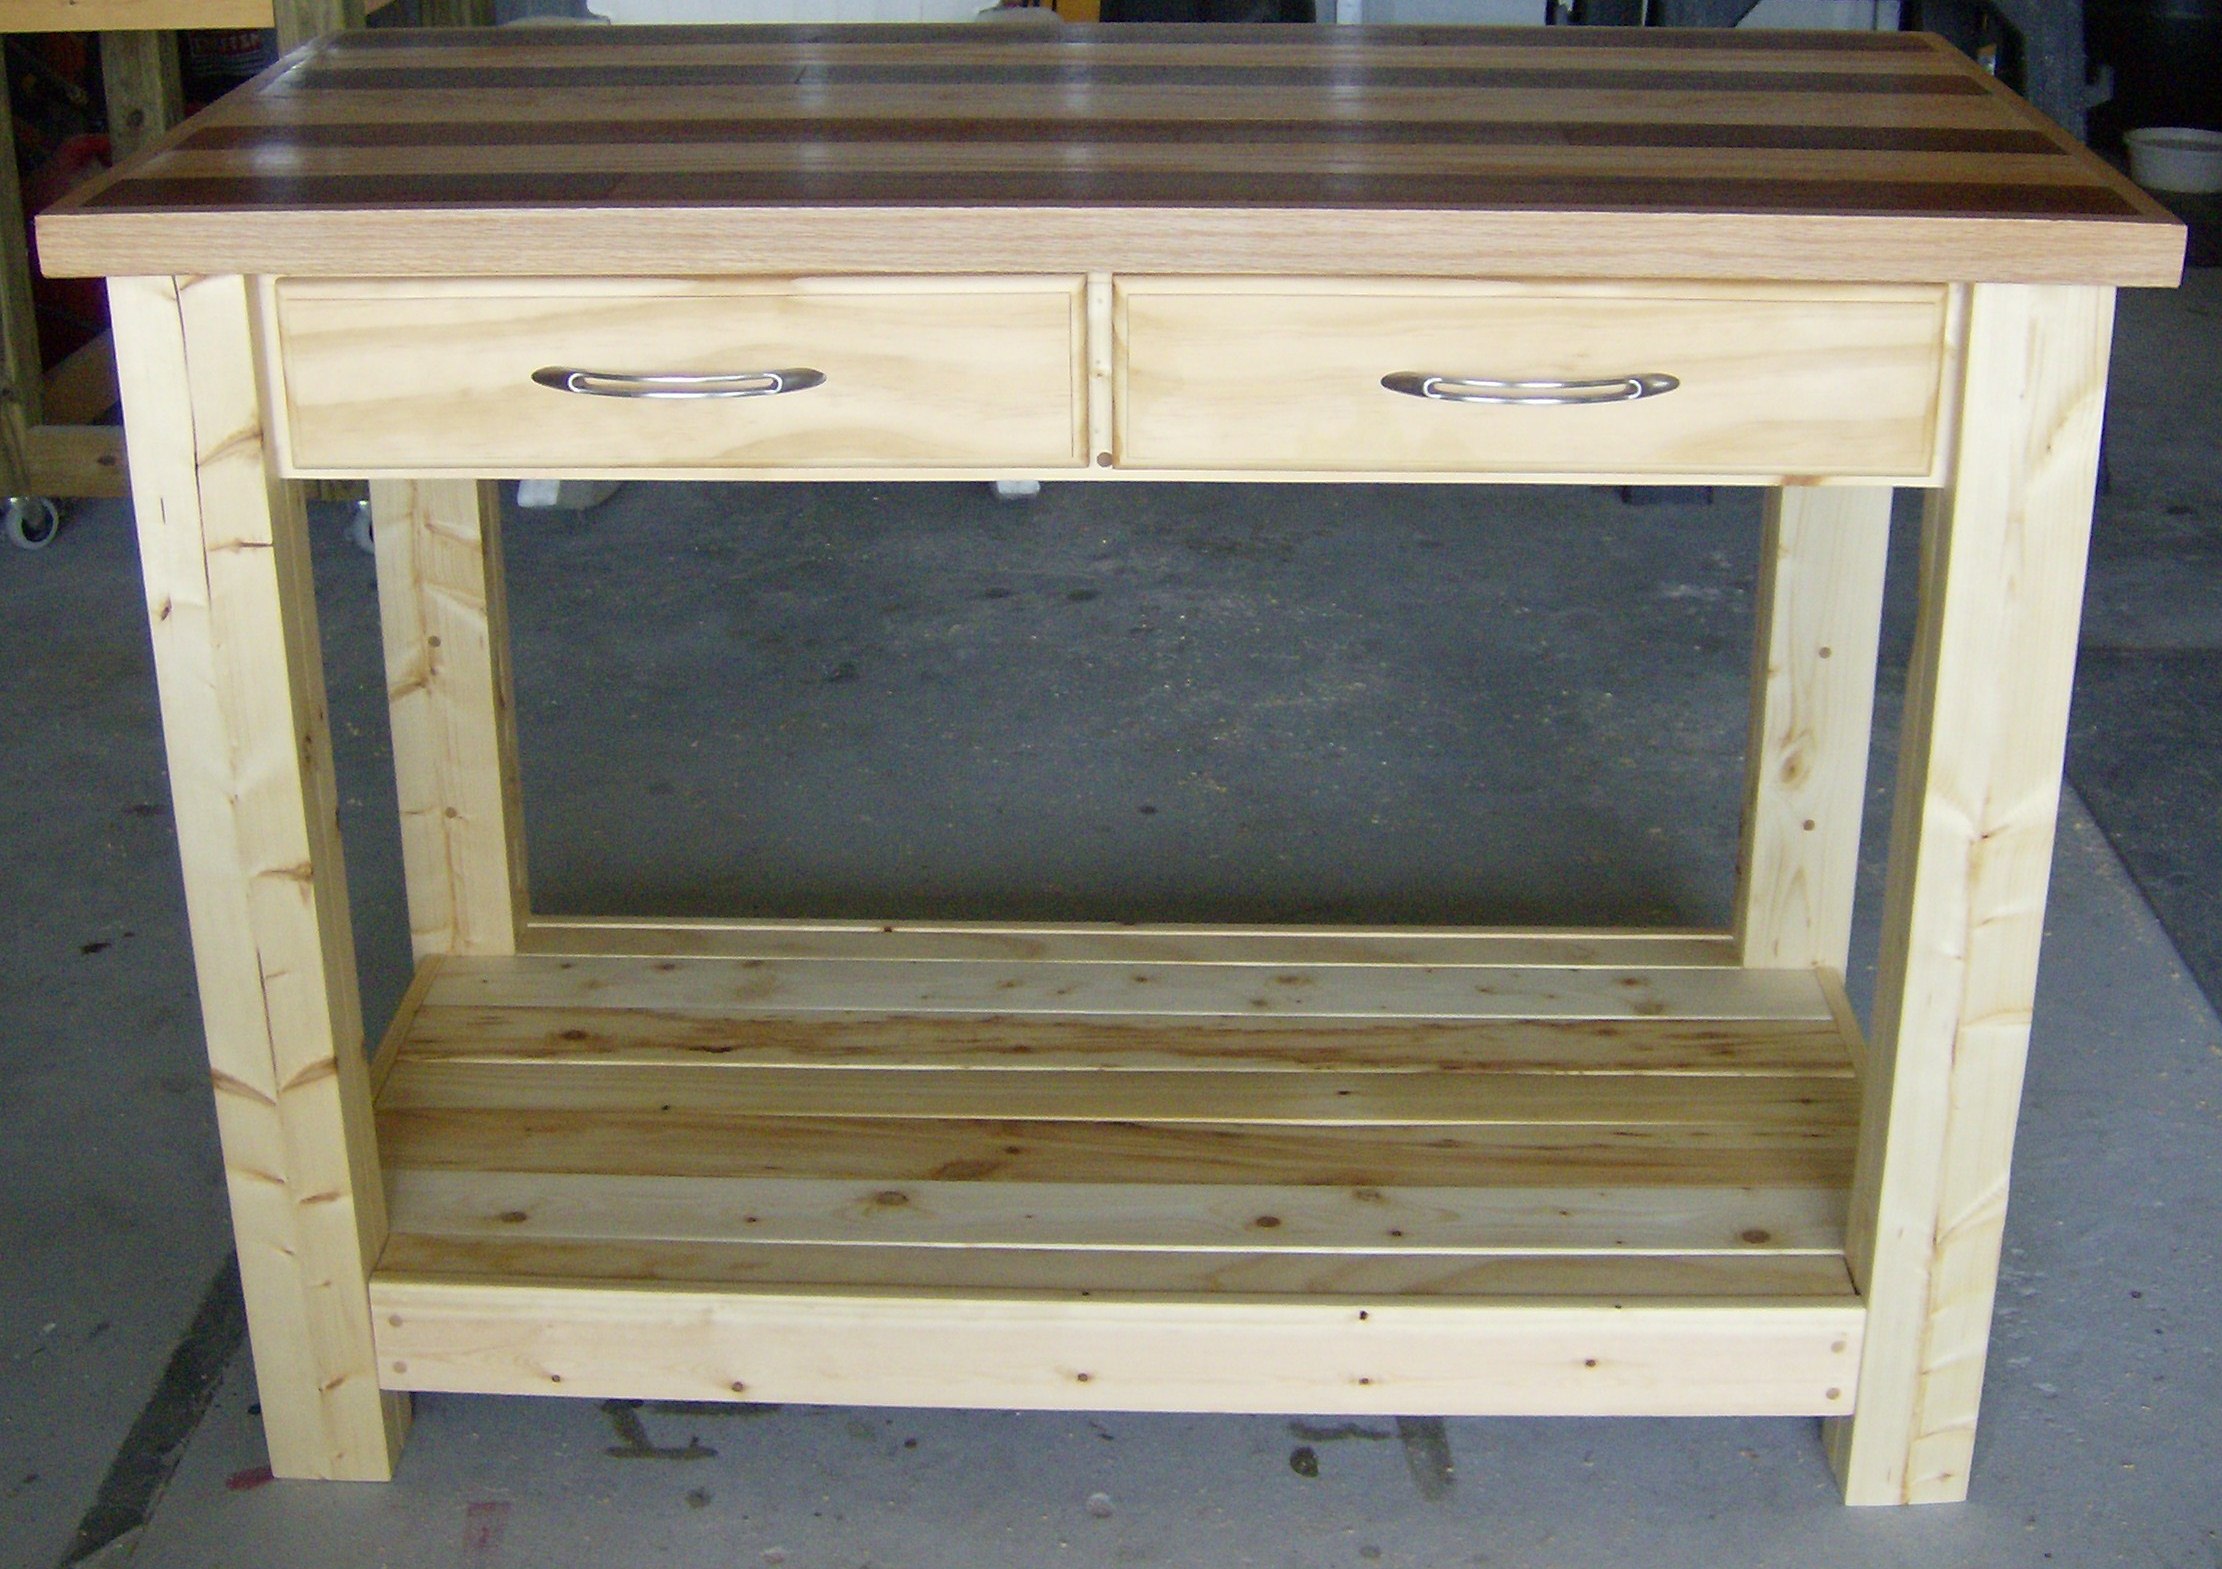
Raised Pet Feeder - Small

Submitted by takahler on Wed, 08/31/2011 - 11:46

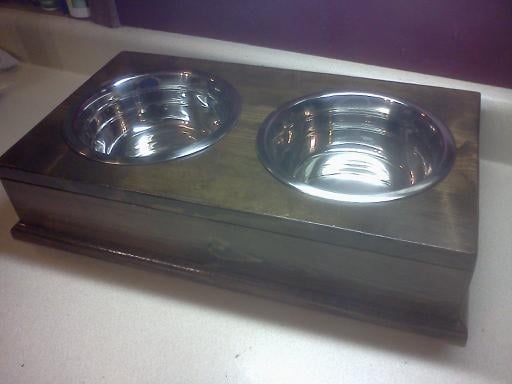
As soon as I heard my brother was going to get a puppy this month, I decided I was going to make this food and water dish holder. I LOVE IT! I am going to give it to him for Christmas. I made it with larger bowls for when the puppy becomes a full size Golden Retriever. She won't need it right away, so I've decided to wait until Christmas to wrap up and give to my brother. I had a lot of fun making this project. I need to make one now for our cockapoo.

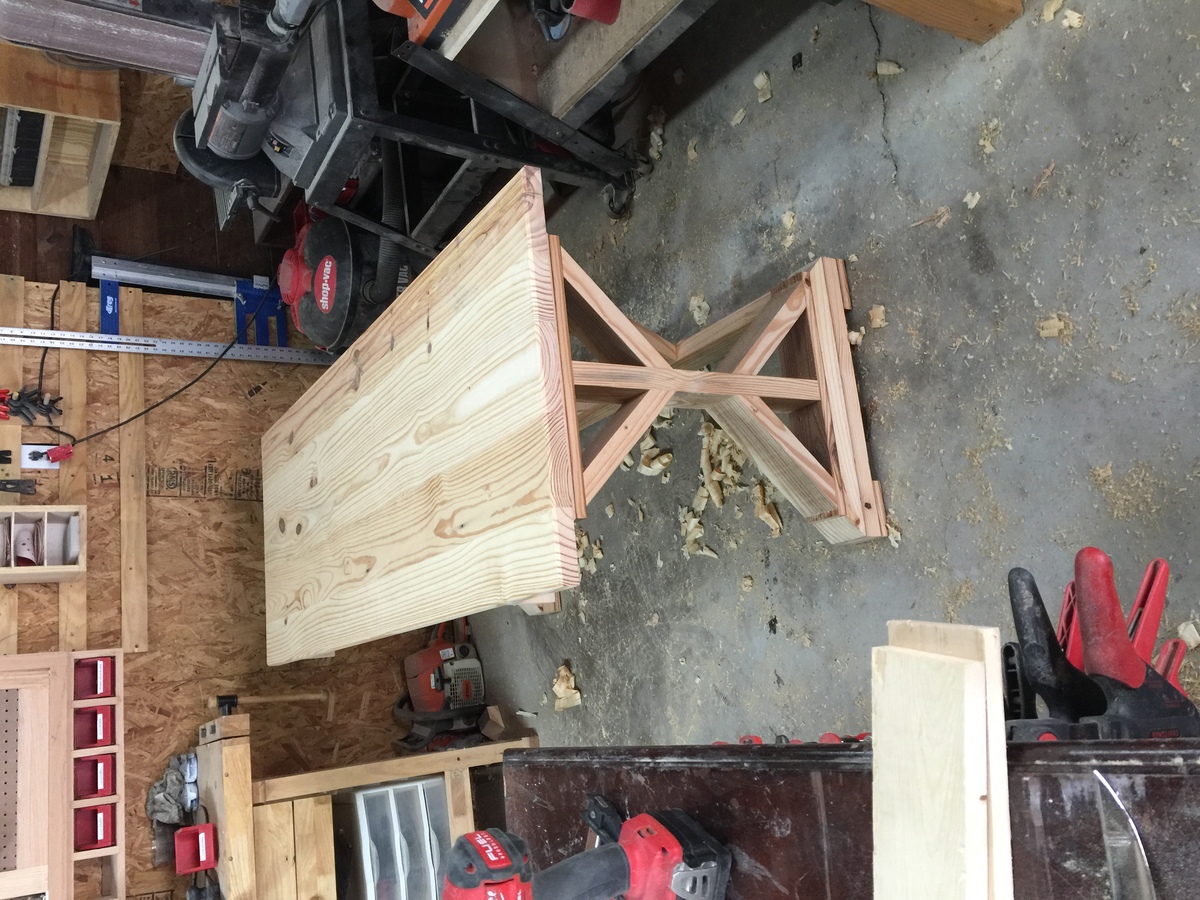
Since I had to use larger bowls, I had to come up with my own measurements. I'm pretty proud of myself for tackling that all by myself. :-)

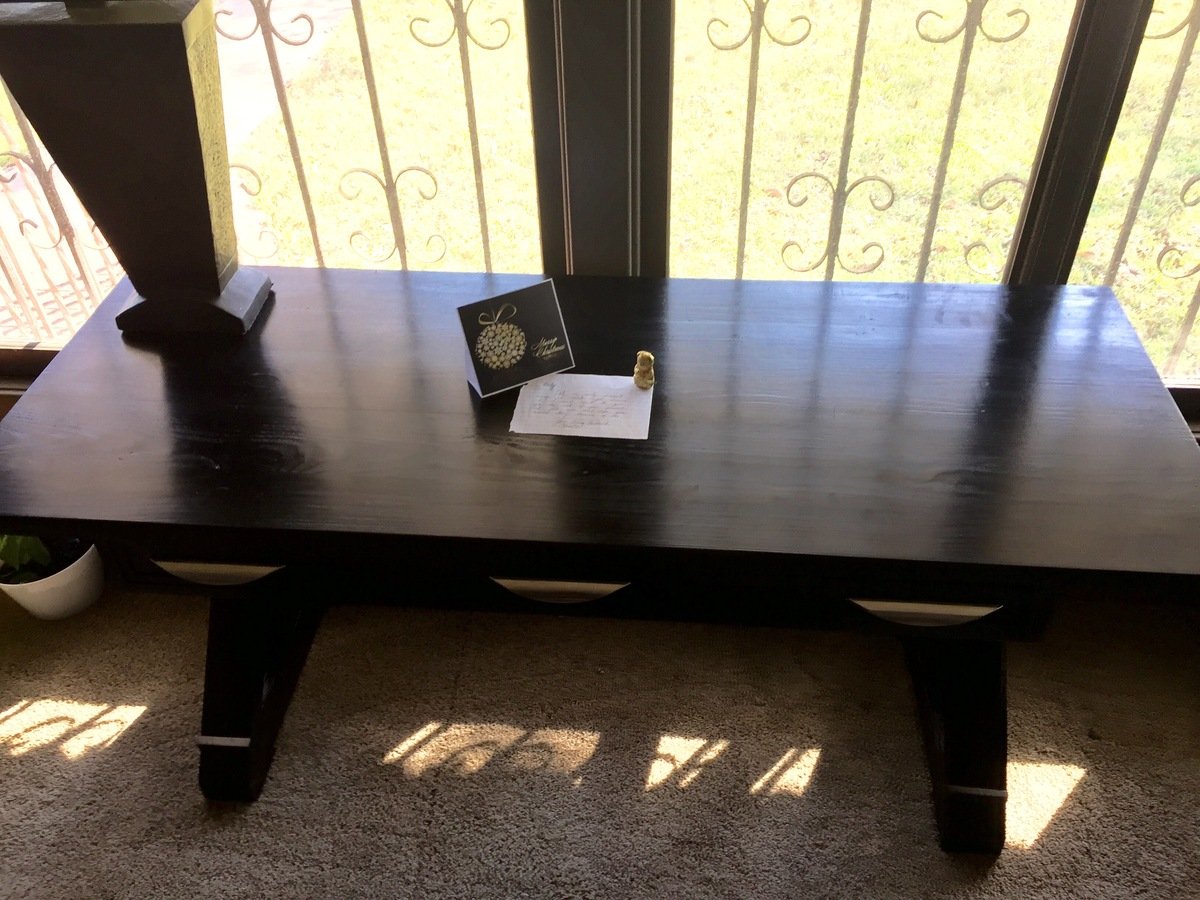
Coated it pretty heavy with the polyurethane to protect it from water spillage.

Built from Plan(s)
Estimated Cost
$9 for the bowls and about $6 in lumber--Total of $15
Estimated Time Investment
Afternoon Project (3-6 Hours)
Finish Used
Dark Walnut and polyurethane
Recommended Skill Level
Beginner

Comments

Lapdesk

Submitted by DogDoc25 on Sat, 09/21/2013 - 16:10

This was a pretty simple project and only took a few hours. I painted the bottom with some oops pain I found at Home Depot- I wanted the blue to be darker, but I still think it turned out ok and I will probably end up giving it to my nephew. I followed the instructions that one of the other builders had done on this project as far as making the legs shorter and leaving the compartments out to make it lighter. Happy with it overall!

Built from Plan(s)
Estimated Cost
less than $10
Estimated Time Investment
Afternoon Project (3-6 Hours)
Finish Used
painted the bottom with blue oops paint and used minwax golden oak (1 coat, left on 20 minutes then wiped off) and polycrylic for the top
Recommended Skill Level
Beginner

Barn door console

I made the sliding barn door console from your plans.  I liked it so much I made a 3 opening version for another wall.  I found patio door rollers to use instead of taking apart a pulley in the directions from the that's my letter plan.  I used old crates my parents had kept and scraps for my doors so it has sentimental value. 

Built from Plan(s)
Estimated Time Investment
Week Long Project (20 Hours or More)
Finish Used
Varathane golden pecan and espresso for the top. Vinegar and steel wool for the backing. Various colors for the doors. Min wax clear polycrilic finish.
Recommended Skill Level
Intermediate

Leaning Desk and Bookshelves

Submitted by Anonymous (not verified) on Sat, 01/19/2019 - 21:22

Used a handheld propane torch to “burn” the wood and it turned out amazing! 

Estimated Cost
$100 I didn’t have any wood on hand so had to buy all of it. The rest of materials I already had.
Estimated Time Investment
Day Project (6-9 Hours)
Finish Used
Propane to burn the wood
Recommended Skill Level
Beginner

Grid Mirror

Submitted by Anonymous (not verified) on Fri, 11/25/2022 - 06:05

Thank you Ana for your amazing easy to follow plans and videos! I’ve had so many compliments in the mirror and goes great with the table from Shanty2Chic. I went with 8 x 8 mirror tiles. We love it!

Comments

Storage Sofa with Armrests

When we bought our house a year ago, my husband was super excited to be able to get tools and start working with wood. At first, I didn't share his desire for DIY projects. It honestly wasn't until I found your website that I started to get excited. It was first a excitement of things that I could have my husband do/make as he had already made the coffee table that you see along with an entry table, 2 small bookcases, workbench, wall shelf, and storage shelves.

However, recently I started to get the crazy idea in my head that I could help and we could do projects together. When we decided that our couch was too big for our small living room space, we determined to buy a newer smaller couch. That was until I found the plans for this one. We decided that we would give it a try, and if it didn't turn out like I wanted it to, it could go in his man-cave.

Keep in mind, I am not a seamstress nor can I really sew in a straight line, but following Anna's plan made this project easy. My husband and I decided that he wanted armrests on the couch and came up with the armrests designs you see here.

I am already excited an working on our next project of a Farmhouse table that I have (not the hubby) done most of the work on.

Built from Plan(s)
Estimated Cost
$300
Estimated Time Investment
Week Long Project (20 Hours or More)
Finish Used
Early American, I believe. Fabric was the cloth paint drop cloth suggested in the plan which I love the neutral colors of and it makes things easier to decorate for the seasons.
Recommended Skill Level
Starter Project

Comments

Sammie

Thu, 01/02/2014 - 10:05

I love your couch! My boyfriend and I just started this yesterday too. Were the armrests hard to construct for the couch?

Kid's Desk

This was my first sizable project, so I wanted something simple.  I do this for an hour or two in the evening, and it took a few weeks due to availability, so I have no idea how much time I actually put in on it.

Built from Plan(s)
Estimated Cost
$120, using select pine
Estimated Time Investment
Weekend Project (10-20 Hours)
Finish Used
Paint and laquer
Recommended Skill Level
Beginner

Factory cart coffee table

Submitted by Anonymous (not verified) on Thu, 01/24/2019 - 04:20

Awesome plan, used 10” boards and 6” wheels to add height. Also added hinges so that the top opens up for storage. Found some hardware to give it some personality. 

Built from Plan(s)
Estimated Cost
$85.00
Estimated Time Investment
Weekend Project (10-20 Hours)
Finish Used
Dark walnut & gray stain, layered.
Recommended Skill Level
Beginner

Extra Long Buffet Cabinet

Submitted by Anonymous (not verified) on Sat, 12/03/2022 - 19:29

My husband and daughter worked on this project together. They modified the extra long buffet cabinet to include a drop leaf on the backside. This project adds extra storage her tiny apartment while also providing a space for them to eat.

It still needs painted, however it looks amazing.

Built from Plan(s)

Comments

Toddler Bed

Submitted by natnoall on Wed, 09/07/2011 - 11:52

I made this slightly wider than the plans called for, just to make it easier for my daughter to tuck sheets in.

Estimated Cost
$50
Estimated Time Investment
Afternoon Project (3-6 Hours)
Finish Used
Rust-Oleum Wood Stain - Paprika 2 coats
Polyuranthe - 2 coats
Recommended Skill Level
Beginner

Extra fancy x desk

Submitted by Risewithin on Wed, 12/09/2015 - 13:58

Built with all recycled material. Wanted to try out a gel stain on pine to get more even results and I love it!! 

Built from Plan(s)
Estimated Cost
$16 in stain
Estimated Time Investment
Weekend Project (10-20 Hours)
Finish Used
Minwax pro series antique black
Recommended Skill Level
Beginner

Comments

BlakeBurns20

Tue, 01/05/2016 - 06:19

Why am I unable to find the plans with the drawers? I have been looking all over this site for them.

Rustic X Coffee Table, take 2

Submitted by Anonymous (not verified) on Thu, 01/31/2019 - 10:07

Made from leftover wood from other projects.  Adjusted the plan to accomodate the lengths of wood I had available.

Built from Plan(s)
Estimated Time Investment
Afternoon Project (3-6 Hours)
Finish Used
Minwax antique walnut, layered with Rustoleum Weather Gray. Minwax hand-rubbed polyurethane finish (2 coats) and 1 coat of wax.
Recommended Skill Level
Beginner

Kitchen island

Submitted by Anonymous (not verified) on Wed, 12/21/2022 - 07:42

We desperately needed more counter space and storage in our kitchen, so we turned to Ana for inspiration. This island is based on the Simple Kitchen Island plan. We purchased a 30" x 48" butcher block countertop and adjusted the dimensions to fit. We also added a second shelf for additional storage. We used materials we had on hand (2x4s and 1x4s for the frame, and MDF for the shelves). We're fairly new to DIY projects on this scale, but the complete, detailed instructions provided on the website gave us the confidence to make the adjustments we needed to make our kitchen island a reality. Thank you, Ana!

Comments

Julie's Bed

Submitted by stitchnsaw on Sun, 09/11/2011 - 10:18

This bed is made specially for a little girl with a doll named Julie, hence the J :)
I would like to say it only took me a few hours, but in reality it took me a week. Mainly because I sand in 3 stages (coarse, medium, fine) and wait overnight between coats of paint and work on multiple projects at the same time. Still a very easy project! (except for the sewing, I'm no seamstress ;))
I used select pine for 1x2's and 1x3's, but I think furring strips are much better because of the rounded edges. Also 2x2's were not select pine and they didn't quite match up with the other boards.

Estimated Cost
~$30 including fabric that wasn't on sale :(
Estimated Time Investment
Week Long Project (20 Hours or More)
Finish Used
brushed on primer and two coats of spray paint (color: Paprika) lightly glazed black and wipe-on poly.
Recommended Skill Level
Beginner

Pergola Project DIY

Submitted by acer211 on Sun, 09/29/2013 - 07:18

Here are some pictures of the Backyard Pergola (almost finished). Three of us leveled the main beams (easier said than done), but many hands made for lighter work and a lot more fun. Big thanks to Dave and Gretta !!!

The posts on top still need to be trimmed, and the carriage bolts need to be hack-sawed off so they do not stick out.

I found the other "Brags" inspiring while working on this project, so I thought I would share also.

*Used treated wood for most of it, and plan to stain it with "Cabot's oil-based semi-solid stain" when the treated lumber has dried out - next year sometime.

Estimated Cost
$400-500
Estimated Time Investment
Weekend Project (10-20 Hours)
Finish Used
Cabot's semi-solid oil-based stain (w/mildewcide additive).
Recommended Skill Level
Intermediate

Baby Changing Table

This changing table was fairly easy to put together. I have yet to really master drawers, so I was a bit nervous about such a drawer-centric project. Fortunately, they slide great! Next time I may experiment with jigsaw cutouts and moulding, but for now, I enjoy the clean lines and simplicity of this dresser.

Estimated Cost
$150
Estimated Time Investment
Week Long Project (20 Hours or More)
Recommended Skill Level
Intermediate

Customized Sliding Door Console

Submitted by Anonymous (not verified) on Tue, 02/05/2019 - 15:05

Designed from the Grandy Sliding Door console, but I modified it by extending it to 8ft wide, and added a media shelf to not cover remote sensors for my set top boxes. This is my first build from Ana White so it took a little more time and expense than I hoped only because of some startup tools I decided to get to help the process.

Built from Plan(s)
Estimated Time Investment
Week Long Project (20 Hours or More)
Finish Used
Verathane Carbon Grey and Sunbleached
Recommended Skill Level
Intermediate

Comments

ladybug'13

Mon, 07/01/2019 - 14:08

Nice job! I really like your version, especially the doors. How did you make them? 

Jargon89x

Sun, 12/12/2021 - 21:41

I realize its been years since this comment was posted, But i started with a 1/4 ply. Then topped it with 1x4 common wood to create the chevron. They are glued and held with clamps tight against the previous as i built it out. Can provide more pictures if interested.

Modern farmhouse table

Submitted by Anonymous (not verified) on Thu, 12/29/2022 - 09:45

Post and beam farm house table.

Completed 4 years ago by myself while using the Ana-whites plans.

Matching baby change table and crib are also finished for our newborn arriving Jan 3rd.

Built from Plan(s)

Comments

Kitchen Island

Submitted by Laurie Mac on Sun, 09/18/2011 - 16:09

Our daughter asked for a kitchen island so my first stop was Ana's website to see what plans I could find. I built the base while my husband was out of town one week. This was a zero trip to Lowe's project as I raided our wood rack and scrap bins. My husband came home and built the countertop.

Built from Plan(s)
Estimated Cost
Not known as all the wood was pulled from the rack or scrap bin
Estimated Time Investment
Week Long Project (20 Hours or More)
Finish Used
Butcher block oil was used on the top and Howard's Feed-n-Wax (a beeswax/orange oil product) was used on the base.
Recommended Skill Level
Beginner

Comments

Lori E (not verified)

Tue, 09/20/2011 - 08:32

Wow! This is Gorgeous!! Beautiful work.

Wendy M

Sat, 11/28/2015 - 04:09

Where do I get the plans to make this!?  Beautiful! 

SeeSaw

Submitted by Kabarie on Mon, 09/30/2013 - 14:47

The bolt I got was too short so...was about to go out and exchange it when my husband said to be like the amish. So he helped me put a dowel I had in my stash in a 1inch hole that I made...added some grease to it and it works great! Also used ends of staircase spindles that I had leftover from other projects for the handles. Would have gotten done a lot faster if it weren't for the paint and stain. Haven't bothered with the cushions yet. Kids love it!

Built from Plan(s)
Estimated Time Investment
Day Project (6-9 Hours)
Finish Used
Had some green stain from previous project and different colours of paint for seats and handles
Recommended Skill Level
Beginner