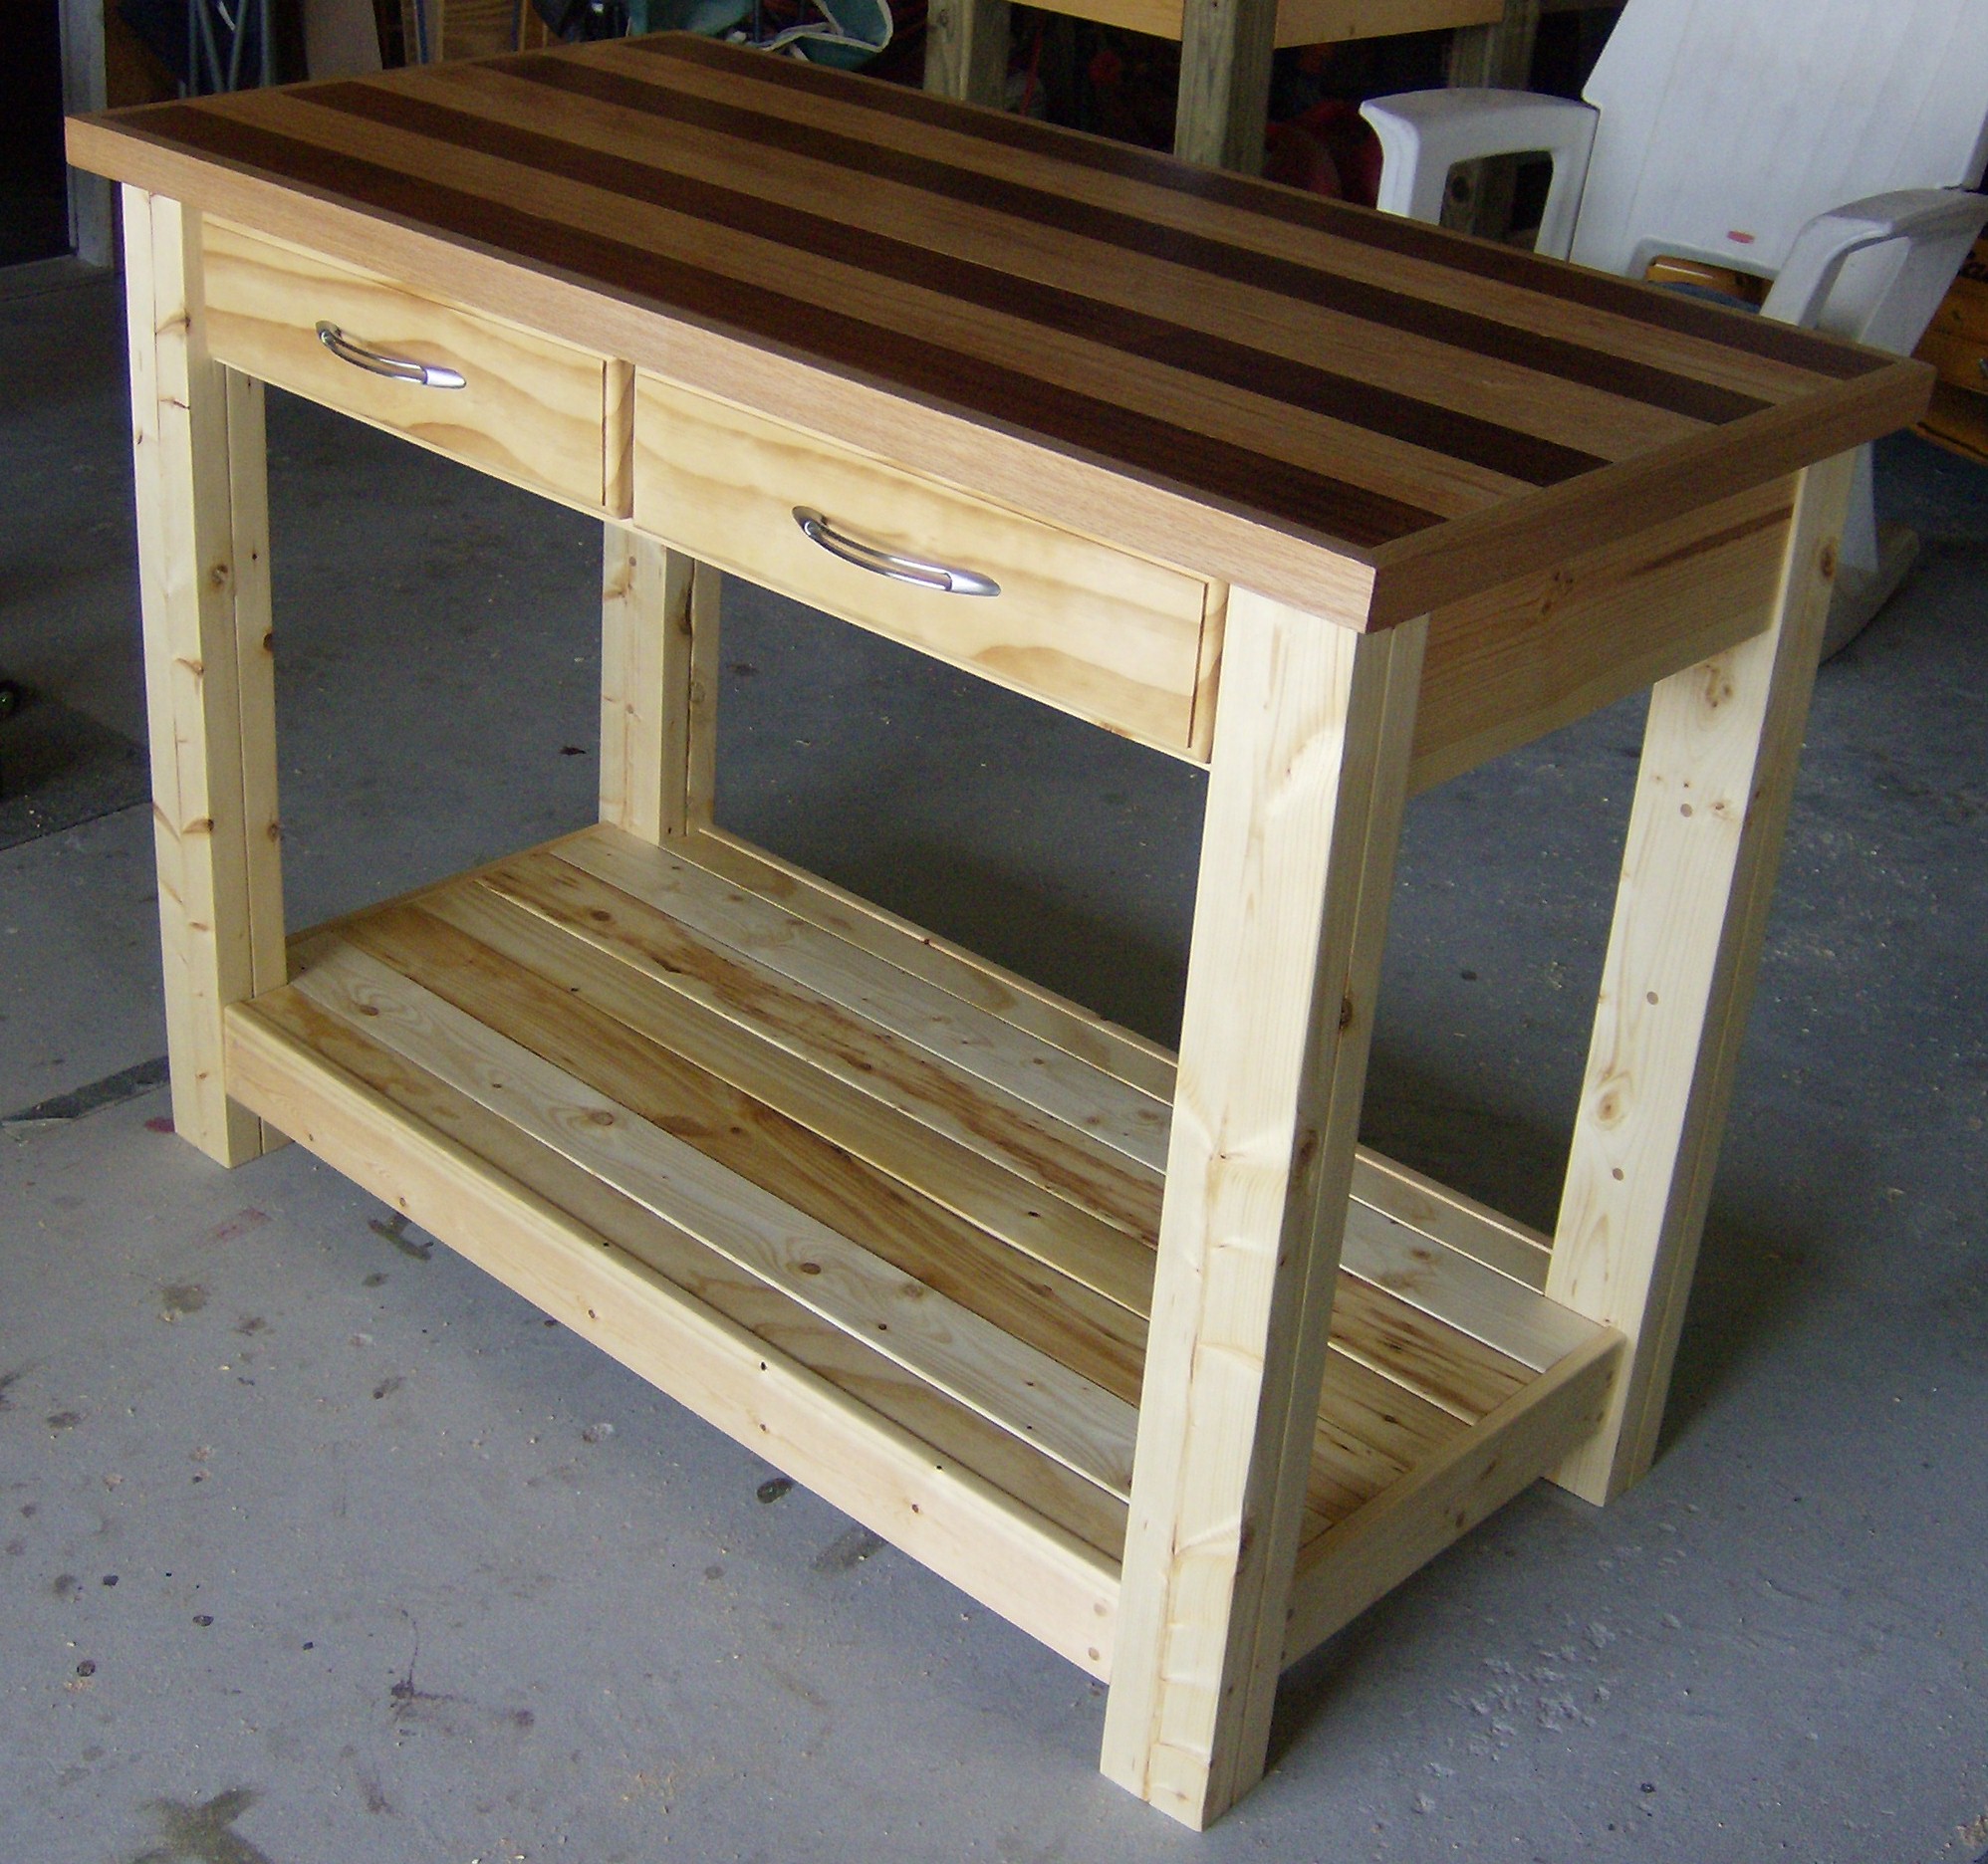
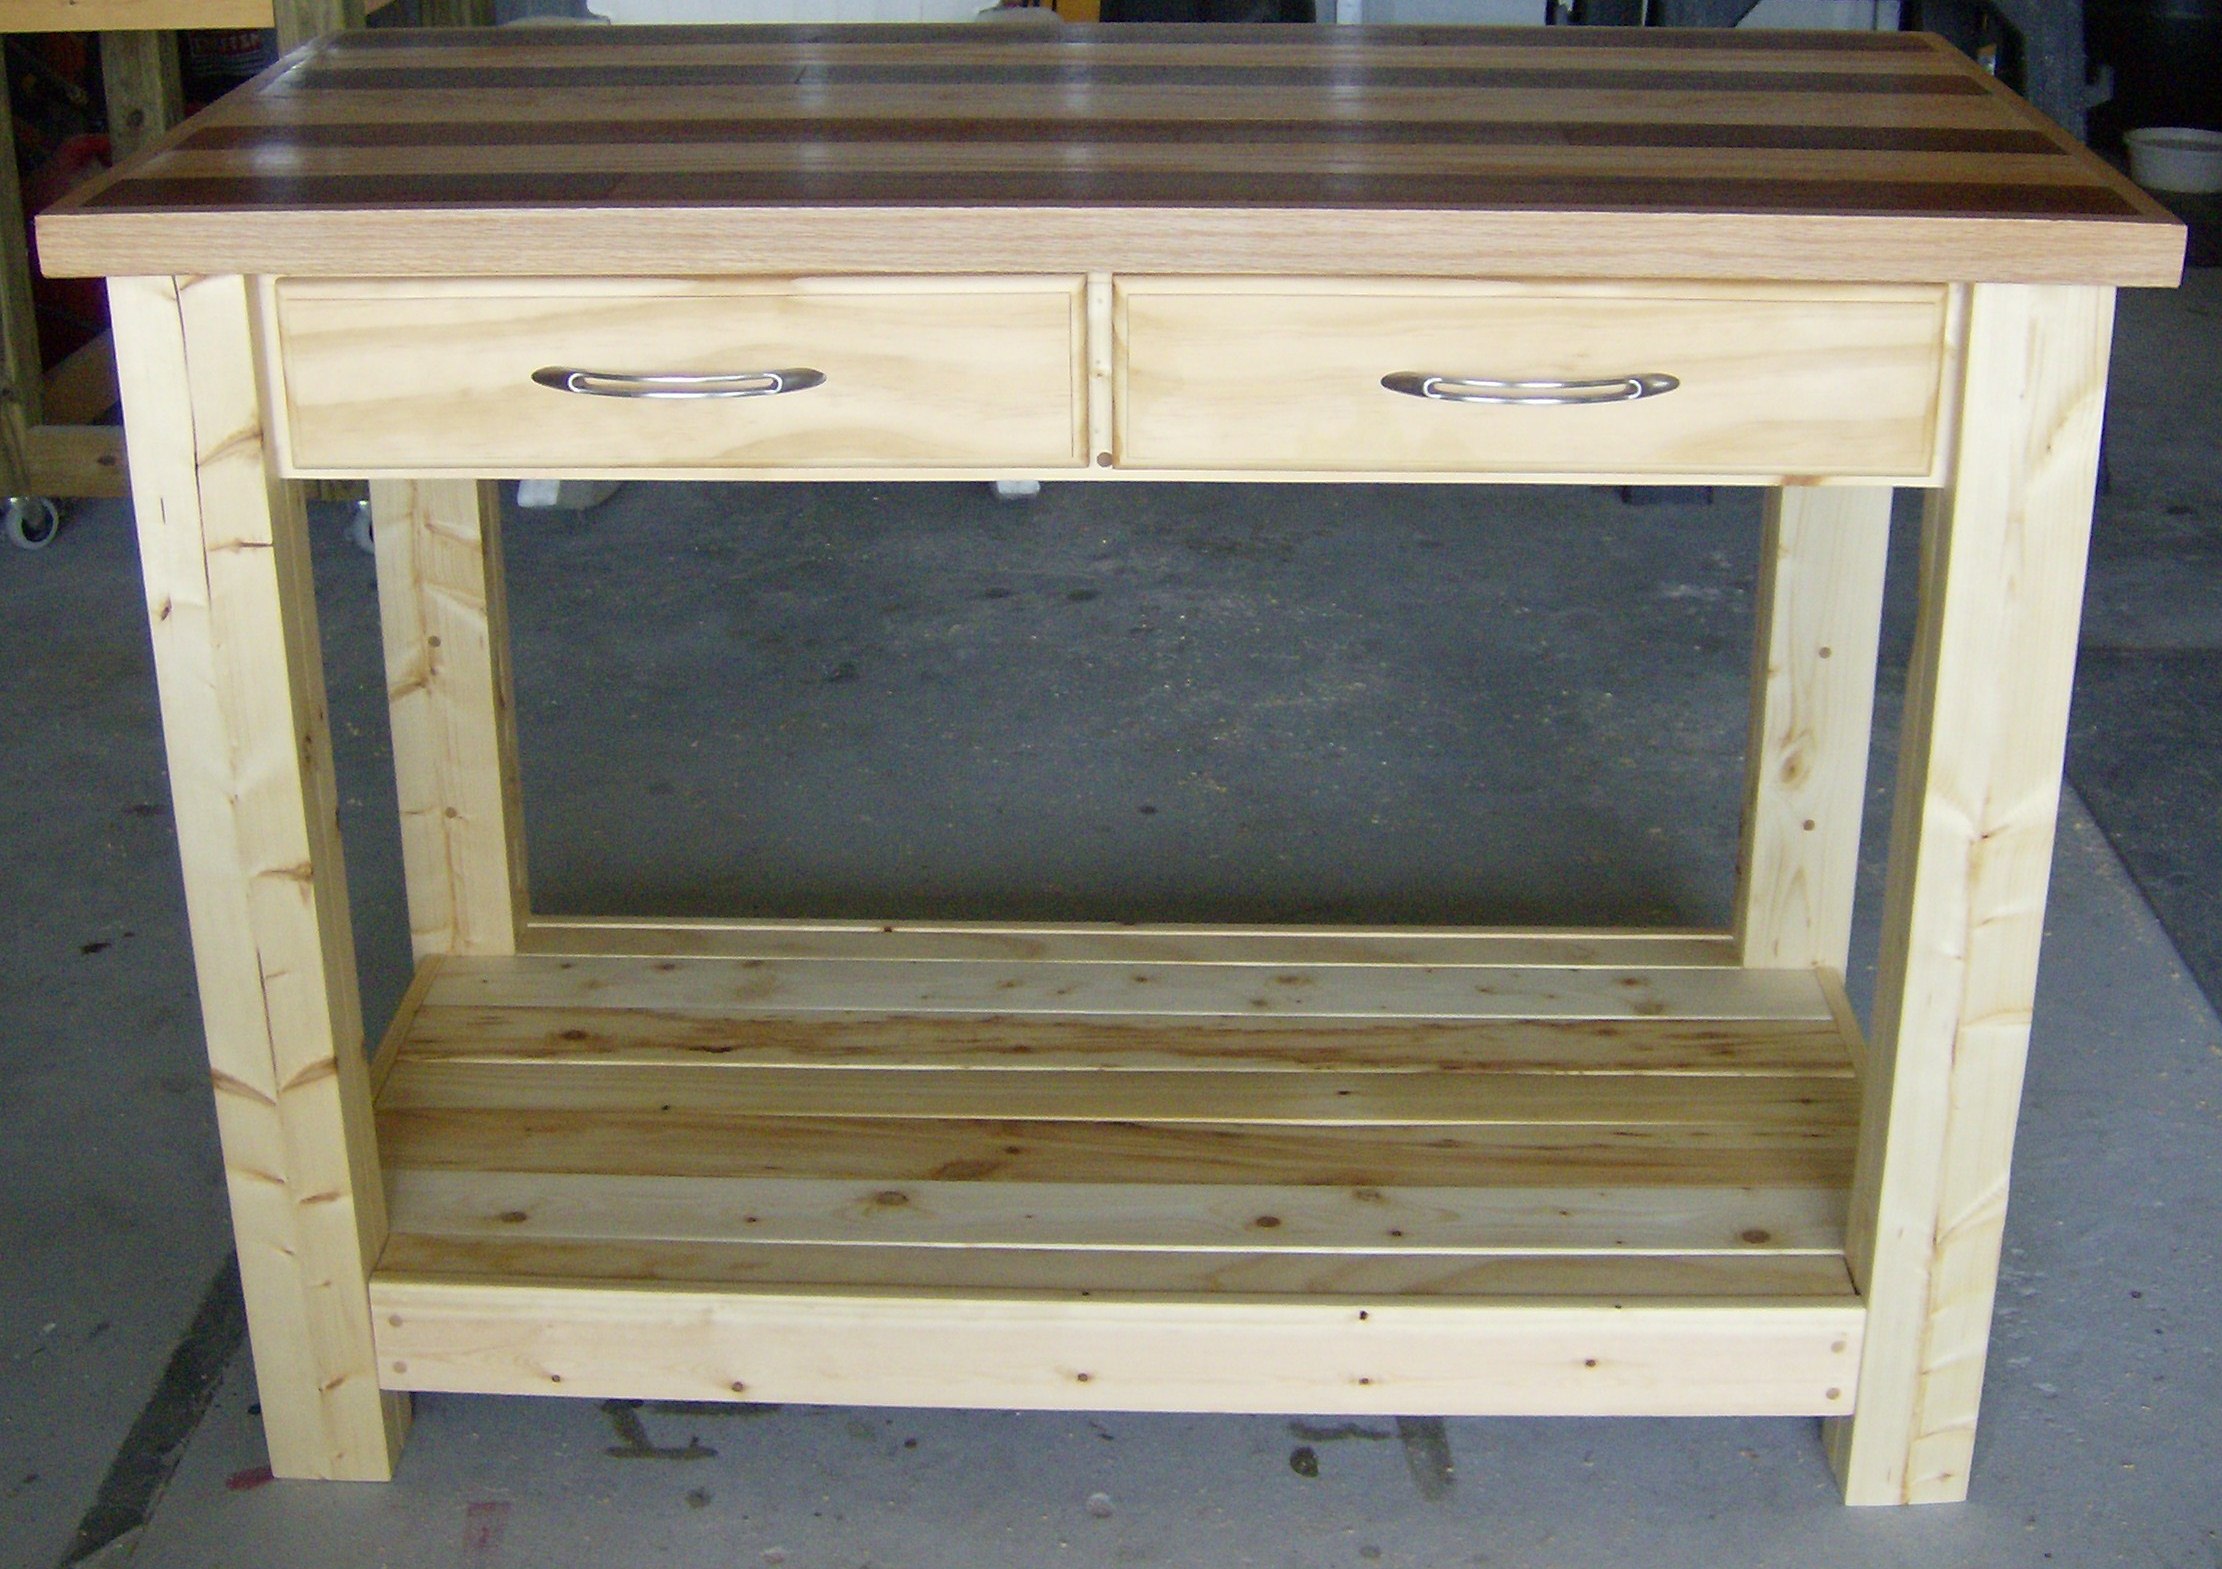
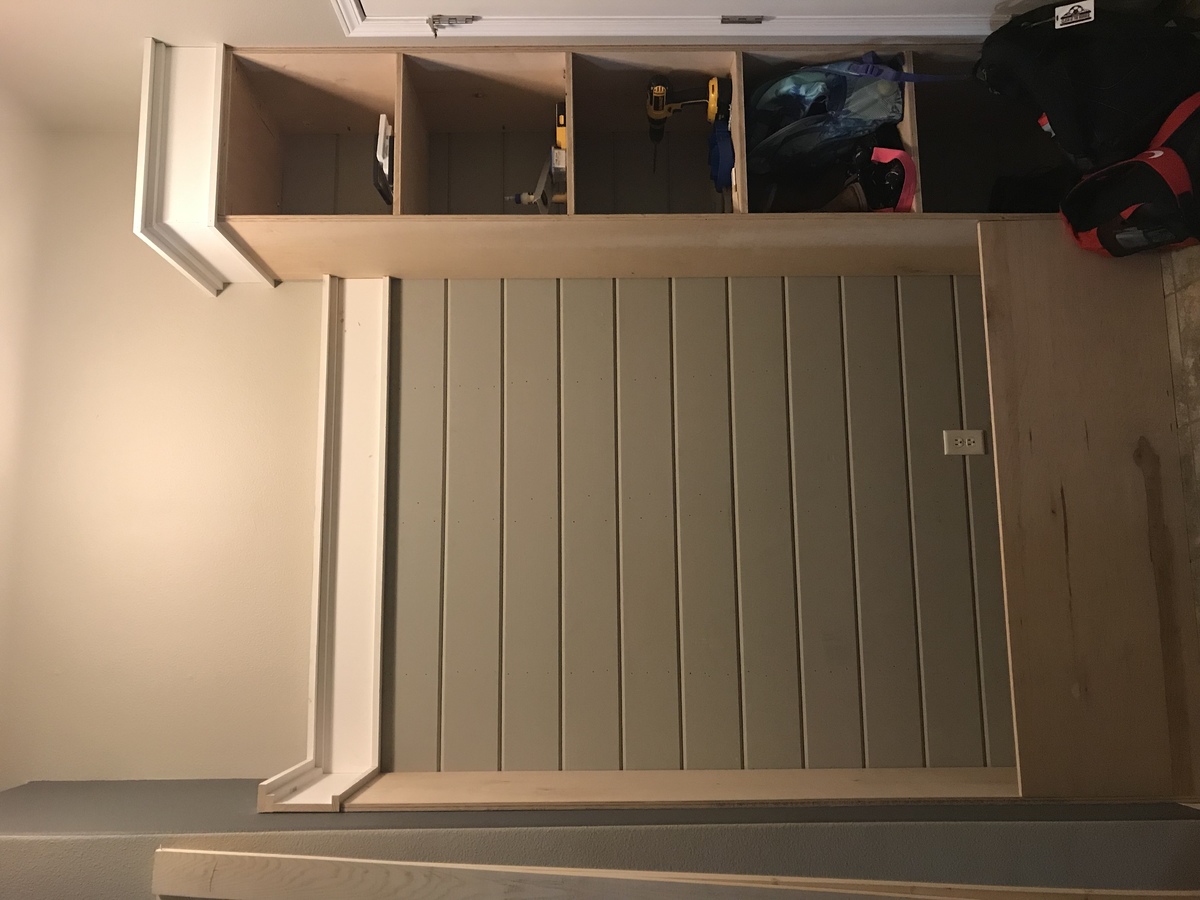
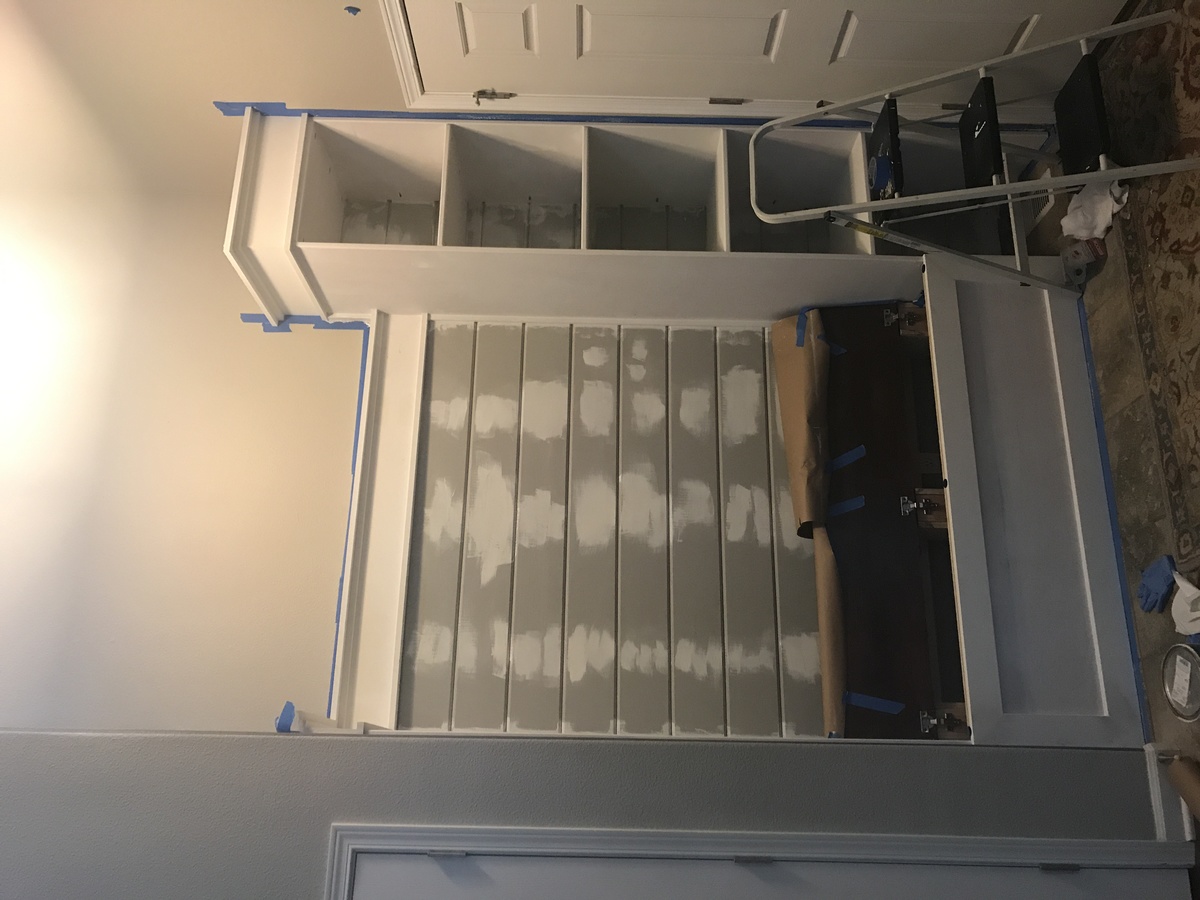
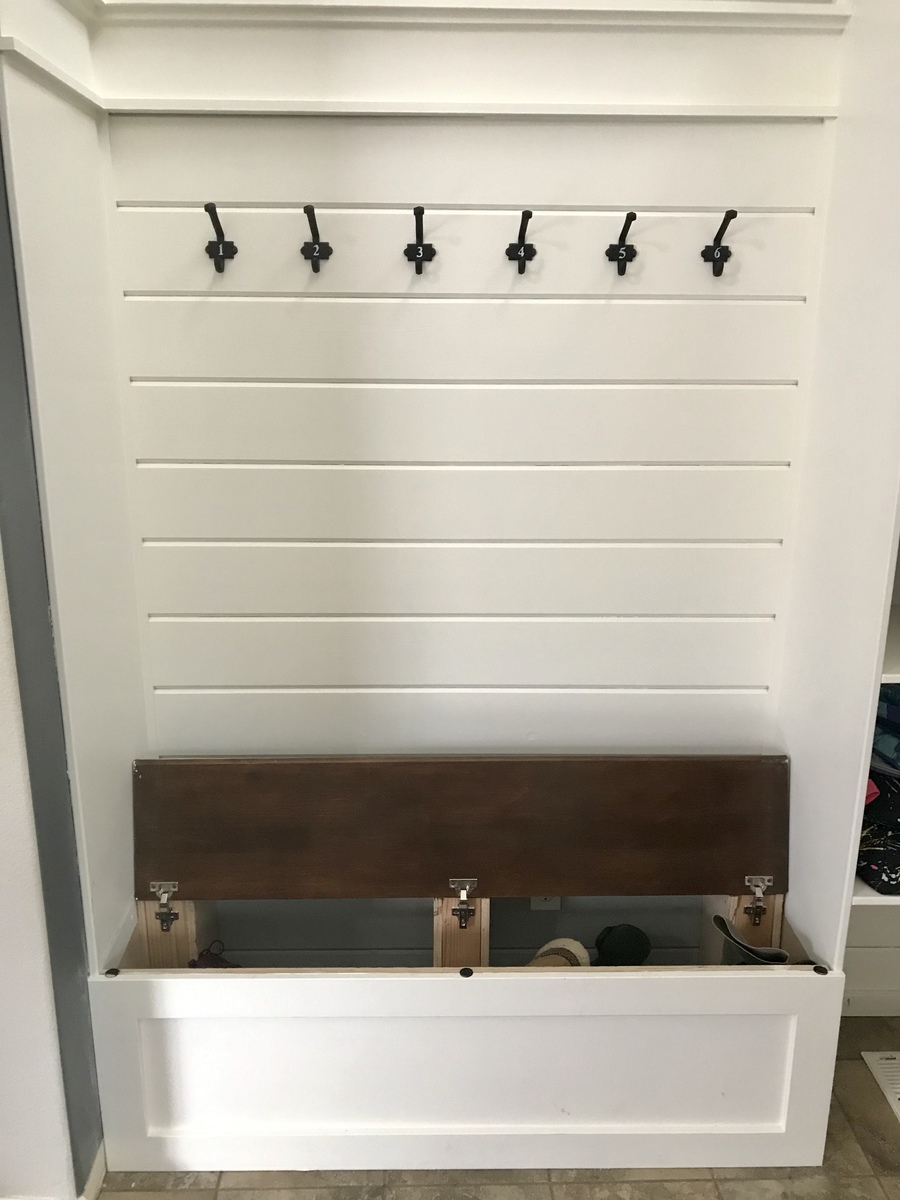
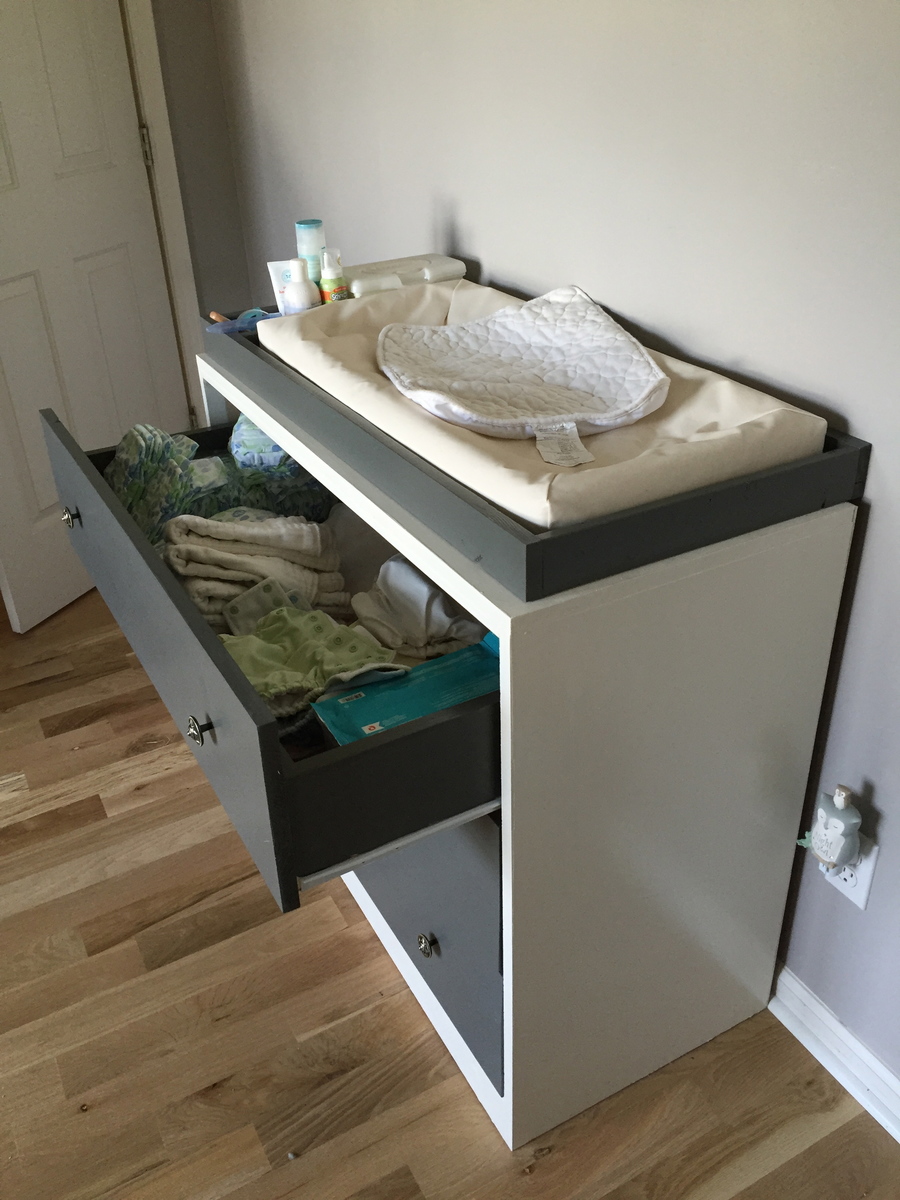
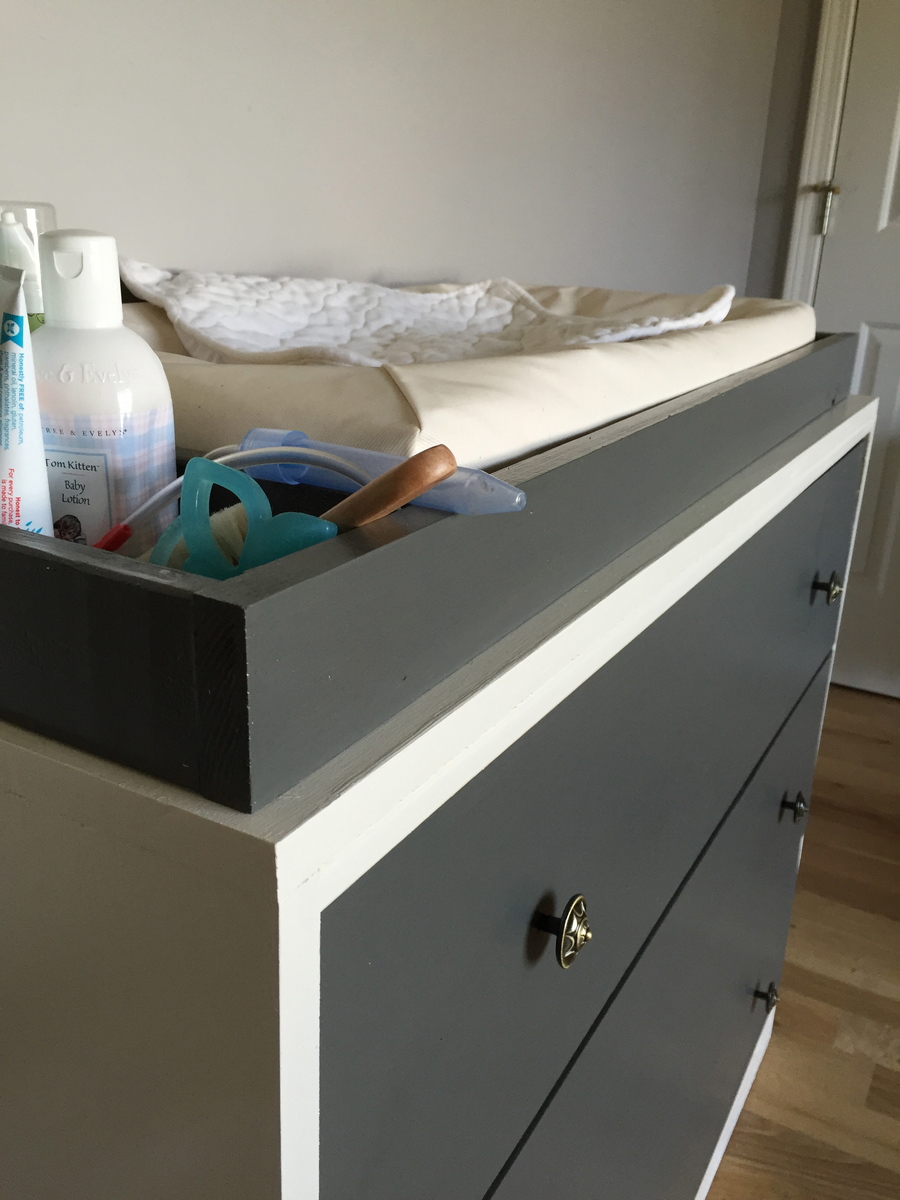
Community Brag Posts

Baby Changing Table

This changing table was fairly easy to put together. I have yet to really master drawers, so I was a bit nervous about such a drawer-centric project. Fortunately, they slide great! Next time I may experiment with jigsaw cutouts and moulding, but for now, I enjoy the clean lines and simplicity of this dresser.

Estimated Cost
$150
Estimated Time Investment
Week Long Project (20 Hours or More)
Recommended Skill Level
Intermediate

Customized Sliding Door Console

Submitted by Anonymous (not verified) on Tue, 02/05/2019 - 15:05

Designed from the Grandy Sliding Door console, but I modified it by extending it to 8ft wide, and added a media shelf to not cover remote sensors for my set top boxes. This is my first build from Ana White so it took a little more time and expense than I hoped only because of some startup tools I decided to get to help the process.

Built from Plan(s)
Estimated Time Investment
Week Long Project (20 Hours or More)
Finish Used
Verathane Carbon Grey and Sunbleached
Recommended Skill Level
Intermediate

Comments

ladybug'13

Mon, 07/01/2019 - 14:08

Nice job! I really like your version, especially the doors. How did you make them? 

Jargon89x

Sun, 12/12/2021 - 21:41

I realize its been years since this comment was posted, But i started with a 1/4 ply. Then topped it with 1x4 common wood to create the chevron. They are glued and held with clamps tight against the previous as i built it out. Can provide more pictures if interested.

Modern farmhouse table

Submitted by Anonymous (not verified) on Thu, 12/29/2022 - 09:45

Post and beam farm house table.

Completed 4 years ago by myself while using the Ana-whites plans.

Matching baby change table and crib are also finished for our newborn arriving Jan 3rd.

Built from Plan(s)

Comments

Kitchen Island

Submitted by Laurie Mac on Sun, 09/18/2011 - 16:09

Our daughter asked for a kitchen island so my first stop was Ana's website to see what plans I could find. I built the base while my husband was out of town one week. This was a zero trip to Lowe's project as I raided our wood rack and scrap bins. My husband came home and built the countertop.

Built from Plan(s)
Estimated Cost
Not known as all the wood was pulled from the rack or scrap bin
Estimated Time Investment
Week Long Project (20 Hours or More)
Finish Used
Butcher block oil was used on the top and Howard's Feed-n-Wax (a beeswax/orange oil product) was used on the base.
Recommended Skill Level
Beginner

Comments

Lori E (not verified)

Tue, 09/20/2011 - 08:32

Wow! This is Gorgeous!! Beautiful work.

Wendy M

Sat, 11/28/2015 - 04:09

Where do I get the plans to make this!?  Beautiful! 

SeeSaw

Submitted by Kabarie on Mon, 09/30/2013 - 14:47

The bolt I got was too short so...was about to go out and exchange it when my husband said to be like the amish. So he helped me put a dowel I had in my stash in a 1inch hole that I made...added some grease to it and it works great! Also used ends of staircase spindles that I had leftover from other projects for the handles. Would have gotten done a lot faster if it weren't for the paint and stain. Haven't bothered with the cushions yet. Kids love it!

Built from Plan(s)
Estimated Time Investment
Day Project (6-9 Hours)
Finish Used
Had some green stain from previous project and different colours of paint for seats and handles
Recommended Skill Level
Beginner

Small Garage Workbench

Submitted by dmozer74 on Fri, 12/18/2015 - 21:17

Easy project. I needed this bench a bit smaller due to space constraints so this is 28" x 42". I kept the height the same and finished the surfaces with some thick polyurethane. It should be noted my cost was a bit higher due to buying a sanded plywood, coated self-tapping screws and a more expensive polyurethane. I also went a bit slow on this project and it took about 2.5 hours including application of the single coat of poly.

Estimated Cost
$75
Estimated Time Investment
An Hour or Two (0-2 Hours)
Finish Used
Satin polyurethane.
Recommended Skill Level
Beginner

Comments

First build done!

Submitted by Anonymous (not verified) on Mon, 02/11/2019 - 07:55

Really enjoyed the build.

You don't really need a Brad nailer or stapler, I did it with good old hammer and nails. Just brace it well when nailing into unsupported beams. You also don't need a tablesaw, I did all the plywood cuts with a circle saw. The shelves in the original plan are deceptively small. After building one side with the shelves how the plan has them, I decided to build the other cart with only one shelf for two on each side instead of four, gives a lot more space. I didn't add any shelves to the other side of the left cart, planning on adding hooks to hang extension cords and such in there. Make sure you predrill, I still had cracking issues even with the self drilling screws. I would recommend splurging on quality plywood especially for the tops and front. 


I plan on adding a dust hood and shelves above each side. Also going to do the tablesaw and bench tool mods to the carts when I get those tools. 

Estimated Cost
Not sure on cost because I bought tools too. Maybe 225? Really not bad. Casters were the most expensive part.
Estimated Time Investment
Weekend Project (10-20 Hours)
Finish Used
Behr paint to match garage
Recommended Skill Level
Starter Project

Farm benches

A set of beautiful farm benches for our outdoor table. I built these beauties with redwood wood using only pocket holes to avoid exposing any screws. The only place where I had to use pocket holes plugs was in the leg stretchers to avoid seeing the pocket holes.
I applied pre-stain wood conditioner and then stained them using Dark Brown transparent stain. I wanted the wood grain to be visible through the stain and this allowed me to do just that.

Farmhouse Bedside Table

Submitted by stacynabby on Sat, 09/24/2011 - 13:21

This was my first project that involved making a drawer...not for the faint of heart. I am in love with this bedside table. It's exactly what I needed and it was a fun build. I enjoyed looking for hardware too.

Built from Plan(s)
Estimated Cost
~$40
Estimated Time Investment
Afternoon Project (3-6 Hours)
Finish Used
Varathane "Light Cherry" and two coats of Varathane Polyurethane Semi Gloss
Recommended Skill Level
Beginner

Comments

Small desk for Family Command Center

Submitted by CAHJMAMA on Tue, 10/01/2013 - 17:40

Easy project and so cheap. I love the way it turned out! We tweeted the measurements to fit in the small space we had for the desk. It looks an d works great.

Built from Plan(s)
Estimated Cost
$35
Estimated Time Investment
Day Project (6-9 Hours)
Finish Used
Black ebony stain (one coat) and 2 coats of polyurethane
Recommended Skill Level
Beginner

Bathroom Vanity Inspiration

Submitted by Anonymous (not verified) on Tue, 12/22/2015 - 03:22

I made this vanity from reclaimed barnwood purchased at a local salvage lumber yard. Counter top was made from concrete. When doing research for the look and feel of my bathroom remodel, I got a lot of inspiration from this site, so I wanted to share the end result. Thanks Ana!

Estimated Time Investment
Week Long Project (20 Hours or More)
Finish Used
Oil based Polyurethane and some badass recycled wood, weathered the old fashioned way.
Recommended Skill Level
Intermediate

Comments

Entryway Storage Bench

Submitted by msfitnik on Sun, 02/17/2019 - 07:33

Total Cost $800


Estimated Cost
$800
Estimated Time Investment
Weekend Project (10-20 Hours)
Finish Used
Sherwin Williams , Poly top coat
Recommended Skill Level
Beginner

Gammie’s Sleeping Angels

Submitted by Anonymous (not verified) on Fri, 01/13/2023 - 06:07

These loft beds were made for Christmas for my grand daughter and grand son !! They now sleep in their own beds!! It was fun to build!

Comments

Rustic Table

The plans for this table were easy to follow (thanks Ana!!!) We used pine for our project and it turned out so pretty. We have not built the benches yet but I will update when we do. The project took about us about 6 hrs. to assemble...however you should keep in mid that applying the stain and polyurethane might be the most time consuming part of the project. We used 4 coats of stain and 6 of the poly. We let the final coat cure for about 48 hrs. I added drawer handles to the ends and sides for decoration and functionality (to move the table). The hubby insisted on using extra bolts on the legs for reinforcement...so I indulged him. He is still getting used to my love of anything rustic or distressed.

Built from Plan(s)
Estimated Cost
$85.00 for lumber, screws (and the xtra bolts) 30.00 for paint, stain and polyurethane
Estimated Time Investment
Day Project (6-9 Hours)
Finish Used
flat latex in Aged Muslin for the legs and apron
Rust-Oleum stain in Early American for the table top
Rust-Oleum Polyurethane 6 coats
Recommended Skill Level
Starter Project

Comments

re-invented nightstands

I purchased these nightstands at a garage sale for $15 each. They were in dreadful shape needing repair and too many hours of sanding to count! I was inspired by this project and decided to try the finishing techniques out myself. I made the hardware myself out of angle aluminum and used the aluminum posts used to bind corporate booklets. Since I wanted to use the existing holes for the original hardware, the shorter nightstand has 2" pulls/handles and the taller has 4.5" pulls/handles. I really like how they turned out!

Estimated Time Investment
Week Long Project (20 Hours or More)
Finish Used
on the nightstands, I first painted 2 coats of KILN brand white primer, then did 3 coats of BEHR high-gloss white paint. On the drawers I used Minwax gray stain (LOVE LOVE LOVE this!), Minwax walnut stain, and a dry paintbrush technique where i painted on a VERY light coat wiping as much paint off of a dry brush as I could and then VERY lightly sanding to get some of the grain to show through. I then hand rubbed 3 coats of Tung Oil on all 3 drawers (even though the can said it wouldn't work on paint, it worked great and left a super soft, shiny surface!)
Recommended Skill Level
Beginner

Comments

Outdoor Media Console

Submitted by Anonymous (not verified) on Sun, 02/24/2019 - 05:58

Outdoor console using this plans, but reduced slightly in width

Recommended Skill Level
Beginner

"JOY "alternate builds for Christmas gifts

Submitted by Anonymous (not verified) on Tue, 01/17/2023 - 06:29

Loved your "JOY" wall art, but after I built the prototype, realized it was way too large for my idea of gifts for the family. Since I had already cut and sanded pallet boards to size, I downsized the idea and used individual boards and 4" and 6" stencils to paint the letters. I wanted a darker border around the letters, so I woodburned around them. Some of that turned out uneven since the wood wasn't smooth but it adds to the rustic look. I used roundish tree ornaments to use for the "O" letter. Popped on sawtooth hangers on the back and left them unfinished. I did finish off the larger red barn boards and the grey one with spray Clear Coat, since I thought the wood looked dried out.
Thanks for all your great ideas and look forward to your new ones!

Comments

Fun Shelves for Toy Collector

As we begin to convert a small room to an office, first priority is creating display shelves for my husbands toy collection. These shelves do a great job! They are easy to create plus very sturdy. No toys will be falling on their own.

This was a pretty easy project and I woul recommend it to any beginner. My only tip is to make sure that everything is clamped before you nail or screw. You don't want to see light through the seams.

Estimated Cost
$40
Estimated Time Investment
Day Project (6-9 Hours)
Recommended Skill Level
Beginner

Comments

Toy Box

Submitted by taurusbia on Mon, 10/07/2013 - 09:42

I made this toy box for my nephew for his first birthday.

Built from Plan(s)
Estimated Cost
$125
Estimated Time Investment
Weekend Project (10-20 Hours)
Finish Used
Classic Grey from Minwax
Recommended Skill Level
Intermediate

Comments

Our Kitchen Plan Set

Submitted by Anonymous (not verified) on Mon, 12/28/2015 - 07:19

Plans were fantastic for this build and our kids love it! Thanks!

Estimated Time Investment
Weekend Project (10-20 Hours)
Recommended Skill Level
Beginner

Comments