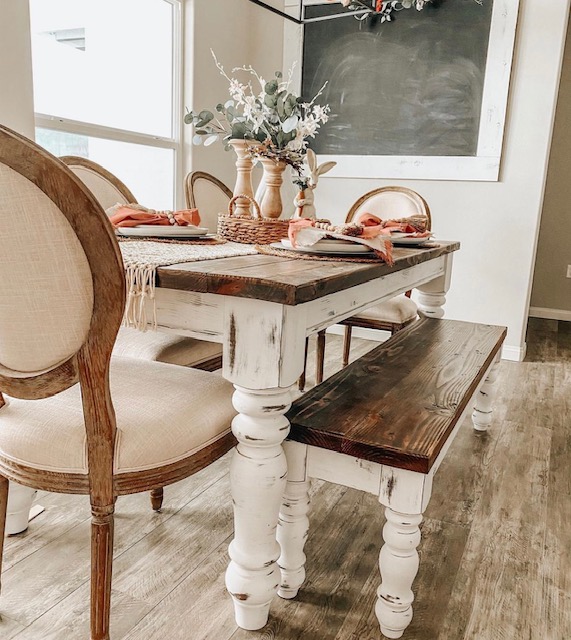
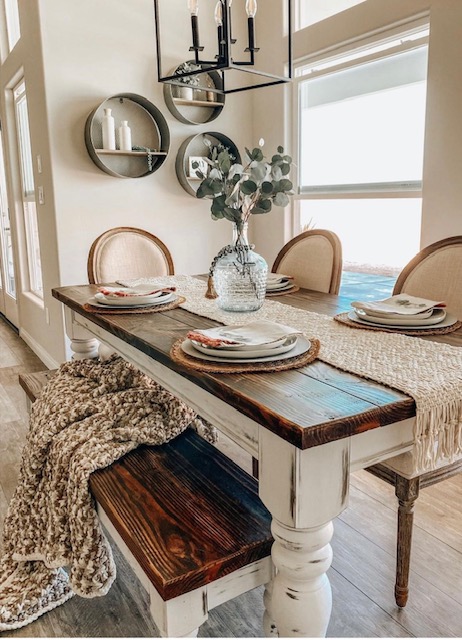
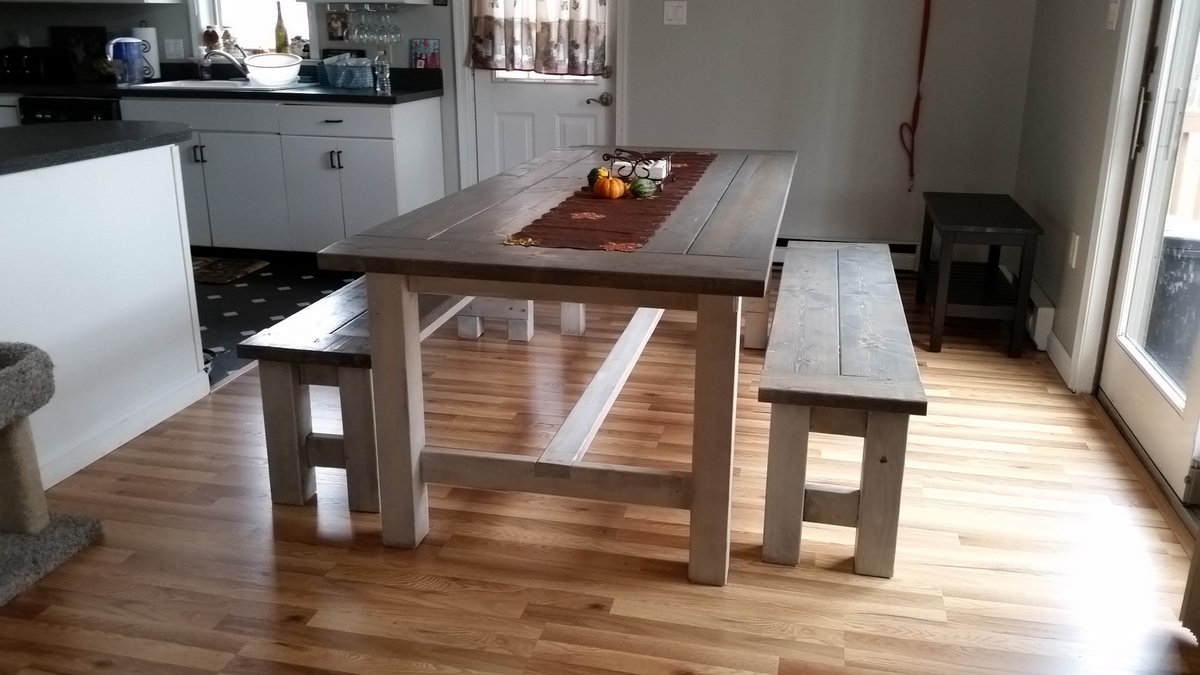
Community Brag Posts

New Dining Nook

Submitted by nfontenot on Wed, 09/04/2013 - 10:16

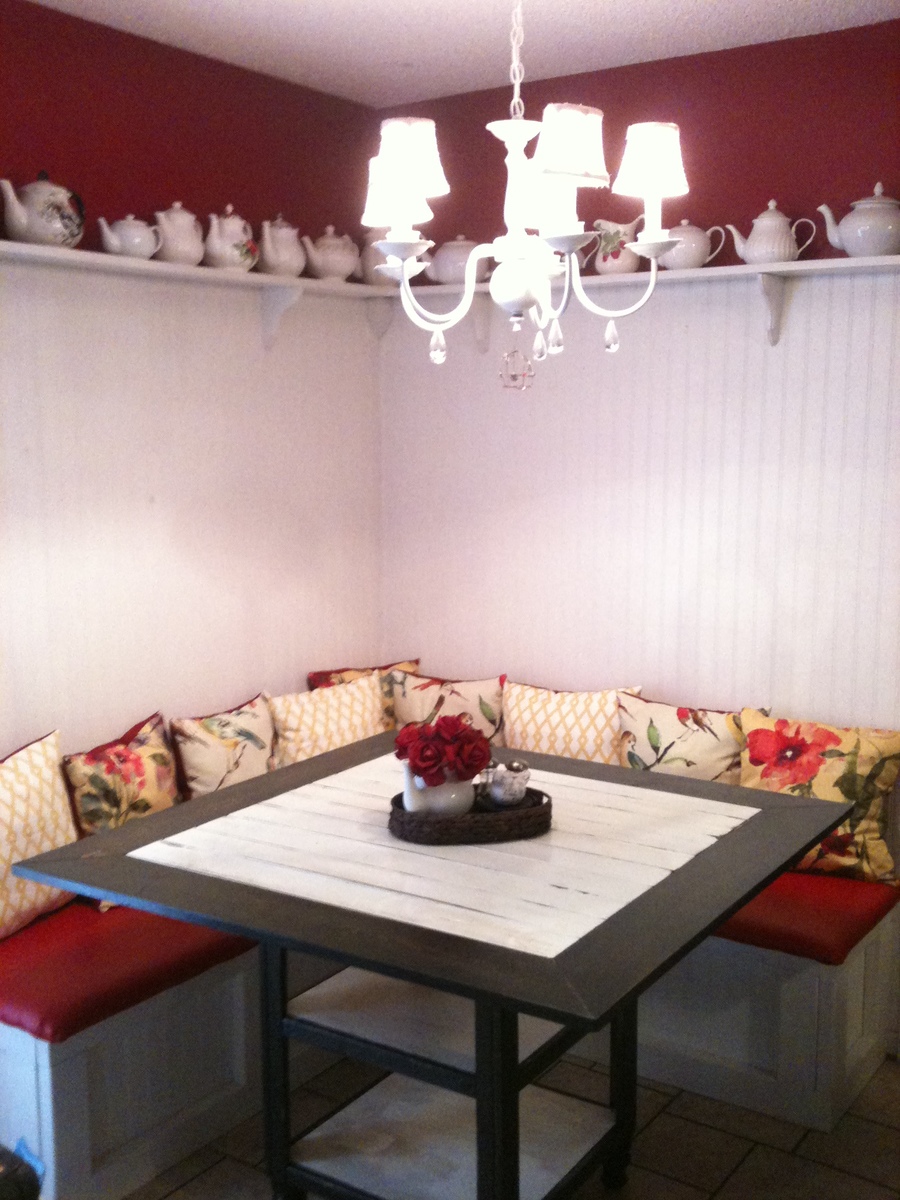
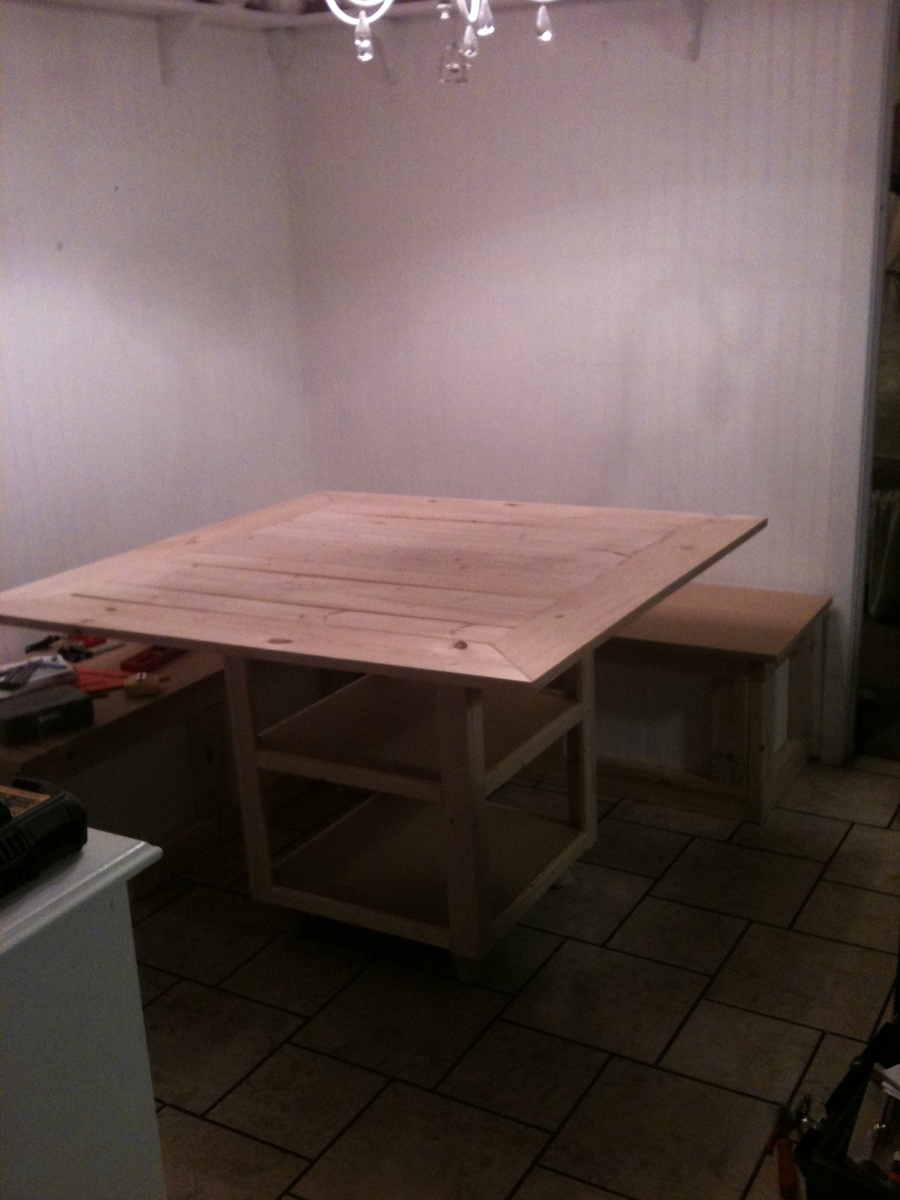
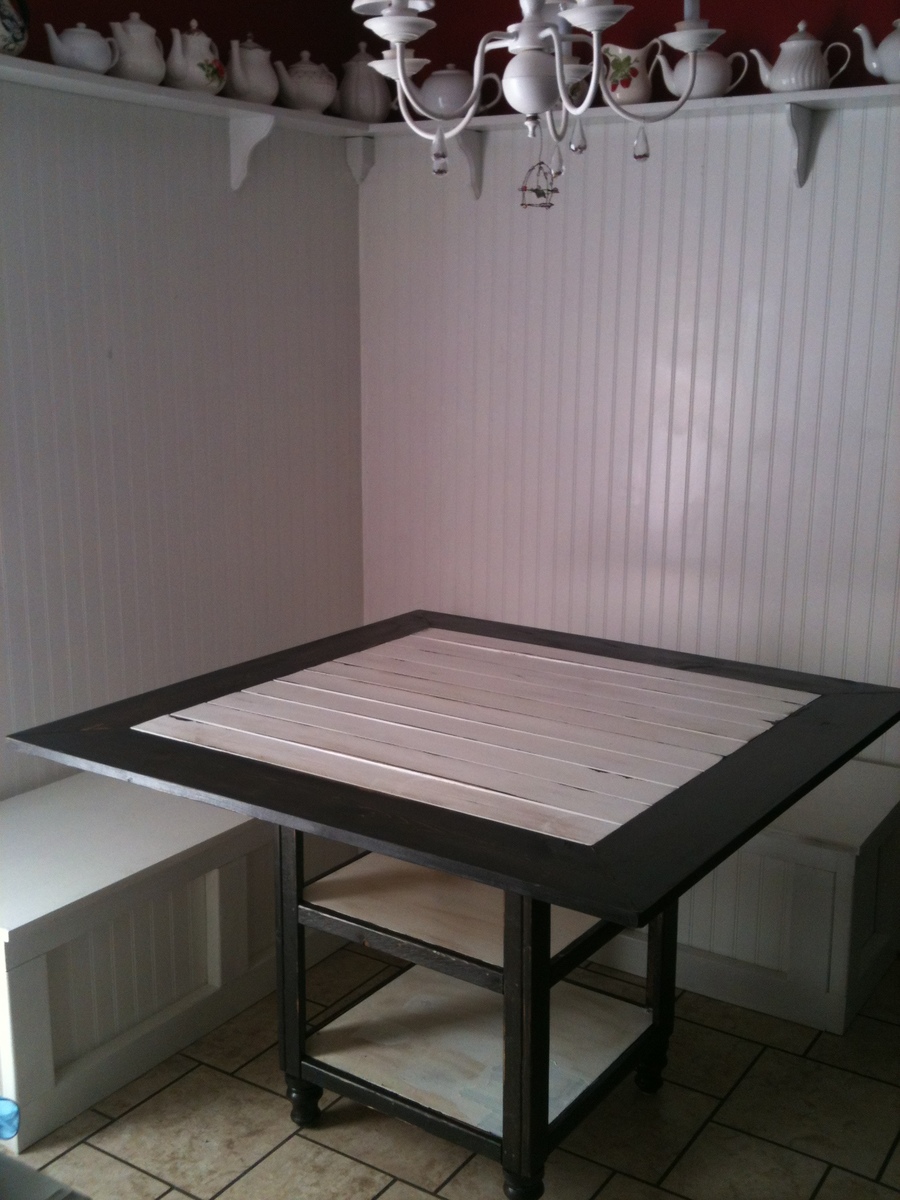
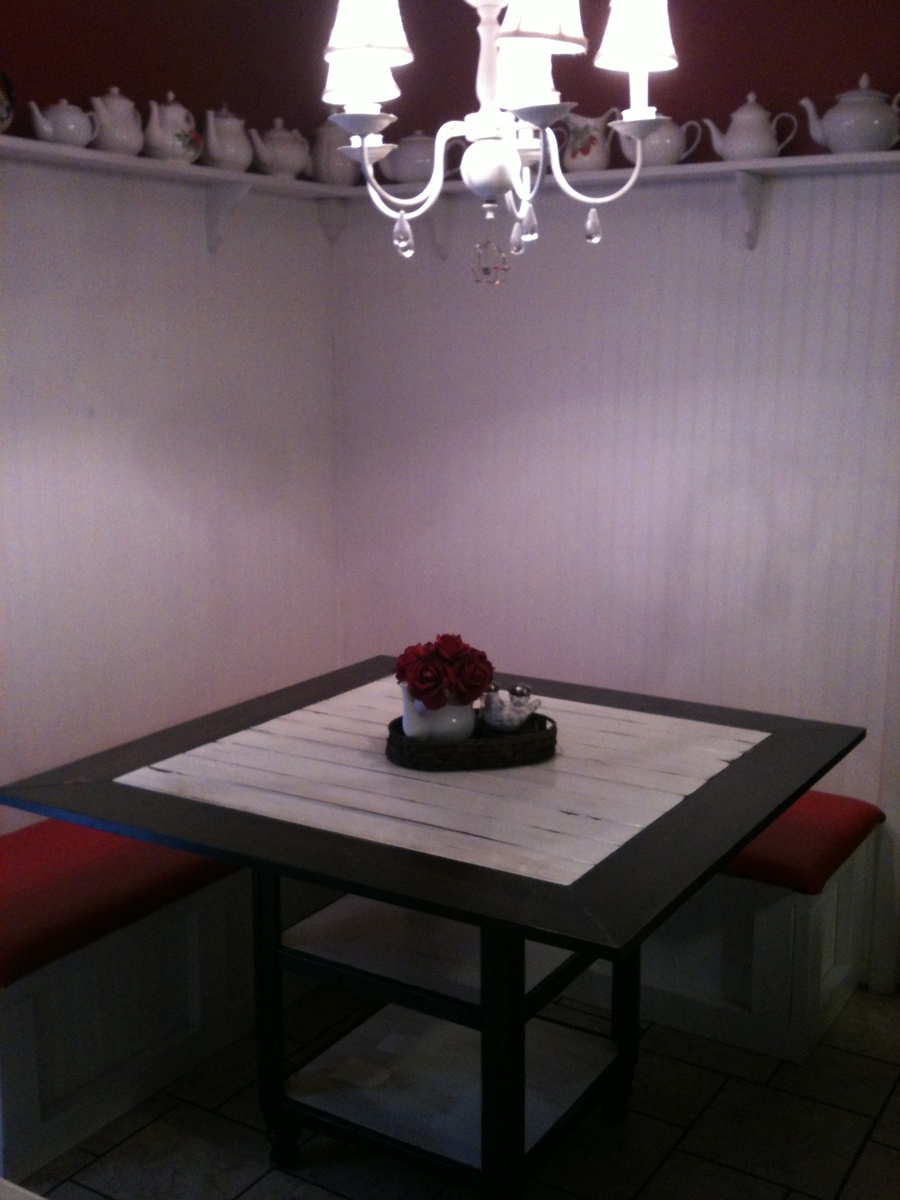
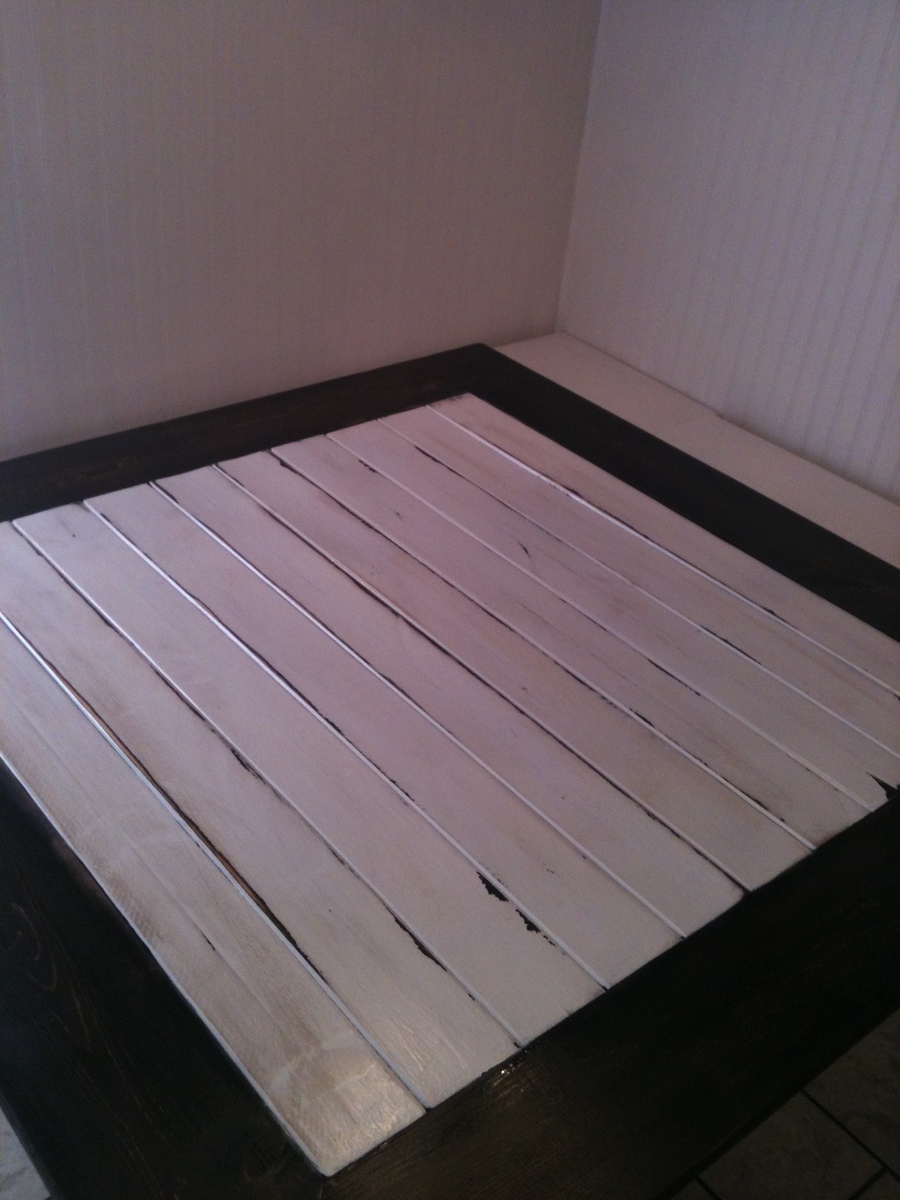
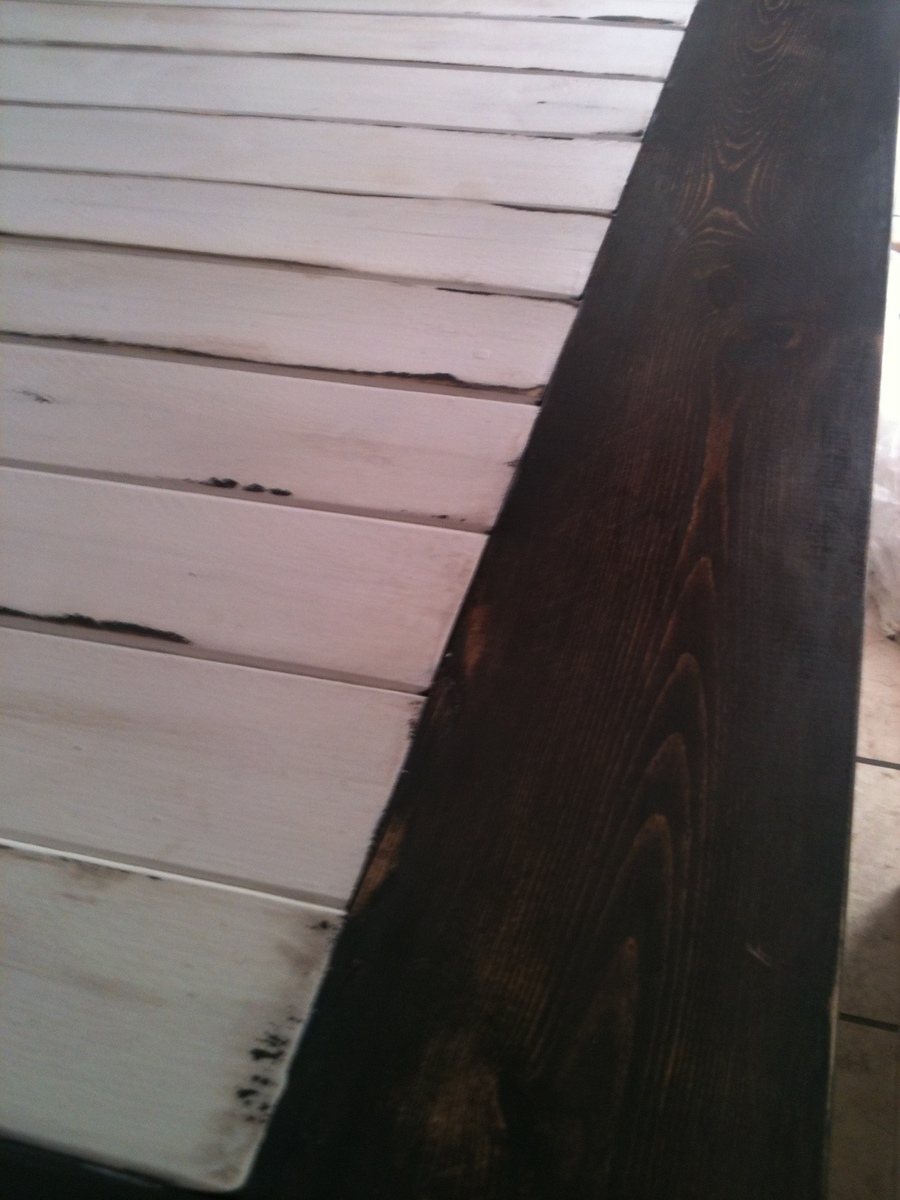
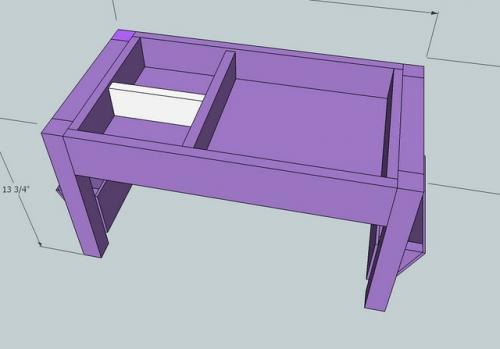
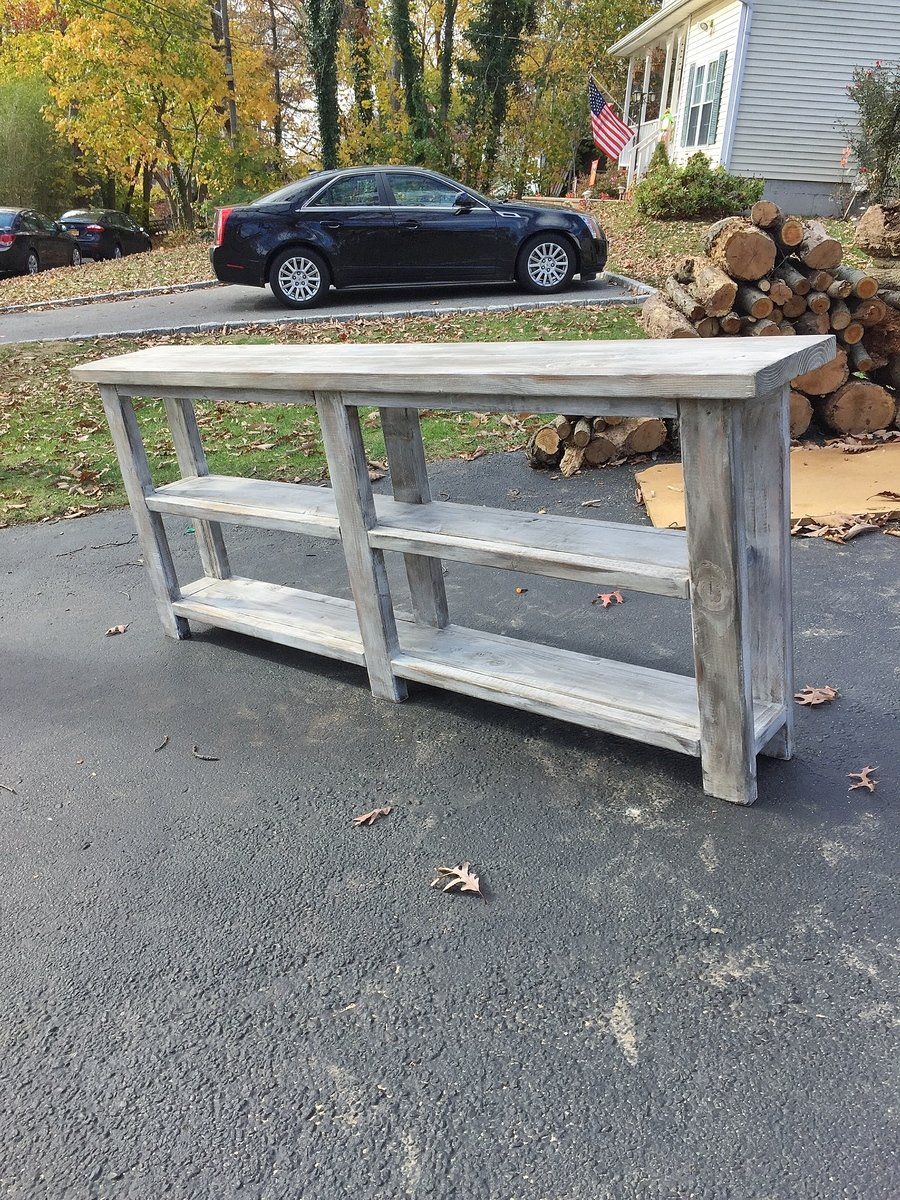
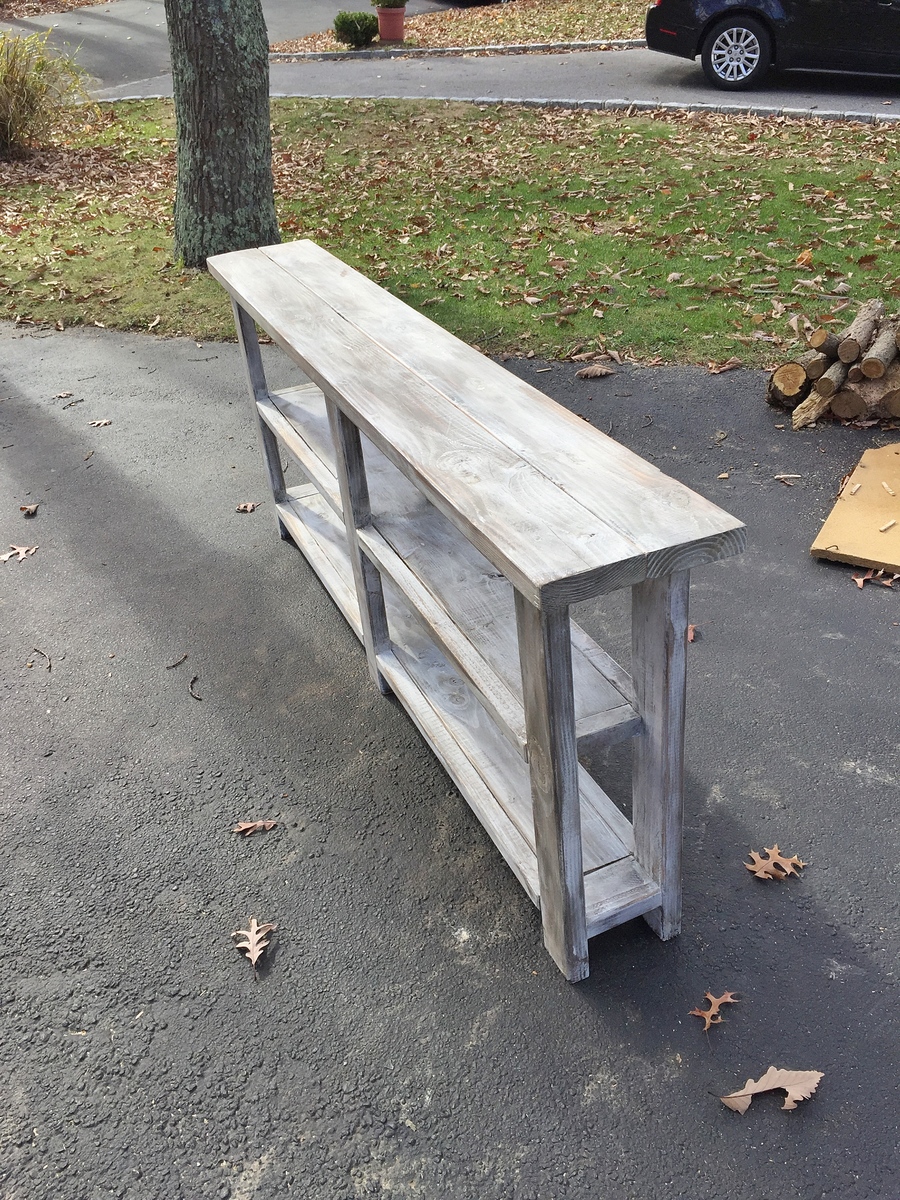
I have always thought a comfy nook would be perfect for this corner in my dining area. Our house is small and lacks storage, so I also wanted a bench with storage. Our previous dining table was bar height and was uncomfortable for some guests; therefore, I wanted a standard height table and seating. Pre-made banquets are quite pricy and way out of our budget. I've been dreaming of this little nook for about four years and always thought it would be expensive to make. A few weeks ago I finally decided it was time to make it. Once I figured out the plan and measurements for the project and priced materials, I was astonished that the project would only cost me about $150-$200! The bench frame is made of 2x4 studs with MDF for the lid and leftover bead board for the bench face. I pre-cut my studs, assembled them, and attached the frame to the wall before I cut the tops. Once the bench was built, I started on the table. (I wanted to do all my painting at once.) I made the base using the plans for the storage dining table, and designed the 46"x46" square top in order to obtain the maximum amount of table top space I could get. The top is made up of 1x4s in the center and 1x6s (mitered at the corners) as the outer frame. I painted the entire bench with white semi-gloss paint. I stained the entire table dark brown and then painted the shelves of the base and the 1x4s on top with 3 coats of white. I then sanded the white to give it a distressed look and to allow the stain to show through. I also did a very light glaze of the stain in order to tone down the white. I sanded the stained parts of the table as well and then highlighted the natural wood showing through with a goldish stain. I finished it off with three coats of semi-gloss polyurethane. I padded the bench top using an egg crate mattress topper from the dollar store covered with a few layers of batting. I then covered it with red vinyl for easy cleanup and made the throw pillows for comfort and coziness! Considering that decorator fabric can be expensive, I waited for a Labor Day sale at the fabric store combined with store-issued coupons in order to get the best price for my fabric. I bought half a yard of the decorator fabrics at 50% off for pillow fronts and 3 yards of a coordinating clearance fabric (which was also on sale for an additional 50% off) for the backs. The vinyl was not on sale, so I was able to use a "40% off a regular priced item" coupon. I also used an in-store "Take an additional 15% off your entire purchase" coupon. I ended up saving about $70 on fabric! The total cost of my project was about $250, and it was custom-made! You can't beat that!

Estimated Cost
$250
Estimated Time Investment
Week Long Project (20 Hours or More)
Recommended Skill Level
Beginner

Comments

spiceylg

Wed, 09/04/2013 - 11:54

This came out so nice. Love the fabric and what awesome savings you got!

nfontenot

Wed, 09/04/2013 - 12:19

Thank you! It seemed like I would never finish because I had to do it all around my work schedule and other planned activities! It was my source of stress relief after long days at work! Definitely worth it!

drekin

Tue, 02/11/2014 - 10:32

This is exactly what I have in mind for my dining room. Can I ask how you did the corner of the bench? Did you build a frame for the corner as well?

Solid Sturdy Chair

Submitted by Rodax74 on Wed, 10/28/2015 - 18:34

I built this from a set of older plans on this site. Next, to paint and deliver ! It is a gift.

Awesome site, so many great ideas. I was also lucky enough to find all this wood in the bargain bin (70% off) at Home Depot. So my total out of pocket cost for the wood supplies was $5.68. So I was pretty lucky.

Built from Plan(s)
Estimated Cost
5.68
Estimated Time Investment
Afternoon Project (3-6 Hours)
Recommended Skill Level
Beginner

Laundry basket organizer

Submitted by Anonymous (not verified) on Wed, 12/26/2018 - 08:10

Inspiration came from this site, but the design is mine. I didn't have plans, so it was drawn out on paper from the sizes of the laundry baskets themselves. Birch plywood with Home Depot feet painted with rattle can white. Sanded and stained with a Minwax redwood stain and coated with Minwax poly. 

Built from Plan(s)
Estimated Cost
$80
Estimated Time Investment
Weekend Project (10-20 Hours)
Finish Used
Minwax redwood stain with Minwax poly
Recommended Skill Level
Beginner

Comments

Country Rustic Shelf

Submitted by PINAR on Sat, 08/13/2011 - 10:05

I replaced the 20 years old fence door, and reused it for my new shelf :)

Built from Plan(s)
Estimated Cost
FREE :)
Estimated Time Investment
An Hour or Two (0-2 Hours)
Finish Used
Acrylic
Recommended Skill Level
Starter Project

Toddler Room

My daughter's room has no closet and is pretty small, and I just couldn't find any furniture I liked around here. But I found tons on Ana-white.com! So, her entire room (except one old bookshelf) is now ana-white originals.... the cubbies hide her clothes and toys; the dress-up center functions as her hanging closet; she colors on the easel (originally made for her brother, but he never used it...); and the doll bed serves as a resting place for several different dolls (sometimes all at once). I think I will build her the dollhouse bookshelf to replace the older bookshelf, and once she's ready for a real bed (as opposed to the mattress on the floor), I'll be building that too! The chalkboard easel was one of my first builds, and I have to say, it still remains one of the most challenging (my screws kept splitting, I had a hard time fitting things together, esp. without another pair of hands....), but watching my daughter scribble all over it nearly every day makes it worth every minute! Building the dress-up center and cubbies took almost no time at all - but it took me over a month to get them finished (sanded, painted and poly'd). Thanks again Ana for the great plans and all your hard work!

Estimated Time Investment
Week Long Project (20 Hours or More)
Finish Used
The lavender color is oops paint; the white on the cubbies is Benjamin Moore that we used as trim for other rooms in the house.
Recommended Skill Level
Beginner

First Project-Triple Truss Coffee Table

This was my first project other than making garden boxes. It went really well. I built it with some friends and we had it assembled in a weekend. Stained it the next weekend. We used a Ryobi Miter Saw.

We used pine. For assembly, we decided to invert the middle truss for fun. We also fell in love with the Kreg Jig and decided to Kreg Jig the 2x6's together to make a flatter surface and incase I move it would make it easier to detach to carry down 3 flights of stairs. Did two coats of wood conditioner and stained with a light coat of Onyx water based wood stain. We decided to keep the legs and not have wheels.

Built from Plan(s)
Estimated Cost
Wood $25
Stain and wood moisturizer $10-$12 each.
Estimated Time Investment
Week Long Project (20 Hours or More)
Finish Used
Onyx water based wood stain from Home Depot. Very light coat.
Recommended Skill Level
Beginner

Heavy Duty, from reclaimed deck boards!

Submitted by Anonymous (not verified) on Sat, 12/29/2018 - 12:31

Heavy Duty, from reclaimed deck boards!

Especially with having to store active military gear, the huge gorilla trunks, and conveniently having a huge pile of 2x6's from disassembling a small deck . . Worked out perfectly!

Also, because they are heavy and tall, we did anchor them to the wall!

(I personally want to figure out how to add a sliding ladder, haha)

Estimated Time Investment
Afternoon Project (3-6 Hours)
Finish Used
None, pressurized deck boards
Recommended Skill Level
Beginner

Farmhouse Dog Bed

Submitted by StacieM on Mon, 08/15/2011 - 10:26

So I finally finished the dog bed I've been working on for over a month now (I've been trying to avoid the 100+ Texas heat but it just wouldn't go away!) It was based on dmanar33's farmhouse dog bed (linked below) and I just made it larger for our greyhound, Daisy. It's far from perfect but it's been another good learning project for me while practicing before I start our desperately needed King bed.

The bed was made using 2x8 for the internal structure (with one 2x4 center "slat"), 1x6 and 1x8 boards for the surround, with 1x2 as trim and 3/4" plywood for the cushion base. It is rather heavy but can easily be moved with two people. This was my first project using my finish nailer ($16 at Harbor Freight) and it was worth every penny! I can't believe I never picked one up before.

For the cushion I tried to find a cheap, thin 3" futon mattress on Craigslist to cut up (as I've done before), but after 2 days of looking online I ended up settling for a $12 full size foam mattress topper from wally world. I folded it in half and wrapped with some thick batting I had laying around so the cushion ended up ~2" thick. And for the cover I used Ana's doll mattress tutorial with some wally world Chino Cotton curtains for $16 as fabric (thick, durable, cotton and cheaper than anything I could find at the fabric store) and it worked out great! I left one end open to put a zipper into once I pick one up, so right now it is like a large pillow case, but it works just fine.

I'm very happy with the total project and I love that Daisy (~75lbs) won't be breaking it anytime soon. She has plenty of room to stretch out and it looks much nicer than the old lumpy "giant pillow" style dog bed on the floor we had before.

Estimated Cost
~$30 for the wood and ~$30 for the cushion
Estimated Time Investment
Day Project (6-9 Hours)
Finish Used
One coat Sherwin Williams bright white flat (leftover ceiling paint) and one coat Rustoleum gloss white spray paint.
Recommended Skill Level
Beginner

Comments

kelli224

Mon, 08/15/2011 - 10:47

This is so fantastic!! But what I love even more...is that sweet greyhound! We are a greyhound family as well and I think our Breezy girl needs one of these.

juliead18733

Sat, 11/12/2011 - 08:35

You did an amazing job on this and thanks so much for giving detailed info about what you used! I've been toying with the idea of making a bed like this for my Pit Bull but I've been hesitant without knowing what materials would make it structurally sound for a large dog to lay on. Thanks for showing me how to give my big dog some of the pampering that the little dogs get all the time!

tnlscott

Wed, 01/11/2012 - 07:55

I saw the original blog about this bed, but it was quite smaller. I have a great dane that I want to make this bed for, so it's good to see how it looks bigger! I have a baby mattress that I'm going to use, so it'll be pretty big!! Awesome job!!

Adirondack chairs

Submitted by yummybear on Sun, 09/08/2013 - 12:20

This was the plans for the adirondacks out of your book, The Handbuilt Home. This was super easy and I love how they turned out! I plan to build 2 more and then onto the child size version. Thanks Ana!

Estimated Cost
$13 for the wood only
Estimated Time Investment
Day Project (6-9 Hours)
Finish Used
I used some indoor paint I had bought for kid's room. I finished it with a coat of spar urethane.
Recommended Skill Level
Starter Project

Comments

Bathroom Cabinet

Submitted by Smokeydog on Wed, 11/11/2015 - 10:58

I built this cabinet for a little additional bathroom storage.  I used select pine for most of the project and some old leftover hardwood flooring for the top.  The lines of the hardwood gave the cabinet top a nice rustic appearance.  I am happy how this project turned out.

Built from Plan(s)
Estimated Cost
Around 100.00.
Estimated Time Investment
Weekend Project (10-20 Hours)
Finish Used
BEHR satin paints
Recommended Skill Level
Intermediate

Rustic x console table

Submitted by Anonymous (not verified) on Tue, 01/01/2019 - 06:41

Made from rustic x console plans from Ana white

Estimated Cost
120
Estimated Time Investment
Weekend Project (10-20 Hours)
Finish Used
Minwax early American
Recommended Skill Level
Intermediate

Mudroom Bench

Submitted by Anonymous (not verified) on Fri, 09/23/2022 - 15:43

This mudroom bench is my favorite Ana White build! Everyone has a place for shoes, backpacks and boots can be stored in the bench. We added baskets to keep gloves, hats and other small items organized.

Comments

Chairs, Chairs Everywhere!

I started about a year ago building my bench. It has been on Ana's Site before- especially for the color- Citron from Orange. I also modified the arm supports to look more modern and changed the boards to be 10" on the seat and 12" on the backs.

This year my neighbor who is a painter and I teamed up and built 6 chairs and another bench! I cut all the wood, then my neighbor primed and painted all sides except one flat. After assembly, another 2 coats of paint went on all surfaces.

It was about $400 in material for 1 bench and 6 chairs (bought from Blue)

Oh- BTW. The table is from Target with a coat of red Rustoleum!

Built from Plan(s)
Estimated Cost
$400 + paint (1 Bench & 6 Chairs)
Estimated Time Investment
Week Long Project (20 Hours or More)
Finish Used
Zinzer Primer
Outdoor Laytex Gloss
Recommended Skill Level
Intermediate

Comments

Easy Whiteboard

Submitted by Bekah on Tue, 09/10/2013 - 21:38

We wanted to put up a whiteboard to use for homeschooling and were amazed at the cost of even a small one. We got some shower board from Lowes that measures 8 feet by 4 feet, put 1x2" boards over the top and side edges and screwed through them into the wall studs, and added a Ten Dollar Ledge shelf we'd already been using for the kids' books. Super easy and it looks great!

Built from Plan(s)
Estimated Cost
Less than $30
Estimated Time Investment
An Hour or Two (0-2 Hours)
Recommended Skill Level
Starter Project

Farmhouse Table

Submitted by Greena57 on Mon, 11/16/2015 - 07:39

This is the first table I have ever built the pocket screw plans were simple to follow. Benches were made using the same basic premise. I made sure they were short enough to fit completely under the table when not in use.

Estimated Time Investment
Weekend Project (10-20 Hours)
Finish Used
Classic Grey and Weathered Oak mix for stain. Antique White painted base which I then wiped a the same stain on and quickly wiped off
Recommended Skill Level
Beginner

Building Block Pyramid

Submitted by TamIam on Thu, 01/03/2019 - 23:08

I used the homemade holiday plans to make this as a Christmas gift for my 2-year-old great-niece and it worked out really great!

Estimated Cost
$35-40
Estimated Time Investment
Weekend Project (10-20 Hours)
Finish Used
I finished the blocks with kid-safe, non-toxic acrylic paint and the tray with interior, latex, semi-gloss white paint.


I’ve used food coloring on blocks in the past, making toys for my rabbits, and it works well, but I was short on time and never would have gotten good coverage, thus the swap to acrylic paint.
Recommended Skill Level
Beginner

Comments

Egg Holder

Submitted by Anonymous (not verified) on Sat, 10/01/2022 - 13:17

This was very easy to make and I love how it turned out! It was a fun gift to give to our chicken-loving friends:-).

Built from Plan(s)

Comments

The Boy's Bed

We had the Upside-Down bed from IKEA for our little guy, but my husband continued to complain on how he had to "crawl" into the bed. Okay, scrap that. No problem. I just searched Ana's plans for a nice bed I could make. And add a trundle. There you go.

I did modify the height of the headboard, as I plan on moving Jack to an upstairs bedrooms that has slanted walls. I wanted this bed to fit in any configuration, so I had to take 10" off the headboard. Also, due to the impending moving, I wanted the bed to easily be taken apart. So I attached the side rails with surface mounted keyhold brackets from Rockler Woodworking. They work great.

Estimated Time Investment
Day Project (6-9 Hours)
Finish Used
I love to distress and antique furniture, but to my husband's delight, I just decided to paint this bed. I used Sherwin William's Regatta. I first put on two coats of primer and then 3 coats of the paint. I did want to use my nifty Wagner spray gun, but we were having really rainy weather and I couldn't set up outside. And because I'm impatient, I just decided to brush it in the garage.
Recommended Skill Level
Beginner

Comments

Guest (not verified)

Mon, 08/29/2011 - 07:51

Great job! I am hoping to make two of these for my boys and would love to have the trundles. Could you give the specs on that? Thanks!

debandtom25

Wed, 08/31/2011 - 17:42

The specs will be different depending on the size mattress you have -- what I mean by size is height. I just used a foam mattress that was only 5 inches high. I wanted the mattress to fit bigger than the sides of the trundle, so I might have made it just 4 inches high (not including the wheels underneath). I made sure I had about 1.5" of clearance total between the headboard and footboard to move the trundle in and out.

Just make sure you take into account how thick your mattress is, the widths of your boards and the height of your wheels. Give yourself a little room for bedding and you should be all set.

Guest (not verified)

Mon, 11/21/2011 - 10:06

The bed looks awesome! The hubby and I are gonna attempt to make one just like it (with the shorter headboard as well). I also have a 5 inch mattress for the trundle. The questions I have are: 1) How much space did you leave between the floor and the bottom of the trundle? 2)What is the distance between the floor and the bottom of the side rail? 3) did you use the 1x10 for your side rail? (we are going to be using a 1x8 instead). 4) Did you order your casters from Rockler as well, or find them at a home improvement store?

Thanks so much, in advance!

debandtom25

Wed, 11/23/2011 - 11:58

1. The sides of the trundle are not flush with the bottom. The bottom (that the bed rests on) is about 2" higher than the side rails. This allows room for the wheels and about an 3/4: between the floor and the side rails. This measurement will all depend on the size of the casters you get and how much room you have beneath your bed for the trundle.
2. As mentioned above, there is about 3/4" between side rail and bottom of floor. Like I said before, it's total preference and how much room you have to work with.
3. I did use a 1X10, mainly because I like the look of the wide board.
4. I got the casters from HD or Lowes (can't remember).

Hope this helps!

Guest (not verified)

Sun, 01/29/2012 - 23:15

I love this and am going to make for my sons bed but I didn't see what you used to attach the sides to the base...unless I just didn't see it. :-) Did you use "L" brackets?

Saadia (not verified)

Sun, 03/25/2012 - 12:30

Hi, I was just wondering how you adjust the cleats when you are using the rockler brackets? I plan on using 2 x 8 for the siderails so there isn't enough room to fit the bracket and cleat along the edge. Did you have to shorten your cleat by just a little bit?

KAD050209 (not verified)

Fri, 08/17/2012 - 23:32

I was wondering if you could tell me how many inches the gap is from the bed to wall (where you have the bed horizontal against the wall)? Just trying to get an idea; my daughter is young and don't want her falling between the gap at night :) Thanks ahead of time!

In reply to by KAD050209 (not verified)

debandtom25

Wed, 09/05/2012 - 20:16

The gap is about 3.25". I remember one of the first nights that Jack slept in his bed he fell in the gap. I wasn't expecting that at all. We just stuffed the extra bed pillows in there at night. We don't even remember to do it anymore and he's never fallen in again.

Threshing Board Table

I wanted a character filled leave outside table for my pergola. I wanted to use reclaimed boards of some kind. I got estimates starting at $1,000 and I wasn't even sure I liked them. Then - hurray - I found your blog and started browsing through the DIY plans for farmhouse tables. I had a couple of ideas. First, I needed to find the wood. I found the gorgeous (still caked with manure) 2" thick barn threshing boards for a very reasonable price and they were long enough, at 8 feet, for my dream table to start taking shape.

The idea of creating with wood has always appealed to me, but I have never had any idea how to begin. Enter your plans + my lovely friend Lisa and her miter saw. As per the easy to follow instructions I went shopping for the wood. I chose a lovely cedar board which I think will weather nicely without taking away from the great patina on the top of the table.

Again - as per the easy to follow instructions - my friend and I put together the table, cleaned up and popped a bottle of sparkling wine to toast - all in about 3 hours!

BIG thanks to you and your inspiring work!

Built from Plan(s)
Estimated Cost
$40. for bottom of table, @$250. for reclaimed wood
Estimated Time Investment
Afternoon Project (3-6 Hours)
Finish Used
Top finished in a clear marine varnish.
Recommended Skill Level
Beginner

Comments

Console/sofa table

I made this table top with 2-2x6 boards to make it more narrow. I used 1-2x6 for the shelf and just adjusted the plan accordingly. The finish is dark walnut stain, then painted with rustoleum chalked linen white paint, distressed then covered with Minwax finishin wax in natural color.

Built from Plan(s)
Estimated Time Investment
Afternoon Project (3-6 Hours)
Finish Used
Minwax Dark Walnut stain
Rustoleum chalked linen white chalk paint
Minwax finishing wax natural color
Recommended Skill Level
Intermediate

Comments