Community Brag Posts

Kitty Outhouse

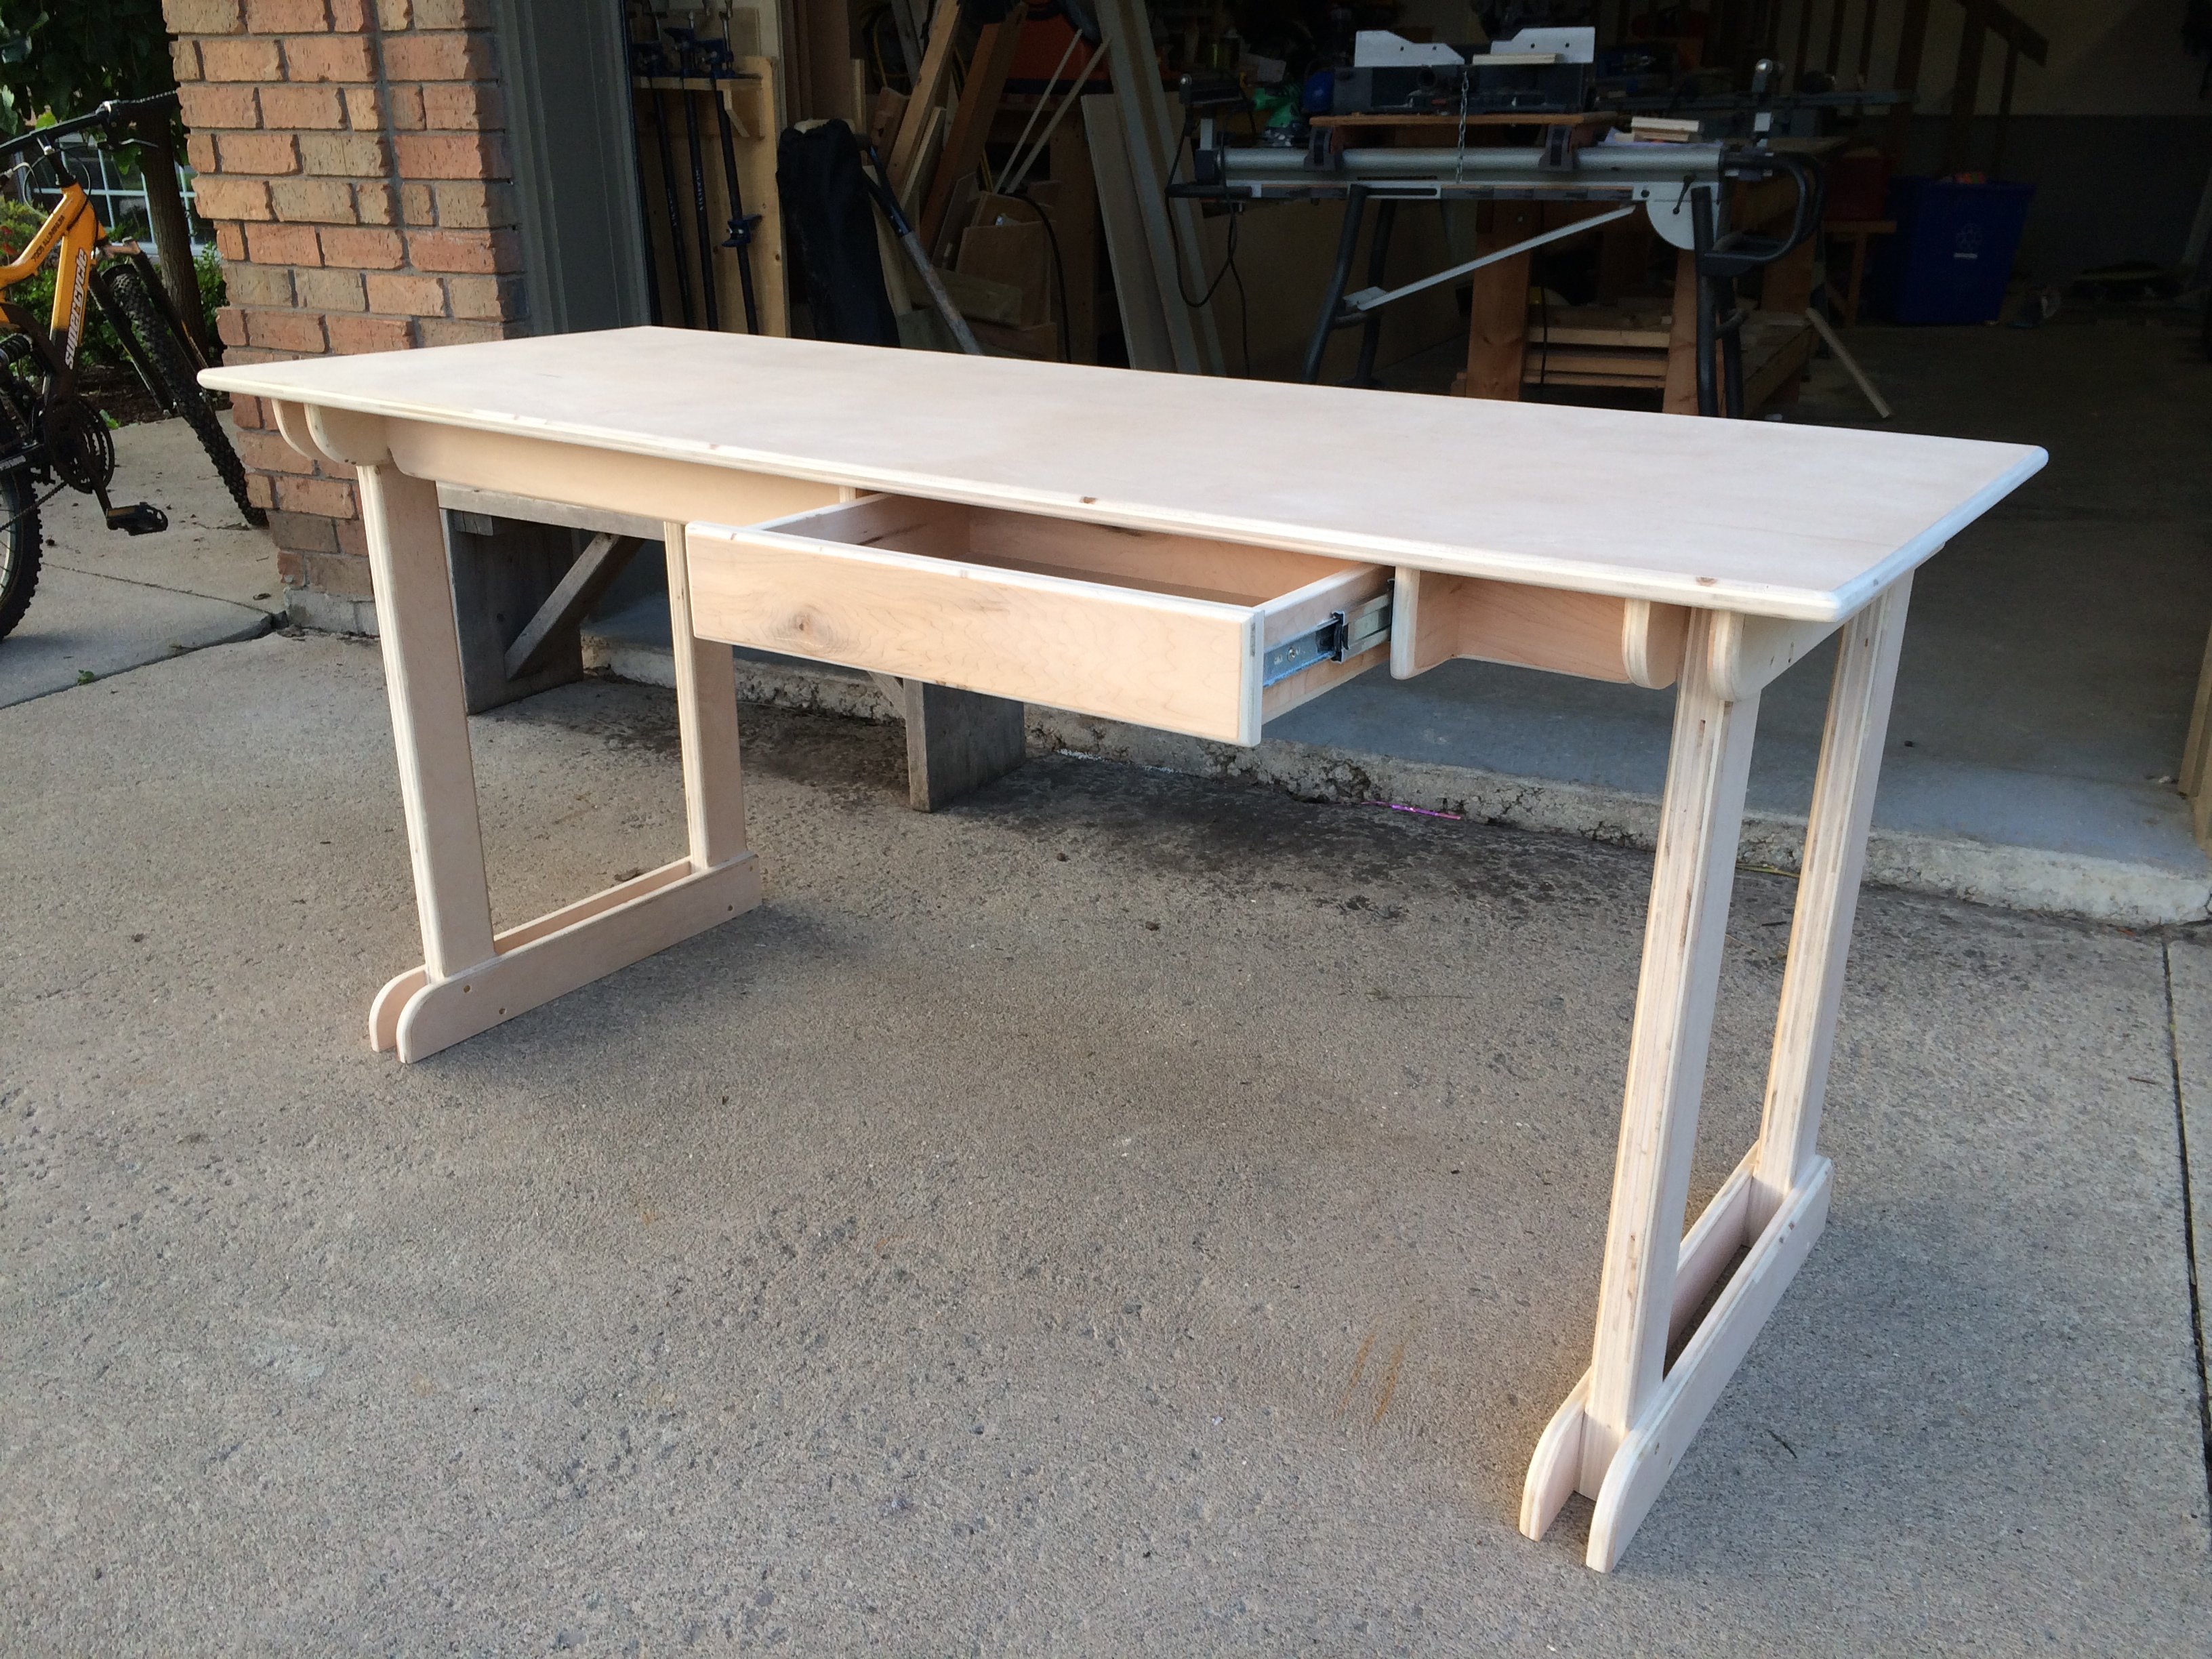
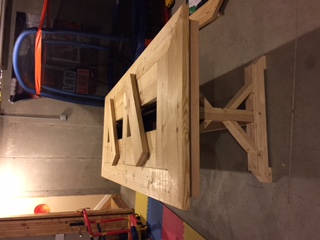
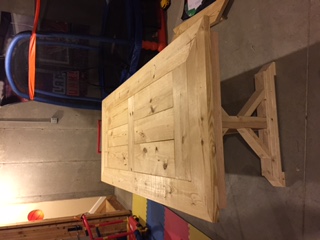
My first Ana White project. Built Ana’s awesome small cedar shed as an outhouse for our many cats. The have access to it from inside the house. Great way to keep litter boxes and the mess out of the house. It is stand alone, and attached to the house, in front of a bedroom window. There are two ‘entrances’ as well as two, one-way, escape hatches, if a cat in the outhouse is interrupted by another cat (I.e. a male cat comes in and the female feels trapped) they can exit to the outside (one way so no critters can come inside!). Ana has easy to build plans, great site! I plan on making the square table just posted today for my newly refurbished deck. Keep in mind, my estimated costs and time reflect a LOT of additional features on the inside. The shed itself, very easy, simple, inexpensive. Very little waste with Ana’s projects as well.

Built from Plan(s)
Estimated Cost
$500
Estimated Time Investment
Week Long Project (20 Hours or More)
Finish Used
No finish, at least not yet.
Recommended Skill Level
Intermediate

Comments

candyland cottage loft bed

I cannot take any credit for helping with the creation of this bed (only helping carry some pieces up the stairs) but my Aunt Cheryl is the heart and soul of this amazing bed! It is themed candyland as you can see the cupcakes, lollipops, and candy cane my aunt added with her own special twist. The stairs are storage and there is a little door underneath (in the house) that has a shelf in it. This is the best thing ive ever seen and am sooo thankful for my aunt making an amazing bed for my daughter. I just had to share, definitely worth bragging!

Estimated Time Investment
Week Long Project (20 Hours or More)
Recommended Skill Level
Intermediate

Comments

Plywood Student Desk

Submitted by DangerDad on Tue, 02/10/2015 - 06:22

Simple desk made from maple veneer paint grade plywood.  It's very sturdy and looks great.  The last photo shows a matching dresser that I made as well.  So far I've made two of these identical desks and another with 3 large drawers underneath to one side.  You don't have to have alot of fancy tools and expensive wood to make great looking, sturdy, and functional furniture.  As always, sketchup plans available!

Estimated Cost
About $75
Estimated Time Investment
Weekend Project (10-20 Hours)
Finish Used
3 coast poly (satin finish)
Recommended Skill Level
Beginner

Comments

MATTRUSSO

Fri, 02/20/2015 - 21:31

why can't i get more info on this desk. A cut list and quick diagram.

Living room bookshelves

Submitted by Anonymous (not verified) on Thu, 05/06/2021 - 06:27

We ordered 2 custom bookshelves using the configurator. Each is 48" x 72" and 11.5 in deep. We primed and painted the pieces first, then assembled using pocket screws. A little touch up required. We attached a back of 1/4 in plywood for a cleaner look, and attached to wall, added baseboard trim. Attached a small facing piece to top edge only. We love them!

Estimated Cost
$450
Estimated Time Investment
Weekend Project (10-20 Hours)
Finish Used
Lightly sanded, applied Shellac primer, lightly sanded any rough spots, then applied 2 coats of white trim paint. We painted the pieces first, then assembled.
Recommended Skill Level
Intermediate

Comments

20 Sec Tidy Up Trundle coffee Table small version

Submitted by Jolynnw on Sun, 03/31/2013 - 18:36

I wanted a table that was this shape and functionality, but smaller to fit my living space. So I measured the area that it would be going into and changed it by 18 inches. This was a 2 weekend project as I was getting sick so It was not done as quickly as I wanted. But once I was better I finished it in about 16 hours. Spread across 4 days.

Estimated Cost
$70-90
Estimated Time Investment
Weekend Project (10-20 Hours)
Finish Used
Wood Rich Early American Stain 230 and Poly Laquear.
Recommended Skill Level
Beginner

Husky Farmhouse Table

We saw the plans for this table and I had to have it. We followed it to a T! The only thing we did different is made it a foot shorter and added rustic nails on top. 

Built from Plan(s)
Estimated Time Investment
Weekend Project (10-20 Hours)
Recommended Skill Level
Starter Project

Rustic X Console Table

Submitted by Anonymous (not verified) on Fri, 05/12/2017 - 17:11

I built this table for my sister-in-law's townhome. I also put the stone on the fireplace.

Built from Plan(s)
Estimated Cost
$75
Estimated Time Investment
Weekend Project (10-20 Hours)
Finish Used
Homemade with 0000 steel wool and vinegar
Recommended Skill Level
Beginner

Rustic X Coffee Table

Submitted by Dan Dodd on Fri, 05/14/2021 - 06:37

Here is one of the coffee tables I built for a customer. Honey Stain, gloss polyurethane. Took about 4 hours total. Fun build

Built from Plan(s)
Estimated Cost
80
Estimated Time Investment
Afternoon Project (3-6 Hours)
Finish Used
Honey Stain, gloss poly, white gloss paint
Recommended Skill Level
Beginner

Comments

Window Cornice

Submitted by BeingHome on Thu, 04/04/2013 - 01:46

I have been wanting to build a window cornice for the laundry / mudroom and decided it was finally time. This project was very easy and inexpensive. Luckily, I was able to use some leftover MDF and only had to purchase and 8ft piece of trim. Everything things else I already had. 1. Using left over MDF the front and sides of cornice were measured, mitered and glued together using Loctite power grab (very strong glue). 2. Once glue dried, L brackets were placed on the corner insides for additional reinforcement. Probably not necessary since Loctite power grab is some super strong glue, but I did it anyway. ;) 3. Attached top piece of cornice using nail gun and #18, 1 3/4 inch nails. 4. Mitered trim pieces and glued on using Loctite power grab. 5. Paint cornice. 6. Attach L brackets onto top window frame. 7. Mount cornice onto L brackets. Once in place, I used #6, 1/2 inch wood screws to secure the cornice onto the L brackets. Again, this was an easy and a fun starter / beginner project. :) For more info, please check out my window cornice blog post. Thank you.

Estimated Cost
$8.00 and using supllies I already had. Otherwise this project could probably be done for about $20.00.
Estimated Time Investment
Afternoon Project (3-6 Hours)
Finish Used
Behr Ultra (paint and primer in one) in ultra white.
Recommended Skill Level
Starter Project

Comments

Distressed rustic bench

Distressed rustic bench. 

Built from Plan(s)
Estimated Cost
$65
Estimated Time Investment
Afternoon Project (3-6 Hours)
Finish Used
Early American Minwax
Recommended Skill Level
Beginner

Outdoor Sofa Build

Submitted by Anonymous (not verified) on Mon, 05/15/2017 - 11:33

Im so proud, this was my first big proyect. The instructions are just perfect like a nice recipe :)

Built from Plan(s)
Estimated Cost
Wood 50$,screws 10$, Stain 8$
And the cushions some that i have at home and few from IKEA.


Estimated Time Investment
Afternoon Project (3-6 Hours)
Finish Used
Stain minwax 211. I sand it first.
Recommended Skill Level
Beginner

Adirondack Chairs built by High School Class

Submitted by Anonymous (not verified) on Mon, 05/24/2021 - 18:07

Thirty High School Students spent several weeks in the classroom building a dozen of the Adirondack chairs. By the time they were completing the last of the chairs, they pretty much could build them from memory. They really had no trouble building the chairs and learned how to use all of the tools in the school shop.

Estimated Cost
$70
Estimated Time Investment
Afternoon Project (3-6 Hours)
Finish Used
We painted the chairs several different colors using latex exterior paint from Lowes.
Recommended Skill Level
Beginner

Elementary trestle desk

Submitted by dinifam on Fri, 04/05/2013 - 12:55

II fell in love with this desk and all it's storage! It was the perfect size for my space and it was super quick to build! I used mdf for the top painted in homeade chalkboard paint! Used the post from shanty to chic for the rolling storage cubes. It all came out perfect!!! This is my third real build all done for my youngest sons new room.

Estimated Cost
50.00
Estimated Time Investment
An Hour or Two (0-2 Hours)
Finish Used
Java gel stain and bear bleached denim paint mixed with unsanded grout
Recommended Skill Level
Beginner

Farm Table with Built in Coolers

Submitted by Anonymous (not verified) on Fri, 05/19/2017 - 11:35

I built this table using a modified version of the Ana White, Fancy X Farm Table plans. The coolers are two, 36 inch plastic planter boxes. If you have any questions, please let me know.

Built from Plan(s)
Estimated Cost
$200
Estimated Time Investment
Week Long Project (20 Hours or More)
Finish Used
My wife used classic Gray stain from Minwax along with a Lime wash and glaze.
Recommended Skill Level
Intermediate

Mantel Moulding Headboard

Submitted by Jon Moore on Sun, 04/07/2013 - 20:16

While browsing I ran across Ana's Mantel Molding Headboard (Pottery Barn Addison knockoff) and had to have one!

I stuck to her plans except that I used 3/4" boards instead of the 2x4's, made it wider (81") for a King size bed, used some different molding elements and gave it a professional looking finish with my airless paint sprayer. Most people who see it cannot believe it is not store bought.

This of course kicked off a whole remodeling effort including two additional DIY projects that came out great. Looking in the photos they are the boxed shells above the bed and the grass-cloth framed mirror. The bedroom is now one of our favorite rooms in the house!

Built from Plan(s)
Estimated Time Investment
Weekend Project (10-20 Hours)
Finish Used
Behr Clear Moon
Recommended Skill Level
Intermediate

Reclaimed modern desk

This project was not built from one of Ana's plan but I thought it may inspire others to begin working more with reclaimed lumber and metal.  The desk top is built from solid reclaimed oak.  I was able to use these reclaimed planks to build a "breadboard style" top.  The legs are 1/2" thick hairpin legs.  I sanded the wood slightly and sealed it with two coats of oil based polyurethane.  What I love most about this piece is the hanging shelf for a printer/scanner/fax.  


Estimated Cost
$400.00
Estimated Time Investment
Day Project (6-9 Hours)
Recommended Skill Level
Beginner

Comments

Weatherly Sectional

Submitted by Anonymous (not verified) on Mon, 05/22/2017 - 20:08

Ana's plans are so easy to follow. This sectional was a breeze to build.

Built from Plan(s)
Estimated Cost
$120 lumber and materials $400 cushions
Estimated Time Investment
Weekend Project (10-20 Hours)
Finish Used
Glidden outdoor paint.
Recommended Skill Level
Intermediate
Seasonal And Holiday

King Size Bed

My daughter and son in law decide after 2nd kid that they needed a King size bed. I used 1 plan for head board and storage base for the other plan. This was a fun project and was really easy. I made some minor modifications to the plans for the Head board to be used. 1 tip when making the drawers: Take your time and by all means make sure it is square. Thanks for the plans!

Rolling/Revolving Desk Chair

Submitted by Robinwood on Wed, 04/10/2013 - 12:16

After making my grandson's Airport Loft Bed, he said he needed a different chair for the desk inside. But, he wanted wheels and he wanted it to go up and down and turn. All of the kid's rolling pneumatic chairs online were way too expensive and they didn't go low enough to fit under the desk; so I decided I would have to build it - just had to figure out how. Fortunately about that same time, I got an ad for Harbor Freight with a Pneumatic Stool on sale for $19.00 with the coupon.

The stool could have been used as is, but I wanted to maintain the wood look and have a back to the chair. I built the seat from wood scraps - removed the cushioned seat from the stool and just fastened the new wood seat, which is 13" square. It adjusts from 15" to 20" and holds up to 300 pounds; so he shouldn't outgrow it. As a bonus, he can store some of his airplanes in the rack at the bottom.

Estimated Time Investment
An Hour or Two (0-2 Hours)
Finish Used
Oops paint from Lowes
Recommended Skill Level
Beginner

Comments

Kids Nightstand

Submitted by Medickep on Thu, 02/26/2015 - 19:48

Made this from the Owens nightstand plans.  Very simple to build, as long as you have built drawers before!  I painted it to match my sons bed I made for him recantly.  

Built from Plan(s)
Estimated Cost
50$
Estimated Time Investment
Day Project (6-9 Hours)
Finish Used
I used Behr Marquee paint, which advertises one coat on any surface. It didn't even require a primer!!
Recommended Skill Level
Beginner