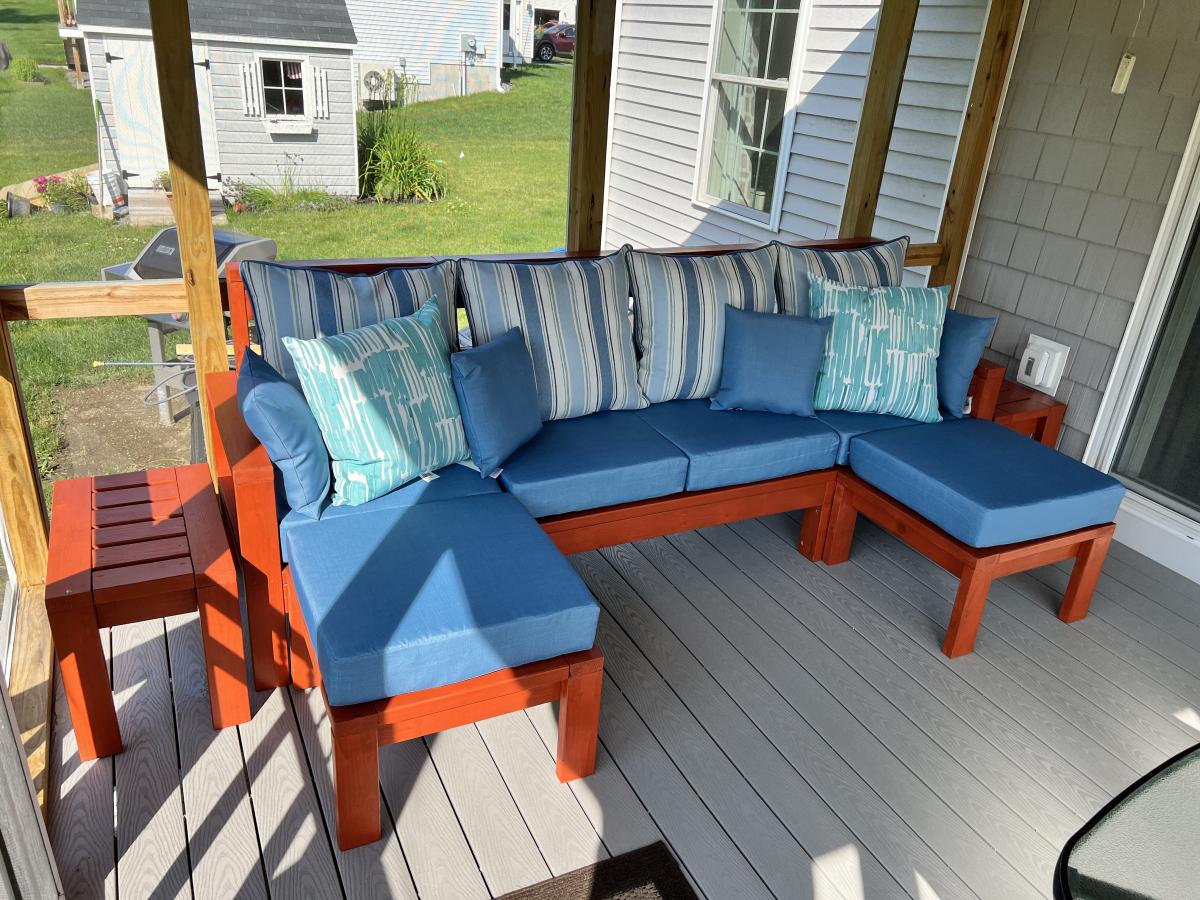
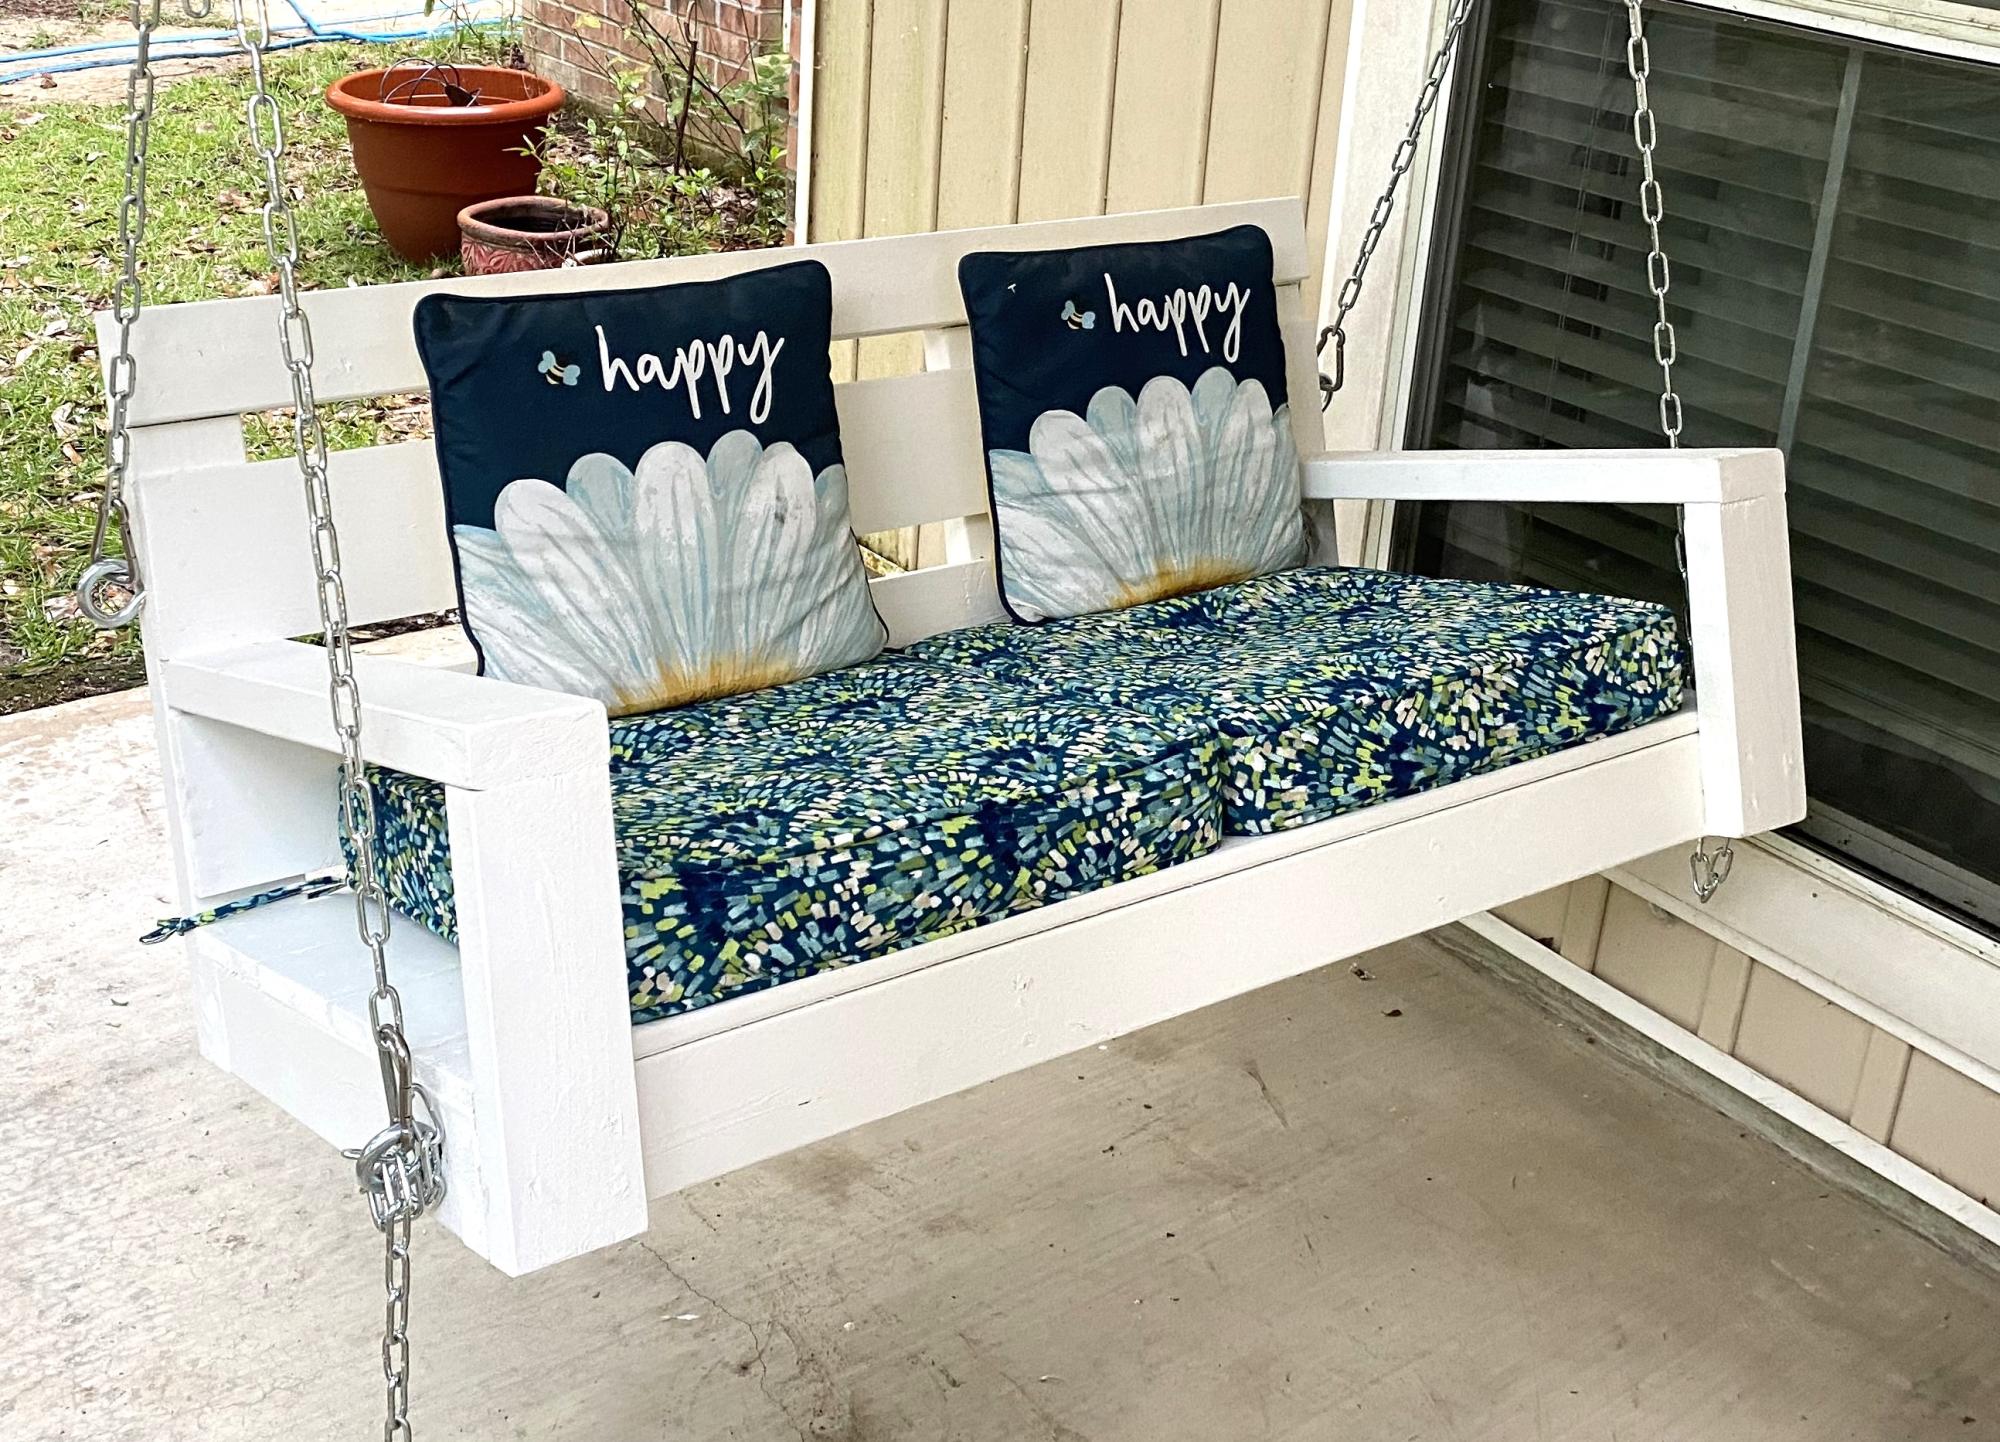
Outdoor Sofa and Table Set
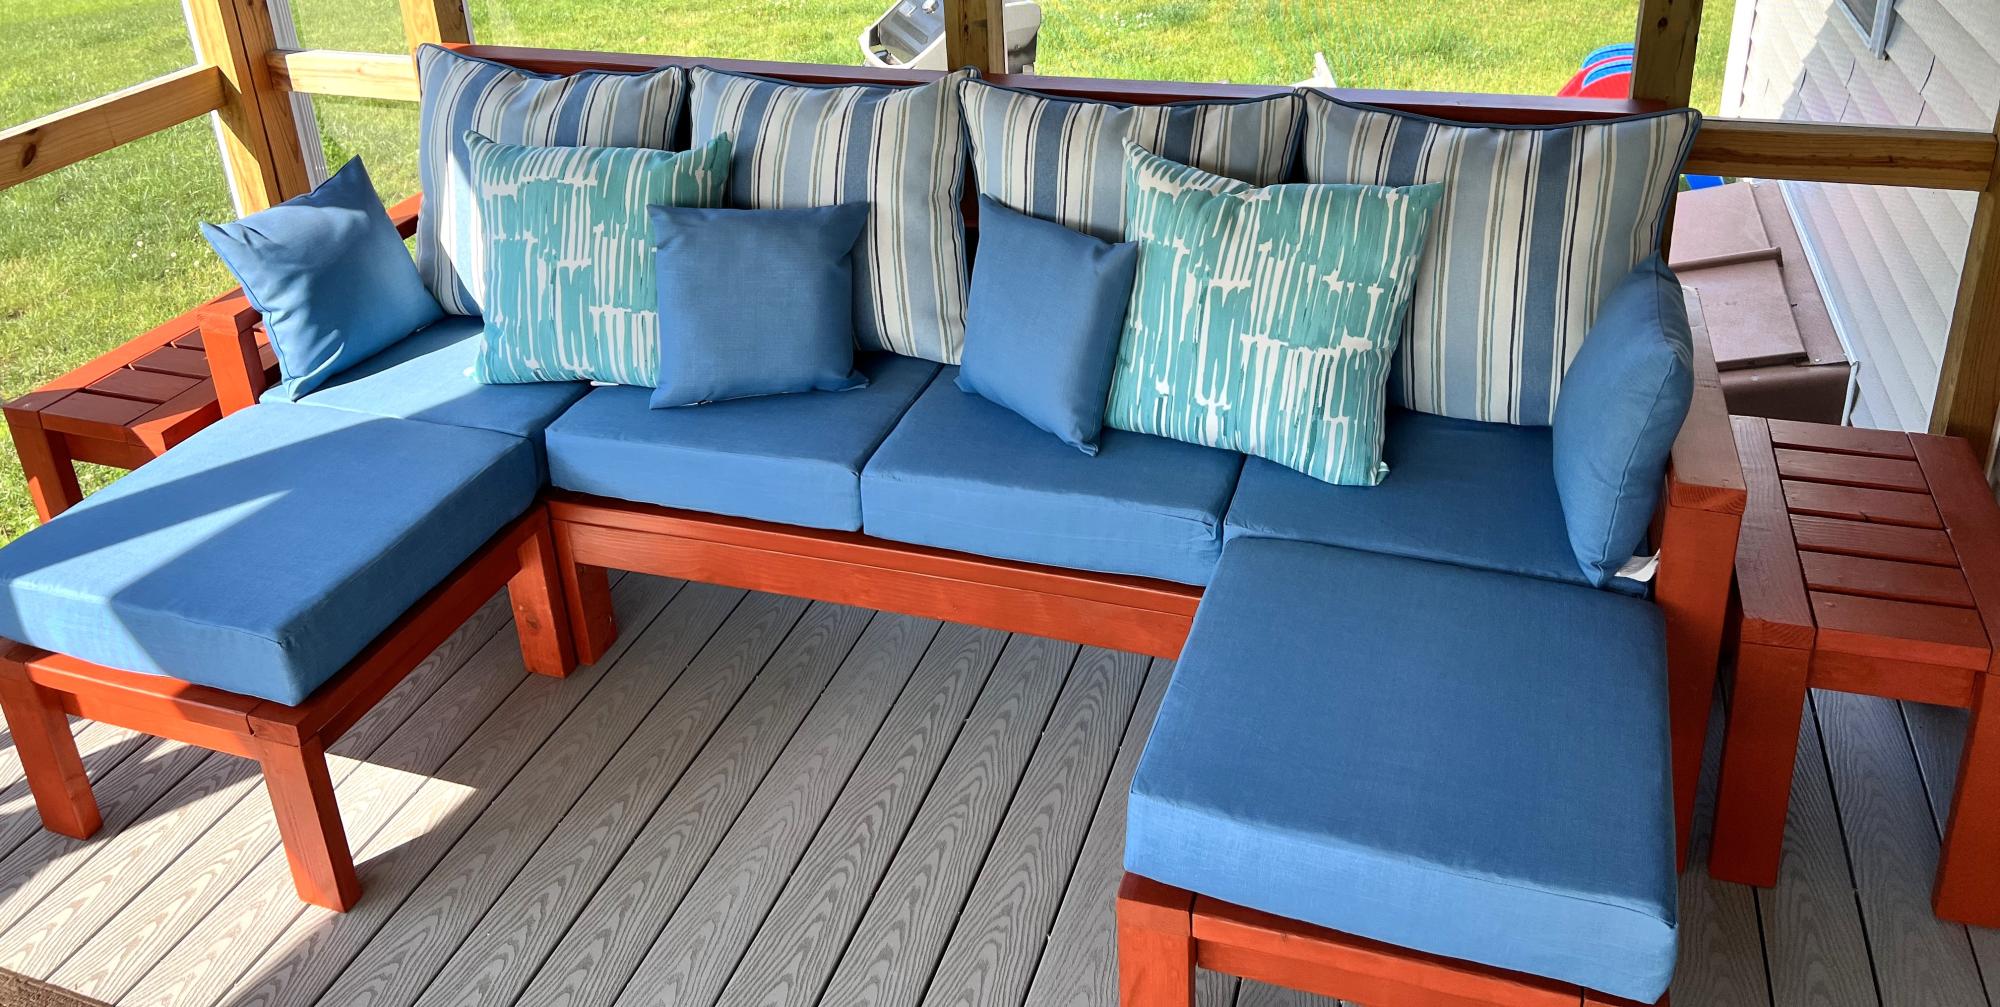
Sofa with 2 ottomans and 2 side tables.
Vinny M
Built from Plan(s)
Sofa with 2 ottomans and 2 side tables.
Vinny M
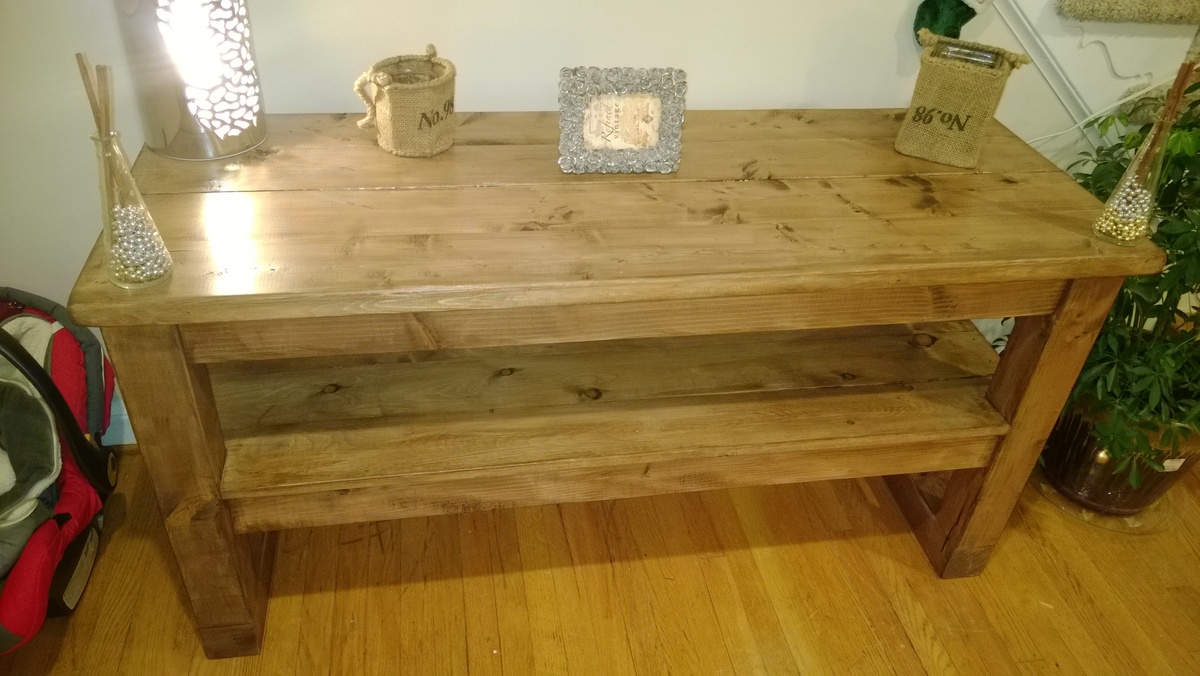
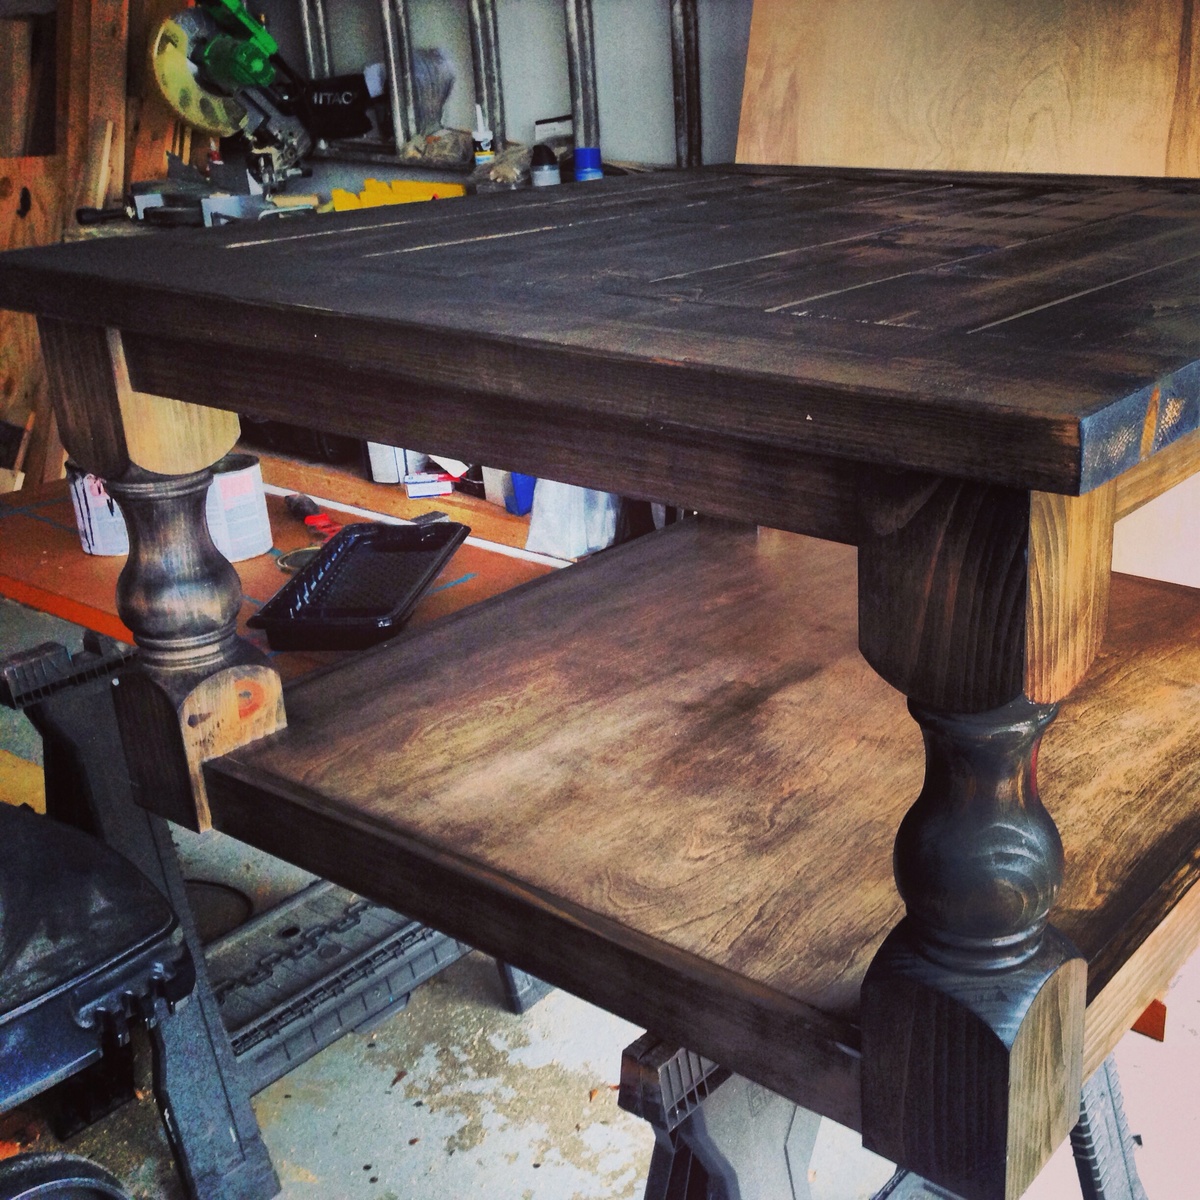
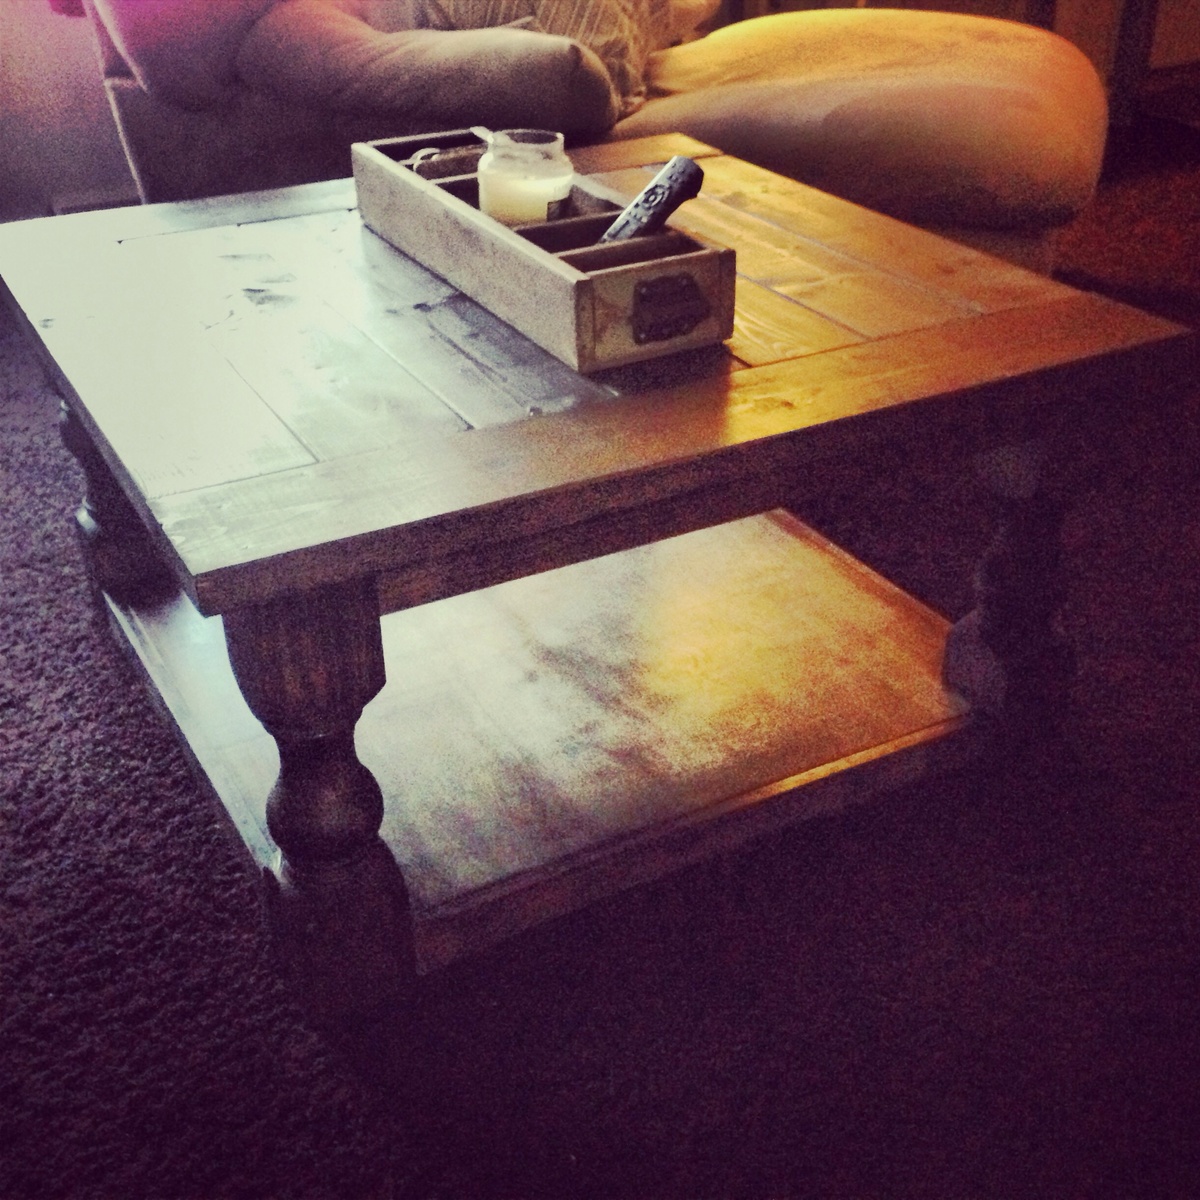
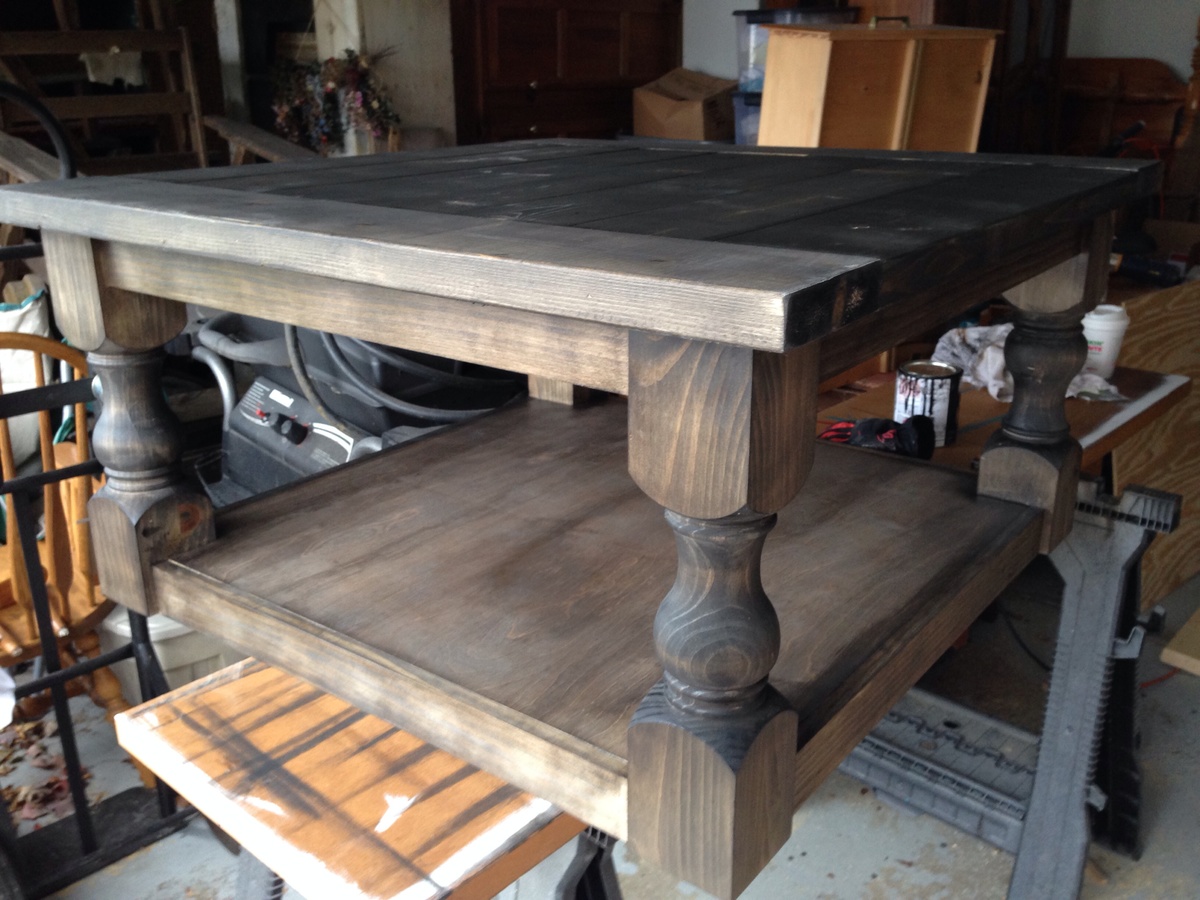
This was a fun and easy project to do. We really like how it turned out and how it compliments the room. For the bottom shelf I used four 1x6 boards instead of a single 21" wide plywood board. For that worn look, I took a drywall rasp and chewed up the corners and edges. Staining was a two part job. The first coat was called weathered gray. After it dried I lightly sanded it with 180 grit and applied a second coat of dark walnut. The gray subtly shows through the walnut. If I had it to do it over, I may have applied a coat of ebony stain to the corners and edges to make the color less even. I did very little sanding on this piece because I wanted a rough texture, but I did enough to make it sliver-free. The project cost about $80.
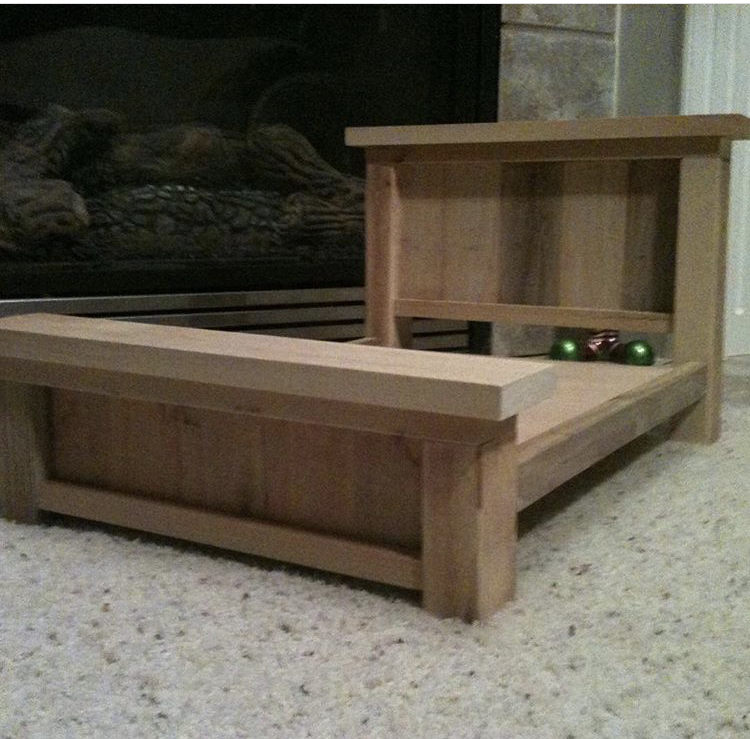
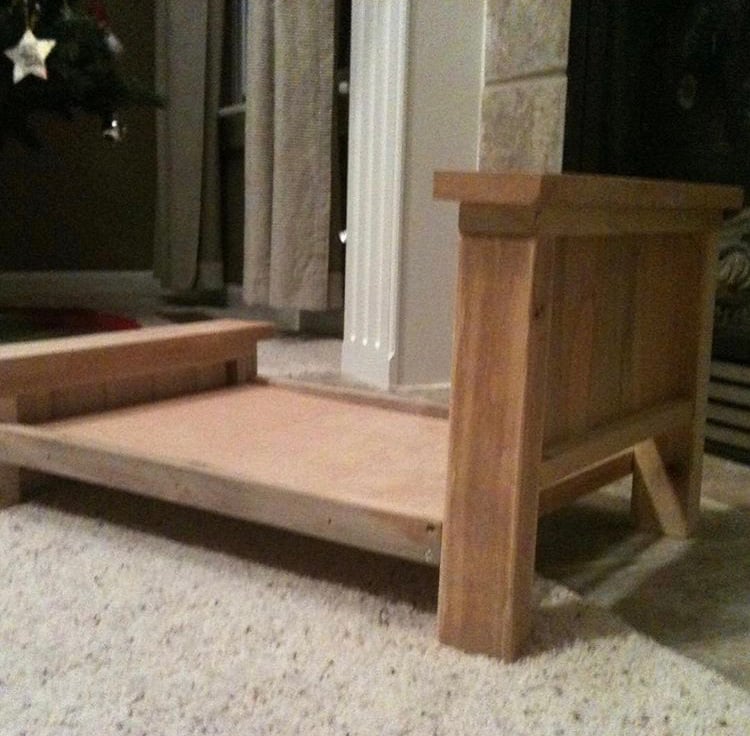
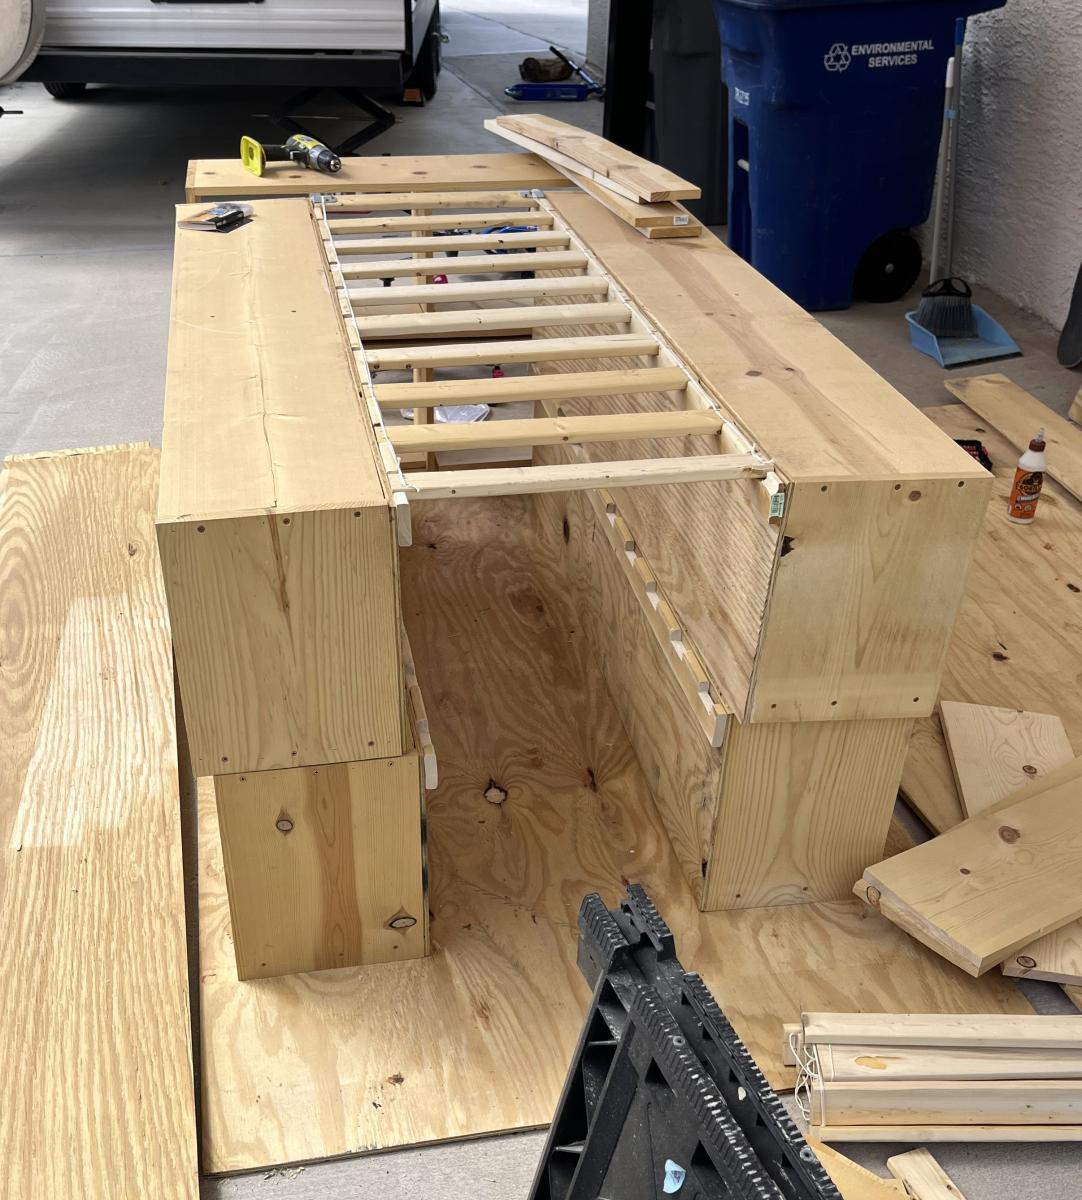
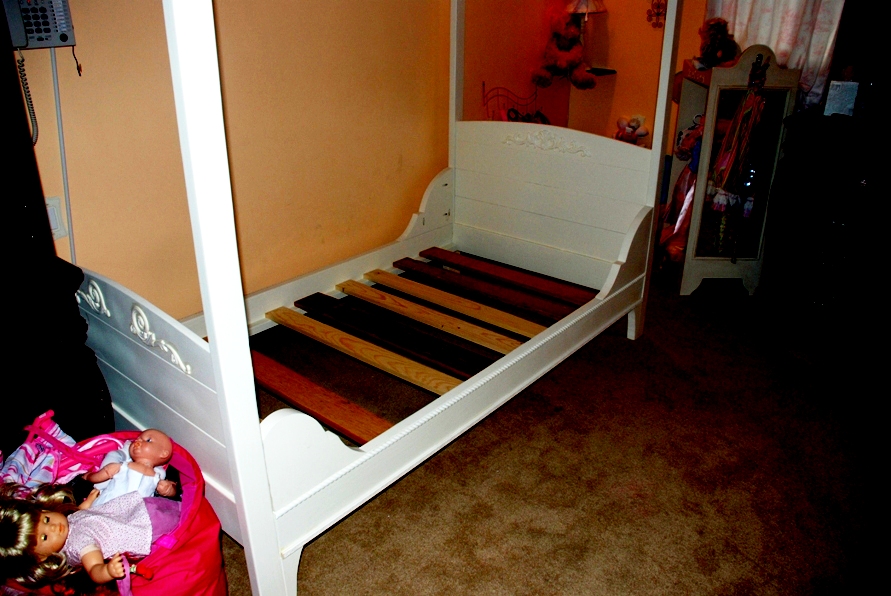
My daughter wanted a bed for her dolls. American Girl Doll Bed beds are outrageous, soI decided to make one out of some scrap wood we had laying around. I modified it a bit and added a trundle bed below.
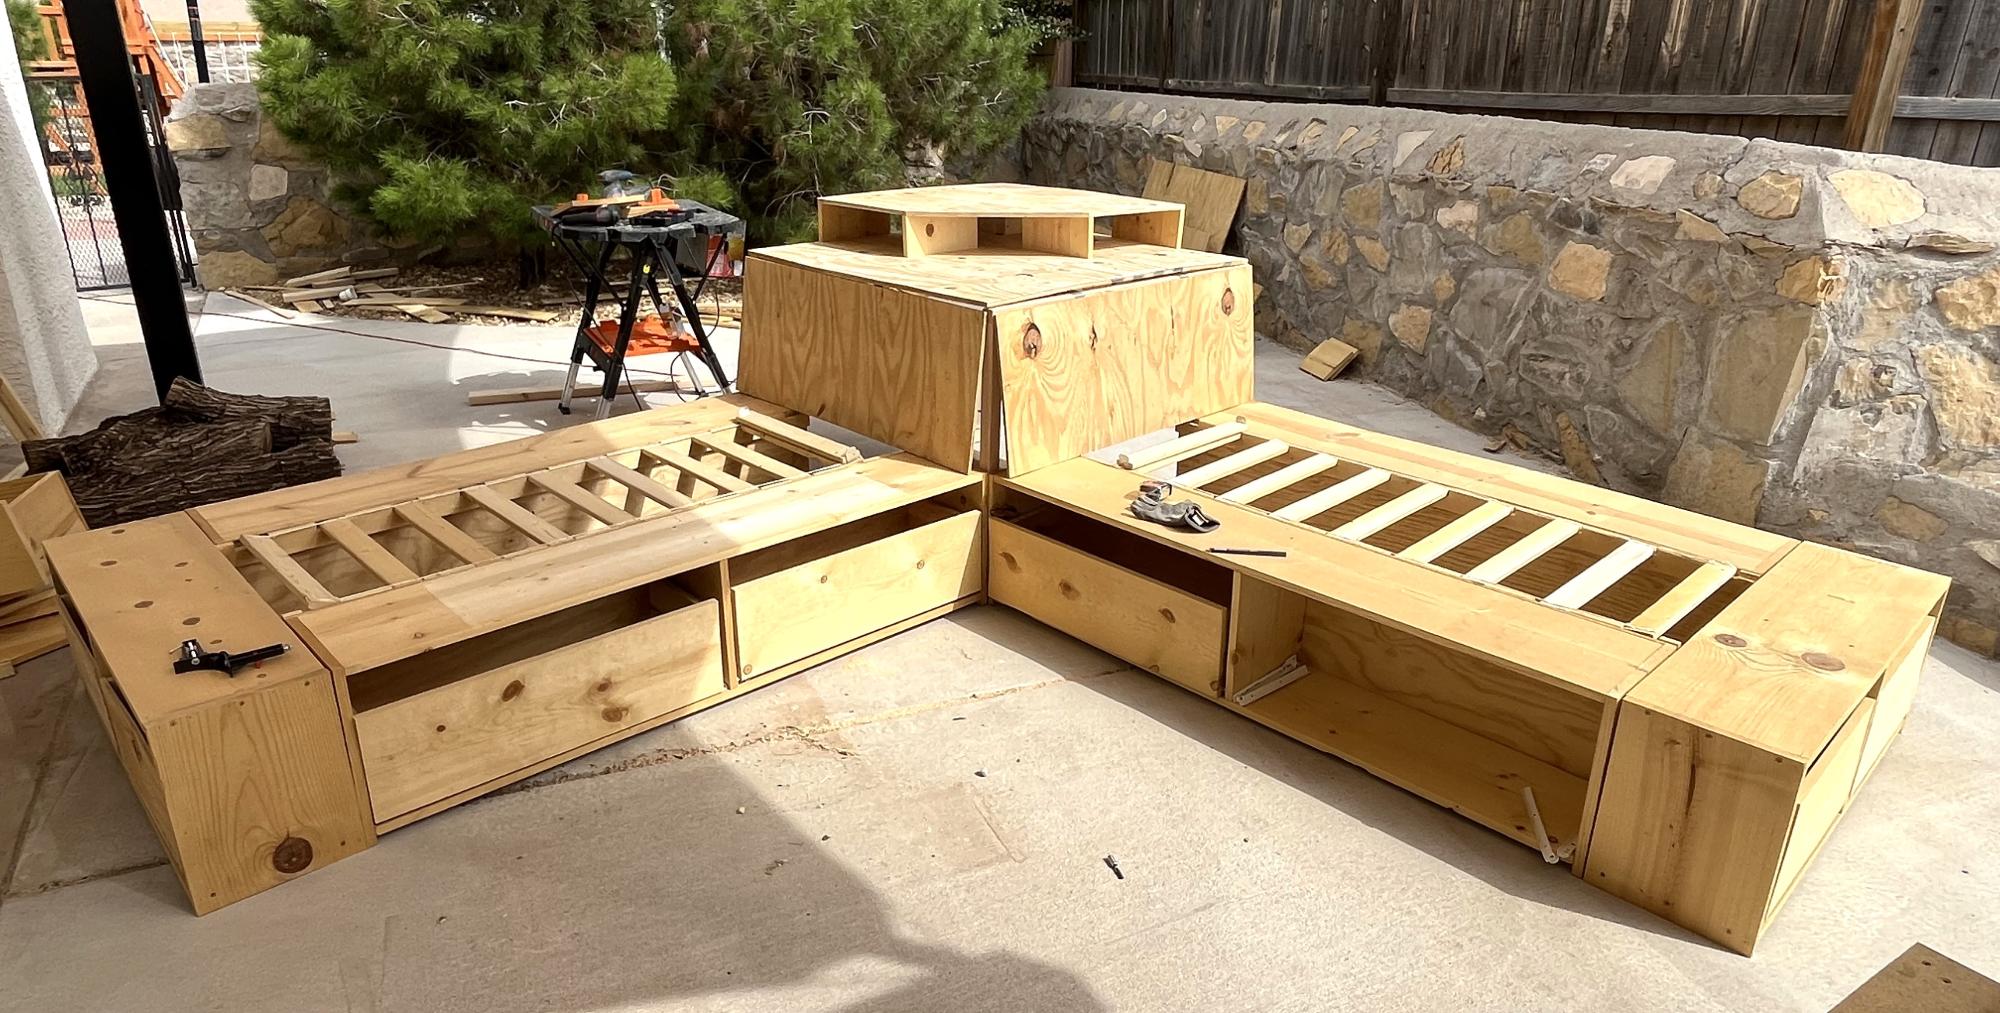
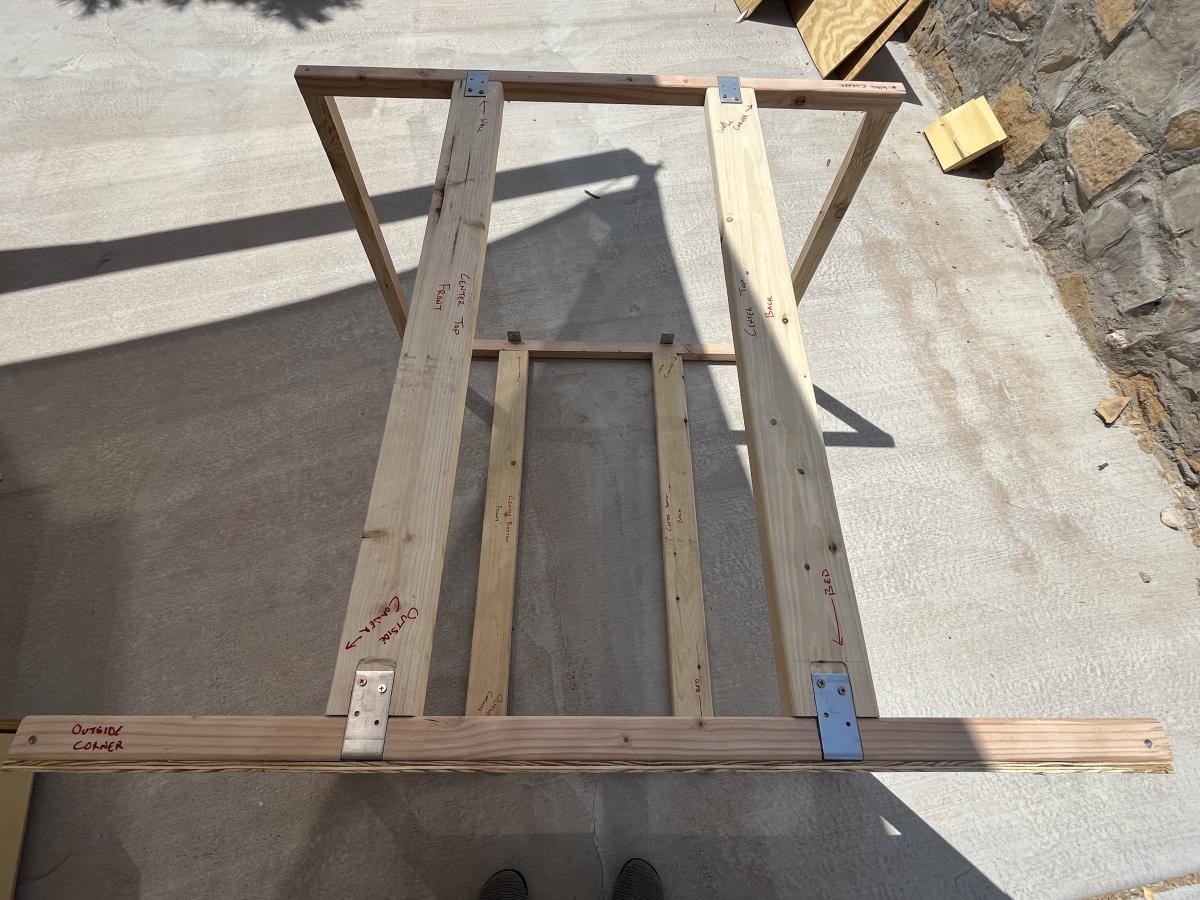
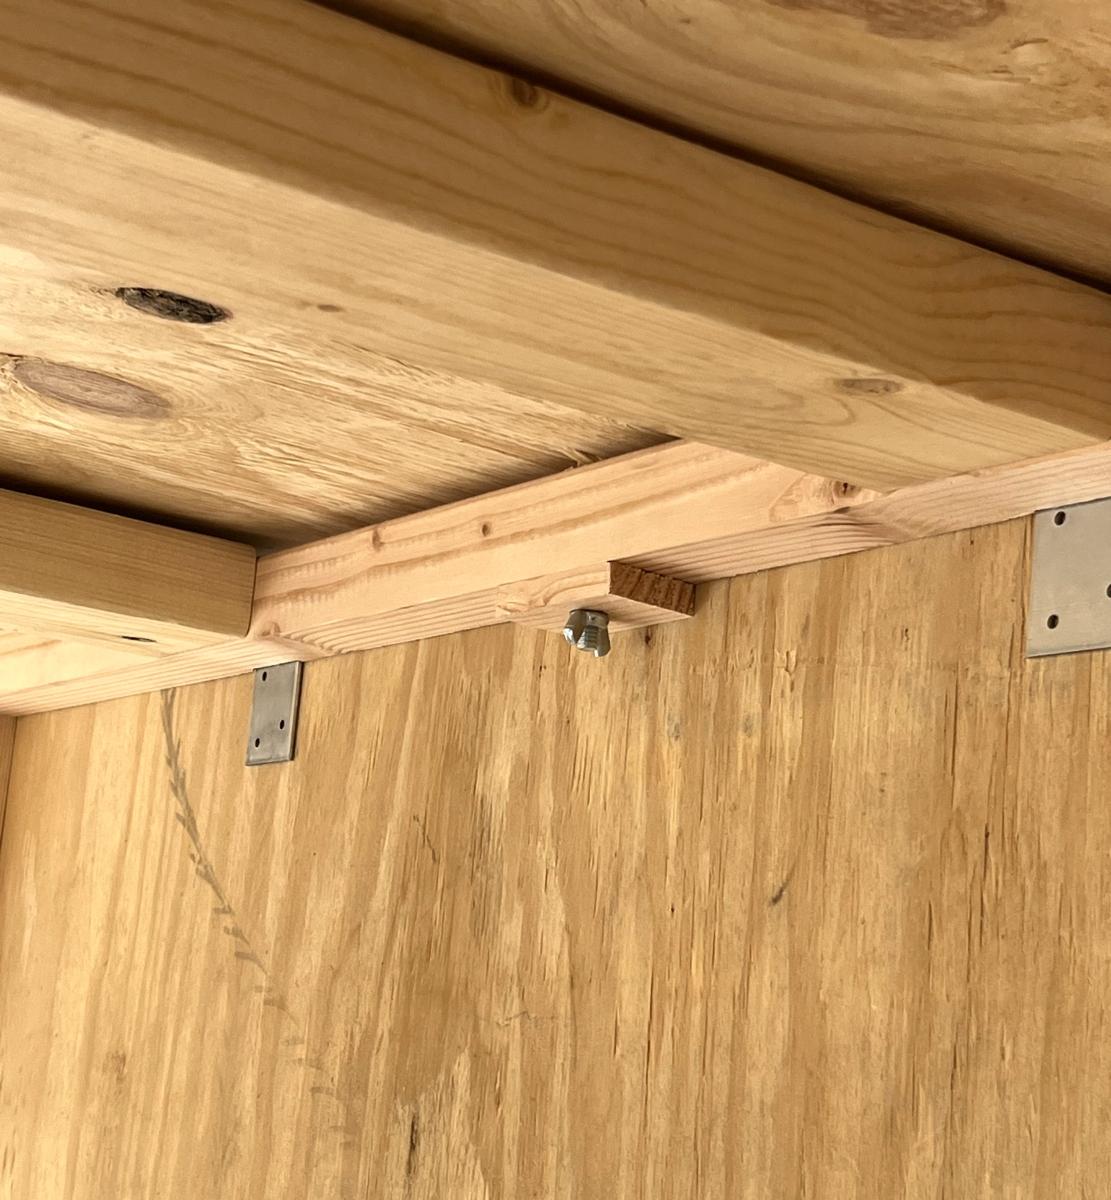
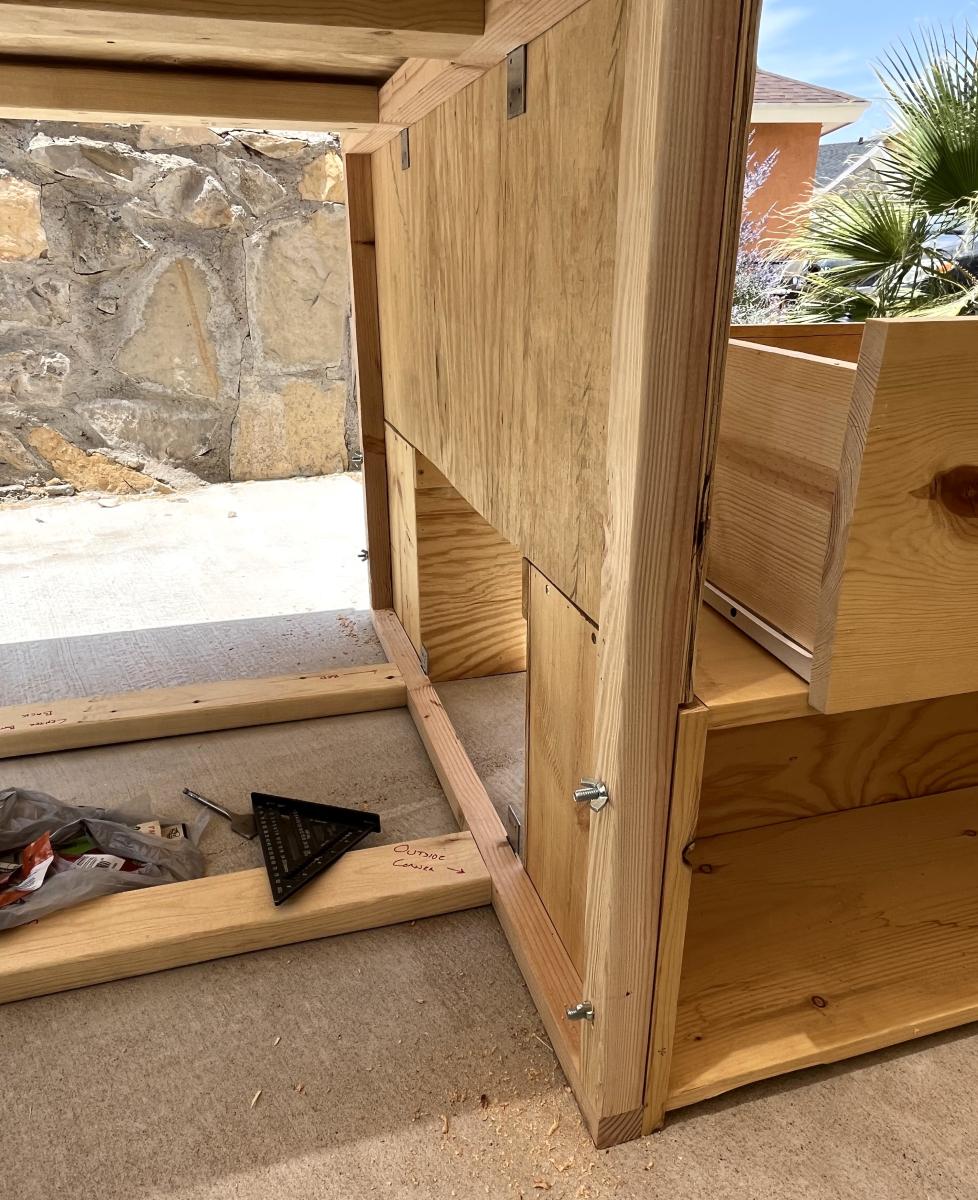
Built this plan, added bolt hangars and flat face mounts, and corner braces to make it easily assemble or disassemble for moving
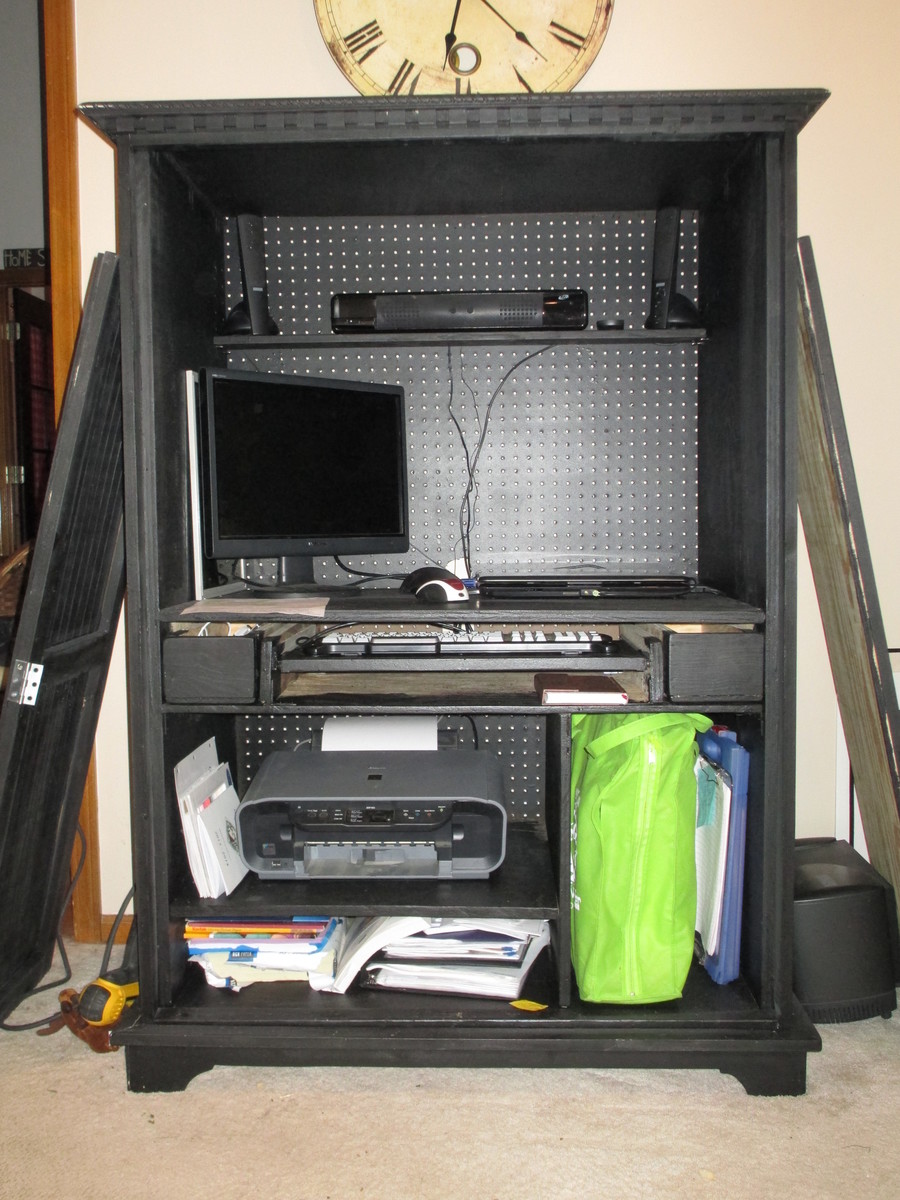
Pottery Barn Inspired Ana-White Collection
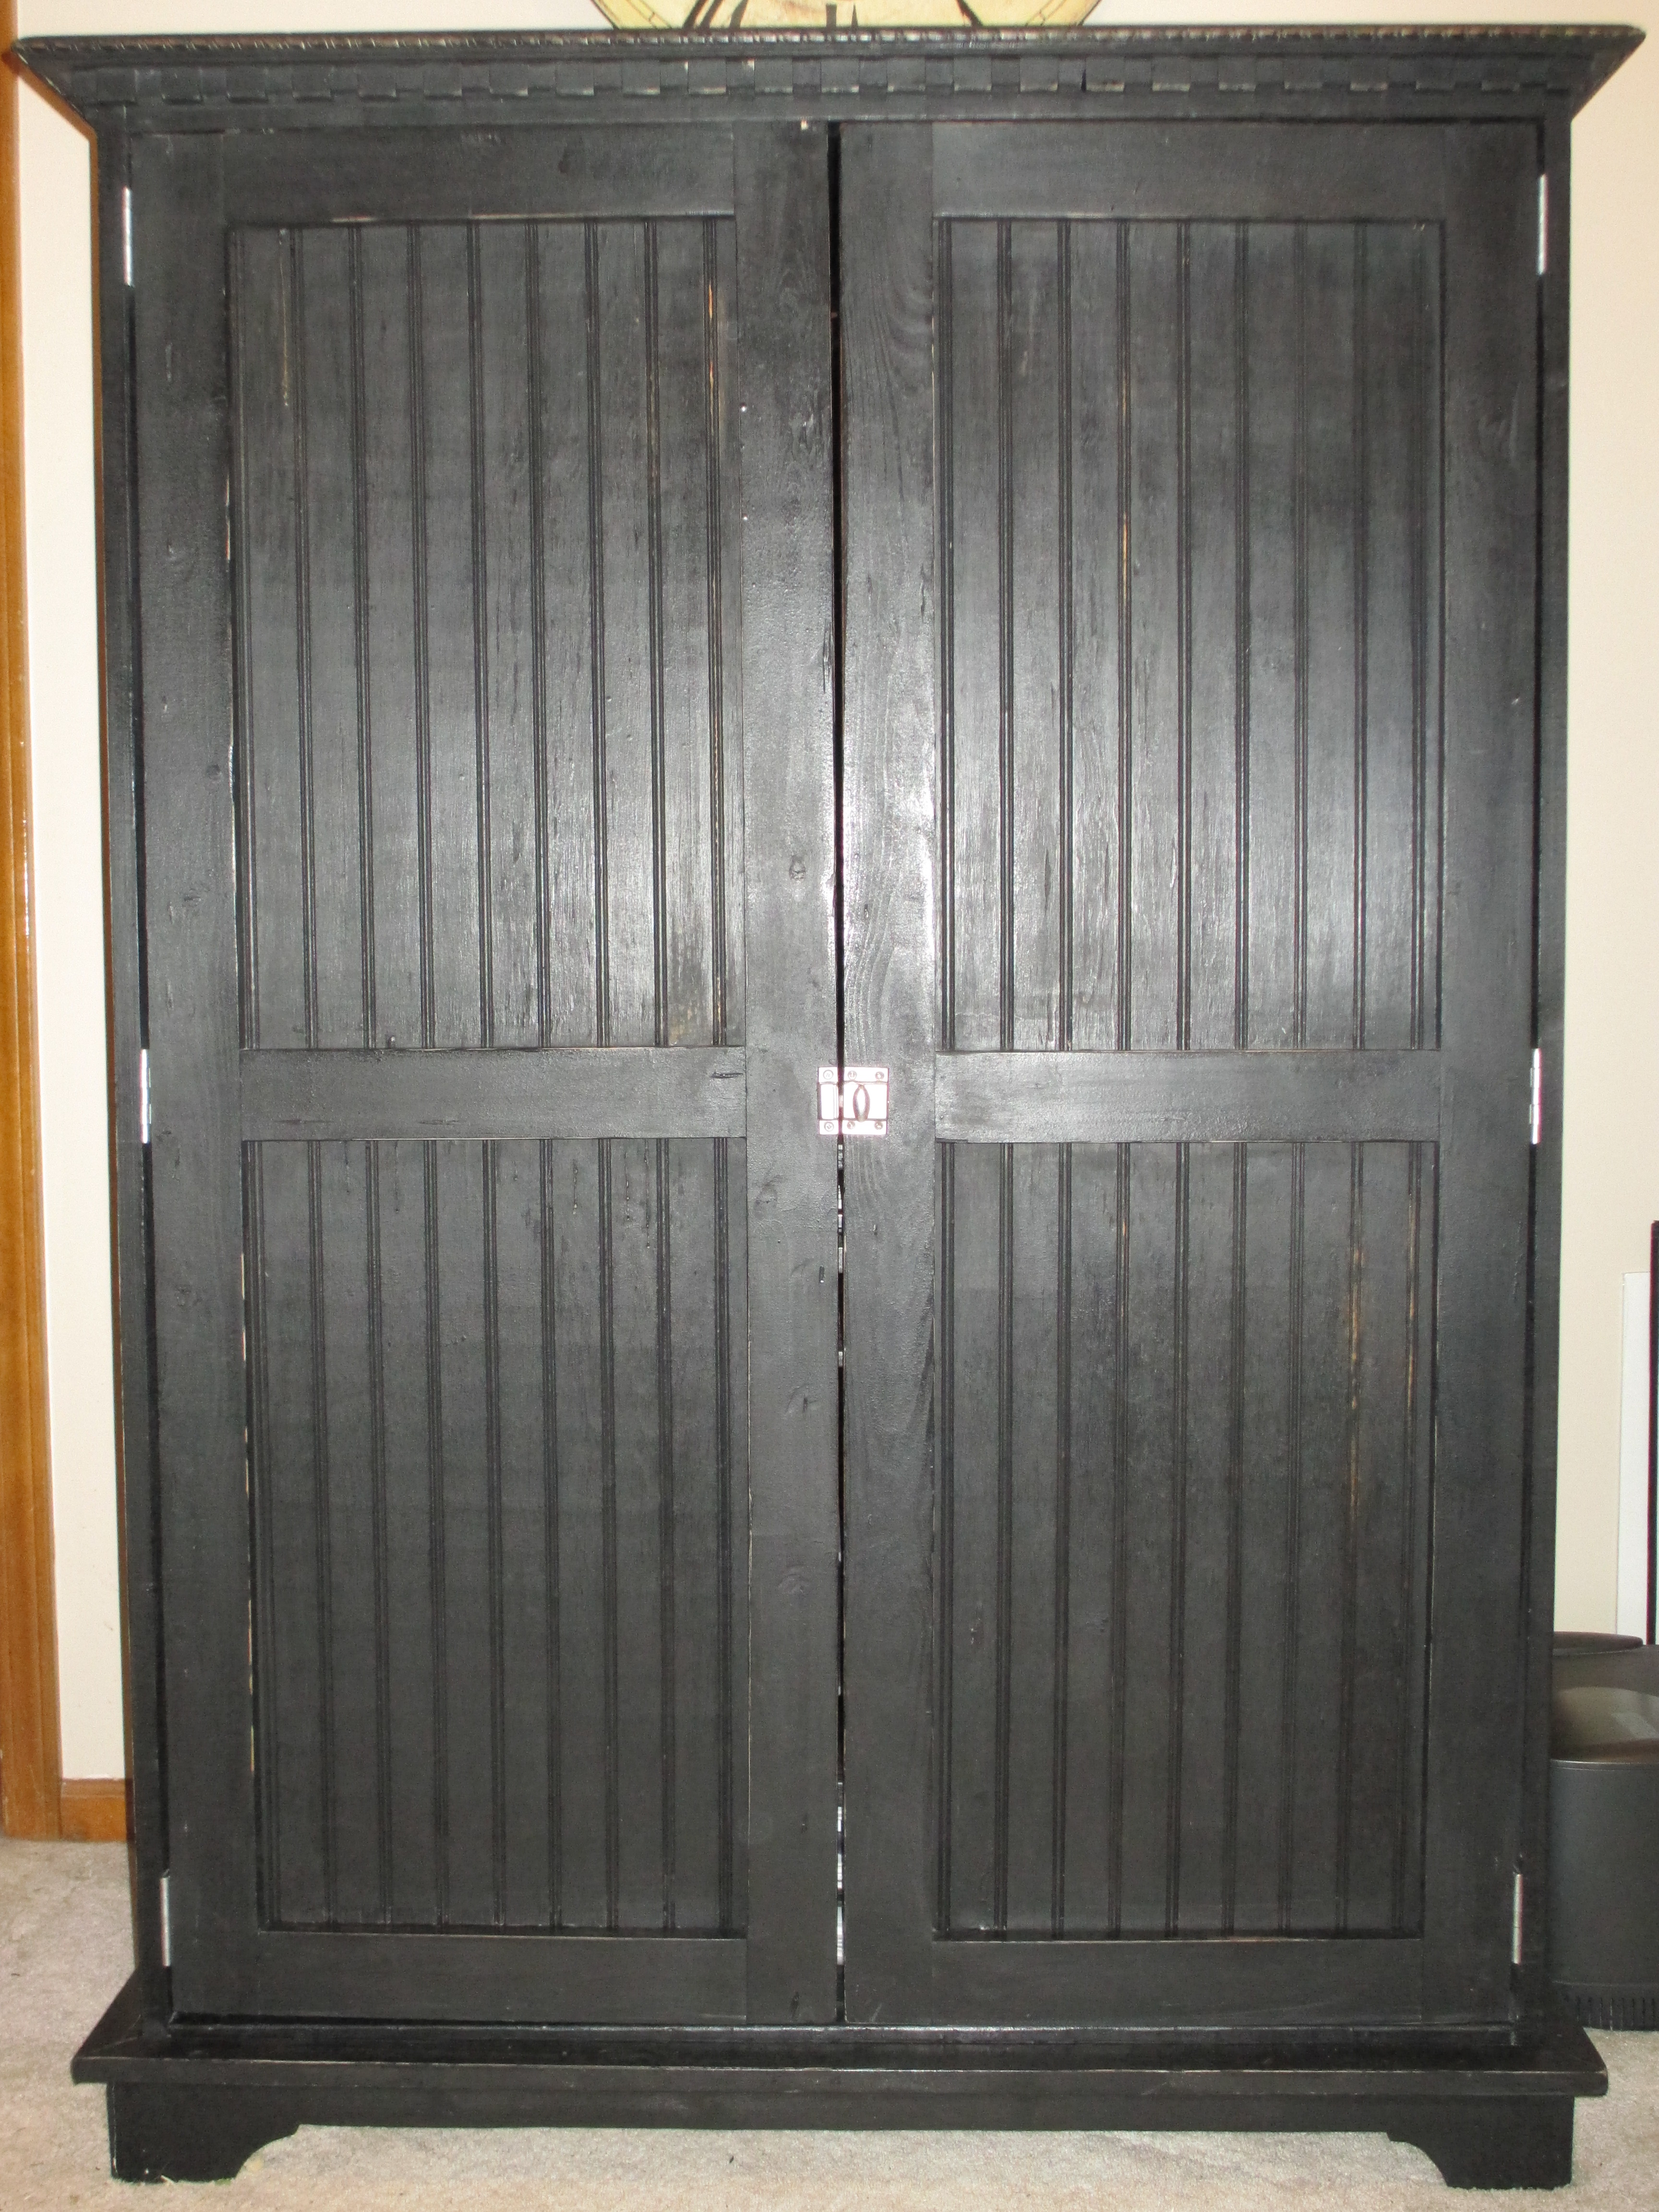
From these plans: http://ana-white.com/2013/05/plans/toy-or-tv-armoire
For my quilting business, I needed an office for the paperwork, etc. that comes with running a business. With no spare room for an office, I built this armoire to hold my computer, business papers, and the bags that contain my quilting samples, forms, etc.
On the inside, I used pegboard for the backing so the electrical equipment would have ventilation. I also thought I might be able to hang stuff from the pegboard as well. If I had to do it again, I would set up the keyboard slide and side drawers a little differently. I used scrap wood for that part. I should have just gotten another piece of 3/4 inch plywood and fixed it right, with pocket holes. I'd intended to put drawer pulls on the drawers, but the doors hit the drawers when they close. So, I will need to cut some holes in the drawers to use as pulls.
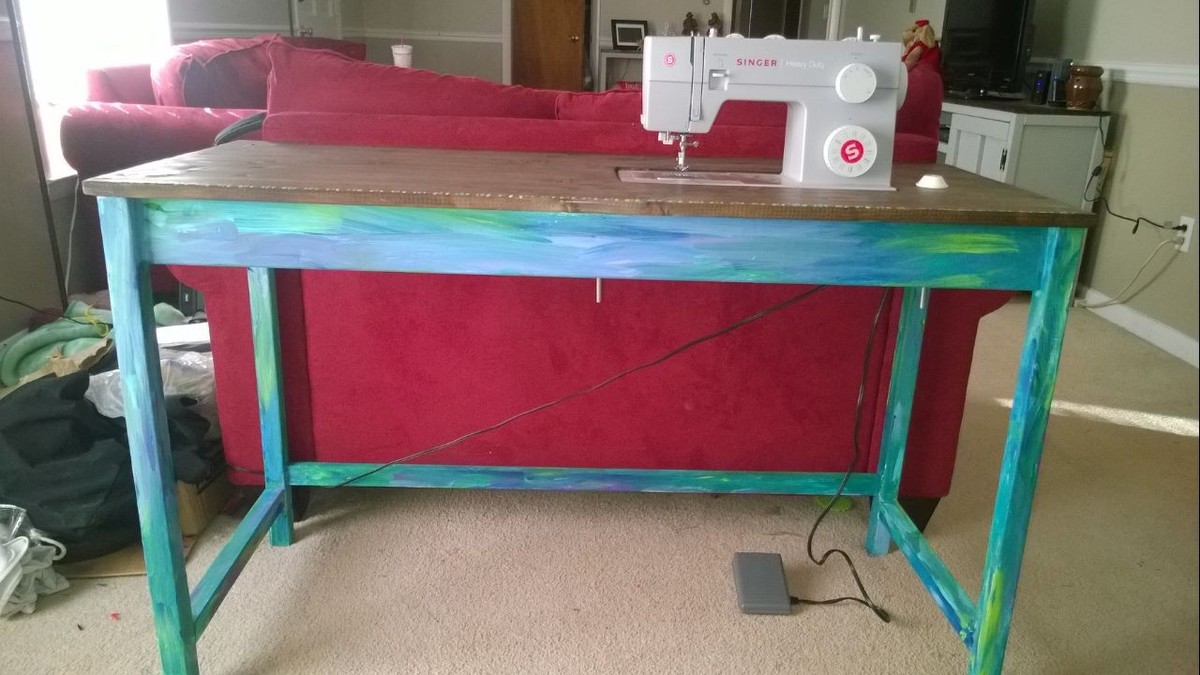
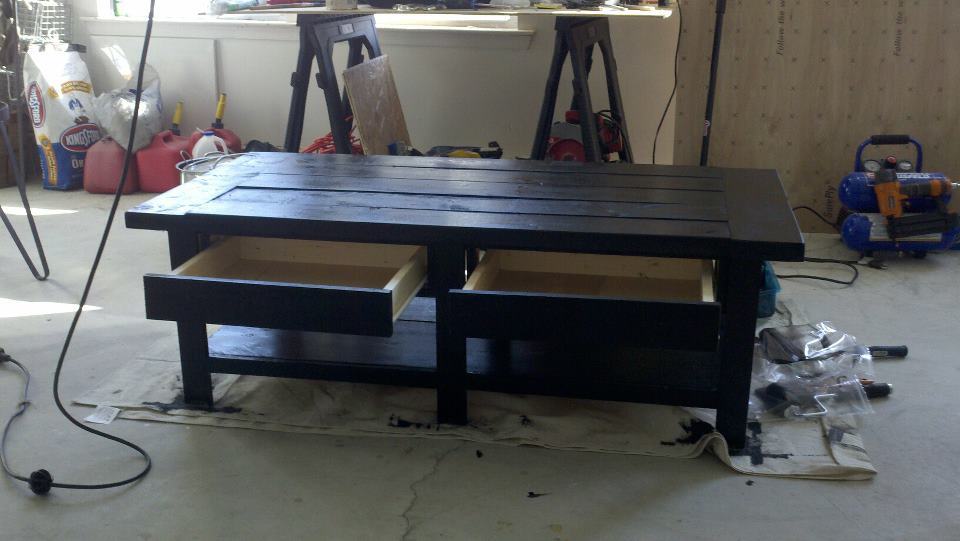
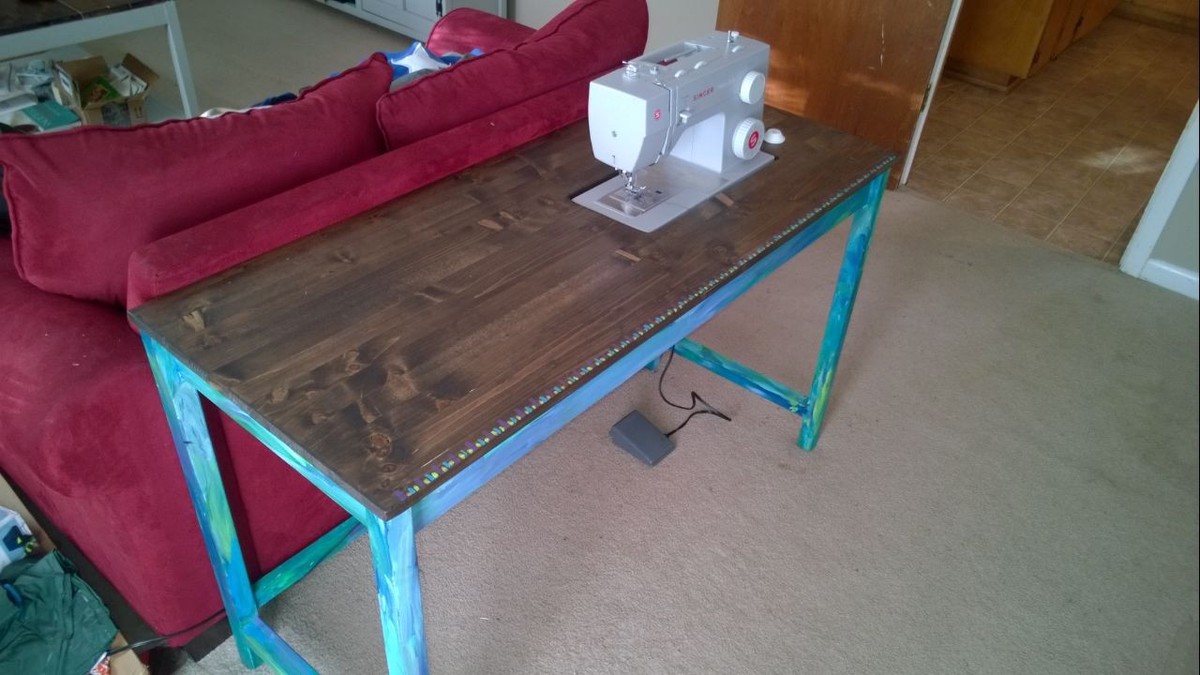
Sewing tables are quite expensive, the cheapest I've seen was about $160. I decided to make one myself. I spent about $30 for all the wood, bolts, and nuts that I used to make it.
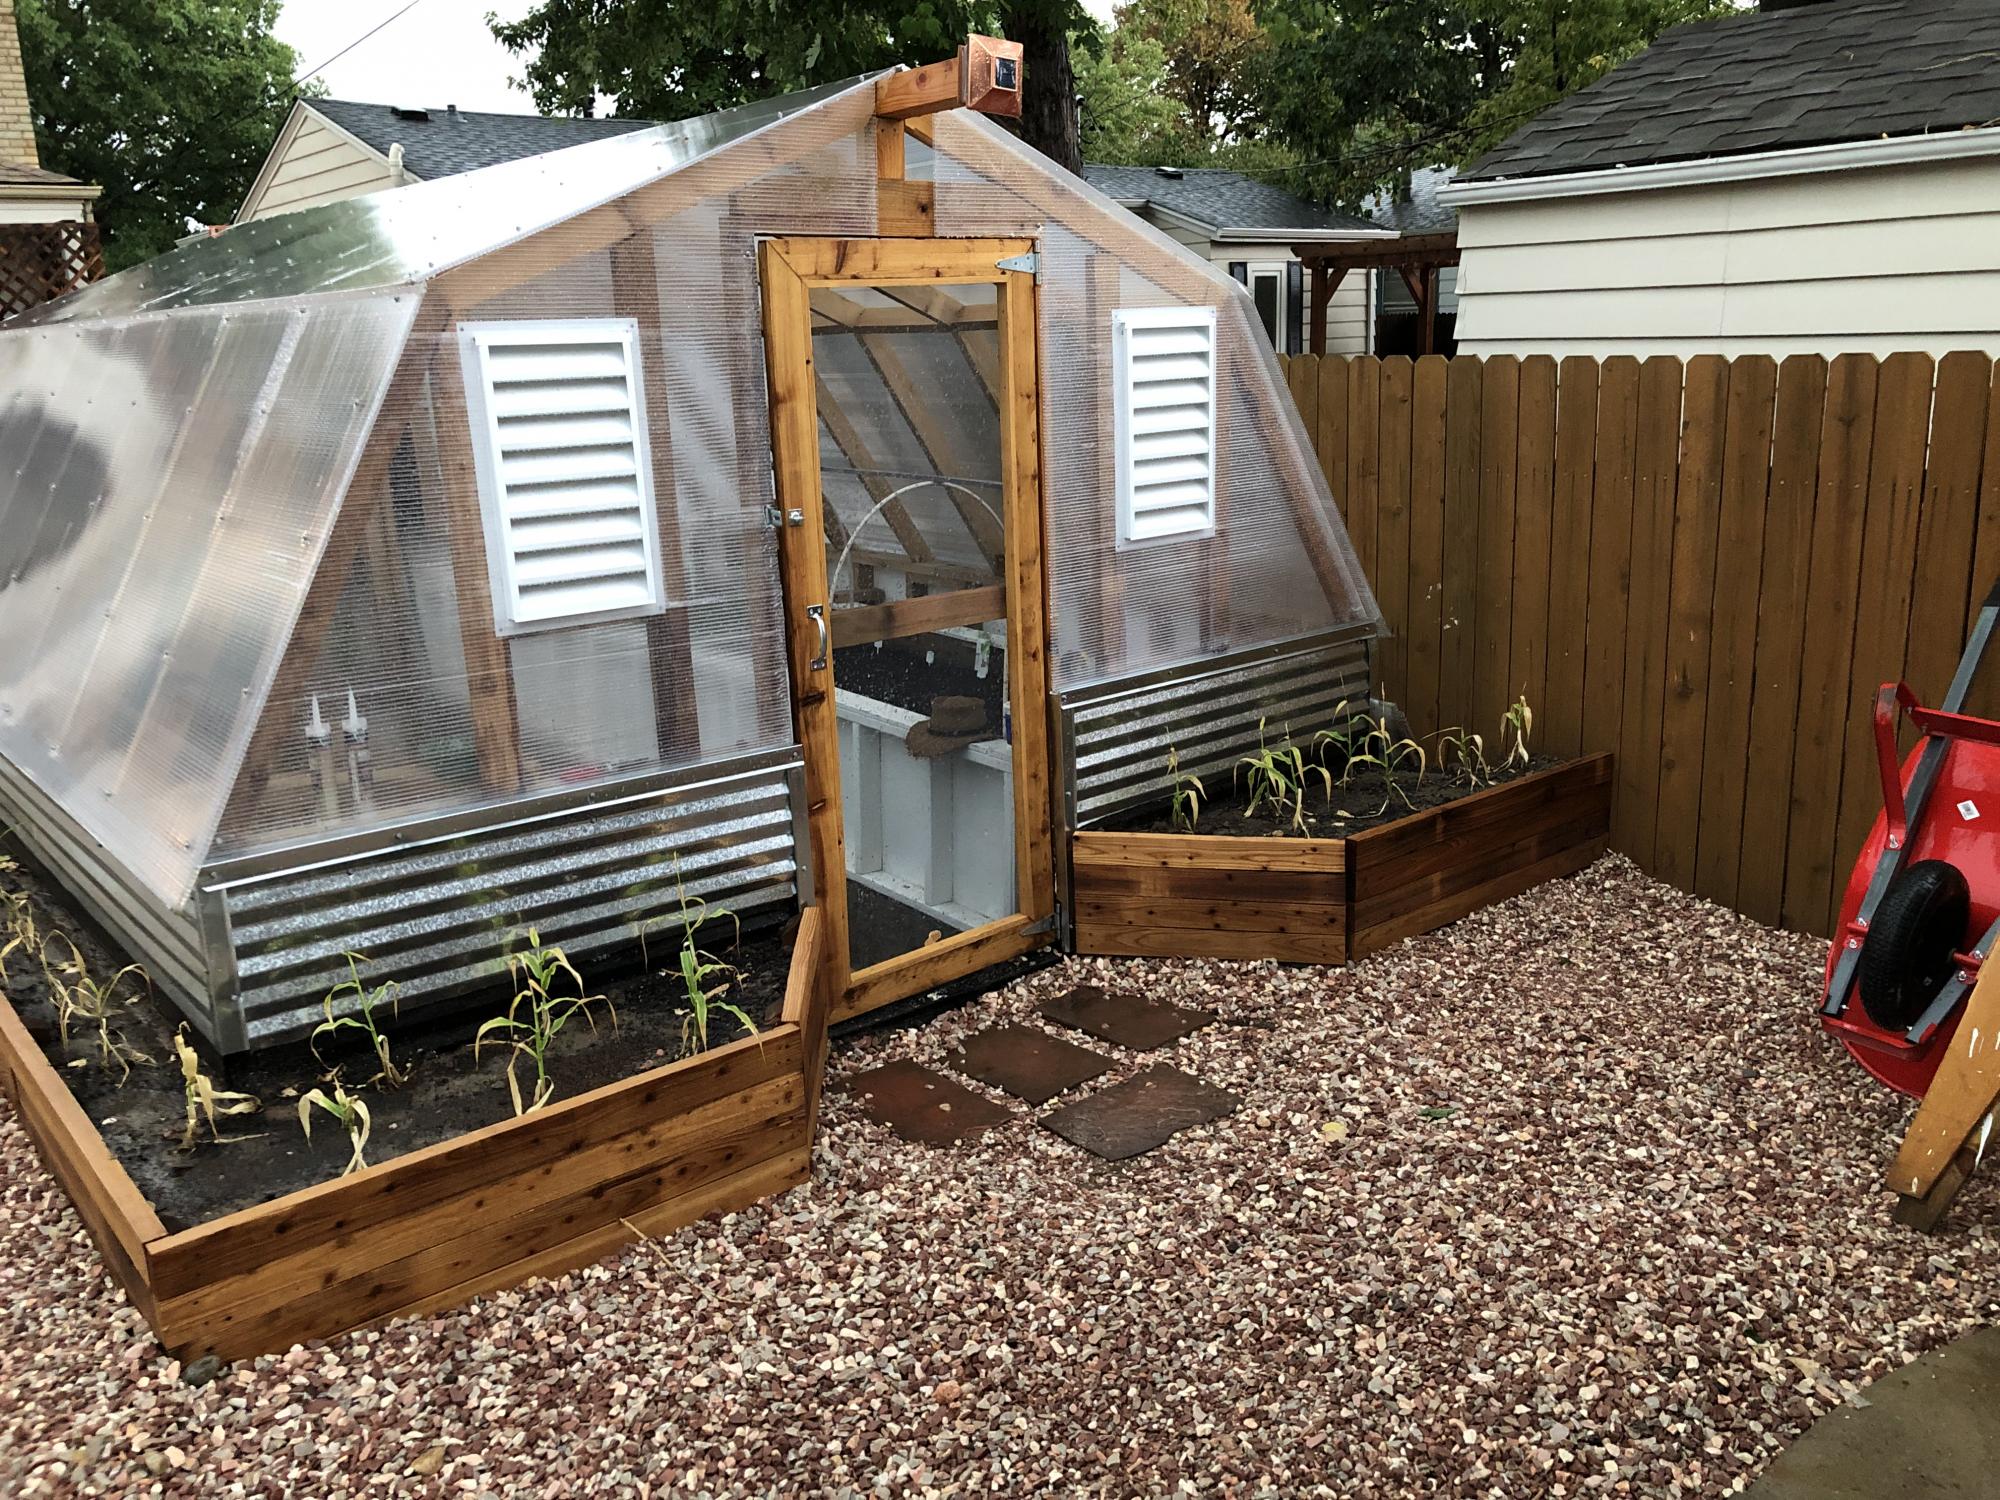
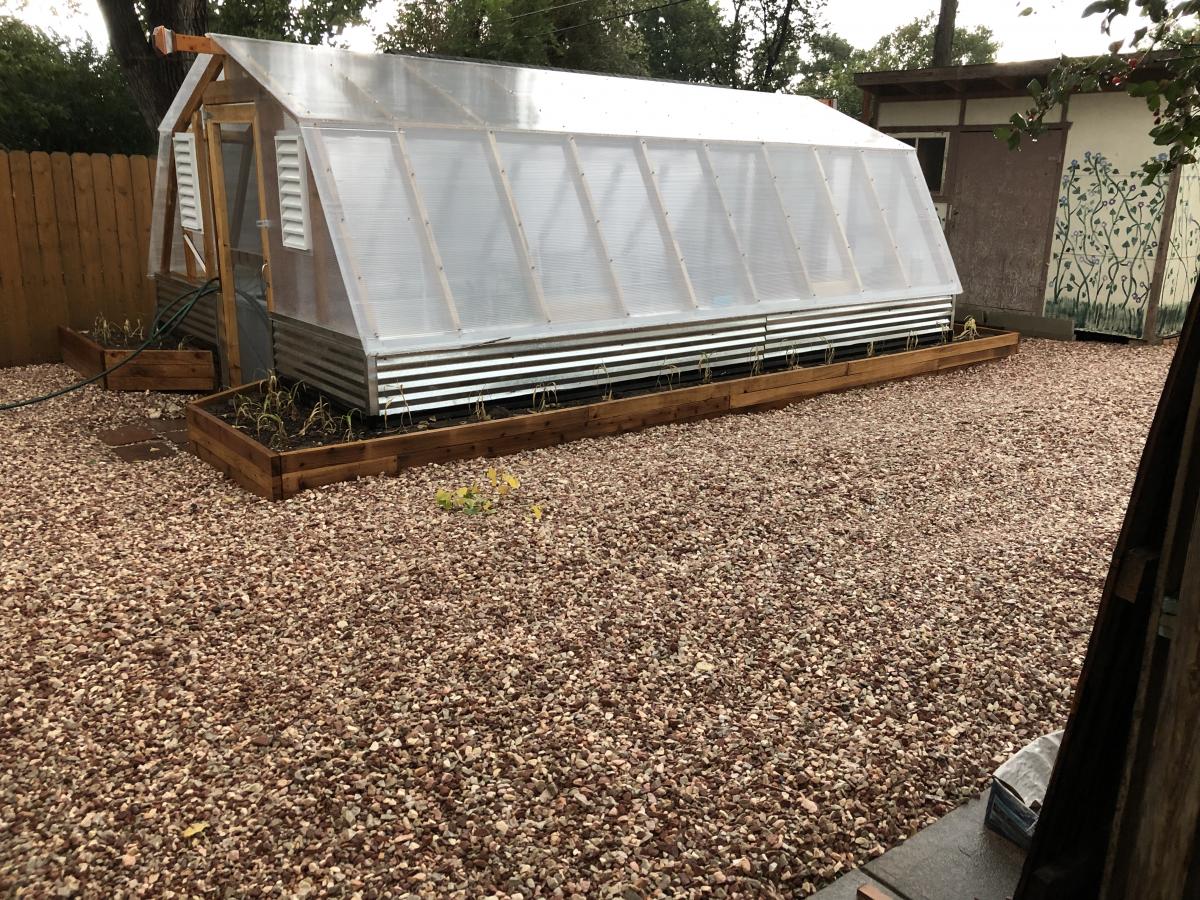
My Annawhite design with geothermal improvements. It will also have a 1000 gallon Aquaponics system inside!

Basically the same idea, I added doors with antique hardware.
Don H.
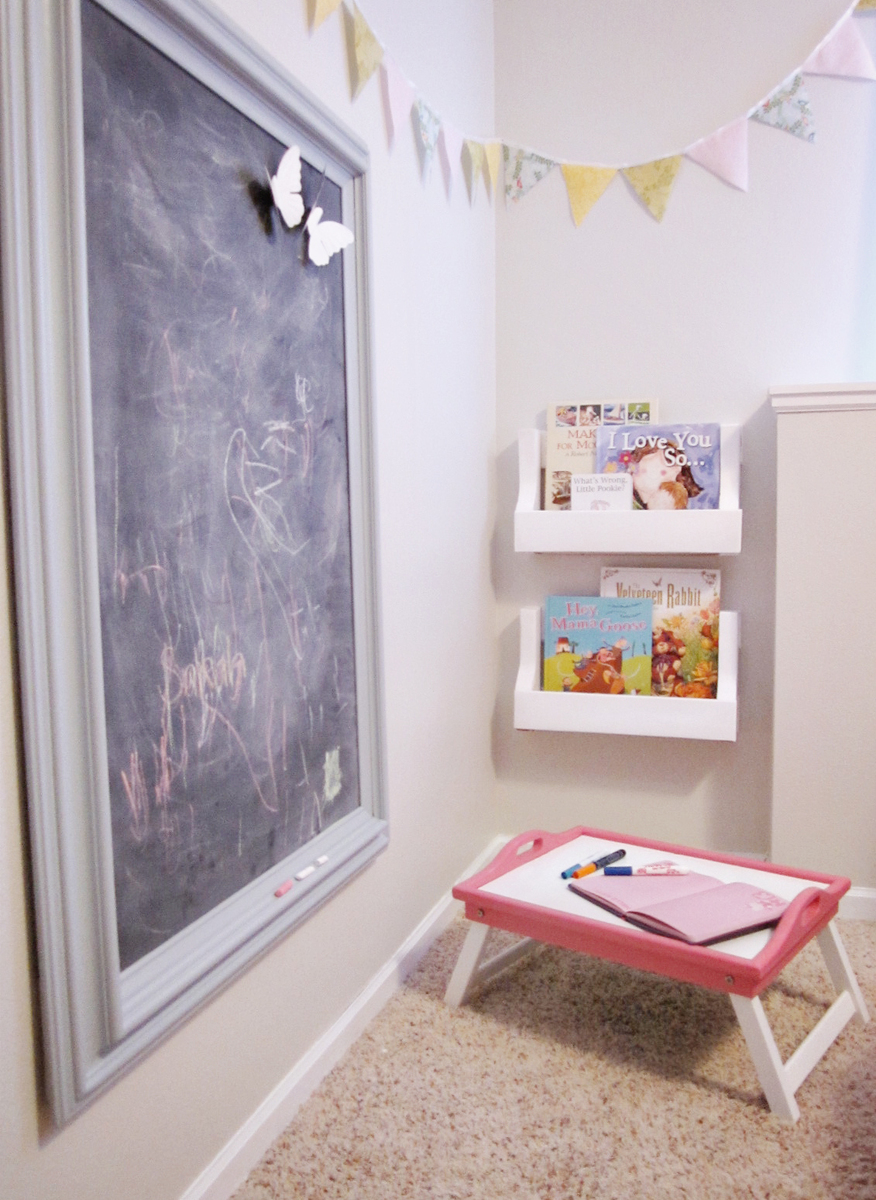
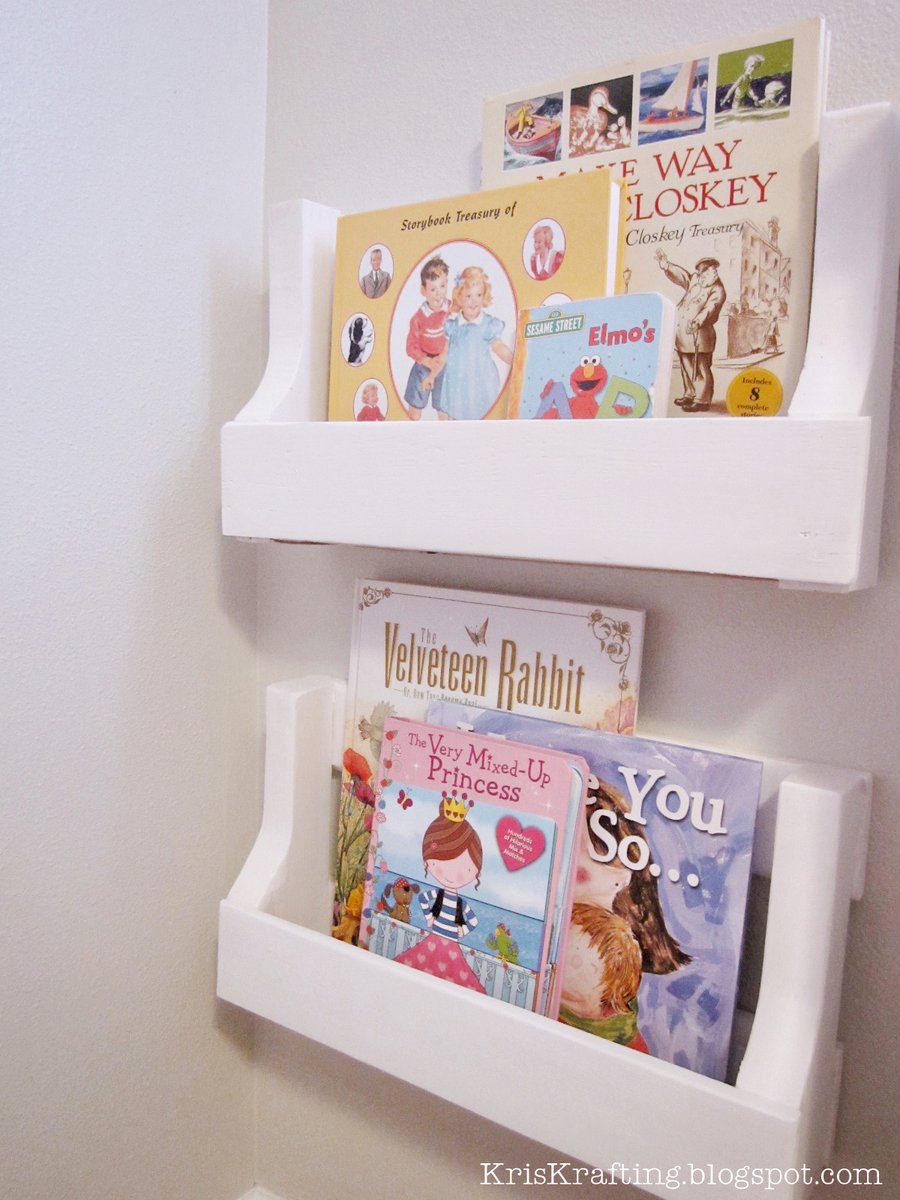
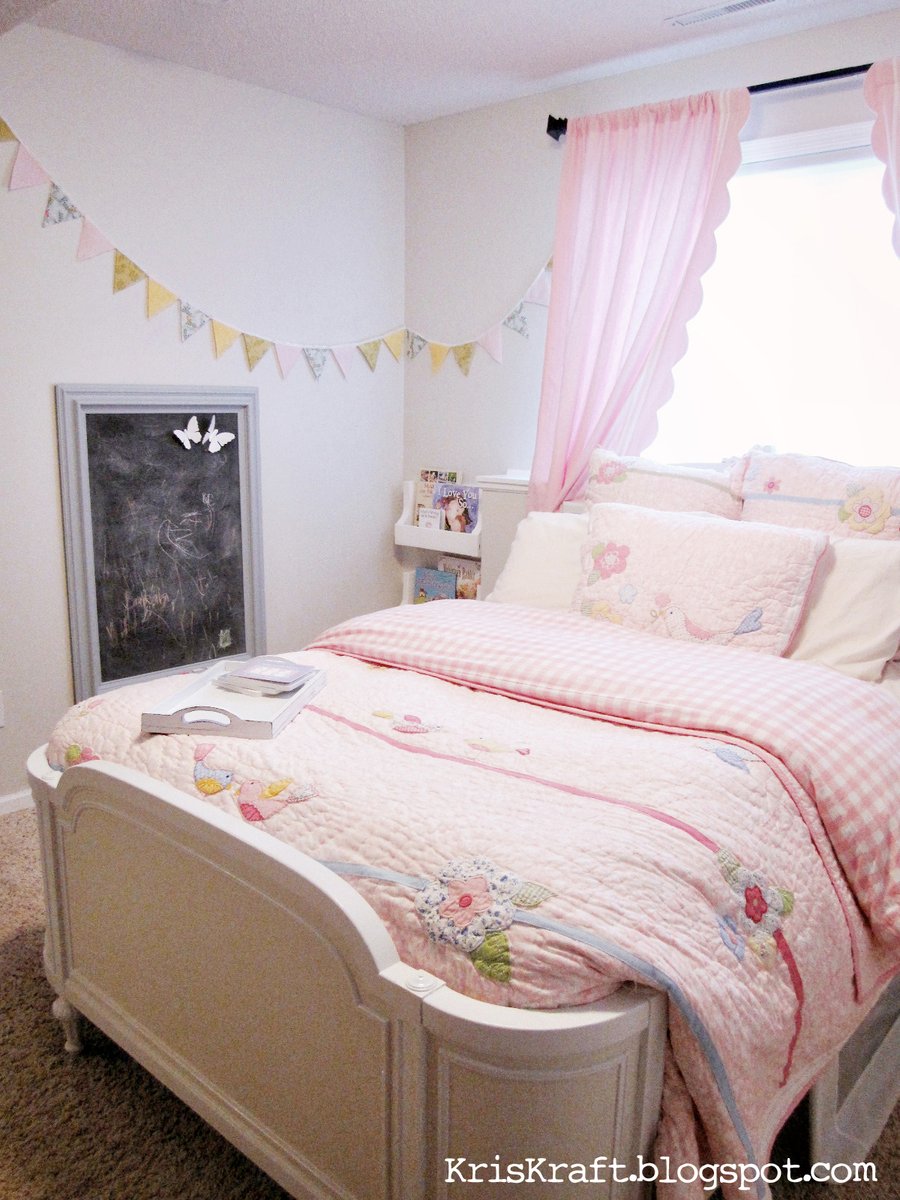
My daughter's room has a strange little cut-out section in one of its corners. We debated for a while over how to make it look like it's supposed to be there. After discussing all of our options, I remembered that we had a wood pallet in our garage. I also remembered seeing a great plan on Ana White's website for a book shelf made from a pallet, so I decided to give it a try. Fortunately cutting the pallet down in half made it the perfect size for this corner. Sarah loves books and drawing, so it makes a perfect little reading/art area. I love how it turned out, especially since it was FREE!

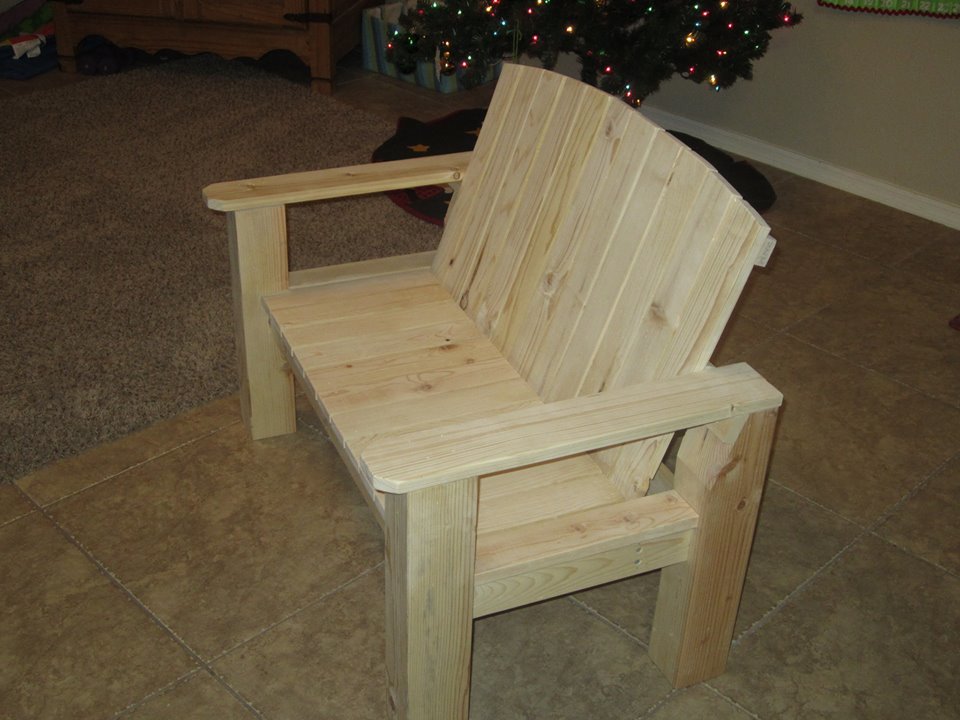
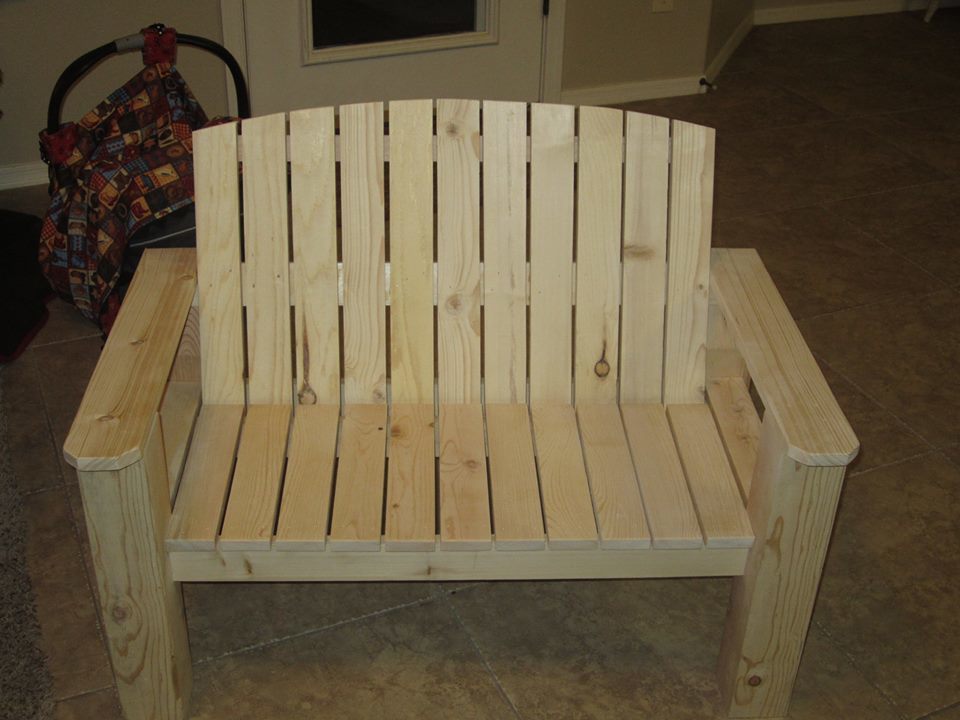
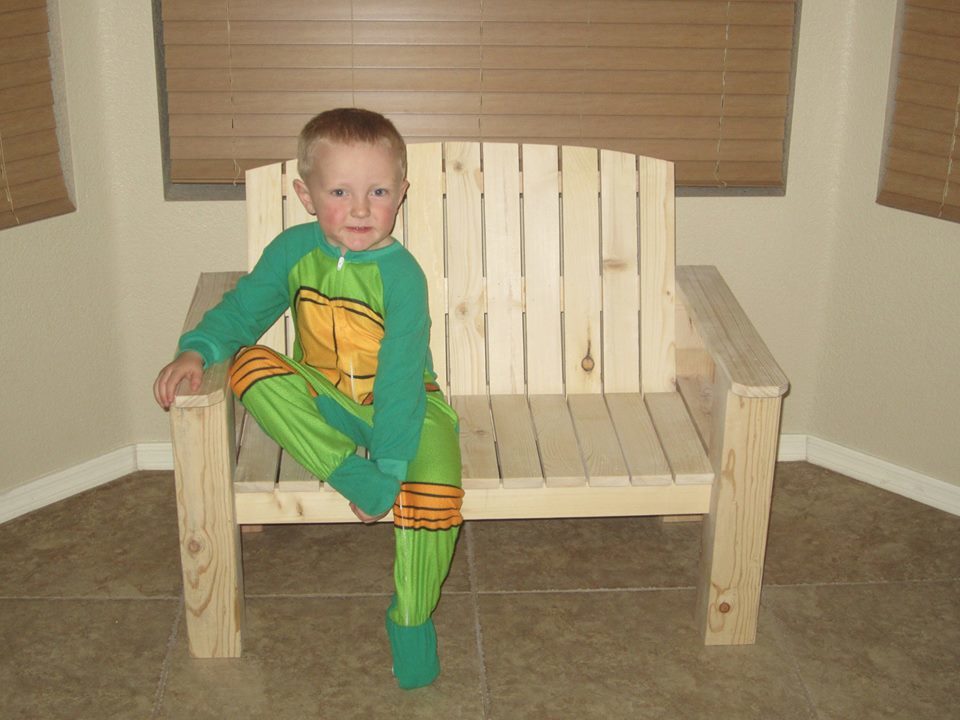
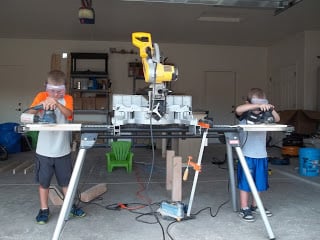
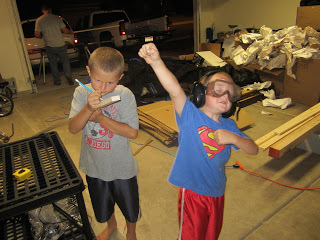
In getting my boys (ages 8, 5, and 3) started in woodworking, I decided to try this bench. We had a ton of fun building it together.
As you can see, I beefed it up a lot - using 4x4's for legs and recessing the frame into the legs themselves. The boys did all of the sanding and assembling and 80-90% of the cutting. I was just there as training wheels. It took much longer to build with the 4 of us than if I had done it myself. I estimate I could have done this in 3-4 hours. Group effort made it about 20-22 hours.
My 5 year old was the one who campaigned for the arched backrest. I think that they did a great job, and just wanted to share.
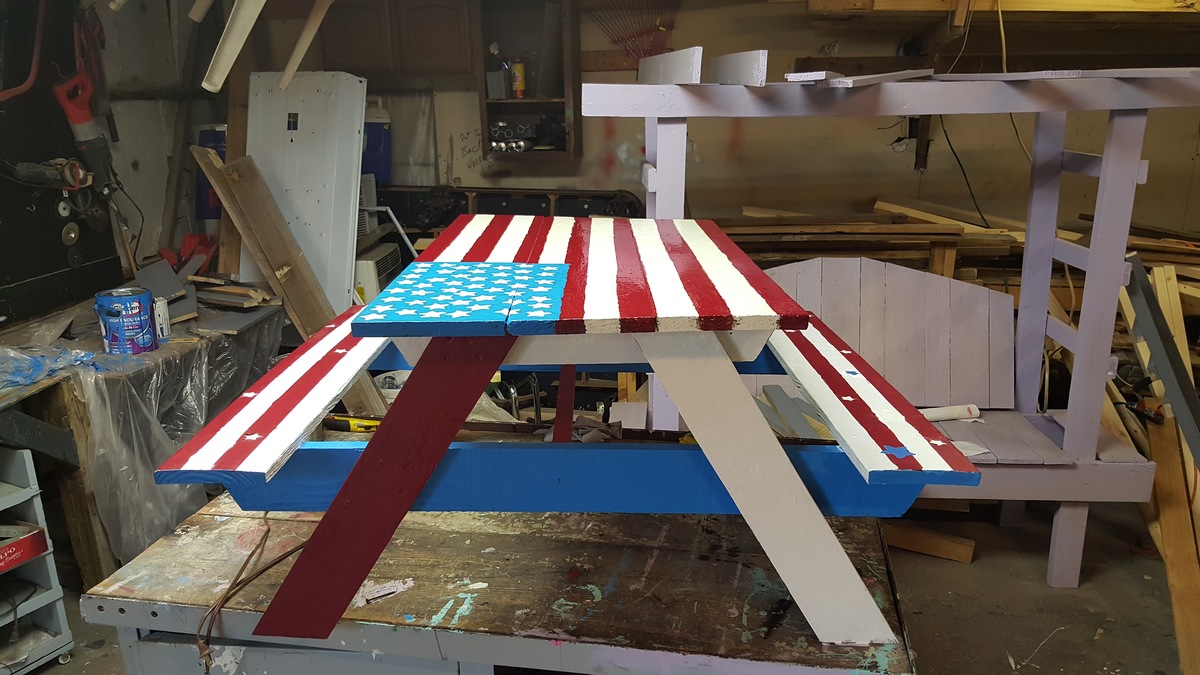
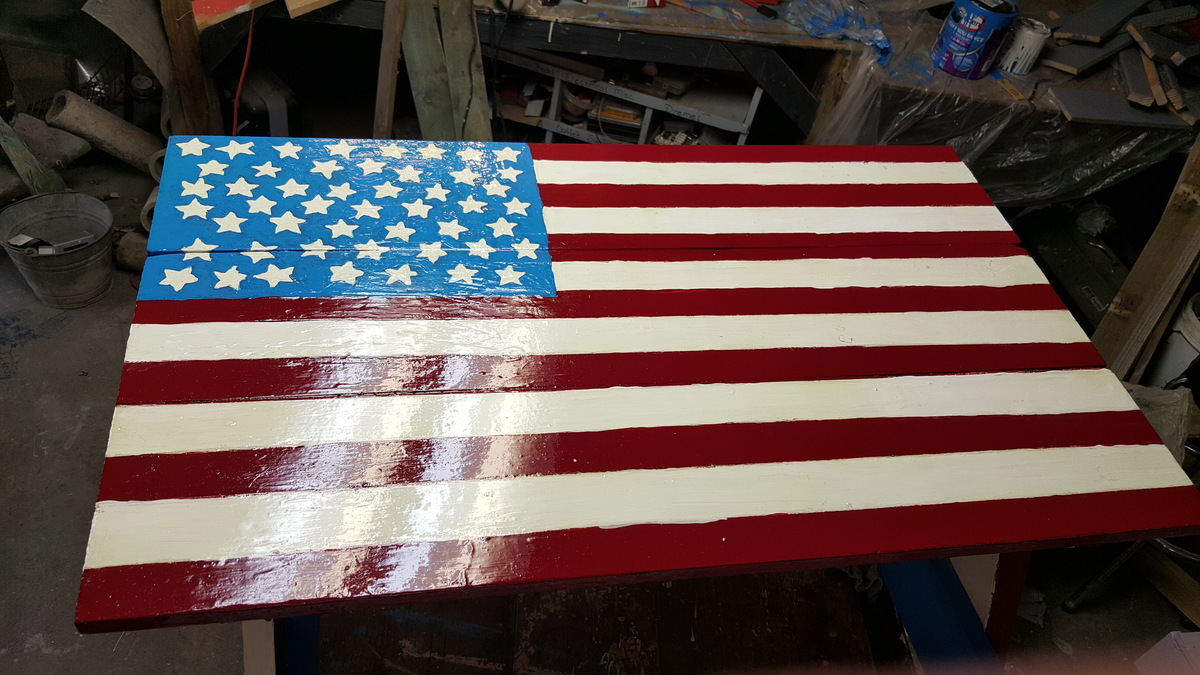
A lot of detail and time spent in painting this, but I am very happy with how it turned out. I used wider boards for the top to accommodate the hand drawn and painted flag. So glad that it is finally done!
This was a great set of plans...easy to follow and everything was available from the local home improvement store. I appreciate the time and effort that you all put in to making the plans easy to follow.
Fun project!
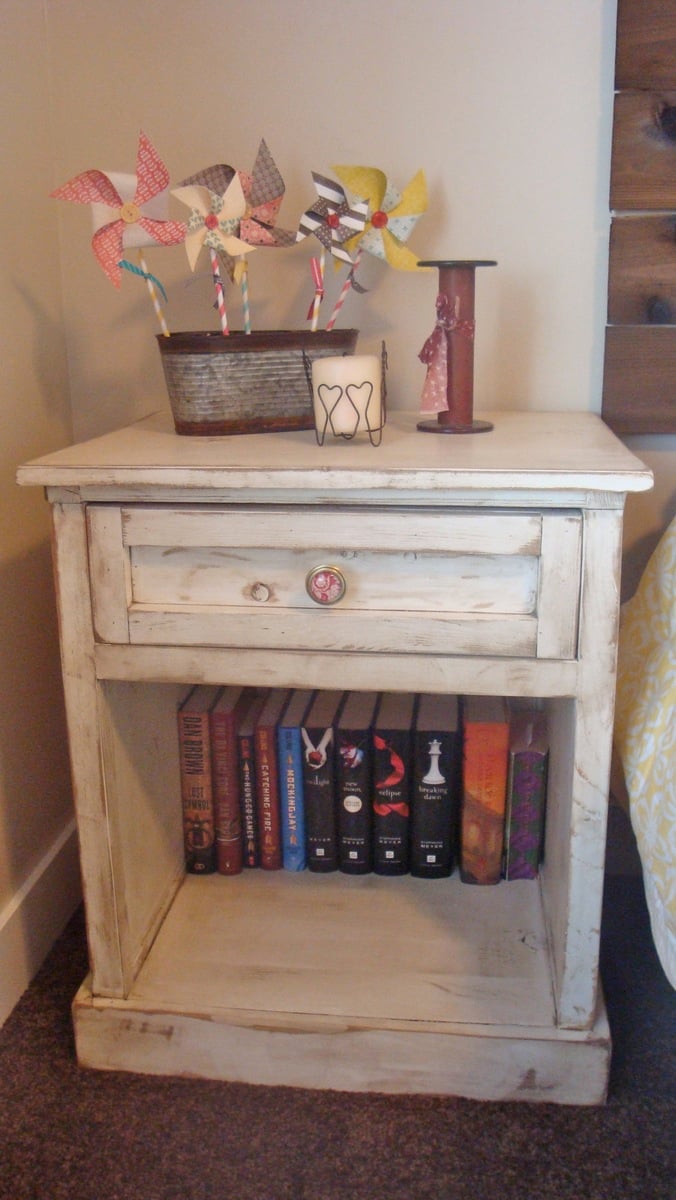
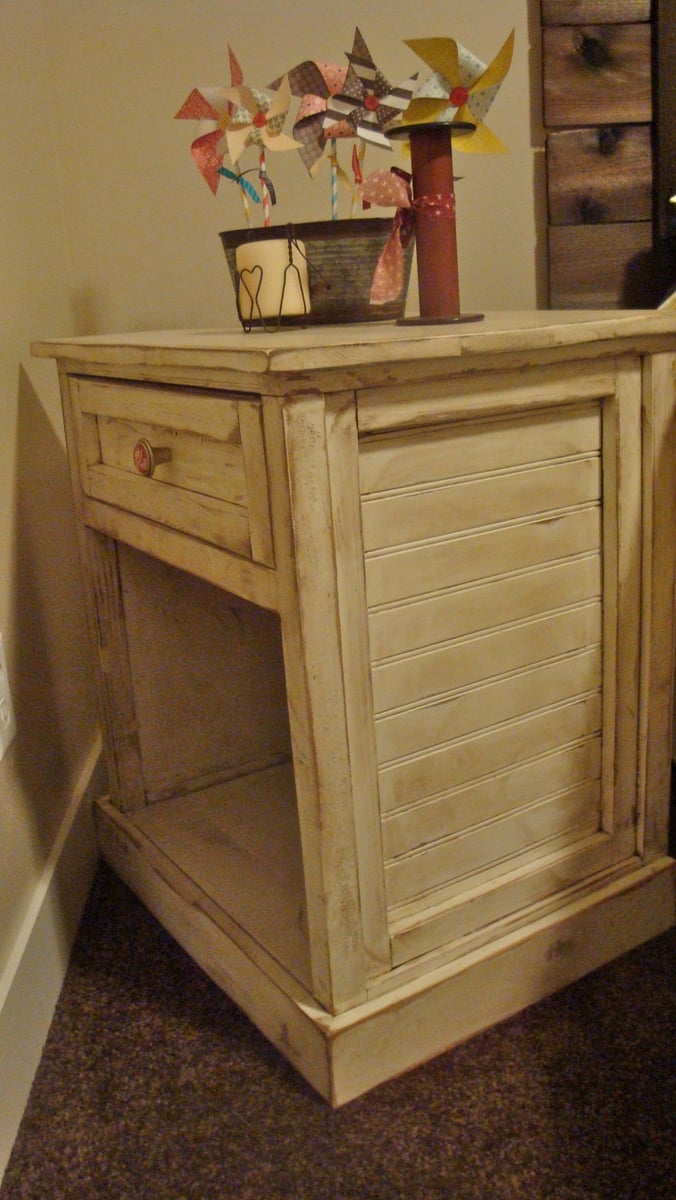
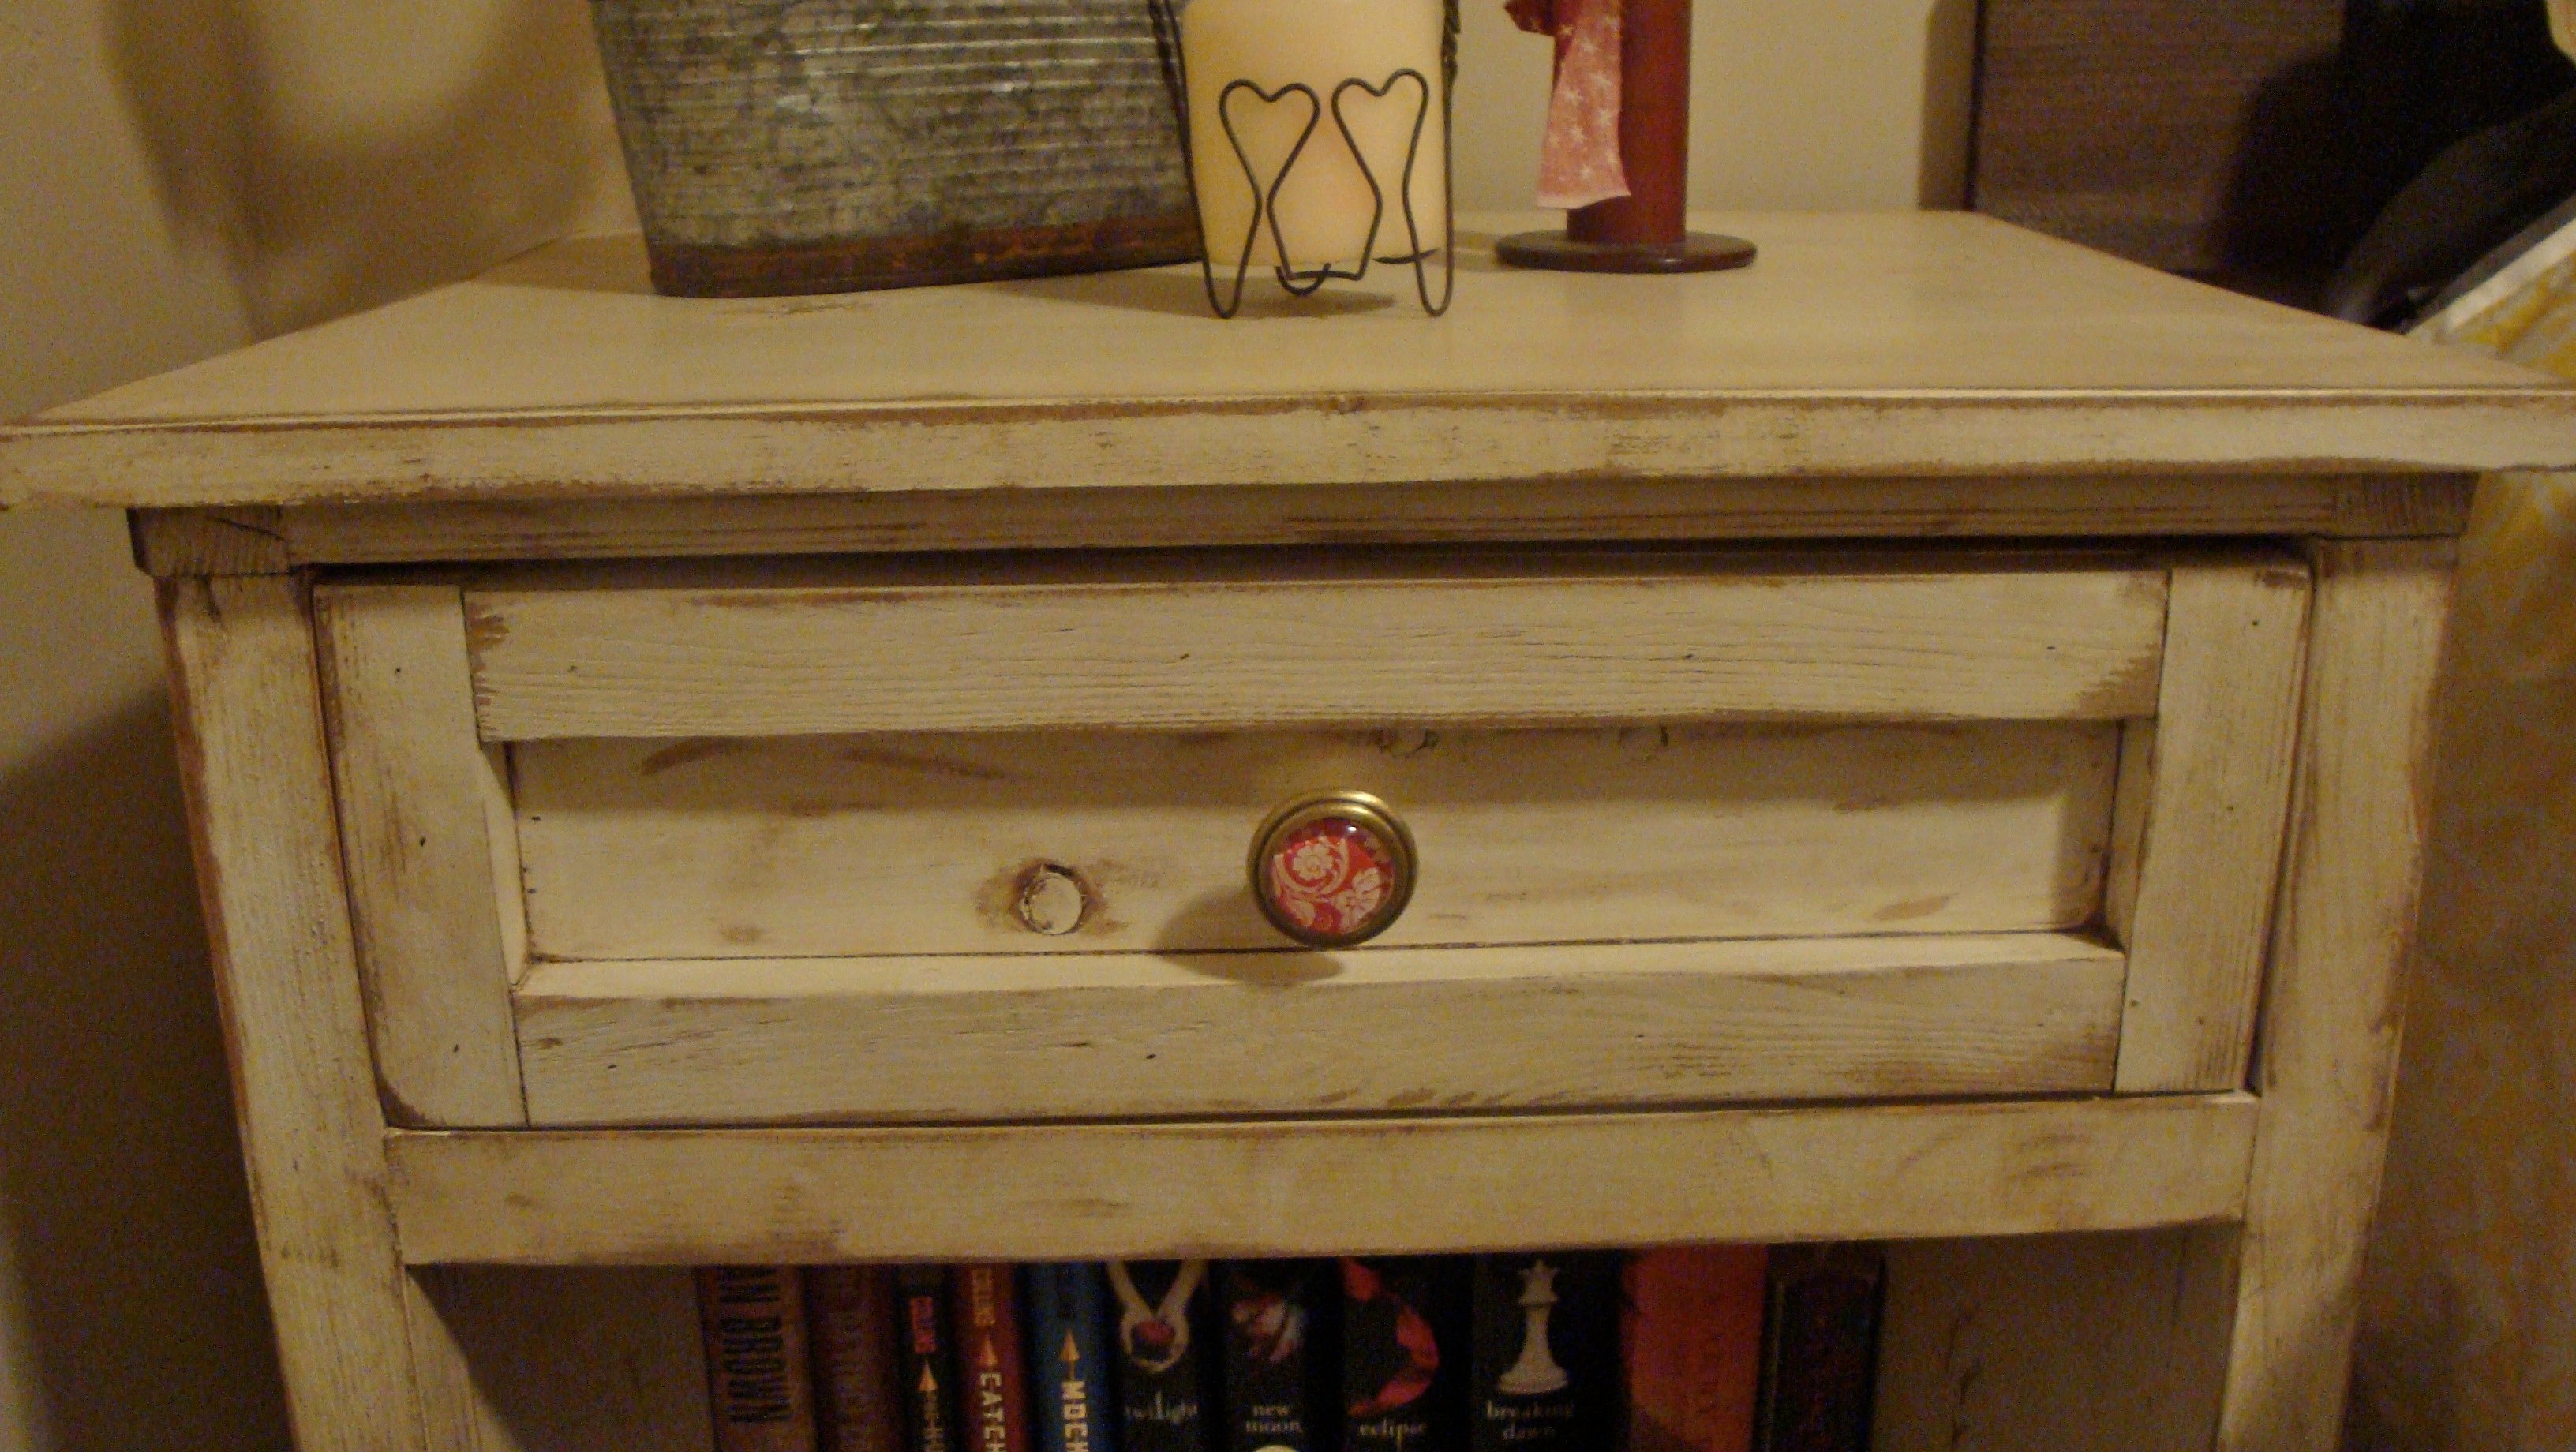
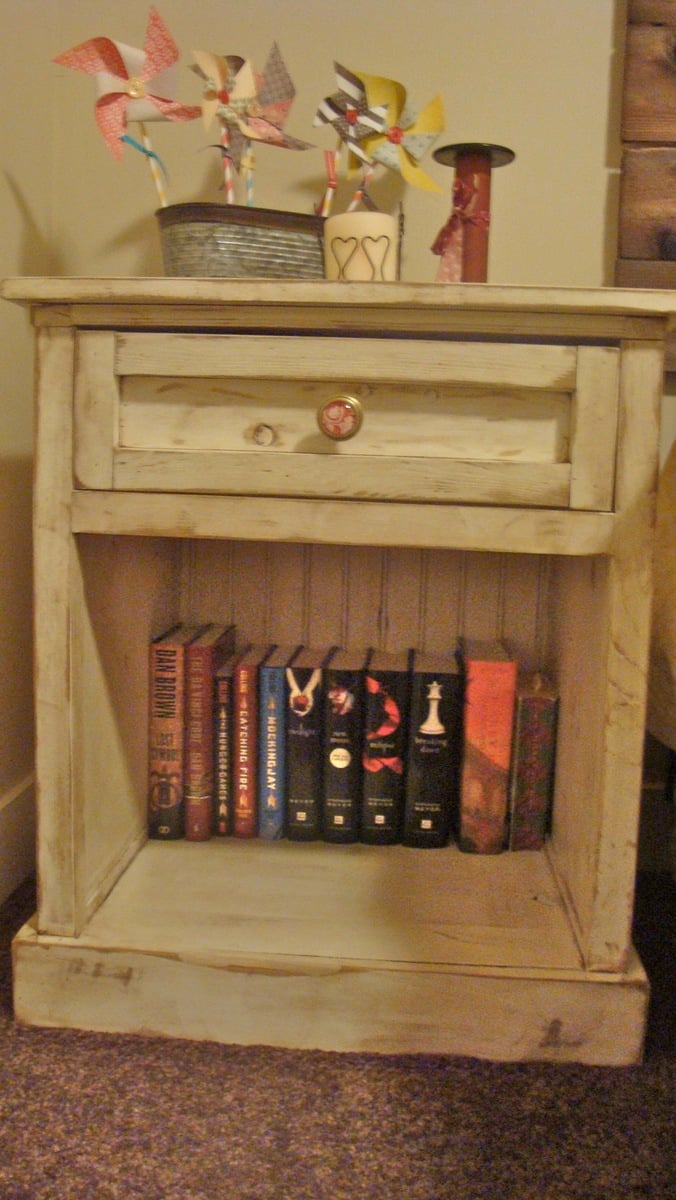
This was my first attempt at doing a project with a drawer. It definitely took time to make sure everything was level so that the drawer would side in and out smoothly. You can't see see it in these pictures but I used bead board in place of the plywood on the back and on the sides. I also used 1x8s glued and screwed together instead of the 3/4" plywood. I can't take credit for the finish on the project though. My wife is the one in charge of making my projects look great. She's the one that did the fun antiqued finish on the side table.
Wed, 02/29/2012 - 19:22
Anyway,your works Your work is very interesting, I am sure.Waiting for more of your new works, you are very popular.
Wed, 02/29/2012 - 19:26
Anyway,your works Your work is very interesting, I am sure.Waiting for more of your new works, you are very popular.
Thu, 03/08/2012 - 23:48
I enjoyed these consultation and expression onward to greasing one's palms and showing the hold. In that respect nonentity of more than worldwide sake that elevating youngsters! Devotes Pine Tree State more or less themes since emerging soundness programing.
Got the plans from this website and built the table for our family room!
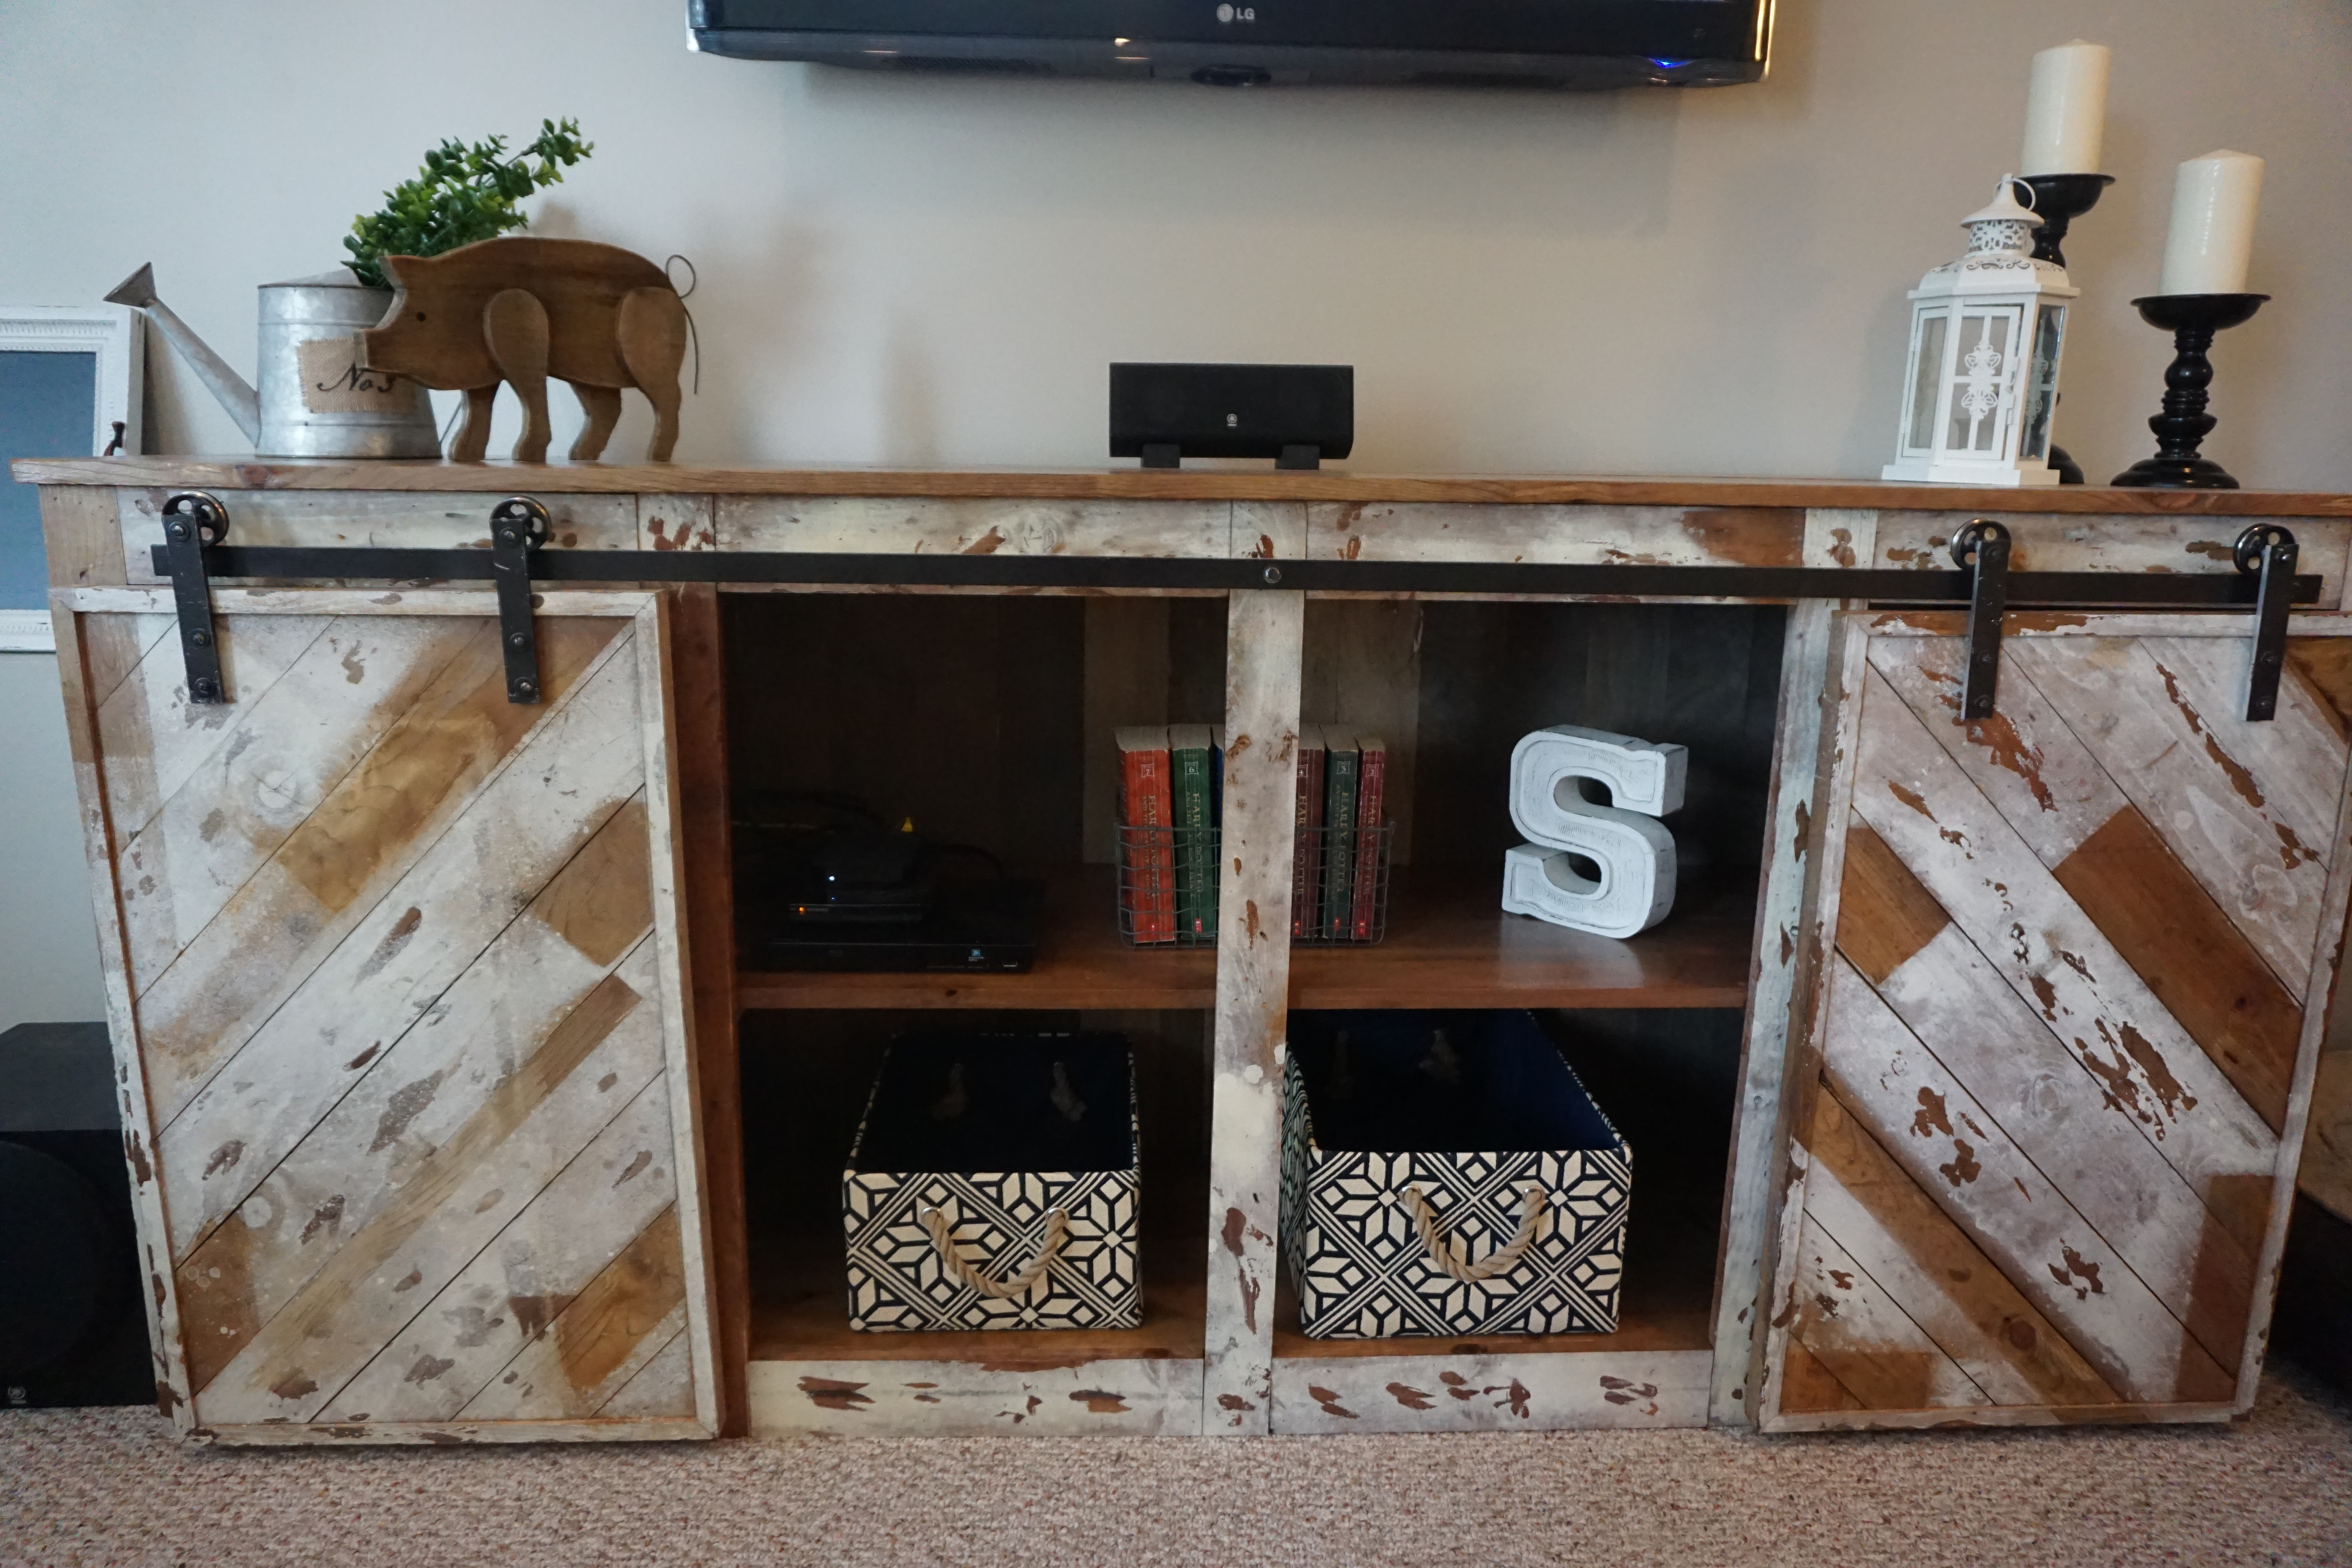
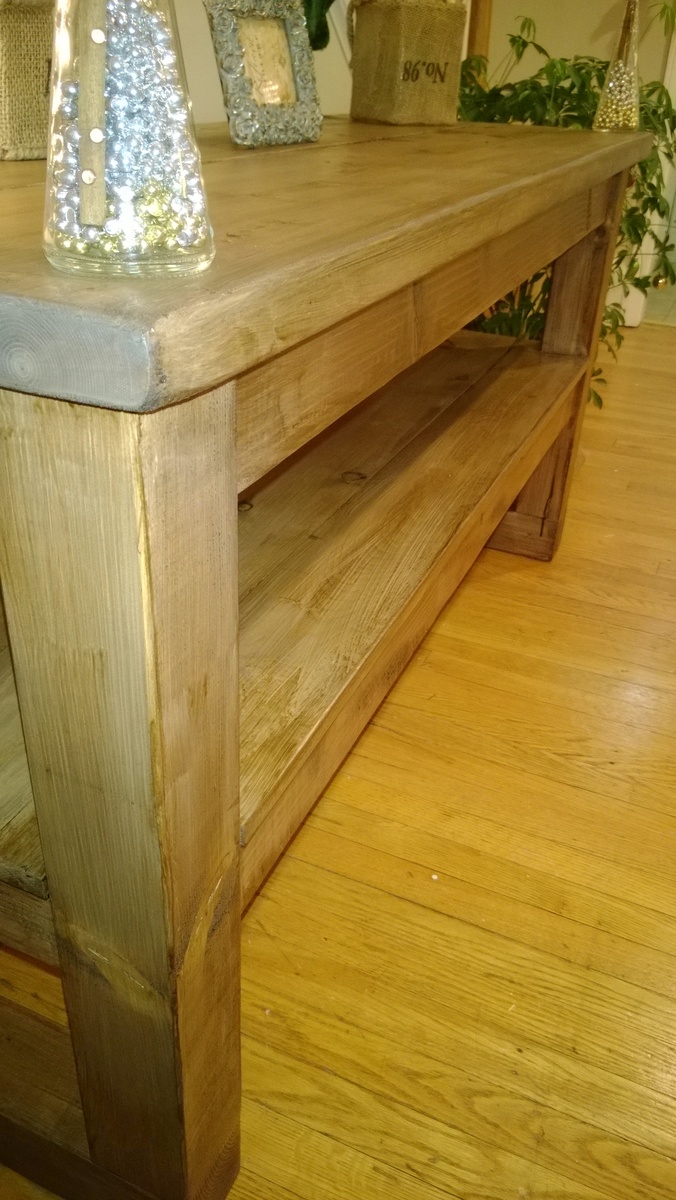
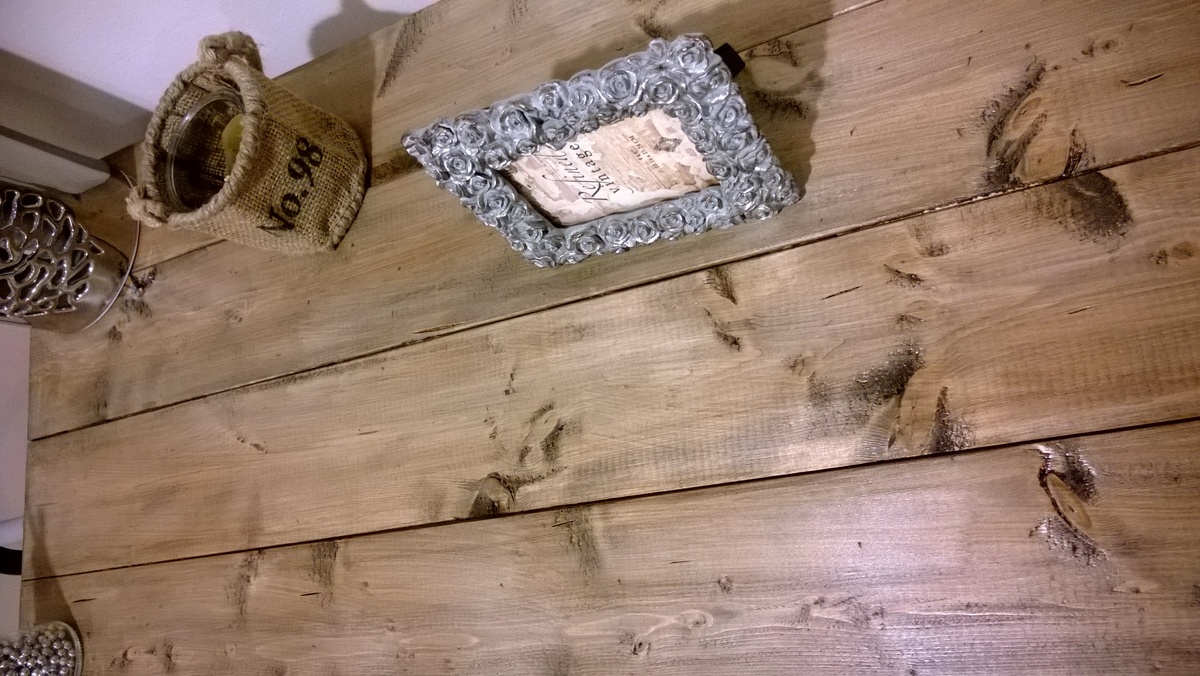
As always, we were super inspired by Ana White designs and wanted to tackle the media console project but add a little bit of our own farmhouse flare. This project was stained with apple cider & white cider vinegar and topped with ivory spray paint. Details are up on my blog, Sincerely the Smiths! Thanks for all your inspiring projects Ana White, we love getting to see all the awesome things you do!

Mon, 03/14/2016 - 21:29
This is so beautiful!!! Thank you so much for everything, I'm so honored that you use my plans and follow our projects. With much appreciation, Ana
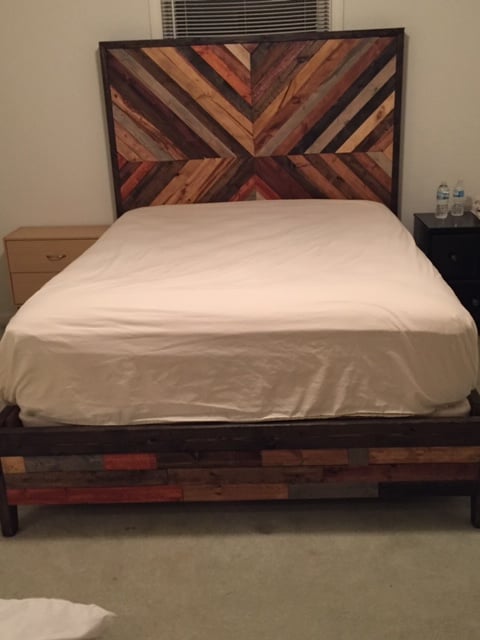
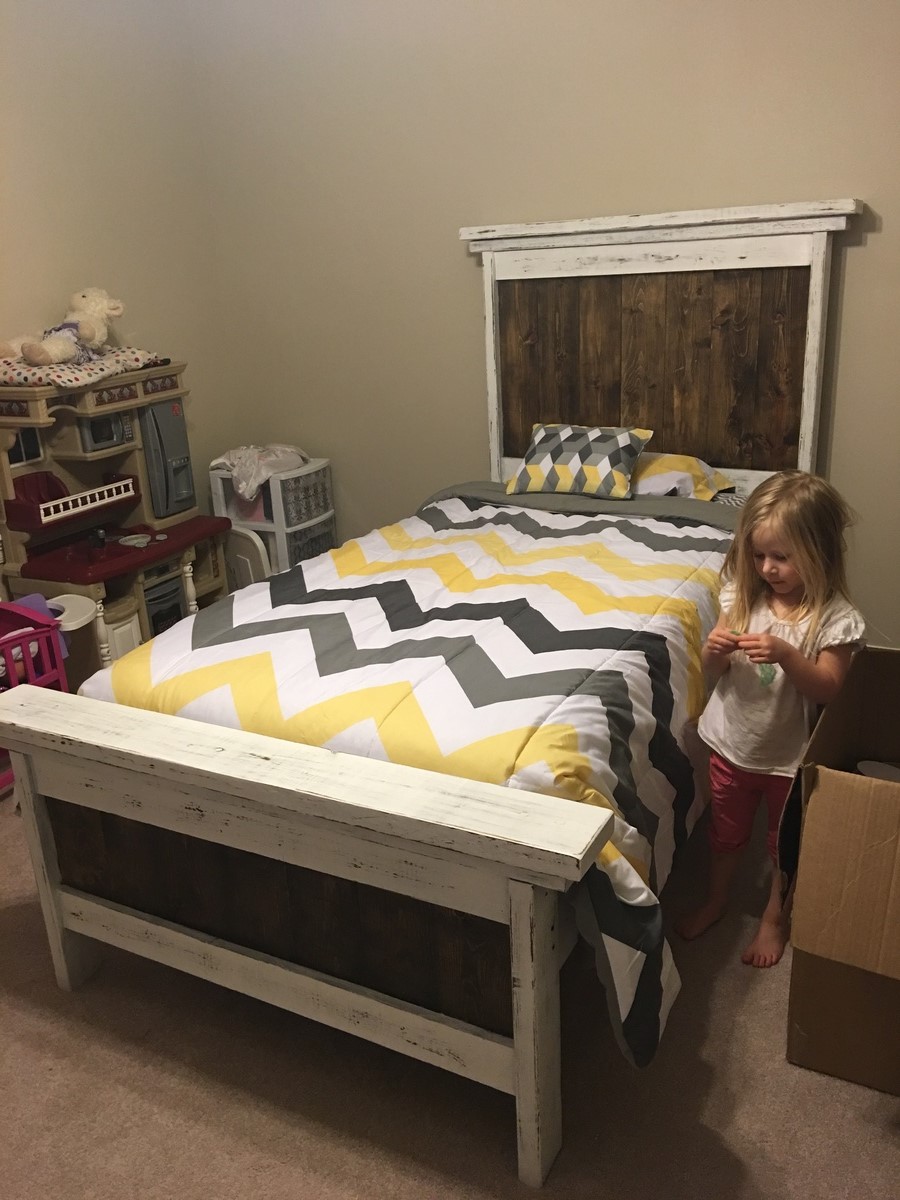
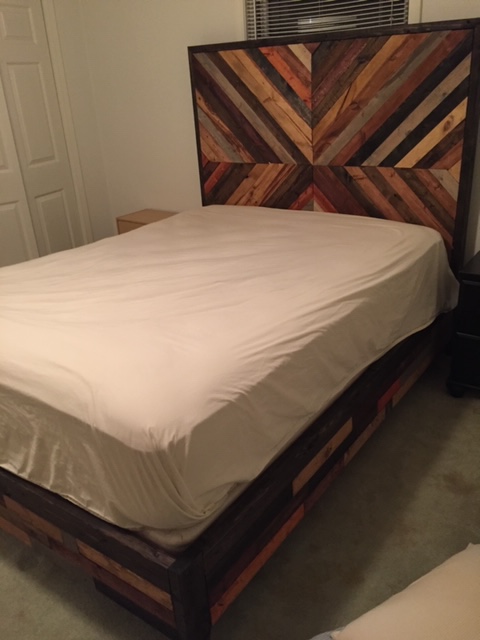
After going through tons and tons of different bed styles settled on this one because i LOVED the way the original image looked, though when it came to picking out stains I decided to do mine a bit differently! I like the look of multiple stains, it certainly allows for you to play with different wood stains on other bedroom furniture as well. This bed WEIGHS A TON, so we agreed that we will never move it unless its to the burn pile but I highly doubt that will ever happen because its incredibly sturdy! Also - Thanks Ana White family, this build introduced me to my kregg jig and it is by far my very favorite tool now!
I am slowly adding things to dress up the outside of my home. This was a fun project to do, many thanks for the plans!
Renae G
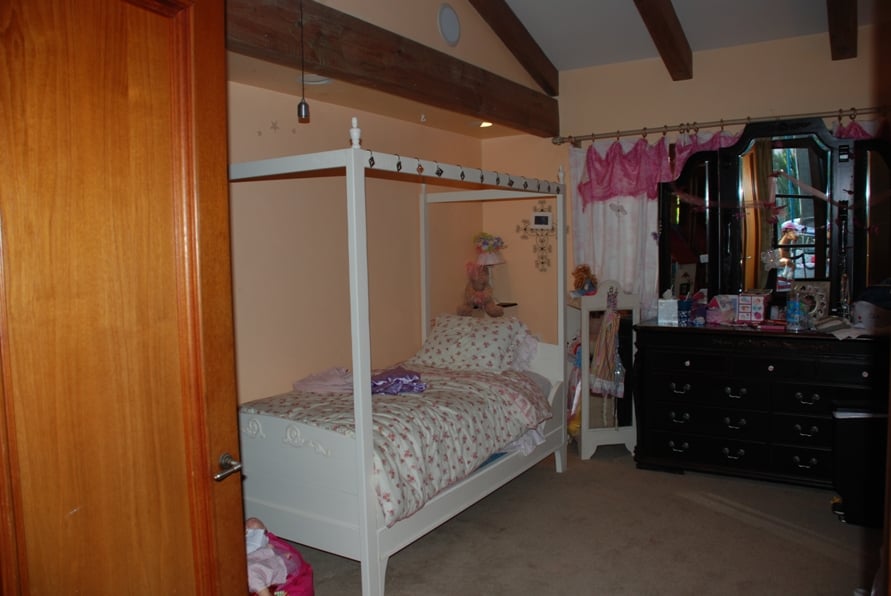
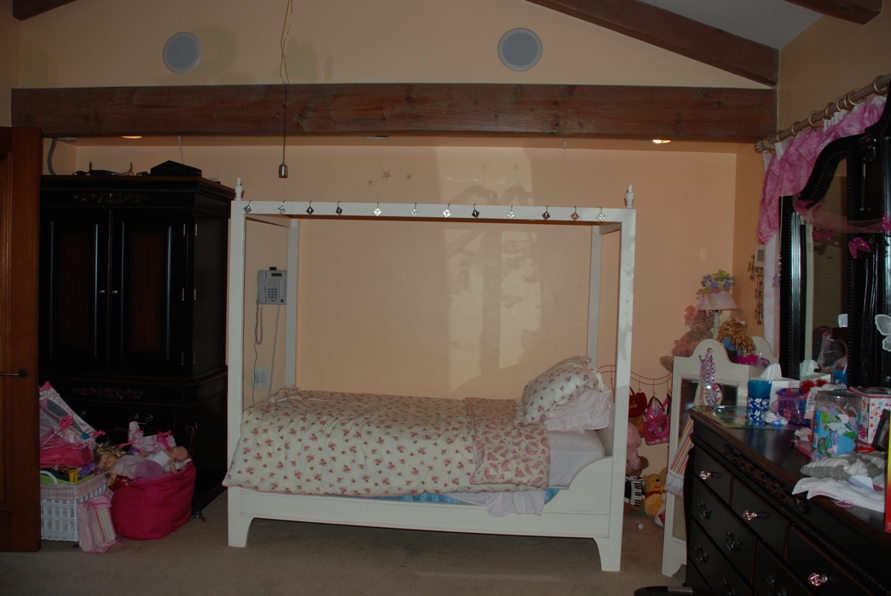
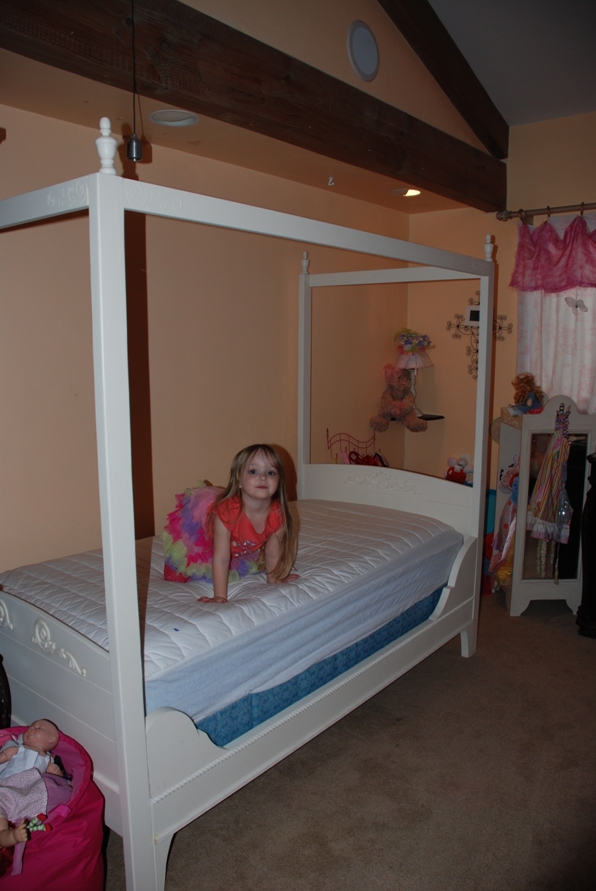
I used the Lydia Toddle Bed plans and made the adjustments to be a twin size bed.

Fri, 09/06/2013 - 16:04
I actually took mine off a bed I took apart awhile ago. But you can get them from Rockler - http://www.rockler.com/product.cfm?page=10&rrt=1
It looks like they are about $15-$16 for a set of 4