Community Brag Posts
Going crazy in California

This is a base loft bed which was my first project. I used raw pine for everything, and then stained. I added the flip top desk, and cubbys on the back wall as well for more storage. But then one of friends had an old play ground set, which he was selling at a ridiculously low price! Due to the pool and BBQ island however, it did not make sense to put these in the back yard. SO, I decided to take down the ladder and give him a rock wall! Both my son and daughter absolutely love it! I am now going to build the platform on the foot of the bed for the slide. More to come!!!! ;)
Estimated Cost
$200
Estimated Time Investment
Week Long Project (20 Hours or More)
Finish Used
Minwax stain
Recommended Skill Level
Beginner
Comments


2x4s on the ends and 1x4s in the middle.
I made the ends with 2x4s and the middle with 1x4s. The most expensive thing was the seat cushions.
Built from Plan(s)
Estimated Cost
The wood was about 70 dollars.
Estimated Time Investment
Week Long Project (20 Hours or More)
Finish Used
Stain
Recommended Skill Level
Beginner
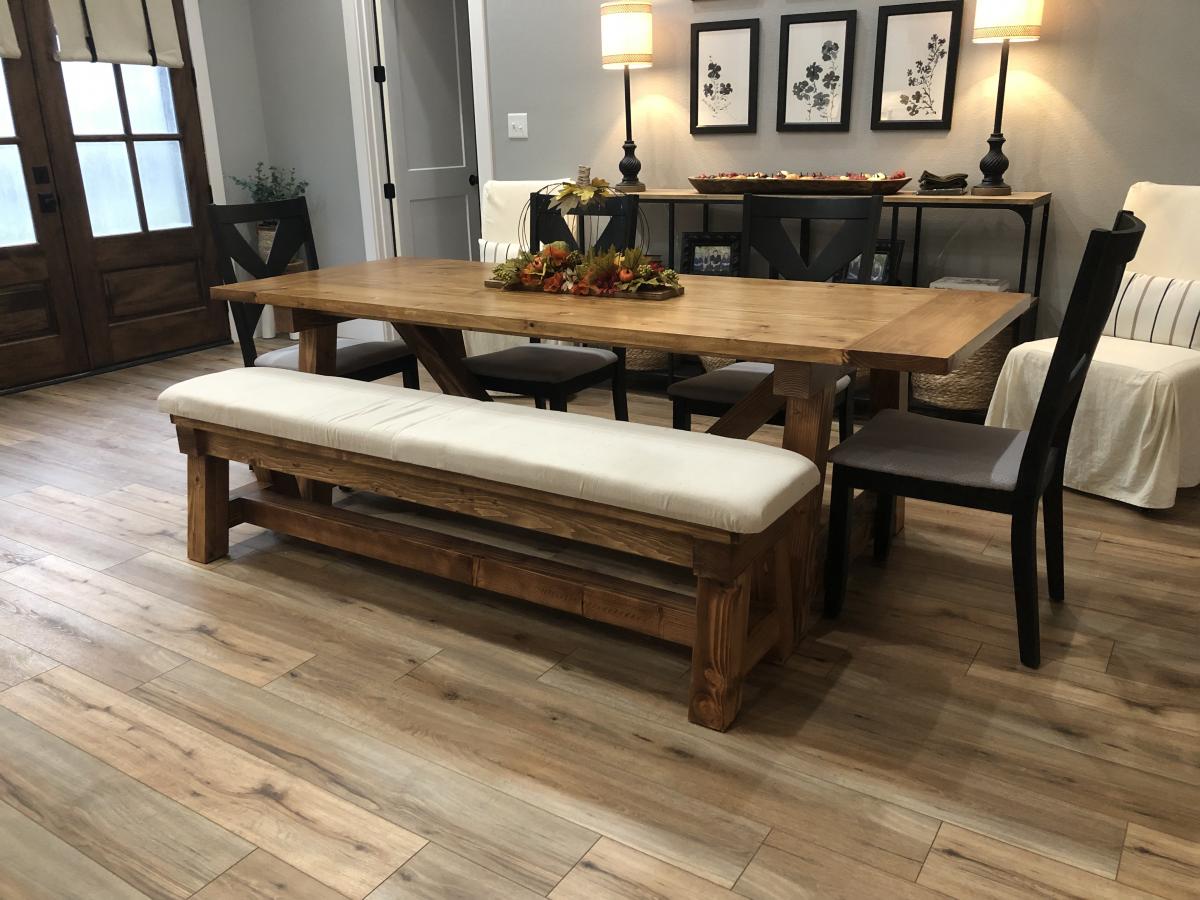
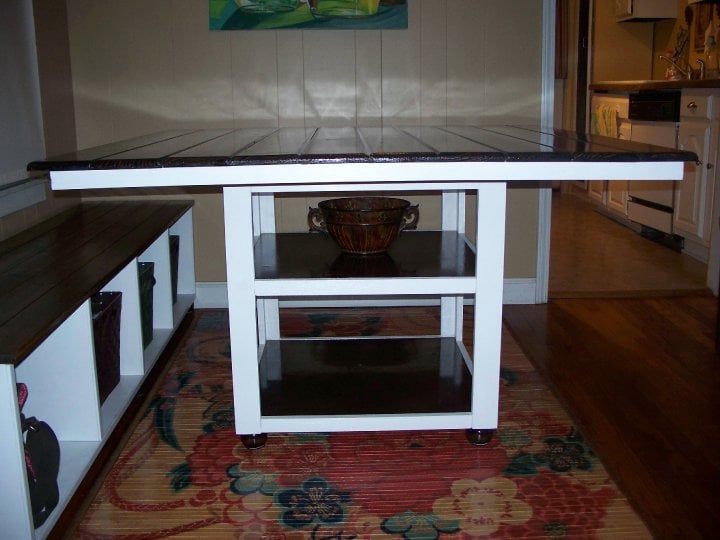
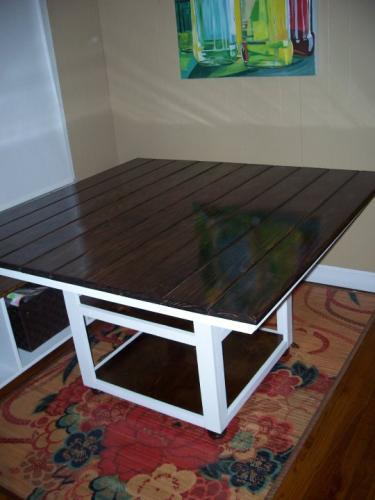
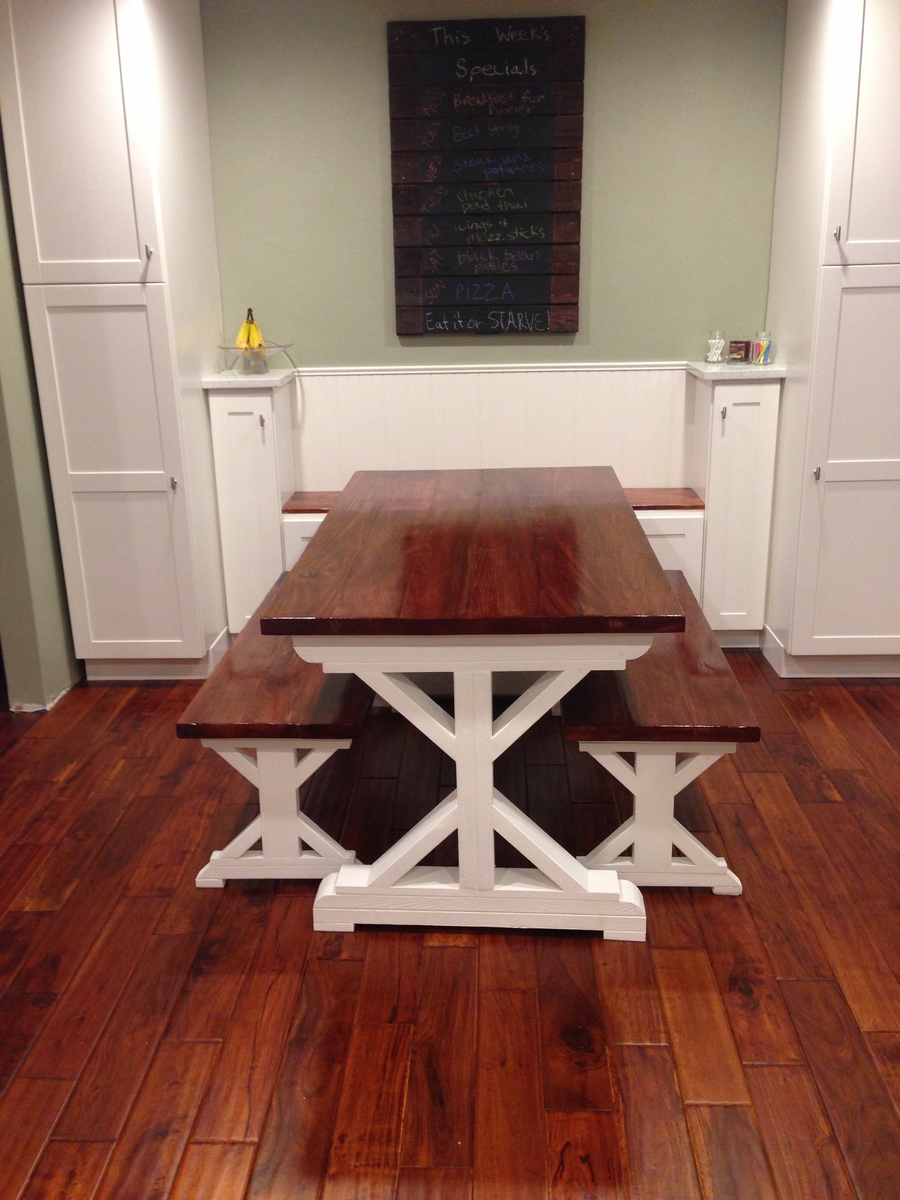
4x4 Truss beam table and bench
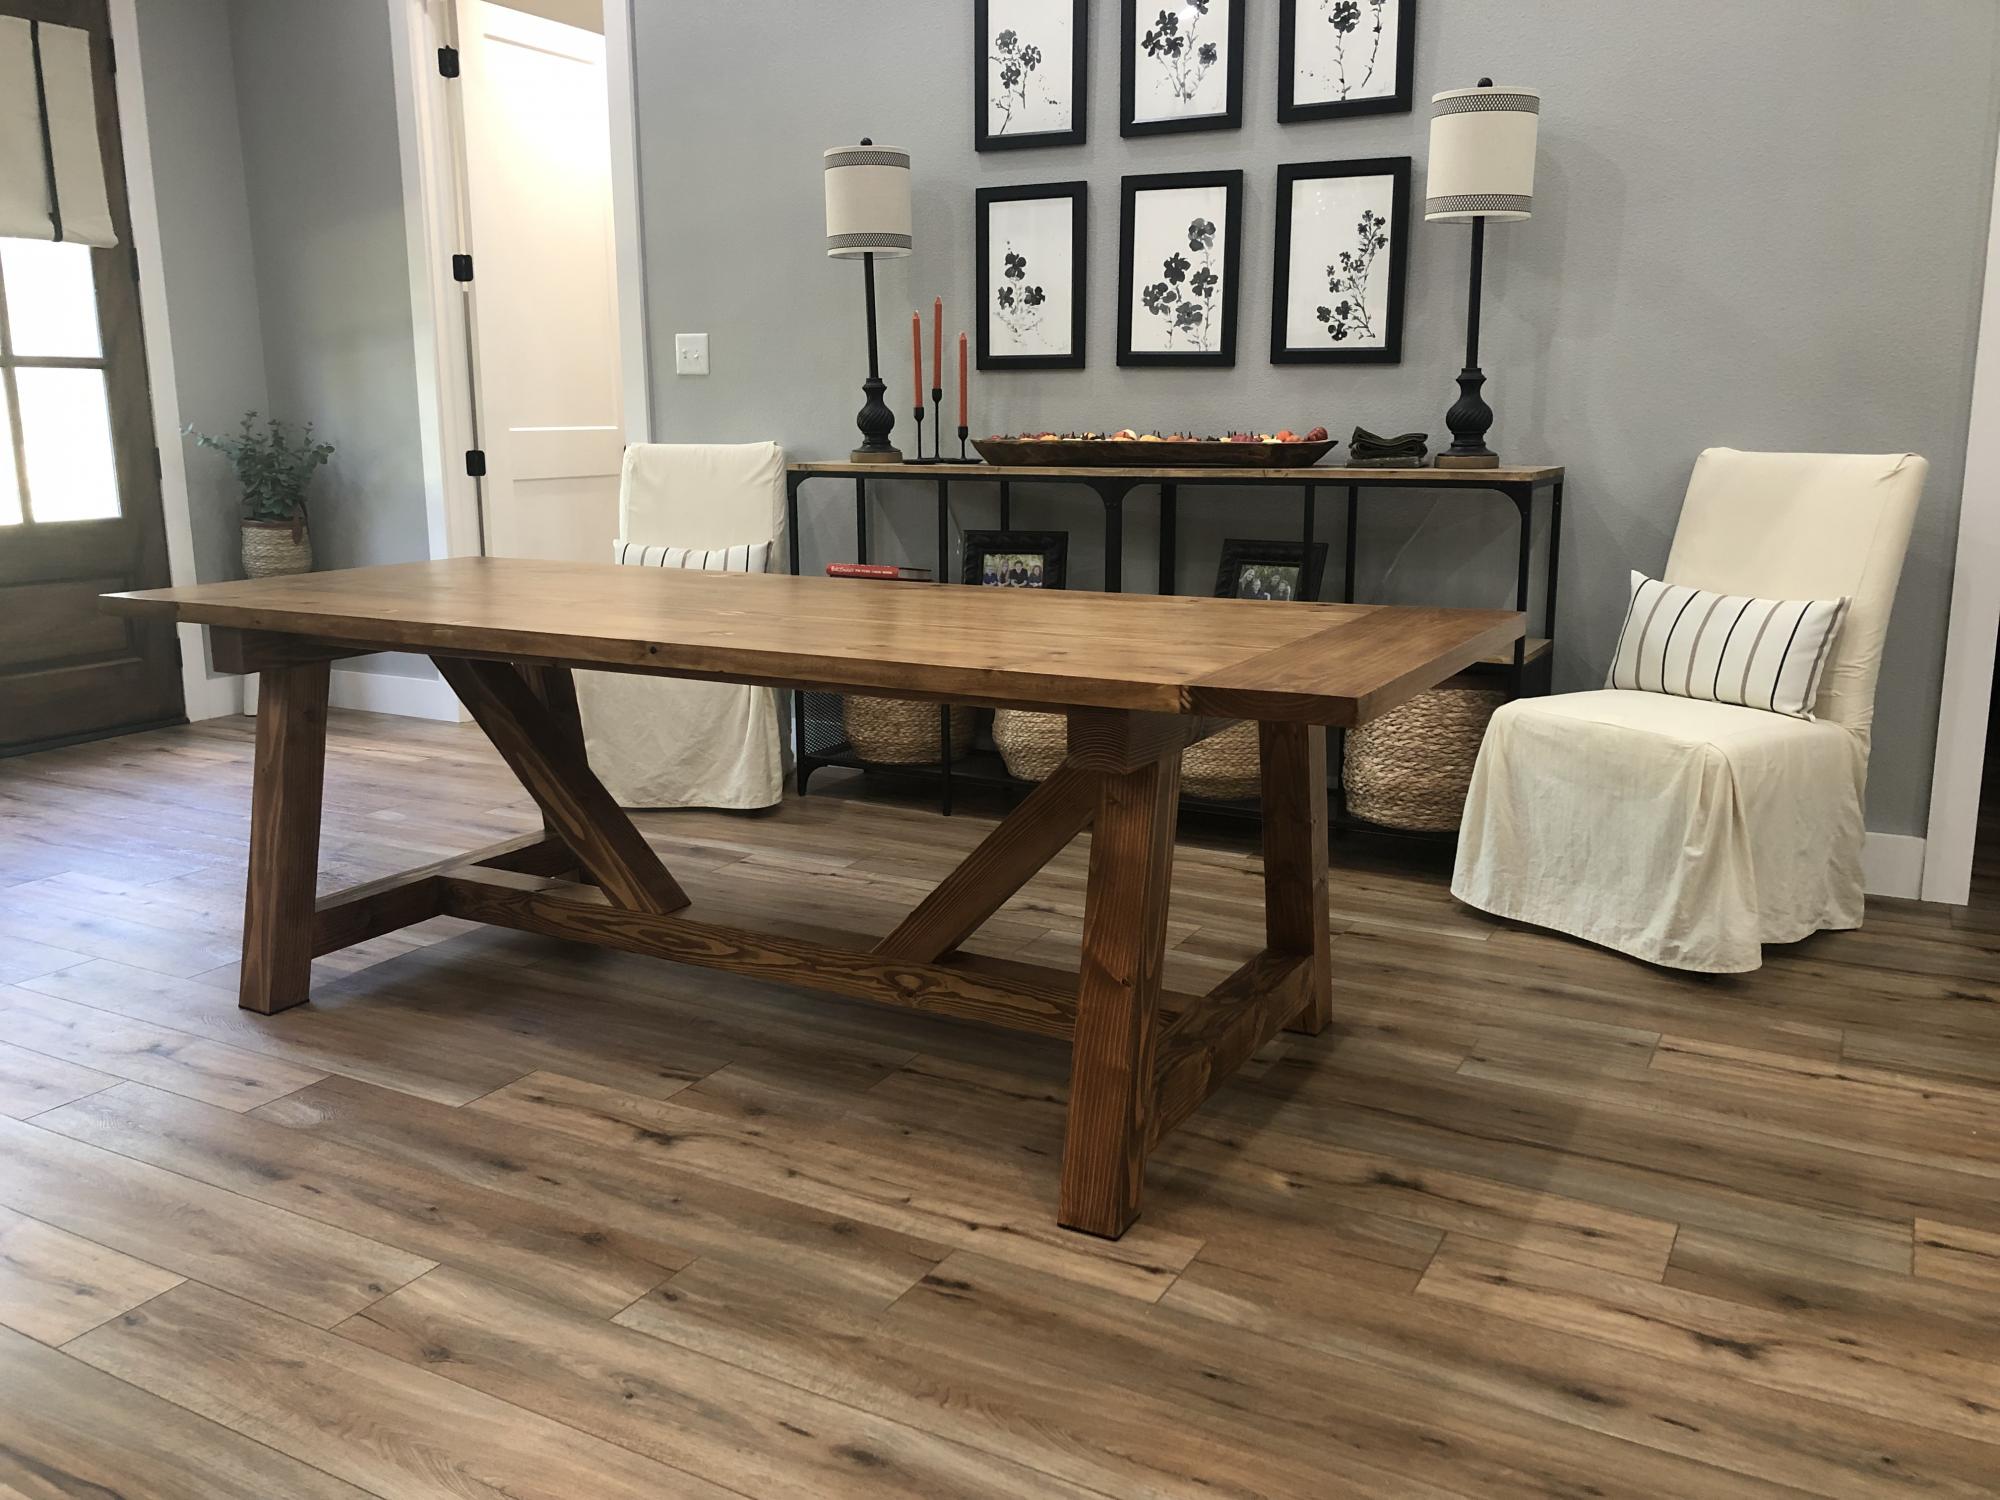
The plans were very easy to follow for non avid woodworkers. We decided to upholster the seat on the bench.
Built from Plan(s)
Comments
Tue, 10/05/2021 - 10:43
Great addition!
Looks professionally done and well built, the upholstered bench is a beautiful addition!
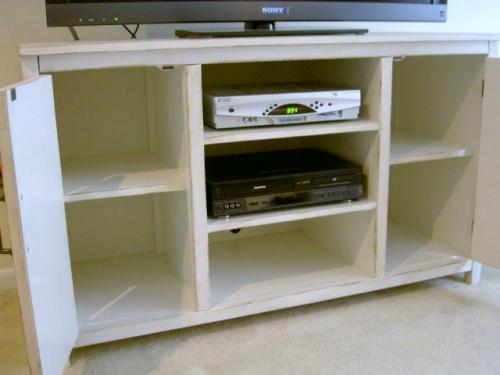
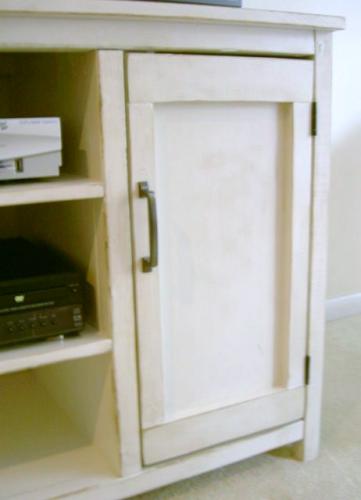
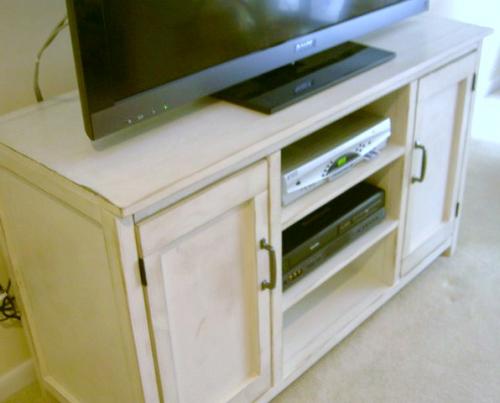
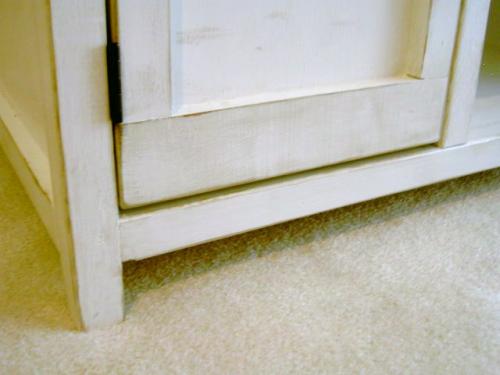
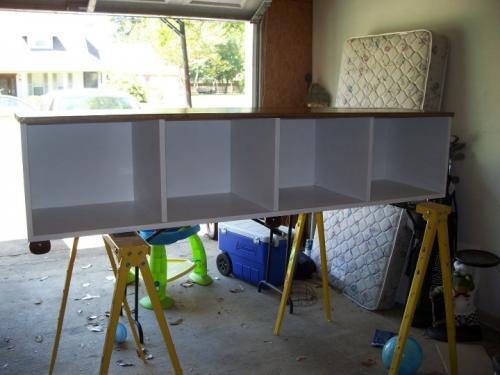
media cabinet
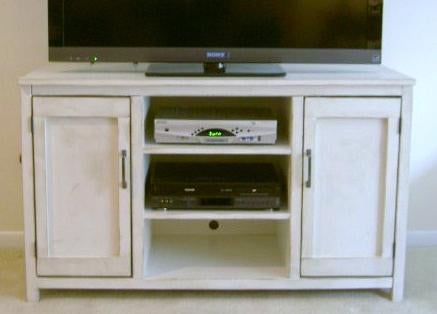
Custom size media cabinet. Two doors with interior shelves. Three open shelves for media components.

Built from Plan(s)
Estimated Cost
$140.00
Estimated Time Investment
Weekend Project (10-20 Hours)
Finish Used
1. one coat primer
2. two coats Behr off white, satin finish
3. distressed with 120 grit sandpaper on mouse sander
4. stain Minwax special walnut
5. two coats Minwax clear satin poly
2. two coats Behr off white, satin finish
3. distressed with 120 grit sandpaper on mouse sander
4. stain Minwax special walnut
5. two coats Minwax clear satin poly
Recommended Skill Level
Intermediate
Our long awaited media cabinet!
My husband and I built this together over the course of three months. We would grab an hour here and there when we had the time.
I am notorious for my numerous "projects", but my husband is so patient and he usually indulges my curiosity. We both learned so much building this, and even though he feigns indifference, I can tell that my husband is just as proud as I am of the end result. We are absolute beginners and my critical eyes can find many imperfections, but I can't help but be amazed that we actually built this thing - this is huge for us!!
We plan to build the rest of the wall system eventually (piece by piece), but I couldn't wait to share.
Thanks Ana for giving us so much of yourself!!
P.S: Lumber wise you get what you pay for - even if you are painting, go for the higher quality plywood and craftboard. The price premium is well worth the frustration it will save you - especially if you are a beginner like us.
Built from Plan(s)
Estimated Cost
$250
Estimated Time Investment
Week Long Project (20 Hours or More)
Finish Used
Vintage white from the Allen Roth Collection - Valspar Paint
Recommended Skill Level
Starter Project
Comments
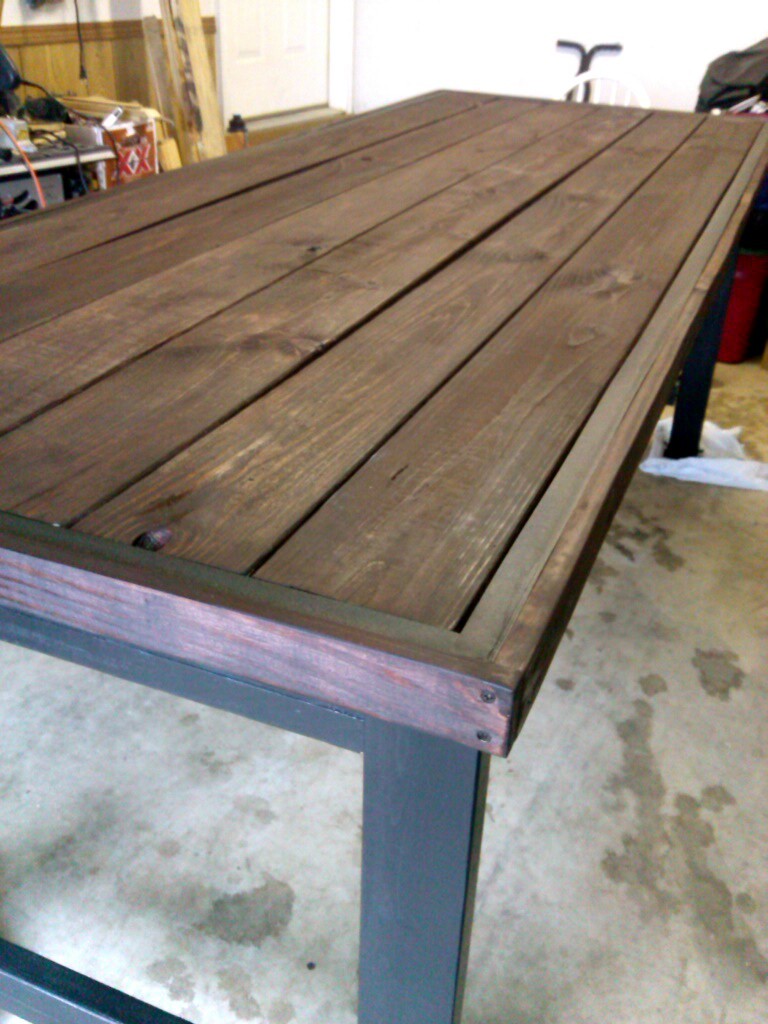
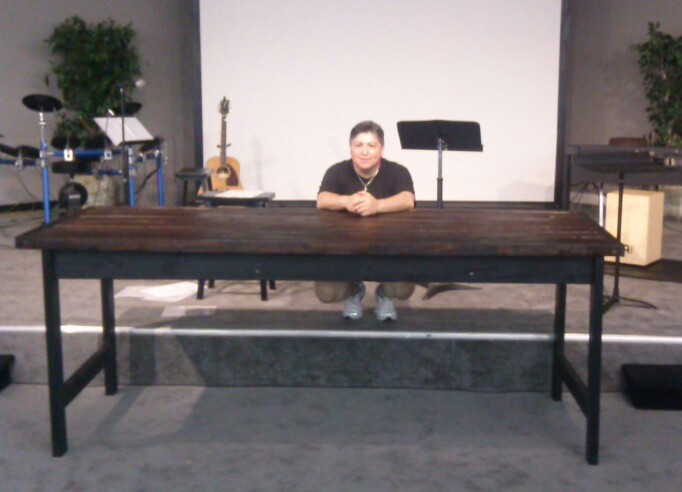
Scrap wood Buffet table
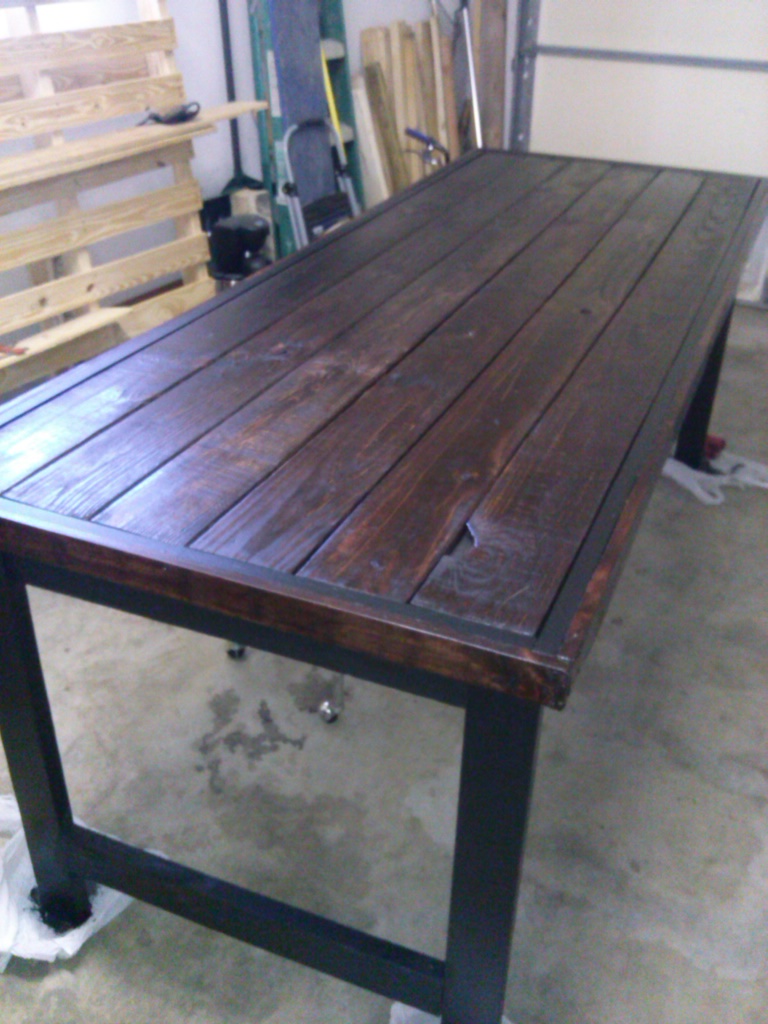
Built this 8' x 3' buffet/serving table from scrap wood gathered from work. I bought (2) 2x4's for the legs and the 1" particle board for stability under the slats on top. Finished with Red Mahogany and Polycrylic. It was built as a gift for my church and will now be used for Easter Service for Communion. One of many projects I've made and very happy with how this turned out.
Estimated Cost
$30 for wood - $17 for paint - $6 for stain - $5 for sandpaper. Total spent - under $60.
Estimated Time Investment
Weekend Project (10-20 Hours)
Finish Used
I used 6 1x6x12 scrap gathered from work - we get a lot of pallets of product so scrap wood is easy to come by. Used the same scrap wood (ones less desireable for the table top and ripped 1" strips to size for the sides of the top.Secured the legs and table top using a Kreg Jig. Then finished the table using Red Mahogany and Polycrylic (1 coat) for the top and sides - and semi gloss black paint for the table legs and apron.
Recommended Skill Level
Intermediate
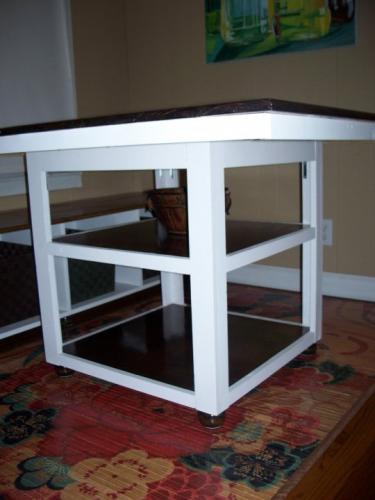
Chevron Coffee Table
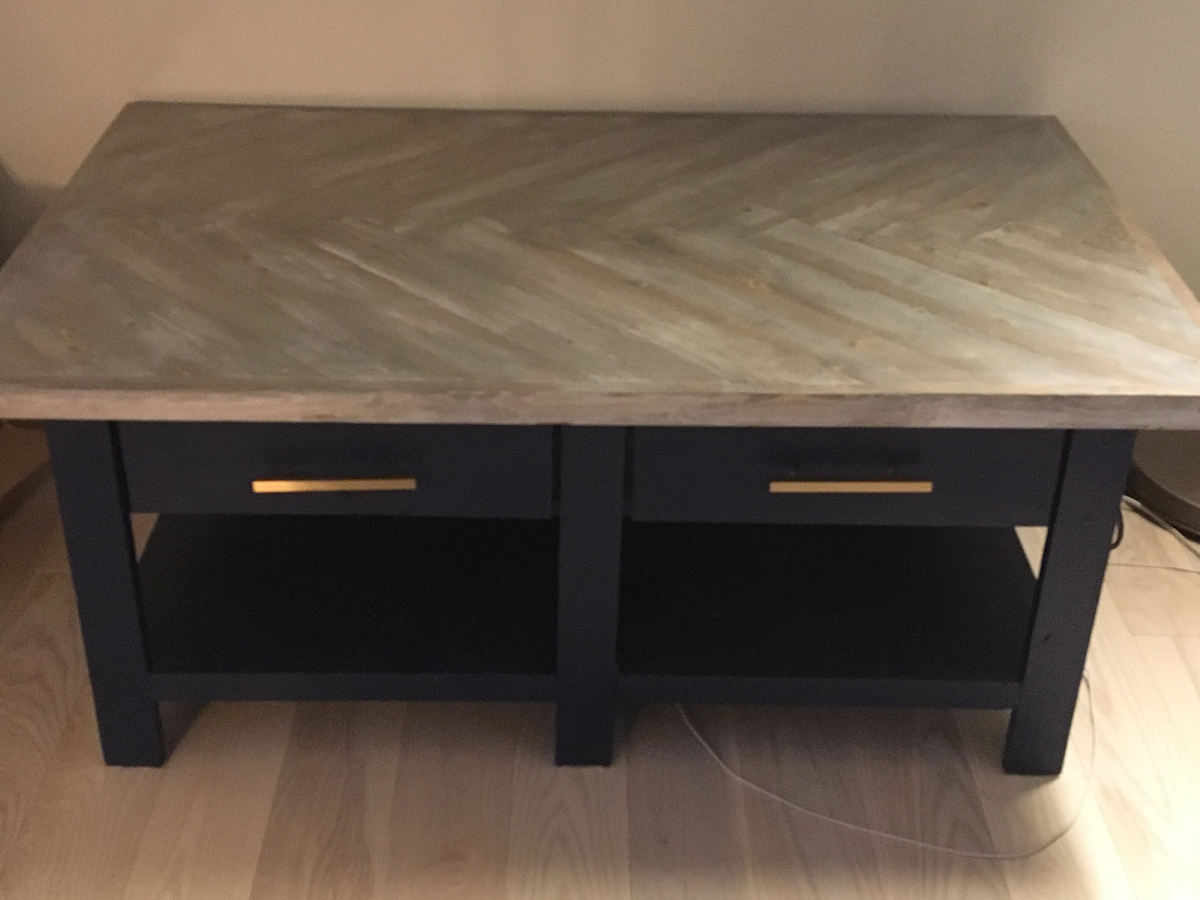
Based off of Ana Whi'te Benchright Coffee Table with a chevron/herringbone table top
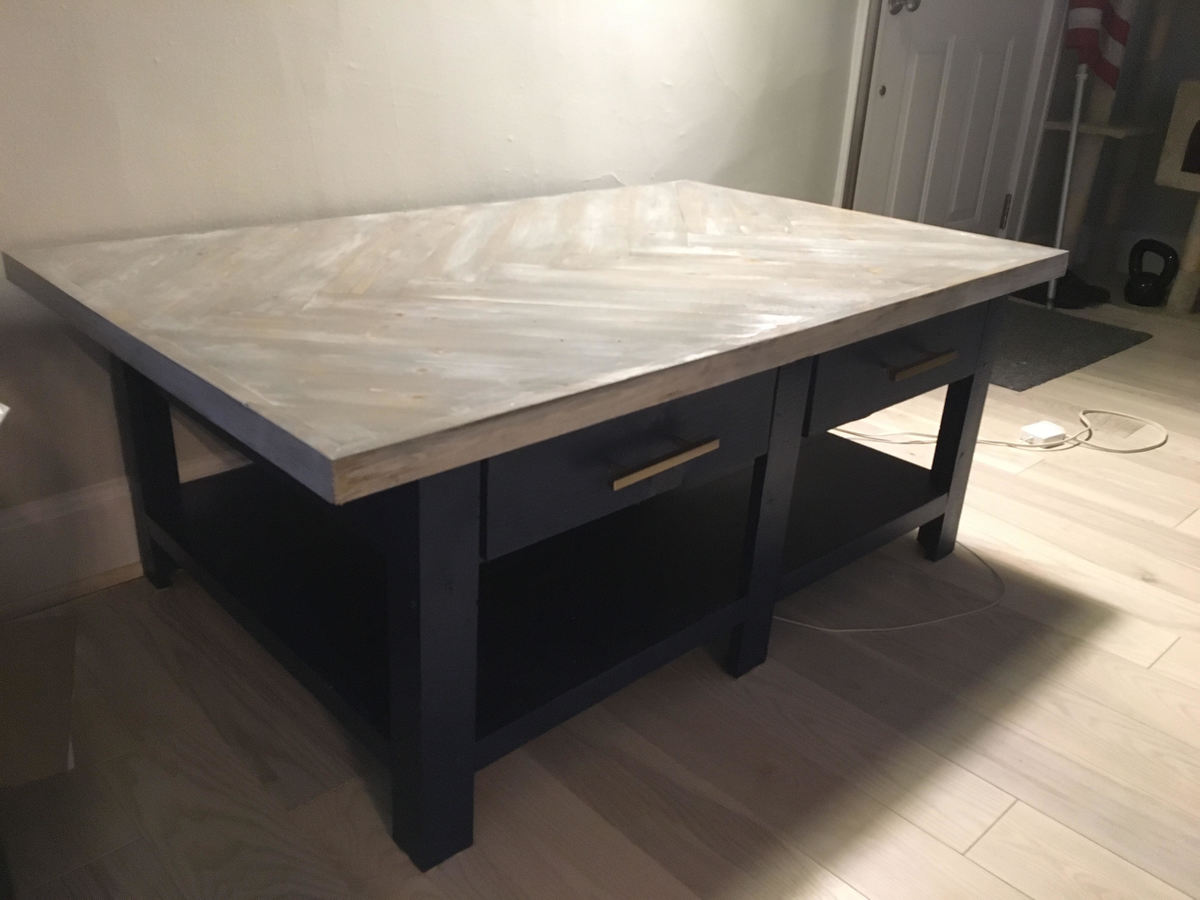
Built from Plan(s)
Estimated Cost
$200
Estimated Time Investment
Weekend Project (10-20 Hours)
Recommended Skill Level
Intermediate
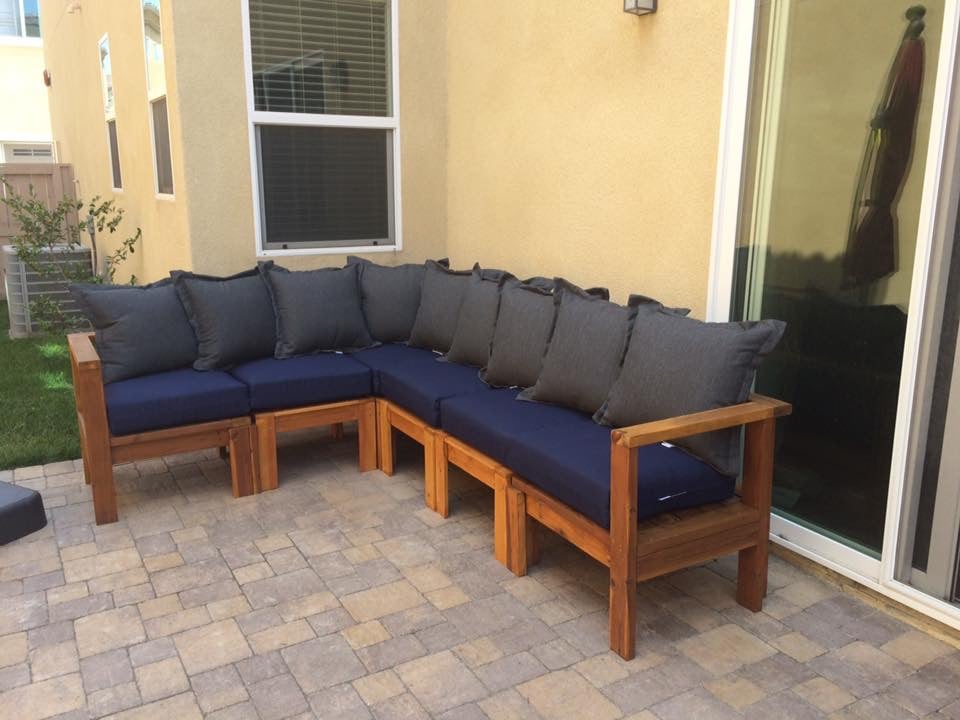
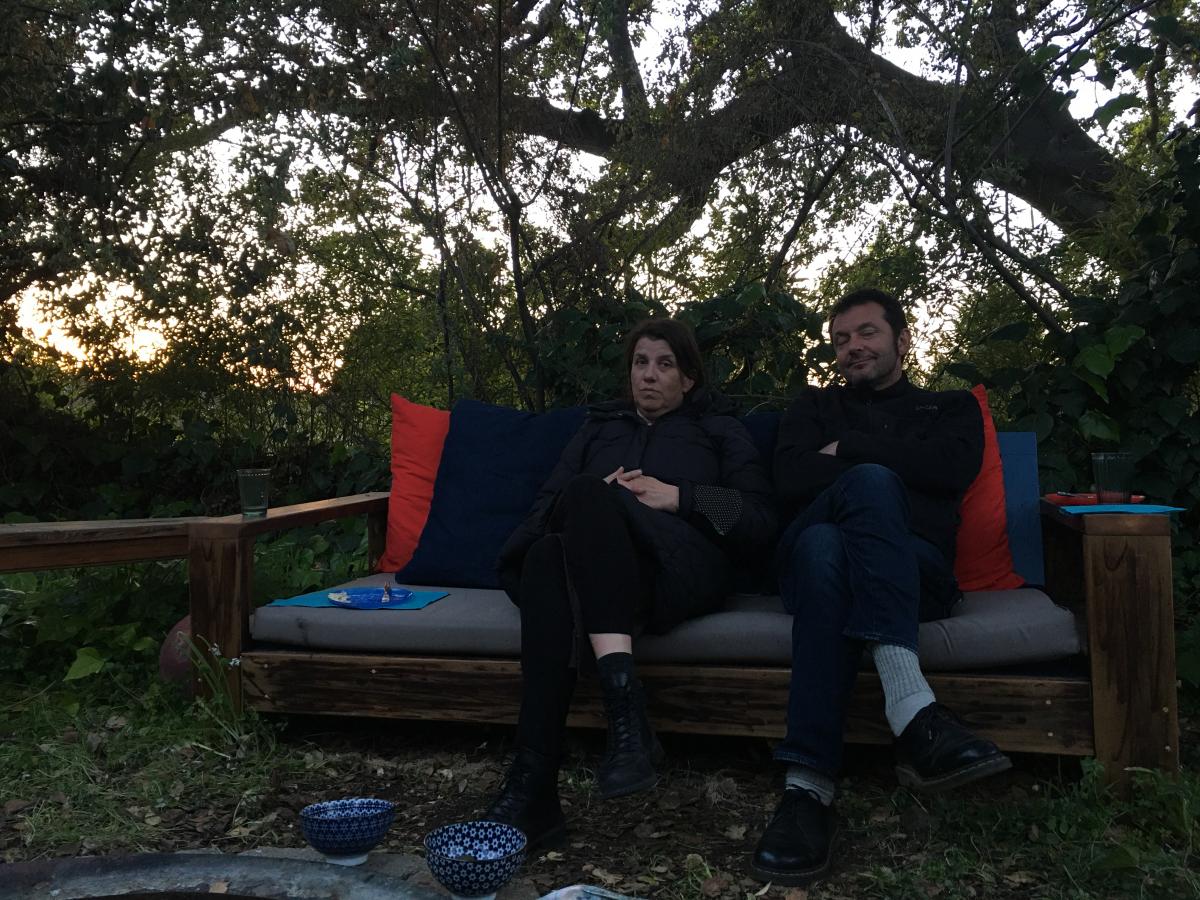
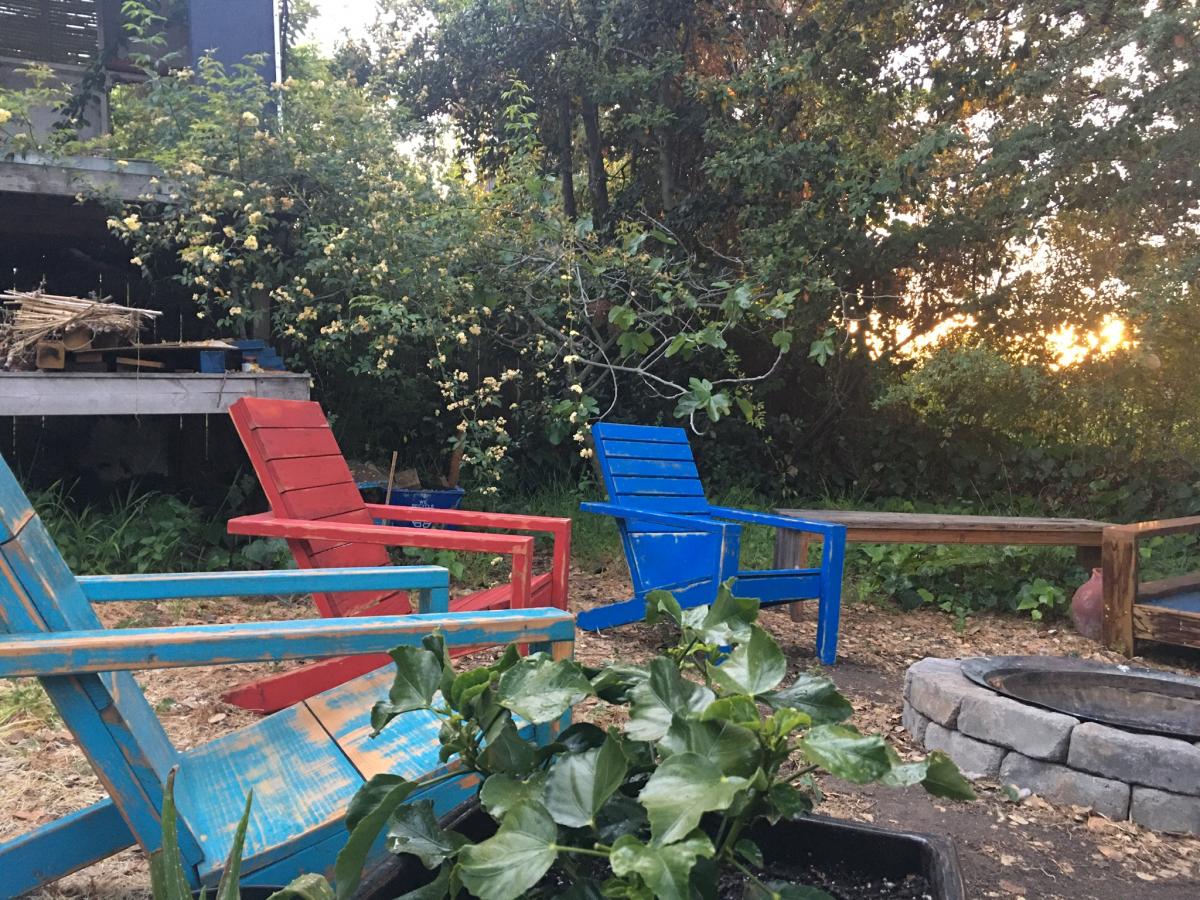
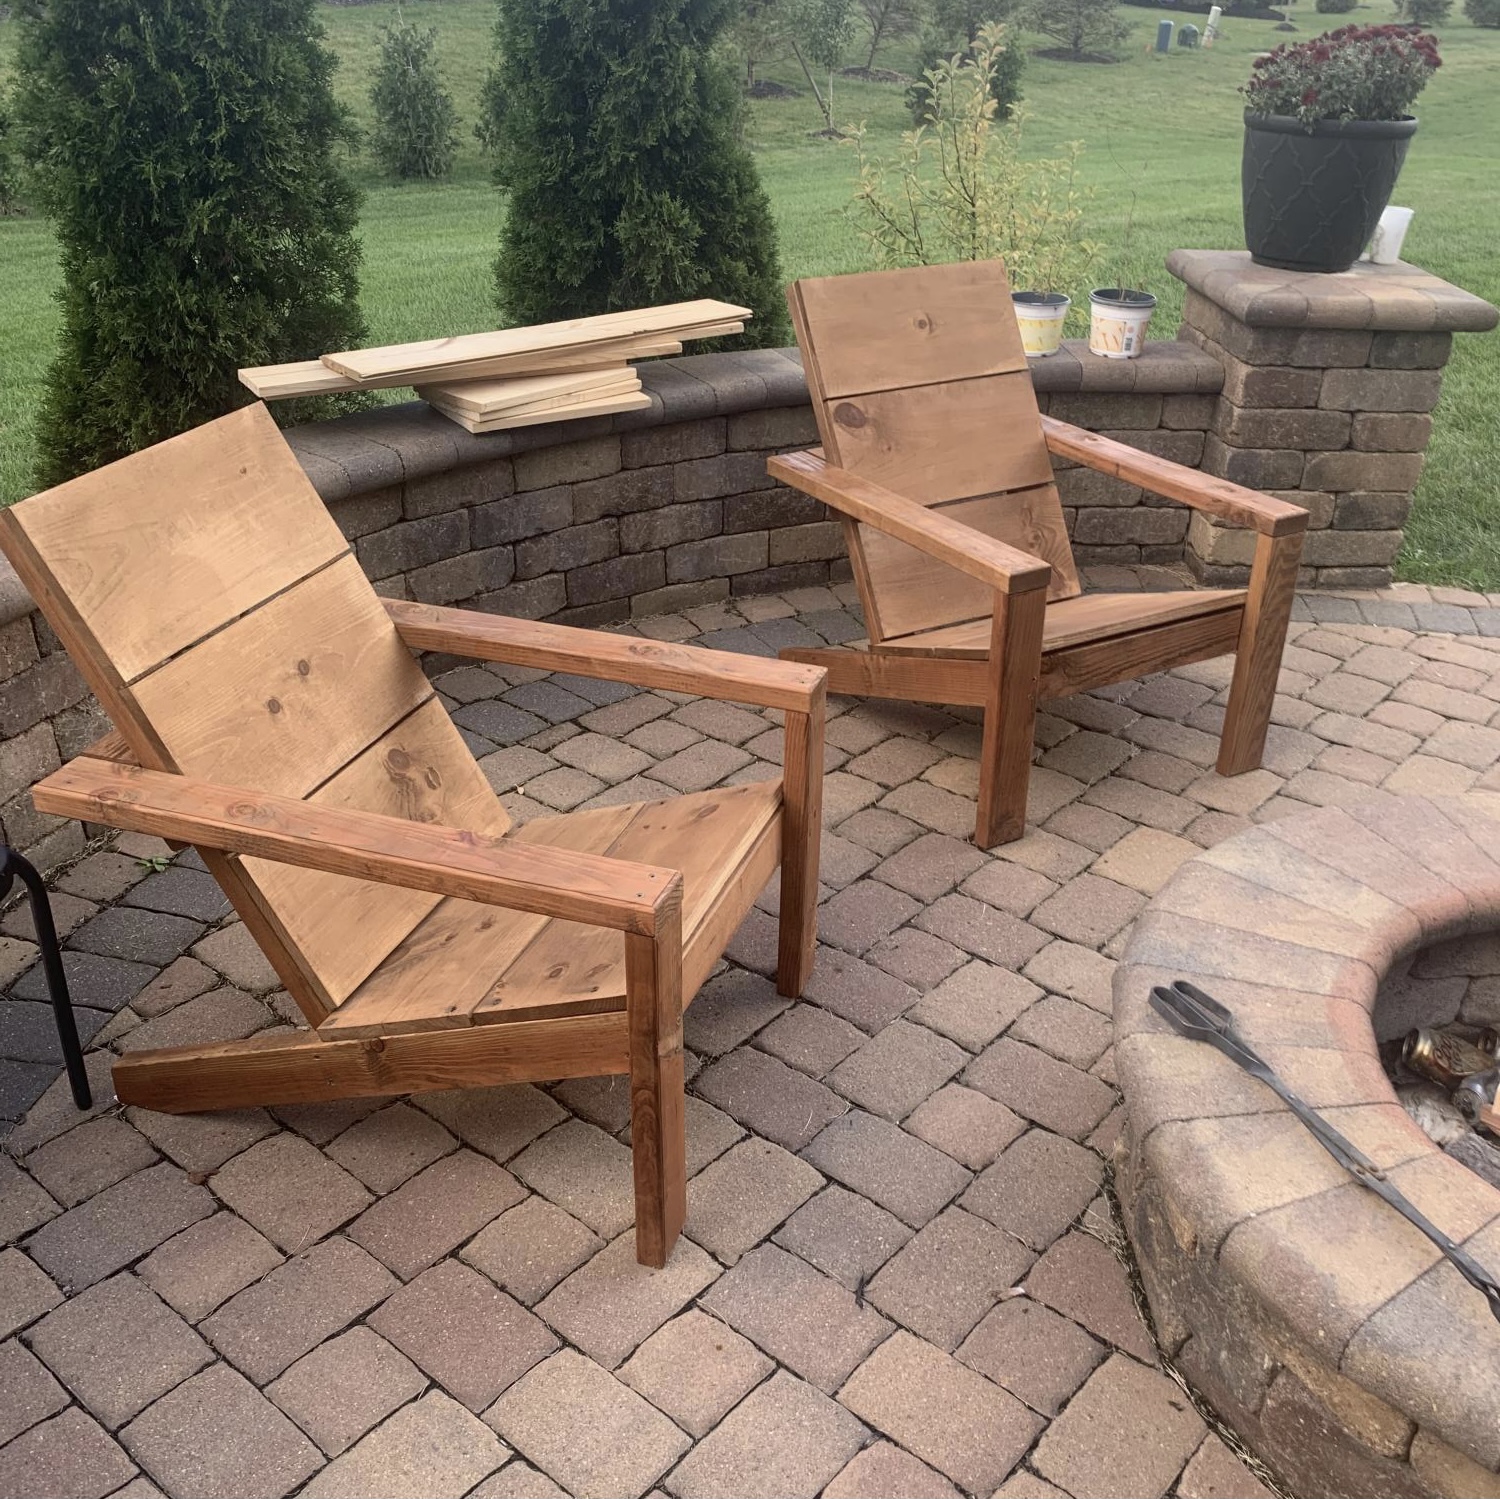
Adirondack chairs and bench
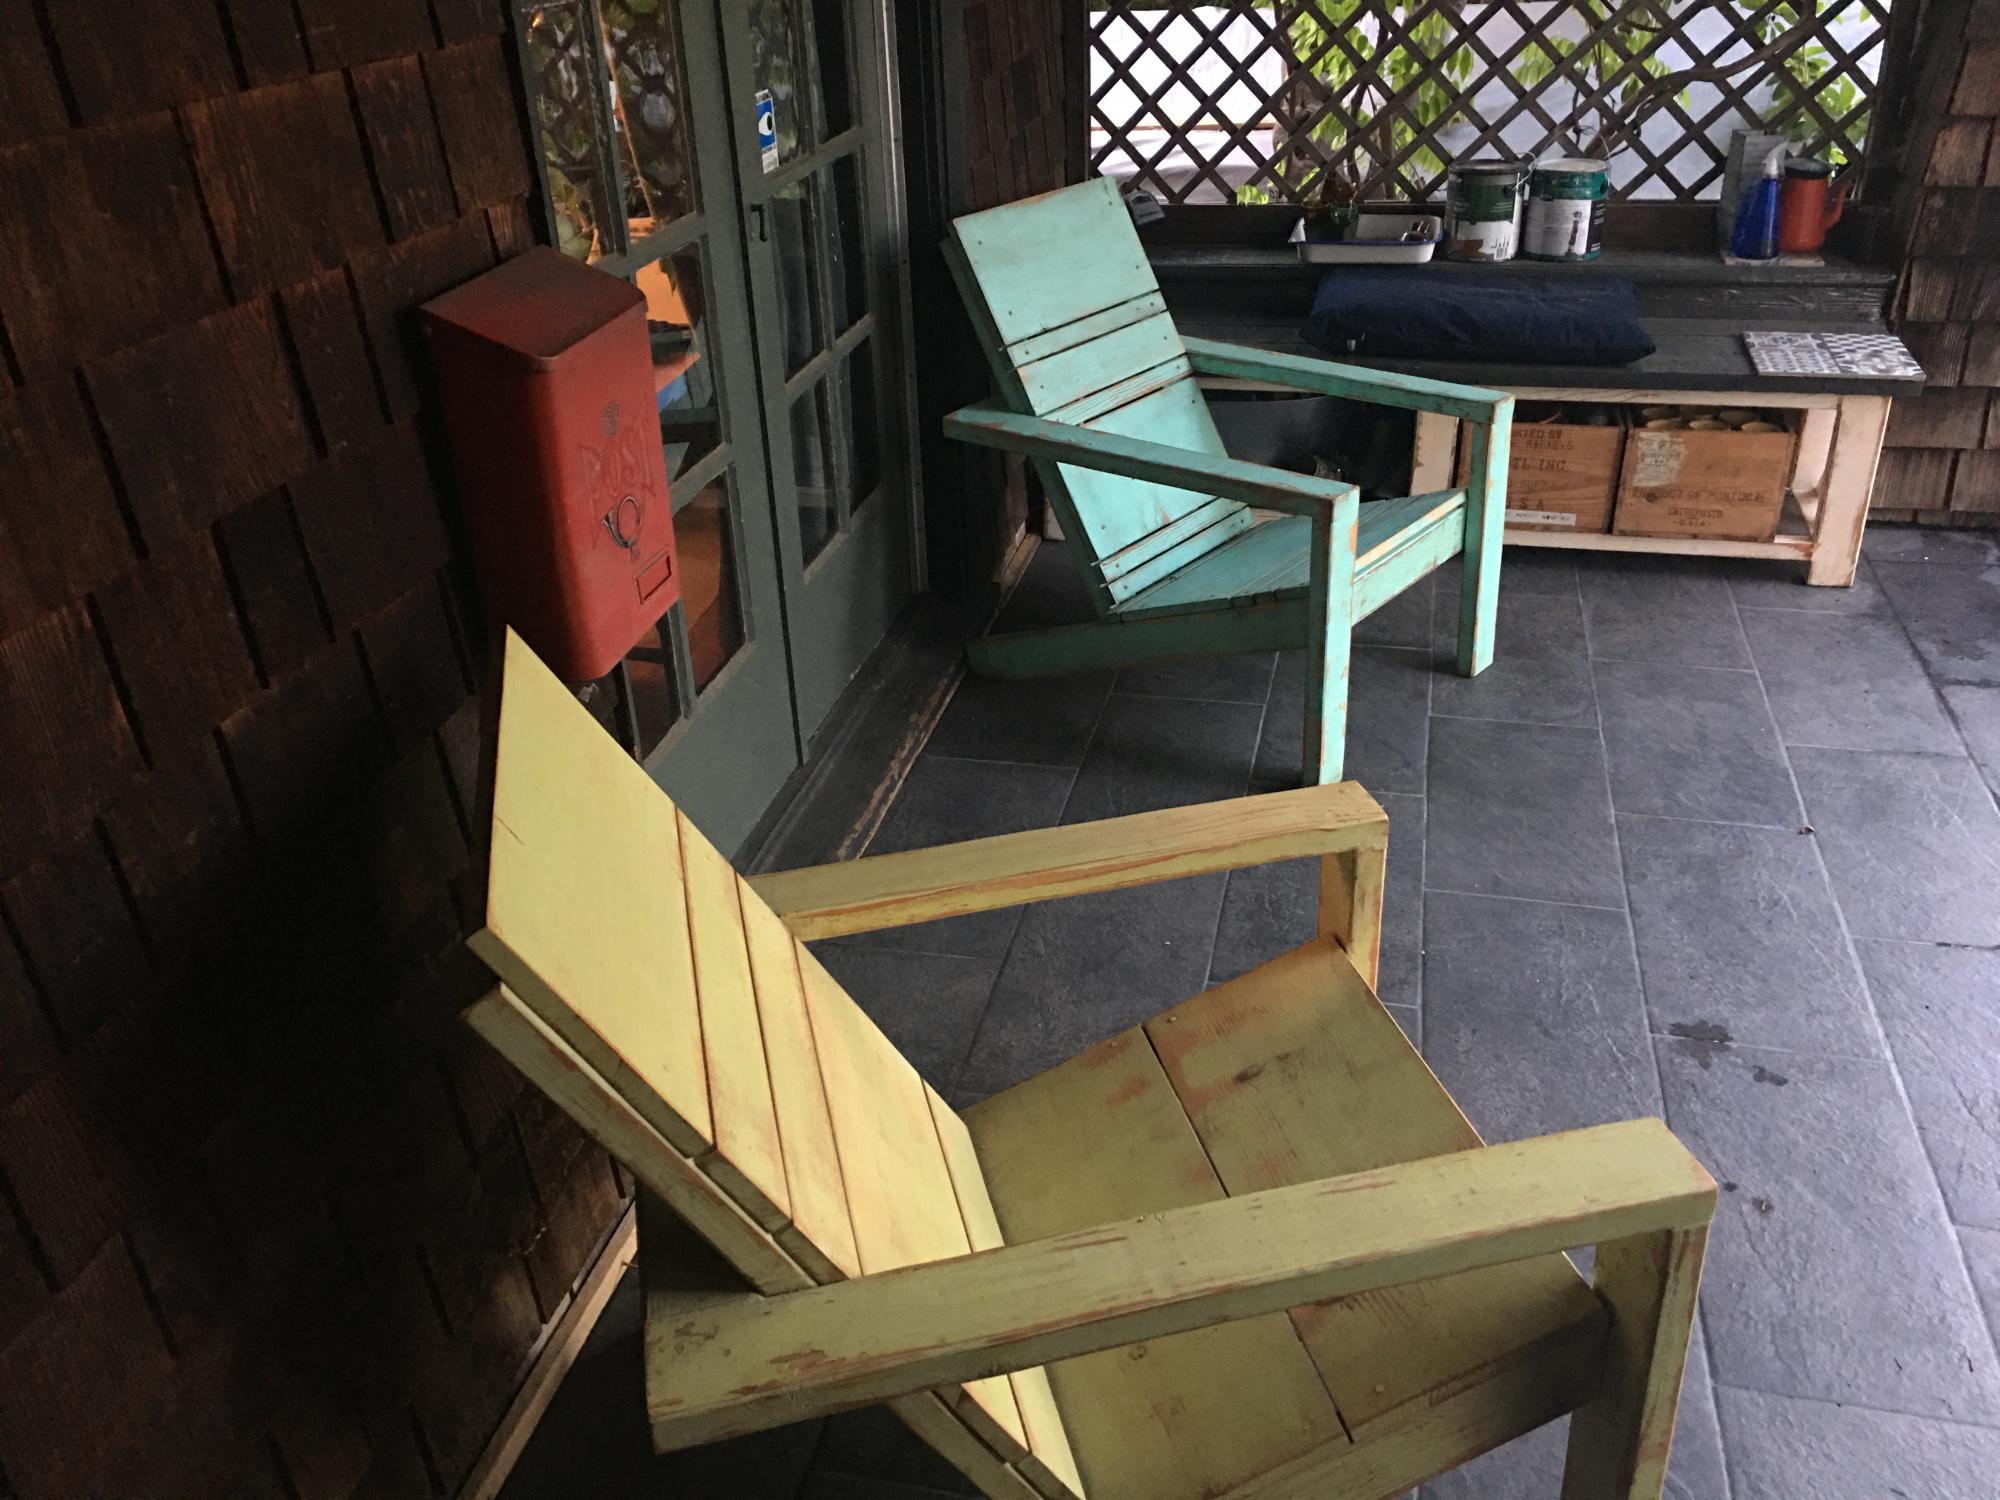
A year and a half long Covid at home and eating and entertaining outdoors encouraged us to transform our back yard into an outdoors living and dining room.
It was also the perfect excuse to finally use all the scrap wood we had lying around and turn it into these super comfy chairs. Add pillows and blankets and we have a cozy back yard that we love to spend time in.
We used this occasion to finish ends of paint cans to paint the chairs in different colors and scraped the paint down for a weathered look, then finished it all with a couple of coats of varnish. Each chair’s back is slightly different depending on scraps we had on hand. We love Anna’s simple and practical plans and instructions!!!
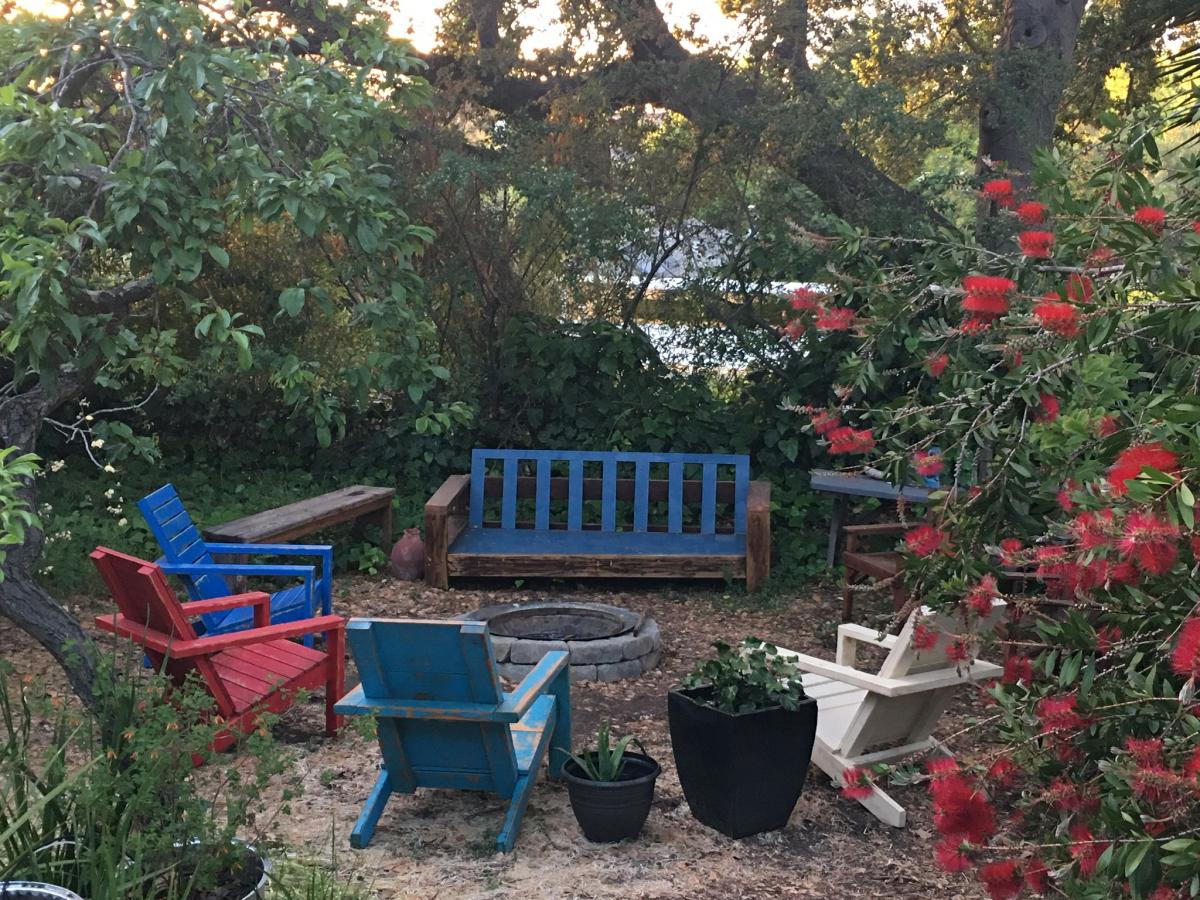
Built from Plan(s)
Comments
Tue, 10/05/2021 - 10:06
Wonderful use of material and extras!
Love the alternating look and colors, very attractive and inviting!
Storage Table and Bench
My 1st project! Came up with bench plans myself and modified Ana's Pottery Barn Storage Table plans.
Built from Plan(s)
Estimated Time Investment
Weekend Project (10-20 Hours)
Finish Used
White Paint, Minwax Stain (Dark Walnut) & Polyurethane
Recommended Skill Level
Beginner
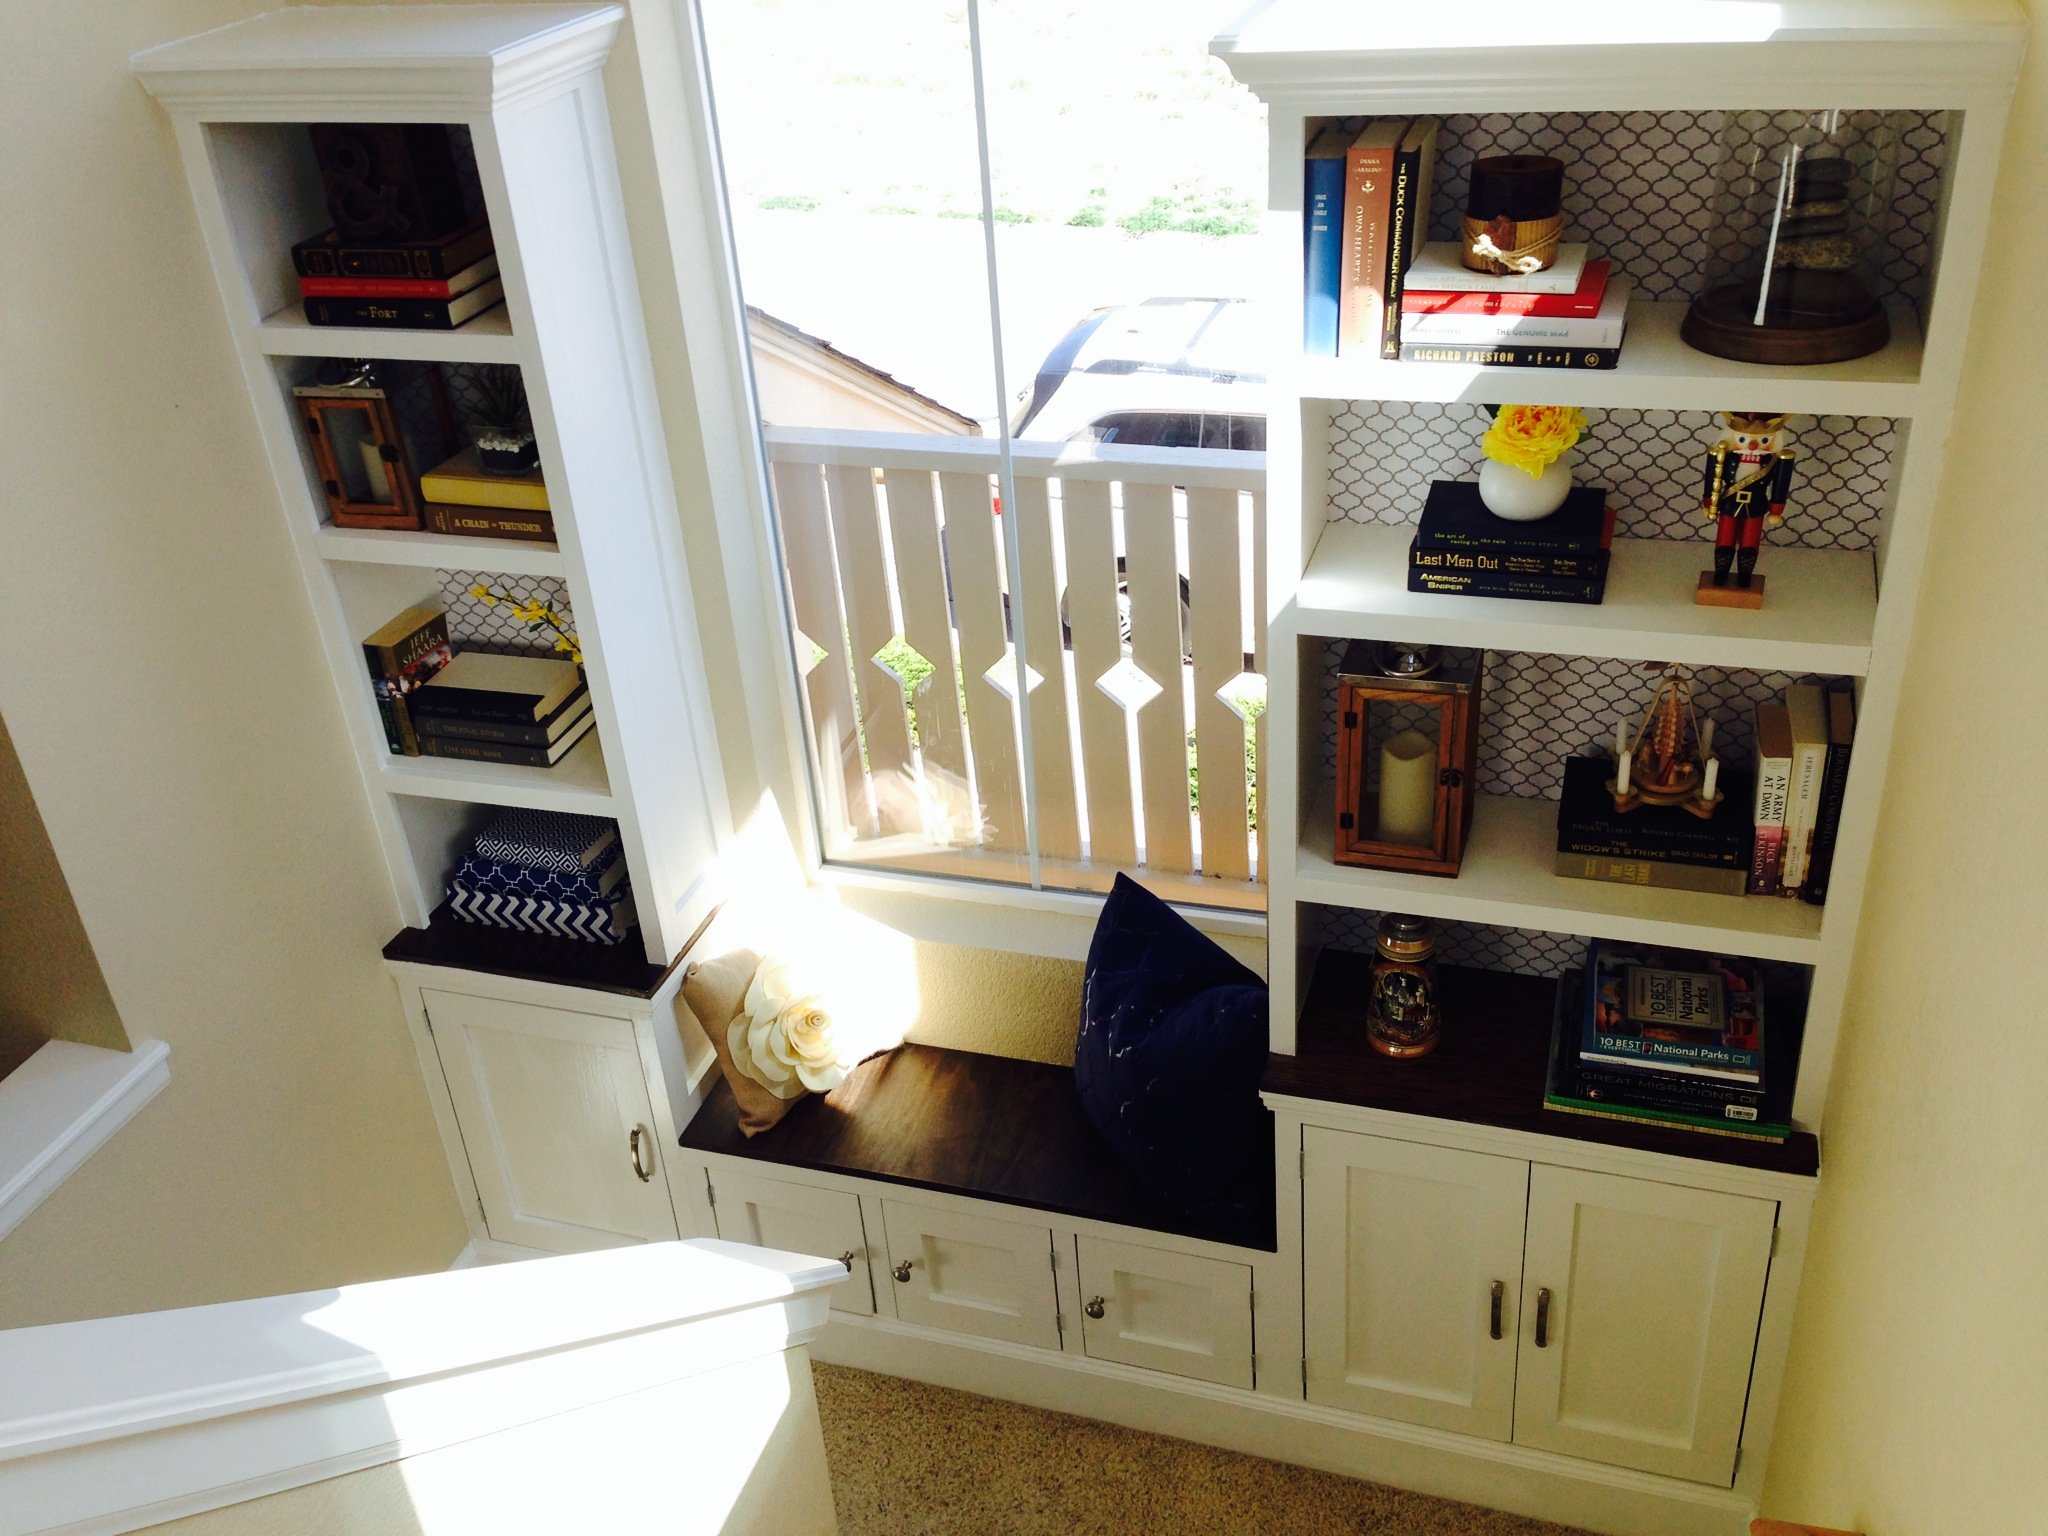
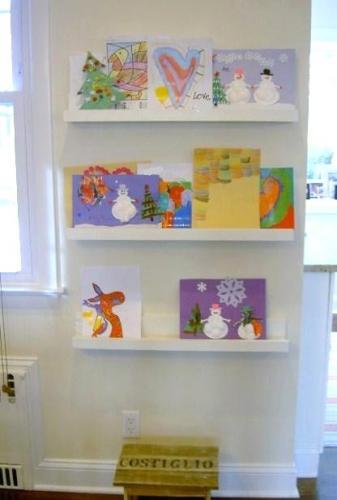
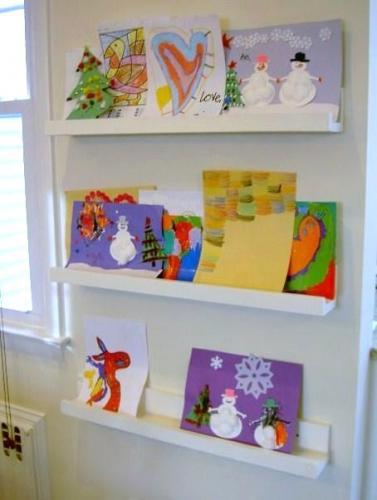
These ledges transformed an entire wall!
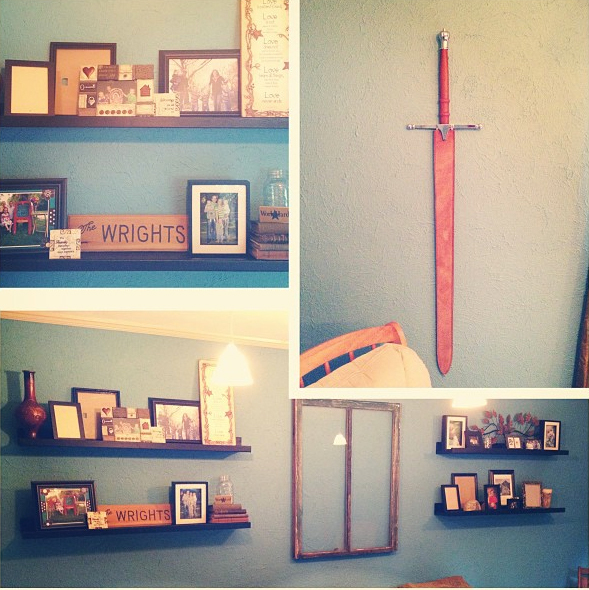
For Mother's Day this year, I decided to completely redo what we call our "front room" for my wife. Before the weekend, it was unorganized, colorless, and boring. We decided to start the project with new paint, which my wife picked out. I got some old windows from a thrift store, and we decided the ledges would flank one of those windows and we'd basically transform the entire wall.
The ledges were a blast to build (my wife even helped a bit!) and we're super happy with the way they came out!
Built from Plan(s)
Estimated Cost
$20
Estimated Time Investment
Day Project (6-9 Hours)
Finish Used
We just painted the ledges with a flat black. Nothing fancy at all!
Recommended Skill Level
Beginner
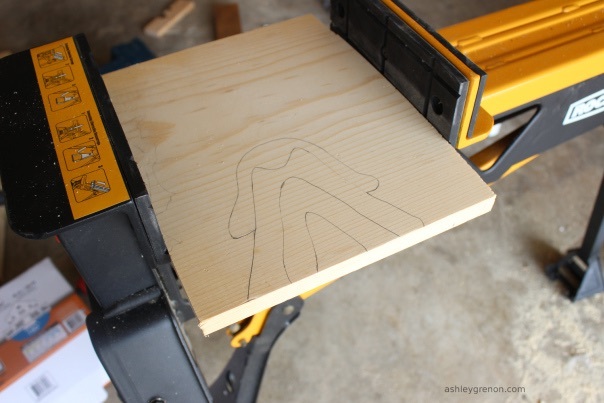
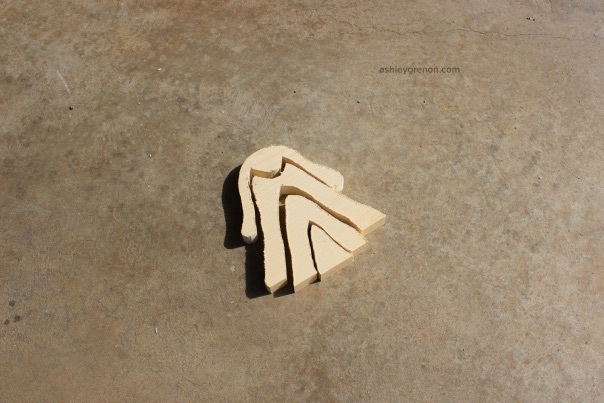
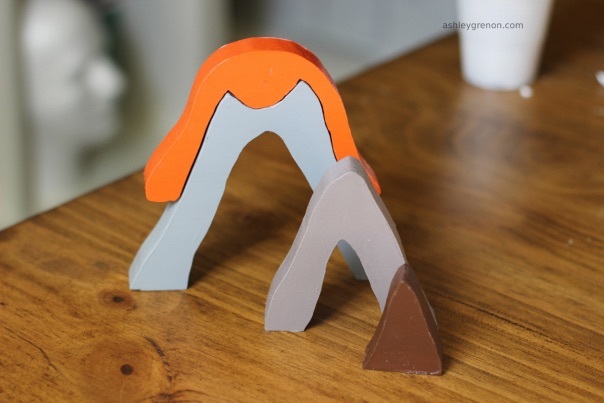
Wooden Volcano Stacker
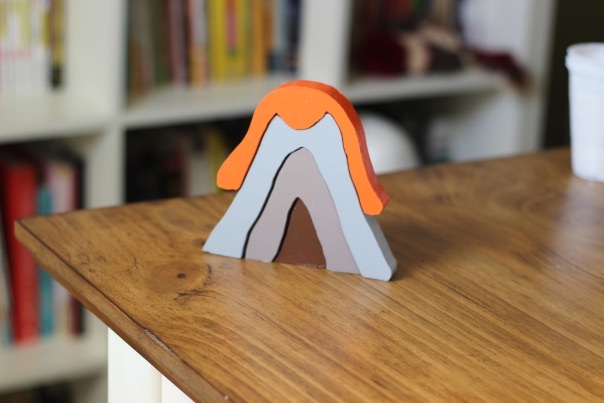
I'm so thankful for Ana's March scrap work love challenge for encouraging me to make use of scrap lumber. I completed several scrap work projects last month. This is a volcano stacker I made from a scrap piece of 1x12 pine. I got the pattern from the book Natural Wooden Toys. I used my scroll saw to cut out the shape. I painted it with craft acrylic paint and sealed it with Mod Podge. The toy is a hit with the little guy!
Estimated Cost
free
Estimated Time Investment
An Hour or Two (0-2 Hours)
Finish Used
Craft acrylic paint and Mod Podge
Recommended Skill Level
Beginner
Kentwood bookshelf
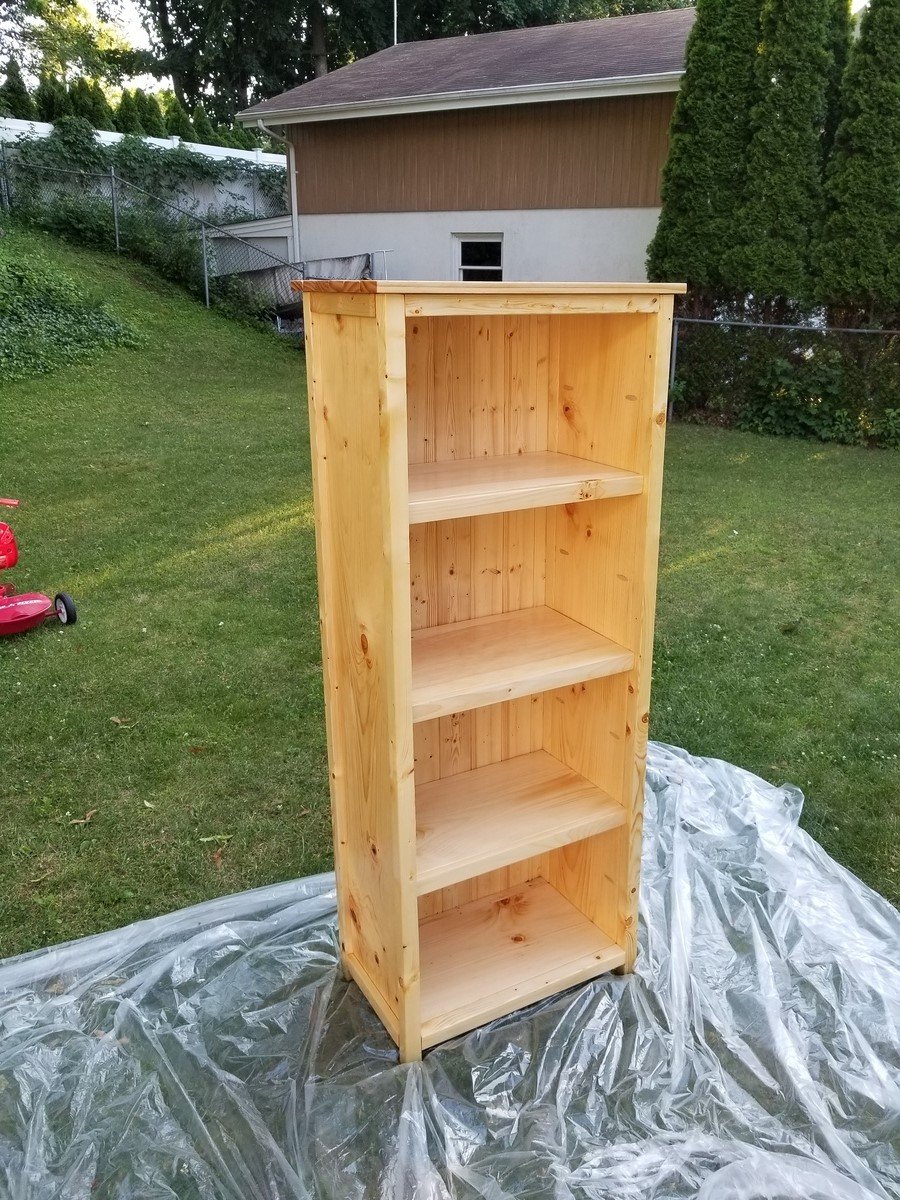
Together with my wife, we decided to start making our own furniture and it was our first project. It took us a week to complete it (it took us longer than most people as we had to learn from scratch how to use the tools for each of the steps such as the circular saw, sander, pocket holes, etc.). We also learned the hard way how critical it is to use straight boards and how difficult it is to find straight 2x2. Overall we loved the process and are very excited by the final result!
Built from Plan(s)
Estimated Cost
$100
Estimated Time Investment
Week Long Project (20 Hours or More)
Finish Used
Danish oil - natural
Recommended Skill Level
Beginner
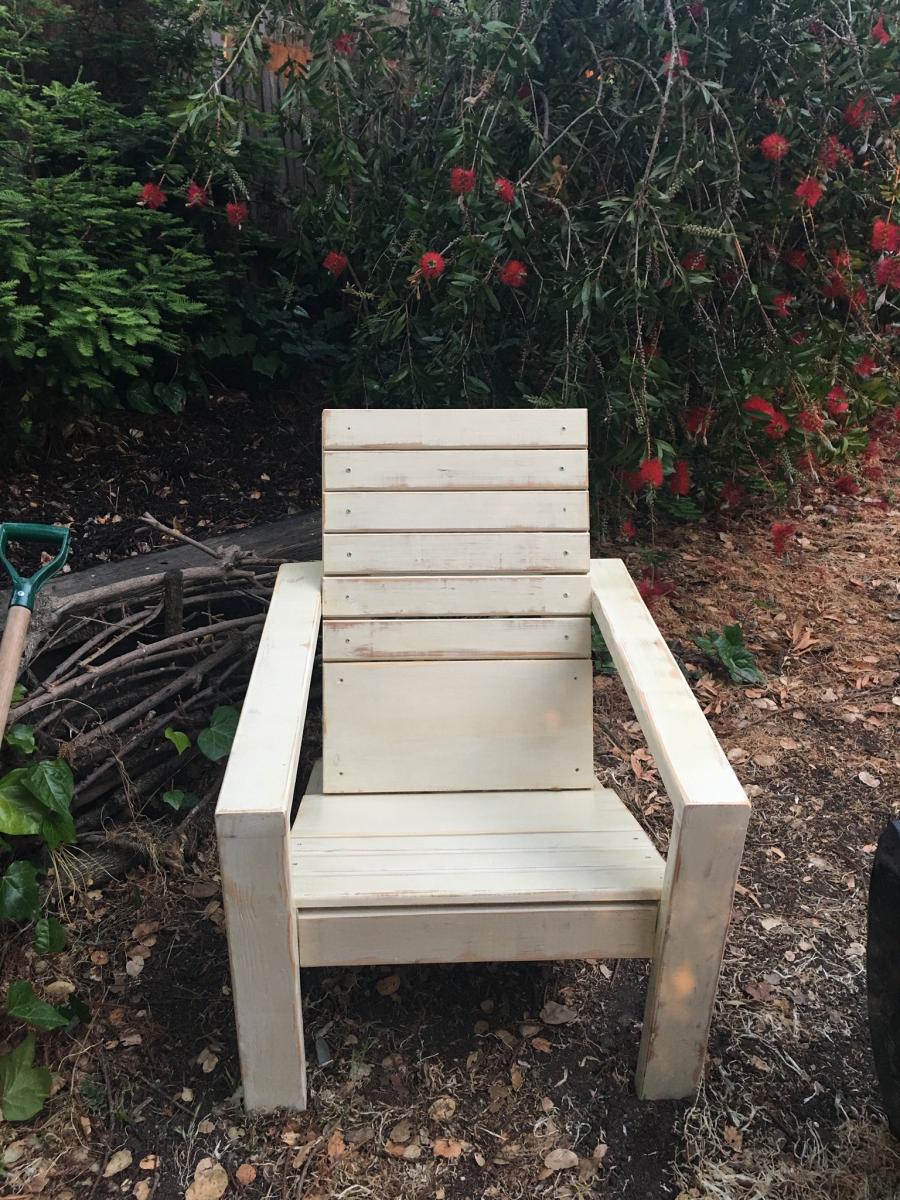
Adirondack chairs
I made five of your 2 x 4 Adirondack chairs. Well I started with one and then my wife wanted four more after she saw how it turned out. We absolutely Iove them and they are easy to make! Thanks Ana!
David Knight
Built from Plan(s)
Comments
Tue, 10/05/2021 - 09:30
Wonderful addition!
Those looks great, so happy to hear you're enjoying them!
artwork ledges

Ledges for my kids artwork.


Built from Plan(s)
Estimated Cost
$0.00
Estimated Time Investment
An Hour or Two (0-2 Hours)
Finish Used
1. one coat primer
2. two coats Behr elegant white semi gloss
2. two coats Behr elegant white semi gloss
Recommended Skill Level
Starter Project
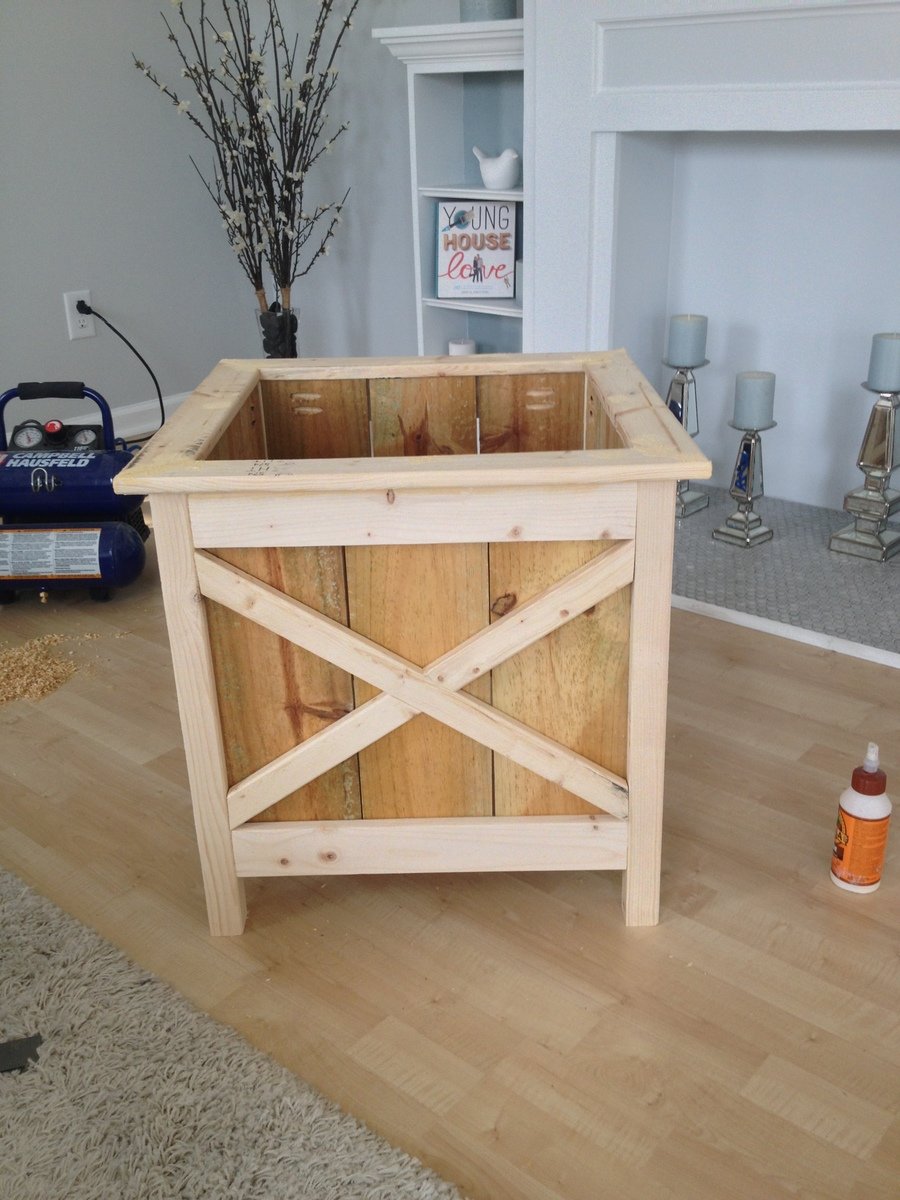
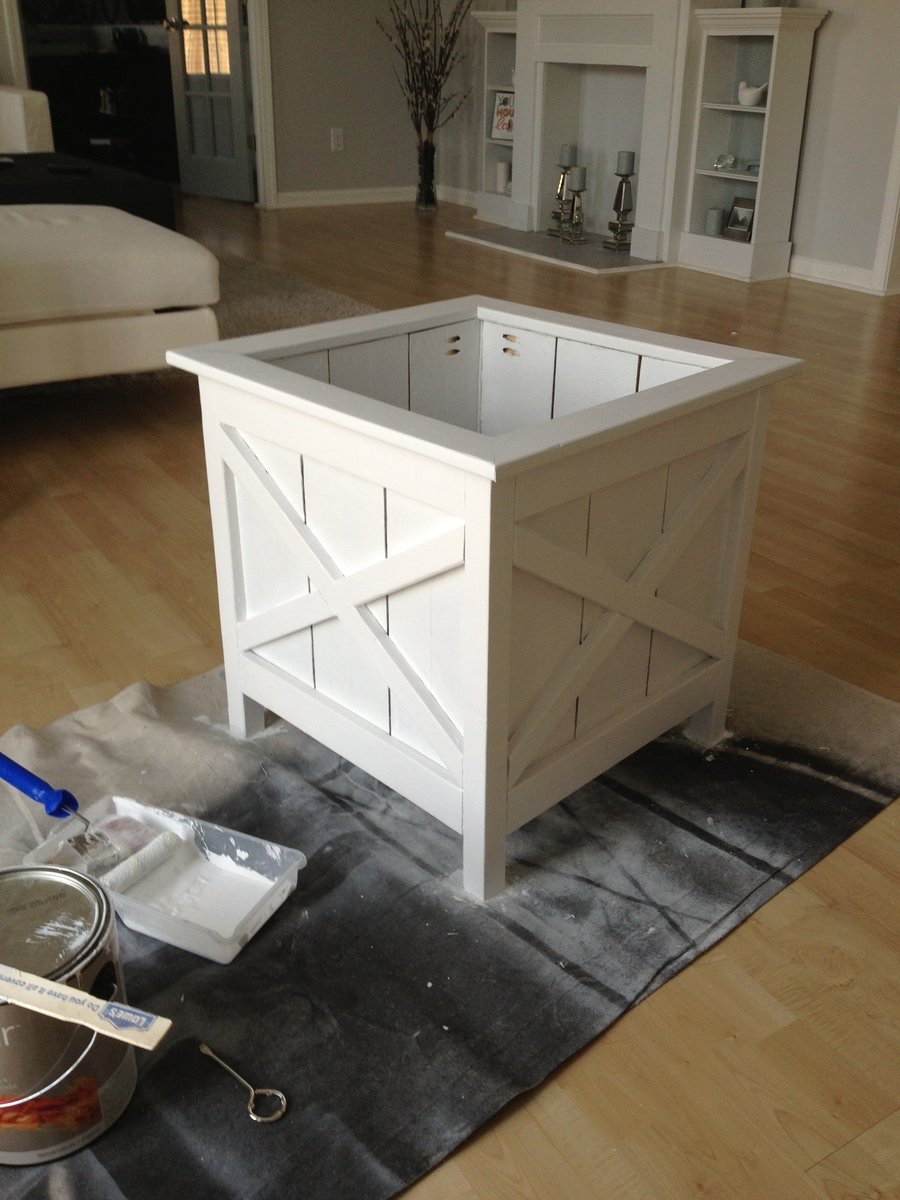
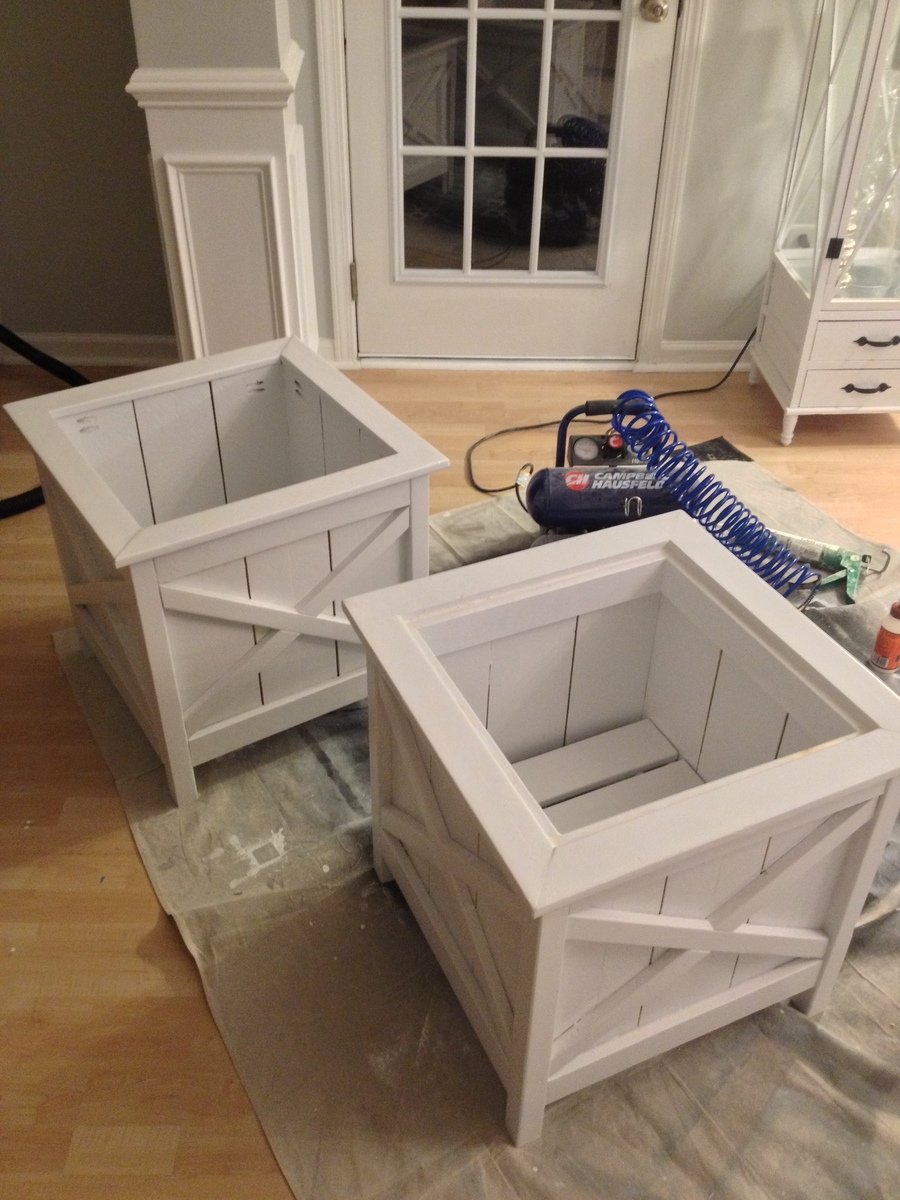
X Planters
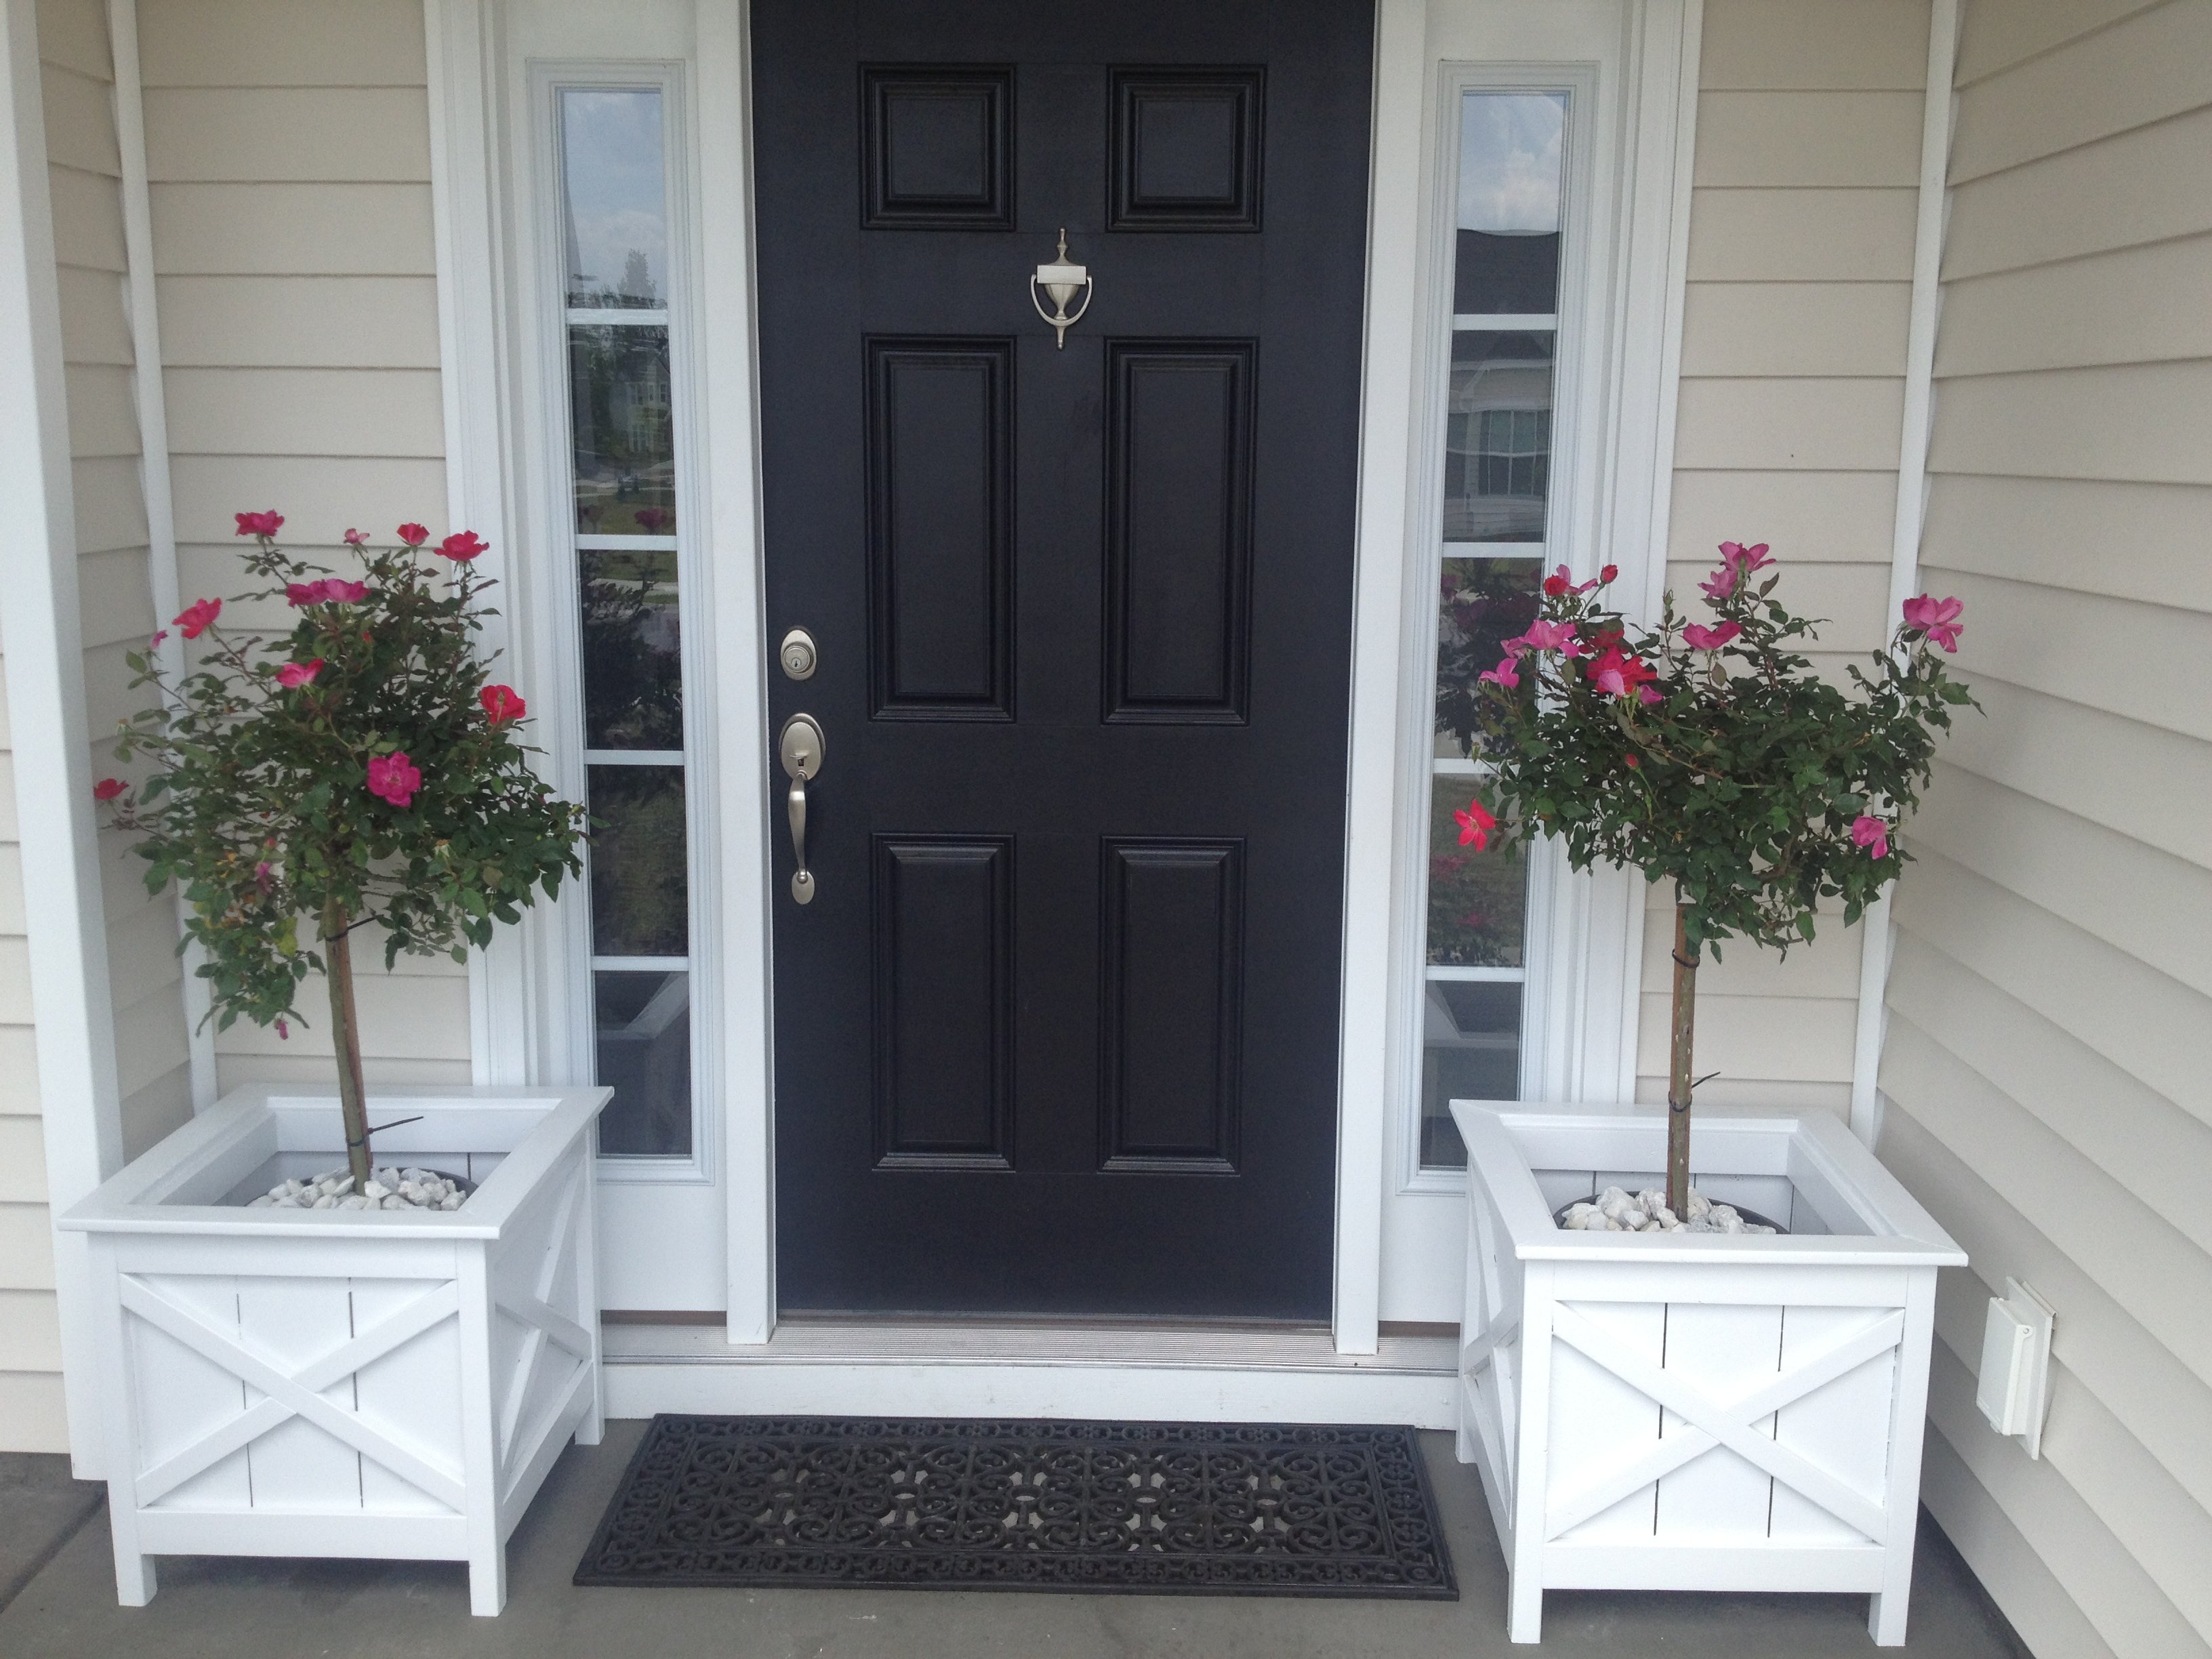
I took the original plan and tweaked it to have the X's on the sides to go along with the Weatherly Outdoor Sectional I made. Also, added the top ledge to finish it off.
Cost was less than $20 just as the plan said. Use fence pickets and furring strips to save money!
Built from Plan(s)
Estimated Time Investment
Afternoon Project (3-6 Hours)
Finish Used
Valspar Outdoor White Paint
Recommended Skill Level
Beginner
Comments

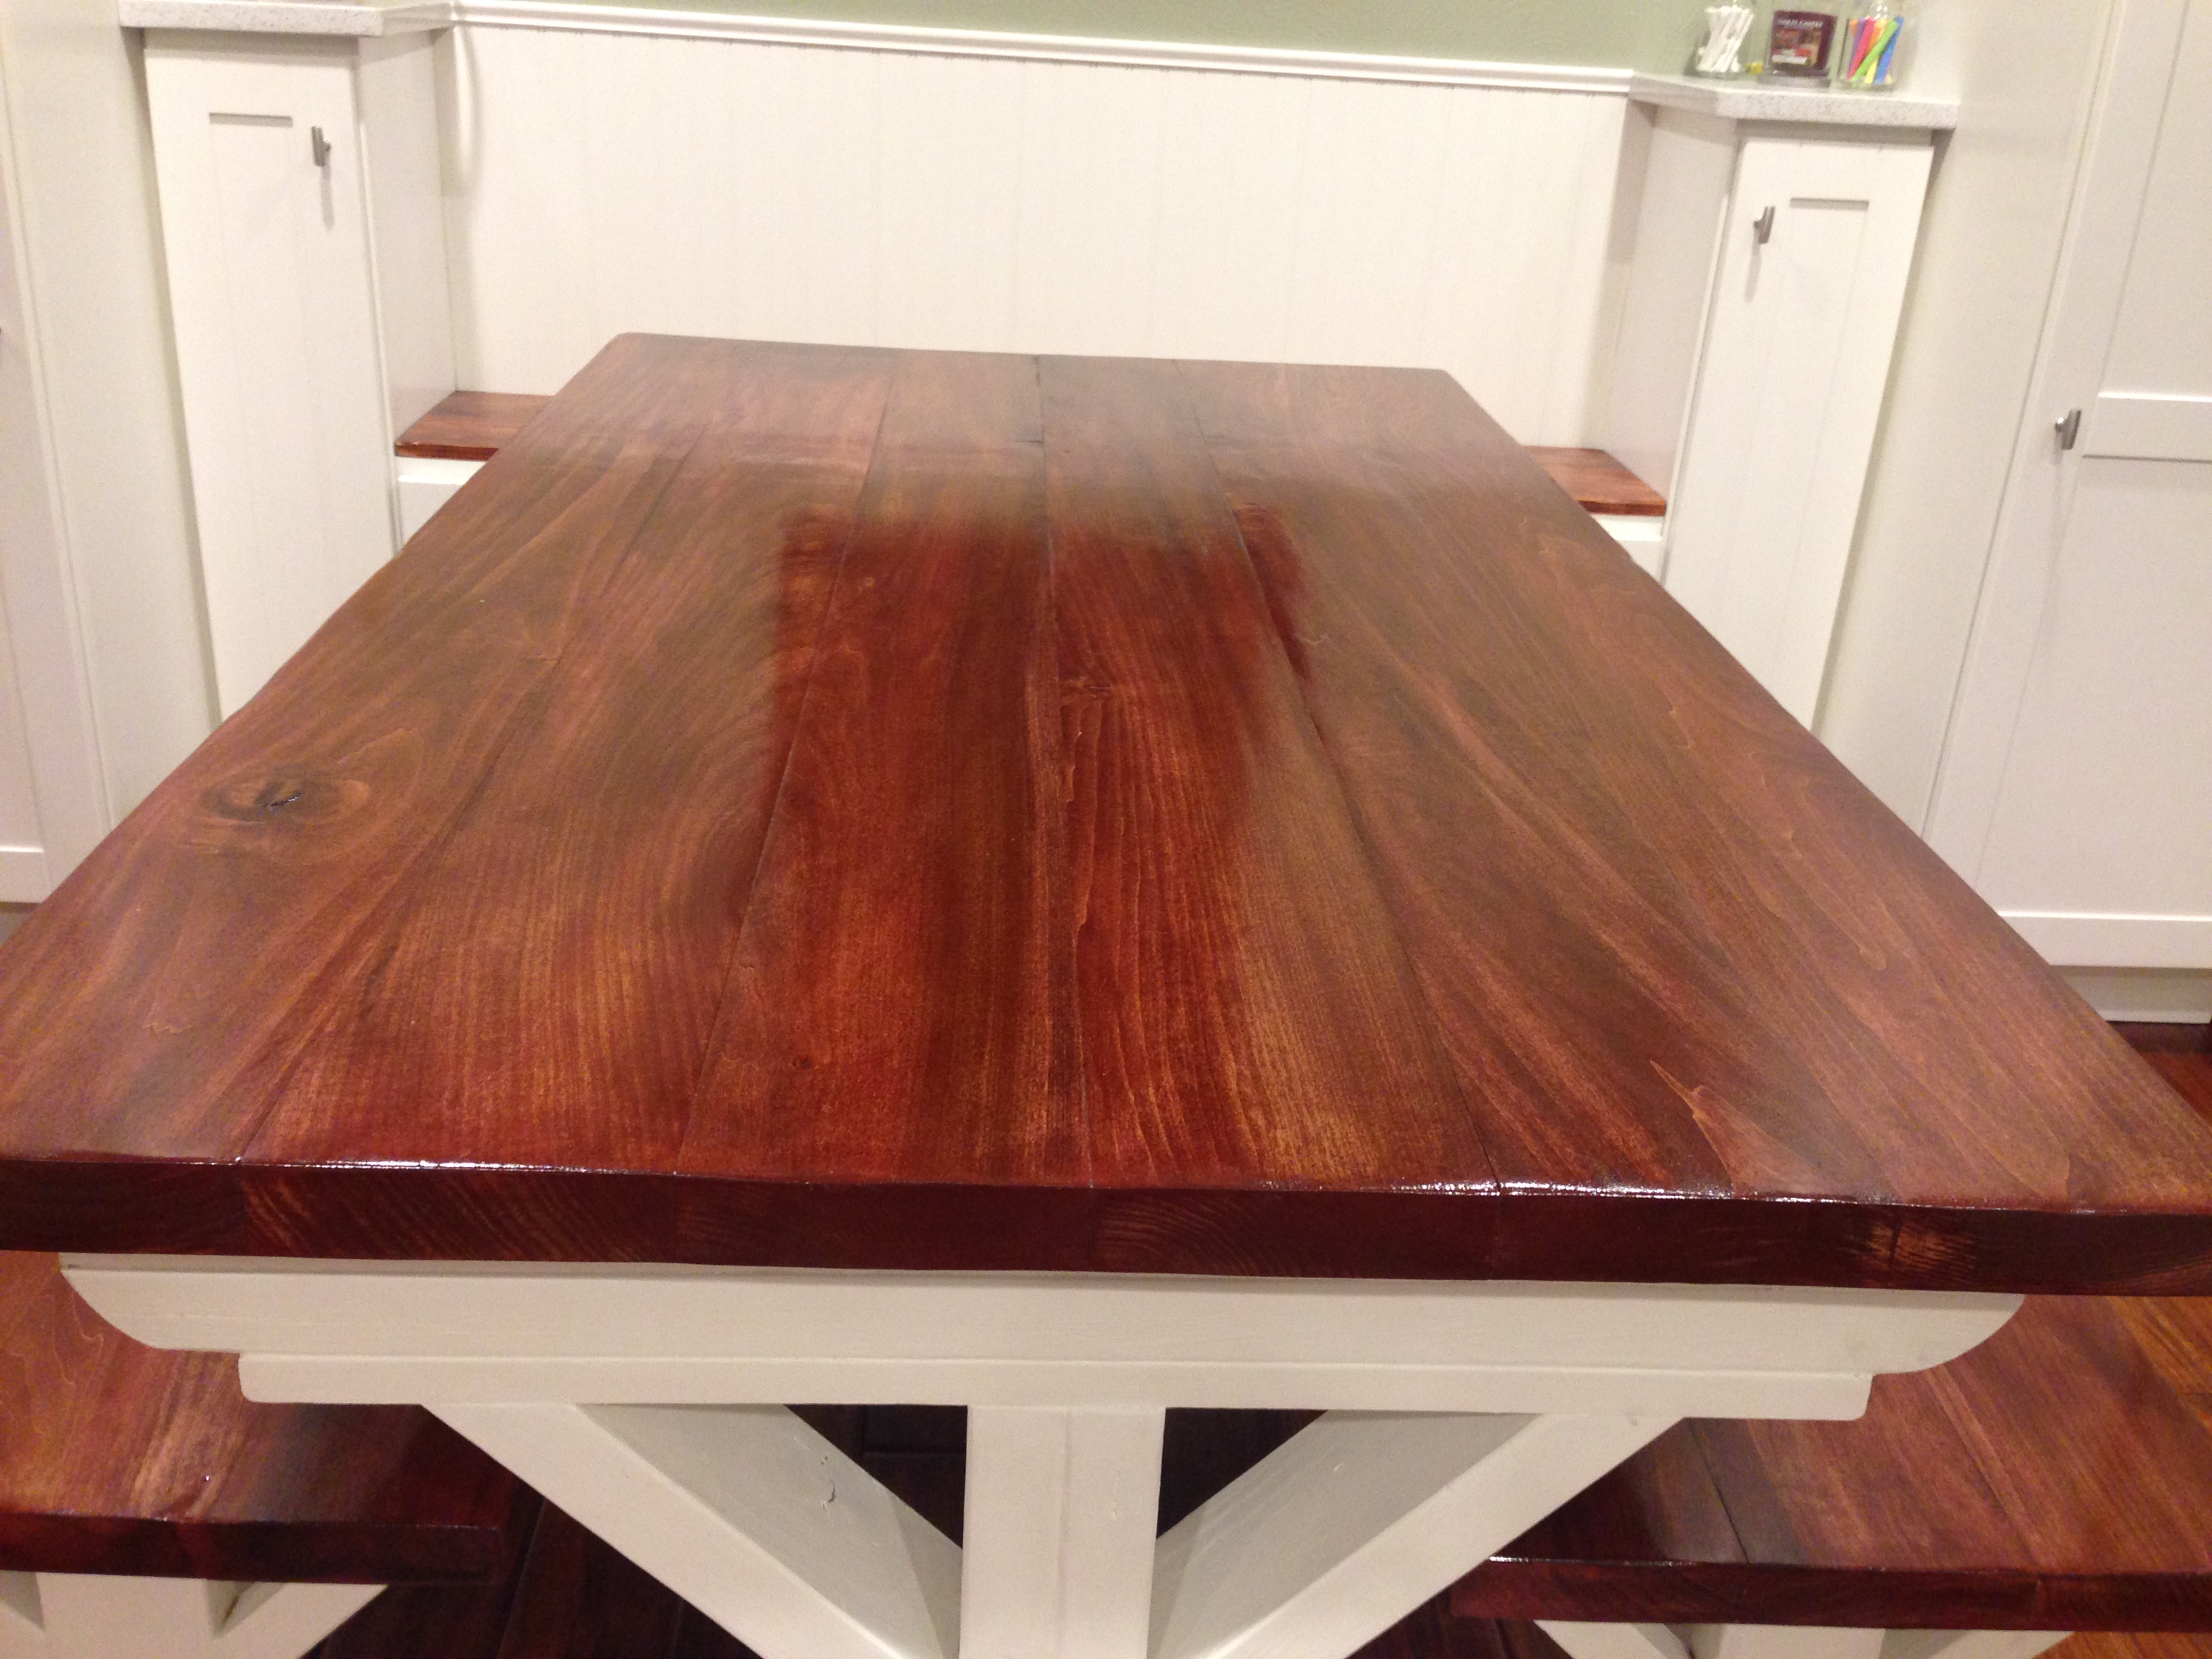
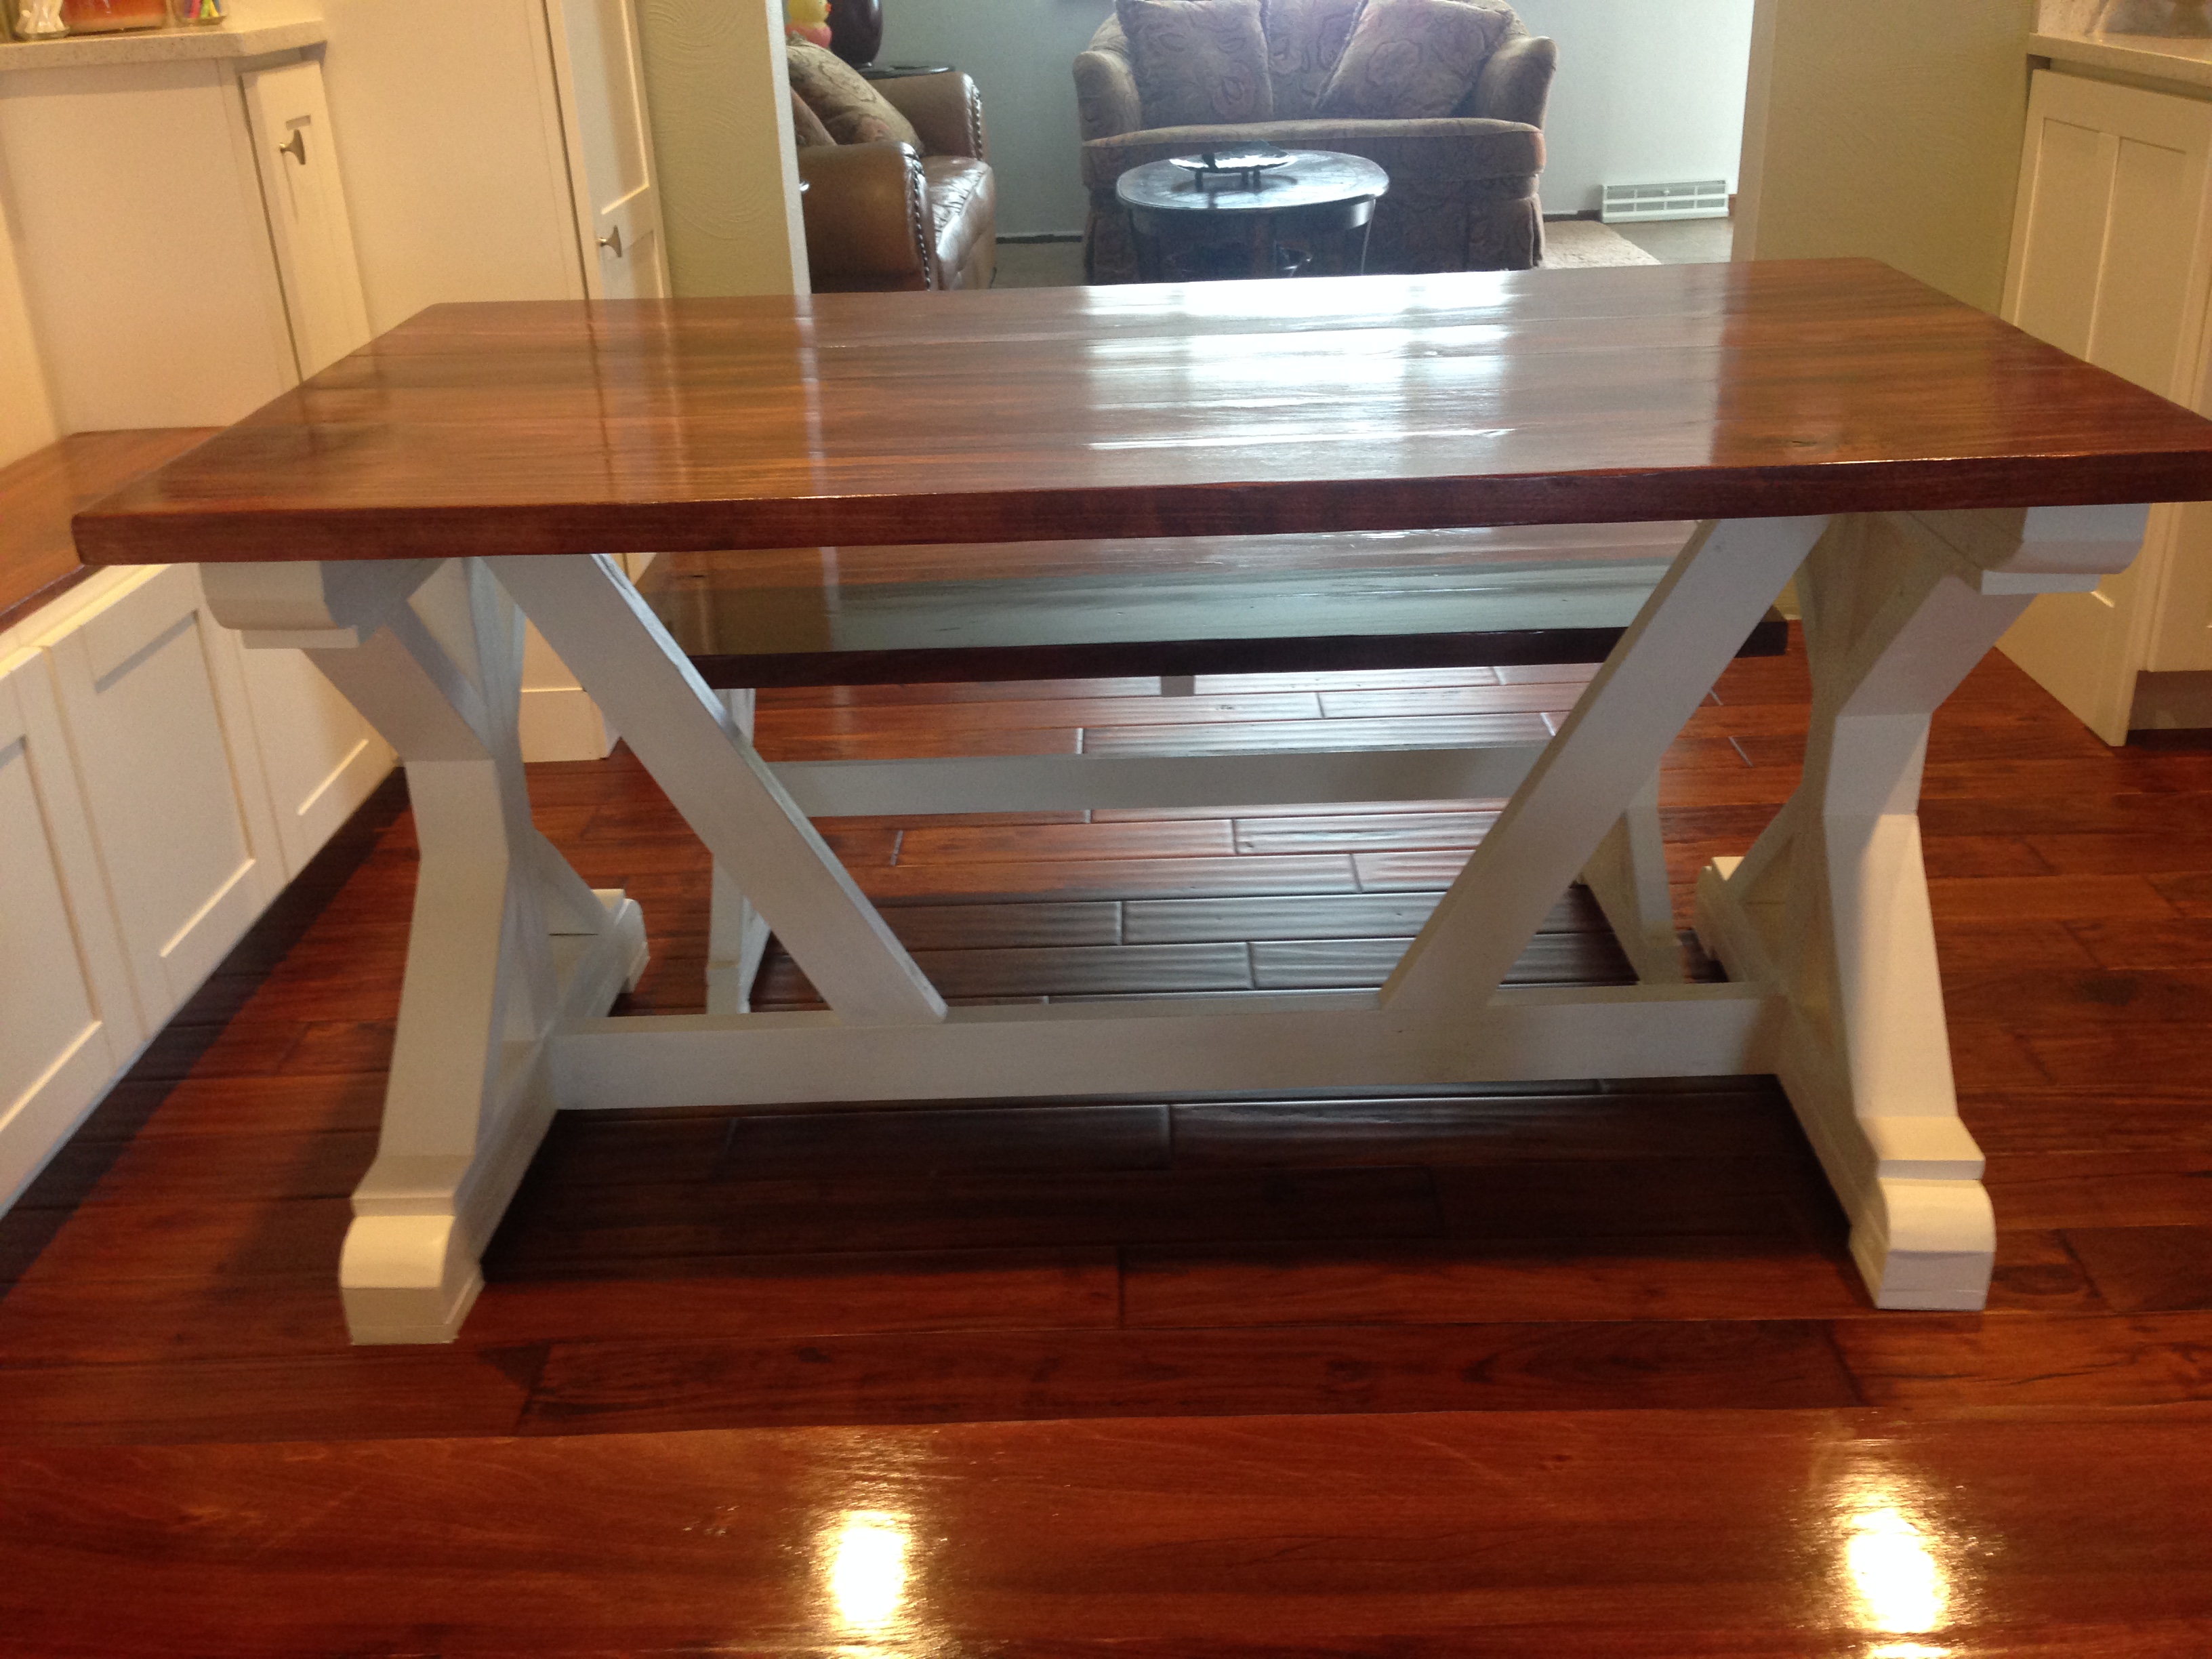
New Kitchen, New Table!
We just finished our complete kitchen remodel, from tearing down walls to new cabinets, appliances, hardwood floors, and countertops. I assembled the cabinets and installed them myself, along with tiling the backsplash and nailing down the floors. So I though I'd try my hand at furniture building. It was my first time building anything like this and I thought it turned out pretty nice!
I used left over boards from the removation for the bases of the table and benches and 2x6 poplar boards for the tops. I made some adjustments in the size since we're only a family on 3. Since I made the table shorter, I changed the 45 degree cuts on the cross braces to 30 degrees so they would fit.
Built from Plan(s)
Estimated Cost
$300 just because I bought high quality poplar with the edges planed so they would fit together with no gaps
Estimated Time Investment
Week Long Project (20 Hours or More)
Finish Used
minwax sedona red
zar merlot
minwax red mahogany
in that order, but I found that the stain effects poplar differently than it does pine
3 coats of brush on polyurethane sanded with 220 in between coats
zar merlot
minwax red mahogany
in that order, but I found that the stain effects poplar differently than it does pine
3 coats of brush on polyurethane sanded with 220 in between coats
Recommended Skill Level
Beginner
Comments
Book Nook Bed
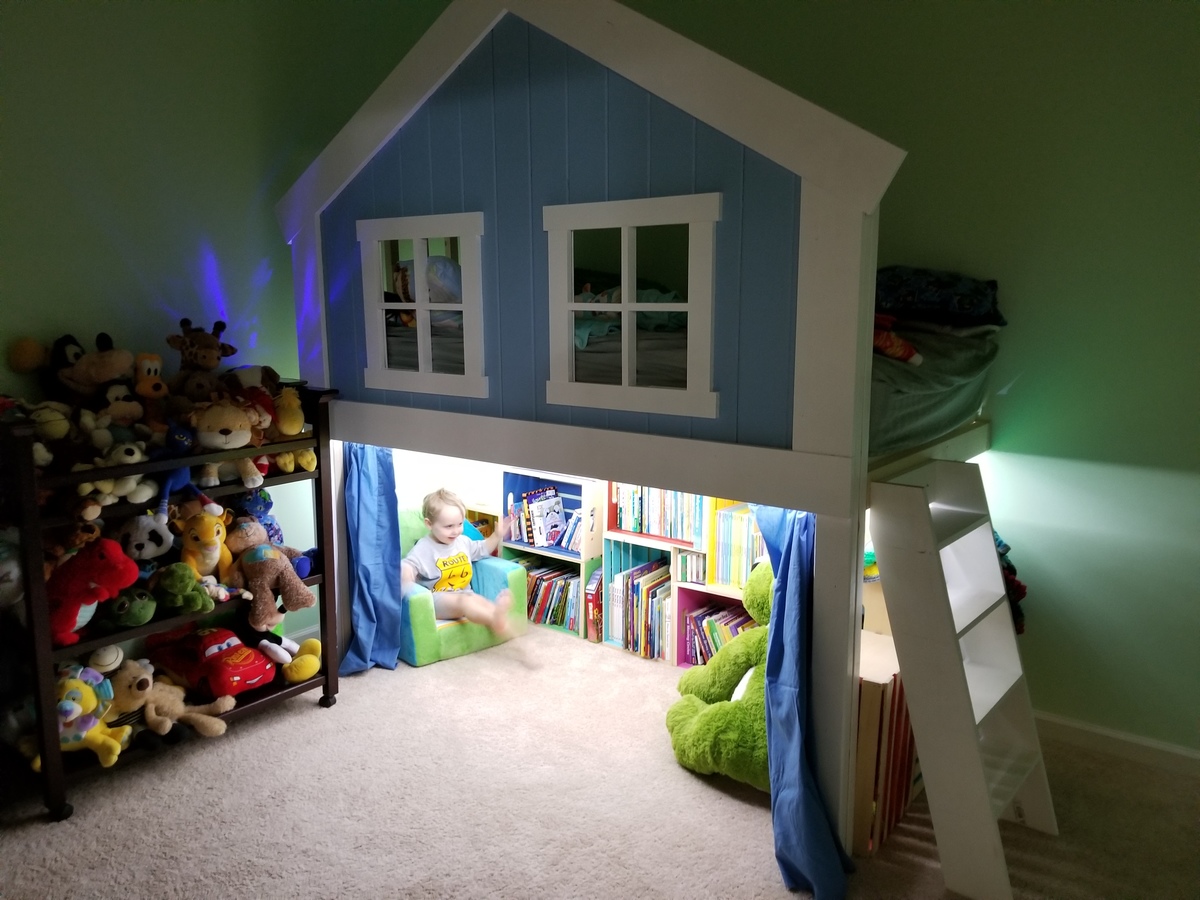
The bookshelf, of which I made last year, was made from crates. I used Ana's Clubhouse Bed idea as the basis for mine but I deviated from it quite a bit. Instead of a front entrance I made a side entrance and added two windows. Additionally I attached it to the wall instead of making it two sided.
Built from Plan(s)
Estimated Time Investment
Week Long Project (20 Hours or More)
Recommended Skill Level
Intermediate
Double Seat Outdoor Chair

Very easy and quick to build. It is amazingly comfortable. There are no cushions needed. My wife loves it. I took parts of Ana’s Simple Outdoor Lounge Chair and Modern Outdoor Chair with a twist patterns and modified them to be a double seat instead of a single seat.
Built from Plan(s)
Comments
Rustic TV/Media Console Table
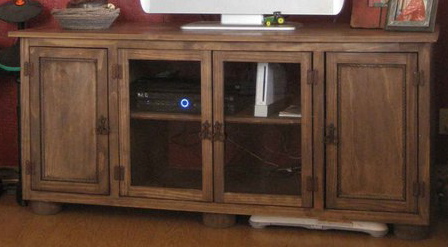
This is our first build ever, not what I would suggest for a first project, but it came out wonderfully! This was a piece built specifically for a friend of mine who had just cancelled an order for a console just like this because the company she was buying it from wanted to charge her an arm and a leg for shipping.
I had been spending a lot of time on Ana's site and started to use Sketch-up to build some pieces that I needed here for us. I told her, Heck, I could build that.. and so it began. :-)
This is made of plywood and is mostly pine, with a couple of exceptions. As soon as Ana has her plan submission thing going right, I will post plans to build this console for yourselves! :-)
I listed this as intermediate because I think you would need to have at least a decent knowledge base as well as specific tools such as; Kreg Jig, circular saw or table saw, power sander and nail gun. I also listed it as 20 or more hours, because that's what it took us to build. You might not take that long, but this was our first build with NO real experience. :-)
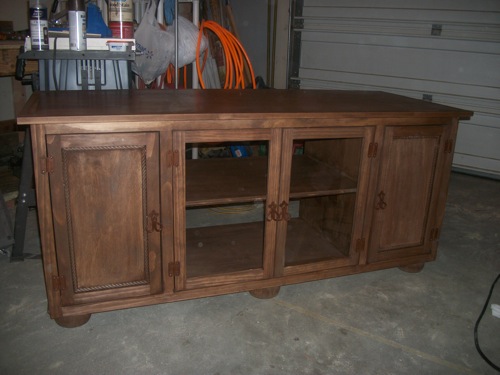
Estimated Cost
$250
Estimated Time Investment
Week Long Project (20 Hours or More)
Finish Used
Minwax water-based stain, clear tint, in Coffee
Recommended Skill Level
Intermediate