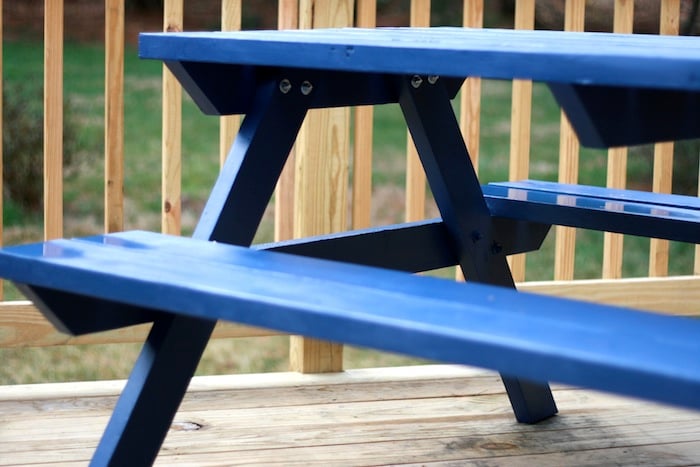
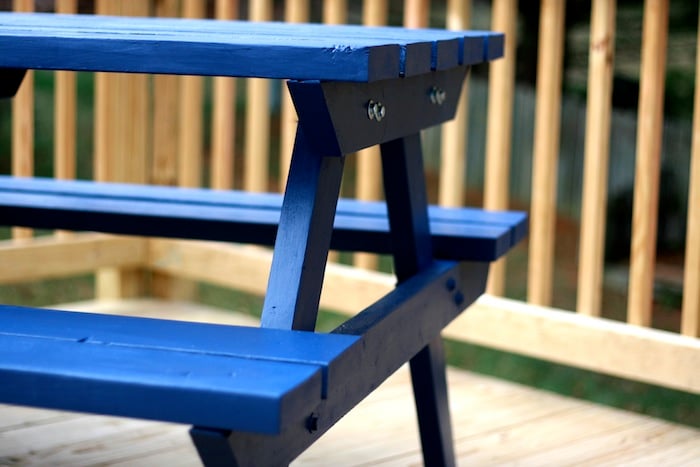
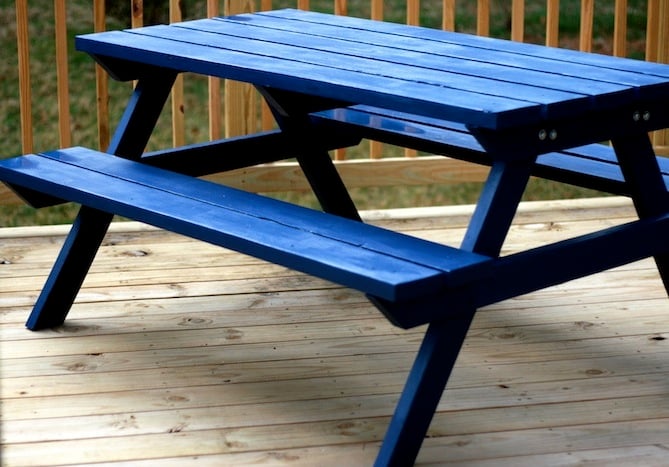
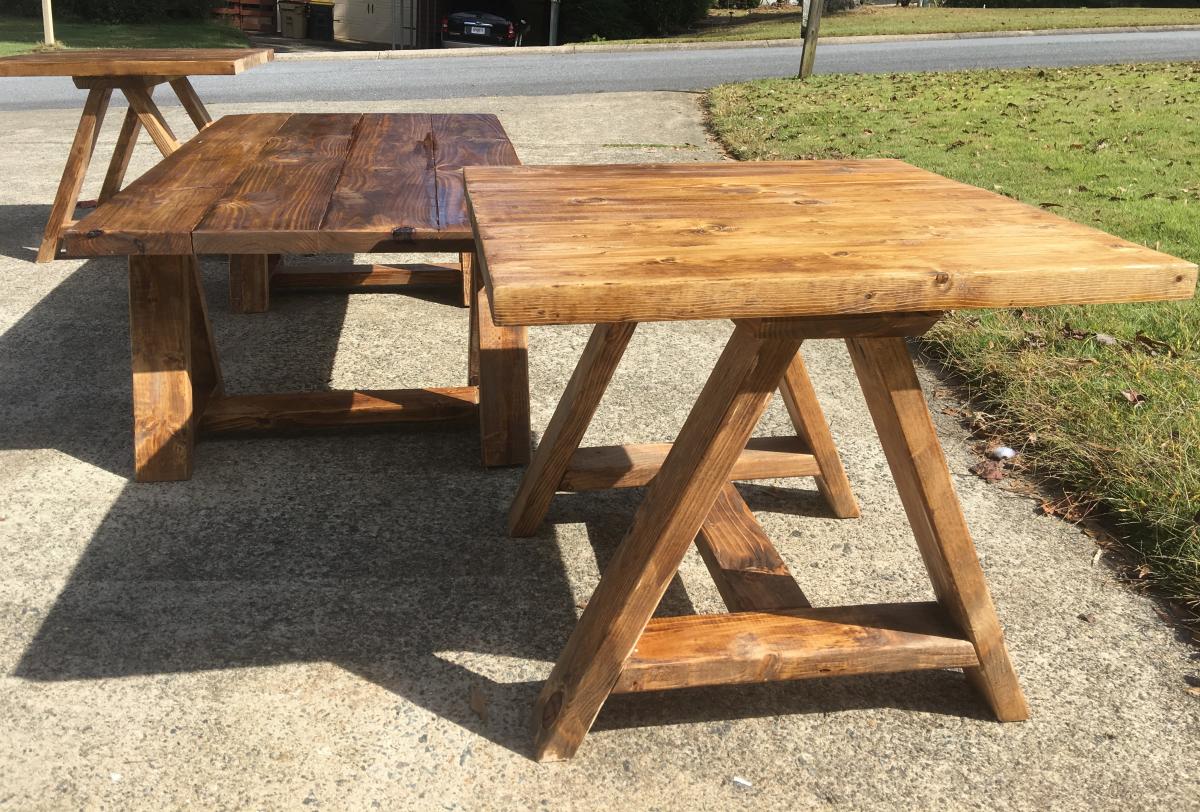
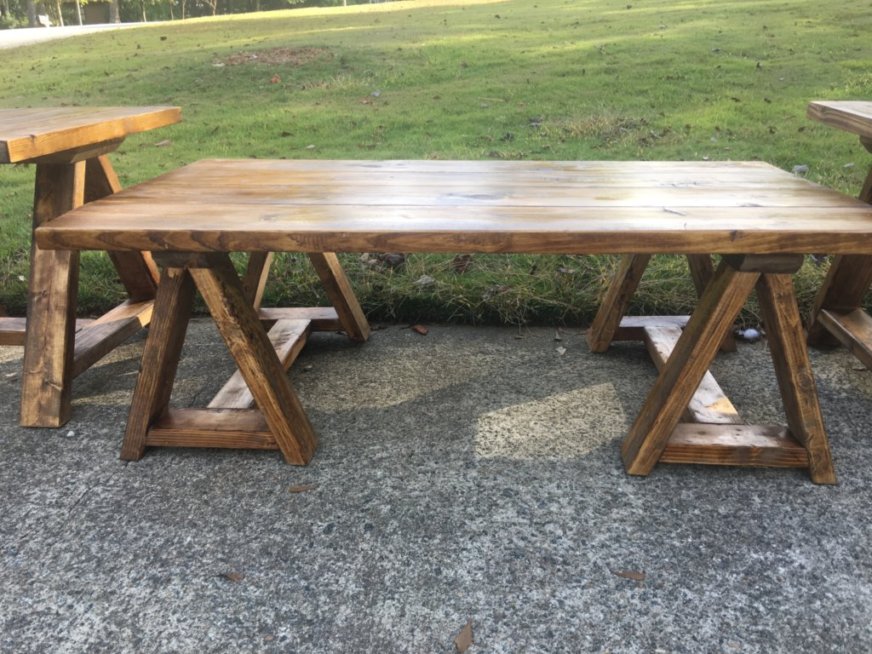
Picnic Table
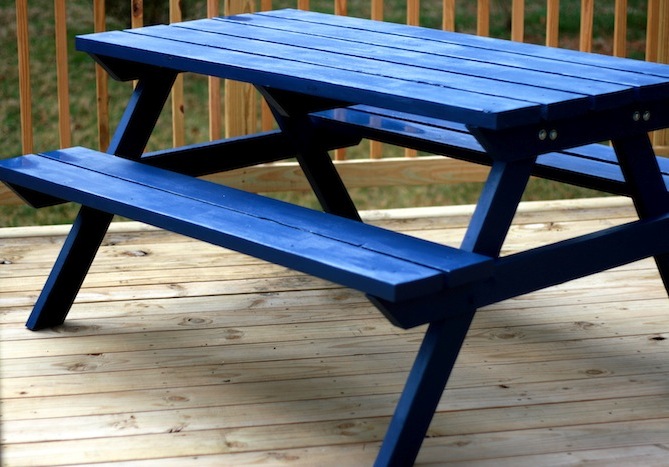
Our first project of many to come!!! Thanks Ana for your website!
Built from Plan(s)
Recommended Skill Level
Starter Project
Our first project of many to come!!! Thanks Ana for your website!
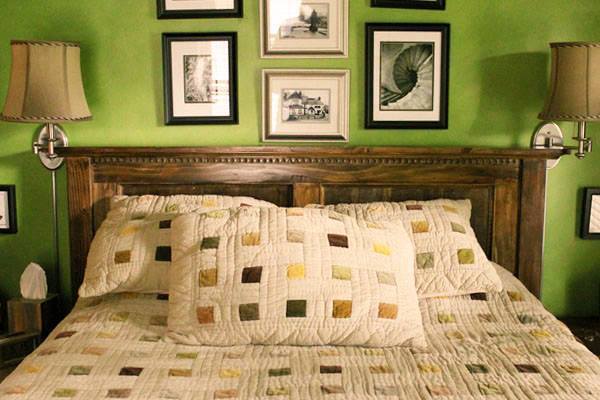
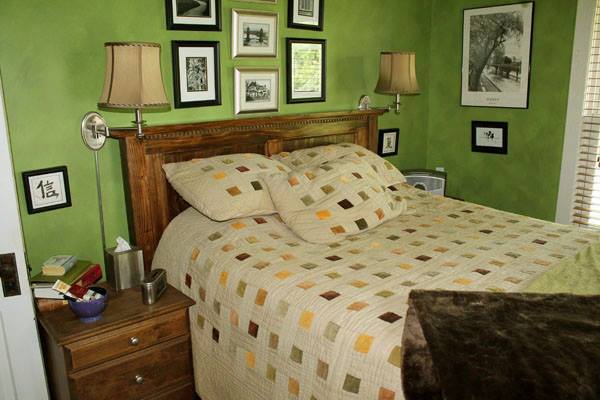
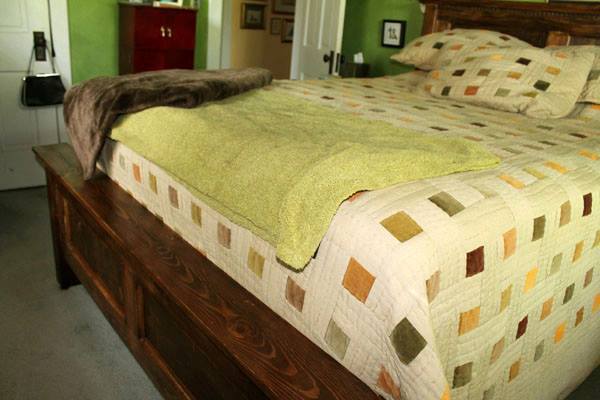
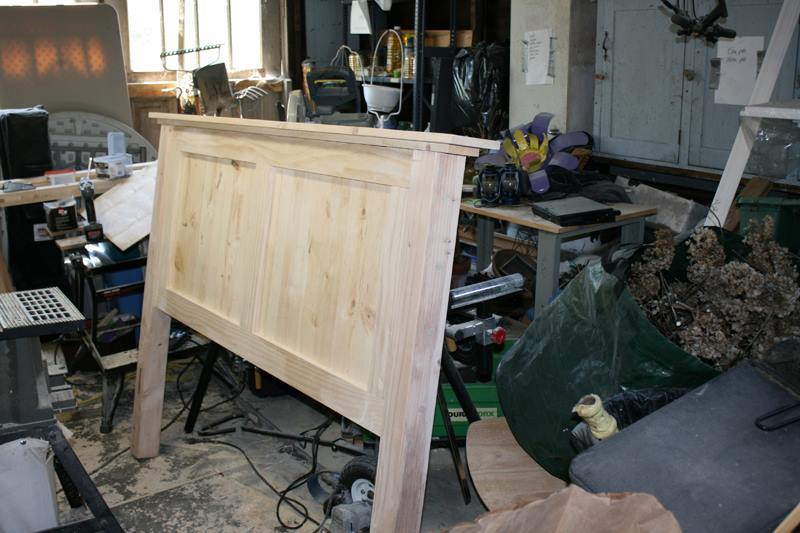
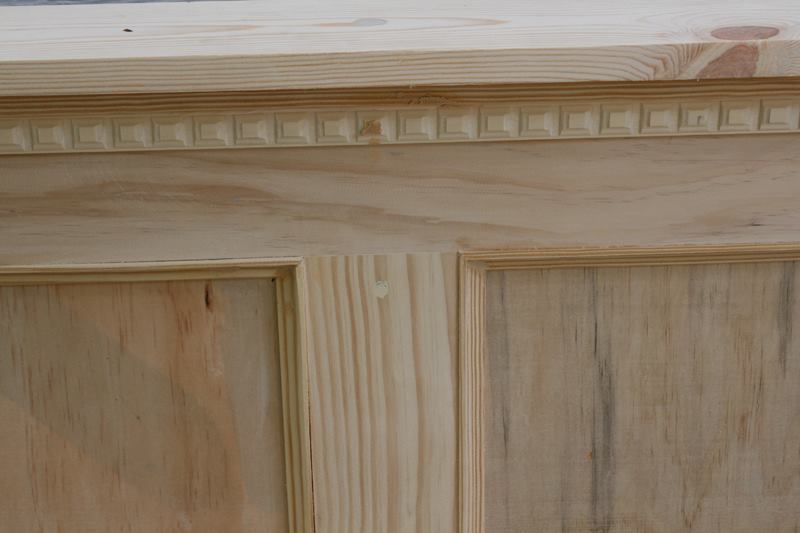
Started off as the rustic farmhouse bed, but I couldn't help adding bits to it - dentil moulding, panels on the headboard and footboard.

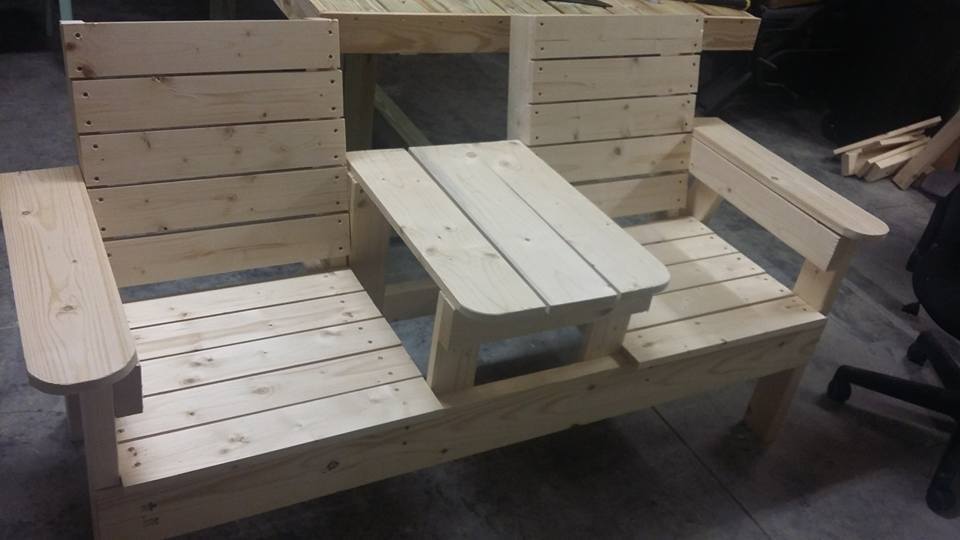
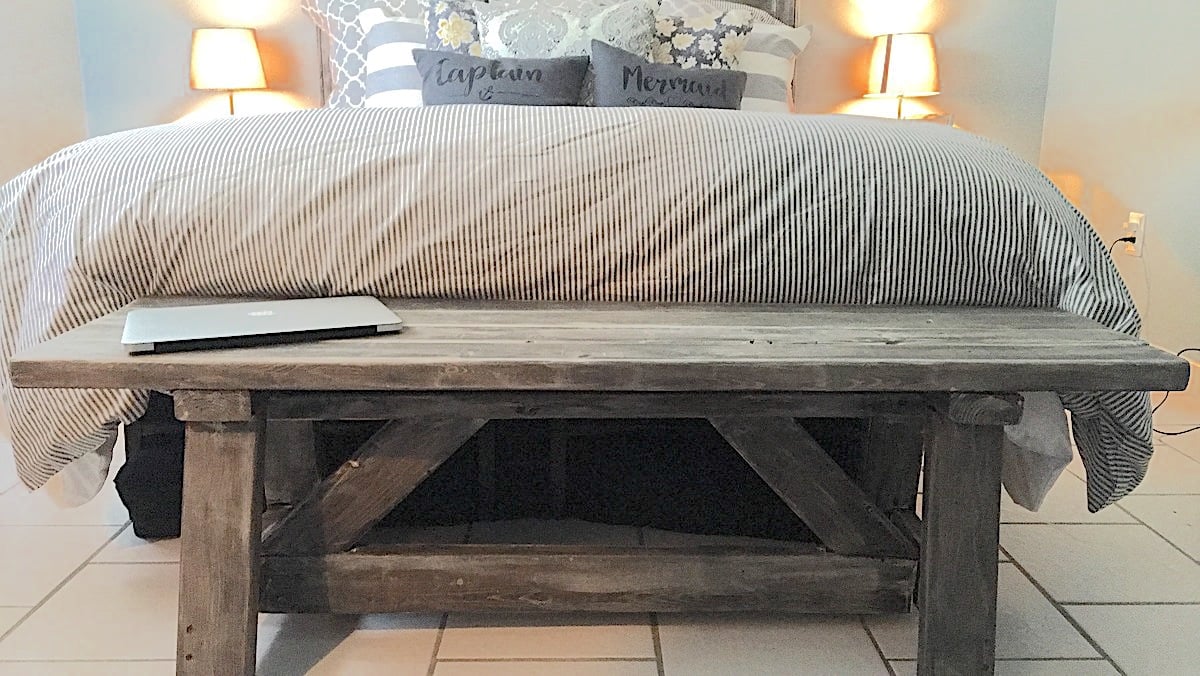
I am so very happy on how this bench turned out. I am new at building things and so I asked my husband to help me we did this in a day. now I have 3 people that want one (family of course.)
Wed, 03/30/2016 - 07:46
Do you have plans? I haven't built anything yet and have my neice's wedding shower this weekend...thinking this would be an AWESOME gift for her!!!
Can one lady with one weak arm take this project on by herself???
And, can you tell us how much it cost you to make?
Thanks!
Wed, 03/30/2016 - 10:57
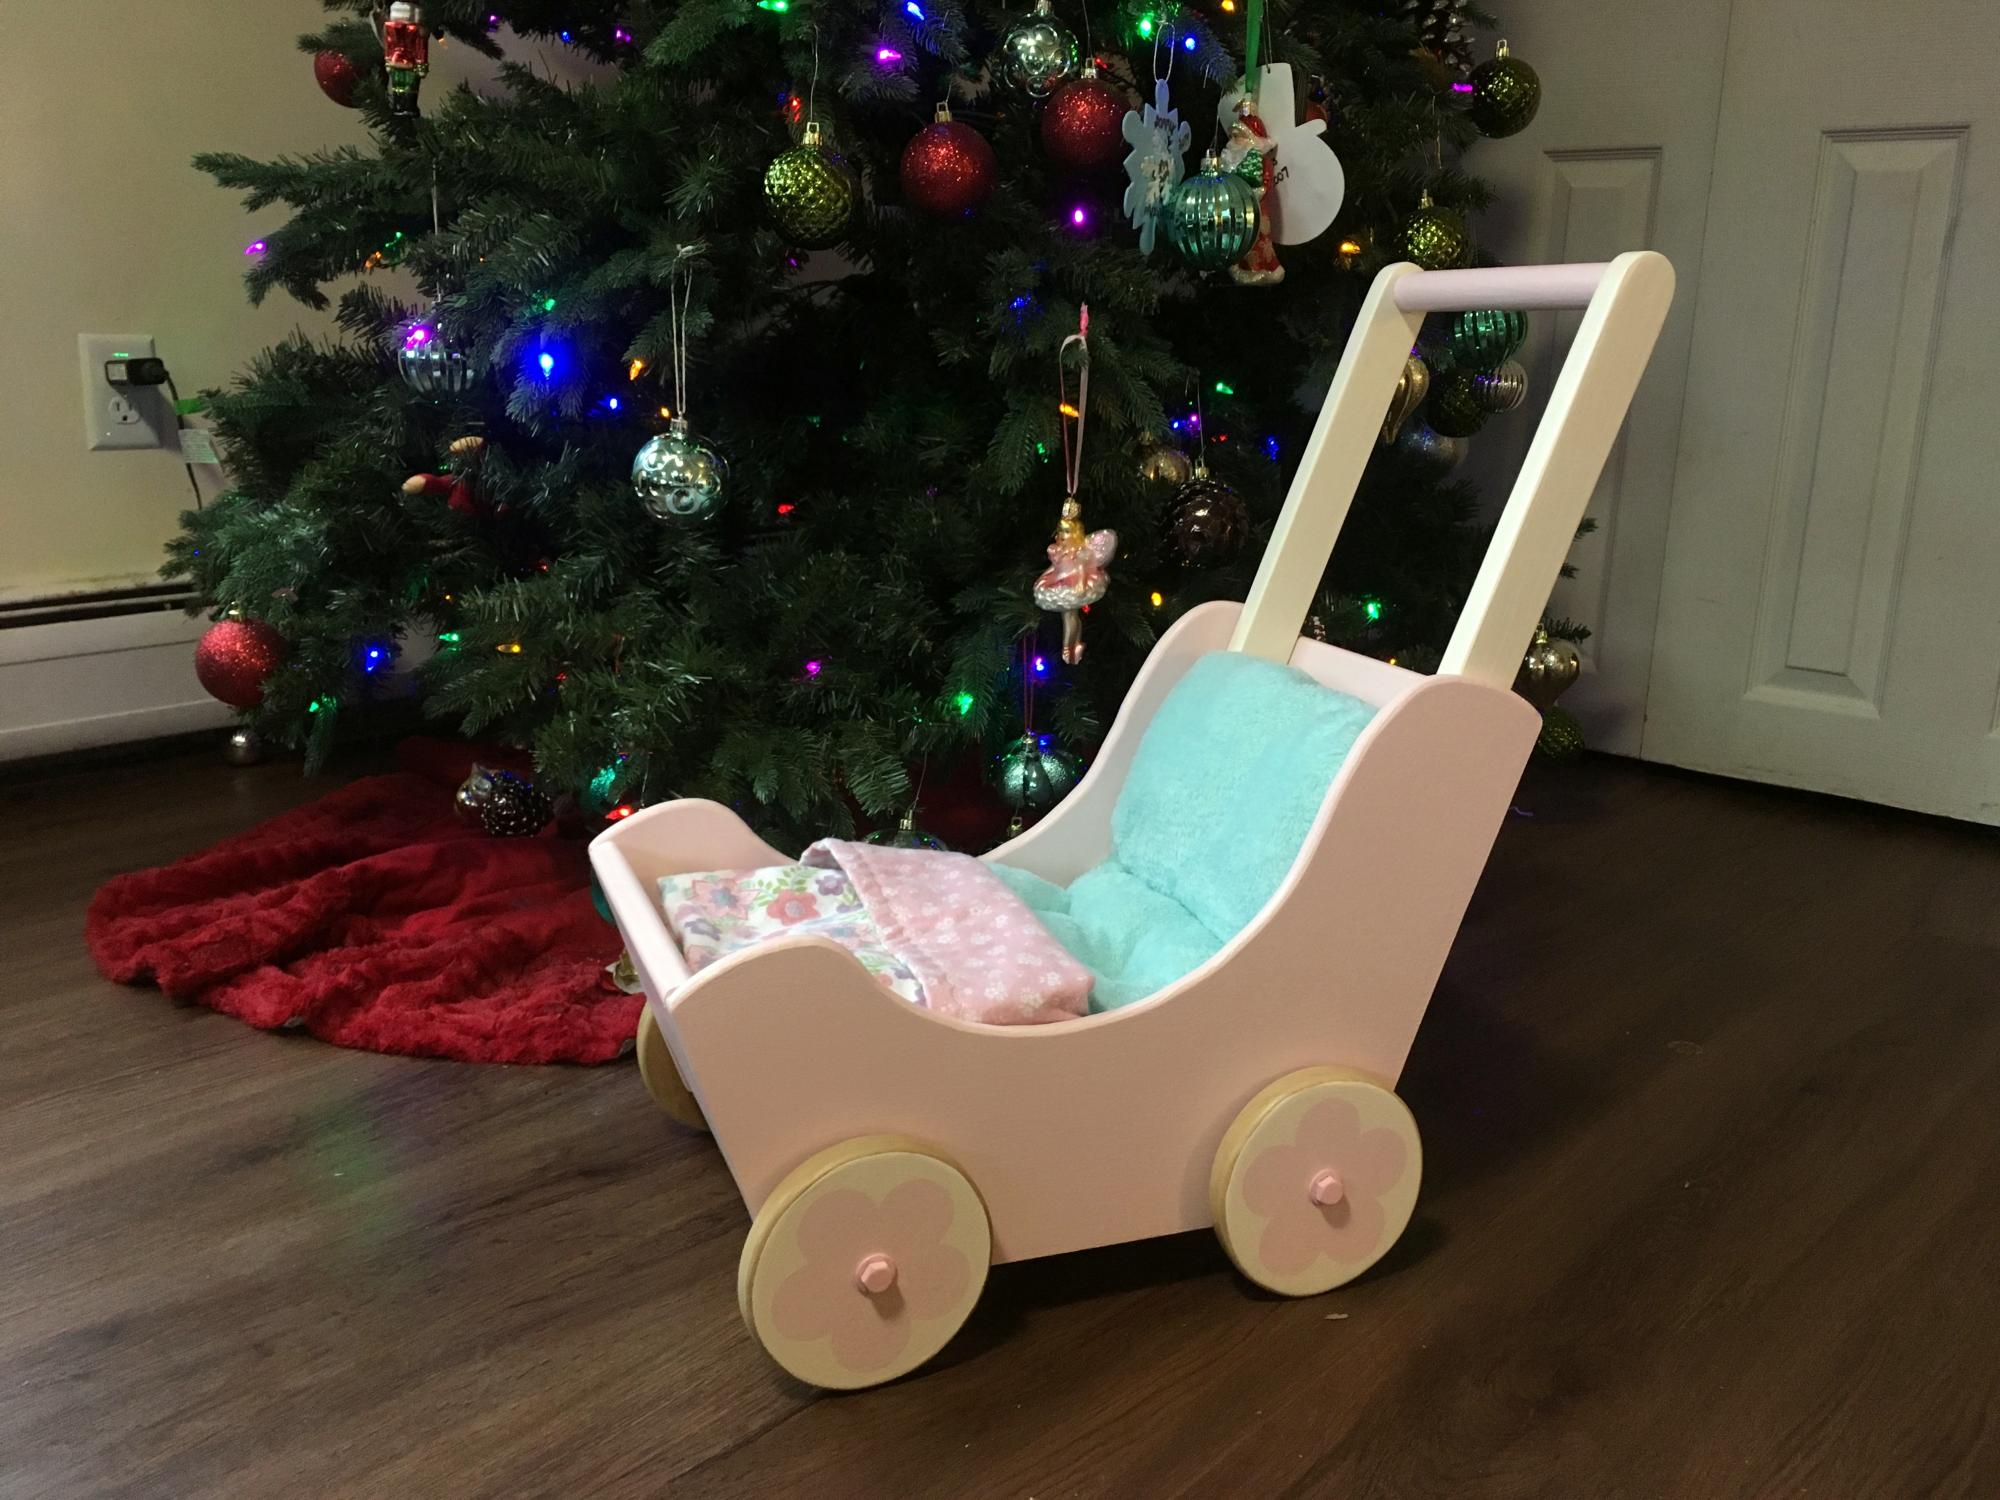
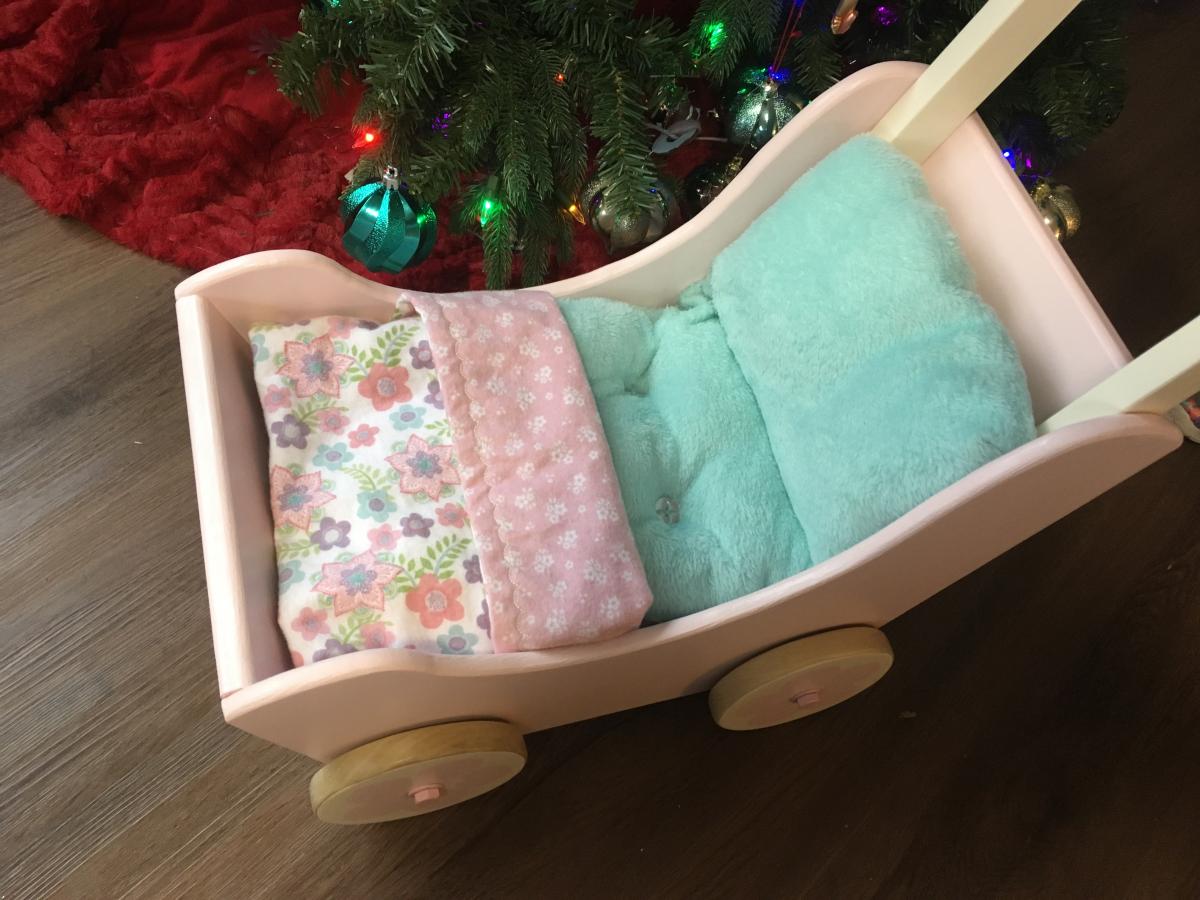
I made this stroller to donate to a charity fundraiser. I'm very pleased with how it turned out! I routered the edges with a small round over bit, which I think makes it a bit safer for little ones. I attached the 1x2's of the handle 3" above the stroller bottom, which gives it a height similar to other doll strollers. I also decide to change the way the wheels were attached. In the picture, the wheels are attached as the plan shows. I decided I would use (2) 3/8" metal rods as axles, washers for spacers, and an axle cap on each end. This works really well, and the axle caps look nicer than the painted bolts. Unfortunately, I donated the stroller without taking updated pictures!
More Photos and details: https://www.ana-white.com/community-projects/reclaimed-wood-headboard-q…
I used Ana's pattern, but modified it a bit to suit my needs and my materials. I used a large pallet I got for free from a local building supply company. My total cost was $8.00, which was for the hinges and the screws. I am so happy with it, and very grateful to Ana White for providing the plans!
Tue, 08/20/2019 - 14:54
Can you post some pics of the back/underside so I can see modifications better? I was hoping to do something just like this and wanted to get some inspiration for the backrest portion.

I got tired of the aluminum framed bunk beds in my kids room, and wanted to build something they can enjoy for years to come.
My 7 year old didn't have the luxury of one of our dogs jumping up on his bed, as he was on the top bunk, and my wife and I didn't interact with him as much as we would have liked during his reading time prior to bed.
Only one thing to do....build the boys some beds. Although they have a little less room in their bedroom, they have their own individual beds and storage nooks.
In an effort to reduce wasted space, I took a similar page out of birdsandsoap's book by hinging the footboard to create easy access to the void under the slats.
The head and footboards were 'tiled' by simply cutting 1x2 and 1x3 pieces and attaching them with wood glue.
Between the sanding, staining, and poly coats, it took about a week (on and off) to complete the set, but overall am very happy with the finished project.
Only 1 bed is included in the pics, as the other one is identical.


Wed, 01/08/2014 - 18:03
This looks super! The "tiled" wood design on the headboard and footboard looks awesome, love the finish too!

Thu, 01/09/2014 - 04:05
I was unsure exactly how I wanted to design and finish, so I just looked through tons of brags on here. I think they are very cool now that they are done, and my kids end up using the hinged footboard to gain access to build small forts.....
Thanks for the great feedback!
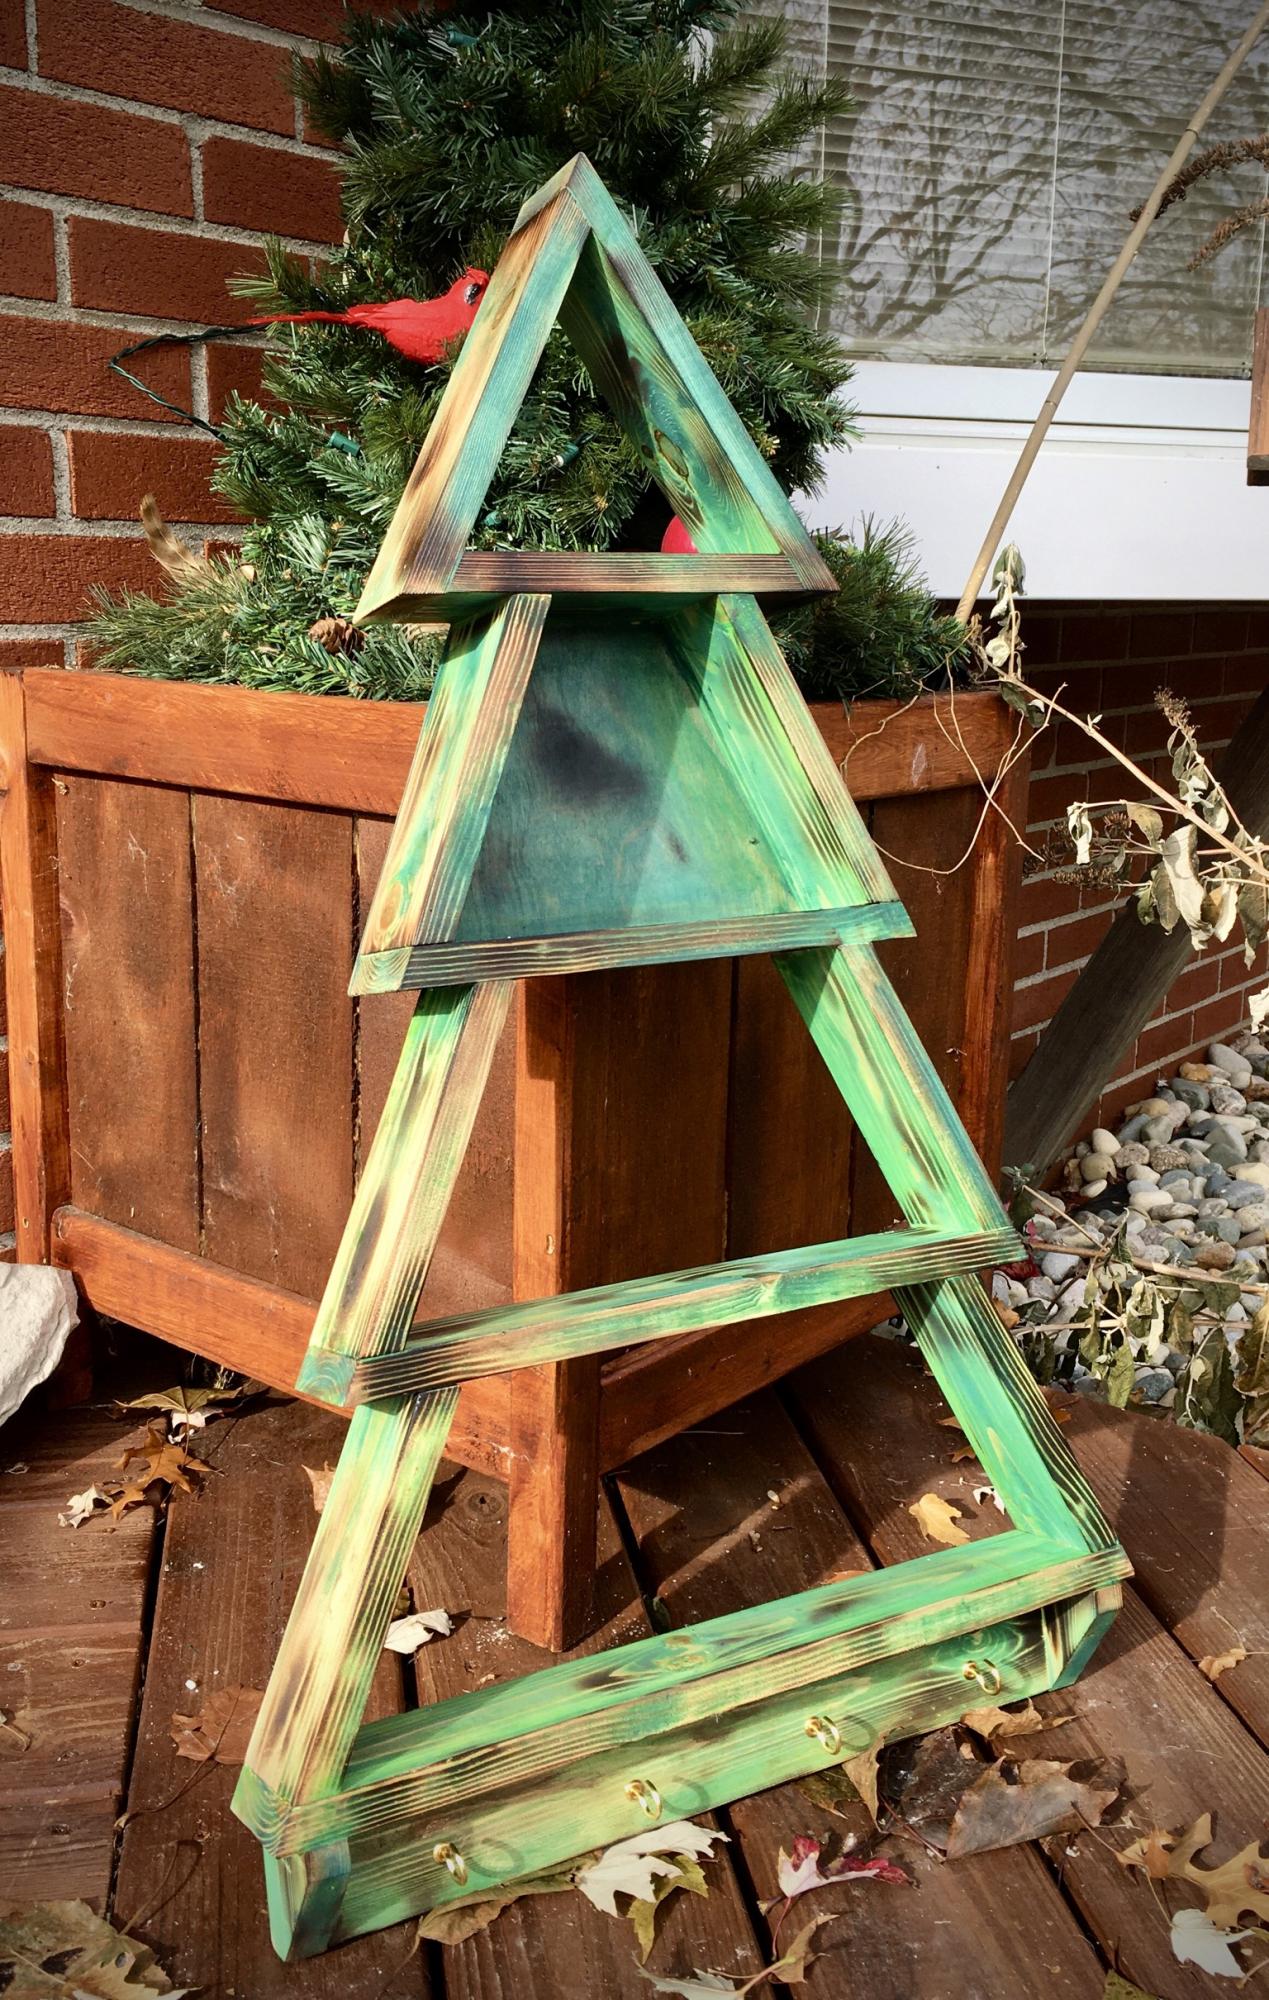
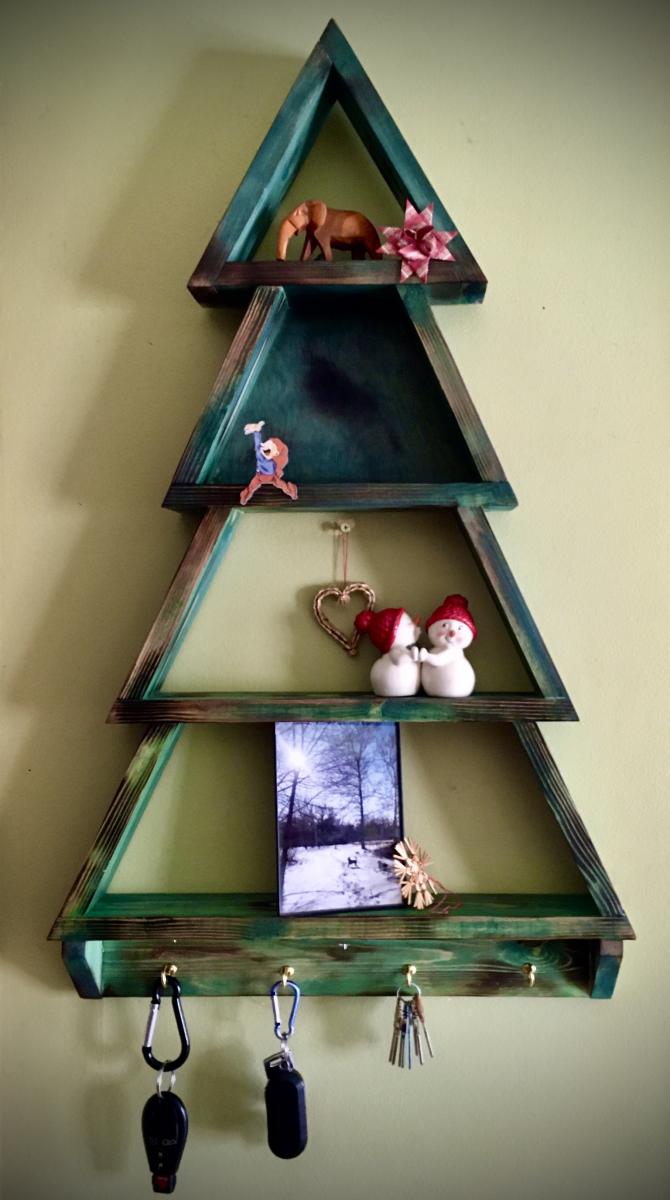
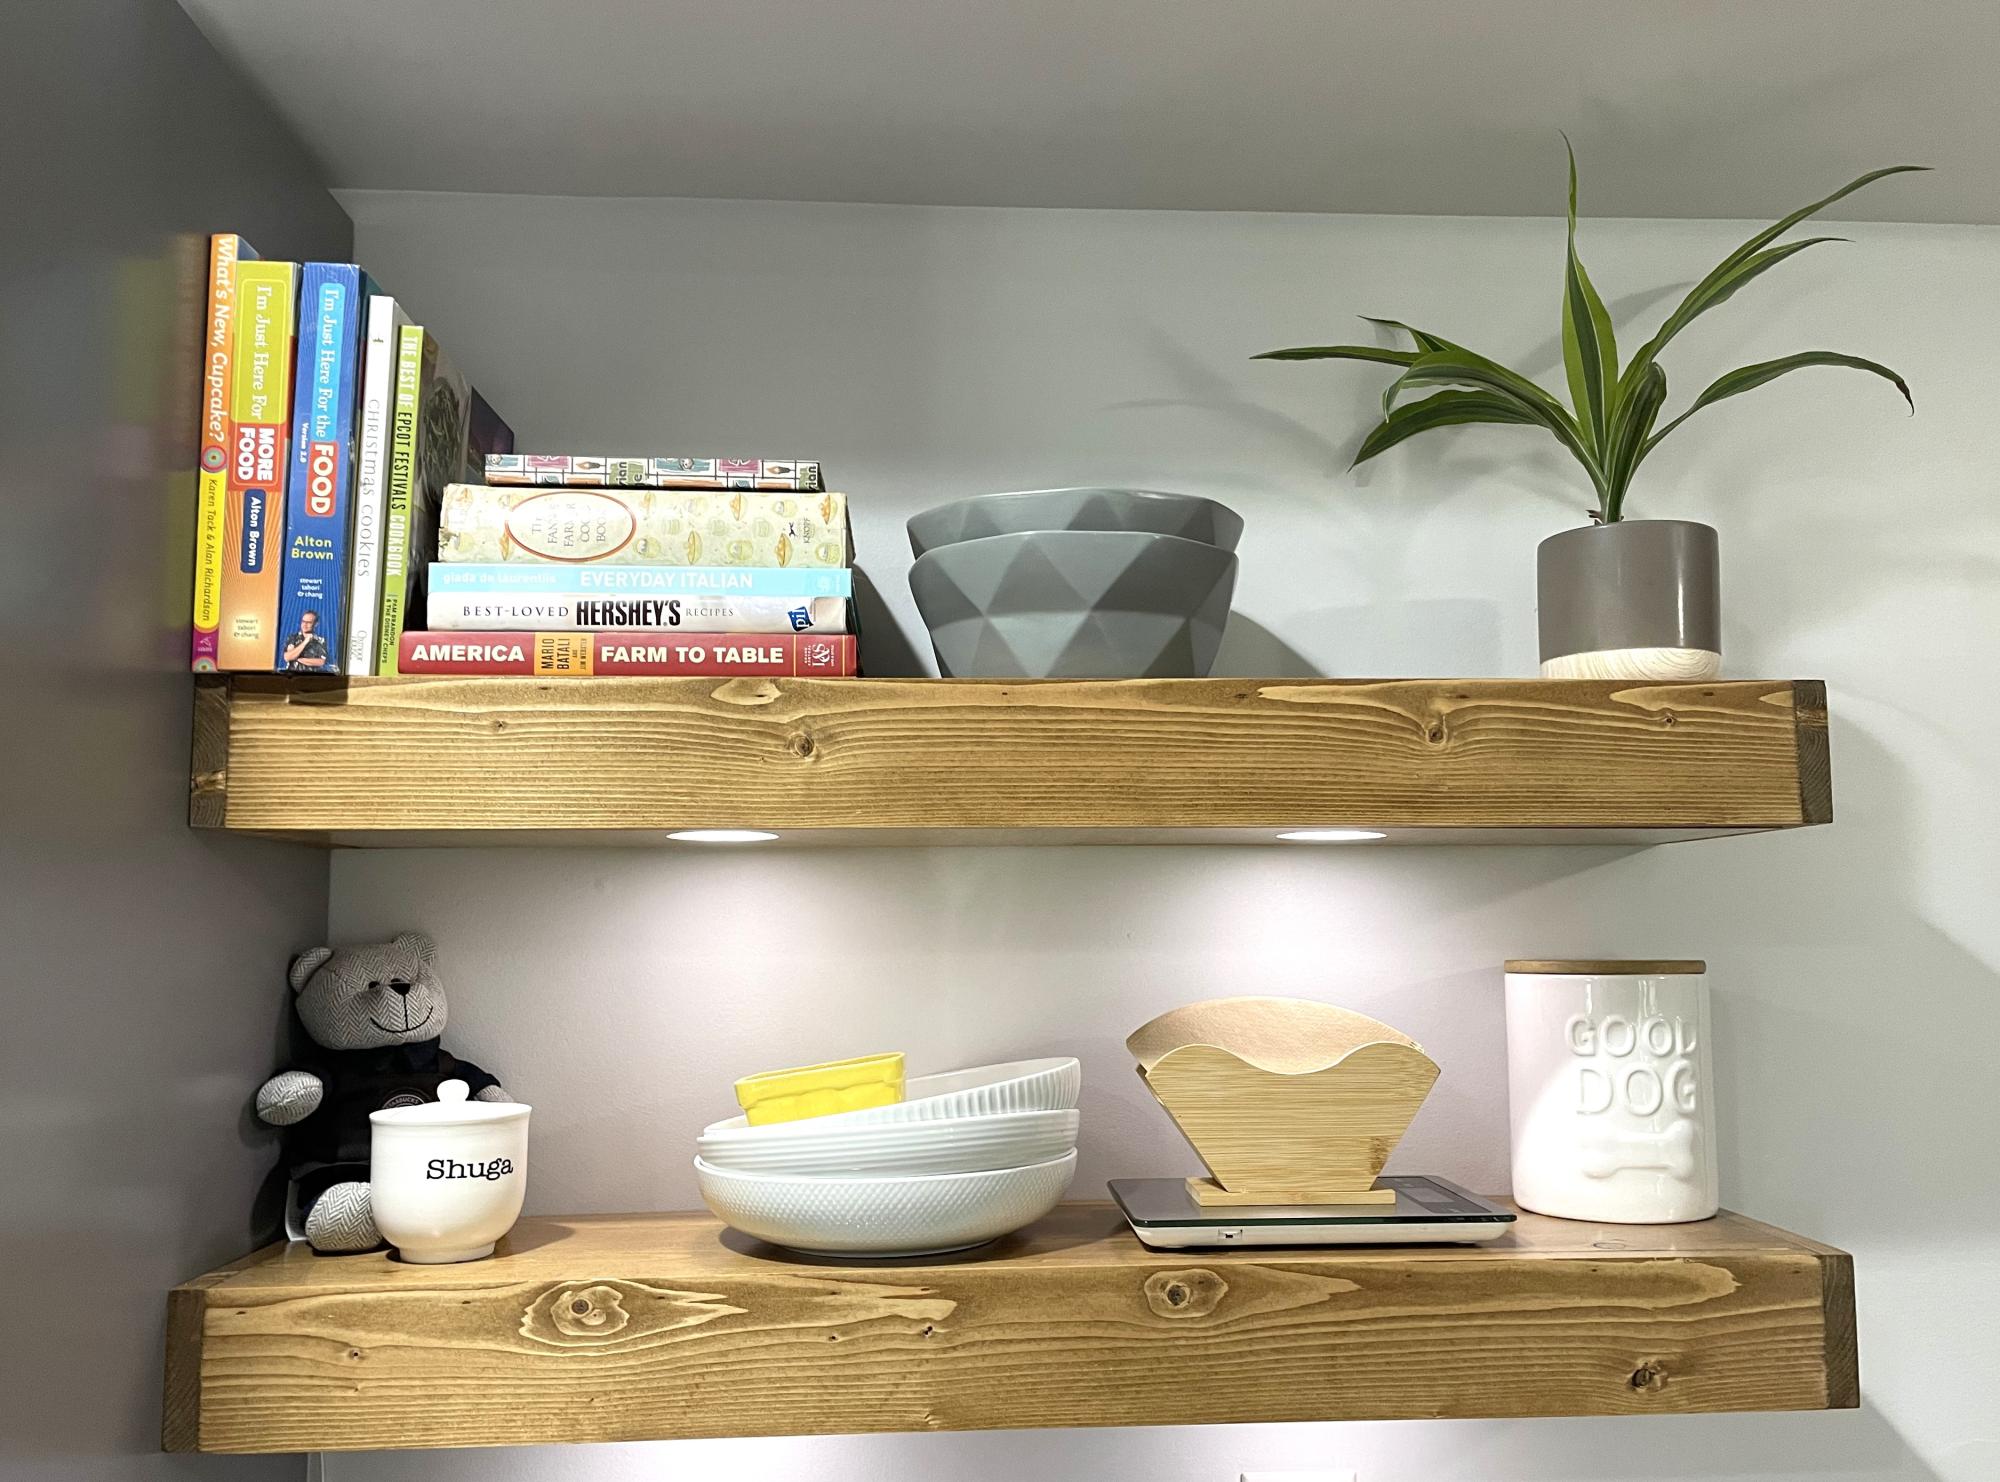
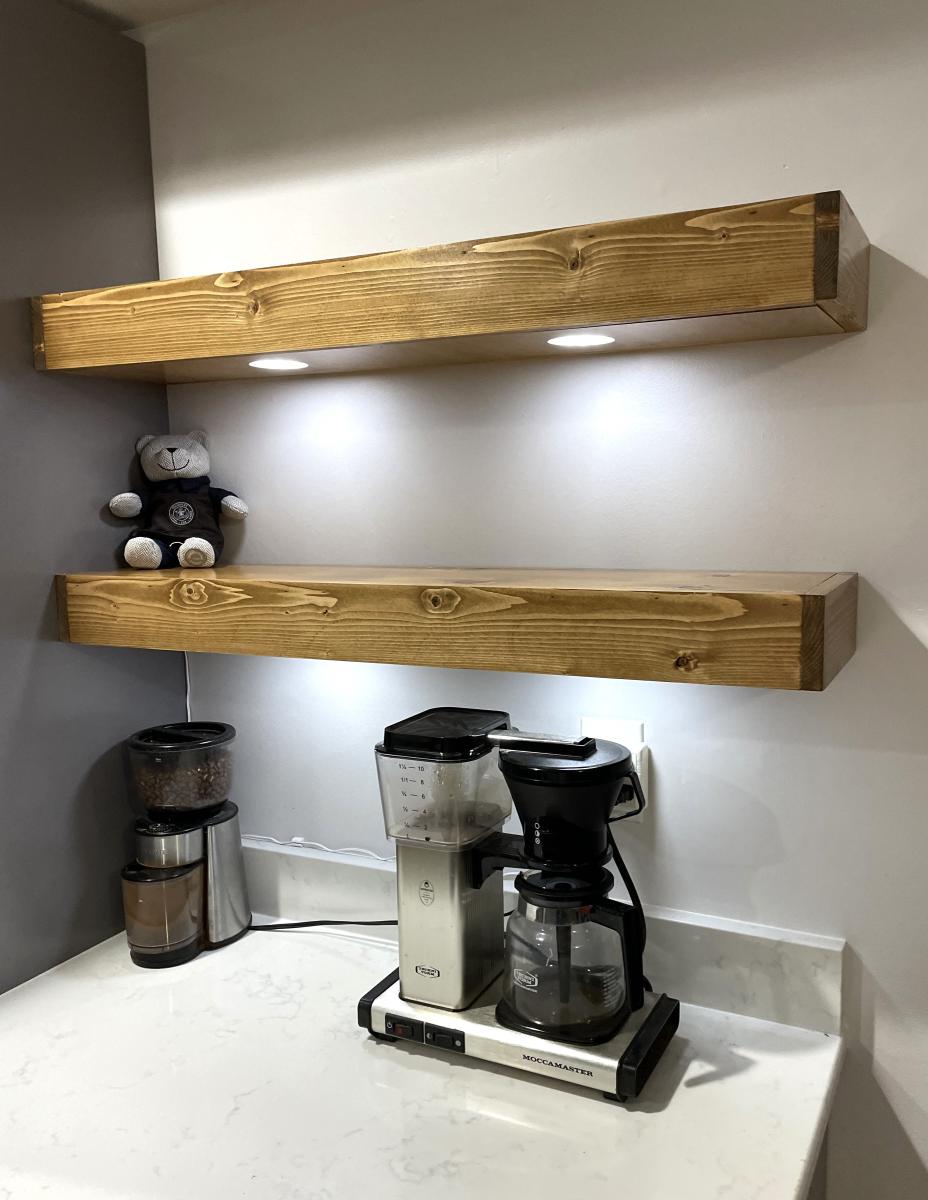
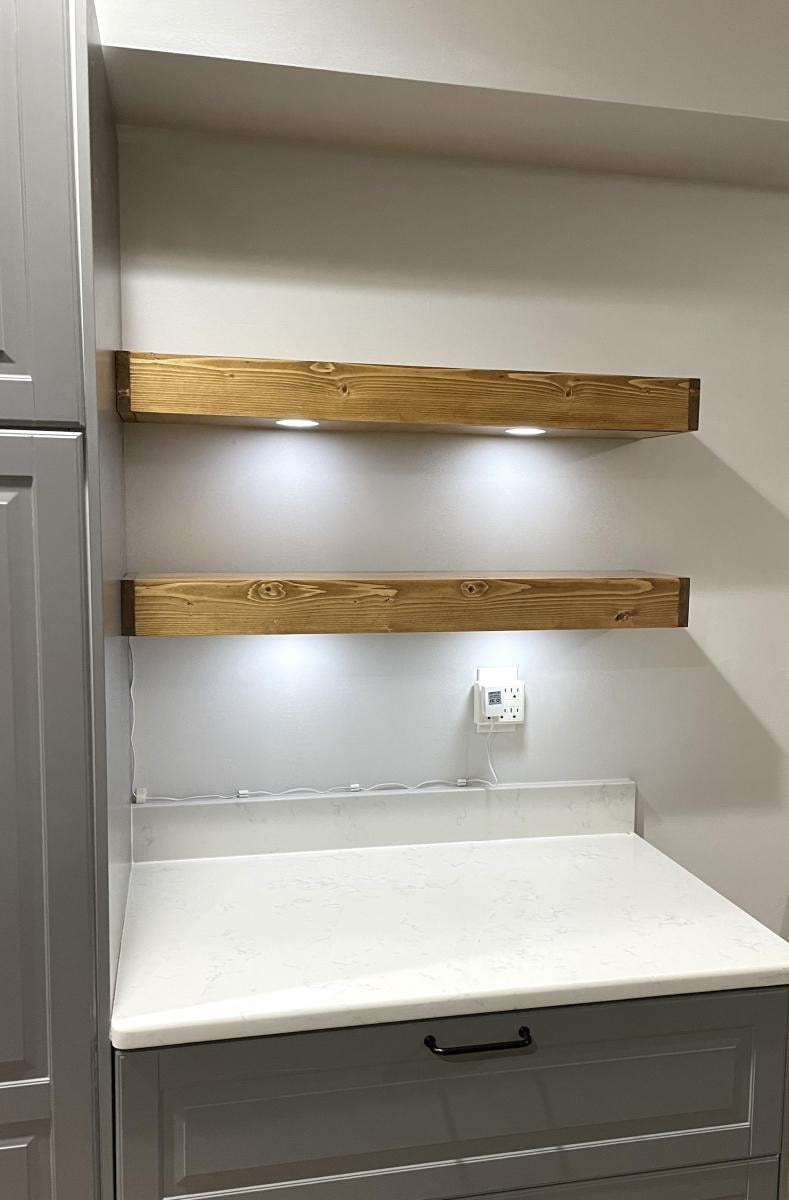
Modified the plans slightly to make each shelf taller. Stained and used a heat torch for the burnished effect. I like it!
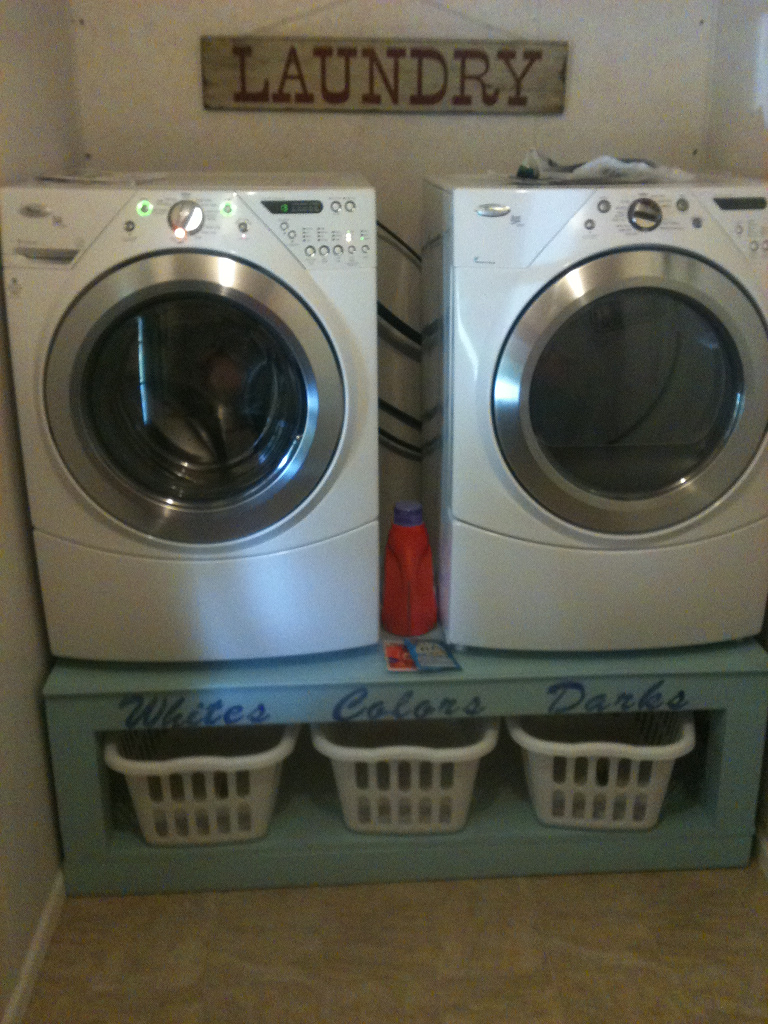
My husband built this for me because it cost as much for one pedestal as it did to build this. I got storage and height for both my washer and dryer for the price of one pedestal. My husband built it, We painted it and I stenciled it.
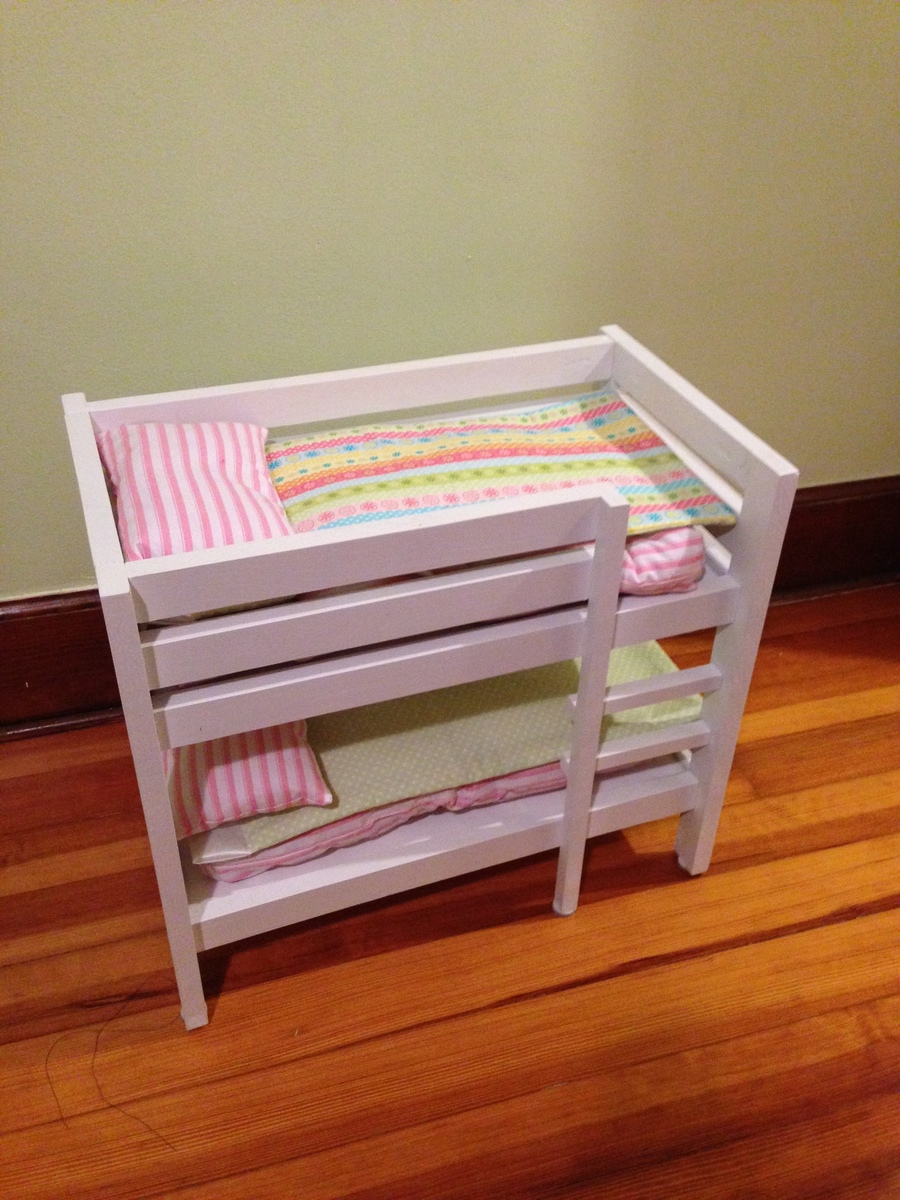
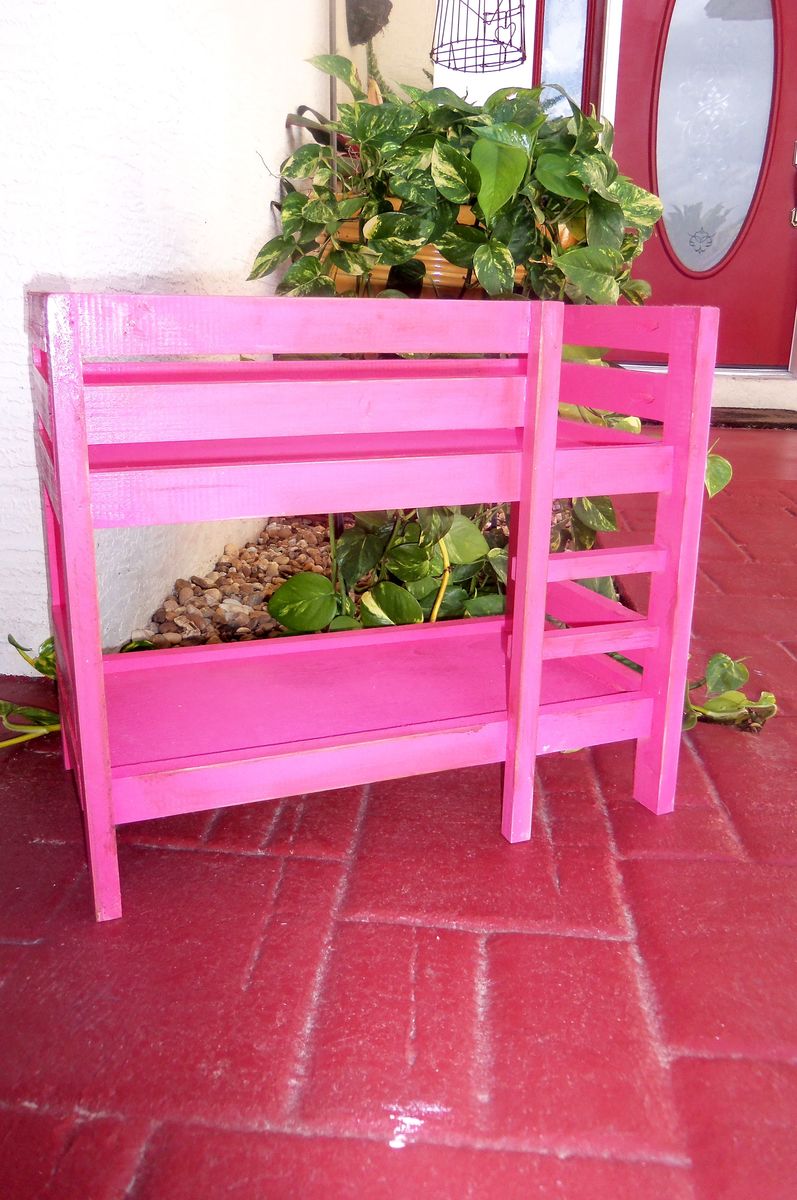
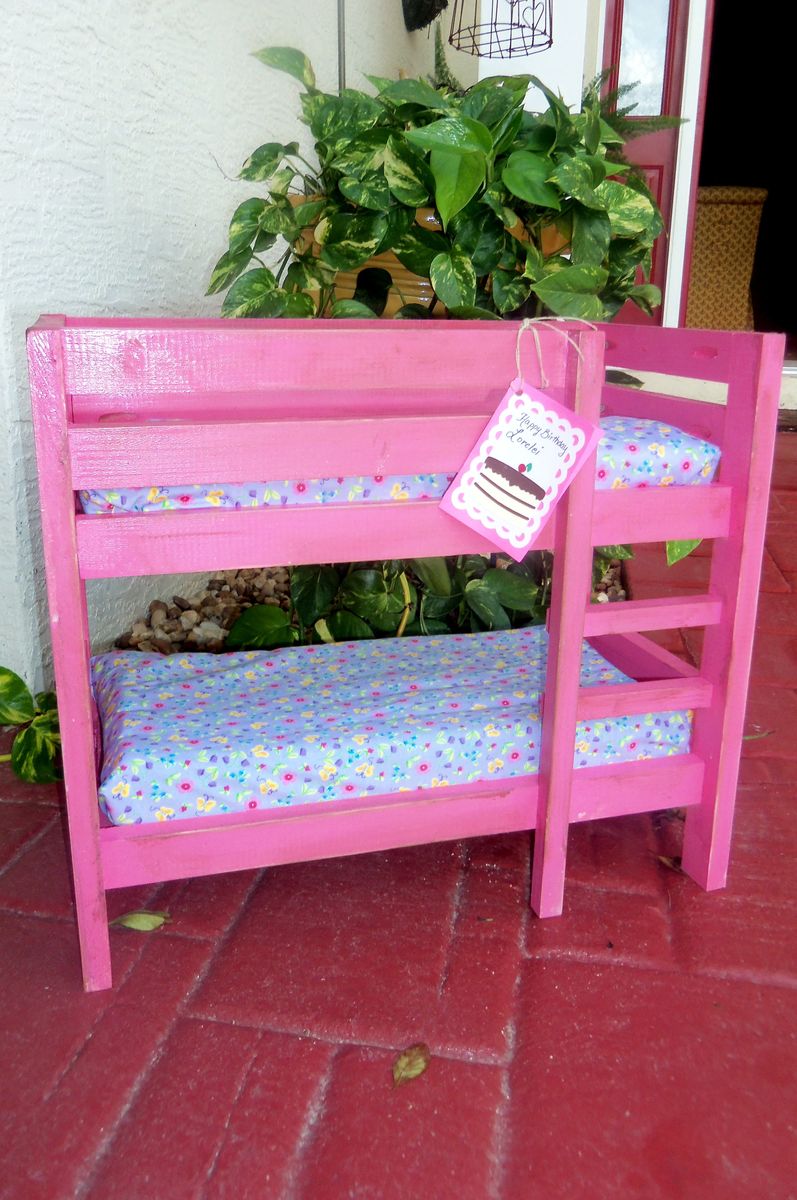
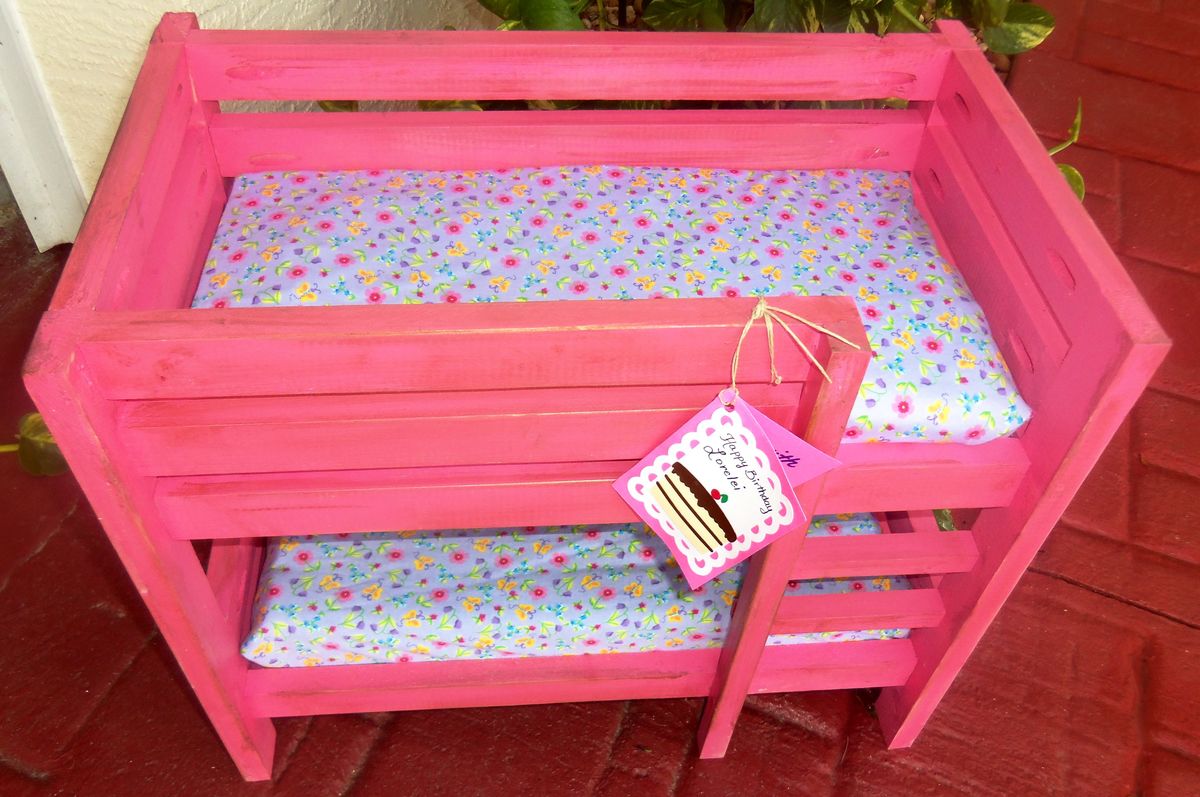
This was really a quick project. It's sized to fit a standard American girl doll. I tag-teamed with my mother to make a Christmas gift for my 4-year old daughter. I built the bed and she sewed the mattresses, reversible blankets, and pillows. My daughter loved them. My only regret was using plywood instead of backboard for the box springs. The plywood was too thick making it a tight squeeze to get the dolls in the bed with the pillows and mattresses.
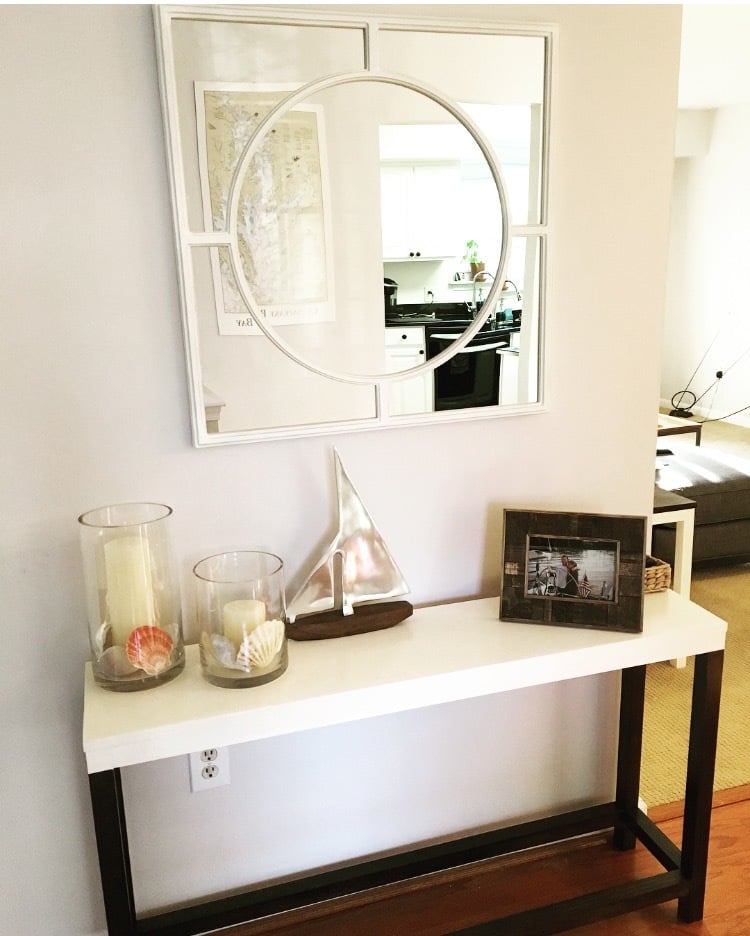
This table is the perfect size to fit our entry way, I just love the dark walnut bottom with the white top. It is just the right piece in its space, and was super simple to put together. We modified the plans a bit, instead of using liquid nails we used the kreg tool and screws to assemble. We also just used one board for the top of table and taped off more of the base and painted it white to give it the illusion of a thick top.
I took on a little bit more than I could chew with this one, but after a little R&I(Resourcefulness, and Ingenuity) I was able to figure it out. I love how it turned out though! Thanks for the inspiration!
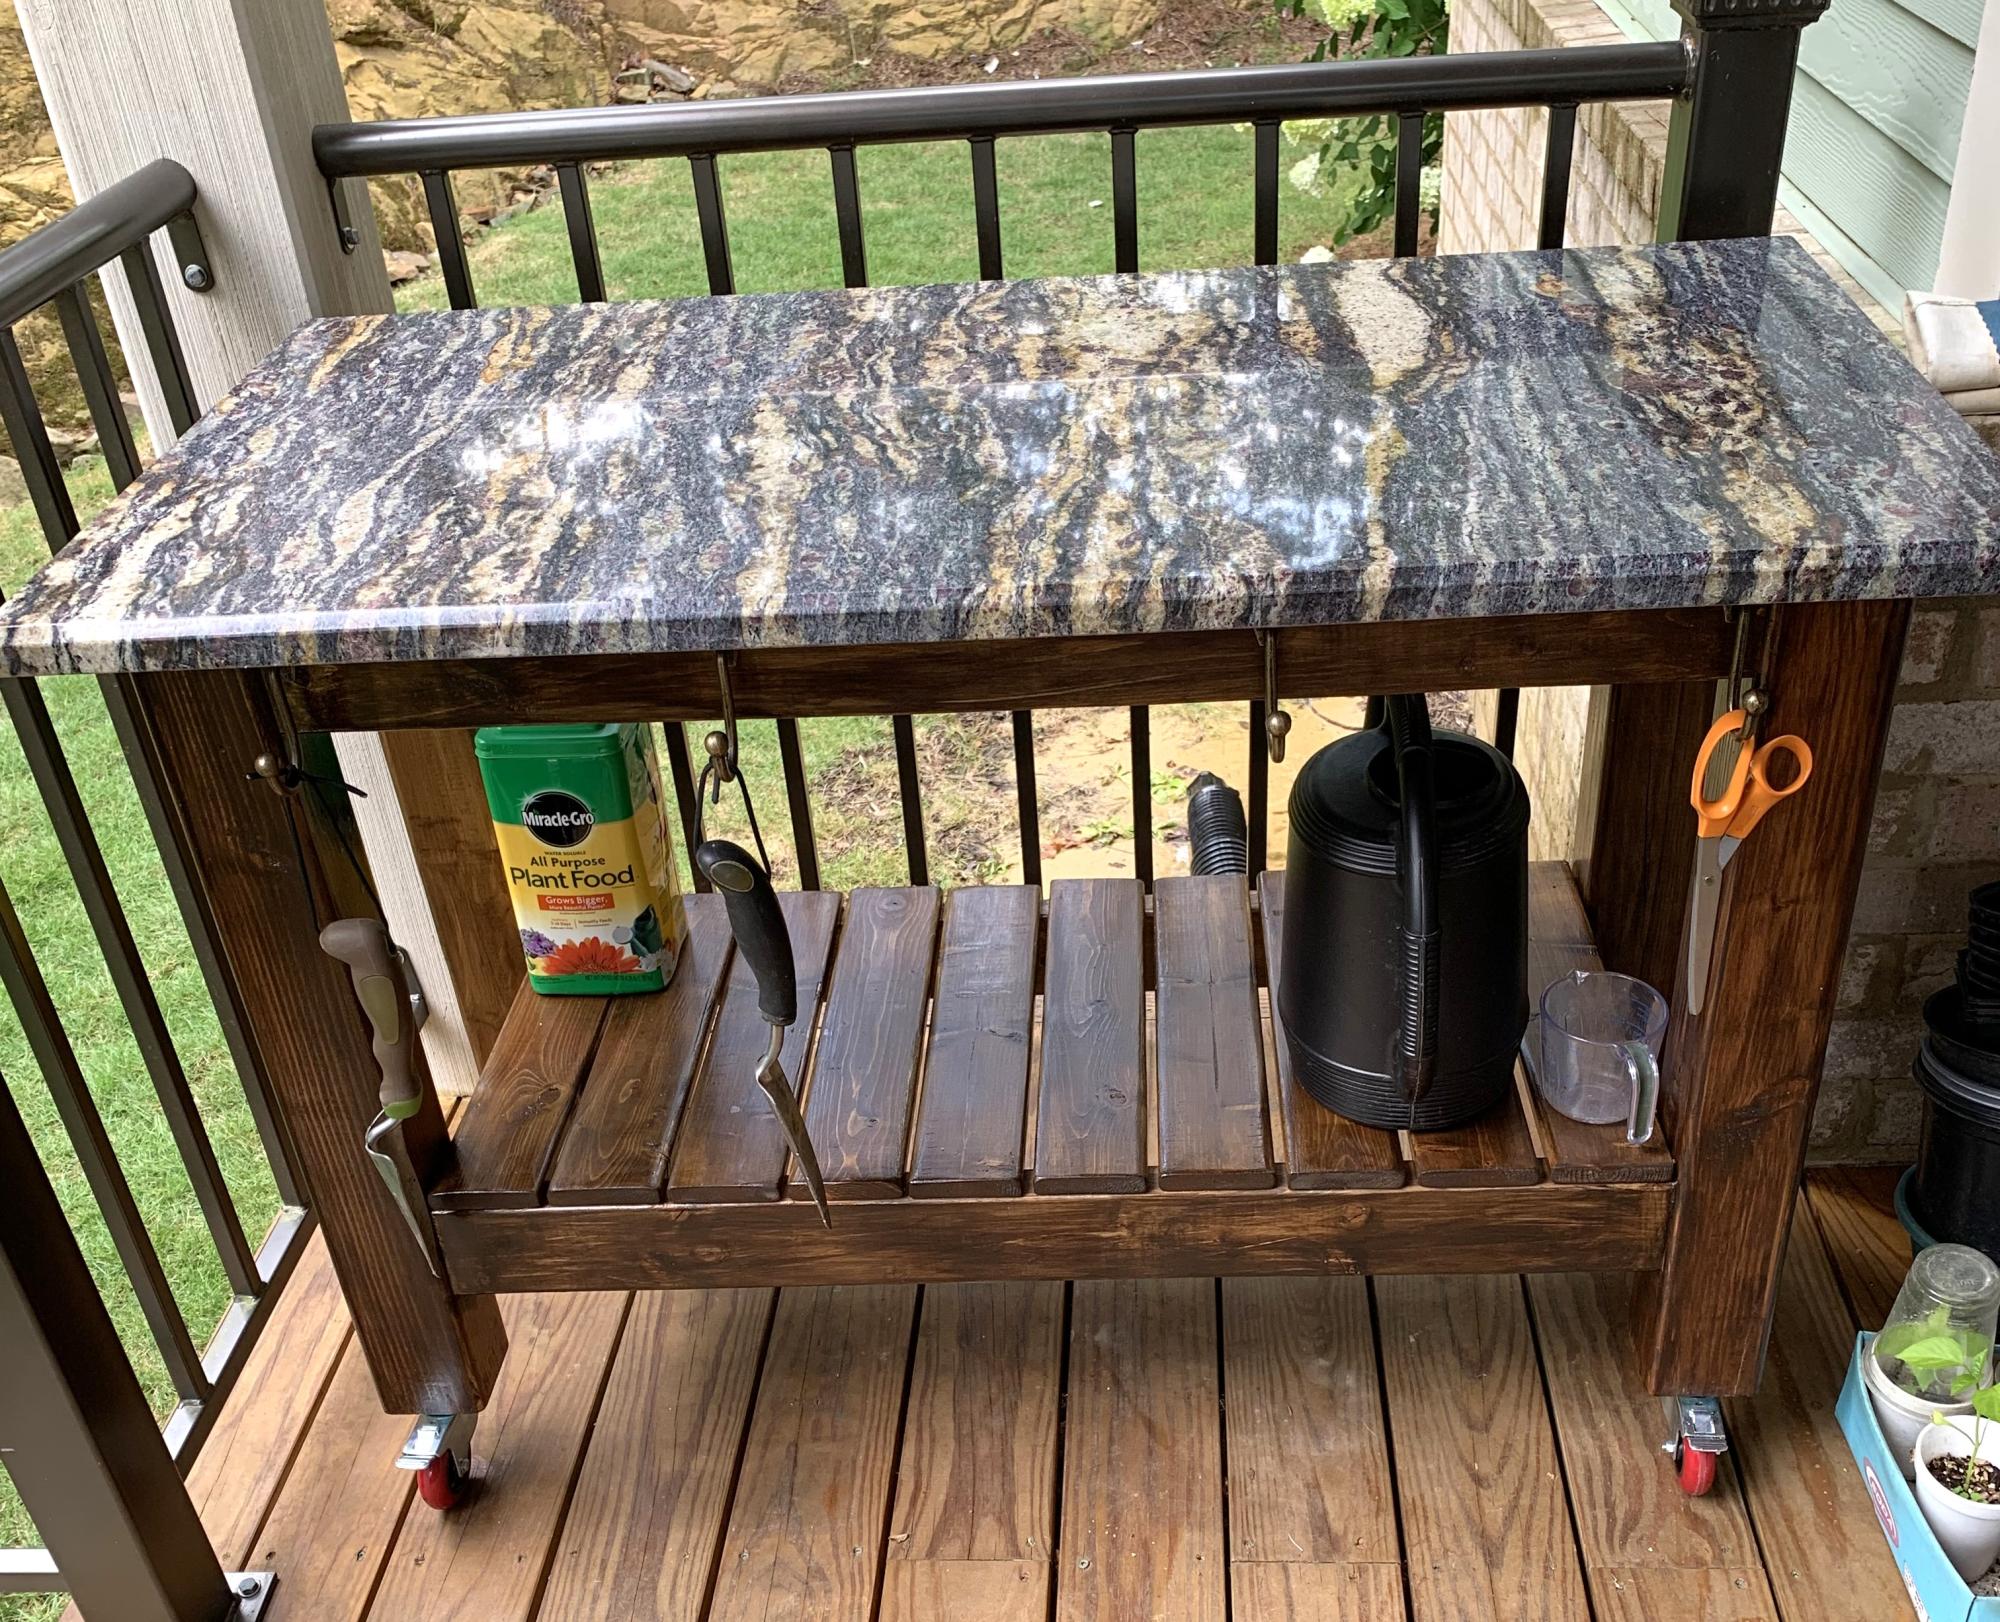
Your potting table selection inspired me. Used pocket holes to join and found a remnant granite piece for the top. My wife used it immediately and it also serves as an extra serving table when needed.
Brad L. - Alabama
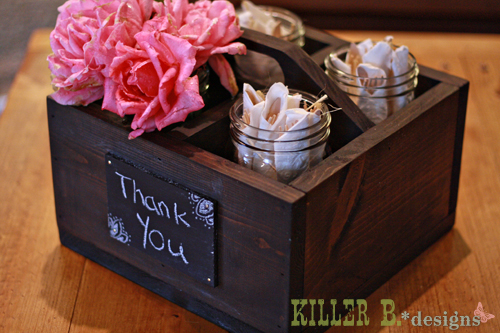
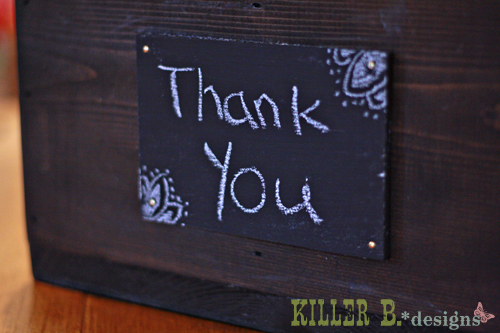
I had some scraps lying around, and it was just the right amount to do this soda crate caddy. The only change was using scrap 1x12 on the bottom instead of two 1x6's. I finished the whole thing in under 2 hours, including stain and the chalkboard front. I gave it to a friend as a thank you present for baby sitting my baby girl.


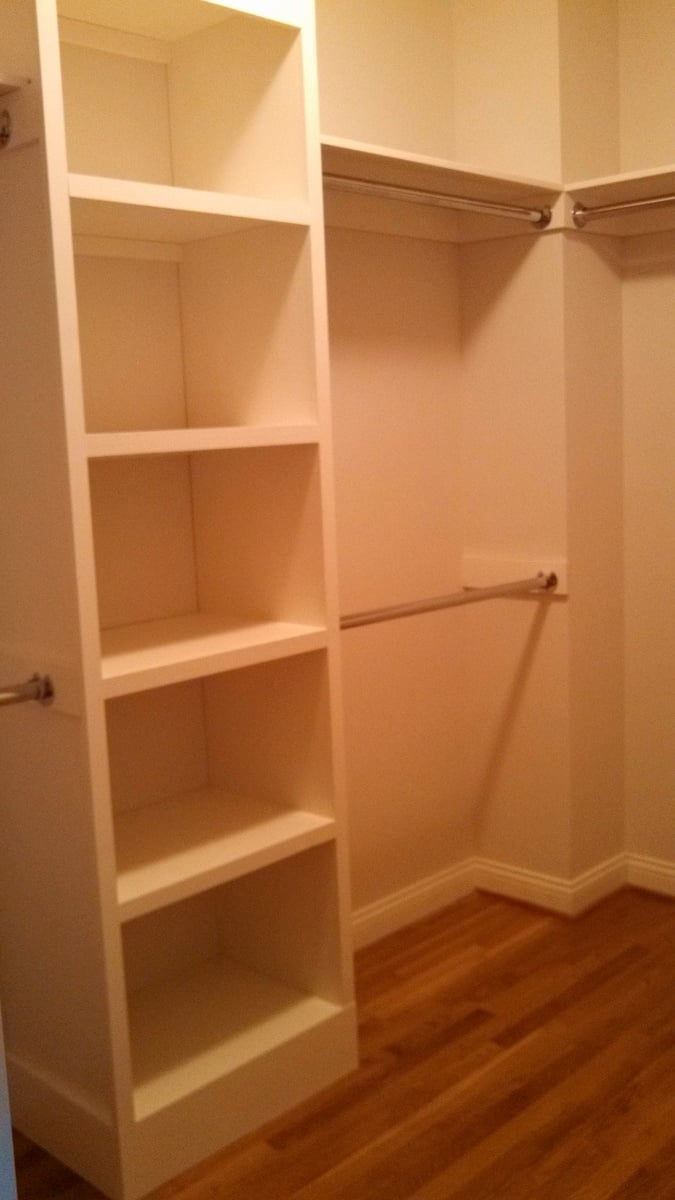
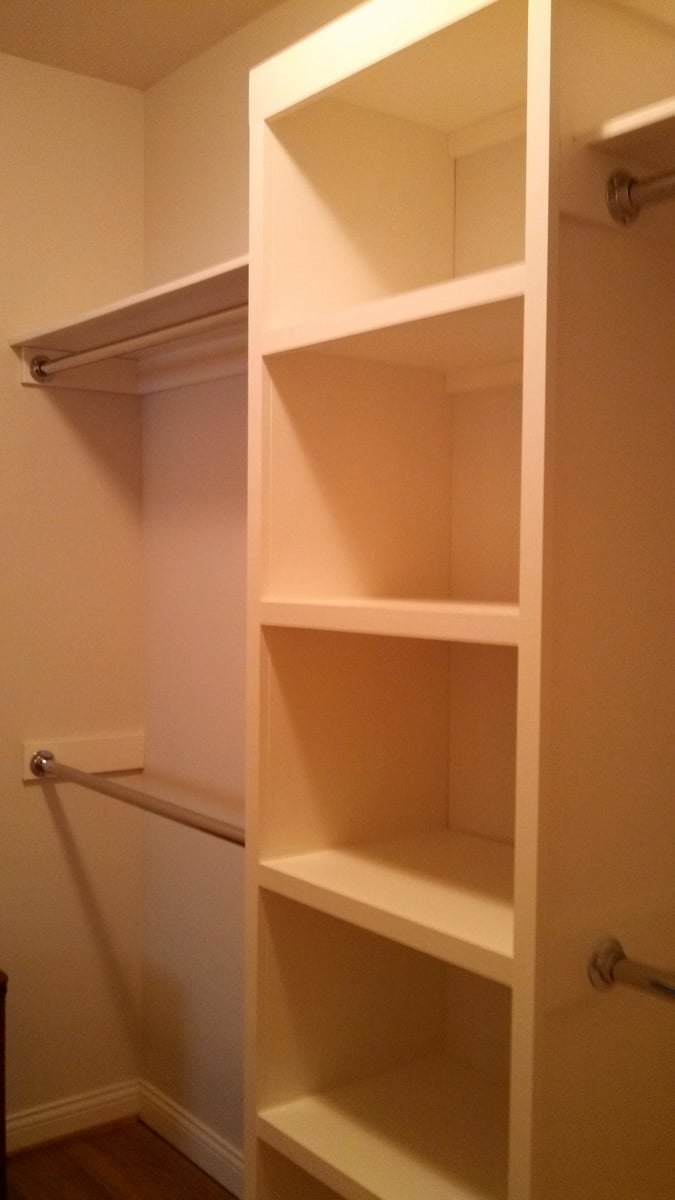
We built this master closet using the simple closet plan. It looks wonderful and wasn't too difficult to do once we determined the measurements we needed to use to fit our closet. My husband does not have much building experience at all, but he was able to do this with Ana's fabulous plans. Thank you so much for saving us hundreds of dollars! We have real wood in our closet and we love it!
We used plywood and painted all surfaces with indoor latex trim paint.
Sun, 01/12/2014 - 19:02
It looks very nice. May I ask what dimension of the plywood you used?
They look more than 3/4'' thick to me, right? My husband and I are planning our very first project!! Any info /advice would be highly appreciated.
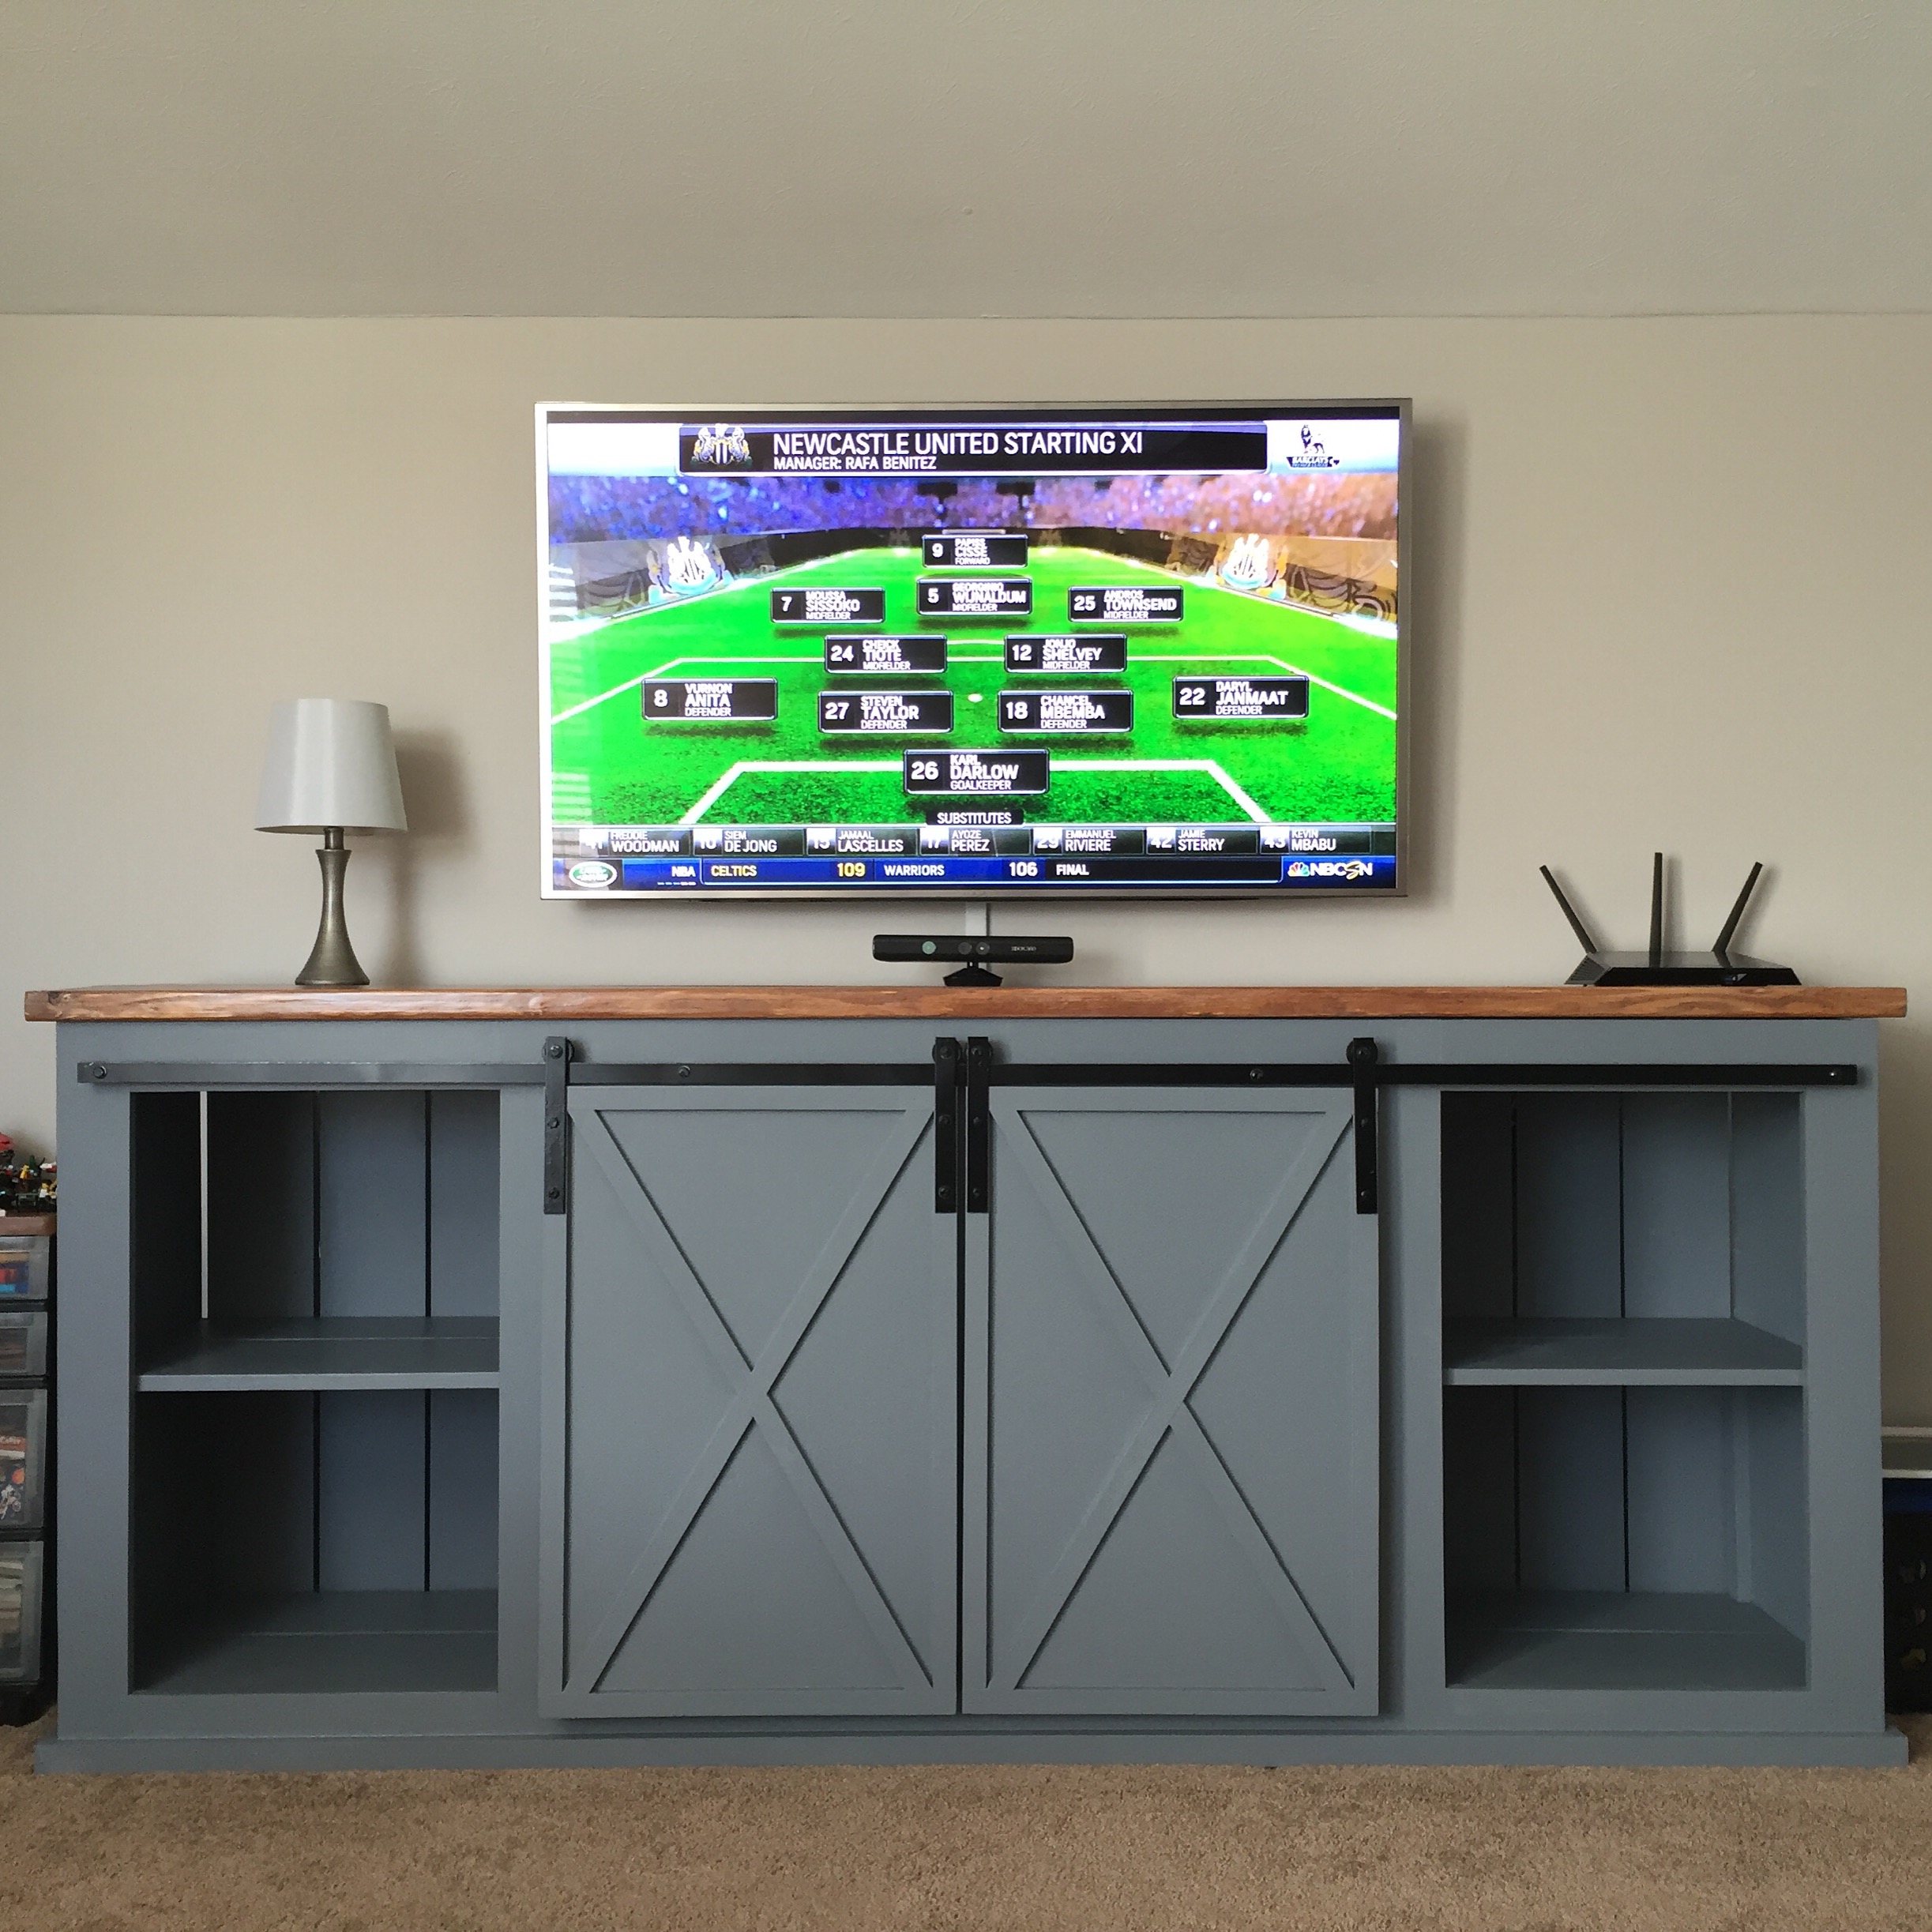
We were needing a new tv console for our boy's playroom and this was a lot of fun to work on. This was the first piece of furniture I have built and I was able to follow the plans pretty easily.
Tue, 04/05/2016 - 07:57
My doors are sticking out over 1 inch at the bottom. Any suggestions why?
Wed, 04/06/2016 - 07:05
Ana,
I was wondering how you were able to fabricate the door hardware? Your plans don't seem to include them in the overall plan area. Can you provide this information please?
Thank you.
Sat, 08/08/2020 - 09:46
What hardware did you use here? I have been having trouble finding hardware small enough to fit in the 3.5" space above the doors, and I do not have the tools to create my own hardware.
Thanks!

I made this as a gift for my friends son. They are expecting a new baby so I made sure every inch was sanded, and sanded and sanded. This was a fun different build. The slightly angled table legs need extra attention in order to guarantee level.
This was our first build from wood to finished product! I had done some refinishing furniture project, but never a project from raw wood like this. It was easy to do, the hardest was installing the smart lights and making sure they worked!
We have a lot of birthdays (5-6 year old range) this week so we decided to try some of these plans out. So much fun and they get easier each time :)
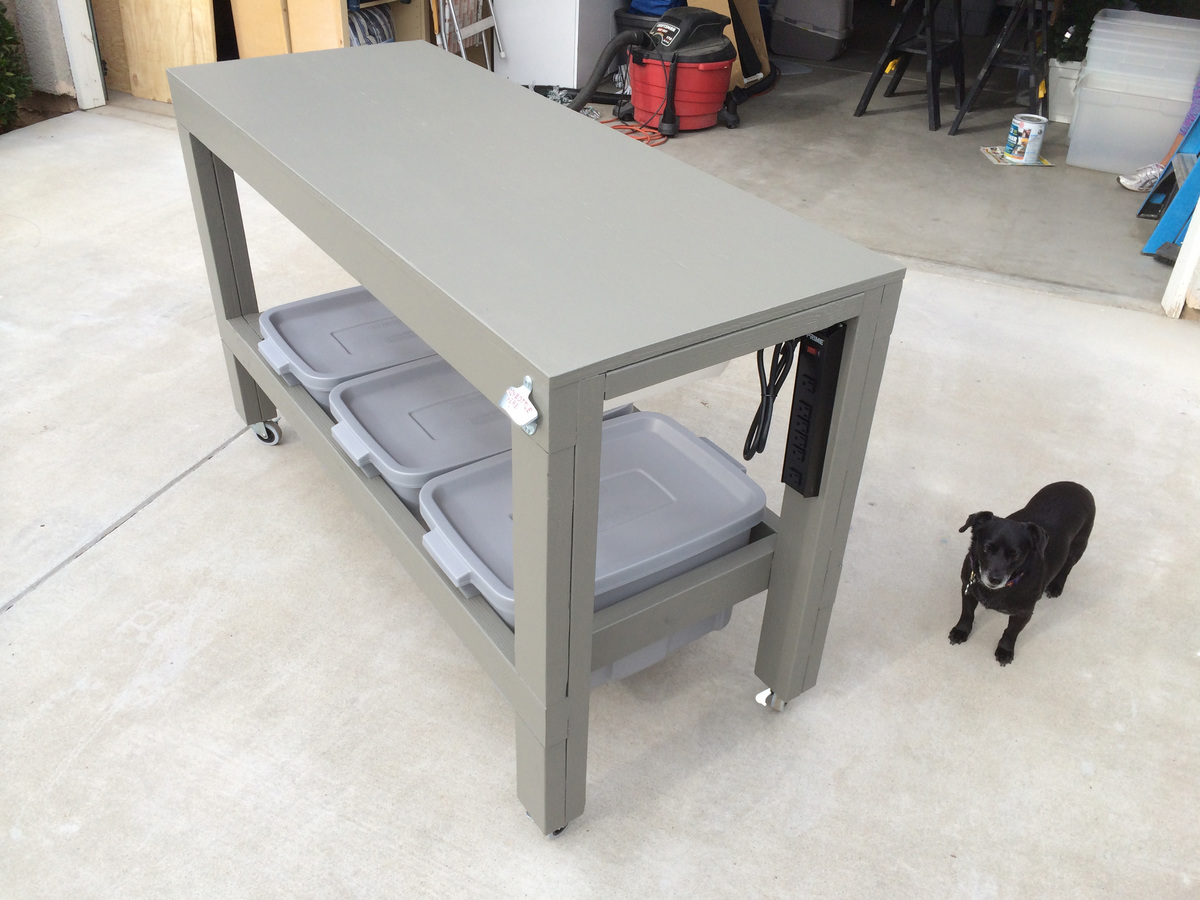
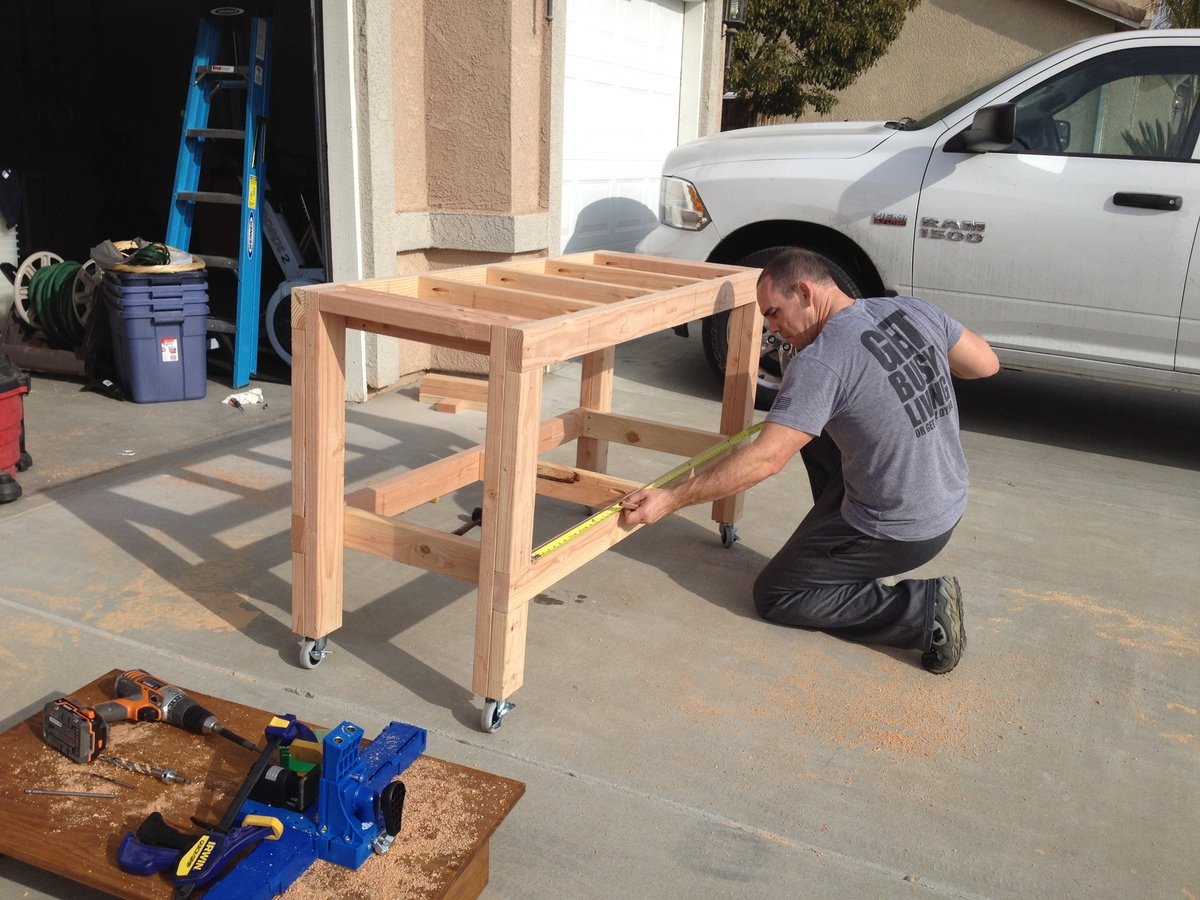
This is from Ana White's "Get the Job Done Workbench" post,
http://ana-white.com/2011/11/workbench-get-job-done
First project using my new Ridgid Sliding Compound miter saw/table and new Kreg HD Jig for pocket holes.
Thanks to my girlfriend for noticing that the depth worked out perfectly for resting three Rubbermaid Roughneck Totes underneath for holding clamps, tools, etc. Also added a paper towel holder under neath, a power strip and of course a bottle opener to the front. :)
Primer and some cheap $2.50 "Oops" paint from Lowe's finished the project.
Now I can move on to other projects and use this sweet new workbench!
Loved these plans. Super easy to follow and modify as needed.
And "Marty" in the photo also approves of the final product.
Thanks!

Mon, 01/13/2014 - 10:26
Great build, and the bottle opener is a nice little added touch, very convenient!
Fri, 08/12/2022 - 13:35
I am looking for the plans to build the mobile workbench on casters but the video is for the wall board to hang tools and for a different work bench with no casters. How do I get the plans for the mobile work bench?
Fri, 08/12/2022 - 13:47
Adding to my prior comment, I thought the plans were different because it does not mention casters that I can see. I now see the bench is in the plans but no mentioned of casters other than comments. I will double check. Thank you.

Comments
amandakerr86
Thu, 04/18/2013 - 04:25
Your table looks great! Love
Your table looks great! Love the color (University of Kentucky Wildcats fan here!) Just wondering about how much it costed to build? Would love to make one!