Community Brag Posts

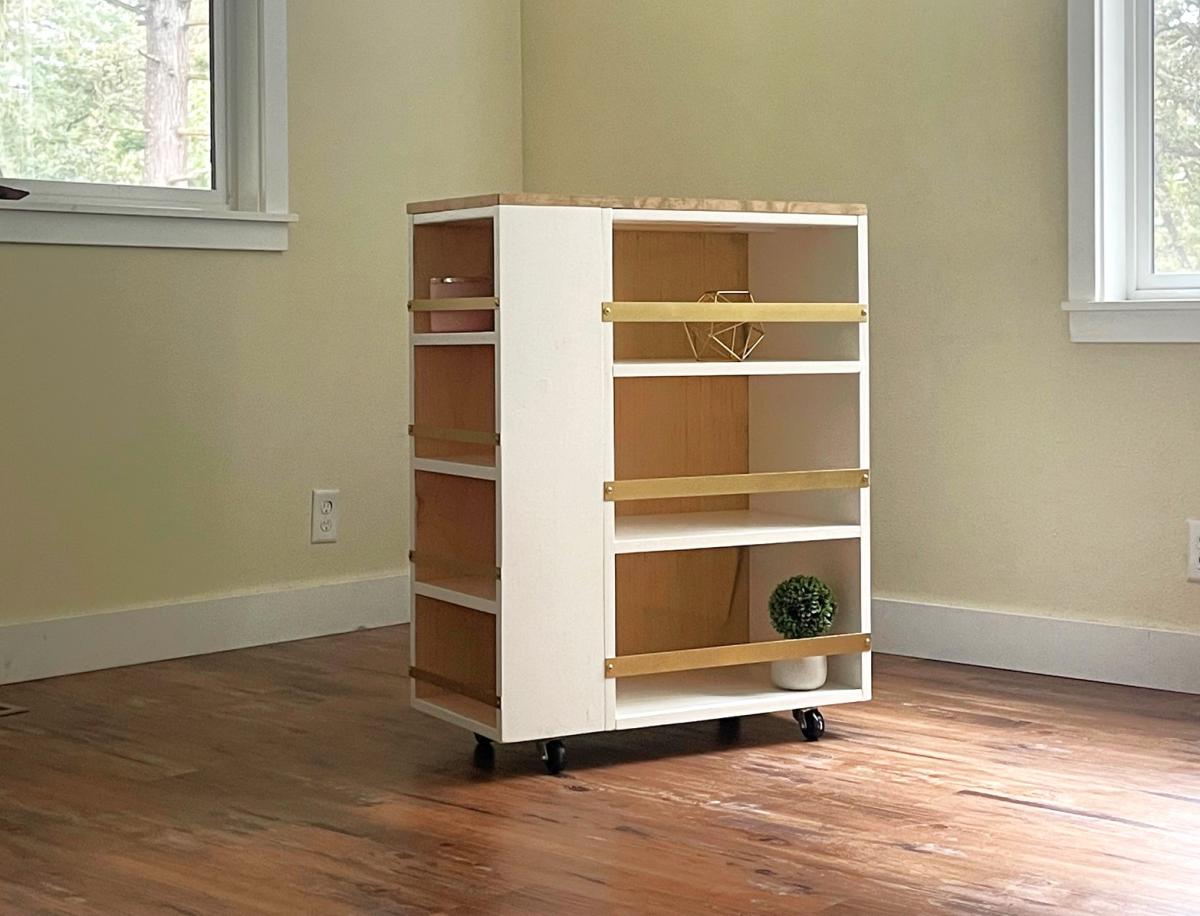
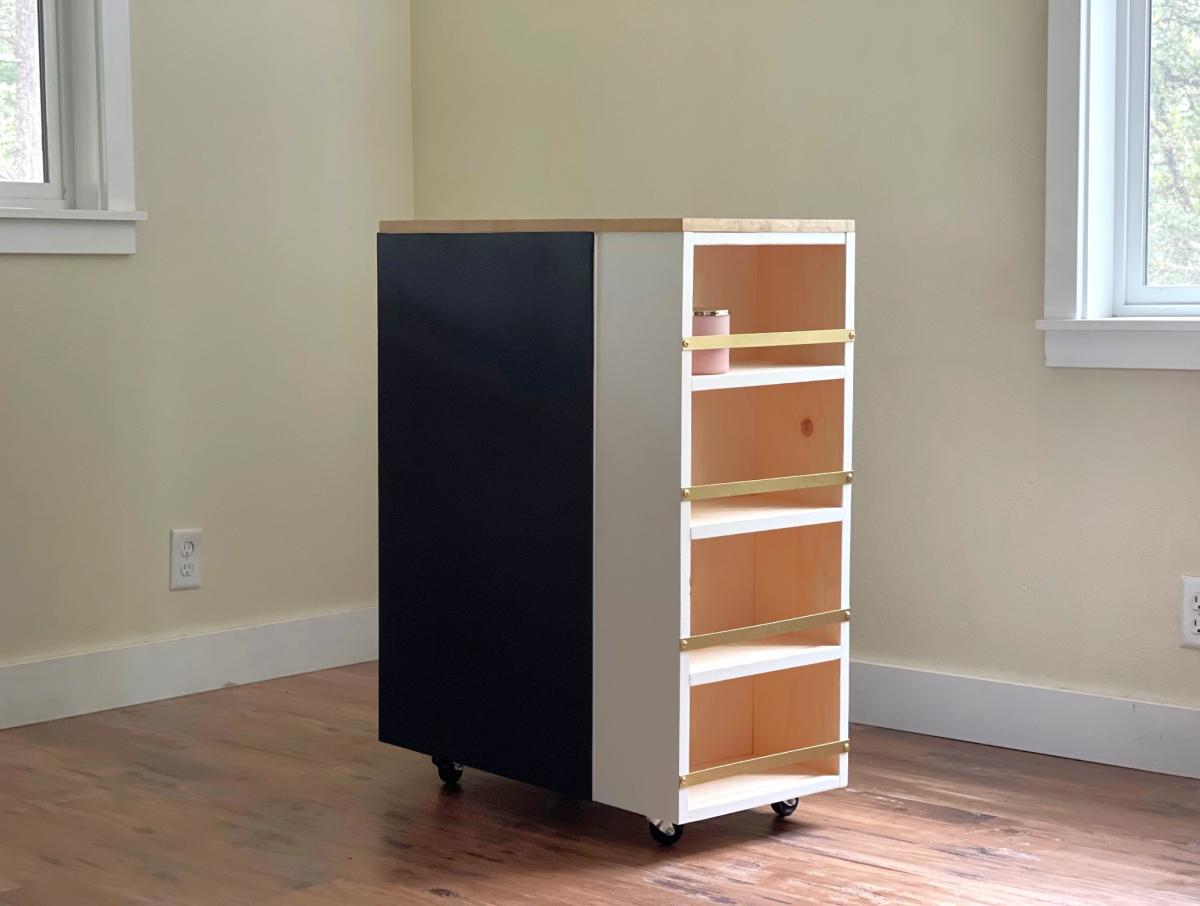
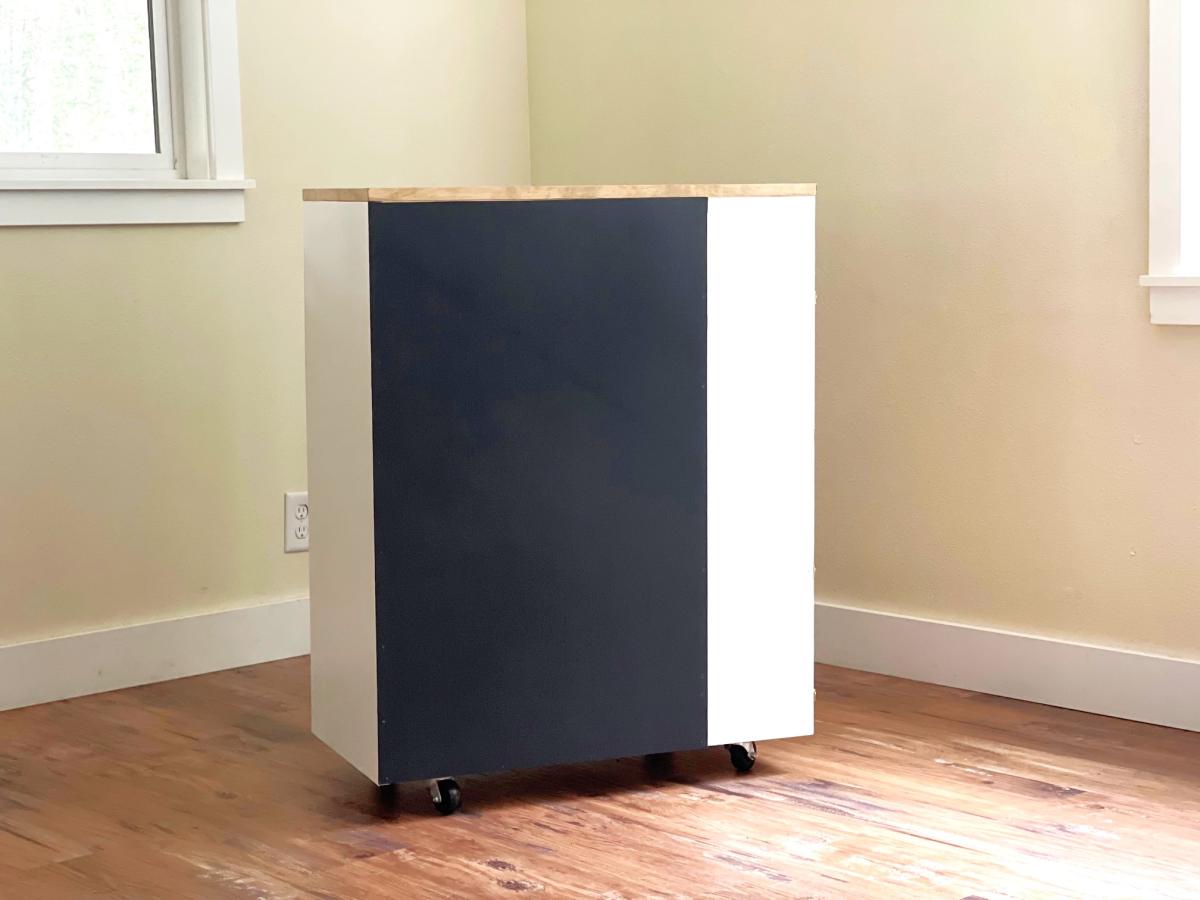
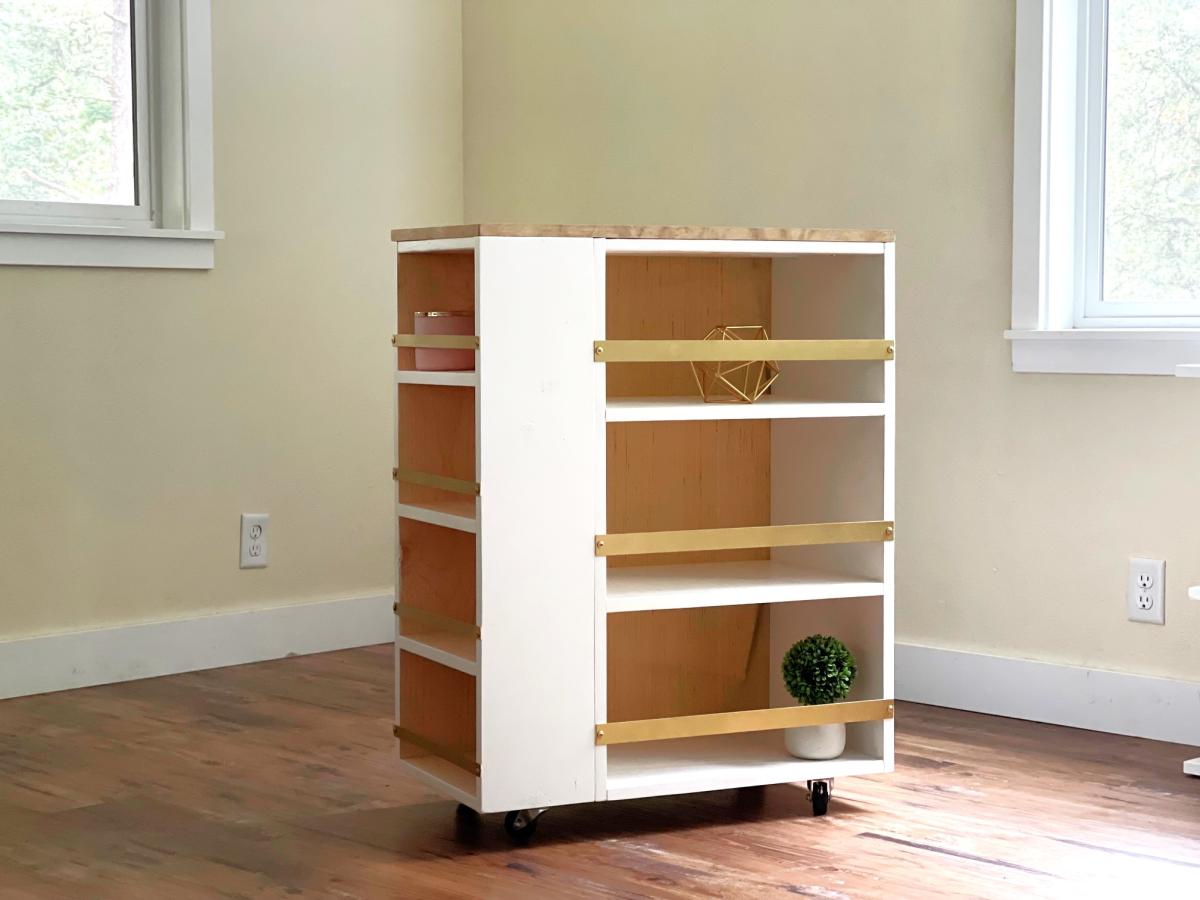
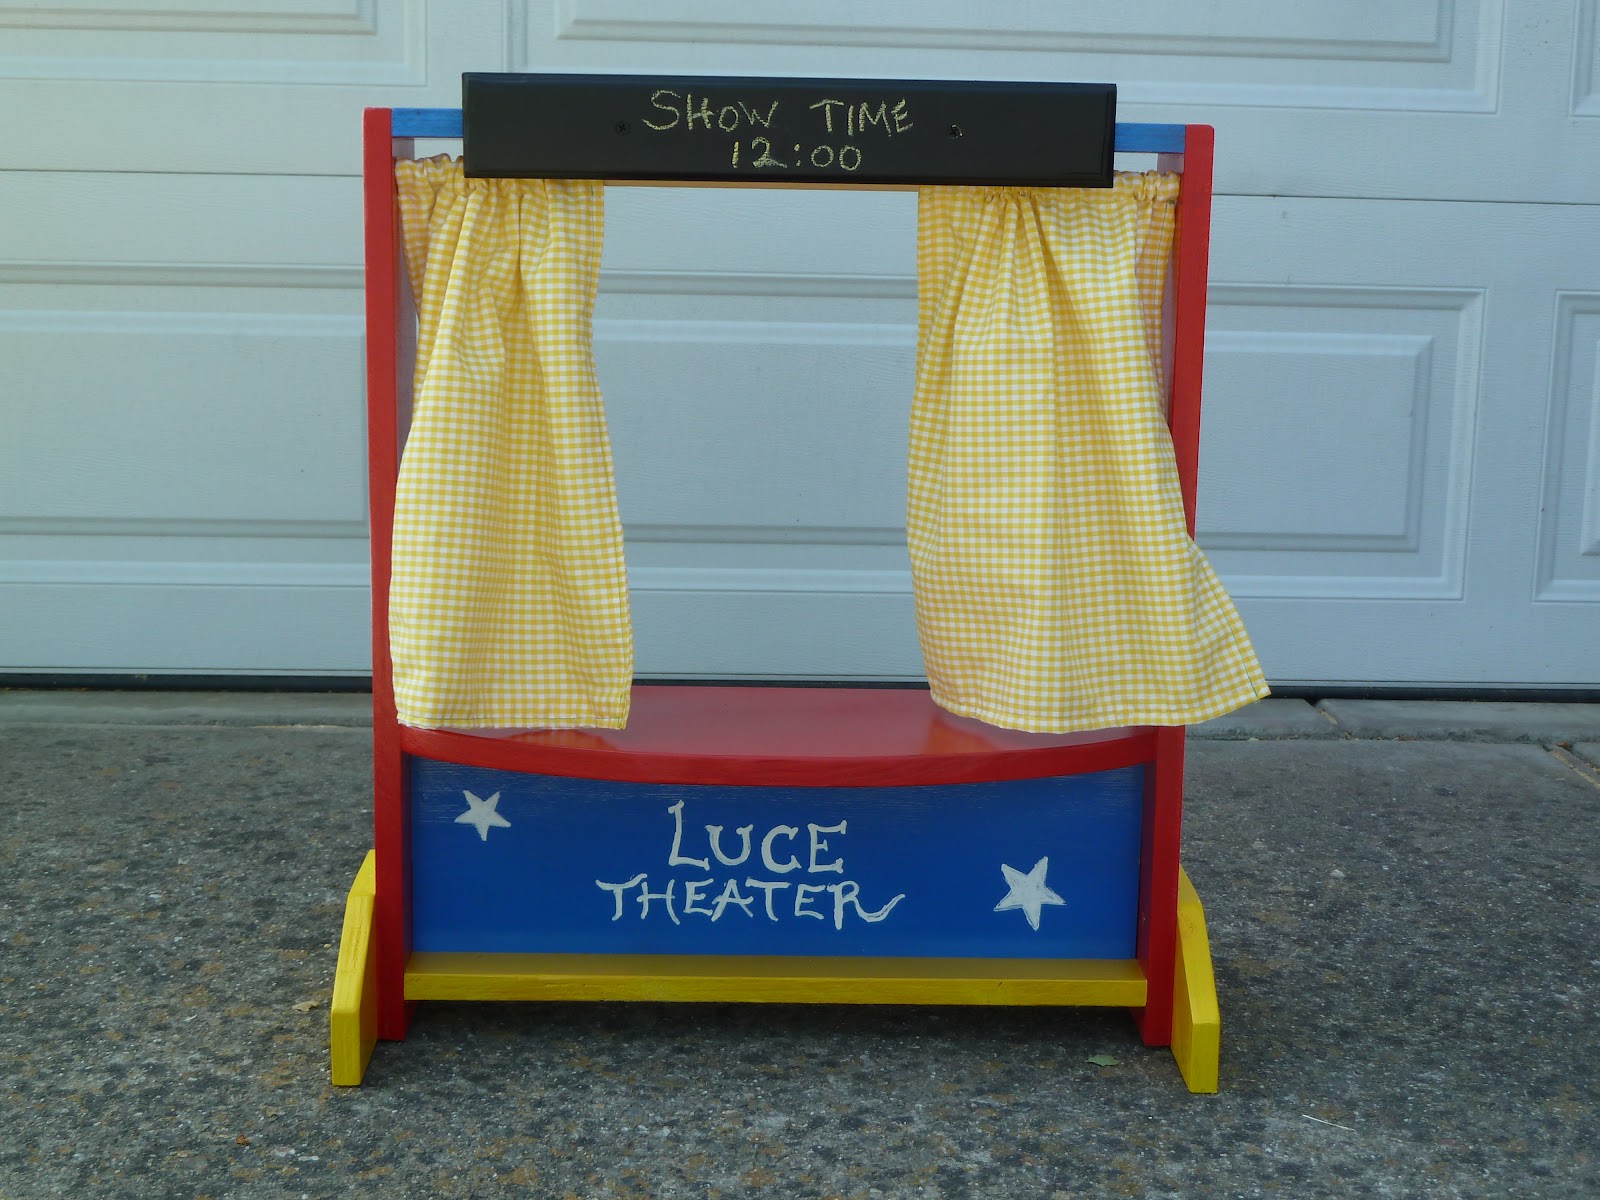
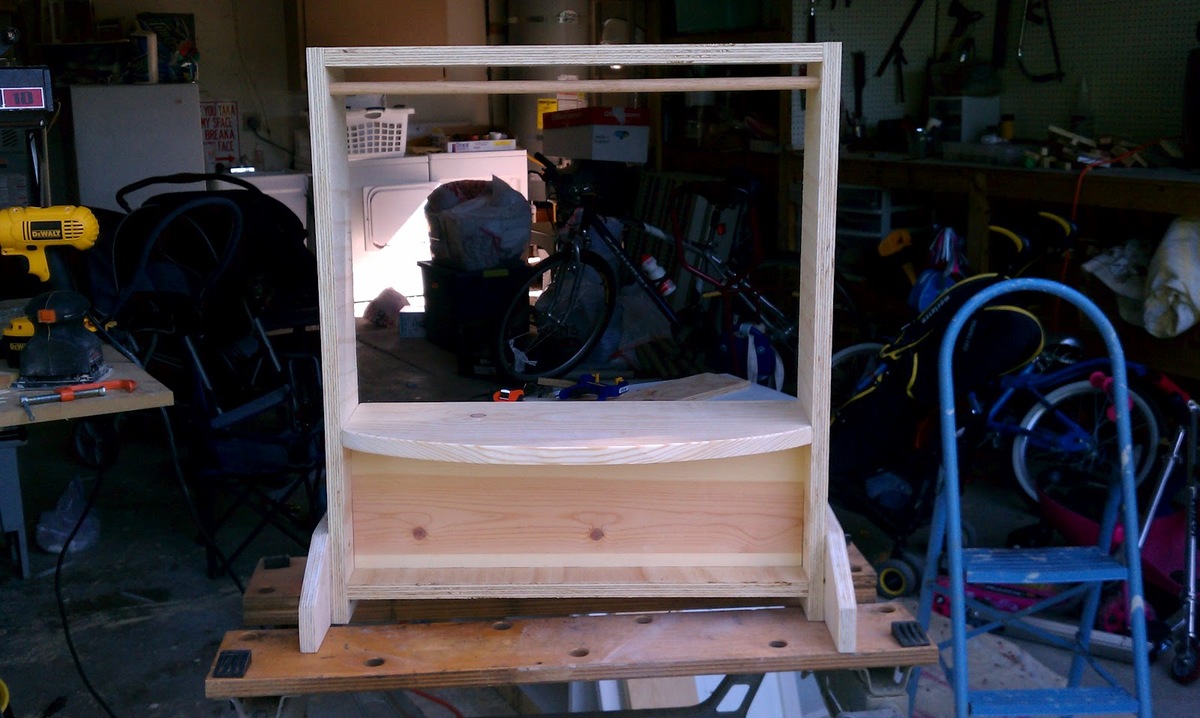
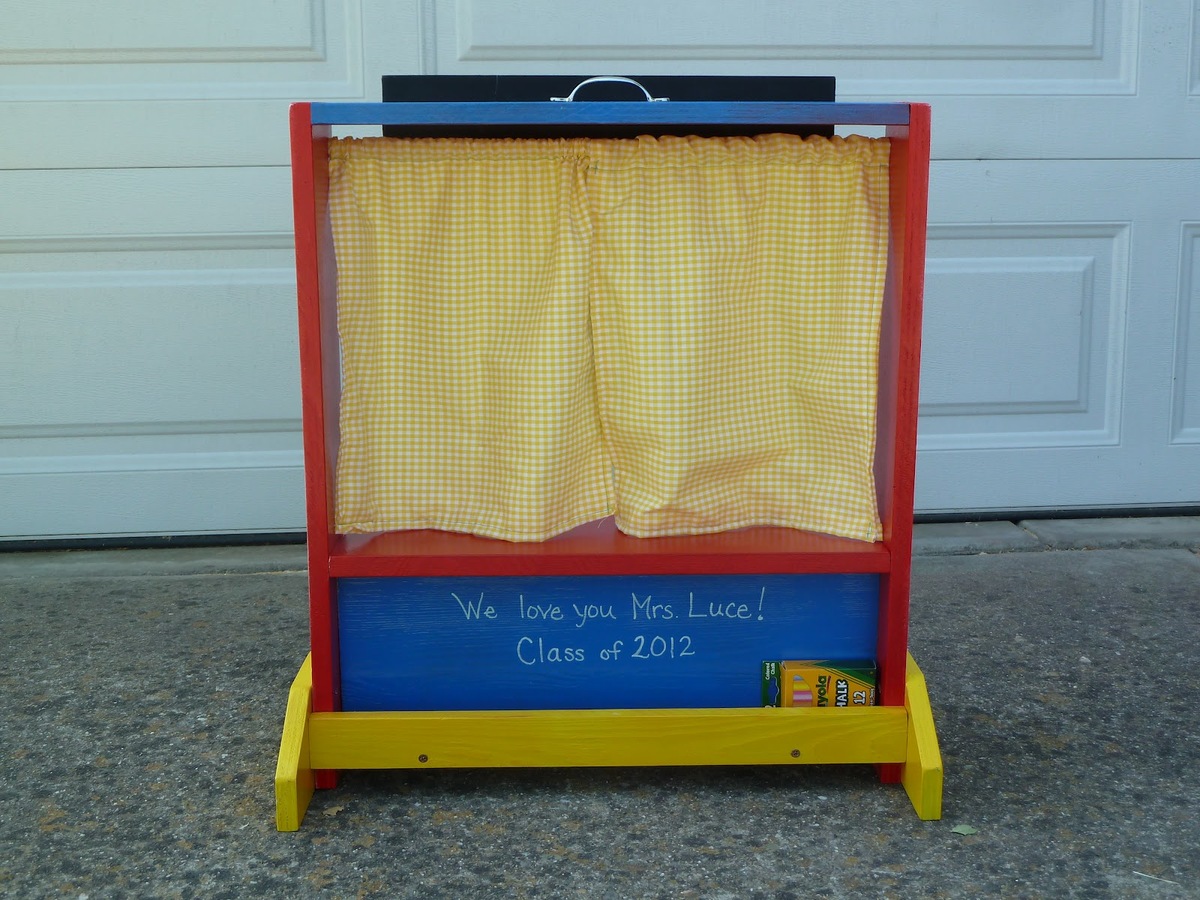
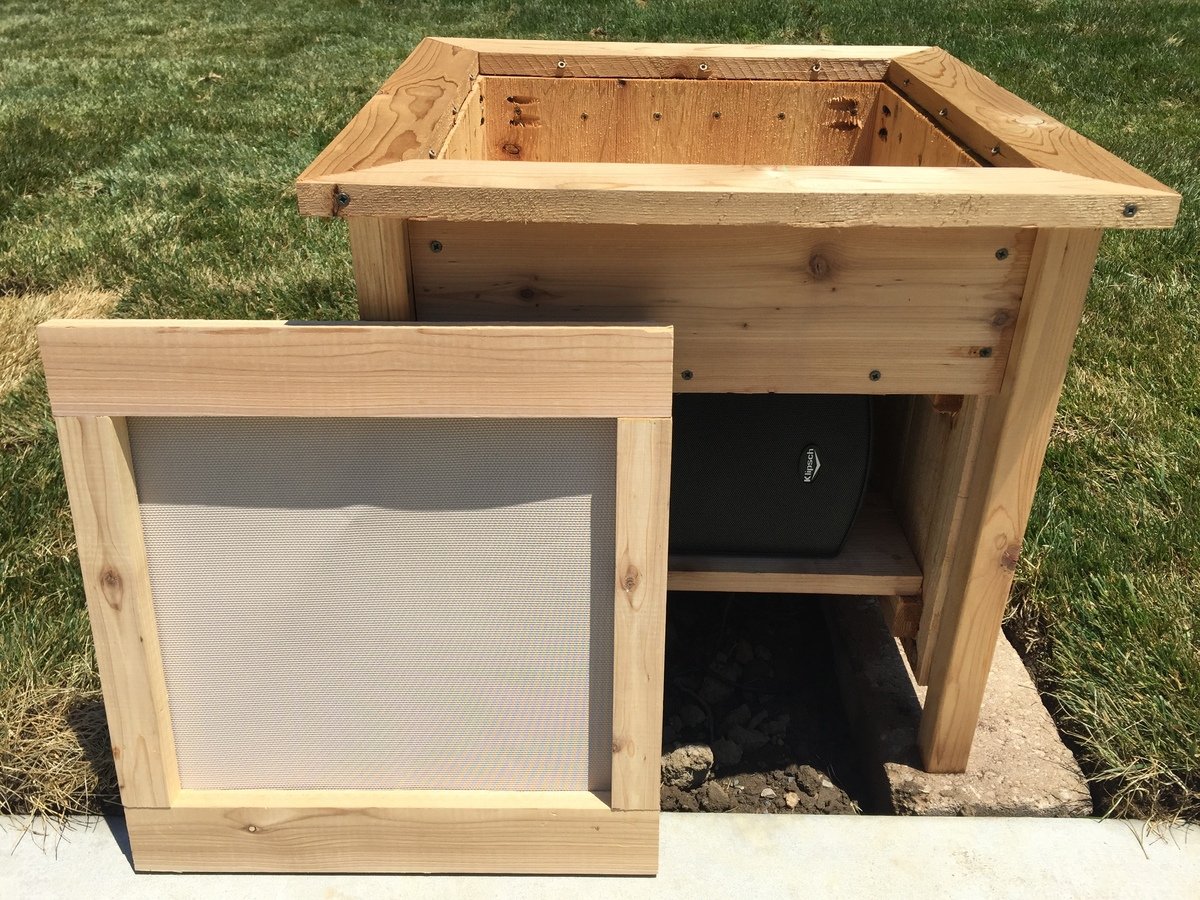
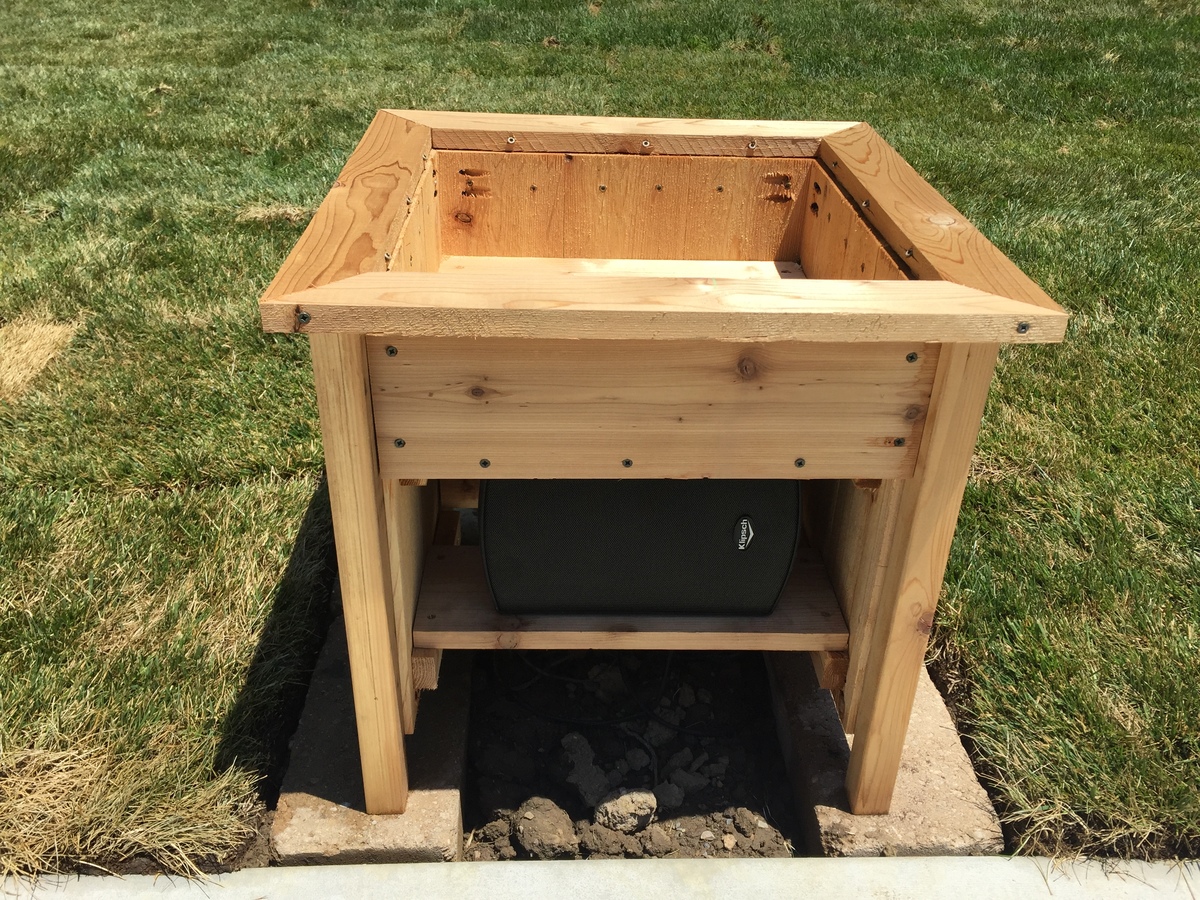
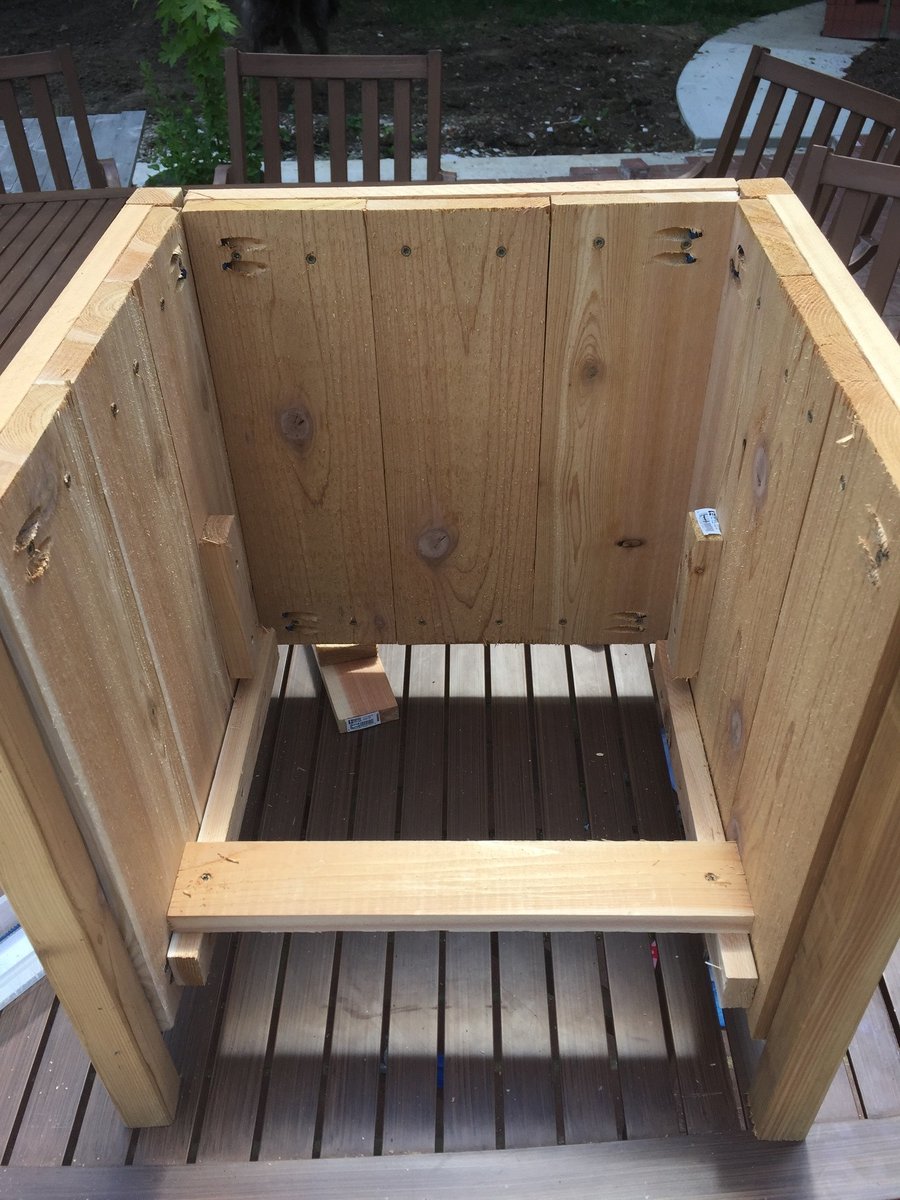
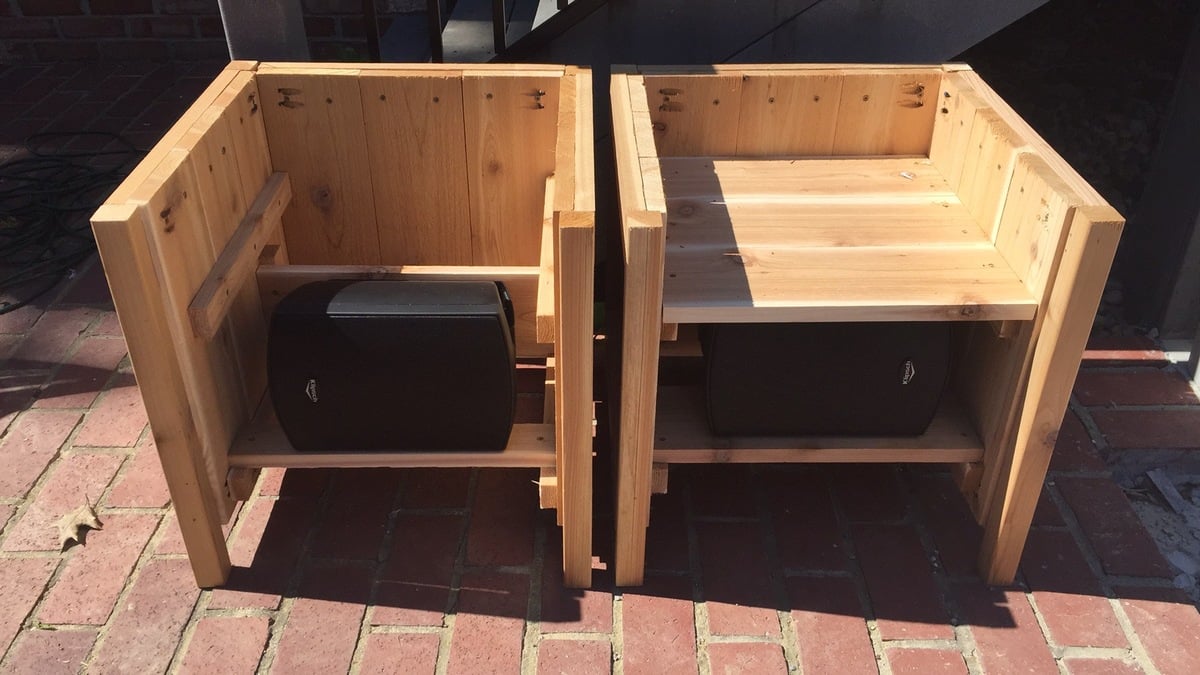
Mobile Storage Cart with Chalkboard Back

Submitted by vendo on Mon, 10/23/2023 - 11:14

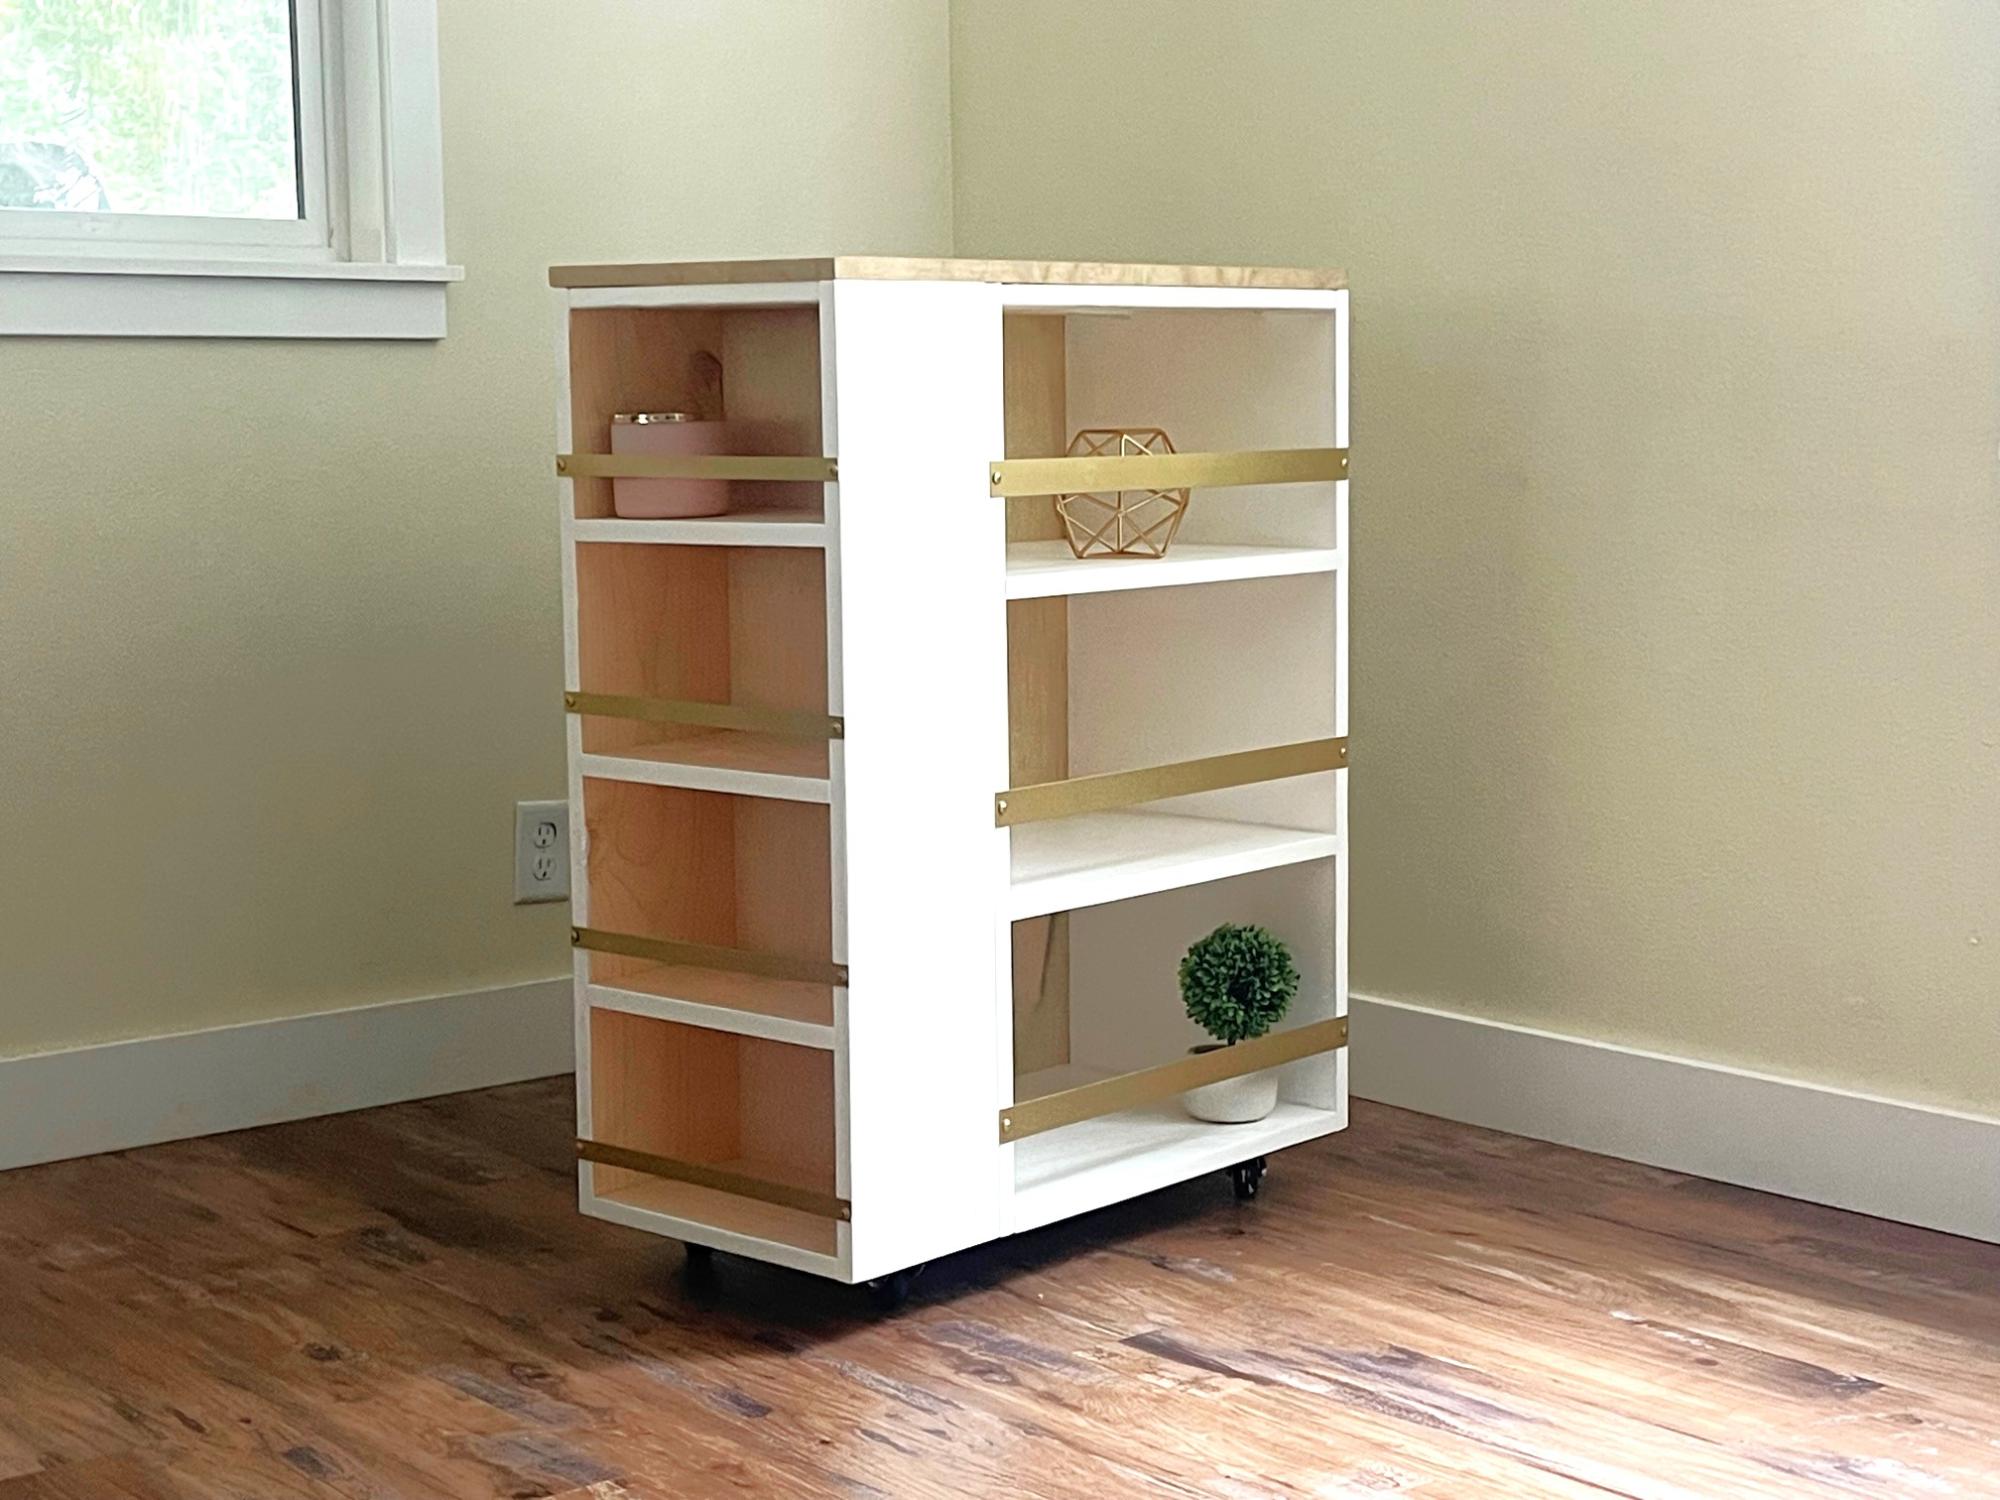
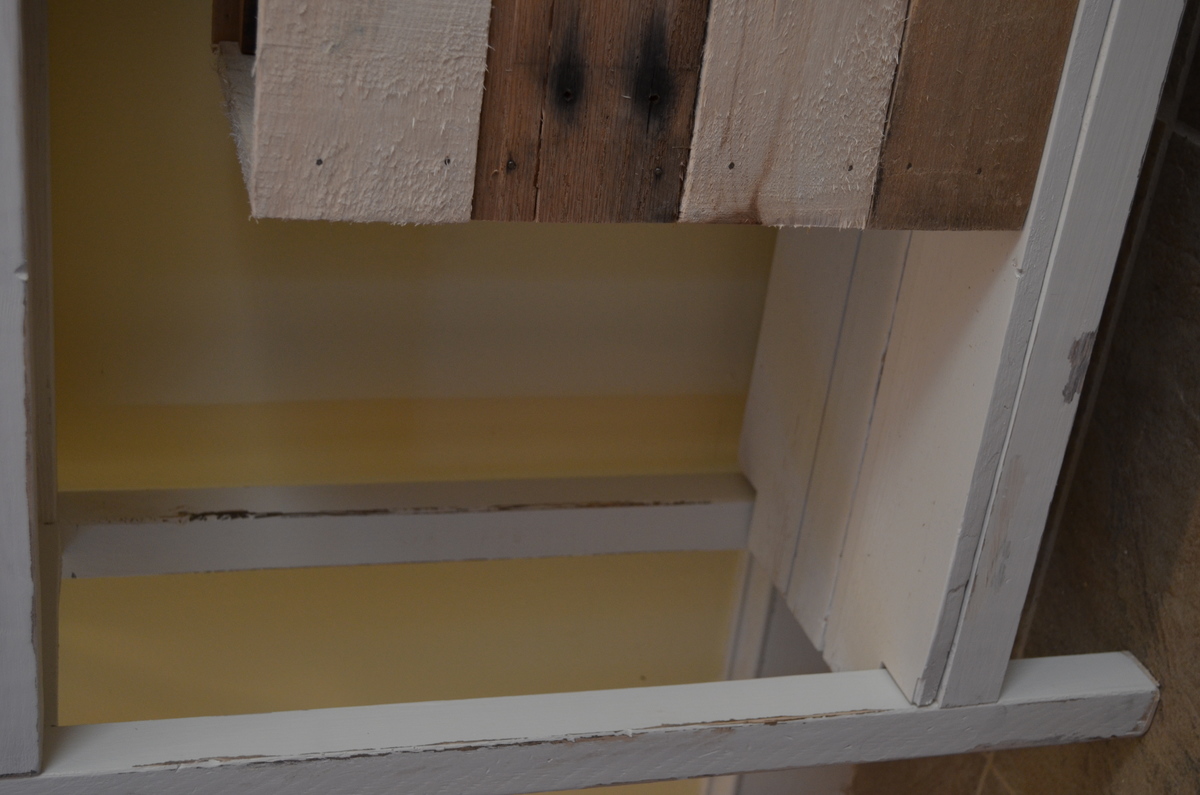
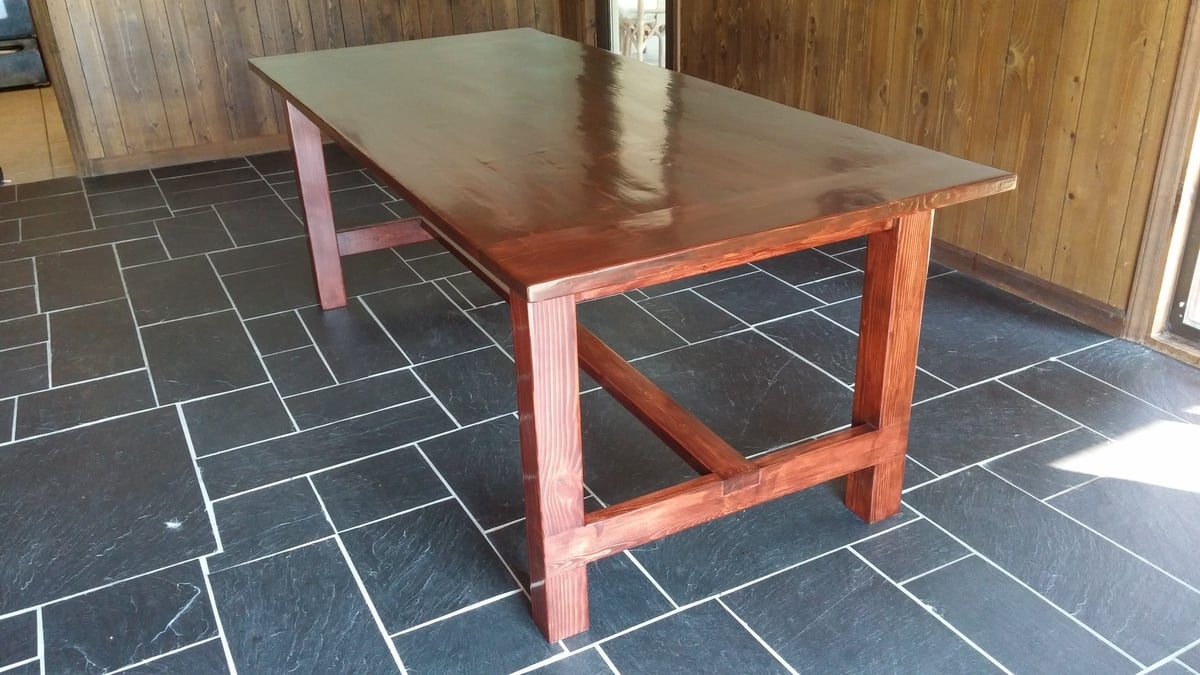
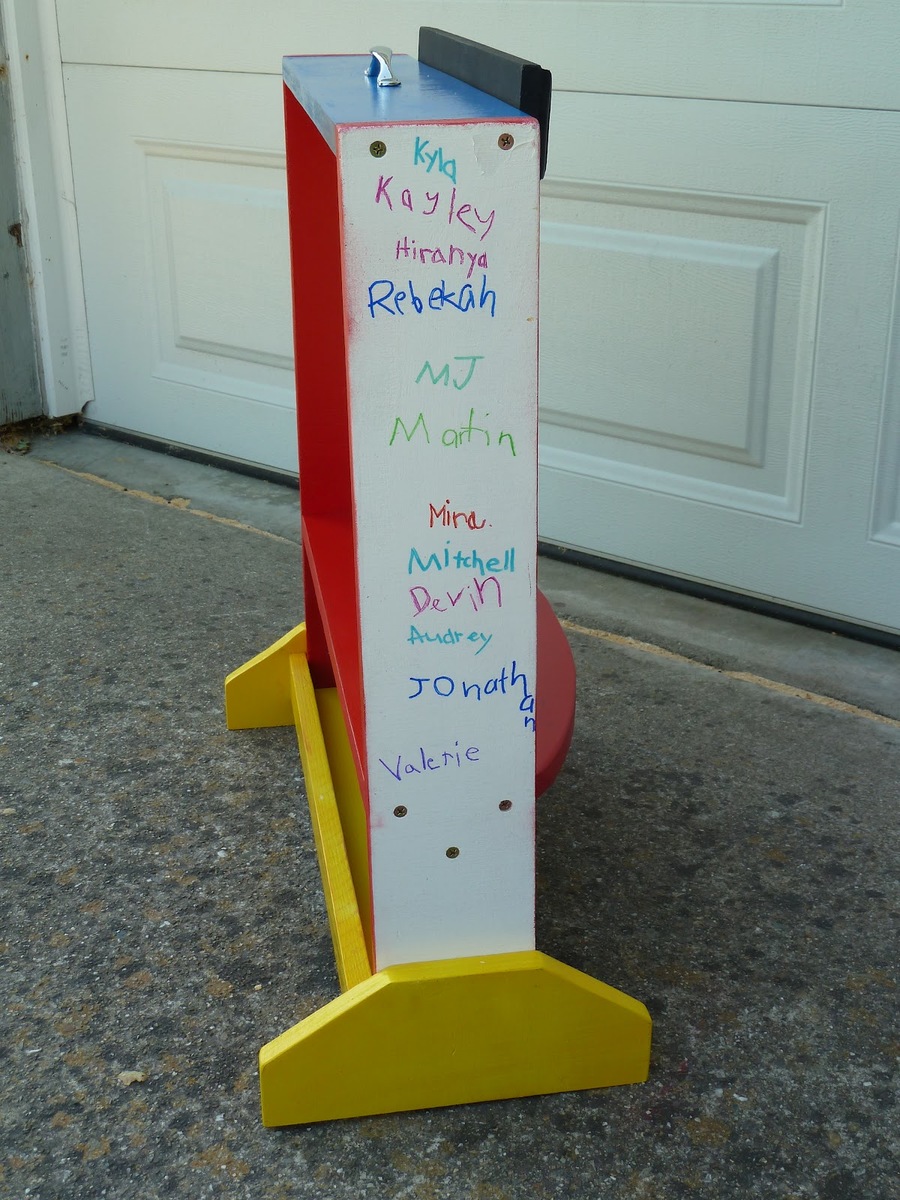
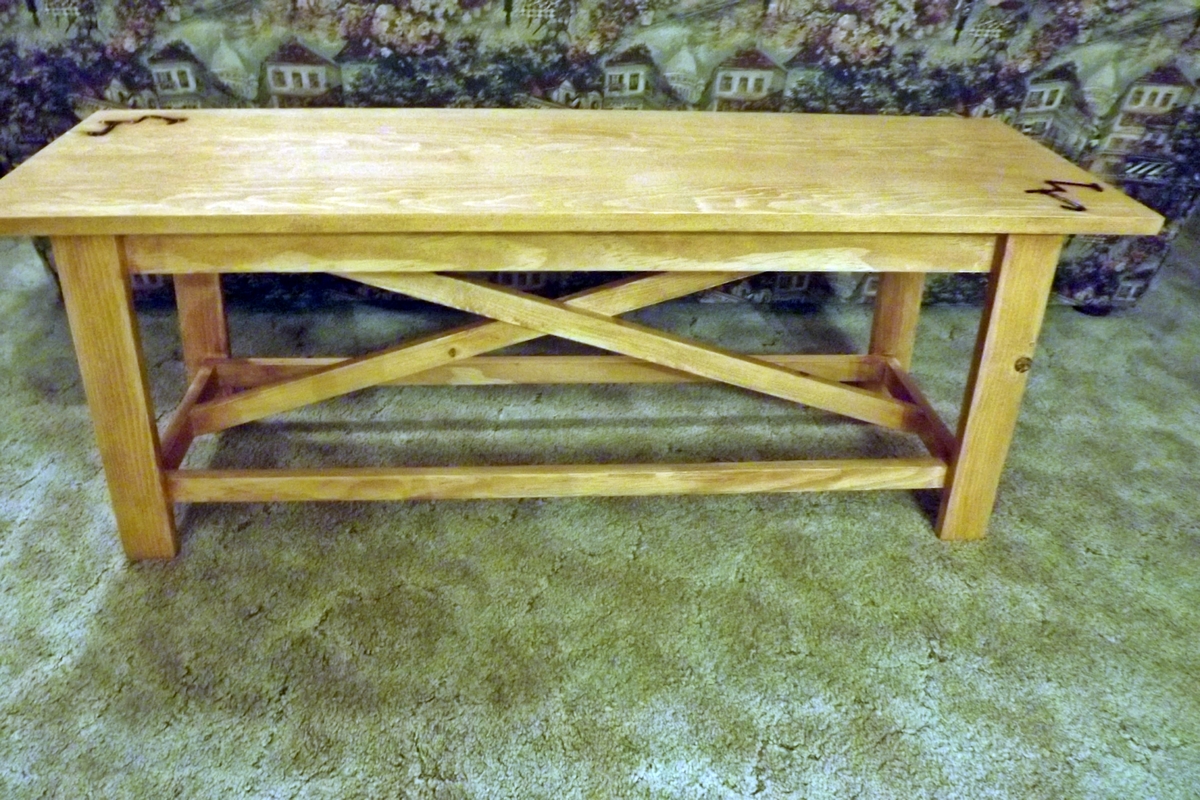
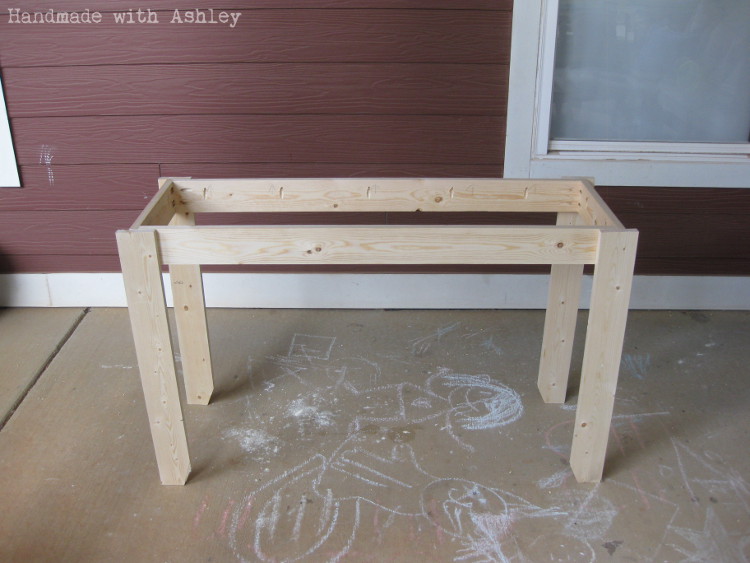
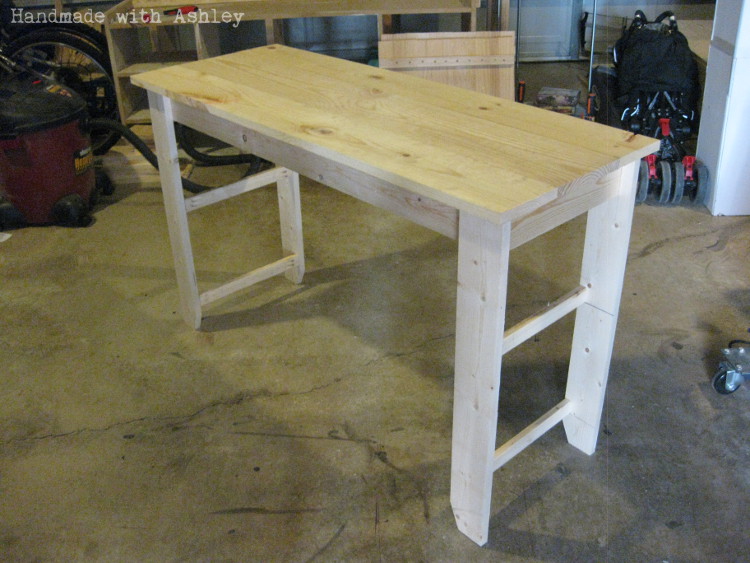
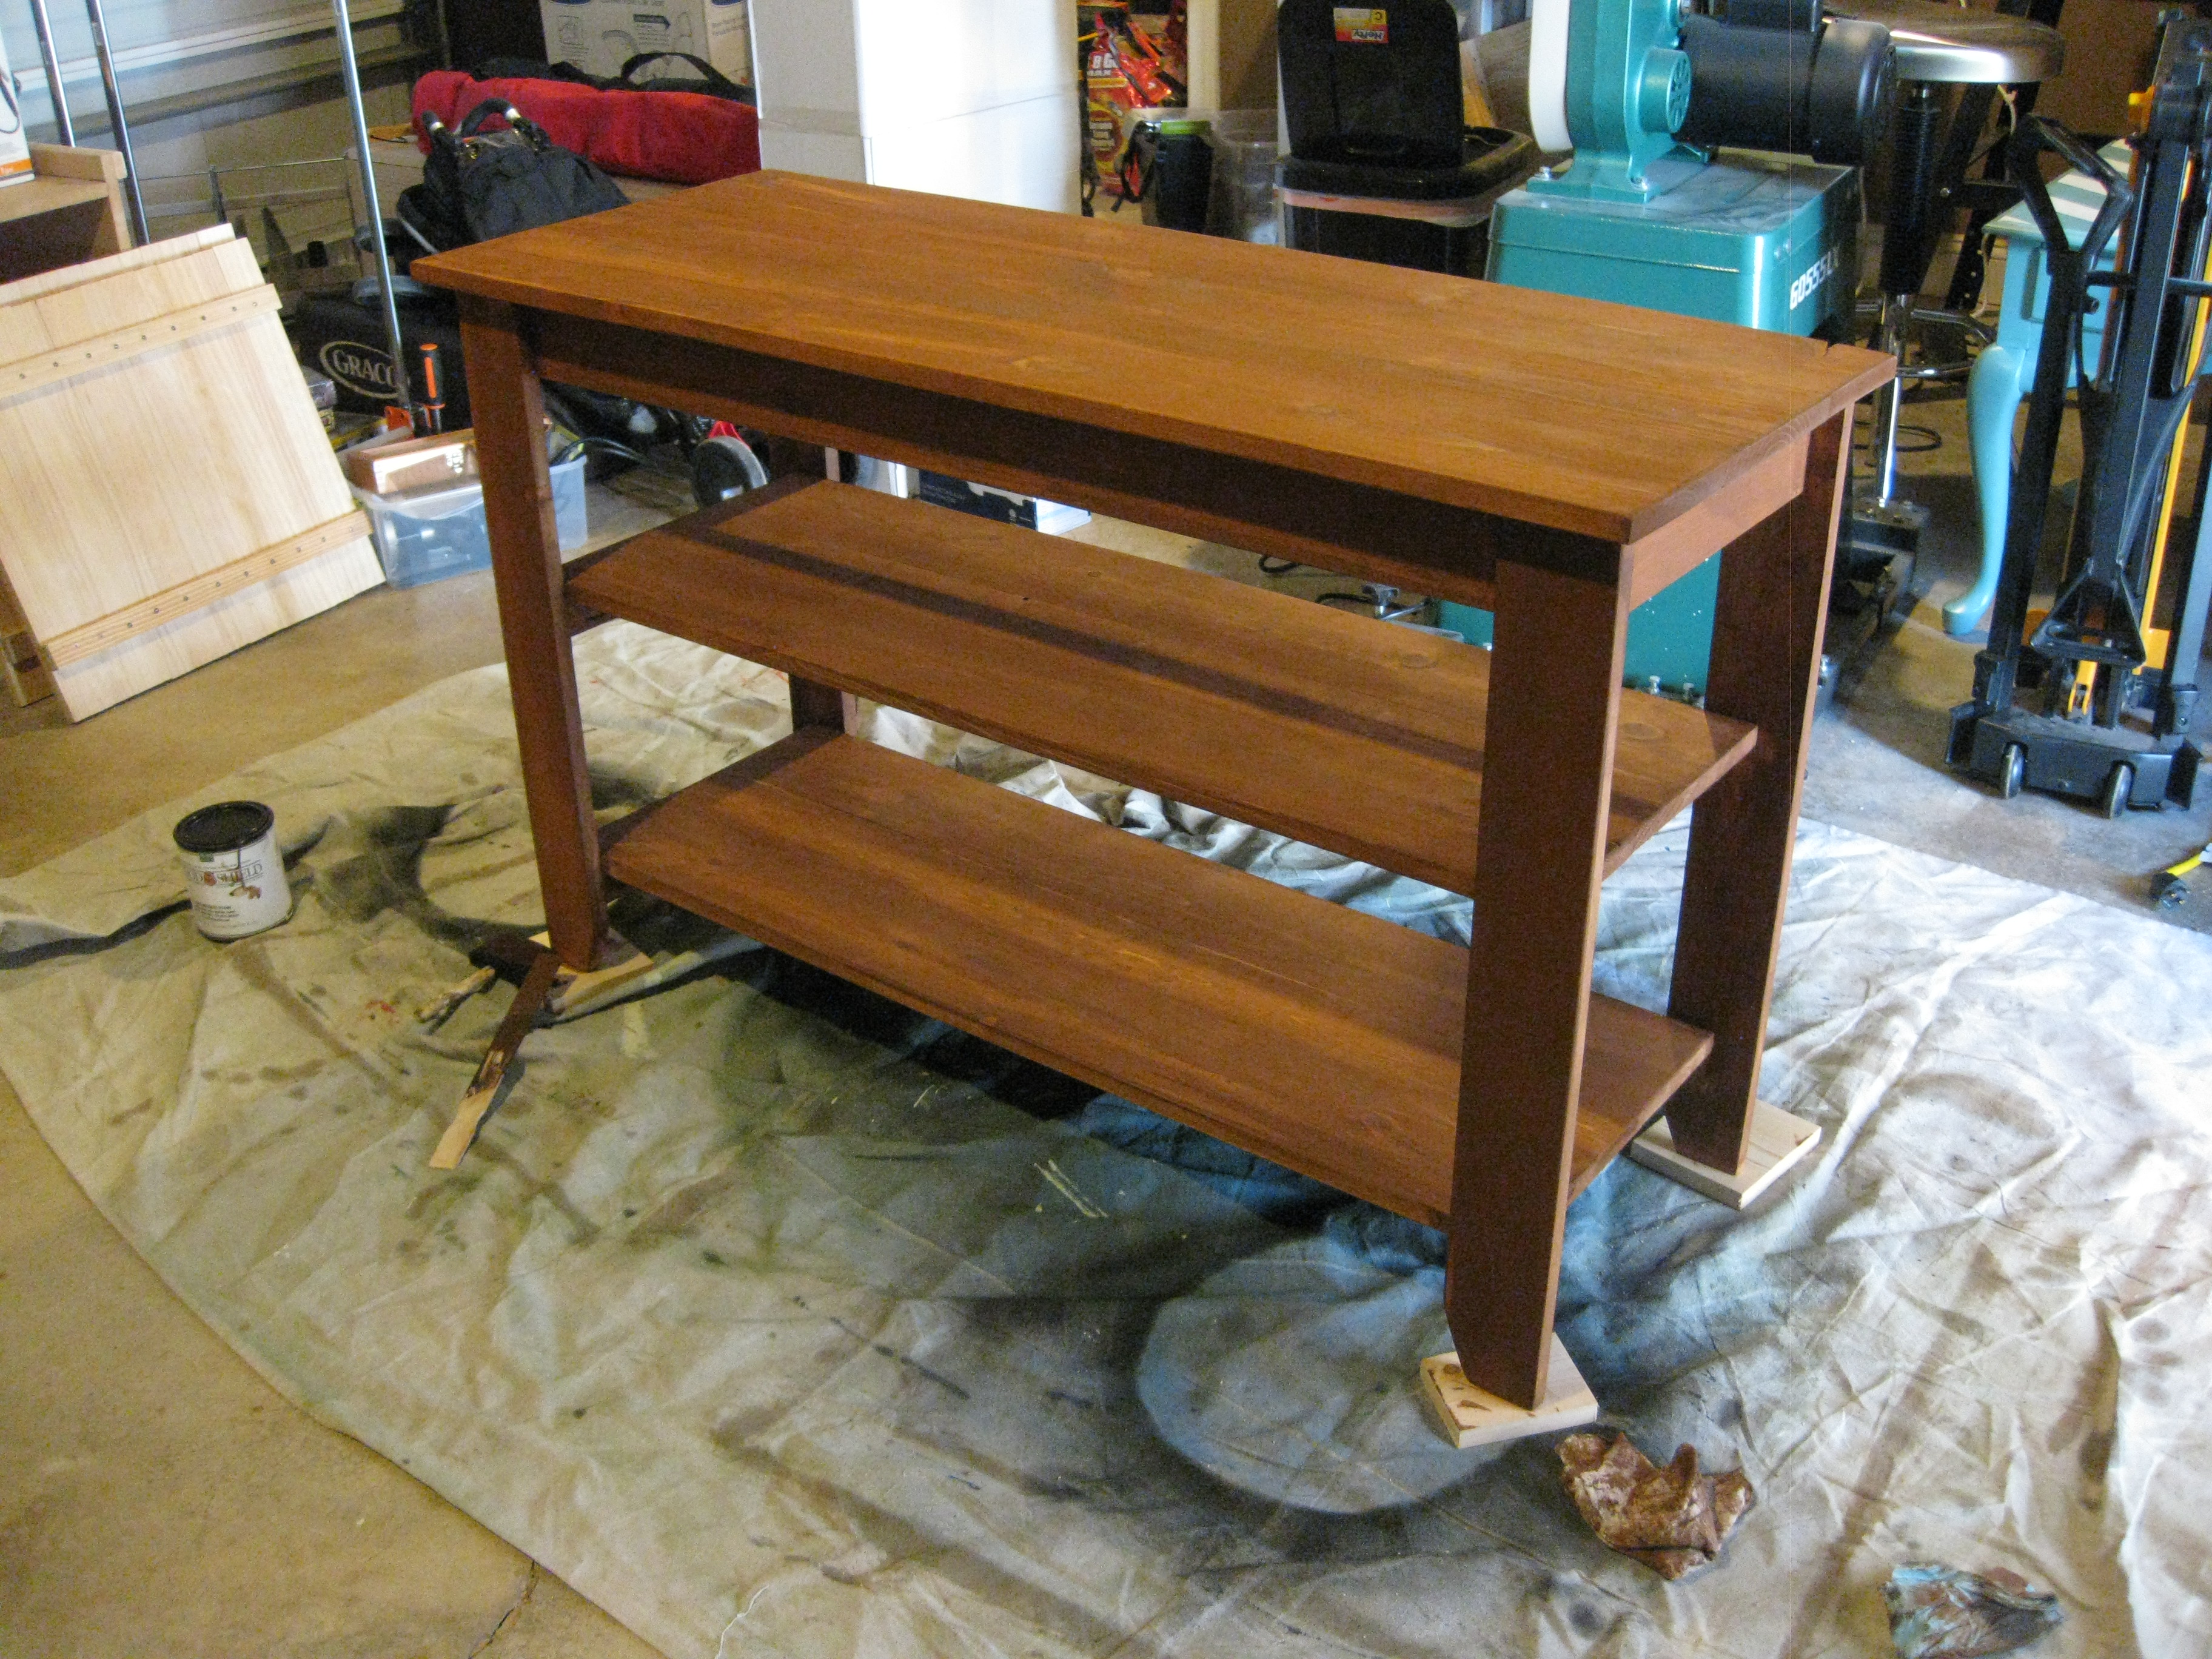
I was asked to build something for my daughters varsity basketball team room. There wasn't a lot of extra space, so this is what I came up with. I wanted to give parents a place to set treats or leave an inspirational message. I was inspired by Ana's modern craft table plans. The smaller bookshelf measures 14" wide by 33 1/4" high (using a 1x8), the larger bookshelf measures 21" wide by 33 1/4" tall (using 3/4" plywood), with a 3/4" plywood top and 2" casters, it's a nice 36" counterheight. I used edgebanding for the top and front exposed plywood edges. I used aluminum flat bar (spray painted gold) to the shelves adding a decorative element as well as to help keep items on the shelves. The back is 1/8" panel spray painted with chalk paint. I added some bay supports at the top of each bookshelf to attach the top from underneath. I'm happy with the results!

Built from Plan(s)

Comments

Simple Outdoor Dining

Submitted by wibblee on Tue, 05/15/2012 - 17:59

I'm SUPREMELY impressed with how well these came out. And just to beat the dead horse.... paint your stuff before you put it together. I didn't and it is a MAJOR pain painting between the slats, man. Major. I'm a little impatient. And impulsive.

Estimated Cost
$120
Estimated Time Investment
Weekend Project (10-20 Hours)
Finish Used
Sanded everything down, linseed oil on cedar boards. Primer and Valspar Bistro White in semi.
Recommended Skill Level
Beginner

Comments

Entryway Table

Submitted by kulichka on Fri, 02/28/2014 - 07:15

This was my first real project where I did everything on my own, start to finish! No help from my husband. I needed a very small and narrow table for my entryway which is very small. This is the first thing you see when you open the front door. The top board is a 12" board, it fits perfectly in the space. I distressed it to give it a nice rustic look and it looks pretty authentic. The crate below is made of recycled pallet wood and will be used for shoes or umbrellas... I'm very happy with the way it turned out for being my first project (it's a tiny bit wobbly..the leg's aren't perfect, oh well!). And it only cost about $30 for the lumber (not including the stain, paint or finishing wax which I already had). Definitely beats trying to find something in the store!

Built from Plan(s)
Estimated Time Investment
Day Project (6-9 Hours)
Finish Used
White ben moore paint which was then distressed, dark walnut minwax stain on top, minwax paste finishing wax over the entire thing (first time I used it and I love it!)
Recommended Skill Level
Beginner

Comments

Farmhouse Table

My brother recently became a homeowner and asked me to build him a dining table for his new (and first) house.  He picked out the Farmhouse Table plan from the site and I spent a few weekends building this table for him. The most time consuming part of the project was sanding and applying the stain & polyurethane. 

Estimated Cost
$150
Estimated Time Investment
Week Long Project (20 Hours or More)
Finish Used
They wanted a red-toned finish so I blended Minwax sedona red and dark walnut oil based stain, followed up with a light coat of minwax gel stain in Hickory. Also used Helmsman Spar Urethane in clear satin for top coat.
Recommended Skill Level
Intermediate

DIY Rustic Coffee Table with Custom Finish

Submitted by Anonymous (not verified) on Sun, 10/29/2023 - 19:41

Great coffee table by April!

For the Finish:

First I lightly burnt the wood. The base is minwax in ebony. I actually sprayed water on the wood and used a damp cloth to apply. 

The top I used random spots of regular satin paint in grey, a couple shades of blue and an olive green and a chalk paint white. Then sanded it down removing most of the paint and stained it with minwax provincial.  And went over some of the edges with the ebony. 

Entertainment Console

Submitted by Klem413 on Sat, 05/19/2012 - 14:35

My husband made this from ordinary pine, modifying it slightly. Eventually he will add doors to the middle. It was spray stained with Minwax polyshades. He took a couple of months on it cause he got busy doing other things but finally finished it!

Built from Plan(s)
Estimated Cost
100.00
Estimated Time Investment
Week Long Project (20 Hours or More)
Finish Used
Bombay Mahogany
Recommended Skill Level
Intermediate

Corner Bookshelf

Recently, I wanted a redo of my mismatched furniture in my sewing room. When I was planning what to do, I decided I needed storage for my sewing books and a place to put my printer. I searched your site for plans (as usual). I found the corner bookshelf that was almost perfect. I had my boyfriend build it for me, but it needed to be just a little taller and a little wider to work with my desk. It turned out fabulous! Thanks for all the great plans you have. They are great inspirations!

Estimated Cost
Unknown - we used some pieces we had and had to get some supplies
Estimated Time Investment
Weekend Project (10-20 Hours)
Finish Used
I finished it with whited paint
Recommended Skill Level
Intermediate

My farmhouse bed

Submitted by Anonymous (not verified) on Thu, 06/02/2016 - 11:07

Simple and easy to build from plans provided

Built from Plan(s)
Estimated Cost
200
Estimated Time Investment
Afternoon Project (3-6 Hours)
Finish Used
No finish yet we are torn between a dark stain or a white chalk look.
Recommended Skill Level
Intermediate

DIY Pantry Shelves

Submitted by Anonymous (not verified) on Sat, 11/04/2023 - 14:49

Built in 5ft x 5ft pantry using pine panels as they were available in the widths we needed. Inspired by your pantry build video, thank you.

Rob Worsnop

Built from Plan(s)

Table Top Puppet Theater

Submitted by melfosson on Tue, 05/22/2012 - 14:26

My son's kindergarten teacher had a table top puppet theater on her "wish list" from an online store - but it cost $70 and I knew there's no way i could buy that. But just one look at it made me realize I could build my own. My son and I built it in just a couple hours and then took some extra time for sanding and spray painting. I had all the kids in the class sign their names on the sides and I used chalk board paint on the top sign so the kids can write their own show title or time, etc. There's a place to keep the chalk in the back. We presented this gift to my son's teacher at the end of Teacher Appreciation week, and it was a huge hit!

PLANS: http://www.tools4moms.com/2012_05_01_archive.html

Estimated Cost
$0-$15 (I only paid for spray paint because I had the wood scraps)
Estimated Time Investment
An Hour or Two (0-2 Hours)
Finish Used
Spray painted all the boards separately before assembling. Use different colors to give it a fun look.
Recommended Skill Level
Starter Project

Rustic X Bench

Submitted by Linda7 on Thu, 03/06/2014 - 14:52

I built this bench for my son and daughter-in-law for their front porch. The plans came from The Handbuilt Home, and I followed them exactly. My daughter-in-law thought it would be cool to burn their brand onto the seat, which added a very personal touch, I think. Very happy with the way it turned out. Thanks for the easy-to-follow plans, Ana!

Estimated Cost
Can't remember; maybe $35
Estimated Time Investment
Day Project (6-9 Hours)
Finish Used
Miniwax conditioner followed by two coats of Minwax "Ipswich Pine" stain. Used three coats of spar varnish, sanding lightly between coats.
Recommended Skill Level
Beginner

Simple Modern Outdoor Sectional

I had been wanting a patio sofa for a long time and while googling prices for the 1,000th time I found a link to Ana White's wonderful website. I can't say how grateful I am to Ana White. The fact that she puts all of these plans online for free and asks nothing in return speaks to her character and what a kind and generous person she is. Helping people build things and helping them learn at the same time! Anyway, I followed the plans explicitly and purchased the cushions at Ikea.

Estimated Time Investment
Week Long Project (20 Hours or More)
Finish Used
Minwax Polyshades Black Gloss
Recommended Skill Level
Intermediate

Coffee Table [Modern Farmhouse Collection]

Decided this table looked like something a moderately skilled person could handle and I was right. I made one modification because I couldn't find any straight 1x10s and I didn't want to use plywood since it can look wrong when staining. I decided to go with an 8 ft. 2x10 instead but then accidentally bought a 2x8. Realizing this after cutting all the boards to length, I fixed my screw up by squaring up the long edges of a 2x4 and adding it up the middle of the top and bottom shelves using pocket joinery like the standard plans. The table turned out a bit heavier than the standard plans would have, but it has a very solid feel. My wife loves it and I am looking forward to adding the end tables.

Estimated Cost
$45
Estimated Time Investment
Weekend Project (10-20 Hours)
Finish Used
2 coats of Danish Oil Dark Walnut and 3 coats of Varathane Ultimate Polyurethane Clear Gloss
Recommended Skill Level
Beginner

Providence Table

Here is my Providence Table made from scrap wood we had left from building our deck. I am not thrilled that it is made out of pressure treated wood but it is what it is. I used 2x6 mixed in with 2x10's for the top, 4x4's for the legs and used a 1/4 router bit for all the edges.

Built from Plan(s)
Estimated Cost
free from scrap
Estimated Time Investment
Afternoon Project (3-6 Hours)
Finish Used
It is still drying out but the plan is to paint the legs white and the top a stain color.
Recommended Skill Level
Intermediate

Comments

Cedar Planter Outdoor Speakers

Submitted by Hoosierdoc on Fri, 06/10/2016 - 10:53

We just put in a pool and I needed something to hide a pair of outdoor speakers. I used Klipsh AW-525 speakers.

Basically I raised the bottom of the planter enough to fit the speaker under and had to add a few framing pieces to secure the speaker mount to. The mount attaches to a vertical board and the weight rests on a horizontal board. The wiring comes up from below.

The front panel uses vinyl mesh from Sailrite.com to hide the speaker but allow sound out. Imm planning to hang it with magnets if it doesn't distort sound too much.

Built from Plan(s)
Estimated Time Investment
Afternoon Project (3-6 Hours)
Recommended Skill Level
Beginner

Comments

Martina Bath Storage

Submitted by wahome on Mon, 05/28/2012 - 13:14

So happy to finally get around to this build. Super easy, though I found I am not that skilled with cove moulding...nothing a little wood putty couldn't hide.

Estimated Cost
$20
Estimated Time Investment
Afternoon Project (3-6 Hours)
Finish Used
Behr primer and paint in one, color was custom mixed based on Martha Stewart craft paint in Pool. Topped with Minwax waterbased poly.
Recommended Skill Level
Beginner

Benchmark Storage Tower

Submitted by katefago on Fri, 03/14/2014 - 20:00

I was given an old window that was going into the trash from an old house in Key West that was being remodeled and decided I wanted to use the window as a door on a cabinet. These plans were very thorough and easy to follow. I modified the measurements to fit the window and am really happy with how it turned out. I added some trim to the top and bottom and used beadboard for the back to fancy it up a bit. I painted it in Sea Mist by Behr and distressed it by hand. This is my first post on this site. Thanks, Ana, for making this possible for me!

Estimated Cost
$125
Estimated Time Investment
Weekend Project (10-20 Hours)
Finish Used
Painted Sea Mist by Behr and distressed for an aged look, followed by two coats of polyurethane in Satin
Recommended Skill Level
Beginner

Comments

DIY Rustic Console

I had a friend make a request for a console table.  We came up with this design to fit her space and needs.  It was a pretty easy build.

Estimated Cost
$150-200
Estimated Time Investment
Weekend Project (10-20 Hours)
Finish Used
ECOS Paints Woodshield - Pine Needles; ECOS Paints Woodshield - Satin Varnish
Recommended Skill Level
Beginner
Back