Community Brag Posts

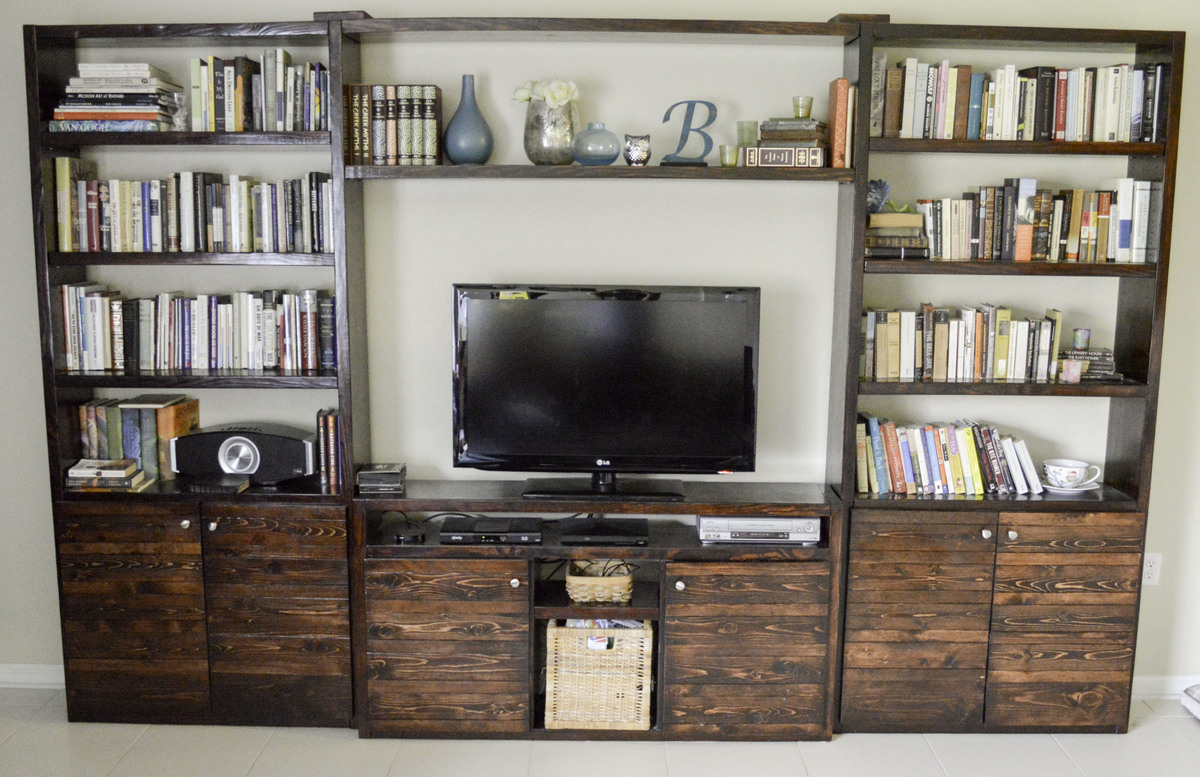
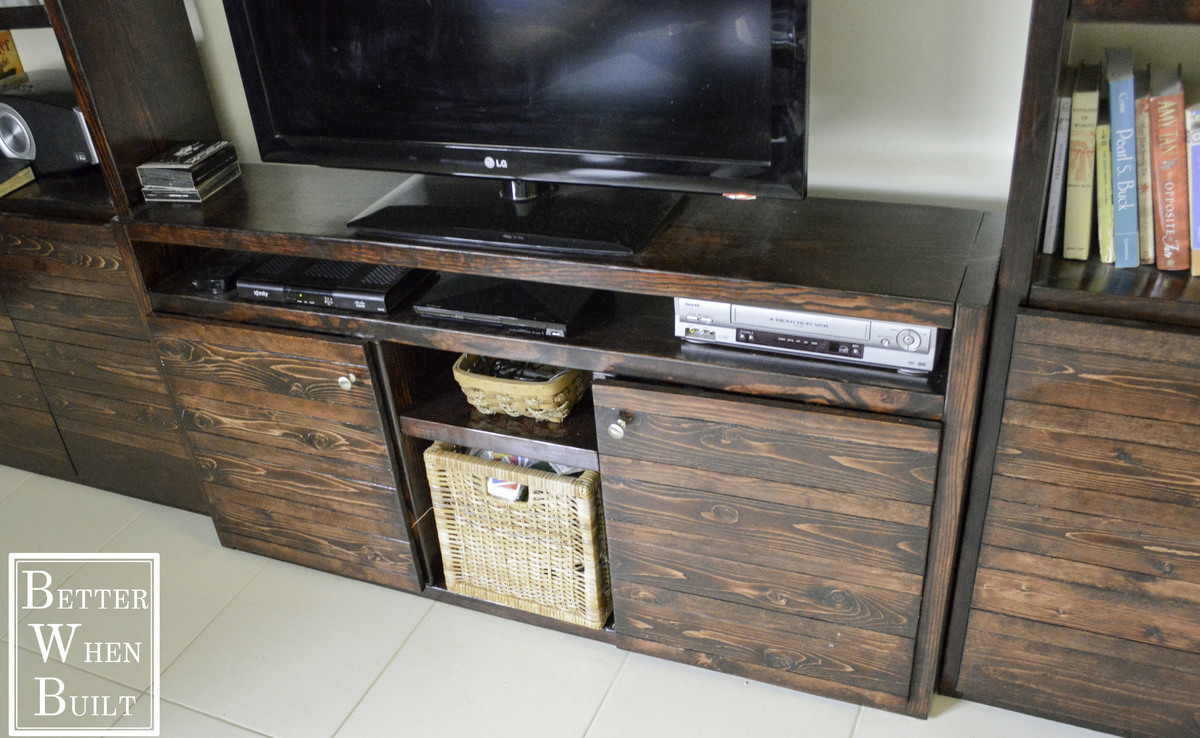
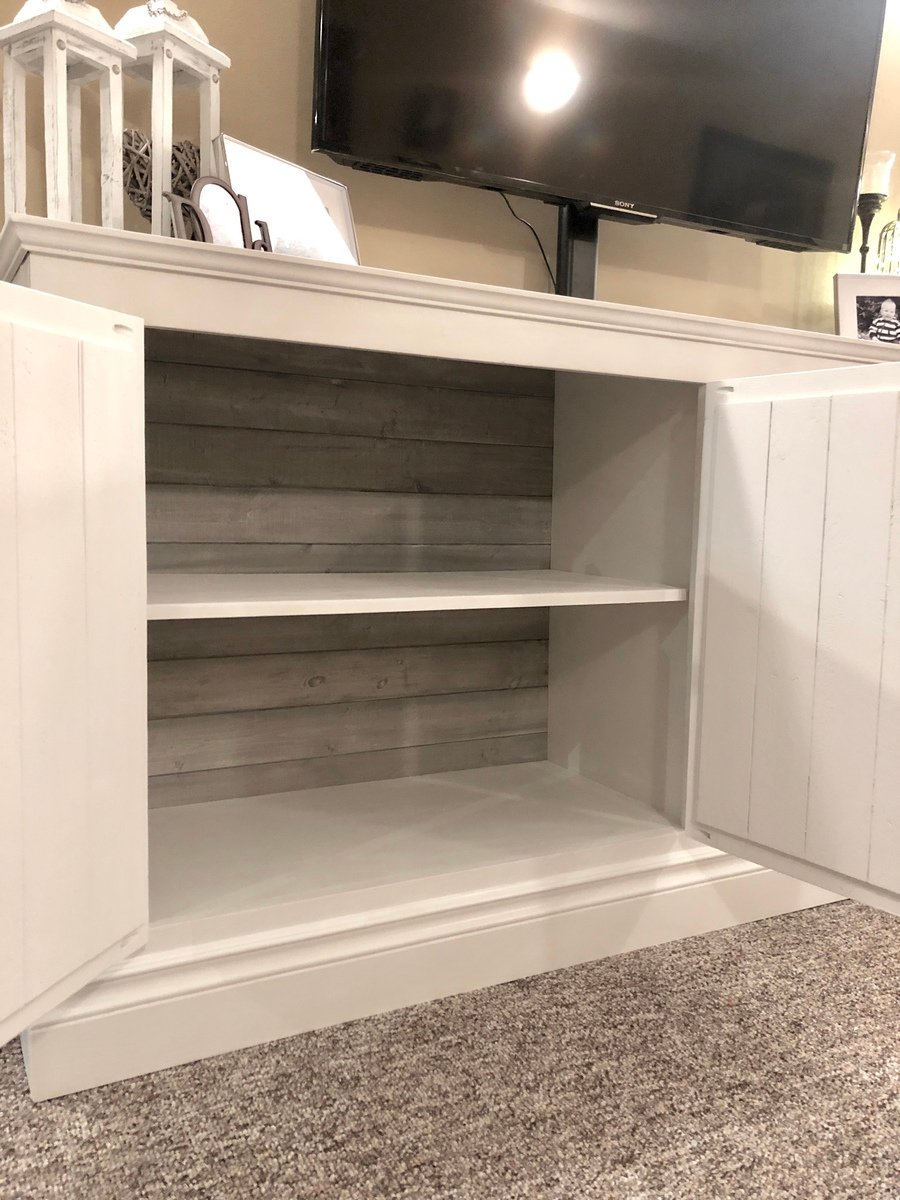
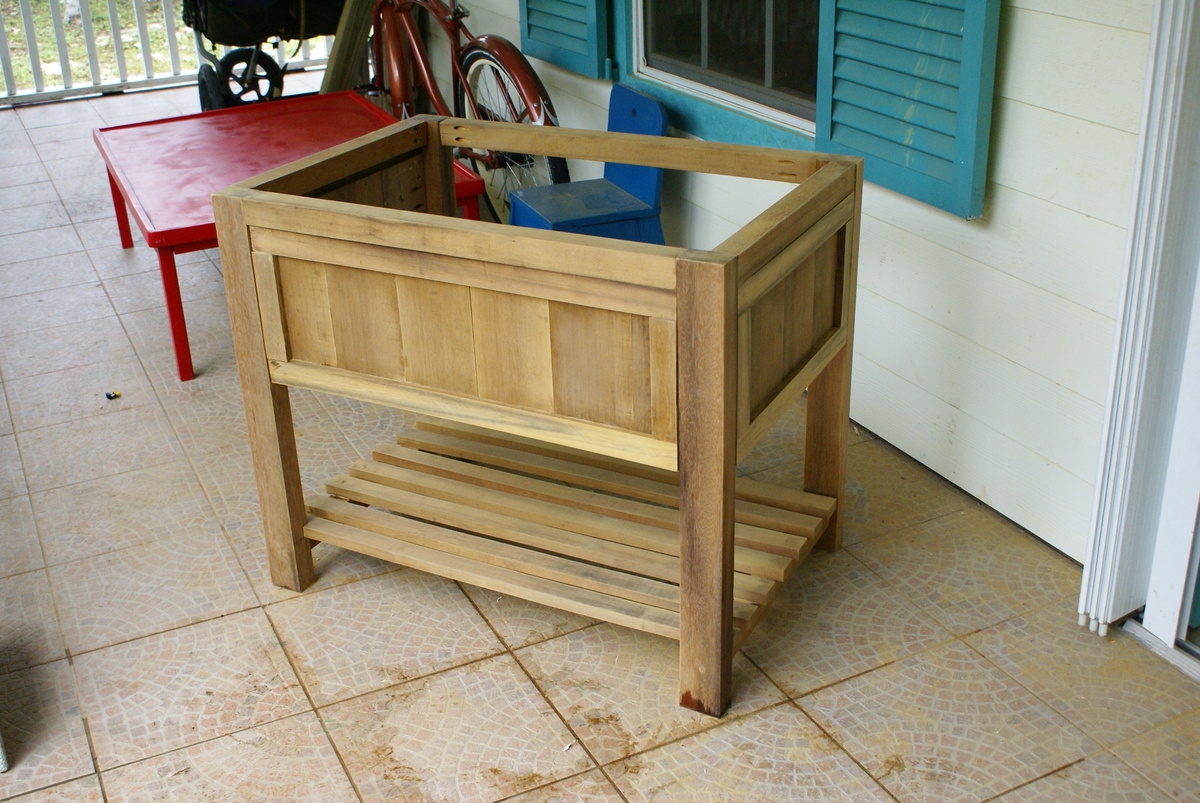
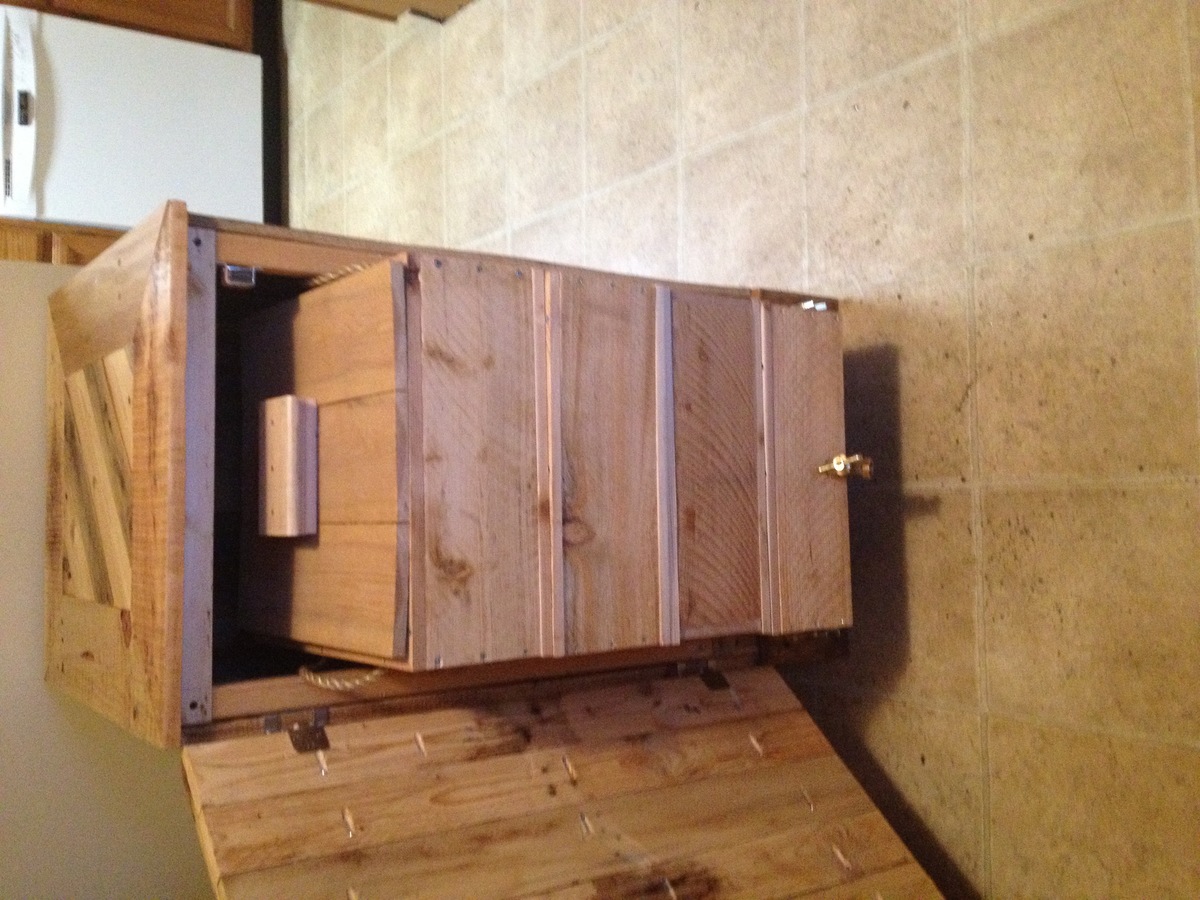
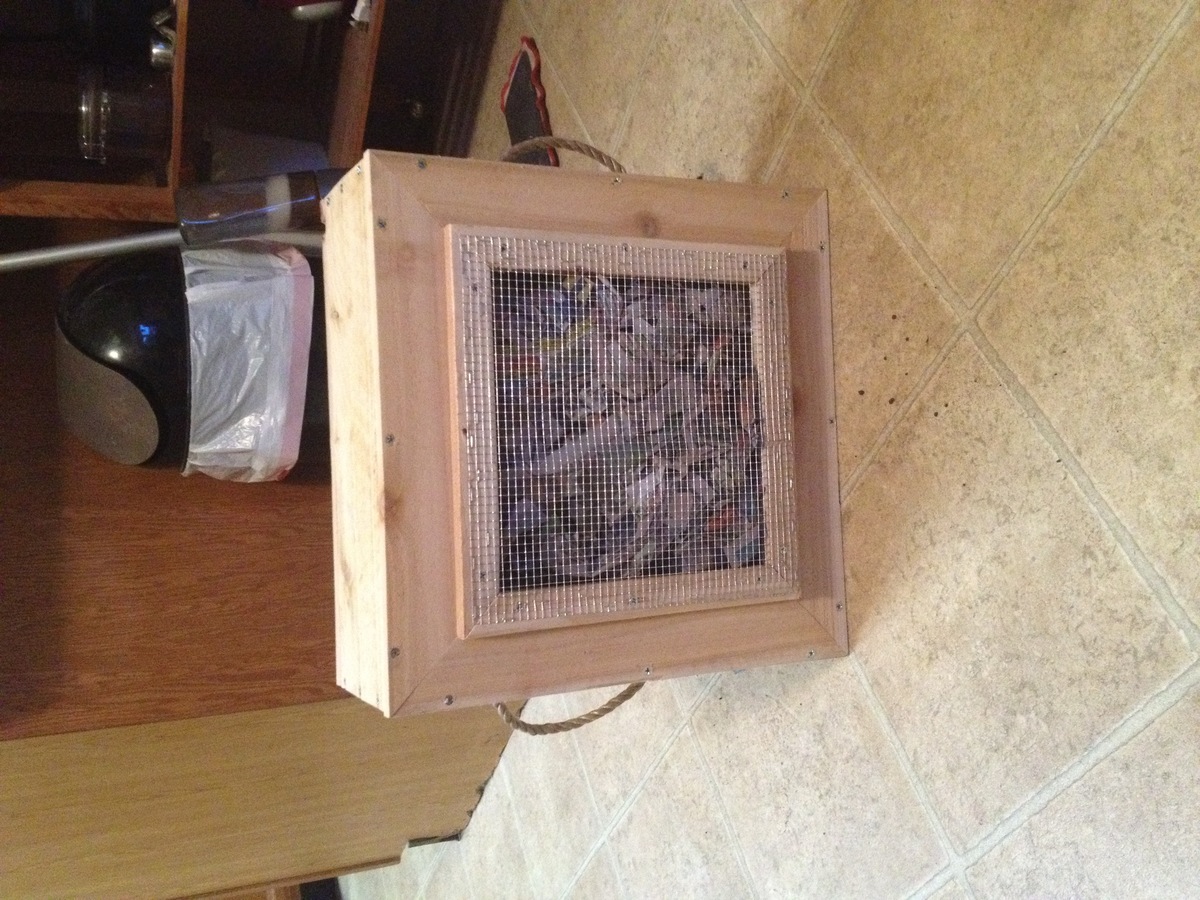
Worm Composter Bins with Cabinet

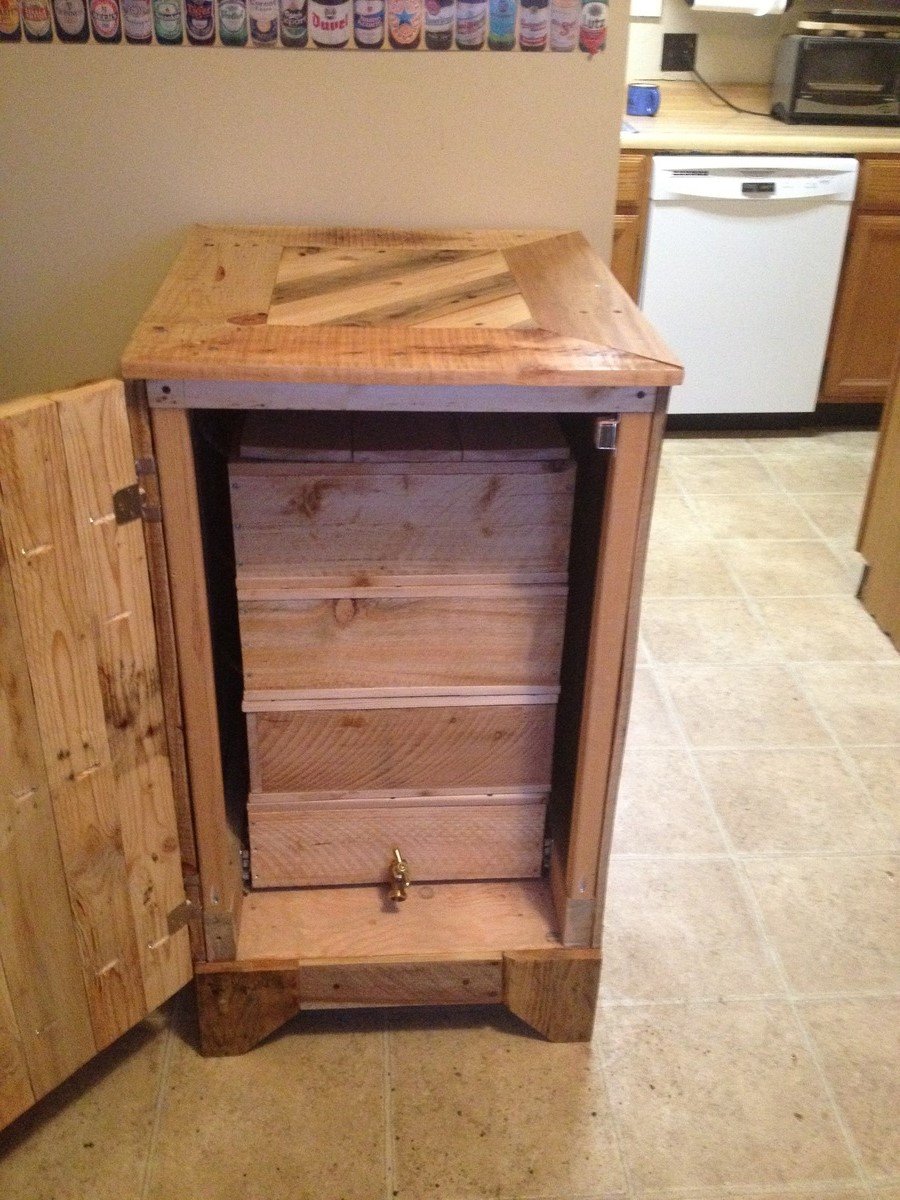
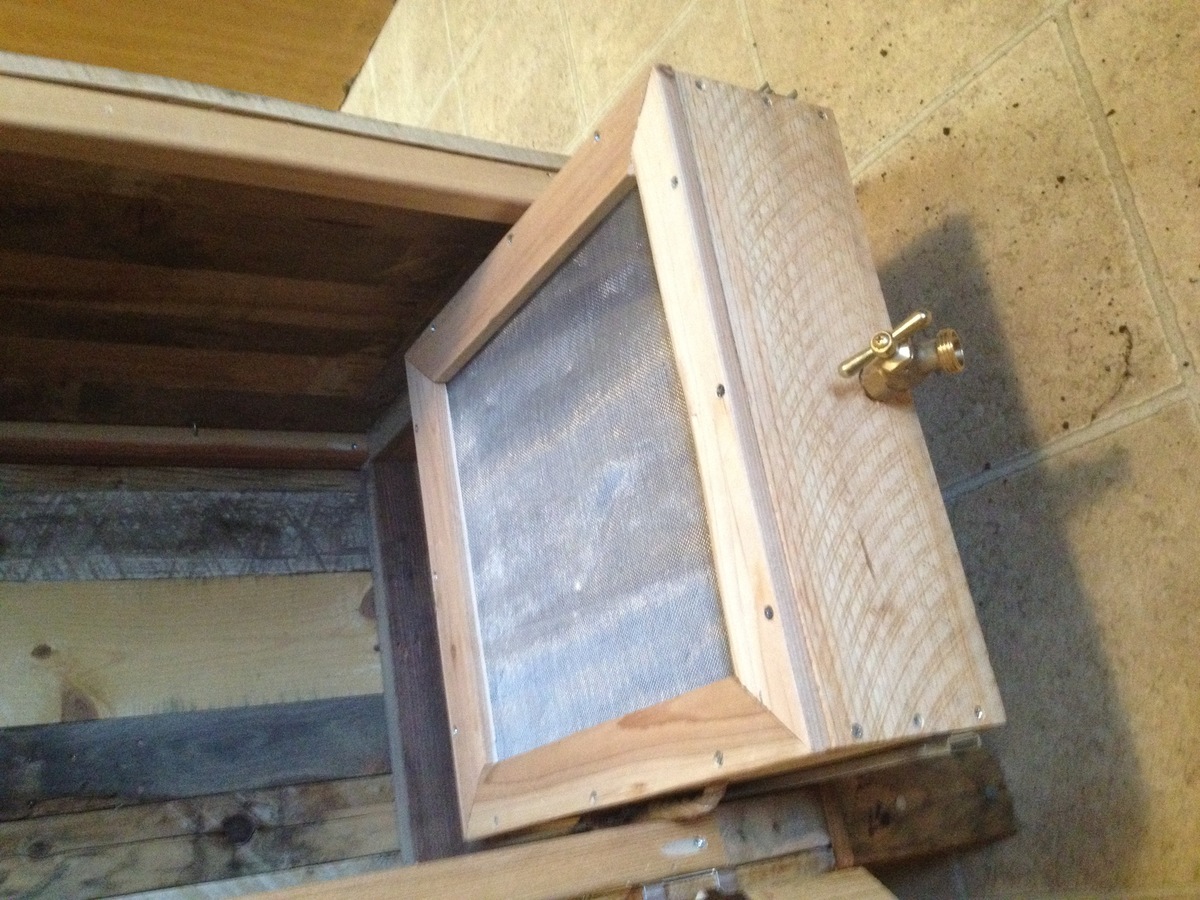
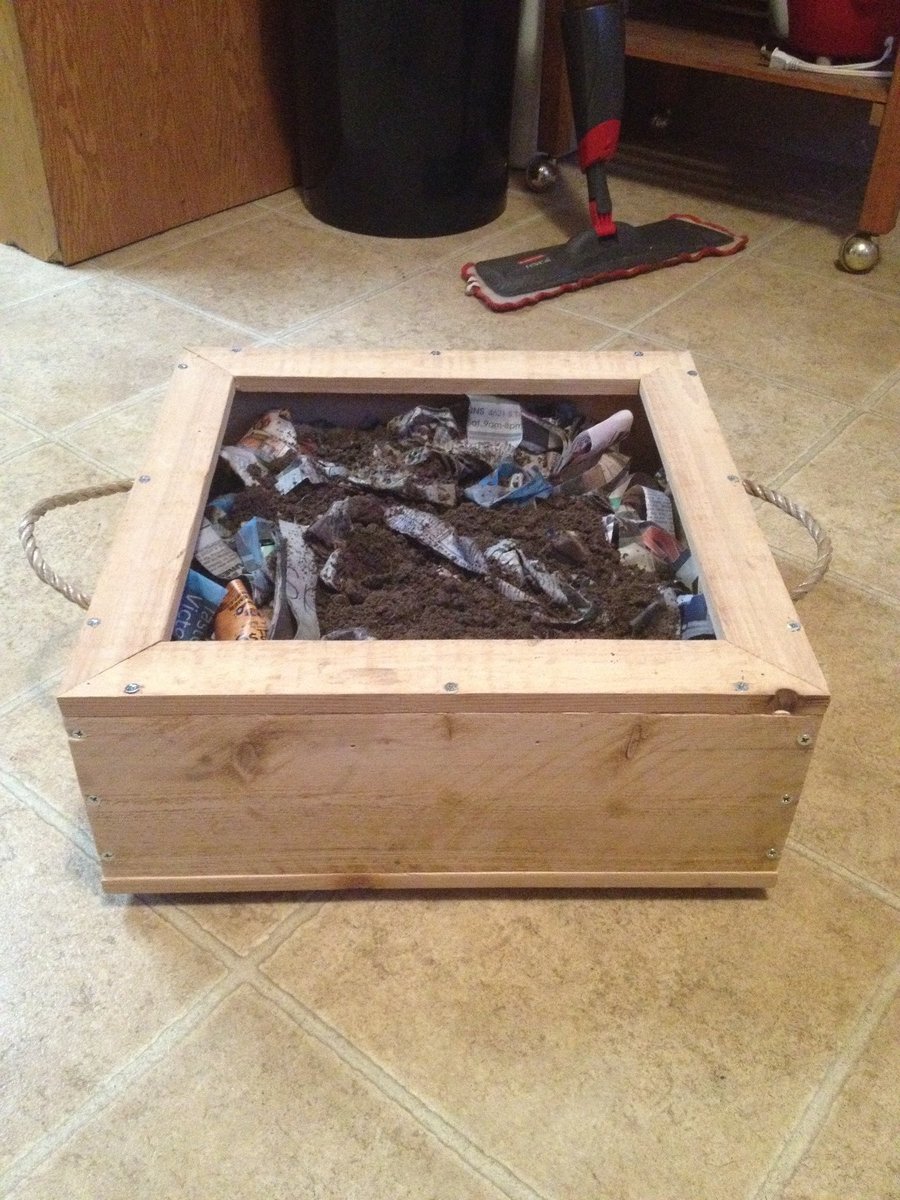
I made the worm composter from Ana's plan and built a cabinet out of old pallets. The stack of worm composters drawers slide in and out of the cabinet on a heavy duty drawer glide set. I used cedar fence board. For 3 bucks a board, it was worth the work to rip them down and sand them. The bottom drawer has a tray built out of old flashing and slopes towards a hose bib in order to collect the worm tea. I designed the drawer insert out of cardboard and cut it out of flashing, using a pop rivet gun to put it together, sealing the seams with flashing caulking. The drawer has a sheet of aluminum window screen under the top square of cedar.

Estimated Cost
50
Estimated Time Investment
Week Long Project (20 Hours or More)
Finish Used
Some free varnish from the County Drop and Swap recycle center
Recommended Skill Level
Intermediate

Lack Inspired Entertainment Center

Submitted by eralben on Mon, 04/20/2015 - 07:24

The IKEA Lack Inspired Bookcase plans became my inspiration for the entire entertainment center.  I made a few changes to the bookcase plans.  I increased the height of the bookcases to 84 inches and added adjustable shelves.  I also included some major extras including a console for the TV, a bridge to connect the bookcases, and doors inspired by www.shanty-2-chic.com.

Built from Plan(s)
Estimated Time Investment
Week Long Project (20 Hours or More)
Finish Used
Red Mahogany
Recommended Skill Level
Intermediate

Modern adirondack chair

Submitted by Anonymous (not verified) on Tue, 10/05/2021 - 08:48

I've made 2 of the Modern adirondack chairs. Really enjoyed the plans and the video for help as I'm new to woodworking. I look for new plans all the time to see what I might build next

Comments

Walk mounted can organizer

Submitted by Anonymous (not verified) on Tue, 10/05/2021 - 20:13

Love this! My husband used this project to help boys learn to use power tools and work with wood. They made one and he did the others. THANK YOU!

Built from Plan(s)

Comments

Kid sized picnic table

Submitted by Anonymous (not verified) on Sun, 12/26/2021 - 12:22

My daughter and I did this project together. It was our first wood working and painting project. Learned a lot in a short time. Plan was as said “Easy” although maybe a bit hard for us given we had no experience. All drawings and paintings were free hand.

Built from Plan(s)

Comments

Bar

I found the Workbench Console plans on this site and thought it would look great behind the sofa.

The length was extended to make it comfortable for 3 people to sit at and also to span the length of the sofa. I cut out a section at the back and lowered it to hold some glasses. This fits 4 beer glasses, 4 wine glasses and 4 shot glasses. The towel holder is a cast iron key that I found on Amazon. On the other end is a cast iron bottle opener found on eBay.

I would like to take credit for the chairs, but I cheated and got these from IKEA.

We love using this while eating dinner and watching a movie and is especially handy when guests are over.

Built from Plan(s)
Estimated Cost
$75-$100
Estimated Time Investment
Weekend Project (10-20 Hours)
Finish Used
Minwax Red Oak stain. Polyurethane.
Recommended Skill Level
Beginner

L-shape Modern plywood desk

I constructed this desk all from birch plywood. It features a pull out keyboard tray, modern drawer finger pulls, and full extension drawer slides. The plywood was finished with a hand-rubbed danish oil for a natural wood appearance.

Estimated Cost
$150.00
Estimated Time Investment
Afternoon Project (3-6 Hours)
Finish Used
danish oil
Recommended Skill Level
Starter Project

Window Bench with Drawers

I made a window seat, it was fun.  It has these 27 Inch soft close drawers , a custom extended vent, and an outlet port with usb on the right end.  It was fun thank you (and my wife loves it!  (Still waiting for our seat pad for it)

by Glen

Built from Plan(s)

Alternating stairs

Thanks for the great idea to make our steep attic stairs safer so we could finish our attic!!!

Estimated Time Investment
Week Long Project (20 Hours or More)
Finish Used
Southern yellow pine
Recommended Skill Level
Intermediate

Kitchen Island

The plans were easy to follow. I modified my island to fit my space and cut it down to 44 inches in length.

Built from Plan(s)
Estimated Cost
The entire project cost $47.00.
Estimated Time Investment
Day Project (6-9 Hours)
Finish Used
I stained the top and shelves with Watco Danish Oil in dark walnut and then used a satin finish varathane for only the top to protect it from spills, etc. The sides and legs were painted with an interior latex paint called "Sandbar" from Home Hardware.
Recommended Skill Level
Beginner

Comments

Emily Jo (not verified)

Mon, 10/31/2011 - 15:33

Your island is gorgeous, and I love the modification you made to the original plans on the shelving support! I would like to know what size the boards are that you used so that I can duplicate. Thank you!

Lisa Tamaye (not verified)

Sun, 02/05/2012 - 18:10

This is great! ANyone know how I could extend one side in order to put stools for an eating area?
Would love to do that!

Alice (not verified)

Tue, 02/07/2012 - 19:43

I would think it would be basically the same build, just add brackets to support the extra wood.

Guest (not verified)

Mon, 03/05/2012 - 15:20

I want to make this Kitchen Island but if can't find the Supply List. Would you mind posting it or emailing me please! This will work perfect in my Kitchen

Katia57

Mon, 03/05/2012 - 17:46

Wow! Just a wonderfully simple project! I can figure it out by looking at it. I have a piece of Rock Maple Counter Top 24"x6'that needs legs. I'll probably use 4x4' for legs, six of them. But the shelves will be just like this. Thank you!

Katia57

Mon, 03/05/2012 - 17:50

Wow! Just a wonderfully simple project! I can figure it out by looking at it. I have a piece of Rock Maple Counter Top, 24in.x6ft., that needs legs. I'll probably use 4x4s for legs, six of them. But the shelves will be just like this. Thank you!

Guest (not verified)

Wed, 04/04/2012 - 11:58

Just click on the link for the instructions. It's under the heading 'About This Project' titled as 'From Plan: Easy Kitchen Island Plans'.

Click where it says 'Easy Kitchen Island Plans'. When you hover your cursor over the words, you will see that is a hyperlink.

Lindsey Adams (not verified)

Sun, 05/20/2012 - 06:48

I love your island and I also have a small kitchen...would you happen to know the sizes of the boards you used? Thanks

??? (not verified)

Wed, 07/25/2012 - 14:31

Yours looks so different and so much better then the one that show how to make it, how did you do it? I really would love to build it but have no idea how...
Thanks so much!

CBsMama (not verified)

Wed, 08/15/2012 - 13:08

This island is perfect. I love the shelves and the size. Any chance you could send me the dimensions of this island and details on how you did the shelves? Great job!

lizzy1299

Mon, 02/04/2013 - 15:03

I'm SO glad I stumbled acrossed your website! I LOVE that island and getting ready to get all the stuff to make it. Did you use the Kreg Jig thing the original person used...? If not, how did you cover the screw heads?

Thanks!

ameliam

Wed, 12/31/2014 - 07:37

Hi, this is my first time building anything. I really like the modification made to the original plans. I like the legs facing the other way. I can't figure out how to modify the cuts on the sides and front and back supports for the top to adjust for turning the legs the other way. Are there modified plans. LOL I need instructions, I’m not quite there yet on doing it myself. Thank you

djbeenie

Wed, 02/04/2015 - 15:03

How did you mount the 1 x2s since its on the side of the 1 x 4s. Did you tac them in. I really like the way that looks. Thanks!

MBuckson

Mon, 03/16/2015 - 08:00

Amazing island! I am in the middle of building this and looking ahead to the finishing aspect of it and I have a question: What tool did you use to apply the oil on the counter top? A cloth or a certain type of brush?

wiri0302

Sat, 06/06/2015 - 18:33

Hello, i love this island but maybe i missed it. What kind of wood is everyone using? Frosting said $47 but that could only be for pine right? Are people using pine to build this? I would like it to look just like the picture. Any help would be appreciated! thanks!

X Book Caddy

Submitted by carongirls on Fri, 08/16/2013 - 06:30

SImple and easy to make. I had leftover wood so all I had to buy was 1x2"s. I'd say the total cost was $15. It's sturdy and holds a lot of books.

Built from Plan(s)
Estimated Time Investment
Day Project (6-9 Hours)
Recommended Skill Level
Beginner

Wide Platform bed

This bed is my first "for profit" bed.  Took some design changes so it could be taken apart and put together easily with metal bed brackets.

Estimated Time Investment
Week Long Project (20 Hours or More)
Finish Used
This finish was MInwax Expresso with several coats of satin polyacrylic lightly sanding between each.
Recommended Skill Level
Intermediate

Simple Step Stool

Submitted by Anonymous (not verified) on Mon, 08/08/2022 - 07:43

Fun and quick build. Made this one out of maple and African mahogany (khaya) for the laundry area of the garage.

Comments

Indoor Dog Kennel

I love my dogs, but their wire kennels were an eyesore. Removing them completely was not an option, but I was tired of looking at them. I went back to my first-ever rehab project, and took it one step further to create a one-of-a-kind castle for my pups.
The original piece of furniture was an old console-style TV cabinet. Sliding doors on the front revealed the TV, and two lids on top contained the tuner and a turn-table.

Armed with screwdrivers, hammers and a dremmel, all components were removed form the cabinet, leaving just the shell. (PLEASE be sure you remove all sharp, potentially dangerous, screws, staples and what-not’s from the inside of the cabinets, to avoid injuring your pet! The dremmel allowed me to cut off and grind down stubborn screws.)

To cover the holes in the top cabinets, I used old checker boards. The cubbies are now a great place to store dog treats and leashes.

OPTIONAL: The back panel of the cabinet I used had holes from the TV components. I elected to replace the back board with a new sheet of peg board. (The peg board allows for much-needed ventilation.) In order to get the size perfect, I traced the old back onto the new and marked the original screw holes.

I vacuumed the inside to remove all construction debris and polished the exterior with Pledge. Then, I inserted an old comforter into the kennel, and stood back as my two pups launched themselves into their new abode.

The doors can stay open during the day for them to enter at their own will, and close for bedtime. And my eyes no longer hurt.

Estimated Cost
Cost of Cabinet (will vary)
Estimated Time Investment
Afternoon Project (3-6 Hours)
Finish Used
I did not elect to change the finish, but it could be painted to match any decor if you want.
Recommended Skill Level
Beginner

Comments

Barbara Cash

Thu, 08/11/2011 - 18:41

This was such a great idea. I love the old console. I love to build but I love it so much more when I can use old wood or repurpose parts of old furniture and industrial pieces. I feel creative. The checker boards are great. Do you have a blog?

Beffus (not verified)

Wed, 08/24/2011 - 09:33

I wish I thought of this or saw it long ago! I have 2 huge ugly crates in my living room...I am now on the hunt for 2 much better looking living spaces for my "other babies"! Love love this idea so much looks beautiful!

My $6 Doll Crib

Submitted by Lady Goats on Sat, 08/13/2011 - 21:17

Well, this crib is STILL unfinished, and the date-stamp says I built it December 5th.... So... Uhh.. I should really get on that!

I had initially built this crib for a friend's daughter's birthday gift, but the baby (8 months old at the time) got REALLY sick, so I wasn't able to finish it in time (don't worry, we got her a Pillow Pet - she got a gift still!). It was just before Christmas, so instead of going out and spending more money that we were tight on, I just bought 3 1x2s and used scraps for the rest of it.

The crib's basically been sitting in the baby's room looking cute until about a month ago. That's when she decided that her stuffed owl (from Build-A-Bear) needed to be put to bed every night before I put HER to bed. It's become such a routine that I have no idea how she'd react if we couldn't put her owl to bed! So I'm scared to try to start filling all the holes and painting in fear that we'd have a mental breakdown if I didn't finish in time for bed! EEK!

Built from Plan(s)
Estimated Cost
$6
Estimated Time Investment
An Hour or Two (0-2 Hours)
Finish Used
OOPS bin paints on the parts that WERE finished.
Recommended Skill Level
Beginner

DIY stackable chairs (added arms) and table

I added arms to the stackable chairs. This table and 8 chairs set came out great and I was able to build everything (including the chair cushions found on clearance) for under $350.00 thanks to this website!

Estimated Time Investment
Weekend Project (10-20 Hours)
Recommended Skill Level
Beginner

Sideboard

Submitted by Anonymous (not verified) on Mon, 01/21/2019 - 23:48

Really enjoyed making this! Thank you for the plans Ana White! 

Built from Plan(s)
Estimated Cost
250.00
Estimated Time Investment
Weekend Project (10-20 Hours)
Finish Used
Rustoleum Chalked linen white with gloss finish.
Recommended Skill Level
Intermediate

Comments

Built in bookcase with lights

Submitted by AndyH on Sat, 12/12/2015 - 14:19

Built in bookcase with lighting and power outlets in cupboards for audio and DVD equipment to feed to the wall mounted tv (to the left).

The photo with the lights is when it was unfinished and I also decided that I didn't like the inset doors and so made new overlay ones. Now I have four doors I need to use on another project...

Estimated Cost
$1000
Estimated Time Investment
Week Long Project (20 Hours or More)
Finish Used
Sherwin Williams Pro Classic Extra White Satin.
Recommended Skill Level
Intermediate

Comments

Ana White

Mon, 12/14/2015 - 05:43

Inspiring to see such amazing work!  Love the attention to detail and precision.  Ana

Bown

Sun, 09/10/2017 - 18:45

Did you go by a plan? I'd like to do this but I definitely need a step by step plan.

Greenheart Bathroom Vanities

I've been working on these bathroom vanities for a family building a home. These are made of gorgeous Greenheart lumber. I have only worked with pine and spruce up to this point, but this wood is truly stunning. It has been quite the adjustment to work with, and I've broken my share of bits and screws :)

All of these together took me about a week to complete. Had I been working with a softer wood it would have taken no time hardly, but the hardwood....that's a whole other ballgame to me!

They will be adding 2'' thick concrete counter-tops on these when they get installed. I love the simplicity of their look!

Built from Plan(s)
Estimated Cost
No idea on what this wood costs (and the costs to get it to where I live)
Estimated Time Investment
Week Long Project (20 Hours or More)
Finish Used
Unfinished in these photos. They are still trying to decide the final finish.
Recommended Skill Level
Intermediate

Comments

NimbleShopper

Tue, 10/01/2013 - 07:35

These vanities are beautiful. It would be really neat if you could add pictures when they are installed with the counter tops! I am contemplating replacing a vanity with a DIY one, and I love seeing how other people have made things beautiful with their own 2 hands.

Benches that Convert to Picnic Tables

Submitted by Steph99 on Thu, 02/02/2023 - 11:14

Simple benches that convert to picnic tables

Comments

Seasonal And Holiday

Rustic X Coffee Table and Side Table

Submitted by Anonymous (not verified) on Sat, 03/23/2019 - 08:53

I absolutely love how this coffee and end table set have completed my living room. Each one took me about a day to complete and $80 or less!! Excellent, detailed plans resulting in a gorgeous piece. Thank you! 

Estimated Cost
$80
Estimated Time Investment
Day Project (6-9 Hours)
Finish Used
The top is stained with Minwax Jacobean finish, then whitewashed with watered down Dover White From Sherwin Williams. Base is painted Sherwin Williams Dover White in semi-gloss finish.
Recommended Skill Level
Beginner

Comments