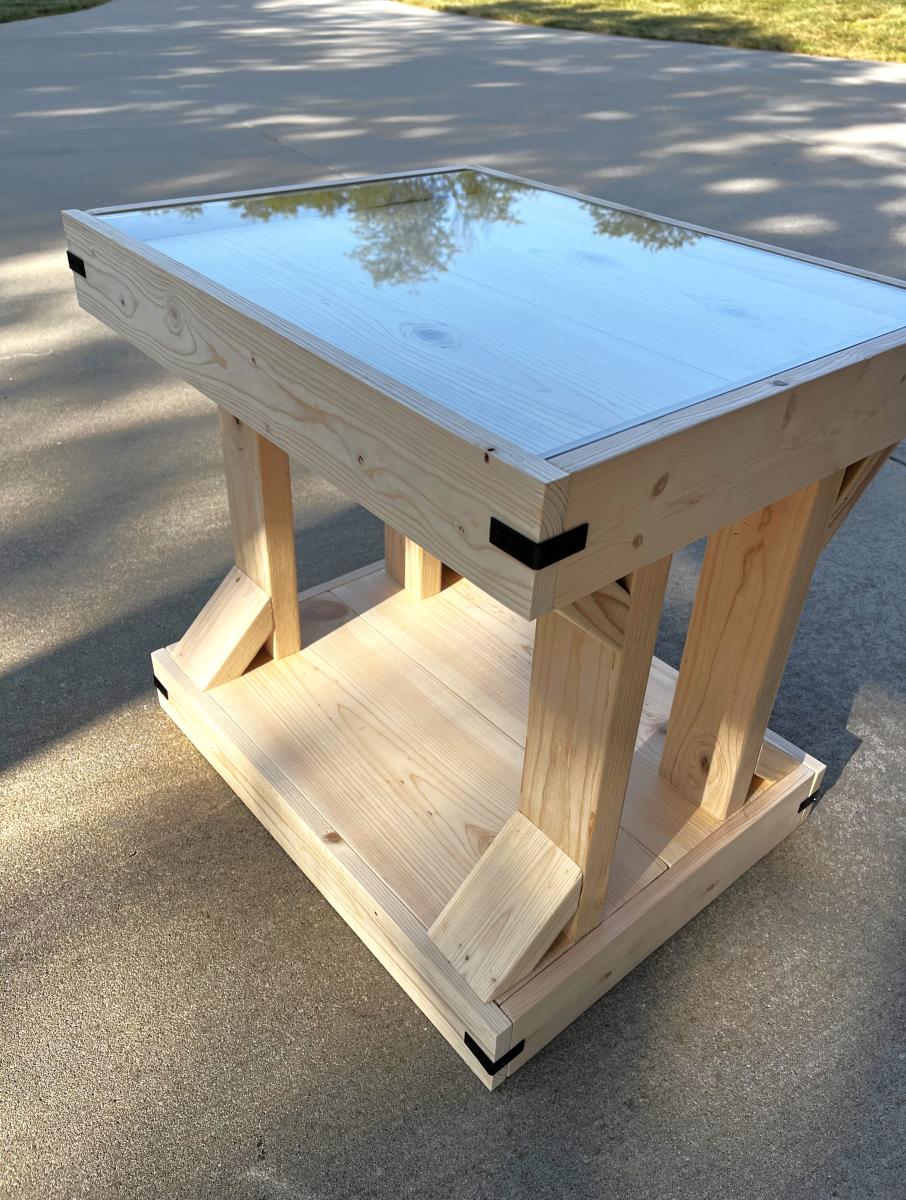
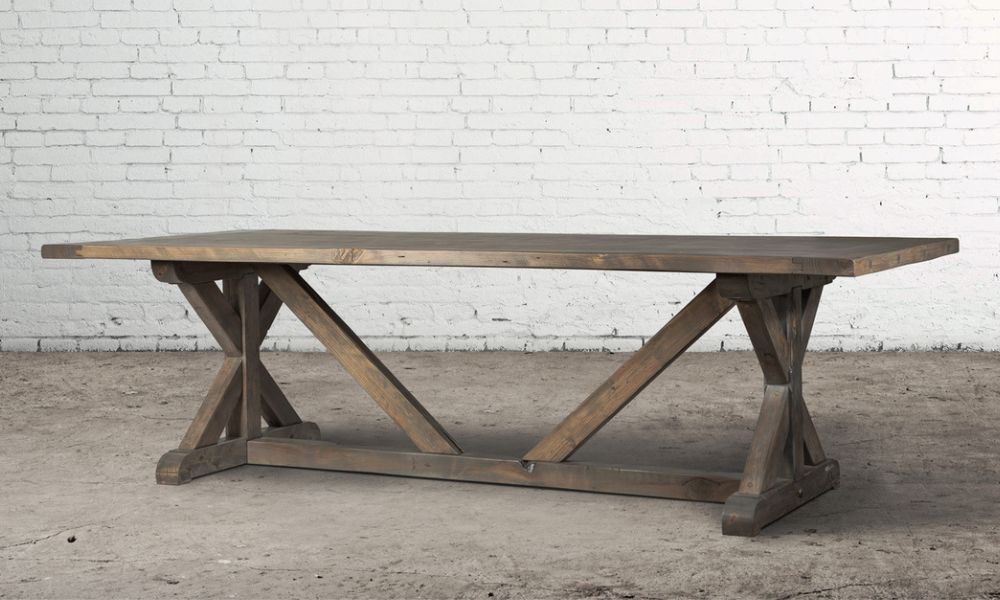
Rolling Workbench with "Drill Holders"
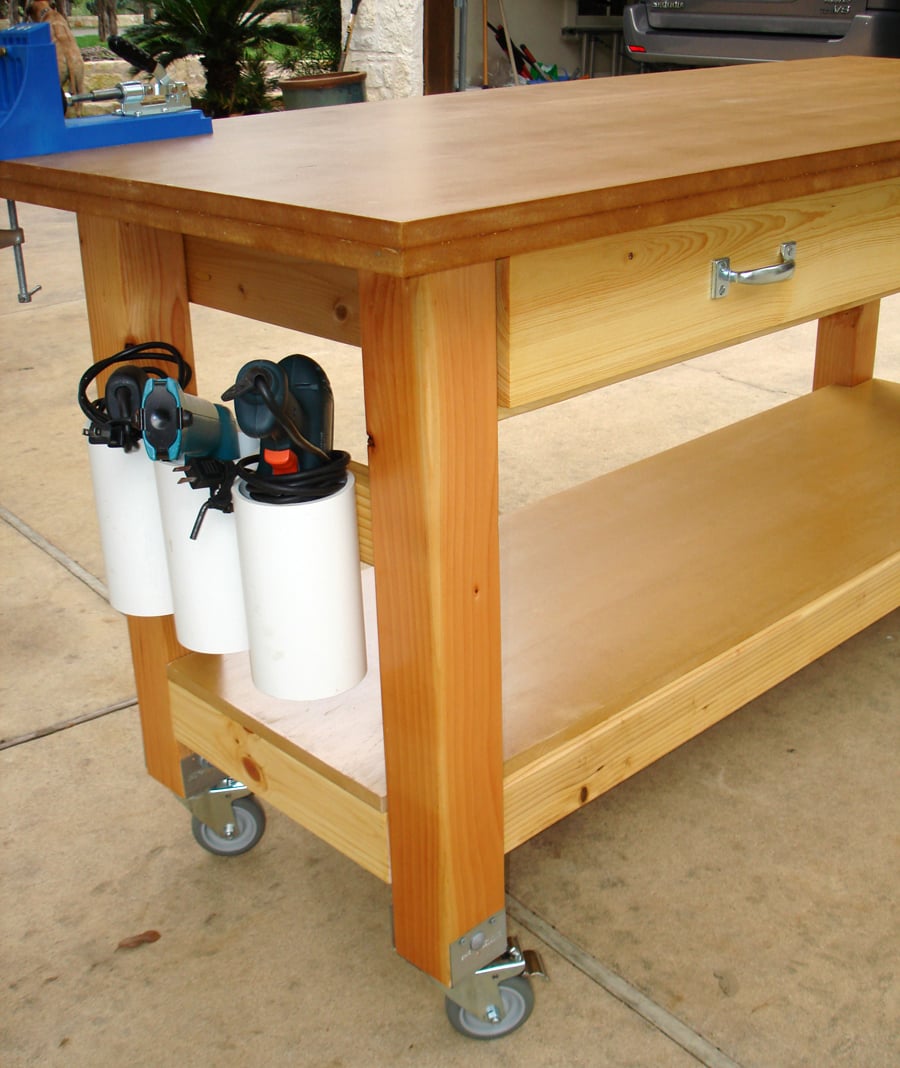
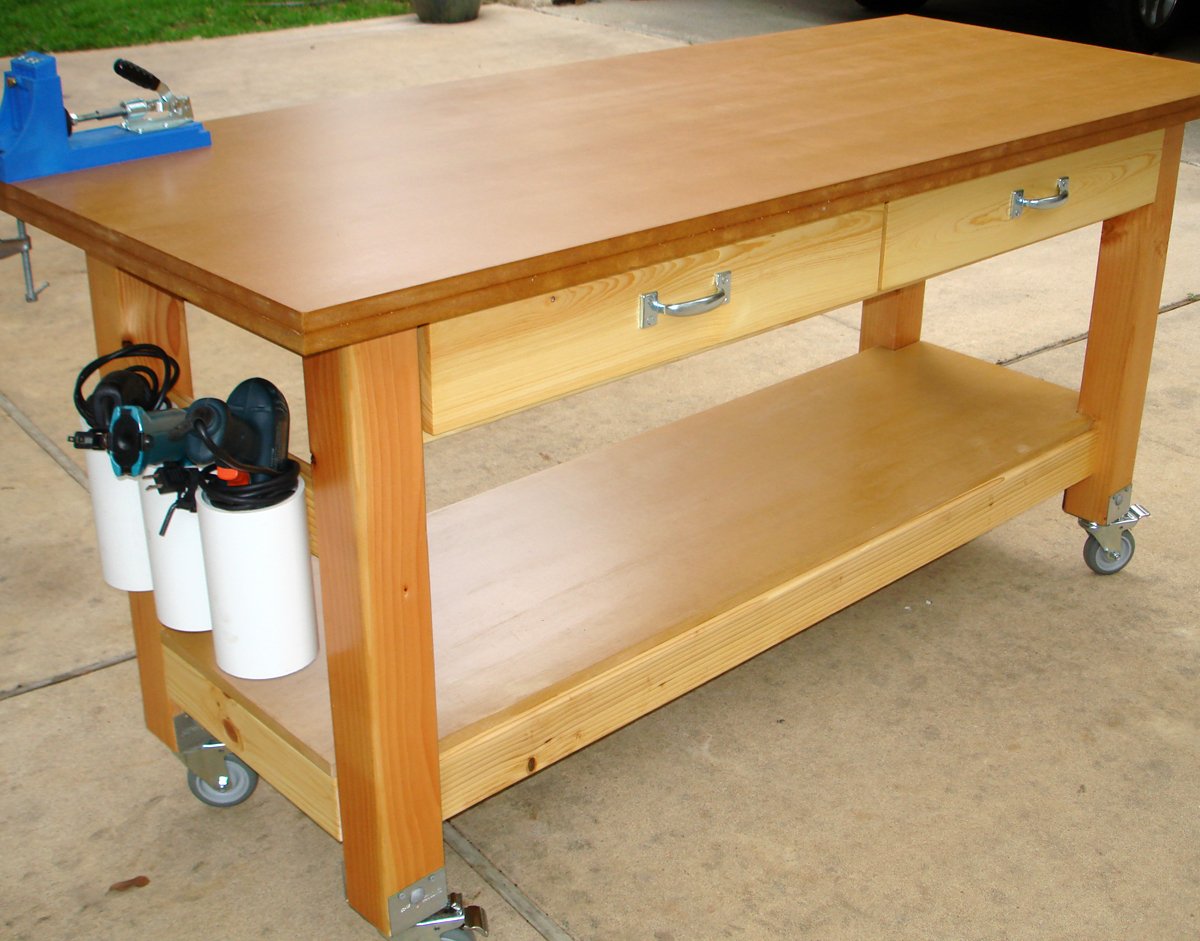
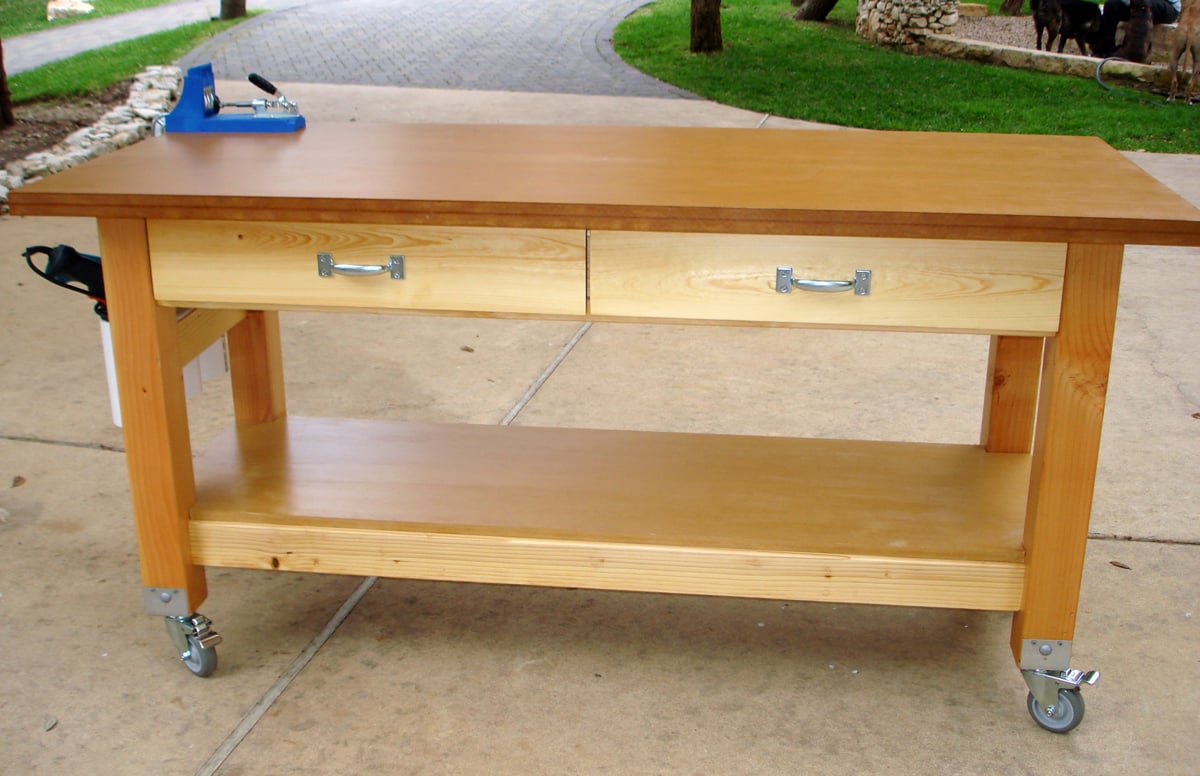
Given that I work out of my garage, I desperately needed a rolling workbench in order to roll out, make the sawdust mess, and roll back in. I had already made Michaela's island for another purpose inside my house, and I loved the sturdiness of the 4x4 posts as legs. I had industrial-type locking castors, but they only screwed in with a threaded post. Thanks to my engineer dad, he determined the best way to attach a screw-in castor to the bottom of the 4x4 (and did all that work for me!).
The size is modified from Michaela's original plan to include a 3 1/2" overhang all the way around for easy clamping (and top is 6' x 2.5'). I also cut a 2' piece of PVC pipe into 3 sections and attached for my drill storage. I put full-extension glides on the drawers and made some dividers from scrap wood.


Comments
birdsandsoap
Sun, 03/18/2012 - 13:29
wow.
This is beautiful. If anything you create ON this table looks nearly as beautiful as the table itself, you have found a new profession. Good job!
Ana White
Sun, 03/18/2012 - 18:21
This workbench is just
This workbench is just outstanding!!! I want! Great job!
matthew (not verified)
Mon, 03/19/2012 - 11:51
I so need this.
This would be the perfect workbench for my small shop/garage. Would love a full write up on how to create it. Great work.