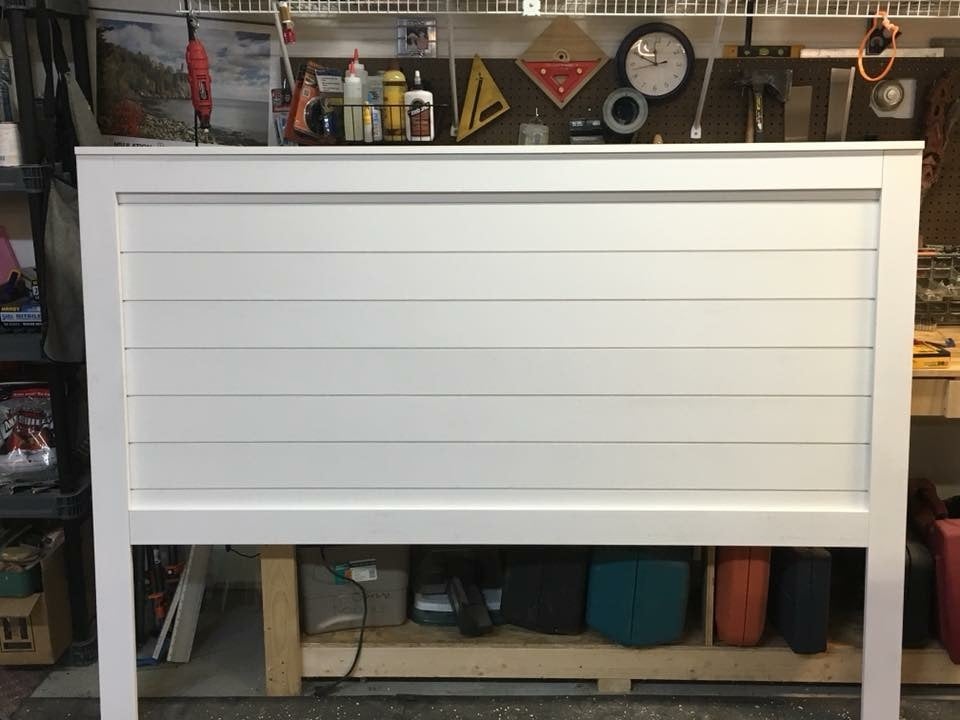
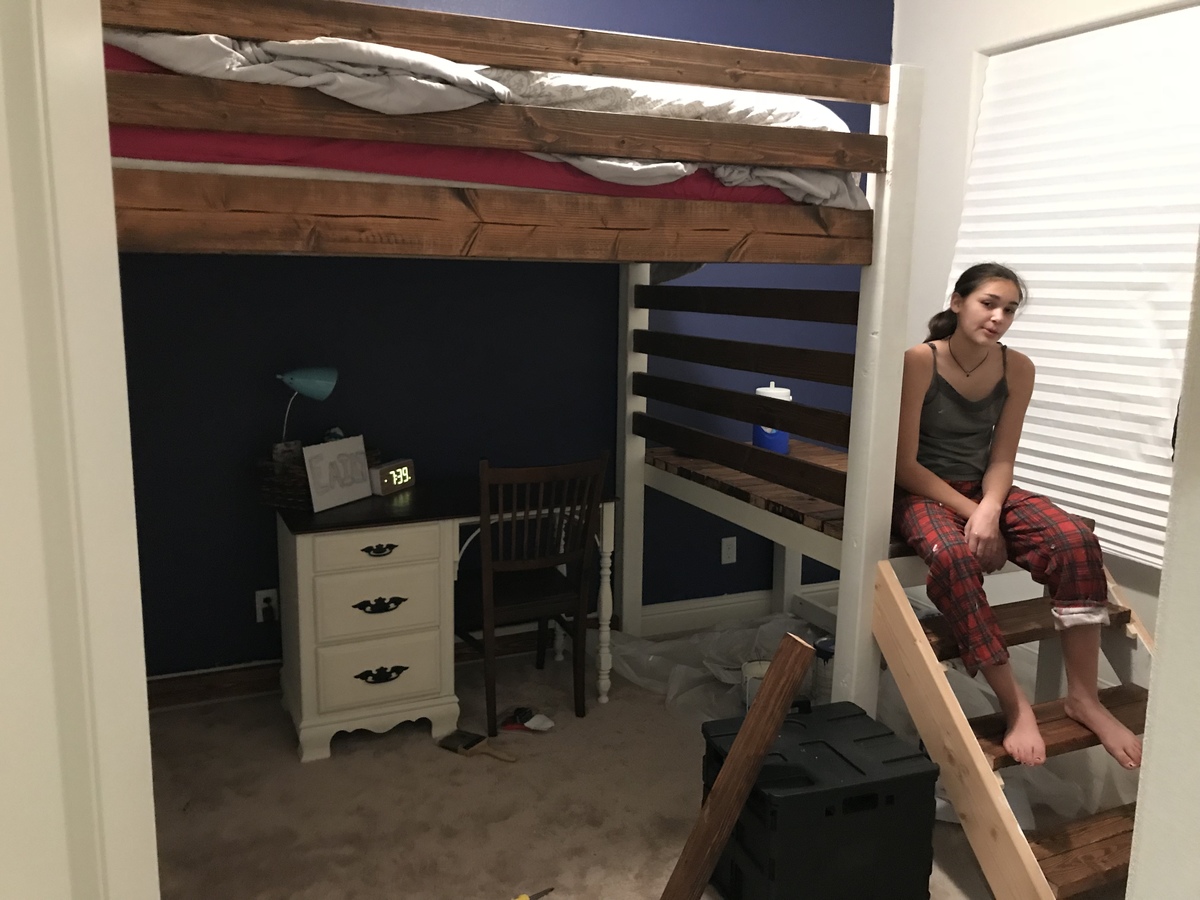
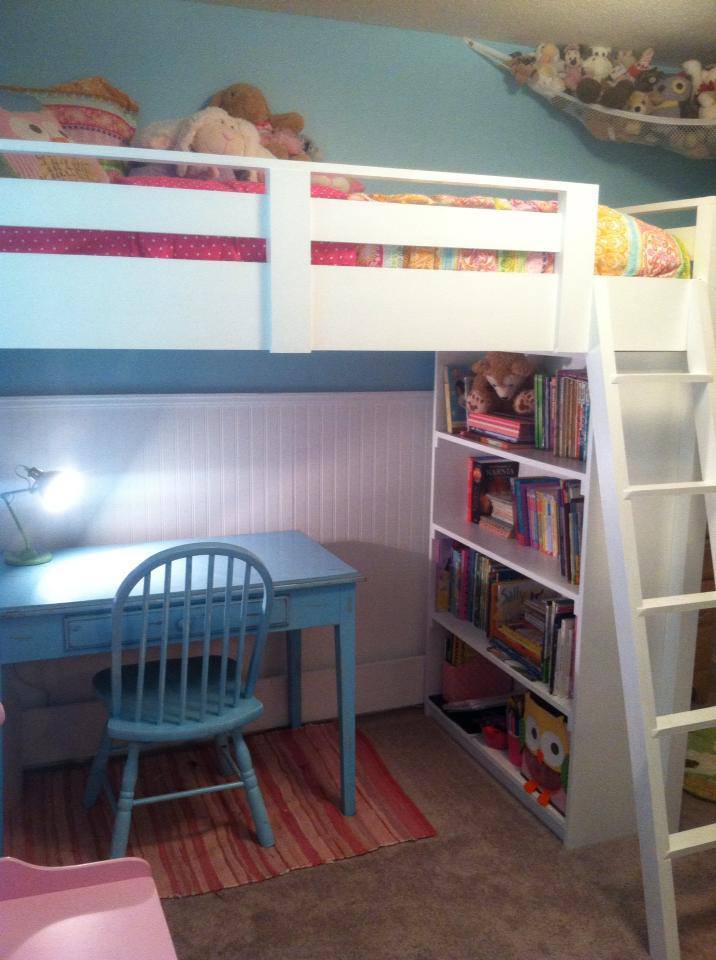
Sweet Girl's Loft Bed
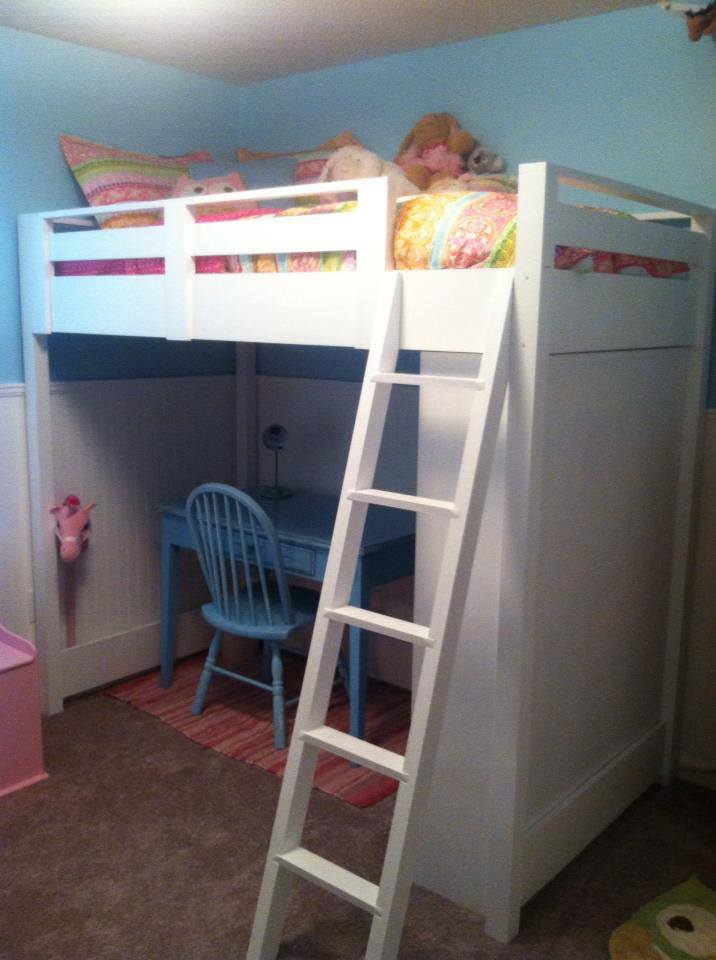
My husband and I just bought our first house, and we realized that our daughter's full sized bed just wasn't going to fit in her 11x10 bedroom (neither was a twin bed--not with the rest of her furniture). So I enlisted my father-in-law, who I've learned is quite handy, to build this loft bed. It is so perfect in my girl's new room, and I know she's going to have it for years to come! Underneath is the perfect spot for her desk, and the shelves house all of her books perfectly (and she has A LOT!). I'm so excited that my ideas and dreams for her room have come to life!
Estimated Time Investment
Weekend Project (10-20 Hours)
Finish Used
white paint
Recommended Skill Level
Intermediate