Community Brag Posts

Cat Tree/Condo

Submitted by Joni on Sat, 05/11/2013 - 07:22

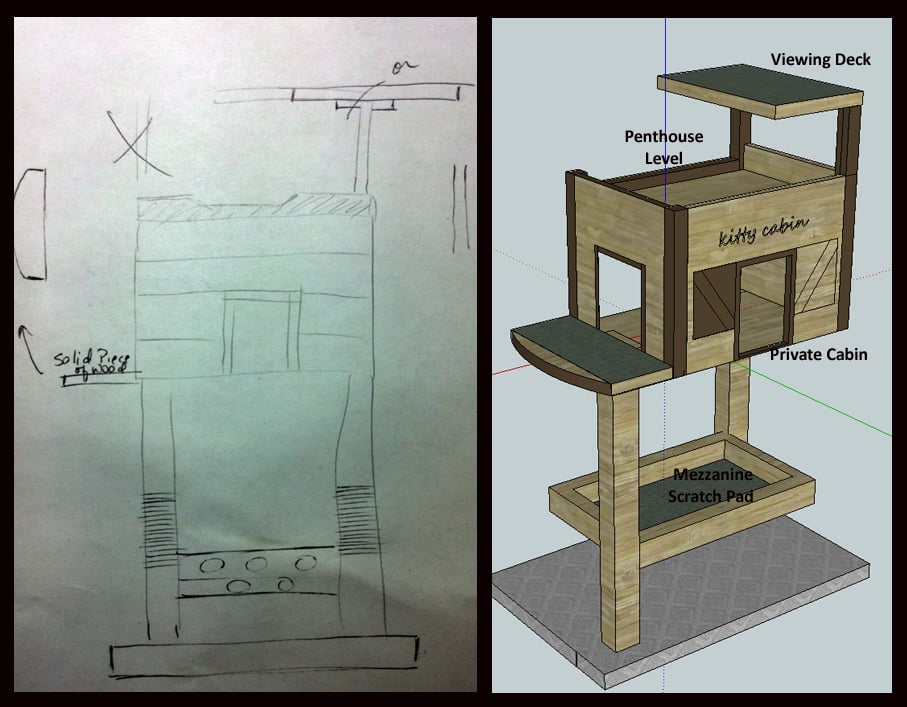
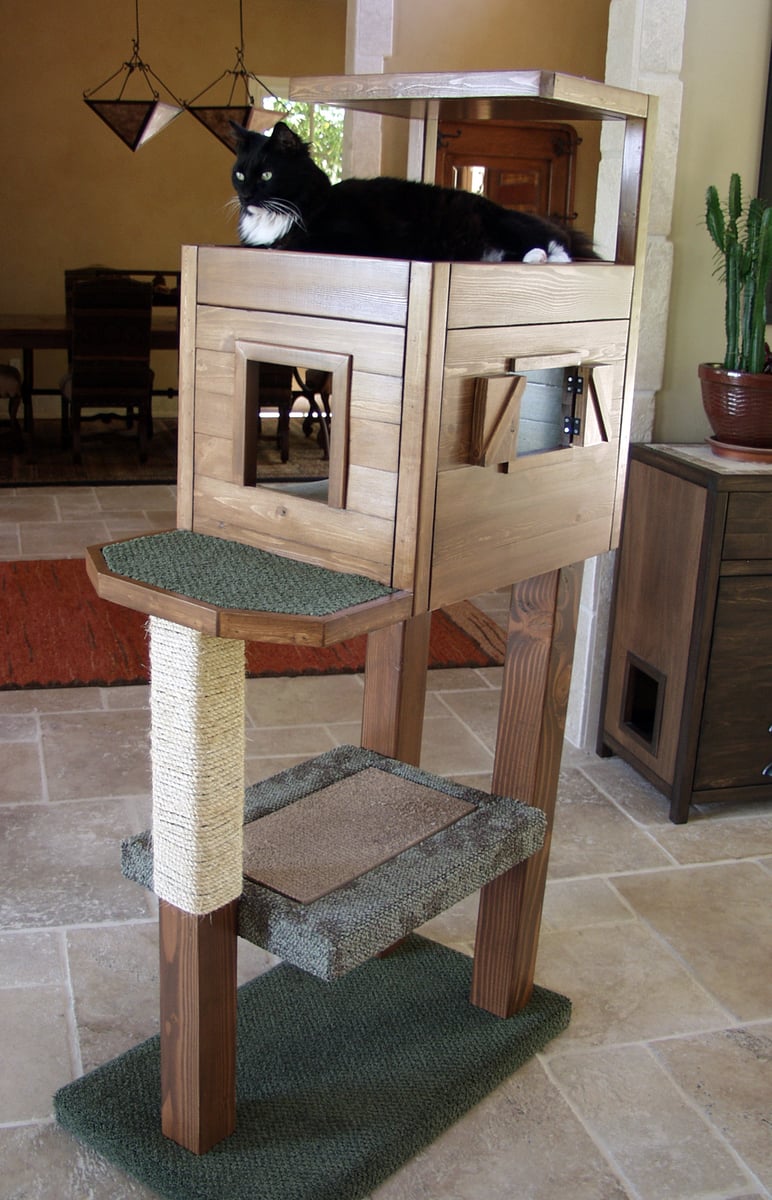
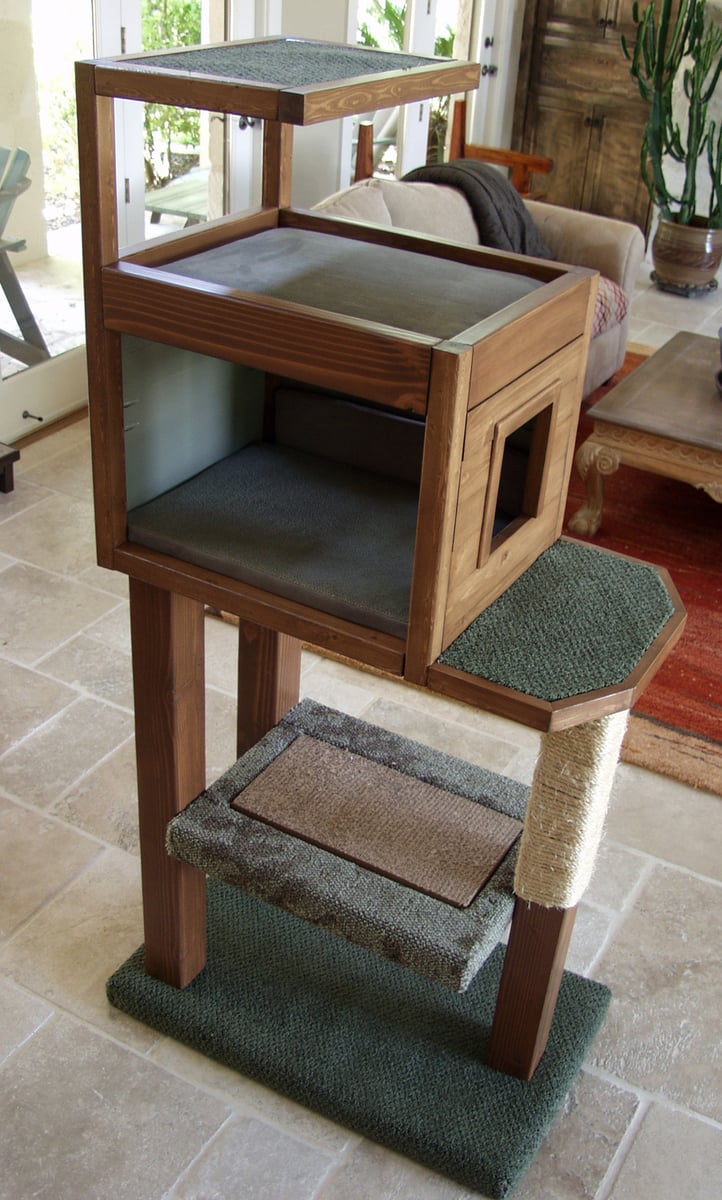
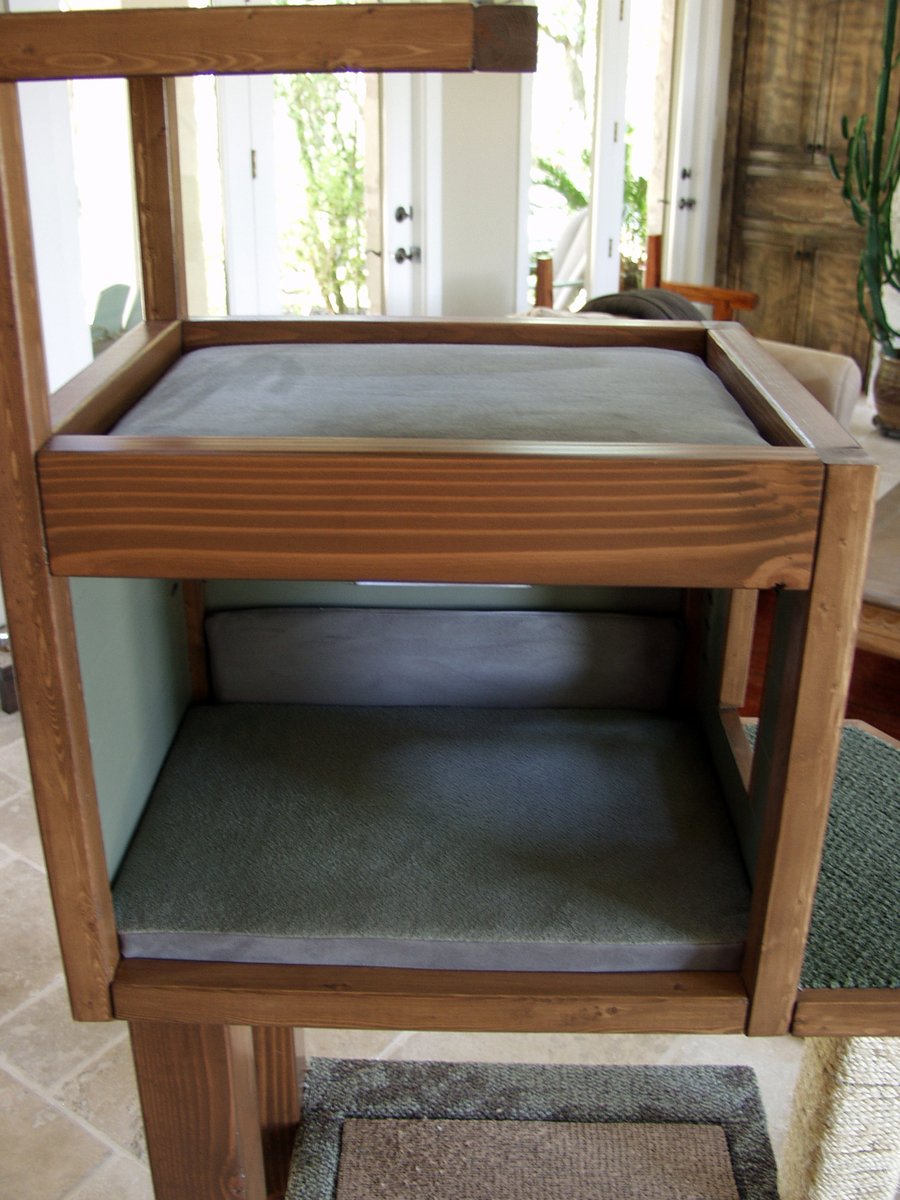
I always wanted a cabin-type cat tree where my cats could crawl in and feel safe, but still have a great view of the birds out of a window. I tried to draw my vision on paper, but that had a hideous result. Learning Google SketchUp (at least the basics) was an absolute necessity. I could never have built this without drawing it in 3D first, and seeing how the boards would connect, etc.

For the scratch pad, I built a frame out of 2x4s on top of plywood, covered it with carpet, and dropped the standard size scratch pad in place. This is the cat's favorite feature. I put barn doors on the window with tiny hinges so that I can close for added privacy. The tree sits against a window so that the back side is totally open. I made cozy zippered cushions for the platforms (that can be taken off and washed). I covered the carpeted areas with spare carpeting.
Estimated Cost
Approx. $30 for can of paint, varnish and a 4x4 (all other was scrap material)
Estimated Time Investment
Weekend Project (10-20 Hours)
Finish Used
Combination of Minwax Water-based stains: 6 parts Colonial Pine: 1 part American Walnut, followed 3-4 coats Minwax Polycrylic
Recommended Skill Level
Intermediate

Comments

bhoppy

Fri, 07/12/2013 - 09:36

Would you mind sharing your dimensions for this? It is absolutely beautiful!

Jodi W

Sun, 08/25/2013 - 08:10

Do you have the plans somewhere? I really want to build this (even got the okay from the hubby!) but I don't think I could do it without some serious guidelines...

Joni

Fri, 08/30/2013 - 15:55

First, sorry for the late notice; I just happened to look and saw the comments/questions.

I don't have plans...all I have is a google sketchup diagram that I created as a guideline for my construction (which is included in the photos), which is not to scale. Actual measurements are:

* Base (green carpeted base): 33.5" x 19"
* 4x4 legs: 35" tall
* 'Mezzanine' scratch pad level: 22" x 17.5"
* Mid-level base: 18" x 32"
* Enclosed cabin: 18.25" x 22.5" x 17" high
* Highest point: 56"

This has turned out to be a fantastic hit with the cats. They use all 5 levels, but the scratch pad and cabin are their favorite spots. If you need anything else or additional pics, please contact me.

Jodi W

Fri, 08/30/2013 - 18:15

Thanks for the dimensions, Joni! I'm trying to learn SketchUp so I can draw up my own plans, also. If I can't figure it out, I'll hand it off to my 12 year old, who is a pro at it (go figure). I know my cats will love it if I can manage to get it built!

Joni

Thu, 10/31/2013 - 14:30

Bhoppy -- I looked at your cat tree on facebook. It's awesome! The sturdiness of it shocked me too. And I was initially worried that my cats might knock it down!!

The worst part of building it was getting that lower scratch pad level on straight with the 3 posts. I'd never want to do that again!
Thanks for sharing, Joni

gregmasciola

Fri, 01/02/2015 - 01:18

Funny, almost every time I'm looking for ideas or inspiration when I want to build something, I end up back on this site. I was searching for pictures of cat trees and this was the only one that made me say "Holy crap, that's EXACTLY what I want!" My cat will love it!

M0710NM4N

Mon, 04/27/2020 - 20:41

Not sure if anyone is still around to see this, but I fell in love with this tree the second I saw it. Wondering if anyone created a detailed plan and might have it handy or possibly a detailed sketchup and wouldn't mind sharing the save file?

In the event nobody has either... I'm planning on having someone else build this for me as I don't have the tools nor skill to do it myself. I have a few questions:

1. The tree base/platform, what's a good recommended thickness?
2. The platform for the scratchpad... is there any certain reason it's so much thicker compared to the other platforms?

Thanks.

whiteroses9

Sun, 09/12/2021 - 11:51

Reverse engineering this project, using just 2x4s. None of the photos show the undersides. How are the plywood pillow bases attached for the top and bottom of the cabin? and the base of the top viewing platform?

Pottery Barn Logan Knock Off Media Build

Submitted by anb80 on Tue, 03/31/2015 - 12:37

This was one of our early builds.  I"ve learned a new way to do doors since then so hope to replace these before we move.  I love all the storage on this unit!  The finish on the tops is a metallic glaze I made.

Estimated Time Investment
Week Long Project (20 Hours or More)
Recommended Skill Level
Intermediate

Modern adirondack chair

Submitted by Anonymous (not verified) on Tue, 10/05/2021 - 08:48

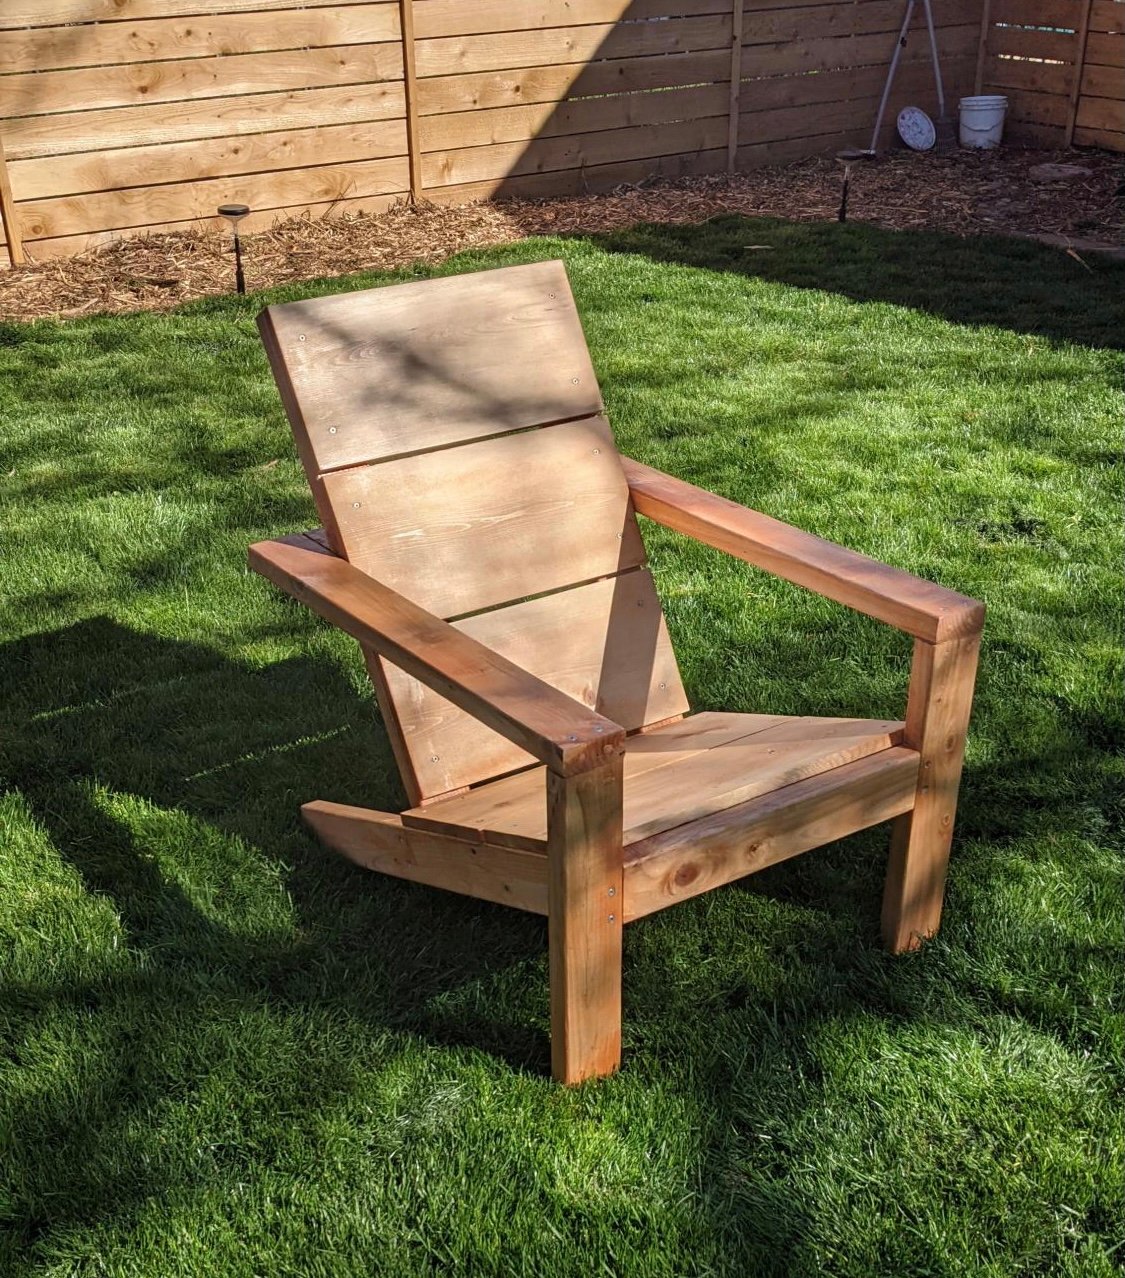
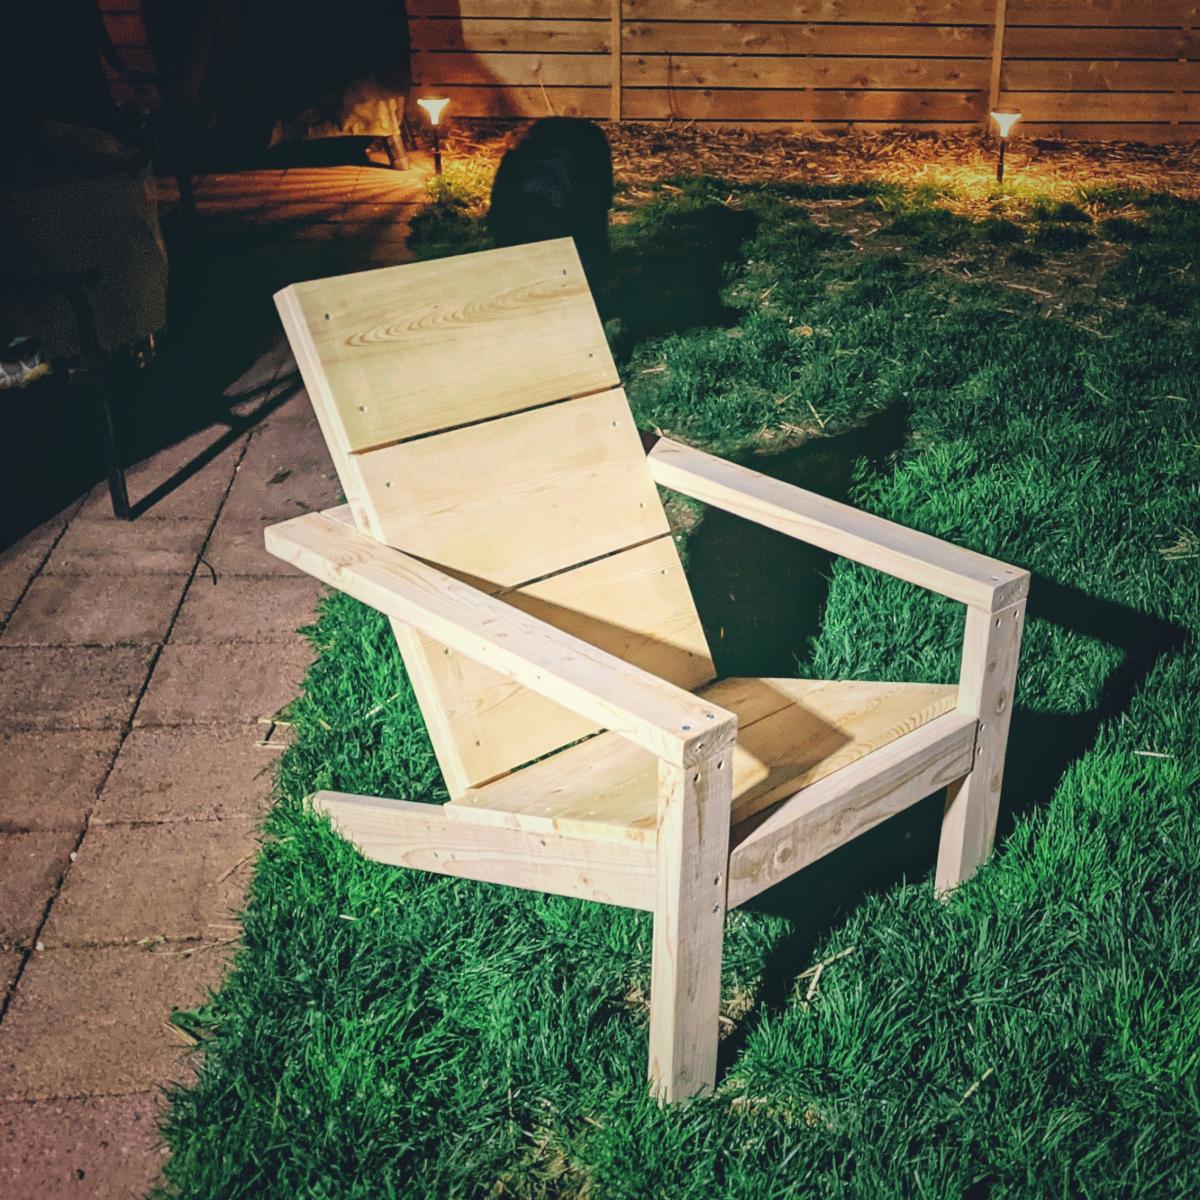
I've made 2 of the Modern adirondack chairs. Really enjoyed the plans and the video for help as I'm new to woodworking. I look for new plans all the time to see what I might build next
Comments

DIY Potting Bench

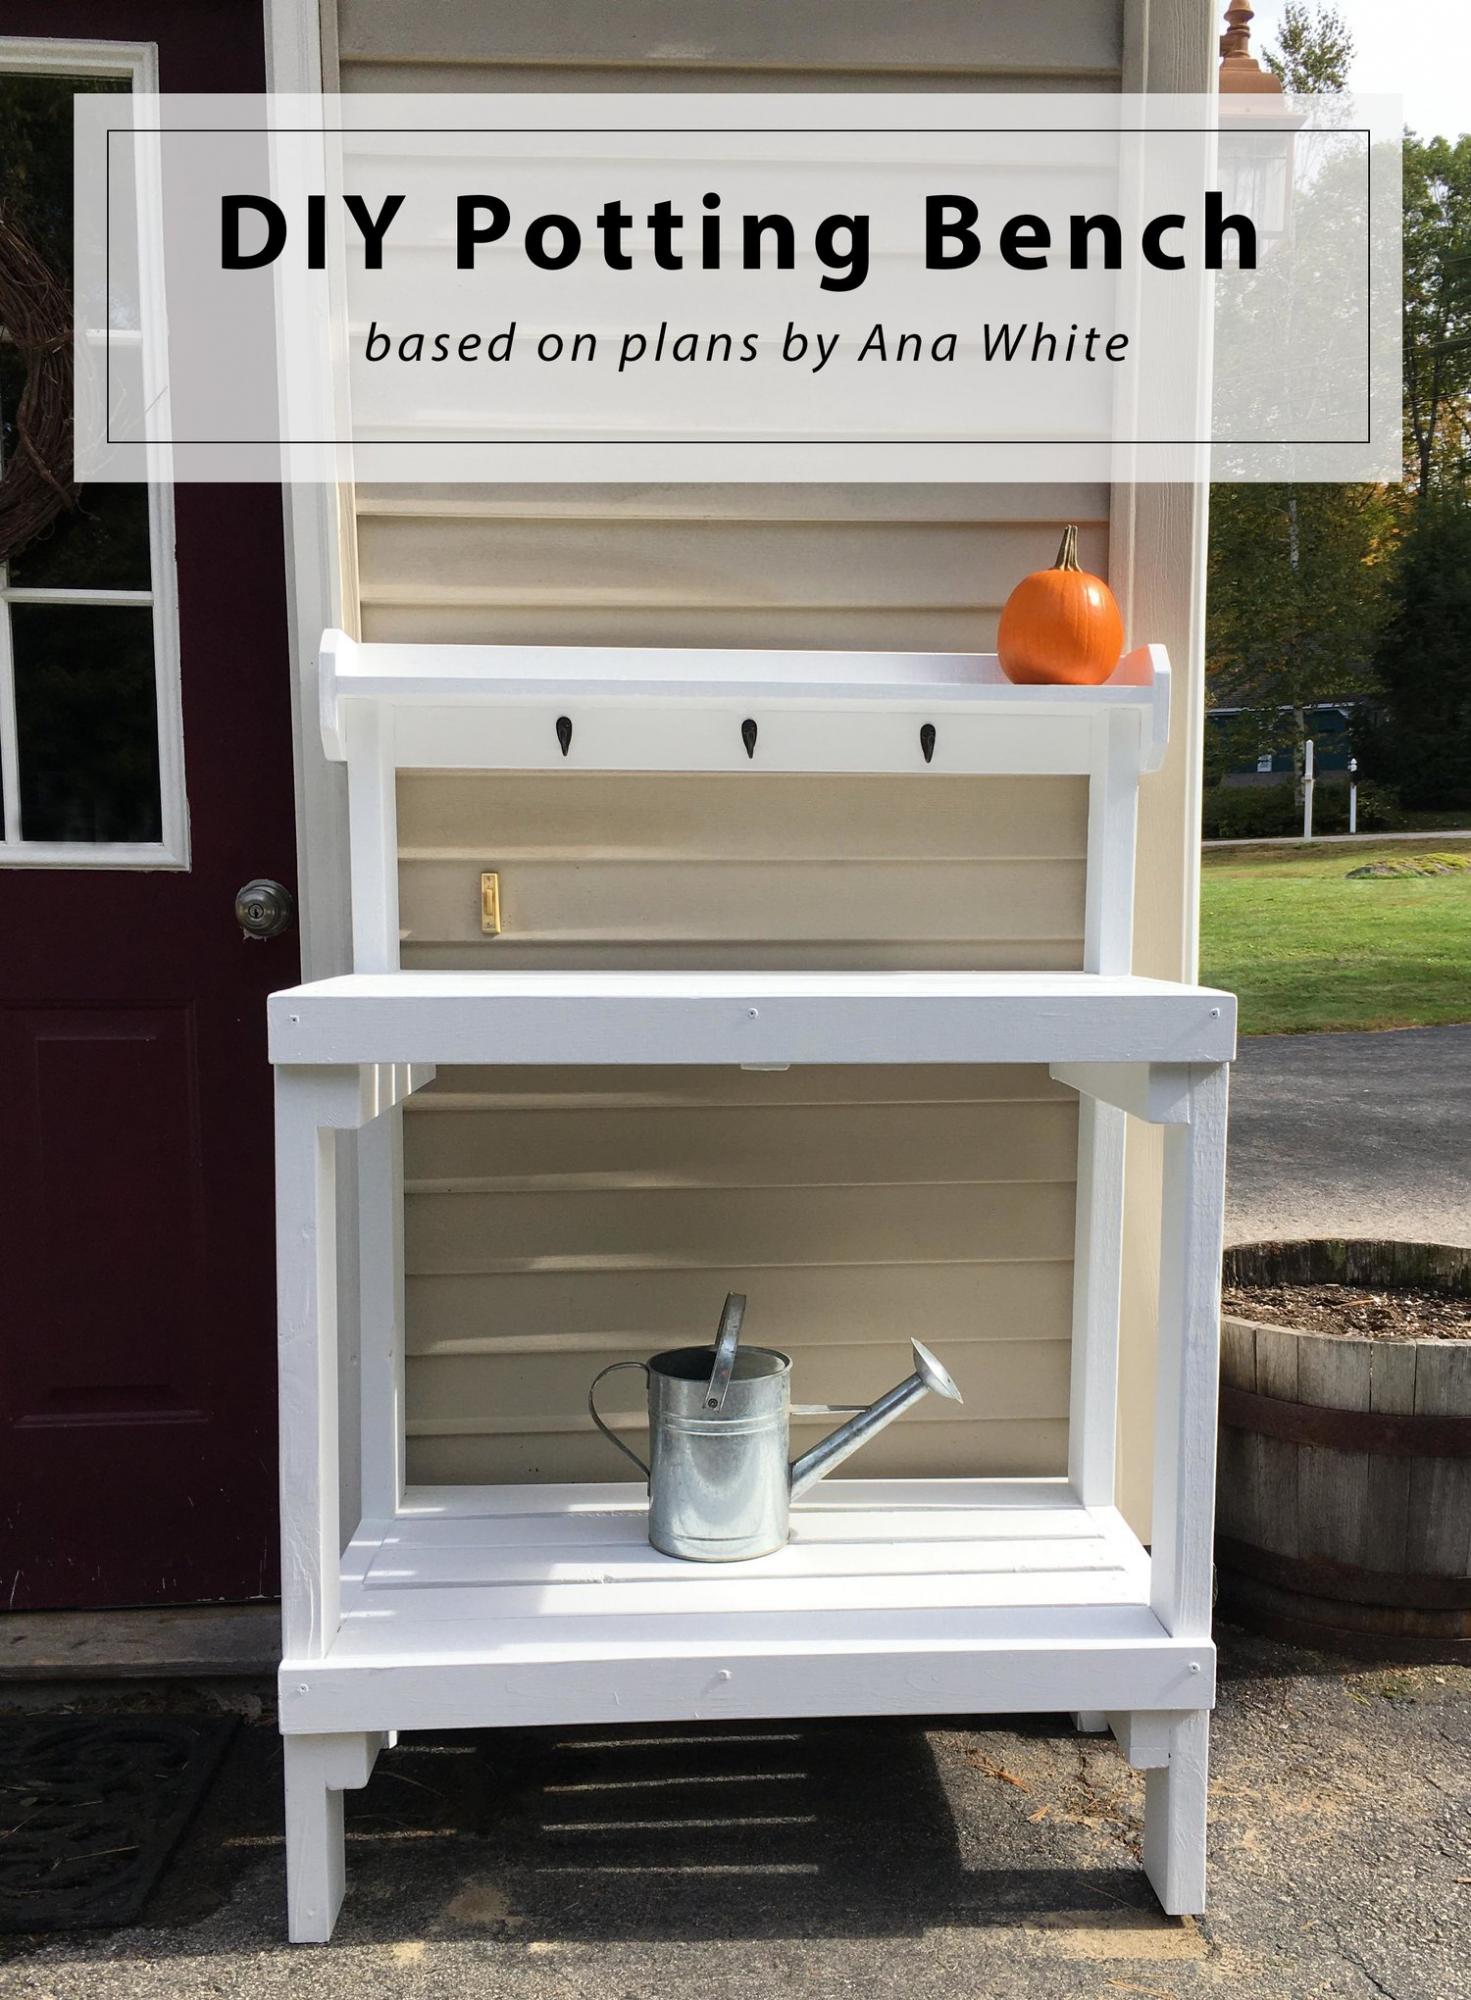
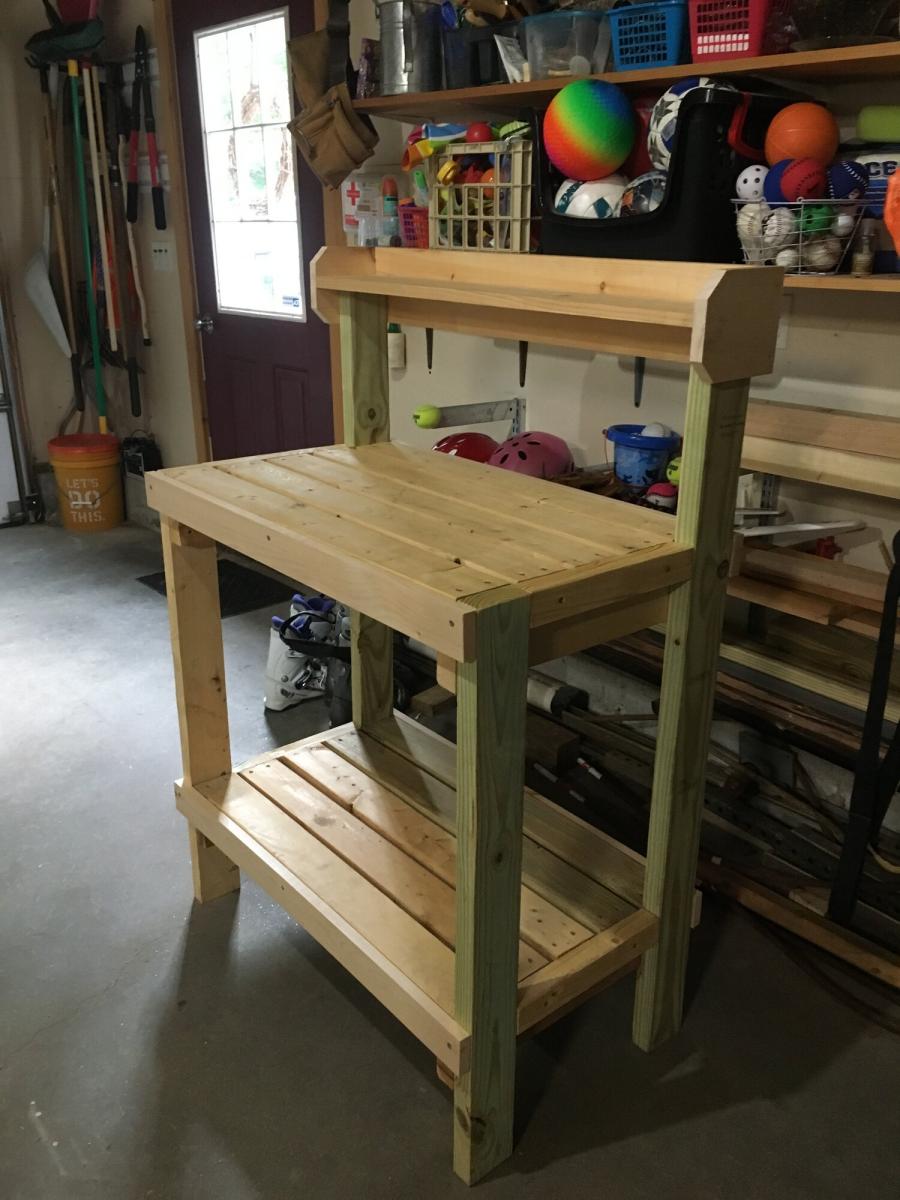
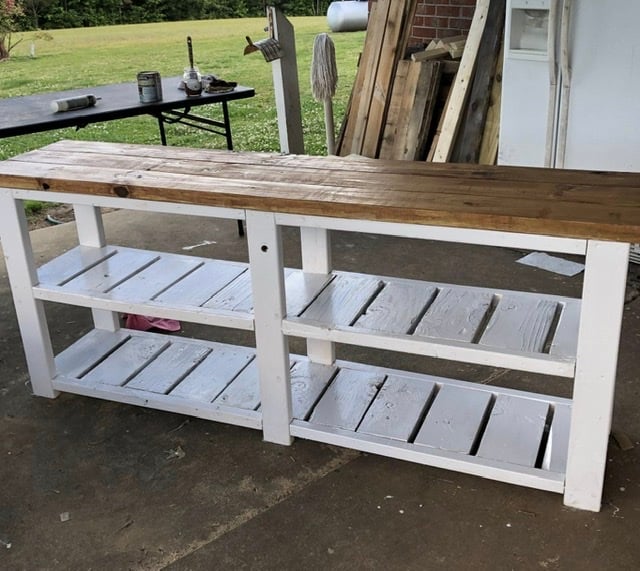
I’ve been wanting a potting bench for a while now - something by the back door to display some decor, use as an outdoor work station, and double as a place for UPS to leave packages. After looking around online and at local stores, I couldn’t find anything that I liked that fit the narrow space - so I did what any #woodworkingmom would do, I decided to build it myself. Please see my blog post for additional photos and lessons learned during this project.

Built from Plan(s)

Comments

Seasonal And Holiday

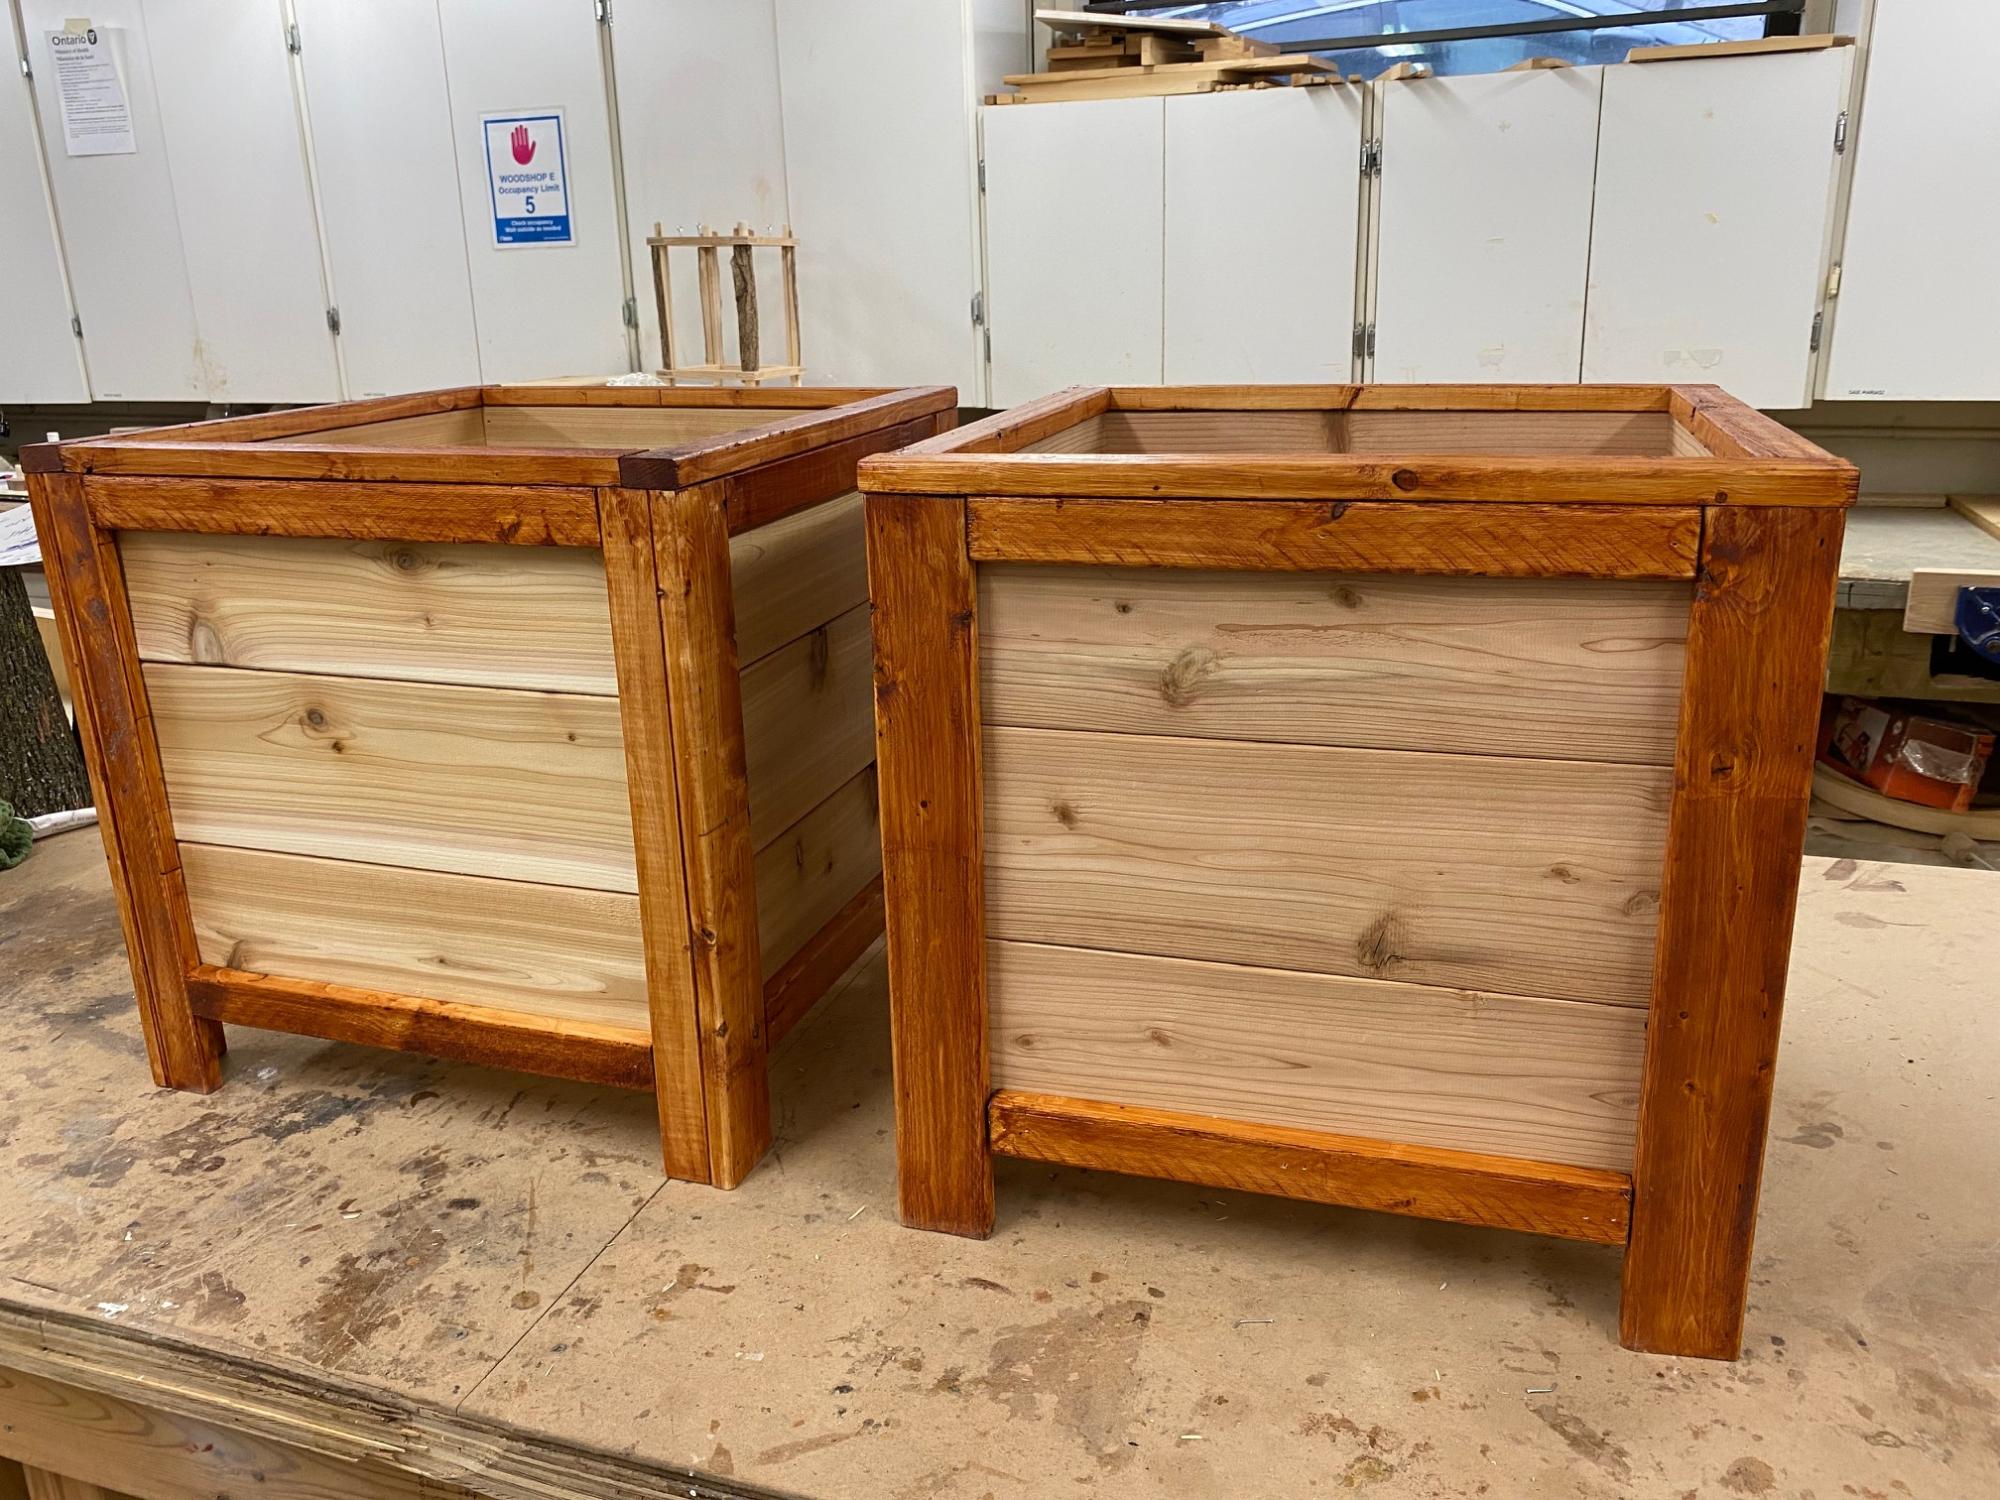
DIY Planter Box

Submitted by Anonymous (not verified) on Sun, 12/12/2021 - 17:37

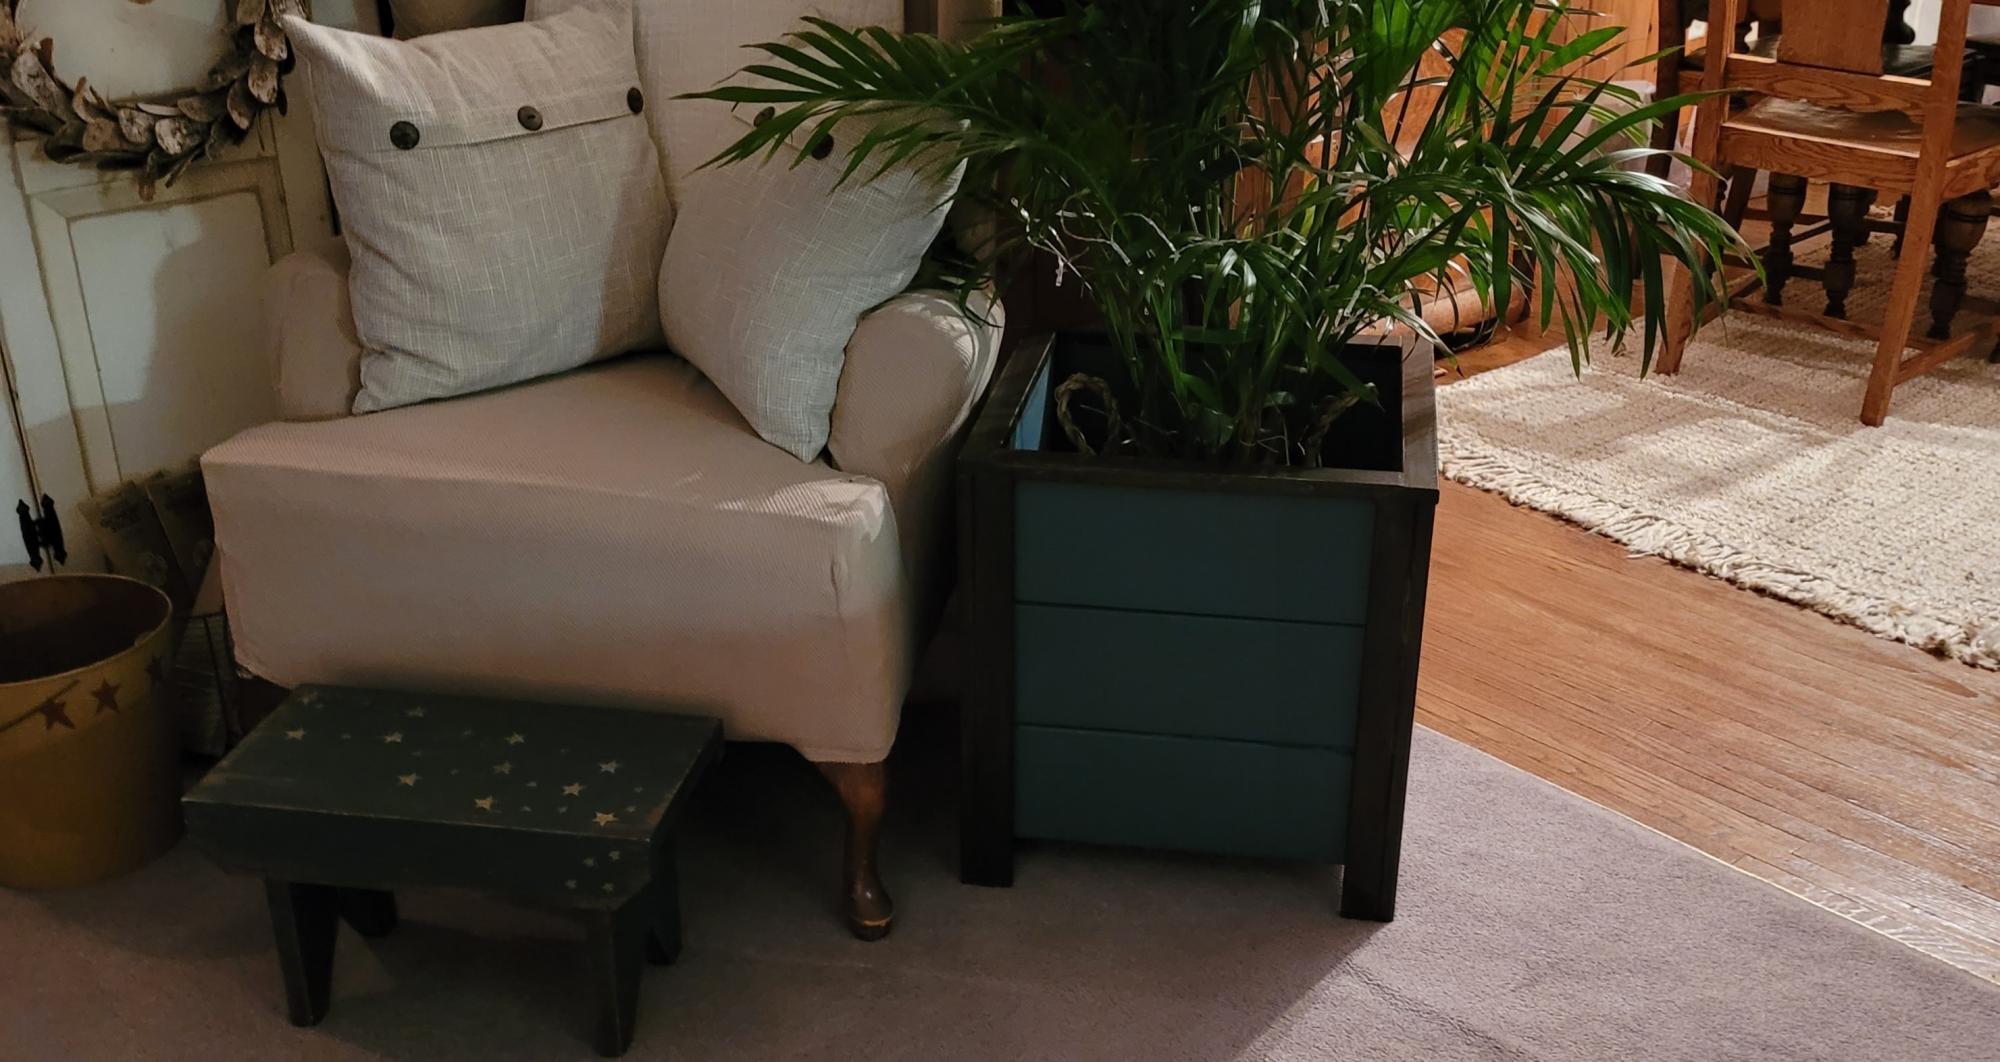
My very first project. Was so easy thanks to Ana's instructions. Dark walnut gel stain and Fusion Seaside. Thank you so much Ana.

Comments

Colorful Bunk Beds with Wraparound Shelves

Submitted by timgrimm on Tue, 01/02/2018 - 20:29

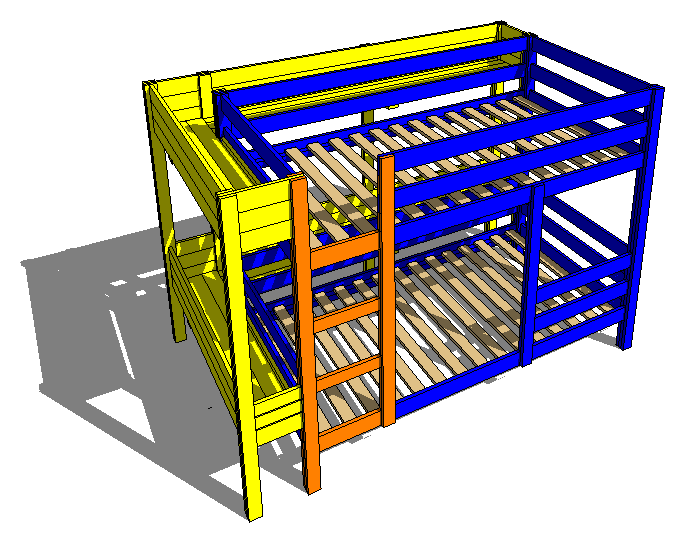
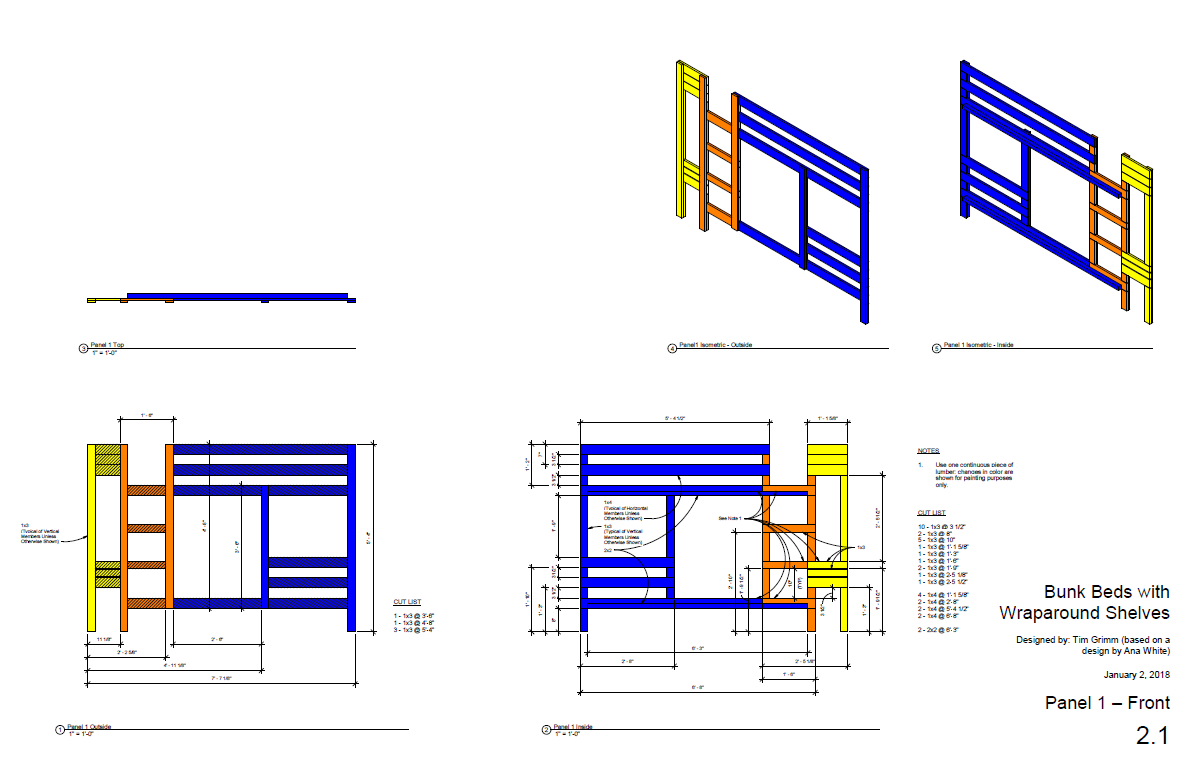
My sons have been ready for bunk beds for awhile and, being an apartment dweller, I wanted some that could be disassembled and reassembled. I really liked Ana's design for classic bunk beds. Because storage space is also at a premium for us, I thought to add wraparound shelves to the bed. I ended up with seven panels instead of four, plus shelving. Also, I wanted to add truncated safety railing to the bottom bunk. Lastly, I wanted to use a bright color scheme that incorporated some of my sons' favorite colors that would also serve to visually separate the shelves from the beds.
The construction plans are available in 11x17 PDF format from my blog, as are the source design files in Revit 2018 format.

Built from Plan(s)
Estimated Cost
$750 all inclusive, including mattresses and bedding.
Estimated Time Investment
Week Long Project (20 Hours or More)
Finish Used
Sherwin Williams paints.
Recommended Skill Level
Intermediate

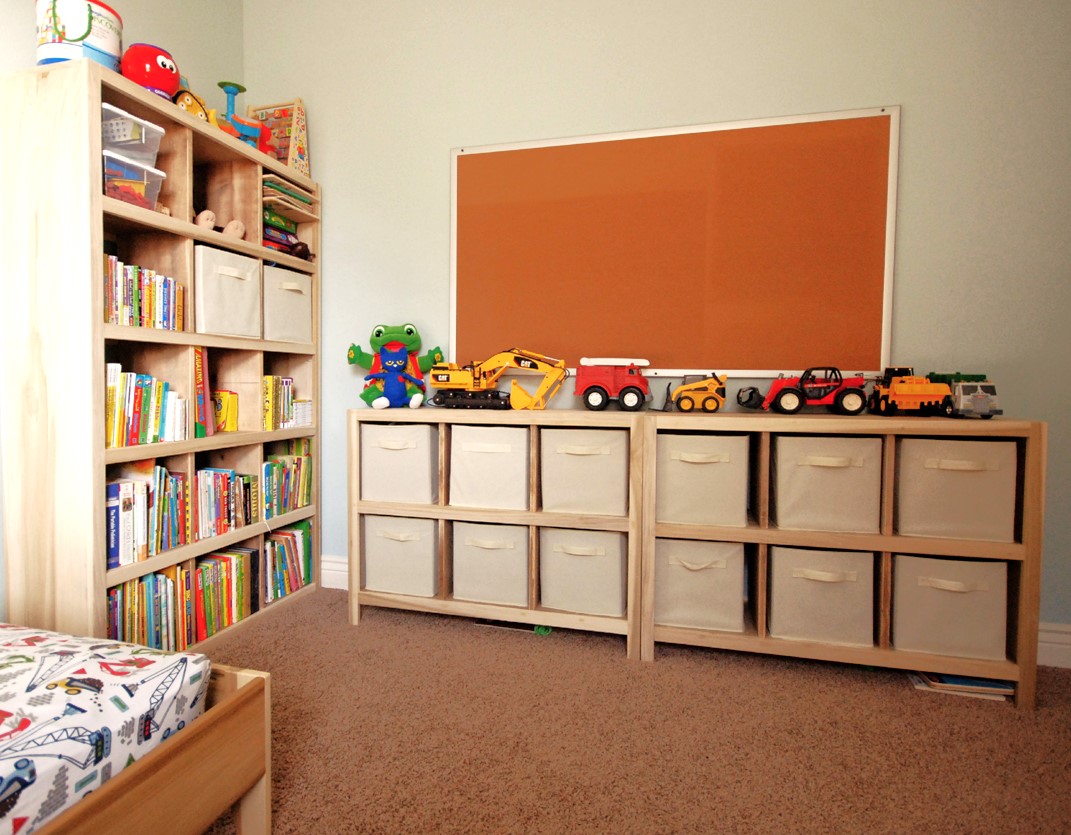
6 Cube Bookshelf - Poplar

Submitted by kev117s on Tue, 07/28/2015 - 18:29

I built this set of cube shelves for my 3 yr old son's room. THANK YOU, ANA! I used poplar as I did not want to paint the wood and I love the irregular pattern of the wood grain. To save money, I used pine for the inner shelves and dividers. I stained it using the oxidized solution (http://www.friendly-home.net/2012/05/oxidized-x-console.html) that Ana recommended from the instructions of the Rustic Console. I added a cup of coffee to the solution to get a darker browner shade and unevenly sanded the wood for the distressed look. It matches the poplar wood more so than keeping the pine wood as is.

I also created a 5-tier version to match the 6 cube shelves but did not include the legs. I thought it would be more stable to keep the lower frame on the ground.

I purchased the storage boxes from Amazon It was around $20 for 6 boxes!


I am ready for the next project!

Built from Plan(s)
Estimated Time Investment
Week Long Project (20 Hours or More)
Finish Used
Oxidized solution for the shelves and dividers.
Recommended Skill Level
Beginner

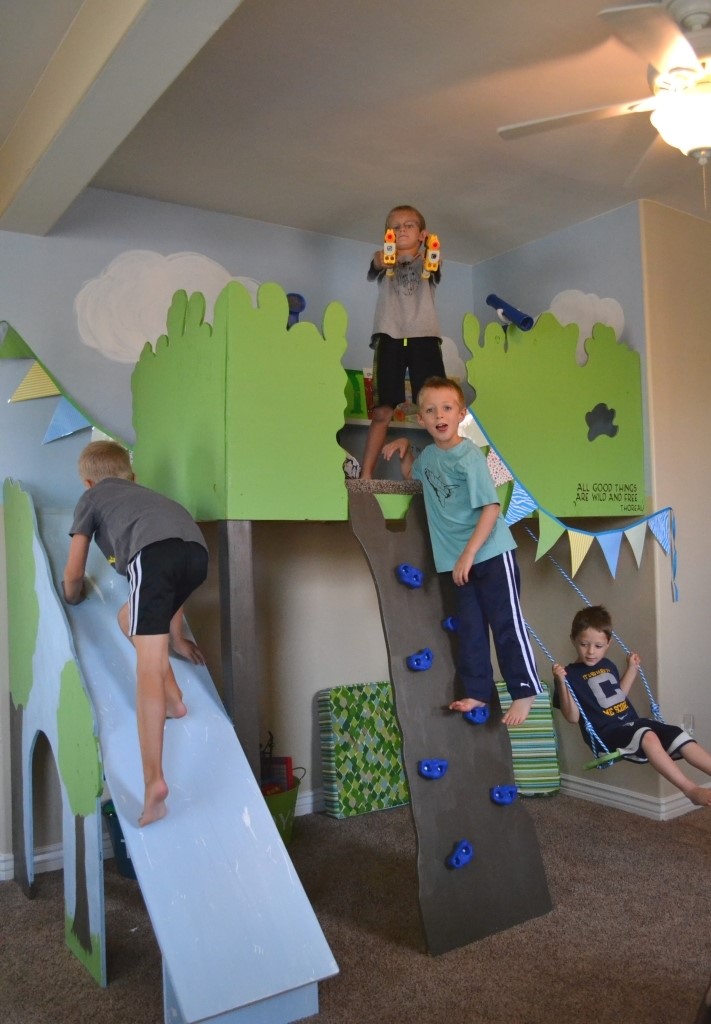
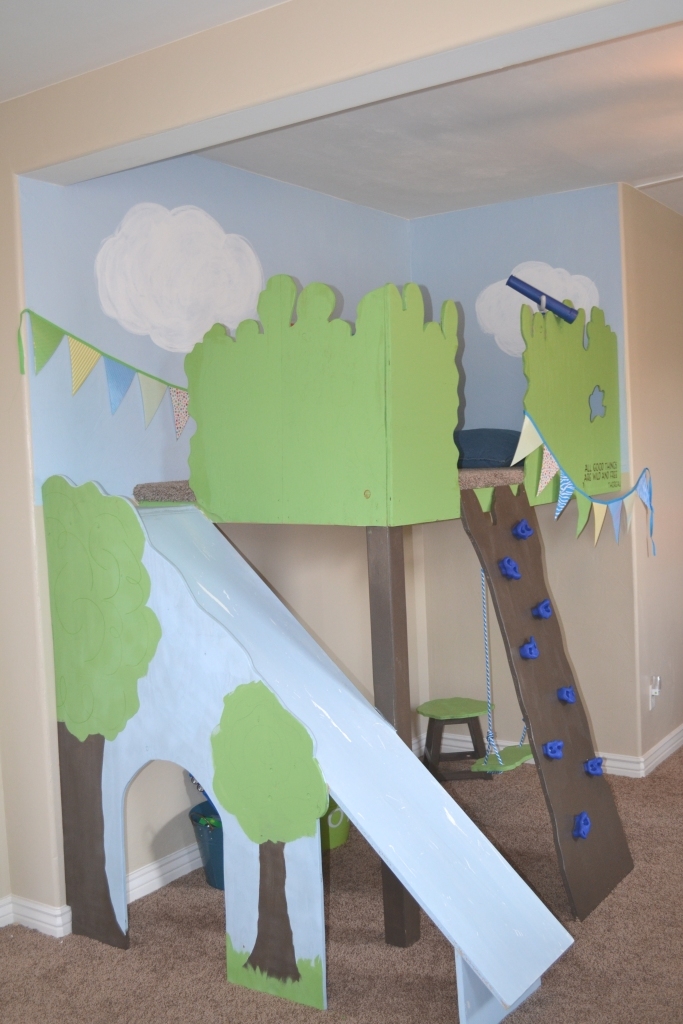
Magic Tree House

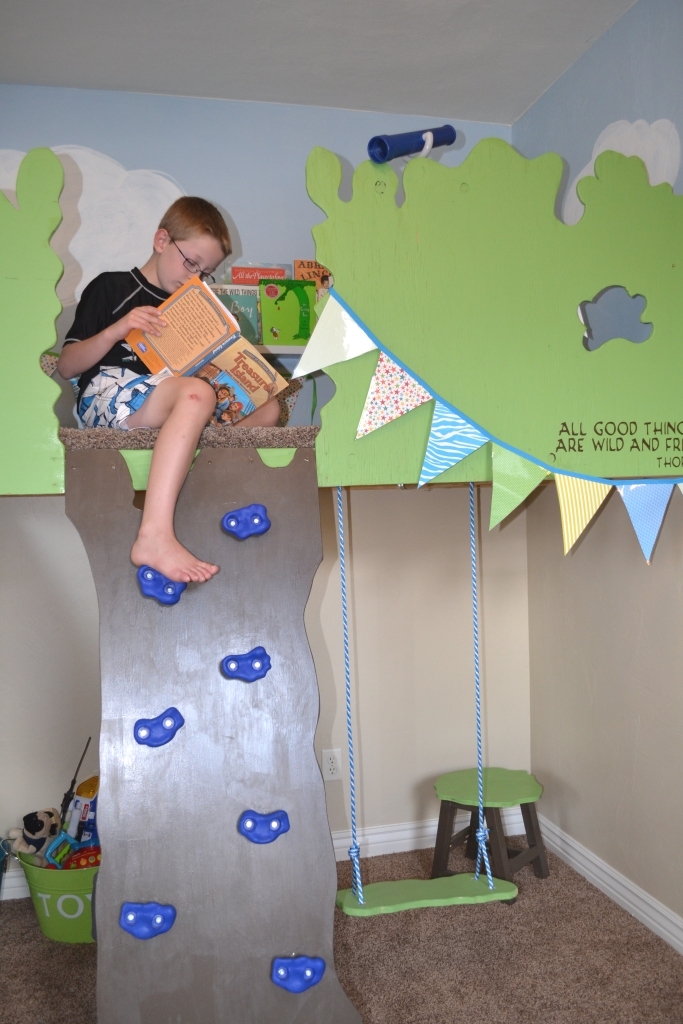
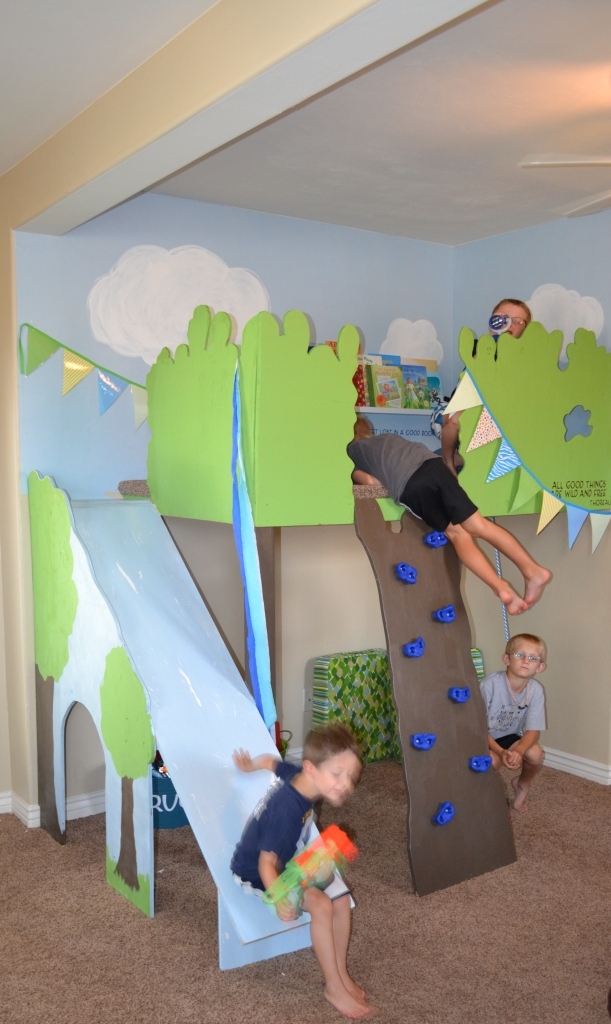
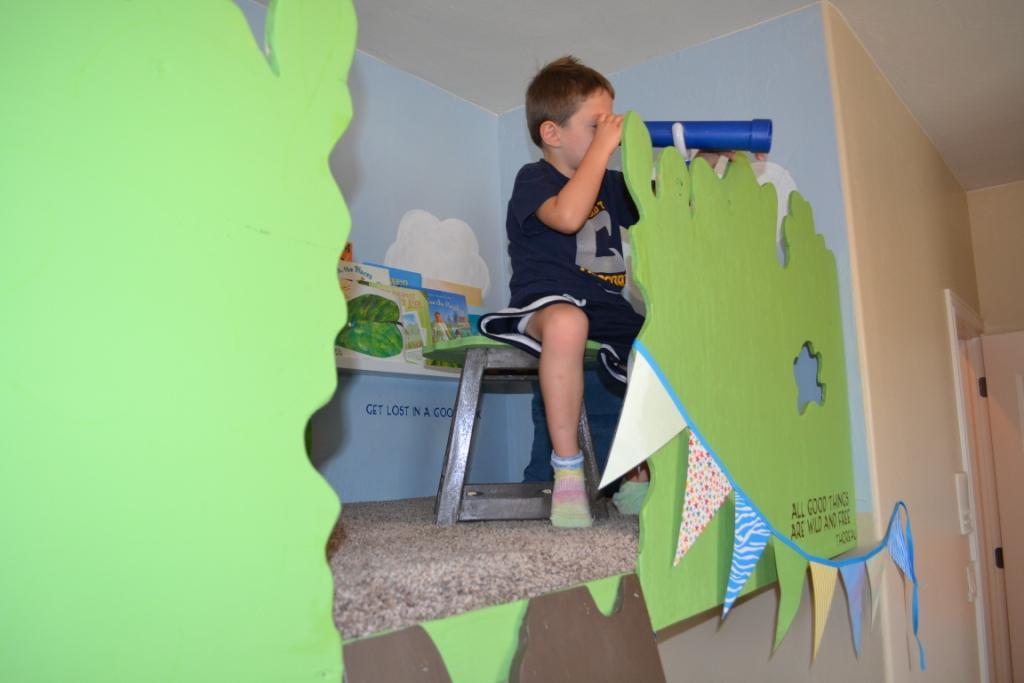
We adapted these plans to build our tree house, I hope it's not too much of a stretch for brag posts! Every kid seems to have two wishes: a fort or tree house and a secret passage way. Or is it just my kids? Turns out we live in the desert and trees are hard to come by. Our solution? Build a tree house in the house. Why not!? Our magic tree house is well used and well loved. This is one of those projects that simmered and in my mind trying to think of the perfect way to build the thing. The stuff our parents built and played in was a hodge podge of left over wood and their own creations, crooked construction and messy paint. So, I set the perfect aside and dove in. The only things our tree house really needs to be is safe and fun. Most families try to find indoor activities for the winter, but in the desert it is so blazing hot we need indoor retreats in the summer. This tree house is the solution a gagillion times over! Thank you Ana!

Estimated Cost
$150
Estimated Time Investment
Week Long Project (20 Hours or More)
Finish Used
paint, polyurathane
Recommended Skill Level
Intermediate

Comments

spiceylg

Thu, 08/01/2013 - 16:06

That's fantastic! I am sure your kids are the envy of the neighborhood!

Ladder Table White

Submitted by Mamasra on Thu, 06/23/2011 - 19:25

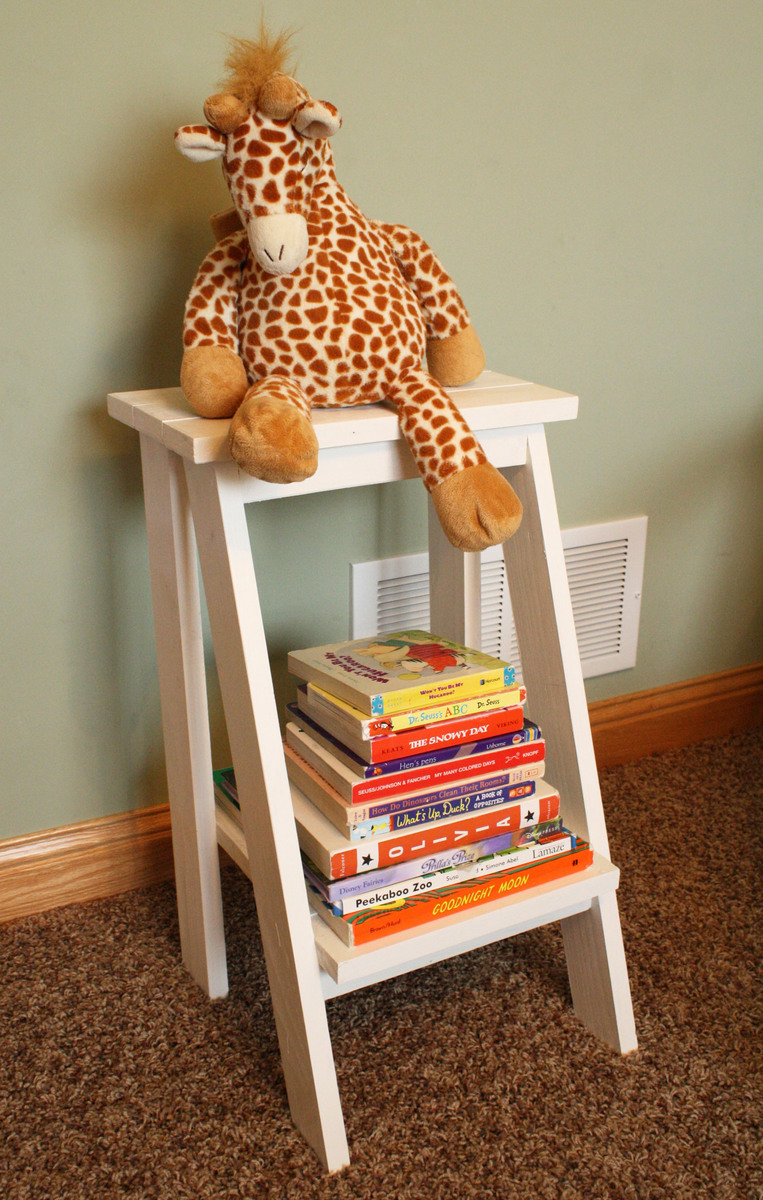
I made this ladder table, I just love it to hold books in my daughters room, I think I got the legs on backwards but you can't tell, and it sits flush. First project done!!

Estimated Time Investment
Afternoon Project (3-6 Hours)
Finish Used
White paint
Recommended Skill Level
Beginner

Book Nook Tent

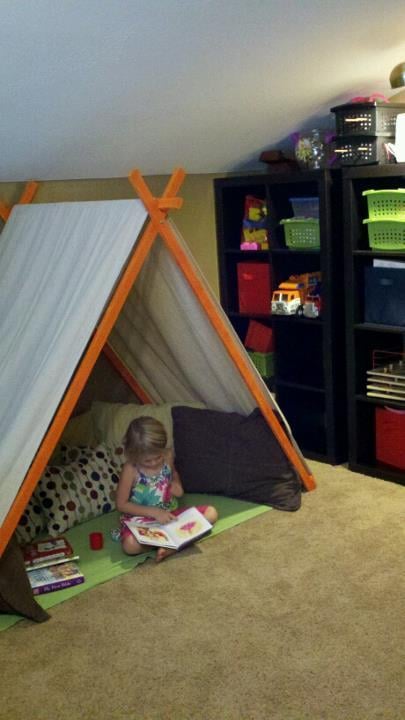
I loved this plan as soon as I saw it. The only modification I made was I used a 4x16 8oz drop cloth up on over the center instead of curtains or fabric and painted the wood with orange gloss spray paint. The kids love it. I think we may make come doors and ties to make it cozier but they love it!

Built from Plan(s)
Estimated Cost
$40.00
Estimated Time Investment
Afternoon Project (3-6 Hours)
Finish Used
Rust-Oleum Painter’s Touch Multi-Purpose Paint Spray in Real Orange
Recommended Skill Level
Beginner

Comments

Anna Lawrence (not verified)

Mon, 09/05/2011 - 13:05

I think I am in love with the look of the drop cloth and spray paint. :)

What a fabulous replacement for the curtains... I know at our HD or L a huge cloth is $8 or $9 bucks, so that's a really economical choice.

Guest (not verified)

Wed, 09/28/2011 - 13:44

I love your tent! I am thinking of making one but want to get an idea of the area it will take up. Can you tell me how much space (l, w, h) it takes when assembled? Thanks!

CraigCaggiano (not verified)

Sat, 02/11/2012 - 08:21

If you want to make one to sell let me know!

My Daughters Playhouse- My First Project

Submitted by SheilaS on Sun, 10/09/2011 - 08:32

My 2 year old daughter played in a playhouse at a farm and was just amazed by the "little house" every time we would see them at the store or driving down the road she would just scream "mom, its a little house, little house!" I knew I wanted to get her one and started to search. Couldn't believe the price of playhouse kits so I figured I could build it. This playhouse took about 2 weeks to finish but I only worked on it a couple of hours at a time just a couple times a week. Total cost for me for just the playhouse not including paint was $343.90. Thanks Ana for posting the plans and showing everyone that anyone can build!

Estimated Cost
$344.90
Estimated Time Investment
Weekend Project (10-20 Hours)
Recommended Skill Level
Beginner

Sawhorse Desk

Submitted by kcragun on Sun, 11/10/2013 - 10:22

I used Ana's sawhorse plans and painted the sawhorses black. I made up a plan for the desk top inspired by some of the farmhouse table plans. The top looks very thick and chunky, but is mostly made from cheap 1x6 boards put together with glue and pocket holes. The ends of the top are made from 2x2 boards attached with pocket holes. The sides are from 1x2 boards - all attached with glue and pocket holes.

For the finish I used a water based stain from General Finishes - Black Cherry. I started with one coat of poly-acrylic and did not like the look. I sanded it back and bit (distressing the edges a bit) and put on two coats of wax.

Built from Plan(s)
Estimated Cost
$50
Estimated Time Investment
Weekend Project (10-20 Hours)
Finish Used
General Finishes - Black Cherry
Recommended Skill Level
Beginner

Princess Bed with Stairs and Slide

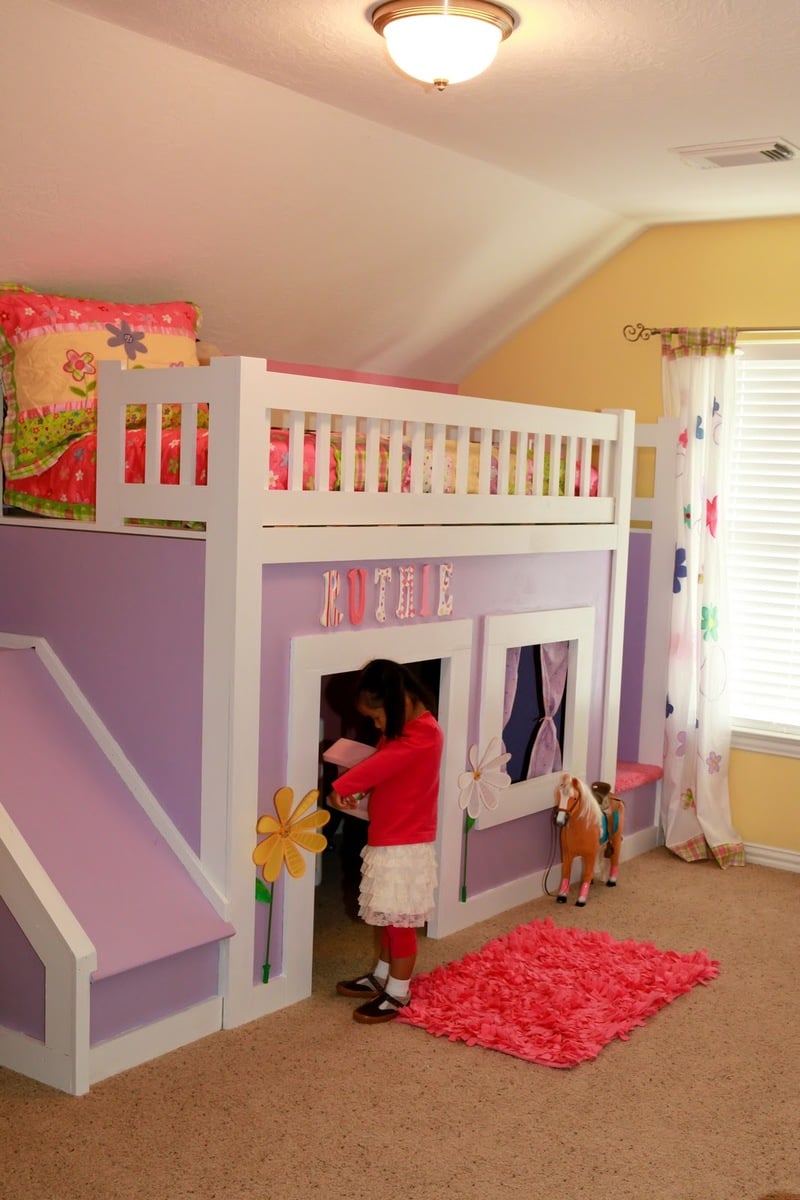
Made a princess bed for my little peanut. We adapted the idea of the stairs with storage and then added a slide. I hung LED Christmas lights underneath with a foot switch so she has light in her play area.

Estimated Cost
$350
Estimated Time Investment
Week Long Project (20 Hours or More)
Recommended Skill Level
Beginner

Comments

Guest (not verified)

Tue, 01/10/2012 - 19:20

Please tell me your roof pitch is 12:12 - we are building a house and I have already promised my children to build them both this kind of bed. But I'm fretting that I won't have enough head room - but seeing this picture gives me hope! Our roof pitch is going to be 12:12 and our house is 28 wide, witch will make the upstairs rooms about 20 foot wide I believe at the base of the wall....sorry for rambling....just excited to see your pic. Great job by the way:)

trenthenderson

Fri, 01/13/2012 - 07:17

I made another comment but forgot to hit reply. You can see it below this one. But the point at the ceiling-wall intersection you see in the picture is 72". Hope that helps on perspective.

Trent

trenthenderson

Wed, 01/11/2012 - 14:11

If our pitch isn't 12:12, it's dang close because it's steep on that side. The general layout can be found on Ana's site. I had to modify extensively on height and width to accommodate the room and the play kitchen and the slide. My dimensions are 67" high at the posts, 114" wide from outside slide to outside stairs, and 42" deep. With her mattress on there, she has 8" of railing to make sure she doesn't tumble out. Hope that helps.

If you have other questions, let me know.

Trent

Guest (not verified)

Sun, 01/22/2012 - 17:23

Can you post the plans and dimensions for the slide? I love this bed, and I'm planning to start on it for my daughter.

trenthenderson

Sun, 01/22/2012 - 18:24

I honestly don't know how to post plans here. My email is trent henderson at hotmail dot com. If you'll email me the request, I'll put it on a PDF or something and send it to you.

Modified clubhouse bed

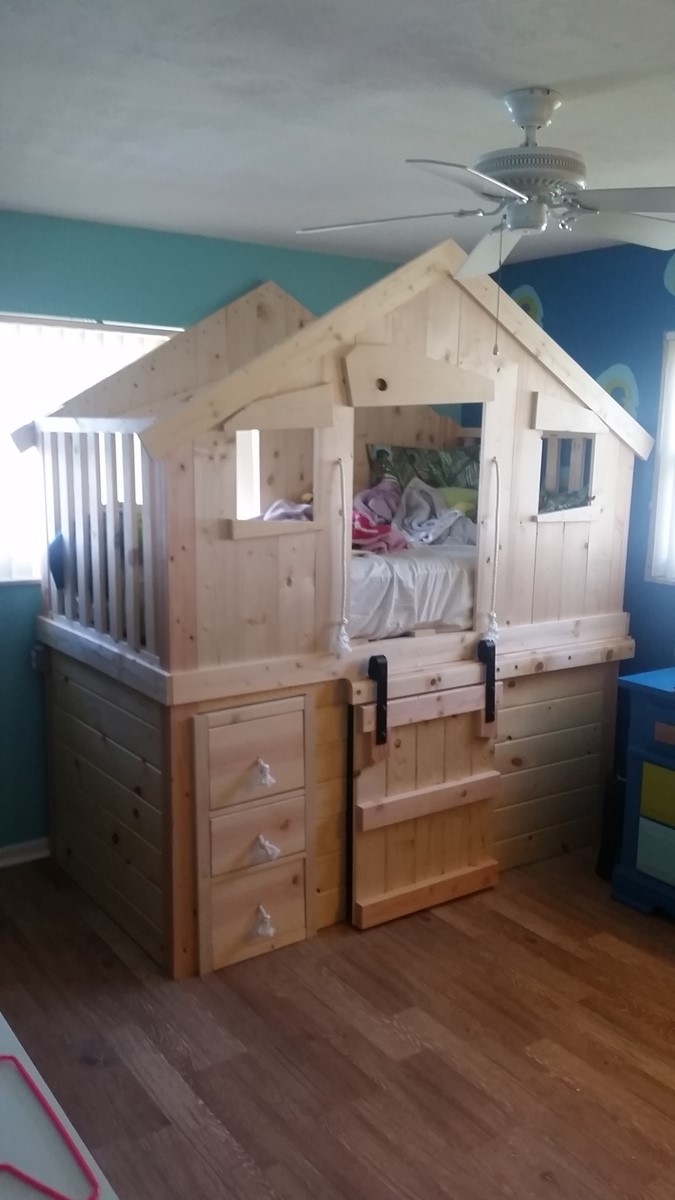
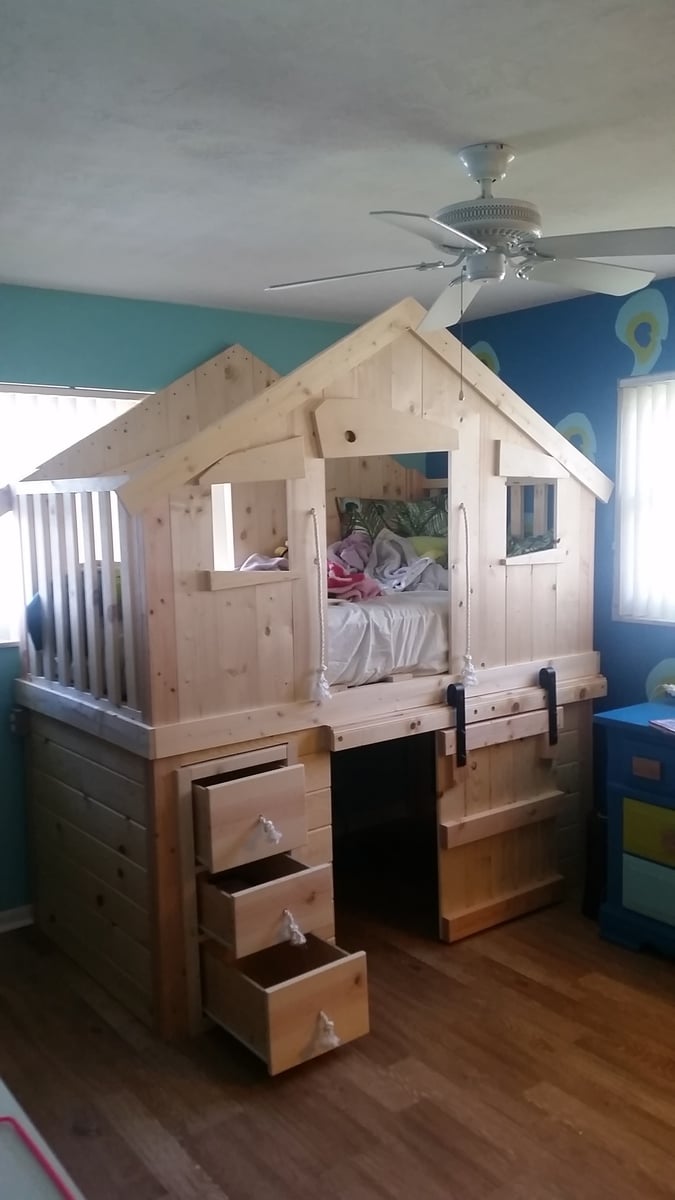
My daughter wanted to remodel her room with a peacock farm theme. These plans worked perfectly. I decided to just enclose the bottom, add 3 drawers and a barn door to give it functionality and add to the "farm" theme. Enclosing the bottom mad for way more storage in her room. I'm going to add a cubby on the head board side. It's going to mimic a "lean to" shead to further add to the rustic farm look.

Built from Plan(s)
Estimated Time Investment
Weekend Project (10-20 Hours)
Finish Used
None
Recommended Skill Level
Intermediate

Twin Farmhouse with Trundle

Submitted by mommaerika on Wed, 04/25/2012 - 09:52

This is the twin farmhouse bed and the matching trundle. We chopped about 8 inches off the headboard since we were not using a boxspring for our mattress. Other than that it's as written. I'm so thrilled to free up space in our girls' room!

Estimated Cost
$200 - 250 give or take for both
Estimated Time Investment
Weekend Project (10-20 Hours)
Finish Used
Primer, 2 coats of basic white semi-gloss paint, and poly.
Recommended Skill Level
Beginner

Comments

t00court

Fri, 08/22/2014 - 16:27

This is exactly what I'm looking for!
My husband and I would like to begin building this ASAP. Could you please clarify for me that the original measurements for the Twin Farmhouse bed and the trundle bed will certainly be able to accommodate one another? I just want to make sure it'll fit! I think I saw someone else comment that they changed some of the measurements to make a trundle bed fit underneath, but they didn't go into detail.

We also won't be using a box spring.

Thank you for your help!

Motorcycle Jacket and Helmet Rack

Submitted by Anonymous (not verified) on Thu, 05/19/2016 - 10:52

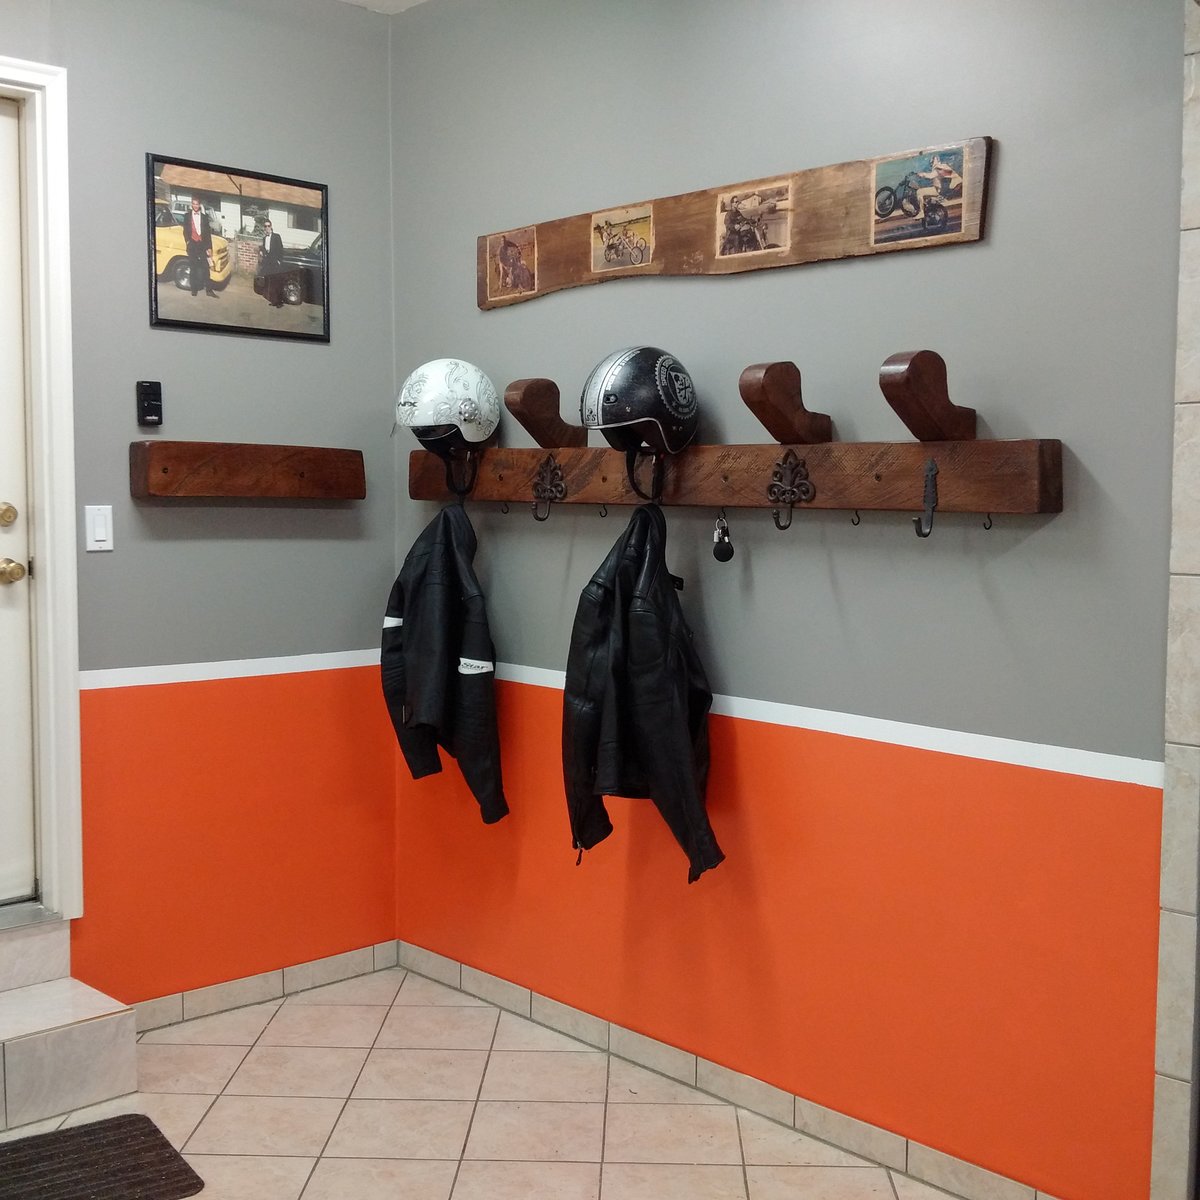
Built from left over Rough Cut Maple.  Jaket, Helmet and Key Rack

Estimated Cost
$50
Estimated Time Investment
Afternoon Project (3-6 Hours)
Finish Used
Minwax Stain and Polyurithane
Recommended Skill Level
Beginner

Comments

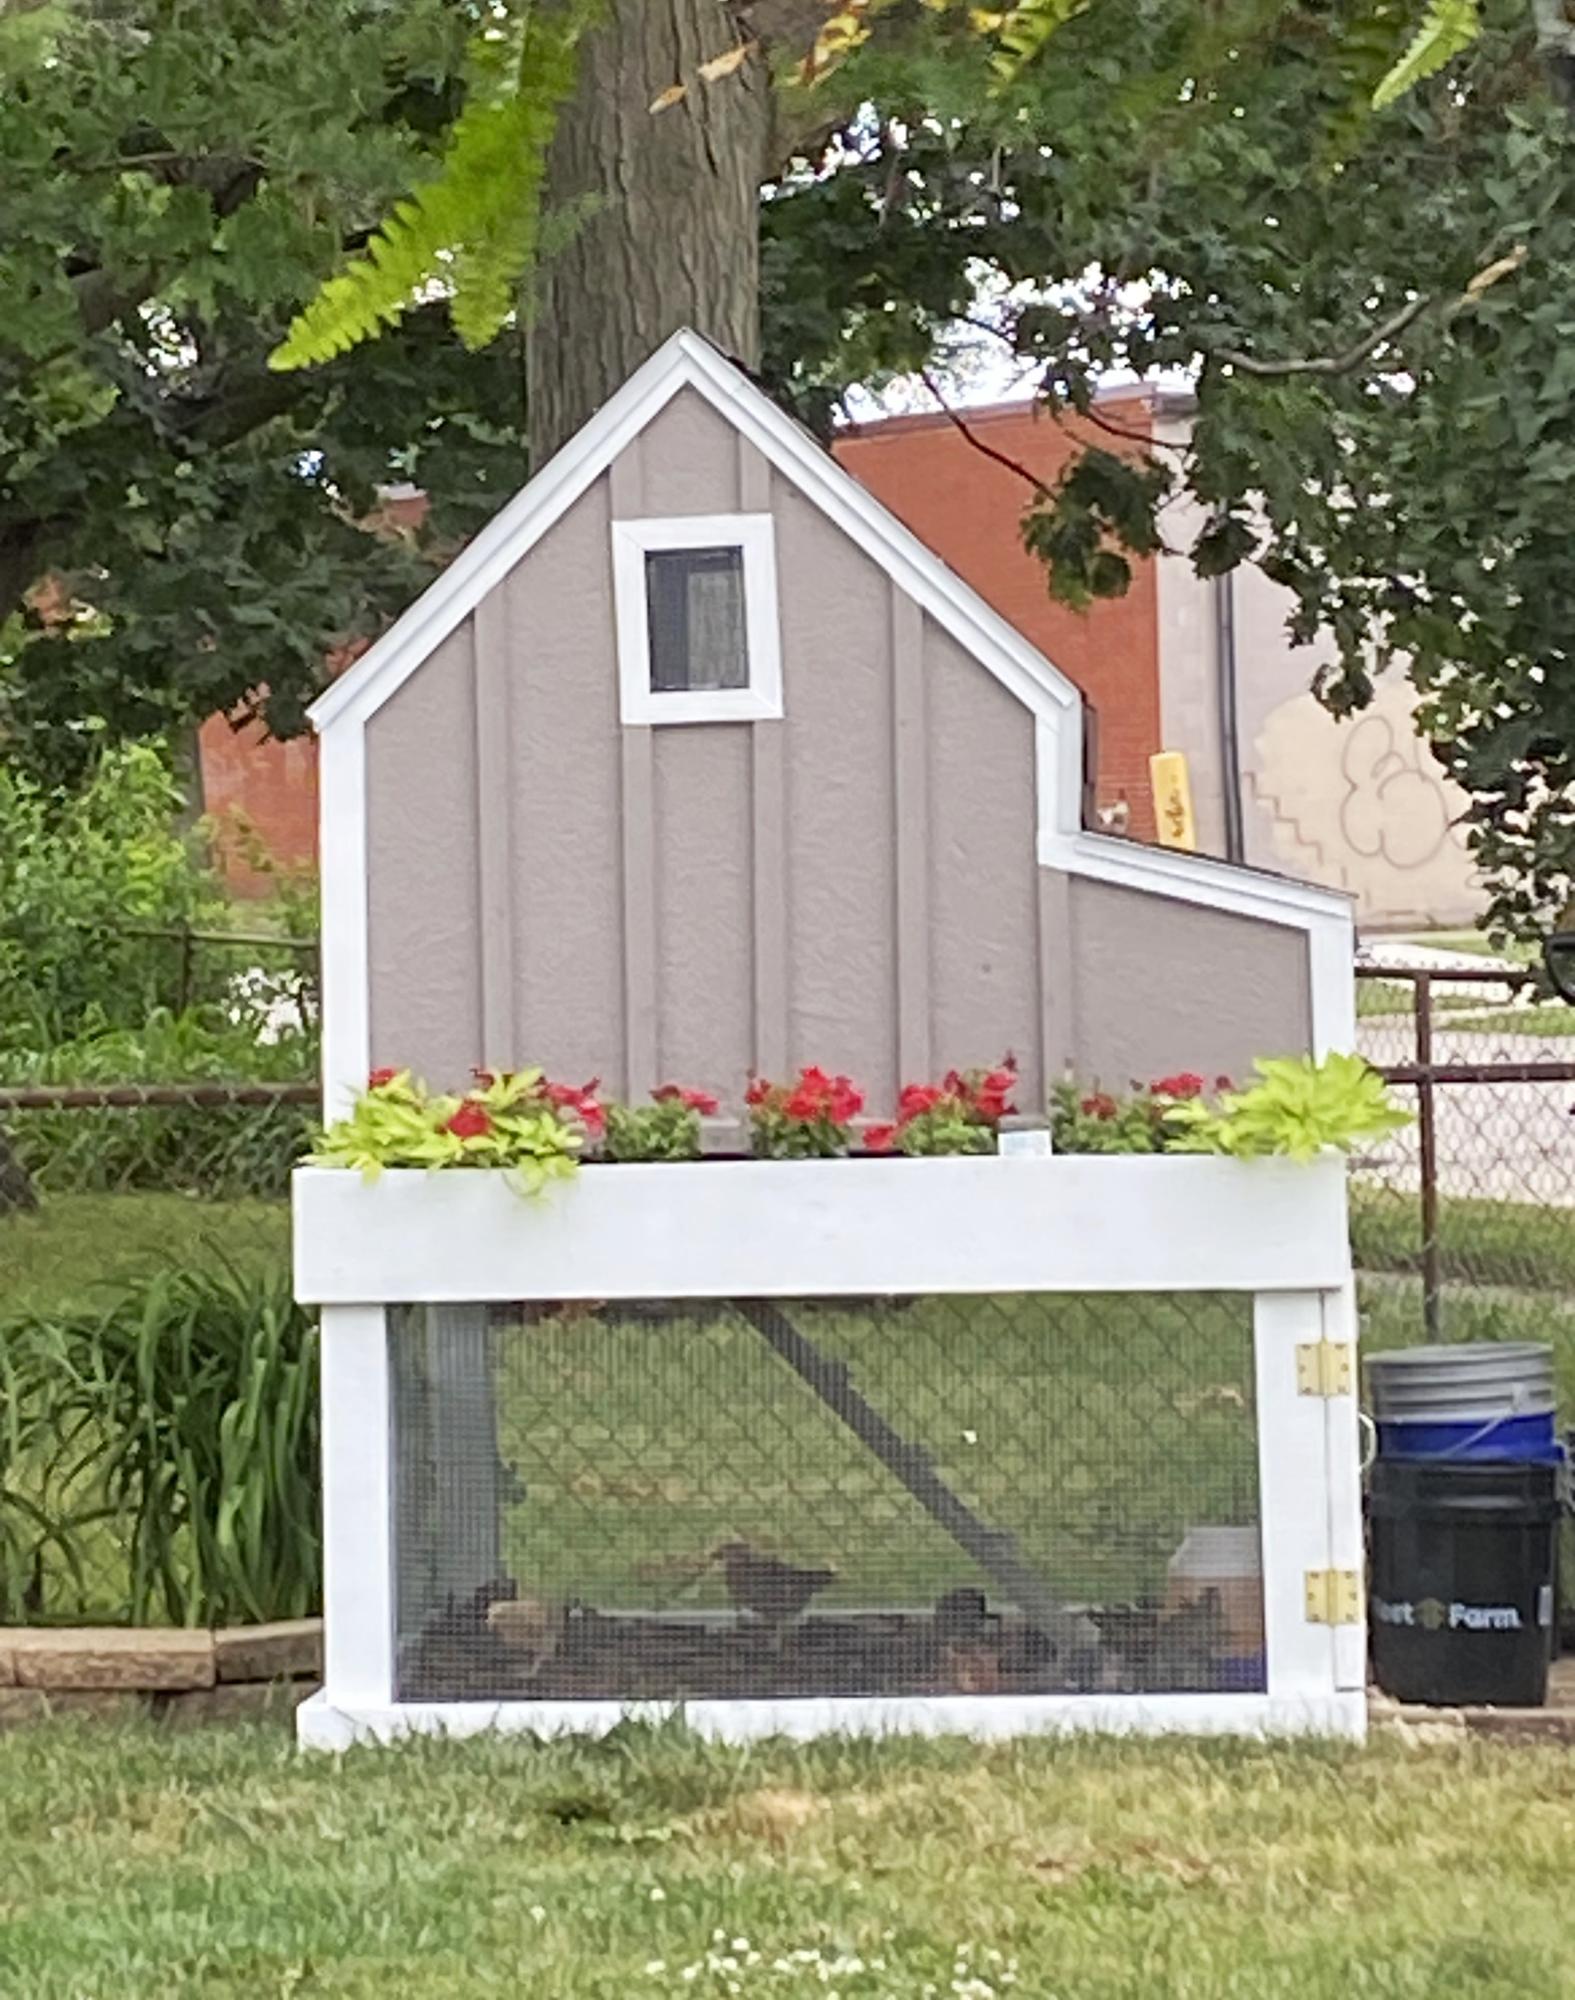
DIY Chicken Coop

Submitted by Anonymous (not verified) on Mon, 10/30/2023 - 17:55

As a first time chicken farmer, I have four chickens now fully grown. It was 29 degrees in Iowa this morning, wondering if I should wrap the lower portion of the coop on three sides with visqueen, and should the roost windows be covered? I have straw bales to roost on and add where needed . I don’t plan to heat the coop . Any help will be appreciated.

[email protected]

Seasonal And Holiday

Farmhouse console table

I have never so much has touched a saw before, but got a wild hair to build something. This is my very first attempt. I didn’t put the X on it, but I did the rest. There are soooo many flaws and I’ve since made several other pieces. But I wanted to post this to show that if you put your mind to it, you can do anything! I’m in love with this piece. Thank you so much for the plans!

Built from Plan(s)
Back