Hall tree
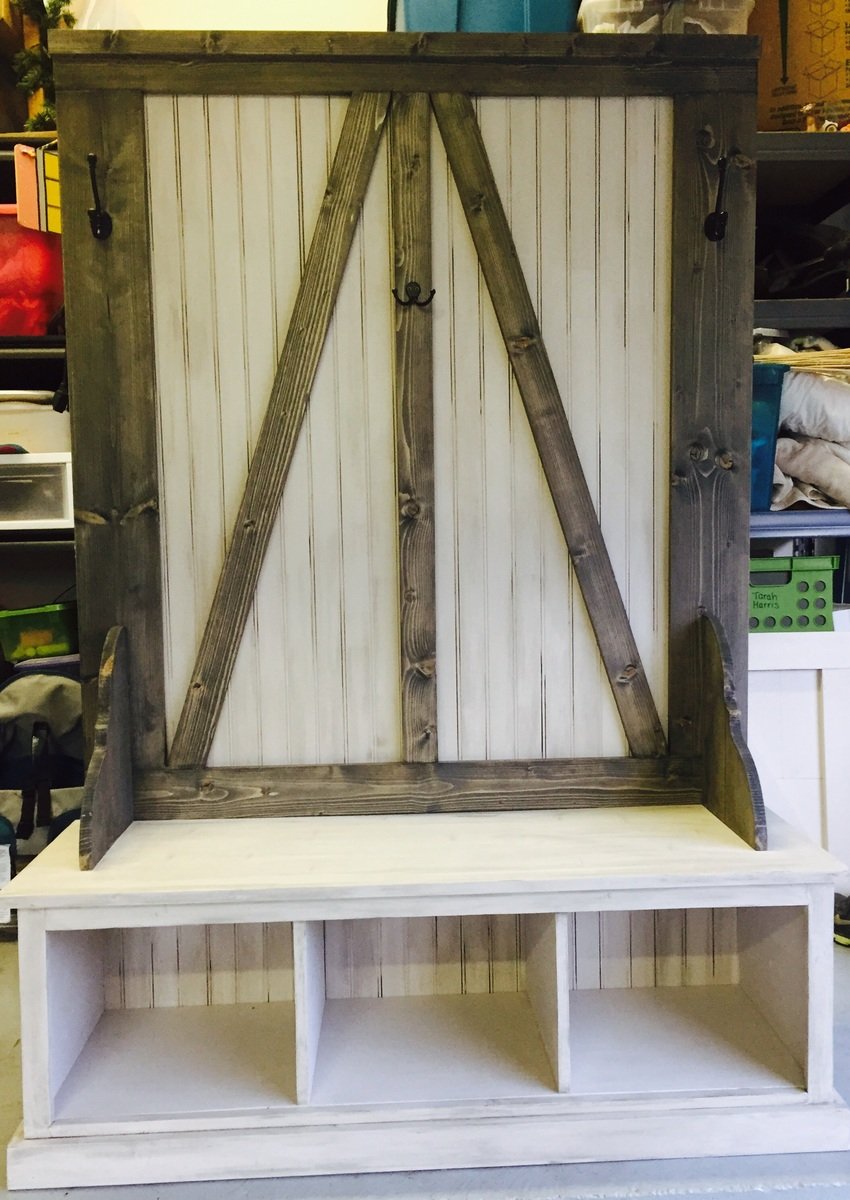
Fancy hall tree
Built from Plan(s)
Recommended Skill Level
Beginner
Fancy hall tree
Hi Ana,
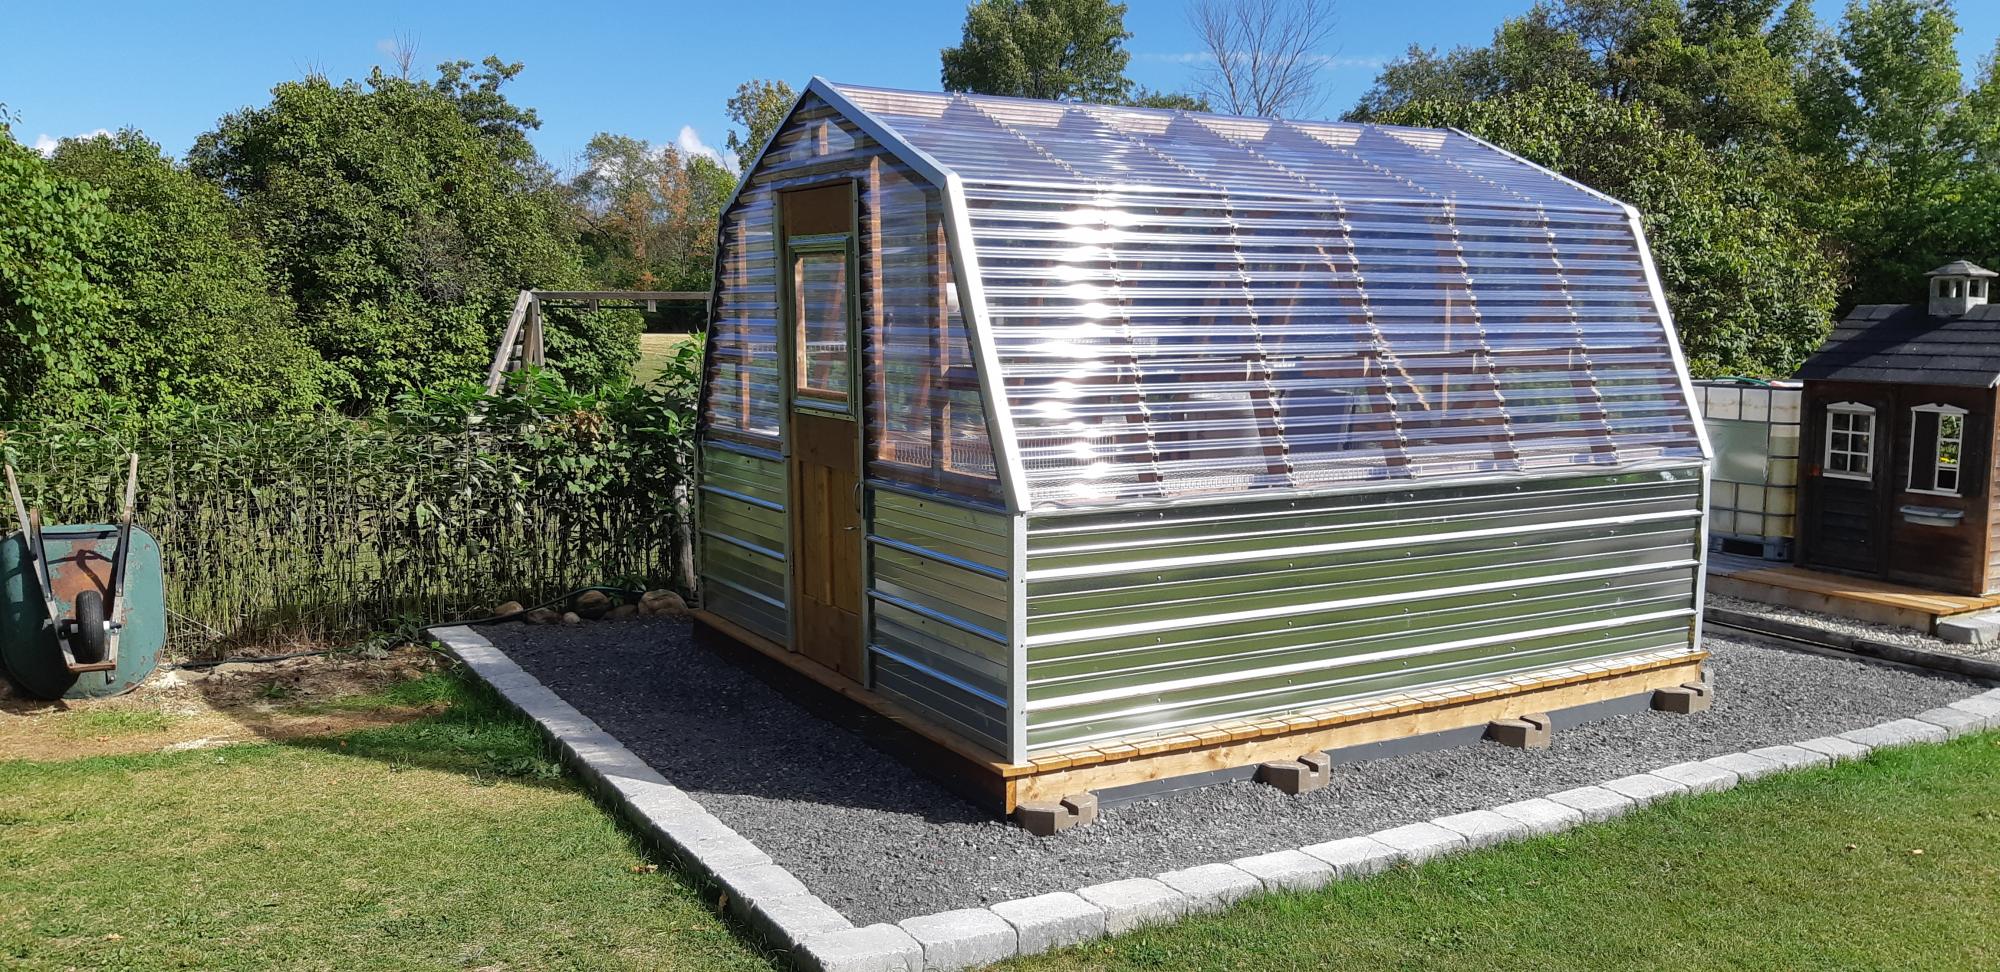
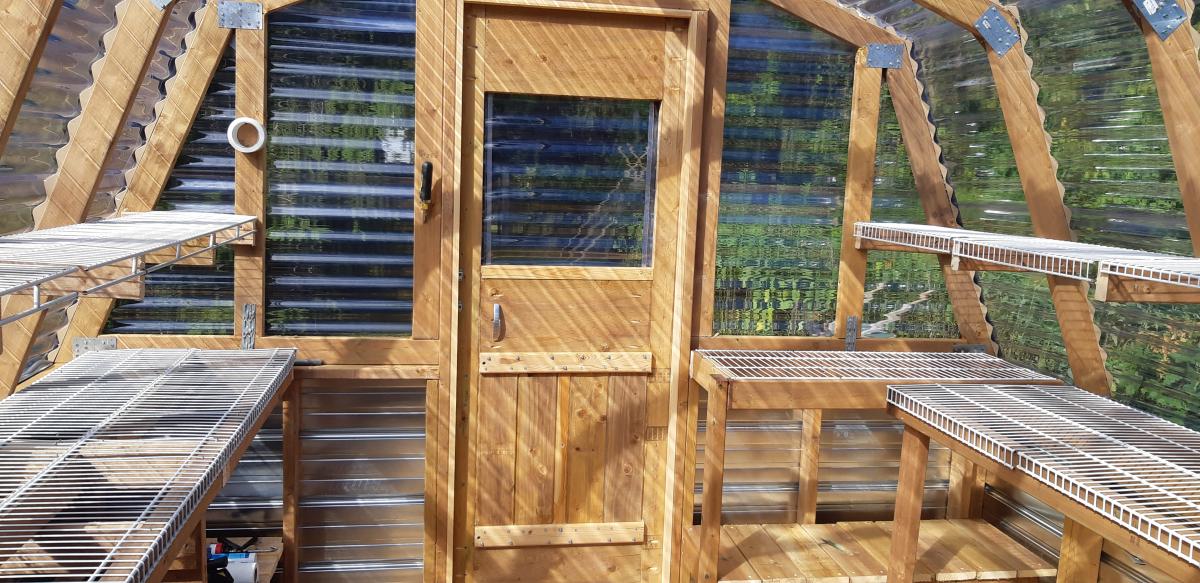
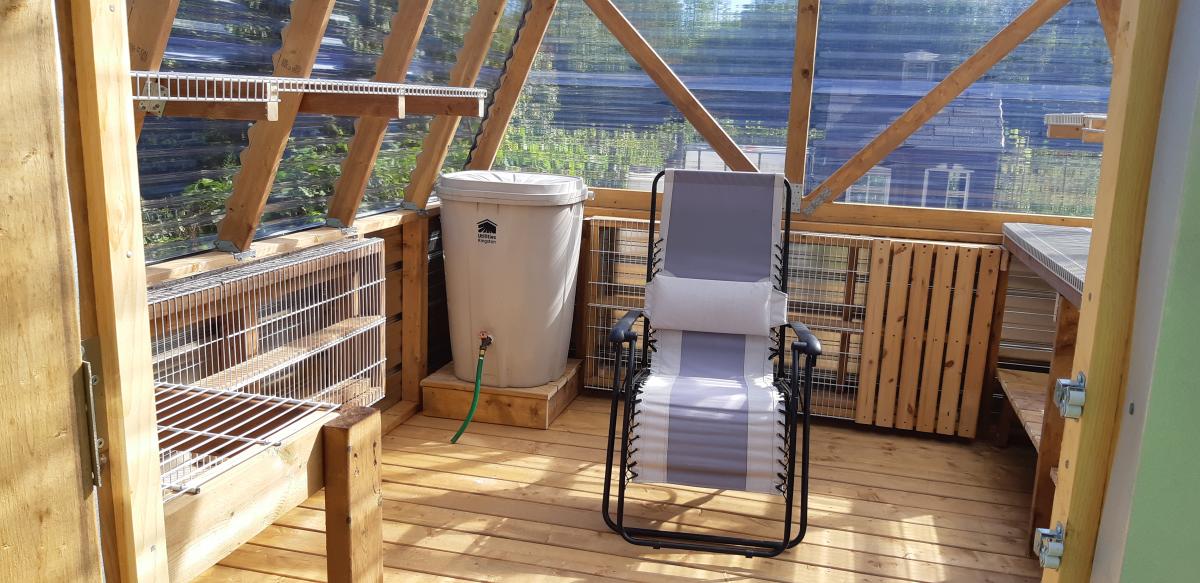
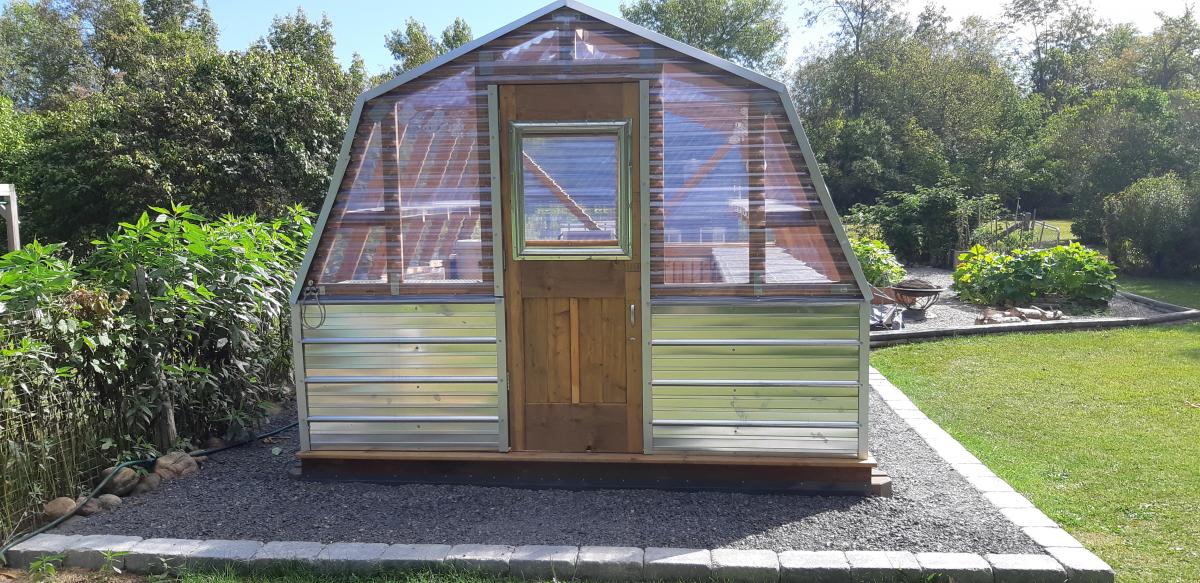
I got your plans online as I always wanted to build a small, simple greenhouse - these plans were excellent, easy to follow and the job went way quicker than I thought. I did the work myself, so, even though 2 people would have really helped, some judicious use of clamps did the job.
I used deck blocks and standard deck flooring. This raised the structure up, as the low lying ground has a tendency to flood in the spring melt and I used old metal baseboards and leftover flashing to fasten a metal skirt to the structure to keep animals out. A bit of spaypaint to match the metal to the gravel. The wire shelving was inexpensive and I managed to get all of it from a local Habitat for Humanity store. The door I made from leftover wood from another project and some leftover cuts from the metal siding. I didn't need any special tools, but did use the project as an excuse to buy a Kreg Jig, which turned out to be really useful.


Mon, 09/02/2019 - 10:51
Wow, this is an amazing greenhouse! Everything about it, from the gravel pad with retaining wall blocks, to the finished door, is just spectacular. Thank you so much for sharing a brag post!
Mon, 09/02/2019 - 18:43
This is amazing, which plans did you use? I'm getting ready to build a greenhouse early next year, and was thinking of doing a pvc pipe structure with the panels like you have, but your post is inspiring me to go with the wood frame.
Loved this plan from Ana. Easy to follow and looks great. 100% reclaimed cedar.
Thu, 05/11/2023 - 19:39
Awesome build, thanks so much for sharing!
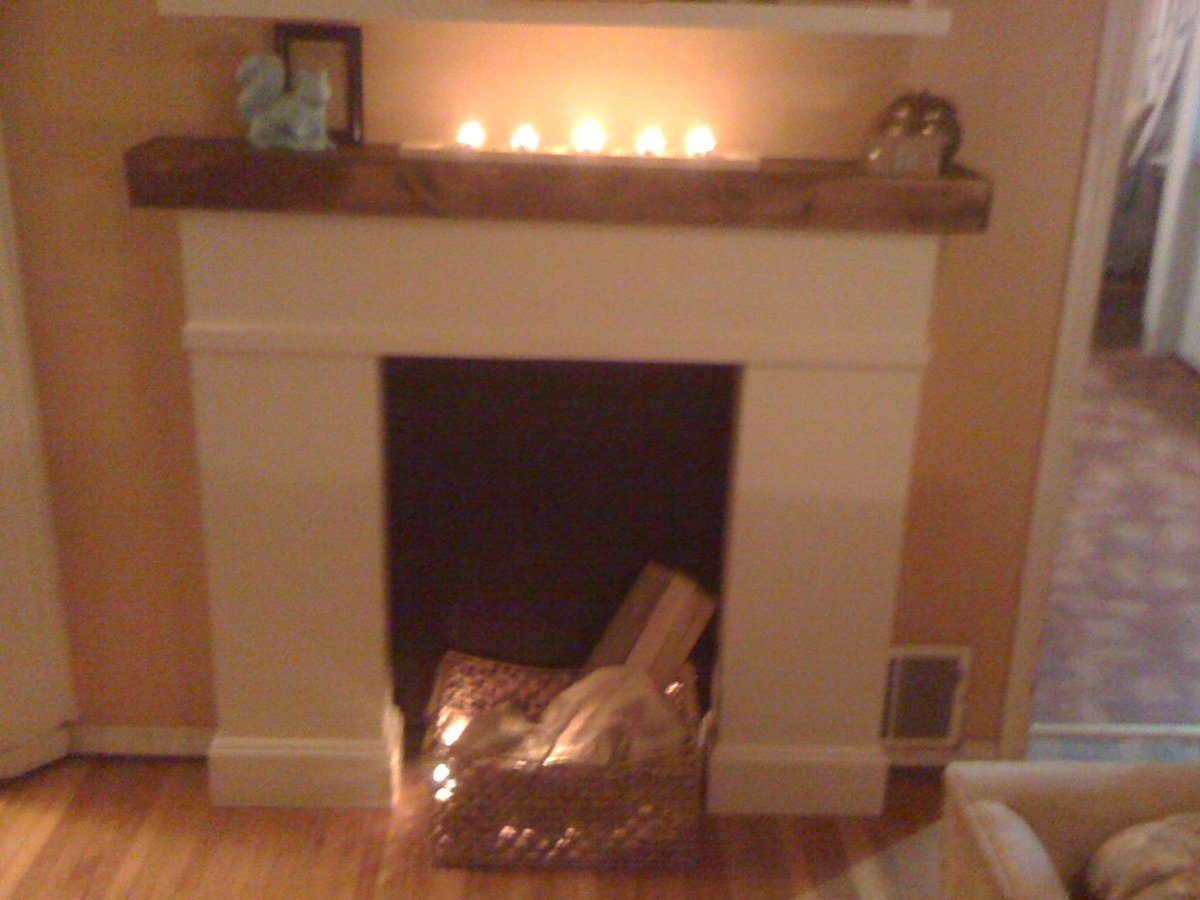
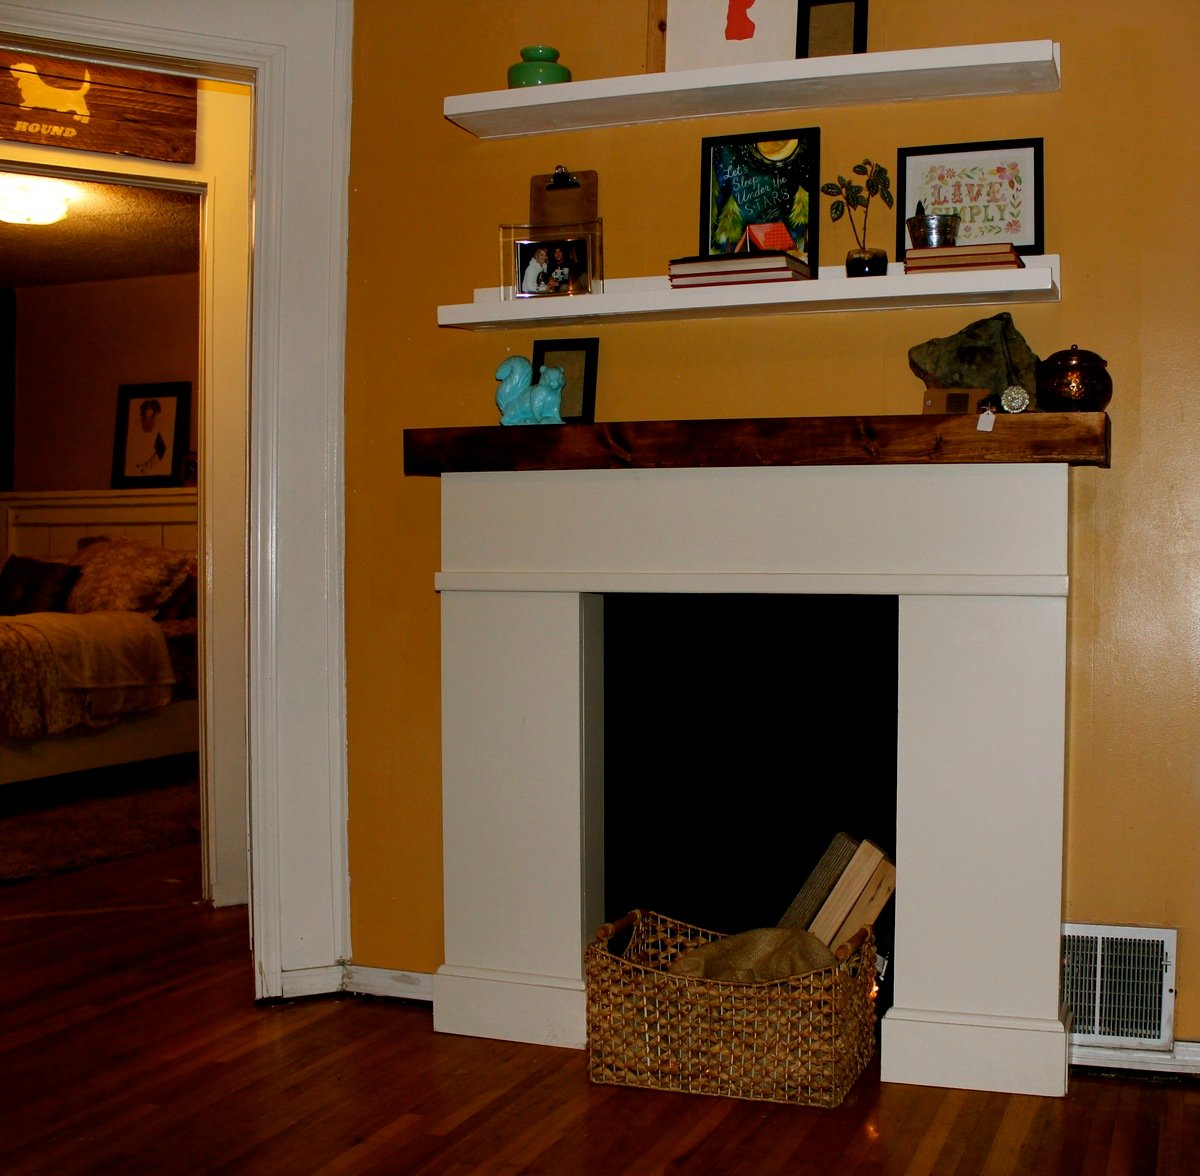
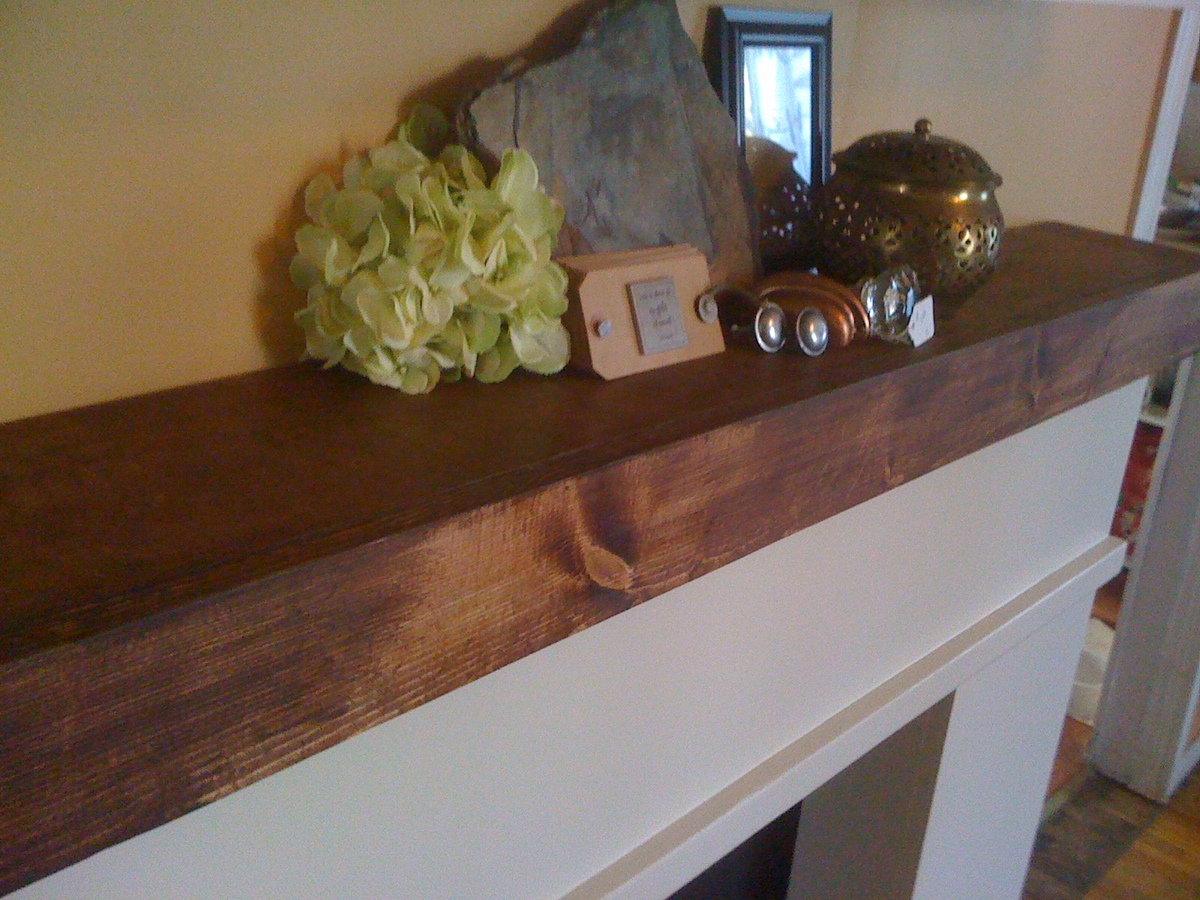
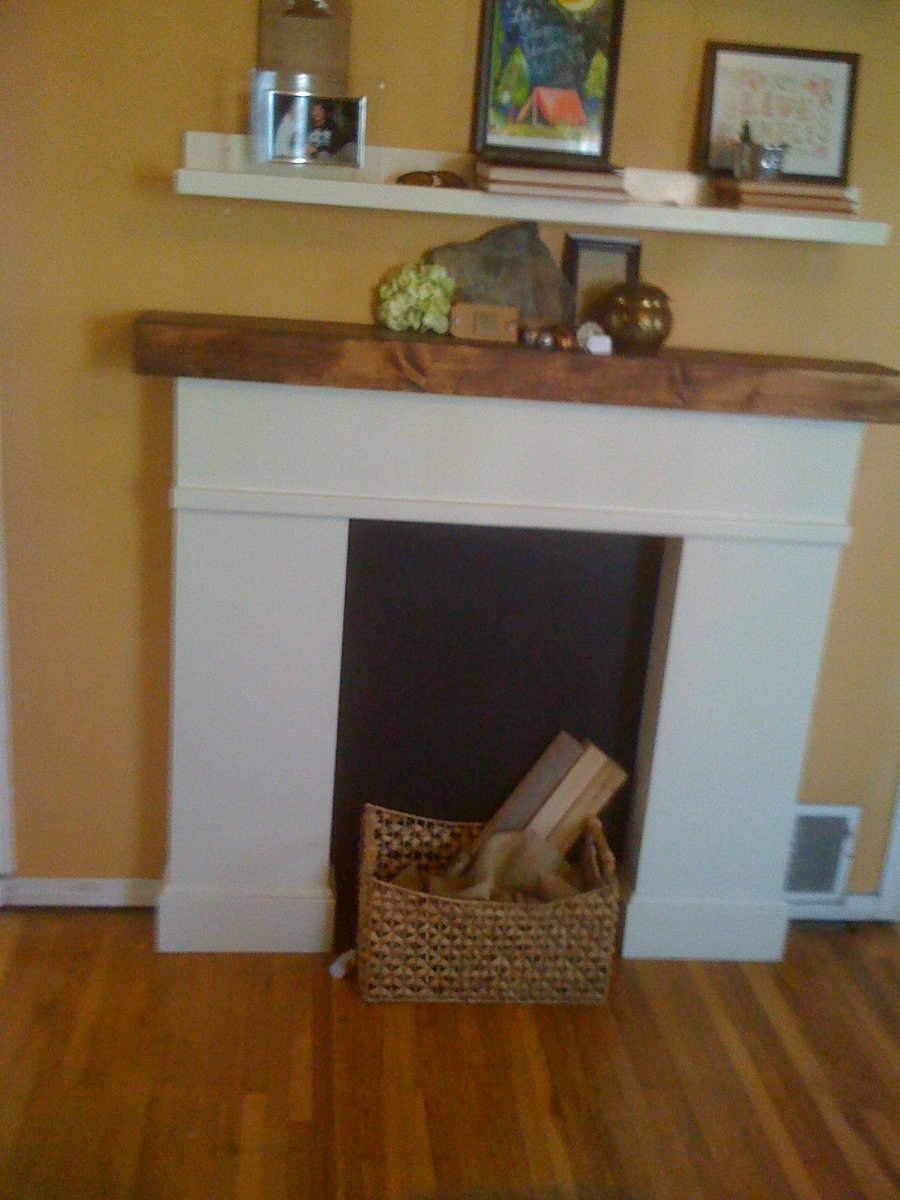
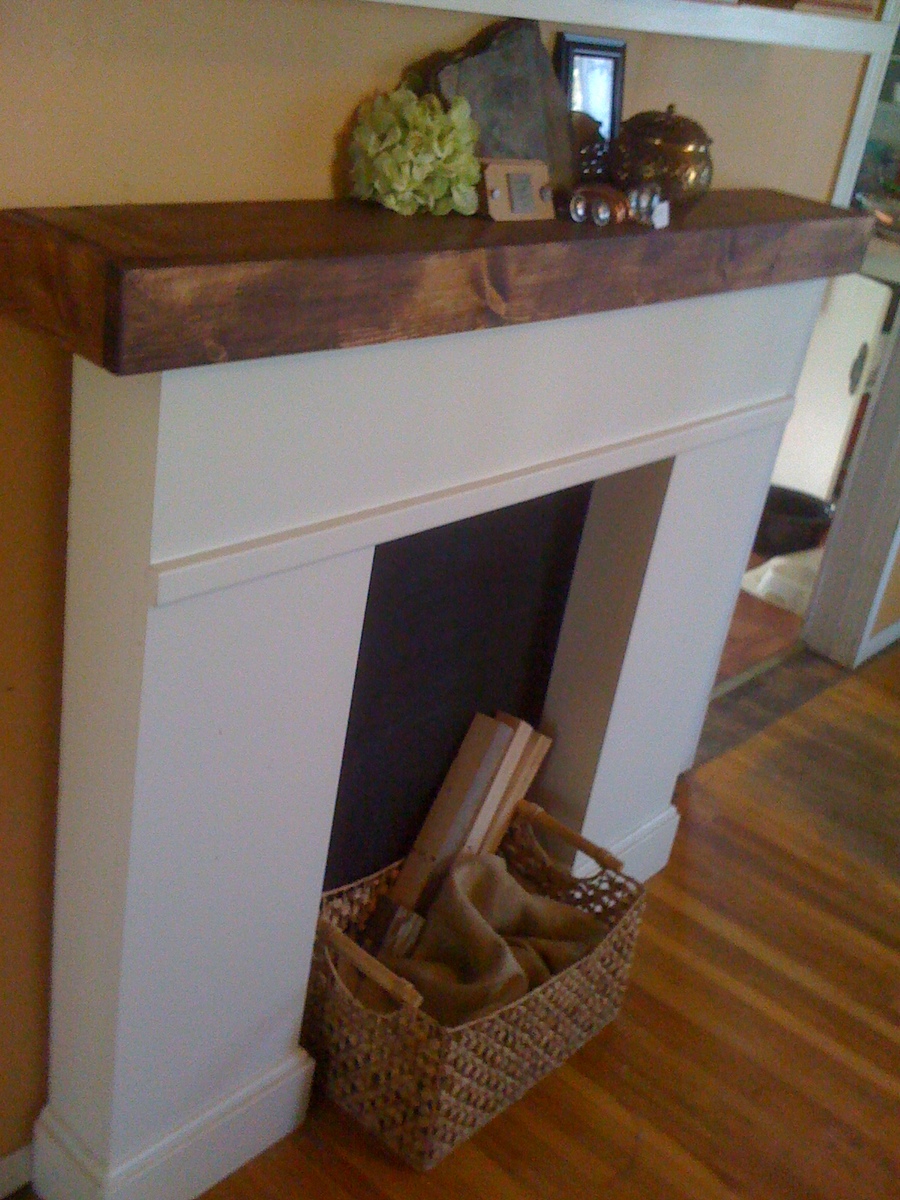
I was drooling over Ana's Faux Fireplace plan and it was perfect! Low profile, beautiful, and I knew I had to have it. We had a bunch of leftover 3/4" MDF and didn't want to spend any money on this project so we constructed the Faux Fireplace out of ripped MDF, a leftover 1x6, 1x2 and some quarter round! We made the faux beam top out of 1x4s as a slip cover that mounts to the wall.
We painted it with the off the shelf antique white paint by valspar that I had leftover and some "American Walnut" stain for the top. I painted the wall behind it in black chalkboard paint. This is the first piece of furniture we've made that pretty much serves NO function but I love it sooo much.
I put a basket in the opening with some christmas lights, burlap and chunks of 2x2s (I want some birch logs in there!) and they look pretty lovely when plugged in.

In reply to Marvelous! by JoanneS
Sun, 11/24/2013 - 16:49
Thank you! we soooo love it!

The plan was cut down to 6ft. This took a few weekends, in order for all the parts to come together (waiting for the hardware, waiting for someone to cut track, etc).
Bought a double door hardware set on eBay for $120 (including spacers and bolts), without the track included. If buying the hardware, consider the size of the hardware you are buying in the overall design!

Tue, 02/09/2016 - 14:33
Very nice work!! I was eyeballing this project myself a week ago, yours came out very clean!
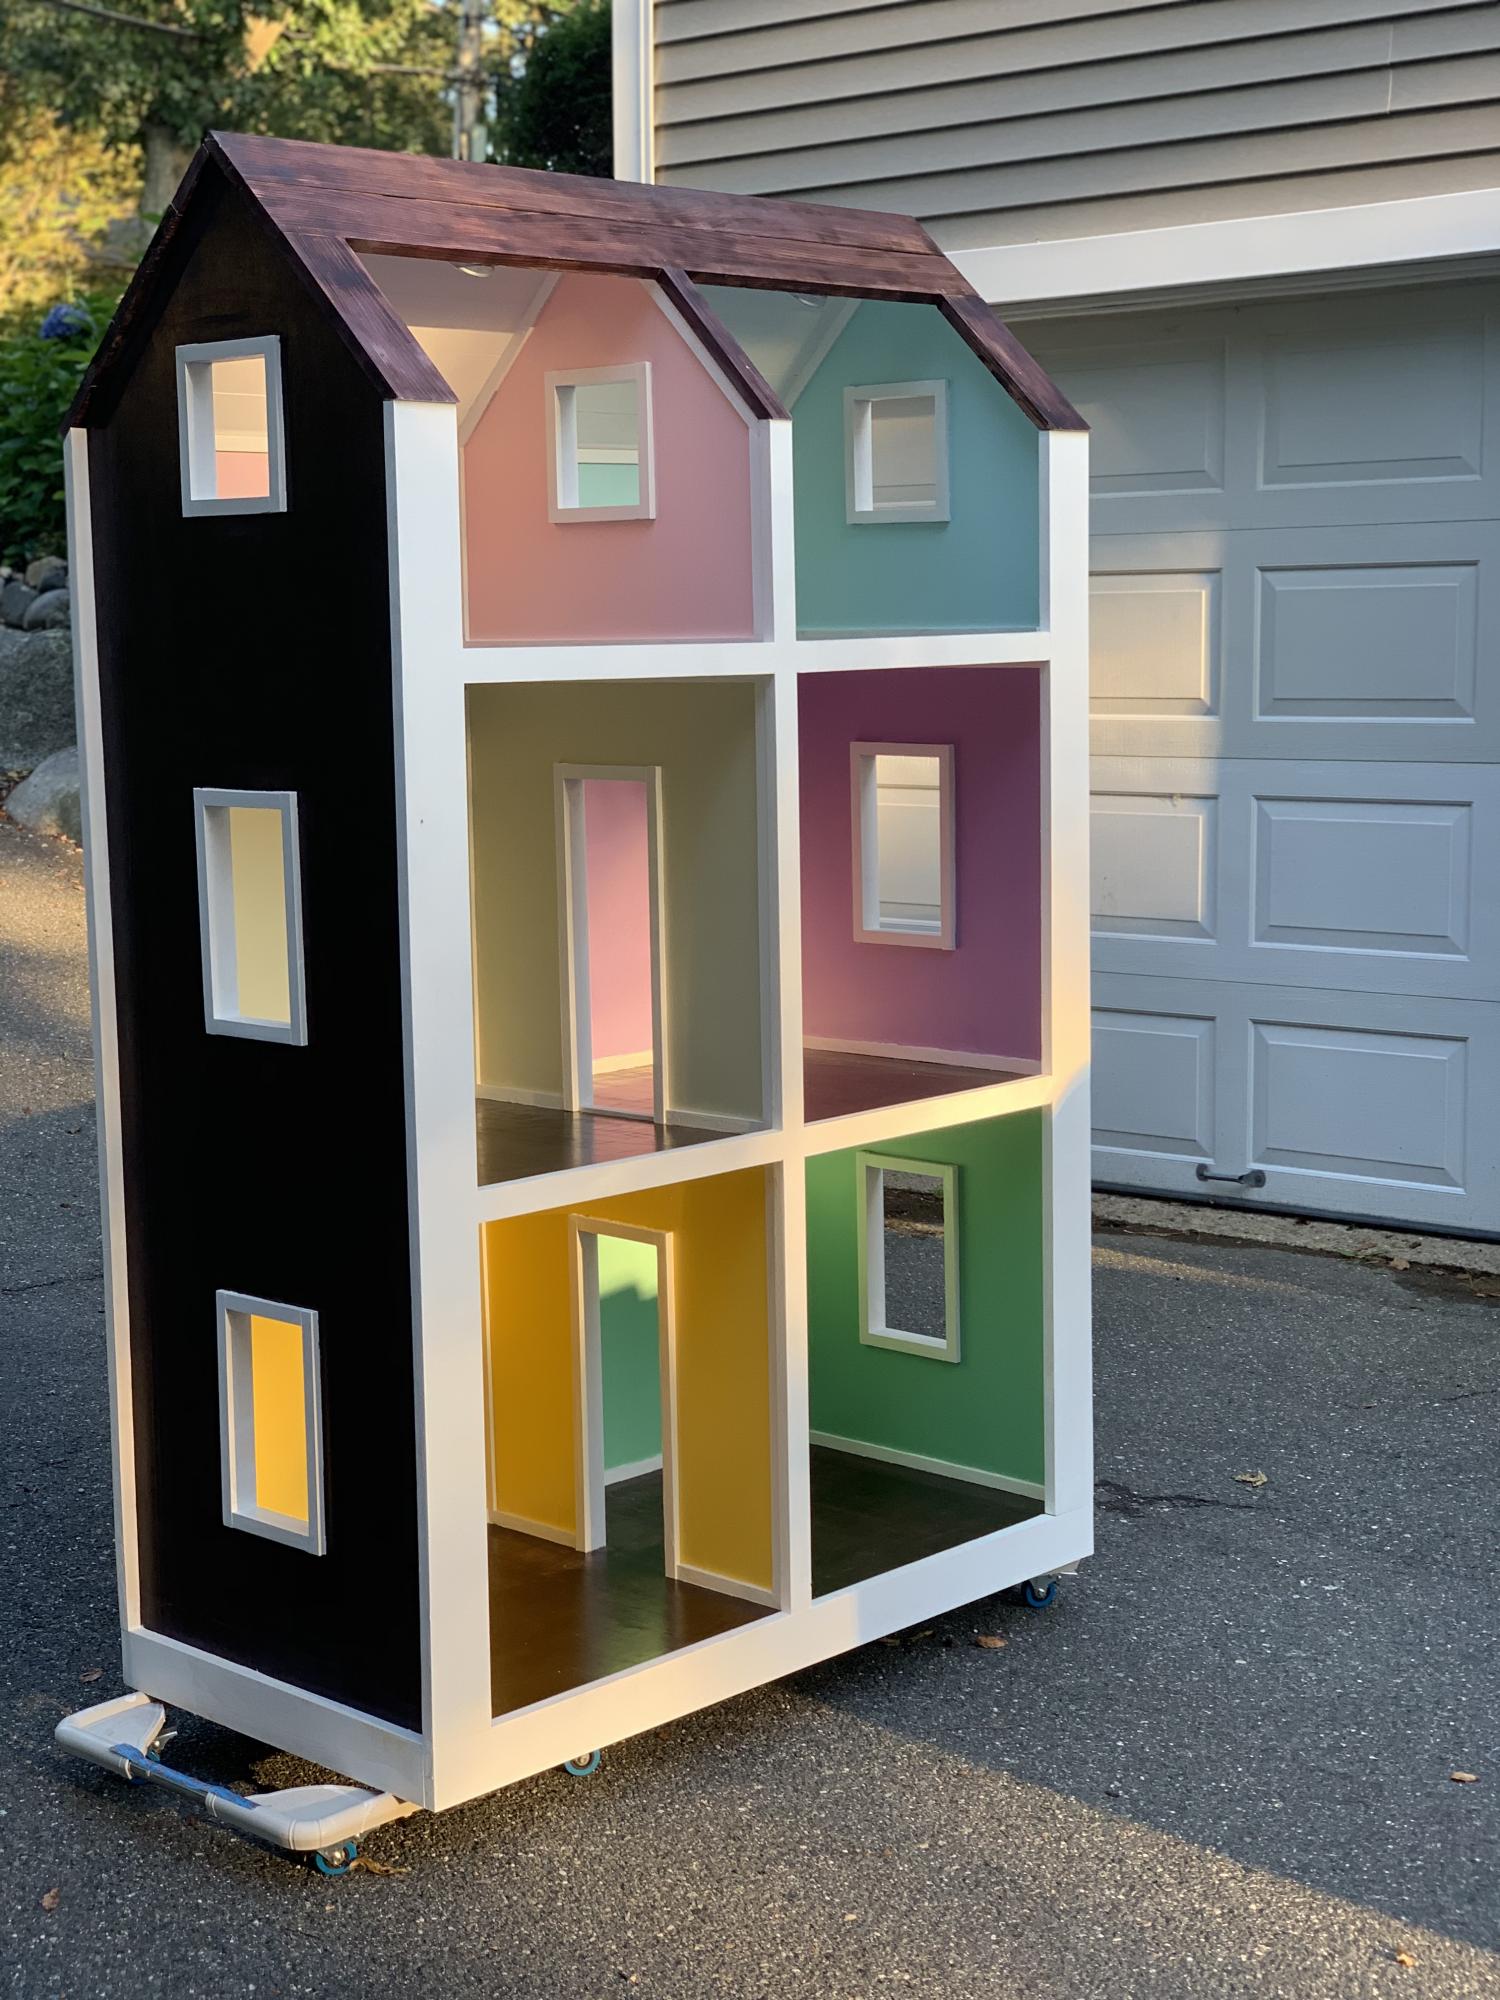
I built this using the plans from here as a base and then made some alterations and added things i saw from different builds and added my taste to a few things.
Shou sugi ban burning of the pine roof and then a cherry stain. I added much more trim than the original plans called for. I put baseboard and trim in each sections of every room. This added about 30 hours to the build. Then the difficulty trying to use painters tape on such small trim. Took about another 5 hours. I used birch plywood with the intention of staining but only decided to stain the outside and the floors and then polyurethaned the floors to look like hardwood floors. Touch lights added to each room. Each room was primed white and then painted a different color per the kids request. We spent about 700$ on the nicer plywood and all supplies when all was said and done. Another $300 to furnish the rooms. I would estimate over a hundred hours spent over four months of work on this project.
This was my first build! I do enjoy this bed unfortunatly i found ana's blog just after i had built it. next time i build a bed i am totally building the farmhouse bed to match the farmhouse nightstand i also just built and will post. hopefully ana in her busy life will find time to post a plan for a farmhouse tallboy dresser to match!
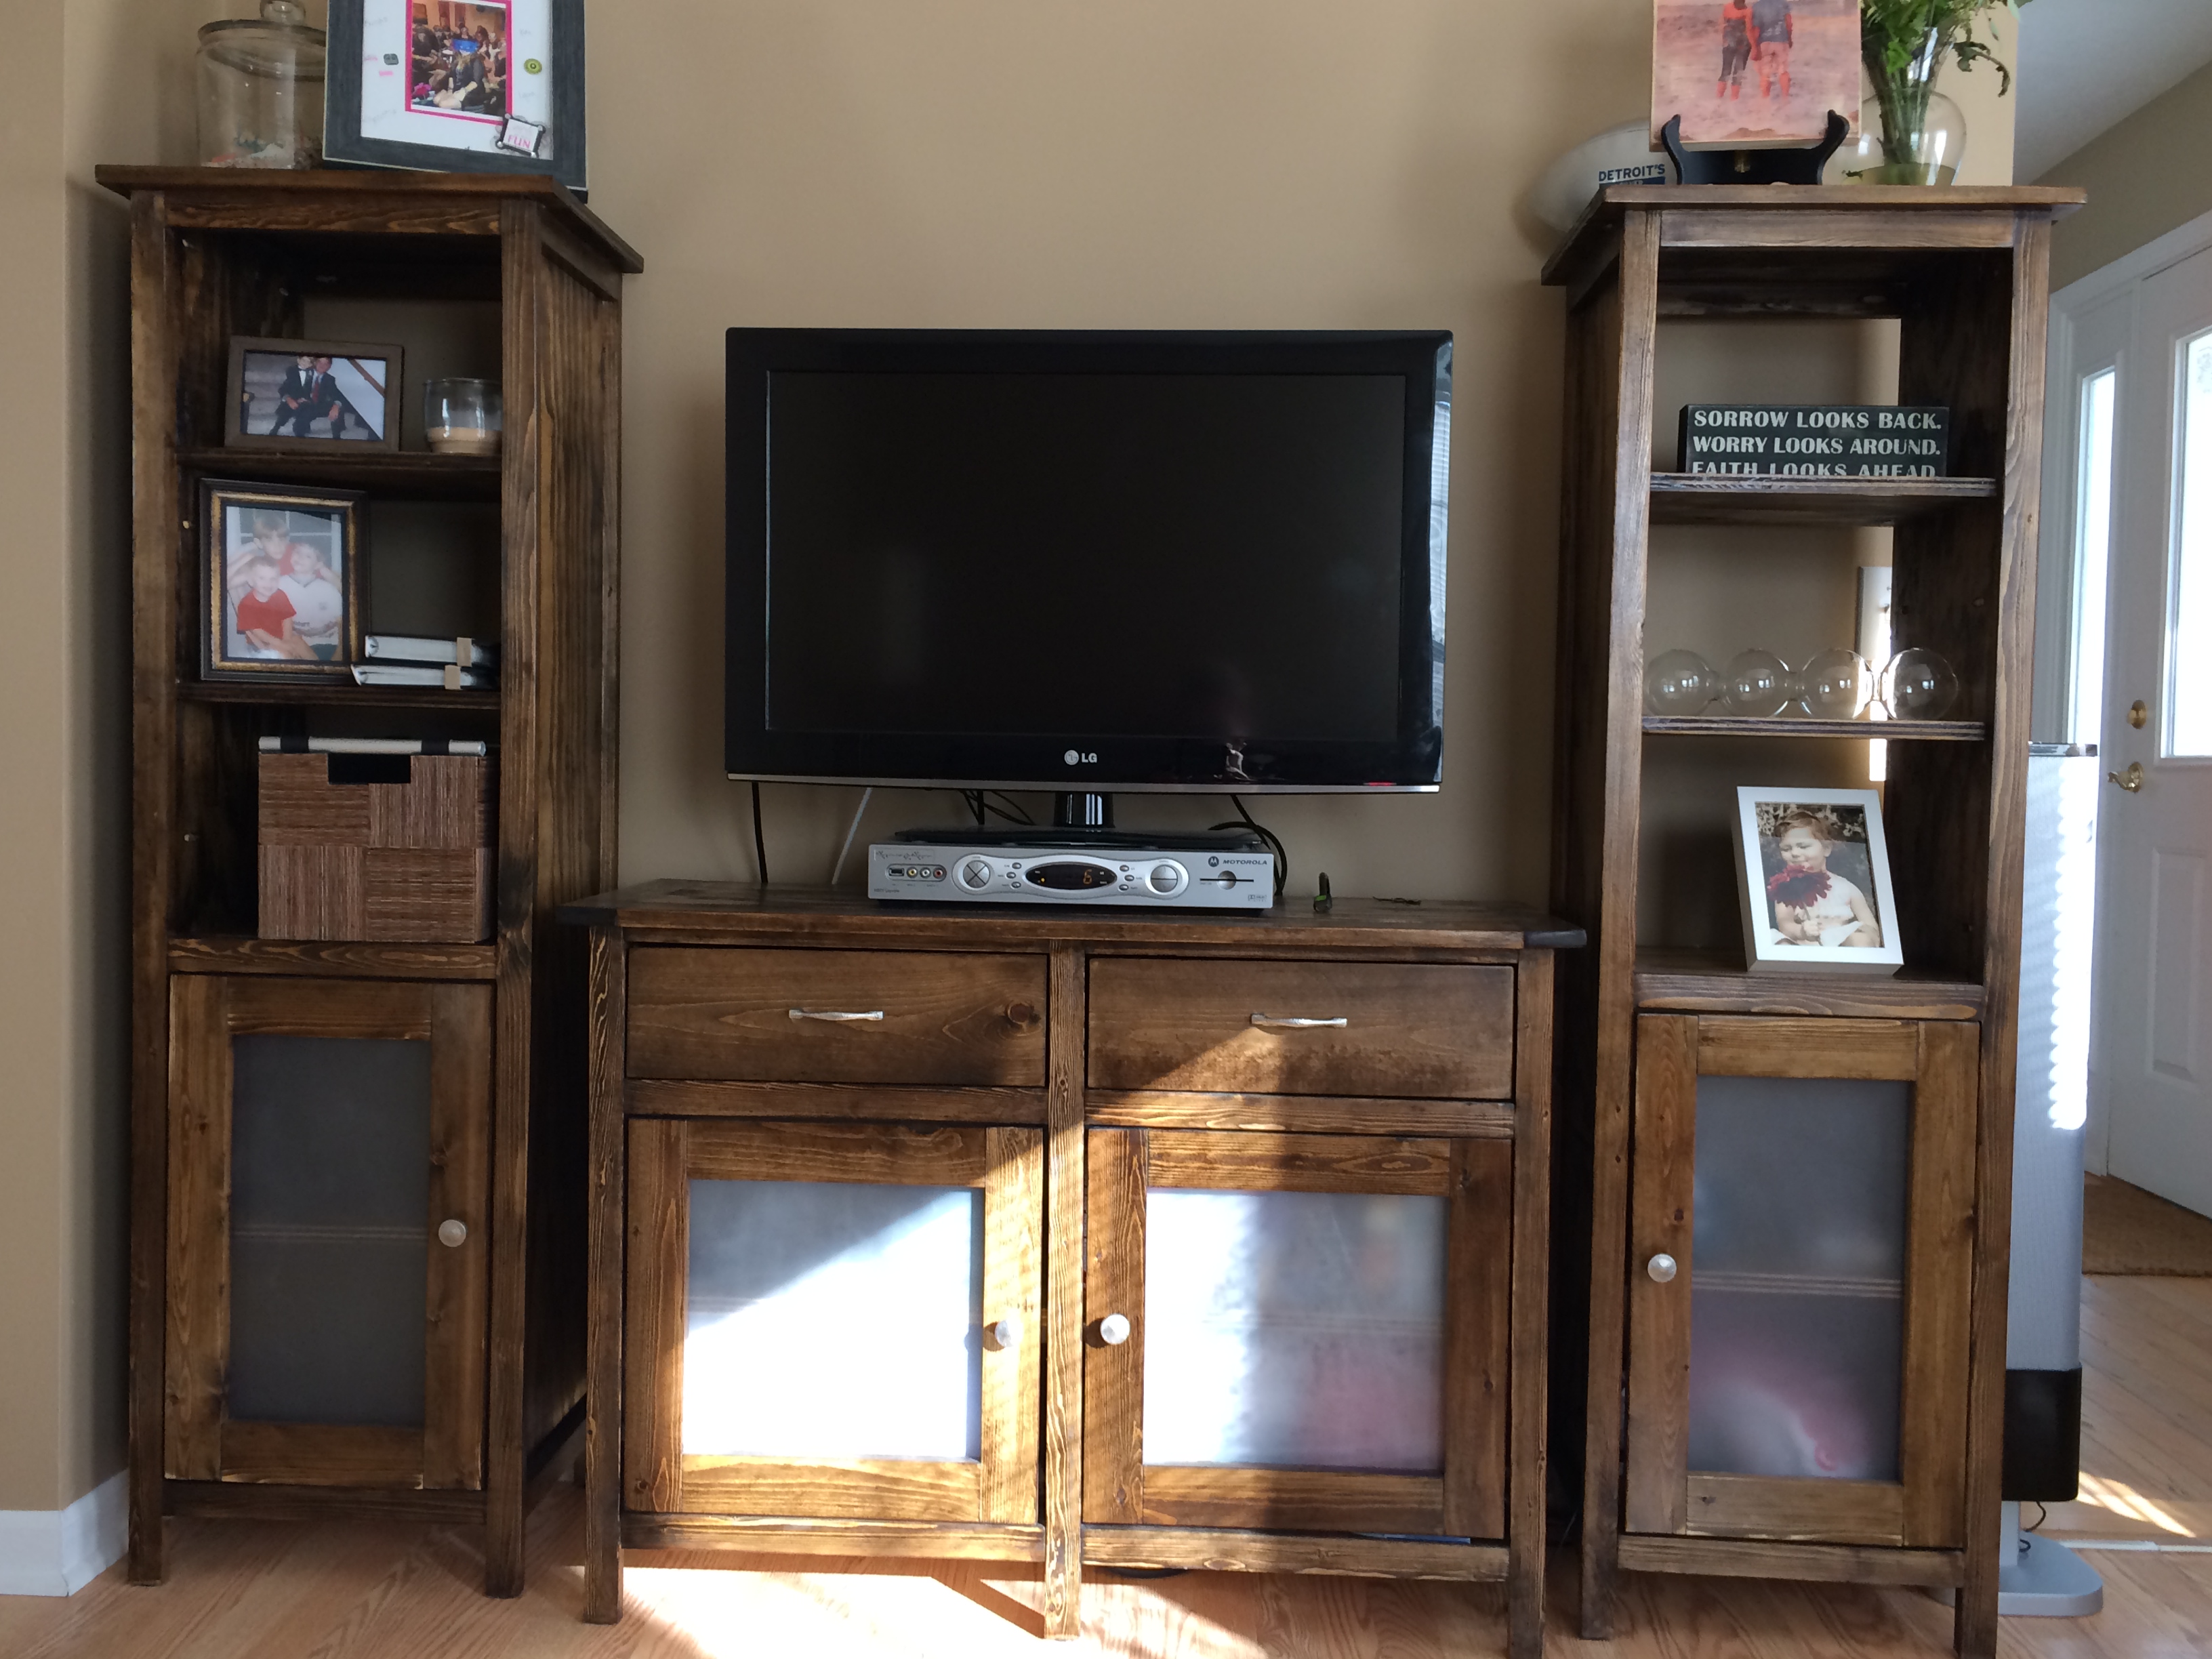
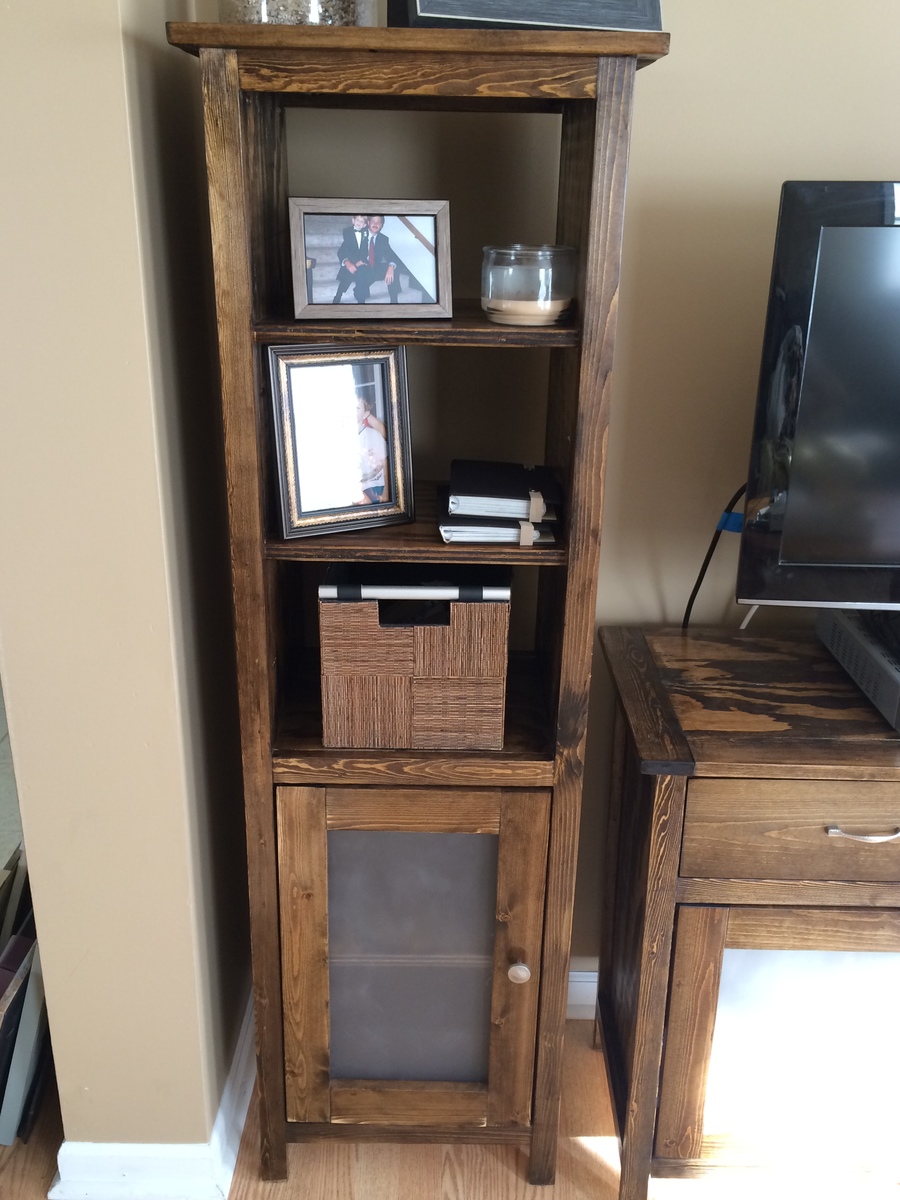
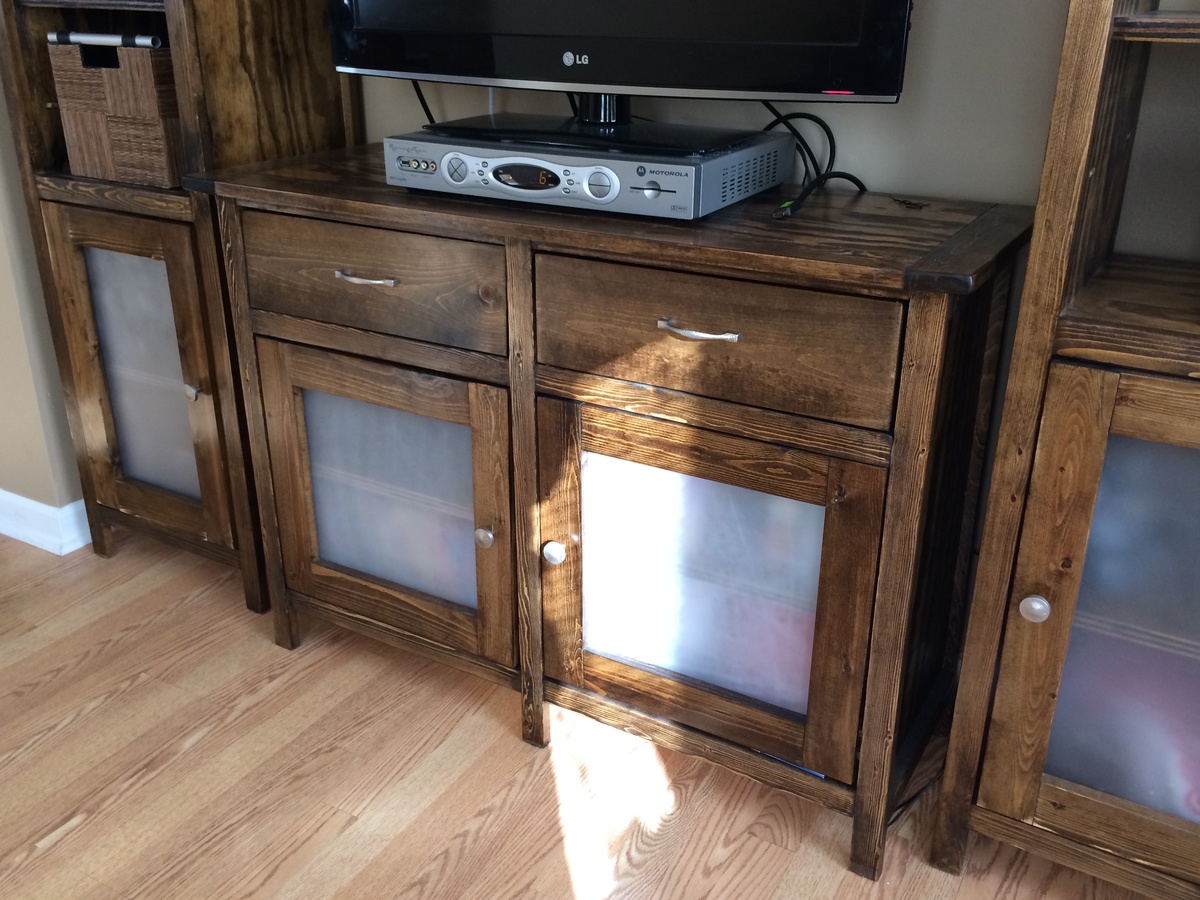
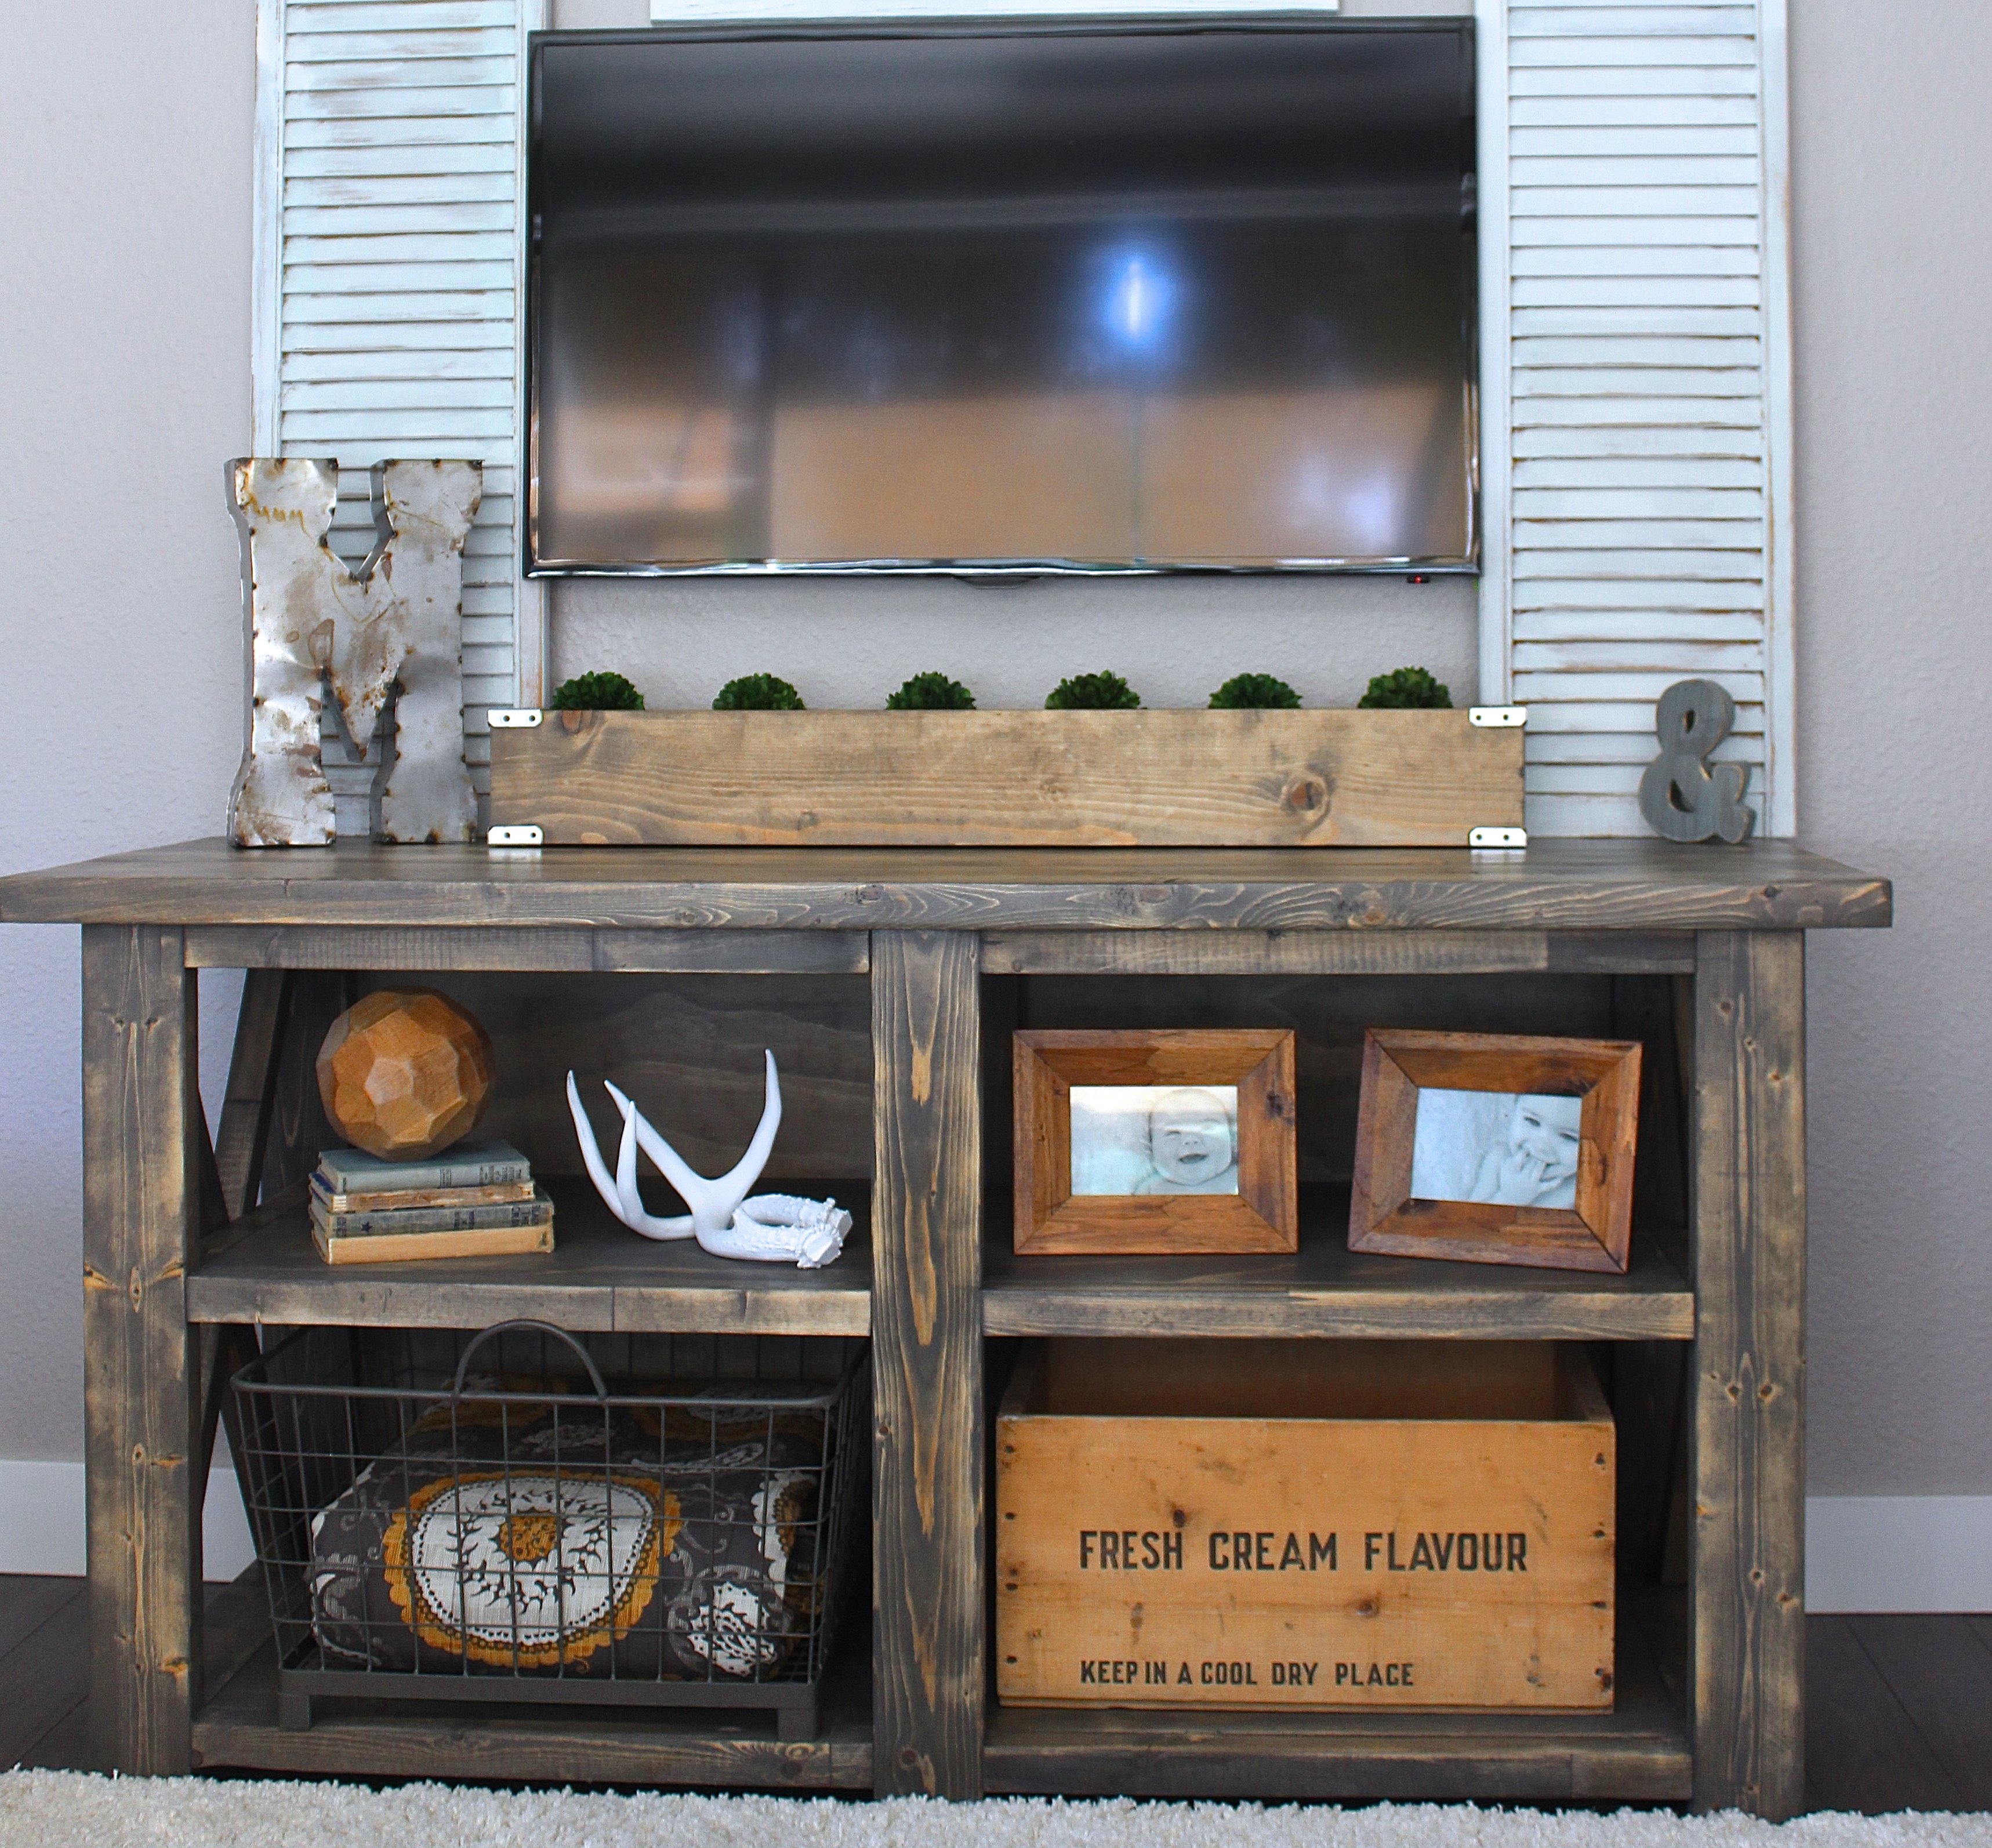
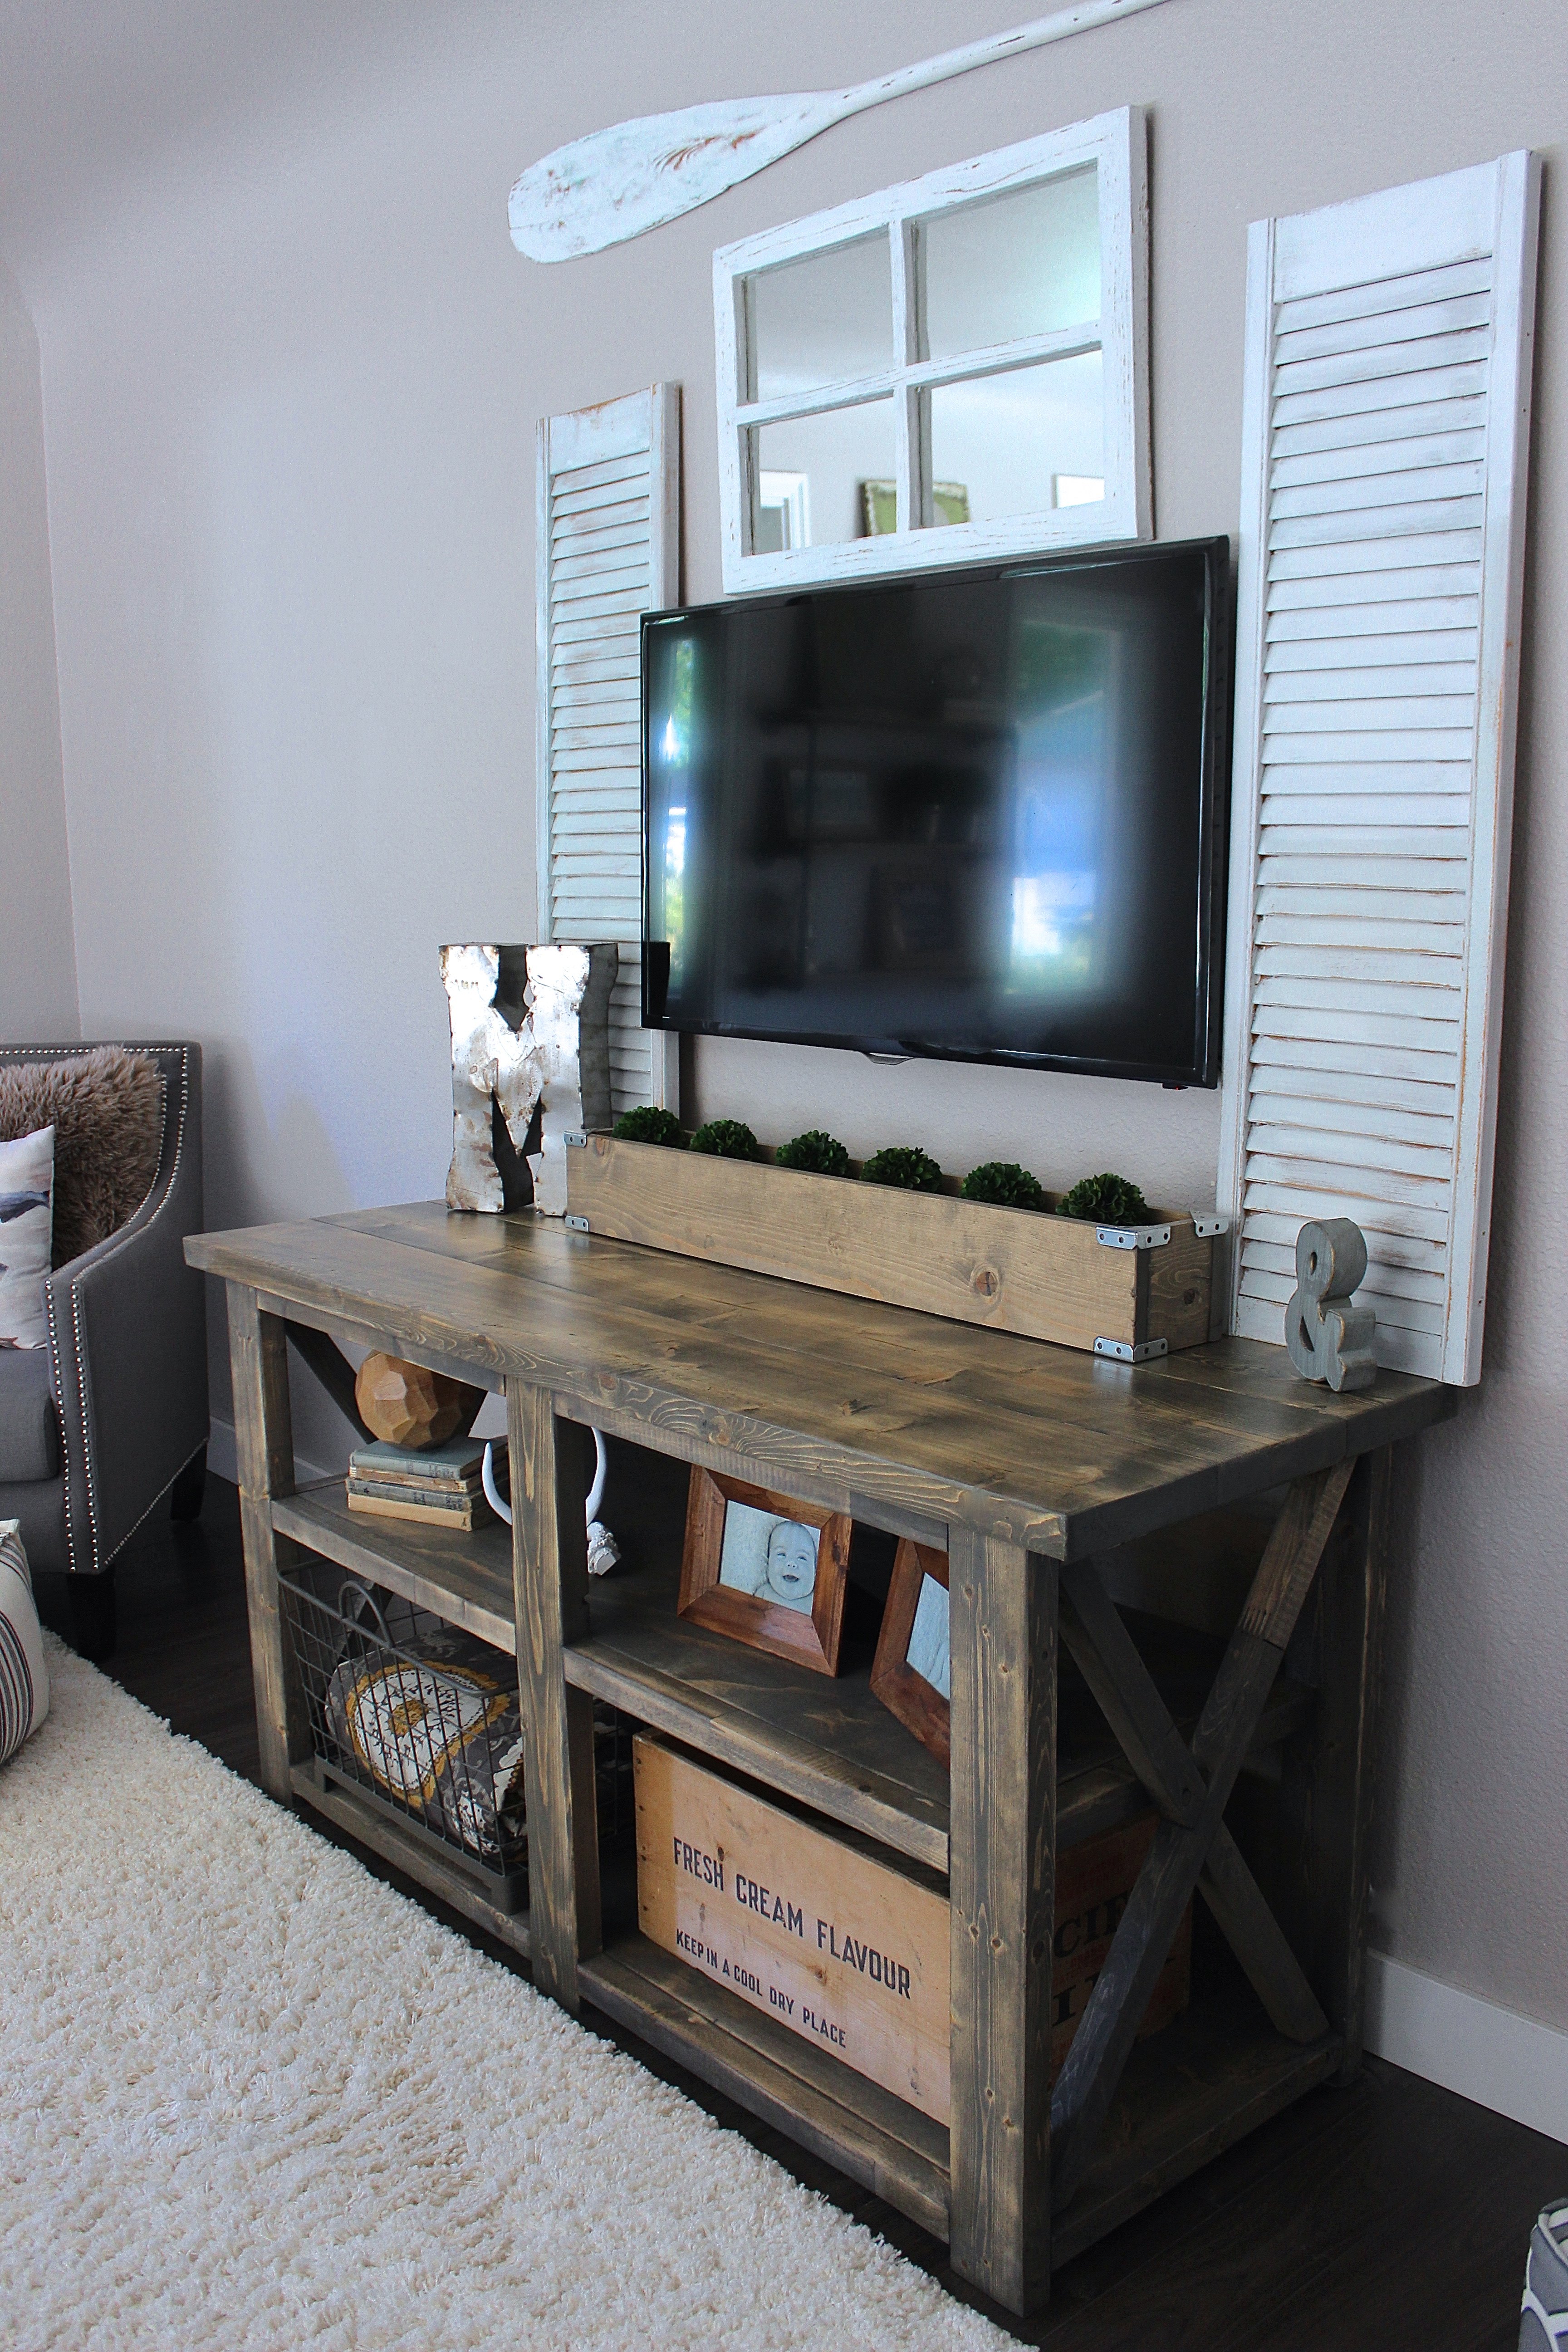
Built this media center for the den. I had to resize all the pieces smaller to fit the console between two doorways.
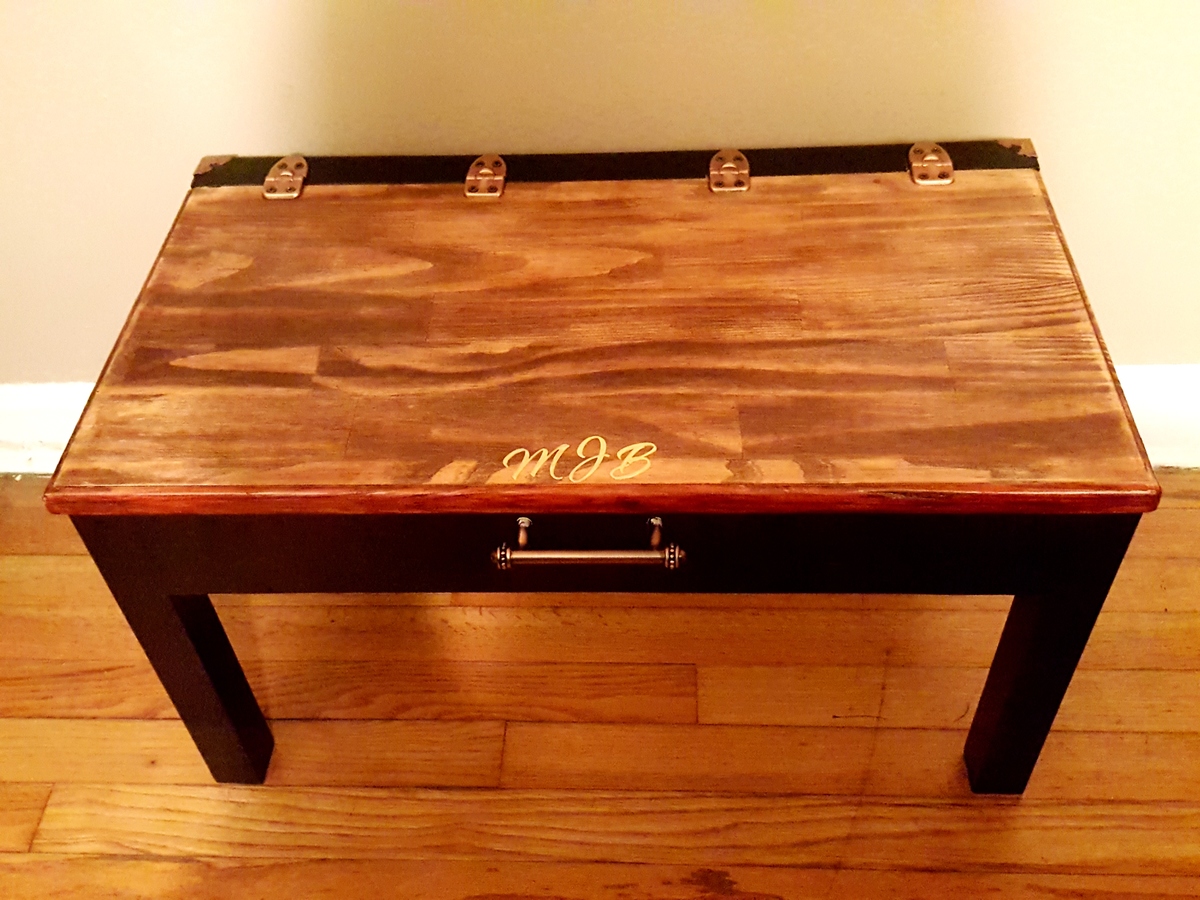
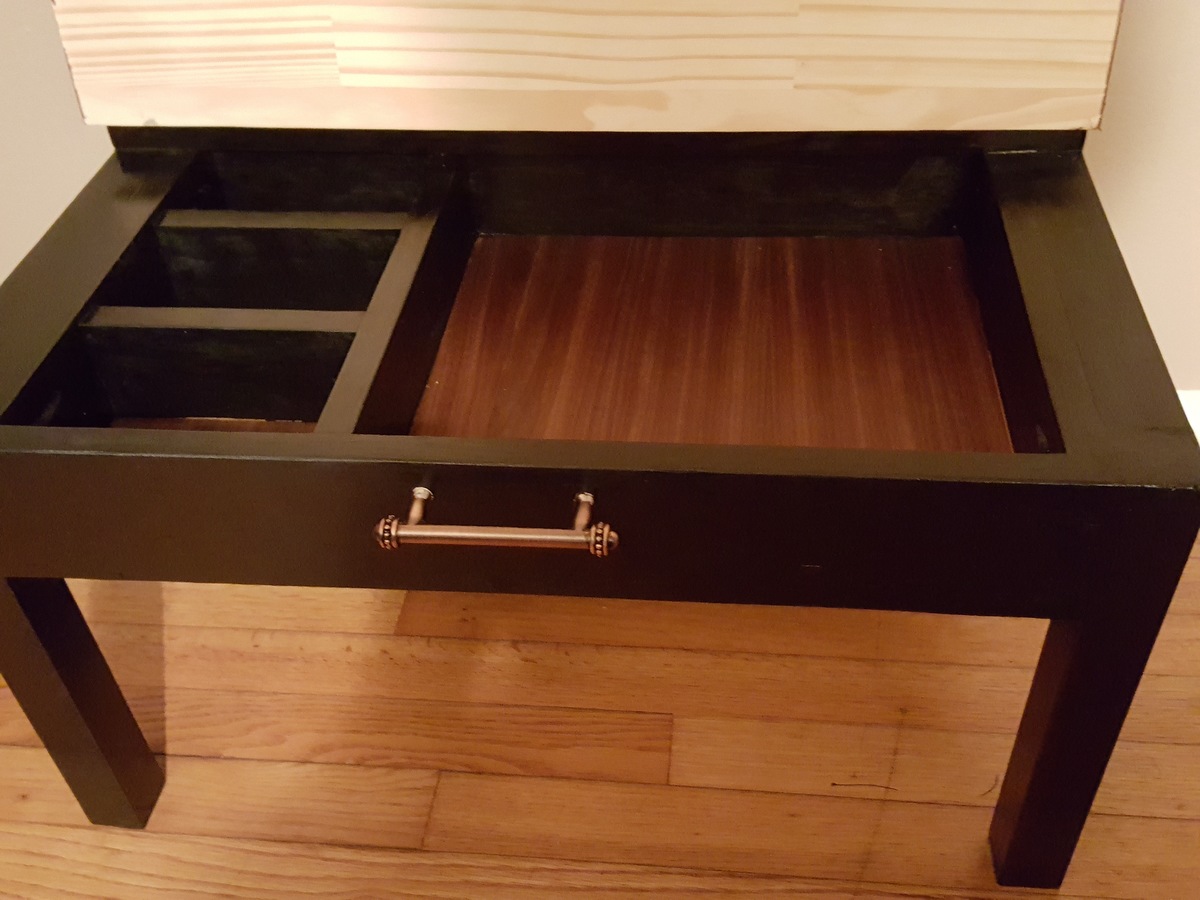
This lap desk was easy to build, it took me less than 2 hrs. The painting and finishing...um, a bit longer. I really hate painting, and filling nail holes is not my favorite thing to do, either. But overall I am glad I built this little desk, as it will keep all of my beads and jewelry-making stuff handy for when I am sitting in front of the tv at night. The side storage compartments were omitted to keep it on the lighter side, and the front handle serves no purpose whatsoever, it is purely decorative. I added my initials on the top, they are just fancy gold stickers I found at the craft store.

First Crack at any wood work since high school. All timber used was reclaimed hard wood, hours of
planing,sanding and clamping (its heavy). A few mistakes but that's learning.
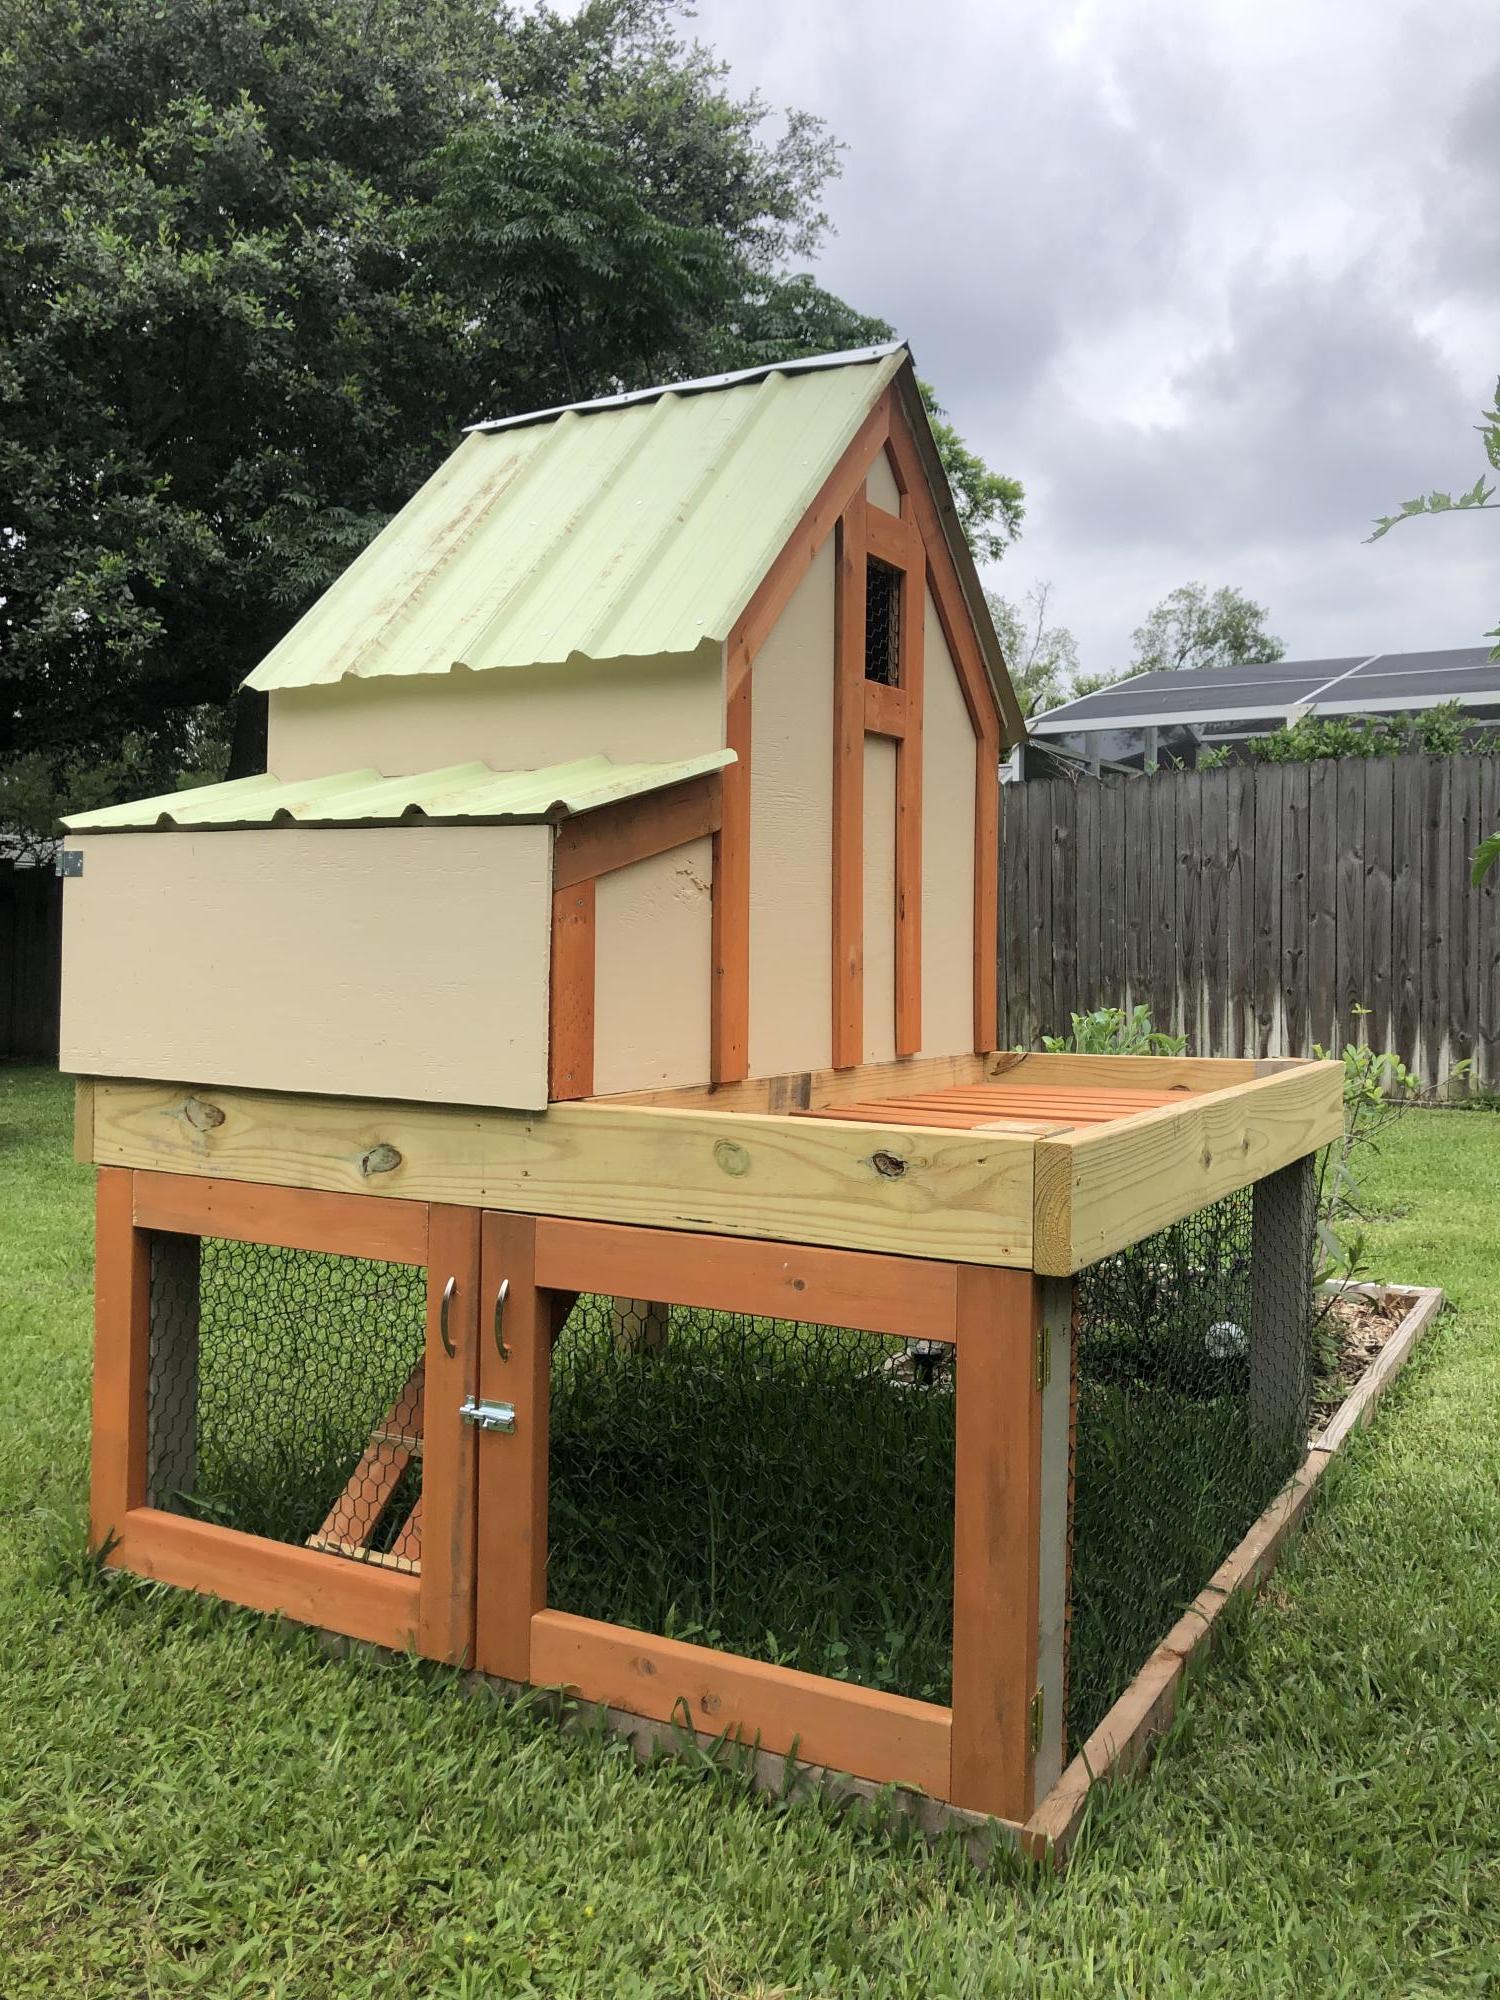
I've wanted chickens for a long time and loved this chicken coop plan. I used lots of salvaged materials so made minor changes in dimensions to use what I had and I absolutely love this! Probably took me longer to build than it should have but the Houston weather was not in my favor....
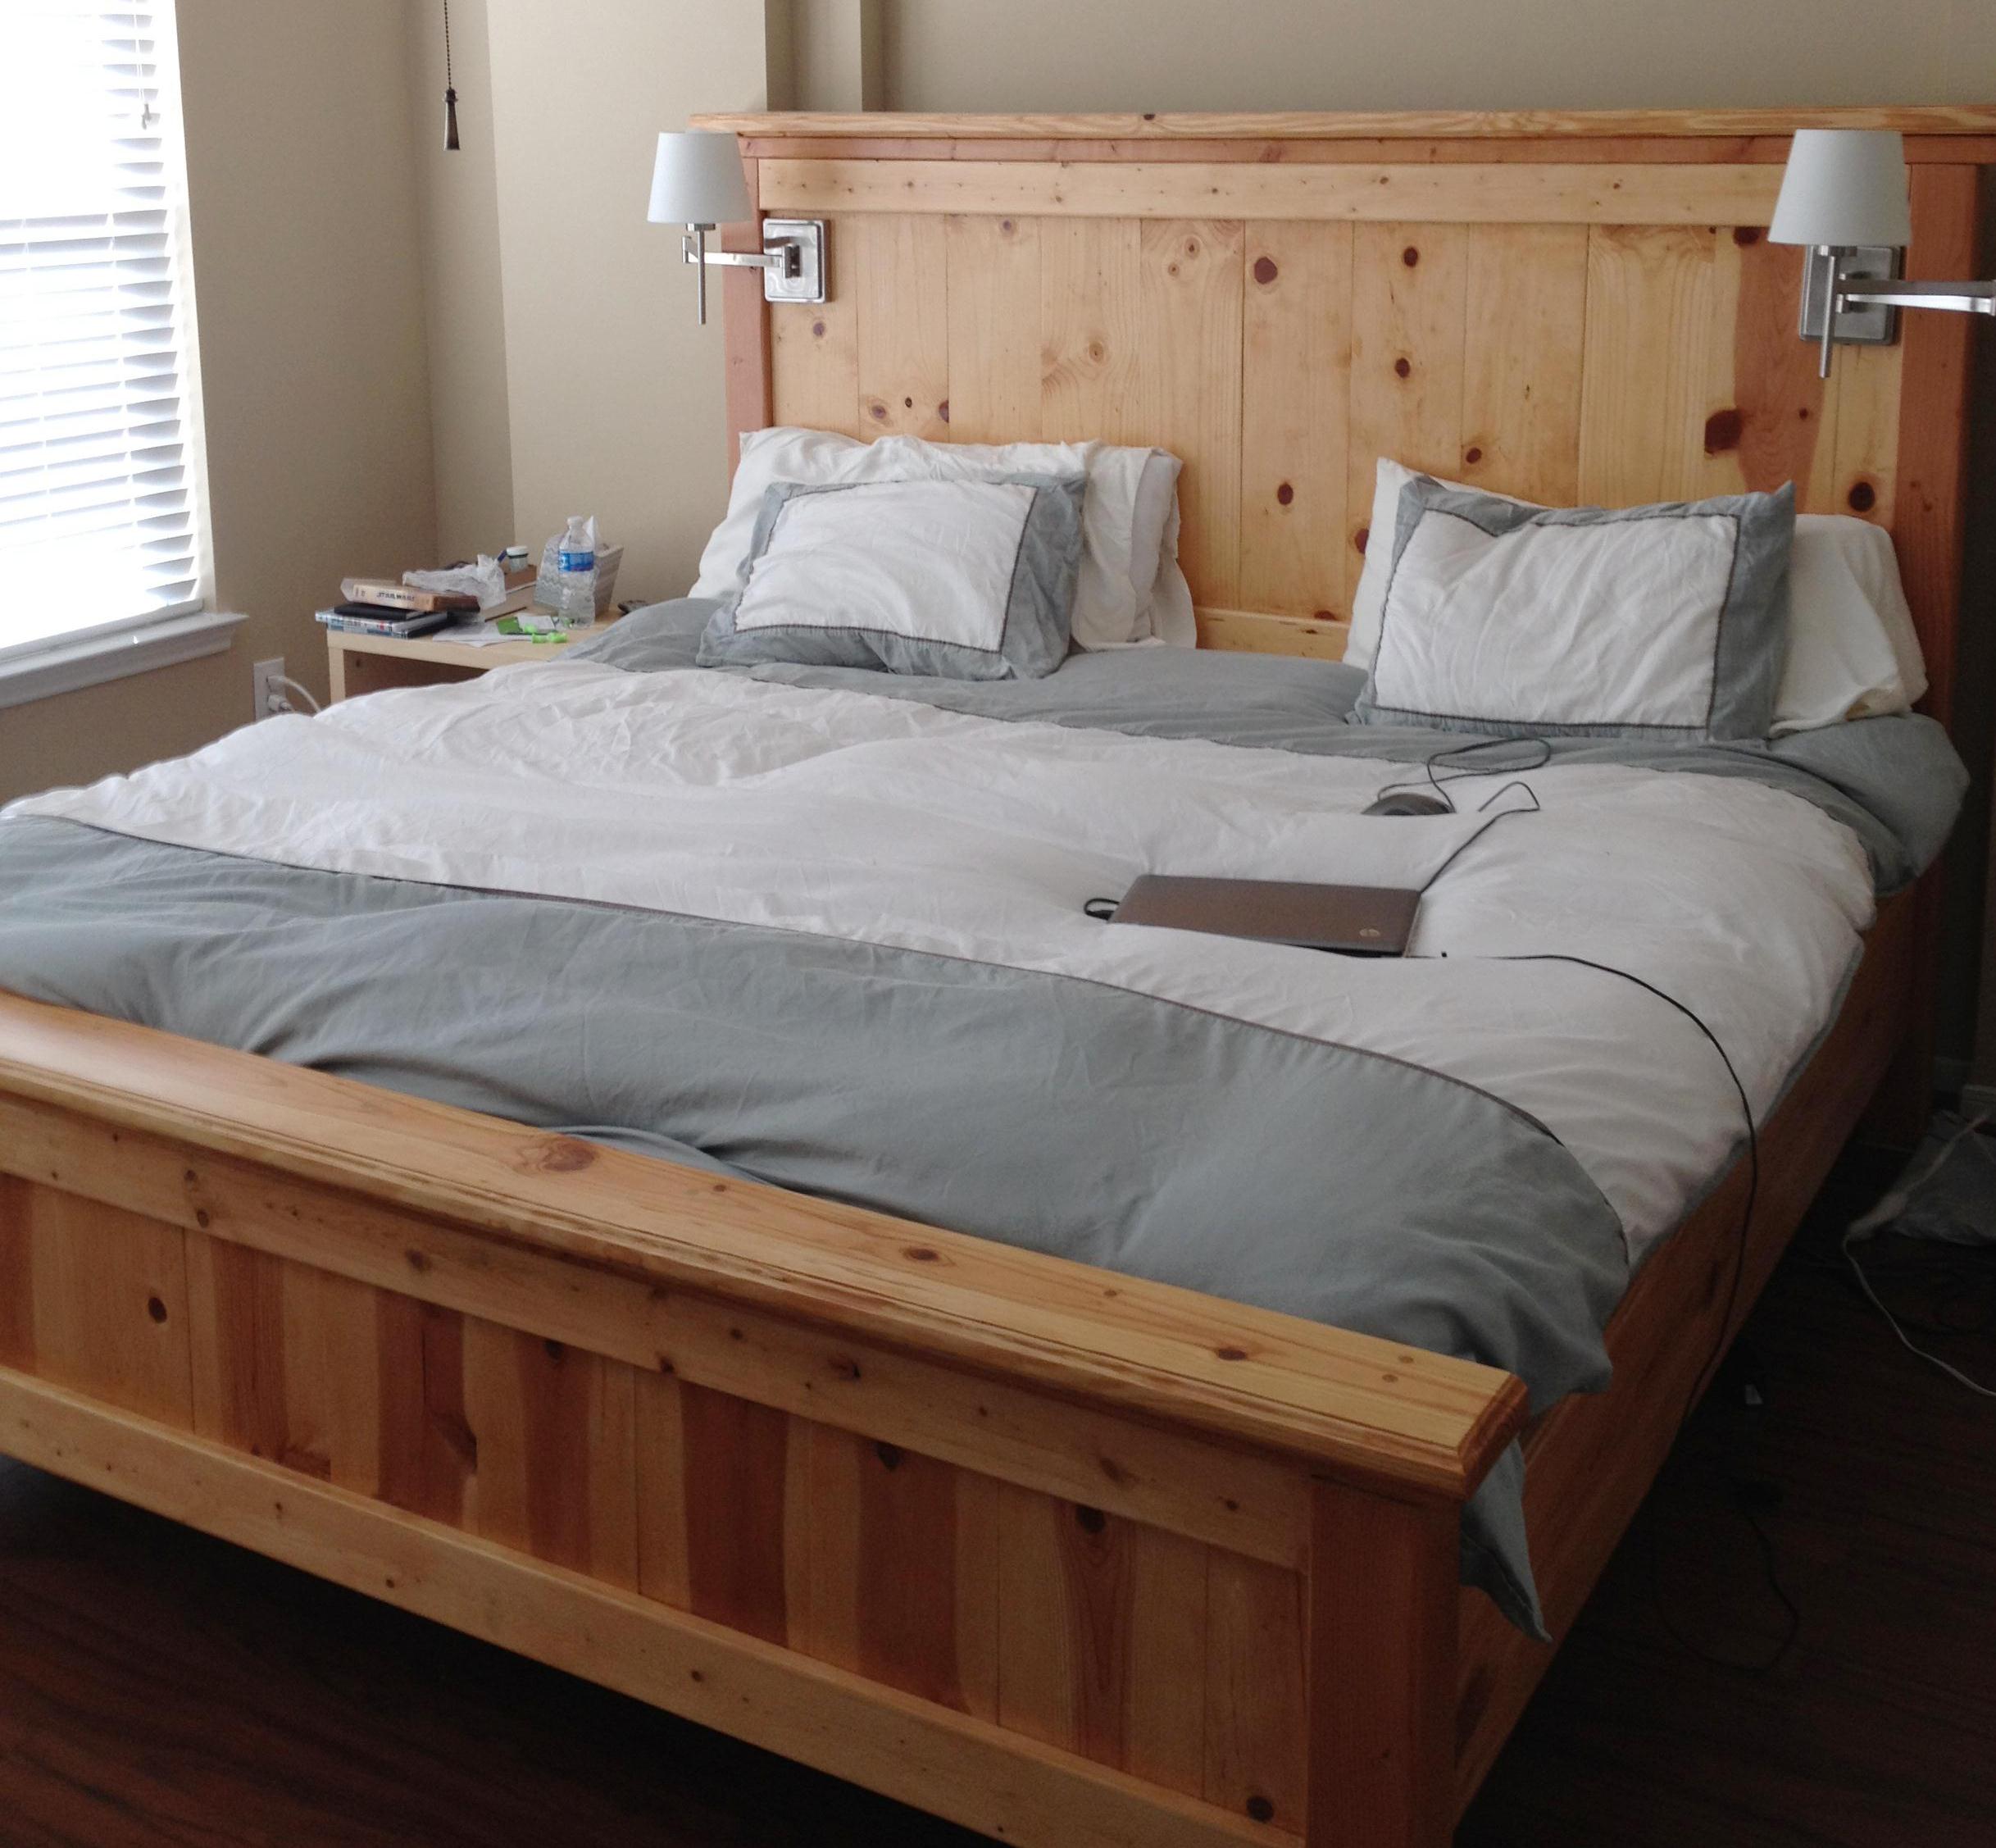
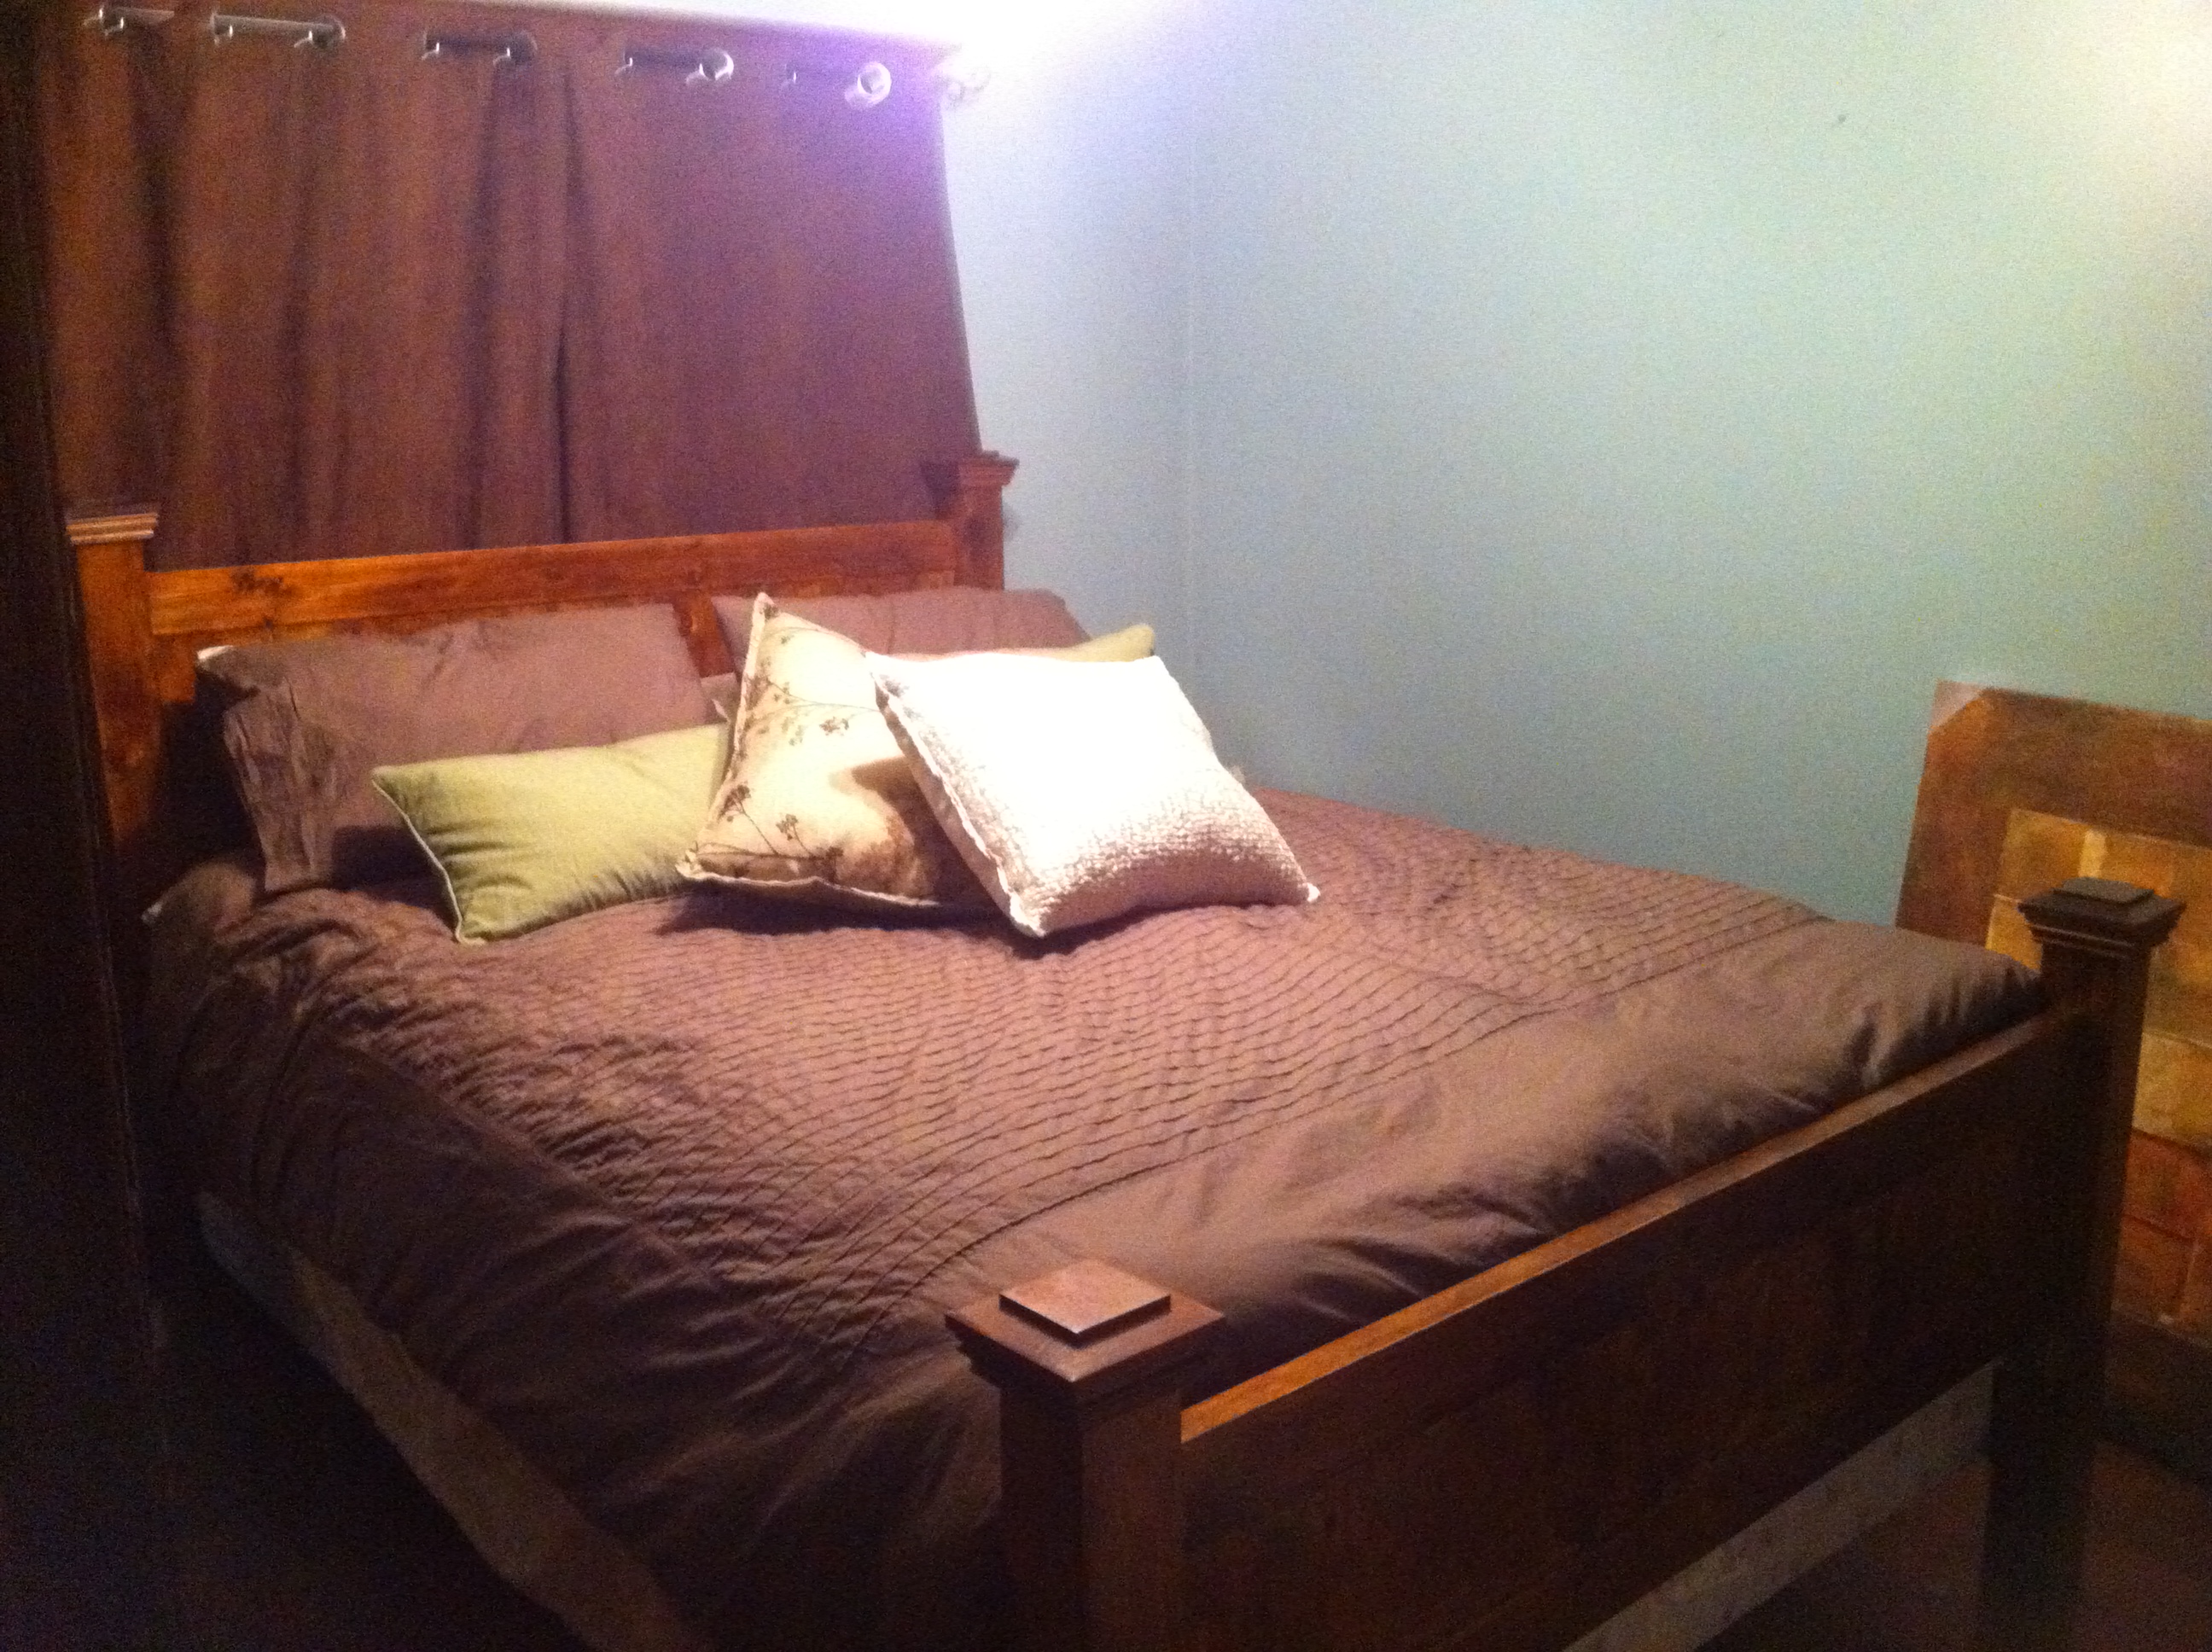
This was the plan that started my addiction! We had just gotten new mattresses, and we needed a new bed frame. All of the furniture stores have dark stains, and we wanted something natural and bright. I was searching one night found your site, and that was it. A few changes, increased the height of the headboard and footboard, wanted a slight overhang on the top of each as well. Also added an additional 2x4 between the legs of the headboard for support.
Wed, 01/11/2012 - 17:15
That looks great! The natural finish looks really great with your bedding. I love the higher headboard - we're planning to do the same with the farmhouse bed I'm planning so that my husband will be able to sit up in bed without hitting the back.
Did you end up using the boxspring, or is the mattress just in slats? I couldn't tell from your picture.
Wed, 01/11/2012 - 18:23
Hi, thanks for the positive response :) The mattress and box spring both are on here. In fact, I kept the bed itself on the original metal frame below, and added the side rails to hide it. Purchased the hardware for the side rails from Rockler
Fri, 01/13/2012 - 08:42
All I can say is wow. Definitely showing this to my wife today. We had plans to do something like this but yours is up up and away! Excellent job!
Fri, 01/13/2012 - 15:48
I'm glad you like the lights. I go back and forth on them. I hated that I had to drill holes into the wood to run the cord, as it does not give us the option to remove later on. Also, if you go with the lights, you might want to put some double sided tape on the back. Thanks!
Tue, 04/03/2012 - 09:41
My husband just forwarded me a link of your bed.
It is SO SO beautiful!!! Love the reading light. Where did you get that by the way?
The bed is so pretty. Love the natural wood look and the knots.
We too have mostly dark wood stain in the house and love this light color look. Did you stain it or coat it with something?
Sat, 04/28/2012 - 15:26
Hi Moldah,
Very impressive and great addition with the lights. Can you tell me how tall your final headboard and footboard are? Thanks.
Sat, 06/16/2012 - 04:46
LOVE IT! I love doing things like this and I am inspired by seeing your pictures!! I am especially impressed with the Star Wars case noted on your endtable LOL Right there I know you have great taste in films, too!!! I am going to do this project! Great job!
Wed, 09/04/2013 - 17:10
Wow, this is so beautiful! Great Job! We are very amateur builders and I had a couple questions. Do you have a blog with more details? How did you achieve the routered edges? And also, do you mind sharing the cost of the project? Thanks!
Sun, 11/03/2013 - 08:44
By how many inches did you increase the height of the headboard and footboard? I am thinking about doing the same when I build this bed and was hoping for some guidance.
Sun, 12/18/2016 - 06:00
We don't have boxsprings. How would you modify this plan for that?
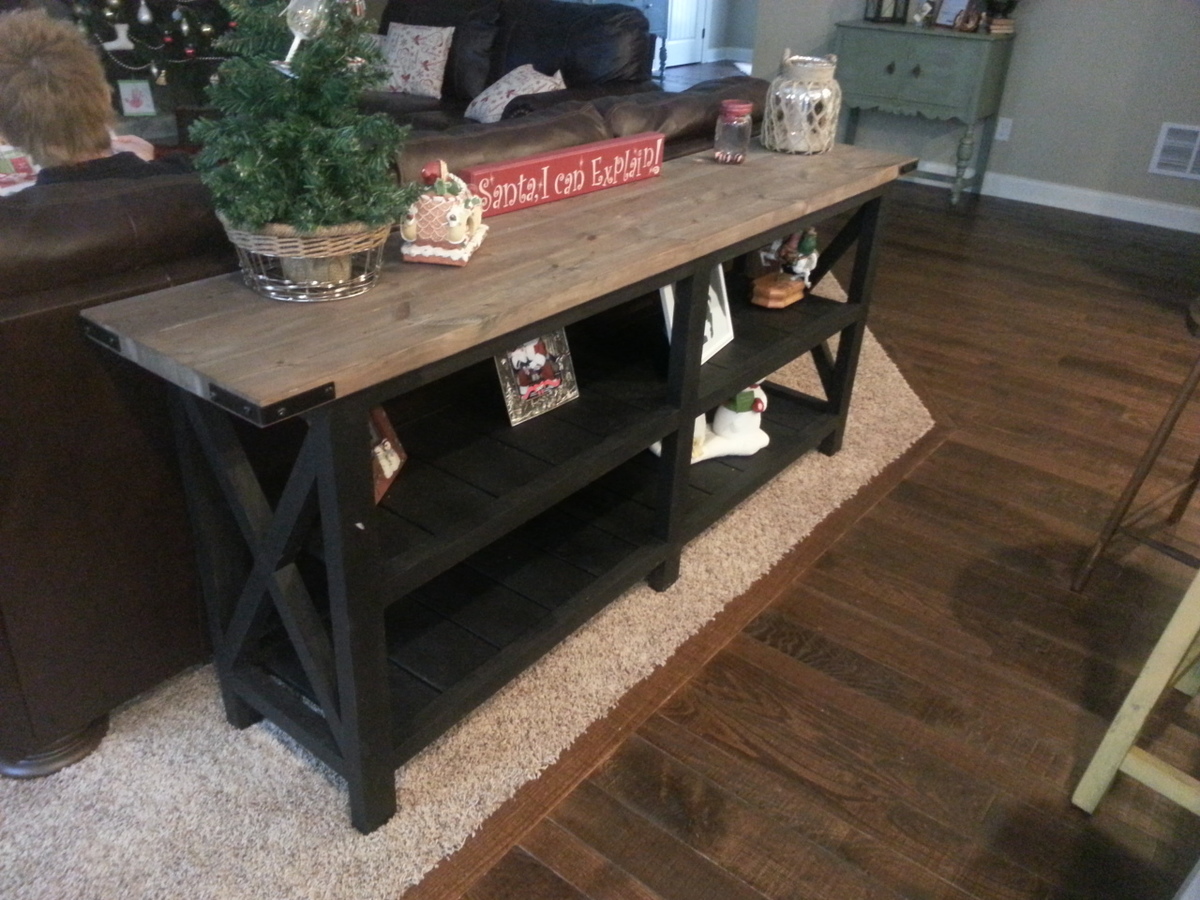
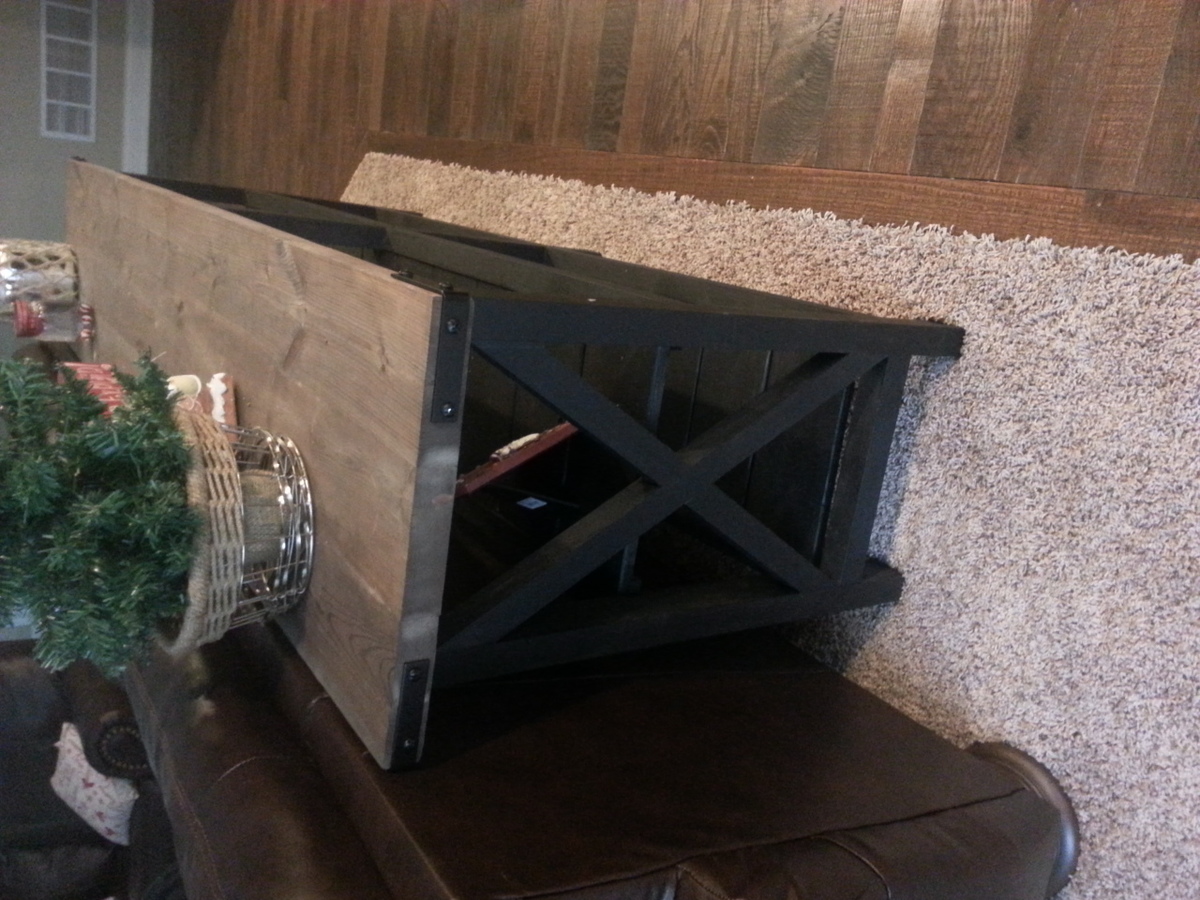
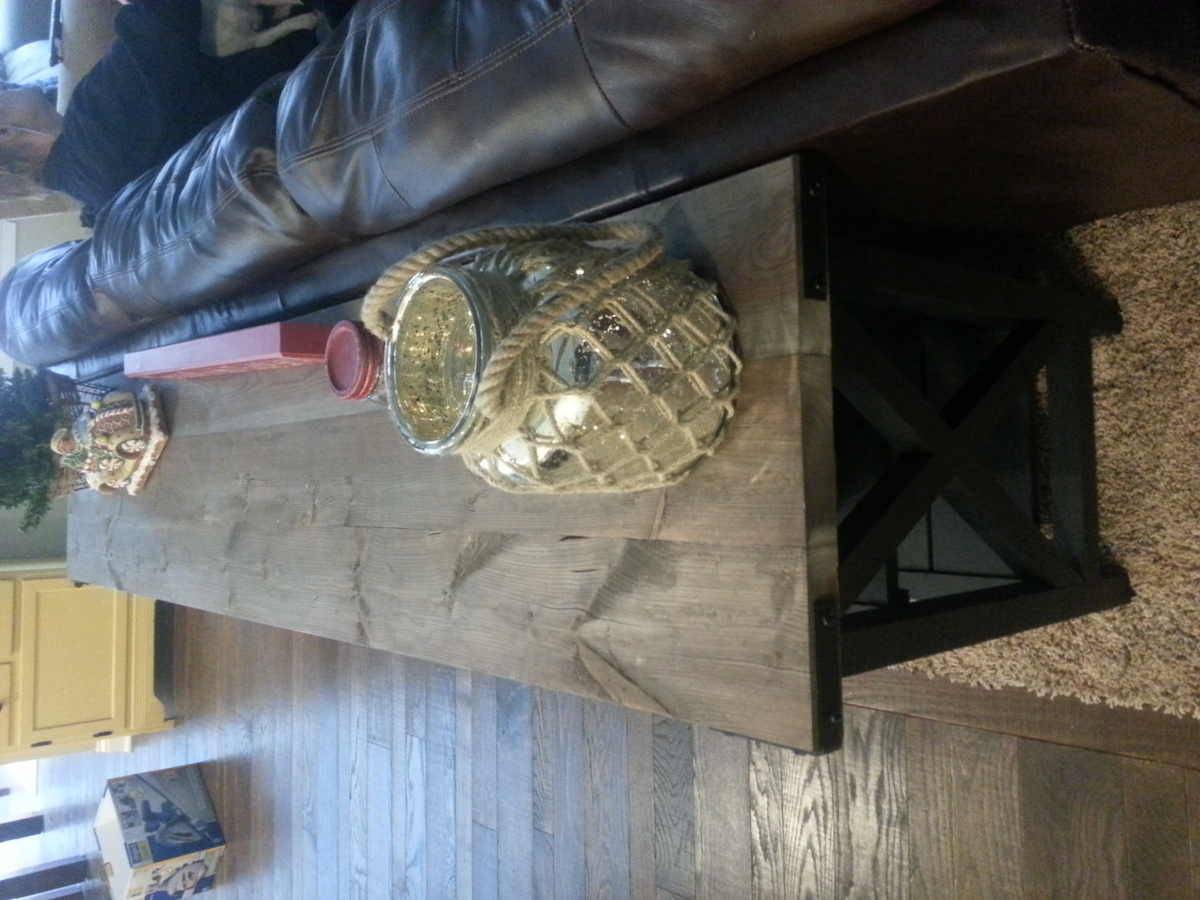
This is a sofa table made from 2x6 framing lumber. I did the bottom shelves a bit different than the plan.

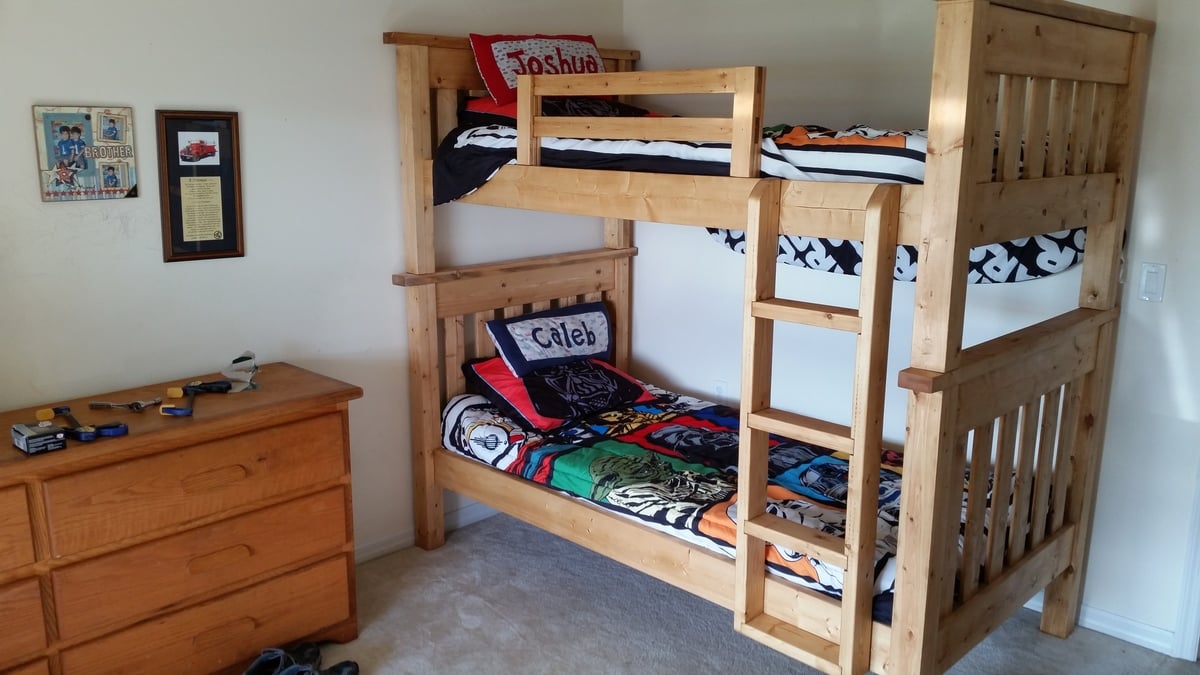
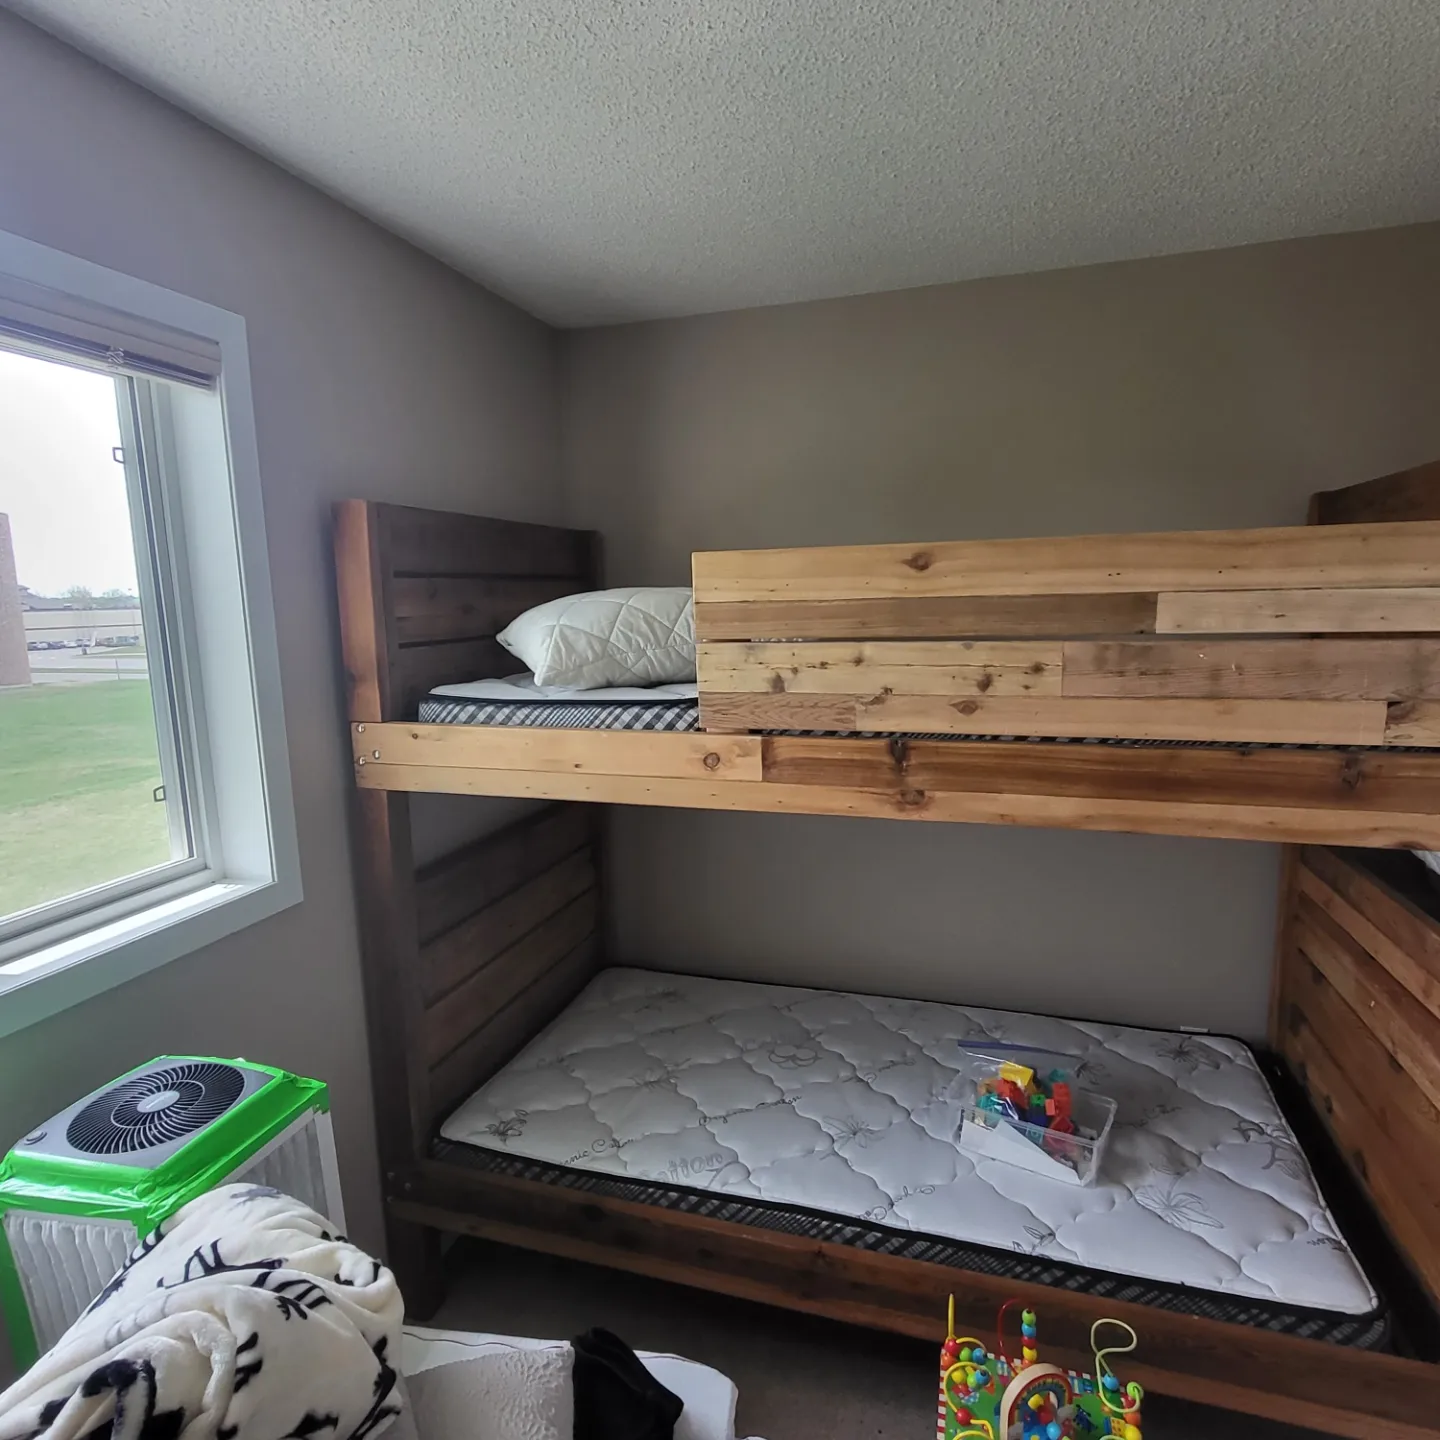
I built the Simple Bed into bunk beds. The plans for this project are pretty straight forward. The only change I made in the plans, was use 2" x 4" angle plates to mount the side rails to the head and foot boards. This made it easy to assemble and disassemble if the beds needed to be separated or moved. I also had to use two 2"x4"'s mated together to make the bed posts since 4"x4"'s are only available pressure treated. The ladder is constructed of 2"x4" with the steps spaced 10" on center.
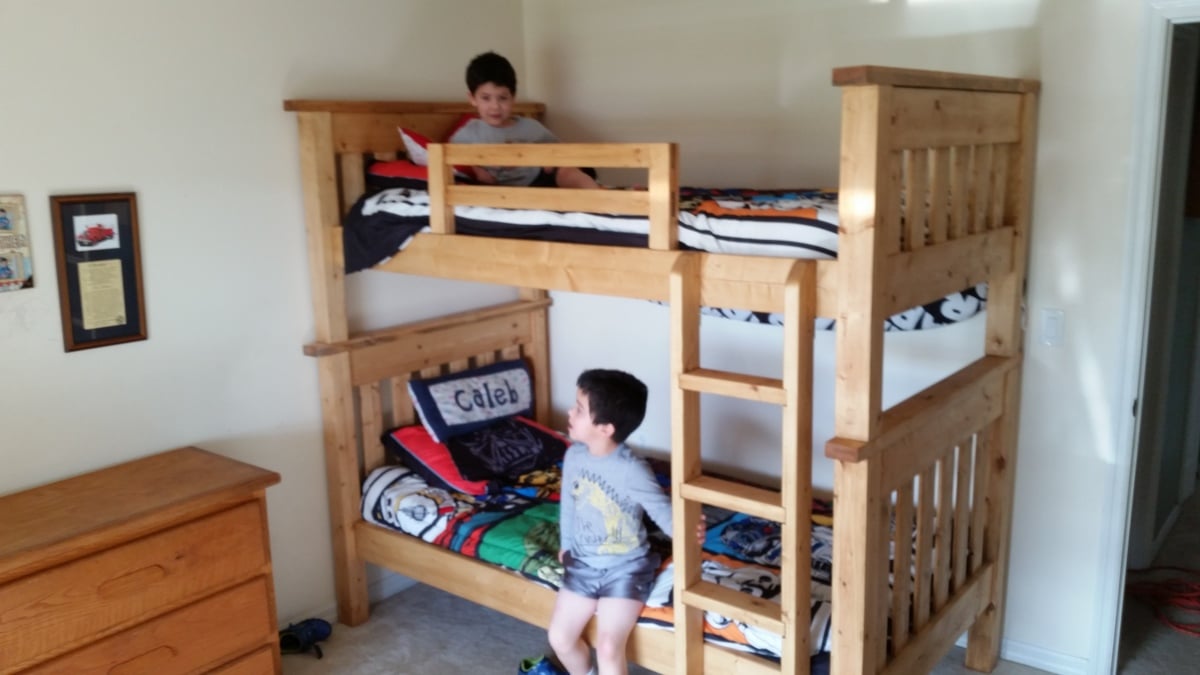
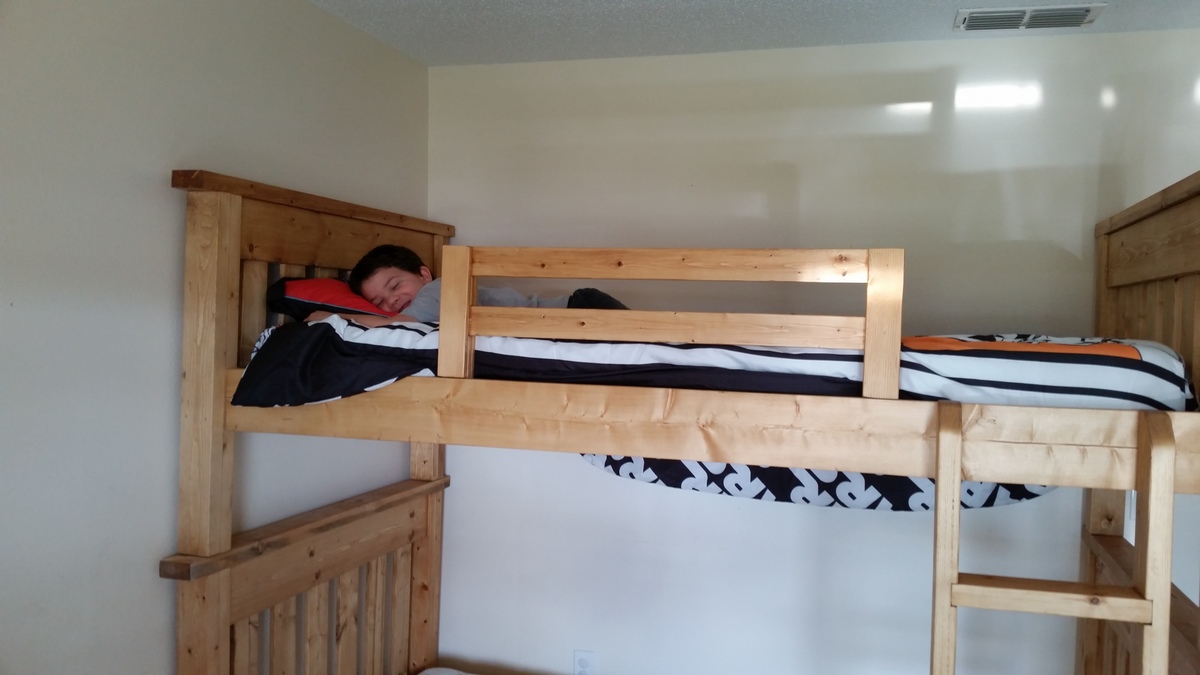

Mon, 02/15/2016 - 19:40
Can I have a url to the angle plates you used ? I am not certain I know what they are.
The beds look great.
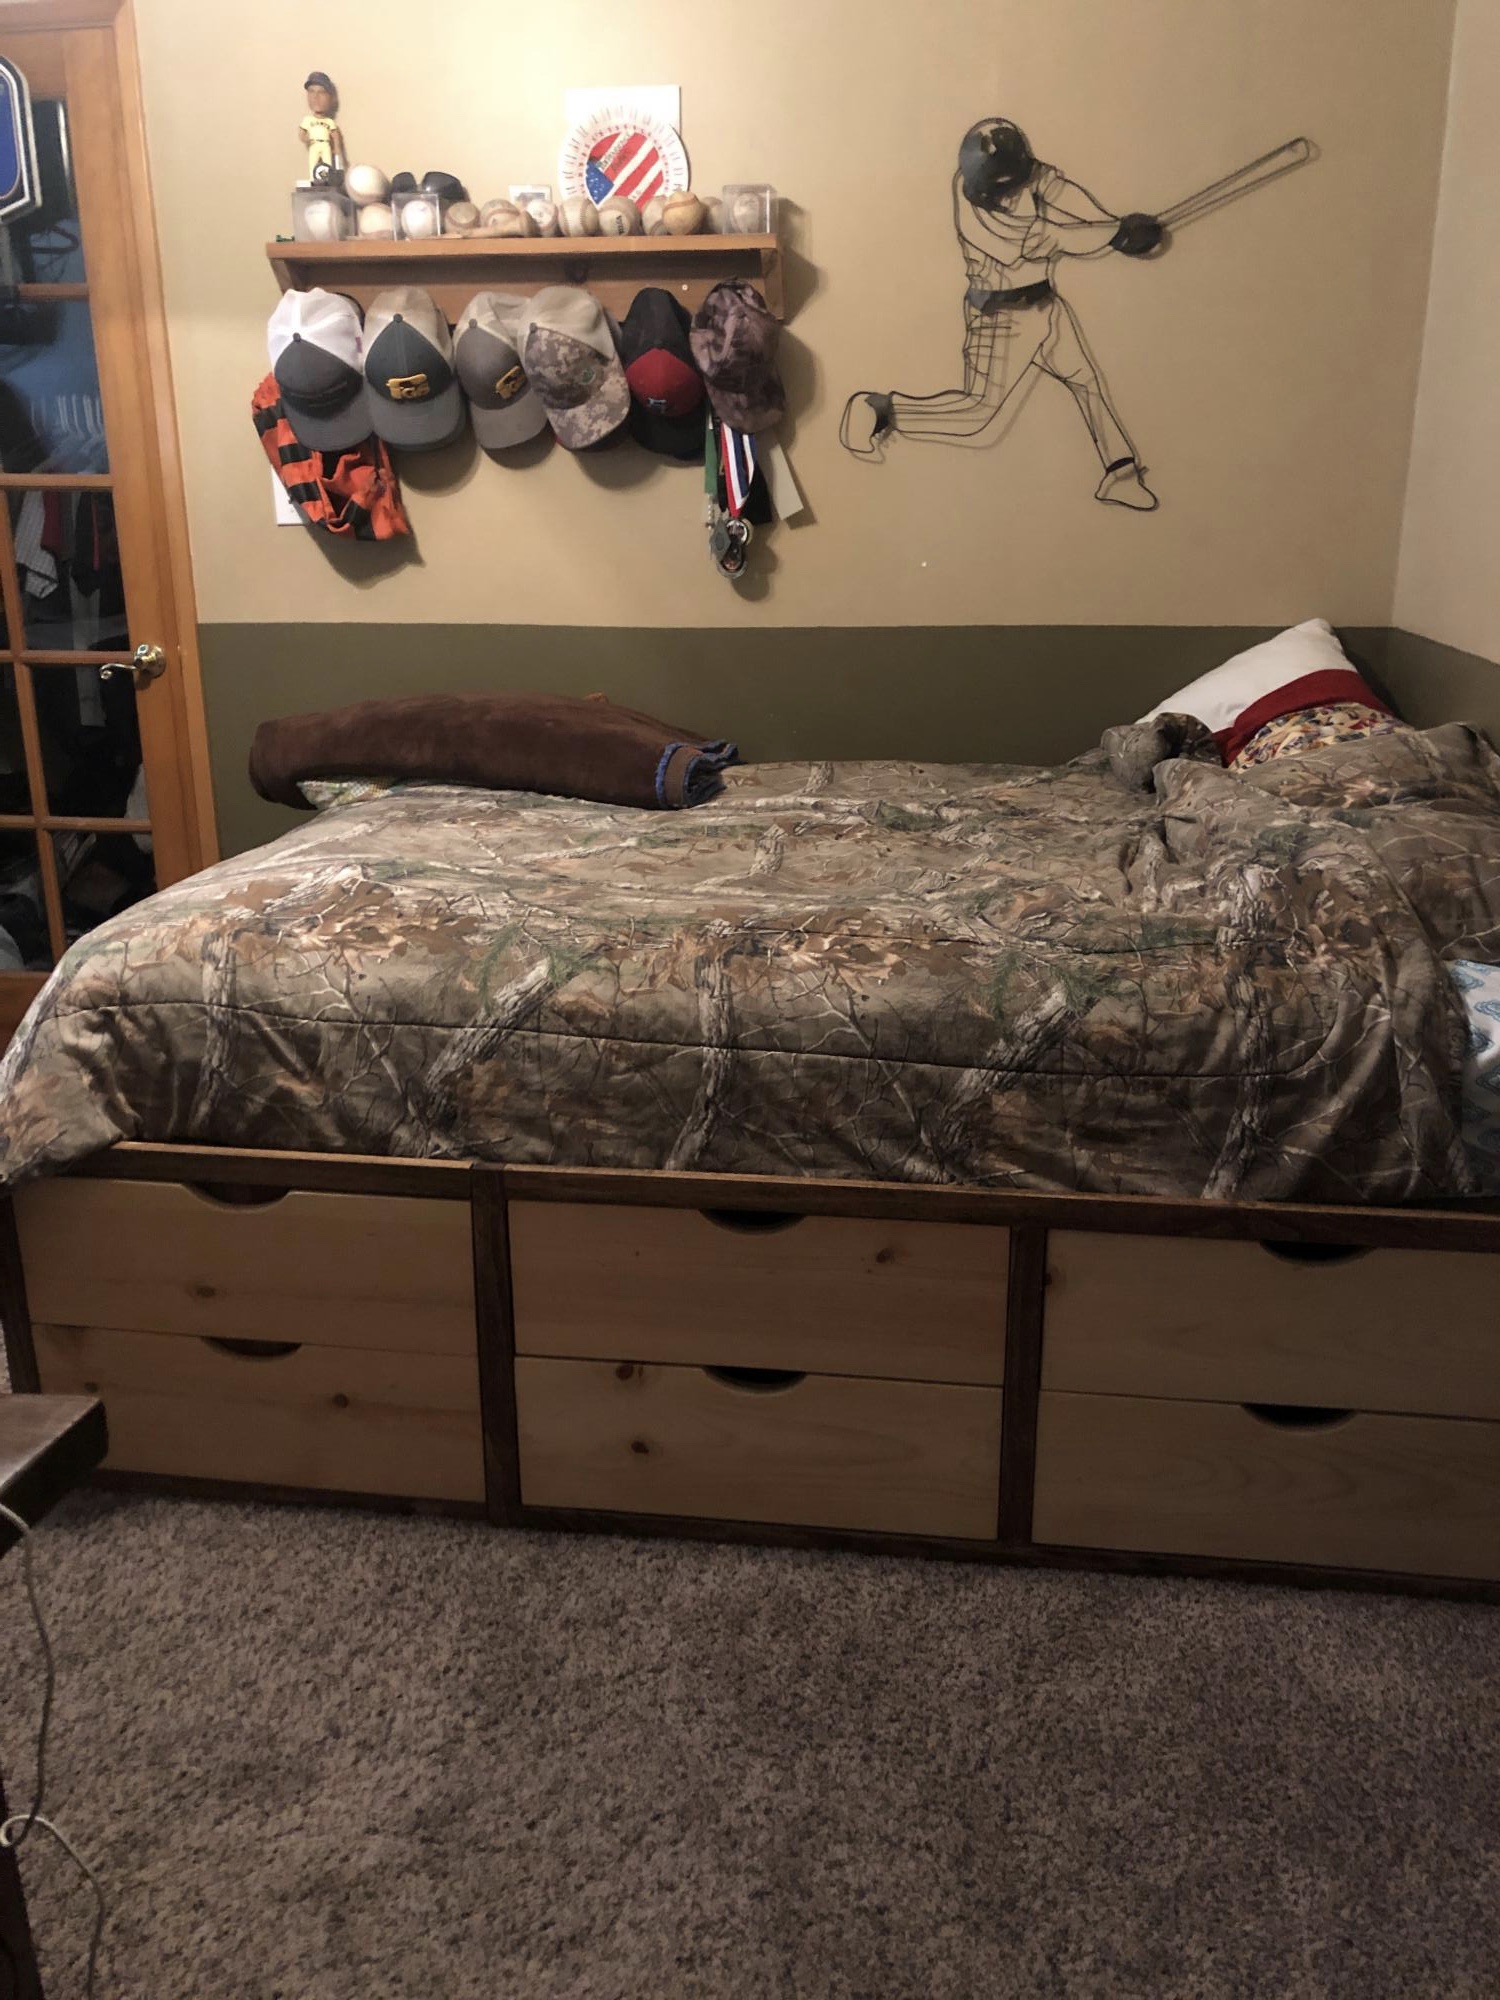
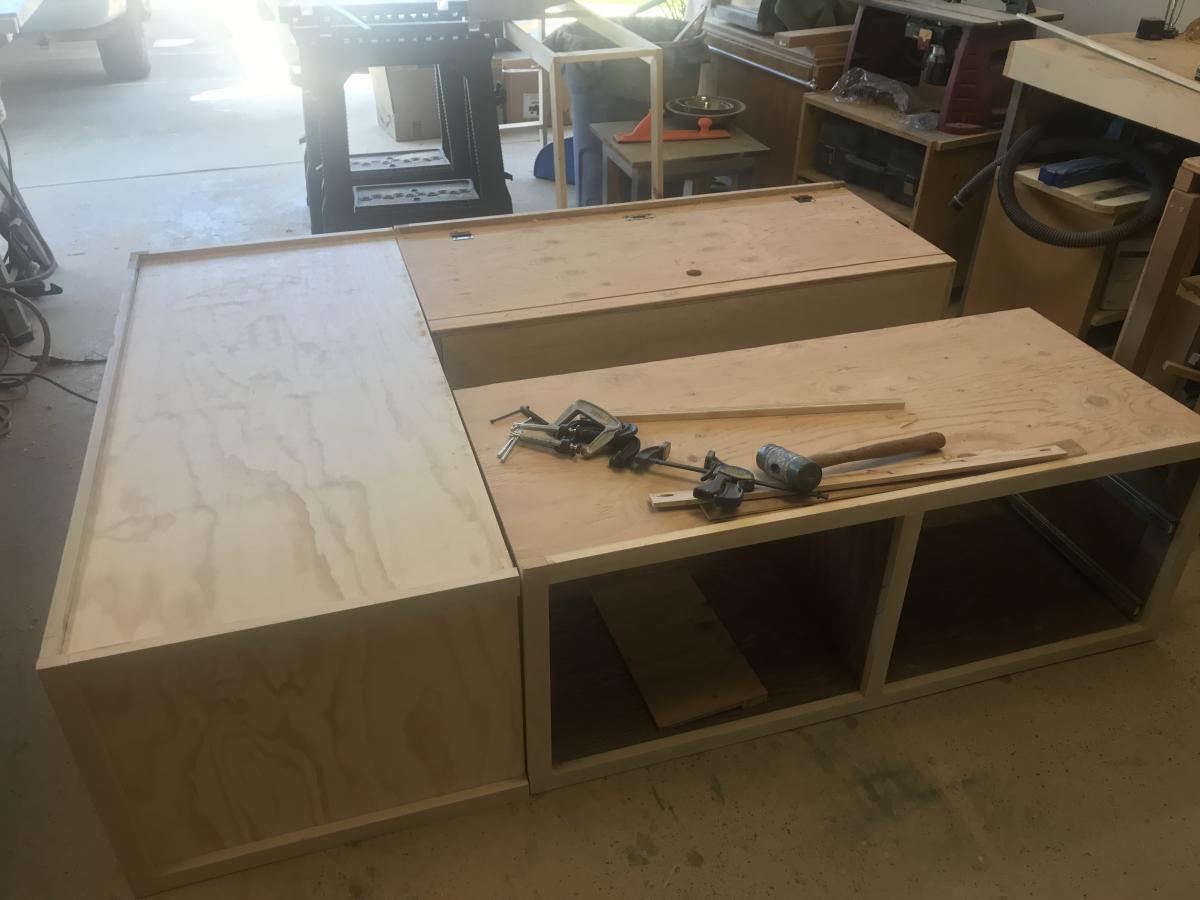
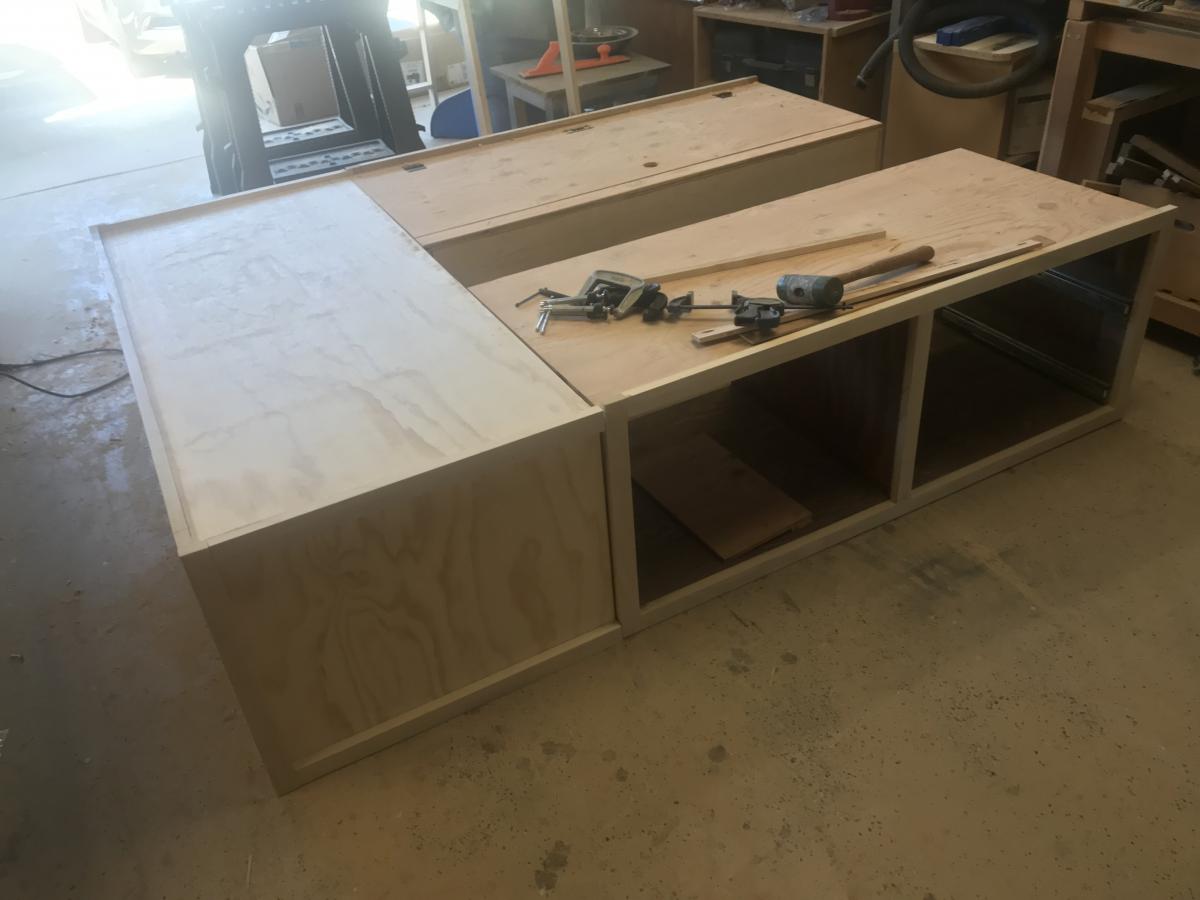
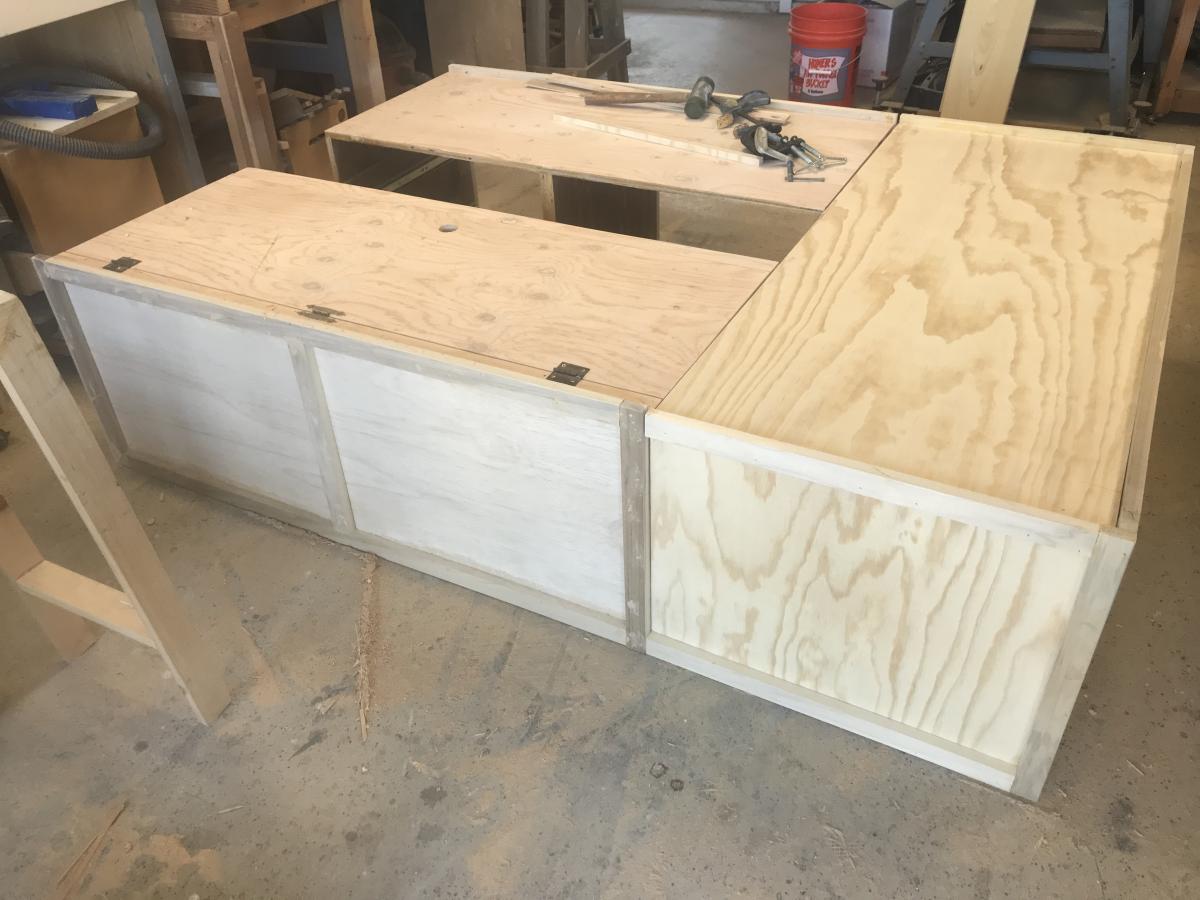
My grandson needed a bigger bed. His mom needed more storage. So, with a few tweaks, this storage bed was just what they needed. One side will always be against the wall so on that piece I added a hinged too so that seasonal items could be stored there-like gilly suits for hunting season. There’s also room between the two side pieces for more storage. They didn’t want it too tall, But still needed multiple drawers. There are four 8” drawers on the side, with two false fronts on the side of the end piece. The end piece had two large deep drawers that will be perfect for bulky items-lots of sweat shirts. So far so good-they both love it.
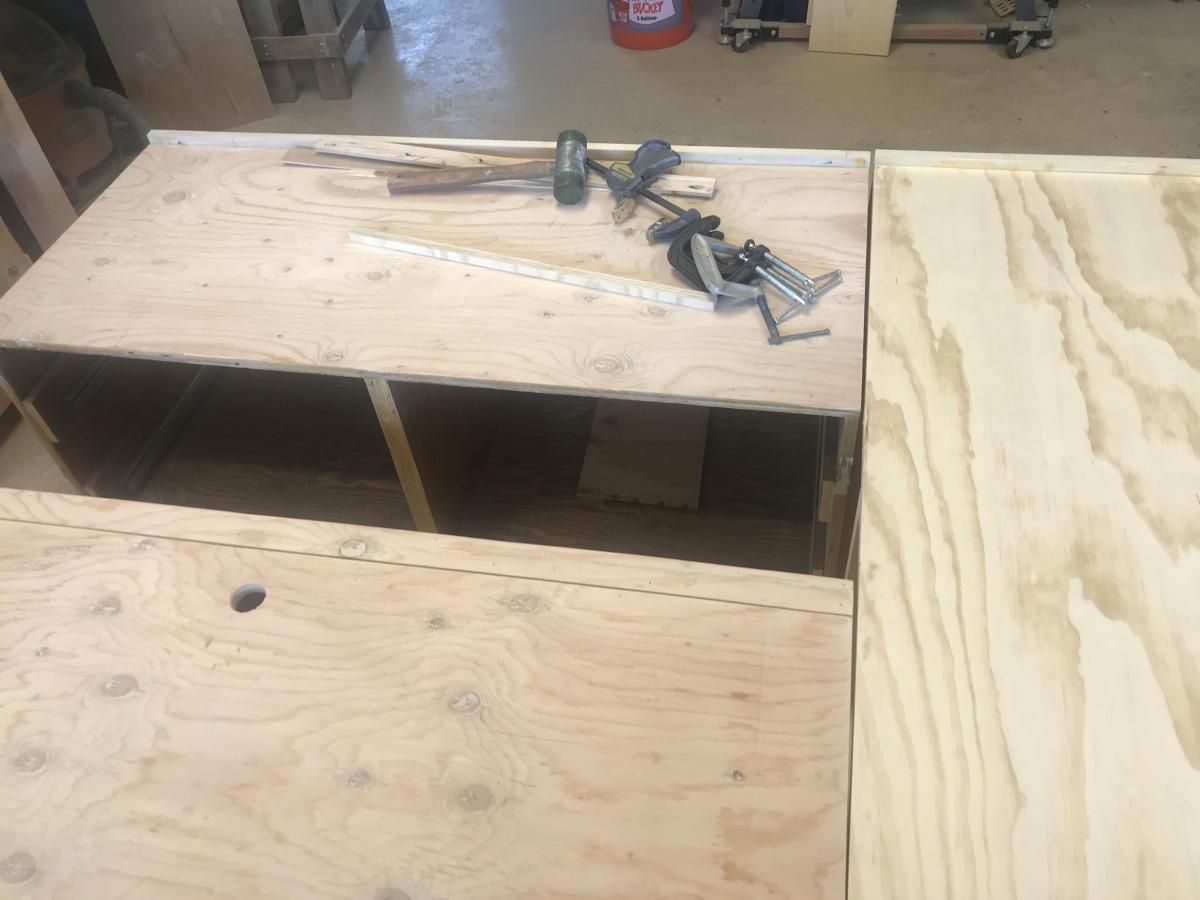
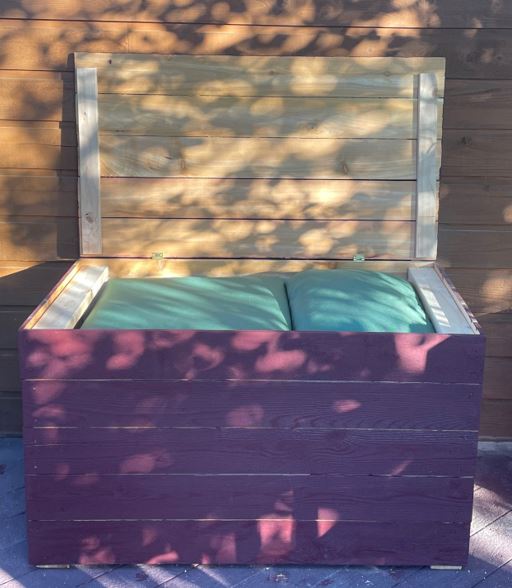
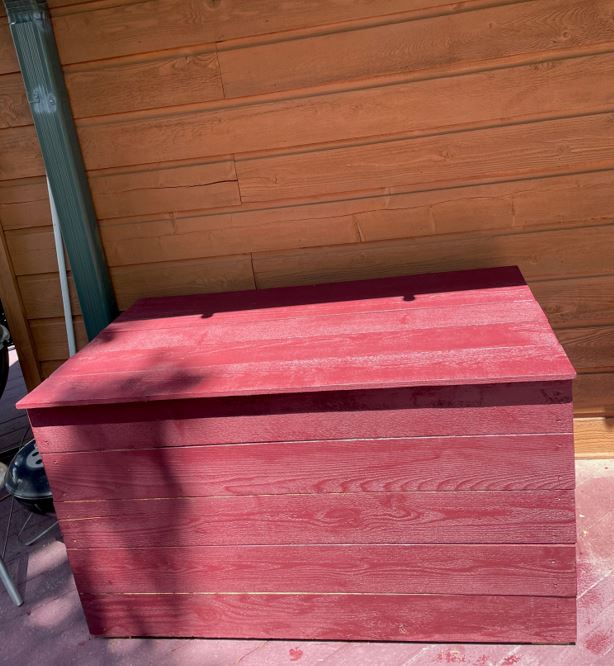
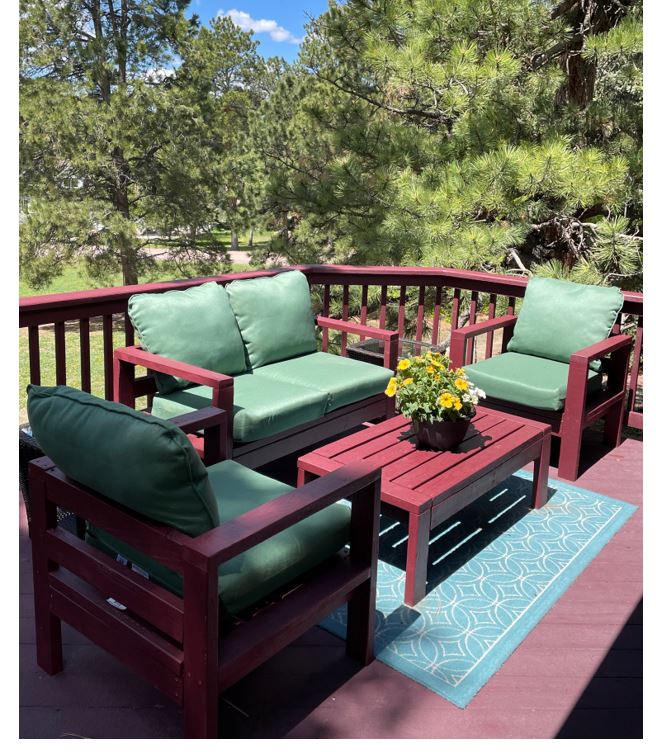
I had built two outdoor chairs with love seat (modified from the sofa plans) with 2x4s. The cushion seats were 24" x 24". Where to store them? I modified the Modern Cedar Outdoor Storage Bench plans to make the box wider, higher, longer to accommodate the cushions. With five boards comprising the top, it's a bit wider than the box so I didn't need to carve in an opening.

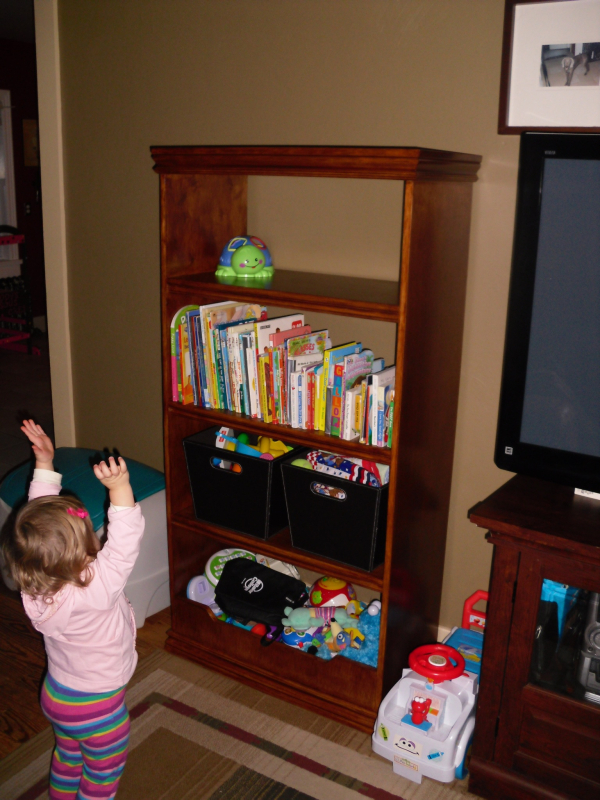
My third project from the Ana-white.com site. Our daughter's books and toys were outgrowing the toy box and small magazine rack we were using, saw this plan, no brainier. It led me the the land of nod website, to see the real deal, and I liked the version with the closed top better, so I modified the plans to fit my needs. Added some trim and oak veneer for the edges, a little stain, and waa laa... Found some boxes at lowe's, perfect fit. We'll move it into her room after I build a new media console for the living room
Thu, 01/19/2012 - 11:17
Could you tell me your exact modifications? I love your book case!!
Fri, 01/20/2012 - 22:18
Thanks! I just figured out how to use google Sketchup today... here are the plans..
http://ana-white.com/2012/01/plans/full-toy-box-bookcase-0
Thanks to Ana as well, for her google Sketchup "How-To" article, it helped out alot.
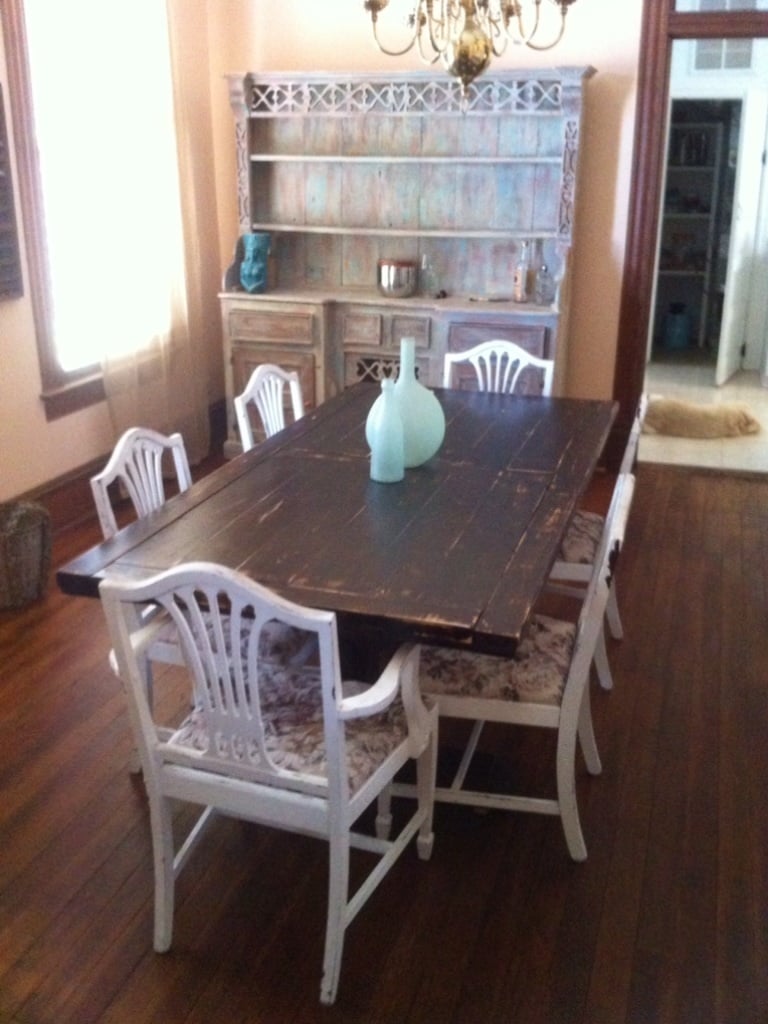
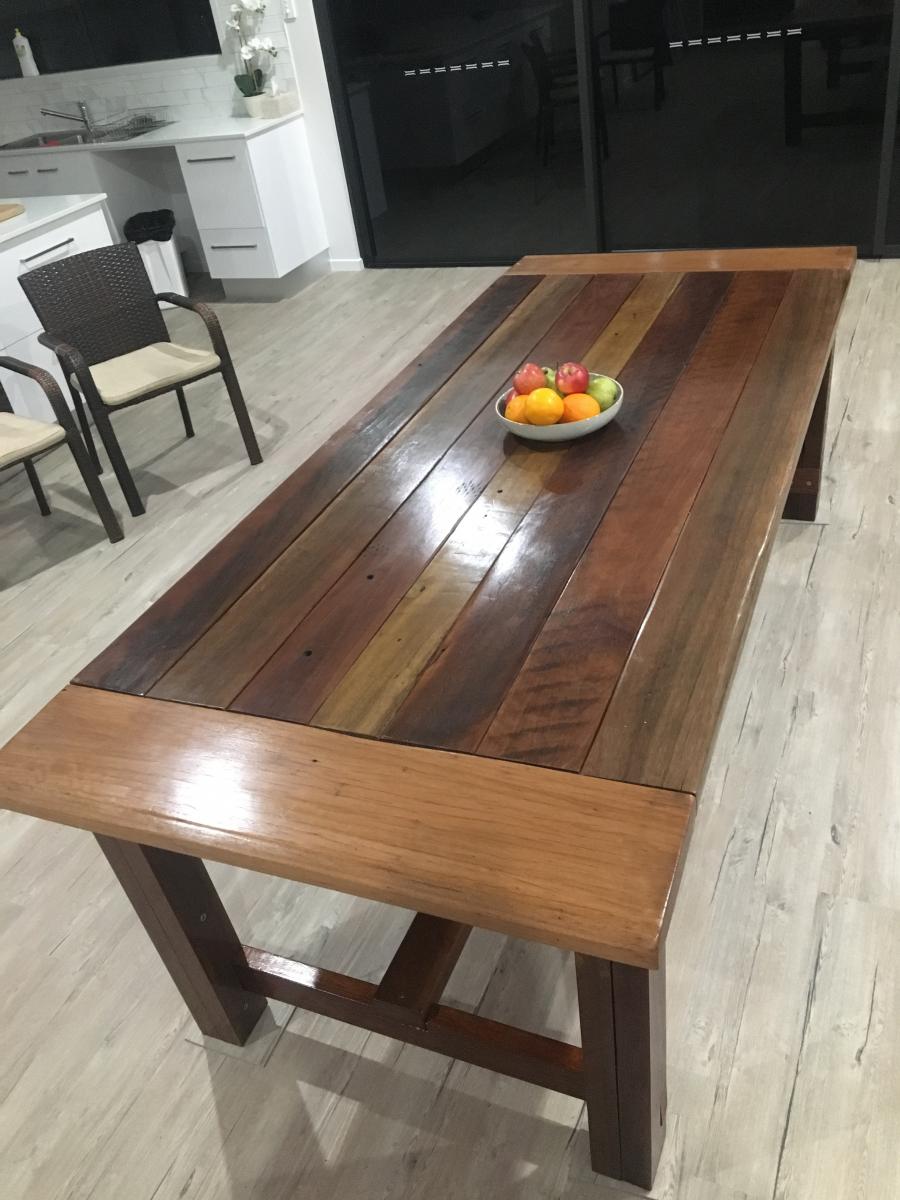
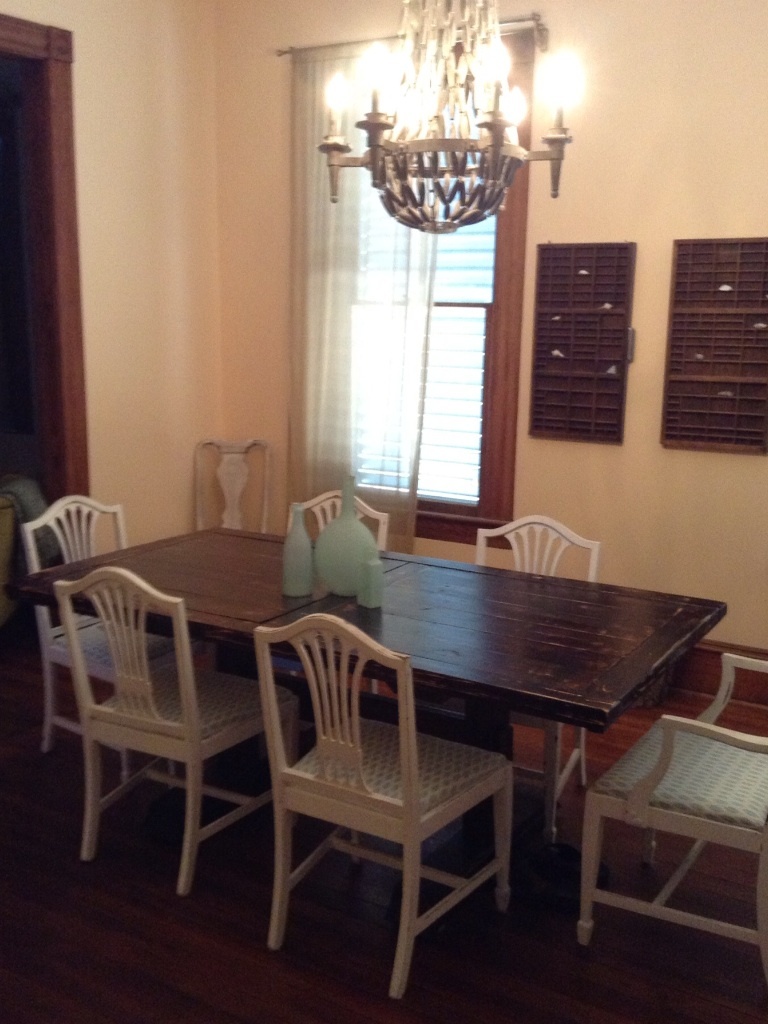
My wife wanted a farmhouse dining room table for our new house, I wanted to get into woodworking so these plans were a perfect fit. Bonus was adding a few tools to my collection! Revised plans to two pedestals and shortened about 2 feet. If I were to do over I would have stained and poly'd separately, but I tried to save steps because I was finishing inside the house and didn't have time for separate steps before leaving town. Ran into a few hiccups along the way but both my wife and I are happy with the end results.

We built this media stand for our home and we had many that followed. We put a backing on ours to hide the cords and such. It makes it feel a lot classier & takes under 5 minutes to add! We used 1/8" particle board and we used our neumatic nail gun.
All in all, this is a super easy beginner project that adds a big bang to the space!
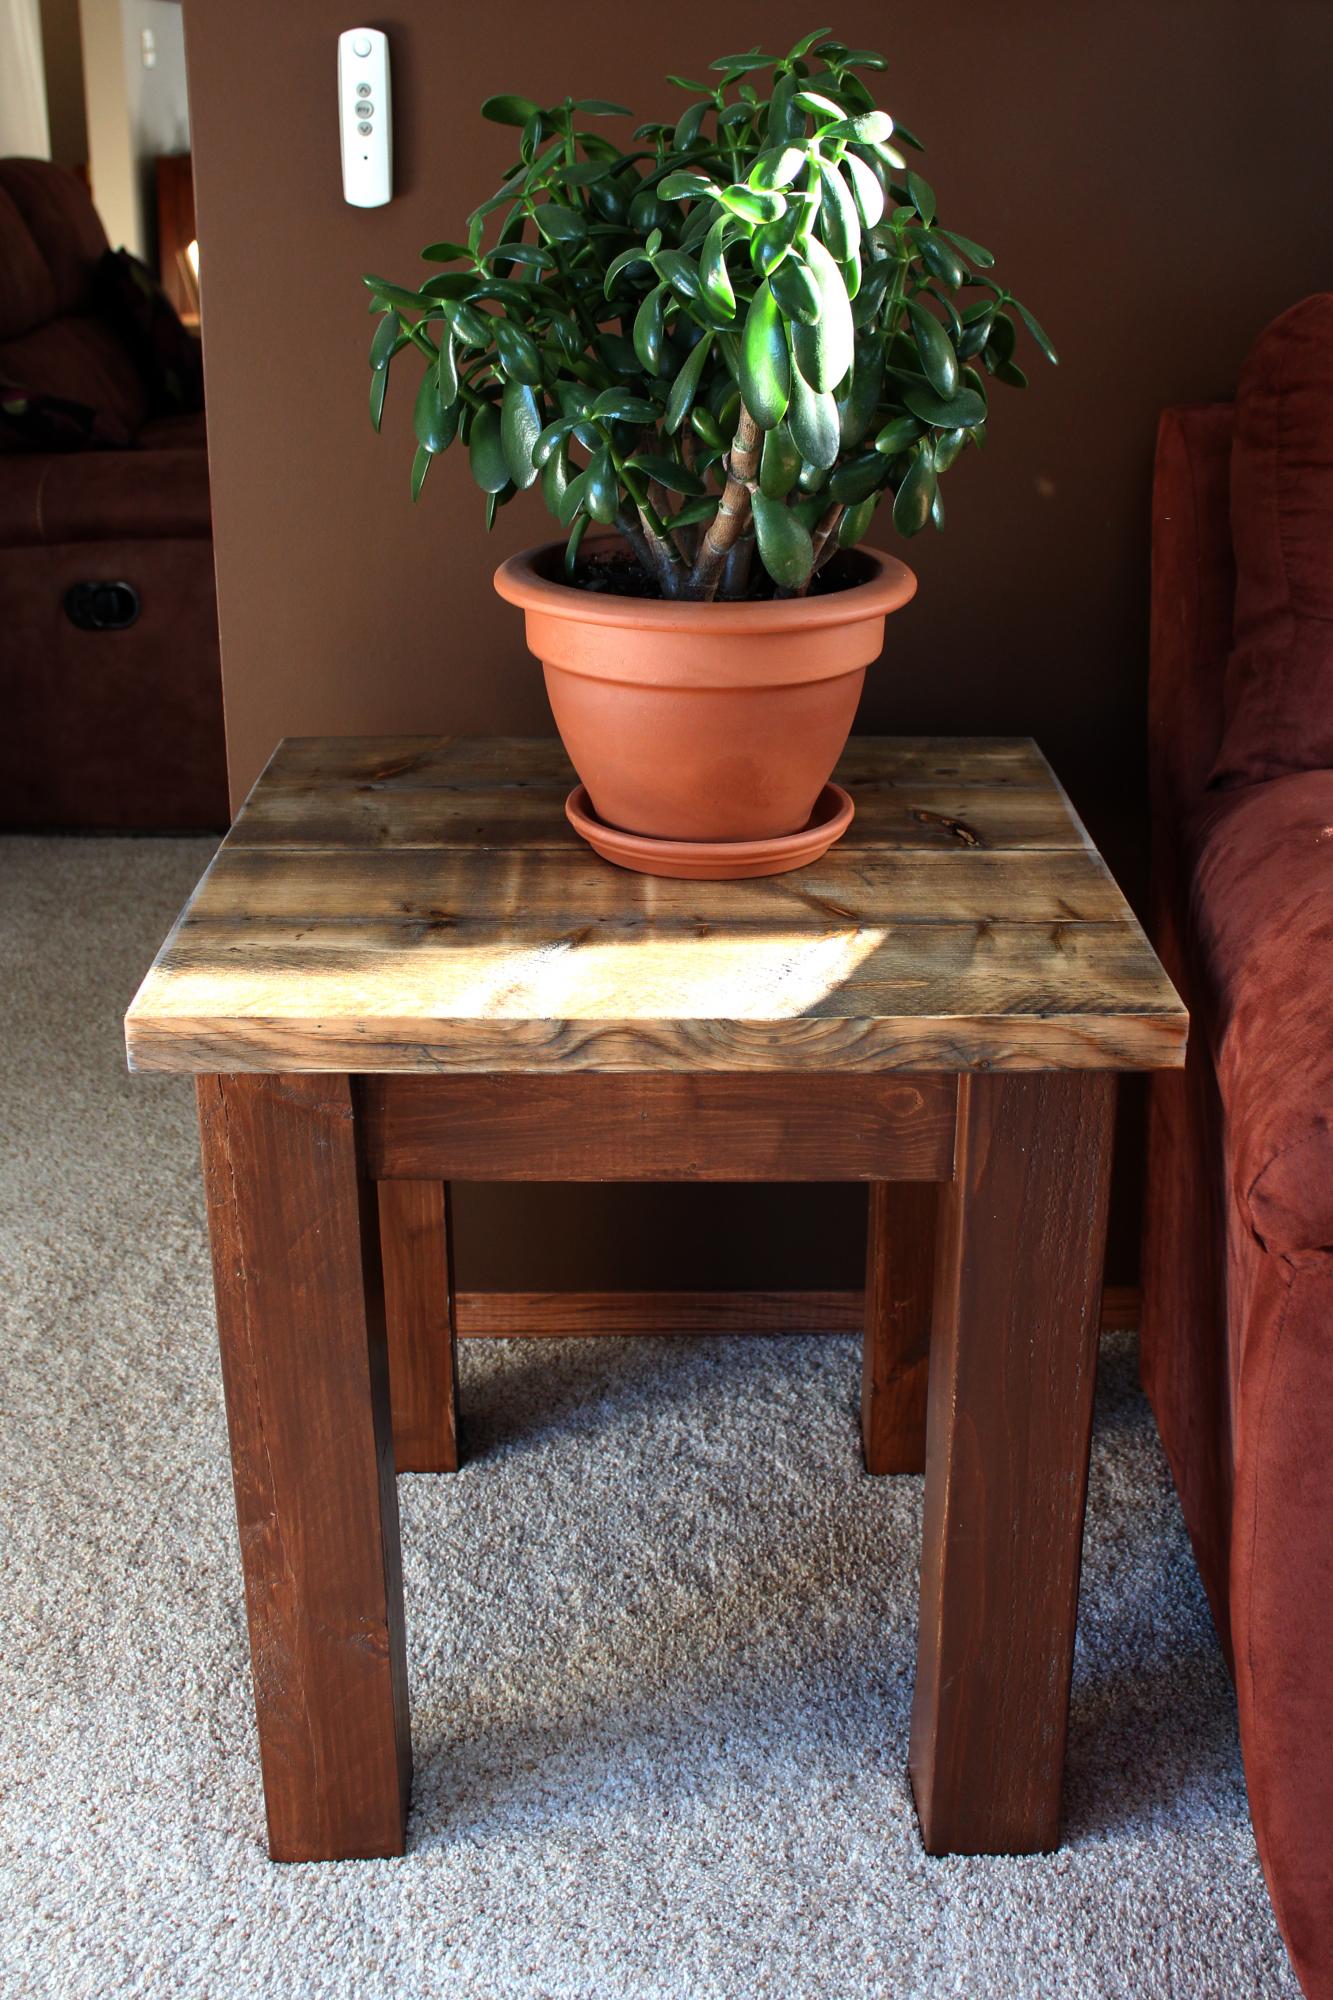
I had a very old, weathered 2 x 10 and wanted to build a couple of end tables for beside our new couch. All I did with the top was to lightly sand to take away a bit of the weathered wood. I had to purchase two 4 x 4 x 8' fir posts for the legs. I decided against adding the bottom shelves.
Wed, 10/02/2019 - 09:35
Beautiful with the weathered wood! Thanks so much for sending in a photo, what a great build!
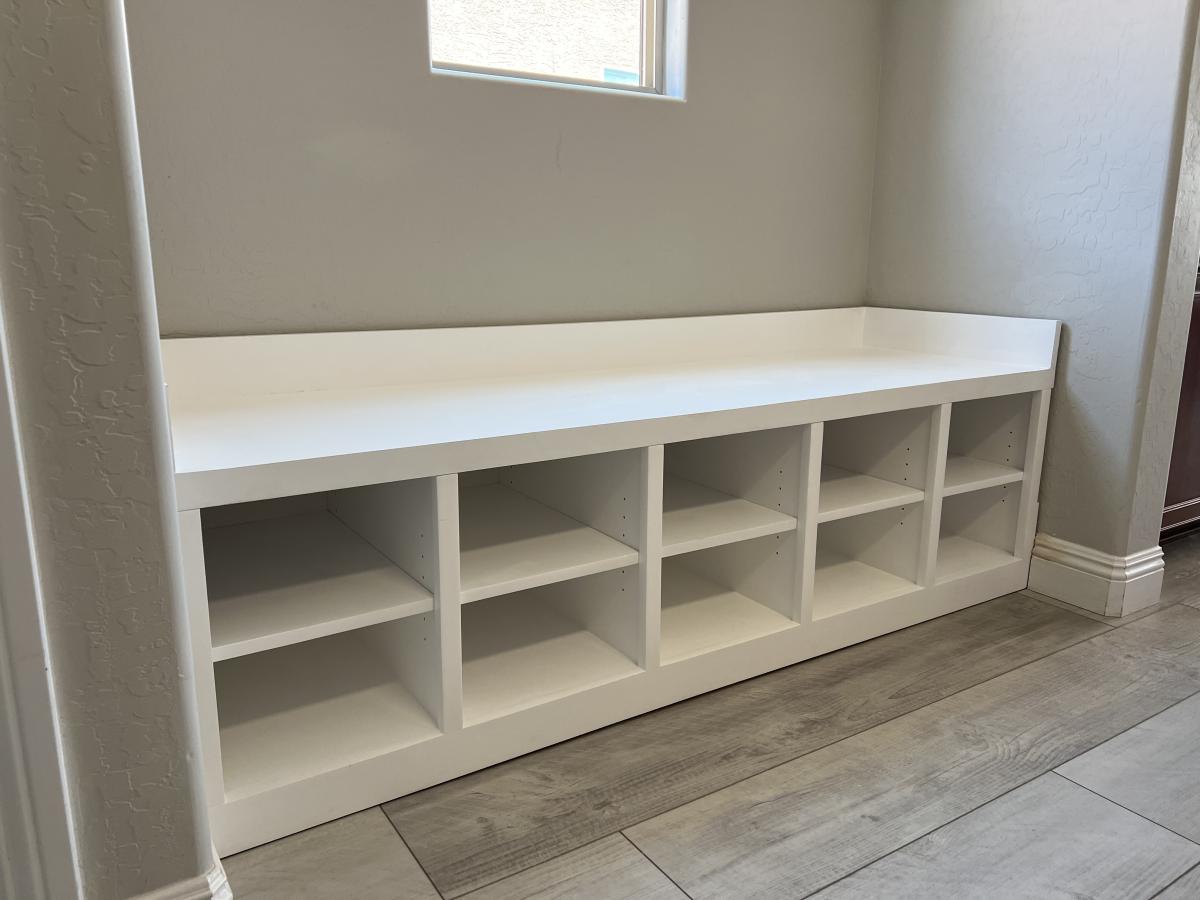
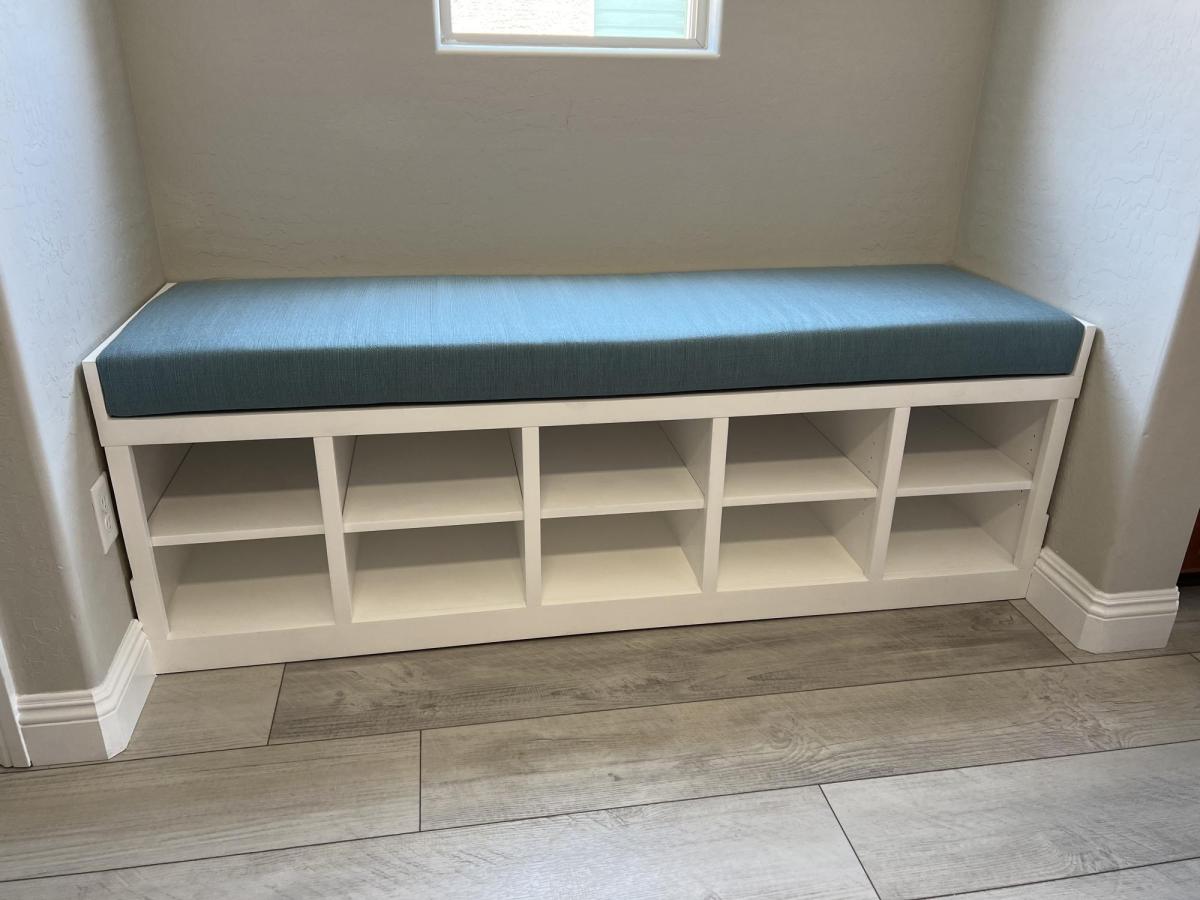
Worked with a client to create a boot bench with adjustable shelves. The Essential Entryway Bench was a perfect starting point! I extended the top trim to home the 4” cushion. I love Ana’s plans! Thank you!!!