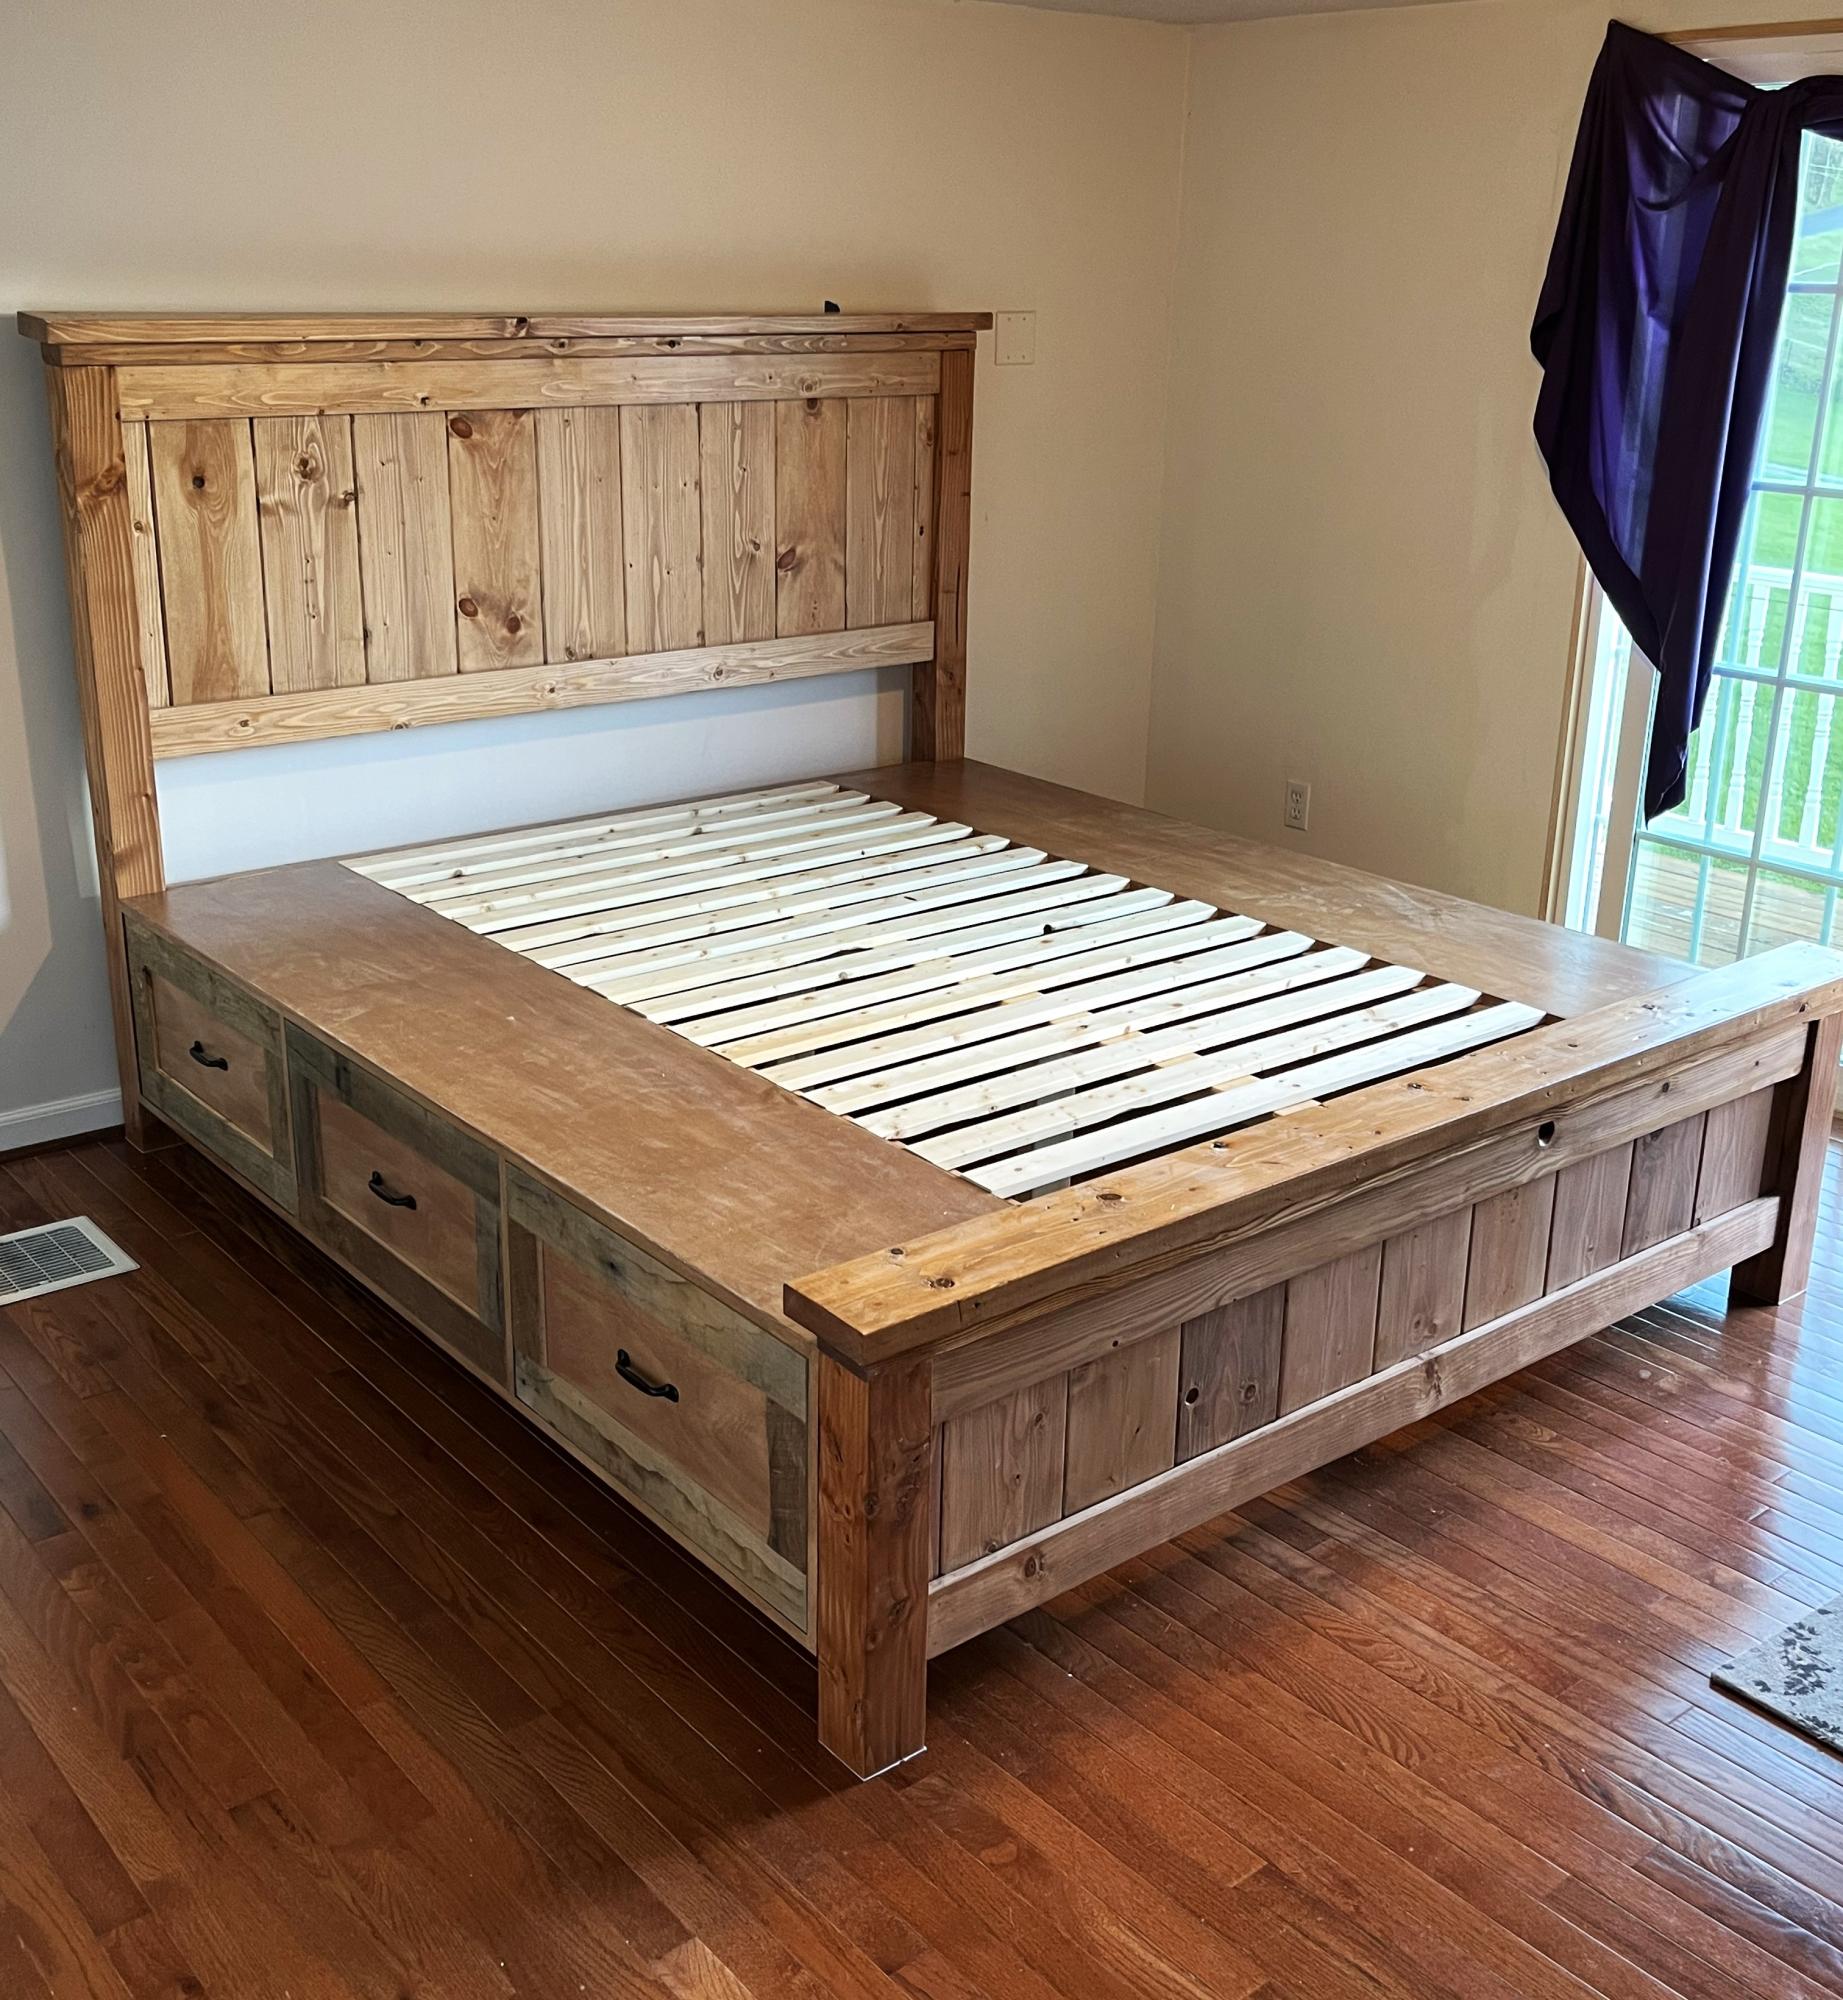
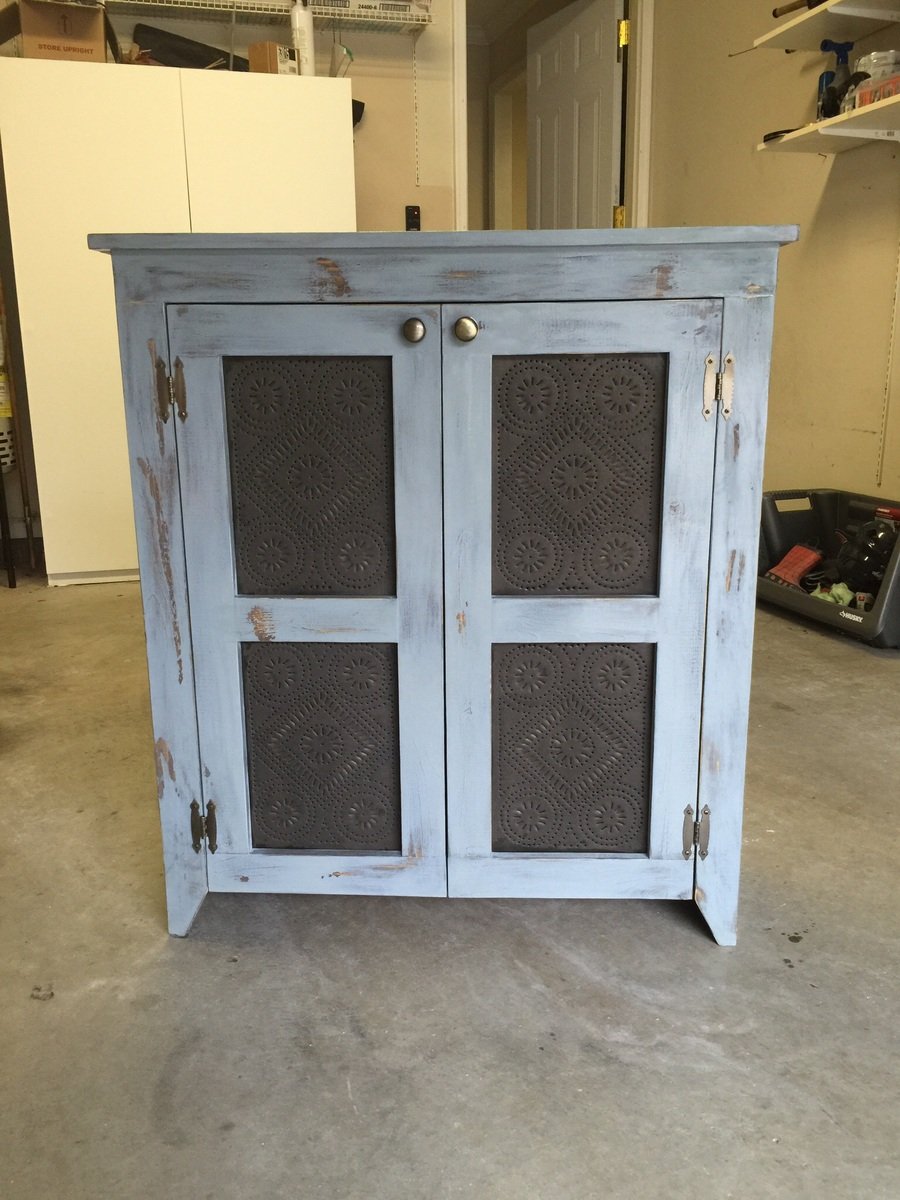
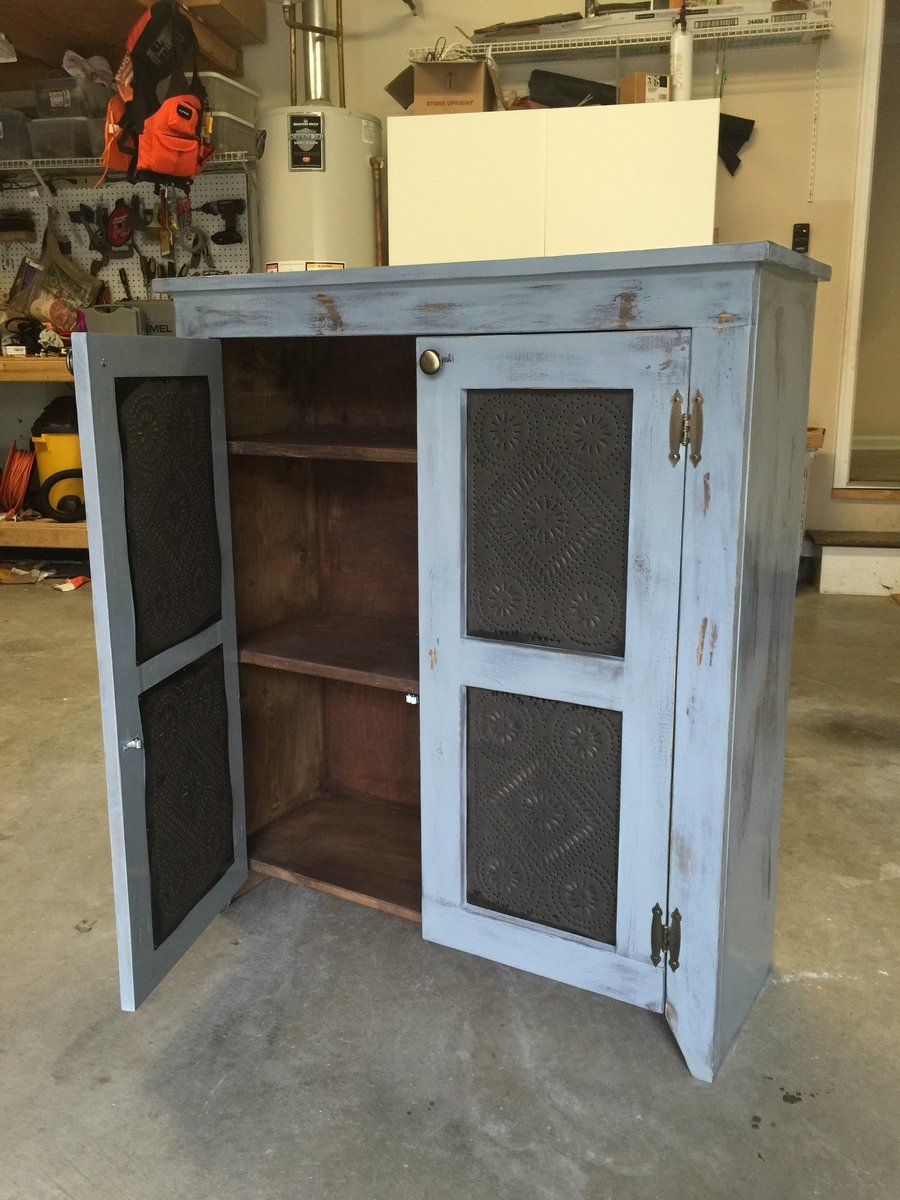
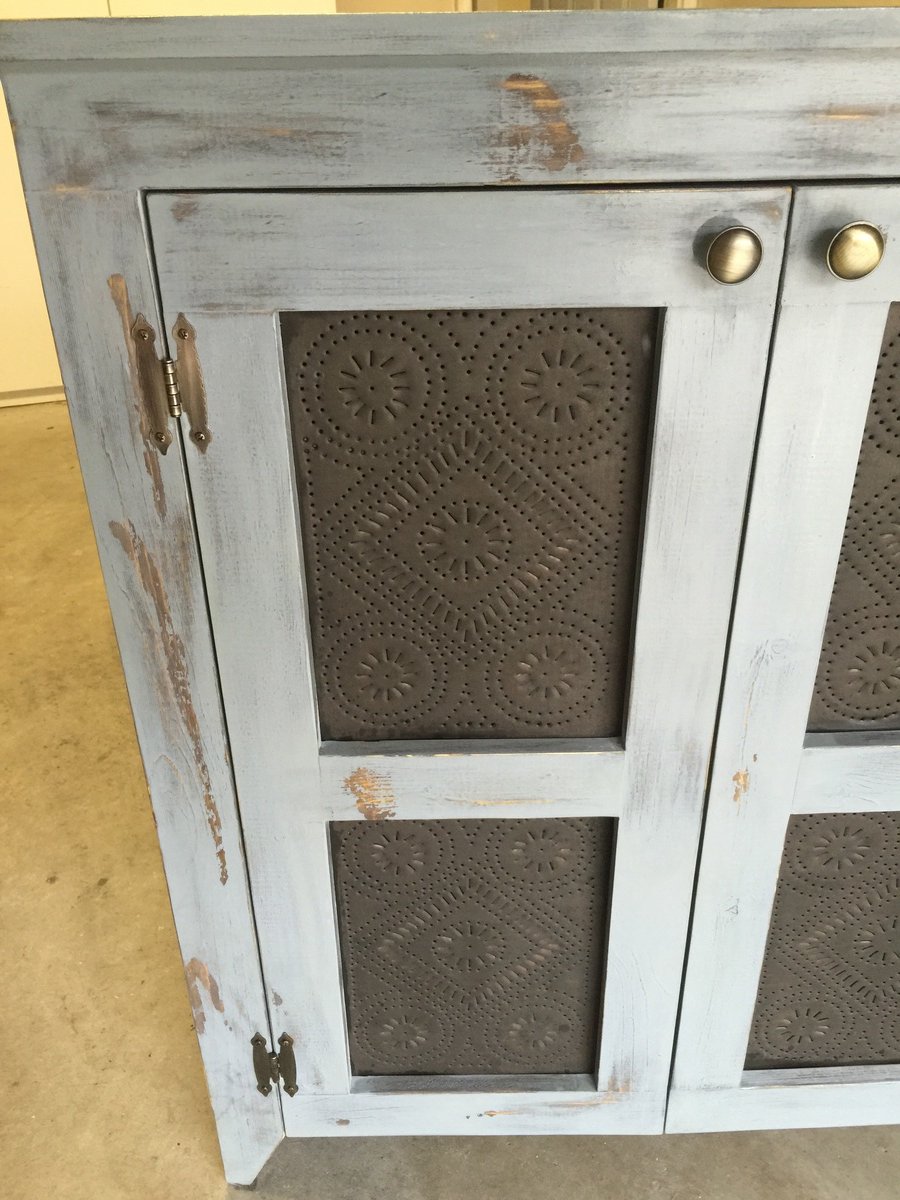
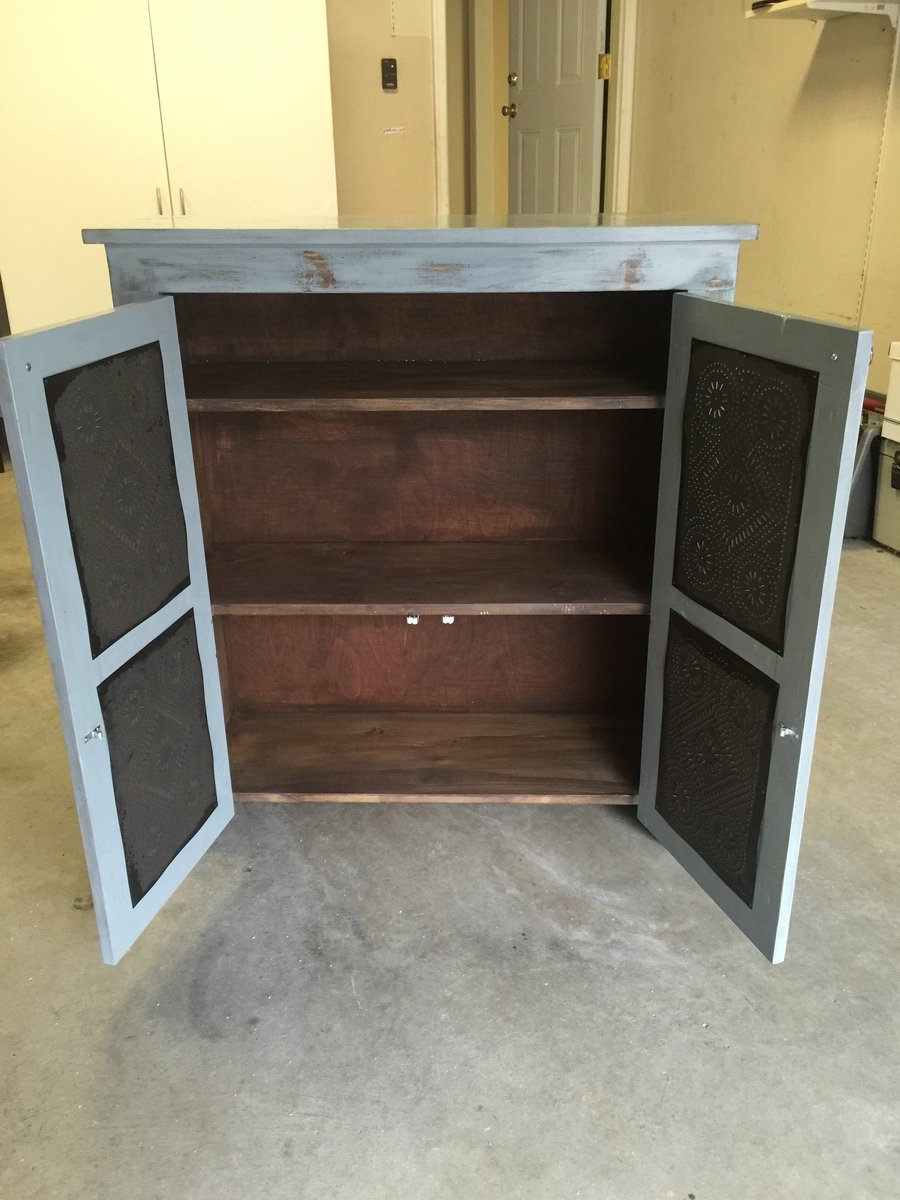
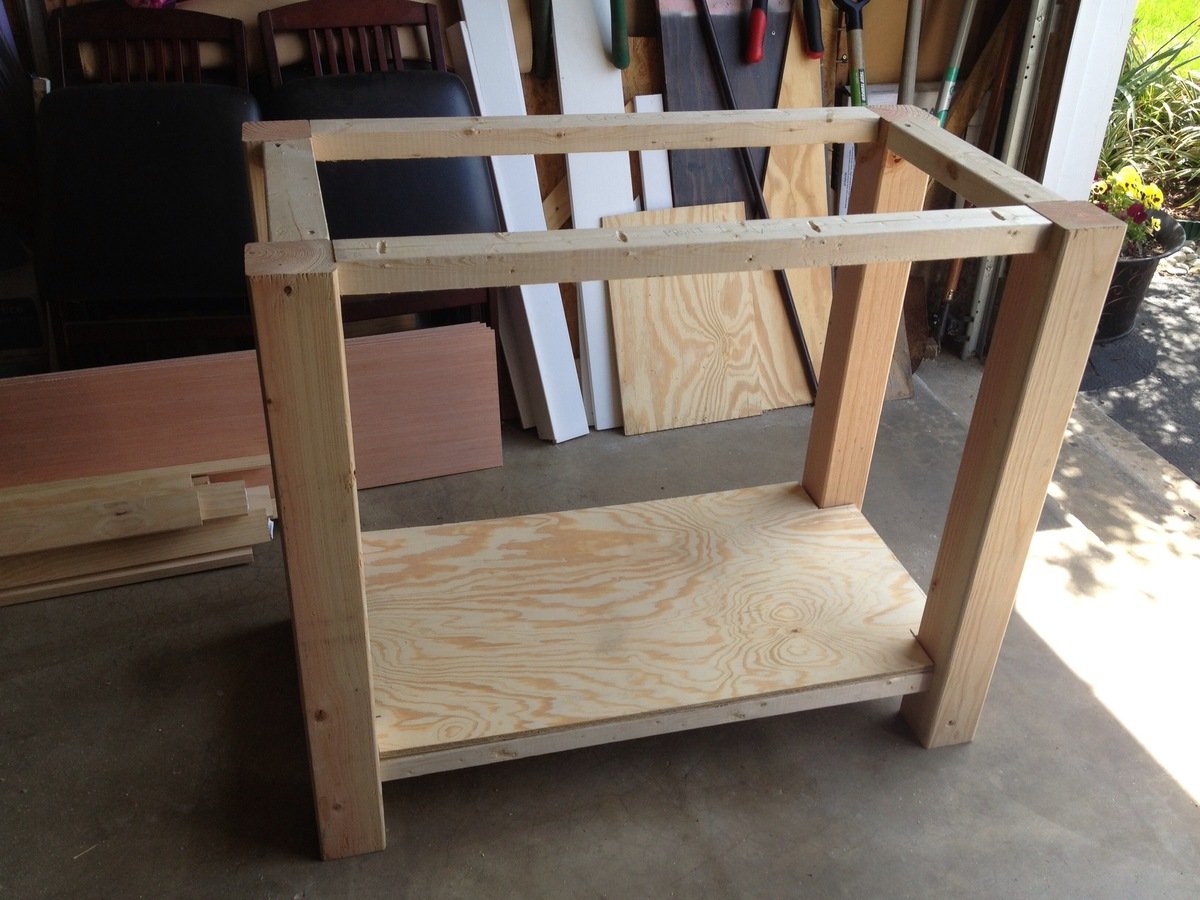
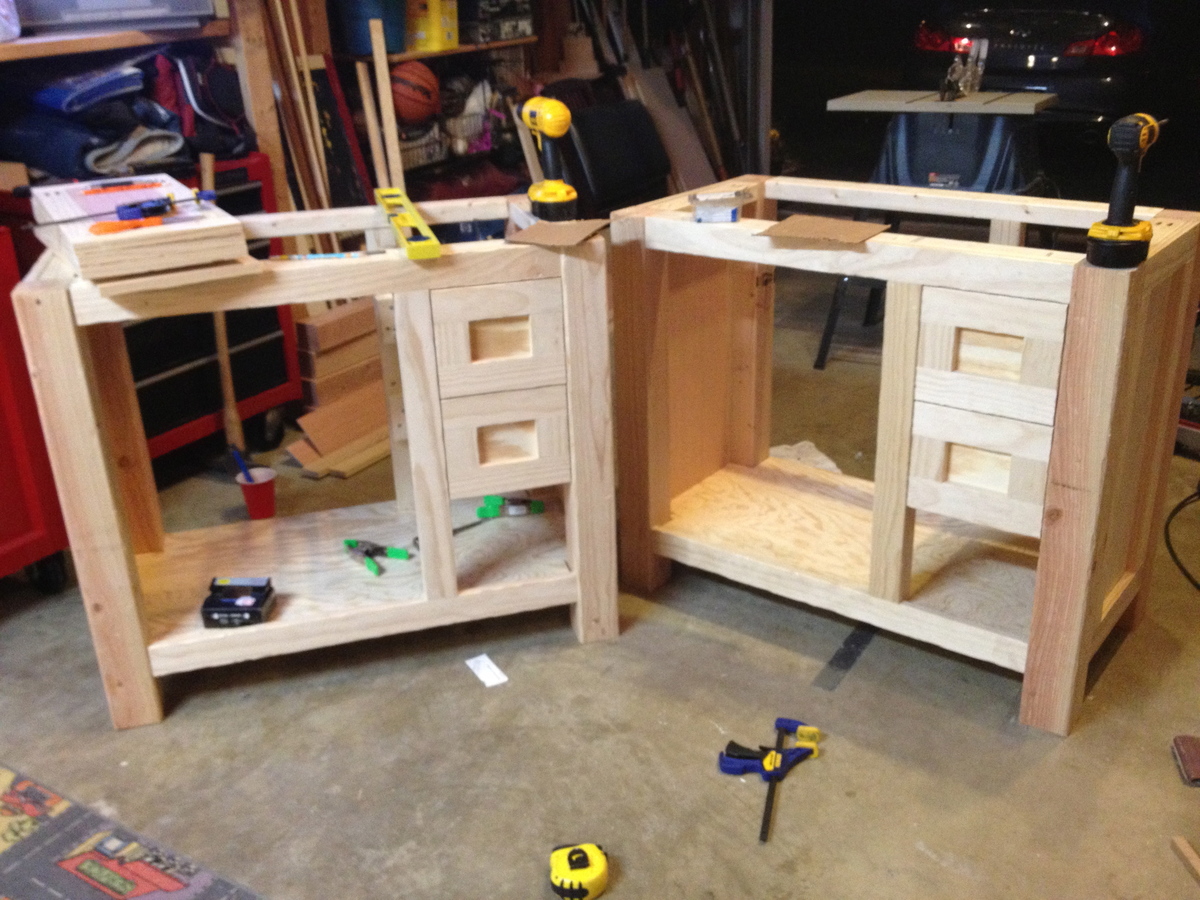
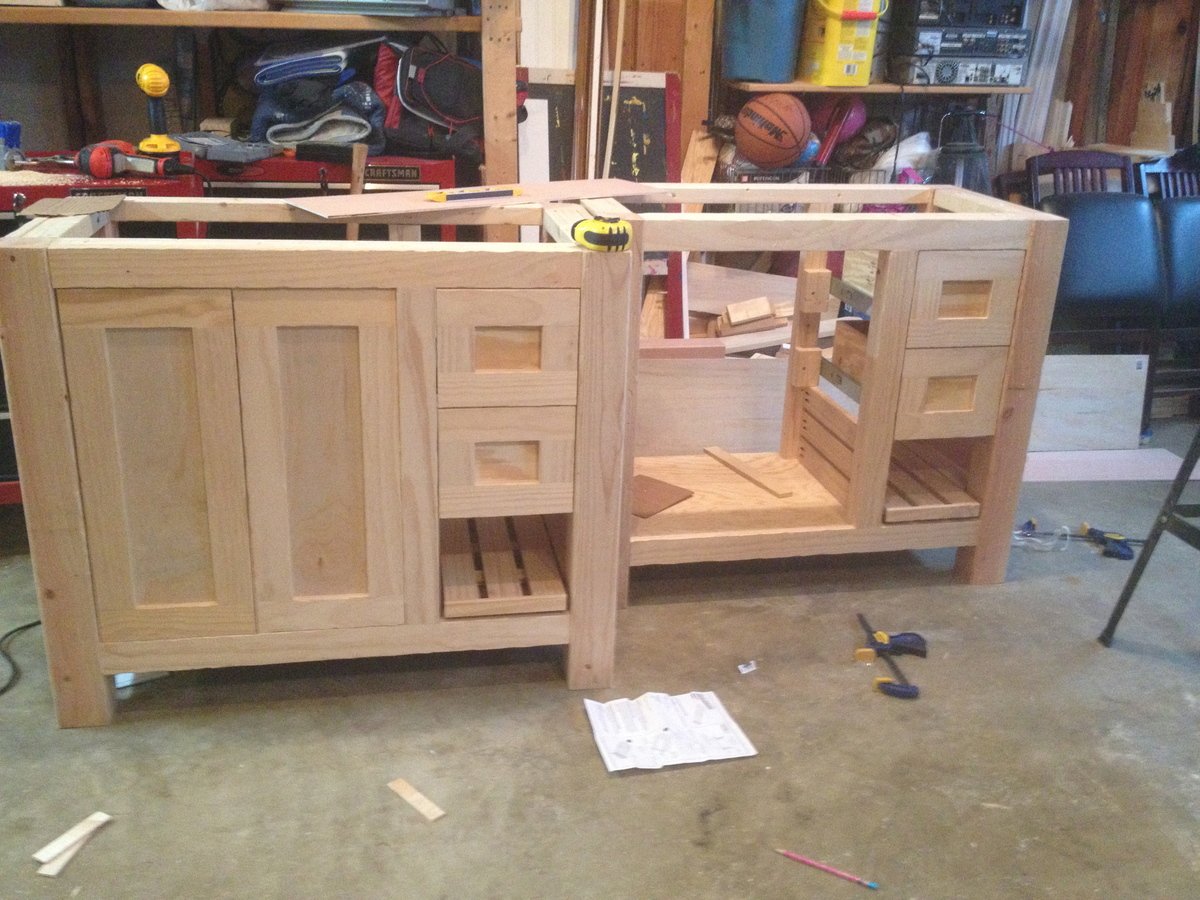
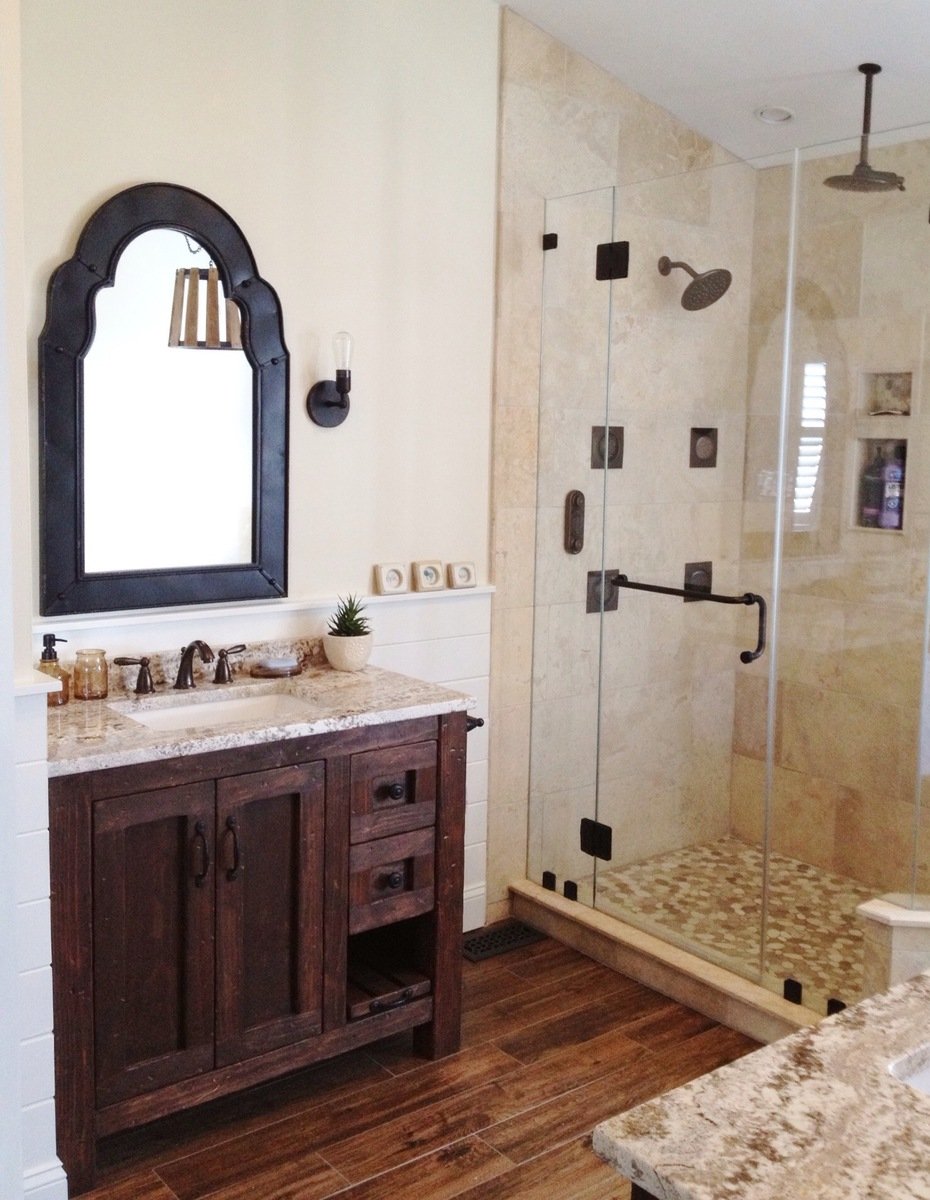
Community Brag Posts

King Size Farmhouse Bed with Dog Stairs and Storage

Submitted by jkjackson on Sun, 05/30/2021 - 15:21

We have a frosty faced blind girl and an aging tri-pawed that we wanted to be able to continue snuggling with us so we adapted the Farmhouse Bed with Storage to make it a king size. We made the drawer boxes deeper which allowed us to get rid of our dresser to create more space in our room. And we added a flight of stairs for the pups.

Estimated Time Investment
Weekend Project (10-20 Hours)
Finish Used
General Finishes White Wash with Arm R Seal Oil Based Satin Finish top coat. (If you want the white wash to be more white and less amber, use water based.)
Recommended Skill Level
Intermediate

Comments

Baby Cradle

Made this from typical dimensions of other cradle plans online and designed it off the cuff. Years ago, my dad made a cradle for me. I thought this would be a fun project to make for friends and family for their new little bundles of joy. The bottom is braced with the idea that older children will probably be playing in it. It was tested up to 65 lbs. All for approximately $60 with the mattress. Hopefully the recipients like it as much as we enjoyed building it. 

Estimated Cost
$60
Estimated Time Investment
Weekend Project (10-20 Hours)
Finish Used
Varathane Light Walnut
Recommended Skill Level
Intermediate

Comments

Modern Patio Chairs/Love Sear

Submitted by Anonymous (not verified) on Sun, 09/25/2022 - 15:57

Super easy and fun project! We altered the original plans to build a loveseat and had zero issues. We did add some extra support below.
I did not find 25”x25” cushions within our price range so I settled for 25”x22.5” and they work but ultimately 25x25 works best.

Kid 4x4 Truss Farm Table

A friend asked for a kid sized farmhouse table and I knew immediately what plans I wanted to modify! The 4x4 truss table is my favorite go to table because it is extremely solid, easy to build and looks so nice! I know this table will hold up to the wear and tear of 4 kids for years! I also modified the 2x4 truss benches to match. They are the same style but not as chunky as the 4x4 truss bench plans. 


Dimensions for table are 24”h x 24”w x 48”L

benches 16”h x 13.5”w x 33”L

Estimated Cost
$82 for table and two benches
Estimated Time Investment
Day Project (6-9 Hours)
Finish Used
Ebony stain for the top and 2 coats of poly. Behr paint and primer for base and benches- just white off the shelf
Recommended Skill Level
Beginner

Nesting Grill Station

Submitted by Anonymous (not verified) on Sun, 08/16/2020 - 18:26

My husband and I built this Grill Station. We made the table top wider and out of 1 solid piece of mahogany. I wanted a wider table so we made it 30 inches wide. We sealed the table top with marine grade sealer and the rest with exterior clear sealer.

Estimated Cost
$150
Estimated Time Investment
Day Project (6-9 Hours)
Finish Used
Marine grade varnish on table top and valspar exterior clear sealer.
Recommended Skill Level
Intermediate

Comments

Single Simple Modern Outdoor Lounger

Submitted by Anonymous (not verified) on Fri, 04/22/2011 - 12:18

Modified the double lounger plans into 2 single loungers. I liked the idea of the boards running the long way rather than from side to side like the single lounger plan. These were pretty easy to build. All assembled with a Kreg for hidden screws. Made with Sanded and super polyurethaned cedar (3 or 4 coats). turned out beautiful with the matching boards running from head to toe!

Estimated Time Investment
Weekend Project (10-20 Hours)
Finish Used
Multiple coats of polyurethane with sanding between each coat.
Recommended Skill Level
Intermediate
Seasonal And Holiday

Rustic Modern TV Console

Just finished up this unique TV console.  Built from reclaimed pallet wood. 

Estimated Cost
$150.00
Estimated Time Investment
Weekend Project (10-20 Hours)
Finish Used
Clear coat of wax
Recommended Skill Level
Advanced

Comments

Templar

Mon, 12/02/2019 - 22:10

Hi there Im new to site and also have the issue of not seeing the plans for this Rustic Modern TV Console. Are they available and Im doing something wrong or??

Large Old English Style Farmhouse Dining Table

My wife and I were wanting a large outdoor farmhouse table that looked stylish, and like it could have been bought at Pottery Barn or another high-end furniture store. We found this plan that Ana white had made "Small Old English Style Farmhouse Dining Table". We often host groups from our church and will have 15-20 people on our patio or around our pool area, so we needed a bigger table... I just made some modifications to make it longer (7ft) in length to better fit our space and allow for more people to sit.

To make this plan longer, I simply adjusted the cut-list on the long 1x2s, 1x4s, and 1x6; and added a crossbar to prevent the longer tabletop from sagging. I also added the diagonal corner struts to make the table a little sturdier.

Adjusted Shopping List:
4 - 1x2 @ 8ft
5 - 1x4 @ 8 ft
6 - 1x6 @ 8ft
Waterproof 1 1/4" Kreg screws (for outdoor use)
Minwax Weathered Oak
Minwax Vintage Grey

Adjusted Cut-List
• 2 - 1x2 @ 26.5"
• 2 - 1x2 @ 76.5"
• 2 - 1x2 @ ~33.25"
• 2 - 1x4 @ 26.5"
• 2 - 1x4 @ 76.5"
• 4 - 1x4 @ 7.25" w/ 45º miter (diagonal corner supports)
• 1 - 1x4 @ ~28" (Crossbar - I forget the exact measurement)
• 6 - 1x6 @ 82"

For seating we just bought some inexpensive farmhouse weather resistant chairs from Walmart:
https://www.walmart.com/ip/Yaheetech-Metal-Dinning-Chairs-Stackable-Cof…

Estimated Cost
$170
Estimated Time Investment
Day Project (6-9 Hours)
Finish Used
Minwax Early American (base), Minwax Weathered Grey (2nd coat)
(See more on outdoor use of stains: https://ana-white.com/blog/2019/05/outdoor-wood-furniture-finishing-secrets)
Recommended Skill Level
Beginner

Comments

Laundry bins

Submitted by wy2ak on Mon, 05/07/2018 - 19:57

This was a build from a picture and made to fit into a space we have in the laundry room. Used the Kreg jig for much of it. 

Estimated Time Investment
Week Long Project (20 Hours or More)
Finish Used
Will be painted and distressed
Recommended Skill Level
Intermediate

Comments

Modern Adirondack Chairs & Outdoor Side Table

Submitted by j_bowman on Sun, 04/11/2021 - 11:35

These modern Adirondack chairs were my first wood working project ever and they turned out awesome! I wanted to build a small table to complete the set and Ana’s new side table plans were exactly what I was looking for. I am truly amazed at how easy these projects were to make and how great they look on our front patio. Ana’s step-by-step plans make it so simple. My wife and I can’t wait to build some more of these projects for our backyard lanai and pool area.

Finish Used
General Finishes Red Mahogany stain
Spar Urethane

Comments

Seasonal And Holiday

My first Easy Build Headboard, King Size

Submitted by andreak on Thu, 05/12/2011 - 16:15

This was my first project and it come out beautifully. I did learn a valuable lesson - if you are going to build something in the basement, make sure it fits up the stairs. Not sure if you can tell from the picture but this ended up 6 inches shorter than the plans. Can wait to find my next project!

Estimated Cost
$150
Estimated Time Investment
Day Project (6-9 Hours)
Finish Used
MinWax Wood Finish Red Mahogany 25 - Minwax Polyurethane
Recommended Skill Level
Beginner

Outdoor Adirondack Chairs and Modern Side Tables

Submitted by Anonymous (not verified) on Fri, 07/07/2023 - 11:37

I love the Adirondack chairs and they were so easy to make. Your directions were perfect. I added an inexpensive cushion from Walmart although I think technically Adirondack chairs don’t have cushions. But they do help make them more comfortable. I also added some tin work design because we live in the south west.

James

Seasonal And Holiday

Laundry Dresser foling area and hanging shelf

Submitted by sandrabees on Tue, 06/19/2012 - 13:15

more details on my blog. I built 2 of the laundry dressers. adjusted the placement of my baskets due to restrictions in the overall height of my unit (I have a ironing board cabinet built into 1 wall that I still wanted to be able to open and use :) I used MDF, but it was a bear to work with and next time I would spend the extra $$ on birch. i painte the bottom in a semi gloss. and plan to add the doors (which will have a beadboard backing) they will be painted white with a dark walnut glaze. The top and shelf /brackets are all done in a distressed finish with ebony and mahogany stain mixed then 2 coats of poly very sturdy even filled!

Built from Plan(s)
Estimated Cost
$140
Estimated Time Investment
Weekend Project (10-20 Hours)
Finish Used
white semi gloss paint, (will be glazing with dark walnut as well),
Recommended Skill Level
Beginner

Comments

Sherice

Tue, 07/15/2014 - 20:27

Very cool rendition of the original plans. I like the folding area, awesome job!

thewife

Fri, 06/26/2015 - 00:00

I have been wanting to make the laundry basket dresser but am holding off because we are moving. What color did you us on the walls, I love it.

Kentwood Bookshelf

Submitted by BeckySmith on Thu, 05/10/2012 - 05:11

This was one of my first bigger builds. I am so happy with the way it turned out!

Estimated Time Investment
Day Project (6-9 Hours)
Finish Used
Golden Oak. I applied the stain with a foam brush and wiped off excess after about five minutes.
Recommended Skill Level
Beginner

Comments

canadianlam

Thu, 05/19/2016 - 19:05

This bookcase wouldn't be out of place amongst the Pottery Barn's bookcases. In fact, it inspired me to go out this afternoon and buy some cedar boards so I can start building my own version first thing tomorrow. Thank you, Becky.

8 foot picnic table

Submitted by Abby721 on Sat, 07/18/2020 - 08:40

This picnic table was a quick build and turned out amazing. I modified the center base support by adding an extra table top support and seat support board to the opposite side of the center legs to give the table symmetry to accommodate an umbrella hole. I also shortened both cross supports by an inch to make sure the base wouldn’t be longer than the top boards. The space between the center table support boards and seat support boards is the perfect size to fit a standard umbrella. I used a 1 3/4” hole saw to make the umbrella hole. The build and stain/paint took me about 5 hours but additional time is needed to properly seal the table. I used untreated pine. Treated pine may give the table longevity but it would also add a lot of weight to an already heavy table. This was a relatively easy and quick build and is a great size to fit my whole family plus a couple guests! I’m happy with how it turned out and would recommend this build to anyone looking for a budget friendly and simple patio table.

Built from Plan(s)
Estimated Cost
$75
Estimated Time Investment
Day Project (6-9 Hours)
Finish Used
Varathane Briarsmoke for the top and Rustoleum Canyon Black Satin for the base. Sealed with 2 coats of Varathane Helmsman Spar Urethane
Recommended Skill Level
Beginner

Comments

Seasonal And Holiday

Second Project: table saw/ miter saw work bench

Submitted by jamesjill on Sat, 01/30/2021 - 20:34

Used part of the Ultimate Roll Away Workbench with Miter Saw Stand to just build one of the roll-away workbenches to work with my miter saw and table saw. I'm very happy with how it turned out.

Recommended Skill Level
Beginner

Comments

Trofast Toy Storage Solution

Submitted by CassieD on Fri, 09/30/2011 - 17:27

I had been asked a few times for these plans, but as someone else posted a similar one, I'll just stick to a blog post for now and describe my differences. I made this shelving unit January 2010, just after I found out of I was pregnant with my third child, and it's been a lifesaver since then. I desperately needed a toy storage solution (and purging), as shown in the 'eek' kids closet below. I didn't like the shape of triangular Ikea ones, as they spanned more floor space than I cared to give up. Plus, I wanted a place to put *almost* all of my kids toys, so I wanted it to be tall. I'm so glad we did, since we've moved twice (also, 'eek') since than, and it's made packing and unpacking the kids toys super (SUPER) easy. At first, I was afraid that the kids would go crazy and just tear down every bin at once, but it hasn't happened yet. Unlike the other plan that was posted, I used white sliders that ikea sold. I'm not sure if they still sell, as I don't see them online. It cost an additional $24 (they were $1/2), but seemed worth the extra money. I didn't have a router and wasn't particularly confident with our table saw skills. Plus the Ikea version had some really thin areas that made me nervous that it would break easily. I tried to keep it easy and just had to line up and screw the sliders in. Now that I'm a little more confident with a table saw, I'd give the router style a-go. I used two sheets of cabinet grade plywood, each costing about $30. I ripped down some pine boards to cover the front edges, which made the unit look loads nicer. However, I wish I would have used maple, instead of pine as they got dented almost immediately. Not a big deal though. The three shelves were sort of an afterthought, but turned out to be great for puzzles and other type toys. I didn't use backing or cross supports initially, but put some in after we moved. You can see them in the last picture below. The heater in our temporary house caused the slightly-bent sides to become very bent sides. That caused the drawers would spontaneously fall out, which was always quite the shock and disappointment. I put in some supports in the back, which I wish I did initially as it would have made manufacturing easier. Also, If I were to go back, I would put one cross support in the front-middle, as the boards are so tall, it needs something to help maintain the shape in the front. I've found that even in a perfect fitting slider, really heavy buckets would bend just enough to flex out of them to crash... so don't plan on filling one of the large buckets with matchbox cars and sticking it on the top. Regardless, we've learned our lessons, made it work better, and has been a huge success in our house for a while now.

Estimated Time Investment
Weekend Project (10-20 Hours)
Recommended Skill Level
Intermediate

Comments

Supermom77 (not verified)

Sat, 10/01/2011 - 14:22

Great work. Love the colors. Do you have directions on training the kids to put the toys back?

In reply to by Supermom77 (not verified)

CassieD

Tue, 10/04/2011 - 19:42

Haha, I guess a little. Picking up when they aren't motivated is an ongoing battle. However, I did find having a specific place to put items with labels helped a lot, albeit with screaming. Actually the labels would probably be the best motivation of all of it.

The ideal is to have the kids only play with one bin at the time, but with more than one kid, that theory very quickly gets muddled... One child wants to play with one toy and one wants play with another, then "lego houses can't be broken down" and "polly pocket is using those blocks for the house" and so on. So it's more of a end-of-the-day(week/month/year haha) pick-up routine.

However, there seems to be a light at the end of the tunnel. My oldest (almost 6) seems to have caught on that the faster she picks up, the sooner she can move onto other activities besides playing (coloring, playdough, etc.), and is starting to pick up as soon as she's done without us even asking. I think getting an allowance has also helped with that.

That was way more than I thought I was going to comment, but I guess it goes to show you should never ask a Mom her opinion on something, unless your ready for a lecture :)

birdsandsoap

Thu, 10/13/2011 - 21:44

I love that your labels have pictures on them! I thought I should have done that way back when since my children are too young to read. Easy to find and easy to put away. Good job, Mom!

Pallirondack Laundry Basket Dresser

I showed my wife the Laundry Dresser featured on Ana White's website and she asked if I could make one for her, but not quite so tall. I also turned the orientation to fit our laundry room space. I used primarily oak from recycled pallets to build the Laundry Basket Dresser. She wanted a work space on top, so folded laundry, empty baskets, etc. all have a temporary resting place depending on the day. From start to finish, it took me about 6 hours. She plans to stain the piece at some point, but its already in use, so I'm not 100% sure that will ever happen until we move or something. ;-) Great idea and laundry room organization!

Estimated Cost
Half a box of screws
Estimated Time Investment
Afternoon Project (3-6 Hours)
Recommended Skill Level
Intermediate

Comments

Kathy in Pittsburgh (not verified)

Mon, 09/10/2012 - 10:22

I love the open sides, plus it makes it much more feasible to build with scraps repurposed wood, which I love. Thanks for the inspriation

payne.kj

Mon, 04/08/2013 - 08:48

Hi, do you have any kind of plans for how you did this or atleast dimensions? I think this one fits more of what my wife needs, but I'm pretty new to making anything.

nicholas_ftm

Sun, 06/14/2015 - 20:16

Soooo I made this according to the measurements and no laundry basket I find fit. Kind of dissapointed in the fact that this cool thing I just built doesn't have any baskets that will fit it. Any advice on finding a basket that fits?

jkread

Fri, 07/10/2015 - 20:56

I think the idea is to build it to fit the baskets you have or buy some and build around them.

Flip Top Piano Bench

Submitted by amycourts on Mon, 12/17/2012 - 17:54

This was my first DIY build. Having been inspired by my good friend, the brilliant Jen Woodhouse of The House of Wood, I decided surely I could do this too. So I picked something that looked like a challenge, but that we also needed. We have an old piano we bought from Craigslist that has heretofore been benchless. So I used the Flip Top Storage Bench plans, headed to Home Depot, collected the wood (and let them cut it - but made a few of my own cuts, too), and got to work.

I had a little trouble at first, simply because, after assembling the sides and aprons, the unit did NOT square up. I took a few pieces apart and realized it wasn't user error (what?), but warped wood. That's right: one of my 1x3s was warped and bendy. So I rebuilt that side with some of my leftovers, and made sure to square up after each step, and lo and behold it came together!

It's not perfect - one of my legs is a bit off, so it wobbles when no one's sitting on it, but there's no issue when it bears weight - but for my first build, I'm quite pleased! And now that I know I can do this...well, this is just the beginning!

Total time it took me was probably around 15 hours, which includes practicing using my circular saw and kreg jig (both of which were straight out of the box when I started), along with my rebuilding the side.

I used Minwax pre-stain wood conditioner after sanding, followed by two coats of Rustoleum spray stain in Kona. I sanded with 400 grit sand paper after each coat of stain, and finished with one coat of semi-gloss polyurethane. I considered a few more coats of stain, but so fell in love with the weathered look that evolved from the staining and sanding that I just left it!

I also spray painted the hinges - that was a bit of an accident (I didn't know how NOT to cover them in stain...), but turned out to my liking!

My estimated cost is about $100, which covers the wood (including the extra 1x3s and an extra 1x2 I needed for a screw-up), nails, screws, three cans of spray stain, polyurethane, wood conditioner, paint brushes, two packs of sandpaper, and my hand sander. All but the wood will be used in my next few projects too, so that cost covers QUITE a bit!

Estimated Cost
$100
Estimated Time Investment
Weekend Project (10-20 Hours)
Finish Used
Two coats "Kona" spray stain, Minwex wood conditioner, one coat polyurethane, for a weathered look.
Recommended Skill Level
Starter Project

Comments

Angela J.

Wed, 01/30/2013 - 00:25

I am going to be building this bench this weekend. What is a kreg jig? I am so confused. I am going to HD tomorrow to buy supplies.

Great looking bench! I will certainly look out for warped wood :)

In reply to by Angela J.

amycourts

Wed, 01/30/2013 - 08:19

Hey Angela,

The Kreg Jig is a tool that creates pocket hole joints on all your boards - whether you're joining vertical to horizontal pieces, or two horizontal or two vertical, etc.... - and made this build, as my first, INFINITELY easier. You don't *need* the Kreg Jig to build this bench, but Ana recommended it, my good friend Jen Woodhouse, who contributes a lot of plans and builds to this website recommended it, and I highly, highly recommend it. It's about $100, and worth every penny.

Here's the video I used as a tutorial on how to do it. And seriously - it made this job SO much faster than it would have been without the Jig! :)

http://www.youtube.com/watch?v=IrIFHMEPkXs

Bike Storage

Submitted by vendo on Wed, 10/13/2021 - 10:10

I live in a smaller rental with limited garage space, so I needed a place for my kids bikes. This is what I came up with. It required minimal screw holes in the treated fence posts and I attached a rail system(rubbermaid fasttrak) for the bikes to hang from. I used Ana's easy shelves plan for the upright supports and then just added some corrugated roofing and cedar fence pickets (which I had on hand) to finish off the top.