Ana White Cabinet Builder Google Sheet converted to Microsoft Excel
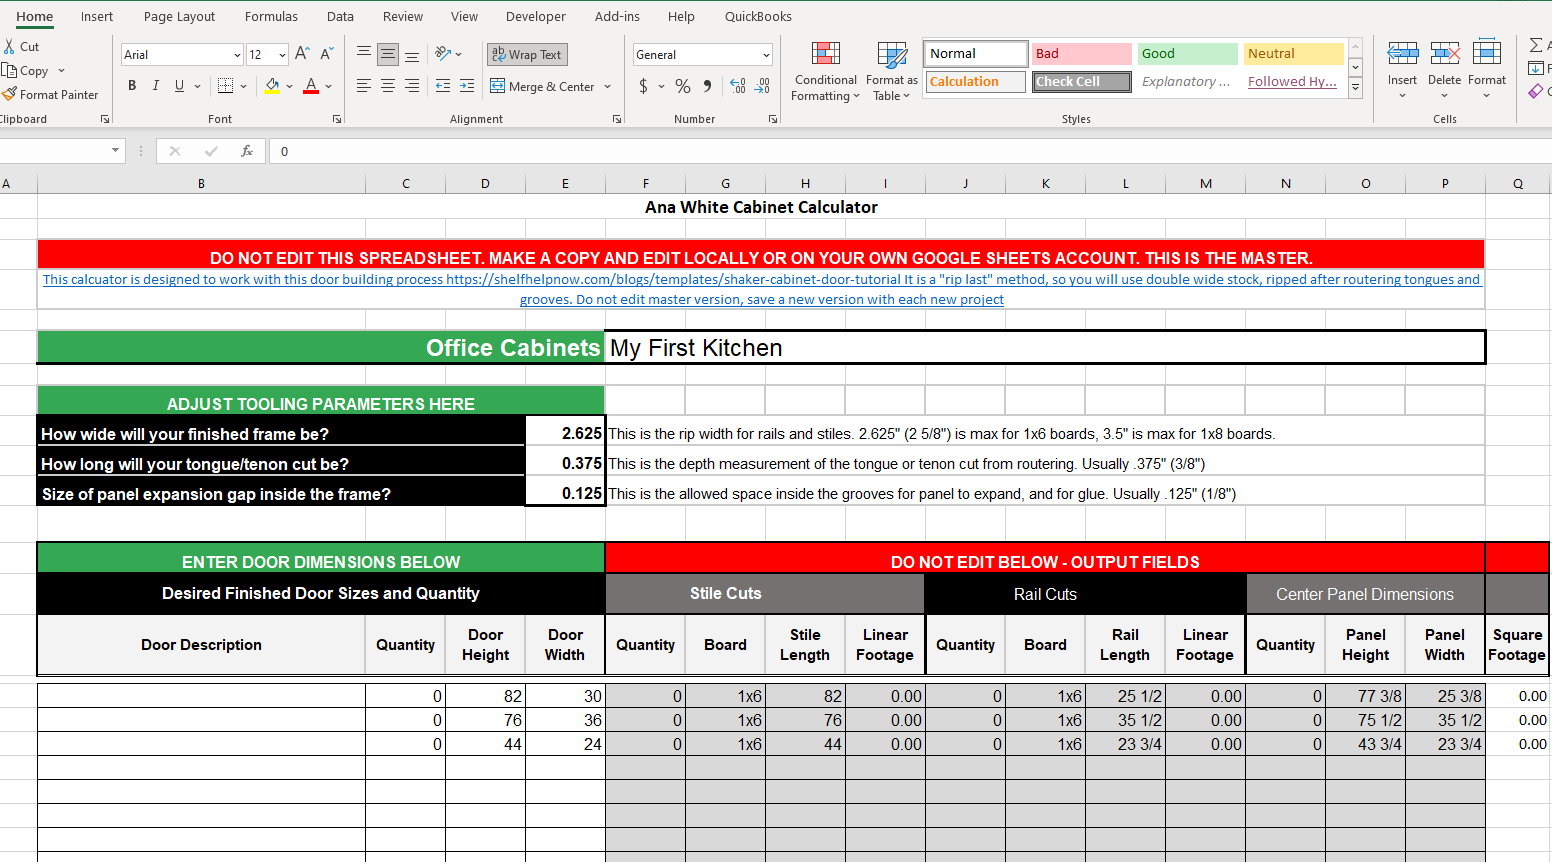
I was trying to use the google sheets cabinet calculator that Ana posted and found that others were accessing and editing the master at the same time. I thought perhaps a Microsoft Excel version of the calculator to download may be useful.
I wasn't able to upload to this site so I've created a Brag Post to link to it on my site.
UPDATE: Ana's website has been updated and the file is now an Excel Spreadsheet which can be downloaded.
Built from Plan(s)
Estimated Cost
none, just converted the functions and calculations to work in excel
Estimated Time Investment
An Hour or Two (0-2 Hours)
Recommended Skill Level
Intermediate