Community Brag Posts

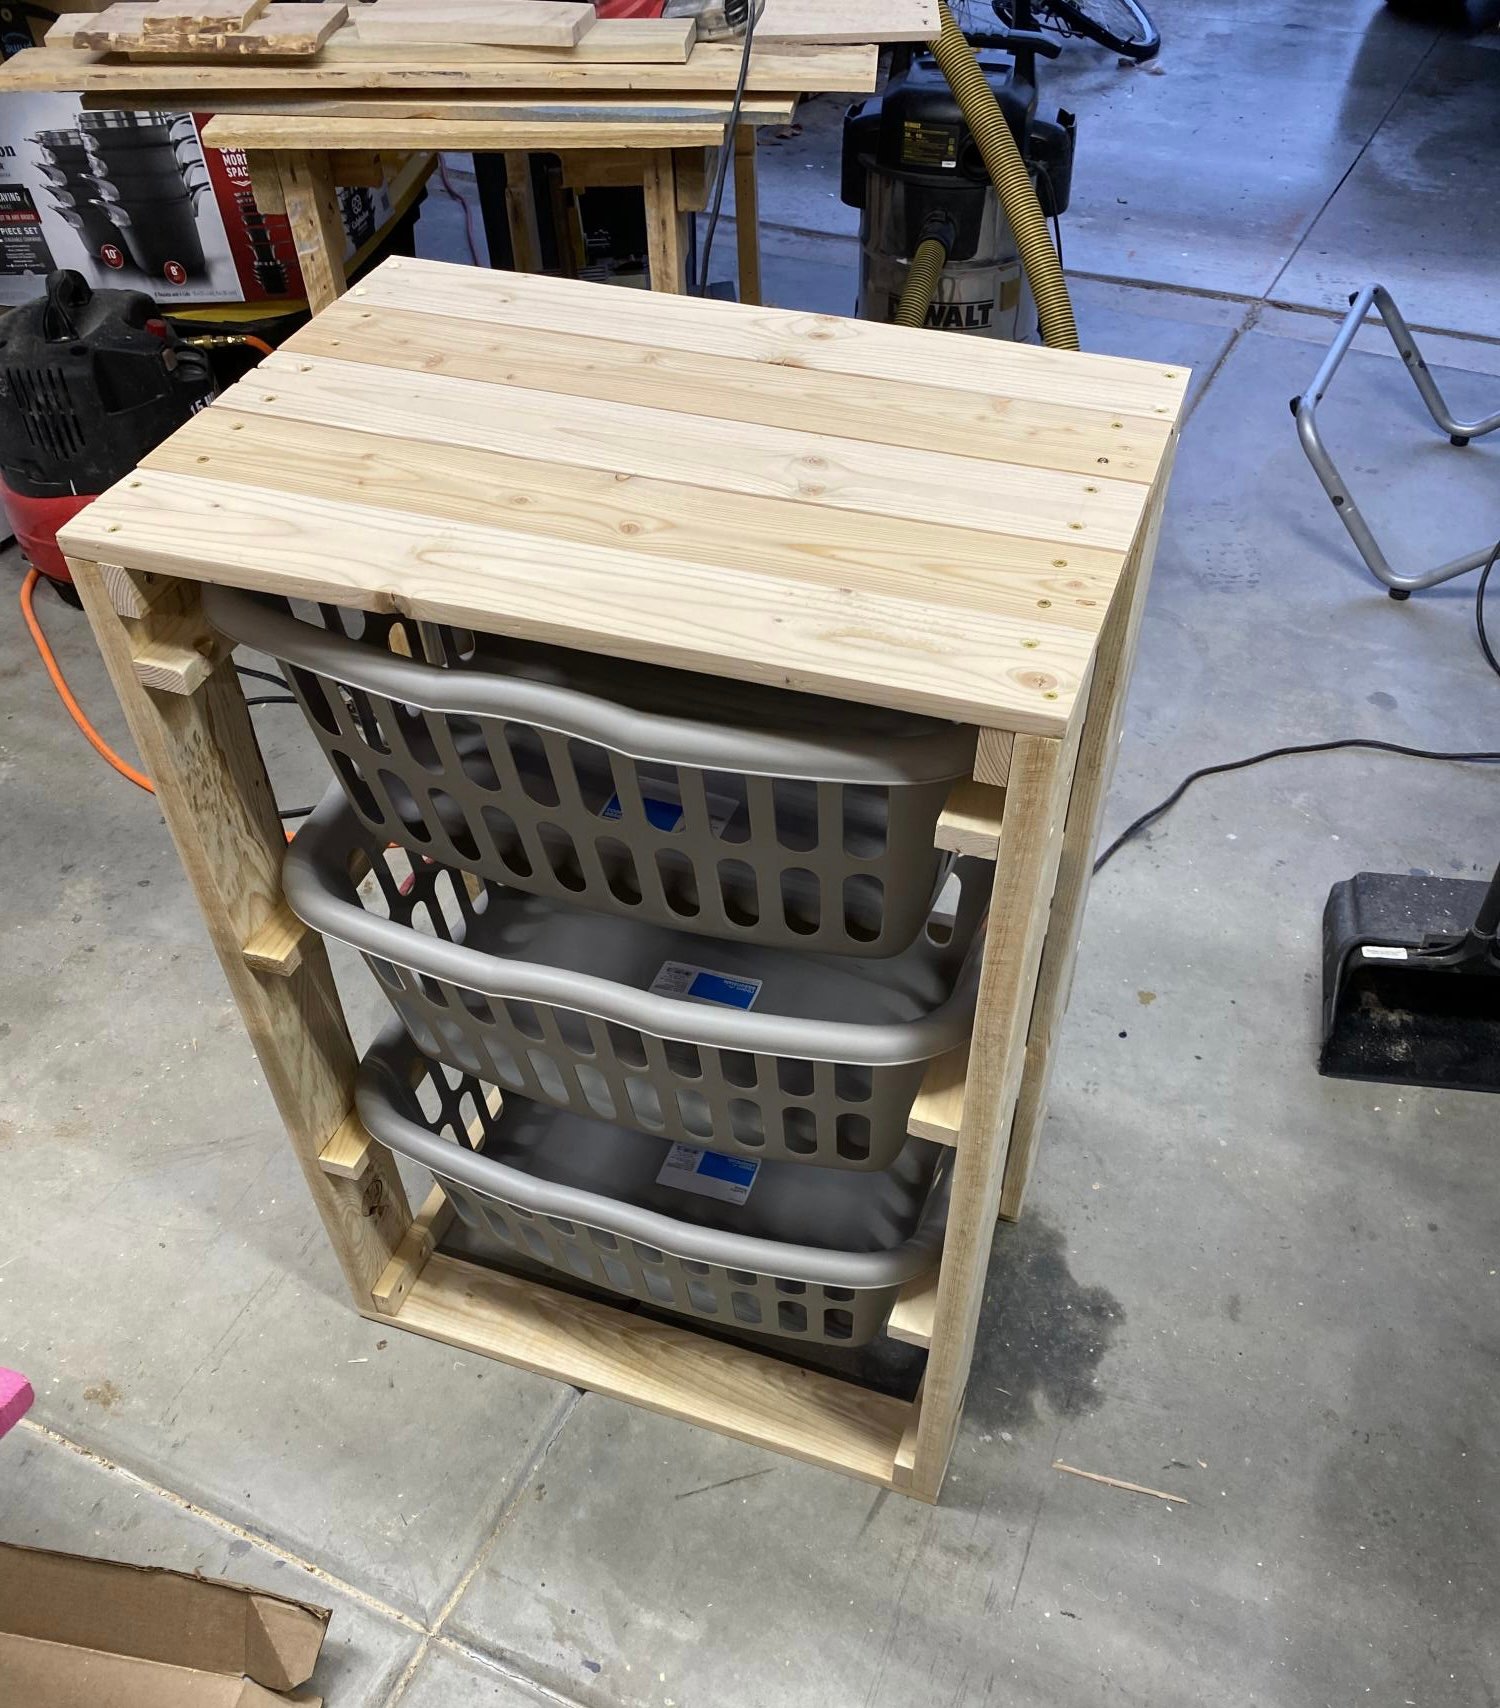
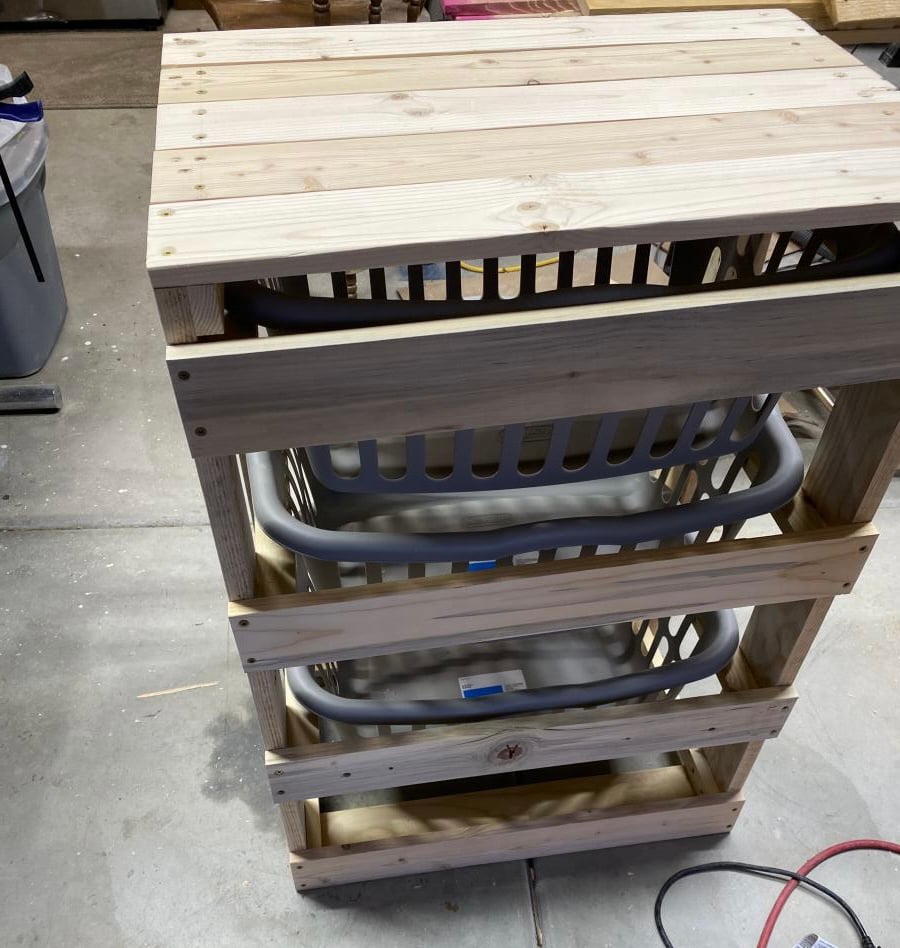
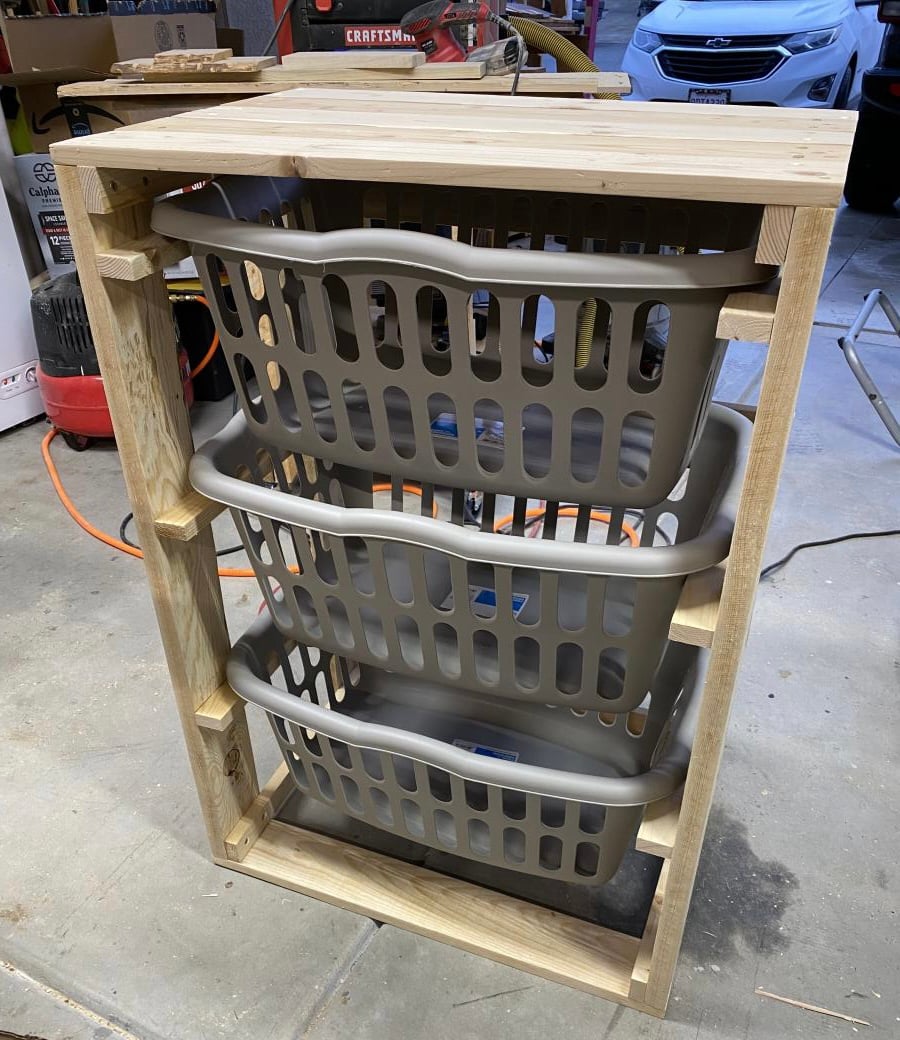
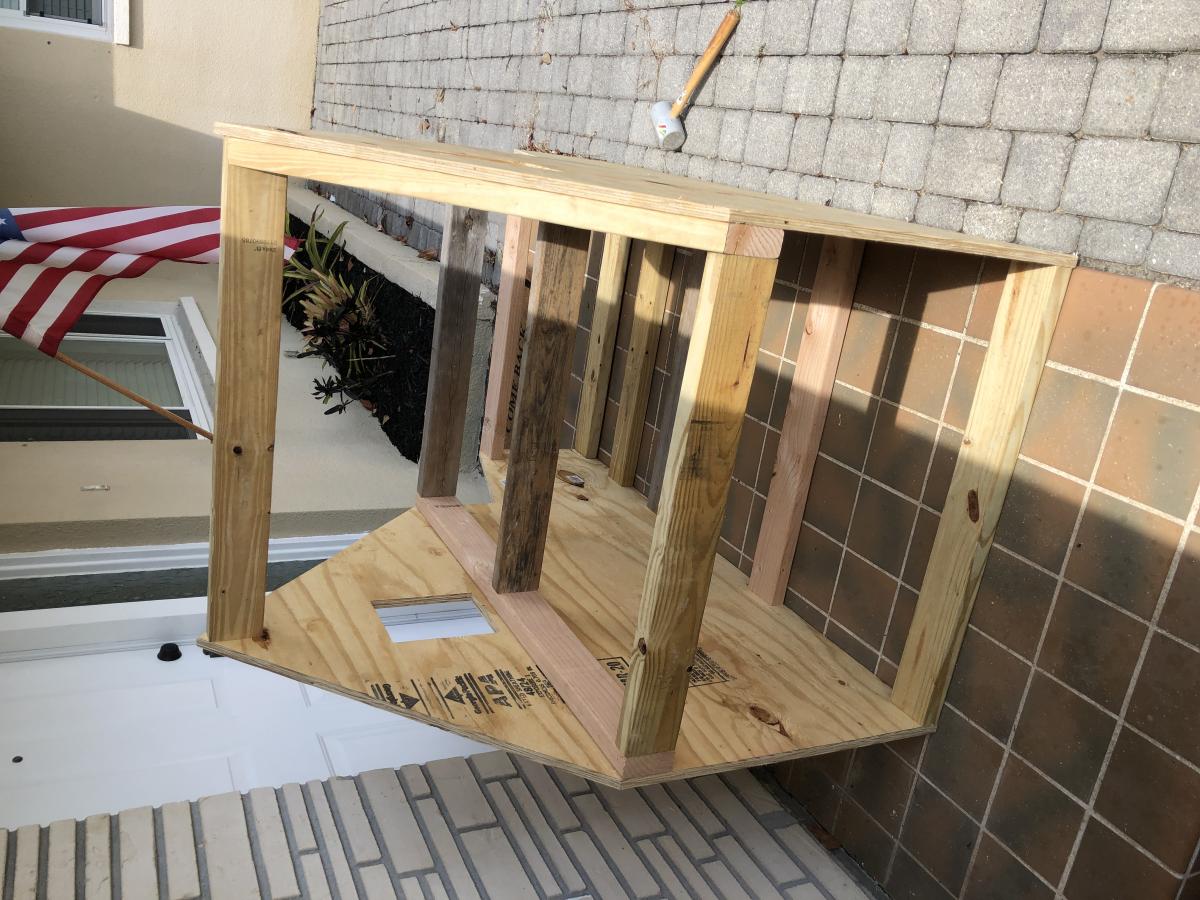
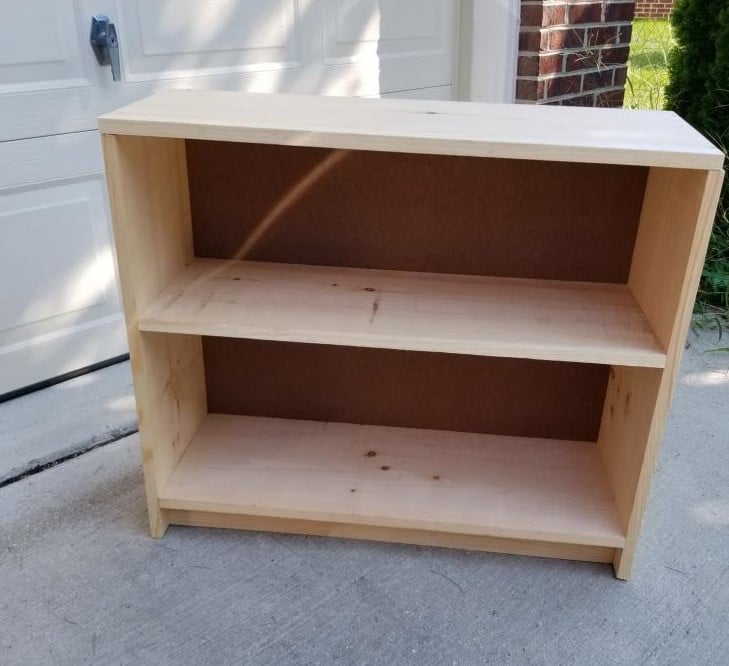
Modified Willy Bookcases

Submitted by AhmaNaz on Thu, 09/17/2020 - 09:57

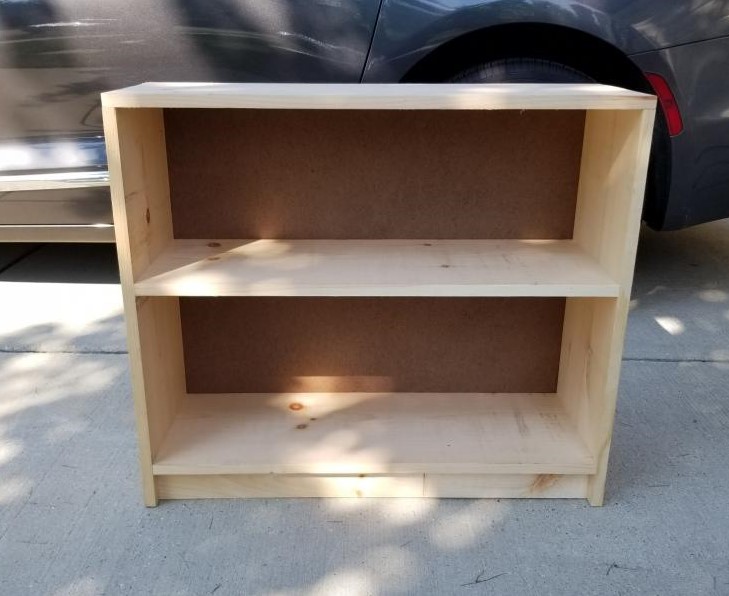
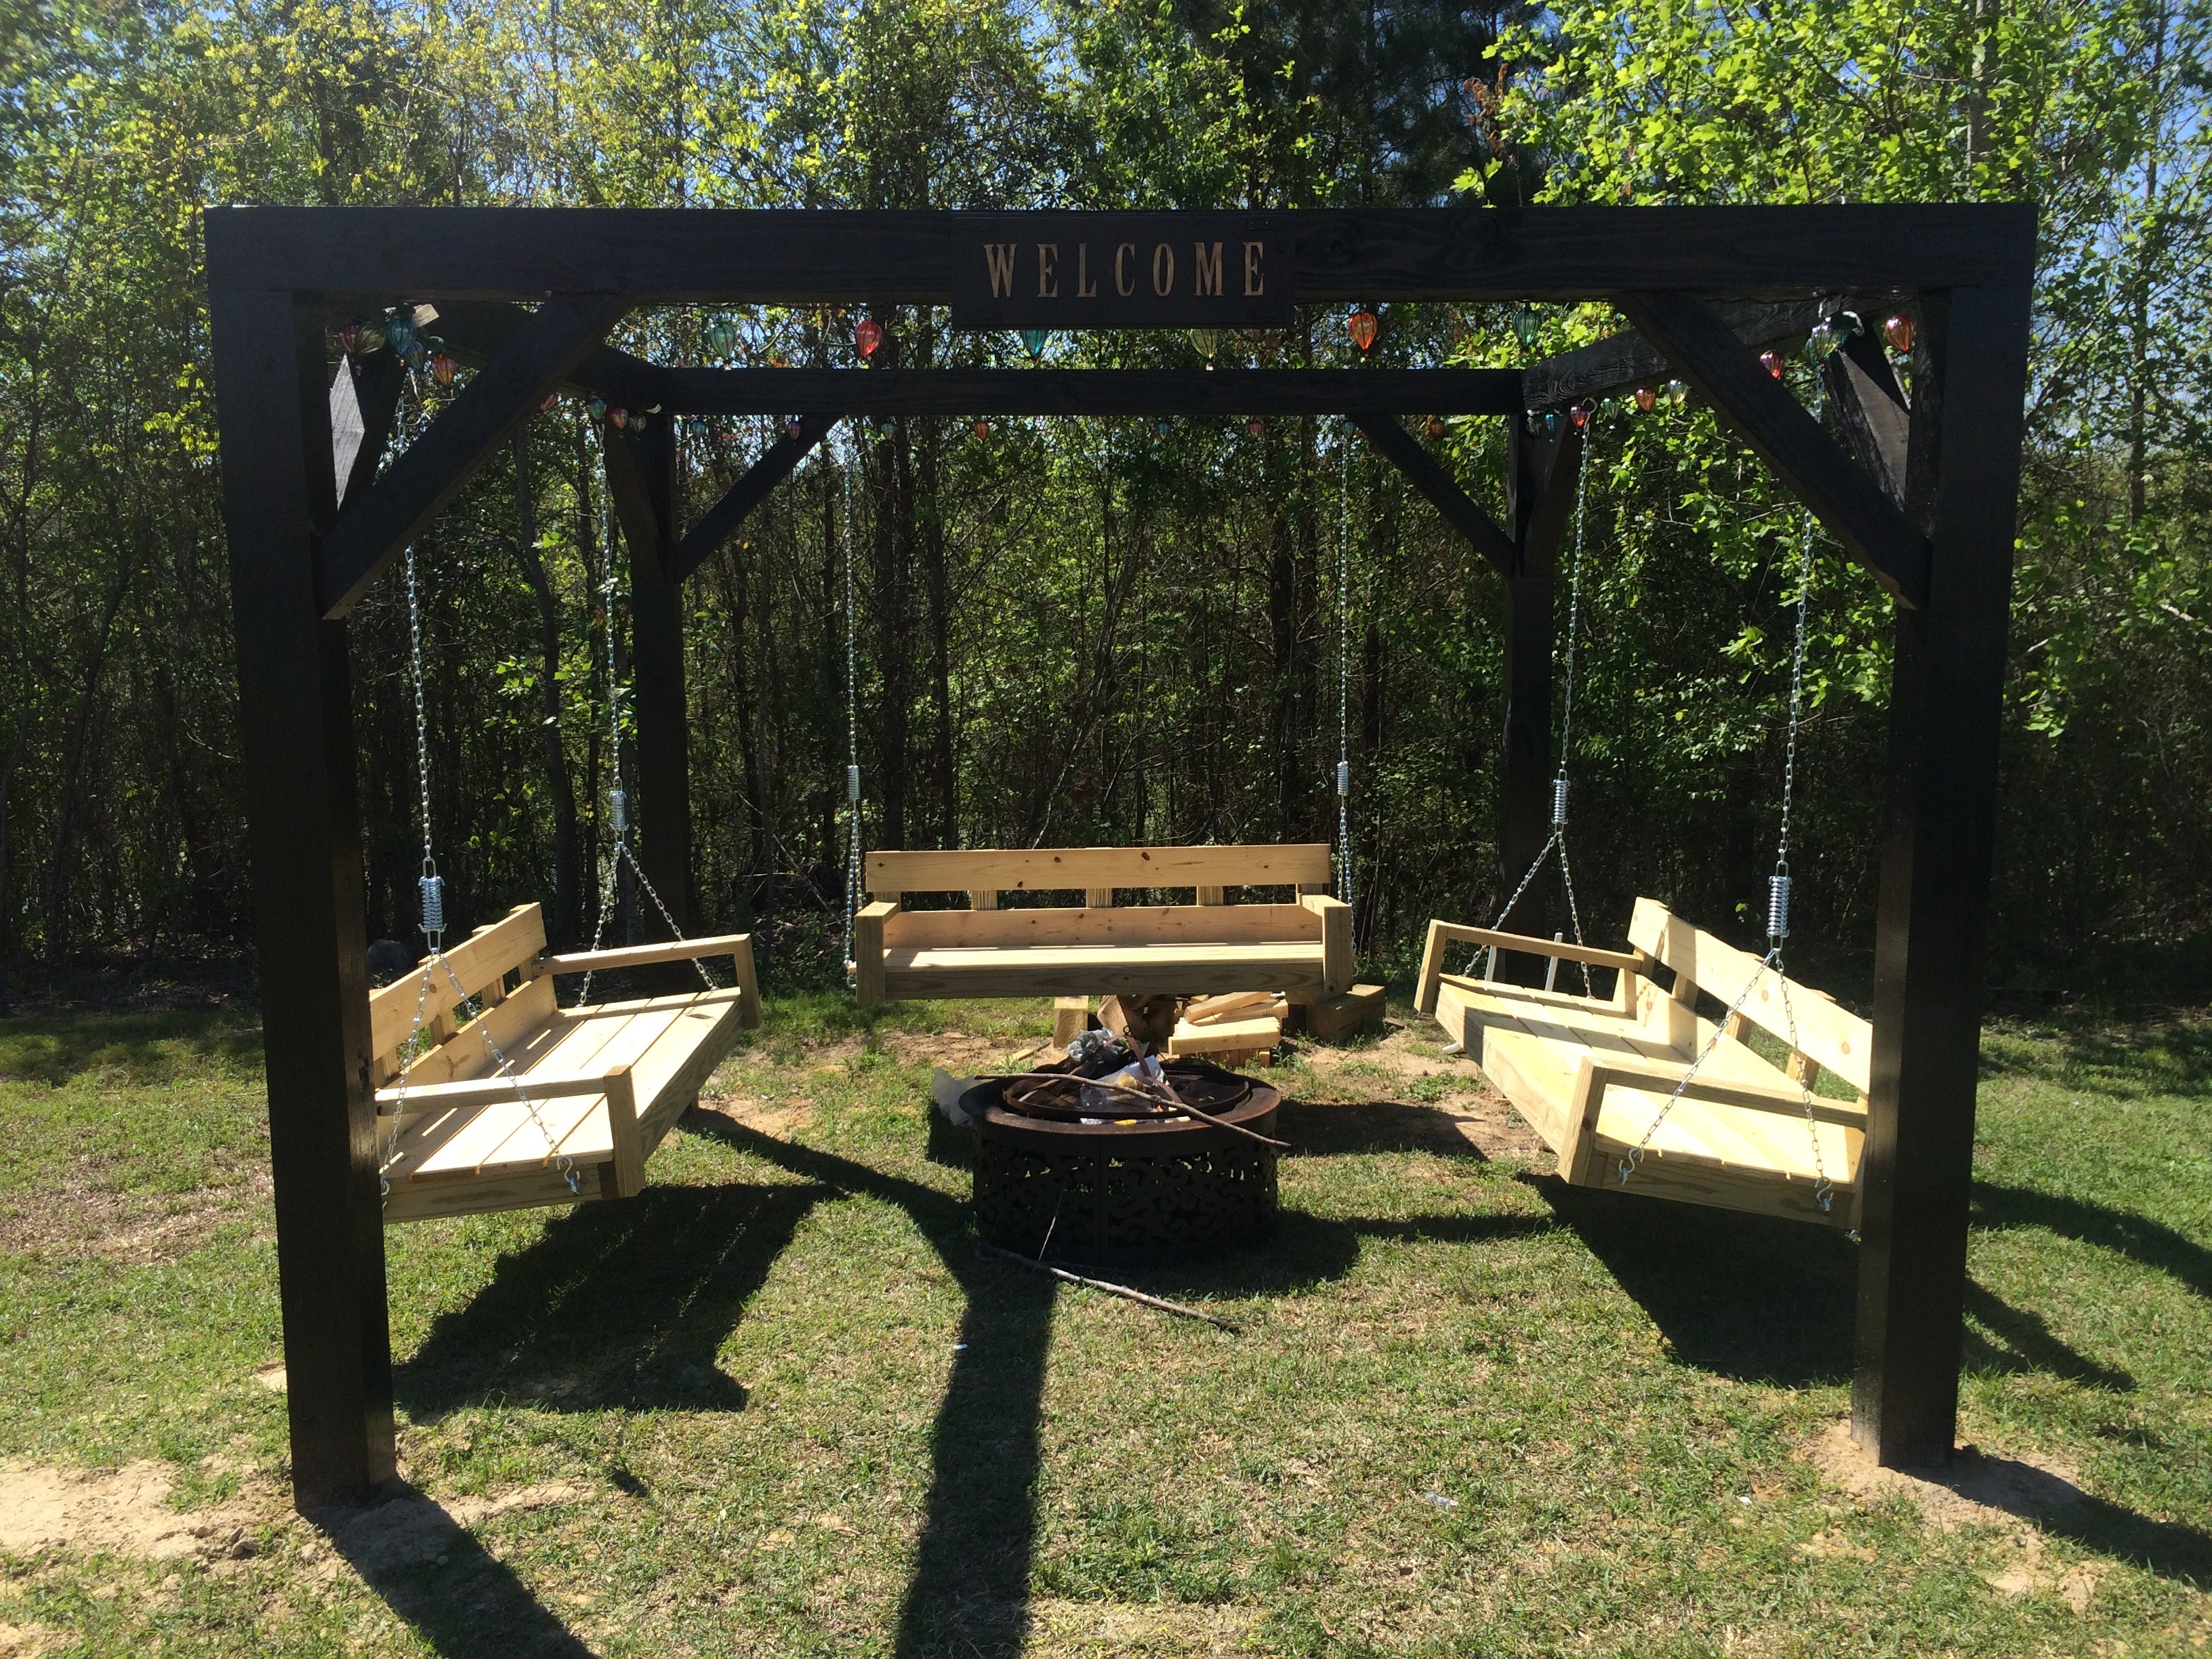
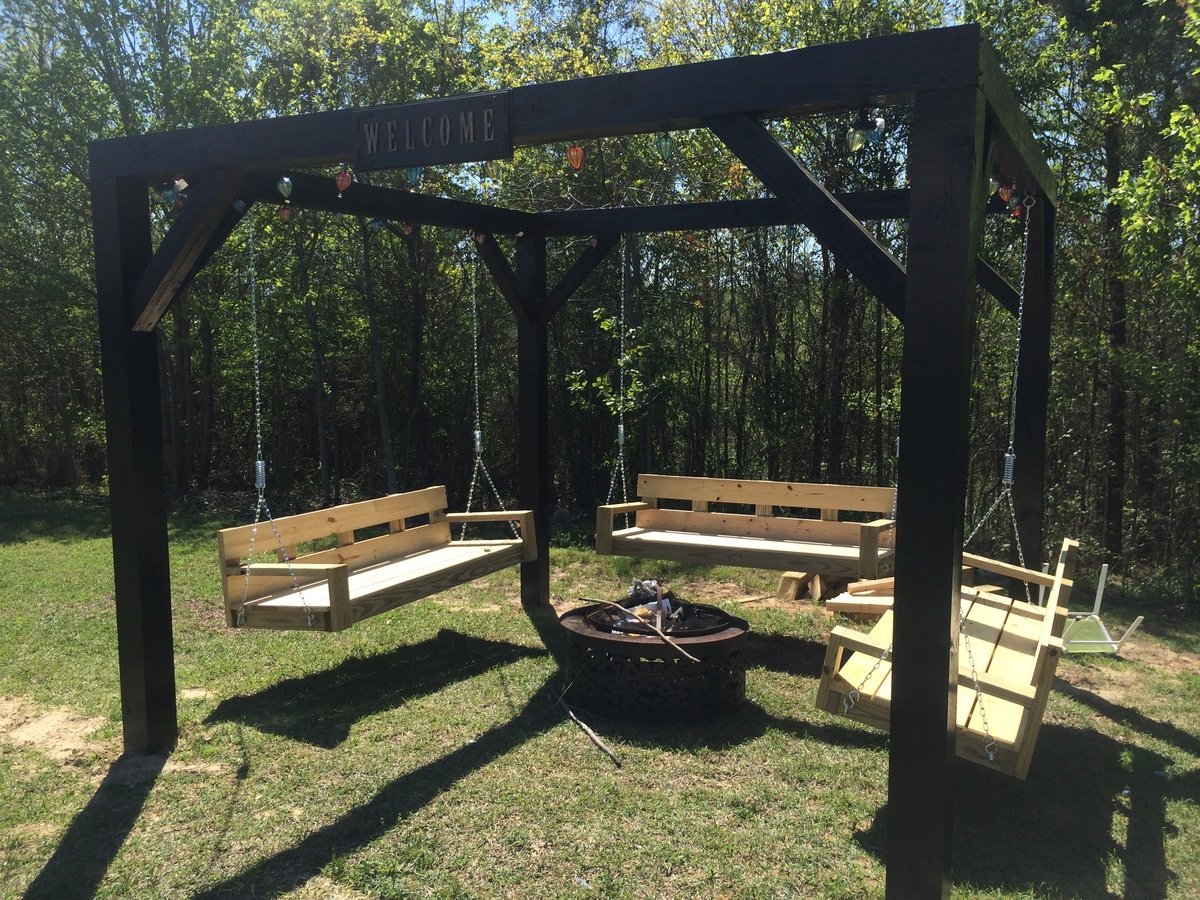
2 bookcases for my family, storage and organization. Left raw for them to customize. Current vision is purple and pink or maybe an ombre stain like we saw on Good Bones. Hopefully I can add update of final decision.

Built from Plan(s)
Estimated Time Investment
An Hour or Two (0-2 Hours)
Finish Used
Raw
Recommended Skill Level
Beginner

Spa Side Table

I completed this table with my 5 year old daughter as my assistant. My husband requested a table to put next to our new hot tub to set his drinks on and this is perfect. We only put one board on the top because I felt since it would be outside, I wanted a smooth top. I just screwed it in diagonally from the bottom. I also used spar varnish since it would be outside.

Estimated Time Investment
Afternoon Project (3-6 Hours)
Finish Used
Rust-o-Leum Ultimate Wood Stain in Kona
Semi-gloss Spar Varnish (3 coats)
Recommended Skill Level
Beginner

Playhouse - Drew Gaffke

Submitted by Anonymous (not verified) on Sun, 12/26/2021 - 14:46

I combined a couple of playhouse plans for this one. The framing is 2x2 treated pine. The front is real stone. I tried to match our home the best that I could. The floor is made out of composite decking.

Comments

Seasonal And Holiday

First Project

Submitted by dragondad on Thu, 08/06/2020 - 11:34

Well, I started with one chair and finished with a full set. Not bad for a first timer. Definitely room to improve. Little tip if you're going to make this amazing set... raise the backs as they are too low with thicker cushions. I built a casing to go on top after the fact. Pretty happy with how it all turned out. Thanks Ana for the plans... now onto the next project!

Comments

Fire Pit Swings

My wife saw something like this on Pinterest and desperately wanted one. The one she saw was hexagonal in shape. We didn't need as many swings so we went with just a plain square shape. We used 6x6s for the legs and posts across the top and used 4x4s for the angled support pieces. We built the swings using the plan from this website. All the materials can be picked up at the blue and orange stores. However when it came to the springs for the swings, the blue store was 1/3 of the price of HD. The legs are 12' long and buried 4' under the ground and cemented in for strength. Luckily I am retired military and was able to rent an auger for 1/2 the price of HD or the blue store. You could do it by hand but it saved us hours and lots of back pain. We found our dimensions for the size we wanted and spray painted dots on the ground where the posts were going to go. We dug the holes and stuffed the 6x6s in them. Using a post level we made sure they were plum. We braced them and added the quickrete and left them to setup over night. The next day we had to make sure all the tops were level with each other. This is where having some knowledge of physics paid off. I took clear tubing and screwed it above the height that I wanted on one post and then screwed the other end to another post. Fill it with water until the water level on the first post is where I wanted it (8 feet high) and it will automatically fill it level on the other end. There is a picture of this above. Water will always level itself out. I had to do this because my yard is at a slight down hill grade. We marked it and cut the tops off to make it level. After attaching the 6x6s on the top with 8" lag bolts it was time to paint. After painting was done we built 3 swings from Ana's plans. We shortened them by 6" to give room to walk between the legs and the swings. All in all it was a great project that only took two dedicated weekends. My wife still has to paint the swings though.

Built from Plan(s)
Estimated Cost
$600ish
Estimated Time Investment
Week Long Project (20 Hours or More)
Finish Used
We used an oil base Black Barn Paint from the blue store.
Recommended Skill Level
Intermediate

Comments

jkread

Wed, 05/27/2015 - 22:38

It sounds and looks like the top 6x6s are mitered and sit on top of the end of the vertical posts. I'd say at least one lag bolt each way to hold the mitered corner together and then at least one in each piece down into the vertical to hold it in place.

carewarner

Mon, 04/27/2020 - 10:24

WOW, LOVE!!! This is simply gorgeous! What a warm and welcoming addition to your yard. And thanks for sharing your method of finding level for your posts on your sloped yard. I absolutely love it!

lakidog

Mon, 03/17/2025 - 04:51

Macau is actually much bigger than Las Vegas in terms of gambling revenue—it’s been the world's top casino destination for years. While Vegas has more entertainment options, Macau is focused almost entirely on gambling, attracting high-rollers from China and other nearby countries. The games are different too—Baccarat is king in Macau, while Vegas has a mix of slot machines, poker, and table games. One major difference is that Vegas thrives on tourism, with people coming for shows, restaurants, and nightlife, while Macau is almost entirely about the casinos. The laws are also stricter in Macau, with fewer options for casual visitors who just want a fun experience. If you’re interested in how Macau compares to Vegas in terms of revenue, gaming trends, and visitor demographics, this article breaks it all down: https://www.tellyexpress.com/online-gambling-in-east-asia/ . It’s a great read if you want to understand why Macau dominates the casino world!

Seasonal And Holiday

Outdoor Sofa - Front Porch

Submitted by mclaudeg3 on Fri, 11/06/2020 - 16:47

This project was quite easy and did not require many tools. The plan allowed me to adjust the measurements easily so it could fit in that space. I used regular 2x4’s and treated the wood with Mountain Ash colour in a semi-transparent stain from Sherwin Williams, I just love the colour! I build 2 - 2 seaters exactly the same. The one side has no arm, as I wanted it to look like a lounge chair. I love to sit in the corner and stretch my legs 😊. I bought the cushion covers from IKEA, and got good quality foam.

Estimated Cost
Wood ~$300
Estimated Time Investment
Weekend Project (10-20 Hours)
Finish Used
2 coats of semi-transparent Mountain Ash stain from Sherwin Williams.
Recommended Skill Level
Beginner

Comments

Seasonal And Holiday

Chicken Coop and Run

Submitted by Klombers1 on Mon, 03/24/2025 - 08:47

We started with a commercial coop. I used your plans to extend the run, and after the chicken math happened and we moved to the farm full-time, I built a much larger version of this plan (painted to match our actual barn), and created a removable center divider in the run to make introducing new chicks easier, while giving them protection until they reached mature size. We are fortunate to free-range our chicken (we have 2 Great Pyrs in the pasture with them) and have an automatic coop door on the blue coop that allows them to go out onto the top of the run. - Robin K.

Large Covered Sand Box with Seats

Submitted by Anonymous (not verified) on Sun, 11/10/2024 - 20:03

Followed the plans for the sandbox for my granddaughter. She absolutely loves it and so do I since I have a seat I can sit at! I did enlarge it a little so added some supports. It works so great. - Sandy

Built from Plan(s)

Bar stool

Submitted by Anonymous (not verified) on Fri, 03/10/2023 - 13:10

Hi Ana,

Using the bar stool plan and I built two bar stools for my man cave in Australia. Thank you so much. Cheers
Ricky

Built from Plan(s)

Comments

Basement Sofa Table Bar

Submitted by advanlente on Sat, 03/28/2020 - 12:04

My husband and I had been looking at many different stores to try and find a bar table for behind our new couch in our basement. We wanted something that people could eat and drink at when we entertained and/or be able to sit at and play video games. I should have known we were better off to build our own rather than look in a store. It was only $30 in lumber and took 3 hours to build. And another project in the books!

Estimated Cost
$30
Estimated Time Investment
Afternoon Project (3-6 Hours)

Comments

megs502

Fri, 04/03/2020 - 11:03

do you have the plans for this? i've been looking and looking for what i needed and this is it!!

mferrara

Sat, 04/04/2020 - 05:39

Hi - exactly what I've been searching for....do you have plans available? Please and thank you!

beckaroo

Tue, 06/02/2020 - 23:04

Hello,
I would also love to see the plans for this sofa bar table.
Thank you
Becky

Kitchen Island

The plans were easy to follow. I modified my island to fit my space and cut it down to 44 inches in length.

Built from Plan(s)
Estimated Cost
The entire project cost $47.00.
Estimated Time Investment
Day Project (6-9 Hours)
Finish Used
I stained the top and shelves with Watco Danish Oil in dark walnut and then used a satin finish varathane for only the top to protect it from spills, etc. The sides and legs were painted with an interior latex paint called "Sandbar" from Home Hardware.
Recommended Skill Level
Beginner

Comments

Emily Jo (not verified)

Mon, 10/31/2011 - 15:33

Your island is gorgeous, and I love the modification you made to the original plans on the shelving support! I would like to know what size the boards are that you used so that I can duplicate. Thank you!

Lisa Tamaye (not verified)

Sun, 02/05/2012 - 18:10

This is great! ANyone know how I could extend one side in order to put stools for an eating area?
Would love to do that!

Alice (not verified)

Tue, 02/07/2012 - 19:43

I would think it would be basically the same build, just add brackets to support the extra wood.

Guest (not verified)

Mon, 03/05/2012 - 15:20

I want to make this Kitchen Island but if can't find the Supply List. Would you mind posting it or emailing me please! This will work perfect in my Kitchen

Katia57

Mon, 03/05/2012 - 17:46

Wow! Just a wonderfully simple project! I can figure it out by looking at it. I have a piece of Rock Maple Counter Top 24"x6'that needs legs. I'll probably use 4x4' for legs, six of them. But the shelves will be just like this. Thank you!

Katia57

Mon, 03/05/2012 - 17:50

Wow! Just a wonderfully simple project! I can figure it out by looking at it. I have a piece of Rock Maple Counter Top, 24in.x6ft., that needs legs. I'll probably use 4x4s for legs, six of them. But the shelves will be just like this. Thank you!

Guest (not verified)

Wed, 04/04/2012 - 11:58

Just click on the link for the instructions. It's under the heading 'About This Project' titled as 'From Plan: Easy Kitchen Island Plans'.

Click where it says 'Easy Kitchen Island Plans'. When you hover your cursor over the words, you will see that is a hyperlink.

Lindsey Adams (not verified)

Sun, 05/20/2012 - 06:48

I love your island and I also have a small kitchen...would you happen to know the sizes of the boards you used? Thanks

??? (not verified)

Wed, 07/25/2012 - 14:31

Yours looks so different and so much better then the one that show how to make it, how did you do it? I really would love to build it but have no idea how...
Thanks so much!

CBsMama (not verified)

Wed, 08/15/2012 - 13:08

This island is perfect. I love the shelves and the size. Any chance you could send me the dimensions of this island and details on how you did the shelves? Great job!

lizzy1299

Mon, 02/04/2013 - 15:03

I'm SO glad I stumbled acrossed your website! I LOVE that island and getting ready to get all the stuff to make it. Did you use the Kreg Jig thing the original person used...? If not, how did you cover the screw heads?

Thanks!

ameliam

Wed, 12/31/2014 - 07:37

Hi, this is my first time building anything. I really like the modification made to the original plans. I like the legs facing the other way. I can't figure out how to modify the cuts on the sides and front and back supports for the top to adjust for turning the legs the other way. Are there modified plans. LOL I need instructions, I’m not quite there yet on doing it myself. Thank you

djbeenie

Wed, 02/04/2015 - 15:03

How did you mount the 1 x2s since its on the side of the 1 x 4s. Did you tac them in. I really like the way that looks. Thanks!

MBuckson

Mon, 03/16/2015 - 08:00

Amazing island! I am in the middle of building this and looking ahead to the finishing aspect of it and I have a question: What tool did you use to apply the oil on the counter top? A cloth or a certain type of brush?

wiri0302

Sat, 06/06/2015 - 18:33

Hello, i love this island but maybe i missed it. What kind of wood is everyone using? Frosting said $47 but that could only be for pine right? Are people using pine to build this? I would like it to look just like the picture. Any help would be appreciated! thanks!

Big Kids Picnic Table

Submitted by gsnpbc on Mon, 04/24/2017 - 10:00

My son and I made this table this weekend in just a couple of hours with no problems. The directions were clear and easy to follow. Thank you for sharing them with us.

Built from Plan(s)
Estimated Cost
$40
Estimated Time Investment
An Hour or Two (0-2 Hours)
Recommended Skill Level
Beginner

Laundry Basket Rack

This was a great last minute Christmas gift. Took me a little over two hours. Made completely out if pallet wood.

Comments

Cedar Planter for Pole Beans

Submitted by swhitead on Mon, 07/20/2020 - 10:41

Increased width of box to 46" by using 8 fence boards instead of 3. put base at 12" down, lined box with landscaping fabric to hold dirt. Created trellis with 1x2 boards with 10" long corner braces, spaced screws 6" apart around edges and weaved cotton thread to create the trellis. Used 12" scraps of 2x2 to create a "slot" inside the center of the planter to support the trellis. Added container mix and green pole beans started in egg cartons earlier in the spring.

Built from Plan(s)
Estimated Cost
$35
Estimated Time Investment
Day Project (6-9 Hours)
Finish Used
None
Recommended Skill Level
Intermediate
Seasonal And Holiday

Rolling shelf turned laundry cart

Submitted by makermave on Sun, 11/21/2021 - 16:17

This is my first build! It came together really easily. I modified the dimensions to fit my space. I didn’t add the black pipes, simply because I couldn’t find all the pieces, or the corner brackets, and I think it looks great without them. I added a handle (a towel bar I found on Etsy) to pull it in and out. I used rough cut cedar, and have not finished it. I’m not sure if I will. I wanted to spray paint the wheels, but the person that helped me attach them (a.k.a. my dad) was ready to to help me before I had them painted! But I love it, and it really adds functionality and stoage to this little gap between our washers and dryers.

Built from Plan(s)

Comments

Rabbit Cage

Submitted by blouden on Fri, 07/13/2012 - 23:30

I have a pet ferret that has little room to run around. So I seen this rabbit/ferret cage at the pet store. It was about $150 or so. So I took a pic of it on my phone, and found the Google Sketch app, and watched some videos, and now I have plans for the cage. Some 2x2's, 1x8's, plywood, chicken wire, and some locks and hinges for the ramp an lid.... Still tweaking it, but hopefully it will work out.

Estimated Cost
$50-60
Finish Used
Stain
Recommended Skill Level
Beginner

Comments

Mom's Train Table - our version

I was planning to make a train table trundle for my son's bed, but once I saw this plan everything changed. I'm so SO happy with it. Modifications: 1) We took off the bottom shelf because hubby likes to stretch his long legs out underneath. 2) We used laminated pine project panels for the top, they cost more, but they were already the correct size, and the finished look of the top would be nicer. We altered the design to make the panels go lengthwise. So far so good, neither have bowed whatsoever. 3) we used inset handles from Lee Valley with an antiqued finish. I had yet to lacquer this when I took the photo because we couldn't wait to get the trains in there! I have since done 3 coats of minwax Poly to protect it from little hands, crayons, etc.... We're hoping this table will graduate cars, then to legos, and then....who knows!? Thanks to Ana and all the contributors here.


Built from Plan(s)
Estimated Cost
$150 with the hardware
Estimated Time Investment
Afternoon Project (3-6 Hours)
Finish Used
Minwax Stain in Golden Pecan, one coat
Recommended Skill Level
Beginner

Comments

Fancy + Mimi's Hall Trees

Submitted by Anonymous (not verified) on Sun, 02/05/2017 - 13:28

Took the fancy hall tree bottom and added Mimi's hutch to the top. Added a little bead board to the bench and top edges to cover up the plywood, and voila! My wife's Christmas gift. 

Estimated Cost
$250-300
Estimated Time Investment
Week Long Project (20 Hours or More)
Finish Used
White paint and polyurethane
Recommended Skill Level
Intermediate

Stylish Chicken Coop

Submitted by Anonymous (not verified) on Wed, 11/11/2020 - 15:52

Housing three (3) hens now that are about a month old. Probably late January before can expect any eggs.

Great project. Metal roof worked well. I used flashing for the ridge caps. Have allowed for as much ventilation as possible for this Southwest Florida heat.

Thanks Anna, for sharing this project.

Estimated Time Investment
Week Long Project (20 Hours or More)
Finish Used
Sherwin-Williams outdoor barn red and white.
Recommended Skill Level
Intermediate

Email Me
Free Plans

Get new plans sent right to your inbox for free!

    We won't send you spam. Unsubscribe at any time.