Community Brag Posts
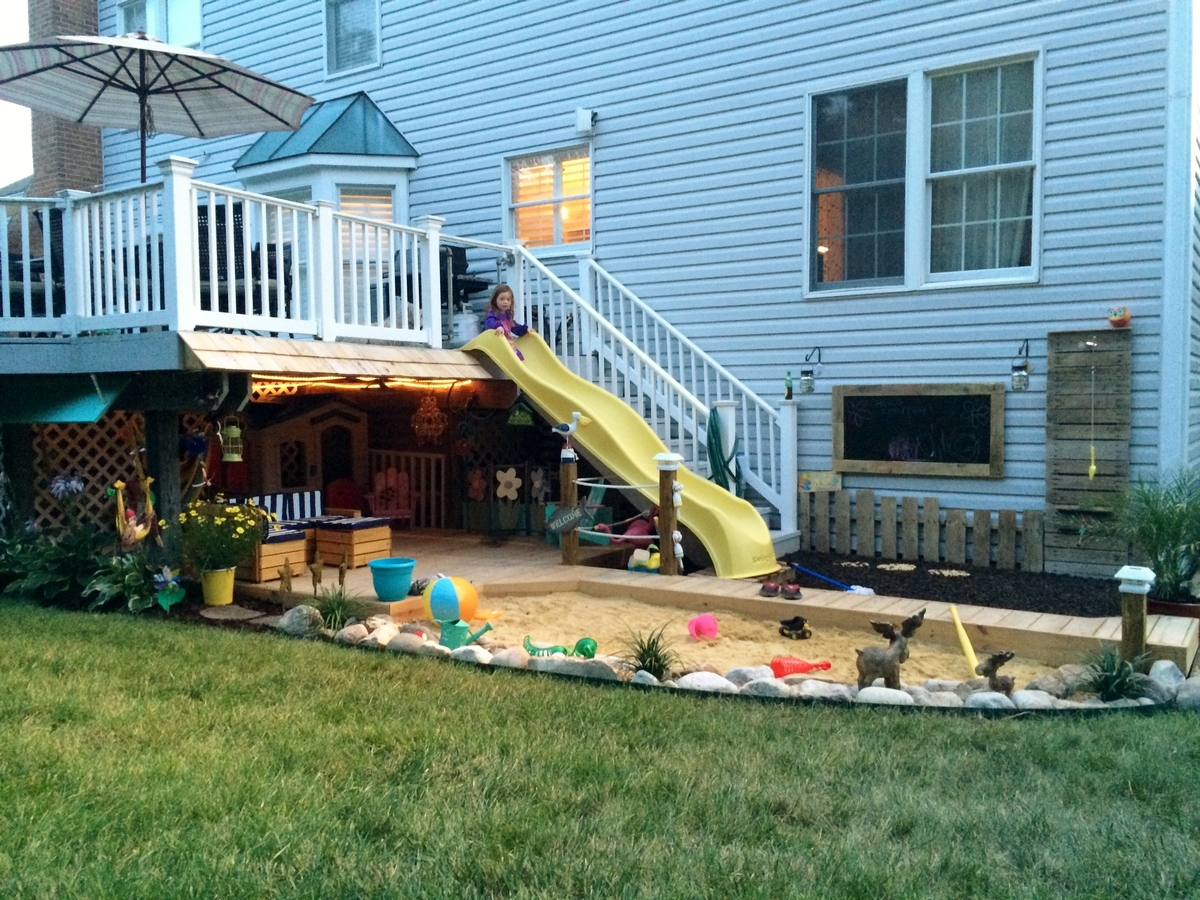
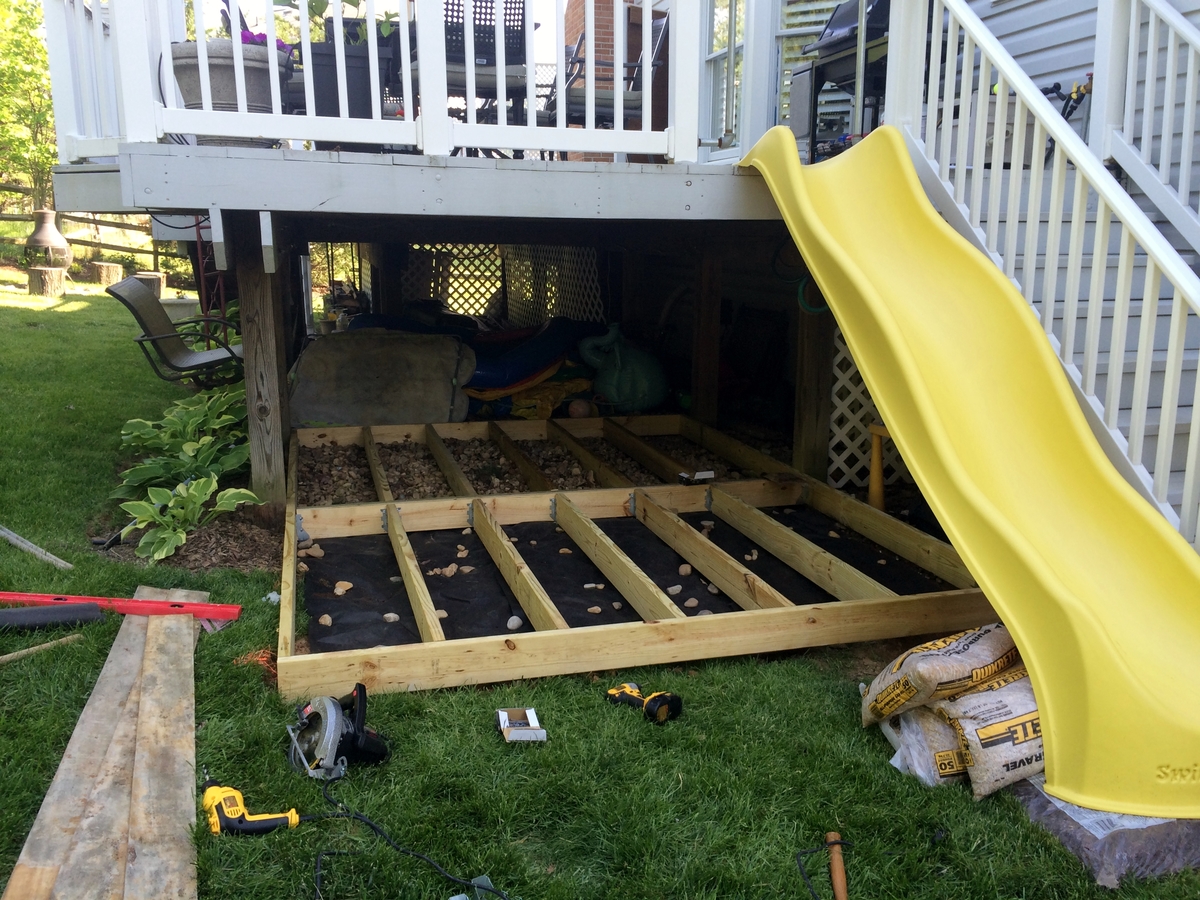
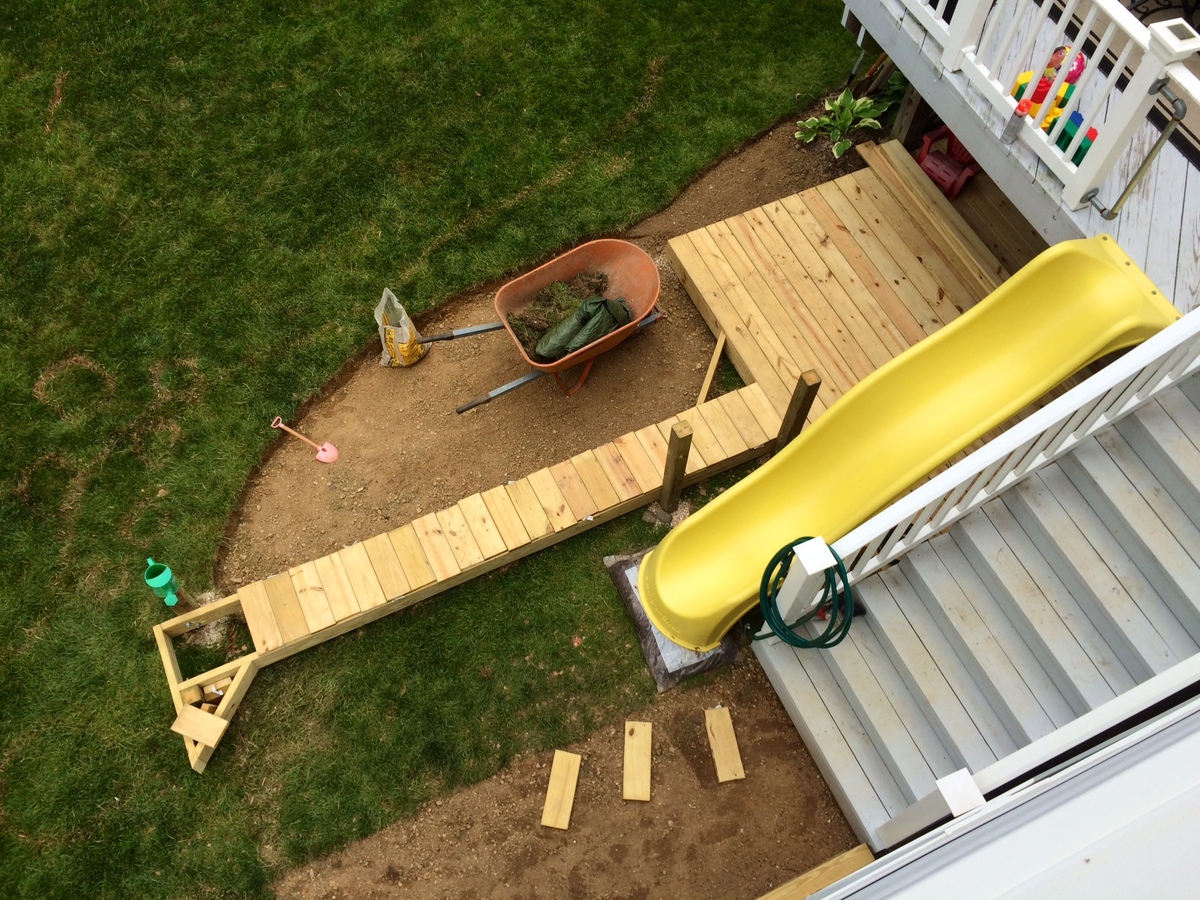
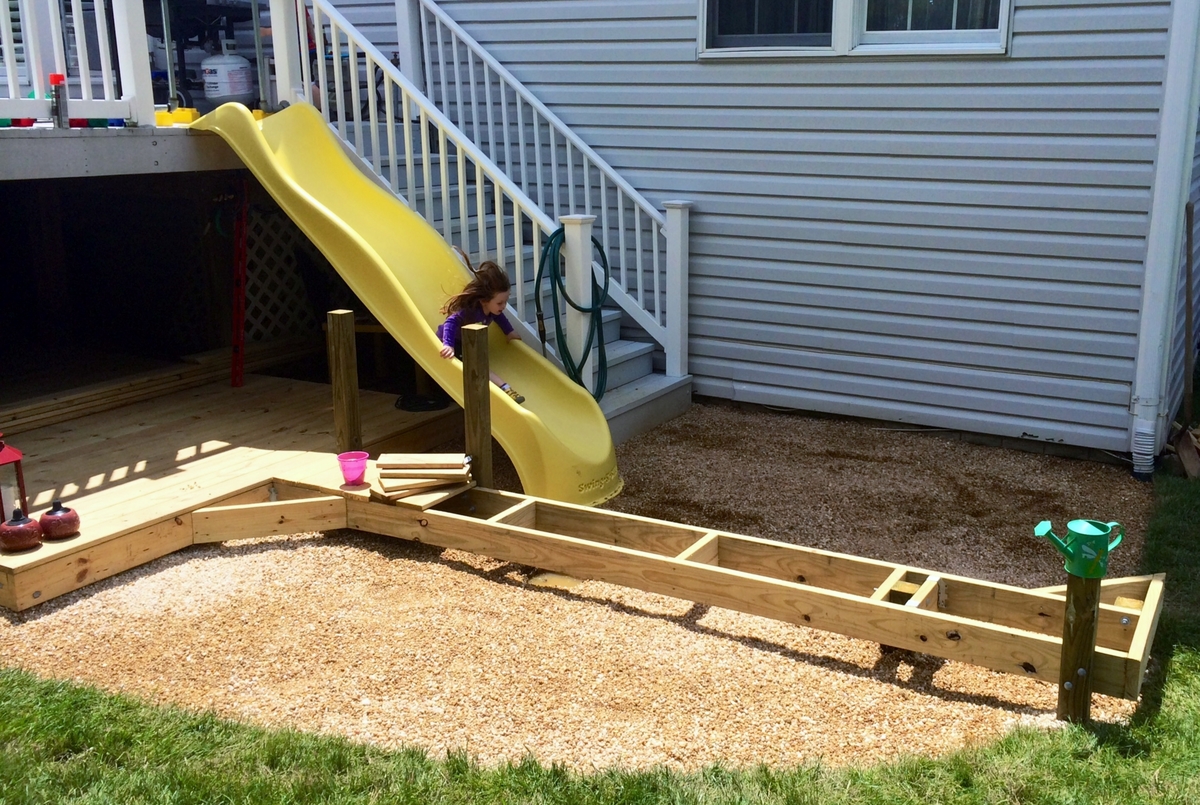
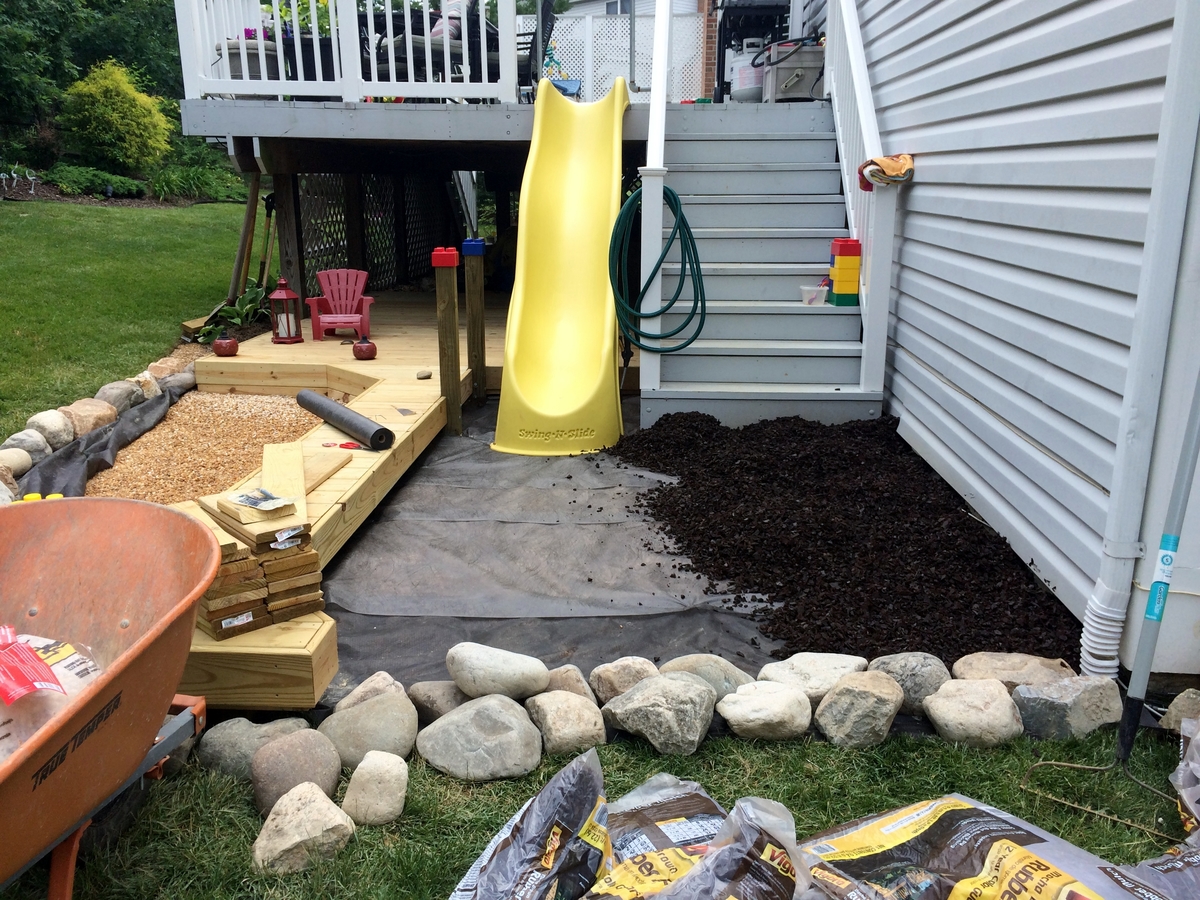
Backyard Bliss!
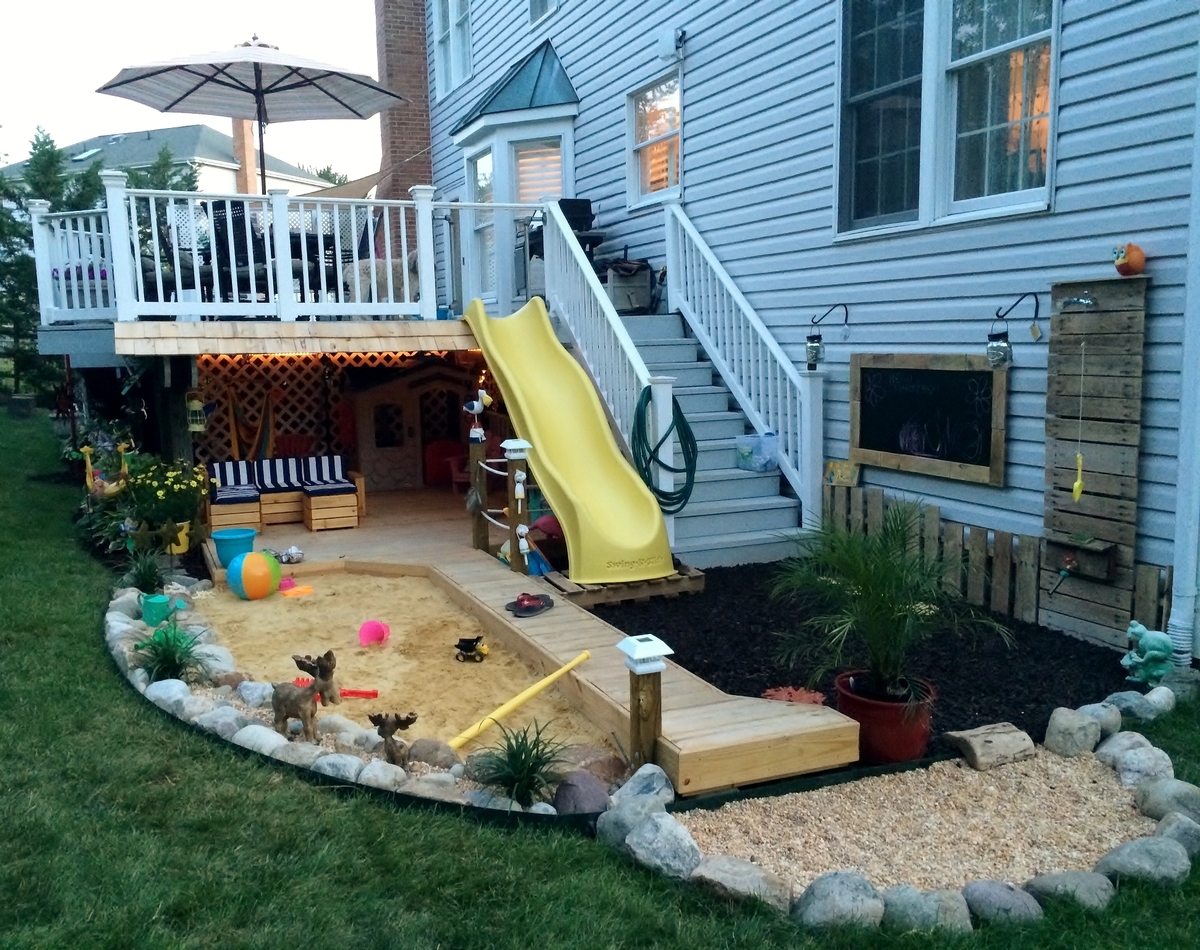
I built this outdoor play area for my kids this past summer. The area under that portion of the deck was always messy and muddy and so I wanted to make use of it. I built the deck and anchored it with lag bolts to the deck supports. On the one side I used rubber mulch and on the other there is play sand. I dug holes in various locations and filled with gravel to allow for drainage under the sand and mulch. For the awning I used plain cedar shingles. I added a shower that is just regular 1/2" metal pipe with a hose adaptor. The shower wall and fence are just old pallets that I had for a while, cut to size, which was pretty much random but they came out great. I added a misting system under the awning that works great, the kids love the cool mist on the hot days. Overall, a heavy job ripping up the grass, moving the wood, gravel, stones, sand and mulch, but a fun deck build and even better experience doing this with my kids by my side!
Estimated Time Investment
Week Long Project (20 Hours or More)
Recommended Skill Level
Intermediate
Comments
Tue, 01/13/2015 - 09:37
What an amazing use for a
What an amazing use for a weird outdoor space ! You are genius !
Wed, 01/14/2015 - 06:21
Just. Plain. Awesome.
I love it! I'm now trying to convince my husband to let me add a slide to the deck. Who wouldn't love that?!
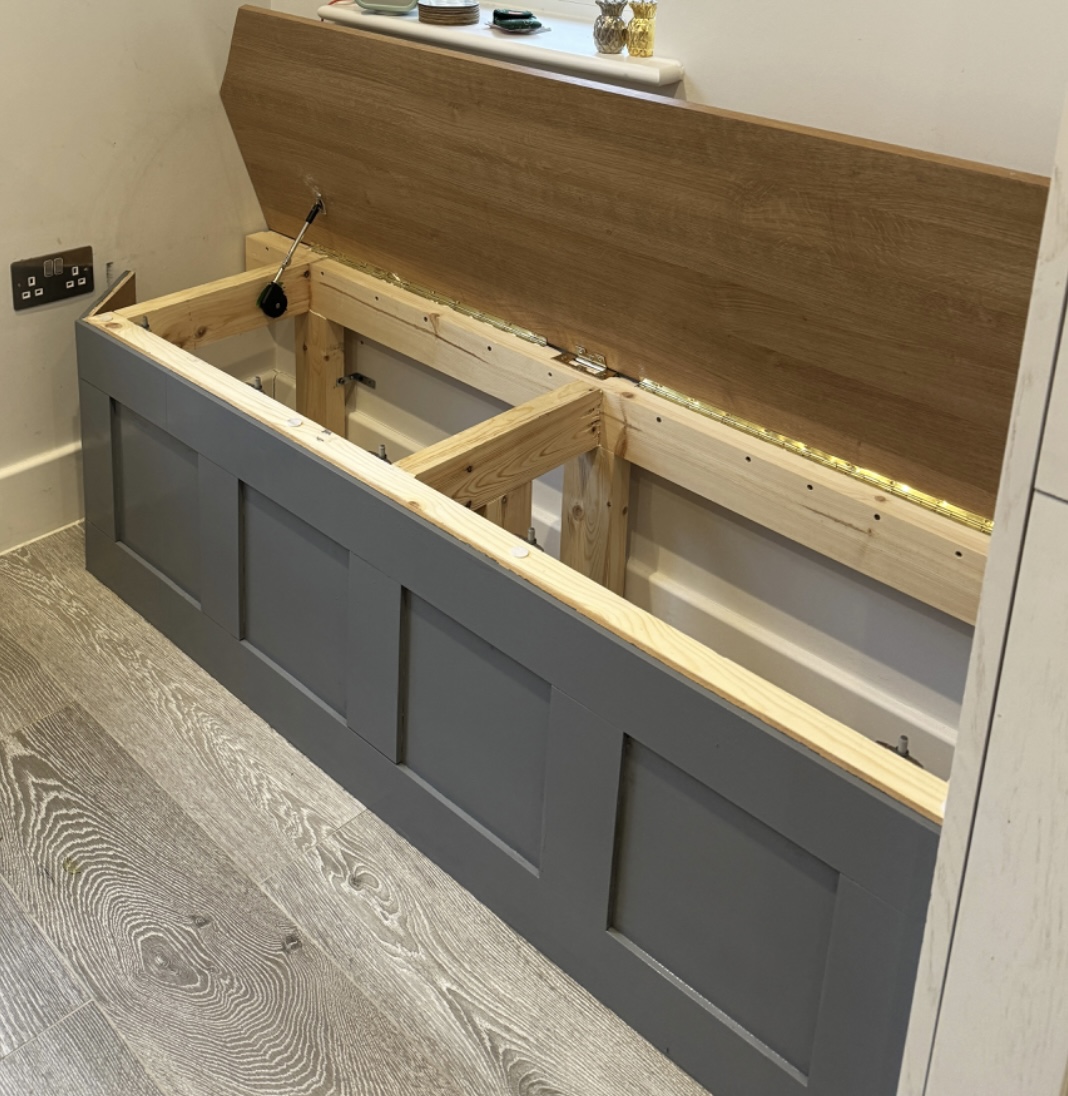
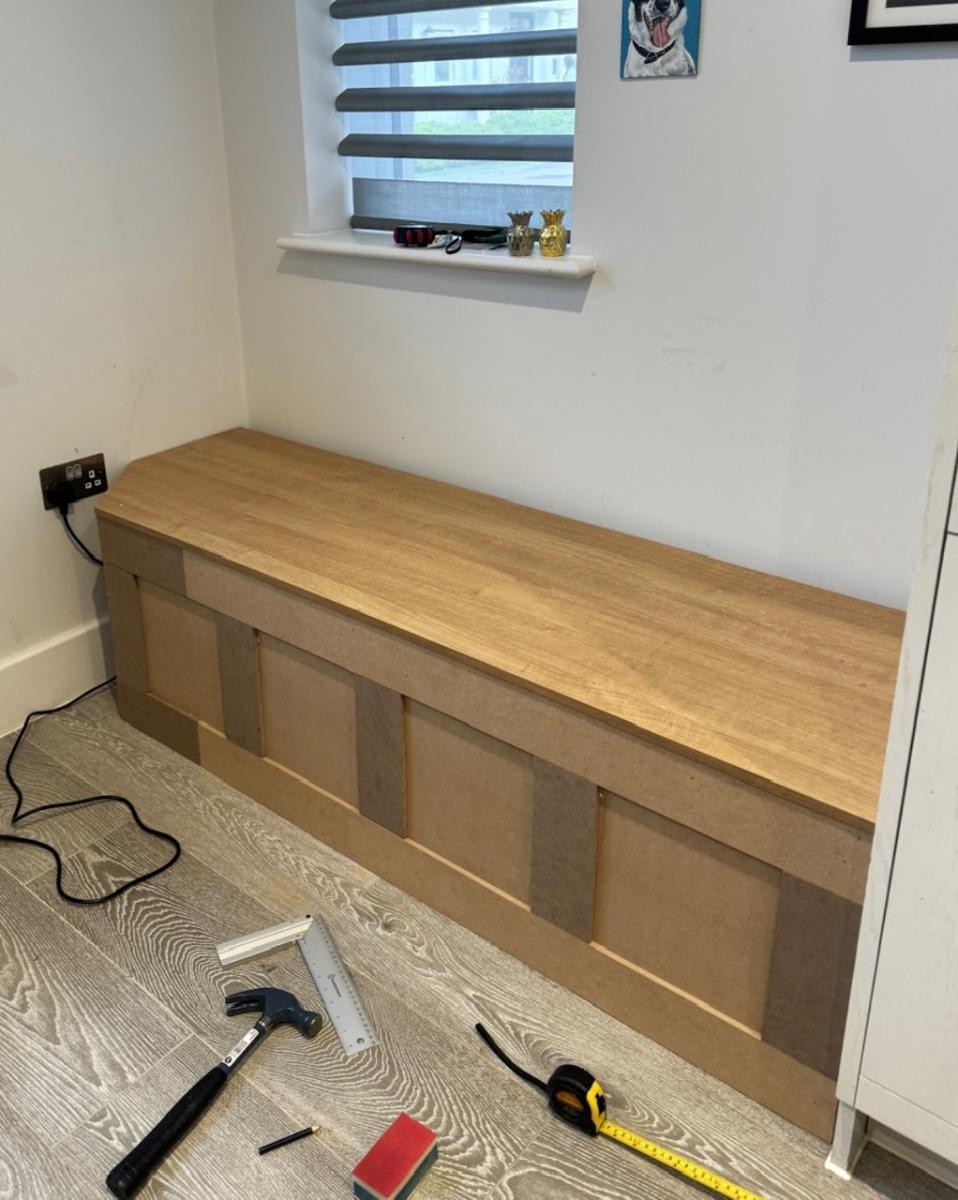
Storage Dining Bench
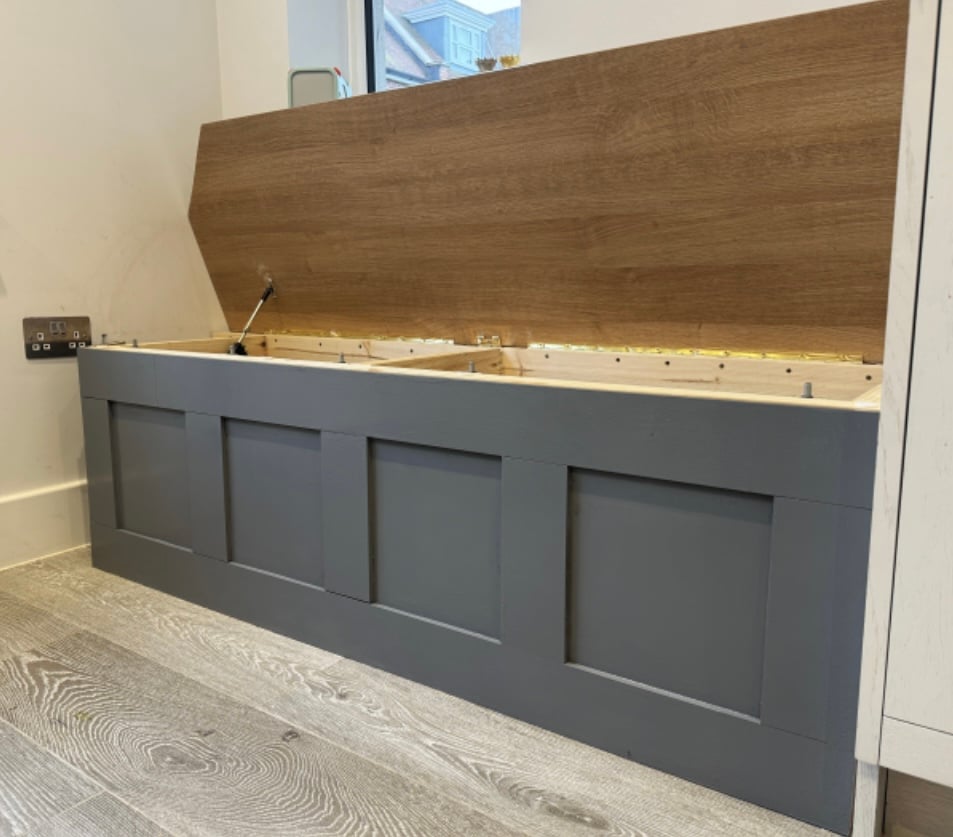
Kitchen dining bench with storage. Due to the plugs being in an awkward position, I opted to build this bench with a facade as opposed to adding a back and sides. This also meant it had to be panelled in situ which was a fun challenge! It has piano hinges as well as soft close pistons making for a great storage bench that is in keeping with the rest of our kitchen.
Built from Plan(s)
Second Project: table saw/ miter saw work bench

Used part of the Ultimate Roll Away Workbench with Miter Saw Stand to just build one of the roll-away workbenches to work with my miter saw and table saw. I'm very happy with how it turned out.


Built from Plan(s)
Recommended Skill Level
Beginner
Comments

Sun, 04/28/2024 - 12:57
Ultimate roll out with Dewalt 10 inch table saw question
Hi, I am planning on getingt a dewalt 10 inch table saw as well. I am wondering what you did to adapt it for extending the rails with the fence? Curious if there were more photos. I would very much like to adapt my station to be similar to yours. Thanks. .
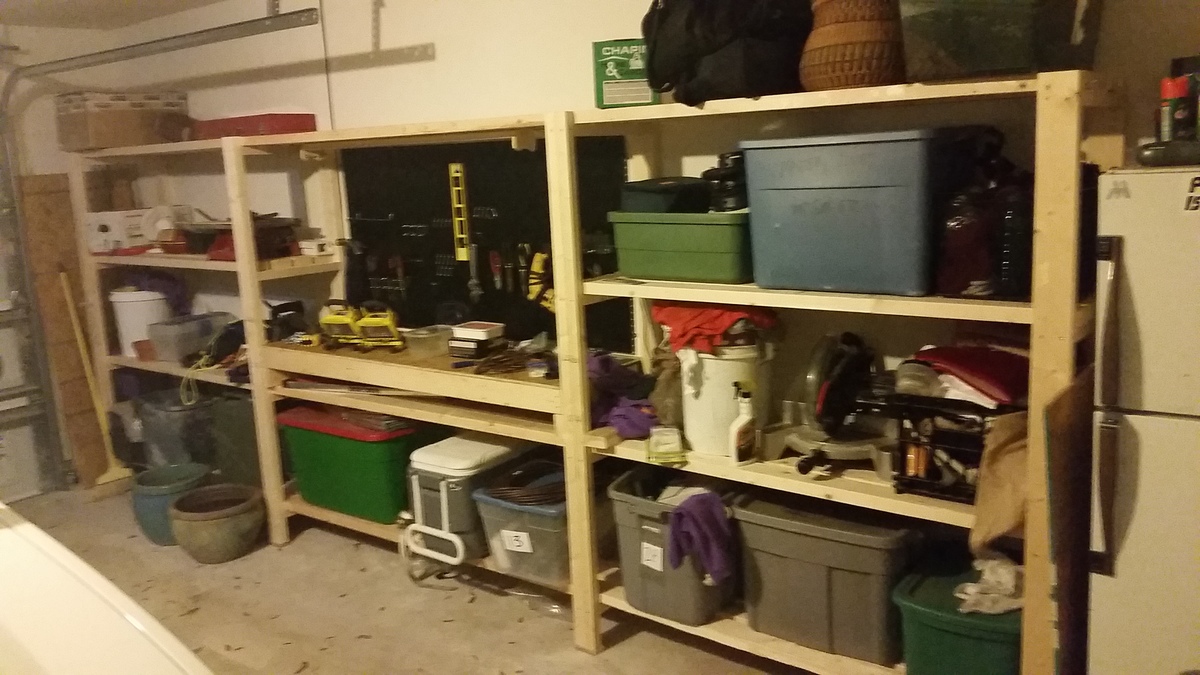
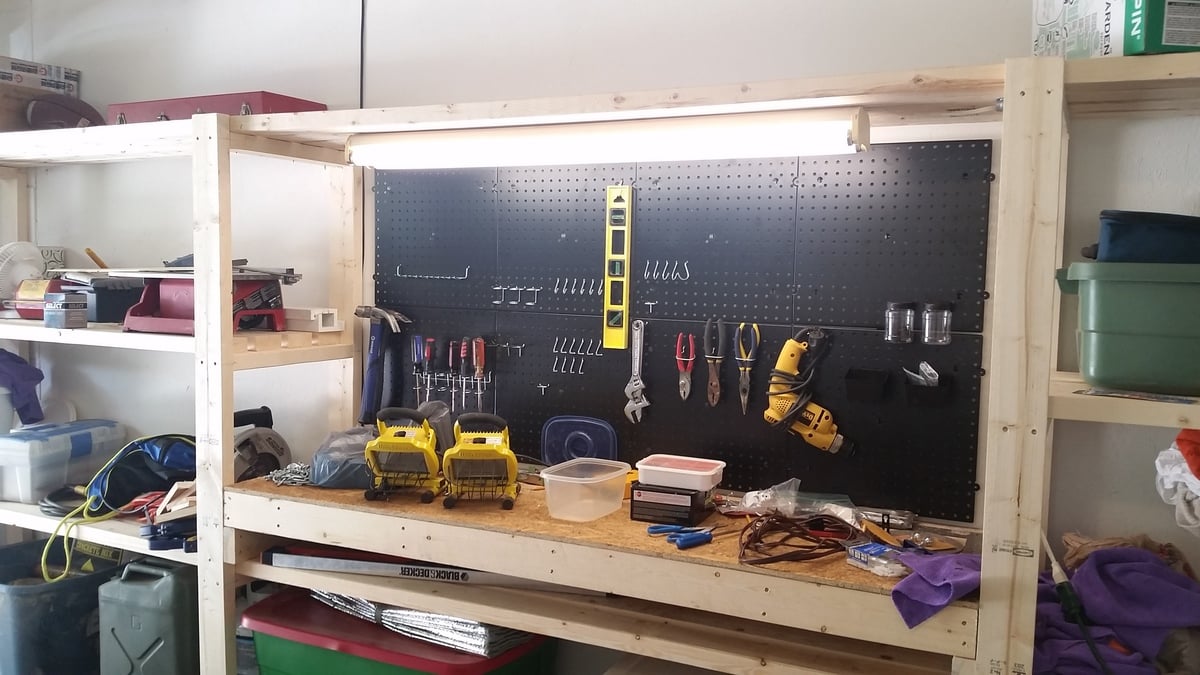
Modified Garage Shelf (w/ Workbench)
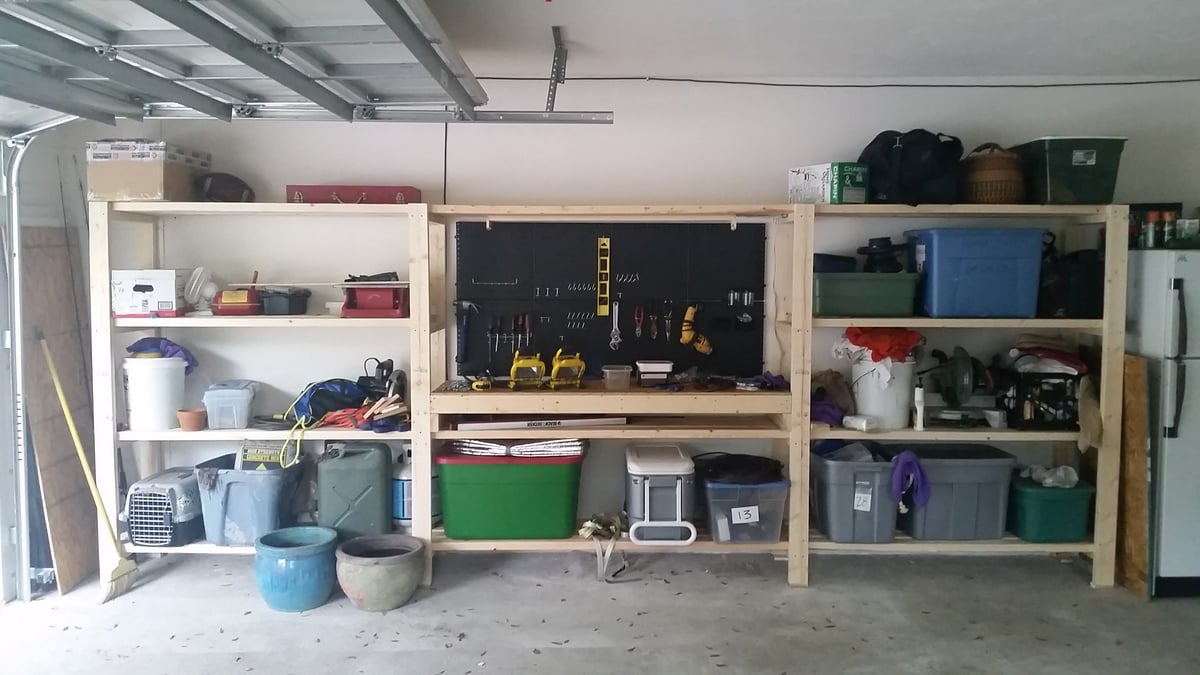
Great plans allow for versatility and easy customization. Put the whole thing together in a day w/ one other person. My set up is 16' long - 5' on the side shelves and 6' for the workbench. Added a pegboard and fluorescent light under the top middle shelves. I'm also designing a slim drawer to go under the workbencheck area. Thanks a bunch!
Built from Plan(s)
Estimated Cost
~$150 including pegboard.
Estimated Time Investment
Afternoon Project (3-6 Hours)
Finish Used
Will stain dark in the future
Recommended Skill Level
Starter Project
Comments
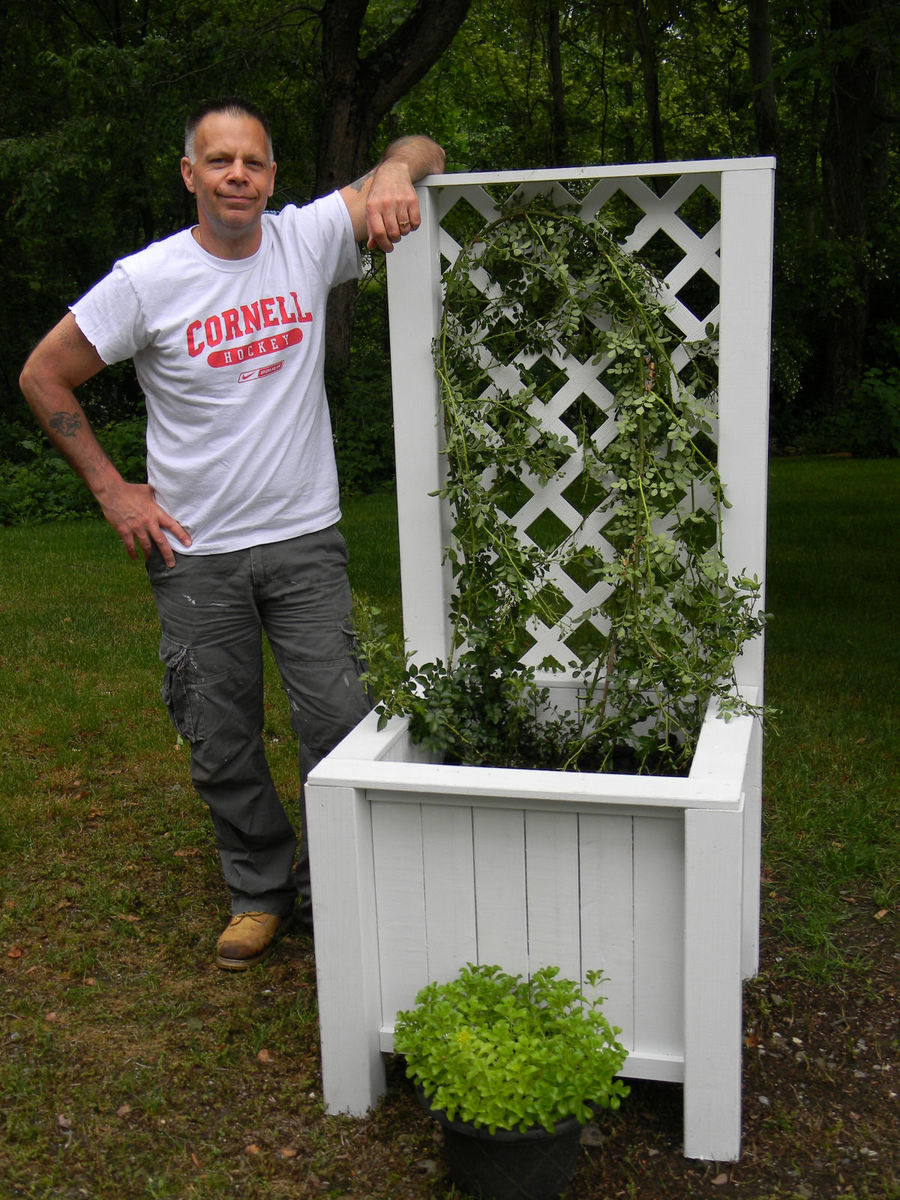
Planter Box with Trellis
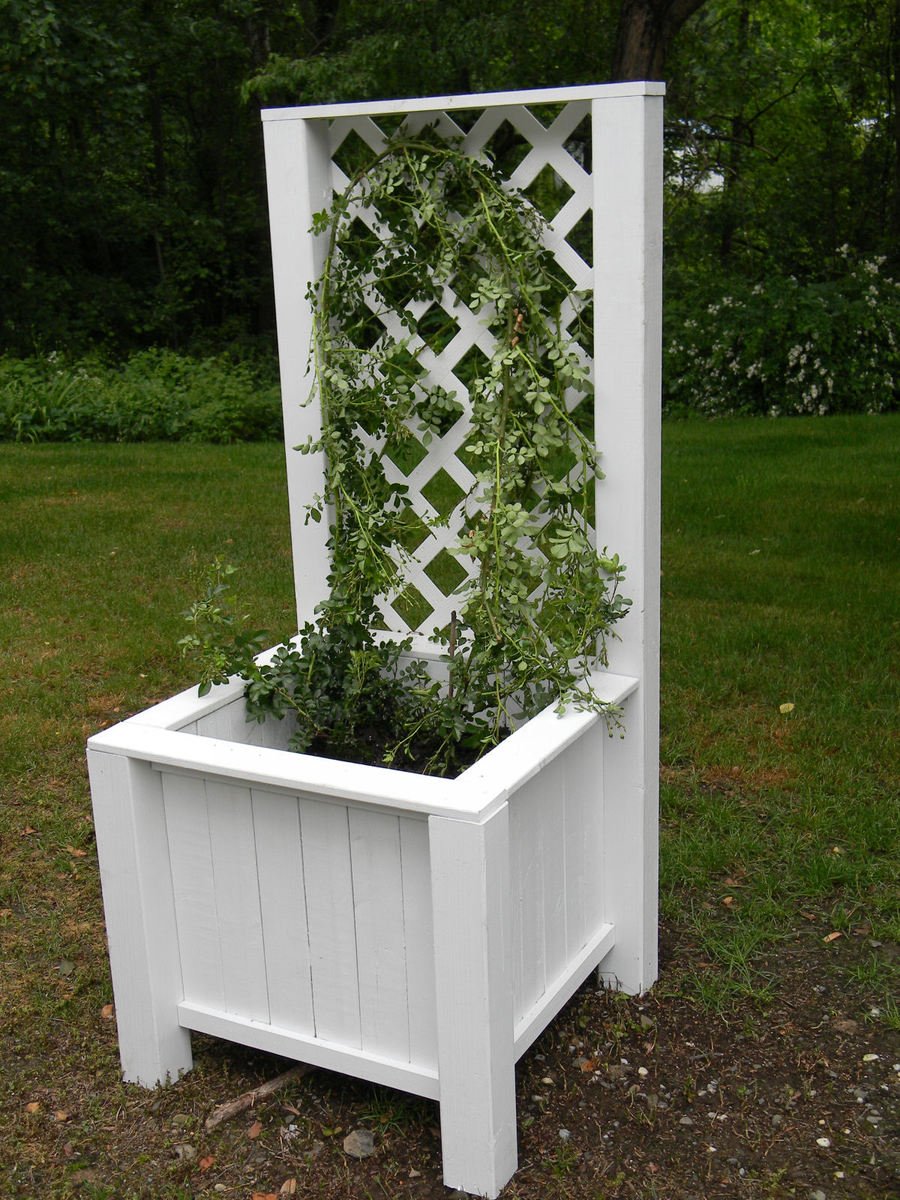
My husband built the Planter Box with Trellis for his mother for her birthday. We planted one of our rose bushes in it. They are pink teacup roses and should look fantastic against this bright white backdrop once the buds blossom.
This was a great project that was easy to cut up beforehand and put together the next afternoon. I think I want one!
Built from Plan(s)
Estimated Cost
$50 with exterior paint
Estimated Time Investment
An Hour or Two (0-2 Hours)
Finish Used
White exterior Valspar paint.
Recommended Skill Level
Beginner
Comments

Tue, 06/14/2011 - 06:21
I wish you could see my happy dance right now!
I am SO PLEASED that that design came out so beautifully! THANK YOU for using my plan!!! You did a wonderful job! =) I hope your husband's mom loves it!
~Tina
In reply to I wish you could see my happy dance right now! by biz_kid1
Tue, 07/12/2011 - 03:59
Thank YOU!
Thank YOU, Tina! The plan was so easy to follow and we were just amazed that this thing came out looking almost exactly like the picture. Often times, we are not so lucky and "modify" the project at the time, or "modify" our expectations when it looks a little different. Not so with this one. It's perfect!
Kaitlyn's Crib
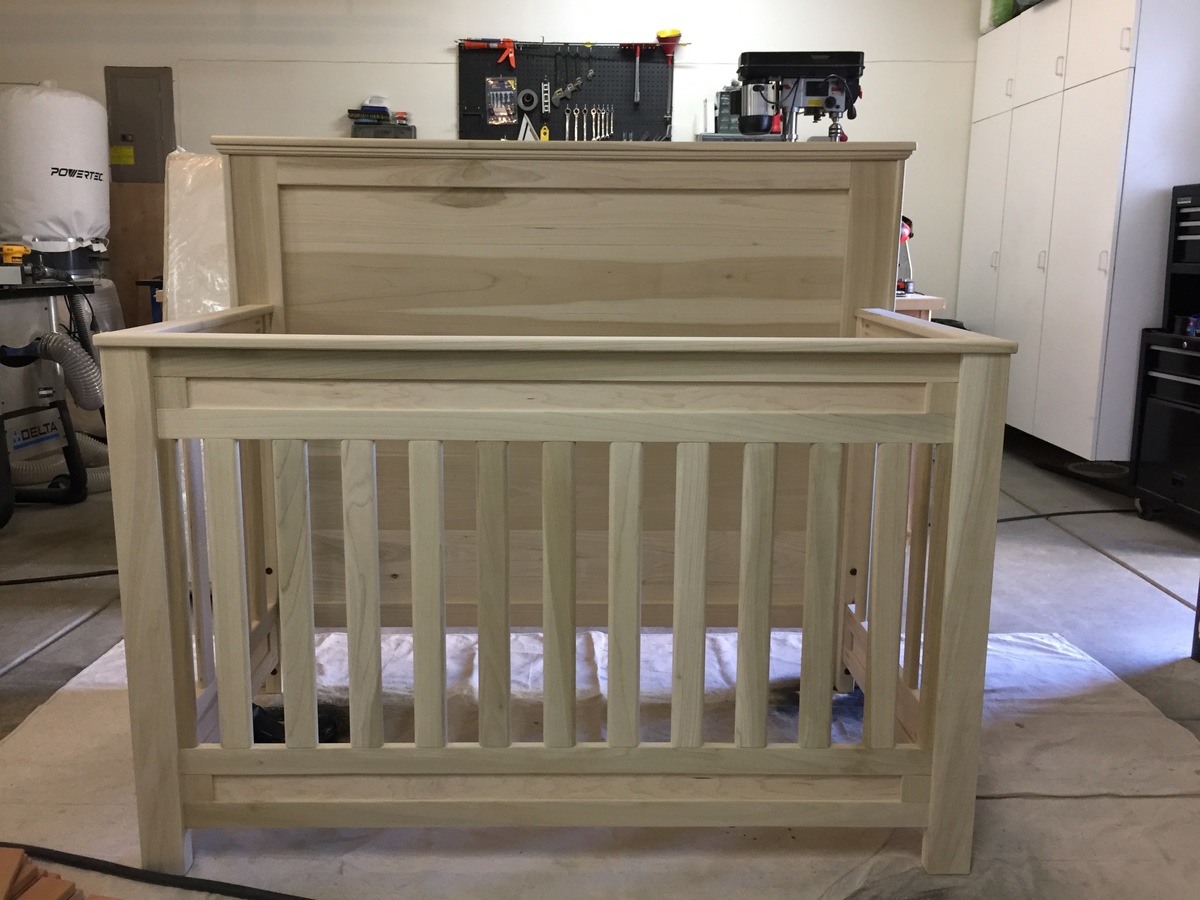
So this is my first post of one of my projects, and super excited to share! I have to say this is one of the most rewarding projects I have ever done. First time Dad and so excited to meet her! My wife is now 35 weeks. I have built many furniture projects in the past but I will admit this one intimidated me more than anything. There are so many safety regulations on cribs and so many stories and blogs online about child safety it made my head spin. I almost let the fear get the best of me and just bought a crib.....but the DIY in me said NO, and here it is! After it is all said and done I couldn't be more happy and a proud Father at the same time! I am still working on finishing this project, so I will add more pics as they come along. We will be painting it a light gray color and top coating with a water based polycrylic. This is made to be convertable, and will also become a Full size bed. Thank you Ana White and other users for inspring us all!
Built from Plan(s)
Estimated Cost
Around $280. I buy all my lumber as rough stock from a local hardwood supplier, and joint/plane myself.
Estimated Time Investment
Week Long Project (20 Hours or More)
Finish Used
Behr Latex paint/ Minwax water based polycrylic
Recommended Skill Level
Intermediate
Comments
Tue, 12/26/2017 - 18:34
Do you have any more pictures
Do you have any more pictures of the constrction? How did you join the sides?
Sun, 12/31/2017 - 09:26
Love your crib
I would love to make something similar for my first grandson, Clayton. Can you share more pictures with me? Thanks.
my email is jayhoover@bsh-cpa.com
Tue, 02/27/2018 - 12:02
Great convertible crib
This crib is terrific and just what I am looking to build for my son and daughter in law. Do you have any dimensions or even rough plans you could share? I will certainly work ast sketching m own but if you have something you are willing to share it would serve as a great starting point.
Thanks so much,
Mark
Sun, 06/23/2019 - 08:46
Did you happen to get any…
Did you happen to get any plans or dimensions for this project?
Wed, 02/28/2018 - 06:37
Beautiful Crib
My wife and I are going to be first time grandparents in the spring and have been asked by our son and daughter-in-law to build a crib - one just like the one you built. I think it wil be a fun project. Could you share any dimensions, drawings or other pictures rom your build? You can reach me at my email address: greyboarder@gmail.com.
Thanks,
Mark
Sun, 06/23/2019 - 08:47
Where you able to get any…
Where you able to get any plans or list of supplies for this project?
Fri, 07/03/2020 - 08:08
Help! Anyone get more info on this?
Did anyone ever get additional details or photos? Would really appreciate anything! Have our first coming in about 20 weeks and want to make something awesome like this for him!
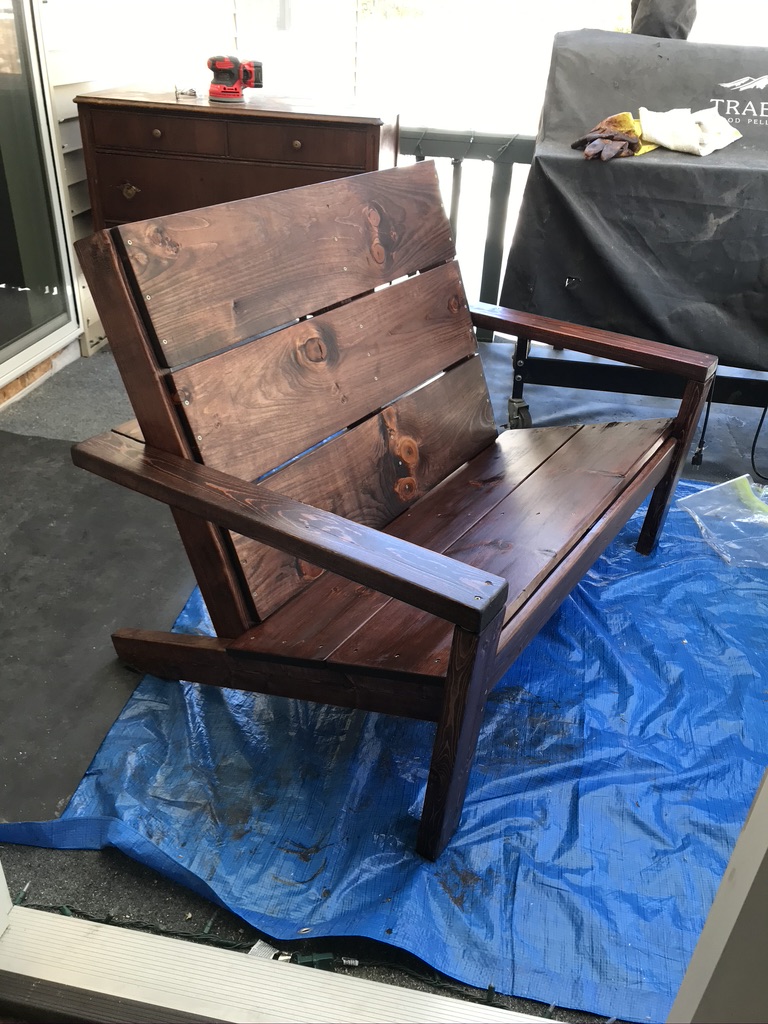
Rustic Adirondack Bench (love seat)
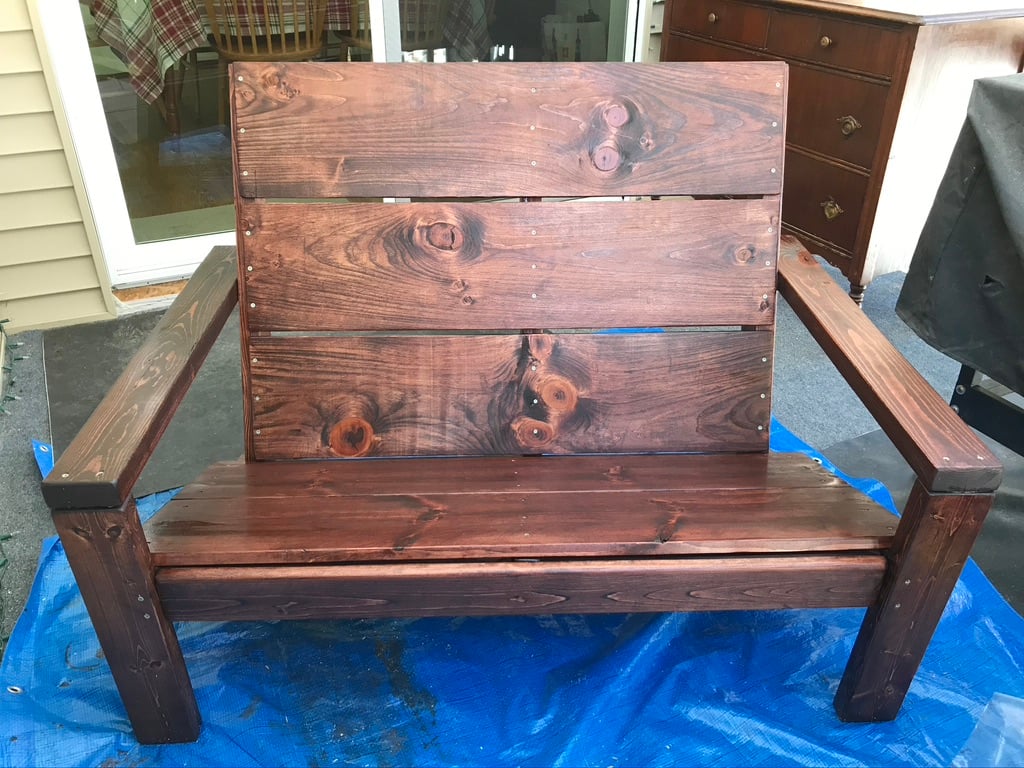
I loved the Rustic Adirondack Chair so much I felt I needed to make a bench in the same style. I had to be a little creative with the chair plans and modify them to make my bench work. I am absolutely thrilled with how it came out! I already have a friend who has requested a chair and bench (love seat) for his son's wedding gift!
Built from Plan(s)
Estimated Cost
Material costs for the wood was $85-ish. Wood prices are nuts right now!
Recommended Skill Level
Intermediate
Comments
Mon, 08/16/2021 - 10:51
Can someone tell me the…
Can someone tell me the dimensions of the wood (1x10) for the bench and the dimensions for the frame (2x4)
Please
Thank you
Fri, 08/20/2021 - 16:37
My loveseat version of Ana’s Plan
You can make the 1x10 in any length you want. I’m planning on making a loveseat too and The measurements I chose for the seating area will be 48” long (which is the size for 2 seat cushions).
The Step 1 in Ana’s plan, all measurements will be the same.
Step 2: The two 2x4 horizontal supports will be cut at 48”.
Step 3: the two 1x10 seat panels will be 3 inches longer than the horizontal supports. So you will cut the 1x10 seat panels at 51”.
Step 4: Instead of two, you will need THREE seat supports. So cut three 2x4’s @ 32 3/4”. The third seat support will go in the middle of the other seat supports, drilled to the horizontal back support.
Step 5: Attach your back bottom horizontal support which will be a 2x4 at 48”.
Step 6: Attach the 1x10 seat back panels. You will cut (3) 1x10 @ 48”.
Here is the cut list for the loveseat version of Ana’s Adirondack plan. These are the lengths I chose. So with this cut list your loveseat should be big enough for two 24x24” seat cushions. I plan to add cushions for extra comfort.
My cut list:
(2) 2x4 @ 31 3/4”
(2) 2x4 @ 19 1/2”
(2) 2x4 @ 33 1/4” Cut at 20 degrees as per Ana’s plan.
(3) 2x4 @ 48” Horizontal supports. One goes behind your calves.
The other connects the end frames/arm rests at the back.
(2) 1x10 @ 51” Seat panels.
(3) 2x4 @ 32 3/4” Vertical supports for the back panels.
(3) 1x10 @ 48” The back panels.
Fri, 08/20/2021 - 17:32
P.S. You will also need an…
P.S.
You will also need an extra support attached underneath the seat panels in the middle for extra support and keep the long seat panels from bowing.
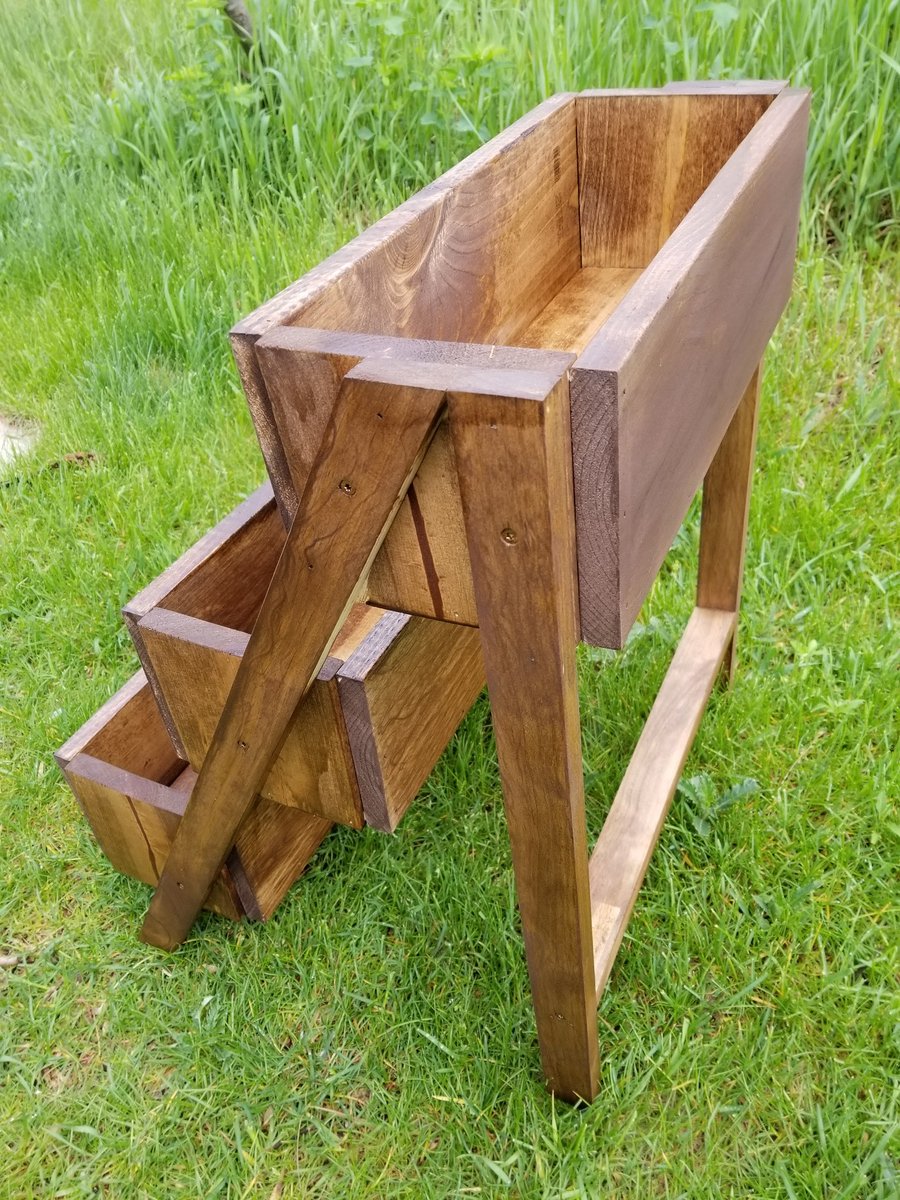
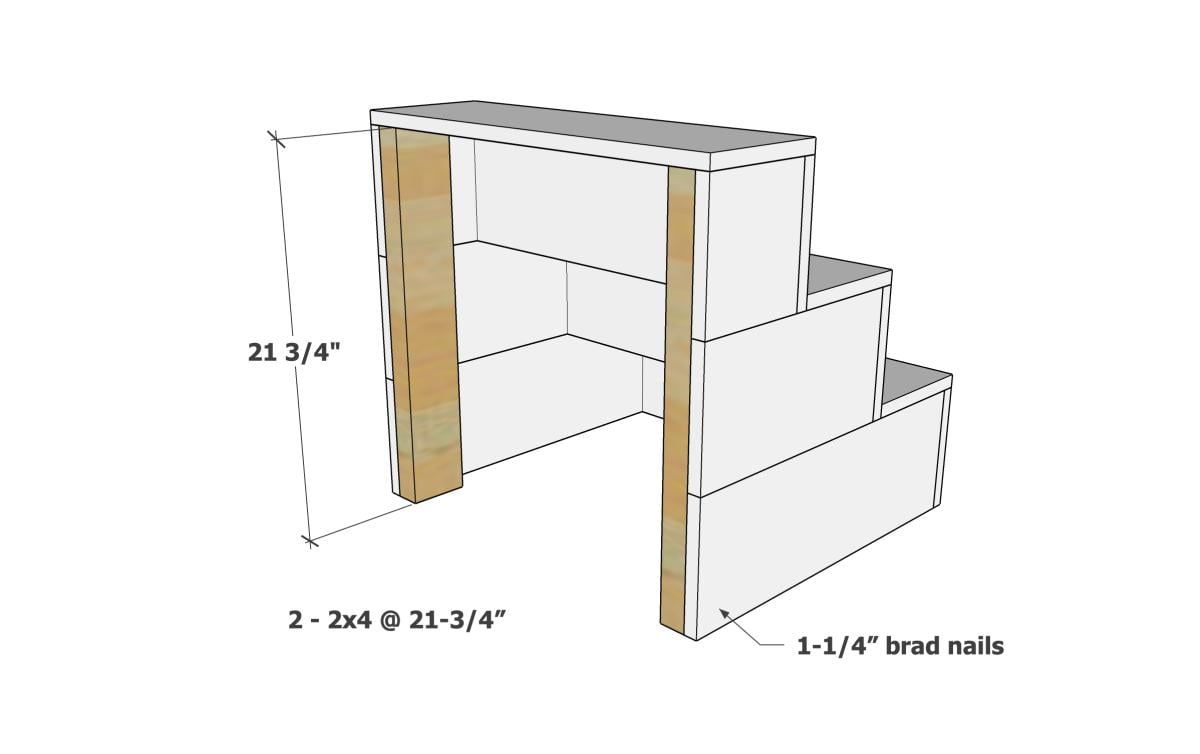
3 Tier Planter
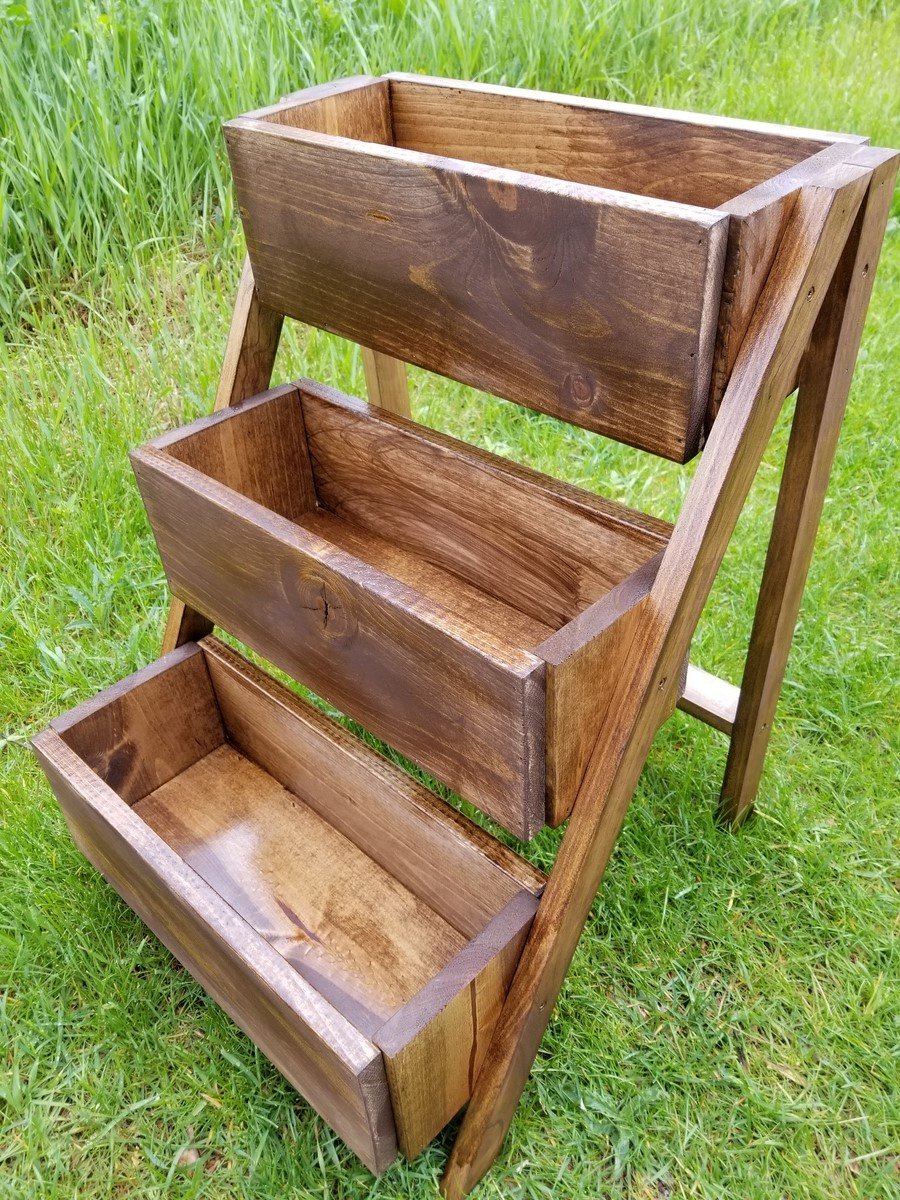
Love this planter. Used quality pine. Perfect size for the balcony! I use it for fresh herbs... i have have other people wanting one too!
Built from Plan(s)
Estimated Cost
17
Estimated Time Investment
An Hour or Two (0-2 Hours)
Finish Used
Special walnut
Recommended Skill Level
Beginner
Farmer’s. Market Stall
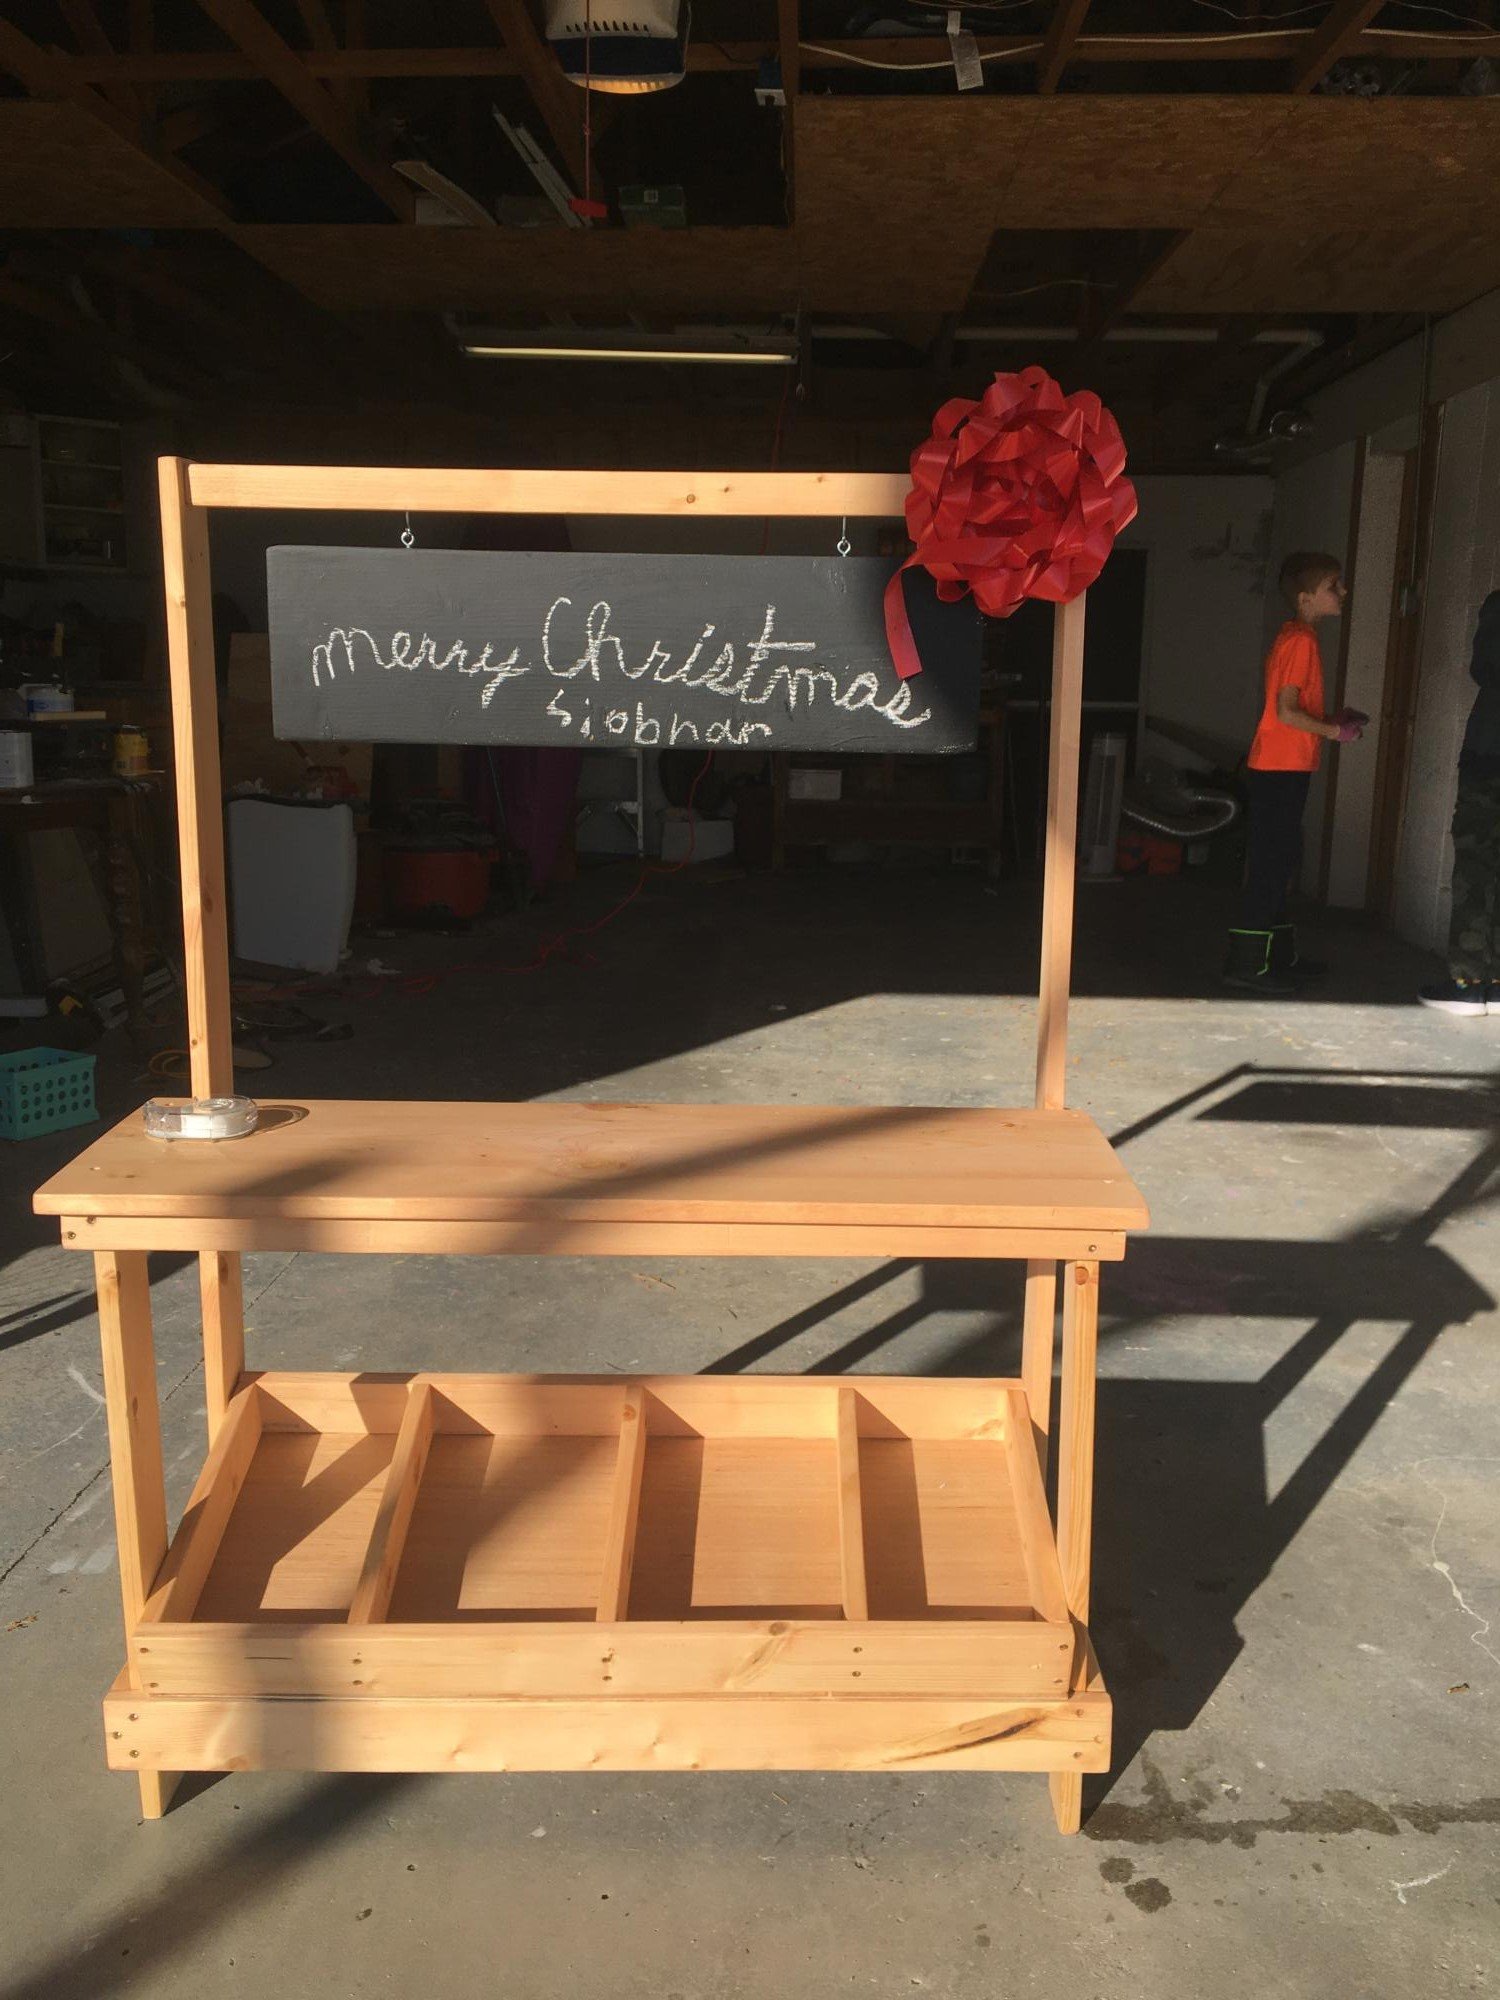
I made this for my daughter this year for Christmas. I’m pretty proud of how it turned out.
Built from Plan(s)
Comments
Wed, 12/22/2021 - 17:59
She is going to love it!
Thank you for sharing, wonderful job and a gift that will be cherished for years to come!
DIY Outdoor Sectional
I used the armless chair plan, and altered the one armed plans to make two chaises. Then I increased the size slightly to accommodate the 25x25 pillows I bought. This took about 12 hours with one person working. I am super proud of it! Finished today, and will eventually stain after the wood has dried out a little. Thank you, Ana, for making straightforward plans that gave me the confidence to do my first woodworking project!
Andrea in Michigan
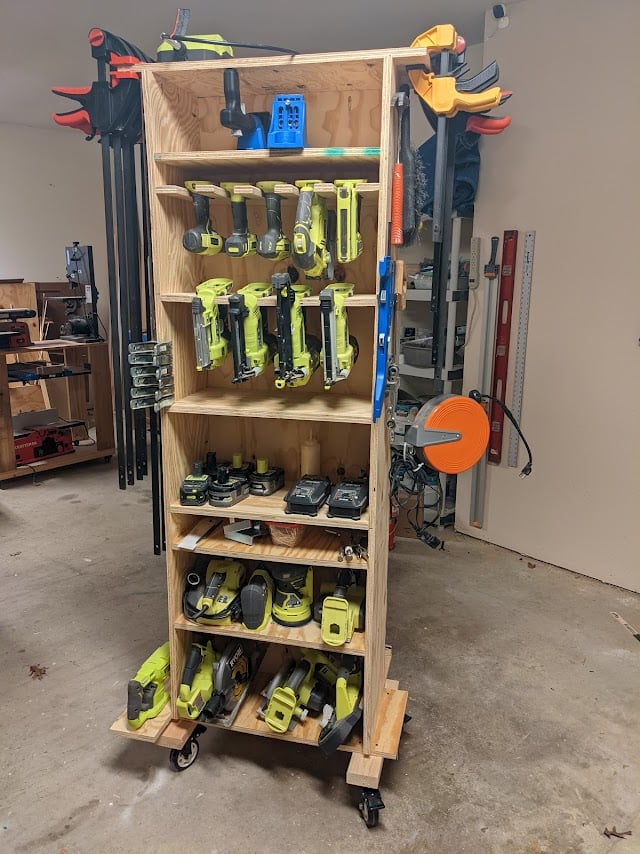
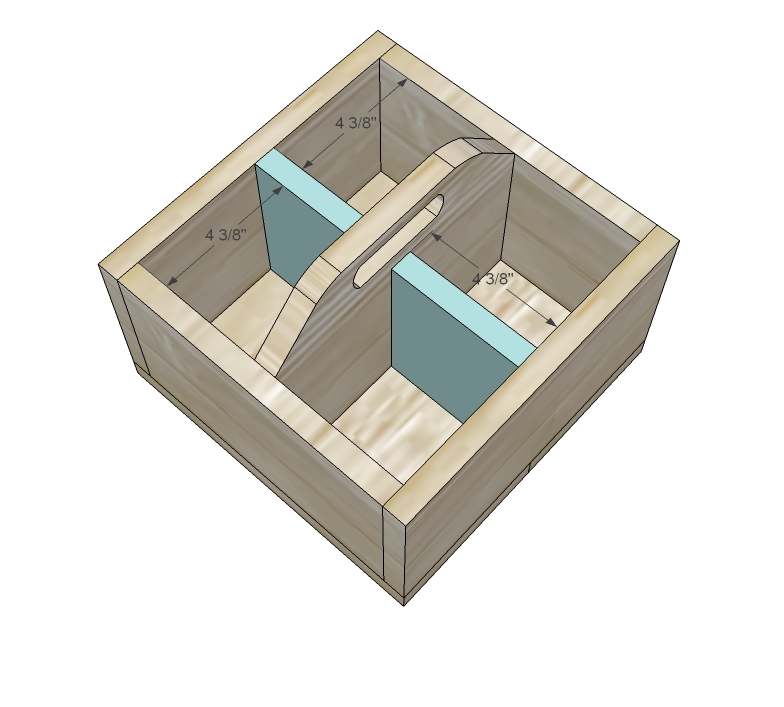
Tool Caddy
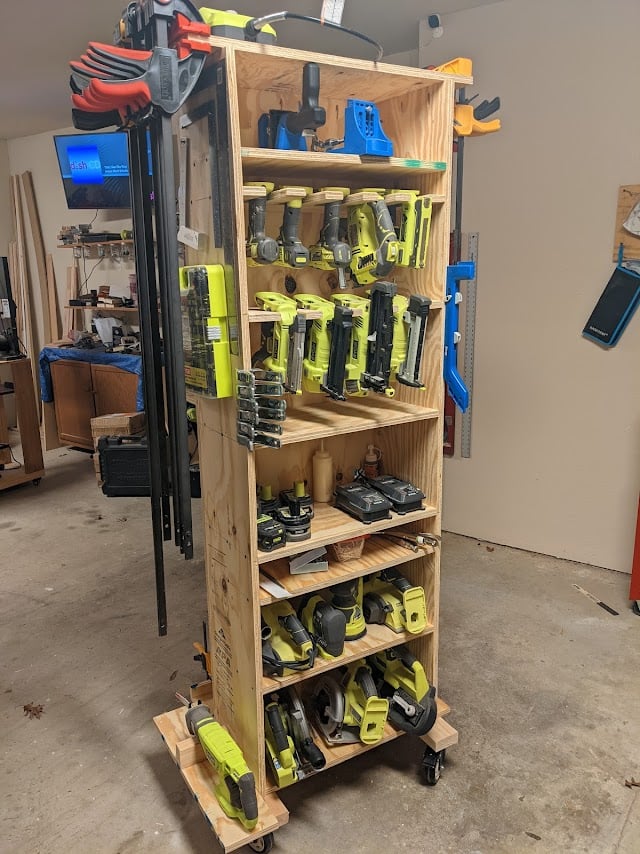
I repurpose furniture as a hobby and I got tired of having my tools hanging on a wall on the other side of the garage so I bult this rolling tool caddy. It is made out of 3/4" plywood, a couple of 2x4's and some heavy-duty casters. I built one about 3 years ago and realized that there were some things I wanted to do differently so I sold it and bult this one. My wife gave me a subscription to SketchUp and I had fun drawing it up and tweaking it. I left an over hang of 3" on both sides so I could store my clamps. I also attached an electrical cord reel on the right side and reversed the ends so the male end can plug into the wall and I can roll the unit across the room allowing me to be able to charge my batteries. The back side has a 44 drawer storage organizer and also a few shelves for additional tools like a router and a multi-tool. I'm not nearly the craftsman many of you are and I'm sure you could do a much better job. I didn't build it to look pretty but to be functional and it works for me.
Comments
Fri, 01/21/2022 - 08:28
What my hubby needs!!
This is EXACTLY what my husband needs!! Are you willing to share your plans so I can build it for him?
Fri, 01/21/2022 - 09:16
Great job!
I really like this idea. I have my tools hung up neat all around the garage, but I keep walking back and forth for tools and batteries. It would be great to roll this over to a project and have everything you need right there. Nice work. I will modify one for my needs.

Fri, 01/21/2022 - 10:06
What a great job
there are some very thoughtful features on this, notably the wings at the top and the bottom for clamps and extra tools and the different shelf heights. Well done! I'm going to build one just like it and a power strip for battery storage.
Fri, 01/21/2022 - 11:25
This is awesome - great job…
This is awesome - great job.
please post plans!
Fri, 01/21/2022 - 14:21
Very cool!!! I would…
Very cool!!! I would appreciate it if you would share your plans…so that I could attempt to make me one.

Thu, 12/05/2024 - 20:26
Tool Caddy plans for the tall one
Not seeing the plans. All I see is a basic description.
Kentwood Bookshelf

This was one of my first bigger builds. I am so happy with the way it turned out!
Built from Plan(s)
Estimated Time Investment
Day Project (6-9 Hours)
Finish Used
Golden Oak. I applied the stain with a foam brush and wiped off excess after about five minutes.
Recommended Skill Level
Beginner
Comments

Thu, 05/10/2012 - 10:32
So stunning! It's gorgeous!
So stunning! It's gorgeous! I just love the wood!
Thu, 05/19/2016 - 19:05
THIS BOOKCASE IS MAGNIFICENT !
This bookcase wouldn't be out of place amongst the Pottery Barn's bookcases. In fact, it inspired me to go out this afternoon and buy some cedar boards so I can start building my own version first thing tomorrow. Thank you, Becky.
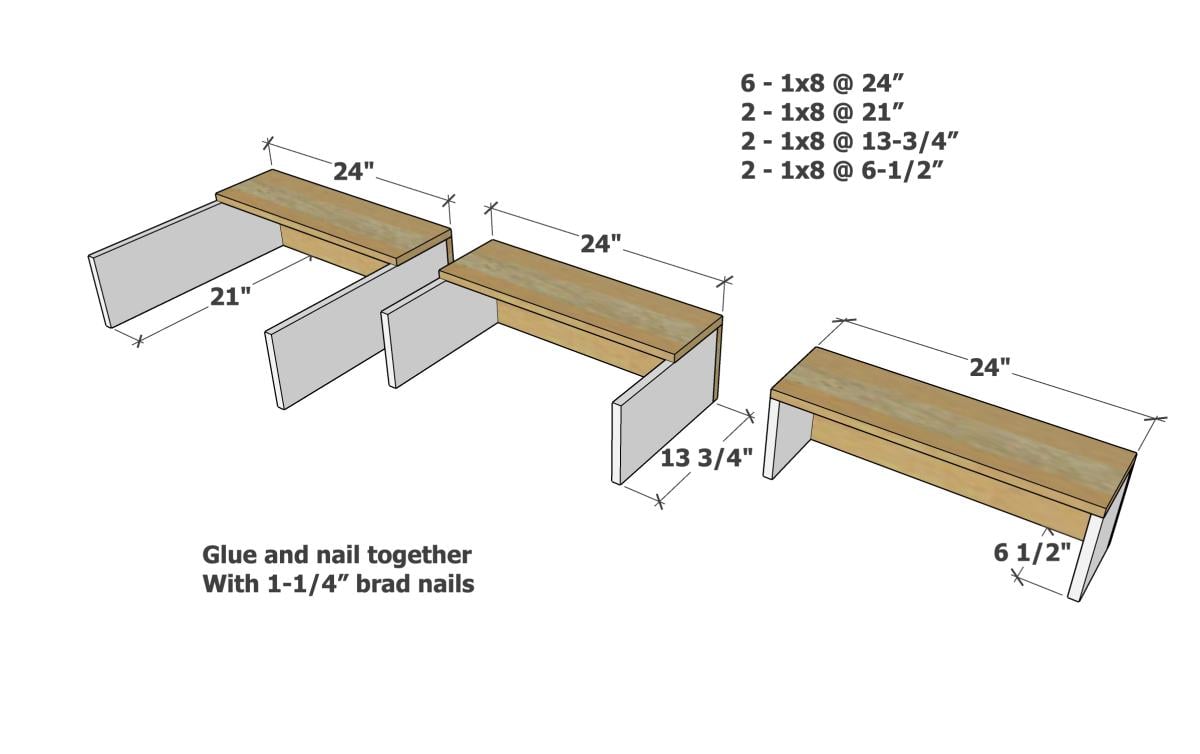
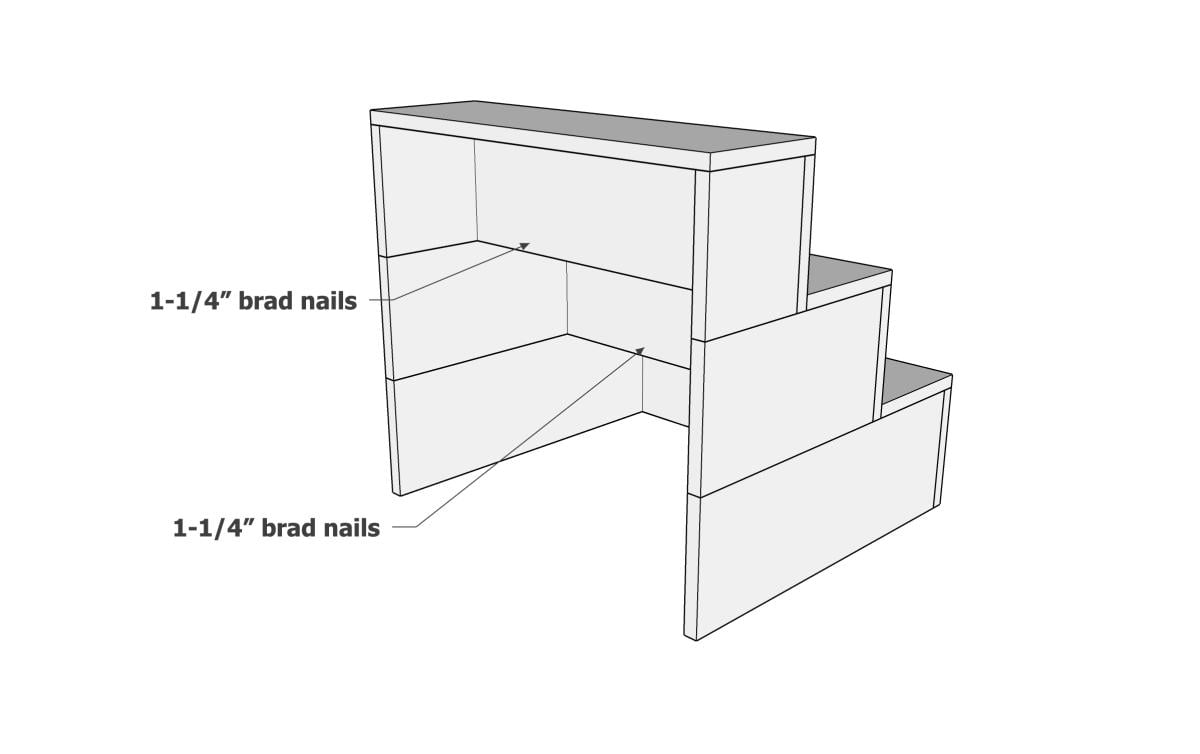
Pet Stairs
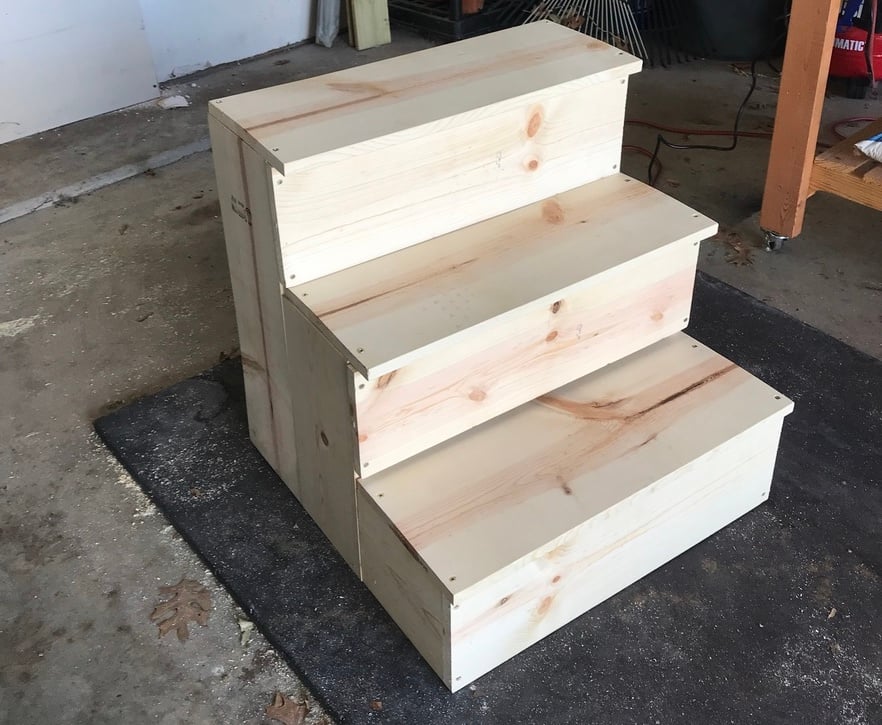
I needed sturdy stairs for my 2 60lb dogs. My bed is 33 inches from floor to top of mattress. So, this is my very first project completed by myself! Custom size pet stairs 24inx24inx24
Estimated Cost
$40-50
Estimated Time Investment
Afternoon Project (3-6 Hours)
Finish Used
Minwax polyshades Espresso gloss (3 coats)
Recommended Skill Level
Starter Project
Comments
Farmhouse Bench in 1 day
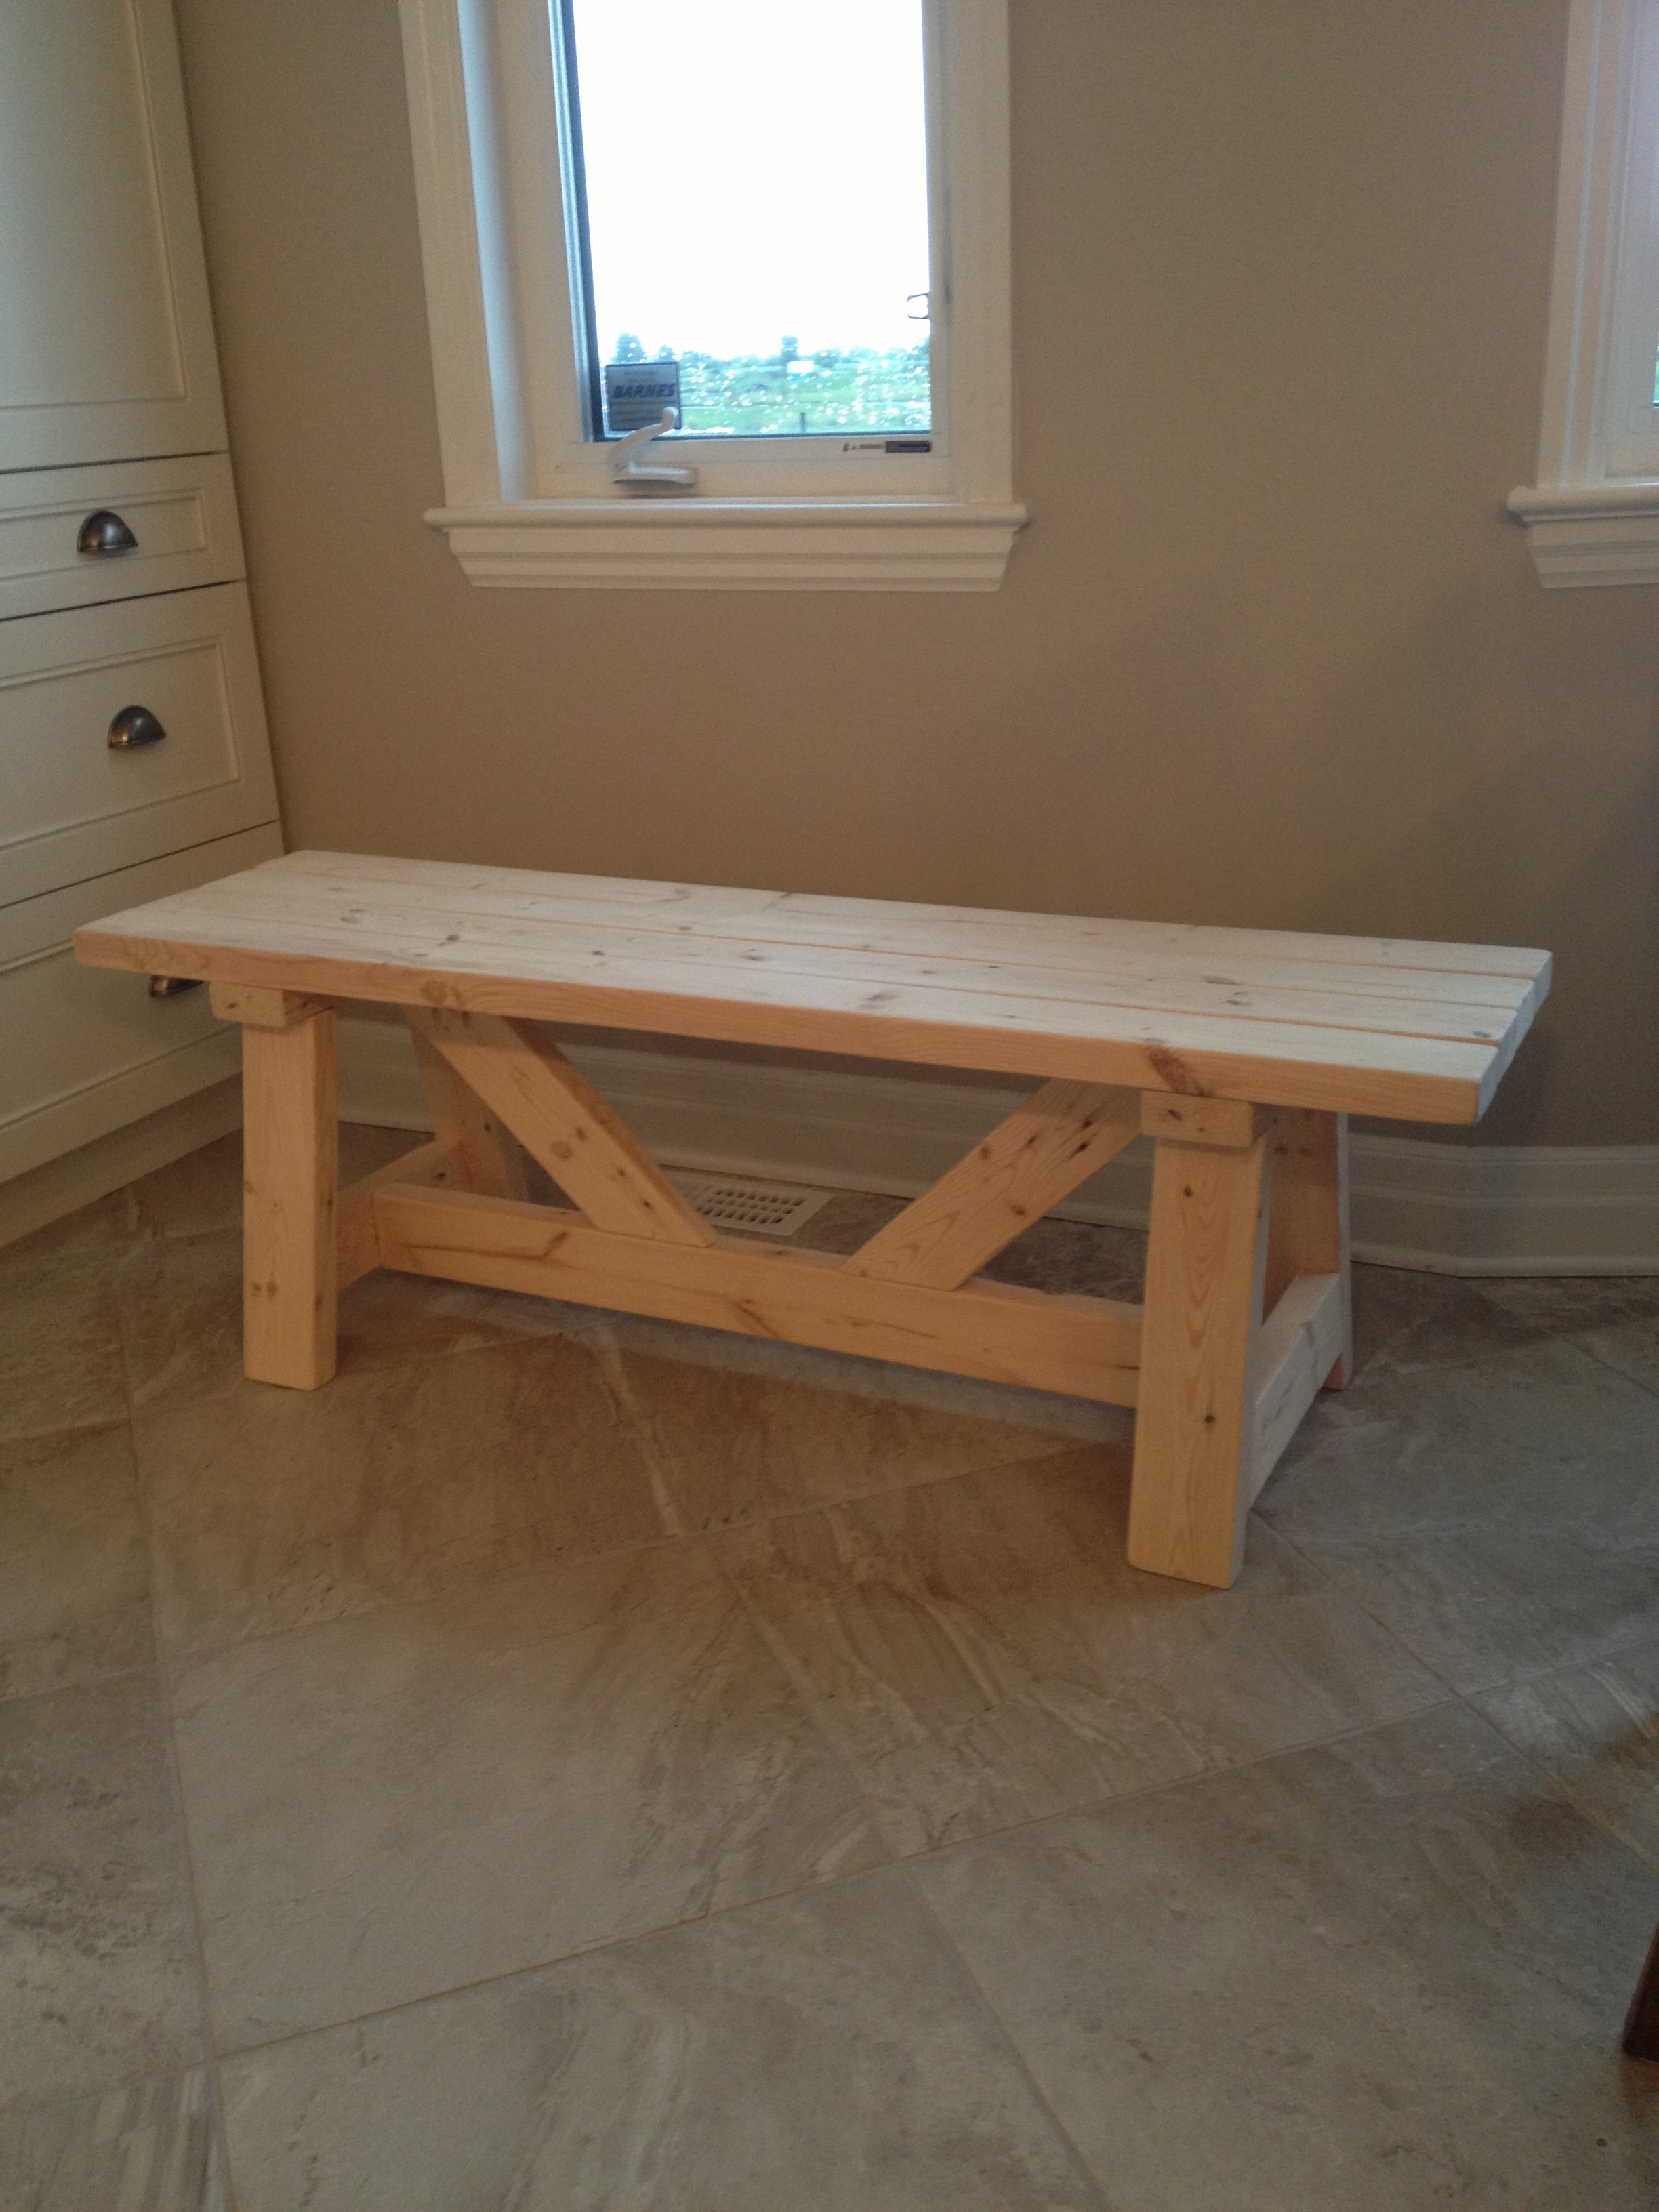
This was my first build from your site! Farmhouse bench.
I was a little confused with the miter saw instructions "bevel cut at a 10 degree angle off center". I had to google to figure out what you meant. In the end the bench looks awsome and I feel very empowered with my tools.
(still need to stain the finished project, bought all the wood and built in 1 day)
Thank you Ana for sharing your plans!! I love your site and I love my Kreg Jig!
Vicki
(Canada)
Estimated Time Investment
Day Project (6-9 Hours)
Finish Used
going to use walnut stain.
Recommended Skill Level
Beginner
Comments
Wed, 04/15/2020 - 11:38
It looks great and rock…
It looks great and rock solid. I can't find a plan for it. Could you please help me?
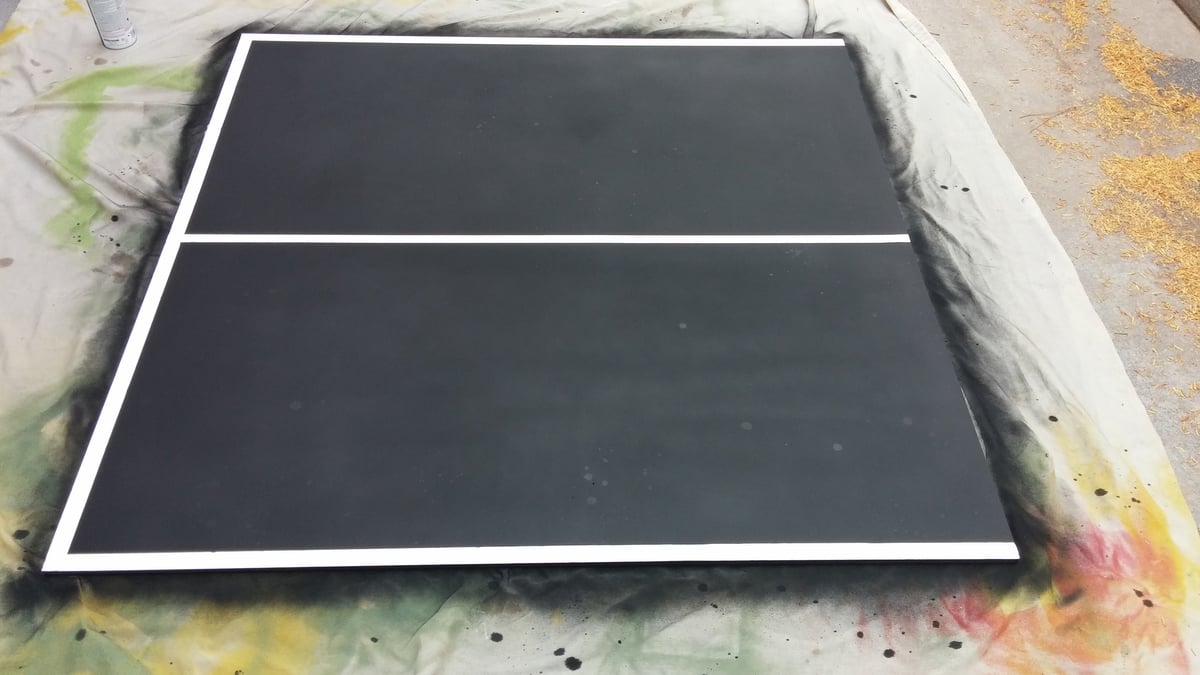
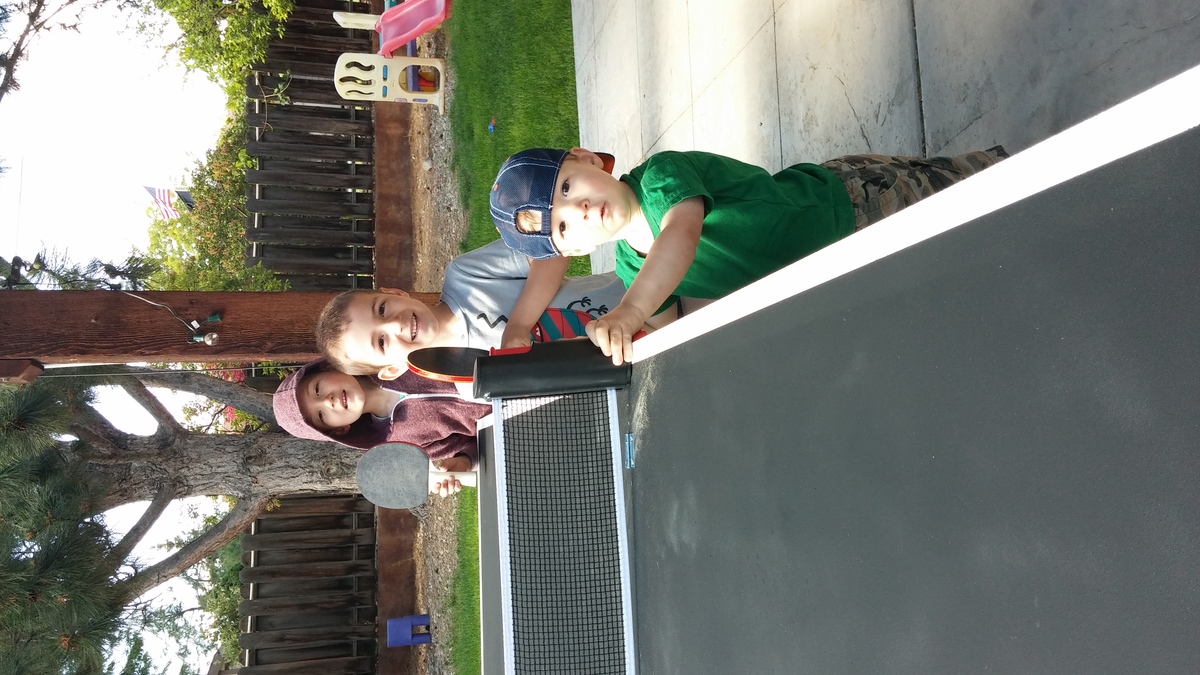
$40 Ping Pong table top game

With Father's Day rolling in, my sons and I needed a gift, stat! My husband thinks that Table Tennis is the quintessential father-son activity, so that was an obvious choice.
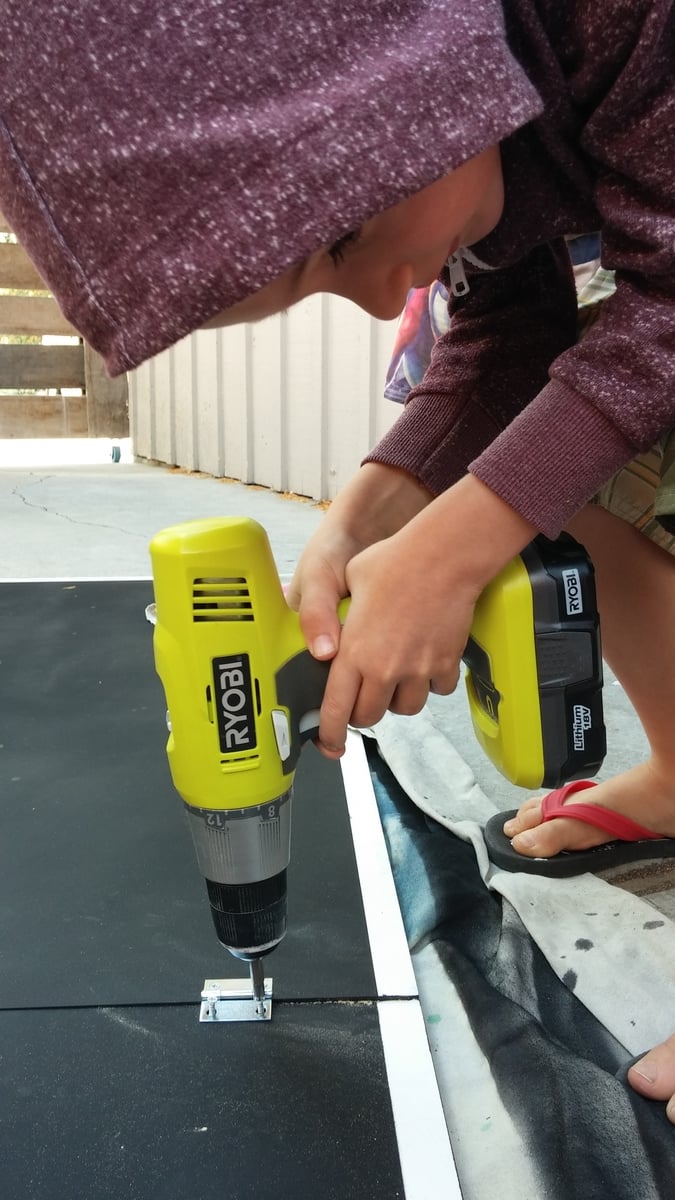
We needed something easy to make, easy to store, and budget friendly. With a 6, 4, and 2 year old helping out, I made a foldable mdf ping pong table that could easily be placed on our picnic table outside.
We had home depot cut the mdf in half, primed it, taped off some lines, spray painted it with chalkboard paint (bonus, you can keep score!), and screwed 4 small hinges to attach the 2 halves. We added a removable table tennis net, some paddles and balls, and have played nearly every day!

Estimated Cost
$40
Estimated Time Investment
Afternoon Project (3-6 Hours)
Finish Used
Chalkboard spray paint
Recommended Skill Level
Starter Project
Comments

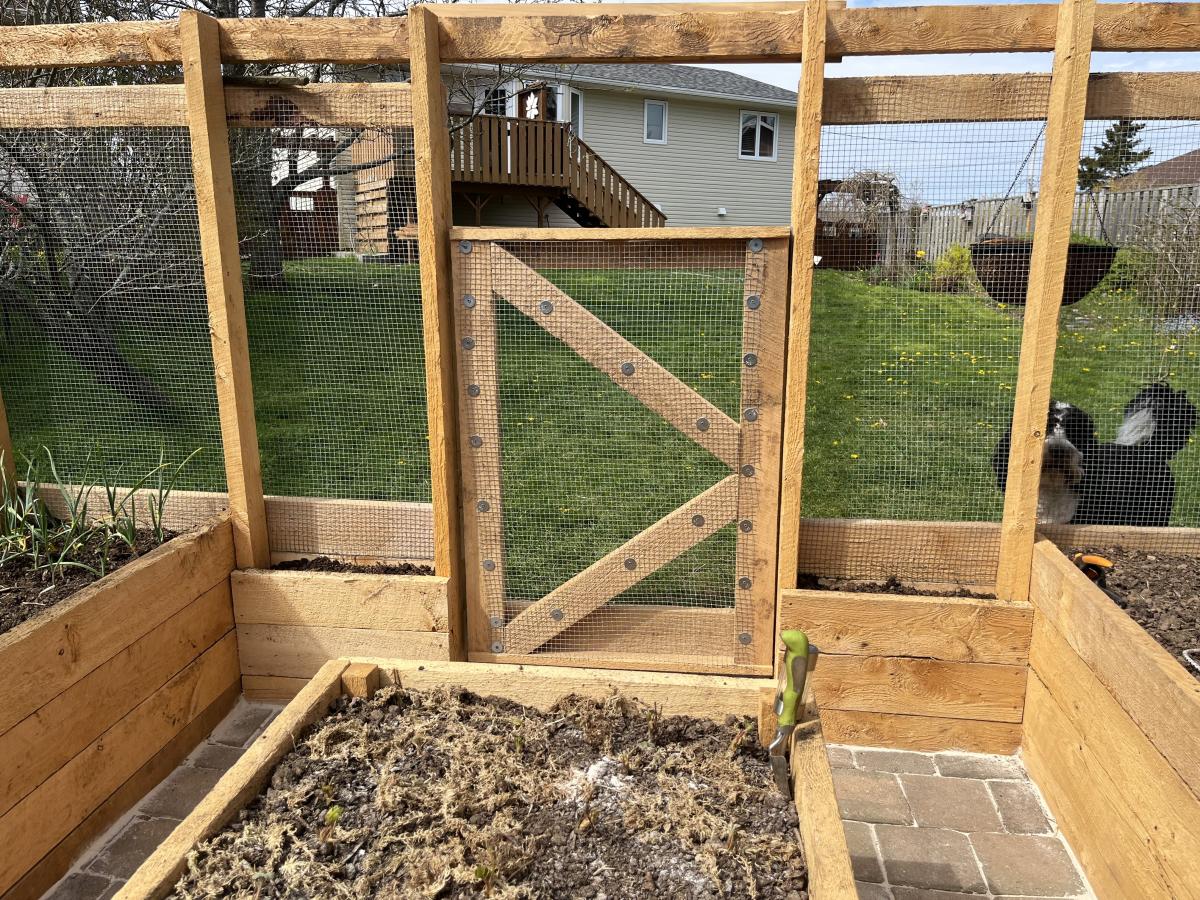
Large Garden Enclosure

The enclosed garden plan.
I made mine 12x12 and added a middle The instructions were very easy to follow. I also had old paver stones, sand and gravel kicking around from a project from last year so created a floor to help with weed control. I used screws and fender washers instead of staples to attach the caging. I added two tiny beds to the inside for sweet peas to grow up the caging to attract pollinators. Let the growing begin!
Barb
Built from Plan(s)
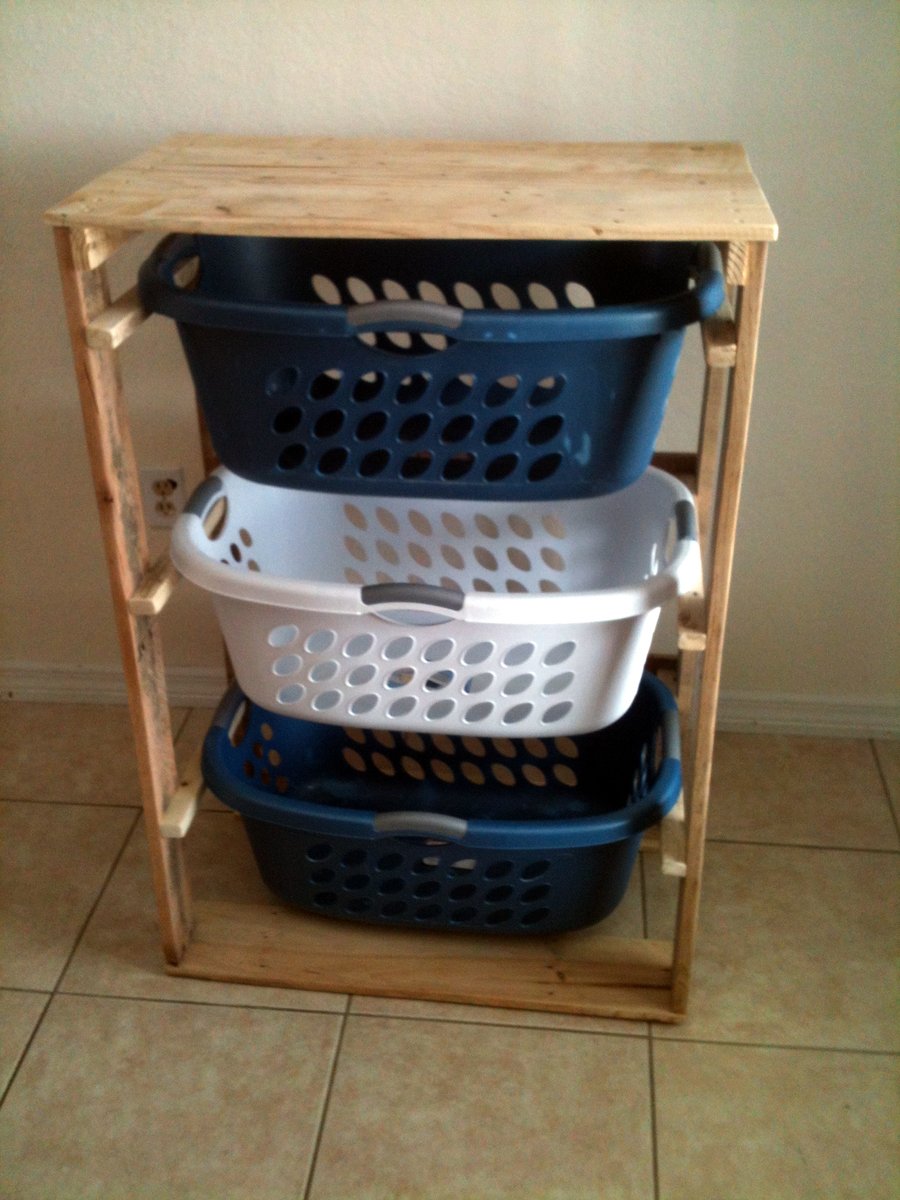
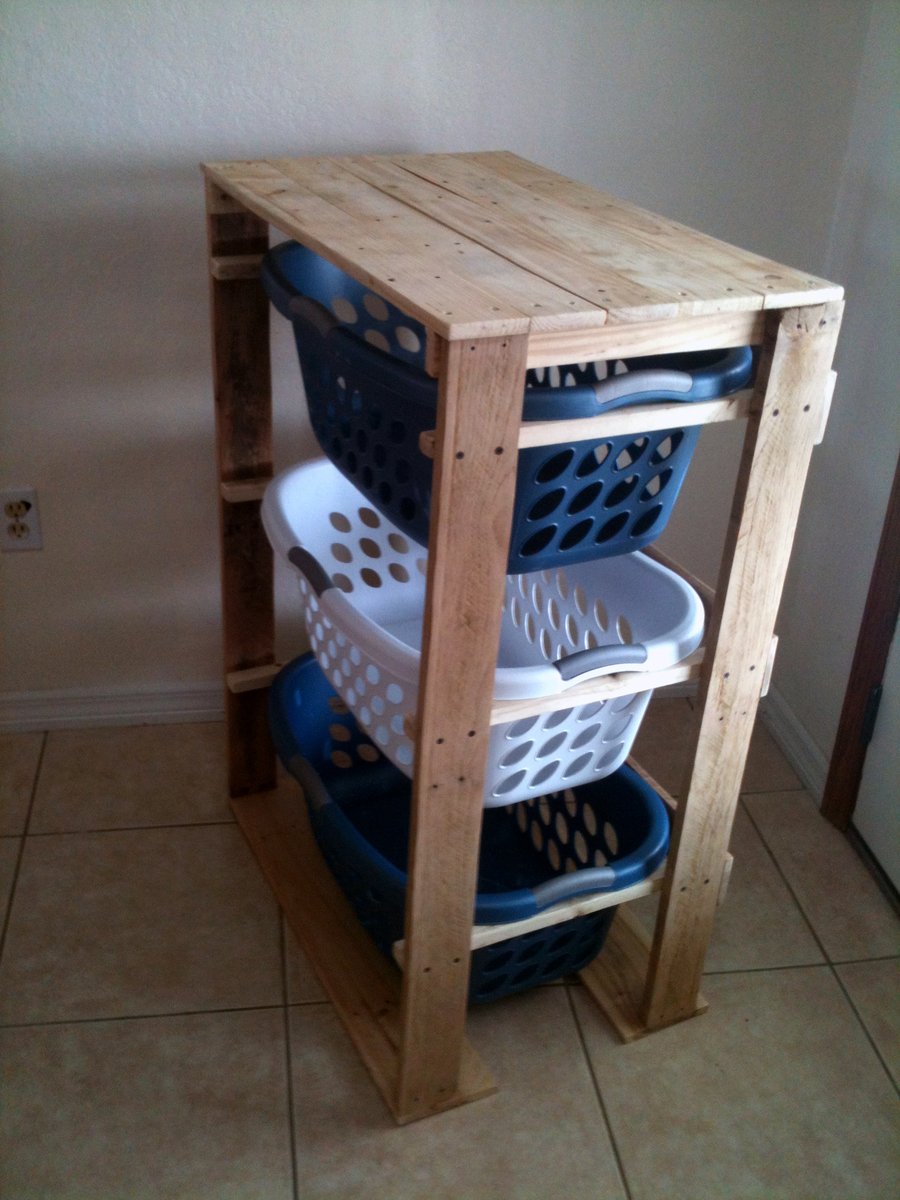
Pallirondack Laundry Basket Dresser
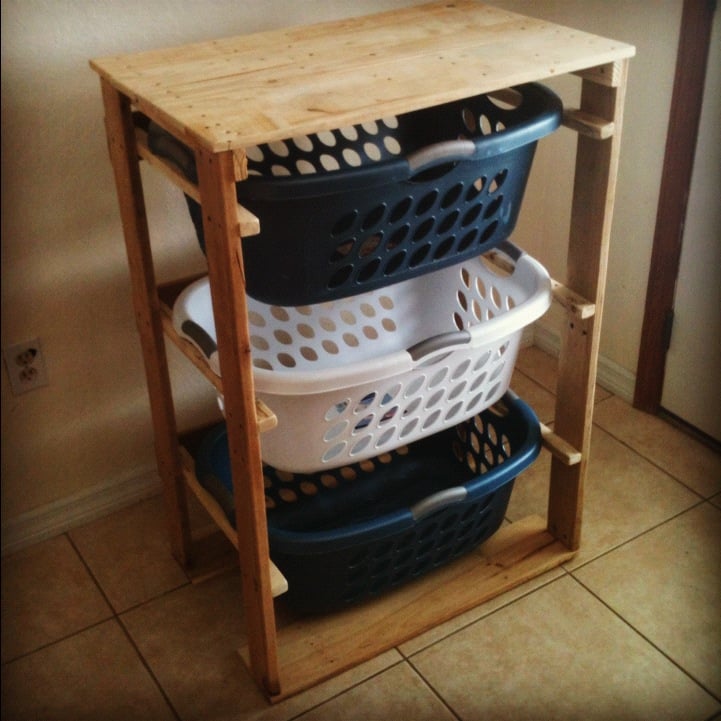
I showed my wife the Laundry Dresser featured on Ana White's website and she asked if I could make one for her, but not quite so tall. I also turned the orientation to fit our laundry room space. I used primarily oak from recycled pallets to build the Laundry Basket Dresser. She wanted a work space on top, so folded laundry, empty baskets, etc. all have a temporary resting place depending on the day. From start to finish, it took me about 6 hours. She plans to stain the piece at some point, but its already in use, so I'm not 100% sure that will ever happen until we move or something. ;-) Great idea and laundry room organization!

Built from Plan(s)
Estimated Cost
Half a box of screws
Estimated Time Investment
Afternoon Project (3-6 Hours)
Recommended Skill Level
Intermediate
Comments

Sat, 09/08/2012 - 17:39
very nice!!
Great job on this!! I love the open sides!! Thanks for sharing. :-)
Mon, 09/10/2012 - 10:22
great job`
I love the open sides, plus it makes it much more feasible to build with scraps repurposed wood, which I love. Thanks for the inspriation
Sun, 10/19/2014 - 06:16
perfect use of pallet wood
I have a pallet sitting against the garage that would be perfect for this
Looks fab, great job.
Fri, 01/09/2015 - 12:27
Laundry baskets...
Hi, I really like this project but was curious what size laundry basket you are using in the project?
Sun, 06/14/2015 - 20:16
laundry baskets
Soooo I made this according to the measurements and no laundry basket I find fit. Kind of dissapointed in the fact that this cool thing I just built doesn't have any baskets that will fit it. Any advice on finding a basket that fits?
Fri, 07/10/2015 - 20:14
Same here. No basket fits.
Same here. No basket fits. Did you ever find one?
Fri, 07/10/2015 - 20:56
Build to fit
I think the idea is to build it to fit the baskets you have or buy some and build around them.
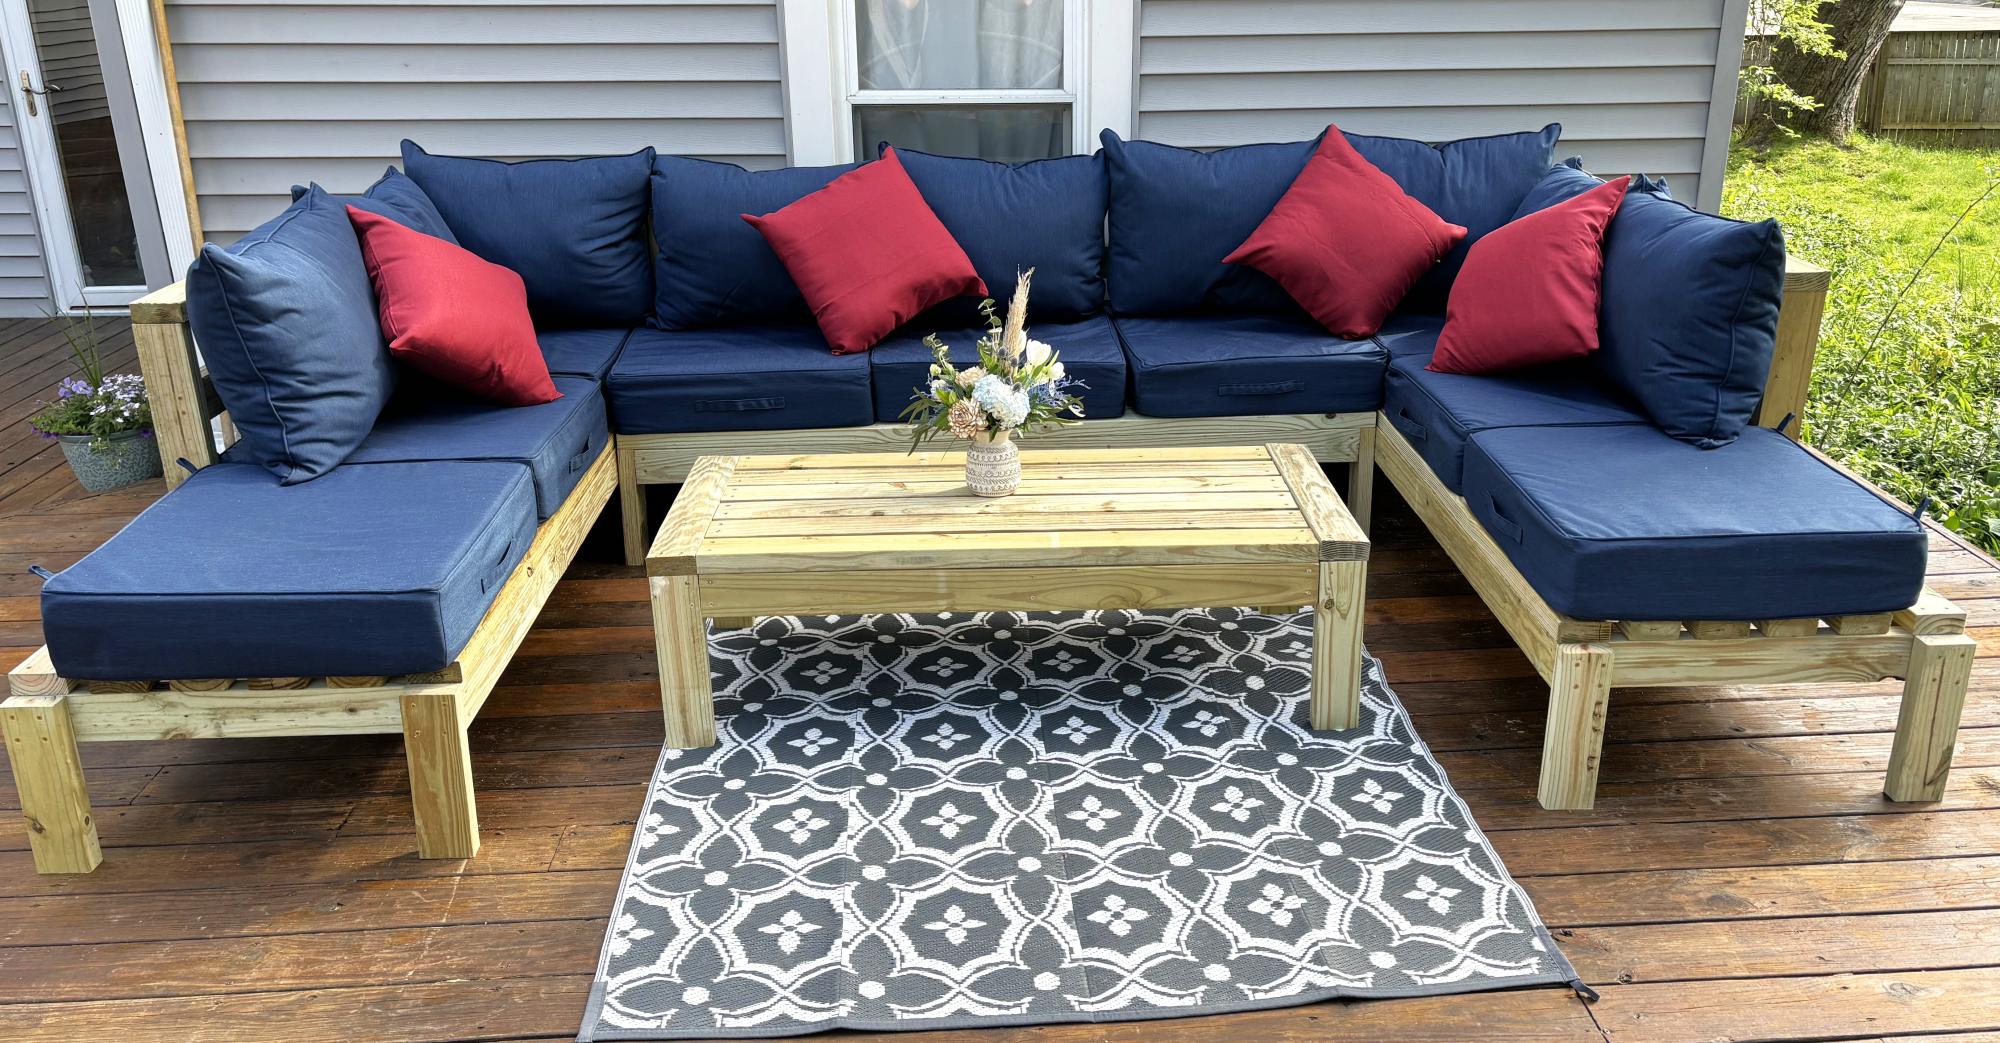
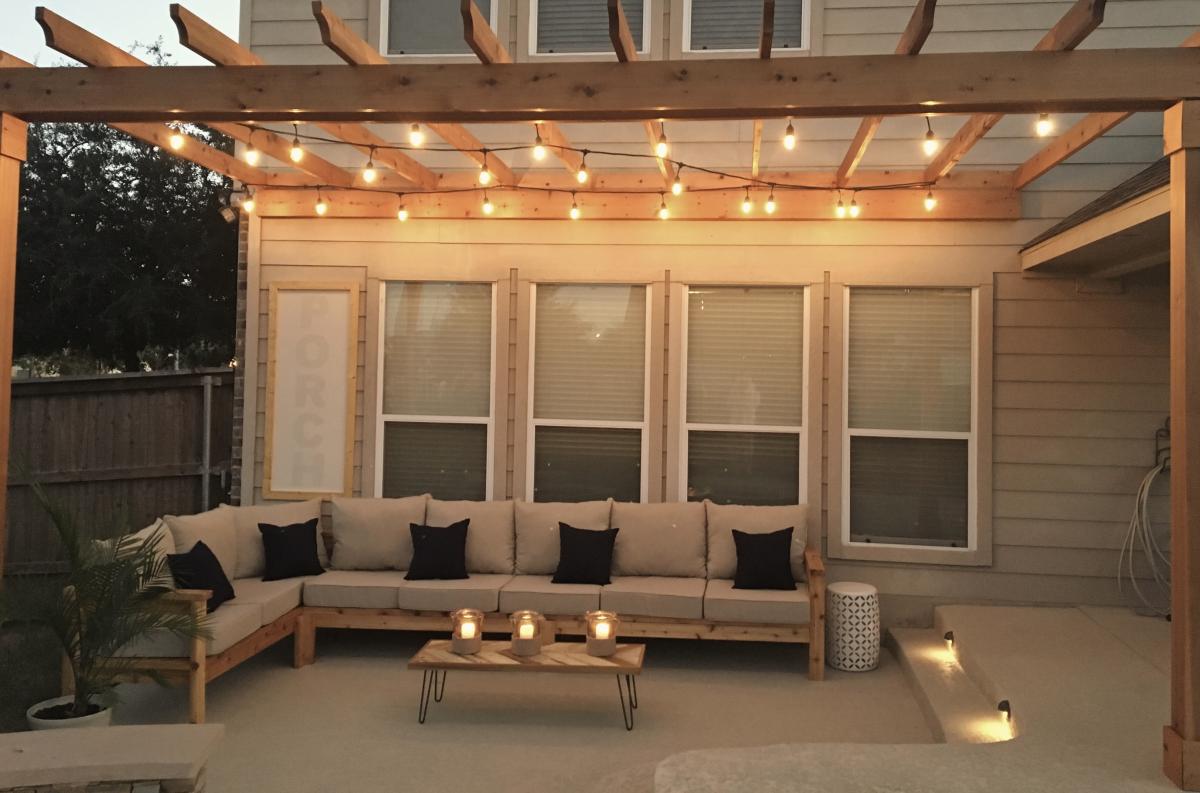
Outdoor Sectional and Pallet Coffee Table
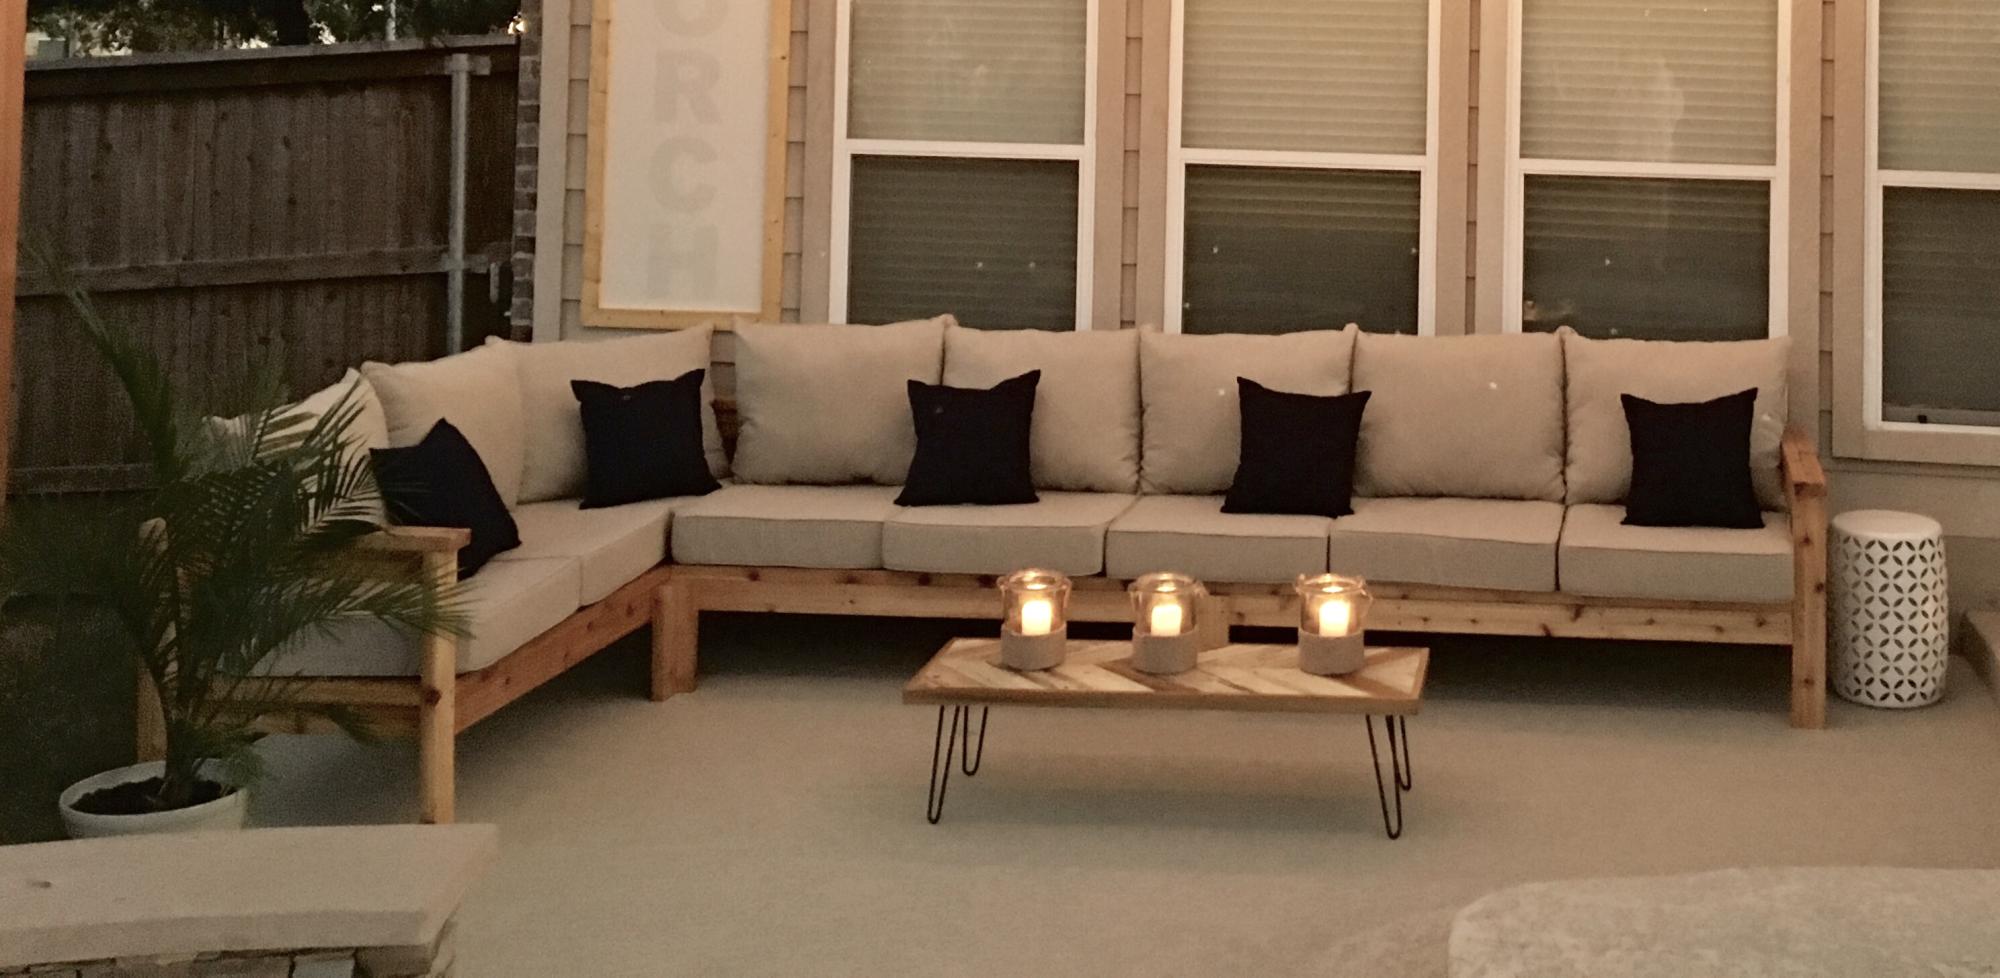
Hi Ana!
My husband used your plans to build the 2x4 outdoor cedar sectional :) He did it in 1 day and it couldn't have been easier! He even tried first time working with pallets to make a small table and it came out perfectly too! Can't wait to enjoy family time on our new back porch.
Thanks Again & Love From Austin ❤️
Kathleen
Built from Plan(s)
Estimated Cost
$350
Estimated Time Investment
Day Project (6-9 Hours)
Finish Used
Stain
Recommended Skill Level
Beginner
Comments
Thu, 10/24/2019 - 16:35
Stain and cushions?
Hi, your furniture is beautiful. May I ask: Where did you find your cushions? And what color/ brand stain did you use? Lovely job.
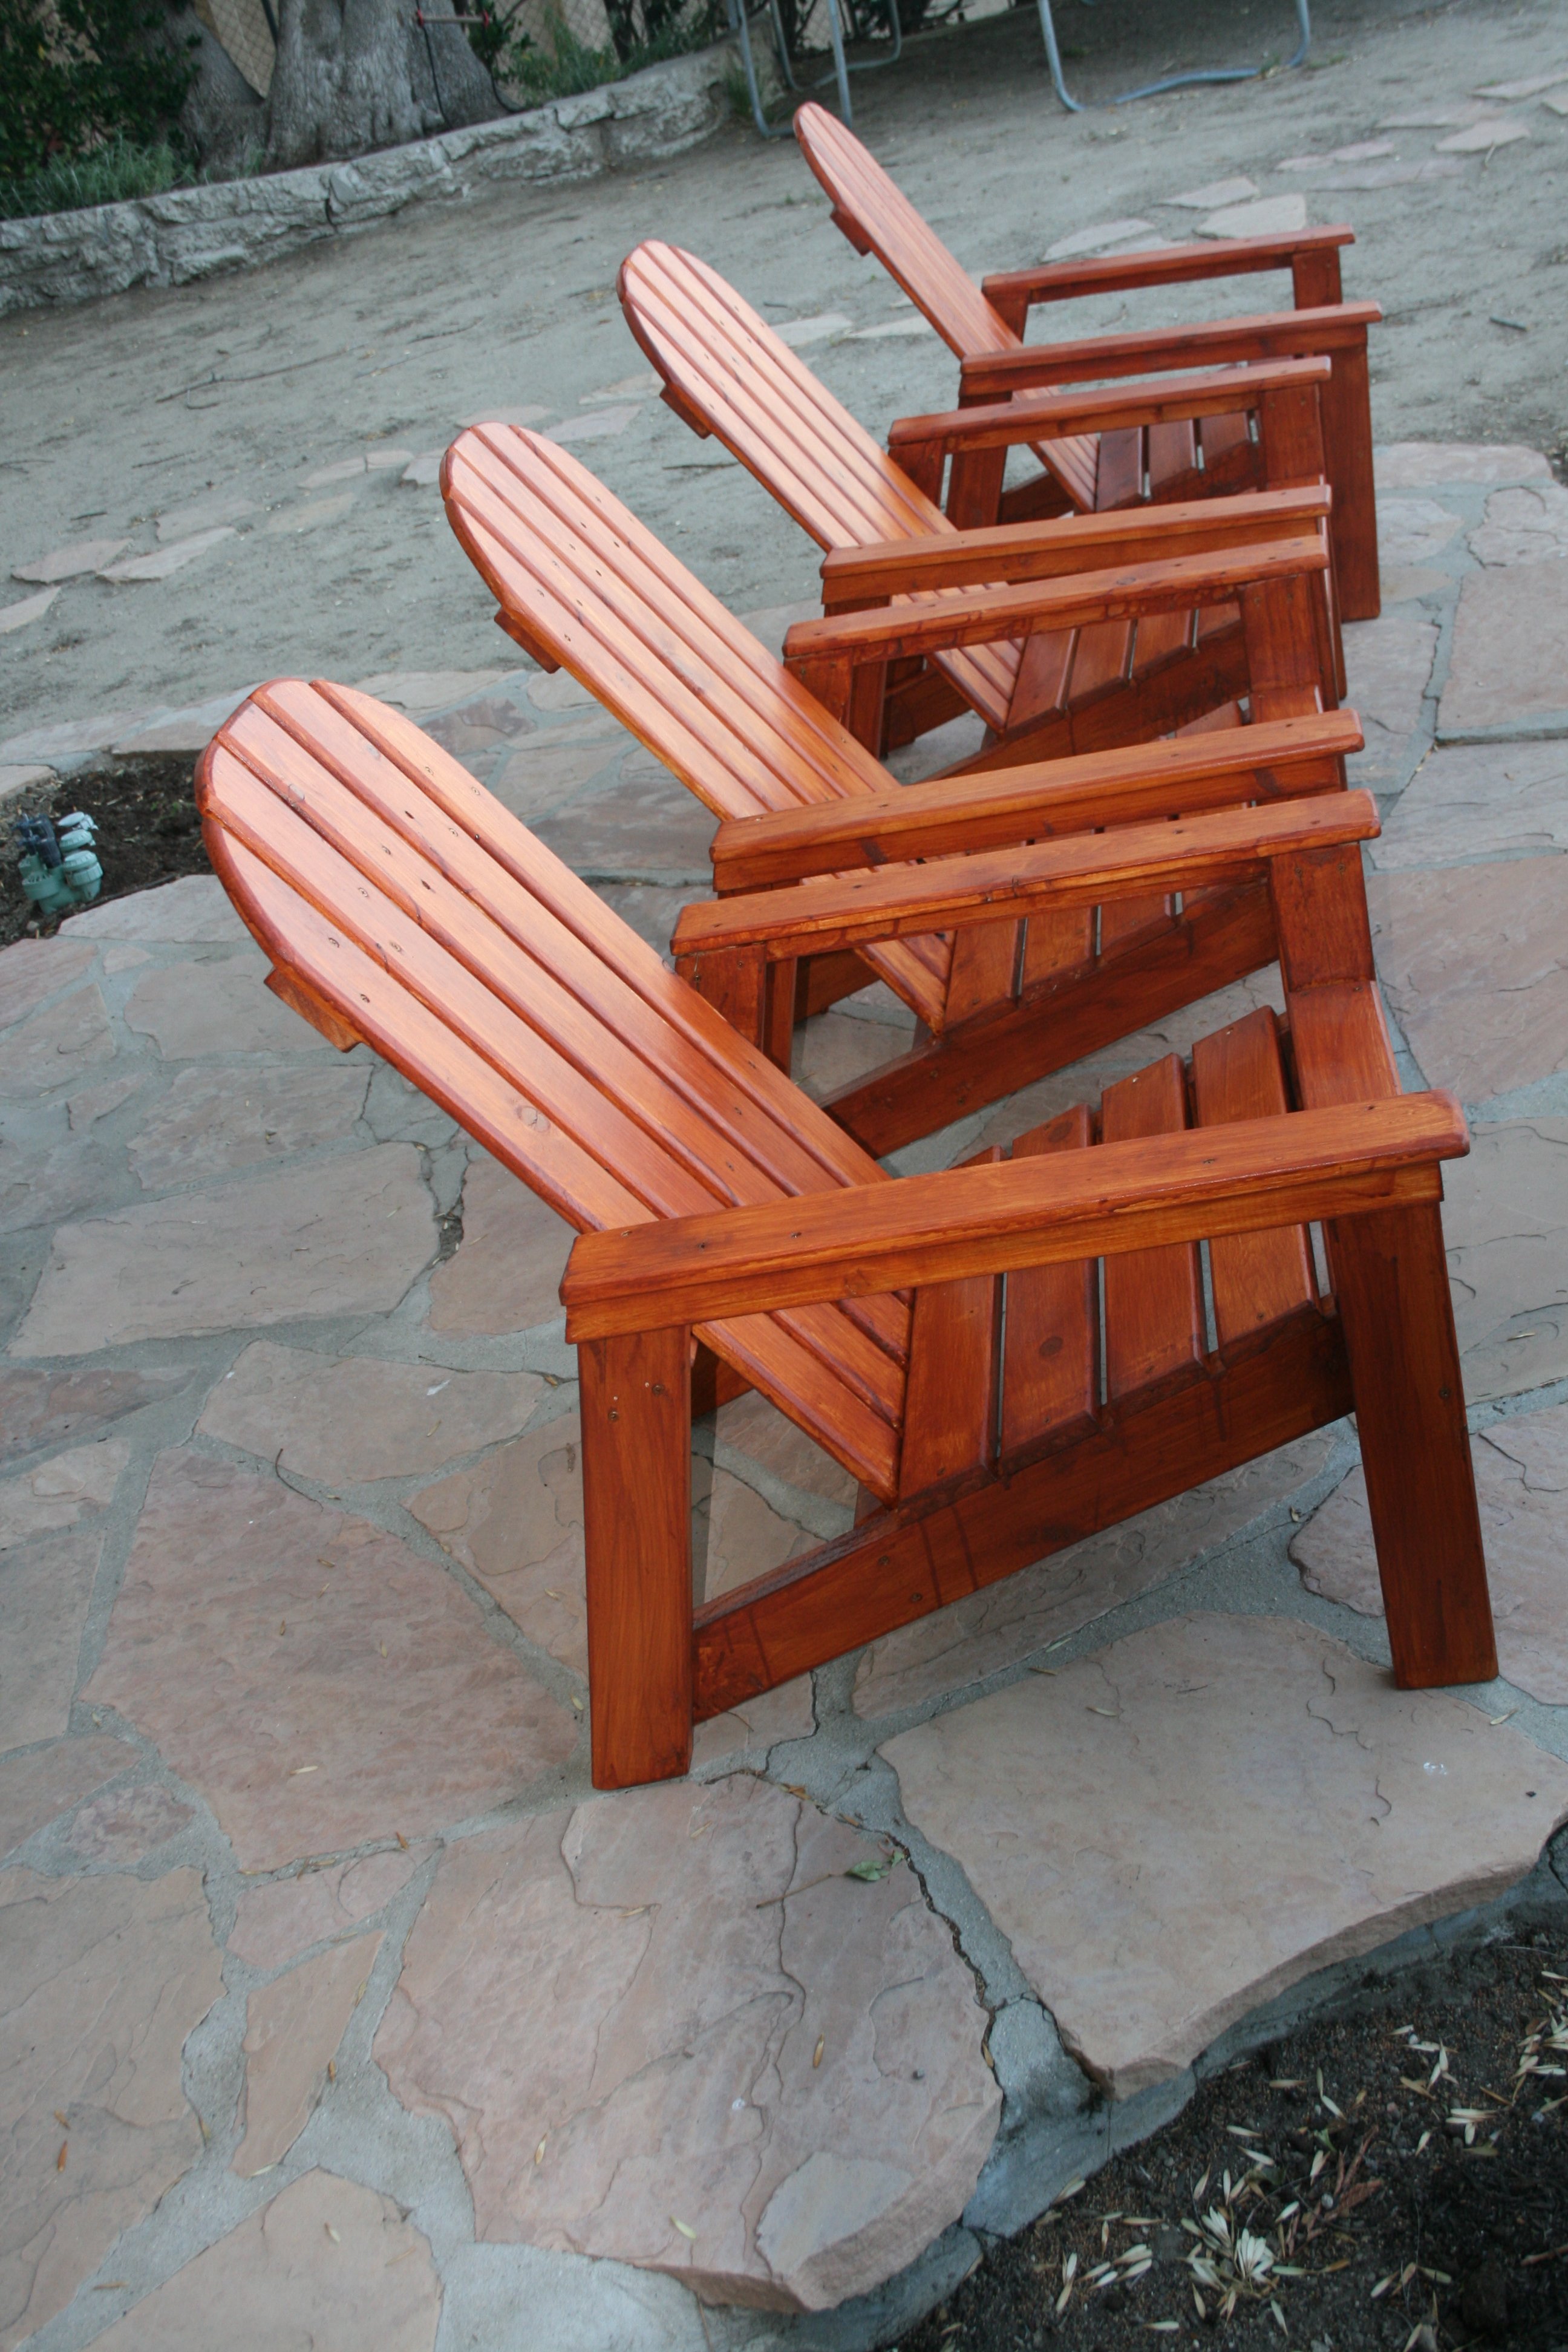
Adirondack Chair
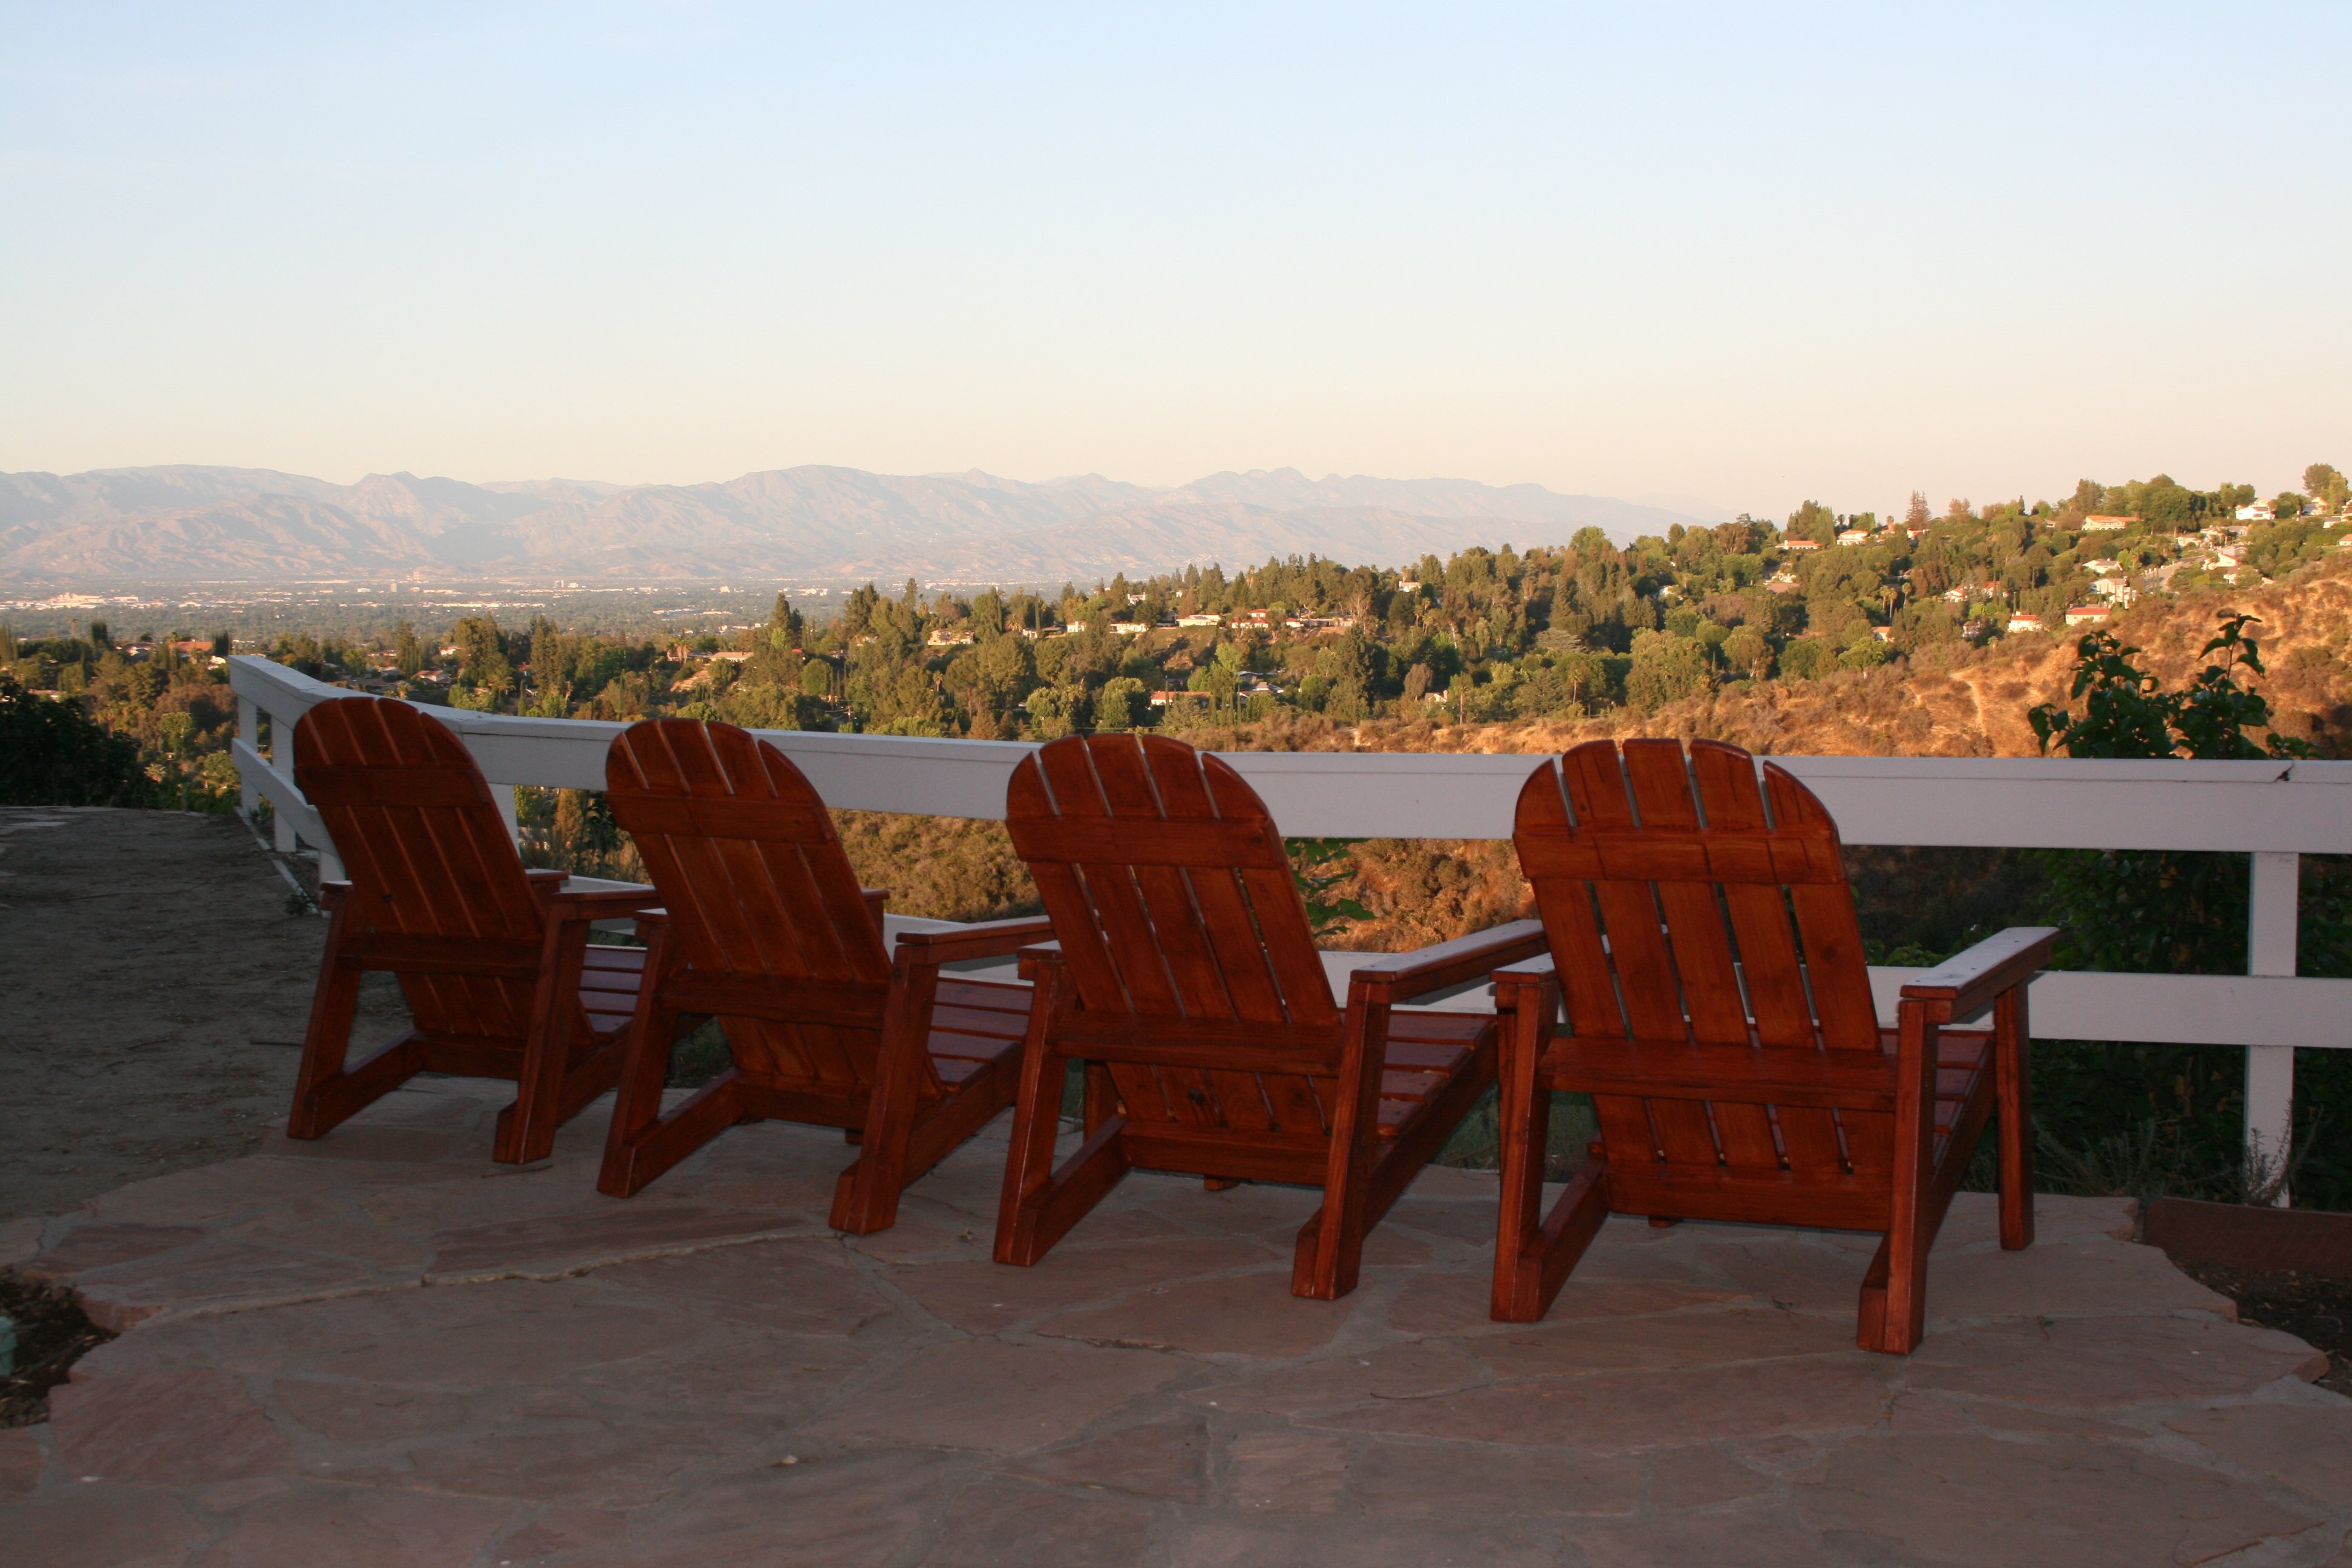
Watts Built on Wolfe Way
Built from Plan(s)
Estimated Cost
$150 for all 4
Finish Used
Behr Transparent Weather Proofing all-in-one Cedar Naturaltone No 501
Recommended Skill Level
Intermediate
Comments

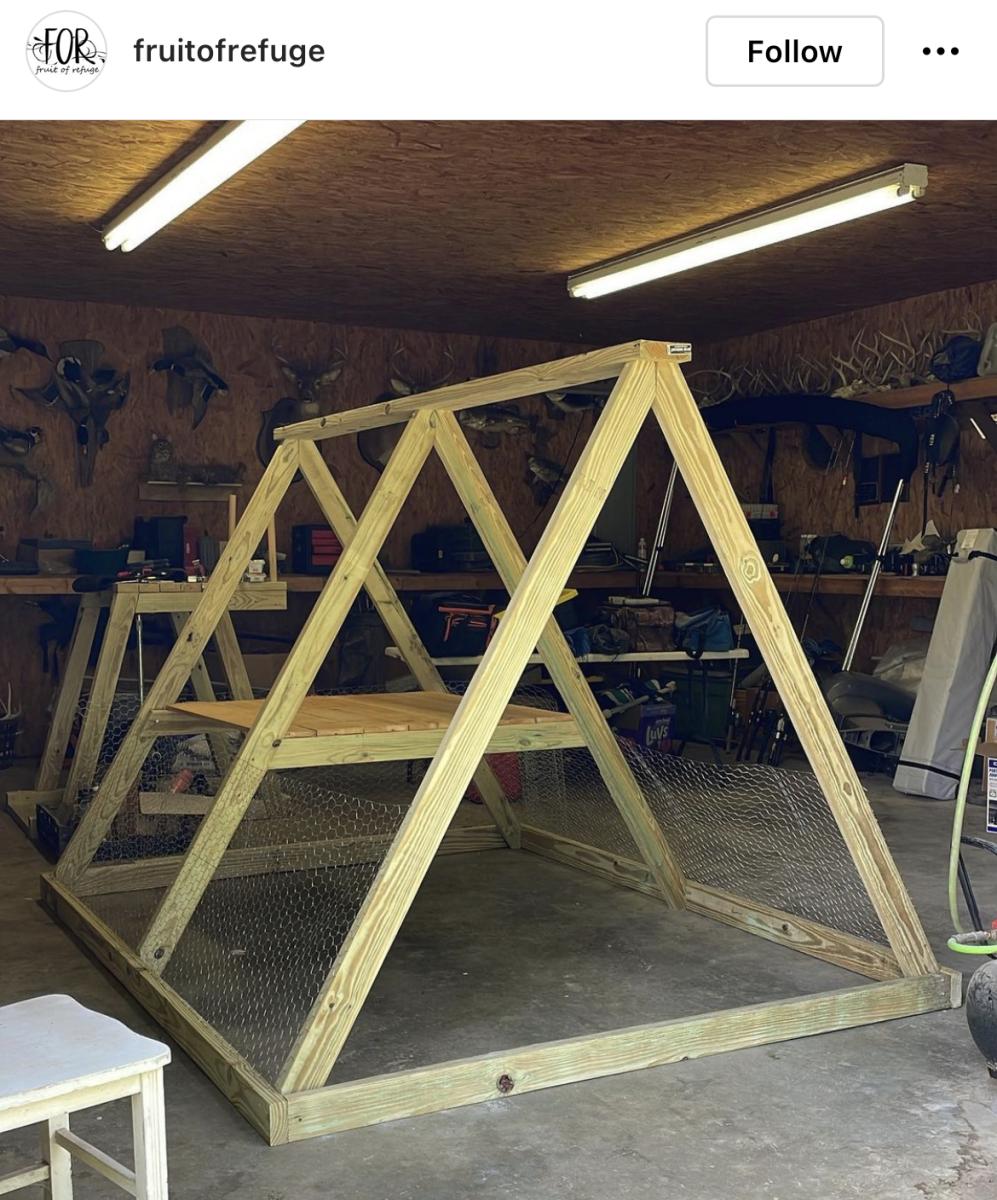
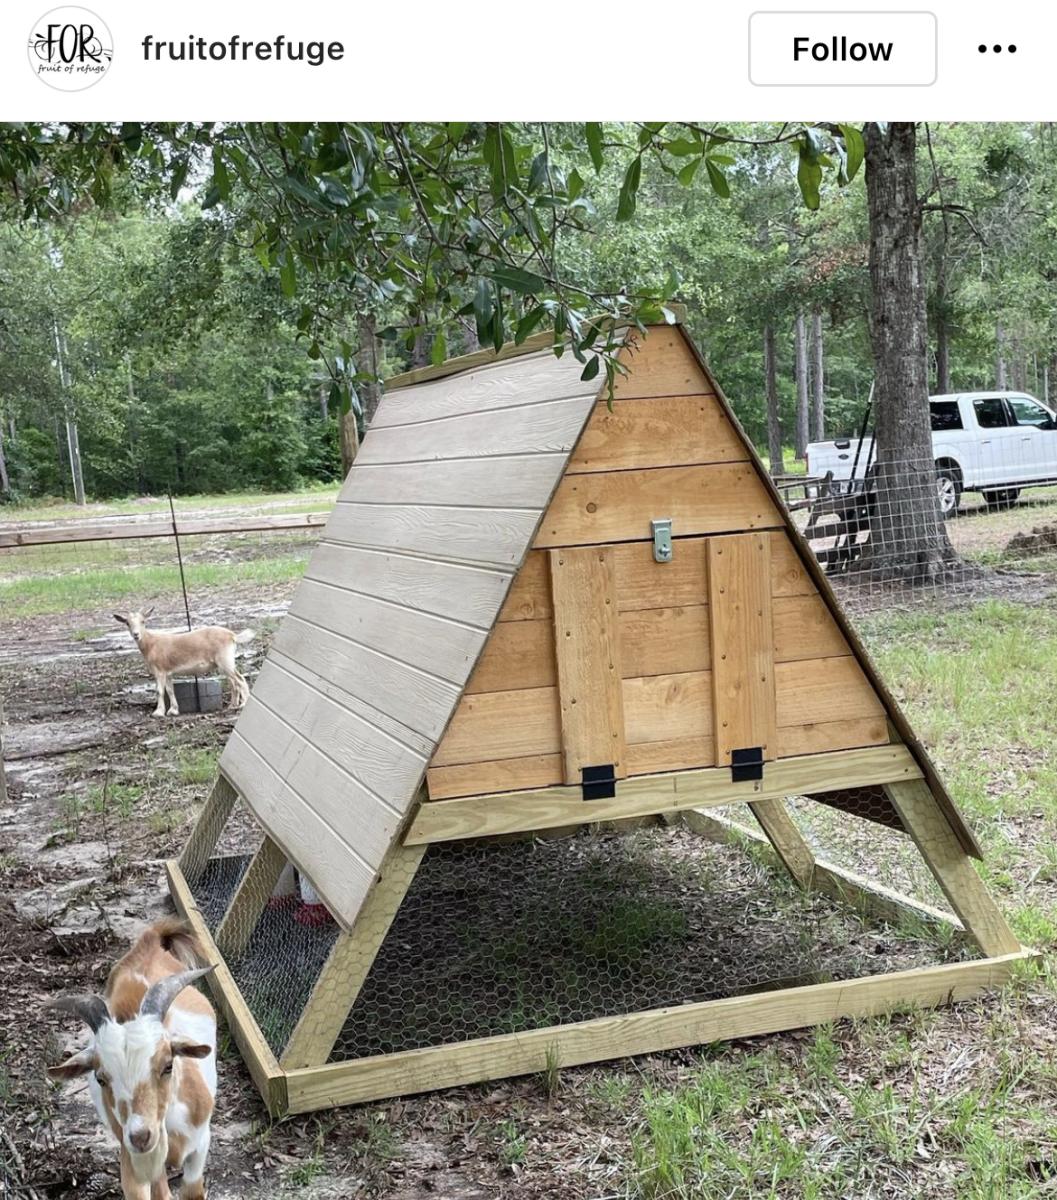
Chicken Coop
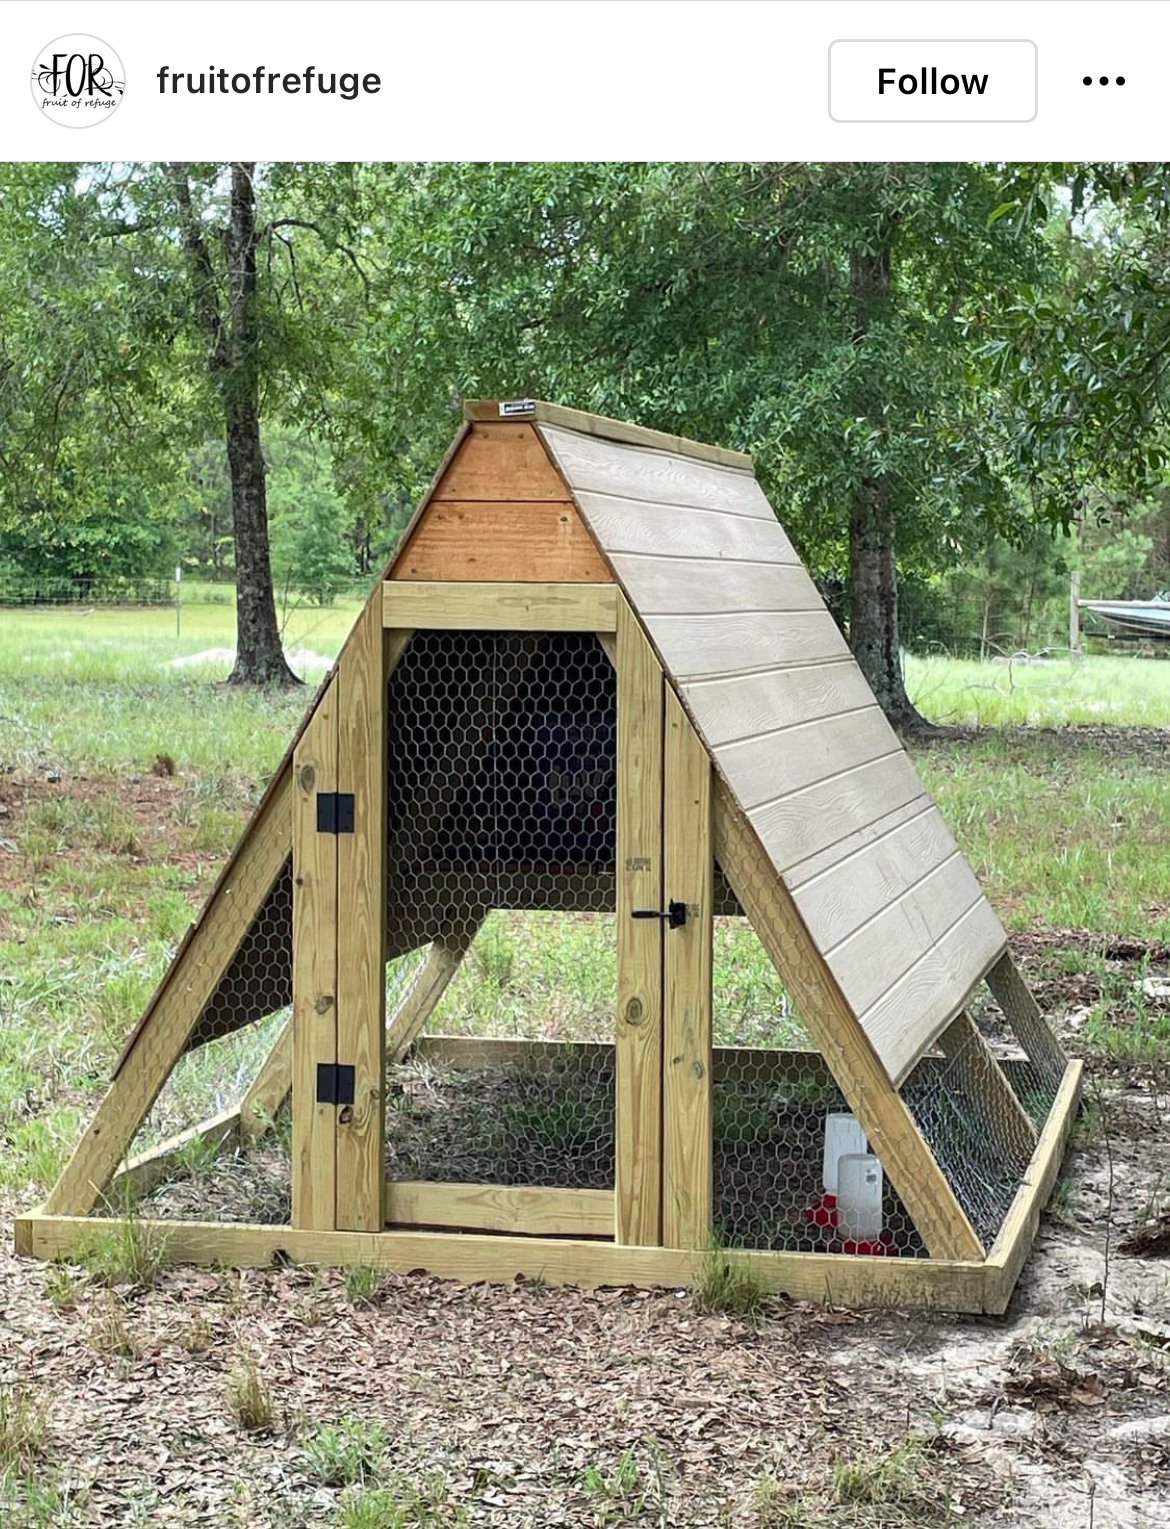
Great for a small flock of 5 or less.

Built from Plan(s)