DIY Bar Cabinet
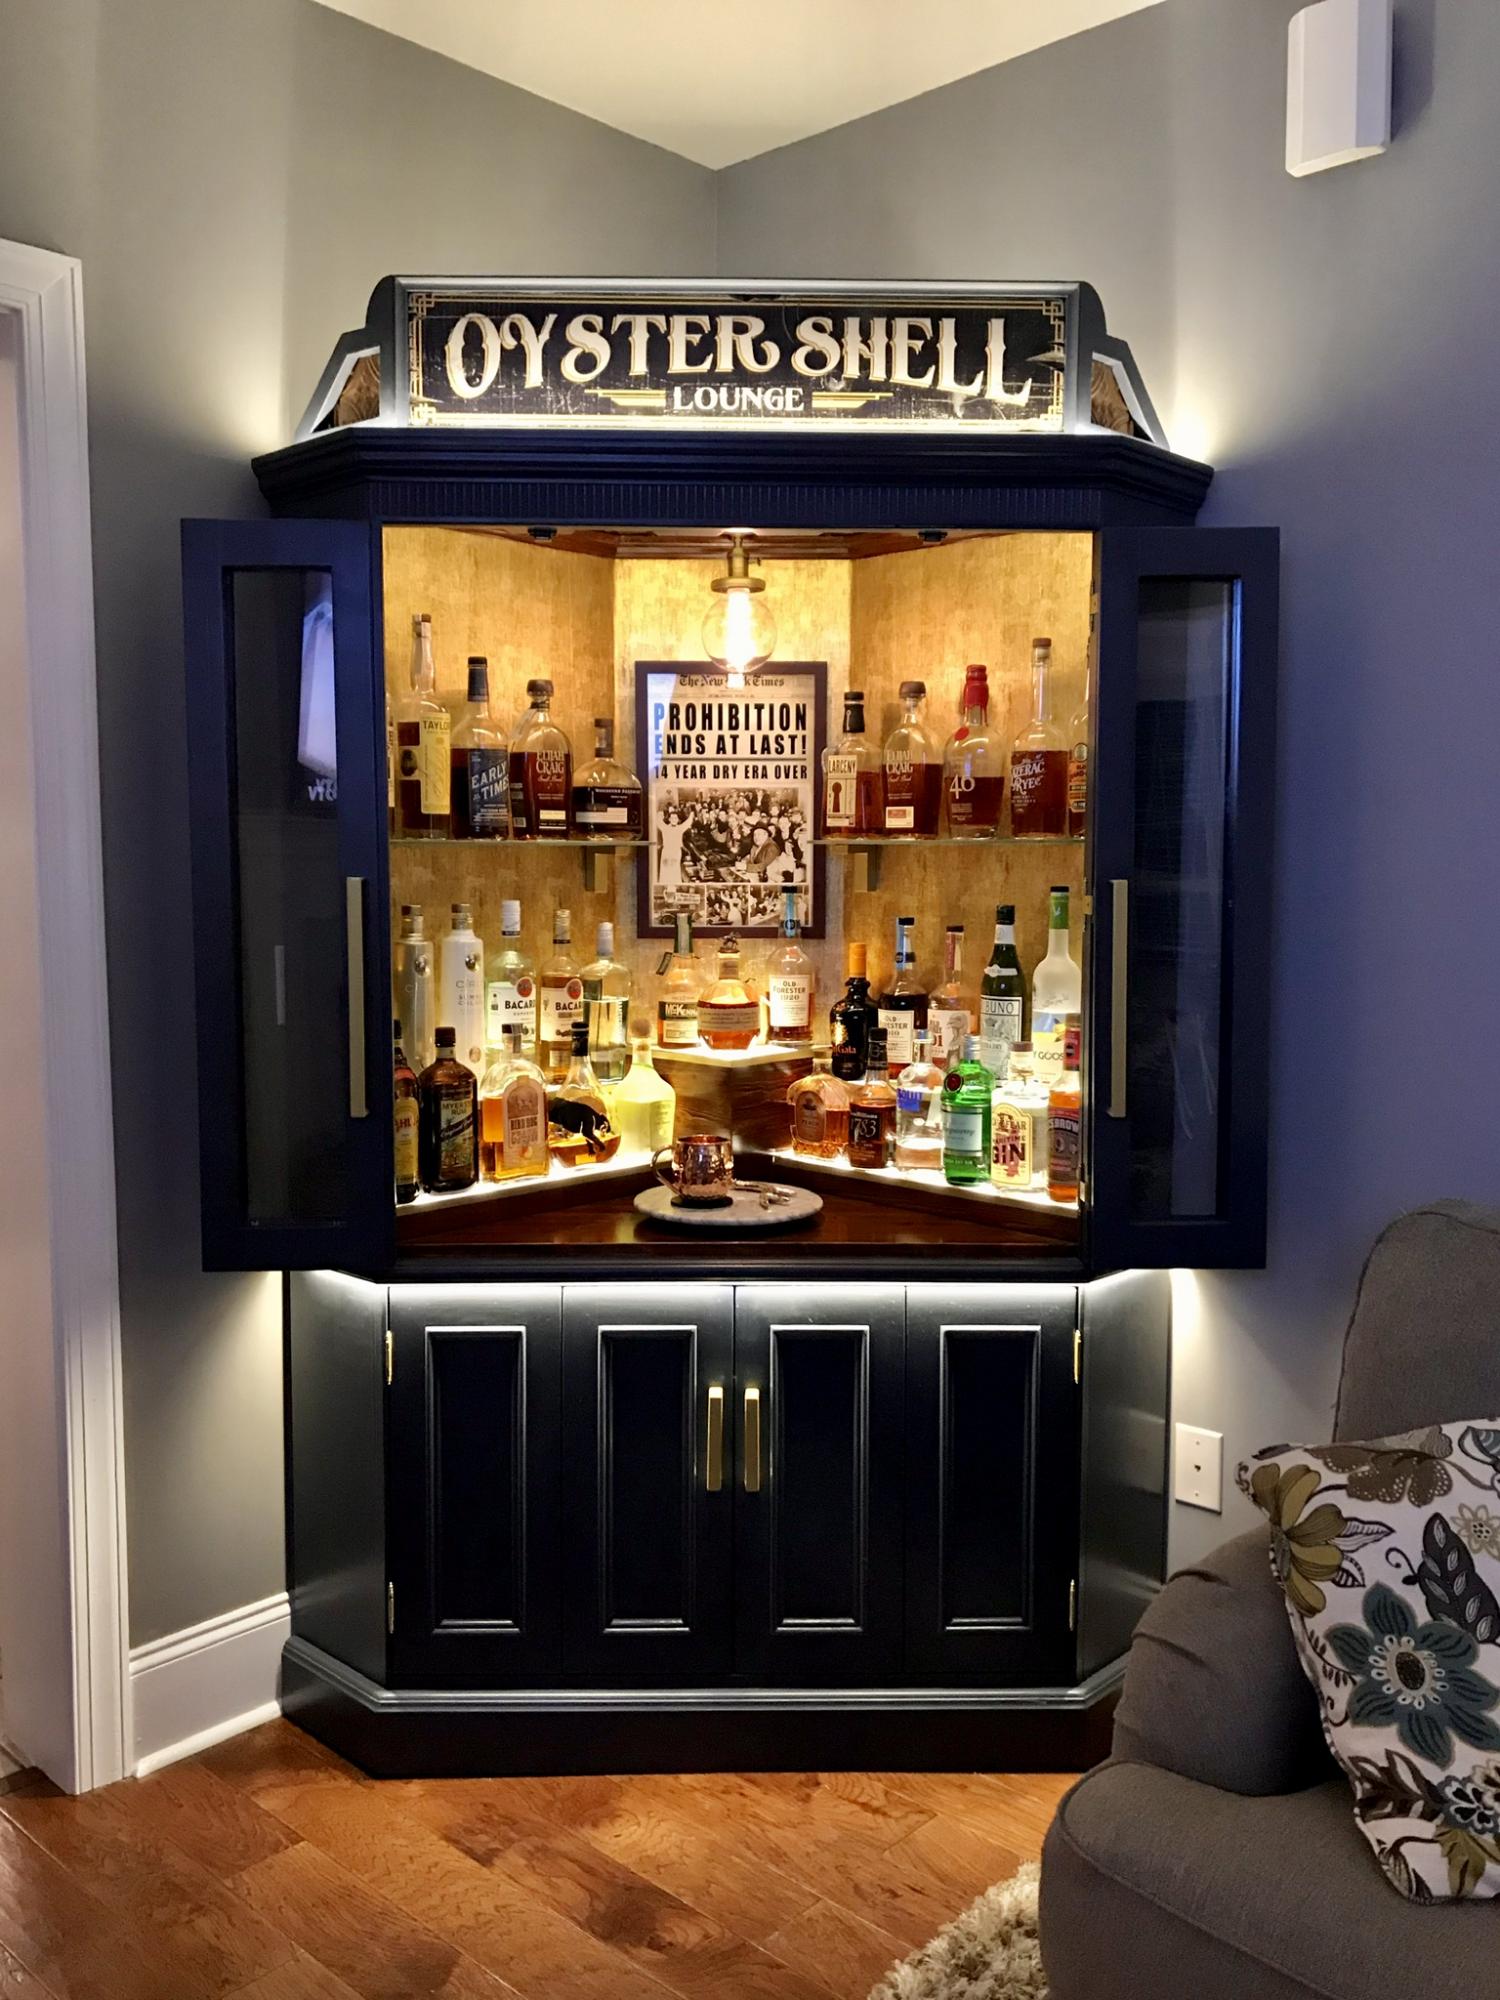
I bought this tv corner cabinet for $40. I spent many hours turning into my perfect bar cabinet. I built a custom lighted liquor display. I have posted photos of the transformation.

I bought this tv corner cabinet for $40. I spent many hours turning into my perfect bar cabinet. I built a custom lighted liquor display. I have posted photos of the transformation.
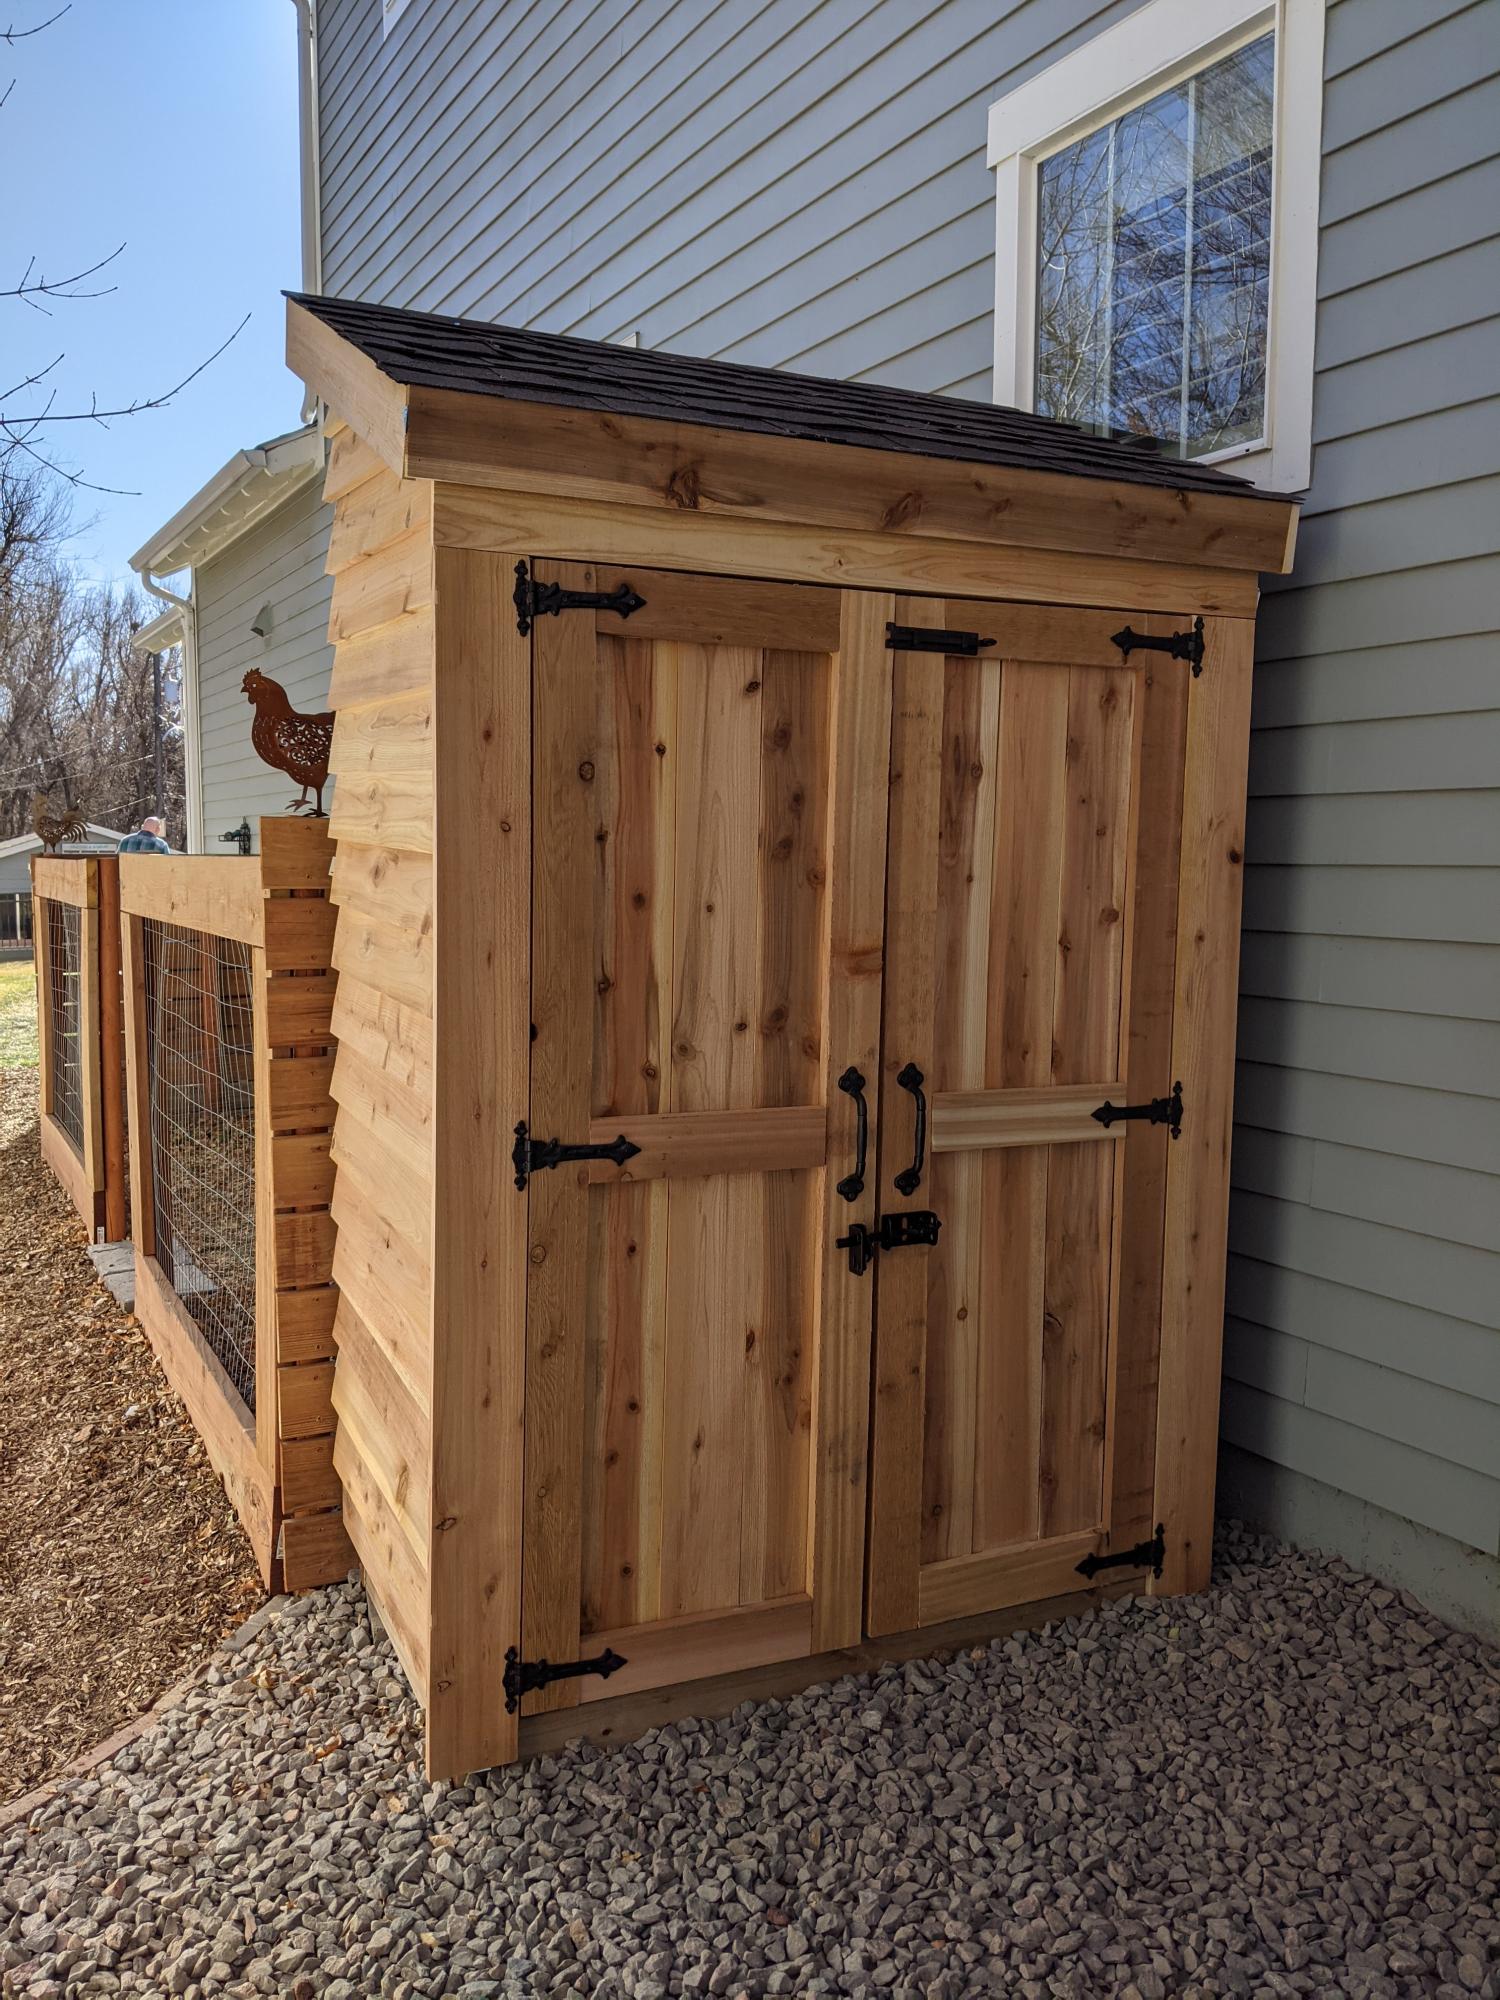
Our take on the small garden shed. Ours is 4 1/2 by 7 feet. We used cedar fence pickets and 2x4 construction. Left over shingles from when our house was built. We are definitely not roofers or framers, also chasing around a 3 year old didn't make things easier. Turned out beautiful for what we want it for. Just rustic enough. Great intermediate project.
Mon, 11/30/2020 - 11:14
You did a great job, the 3 year olds add just the perfect amount of challenge to really appreciate a completed project!:)
My father and I made this awesome poolside towel cabinet using the Benchmark Cabinet plans. A super easy 1 day build and it looks amazing on the patio. Bring on the pool weather!

I used Ana's Freestanding Shelf plan and customized it to fit my needs. I incorporated laundry and recycle storage, a rolling bench and built in for our chest freezer. If you want to see it being built with some added tips, that video is available here https://www.youtube.com/watch?v=N8w7XGiVMbs&t=258s

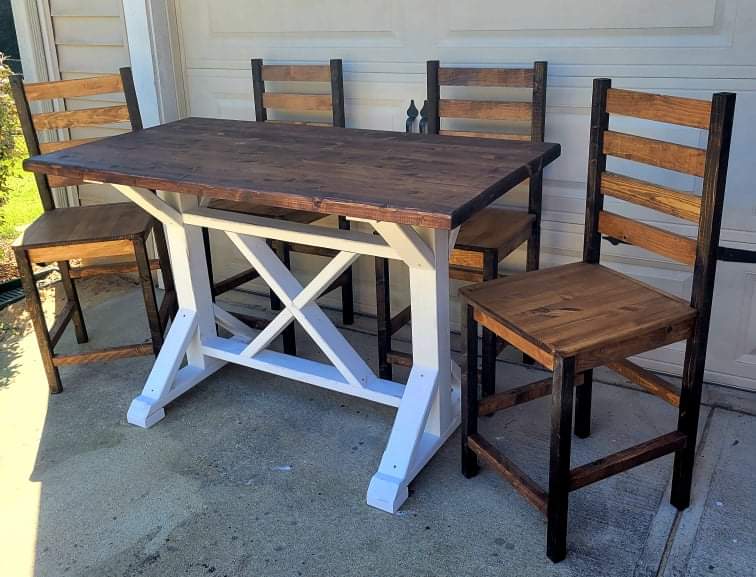
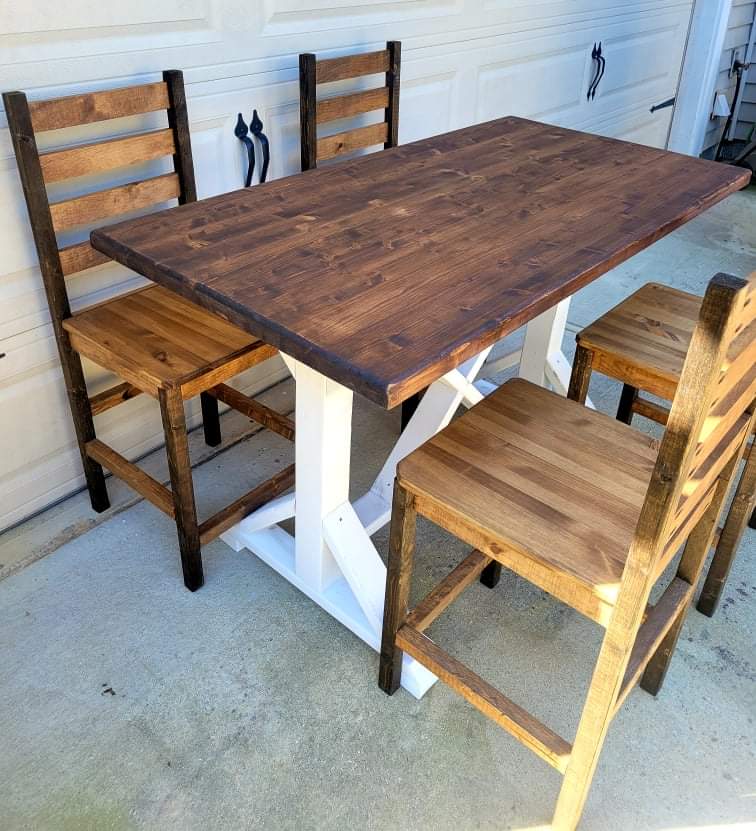
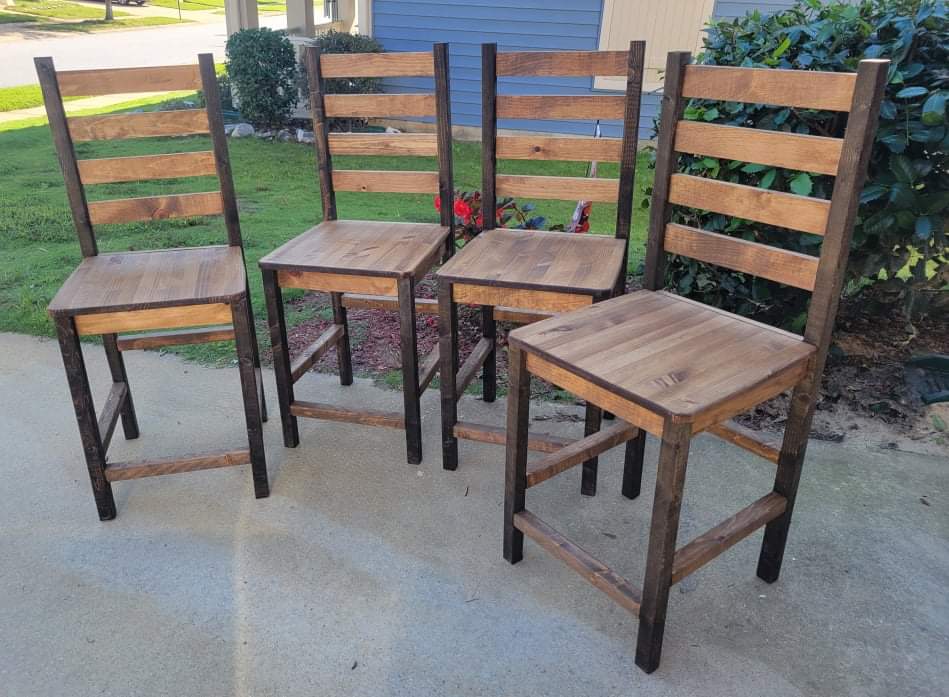
Threw this together over a 4 day weekend. Love how light these chairs are.
Substituted edge glued project panel for the table top and seats instead of joining several planks.
Used a combination dark walnut, jacobean, and early American stain on the finish.
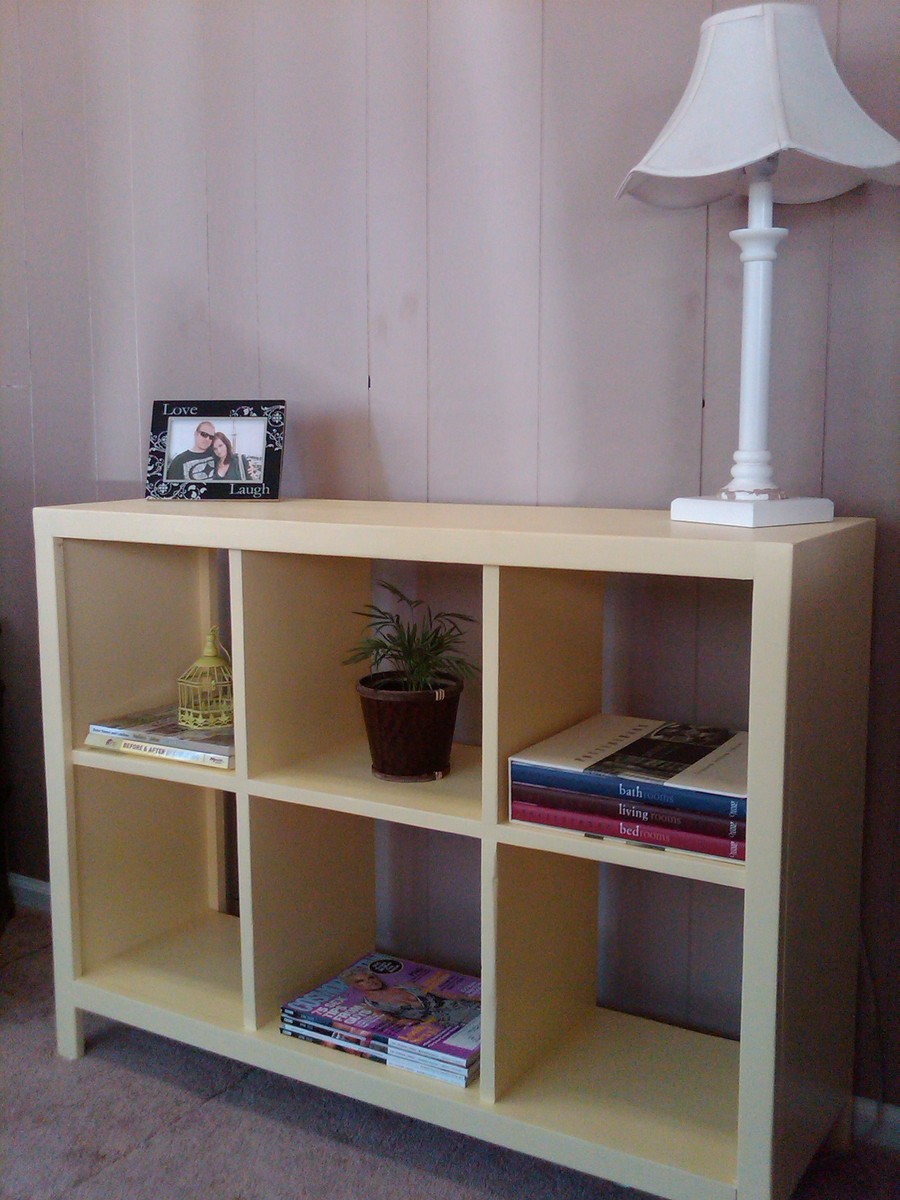
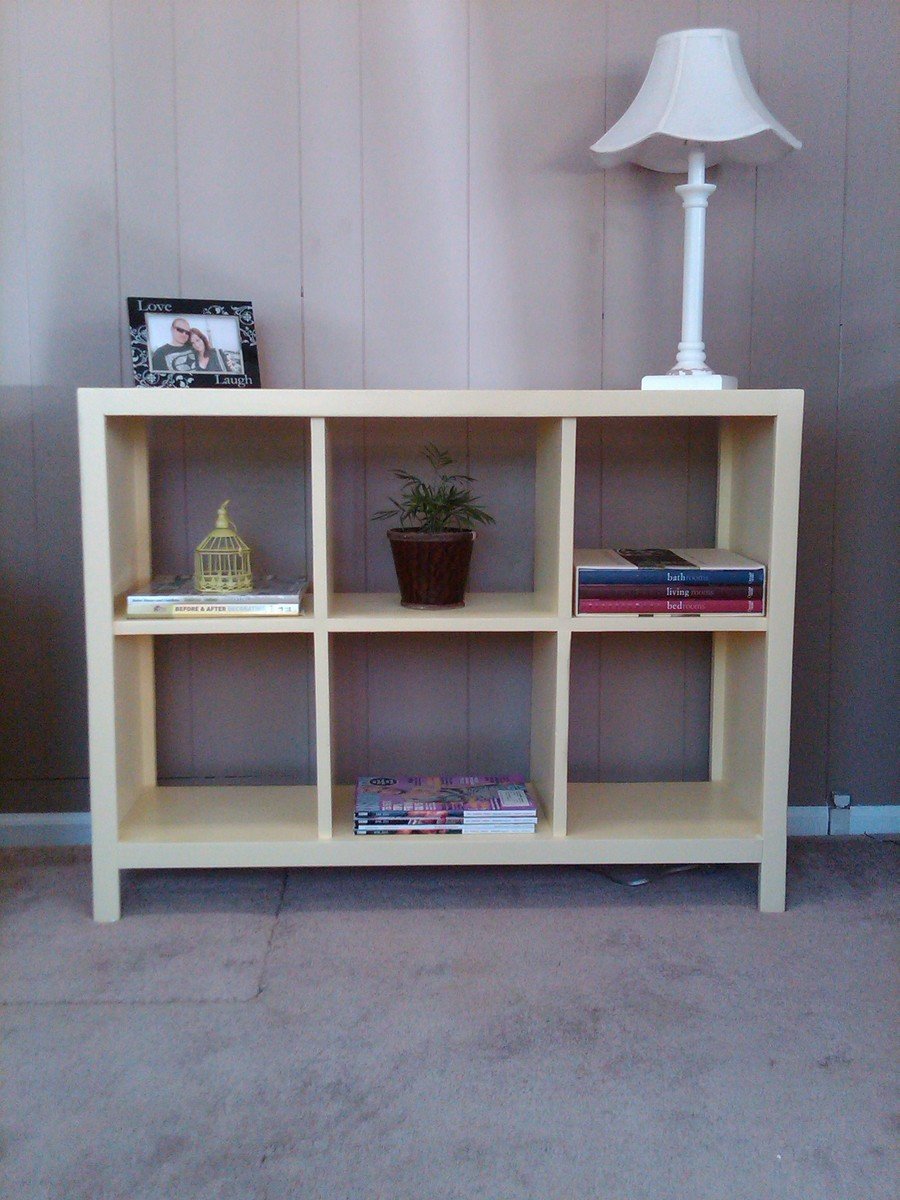
Totally lovin' my new cubby shelf. I painted it bright yellow, but I may paint it a more nuetral color after noticing it does not math anything haha! This is a super sturdy shelf...LOVE IT! Thanks ANA!
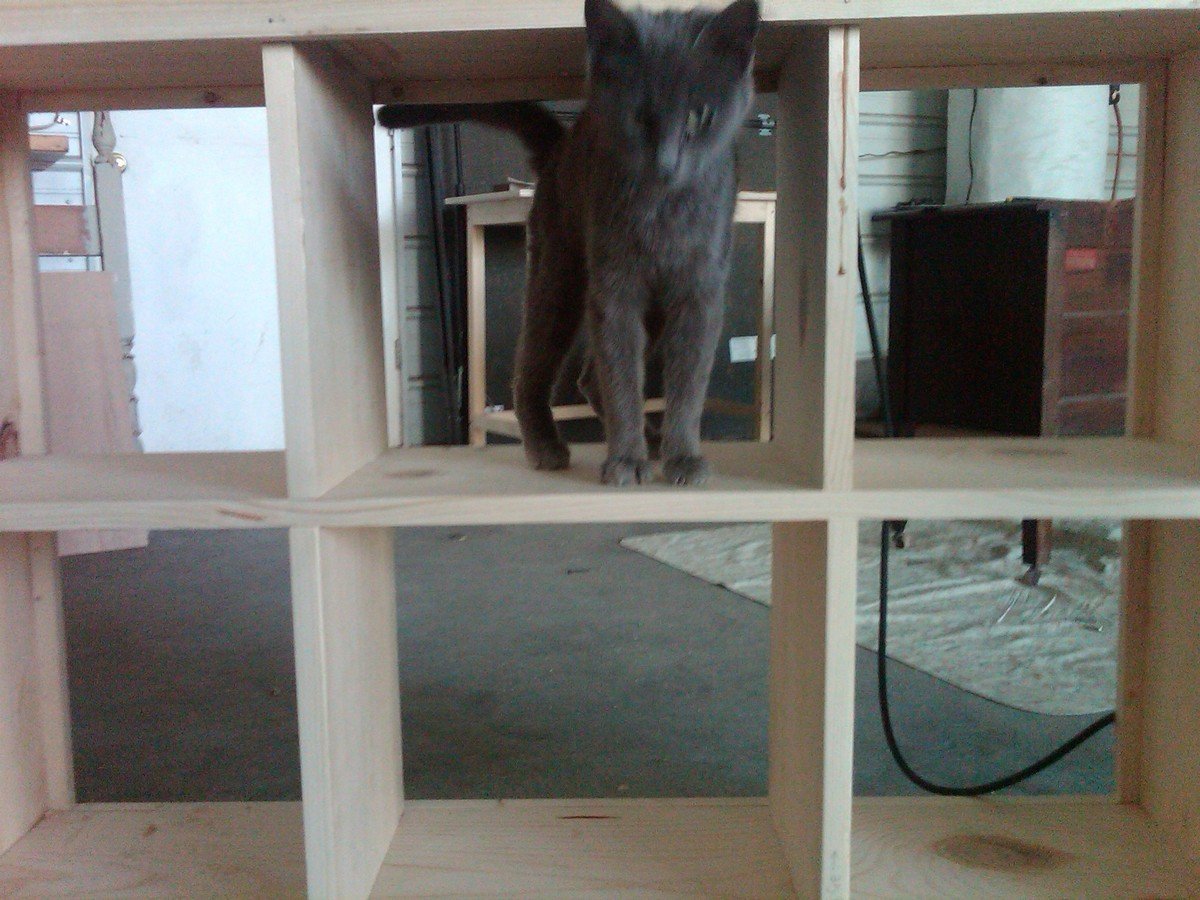
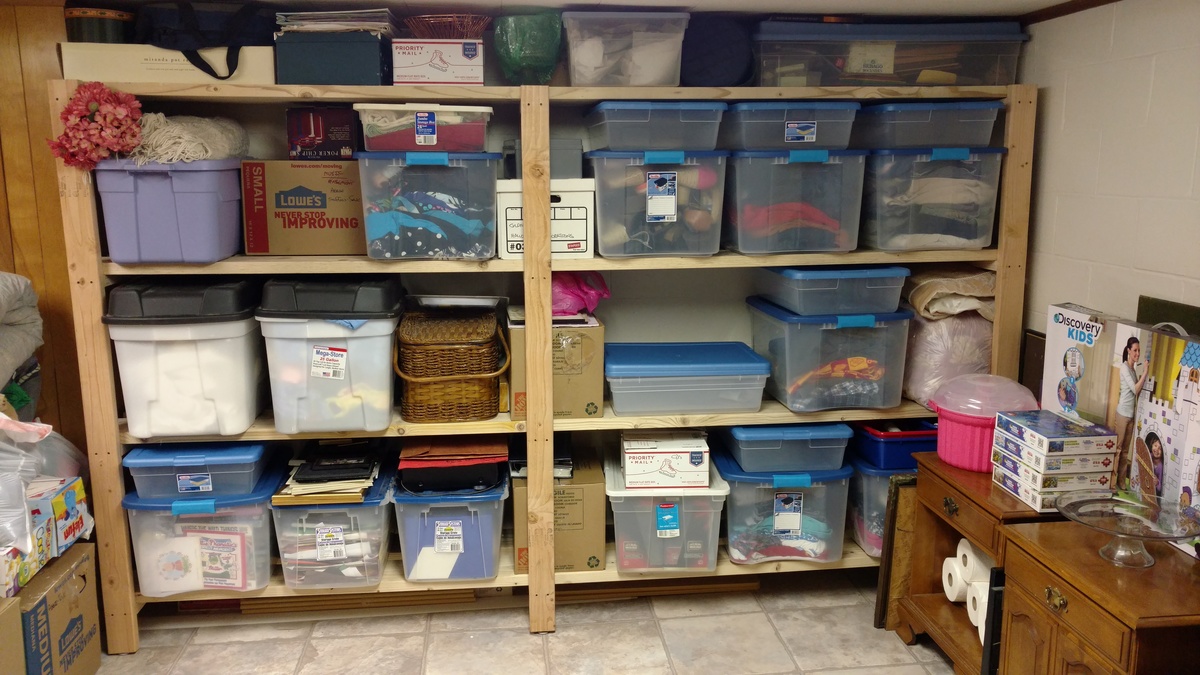
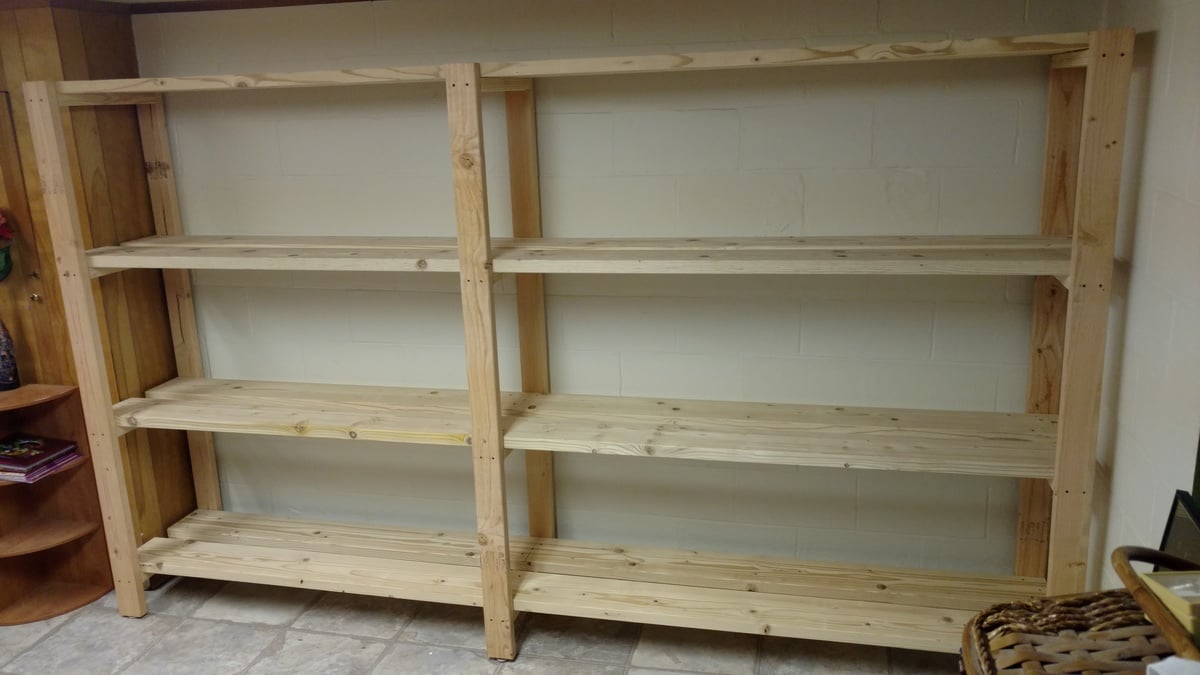
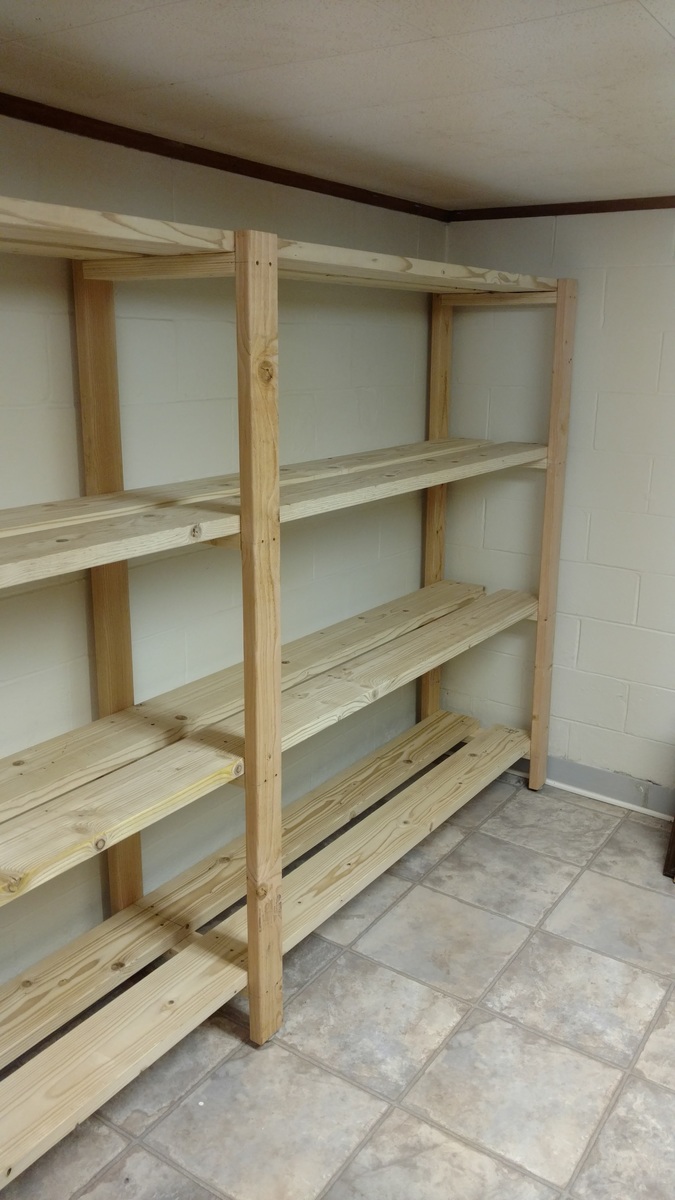
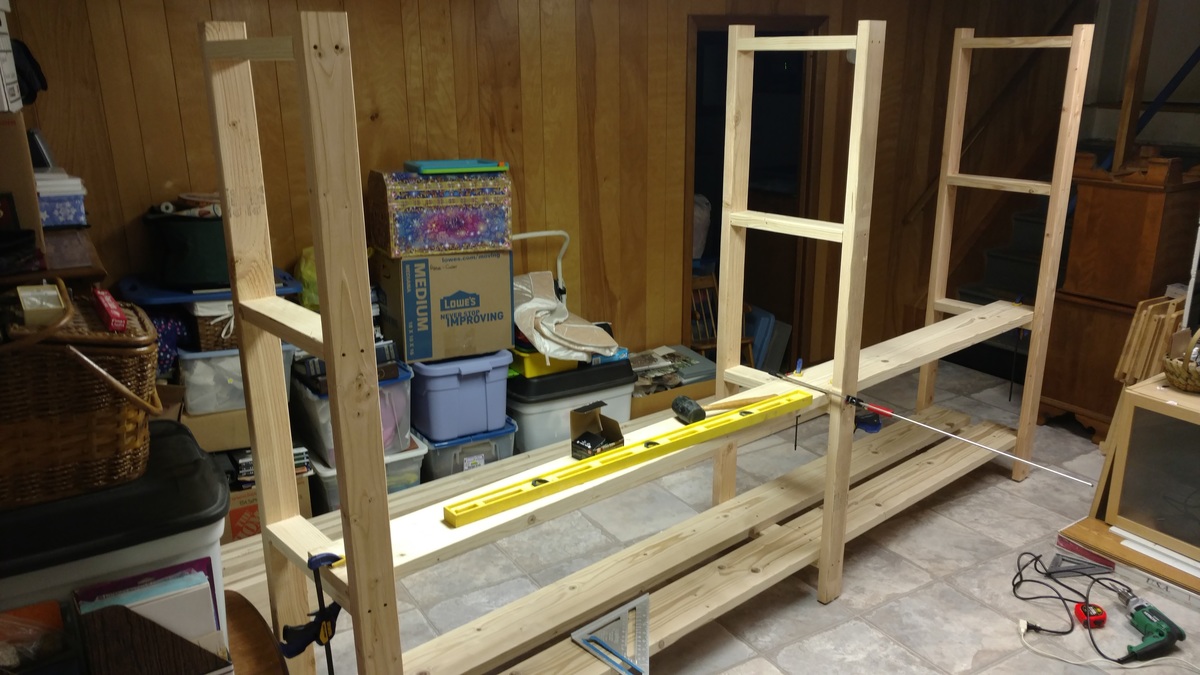
Time to get organized in 2017....and what better way than with some custom shelving. This was not too bad of a project to complete. It only took about 6-8 hours to cut, frame, and assemble everything together (thanks to an interruption or two). 'Twas nice to have a project for once that I didn't have to care about finishing the project with wood filler, sanding, painting. I am sure my wife thanks me more as I would have been another week getting things just right!
A few changes that I made from the original plans:
- used 2x8 for the shelving runs as I only was dealing with a 10ft run and was a few bucks cheaper to buy 8 boards vs 16 boards. Plus less cuts!!!
-installed adjustable furniture feet in the supports to deal with sloping basement floor. Unexpected side effect was it was easier to slide the unit around in the basement as I assembled it.
Outside of those changes I remained faithful to the original design. I didn't bother filling the screw holes as we will be hiding the shelving unit with a curtain once we turn the room into a TV/Office area.
Also as it wasn't 100% clear from the original plans, but the height measurements for the shelf supports are to center... not sure why it didn't register with me right away... but just in case anyone else didn't realize that as well.
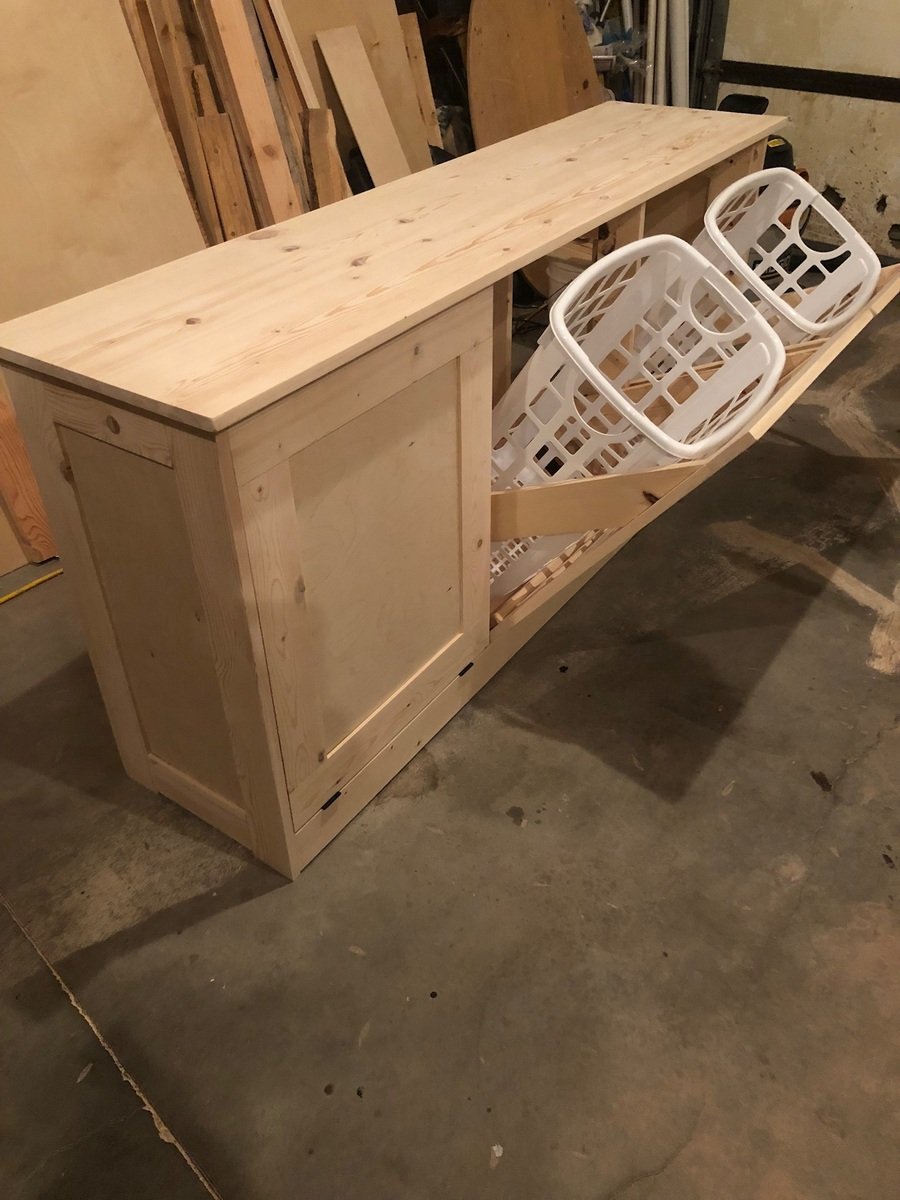
This was a build from a picture and made to fit into a space we have in the laundry room. Used the Kreg jig for much of it.
Tue, 06/05/2018 - 14:52
Awesome laundry sorter! Can't wait to see the paint/stain!
Thanks so much for sharing a brag post - much appreciated!
Ana
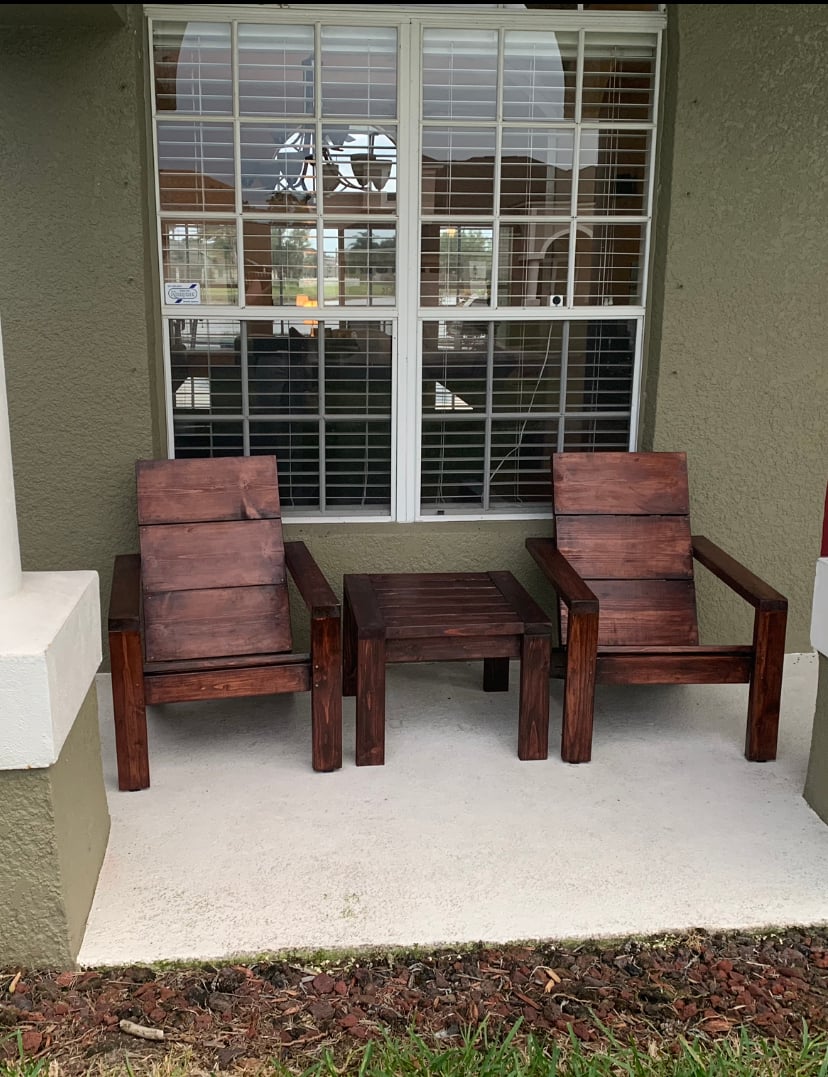
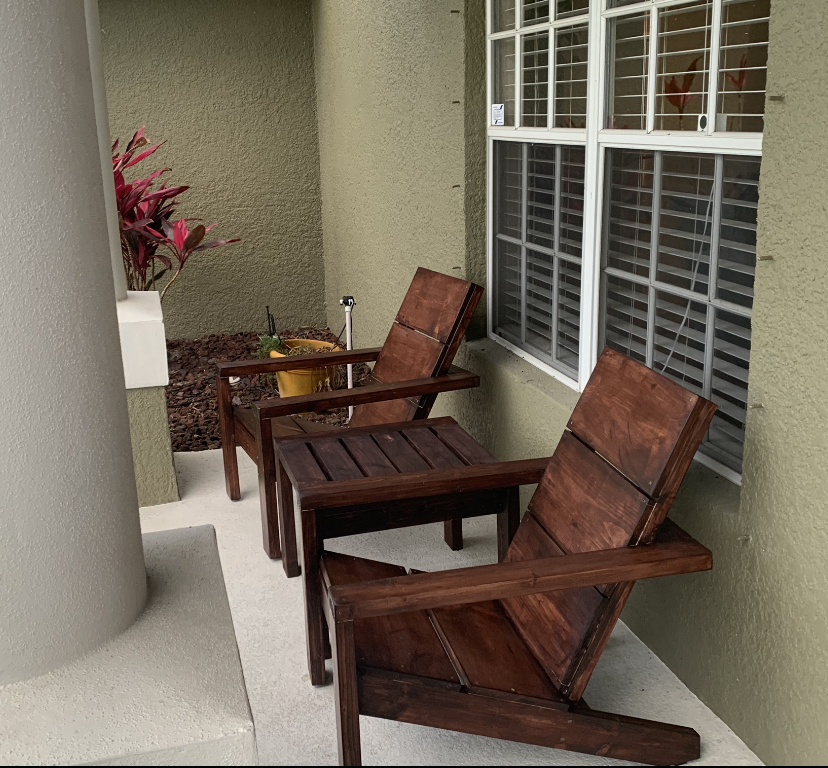
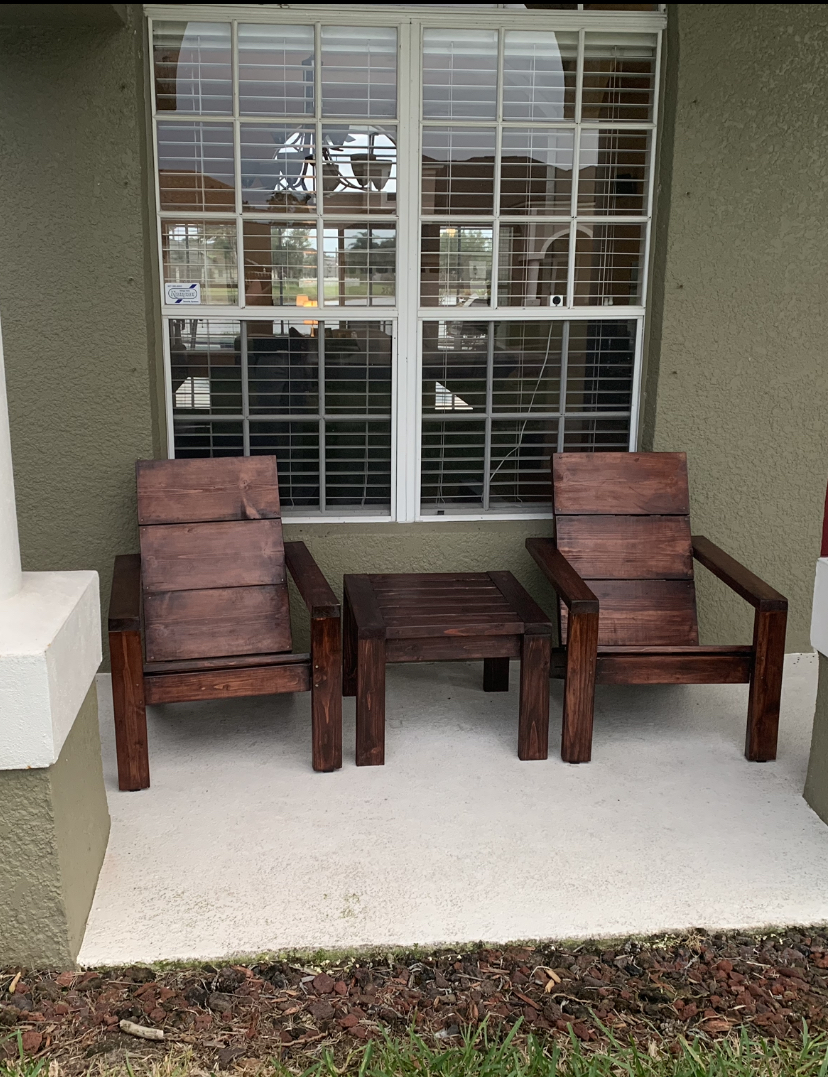
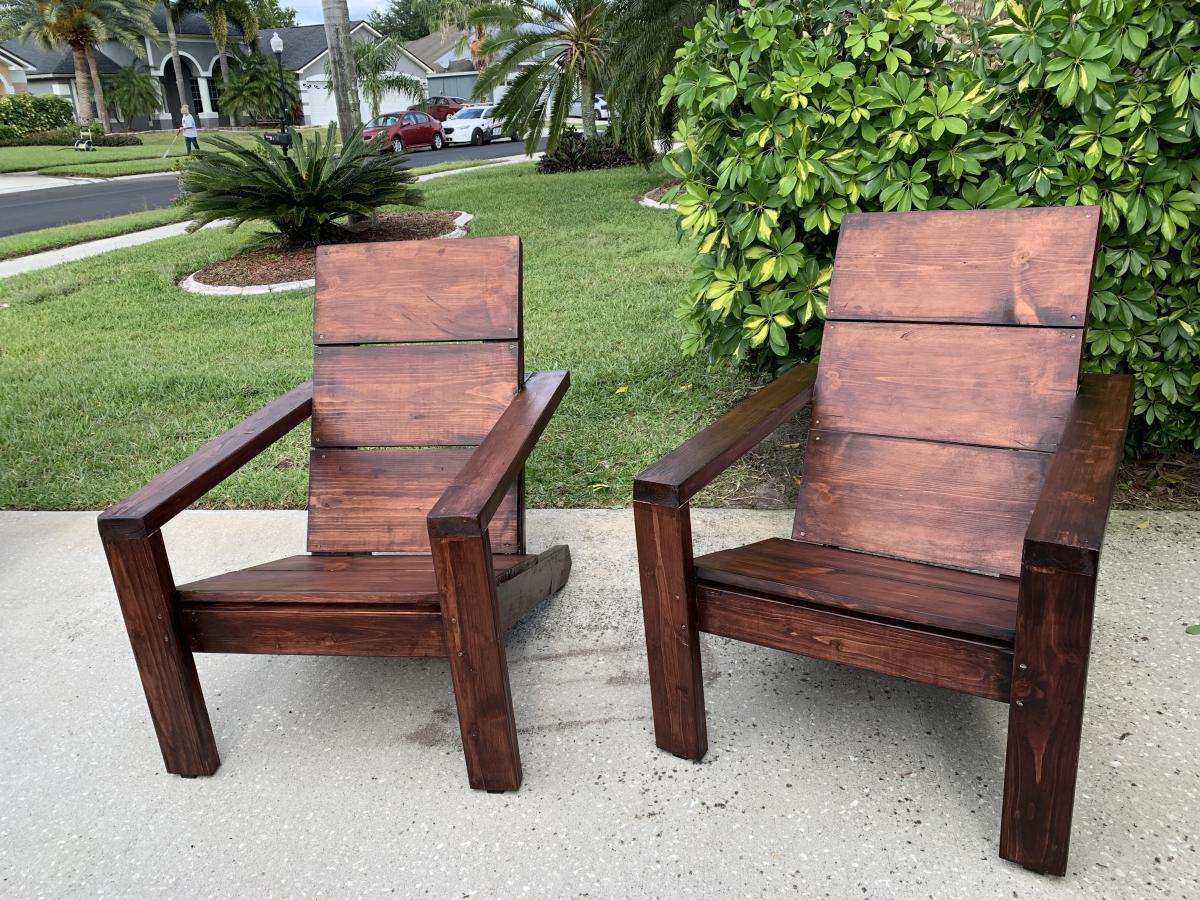
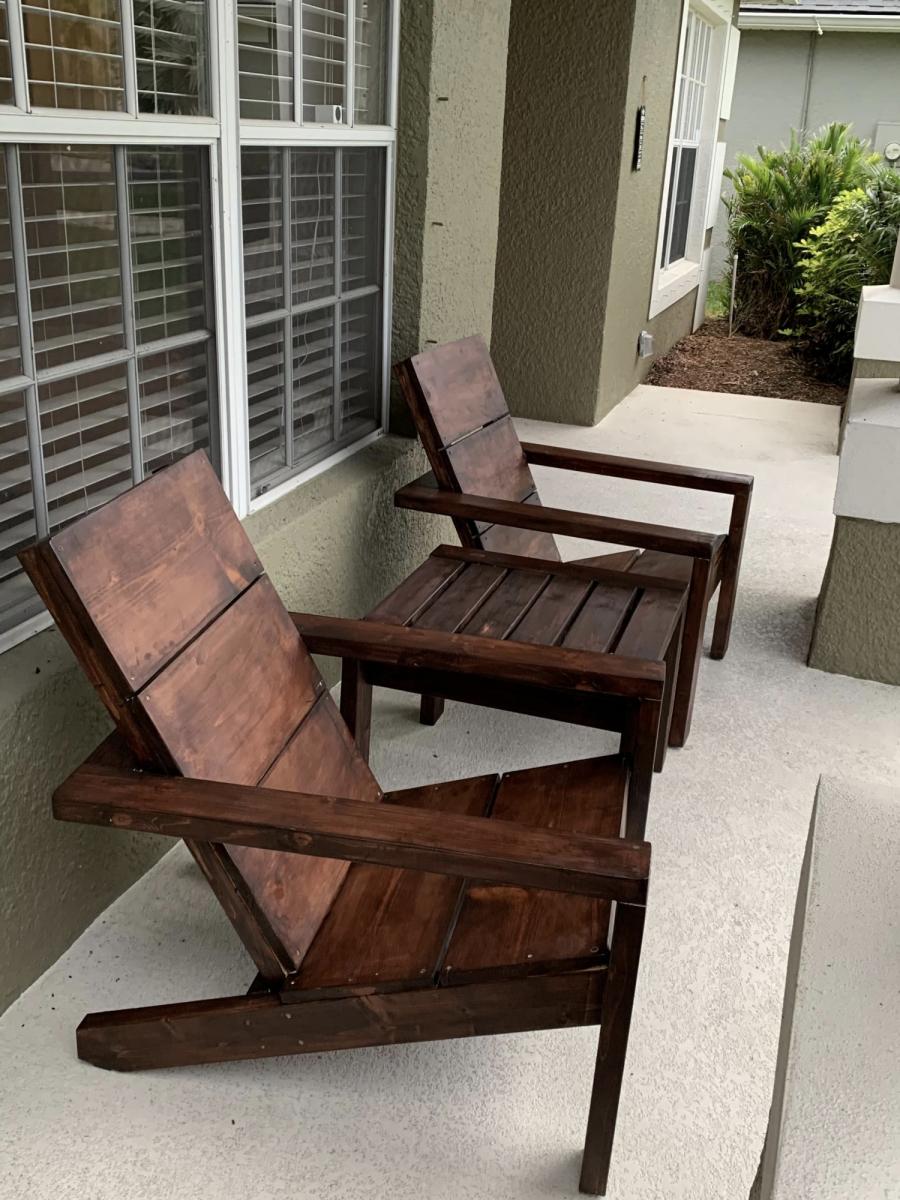
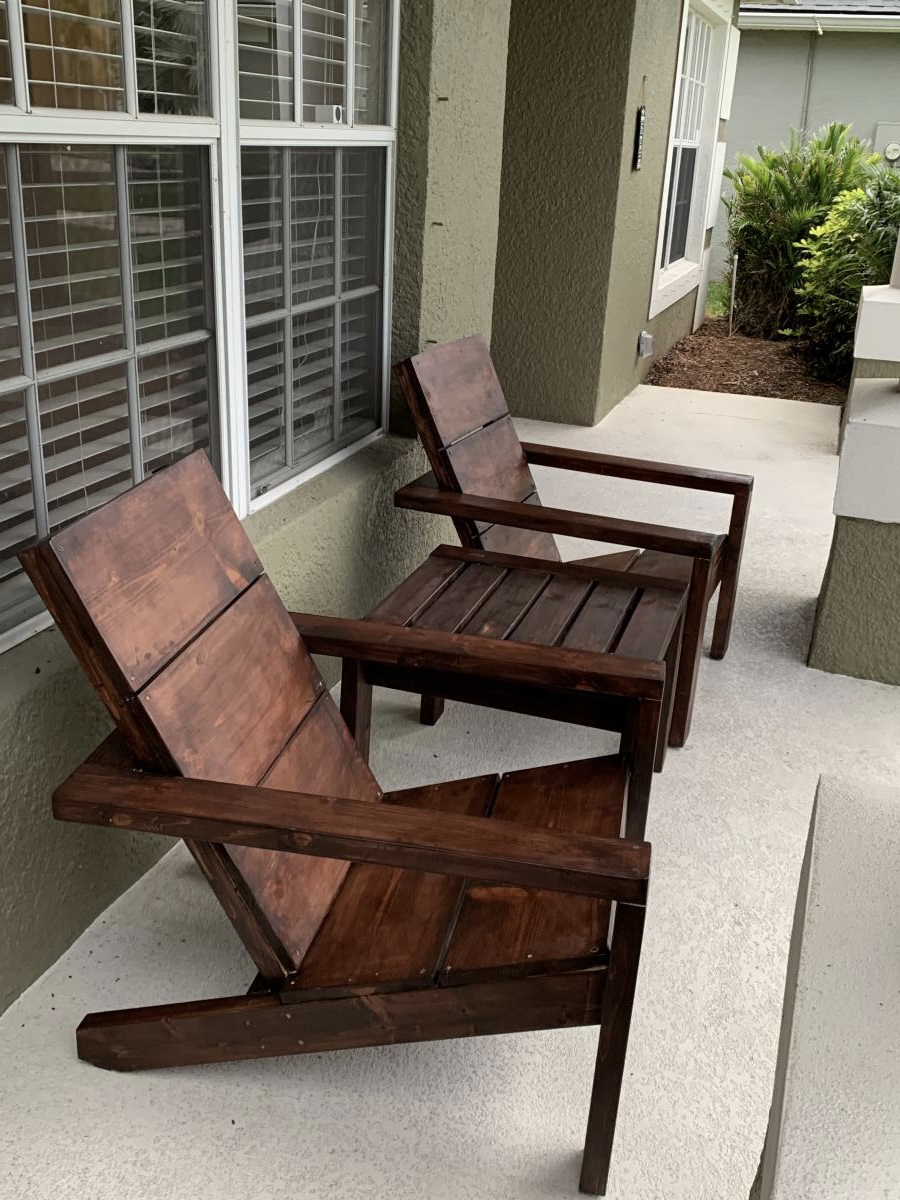
These modern Adirondack chairs were my first wood working project ever and they turned out awesome! I wanted to build a small table to complete the set and Ana’s new side table plans were exactly what I was looking for. I am truly amazed at how easy these projects were to make and how great they look on our front patio. Ana’s step-by-step plans make it so simple. My wife and I can’t wait to build some more of these projects for our backyard lanai and pool area.
Mon, 04/12/2021 - 10:21
Amazing job on your first build, I see more handmade pieces in your future!
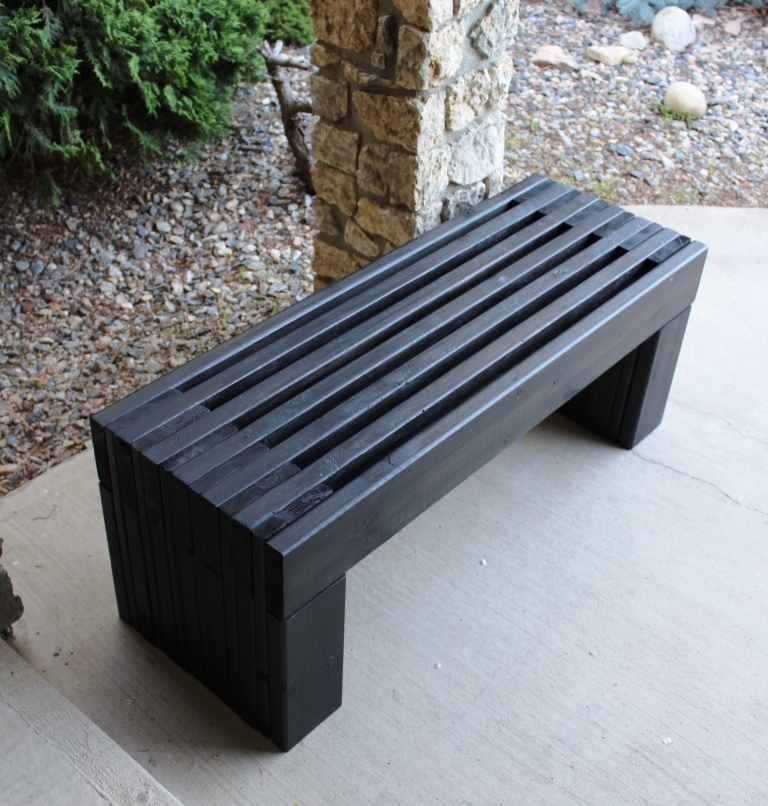
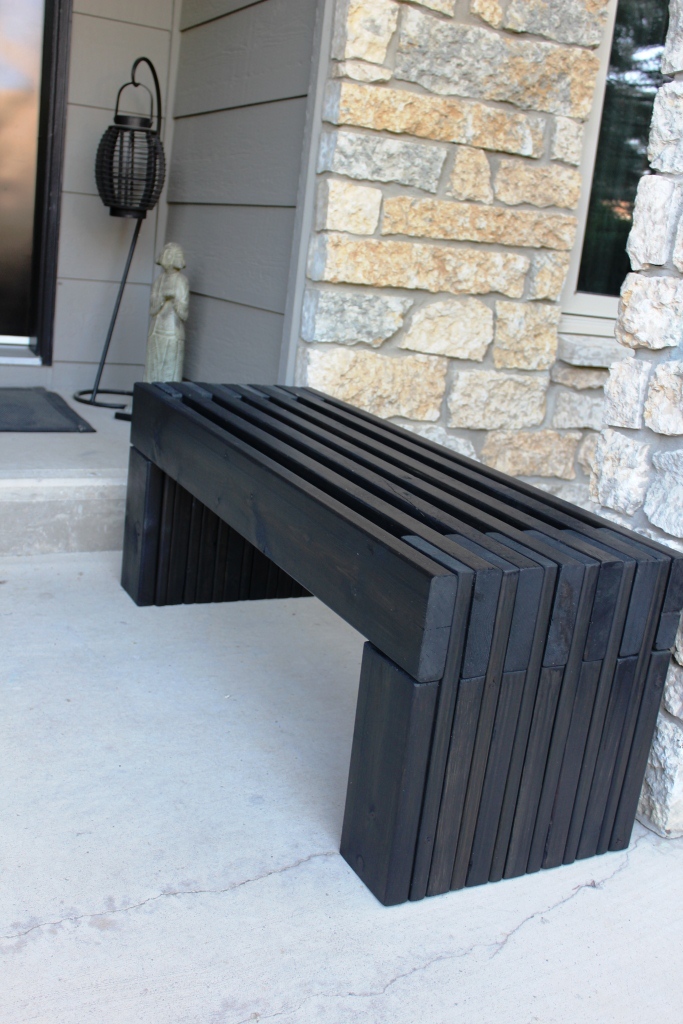
We wanted an outdoor bench for our front entrance way, this one is just what we were looking for! Thank you for the plans.
Wed, 05/04/2016 - 10:01
I am really a novice. The plans say that the 1x4's should be 18-1/2" high? But the measurement of the vertical legs are 14", and the horizontal piece is 4" high, which adds to 18". It all looks flush in the photo. Could you explain what I am missing? Thank you so much!
Wed, 05/04/2016 - 10:01
I am really a novice. The plans say that the 1x4's should be 18-1/2" high? But the measurement of the vertical legs are 14", and the horizontal piece is 4" high, which adds to 18". It all looks flush in the photo. Could you explain what I am missing? Thank you so much!
In reply to quesion by beardjulie
Wed, 05/04/2016 - 11:30
So from what i see in the plans Each 1x4 board is to be cut at 18" and the 2x4 is to be cut at 14-1/2". Cutting the 2x4 at 14-1/2" will insure the 1x4 and 2x4 are fluish for the end product. It doesnt seem to add up given the demensional names of the lumber hahaha however the actual width of a 2x4 (the one the will be going horizontal) is acutally 3-1/2". so then you cut you 2x4 leg piece at 14-1/2" and then lay the horizontal 2x4 on top the total height will be 18" and should be flush with your 1x4 that is cut at 18"
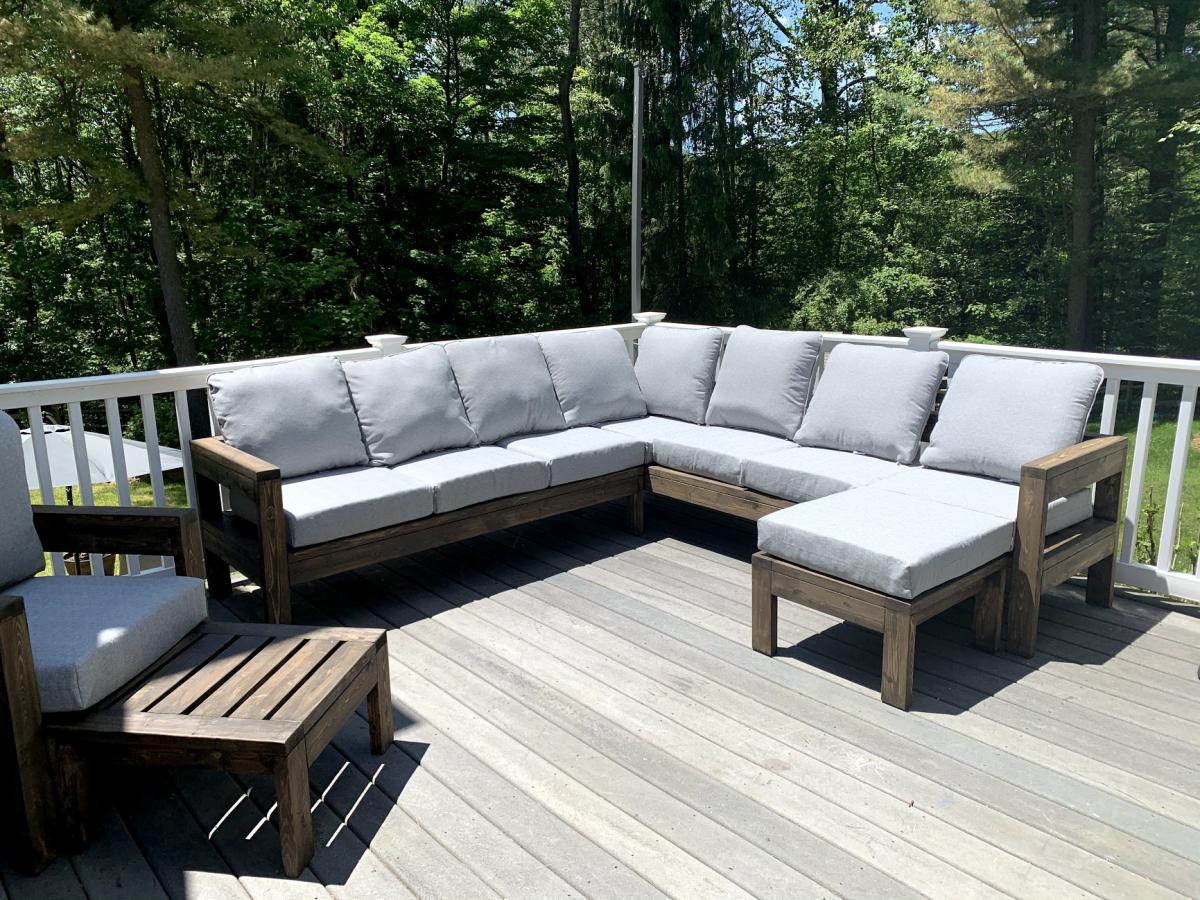
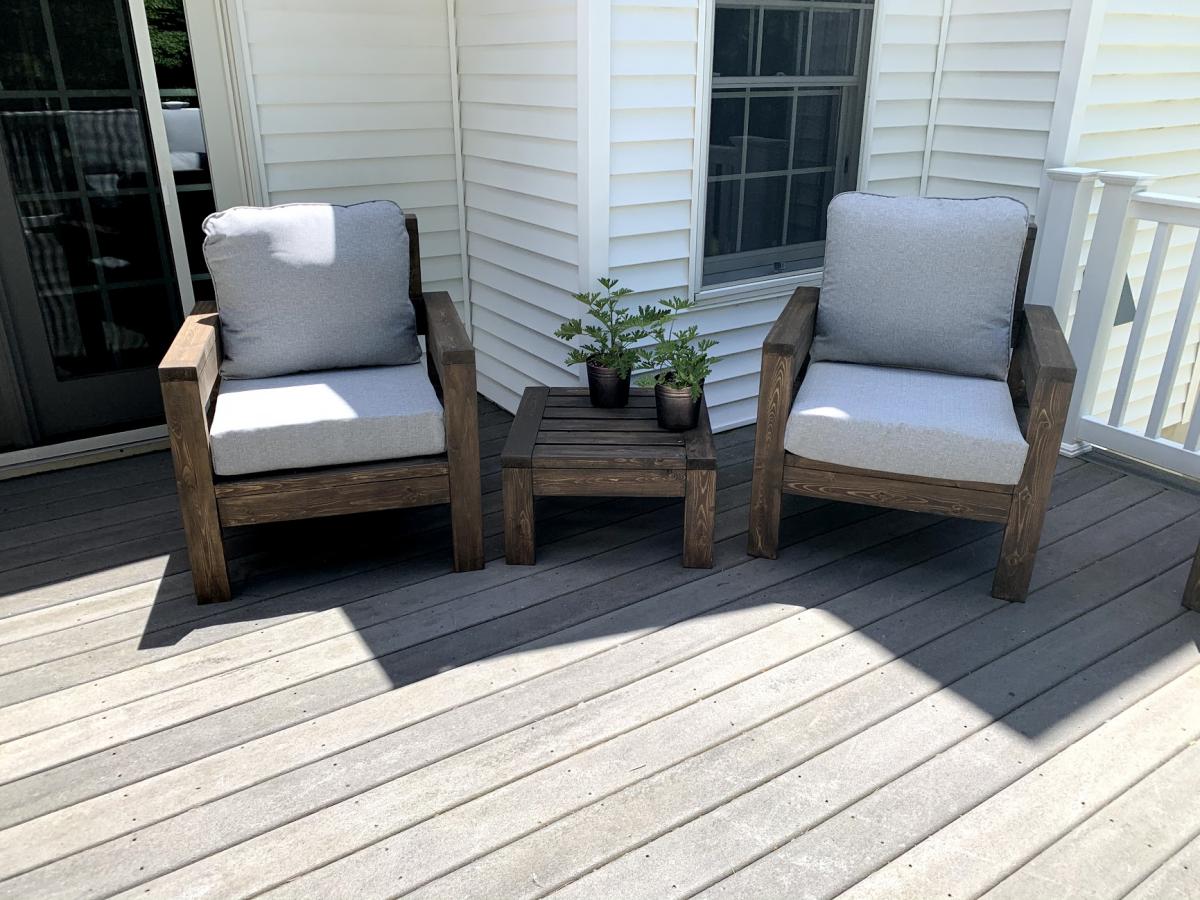
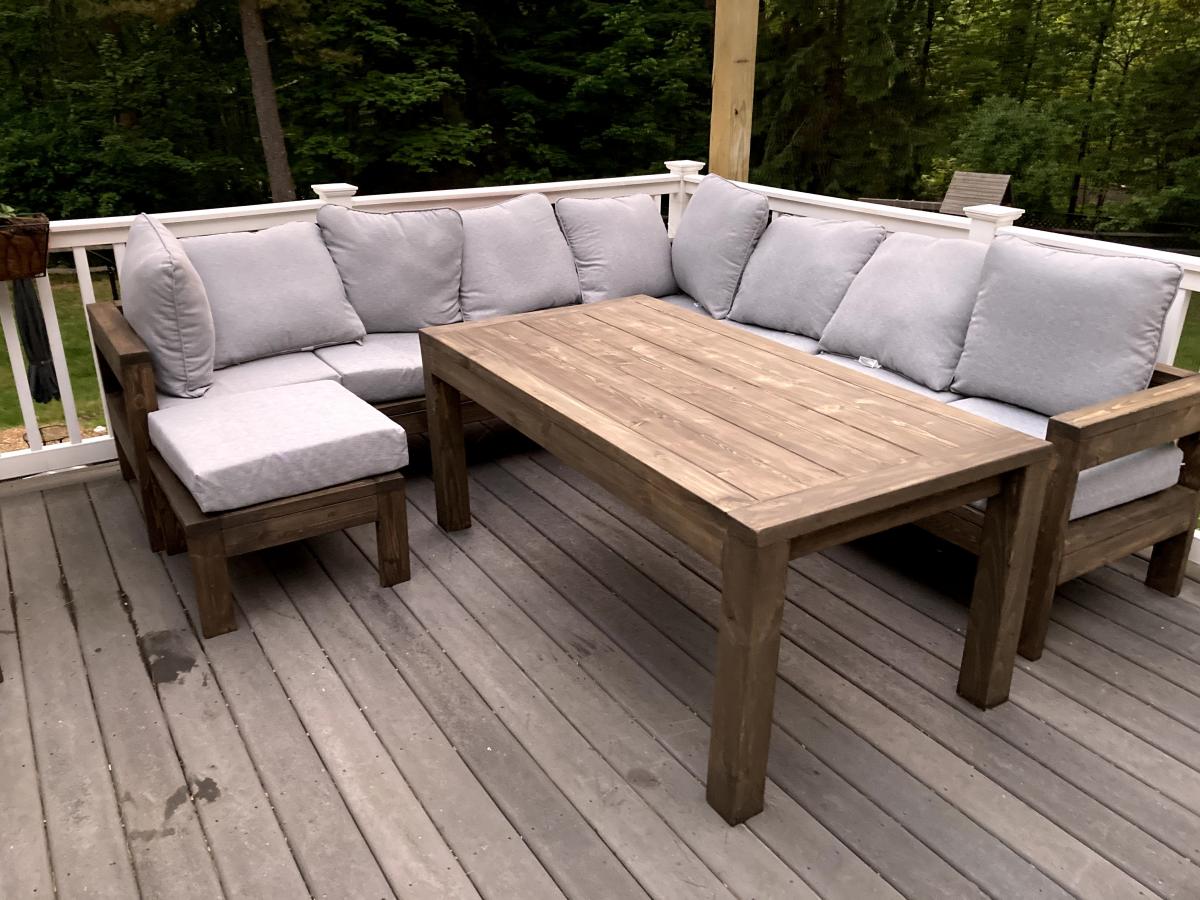
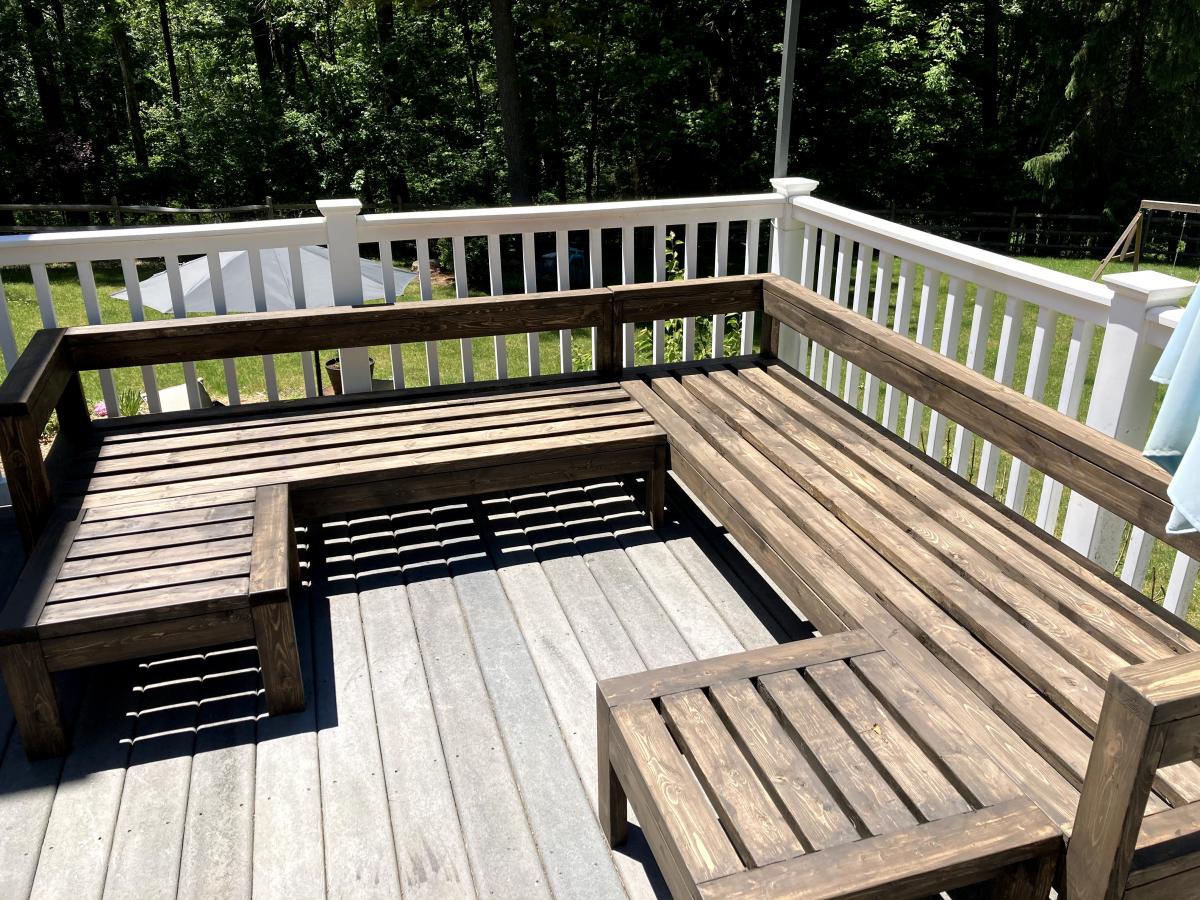
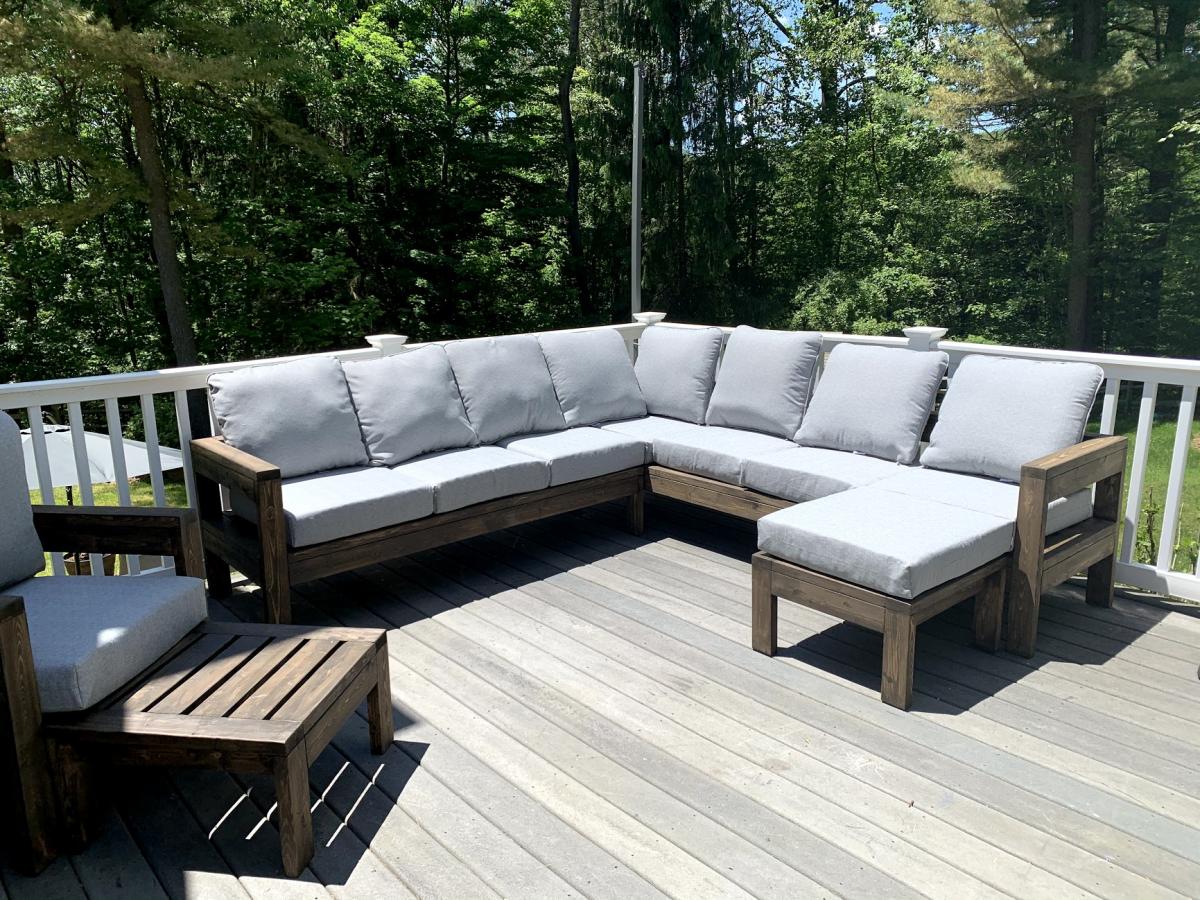
We were looking for outdoor furniture for our deck, and for the size and amount we needed it would have cost us at least $2000. We really like the idea of having an outdoor sectional that we can also use for dining, and we had trouble finding a set we liked. We found Ana's plans for the 2x4 Outdoor Sectional, and i loved the look. After seeing what others have done with the plans, I thought I would be able to modify it to get everything we needed for much less cost than buying a set.
We ended up extending the size of the 2x4 outdoor sofa by one 24" section, for a total length of 96". I then used the same design to make two outdoor chairs, just reduced the length to 24". I modified the 2x4 outdoor coffee table plans to create two ottoman's that can be moved around to make the seating more lounge style Finally, I modified the coffee table plans to make a 5 foot outdoor dining table. All in all, it took about a week and I couldn't be happier with how it turned out!
Mon, 08/02/2021 - 09:44
Looks amazing! What method did you use (pocket holes, dowels, deck screws, etc) to join the visible portions like the arms?
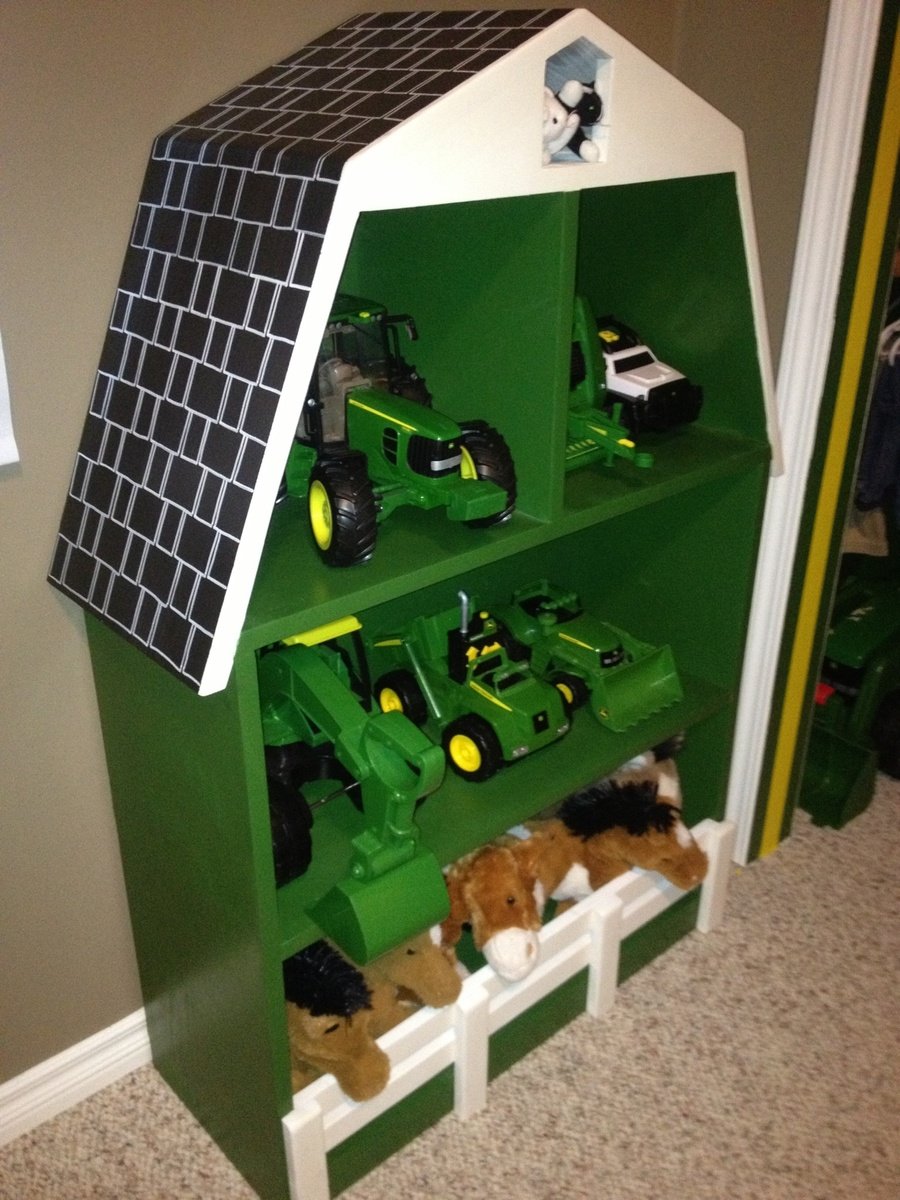
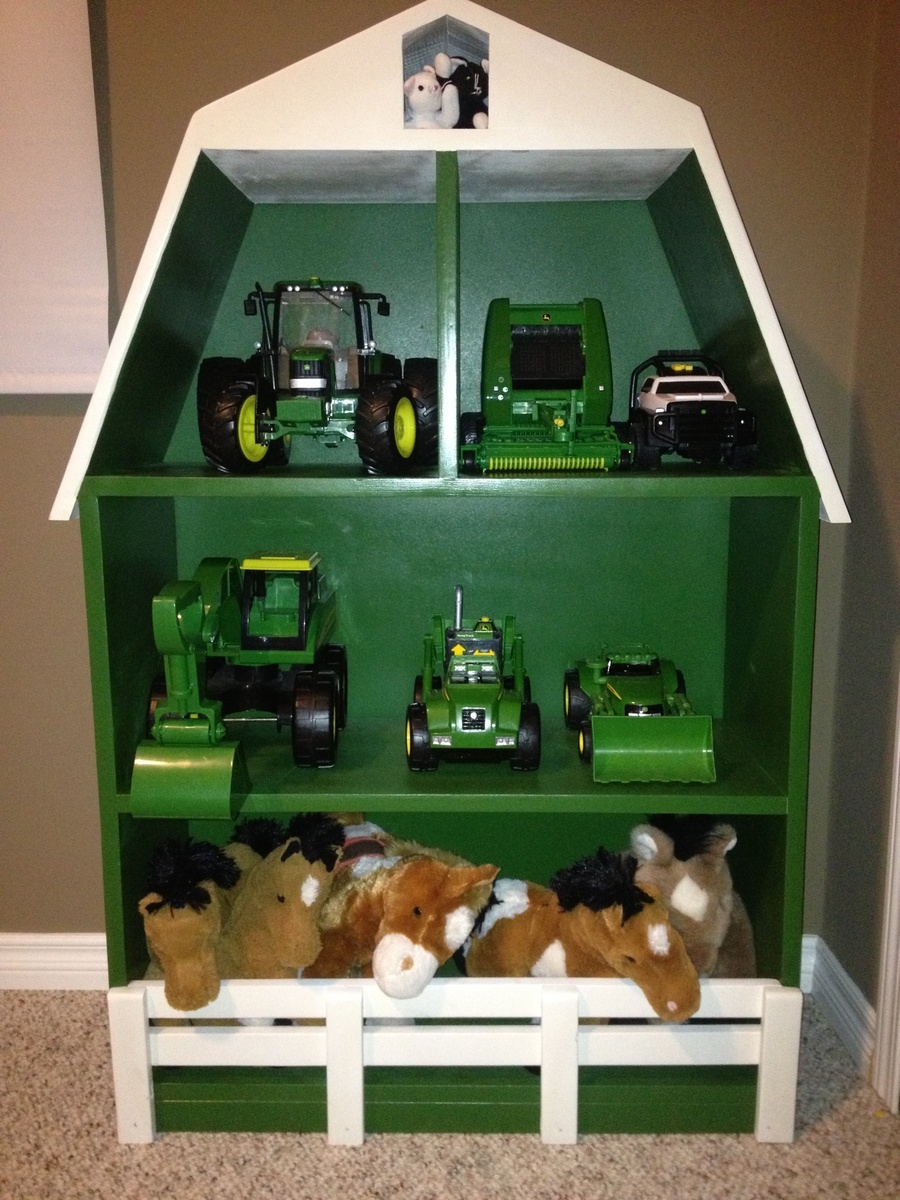
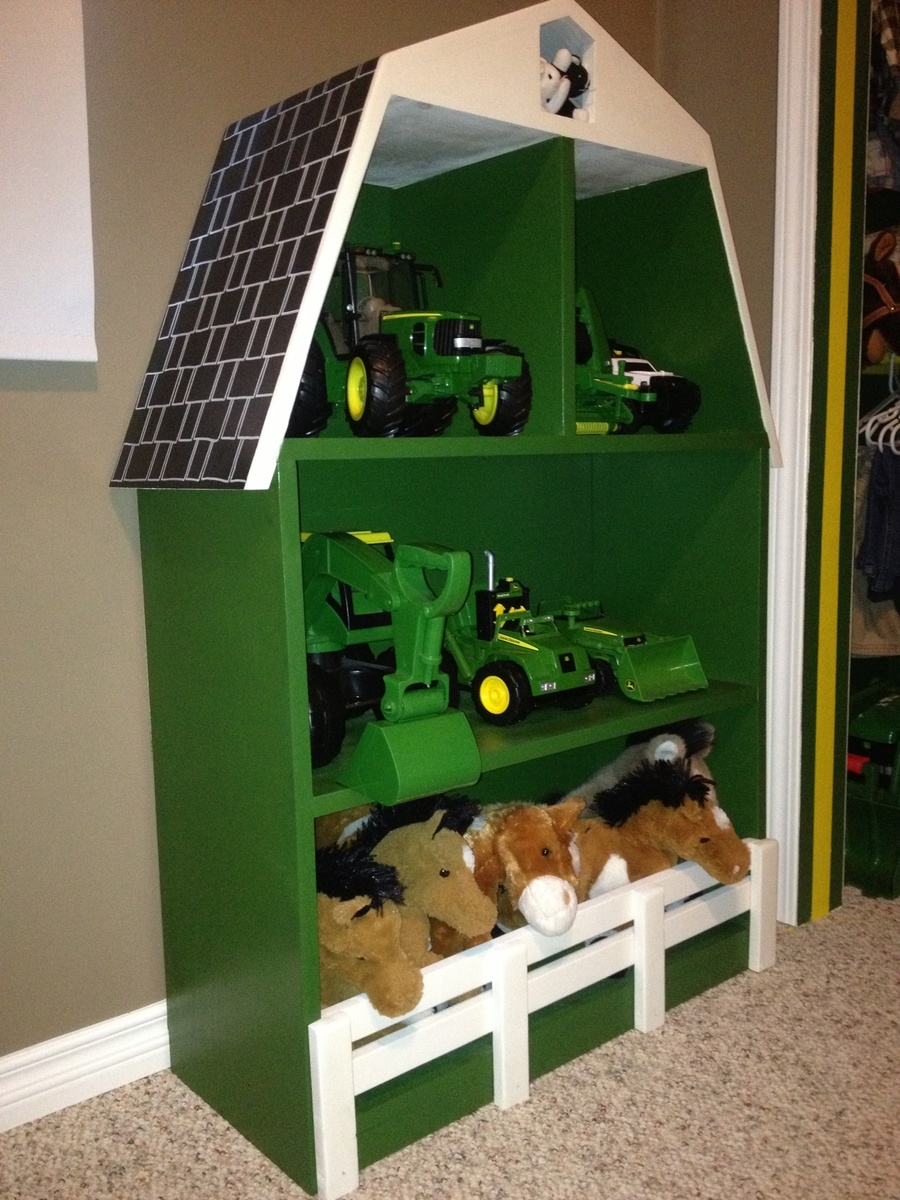
After finishing my boys' new John Deere room and tractor bunk bed (also posted), I saw this plan and thought it would be the perfect thing for some extra toy storage.
Yes, I know, barns are supposed to be red. Everything else in the room is John Deere green and I had paint leftover, which is not cheap. So green it is! I used my new paint sprayer for the first time on this project and am thrilled with it. I would recommend it to anyone who dislikes painting as much as I do. I bought the Wagner Flexio 590 which comes with a detail sprayer as well as the full size and I'm very happy with both.
Thanks to Ana for the well laid out, easy to follow plan and also for helping me create a big boy room that my boys love!
Thu, 07/31/2014 - 07:24
I love this. :) I especially love the spacing of your horses and cats... very realistic. lol. I also saw the bed when you posted it. VERY impressive little details!
Thu, 07/31/2014 - 09:38
Thanks so much for your comments. It's so nice to hear positive feedback since I'm very new to this! My 3yr old is quite particular about everything being in its place, I'll pass along that you liked his animal placement. Lol :)
Sun, 09/27/2015 - 18:26
Could u please send me the plans for this? My email addy is [email protected]
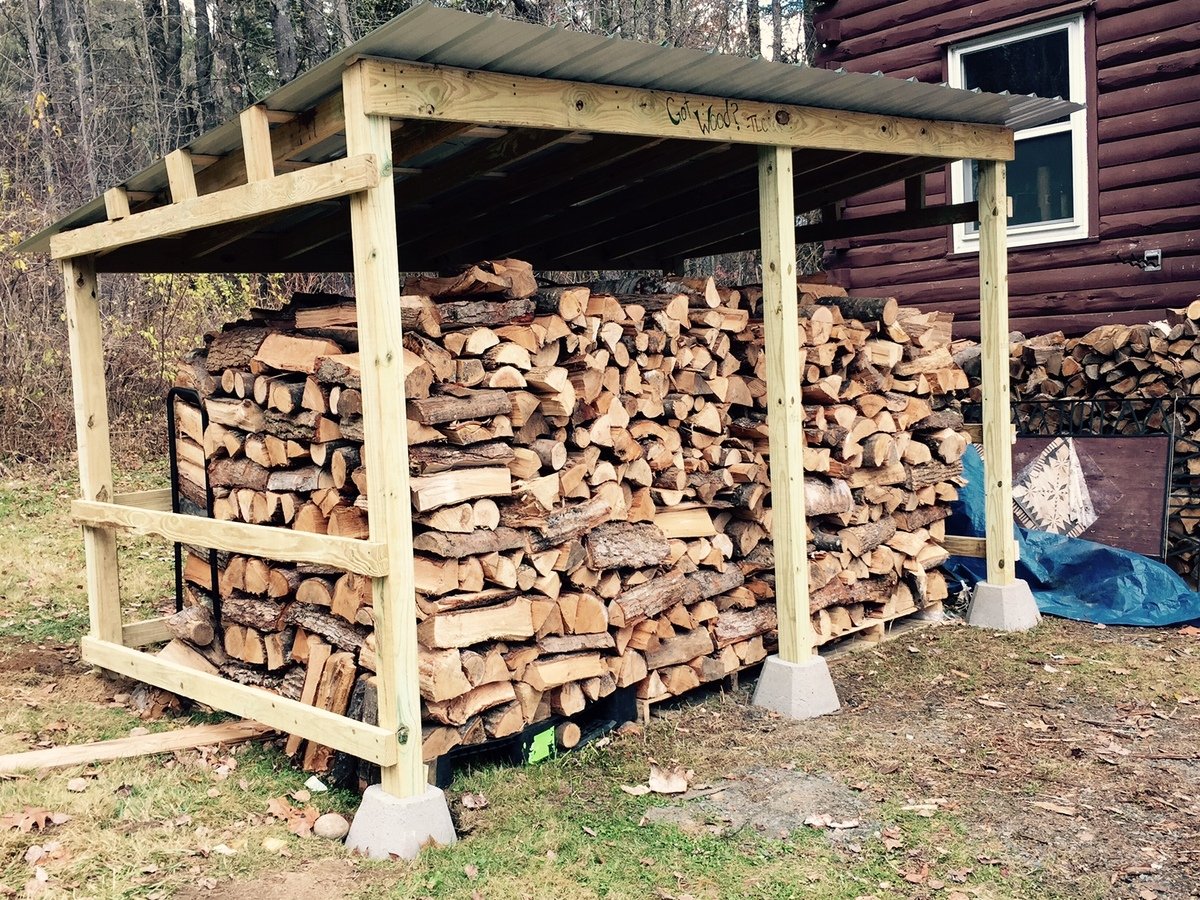
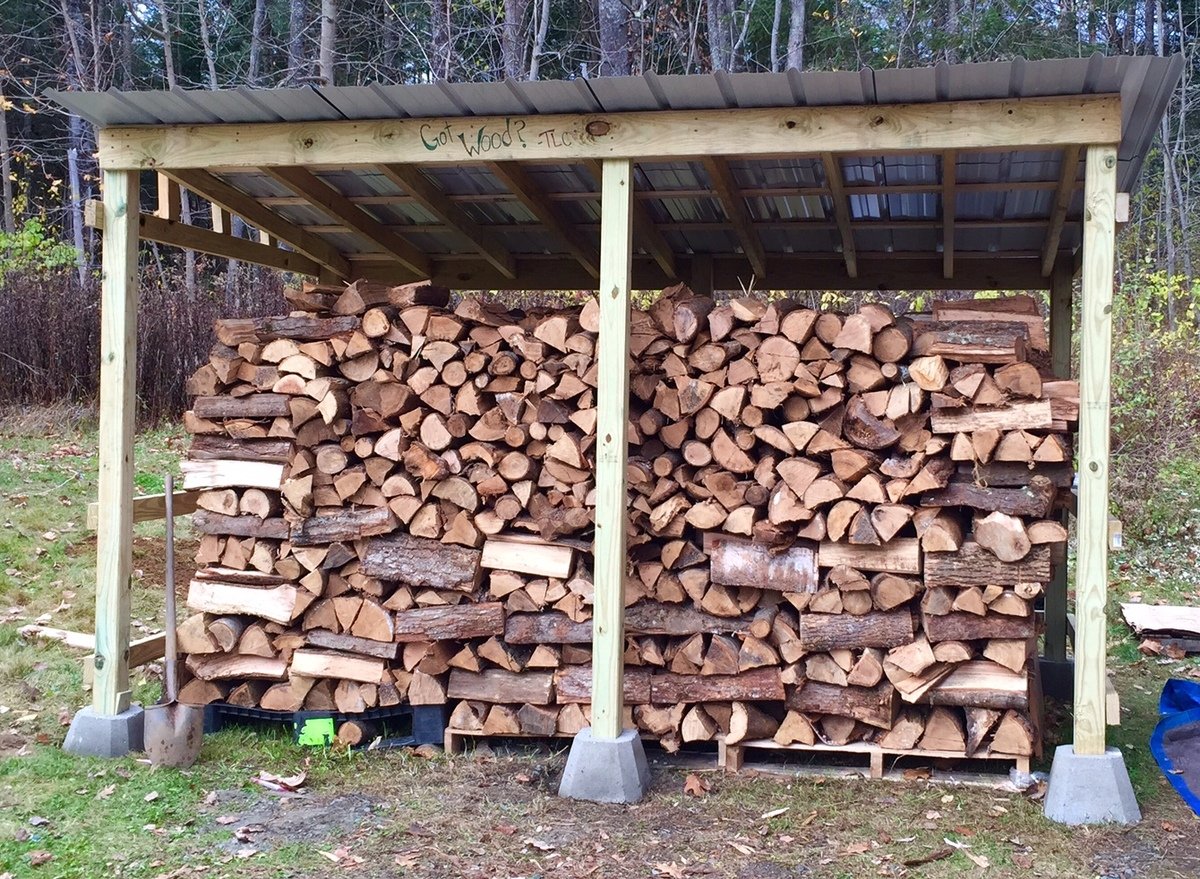
When I decided to build a woodshed I was freaked out because I've never done anything even remotely like this. I struggle with precision and patience, which made this project seem overwhelming as I knew I had to do a lot of prep work to properly level the ground, measure the wood, learn how to operate a saw, calculate angles to cut, etc... I did a lot of research online and found this simple blueprint a great starting point. I made some adjustments since i needed a much bigger shed, it's 11.5' x 7' x 7'. Also, I already had the wood resting on pallets so I just build this shed around the wood with no built in floor. Overall, I'm thrilled with how it turned out!
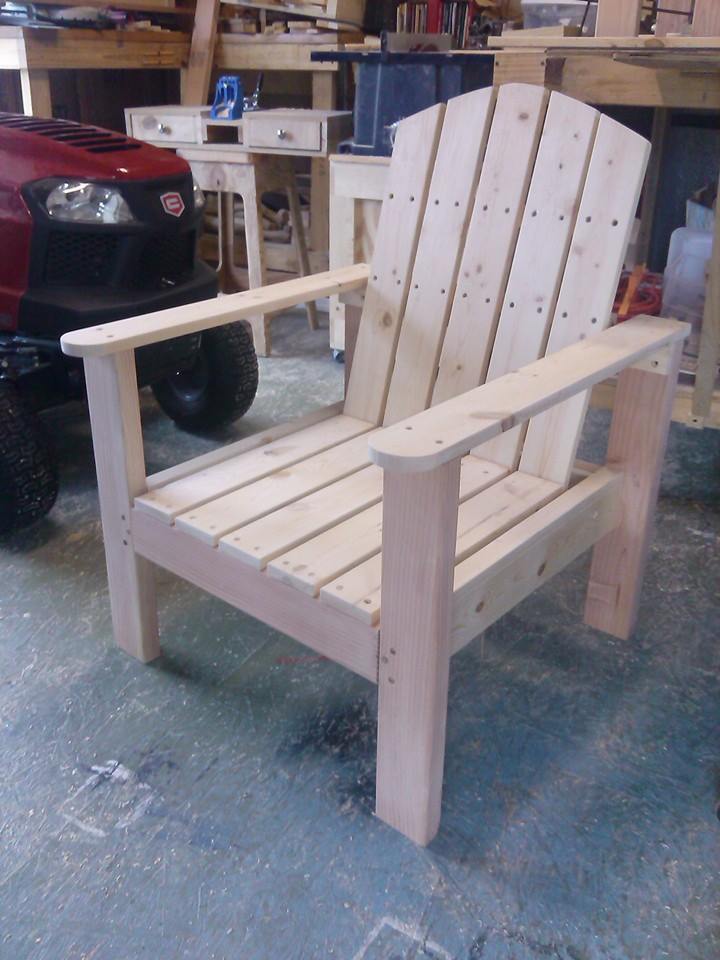
Modified the arm rest and the back to my liking.
Tue, 06/23/2020 - 08:59
Hi, are plans available for this modified chair design? I like that the seat pan appears to be flat and the Adirondack style to the back slate.
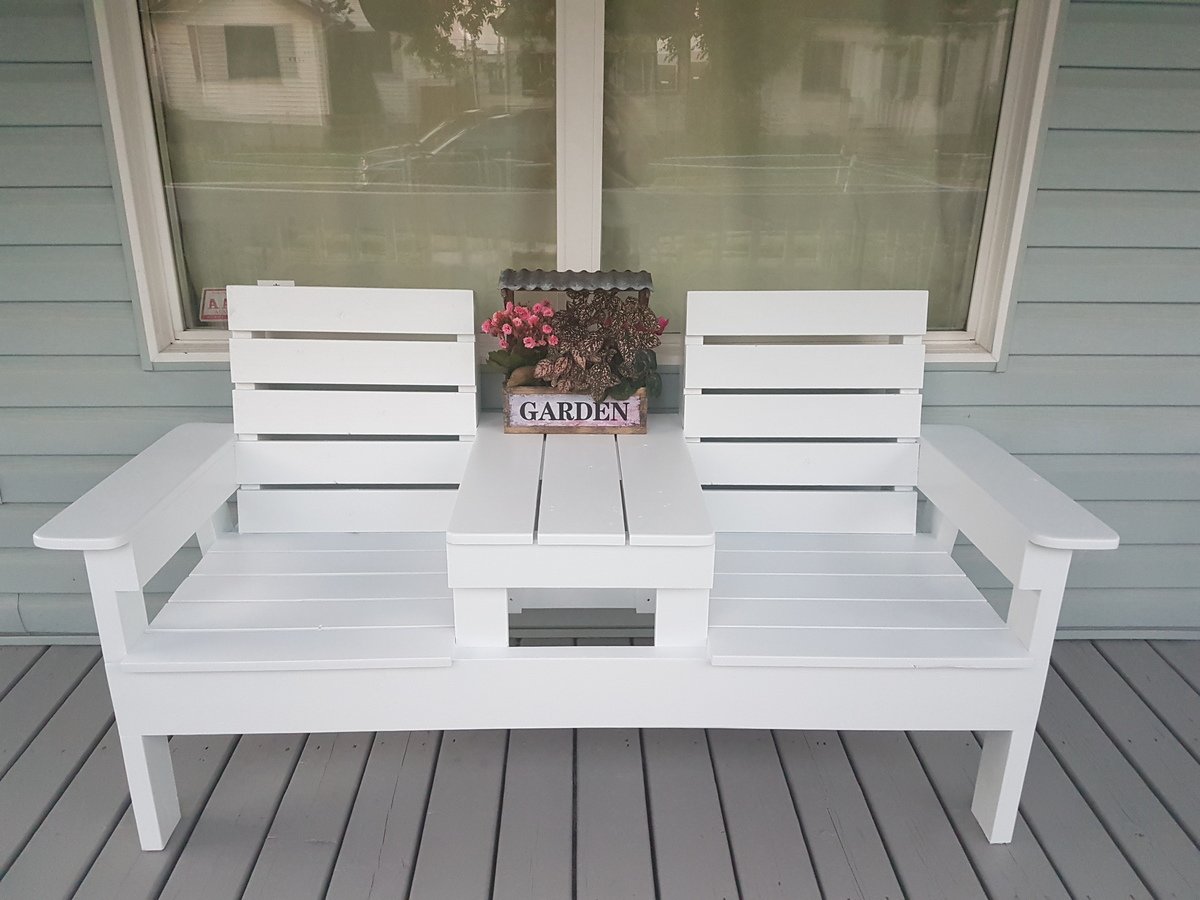
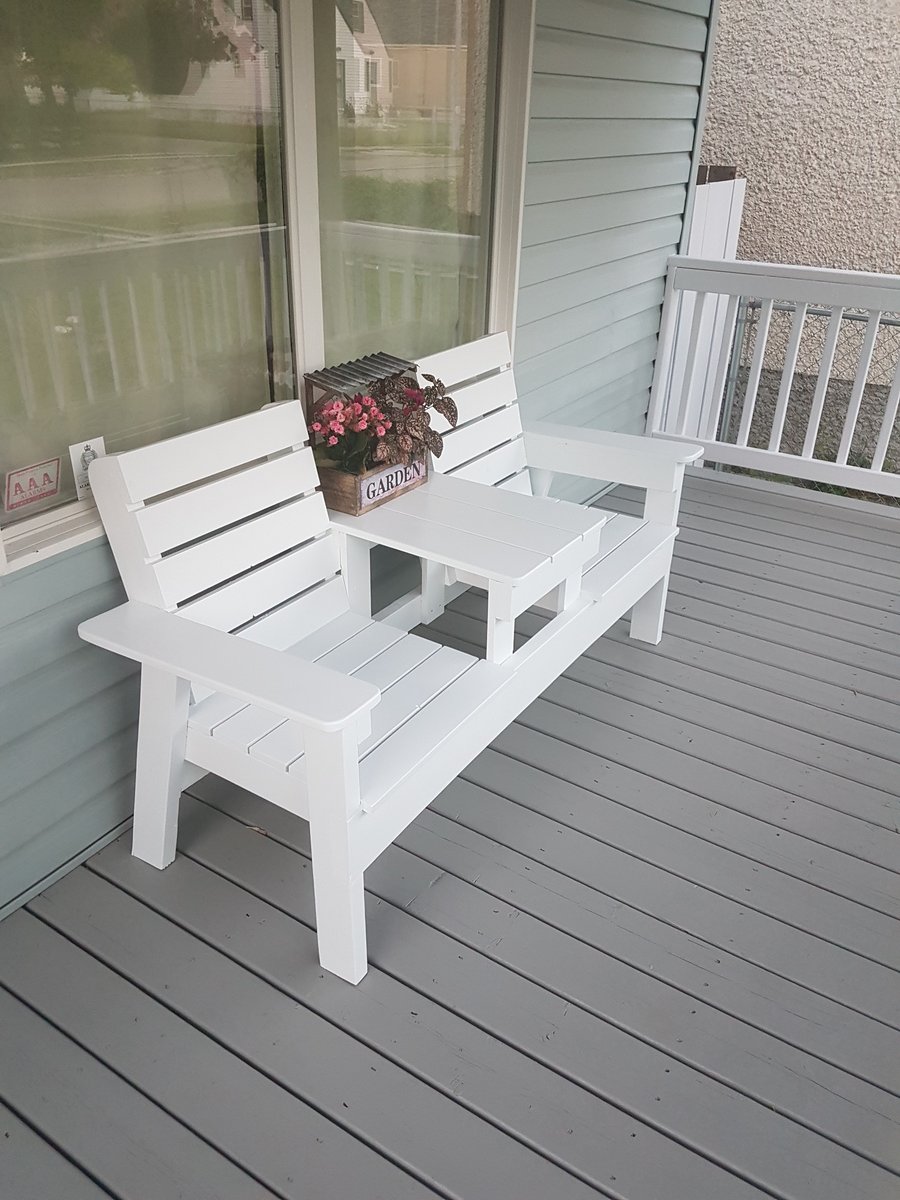
Fun build. Plans were easy to follow!
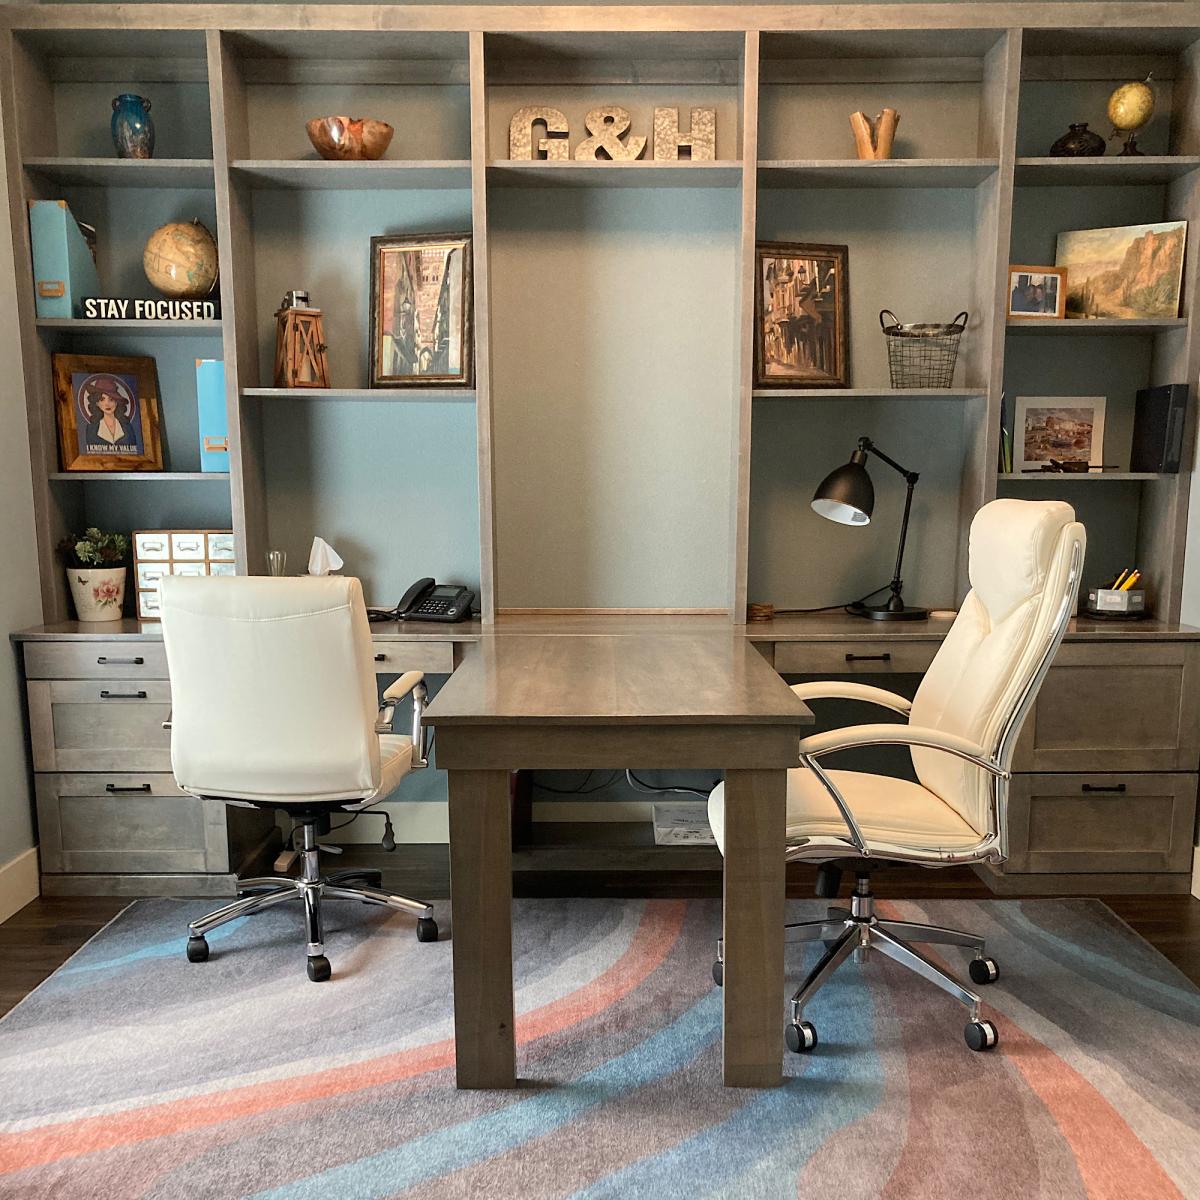
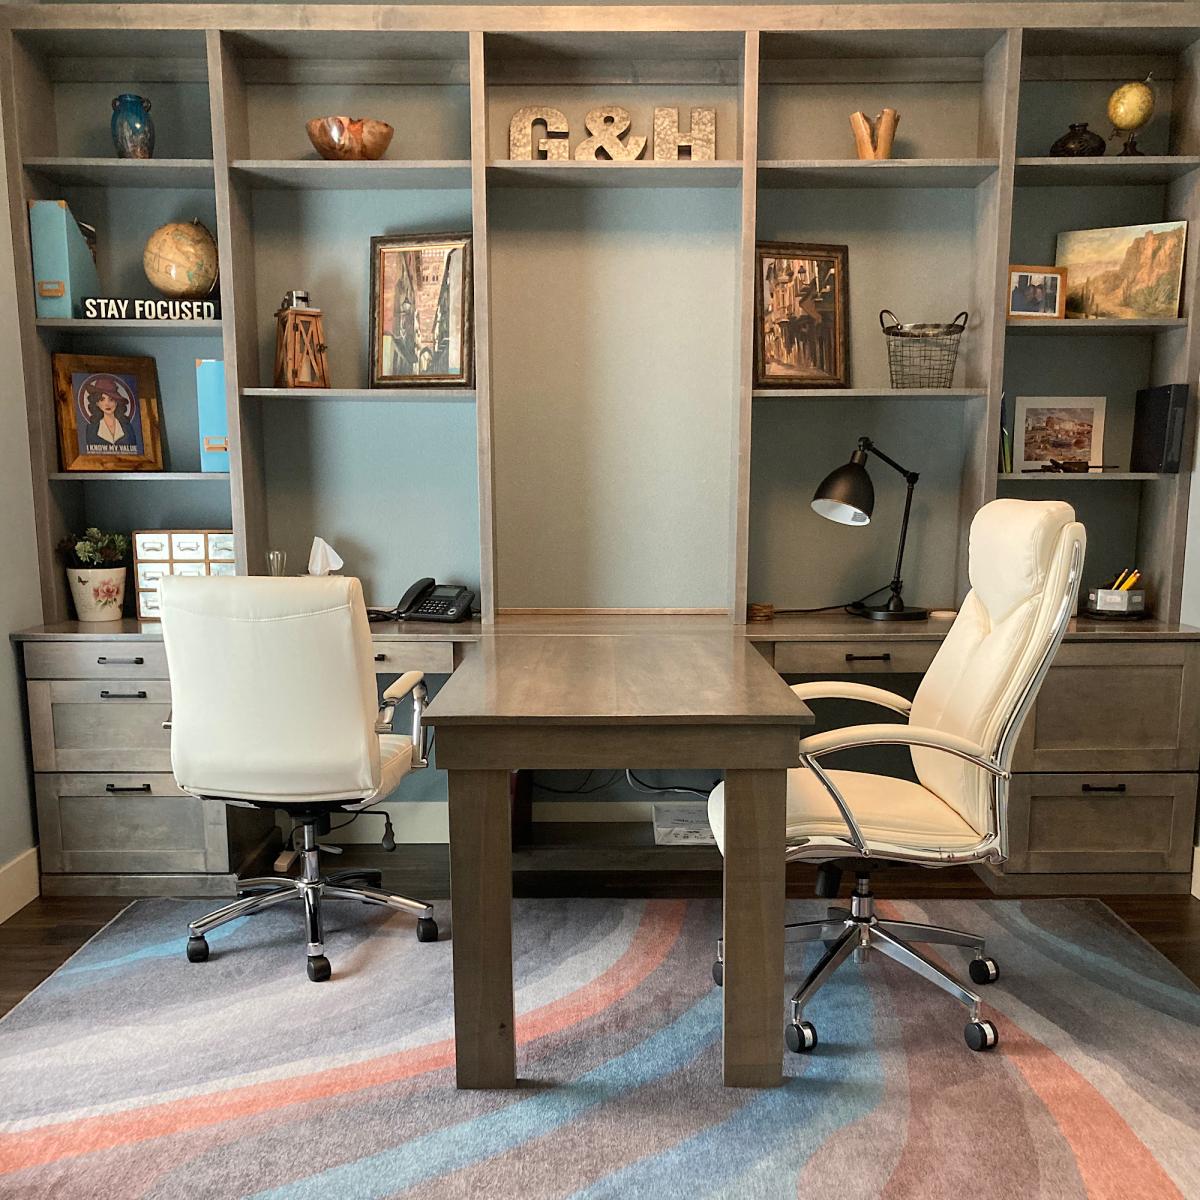
Thank you Ana for so many amazing plans and shelf help that helped me get this monster built! Now my husband has a nice office where he can work from home. I was so impressed with how easy it was to make the plans in shelf help and how quickly it all arrived. (I can’t link the drawer slide trick plans, but they were key and I based the middle table off of the foldable farmhouse idea)
Thu, 01/27/2022 - 15:52
WOW, WOW, WOW!!! This is gorgeous, thank you so much for sharing- posting to Facebook now!

My son chose to make a workbench for his high school theater for his Eagle Scout project, and selected the Ultimate Roll Away Workbench with Miter Saw Stand as the basis for the project. The theater teacher wanted pegboard for tool storage, so we extended the rear legs on each workbench and notched the top to allow them to pass through. We built two frames from 1x3s to fit inside the rear legs, then put a pegboard inside each one.
To secure the extended legs, we added a riser shelf from 1x8s. We put a storage station for drills at one end of the riser shelf.
We also made all the cart shelves adjustable and added an adjustable shelf under the miter saw, and added lighting and power strips.
We left out the panels at the end of the workbench to allow access to the shelves there without having to remove the carts. Once we had constructed it, we added a brace at each end of the workbench to better support the outside front legs.
This plan was the perfect one for the theater, giving a stable work area for the miter saw and allowing for tool and materials storage. The carts can be rolled around to where a work surface is needed. This will come in handy for years of set construction in the theater. So proud of my son and all the leadership and hard work he put into this project!


Mon, 10/18/2021 - 11:54
WOW, that is absolutely amazing, thank you so much for sharing this story!
Fri, 05/31/2024 - 00:38
Wow, what an impressive project! Your son did an amazing job with his Eagle Scout project. The Ultimate Roll Away Workbench with Miter Saw Stand sounds like a perfect fit for the high school theater's needs. I love how you customized it by adding pegboard for tool storage and making the shelves adjustable I remember how I do similar things all day long and I don't have any time left to do housework. Then I use https://essays.edubirdie.com/personal-statement-writing and it's a really great solution. The addition of lighting and power strips is a fantastic touch too. It's clear that a lot of thought and effort went into ensuring the workbench is both functional and durable. Your son's leadership and hard work really shine through in this project. This workbench will definitely be a valuable asset for the theater for many years to come. Great job!
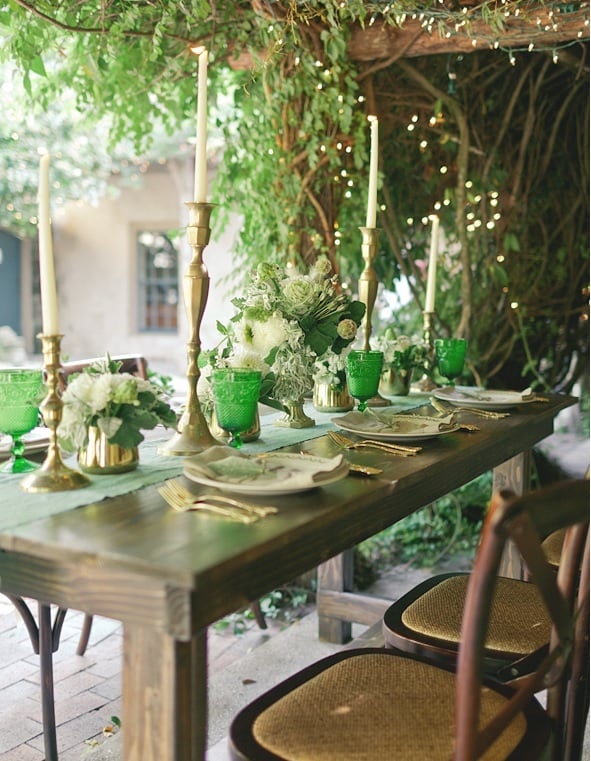
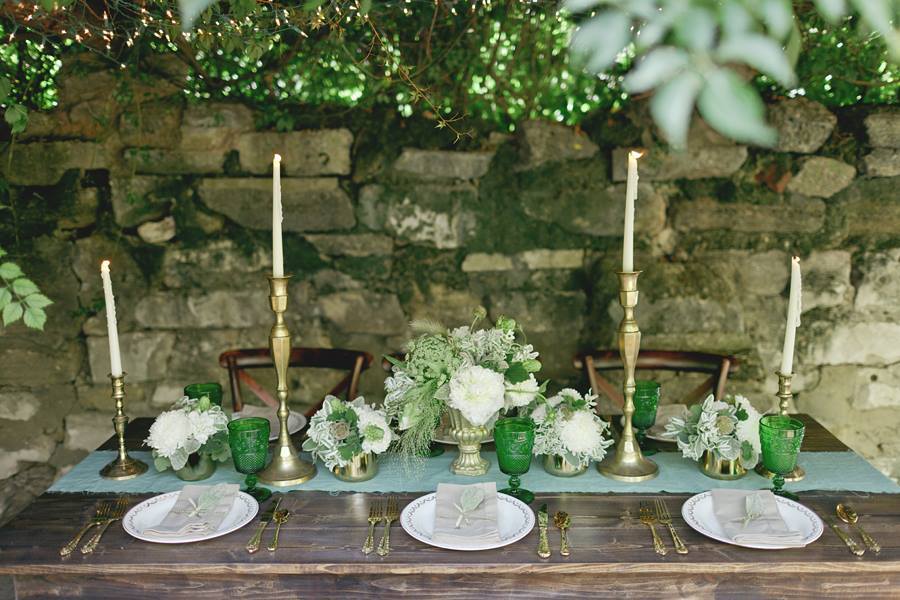
I recently published my first foldable farmhouse table last week here: http://ana-white.com/2013/06/foldable-farmhouse-table The first one I made was very heavy because I used 2x6 tops and 4x4 legs. I decided to make another one that would be lighter and easier to transport. The plans are basically the same just instead I used 1x6 for the top and put 2x4s together for the legs. I also shorted the length by about a foot. The only issue with making the table shorter length is that the legs don't fold completely flush. You could easily make the legs short enough to fold flush, but then the table was a little too short from the ground up for us. The same as before I simply used kreg joints to join the top boards together. I then made a 2x4 frame and attached it to the bottom. I made each of the legs separately by joining 2x4s together and sanding everything down. Everything was stained before putting the legs on using Miniwax Dark walnut stain. I used 2 coats of Miniwax water based clear coat to seal it. A notch was cut out on each of the bottom 2x4 supports on the legs and I glued in a small piece of wood cut to size. These are so I can put in a 2x4 support board under the table so that the legs do not fold in on themselves when it is standing up. The legs are just attached using door hinges you can buy in packs in the hardware section. Be careful when screwing into the 1x6 top not to use too long of screws or else you will over screw and have them come through into your table top. Table design was by Amber Veatch Designs and photographed by Andi Mans Photography
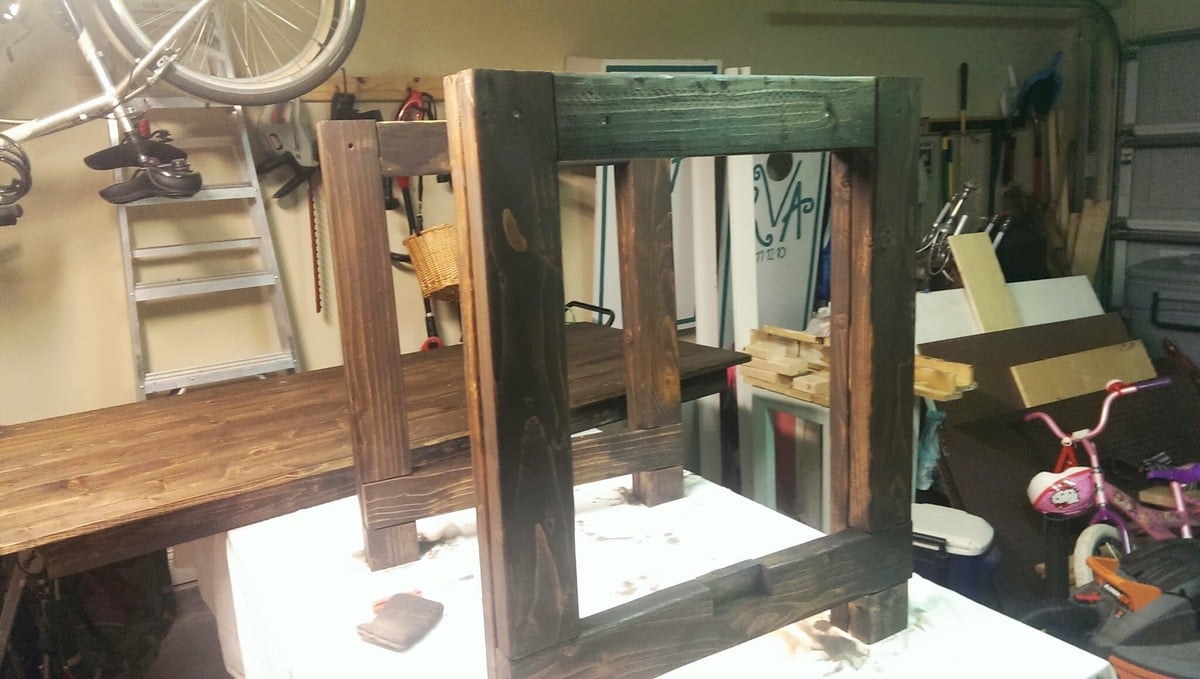
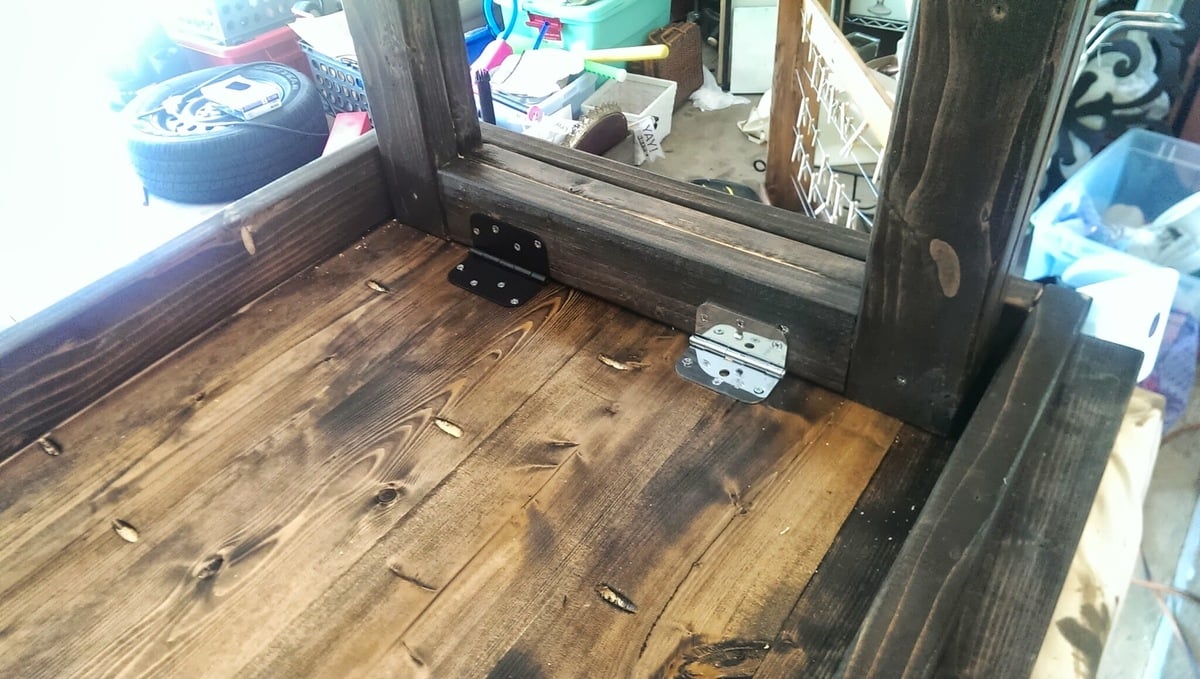
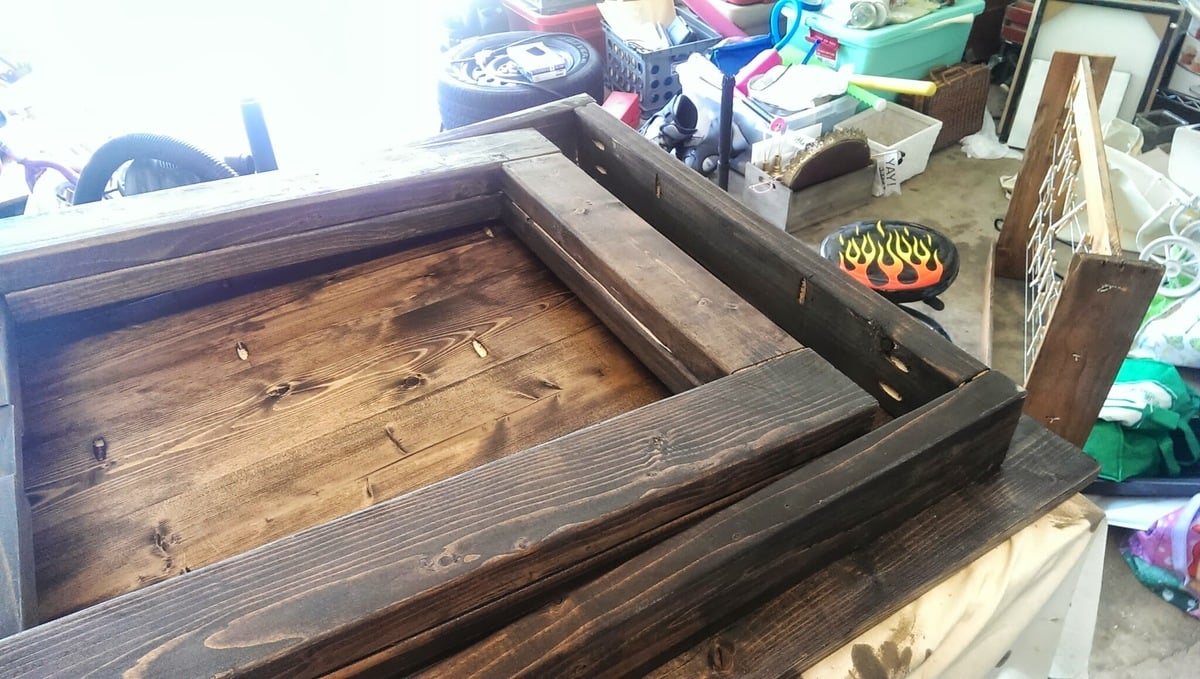
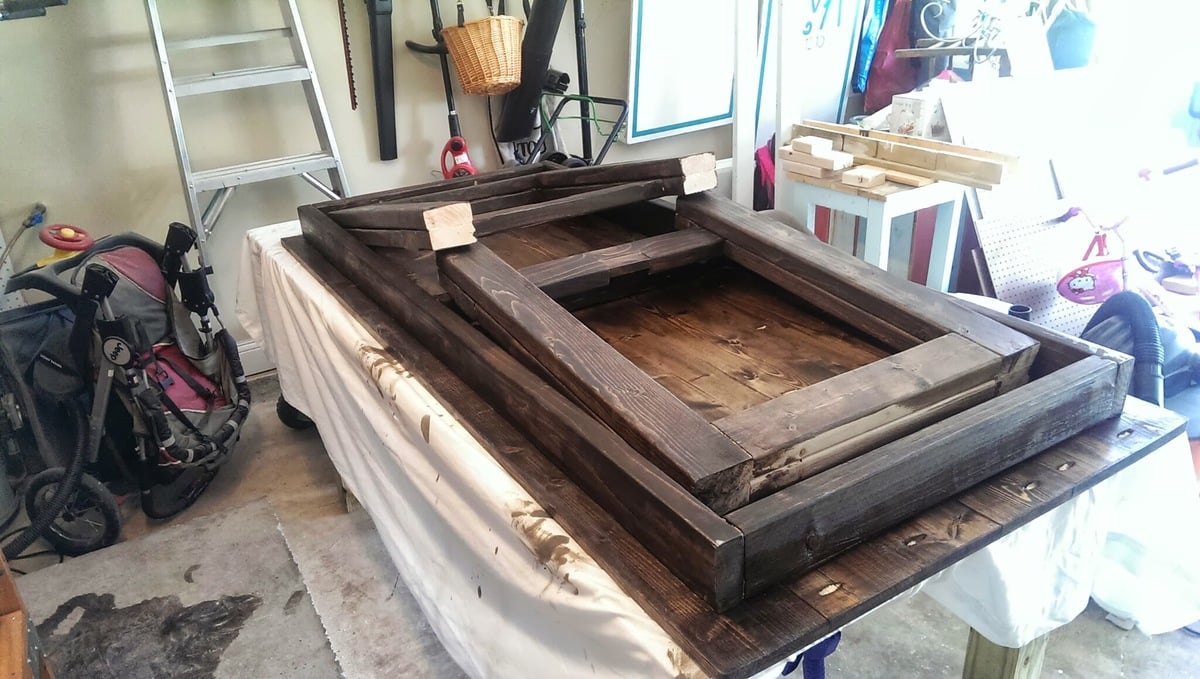
Tue, 07/07/2015 - 06:41
We have built something very similar and we have a good bit of wobble at the top, even though the stretcher down the center of the table is holding solid in there and secred with clasps. Were thinking of some sort of sliding pin into the top of the leg to the apron. Anyone run into this before?
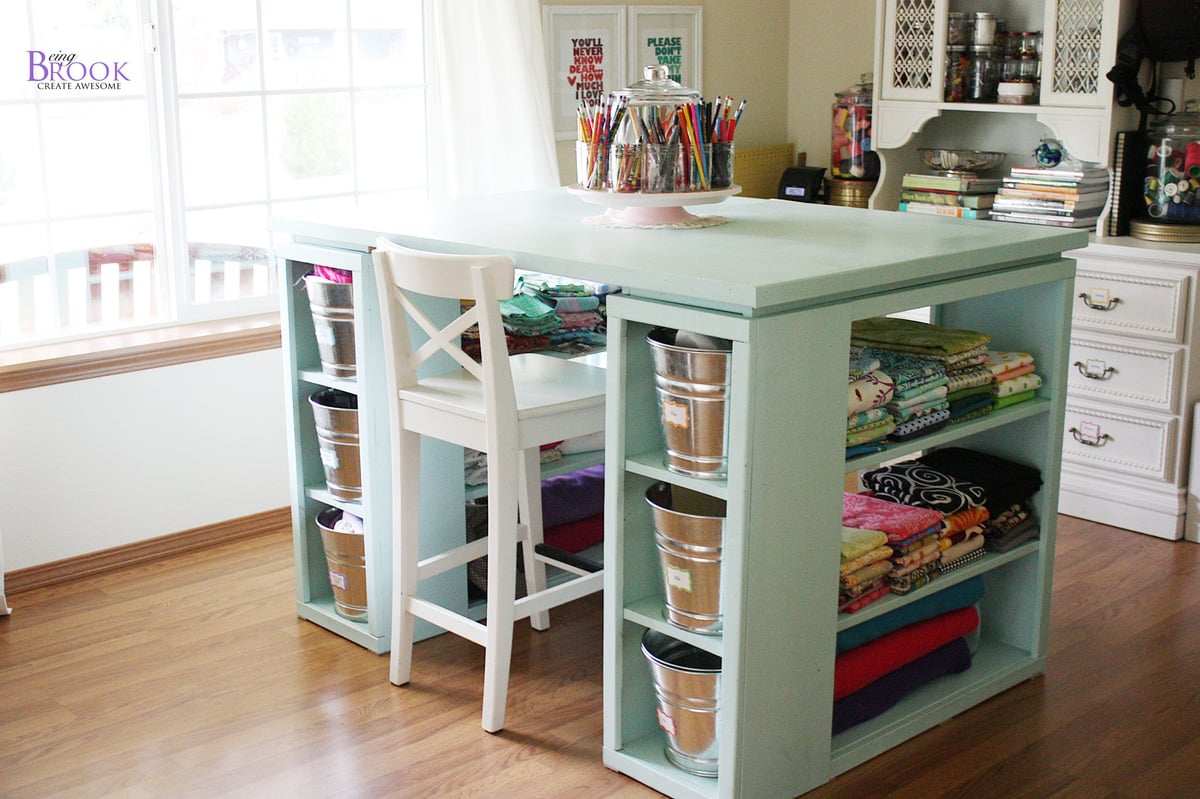
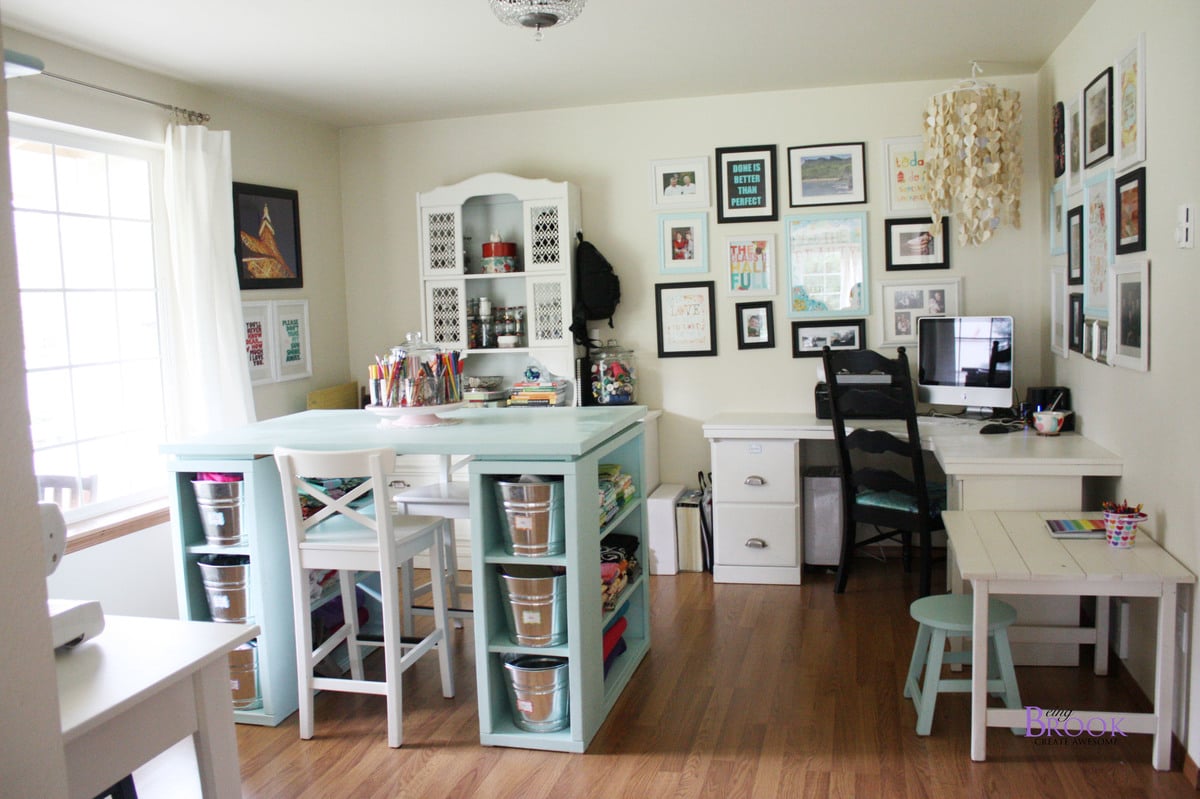
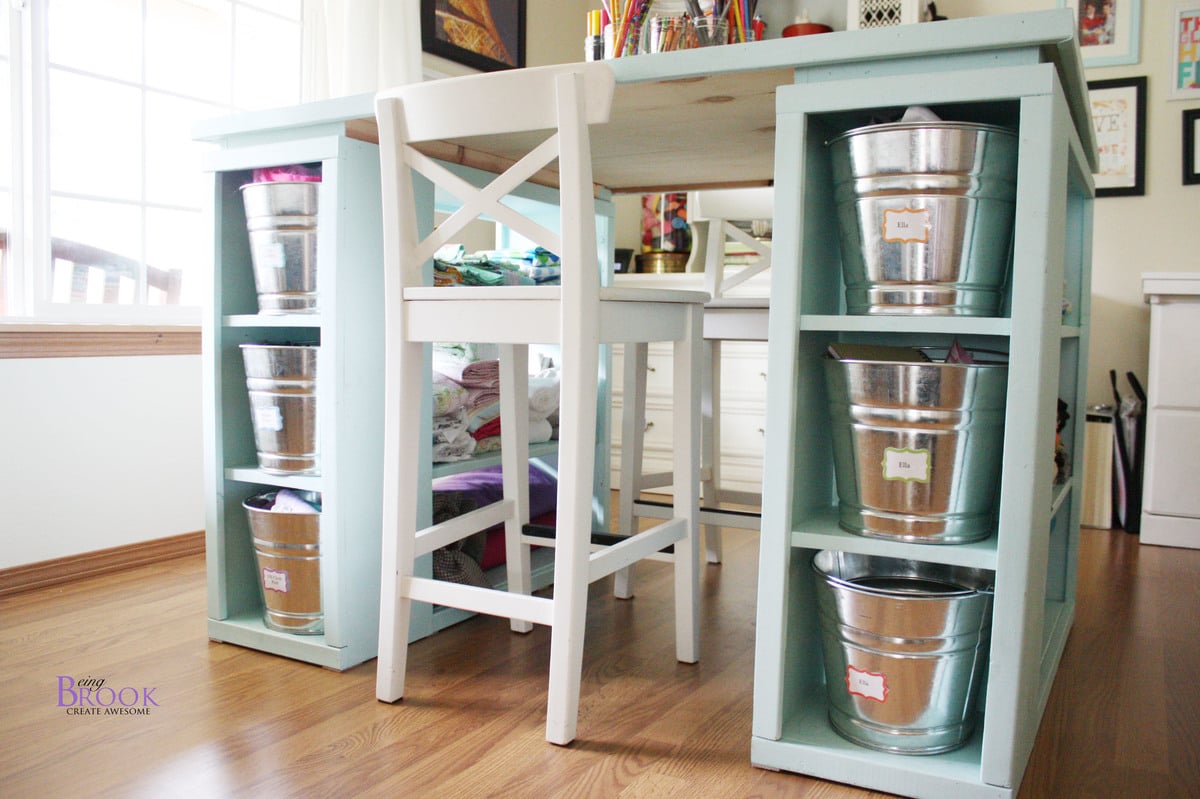
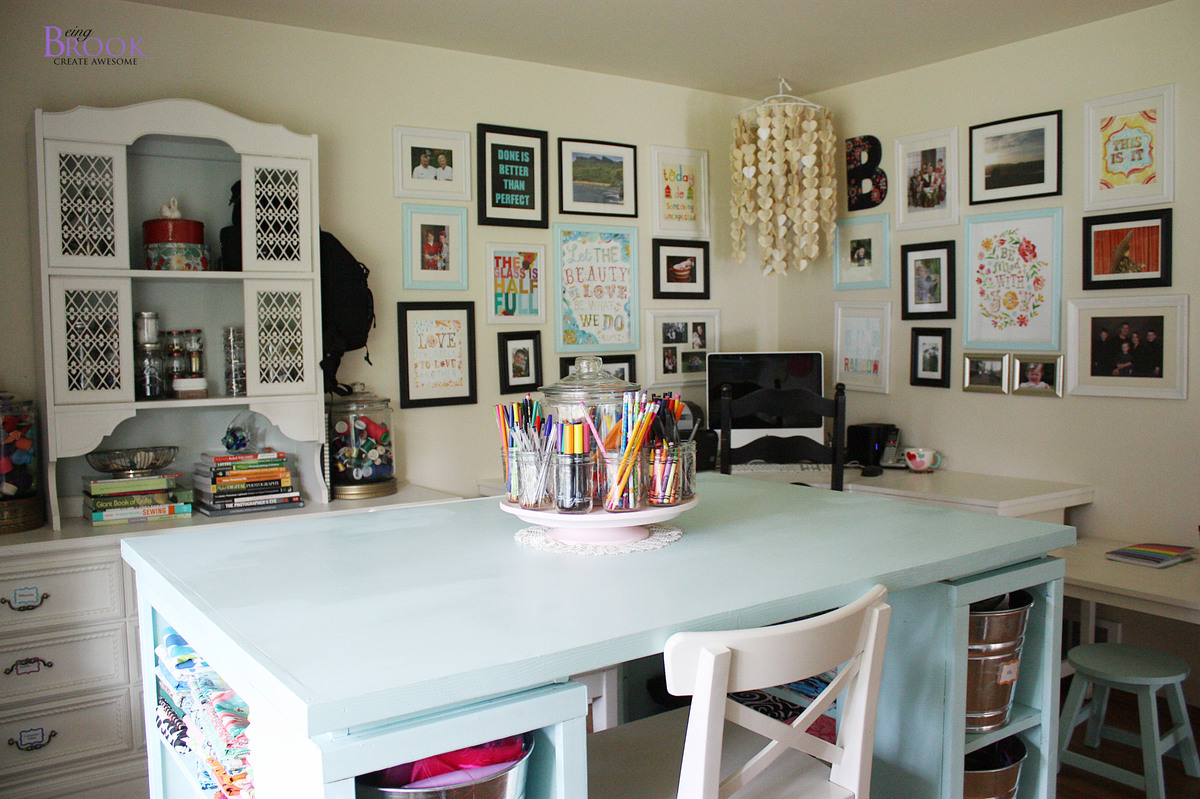
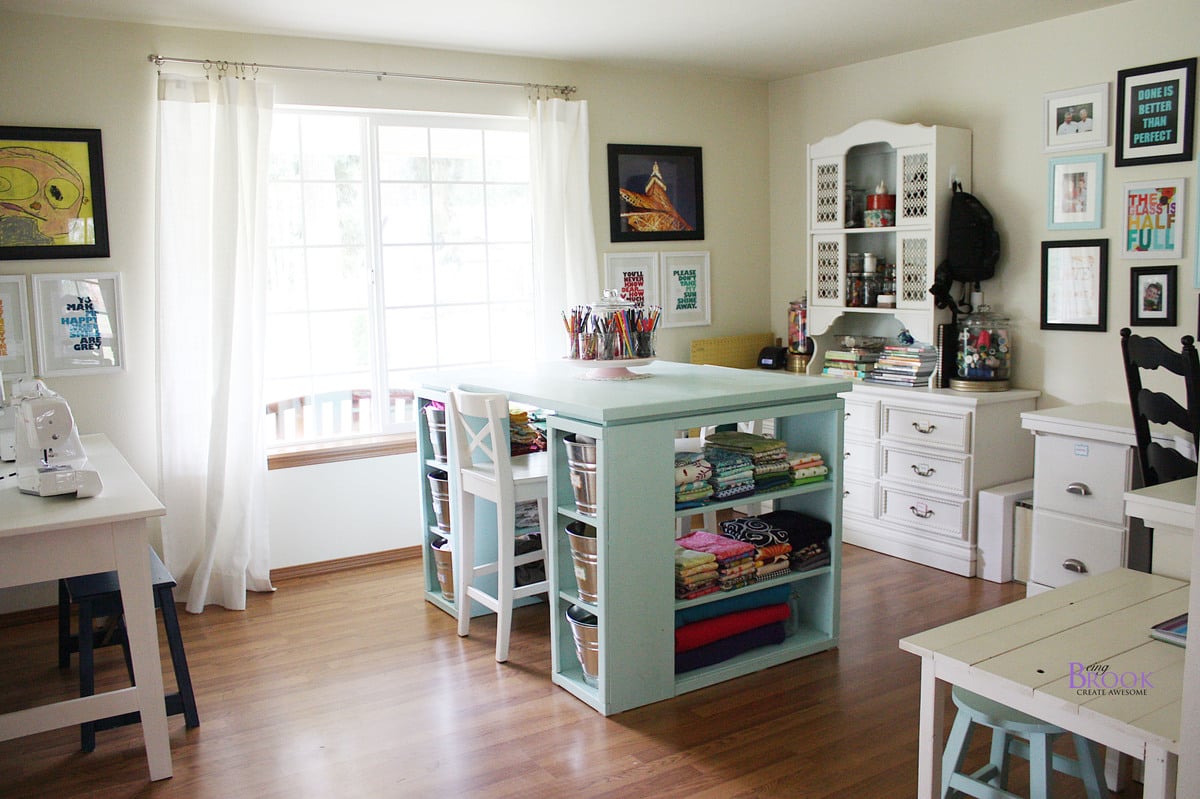
Love the Modern Craft Table! It has lots of storage space and tons of workspace on top. We used pine for the shelves and plywood for the top and edged the top with pine.
There is a spot for two counter stools at the opposite ends of the table which is perfect to give kids their own spot to craft/color.
Sun, 01/15/2012 - 20:10
I love this table but I wonder how do you use it to sew with? or do you sew on this table?
Sun, 01/15/2012 - 21:57
Brook, wow!!! This table is simply amazing! Thank you for sharing such beautiful photos too!
Mon, 01/16/2012 - 10:03
the whole room is beautifull. how many of the other pieces of furniture were built using Anna's plans?
Mon, 01/16/2012 - 10:03
the whole room is beautifull. how many of the other pieces of furniture were built using Anna's plans?
In reply to looks great by Guest (not verified)
Mon, 01/16/2012 - 20:49
Everything but the dresser/hutch and barstools we built using Ana-White plans!
Mon, 01/16/2012 - 12:06
This table is fabulous and I'm really in love with the color! Thank you for sharing. So many new ideas for my room now!
Mon, 01/16/2012 - 12:06
This table is fabulous and I'm really in love with the color! Thank you for sharing. So many new ideas for my room now!
Mon, 01/16/2012 - 17:32
You won't believe this...but today I was shopping for the wood to make the Modular Craft Table, but I did not buy the wood because I was trying to tweek the plans to change the "cubbies" and size. So, I came back to this sight and here is this craft table that would be much better. I want to make it table height rather than counter height so I can sit down and sew at it. I also want to be able to drop the back 12 inches of the table if I do not need it and so it will fit better in my room, wheels on the bottom to pull it out easily so I can extend the 12 inch table when needed. I love what you have done!
Tue, 01/17/2012 - 11:36
You did a fantastic job on this project! Love the way it looks and the color!
Great job!
Sat, 01/21/2012 - 07:00
I love this table, but I can't seem to find the directions to make it. Can you point me in the right direction to find it?
Wed, 01/25/2012 - 17:24
Is there a reason you can't sew on this (from what I gathered from a previous comment)? I want to build something for my wife's craft room and love this, but she will need to sew as well. Help?
Wed, 01/25/2012 - 17:32
Joe,
It would be hard to sew at this table because the table is counter height. You wouldn't be able to reach the foot peddle to run your sewing machine. You could alter the plans to fit a spot that could hold the peddle foot. I sew on a different table in my craft room and use this for cutting fabric and general crafts.
Brook
Wed, 01/25/2012 - 19:26
at one time I had my sewing machine in a spot that was counter height. I used a wood box to put the foot peddle on. One of anna's steep stool plans or the bathroom platform for kids plan might be good to build with this. It was also nice when I was sewing small pieces that needed lots of ironing to stand and sew at the counter.
Wed, 02/01/2012 - 14:25
I have a modern sewing machine (within last 5 years) and I routinely sew at counter height with no problem. I prefer it because it really helps my back. I cannot wait to make this!
Fri, 02/24/2012 - 22:36
Joe,
I think it would work to mount the foot pedal on the inside of the shelf area. She would use her lower outer thigh to depress the pedal while seated.
Tue, 05/08/2012 - 07:47
I love this table! I'm with Brook and don't sew on mine. Height issue is easily worked around - main issue is usually back support. Sewing at a huge workstation tends to leave you feeling unsupported and sitting on a stool (I have a nice wide comfy one from Target) leaves your back unsupported so you usually slouch (bad! bad!). I sew at my smaller desk in a good supporting chair and use my table for everything else. I use this table for a true work area including cutting. I have an Accuquilt Studio and that sucker is HUGE and heavy!
Mon, 11/12/2012 - 11:22
I just talked my fiance' into building this for me to use as a desk. I need a desk for my work from home position where I can store everything as well as have a large area to spread things out. I loved this the moment I saw it and talked him into building it for me. Can't wait to post the pictures when it is finished.
Thu, 02/28/2013 - 16:15
My husband made this FABULOUS Craft Table for me last weekend, it turned out PERFECT! Thank you so much for posting this with such detailed directions....
What do you have in your galvanized pails? What do the labels say?
Thank you!

We've been desperate for more storage in our little house and this build really helped. The whole bench is 103“ wide and each drawer gives us 24"x17" of usable space. We had to do some custom shaping for the benchtop (two joined fir 2x12's) fit as the walls are not square but in the end we were really pleased.
The hardest part of the project was getting all of this built and in place while working around a busy family as this is our only meal space and the majority of cutting/forming was done either on the weekends or after bedtimes. If I were to do this again I'd prioritize sending the kids to grandparents for the weekend and know king everything except for paint out in one go.
We could have spent less time with the benchtop by using plywood like in the plans but we wanted the look of a separate benchtop. We may replace the fir with stained oak down the line but this should be plenty sturdy for the next several years.

Comments
racegurl10
Thu, 03/18/2021 - 00:07
Wow that beautiful do you…
Wow that beautiful do you have directions on what you did?
frendlygrl
Tue, 07/06/2021 - 19:04
Is this your project?
So this is not your project? Because there isn't much information or a before and after picture. This gave me an idea for our home.
coldduck22
Sun, 08/15/2021 - 18:34
Yes, this is my project…
Yes, this is my project. What would you like to know?
Jeremywilson
Wed, 12/29/2021 - 06:41
This looks beautiful and…
This looks beautiful and authentic at the same time. Love how it gives me a theatre vibe! cabinet makers mornington