Community Brag Posts

Foldable Farmhouse Table 2

I recently published my first foldable farmhouse table last week here: http://ana-white.com/2013/06/foldable-farmhouse-table The first one I made was very heavy because I used 2x6 tops and 4x4 legs. I decided to make another one that would be lighter and easier to transport. The plans are basically the same just instead I used 1x6 for the top and put 2x4s together for the legs. I also shorted the length by about a foot. The only issue with making the table shorter length is that the legs don't fold completely flush. You could easily make the legs short enough to fold flush, but then the table was a little too short from the ground up for us. The same as before I simply used kreg joints to join the top boards together. I then made a 2x4 frame and attached it to the bottom. I made each of the legs separately by joining 2x4s together and sanding everything down. Everything was stained before putting the legs on using Miniwax Dark walnut stain. I used 2 coats of Miniwax water based clear coat to seal it. A notch was cut out on each of the bottom 2x4 supports on the legs and I glued in a small piece of wood cut to size. These are so I can put in a 2x4 support board under the table so that the legs do not fold in on themselves when it is standing up. The legs are just attached using door hinges you can buy in packs in the hardware section. Be careful when screwing into the 1x6 top not to use too long of screws or else you will over screw and have them come through into your table top. Table design was by Amber Veatch Designs and photographed by Andi Mans Photography


Built from Plan(s)
Estimated Cost
120.00
Estimated Time Investment
Day Project (6-9 Hours)
Finish Used
Sand to finish and then used Miniax dark walnut stain followed by Miniwax water based clear coat.
Recommended Skill Level
Beginner
Comments

Tue, 07/07/2015 - 06:41
Wobble
We have built something very similar and we have a good bit of wobble at the top, even though the stretcher down the center of the table is holding solid in there and secred with clasps. Were thinking of some sort of sliding pin into the top of the leg to the apron. Anyone run into this before?
Seasonal And Holiday
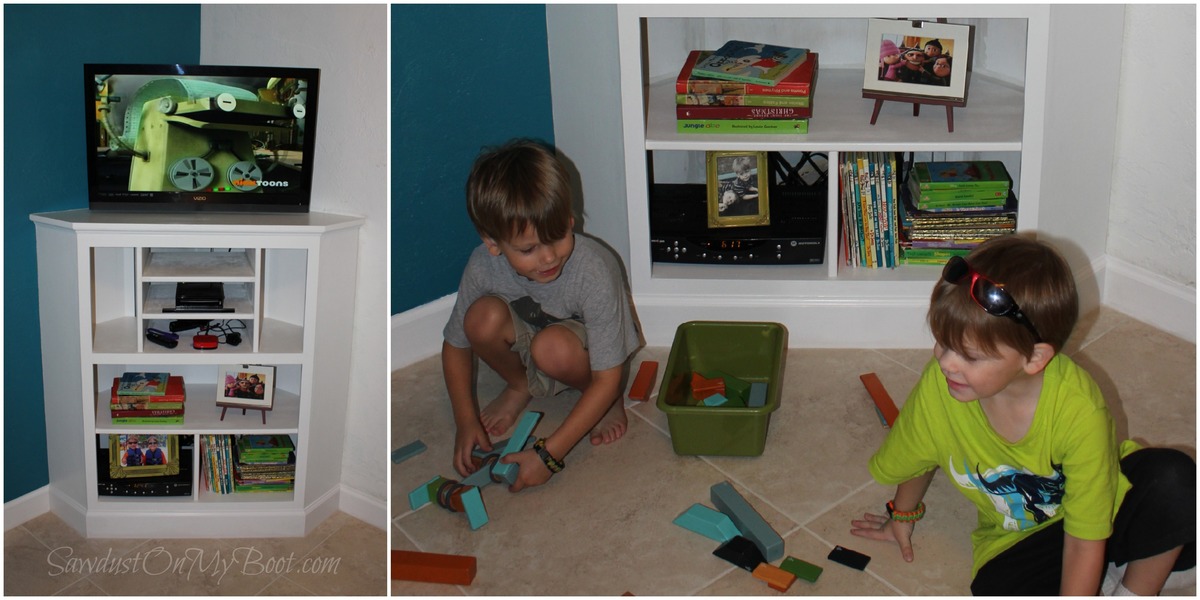
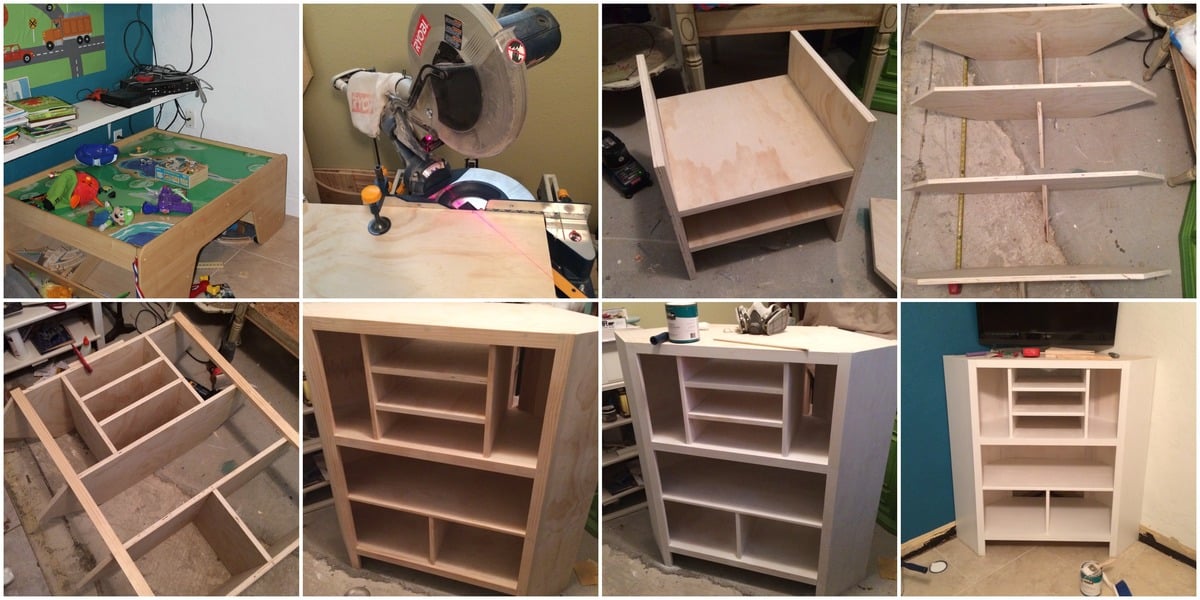
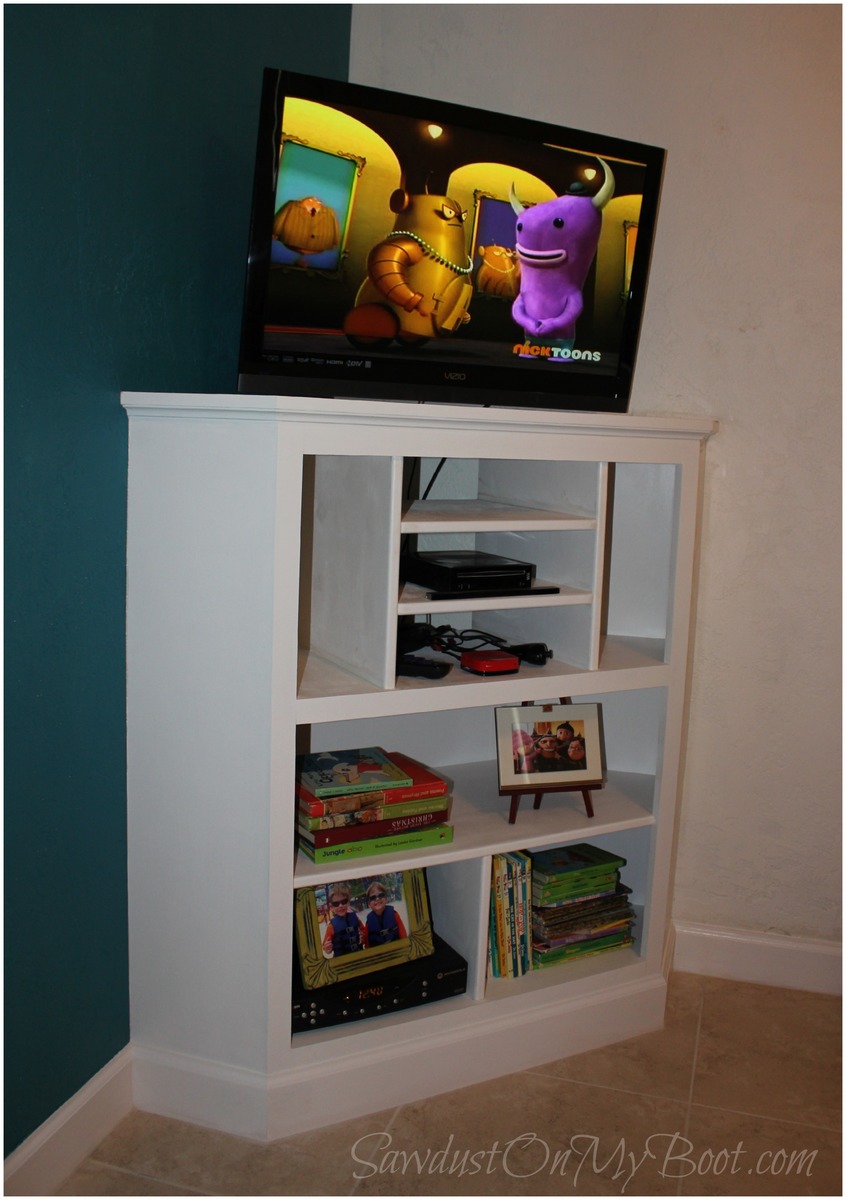
Built-In Corner Media Cabinet
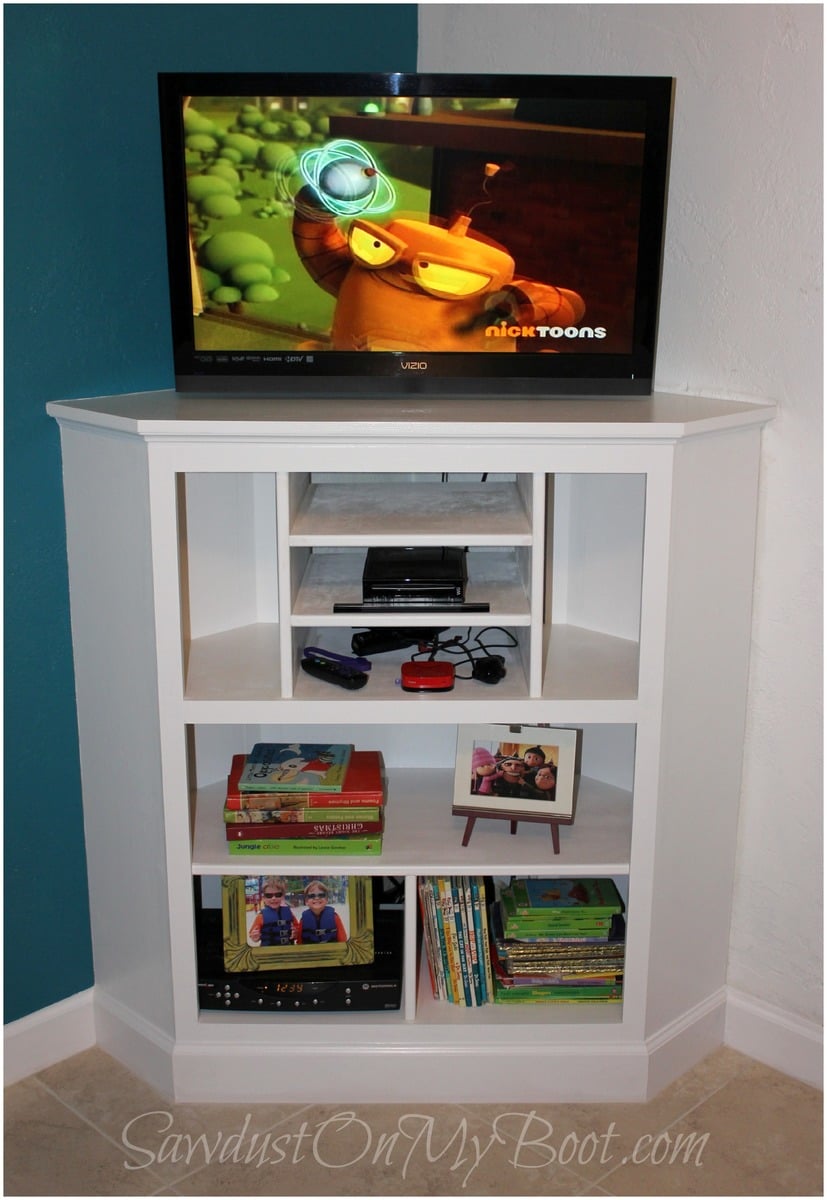
This was a particularly fun build for me since it was for my little guys' room! Hope Santa fills it with tech goodies on Christmas!! Please check out the details on my website! Happy Holidays!!! :D
Built from Plan(s)
Estimated Cost
$150
Estimated Time Investment
Weekend Project (10-20 Hours)
Finish Used
Semi-Gloss Latex Paint
Recommended Skill Level
Intermediate
Comments
Fri, 12/13/2013 - 05:38
Beautiful!!
Great job. The molding looks perfect too!! I love the name of your site. I live on an island and when I'm working on stuff I like to wear my cowgirl boots :) my friends all tease me for them...but I love getting 'sawdust on my boots'! Again, great job!!
Stacked Vegetable Storage

Very easy to make. I made my shorter in width to fit my counter. Instead of 31 1/2" mine is 21 1/2" wide. - Dee Keyone

Built from Plan(s)
Adirondack chair mm measurements
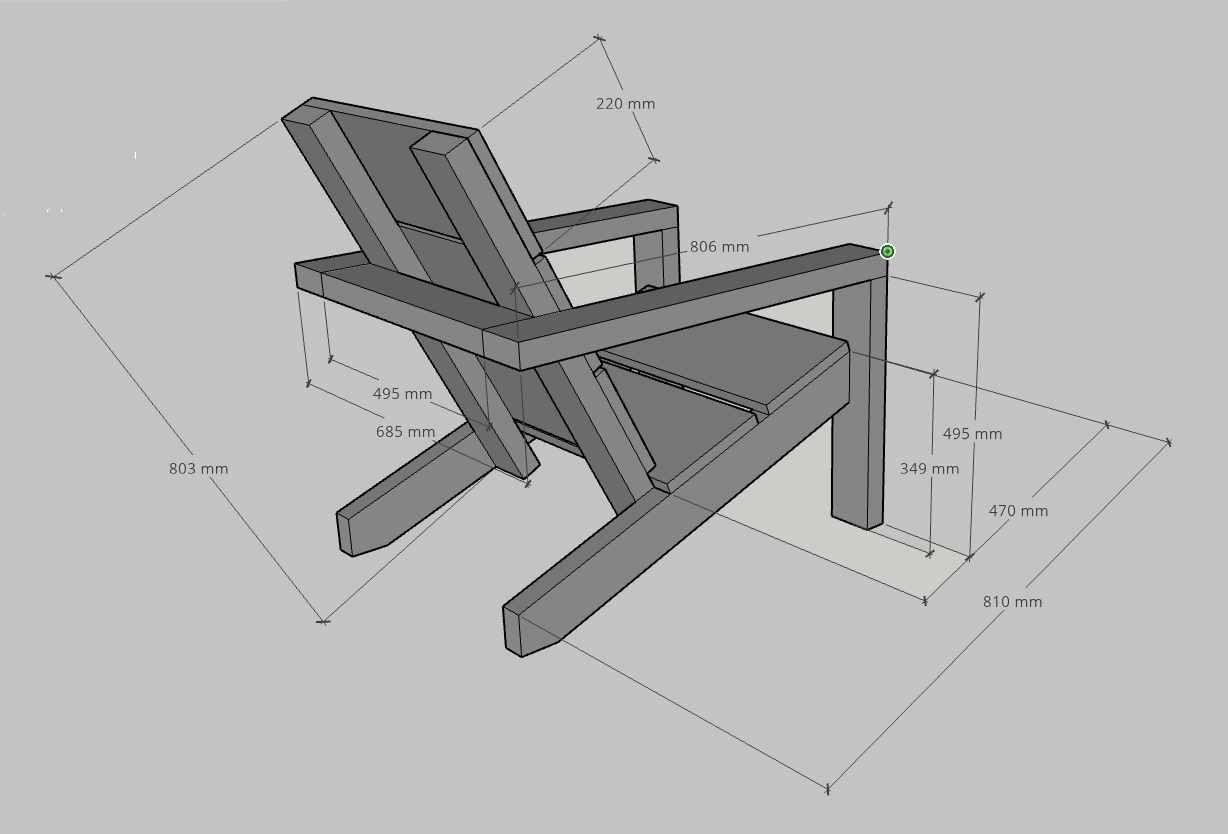
Unfortunately I didn't have the chance yet to build these amazing chairs, but in preparation I figured out what the measurements would be in mm's so I thought maybe other people would like to use it as well :-)
Built from Plan(s)
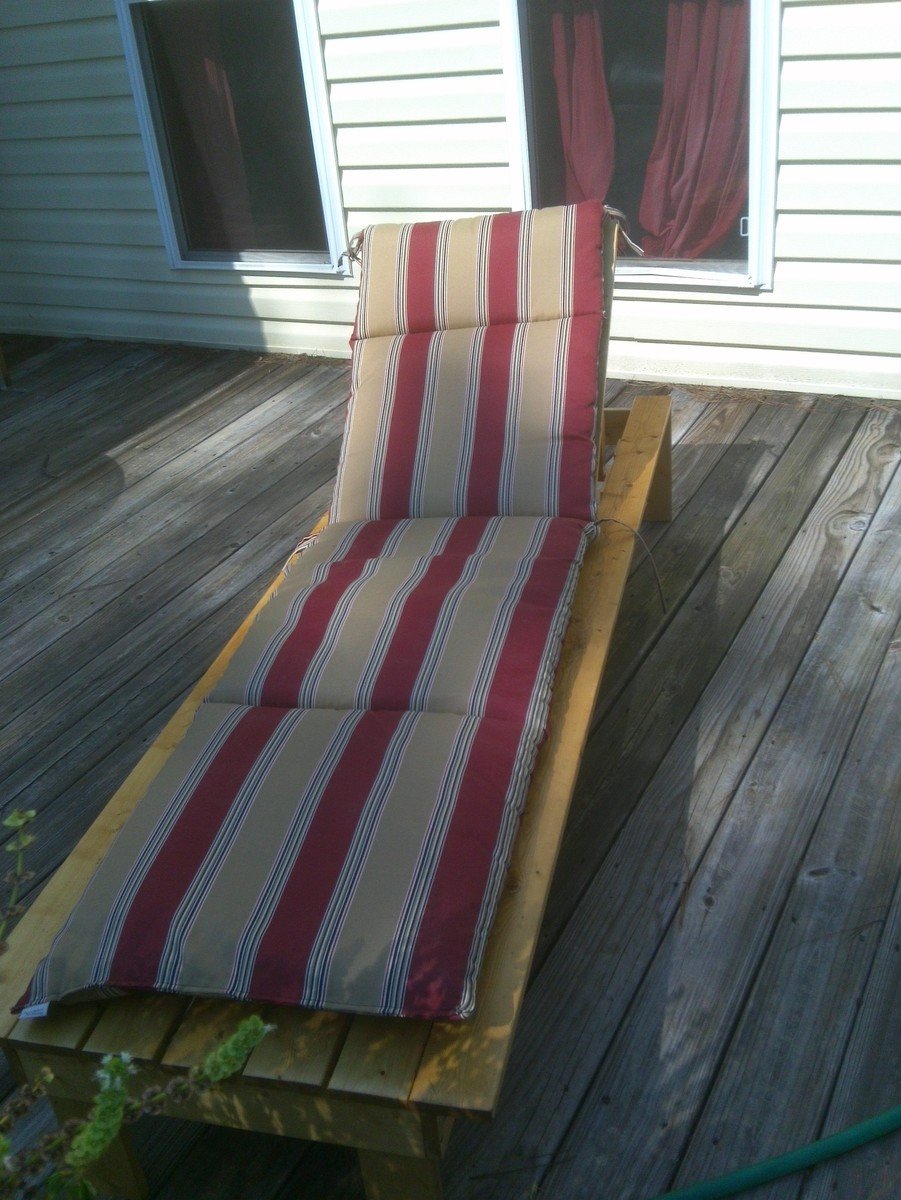
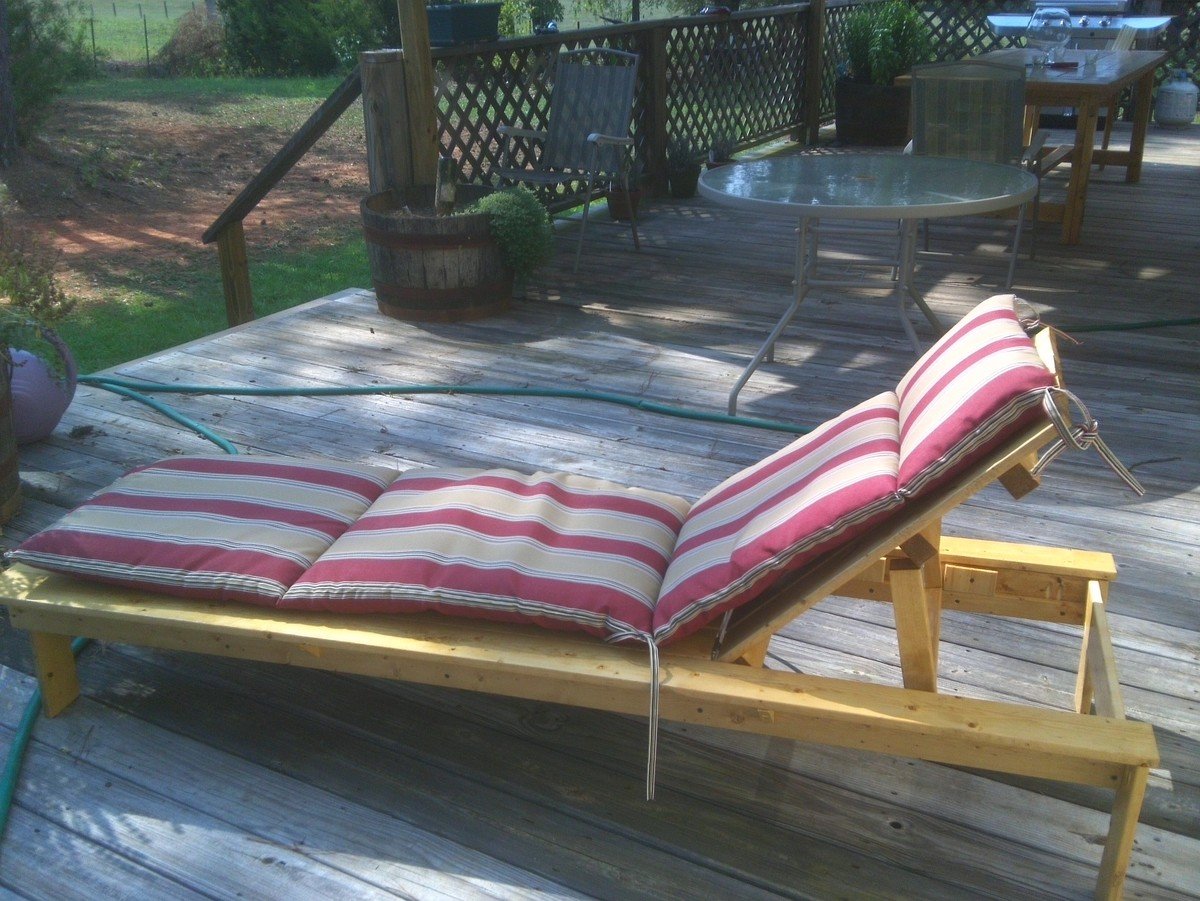
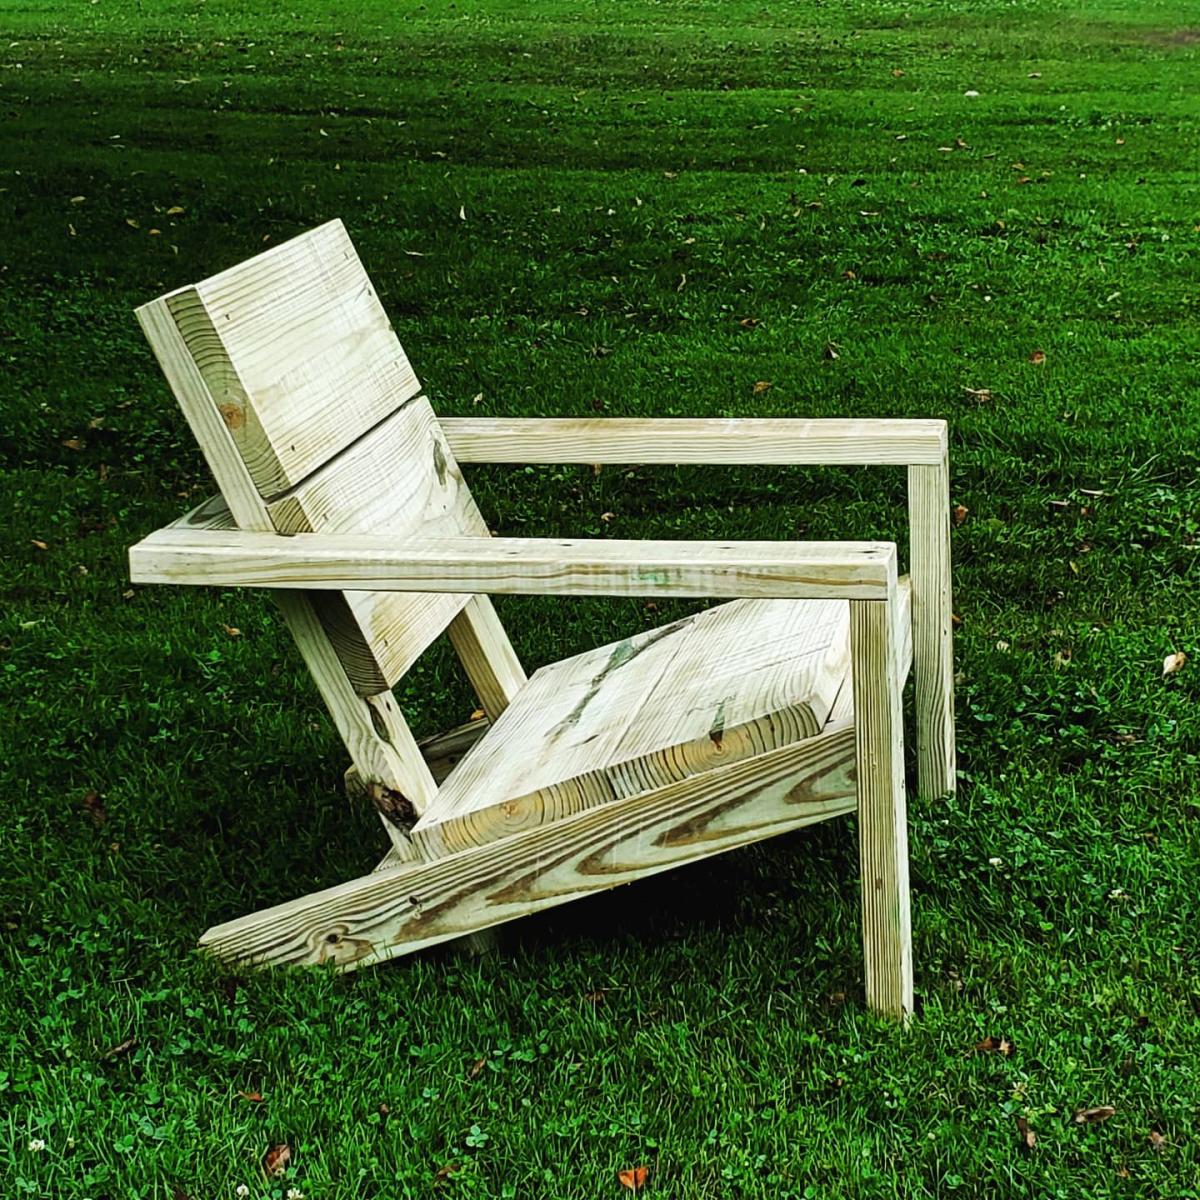
Best Lounger Ever
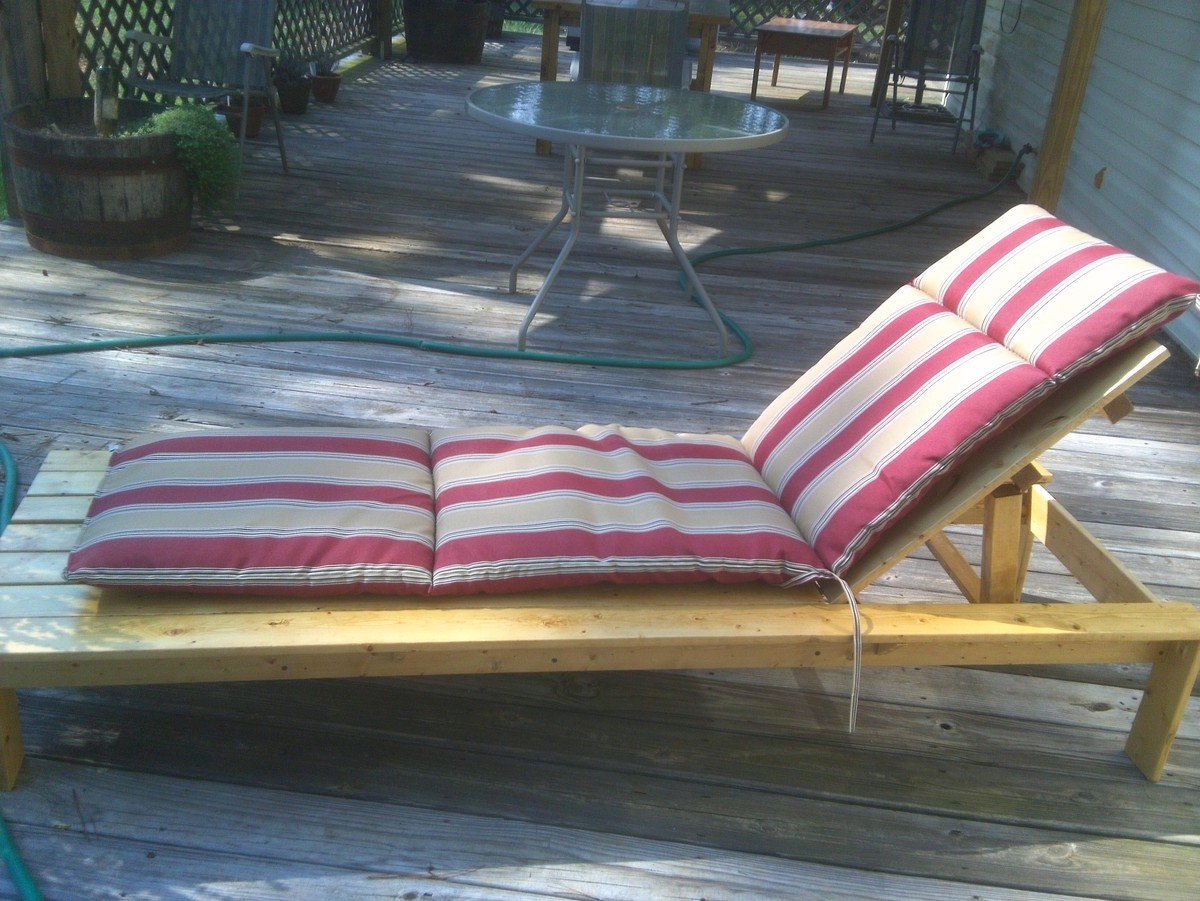
This was my second project from the site. I wanted somewhere to read my book on the back deck. This chair is perfect. When I get tired of reading I can lay it down and take a nap. It is very sturdy and easy to put together. I do recommend using pocket holes to assemble it. I found it much easier.
Built from Plan(s)
Estimated Cost
$70.00
Estimated Time Investment
Day Project (6-9 Hours)
Finish Used
I sanded the seat and sides of the chair. Then stained it with oak and finished it with polyurethane.
Recommended Skill Level
Beginner
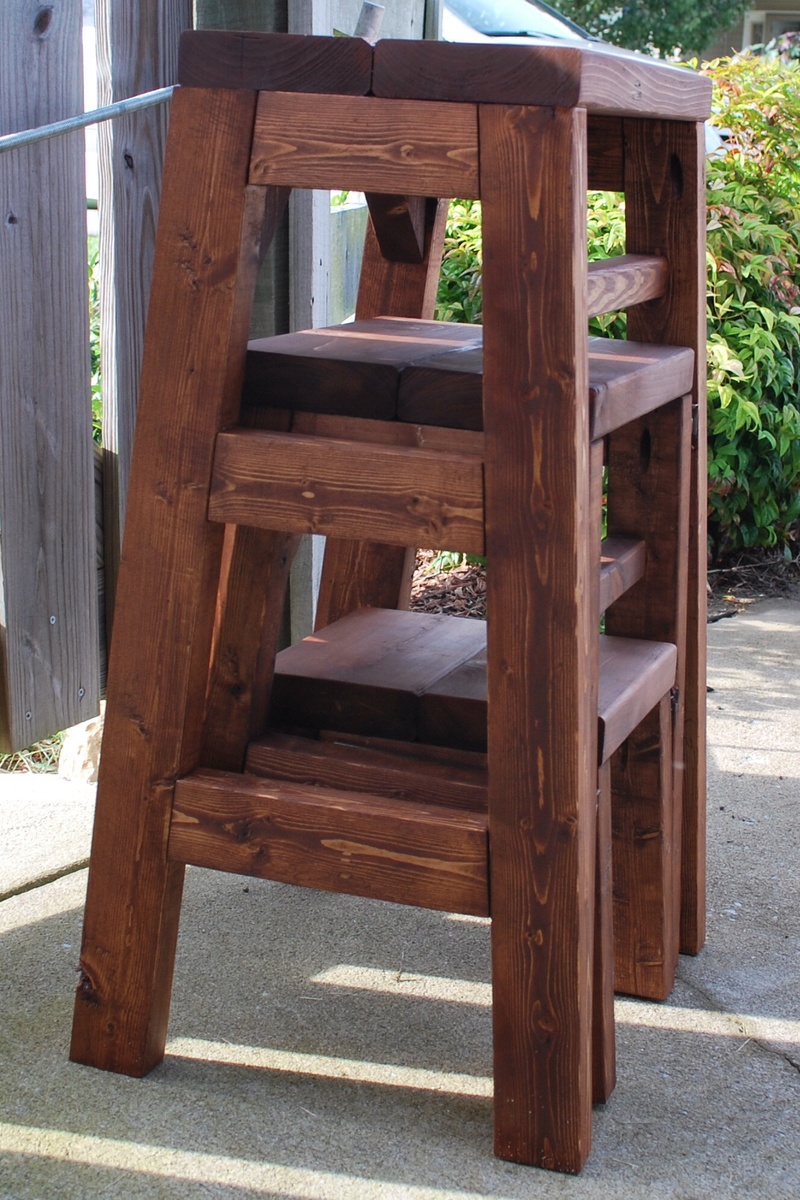
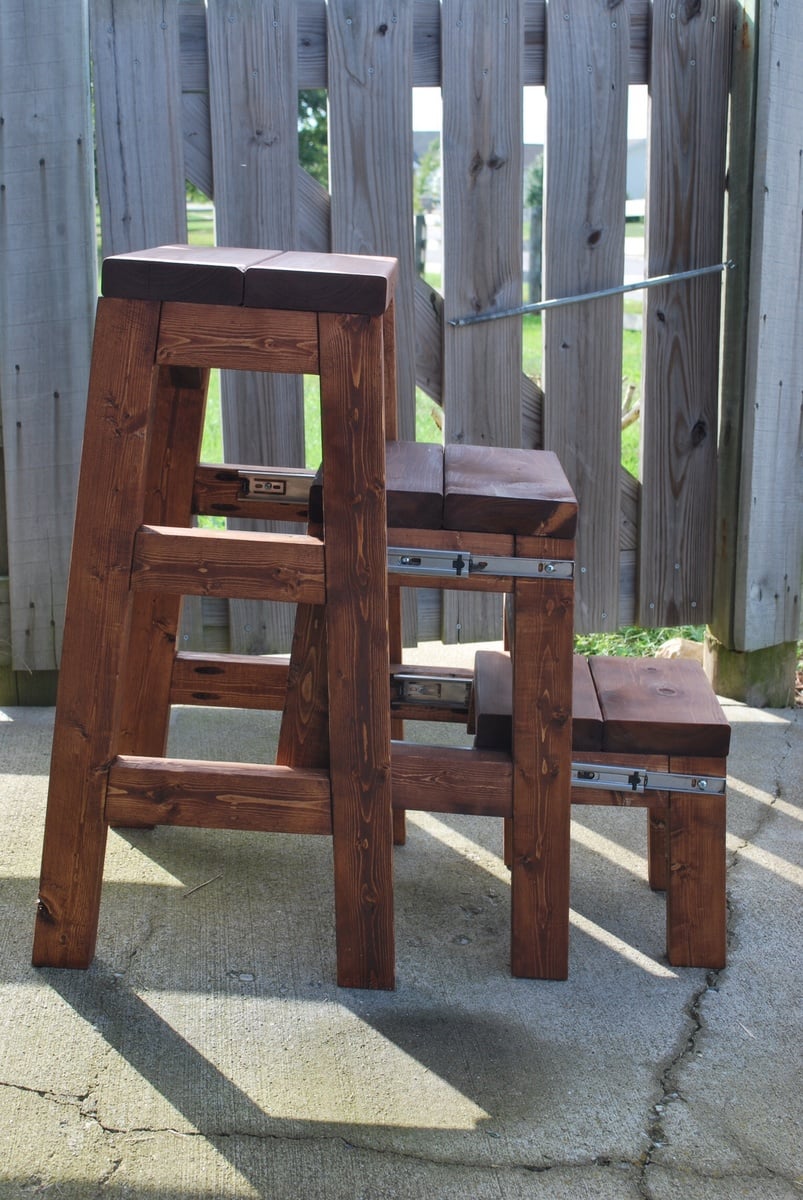
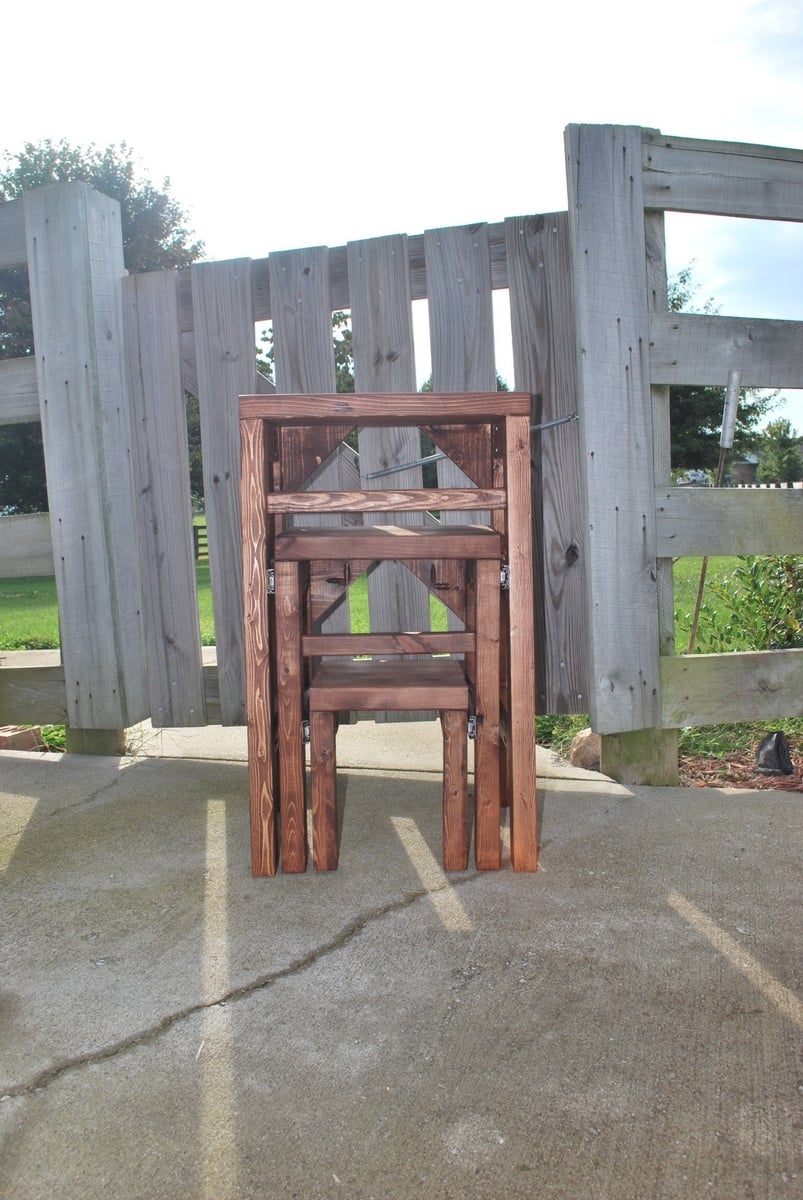
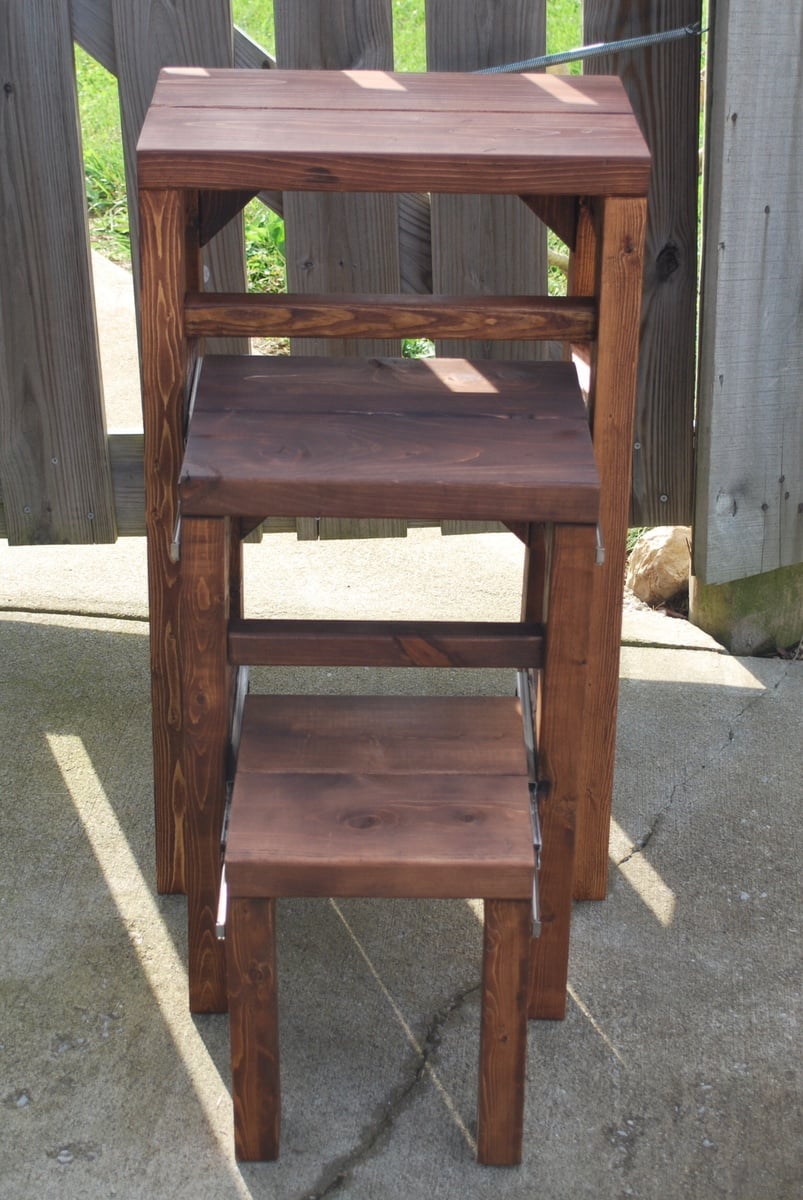
Pull-out step stool
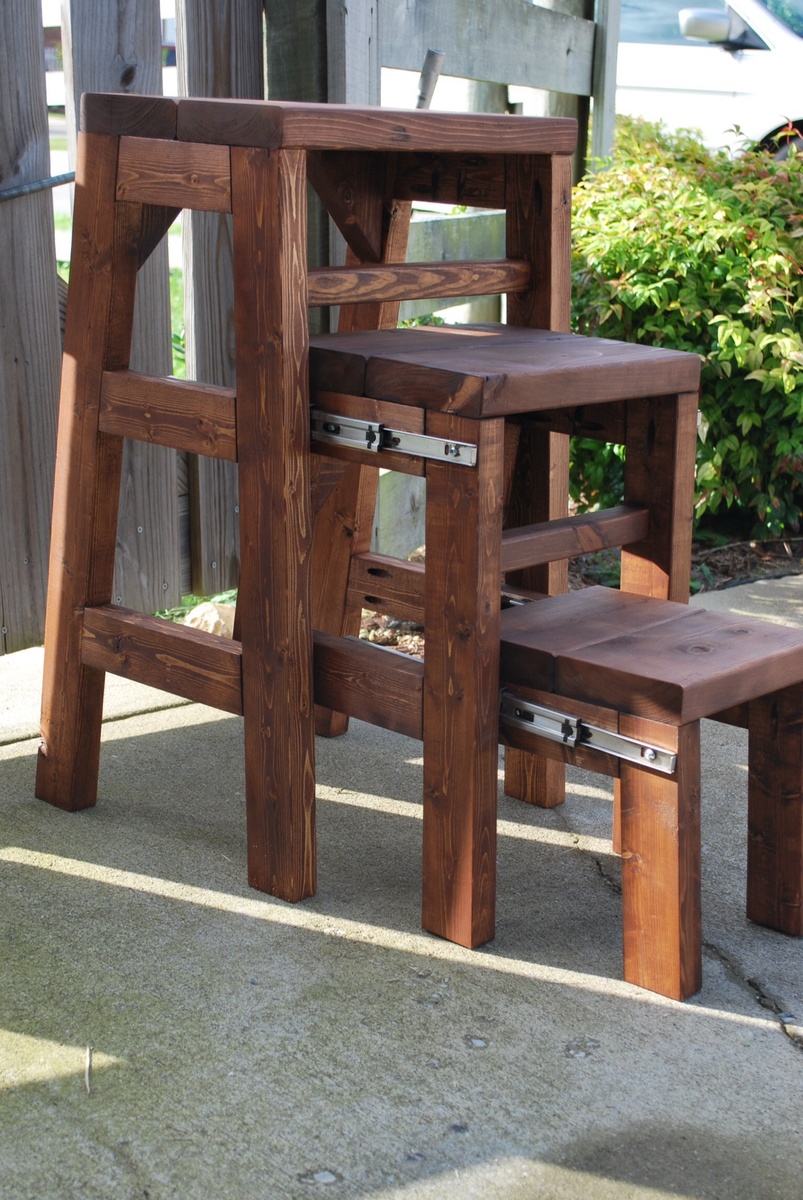
I needed a step-stool in my kitchen to reach in my top cabinets. I'm rather short so I was constantly dragging a chair from my dining table over to find things. I did a google search for a step stool and looked at images. As soon as I saw the picture I knew I had to build it, the retailer selling the original one I saw has a starting price of $270 and goes all the way up to $680! It took me 2 weeks off and on and several times of putting together and taking apart to get Ito the size specifications on the retail website.
Estimated Cost
Around $50
Estimated Time Investment
Weekend Project (10-20 Hours)
Finish Used
Stain and satin finish poly
Recommended Skill Level
Beginner
Comments
Mon, 02/23/2015 - 13:27
Are there plans for this?
Are there plans for this? Looking to make but would like to know what materials are needed
In reply to Are there plans for this? by nengel21
Sun, 05/31/2015 - 18:27
I just used the picture i
I just used the picture i found online as reference and built it through trial and error. Unfortunately I don't know how to create plans either.I can tell you the legs are 2x3's cut at a 5° angle and the tops are 2x6's. I ordered the drawer slides from amazon for approximately $12 a piece.
Fri, 08/21/2015 - 06:34
Would love to recreate
Hi, I've been looking for the original image that you used as your model in an attempt to find dimensions to start with, but haven't been able to find it. Could you perhaps remember what brand it was or what site you found it on? If you still have the stool, could you maybe tell me the width of your top step and I could maybe go from there?
Thanks for the picture. This is a brillant idea and exactly what I'd like to create for my kitchen. I'm hoping to be able to use it as a counter height seat as well when I'm working in the kitchen.
In reply to Would love to recreate by robear529
Sat, 01/21/2017 - 06:42
Sorry, I haven't been on here
Sorry, I haven't been on here in a while so I just saw this. Here is the link to the stool I copied https://www.foreverredwood.com/3-step-wood-stool.html
Thu, 09/17/2015 - 14:04
step stool
This is on my list of things to make. Have to sort th shed out first though.
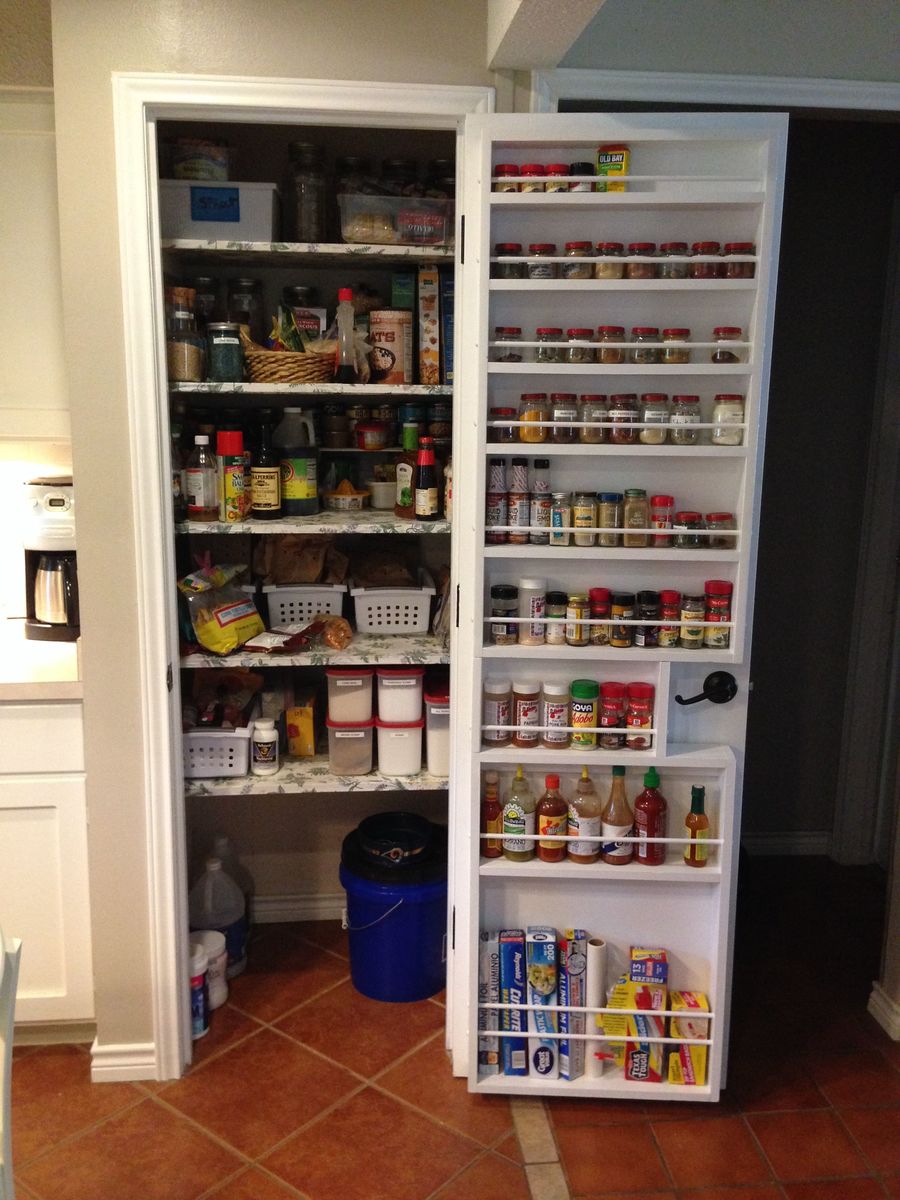
Great plan - added to make it even bigger
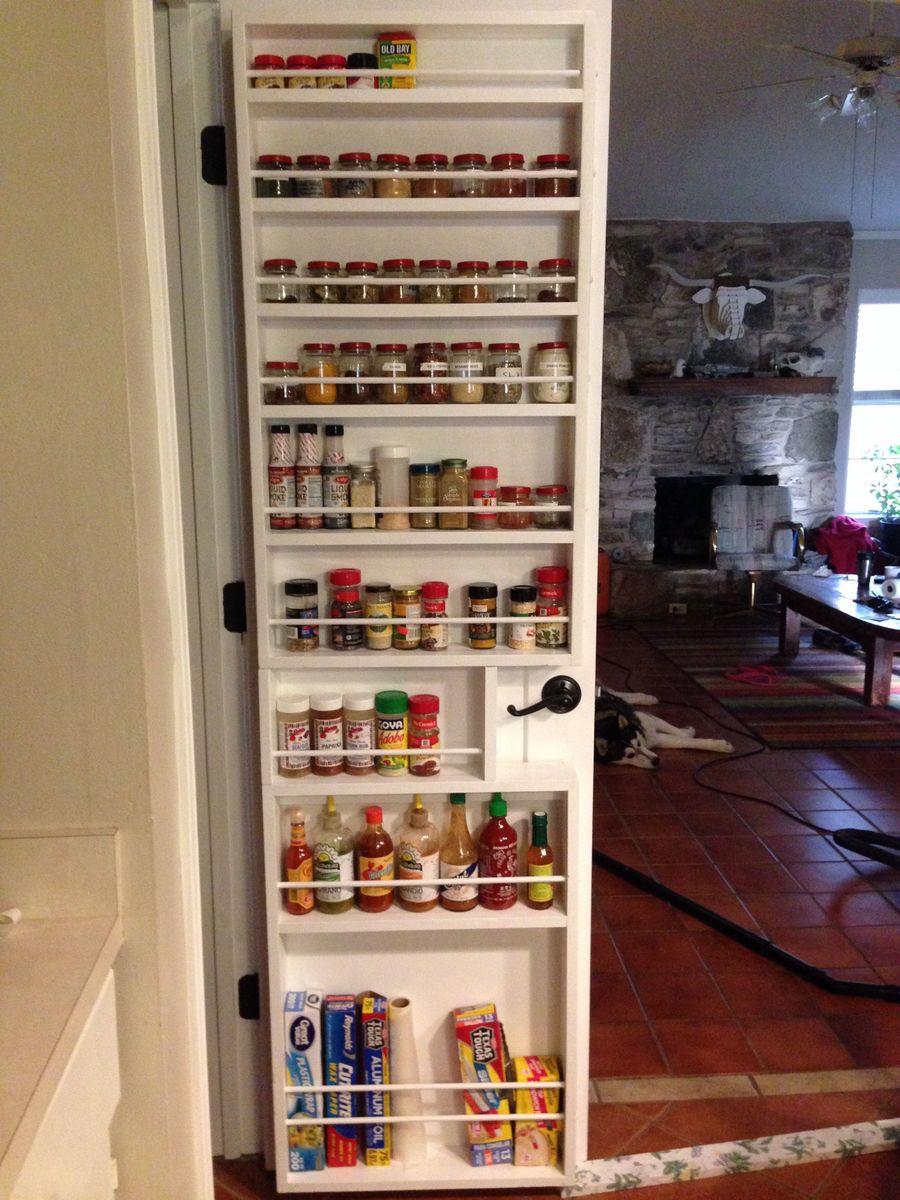
The plan is great, I followed the instructions exactly. Then altered the plan to build a second rack that would fit the bottom of the door, with foil, saran and bag storage at the bottom. Consequently it was heavy and I was very skeptical of the hollow core door anchors, but I installed 3 at the top and 2 at the bottom of both pieces. It's very solid and secure....would probably have worked fine with even less. This door is only 32" wide but has plenty of room for this project. Thank you, looking forward to trying more of your plans.
Built from Plan(s)
Estimated Time Investment
Day Project (6-9 Hours)
Finish Used
Primer and latex paint.
Recommended Skill Level
Intermediate
Comments
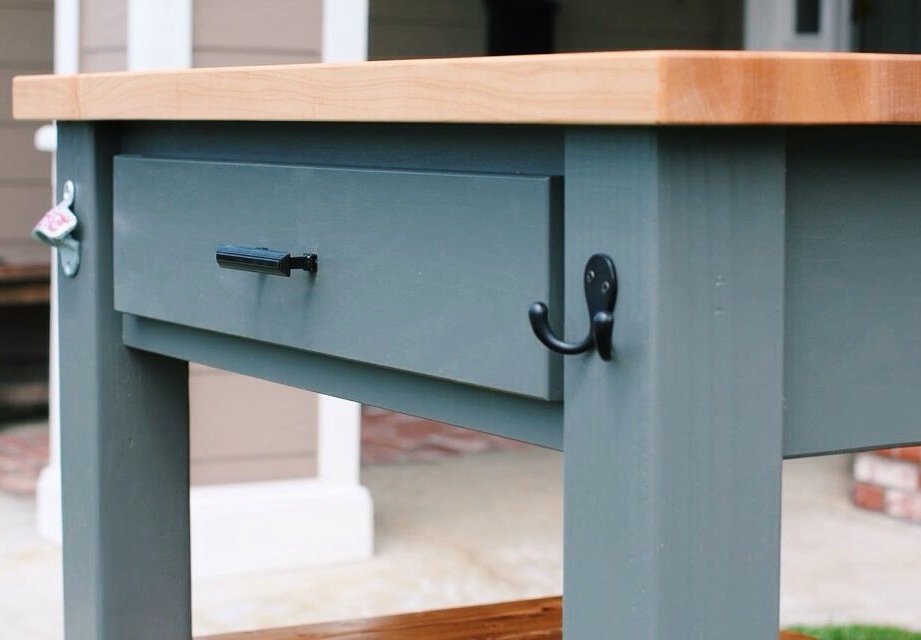
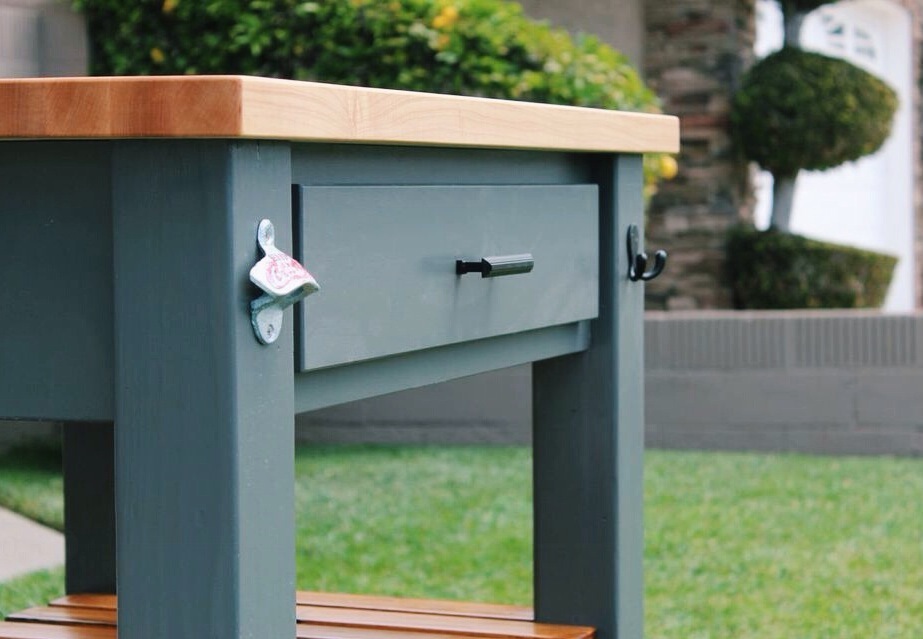
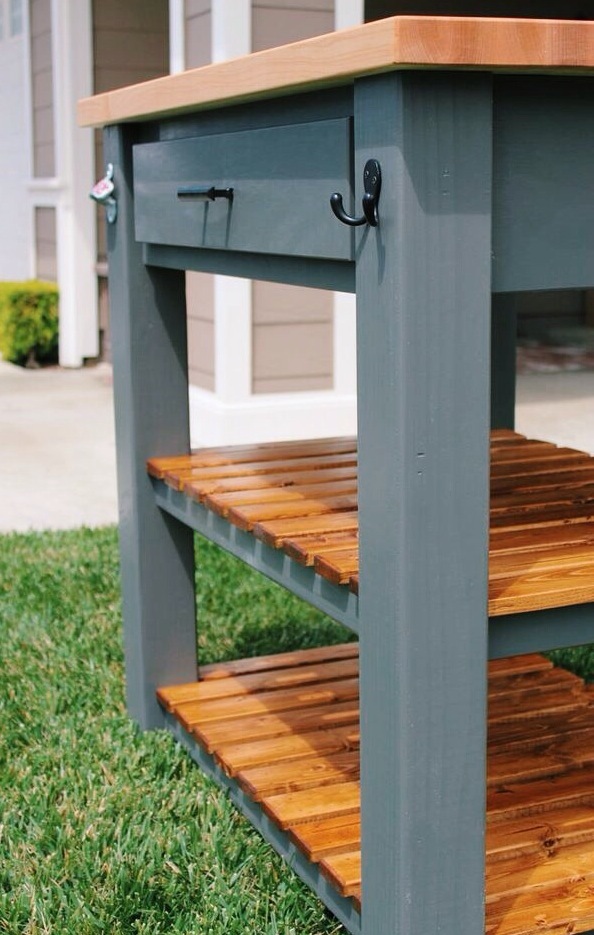
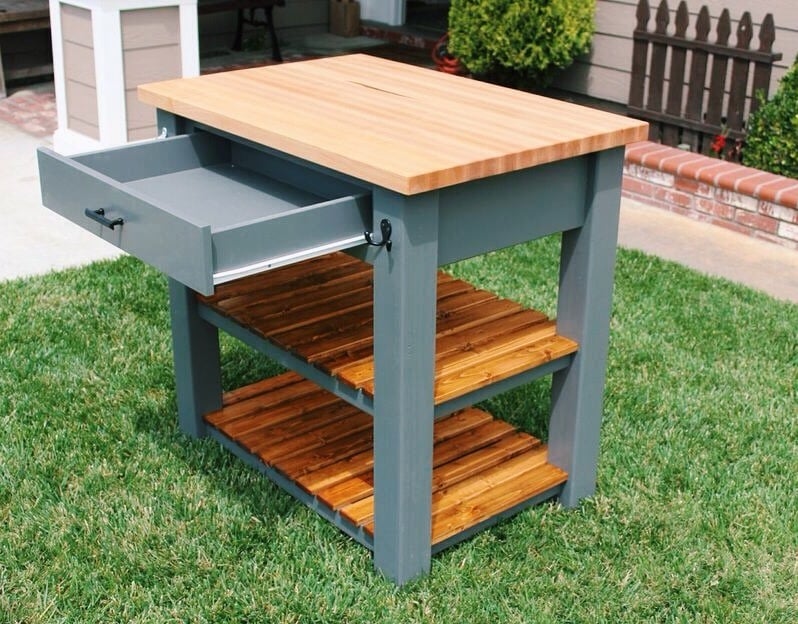
Butcher Block Kitchen Island
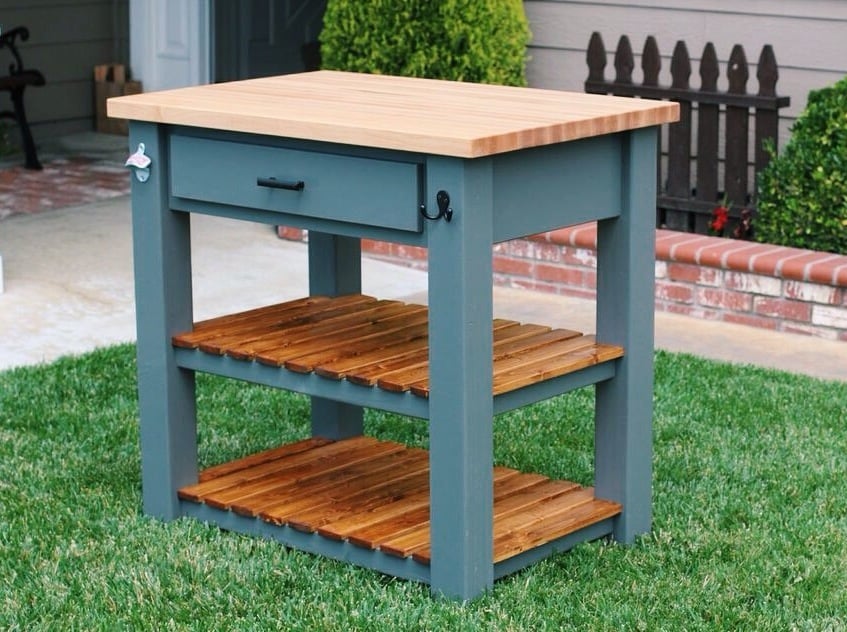
This is a modified butcher block kitchen island built from ana white's plan. Instead of using doug fir (2x4) material for the top, I used hard maple to build an edge grain butcher block top that if knife friendly and food safe. I also altered the dimensions to fit my space.

Built from Plan(s)
Estimated Time Investment
Week Long Project (20 Hours or More)
Finish Used
Mineral oil was used for the butcher block top. The paint is kendall grey by behr and early American stain by minwax for the shelves.
Recommended Skill Level
Advanced
Comments
Sat, 05/10/2014 - 11:05
I love your work!
Yet another beautiful kitchen island. Love the finish and butcher block top on this one! Thanks for sharing!
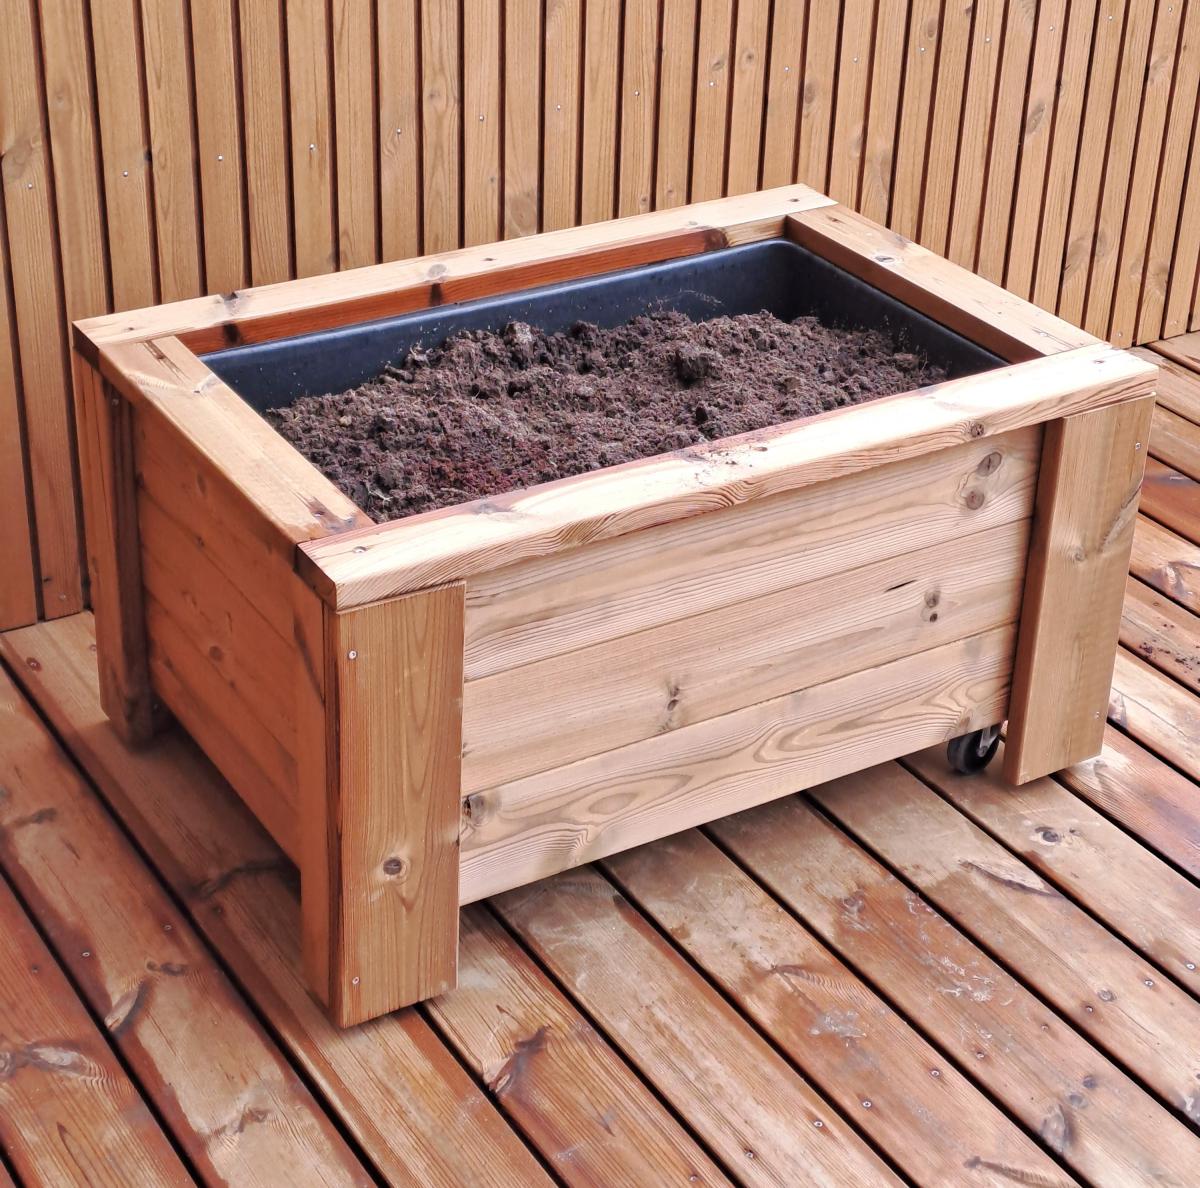
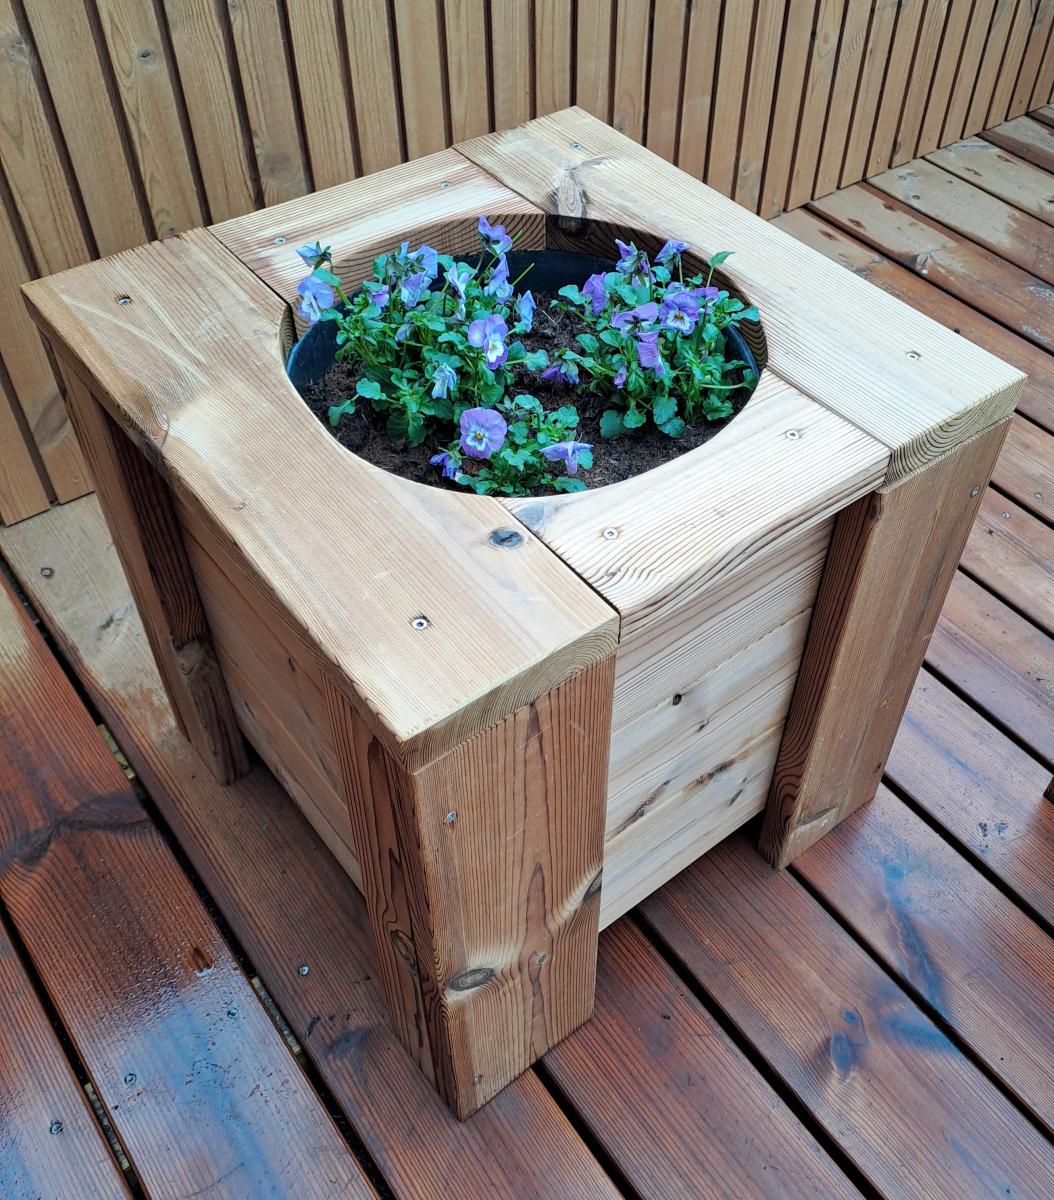
Modern Cedar Planter Box

I build these planter boxes, from wooden remains from terrace building, inspired from Ana White planter boxes.
Søg
Built from Plan(s)
Plant stand
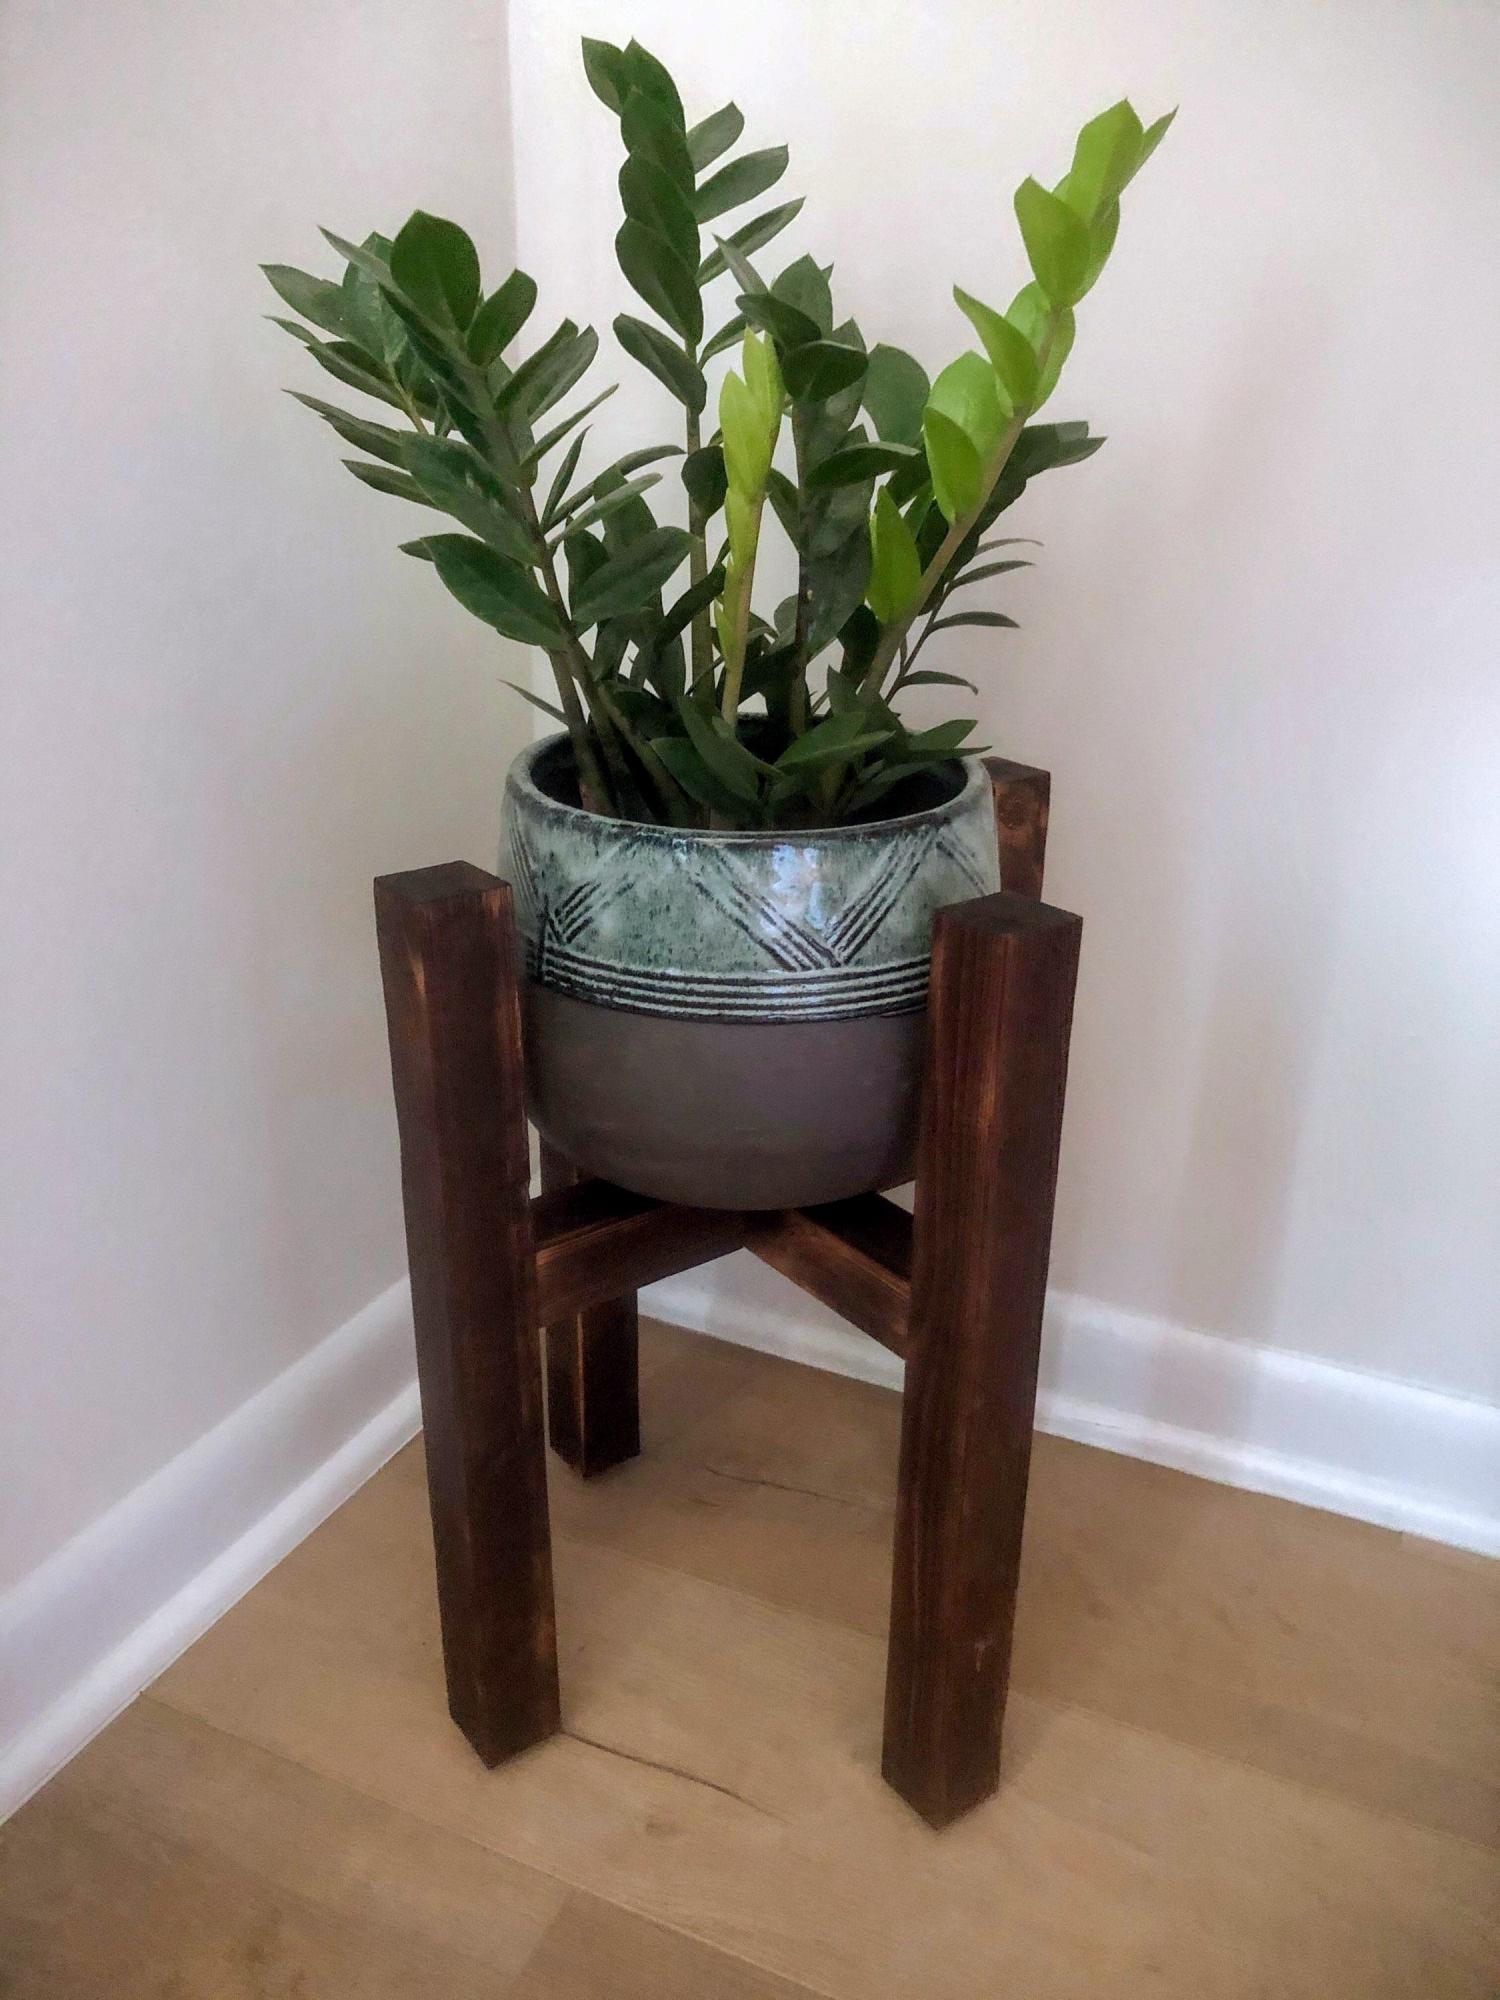
I made 3 of these for a friend. 2 @ 16", 1 @ 20".
Built from Plan(s)
Estimated Cost
$40.00 for 3
Estimated Time Investment
Afternoon Project (3-6 Hours)
Finish Used
Shui sugi ban. Just burned and brushed off.
Recommended Skill Level
Beginner
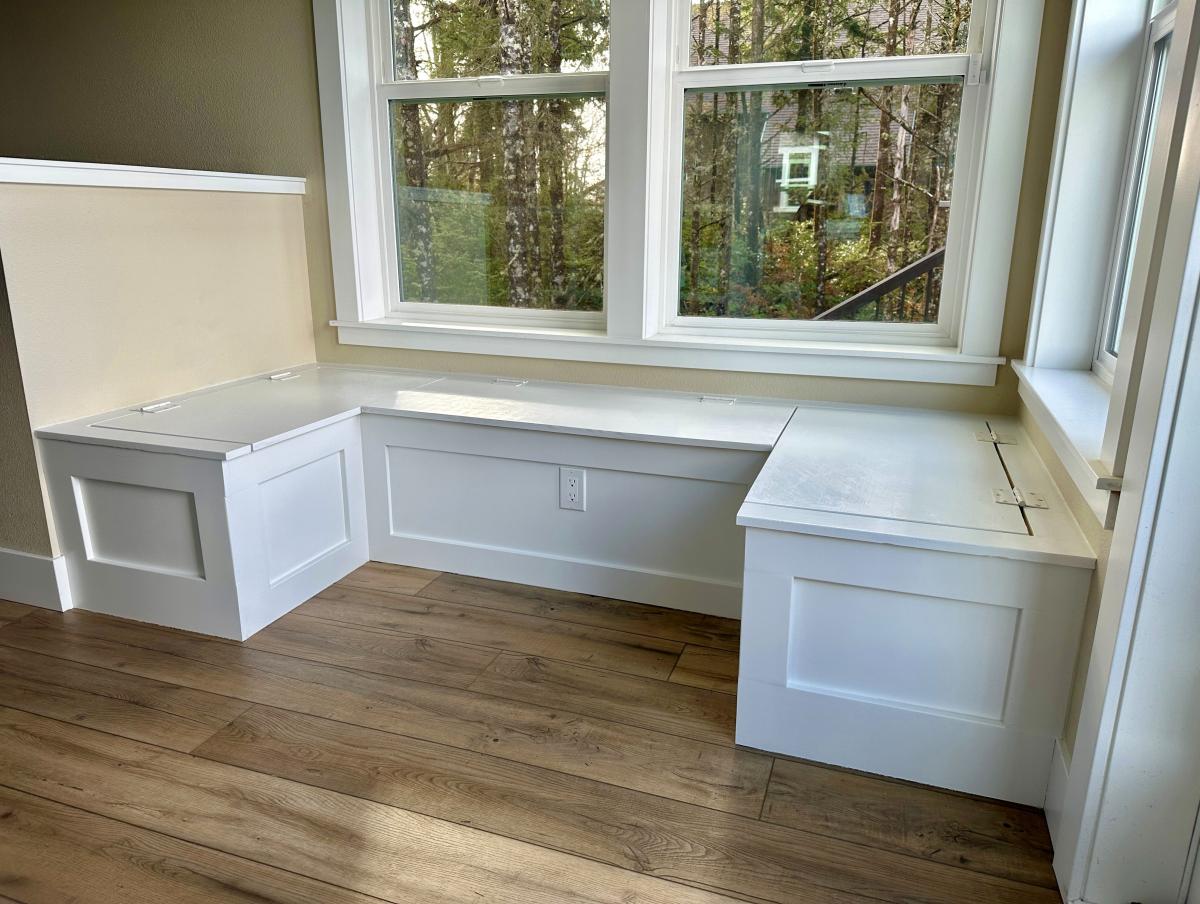
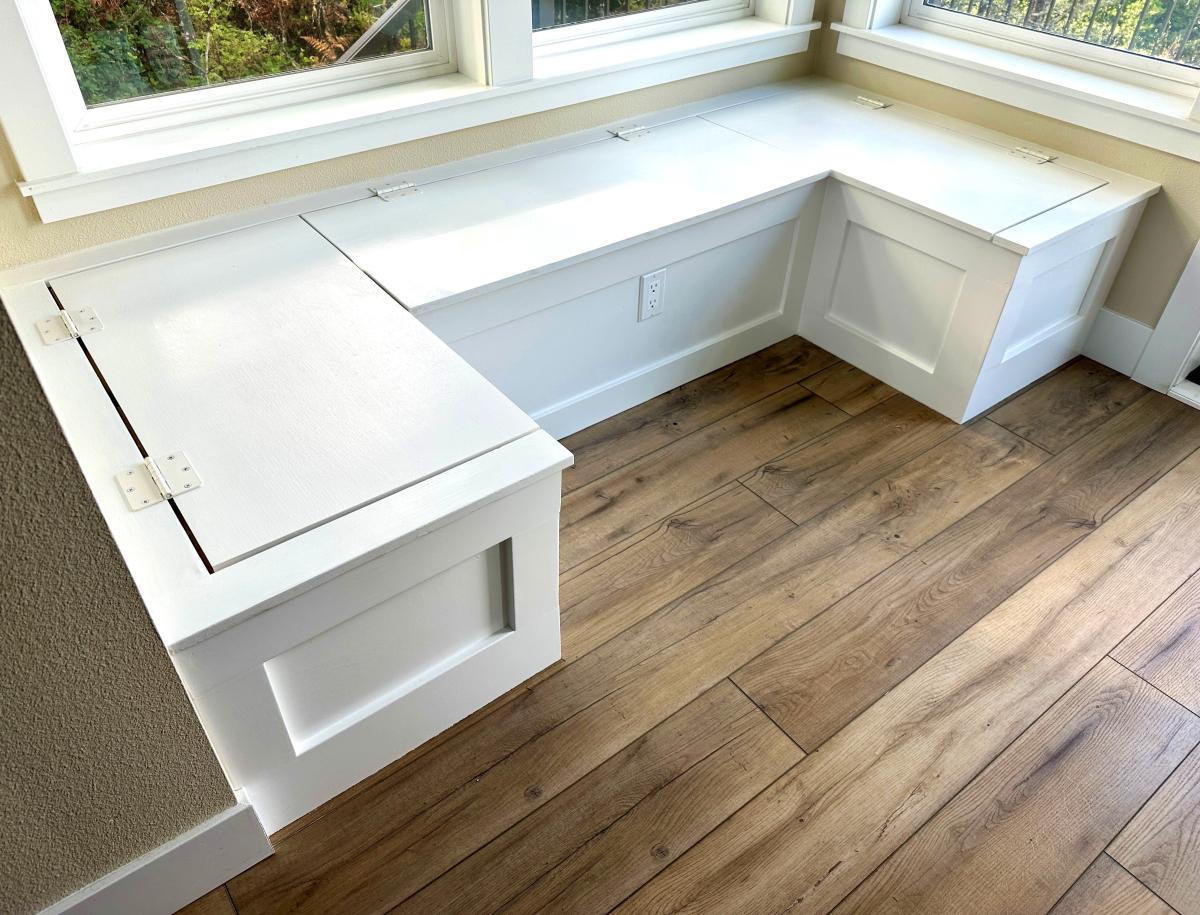
U Shaped Banquette Dinette Bench
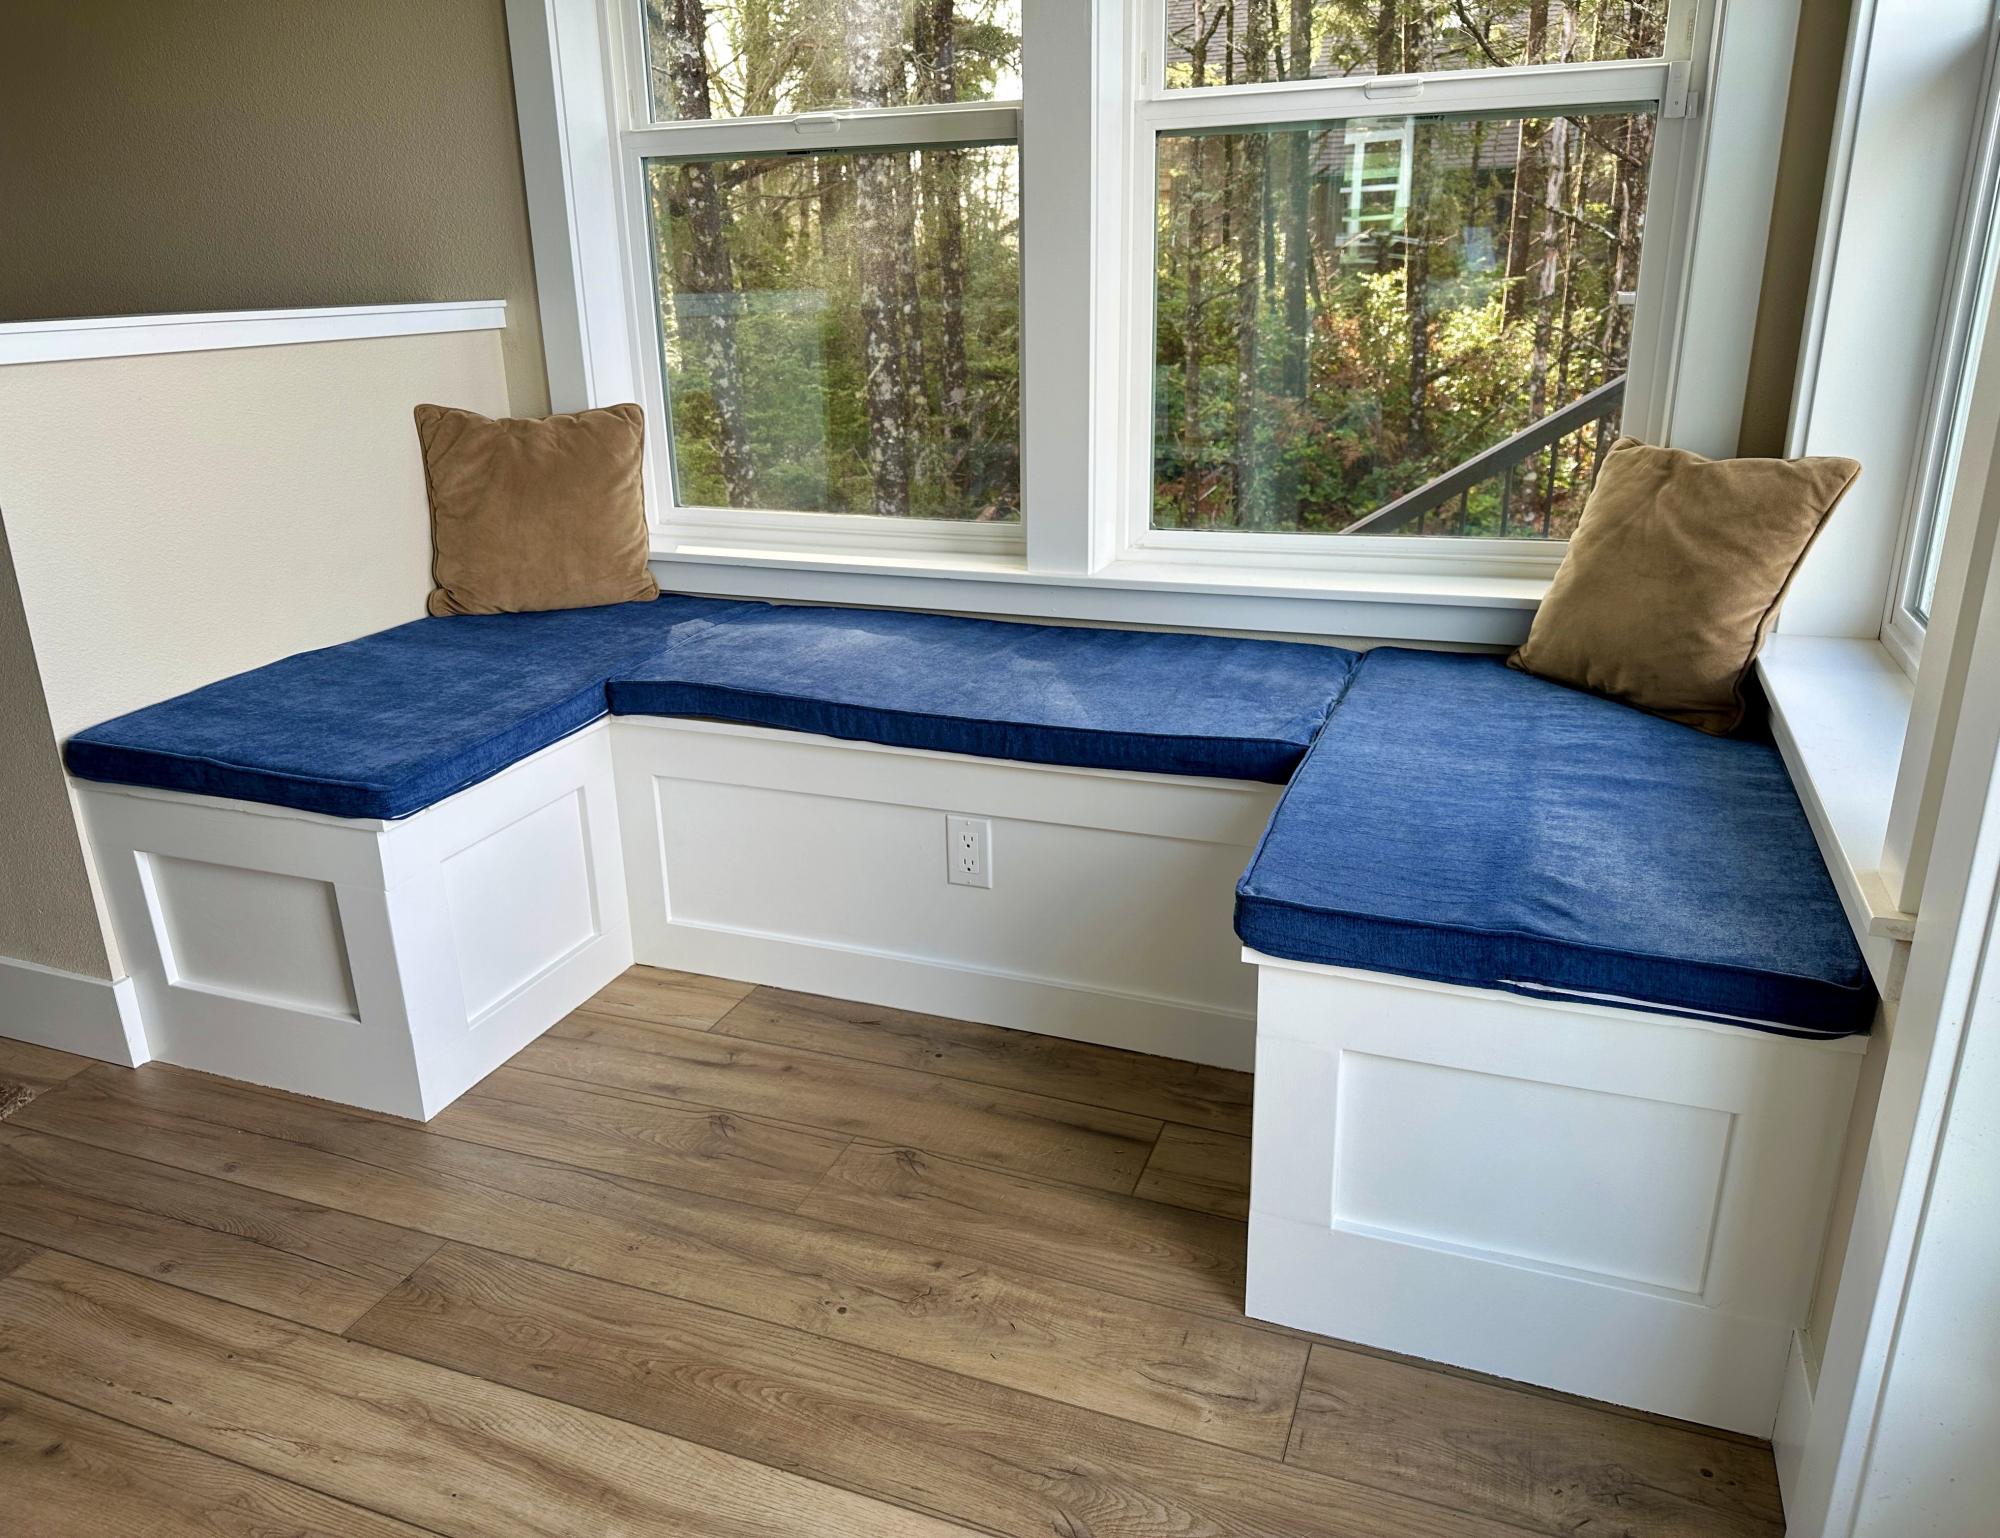
Based on https://www.ana-white.com/woodworking-projects/banquette-bench-flip-sto…, this custom U-shaped banquette works very nicely in my small breakfast area (especially all of the additional storage area it provides for lesser-used appliances). Next up: one of the tables to accompany it (I'm leaning towards a variation on https://www.ana-white.com/woodworking-projects/4x4-x-base-pedestal-dini…) - will send a brag post upon completion. - David P
Built from Plan(s)
Open Tote Storage Rack

I built this open tote storage rack using just 2x4's using Ana's free tote configurator! Perfect for keeping everything organized while staying budget-friendly. Super simple project for many applications, how would you use it?


Built from Plan(s)
Seasonal And Holiday
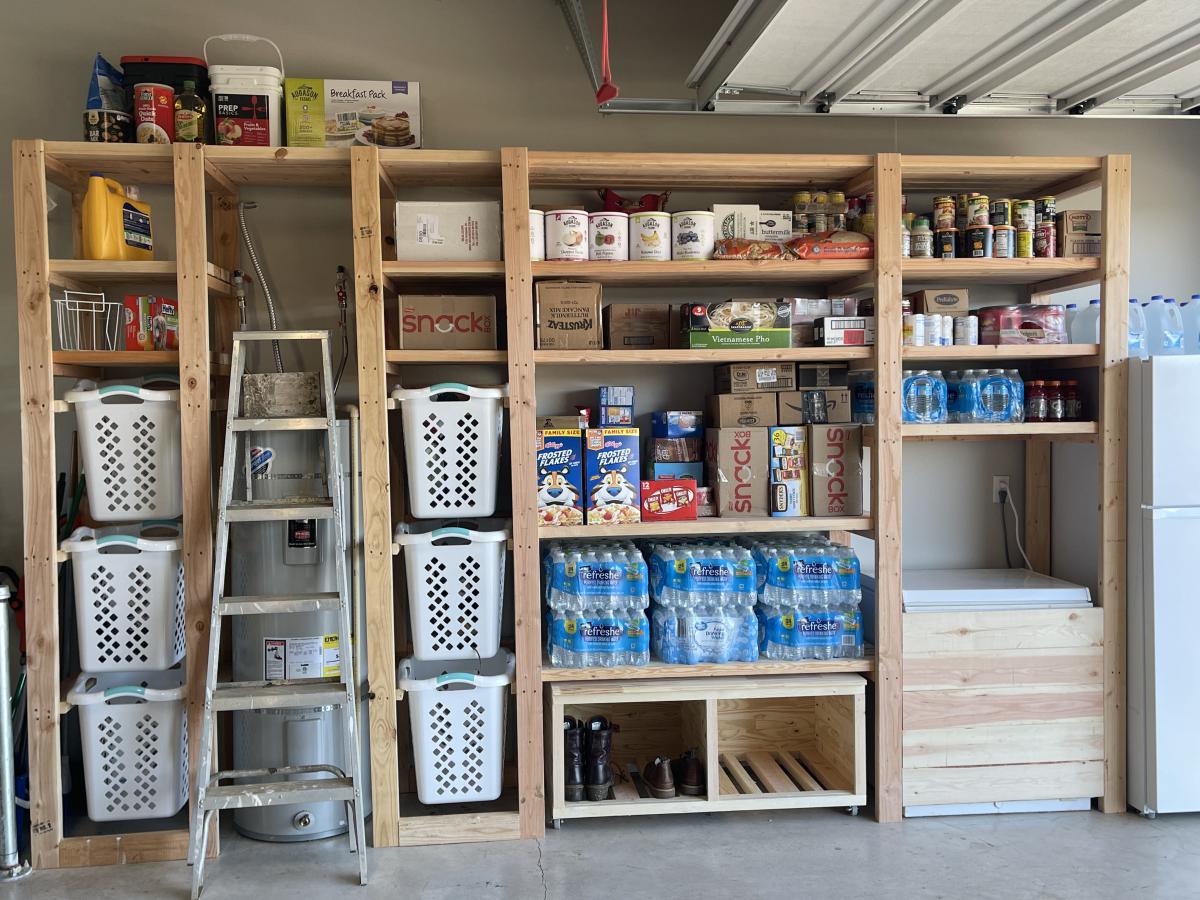
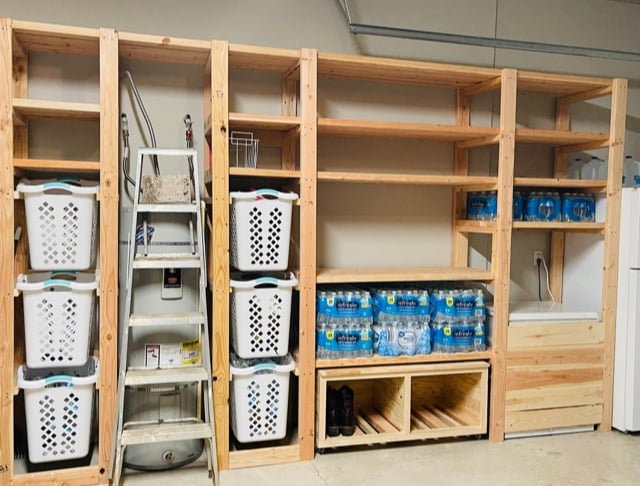
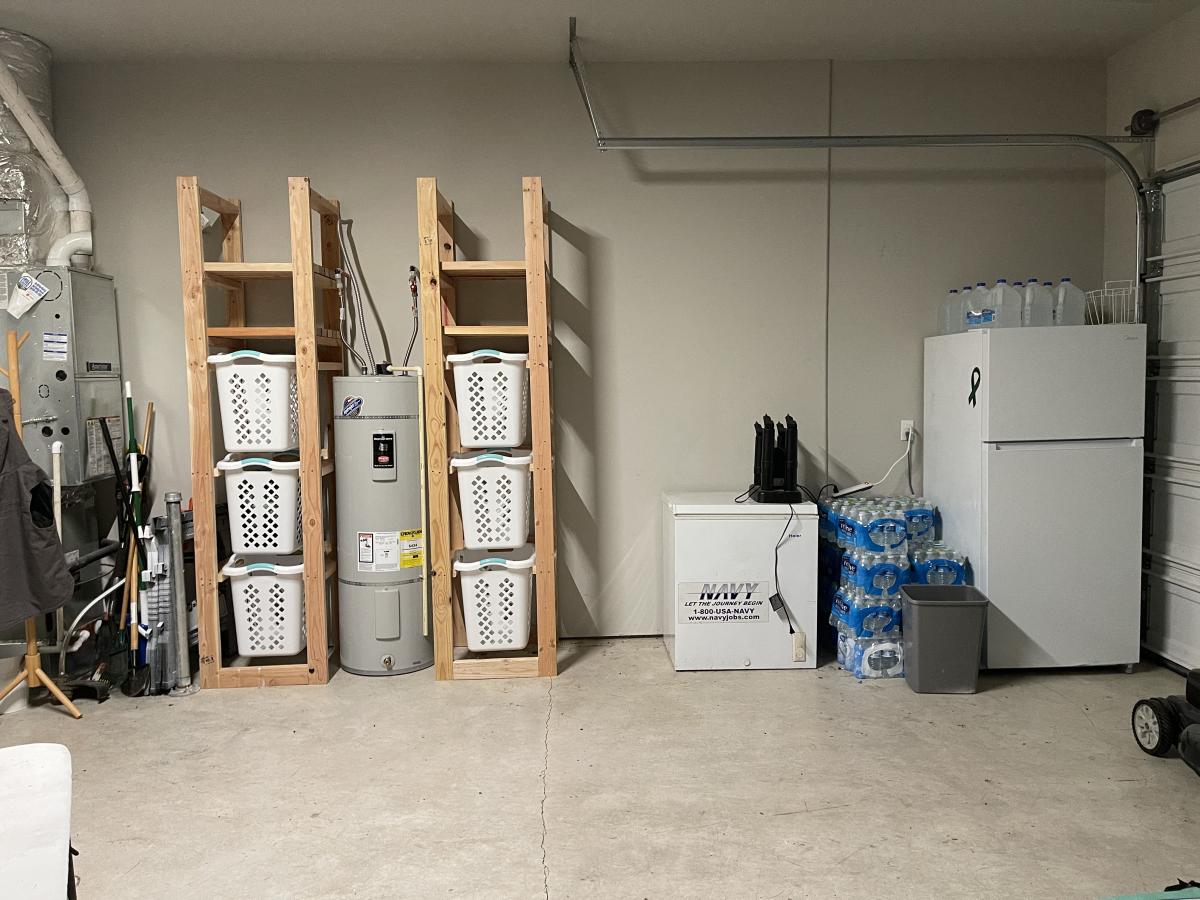
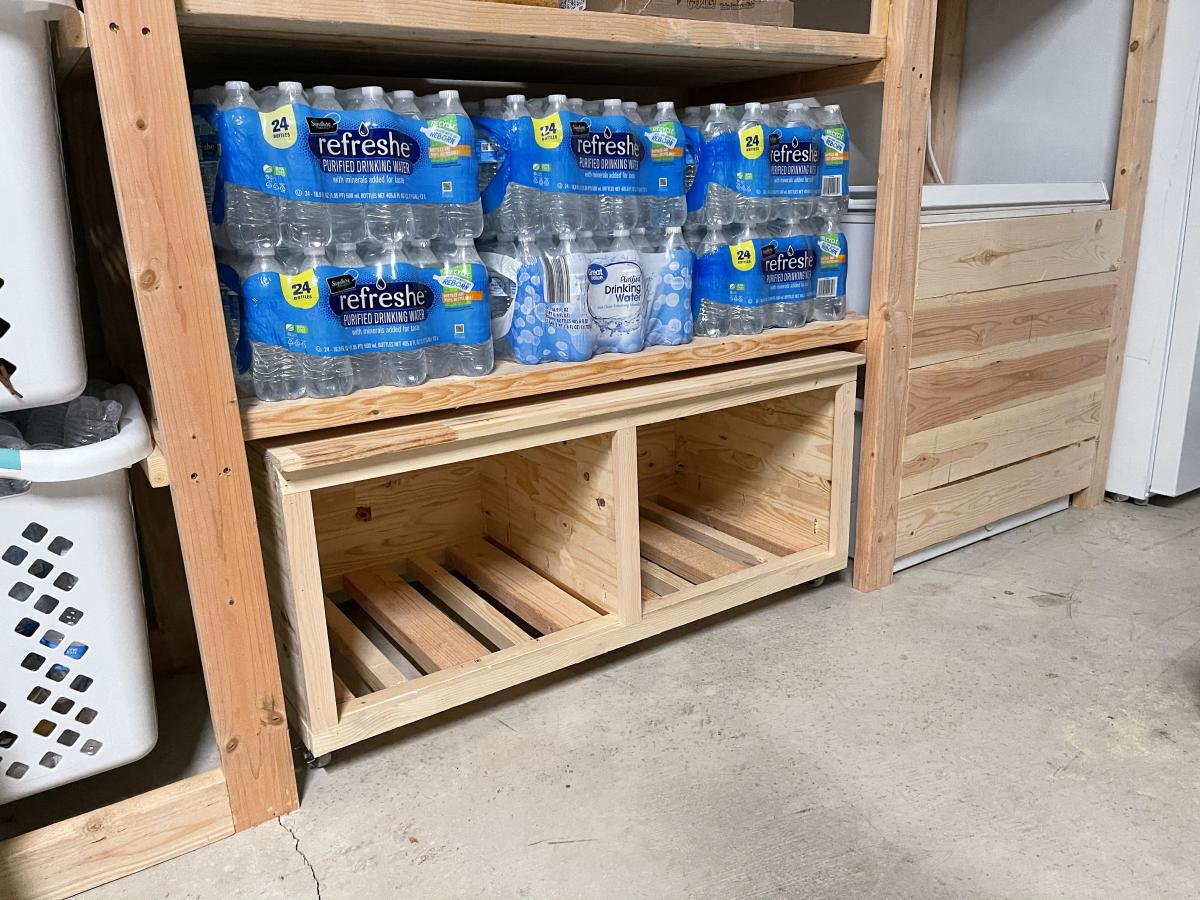
Easy Garage Shelving
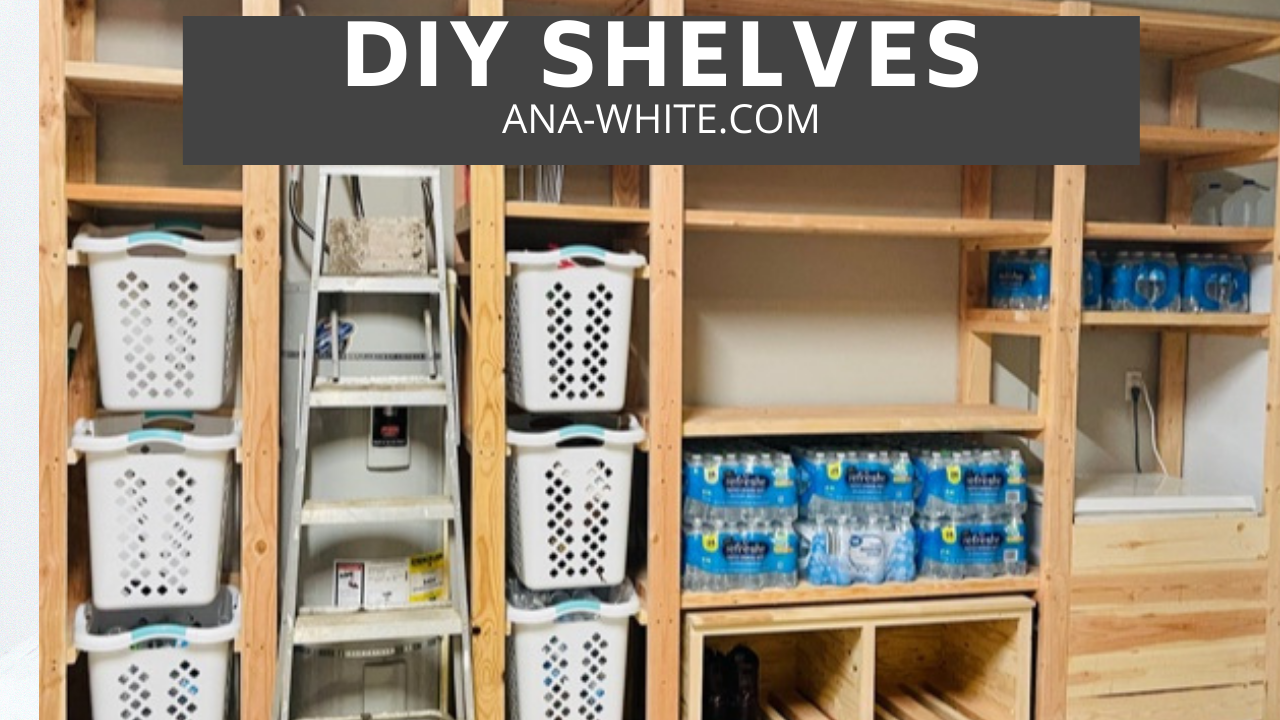
I used Ana's Freestanding Shelf plan and customized it to fit my needs. I incorporated laundry and recycle storage, a rolling bench and built in for our chest freezer. If you want to see it being built with some added tips, that video is available here https://www.youtube.com/watch?v=N8w7XGiVMbs&t=258s
Built from Plan(s)
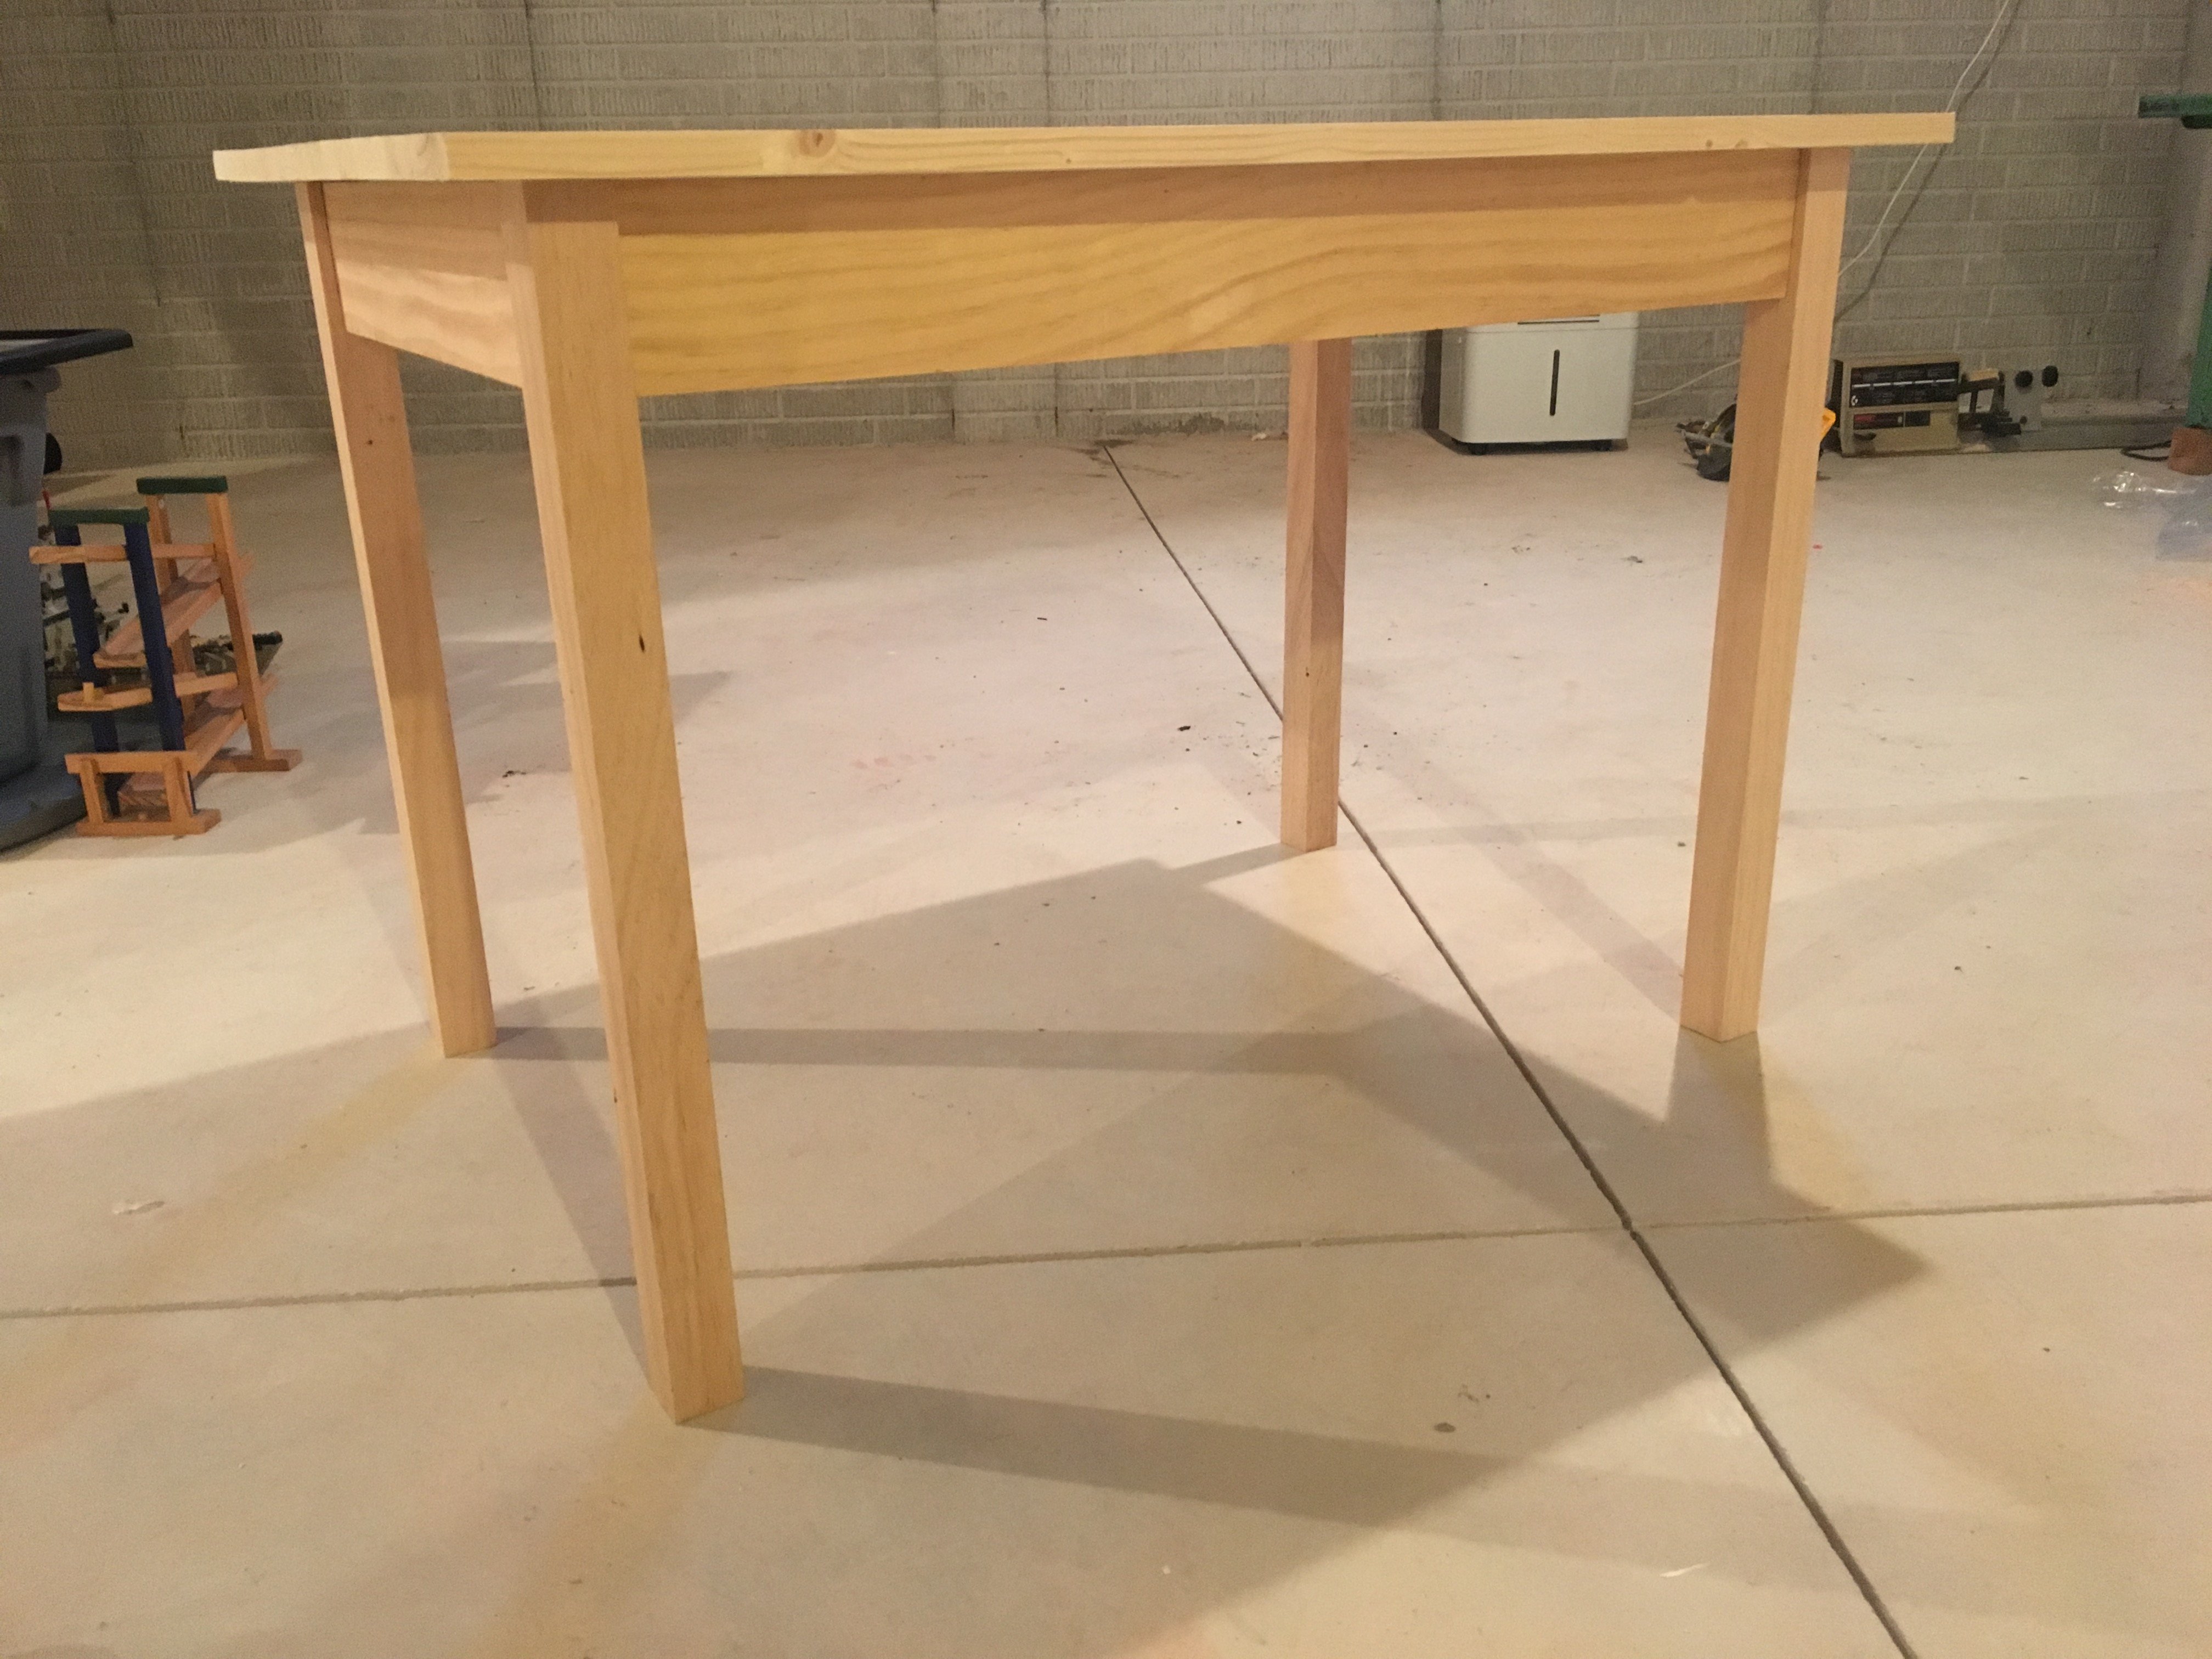
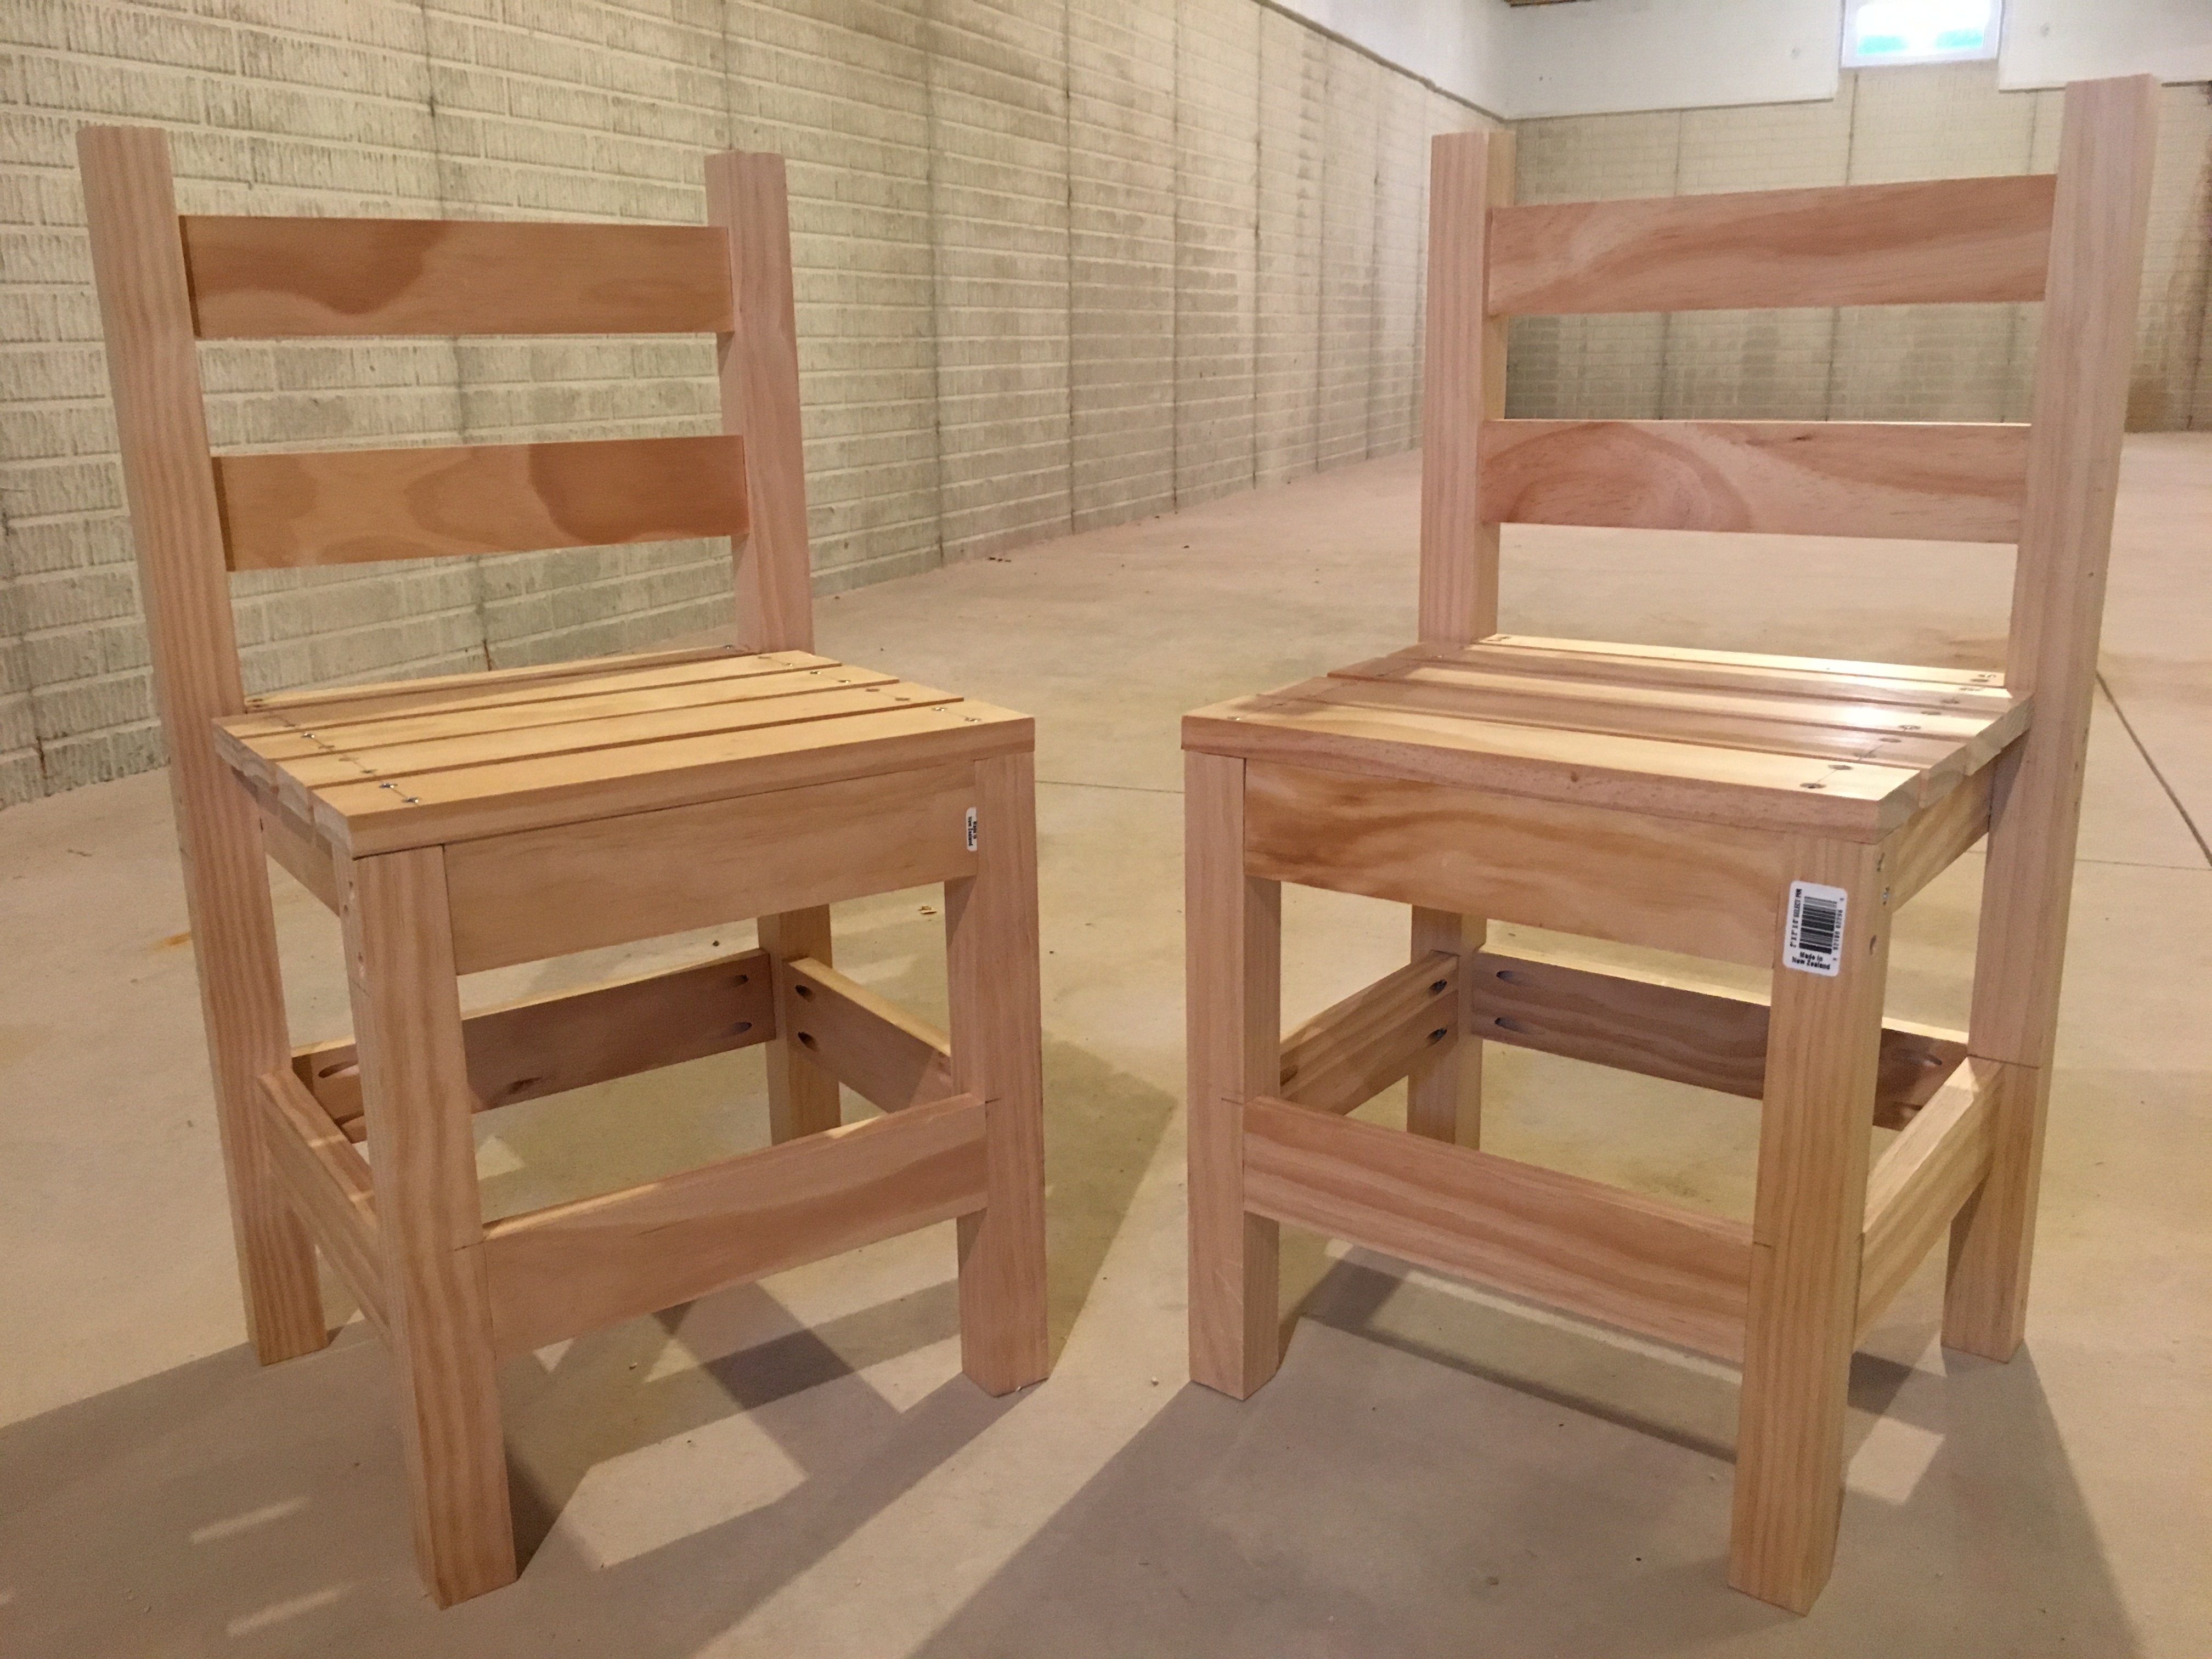
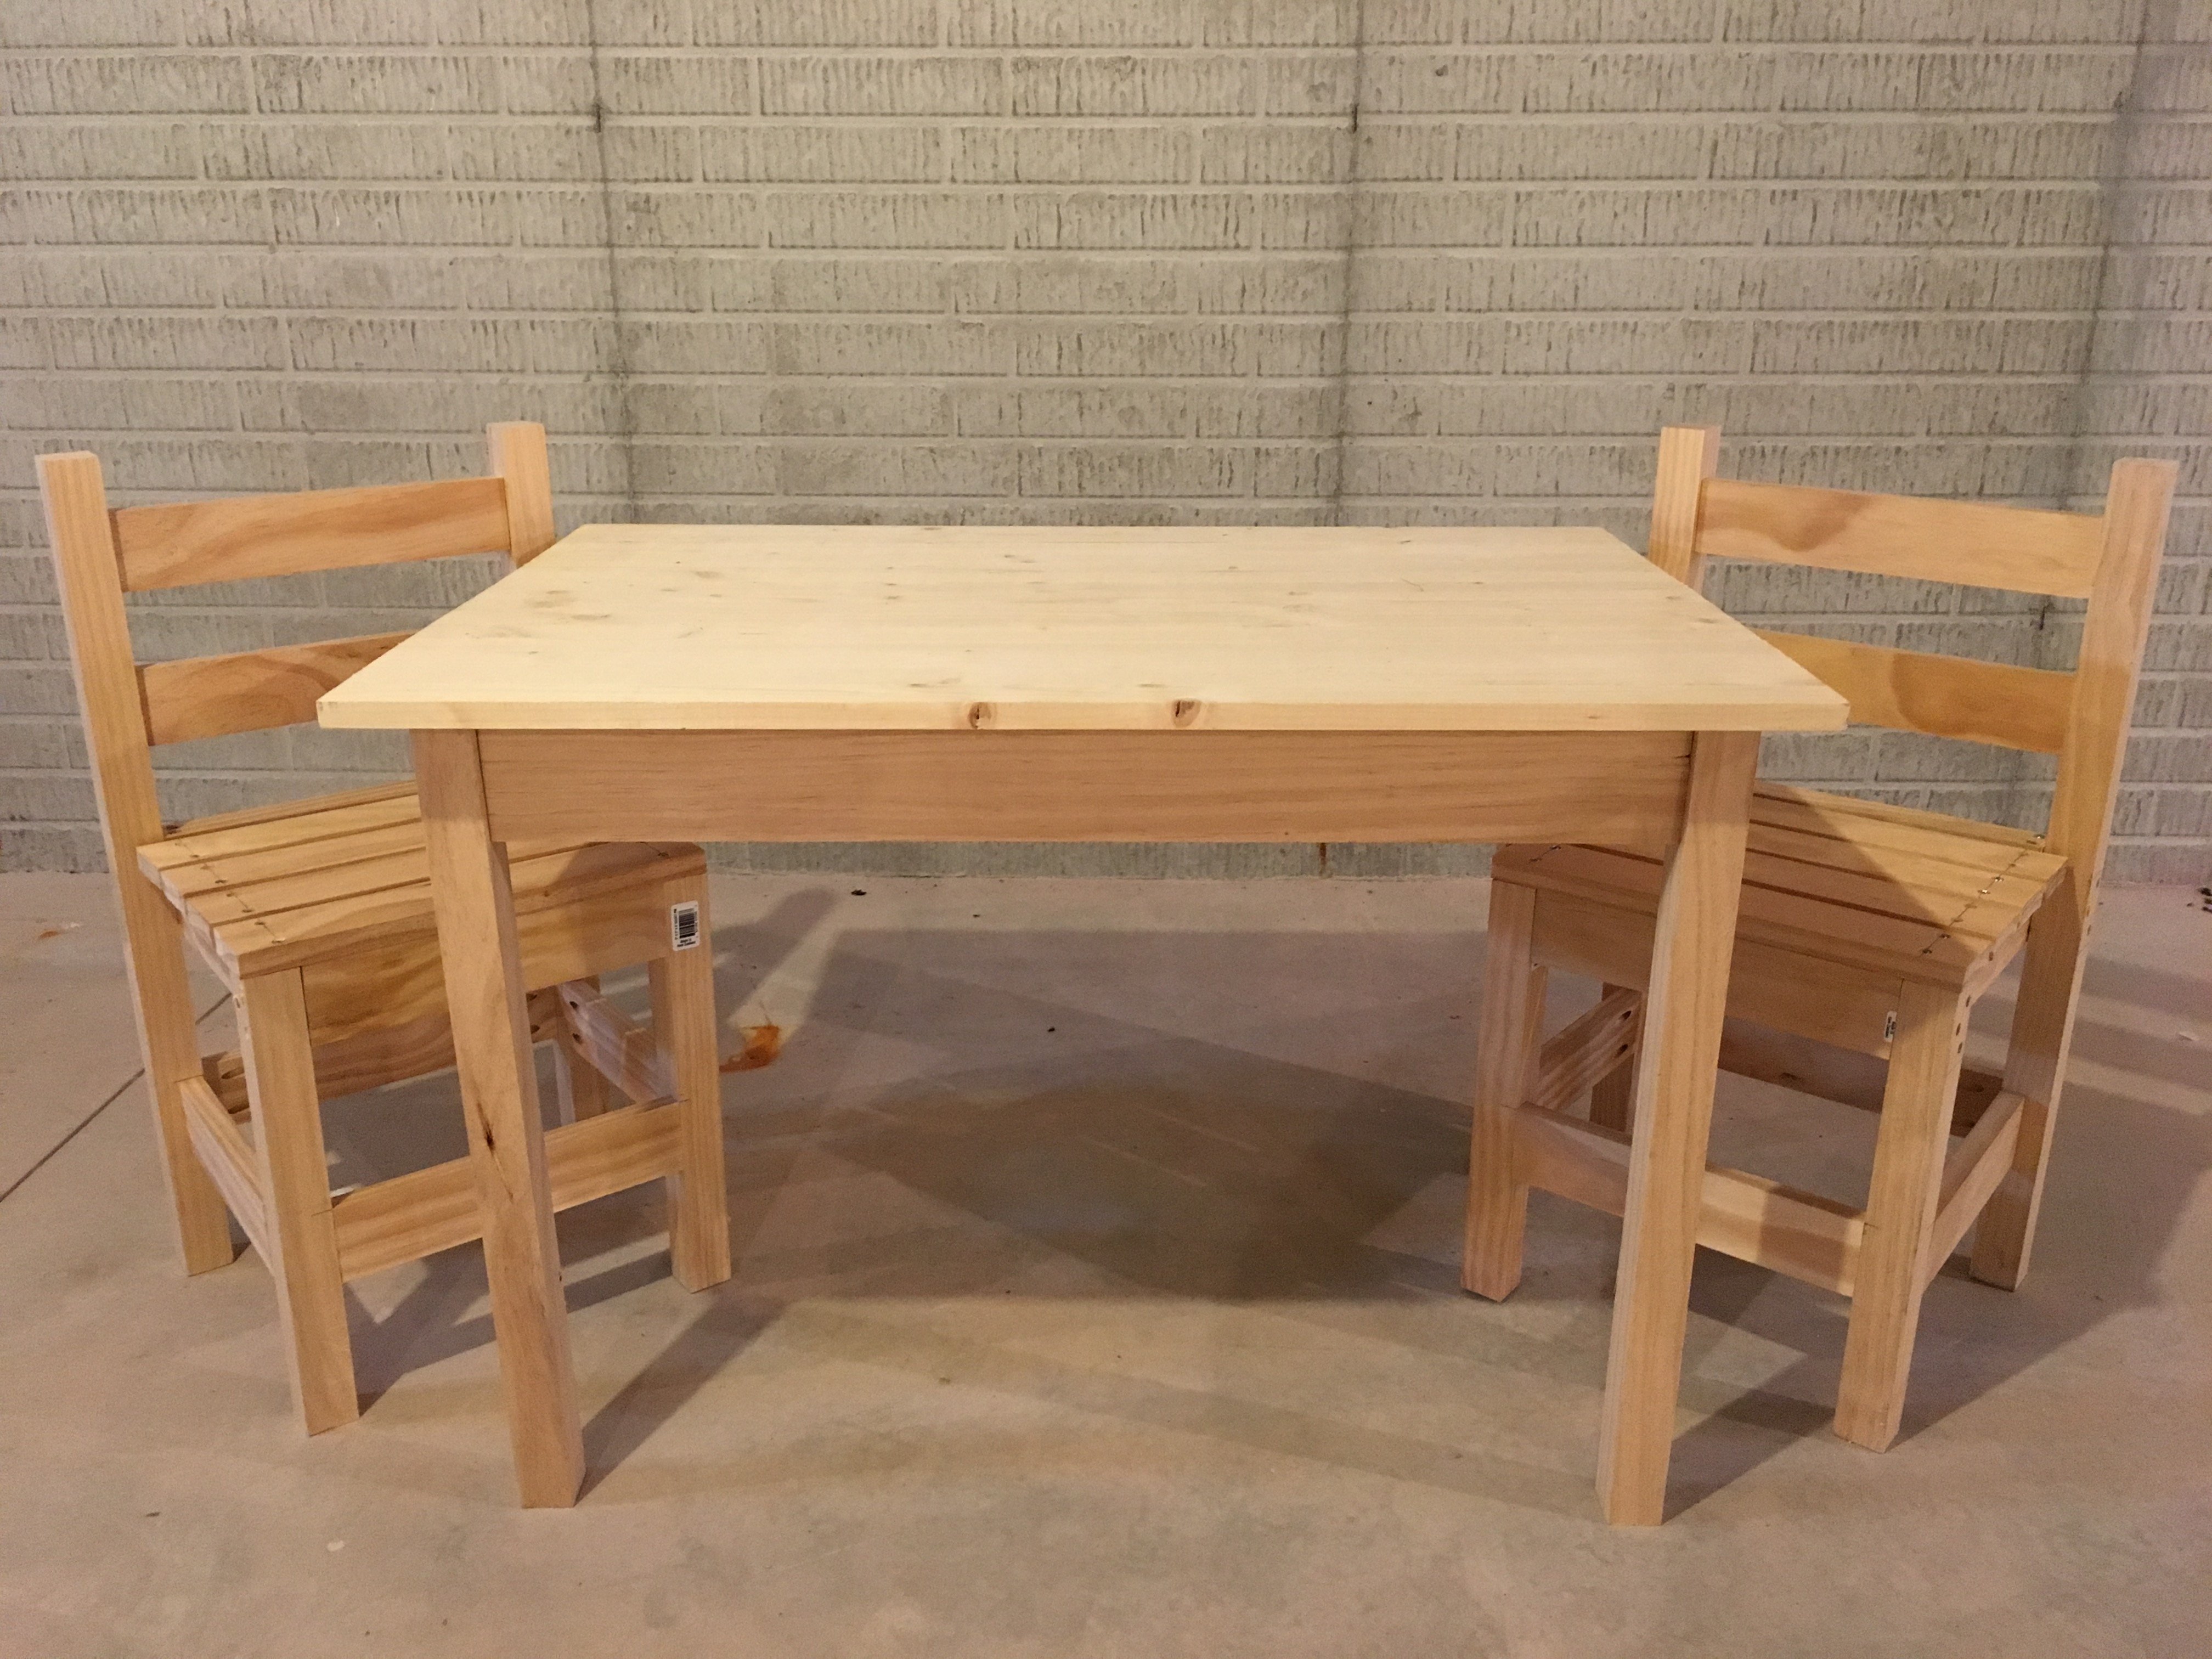
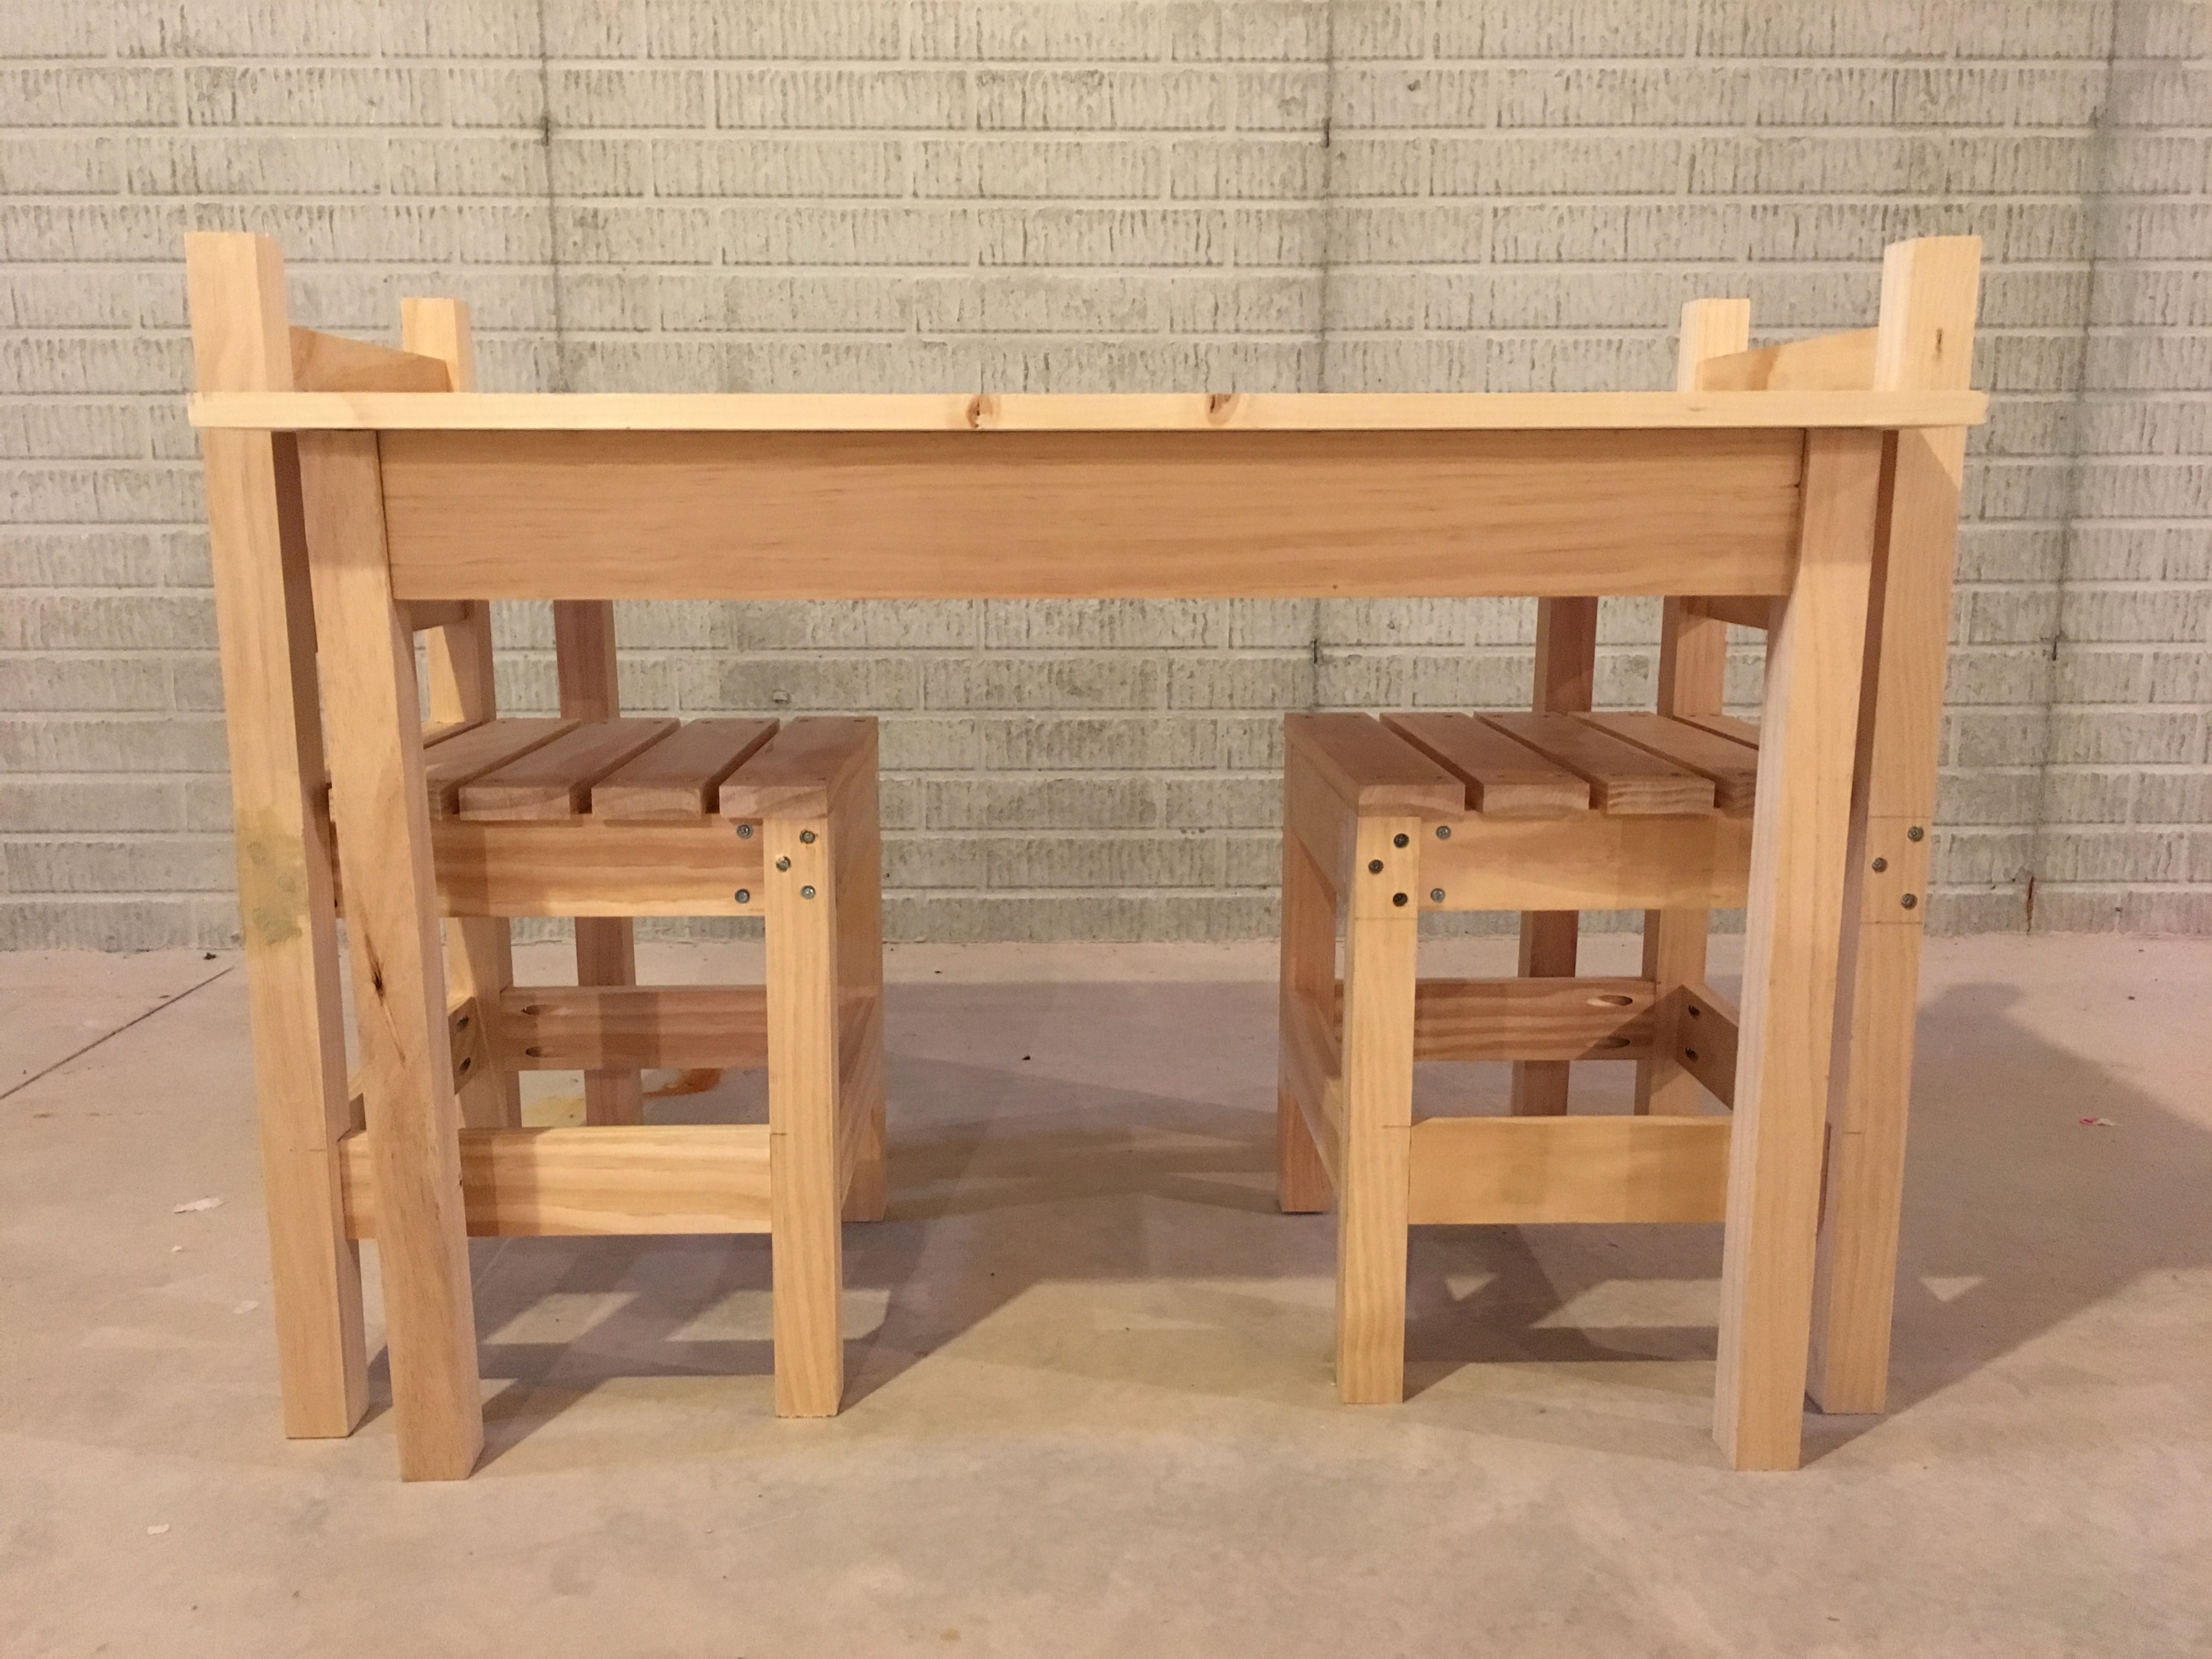
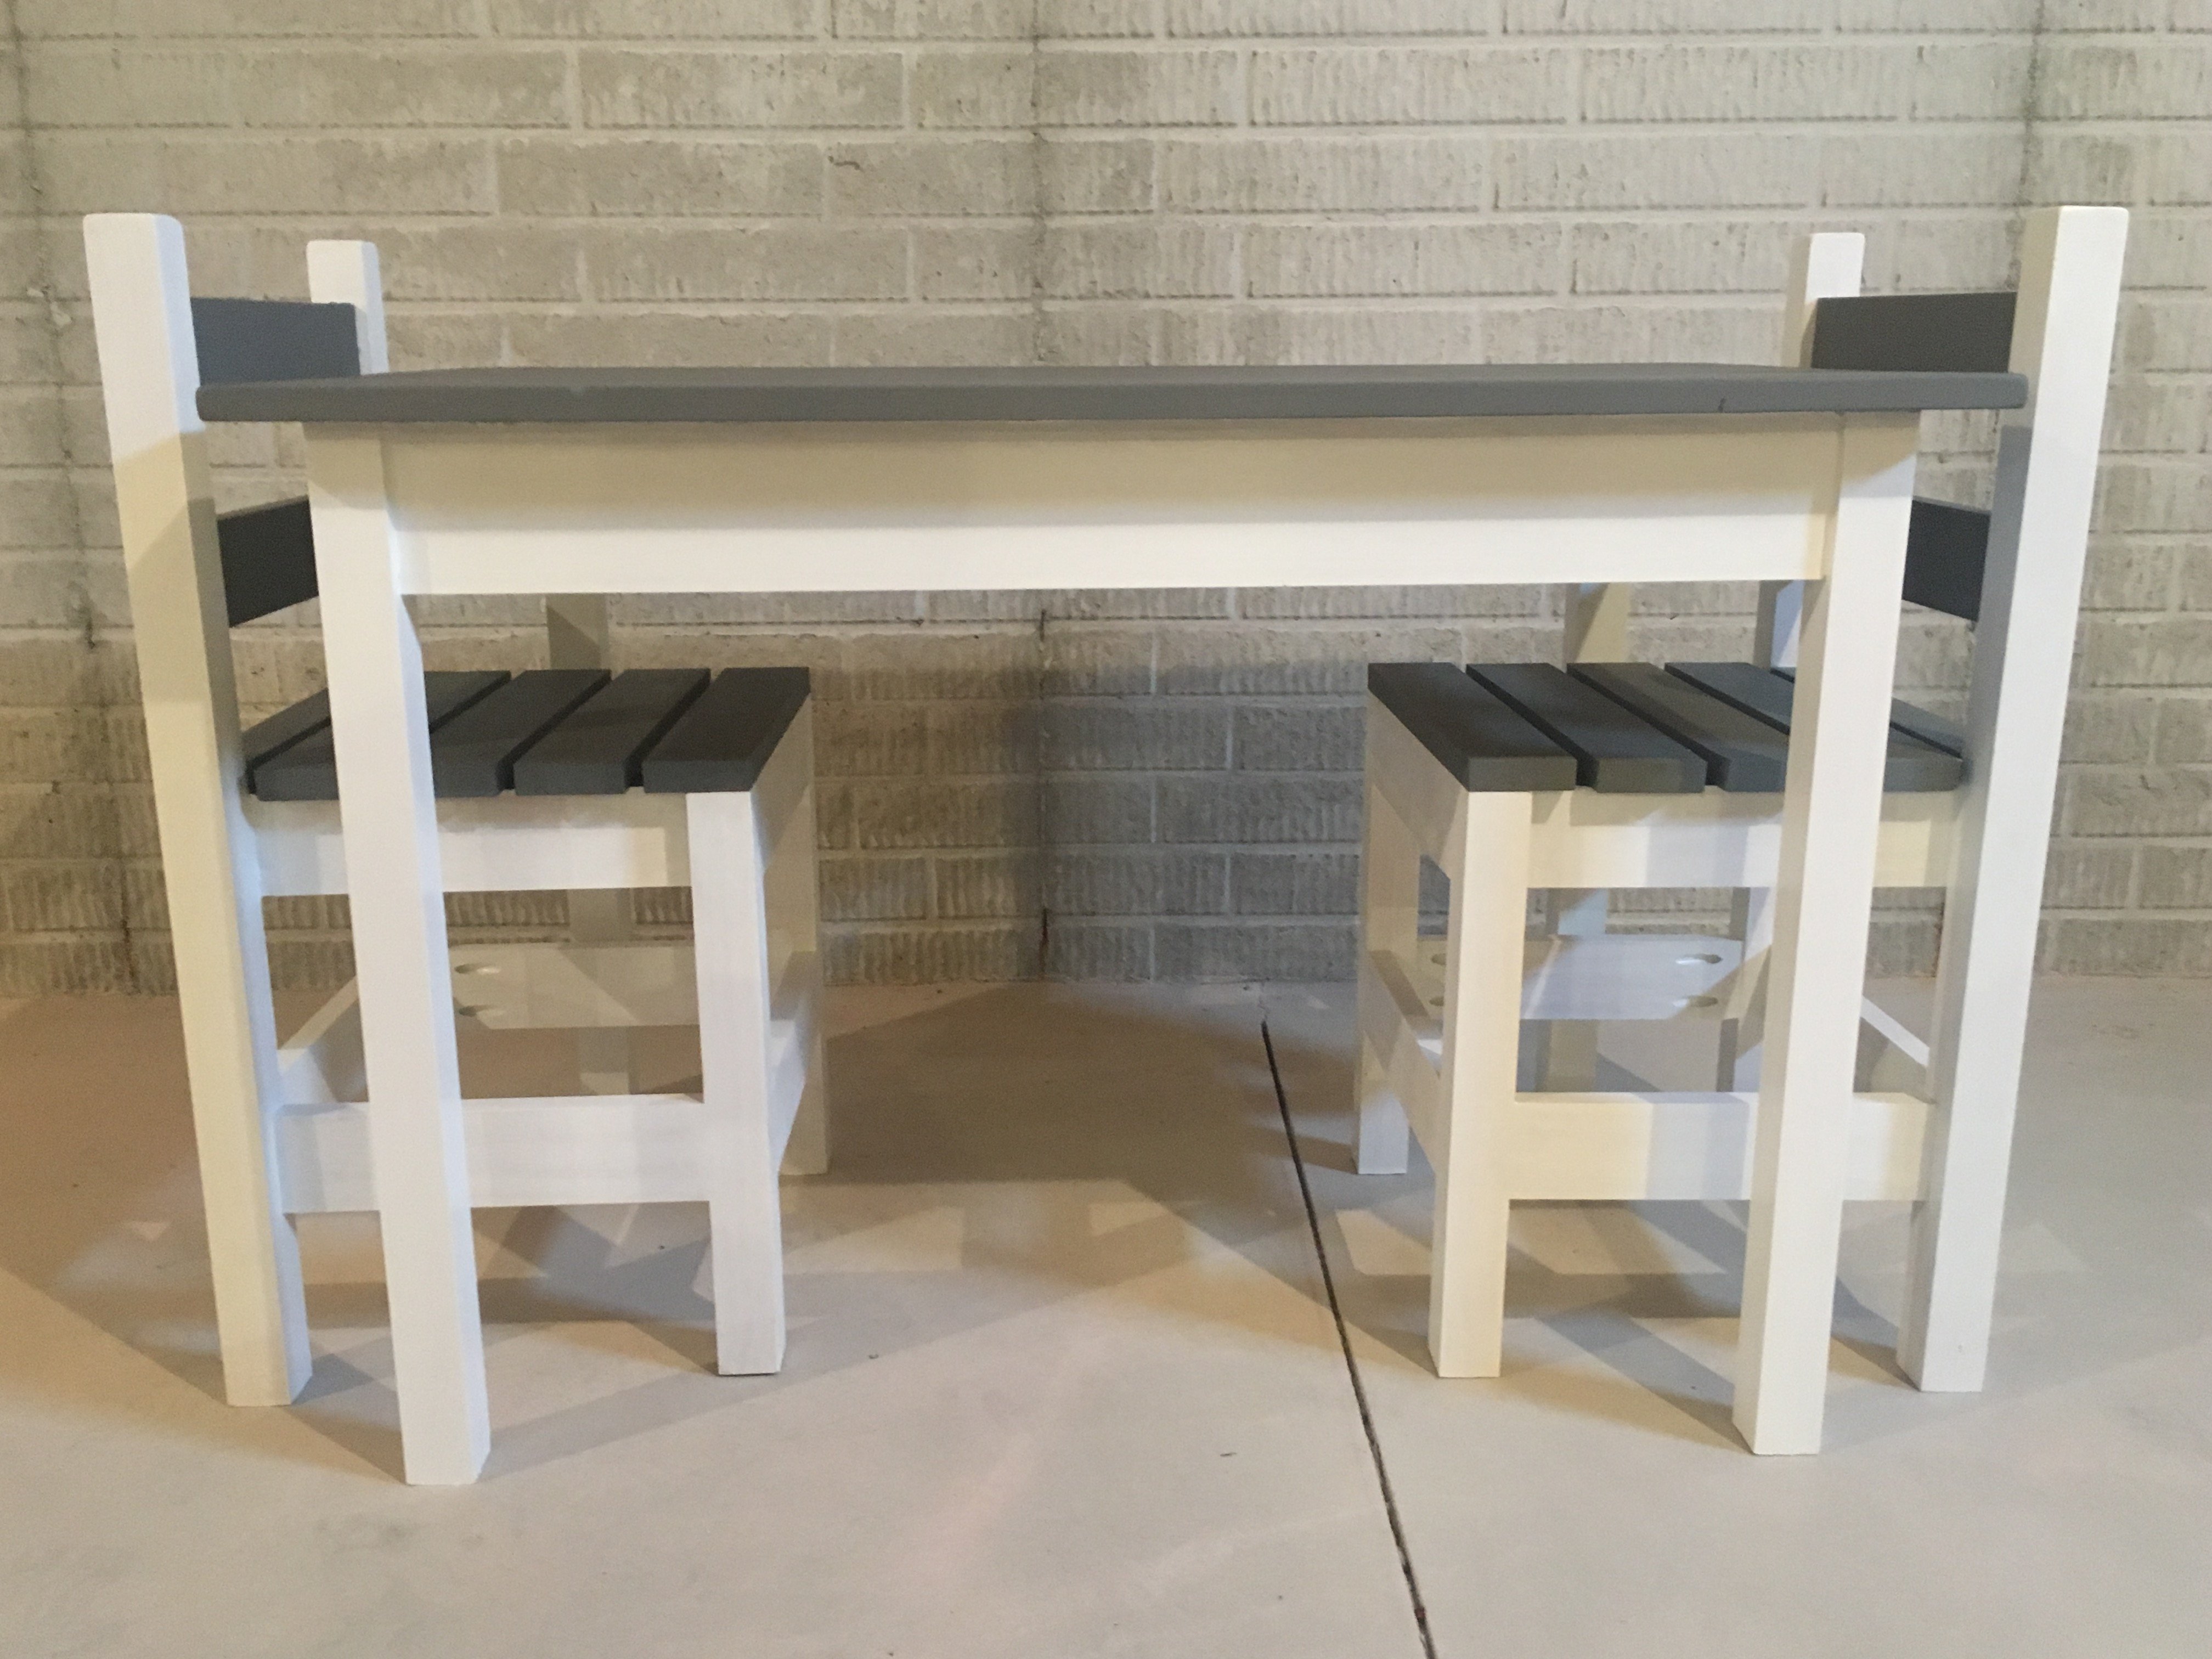
Children's Table and Chairs
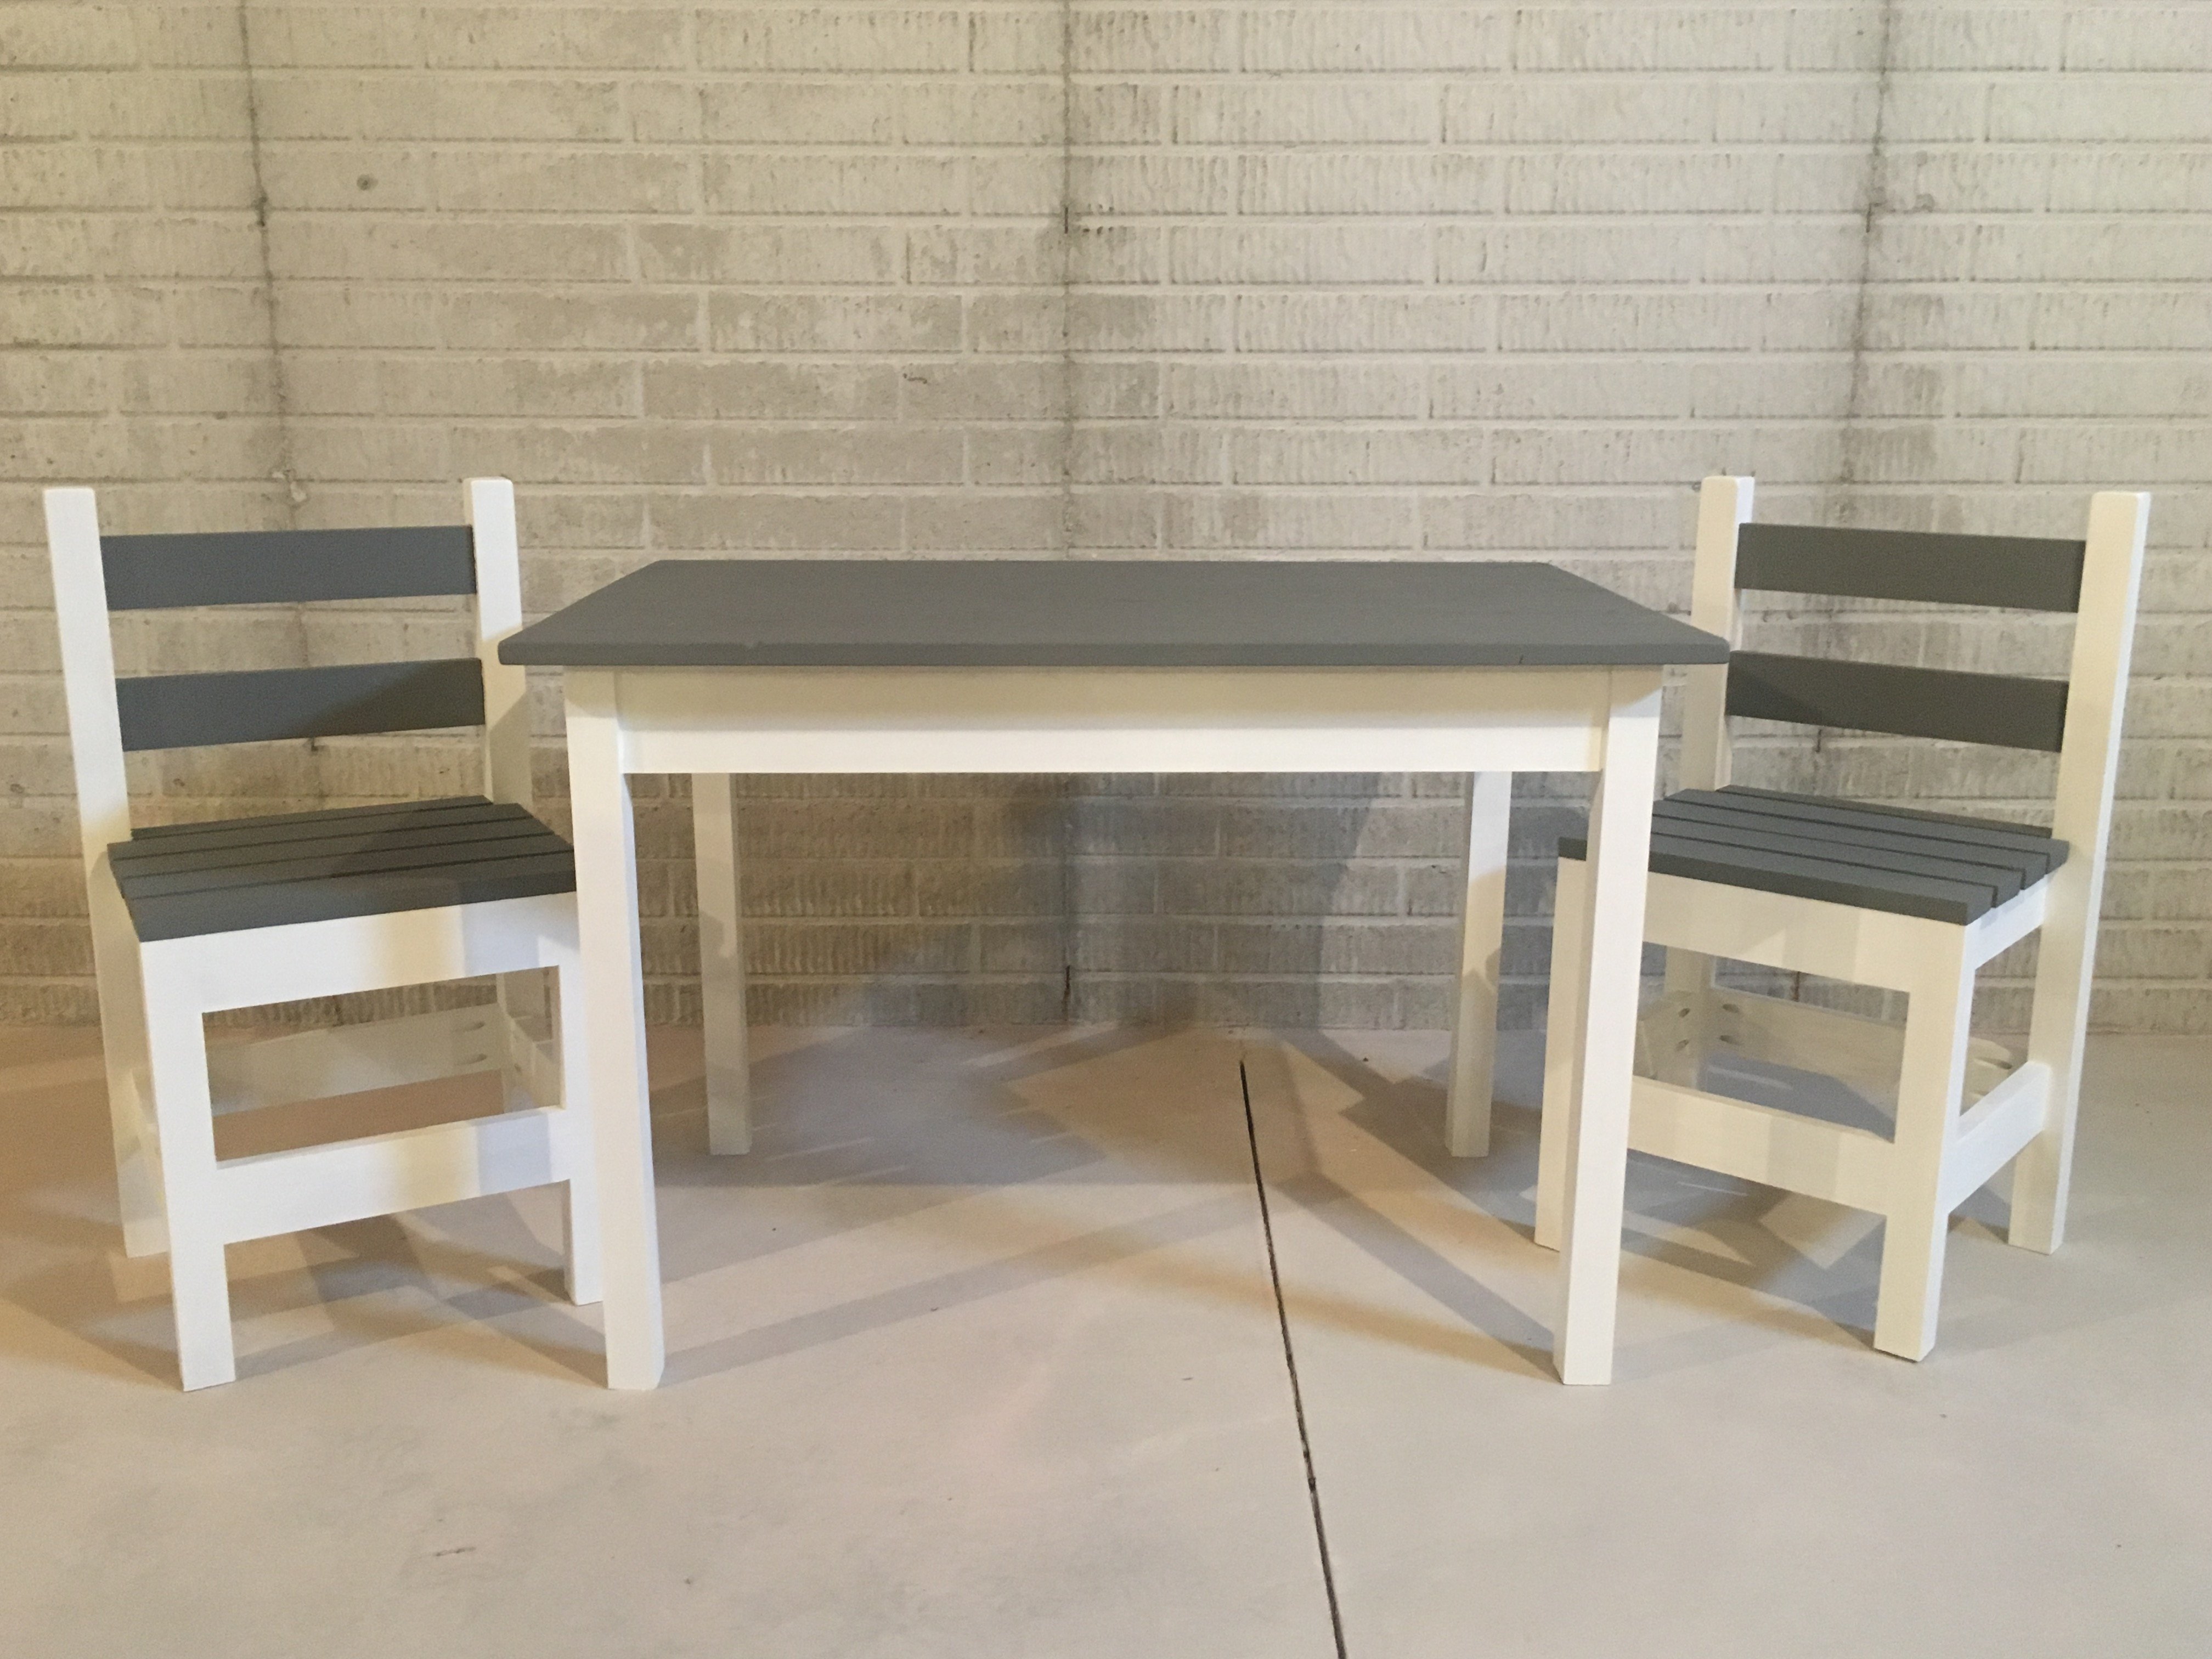
I made this table and chairs for my 1 year old nephew. He is still a little small for it but the table and chairs are both very sturdy. The table top is a one piece, 24 x 36 ,edge glued pine board. I used the one piece table top as an alternative to screwing the 3 boards together. I followed the plans for the table for the most part. As for the chairs, I followed the plan to build the seat base. For the legs of the chairs I took advise from carongirls' table and chair brag post and used 2x2's. I used 1x3's to stiffen the chair legs. I also lengthened the table legs and chair legs by 2 inches.
Built from Plan(s)
Estimated Cost
Table and Chairs - $50-70
Estimated Time Investment
Weekend Project (10-20 Hours)
Finish Used
White and Gray Paint
Recommended Skill Level
Beginner
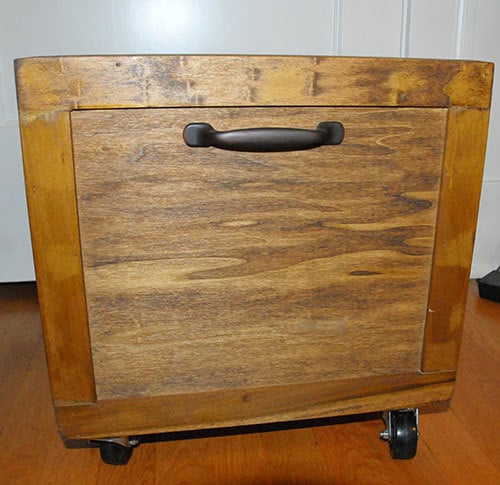
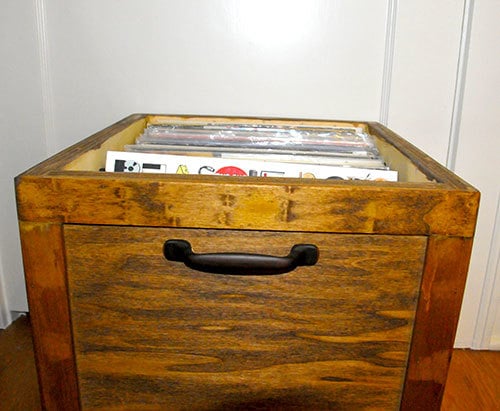
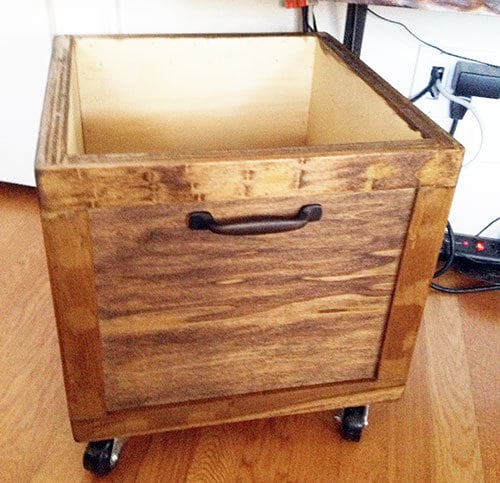
DIY LP Vinyl Record Storage Box with Wheels
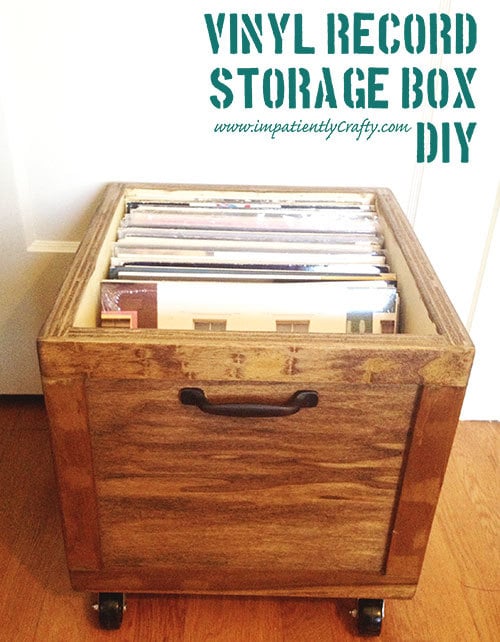
I have to say, there is something about listening to music on vinyl that just gives me the warm fuzzies! A little bit of crackle, fuzz and hum.. physically having to flip over the record to get to the next side, & listening to an album start to finish just has a nostalgic feel to me and I love it.
We’ve started quite the collection of LP’s and quickly found we needed some good storage for them. Since vinyl isn’t exactly the most popular form for listening to music, I just had to make my own.
I knew it had to have 3 things.. size to fit, wheels and easy of searching through records.
I had some scrap poplar plywood lying around, and just had to purchase some casters and furring strips to frame out the box. I even had an extra cabinet handle laying around to use.
I made it 12 inches wide by 16 inches deep, framed it out shaker style with furring strips and then stained it.. added casters and a handle ;)
Estimated Cost
$18
Estimated Time Investment
Afternoon Project (3-6 Hours)
Finish Used
minwax dark walnut stain and 2 coats of matte finish polycrylic
Recommended Skill Level
Intermediate
Comments

Tue, 07/09/2013 - 10:59
Cute upcycling
I love how you appreciate vinyls and gives things you have on hand new purpose. This storage box is nicely done.
I looked at your blog and went straight to the Upcycle tab, since that's where my interest lies too. I love seeing a "pile of useless" restored to use. =D
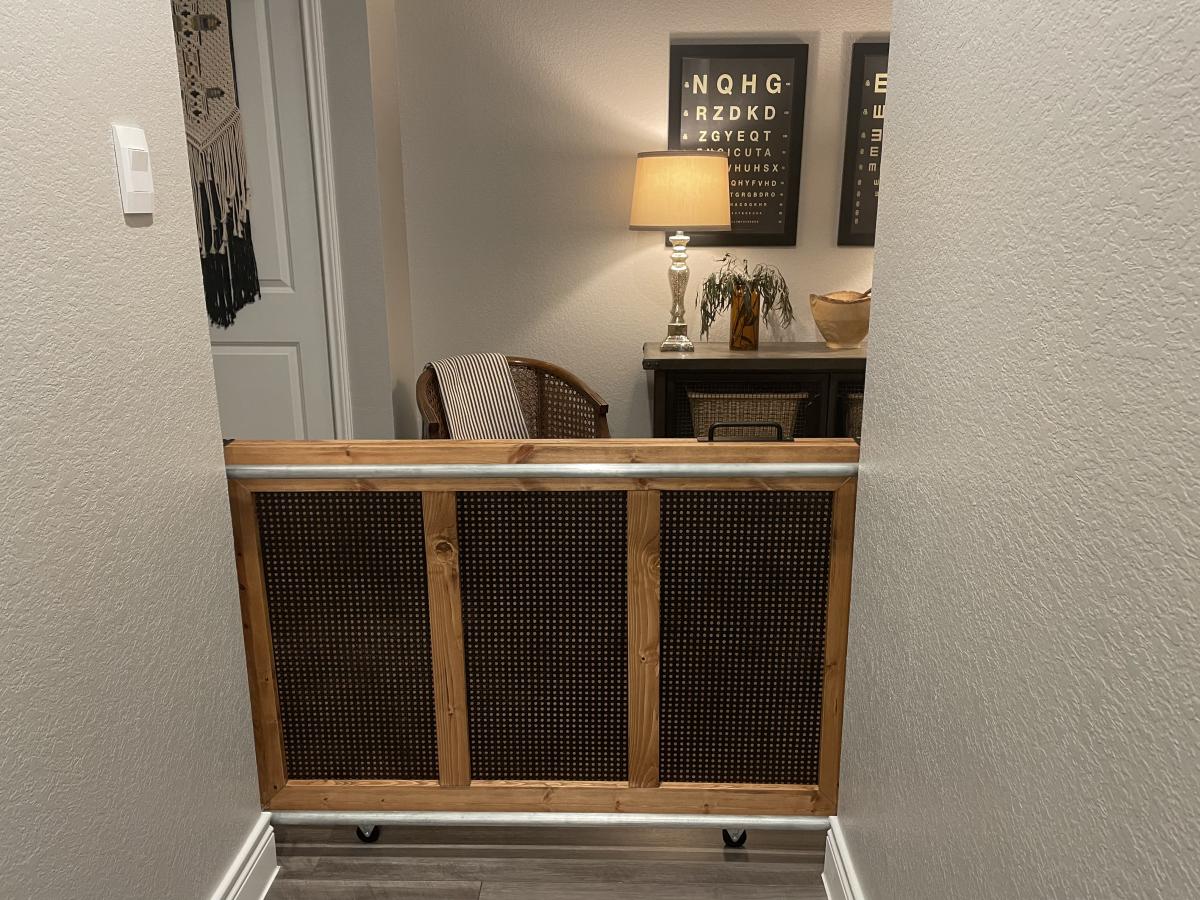
Sliding Pet/Baby Gate
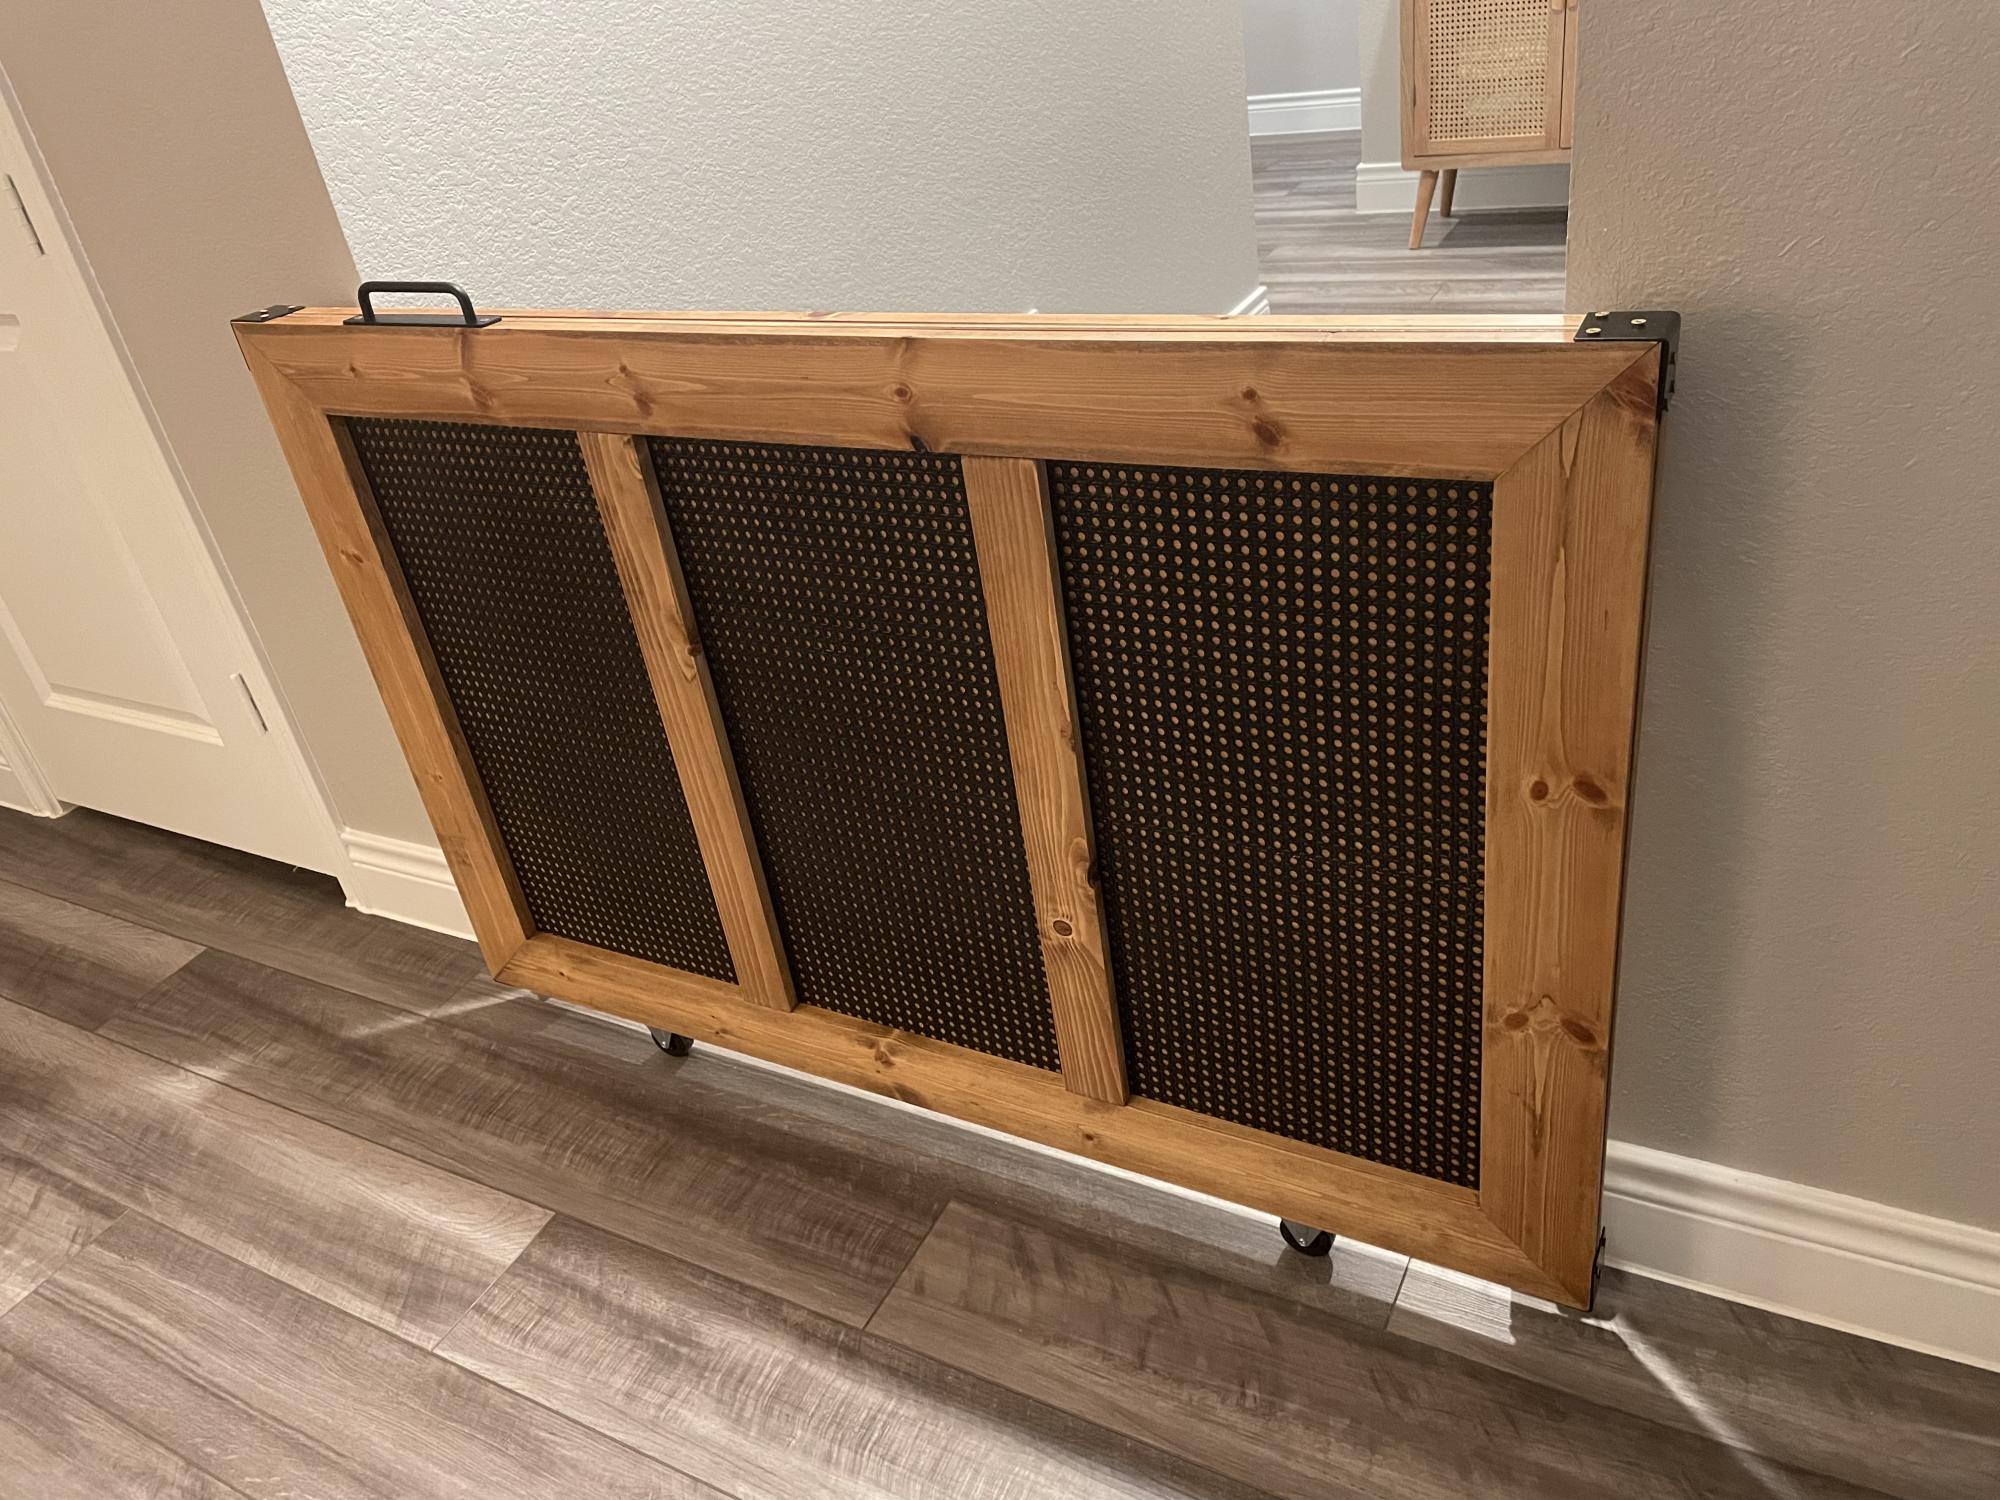
We desperately needed a gate to keep our pets from accessing the rooms, with carpet, in our new home. We originally thought about building a full barn door but, the security system was in the way and it wouldn’t have allowed the light to pass through to our dark entryway anyway. We definitely wanted to steer away from the “barn door looking” gate we did at our last home and wanted to try something more timeless with the sprayed, black caning. We have a very eclectic style. Very vintage industrial, MCM, with pops of RH glam and a touch of BOHO. Sounds confusing but, I needed this gate to take the pressure off of trends we didn’t quite fit in and be easy to use for my teenager. The gate leads to her bed/bath and the guest rooms. The mechanism is not my design but, it’s brilliant, especially for the industrial element to our home. Took me close to 4 days from start to finish. Lost my Kreg jig in our move and was so thankful to a stranger-neighbor that willingly let me borrow his on the curiosity of what exactly I was building. NGL, it felt pretty good when he said how impressed he was with the build. 💞
Built from Plan(s)
Comments
Tue, 02/28/2023 - 07:16
Incredible design!
This looks superb, thank you so much for sharing your super cool gate!
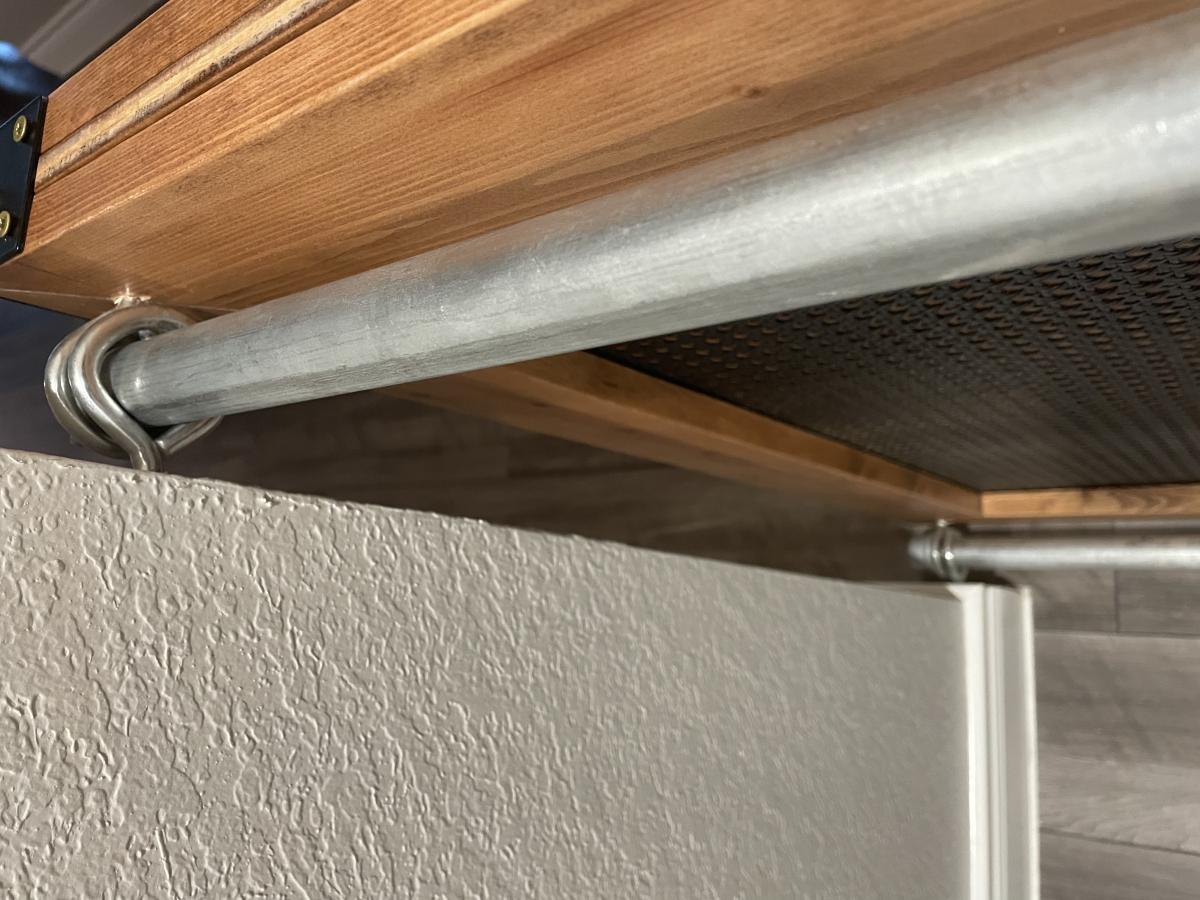
Wed, 09/18/2024 - 09:37
Hi! Can you show or tell me…
Hi! Can you show or tell me more about the mechanism? What does it look like on the other side? How has it held up?
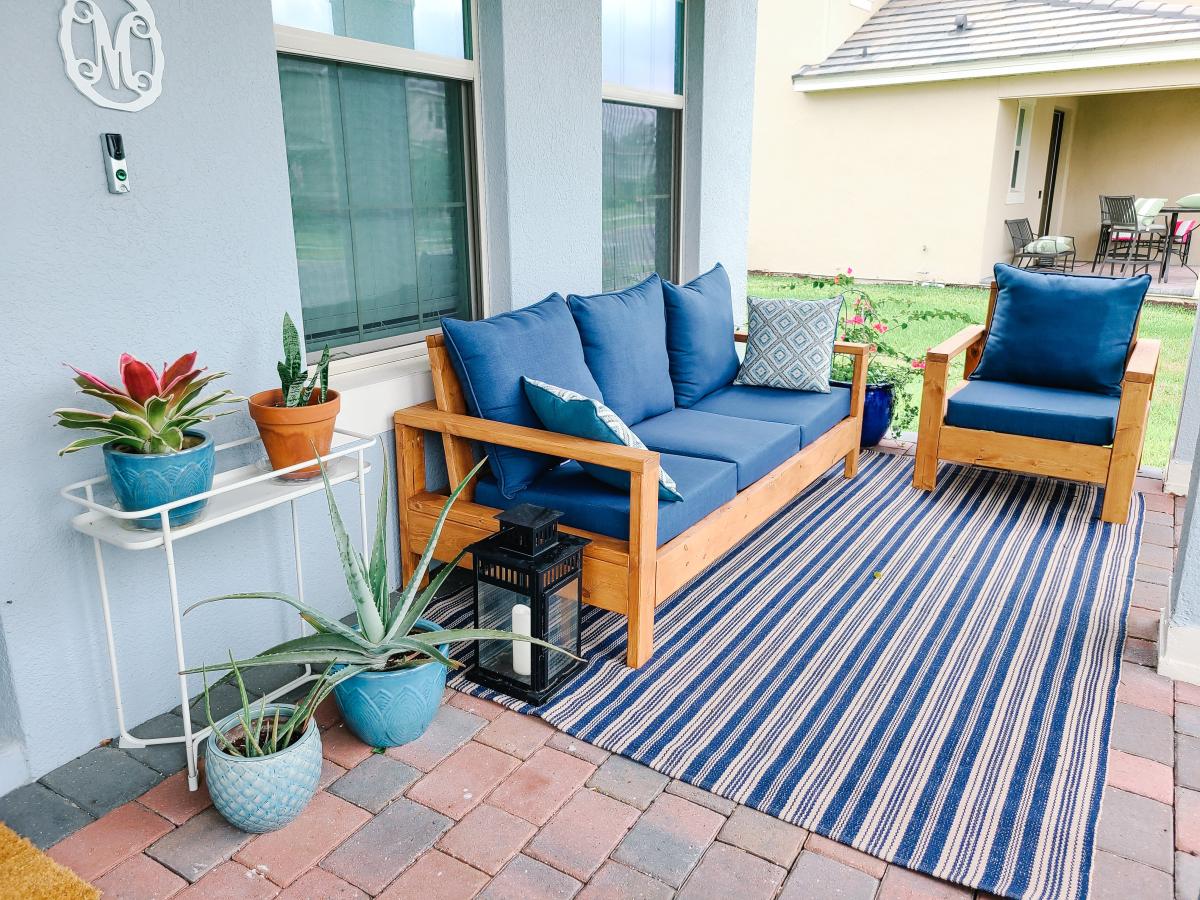
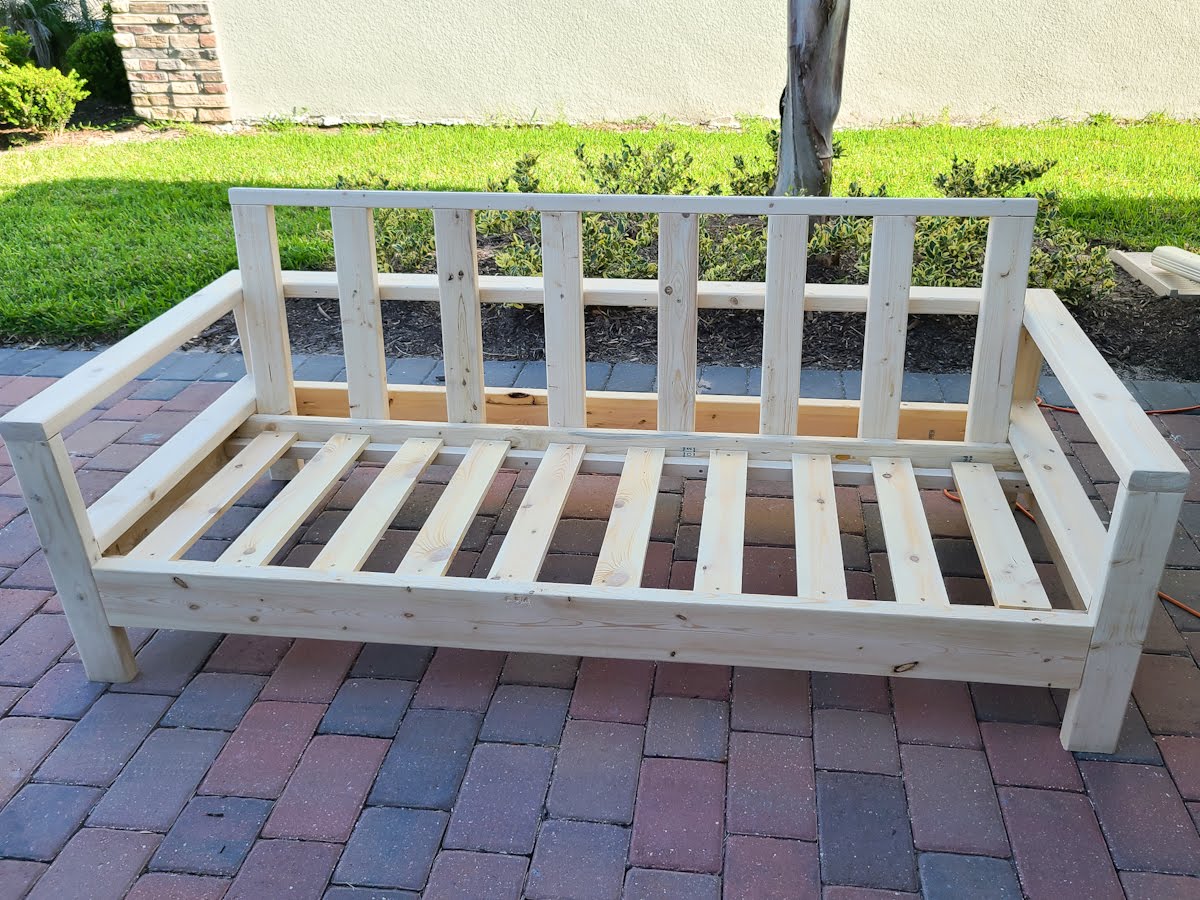
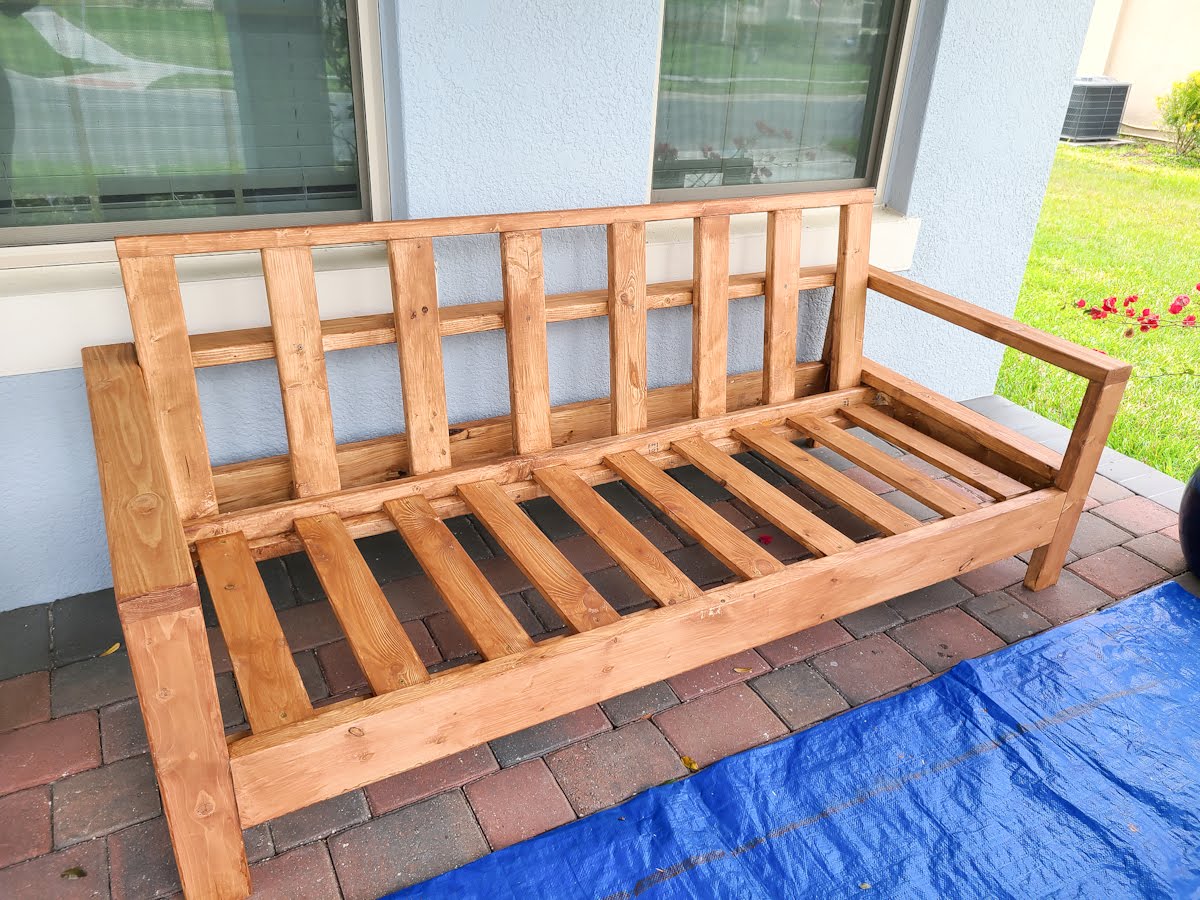
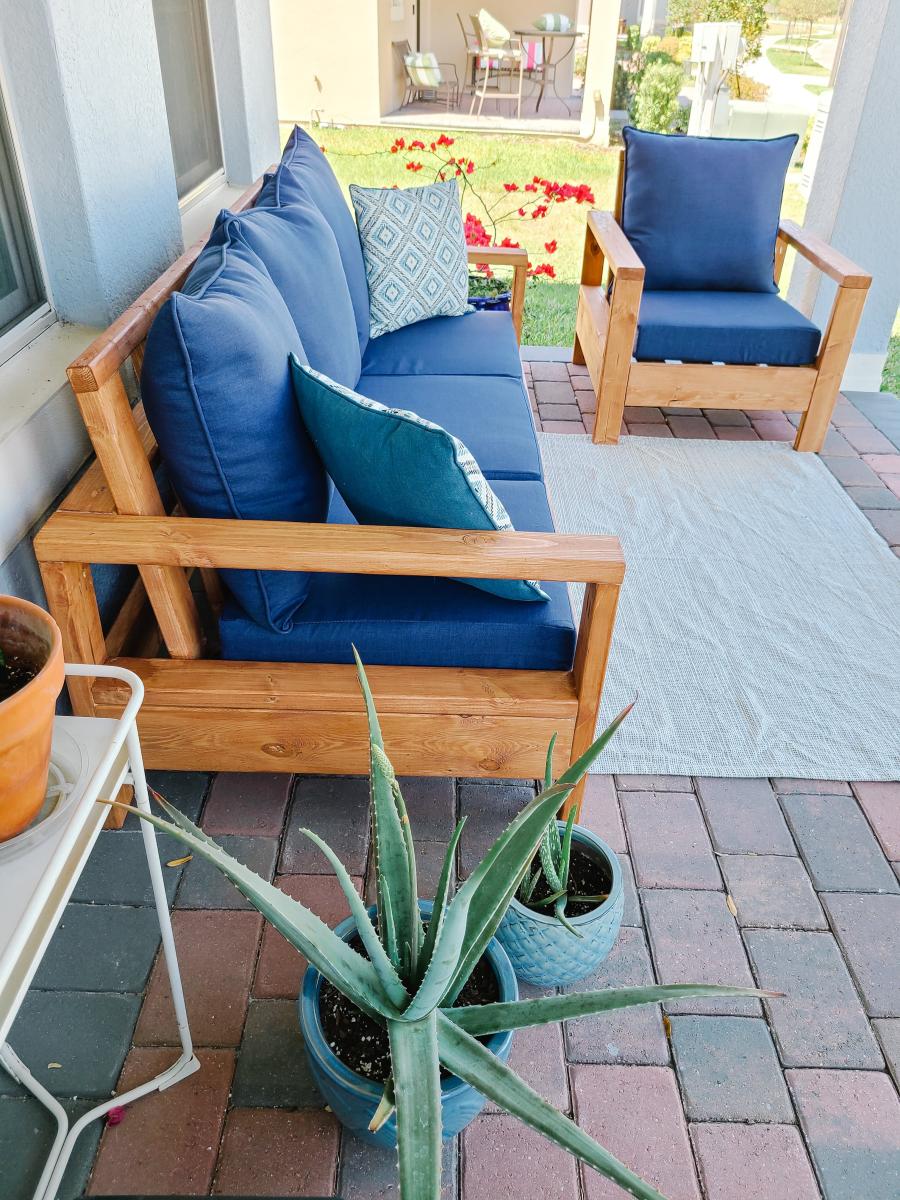
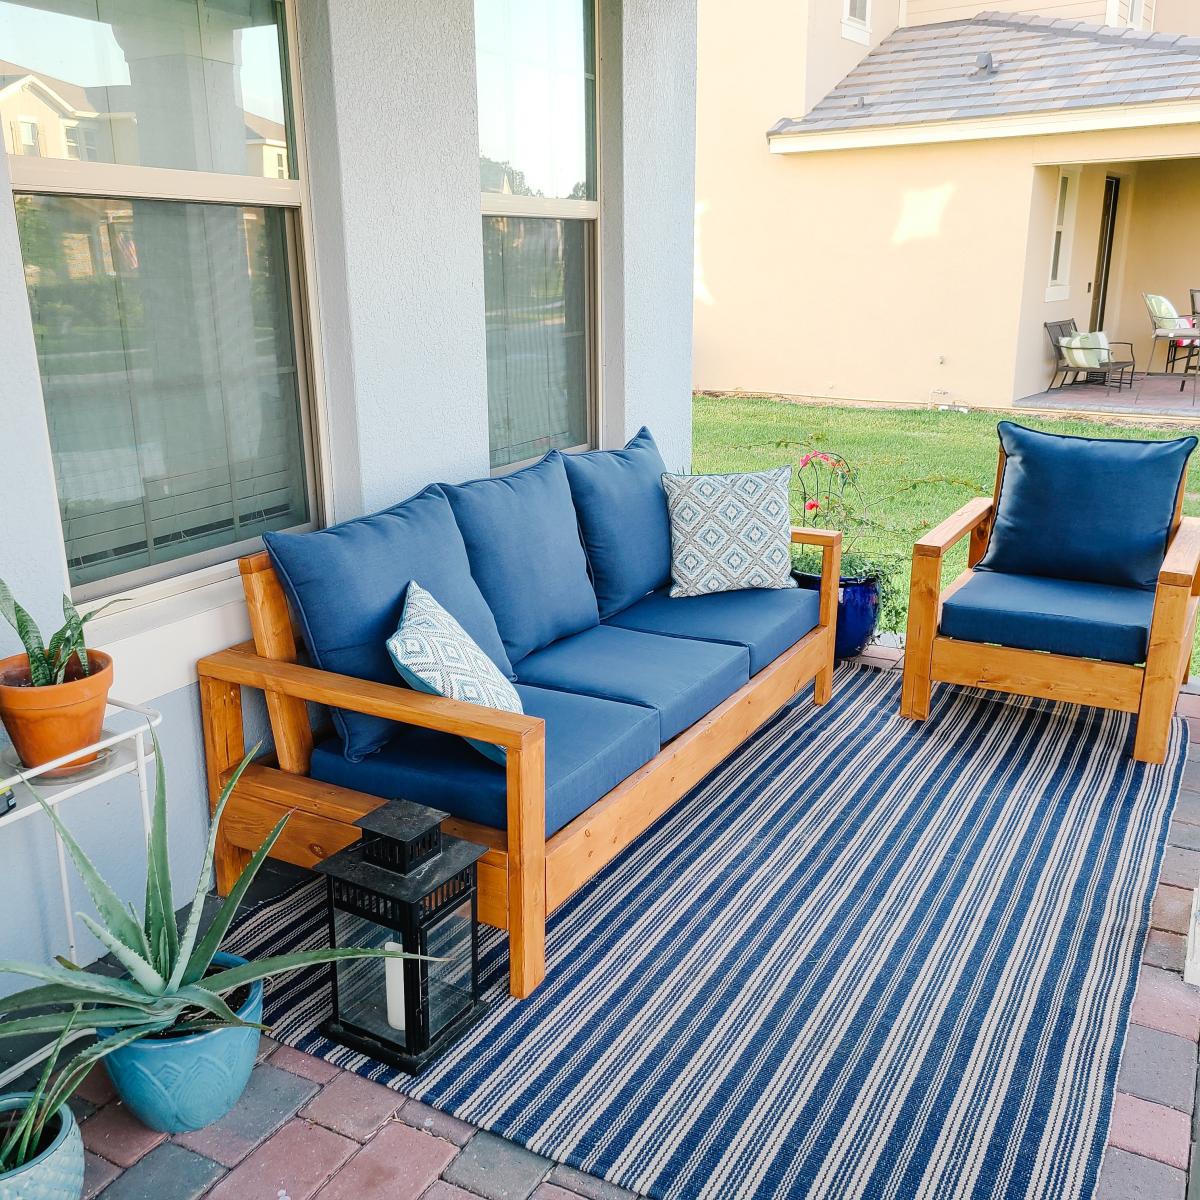
Outdoor Sofa and Chair with Slanted Back
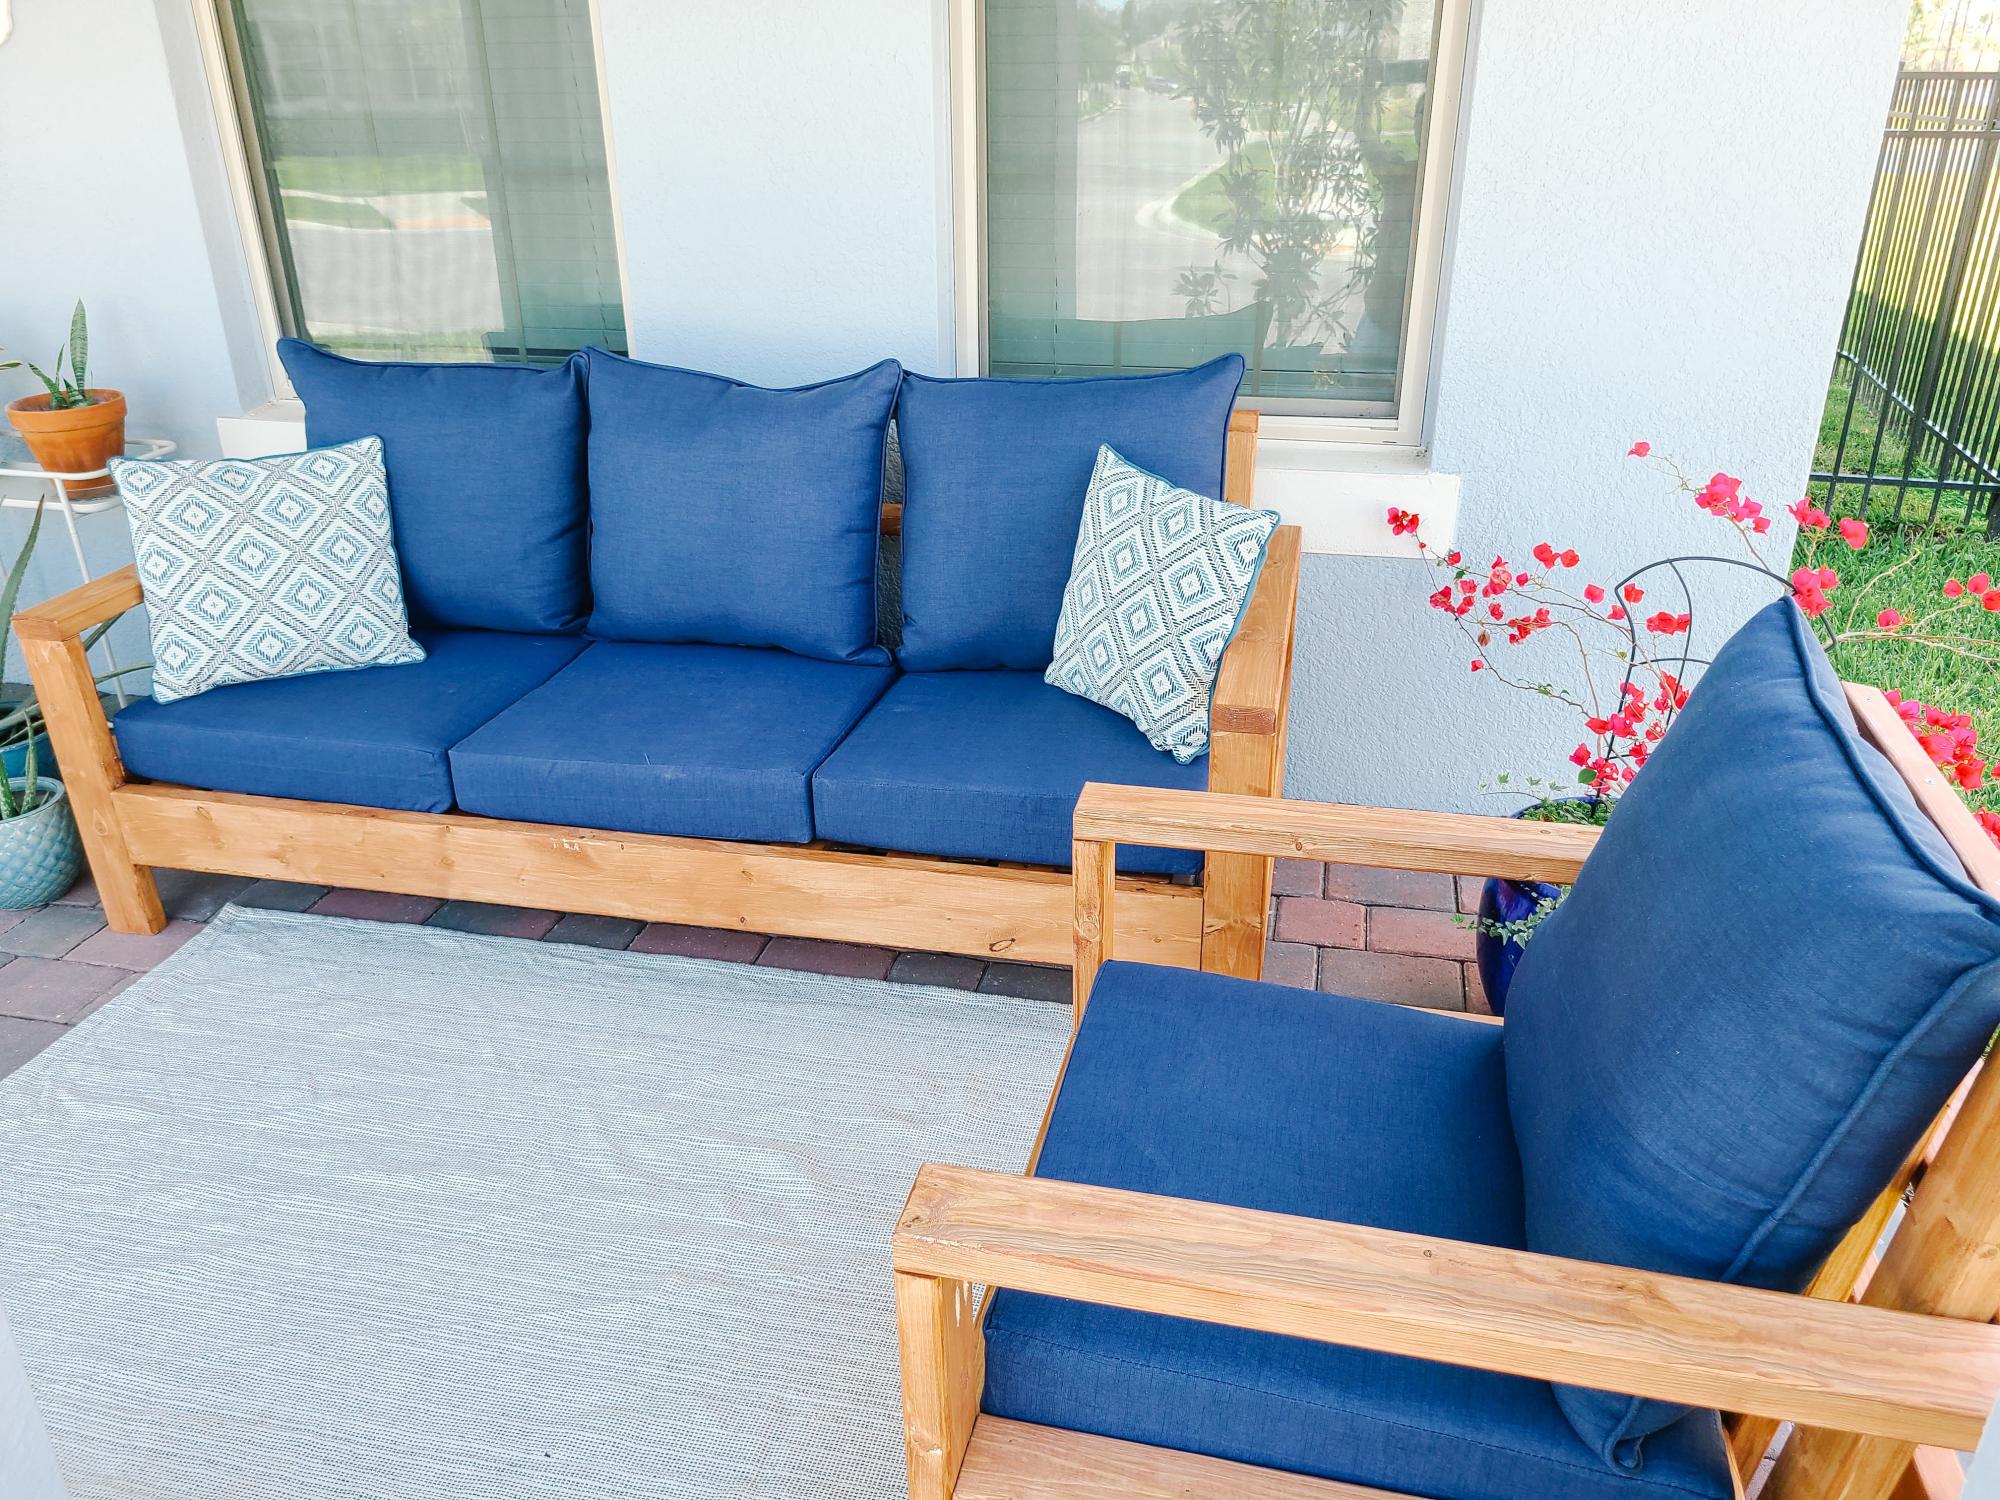
OK, I think this build may be my biggest project yet! It is definitely the heaviest. With the strong winds we can get here in Florida we needed substantial outdoor furniture.
I did make some modifications along the way measurement-wise so the sofa would fit my front porch better. All in all, this took 2 full days. I built the sofa first, stained it the next day and then decided (due to trying to get stain in all the nooks and crannies) to stain the chair pieces first before putting it together.
I am so happy with the results and so far, almost a year later, this furniture looks great and hasn't moved an inch in any of the thunderstorms we've had! Thank you Ana!!
Built from Plan(s)
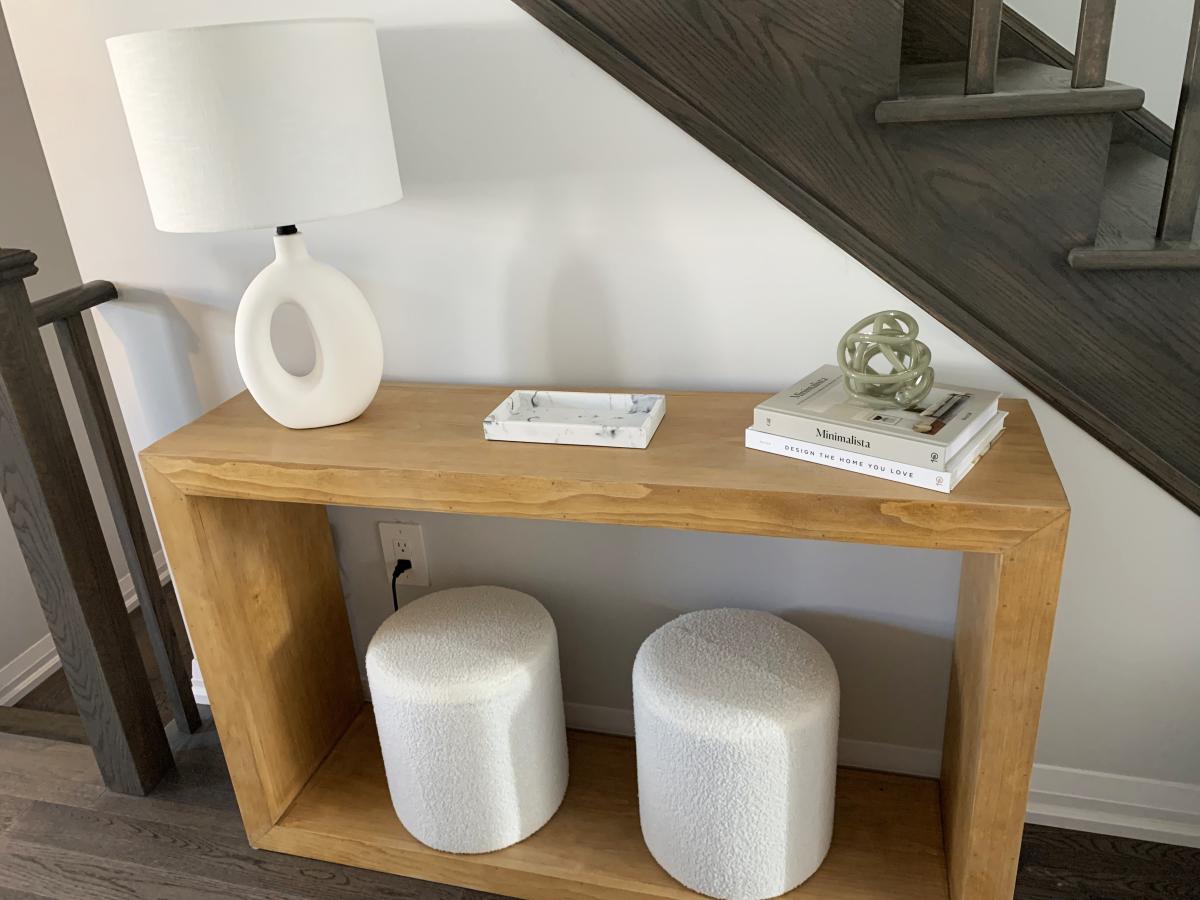
Waterfall Entry Console
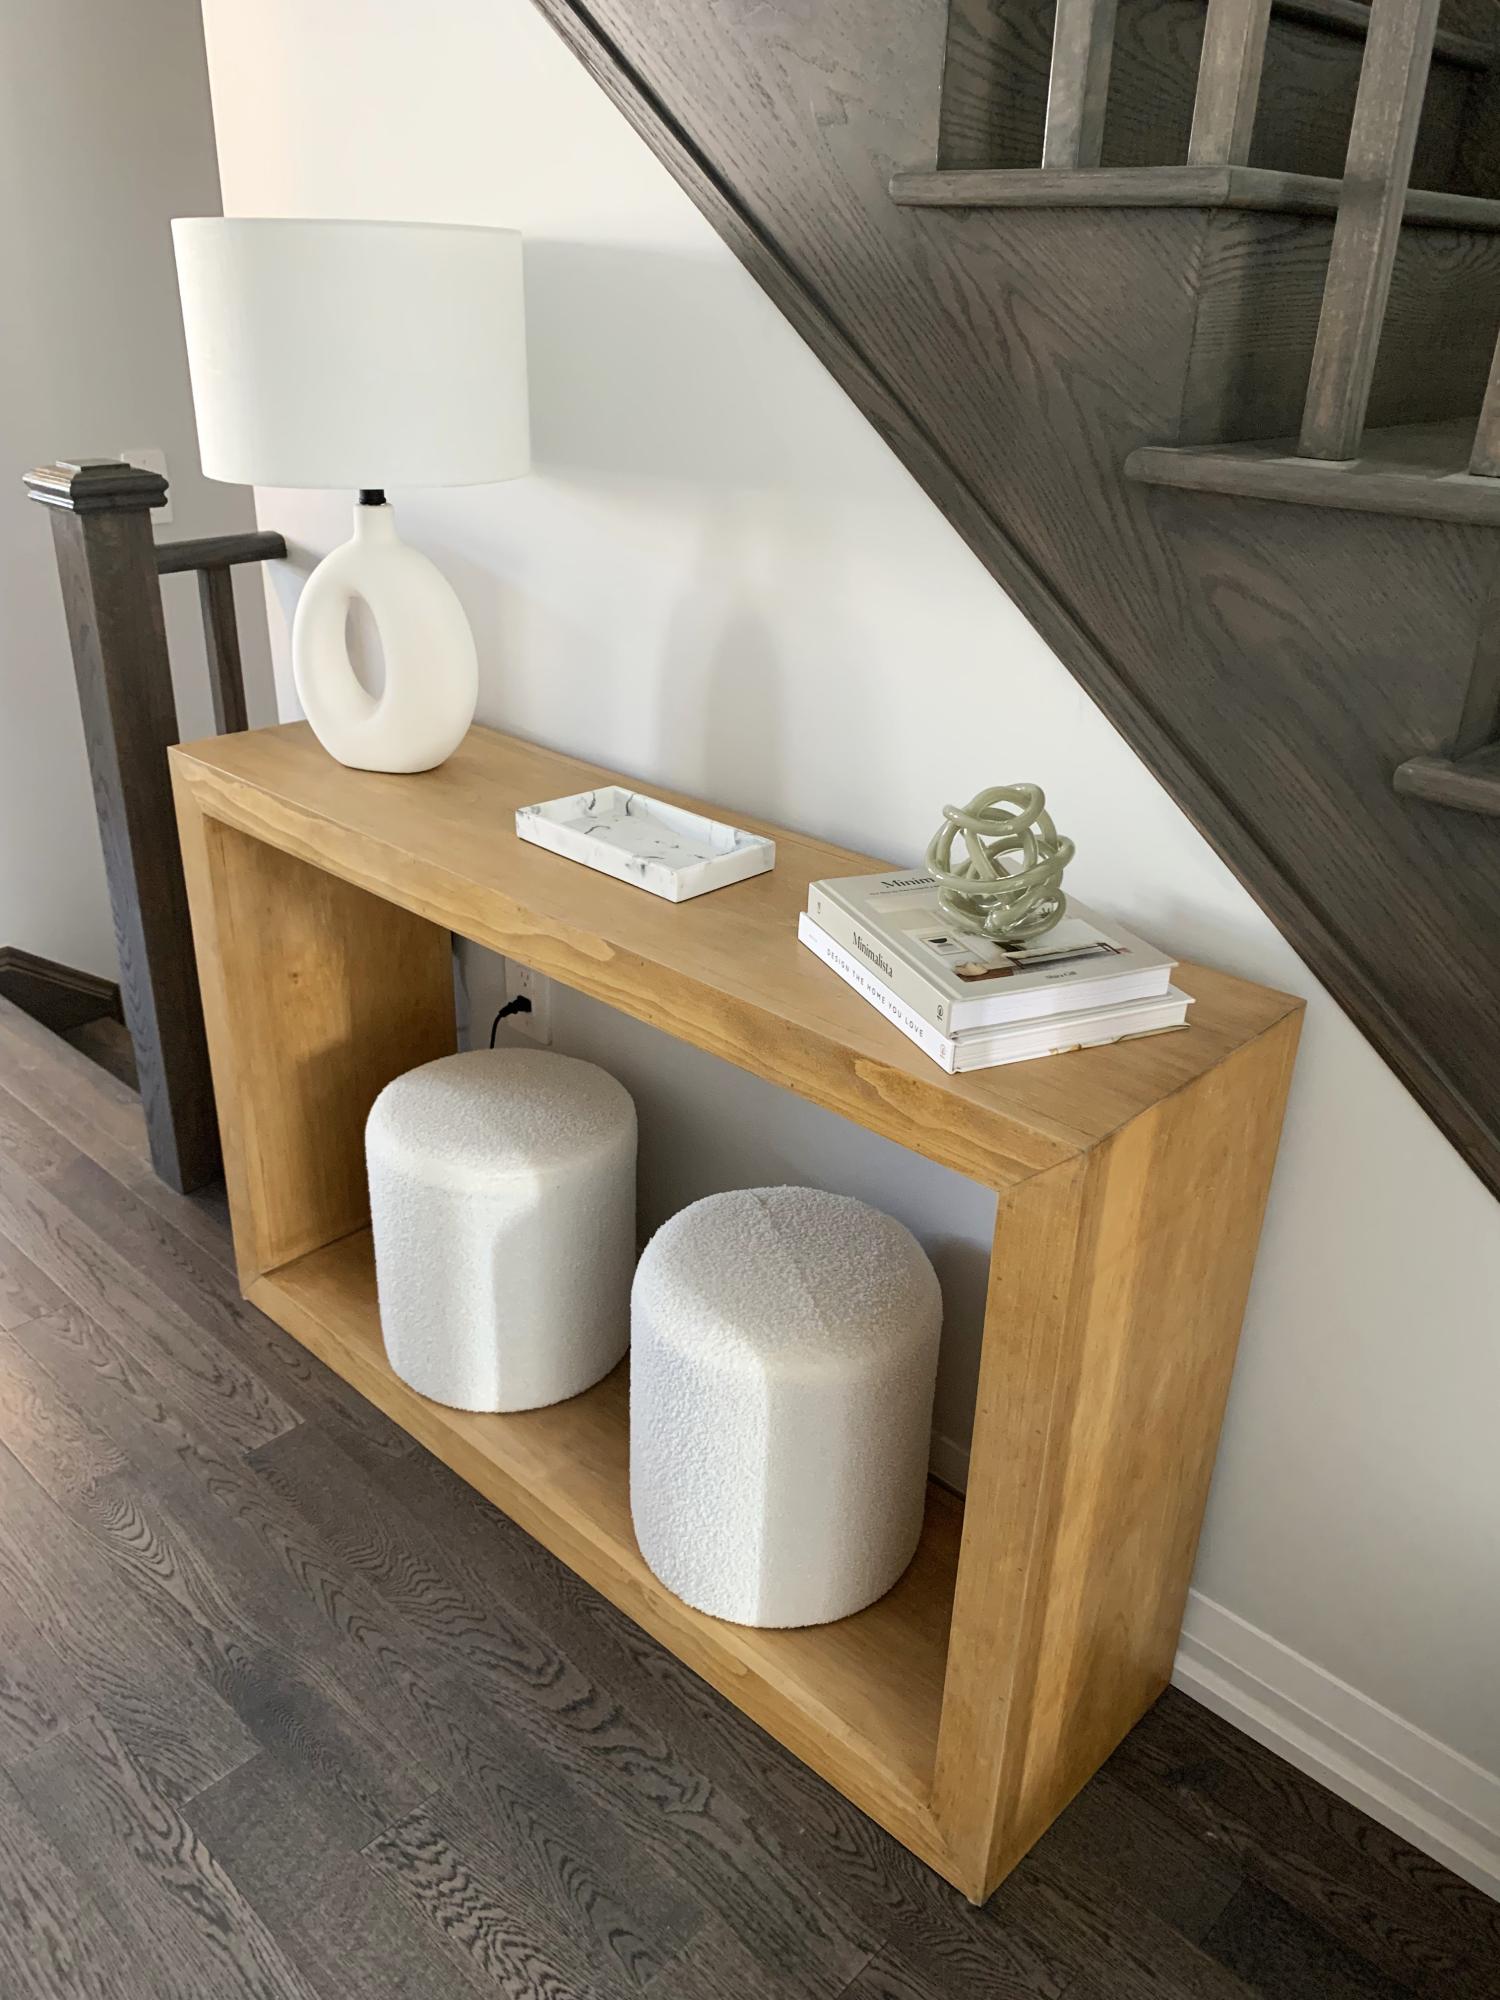
Made the console table for my daughter. Plans were very detailed, accurate and accompanied with great pics and videos. Only tough time we had was trying to get the right diluted whitewash. Onto the matching coffee table next! Thanks Ana!
Brad Brouse
Built from Plan(s)
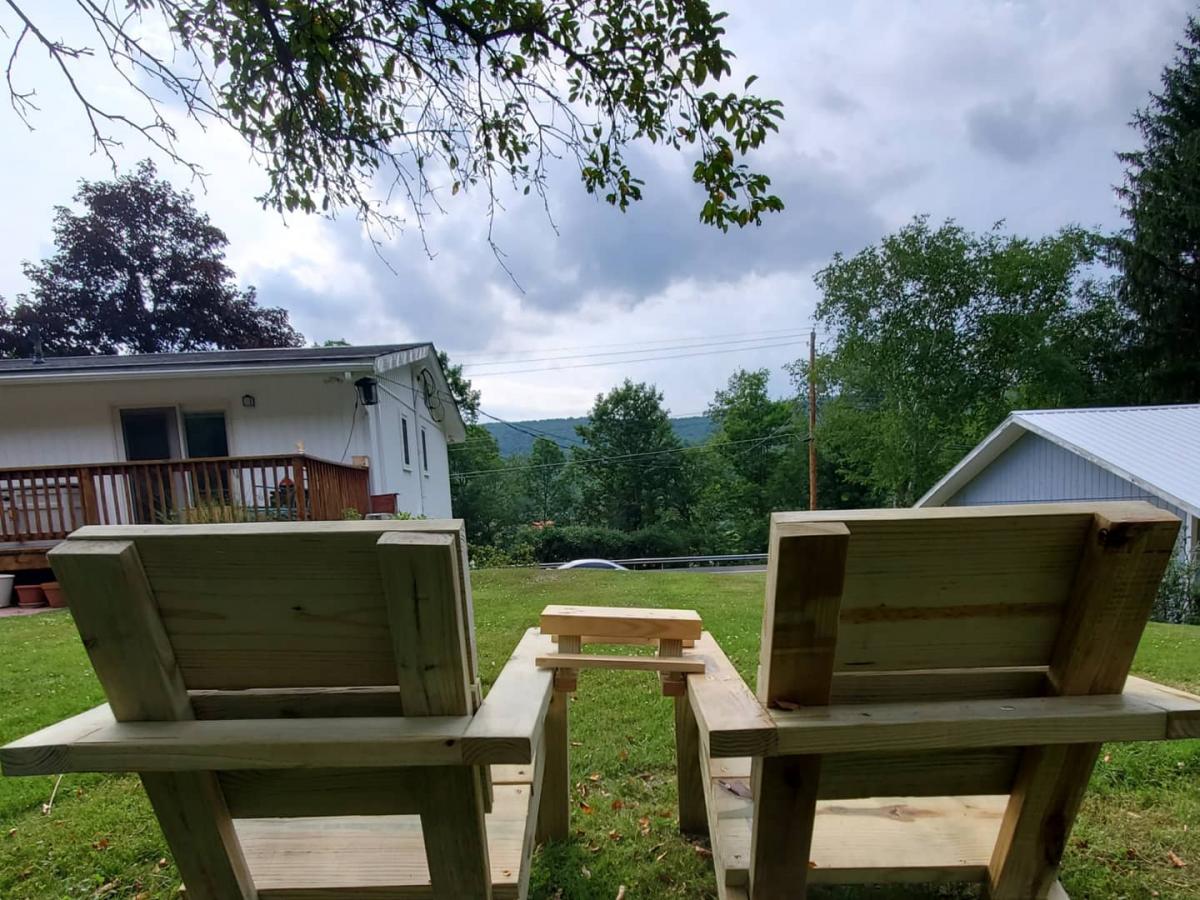
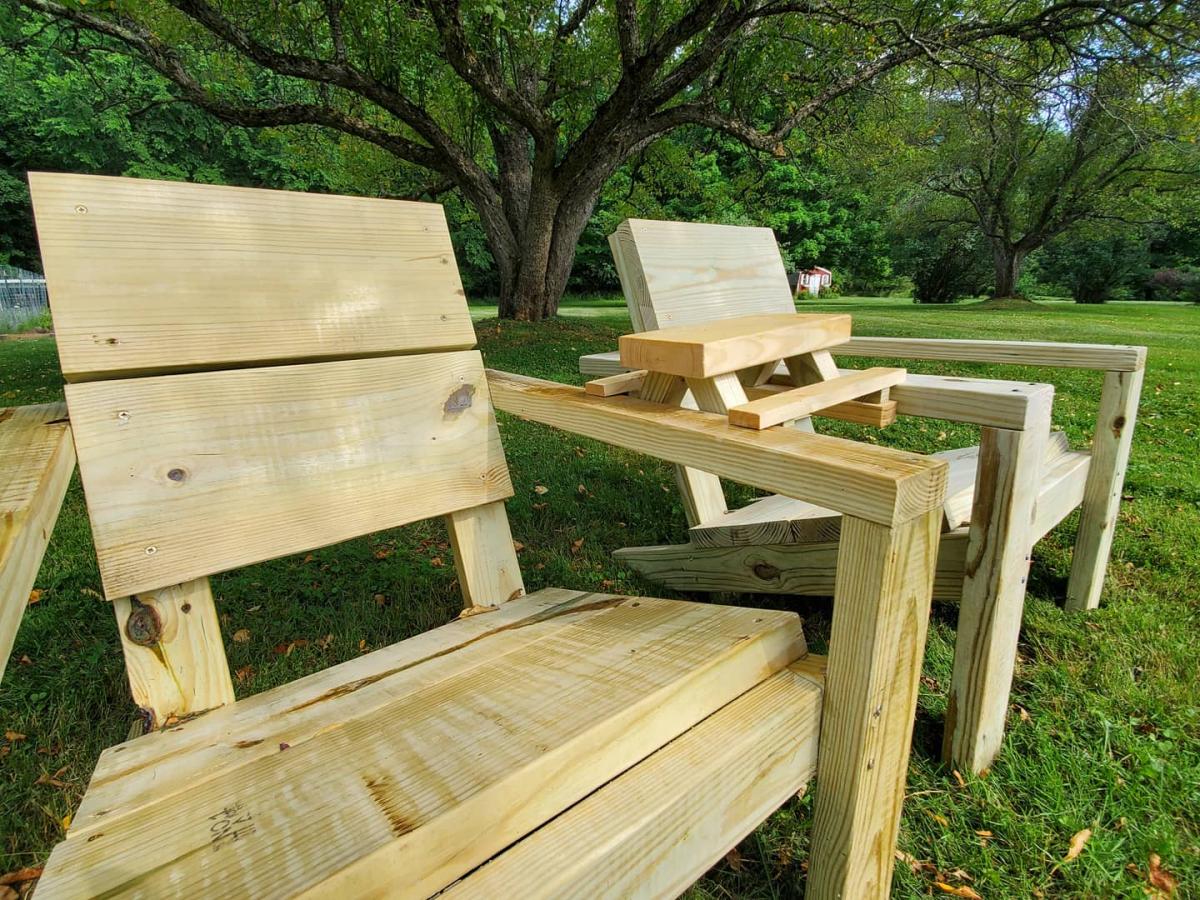
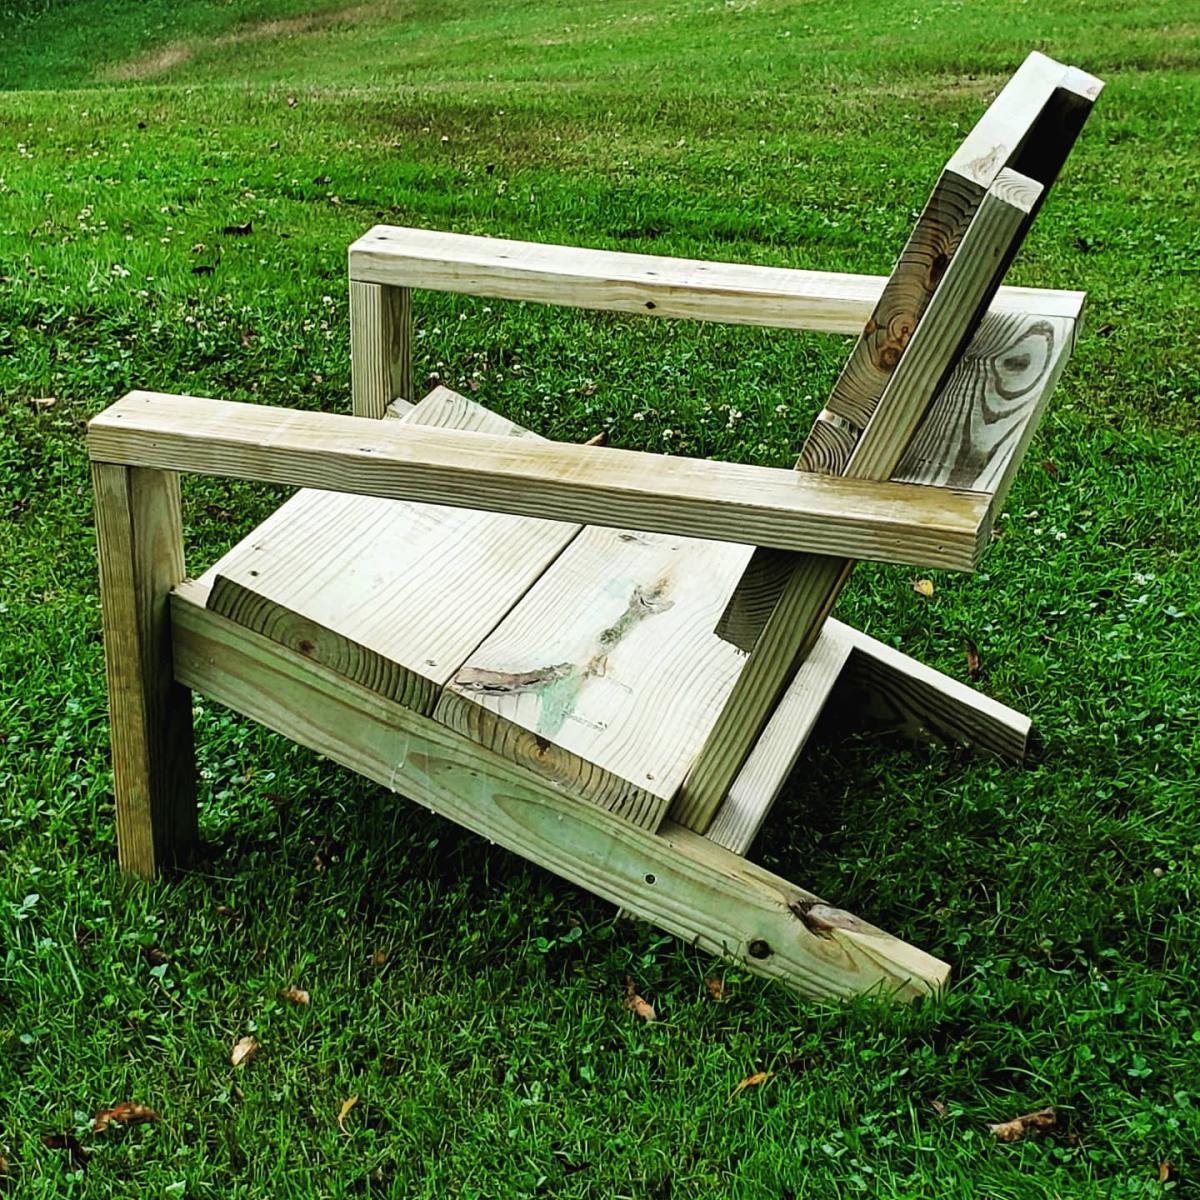
modern Adirondack using 2x6s for the seat and backs
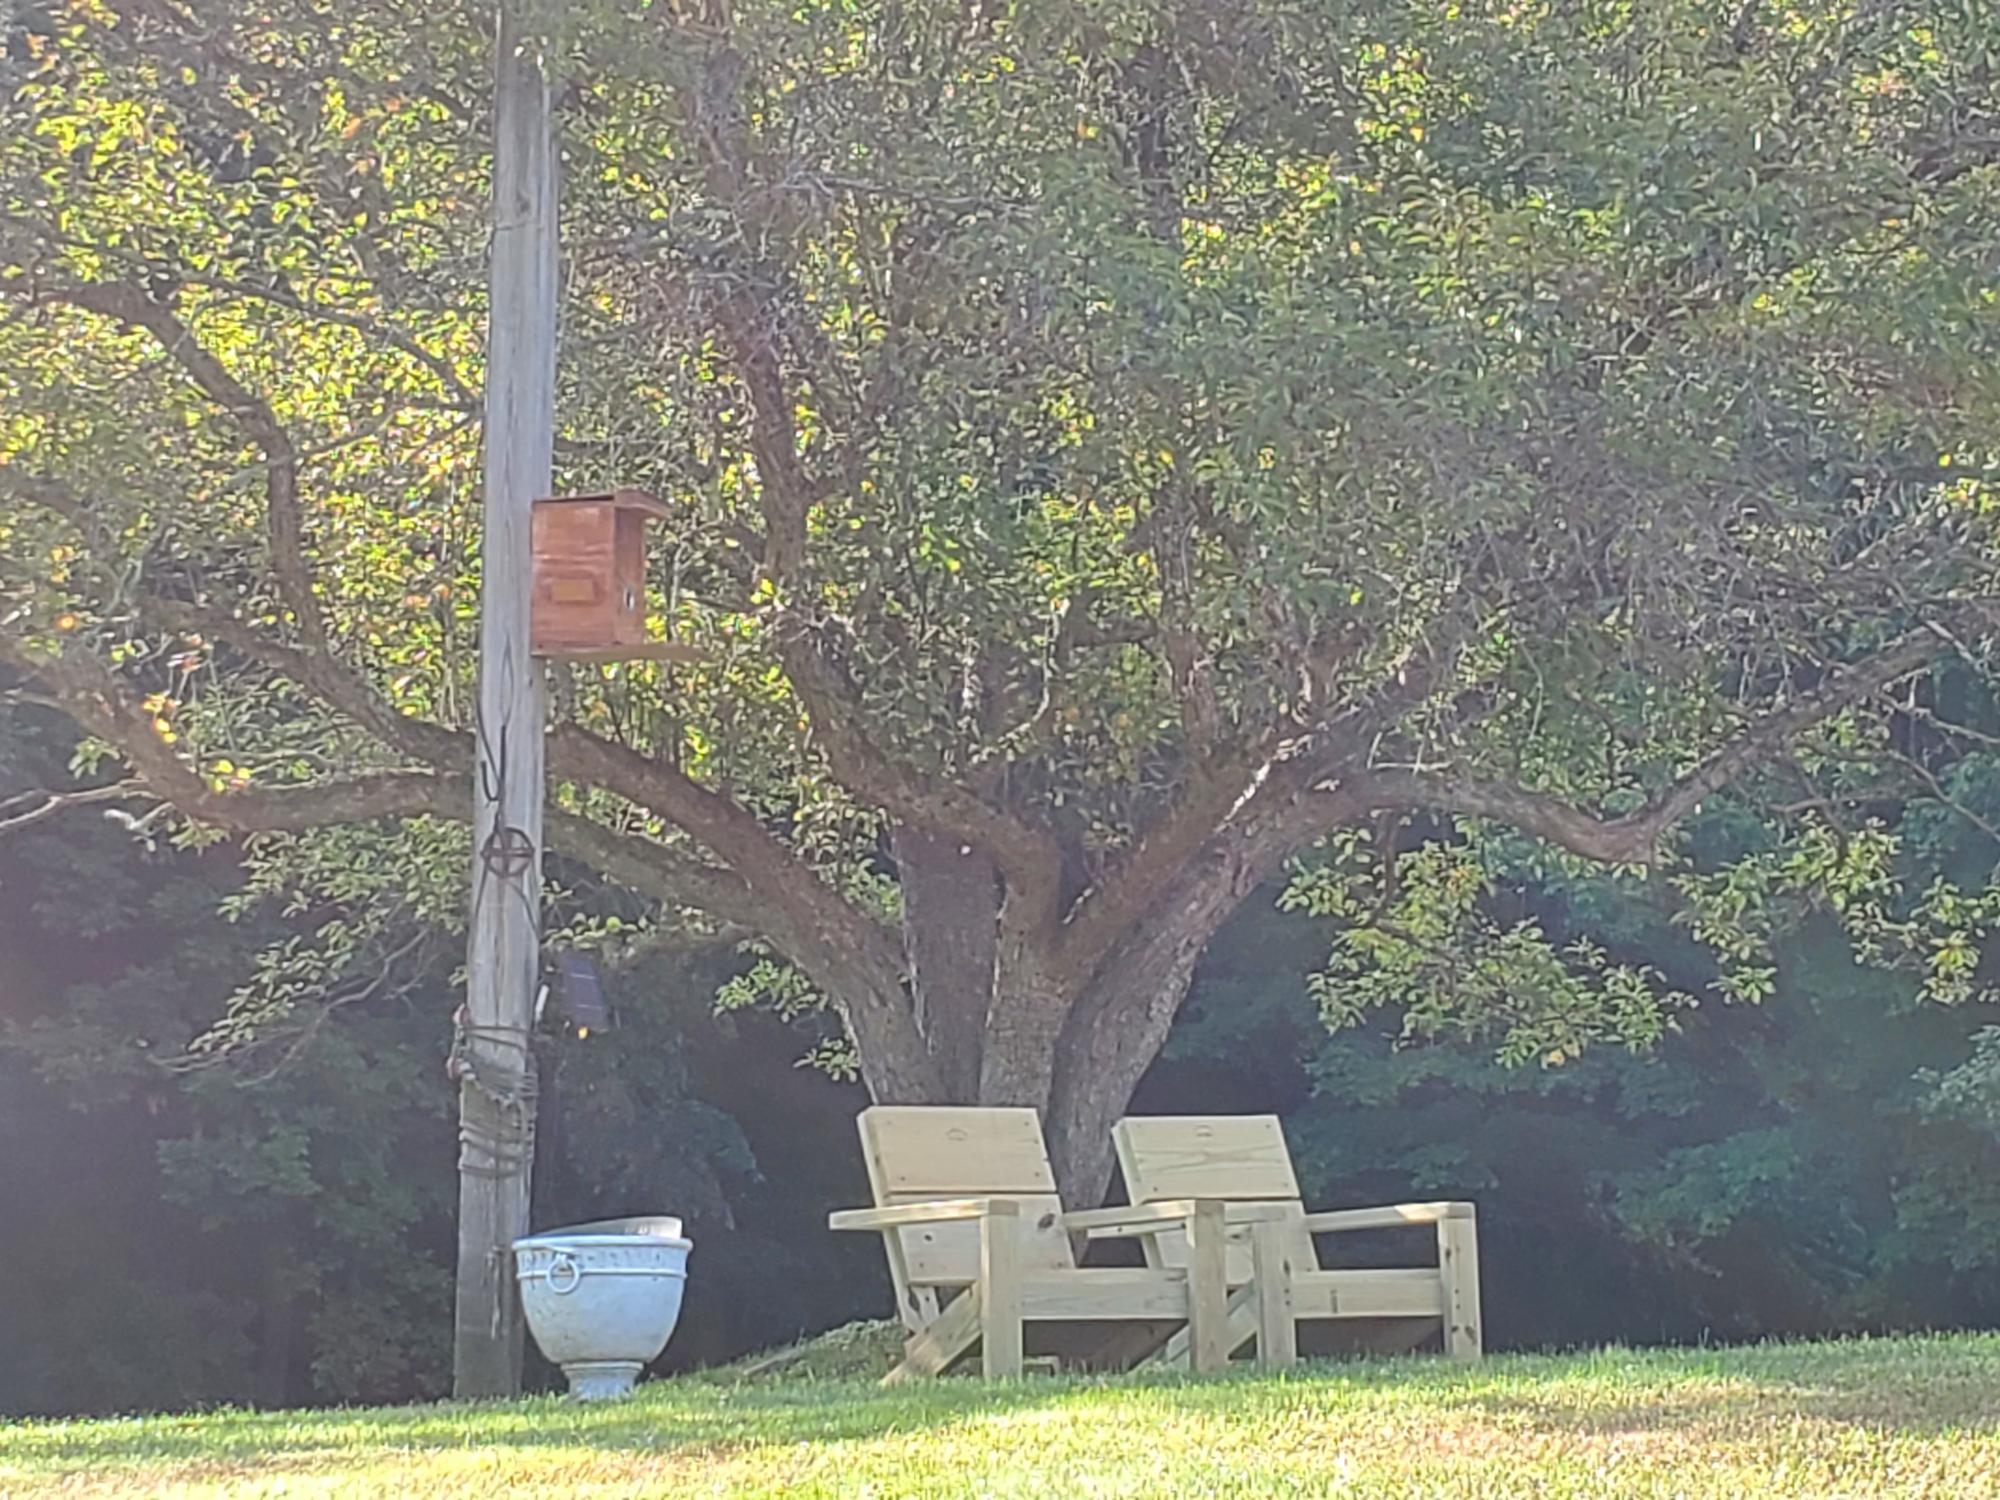
slight change using 2x6 pieces for the seat and back... Otherwise followed the plans to a T and love the outcome

Built from Plan(s)
Estimated Cost
$120
Estimated Time Investment
Afternoon Project (3-6 Hours)
Finish Used
none
Recommended Skill Level
Beginner
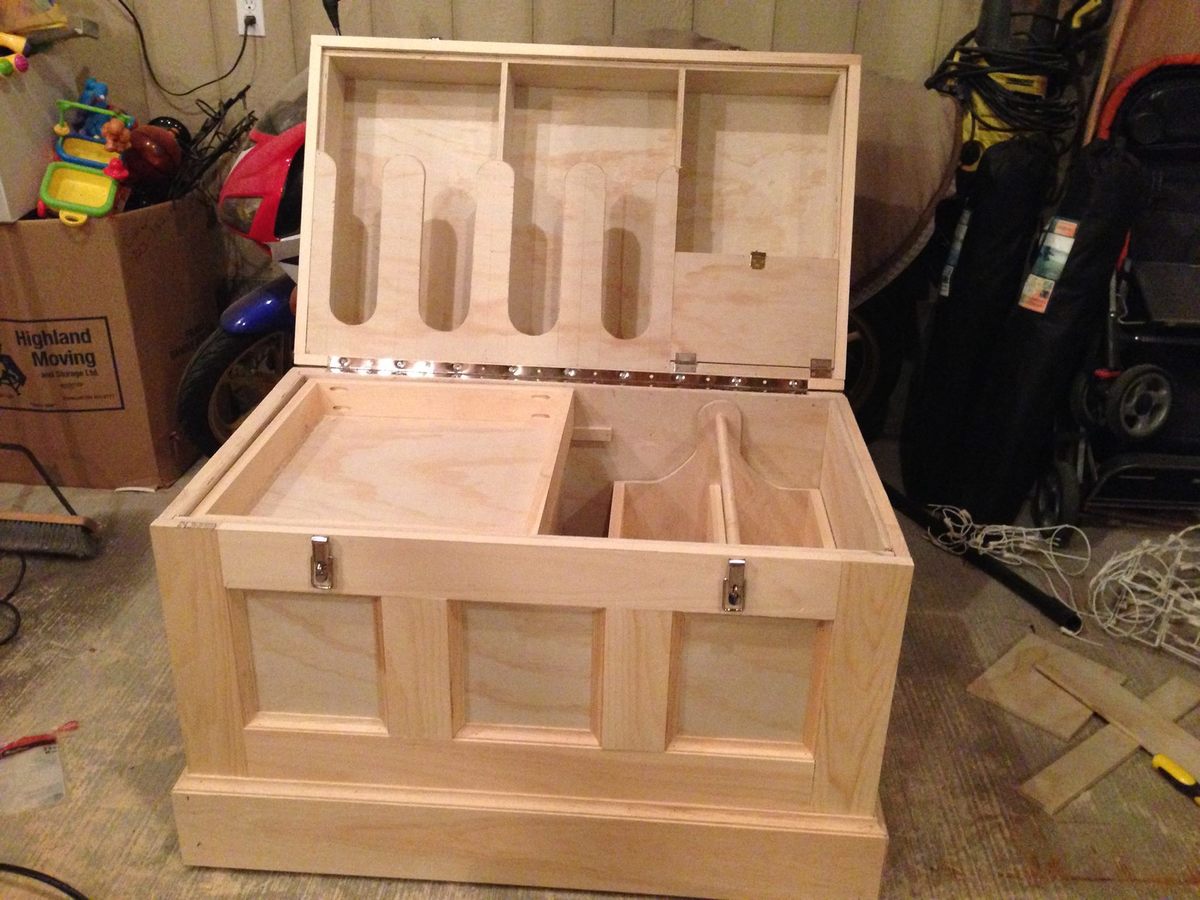
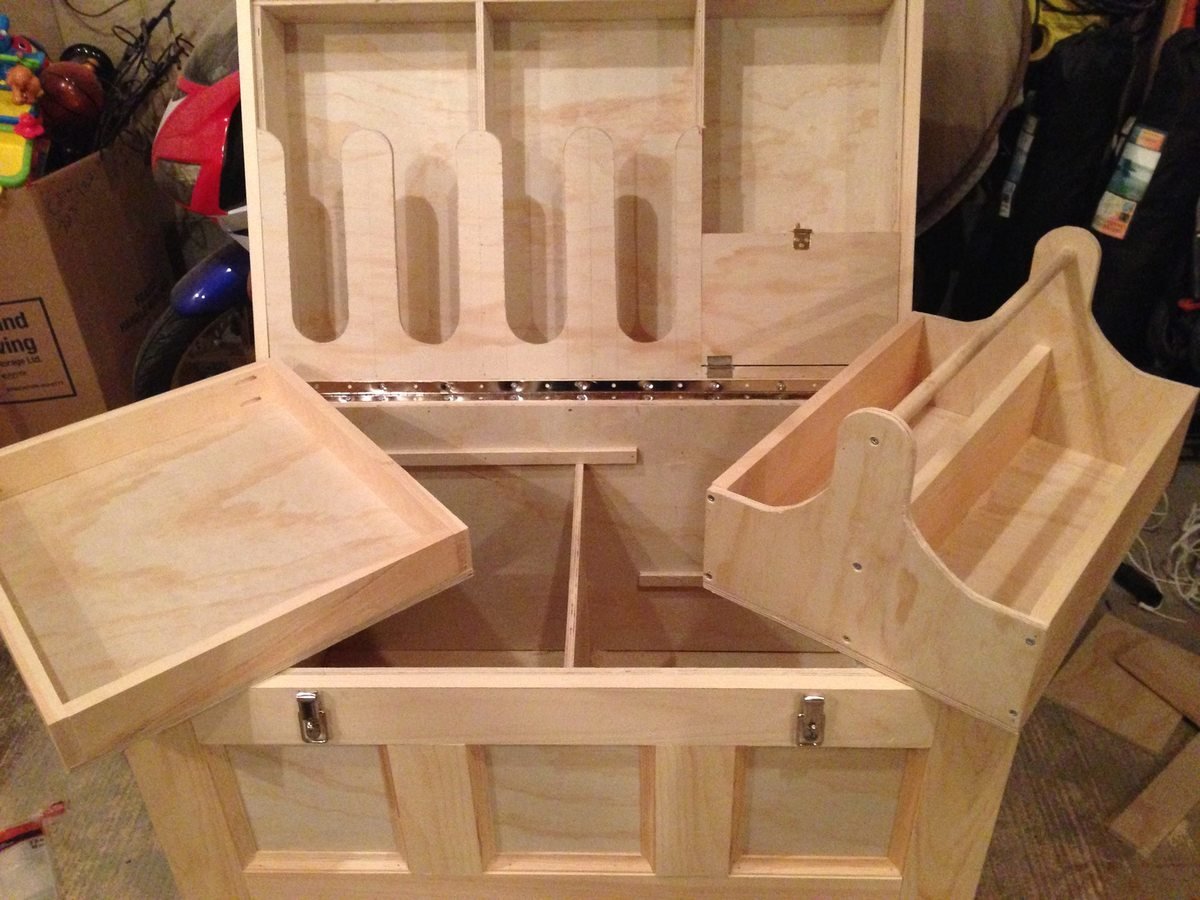
Tack Box
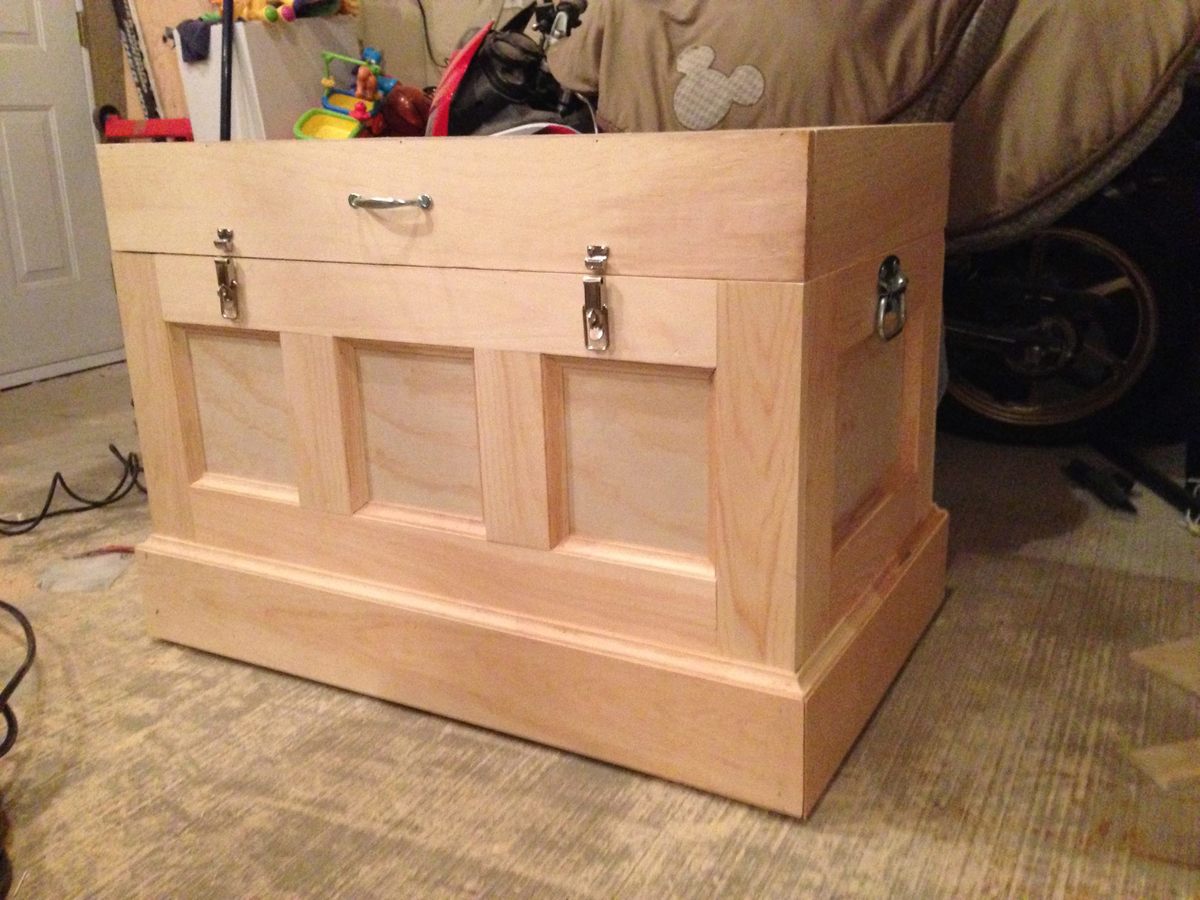
I made this box for my wifes christmas present. She has been riding horses for sometime and is planning on doing some shows. I built this box from Mimi's storage bench design, made it bigger, added a deeper box top and created the rest from looking at pictures online. Its all made of pine plywood and pine boards to keep it light. I added 4 castors to the bottom to make it easily moveable and hid them with the moulding around the bottom. Still has to be sanded and stained before it hits the barn. Its 39W X 24D X 29H. I used a piano hinge and routered the back to set the hing in. Added cove moulding around the bottom and to all the boxes around the front and side. Used a lot of pocket holes and finsh nails. Took me longer than it could have, because I planned everything as I went. I will add more pictures when its finsihed. I would rate it intermediate to advanced depending on your skills with certain tools.
Built from Plan(s)
Estimated Cost
Will all the hardware, wood materials, screws etc, I think it cost me around $250-$300
Estimated Time Investment
Week Long Project (20 Hours or More)
Finish Used
not finished yet
Recommended Skill Level
Intermediate
Comments

Wed, 12/31/2014 - 09:02
Very Well Done!
Wow - that's a lot of work and well done. Great job! I'm sure your wife adores it.