Community Brag Posts

Second Project: table saw/ miter saw work bench

Submitted by jamesjill on Sat, 01/30/2021 - 20:34

Used part of the Ultimate Roll Away Workbench with Miter Saw Stand to just build one of the roll-away workbenches to work with my miter saw and table saw. I'm very happy with how it turned out.

Recommended Skill Level
Beginner

Comments

My Simple Outdoor Lounge Chair with 2x4 modification

I modified this chair with 2x4's as the base and 2x2 for decoration on arms, this is prior to sanding and finishing

Built from Plan(s)
Estimated Cost
$15-$20 dollars, depending on local lumber prices and finishing options.
Estimated Time Investment
An Hour or Two (0-2 Hours)
Finish Used
Unfinished
Recommended Skill Level
Beginner

Comments

RandyW

Sat, 06/13/2020 - 16:33

I always take my sander to the sharp edges and round them off

Sandbox with Built-In Seats

Submitted by Loral on Wed, 05/09/2012 - 15:32

This is a fun project even for beginners. If you have an interest in building a sandbox, and have some tools, I'm sure you can make this easy enough!

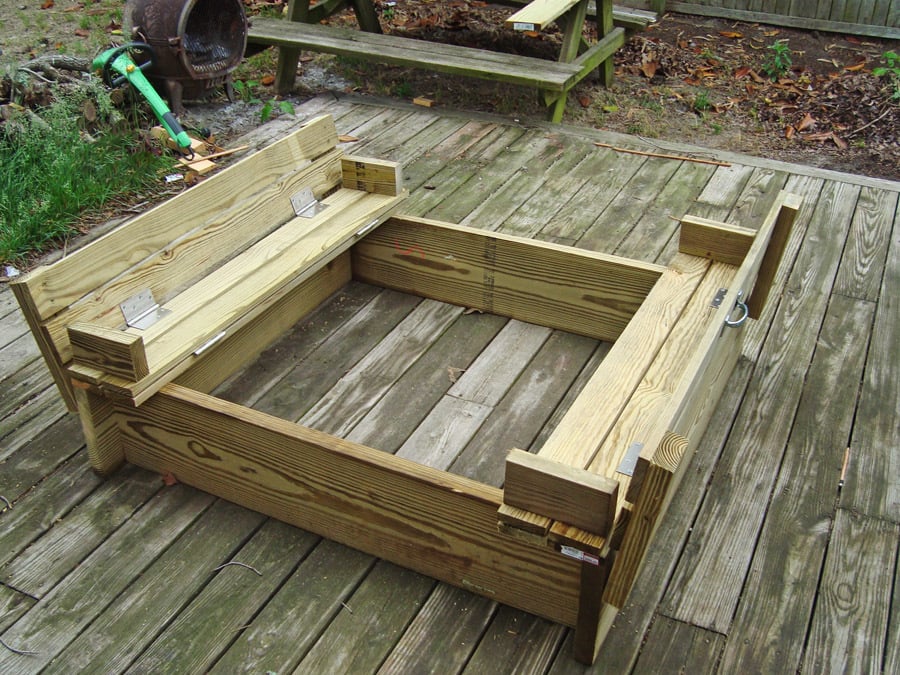
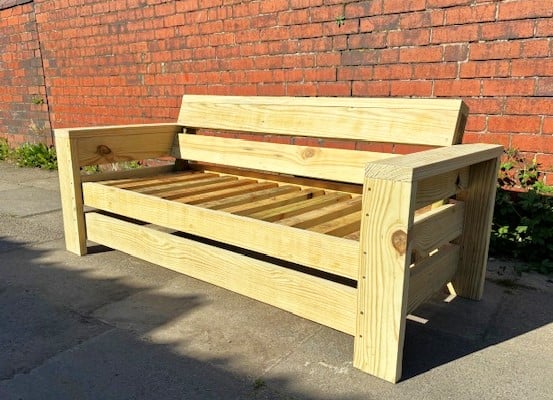
I used 2" X 10" wood for my sides instead of the 1" as the plans call for. This gives extra strength and more depth. When you use 2" wood, you will have to turn your 1 X 4's the other way to match the 47½" width, because with the added width of the 2 side boards, your new width is now 49¼". It's not difficult, you just have to match your 1 X 4 X 47½ boards to the proper width. It will turn out fine, they just won't match the plans or pics of those using 1 X 8's for sides.

Sorry, I'm delivering this to my grandson's house for his birthday present, so no sand, but use landscaping cloth under this sandbox, then fill with sand.

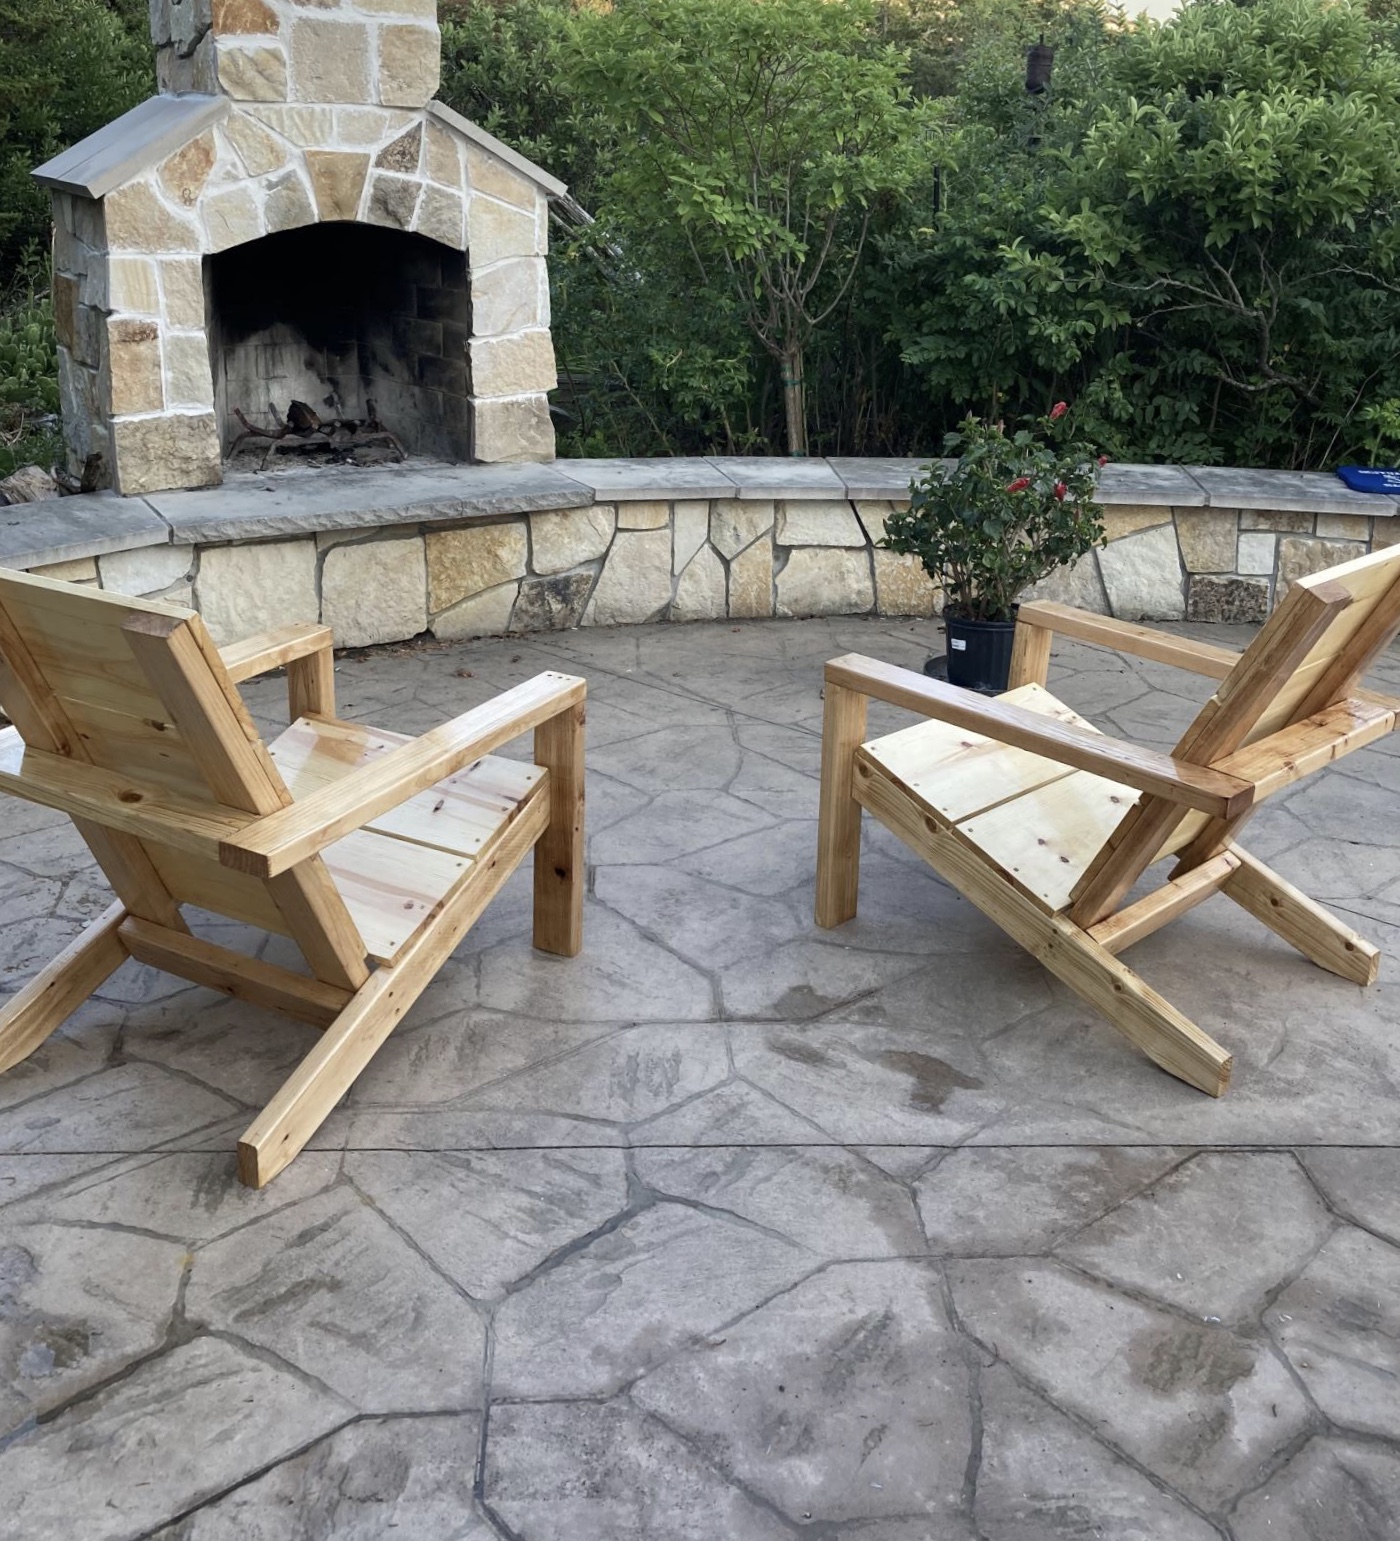
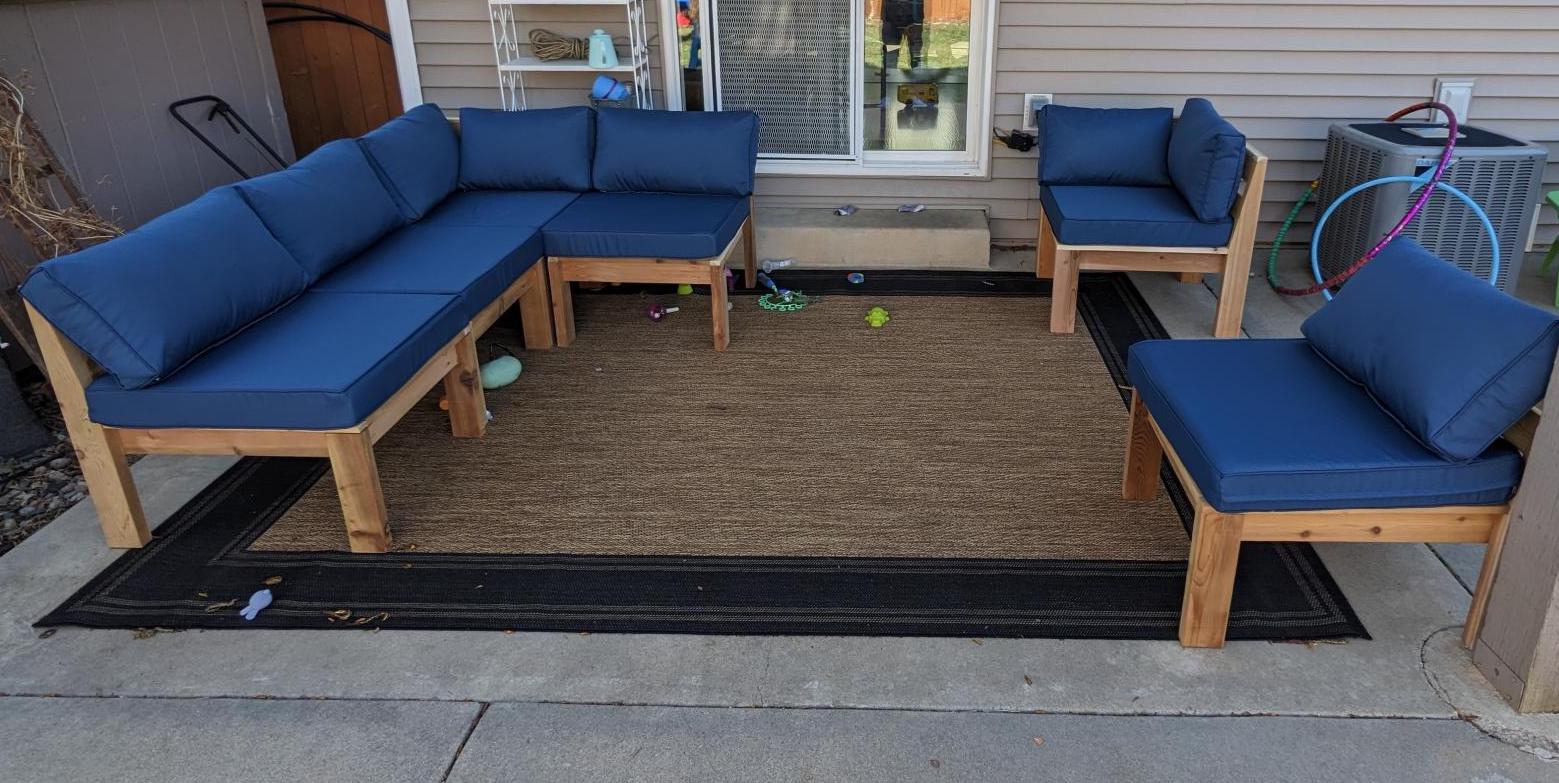
One other thing, I'm toying with the idea of matching the angle the backrest is at and re-cut new pieces of 7½" arm rests. I think that may look a little better than the rectangle blocks.

My added pics are as follows:
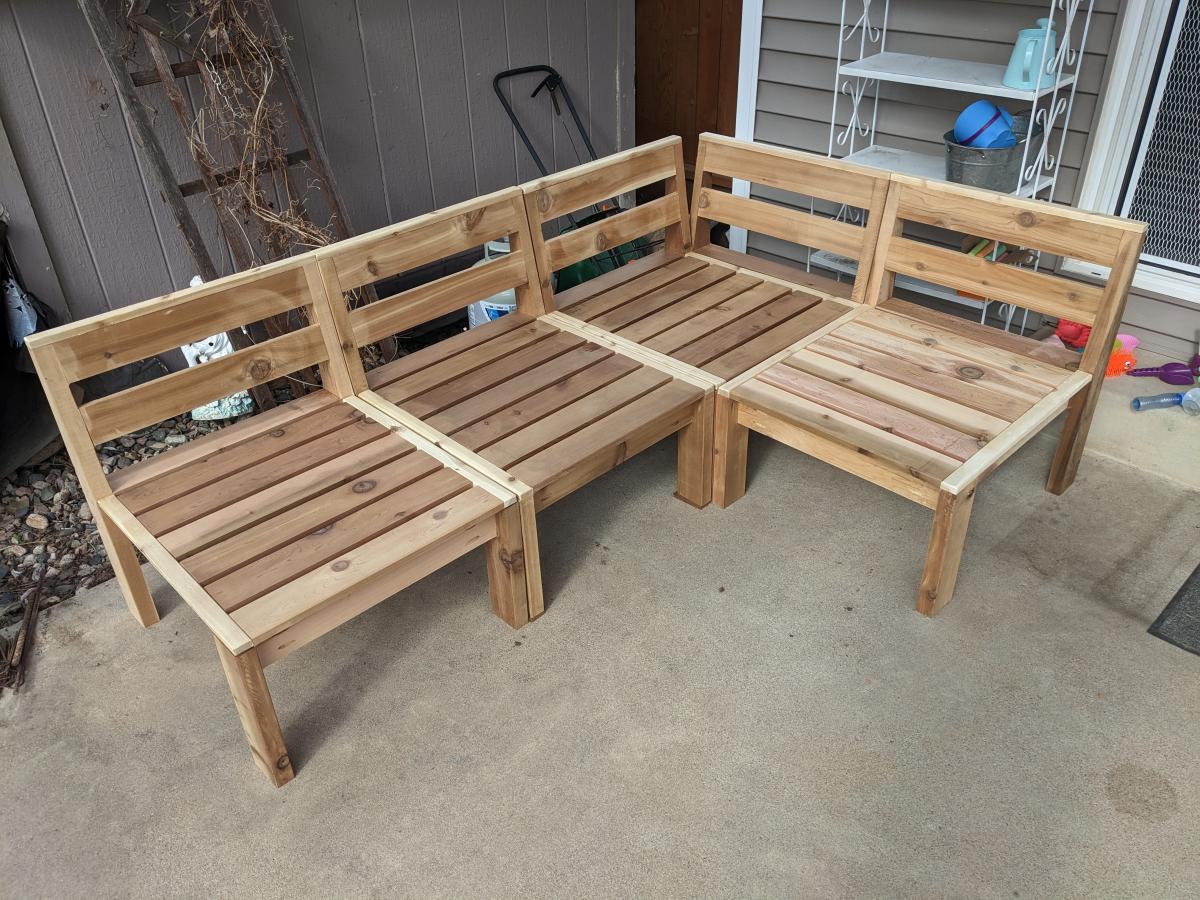
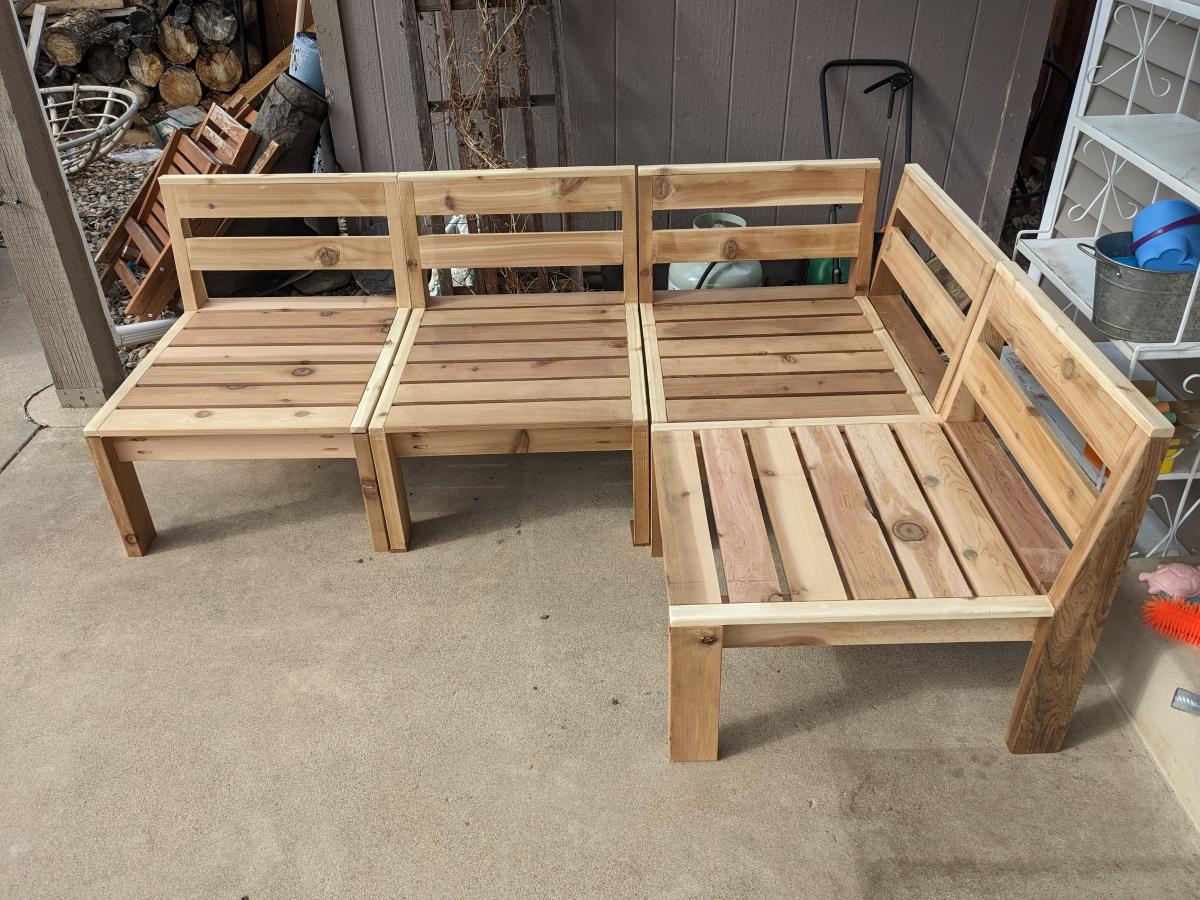
1. The side boards all cut, and sizing up the frame.
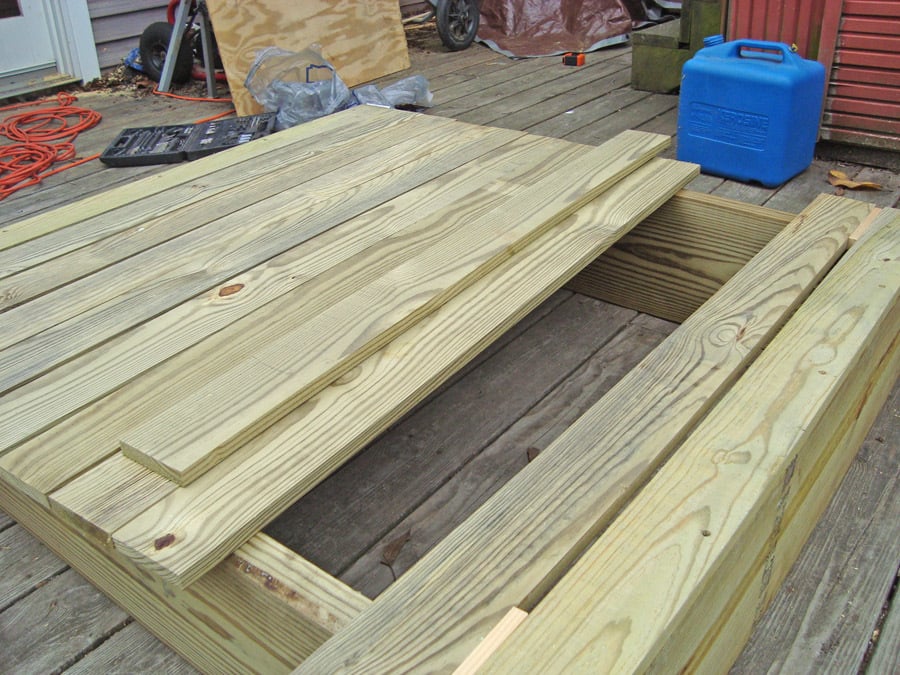
2. All other boards are cut; I laid them out for fit before screwing the pieces together.
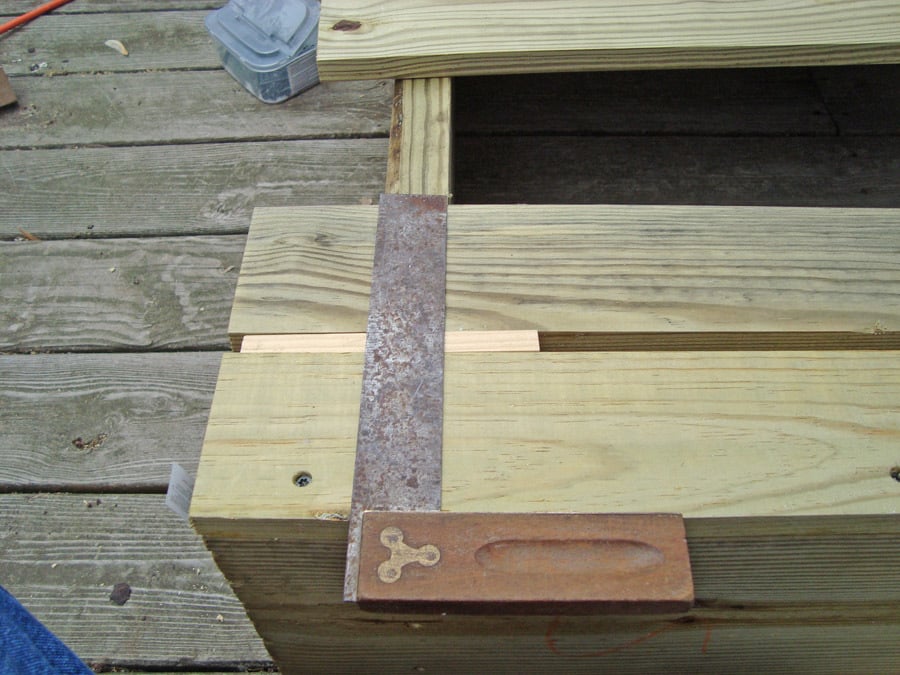
3. Using a square will help you keep everything at the correct angles. Also note in this picture and the next where I used two ½" pieces of wood I ripped to keep the ½" spacing uniform. Just rip any wood to the ½" width, make 2 pieces and butt against the next board on both sides, then screw them down. Makes it VERY easy to keep a uniform gap.
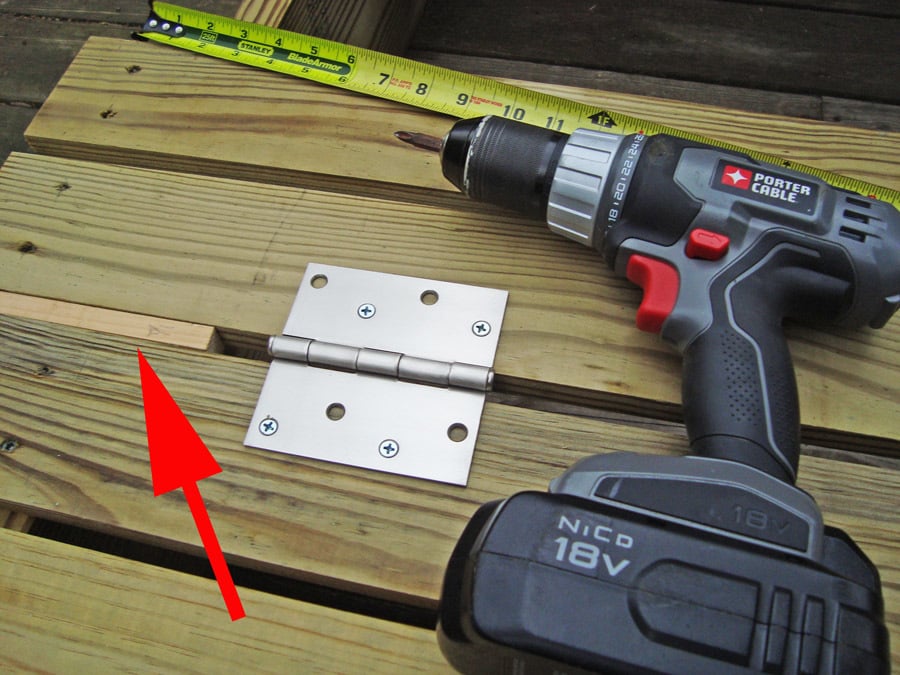
4. This picture shows me using the same "spacer" when putting the hinges in place. The red arrow points to the wood spacer.
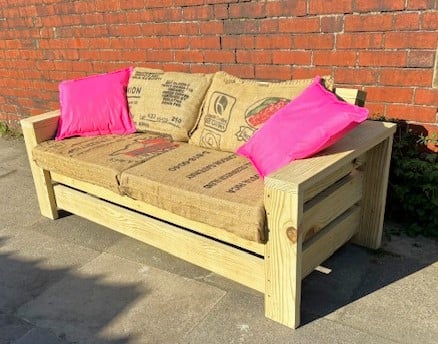
5. The first bench is complete, and working fine!!

With the wood I used in my project, I used 2½" self tapping deck screws for the frame and attaching the 1X4's to the frame; I used 2" galvanized for attaching the 1X4's to any 2X4's; and for the hinges, I used ¾" wood screws. Using these sizes prevented the screws from coming through the other side.

I bought everything needed in this project at Lowe's and it was under $90 in costs; this is all the lumber (upgrading to 2 X 10's), hinges, screws, and handles.

Estimated Cost
$90 - Everything purchased new at Lowe's
Estimated Time Investment
Afternoon Project (3-6 Hours)
Finish Used
This is a gift, so I'll leave it to my daughter and son-in-law to use fence or deck stain to match their house. All pics are un-toned raw pressure treated lumber.
Recommended Skill Level
Beginner

Comments

Lady Goats

Wed, 05/09/2012 - 16:25

I was just going to tell you how to add a brag blog when I saw that you'd already done so! YAY! Your sandbox looks awesome! You guys are all making me wish I had a tolerable yard to put a full-sized box in!!!

Loral

Thu, 05/10/2012 - 13:49

Yeah, you made the plans easy to follow. It was a lot of fun. I spanned it over 2 days, but still was only around 4 hours of work.

I'm considering cutting the "arm rests" at an angle to match the slope of the back rest. I may play with that this weekend.

Thanks for all the help!

Also, what did you use to make the sketch type pics for the plans? I know you mentioned something about not knowing how to put the hindges on them. If I can help, I can probably do it for you in PhotoShop.... Just let me know.

Thanks again!
Loral

Modern Adirondack Chairs. Thanks

Submitted by Anonymous (not verified) on Sun, 07/19/2020 - 16:16

Ana,

Thanks for making the plans available. Was looking for a simple plan and here is it. Needed to replace 4 aging chairs to match a pine table and a bar. Looking forward to another project in the fall. You definitely made a good choice on the pitch of that chairs. Very comfortable.

Estimated Cost
$50
Estimated Time Investment
Afternoon Project (3-6 Hours)
Finish Used
Spar urethane
Recommended Skill Level
Intermediate
Seasonal And Holiday

Wranglerstar Greenhouse

Thank you Ana for the excellent plans. We have been talking about this for months and are excited finally have a greenhouse. We live in the mountains and this will help extend our growing season. Please tell Ram thank you from the Wranglerlerstar family.

Built from Plan(s)
Estimated Cost
$750
Estimated Time Investment
Week Long Project (20 Hours or More)
Finish Used
stain
Recommended Skill Level
Advanced

Comments

jnow8687

Sat, 08/31/2019 - 12:34

Did you extend the base height? I want a greenhouse to enclose trees that do not do well in the winter and I think I would like to raise the base height a foot or so.

Shoe Dresser

I had this space in my mudroom that was a perfect spot to make a custom shoe dresser. I adjusted the plans I found on this website to custom make storage for shoes. Now this weird little space is functional.

Built from Plan(s)
Estimated Cost
80
Estimated Time Investment
Day Project (6-9 Hours)
Finish Used
Rustoleum chalk paint Serenity Blue, classic grey and special walnut Minwax
Recommended Skill Level
Intermediate

Comments

Recessed cabinet

Submitted by Anonymous (not verified) on Fri, 09/02/2022 - 14:14

My bathroom has very little storage space. So during our recent remodeling of the room, I decided to add this cabinet. Changed the plan a little to make it recessed in the wall. I love how it turned out!

Comments

3 drawer rolling dresser

Submitted by Kamabrewer on Fri, 09/20/2013 - 17:07

Super fun and easy! This was my first kreg jig build! Not sure how I got by before I got one!

Built from Plan(s)
Estimated Cost
$130
Estimated Time Investment
Day Project (6-9 Hours)
Finish Used
Dark walnut wiped off after 5 min.
Recommended Skill Level
Beginner

Comments

Corn Hole Boards

Submitted by Anonymous (not verified) on Sun, 05/28/2023 - 10:53

The Ana White corn hole board plans were straightforward and easy to understand. Building was a breeze. Our boards turned out great!

Comments

Wooden Lanterns

Submitted by mrich_d60 on Fri, 05/14/2021 - 15:39

I made 7 lanterns - 6 with 18" uprights and 1 with 13". They were originally just for my daughter's backyard wedding. They aren't decorated yet because she's going to use them on the patio now and is waiting for the solar lights and LED candles to arrive. They were too nice not to use them right away!

Estimated Cost
About $9.00 each
Estimated Time Investment
Afternoon Project (3-6 Hours)
Finish Used
Varathane Ultimate One Coat coverage stain + Varathane Triple Thick one coat clear finish on entire lantern. Thompson's WaterSeal Waterpoofing Stain semi-transparent for underside and feet.
Recommended Skill Level
Beginner

Comments

Custom 42 inch bath vanity

Submitted by milleall on Thu, 07/02/2020 - 08:09

Needed a custom build to fit the plumbing and size requirement for my master bath.

Estimated Time Investment
Afternoon Project (3-6 Hours)
Finish Used
Behr paint in Juniper Berries
Recommended Skill Level
Intermediate

Comments

mfast10

Tue, 06/13/2023 - 18:29

This is the exact size and style I am looking for as well. Would you mind sharing the plans with me as well?

Outdoor Sectional with Slanted Back

Submitted by Anonymous (not verified) on Sun, 04/16/2023 - 11:28

Fun project! Started with rough western red cedar which I ran through a jointer and planer to get good lumber.

I made a few changes to the design. I used thinner seat boards and cut a leaning tilt in the backrests. I also added 2 boards on the back rests.

I used all pocket holes to hide the screws. Once they dry out I will seal the sectionals.

Got a full set of cushions on Amazon for $300. Total for this project was around $700. Not too bad!

Full size loft

Submitted by Anonymous (not verified) on Tue, 10/01/2019 - 18:46

Built a full size loft bed for my kids but wanted something safer than having them climb up and down a ladder so used the Camp Loft Bed plans to add the platform and stairs. It is much easier for the kids. Going to finish by covering the platform and stairs with carpet.

Estimated Cost
180
Estimated Time Investment
Day Project (6-9 Hours)

Comments

EdK

Wed, 02/19/2025 - 14:14

Im looking to build something similar using a double (full) mattress. I'd love to know how you've supported it in the middle? Thanks :)

Wood Frame Outdoor Sofa with Backrest

Submitted by Anonymous (not verified) on Fri, 05/24/2024 - 09:37

What a pleasure it’s been to build this! Hope you don’t mind but I added a simple backrest…
Incidentally I made a pair of them, but run out of time so the other is in kit form waiting for the weekend!
Hope you like what we achieved! Keep the great ideas coming!

Graeme Jobey

Gazebo Enclosure

Submitted by Anonymous (not verified) on Thu, 08/22/2024 - 08:52

We’ve owned this open gazebo for a few years and thought how nice it would be if it were enclosed, so i framed in the base using deck boards and wood siding, built a screen door and framed it. Added outdoor shades and furniture, and a TV of course. The blinds hold in the heat of the gas fire pit on chilly evenings. We live in MN and now we can enjoy our screen gazebo 3 seasons. Fred Vollbrecht

Cedar Fence Picket Raised Garden Beds

I made these for my 81 year-old Grandma, and I will be making some for my own front yard soon. I followed the plans and ripped the fence boards instead of buying the optional 1x2s. My awesome dad showed me how to use the table saw, but the rest I did all by myself! We decided to leave them unfinished for a natural look. It took me about 7 hours total broken up to make all three, but this is my first project and I was slow. Thanks Ana, for inspiring this working Mom to pick up a hammer and get stuff done!

Estimated Cost
$13 per bed in fence boards
Estimated Time Investment
Afternoon Project (3-6 Hours)
Finish Used
Left unfinished
Recommended Skill Level
Beginner
Seasonal And Holiday

Drop-Down Door Hutch Desk

Submitted by danicarby on Thu, 05/14/2015 - 13:47

I designed this desk from another desk I built. With this one, I wanted the overall foot-print smaller but still something that was able to organize all our office stuff and be able to close everything to keep it clutter-free. We have a small apartment, and although this desk is about the size of an up-right piano, it works perfectly into our living space!

I made it out of raw hardwood (Ash) and because I knew just the wood alone would make this desk heavy/bulky to move I made the top hutch removable. It's held in place by wood pegs (dominos). All the shelves are adjustable and the drawers are full-extension (something I've never had - wahoo)! The drop-down door is help up by 2 pull-out boards on each side (my first desk had chains). I spend a lot of money on this desk because I knew it was a chance in a lifetime to make and wanted it to be perfect and something that would last generations.

I built the main carcass off of plans/measurements I designed, but then all the insides, drawers, shelves, doors, etc where made as I built (because just a millimeter difference in building changes everything)!

If you want more pictures/descriptions of the building process I wrote about it in a 4-part series on my blog.

Estimated Cost
$1,000 for all wood & supplies
Estimated Time Investment
Week Long Project (20 Hours or More)
Finish Used
To achieve the ash gray color I used "General Finishes" brand water-based stains (equal mixtures of Walnut, Antique Oak & Whitewash) with 1/2 ratio of Pre-Stain Conditioner (bought from Woodcraft). I did 2-3 coats stain, lightly sanded and sprayed 2 coats of Ceramithane clearcoat using HVLP sprayer (sanding with 550 grit paper in between).
Recommended Skill Level
Intermediate

Comments

Low Loft Bed for Toddler

Submitted by Anonymous (not verified) on Sat, 11/12/2022 - 17:08

I built this low loft bed following Ana’s plan as soon as I found out that I was pregnant with baby #2. We needed a “big boy” bed for our 3 year old, and I couldn’t find a loft bed on the market that was priced reasonably or looked sturdy. This the biggest challenge I have taken on to date, and I was certainly sore after building. I don’t have a workbench, so I worked on the floor of my garage and used a couple of saw horses that my dad had next door. I am so proud of this and can’t wait to build more after baby boy comes!

Comments

Email Me
Free Plans

Get new plans sent right to your inbox for free!

    We won't send you spam. Unsubscribe at any time.

    Back