Kids Picnic Table Build

Little kids picnic table and grill. Ana`s plans are easy to follow and so fun to make!

Built from Plan(s)
Seasonal And Holiday
Little kids picnic table and grill. Ana`s plans are easy to follow and so fun to make!
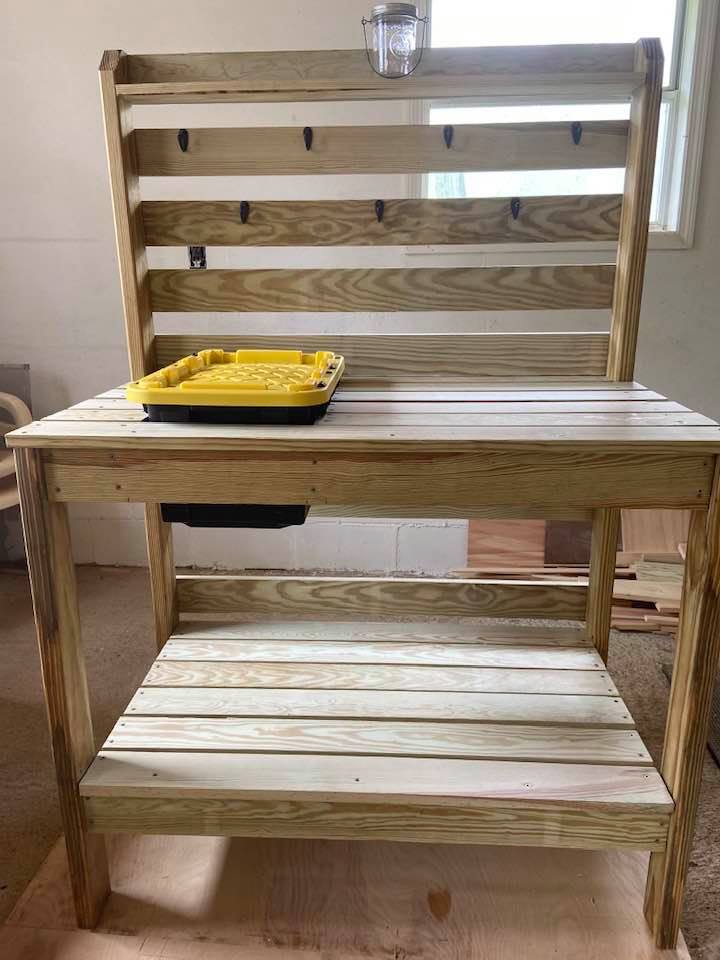
Made this for a friend who does cuttings of her plants for others. I used the Simple 2x4 potting bench plan and modified it to hold an inset 7 gal. Commander tote box with snapping lid with two 2x4 @ 22" braces to support the tote on each side attached to the front and back aprons. She wanted something that would hold a medium size bag of potting soil with a lid to keep snakes and other critters out since she lives in the country. There are plenty of hooks to hang tools and other items.
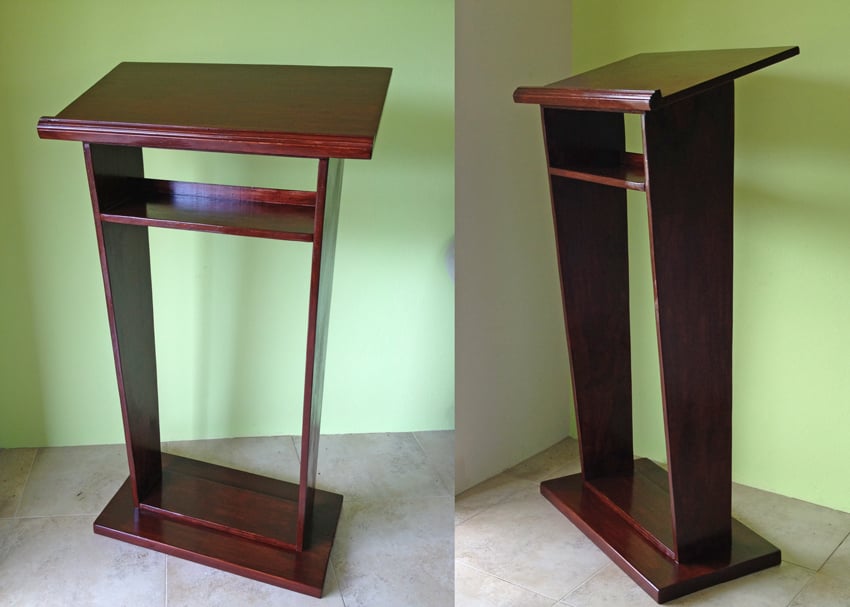
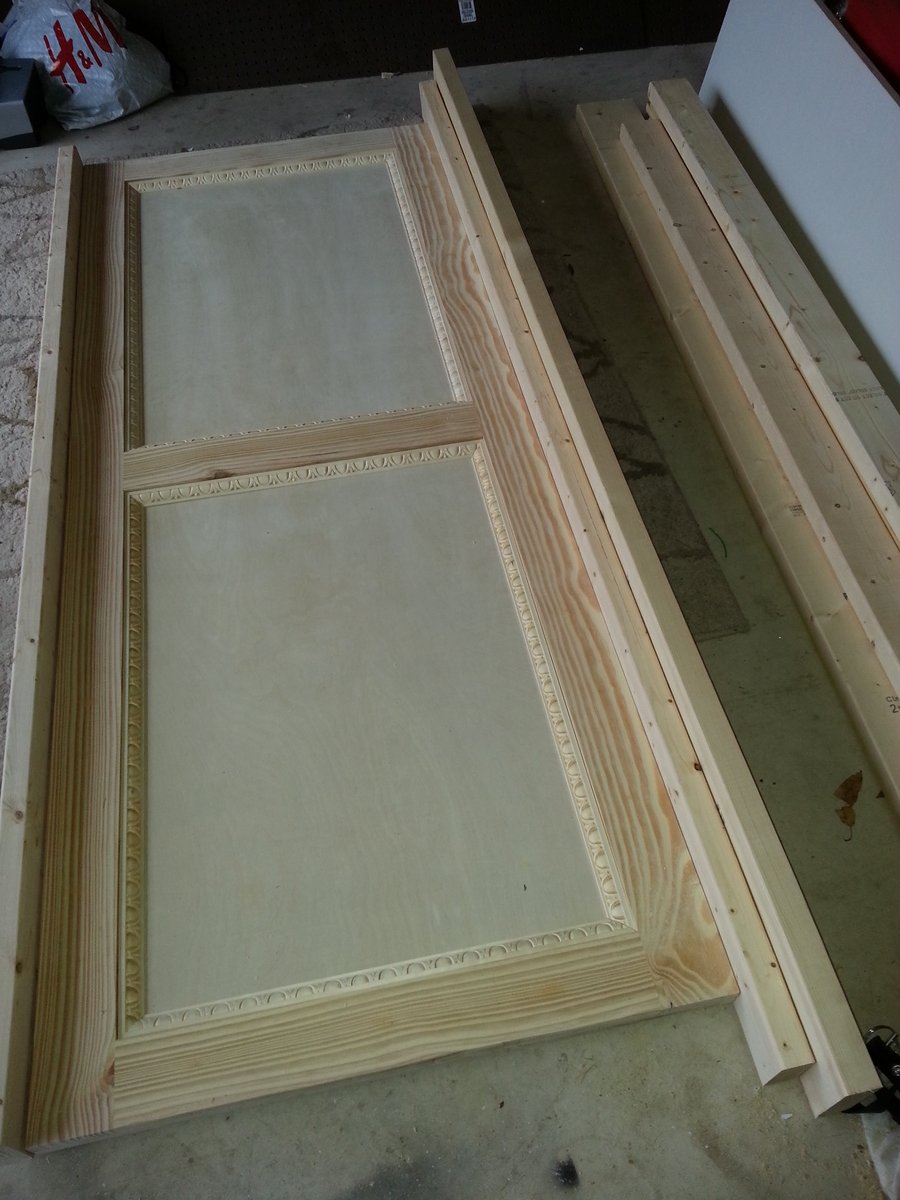
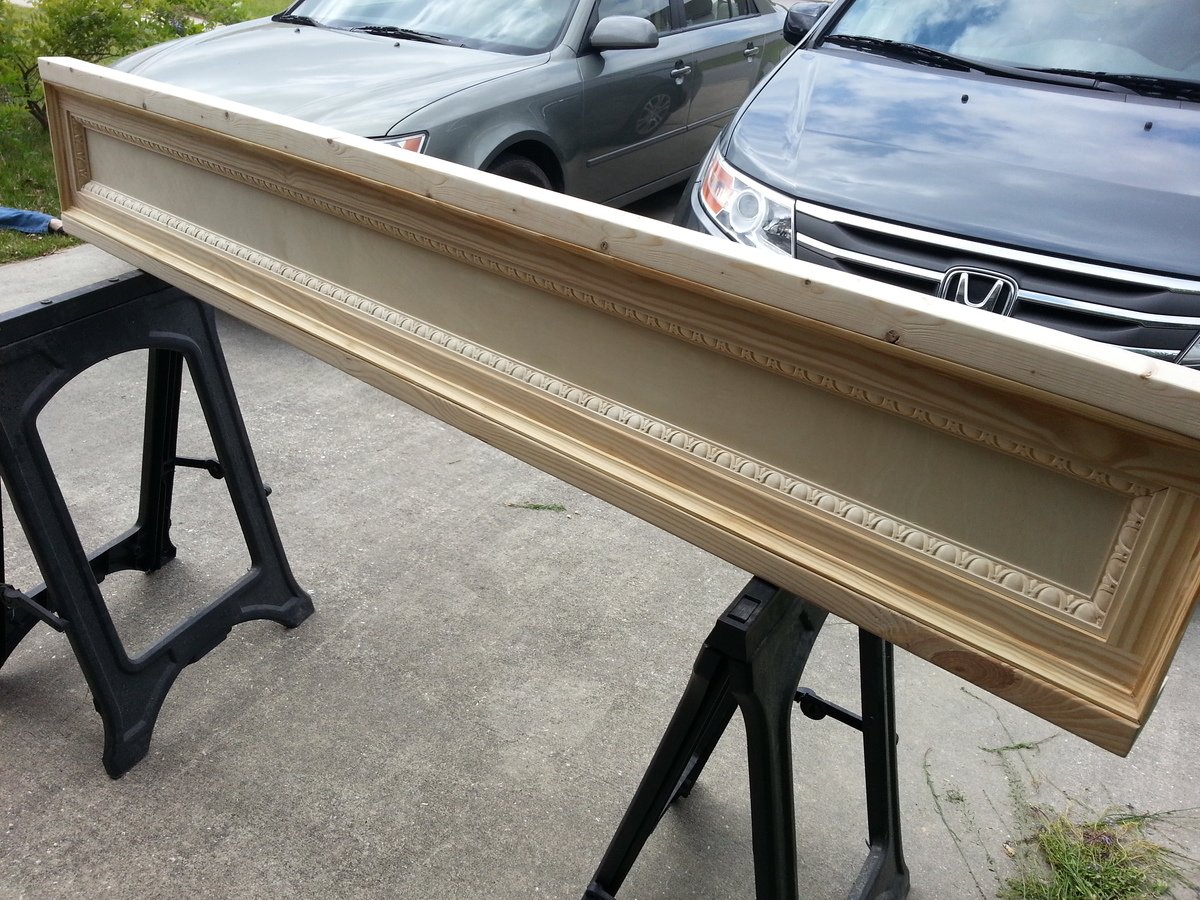
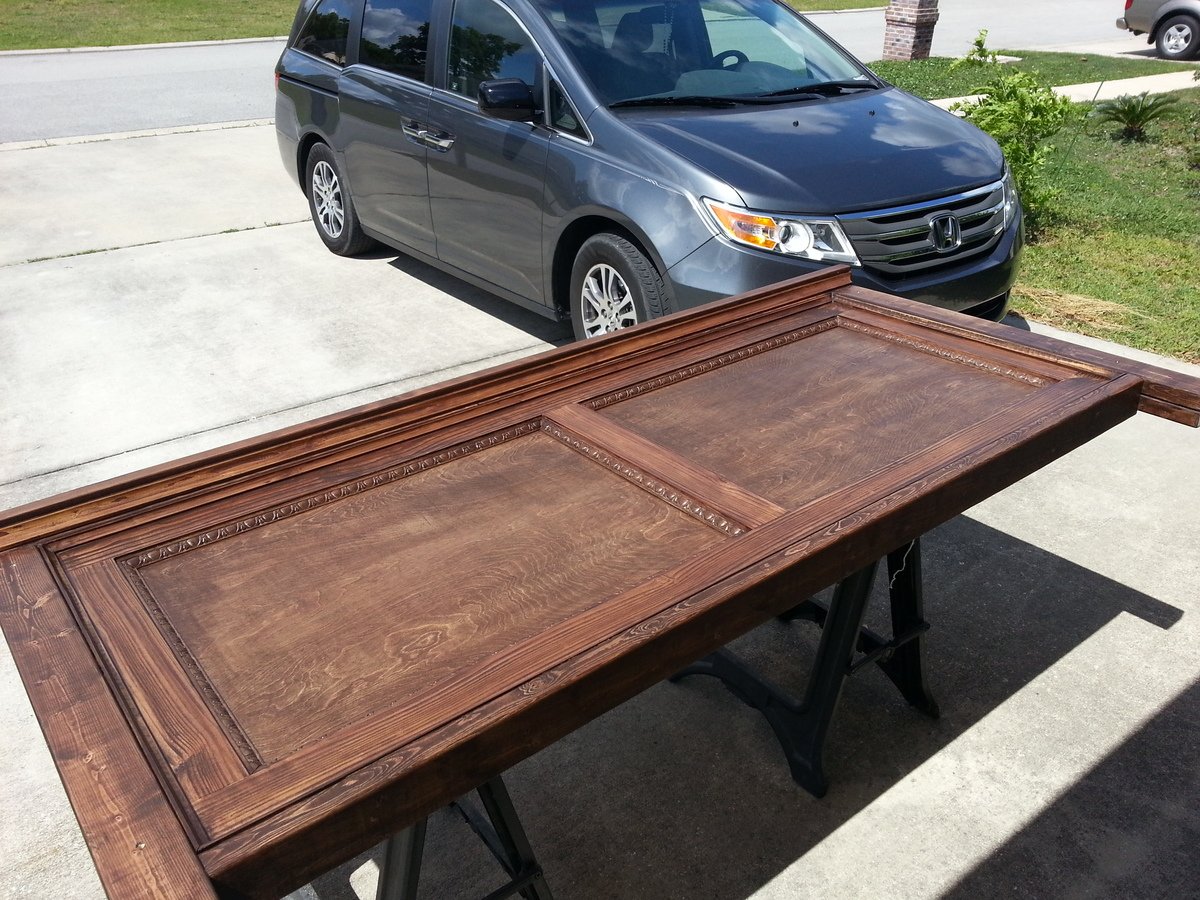
A good friend of mine, a pastor of a local church, asked me to build a pulpit for their recently finished church up in the countryside of Grenada. She showed me a picture of what she had in mind and based on that, I drew my own plan in SketchUp, and then built it out of Yellow Pine boards and Plywood.
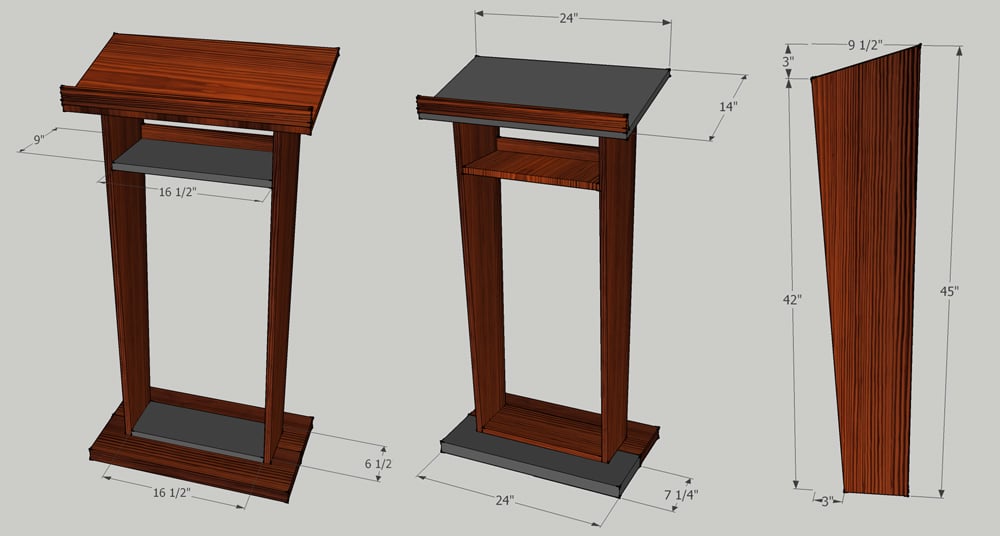
Note to the dimensions:
After I drew the plan, and just when I was at the lumberyard to have the plywood and boards cut, I thought I might have had it estimated not wide enough, so I decided on the spot to make it 2" wider and the top panel 2" wider and deeper too. So if you'd like to build based on my plans, please consider if it's wide enough for your purposes.
This is what I used (corrected measurements here):
2x 2x8 26" long YP Boards (Base)
1x 18 1/2" x 6 1/2" Plywood (Base Support Panel)
1x 26" x 16" Plywood (Top)
1x 18 1/2" x 9" Plywood (Shelf Panel)
2x 45" x 9 1/2" Plywood (Side Panels ) - these are cut angled, see plans
1x 44 1/2" Wood Moulding (for the "stopper" on the top panel, and the "back" of the top shelf.


Tue, 02/04/2025 - 18:21
How did you put it together? Did you use dowels or biscuits or another way. Thanks!! Your plans are great!! This will be the third project of yours I’ve done. Very thankful.
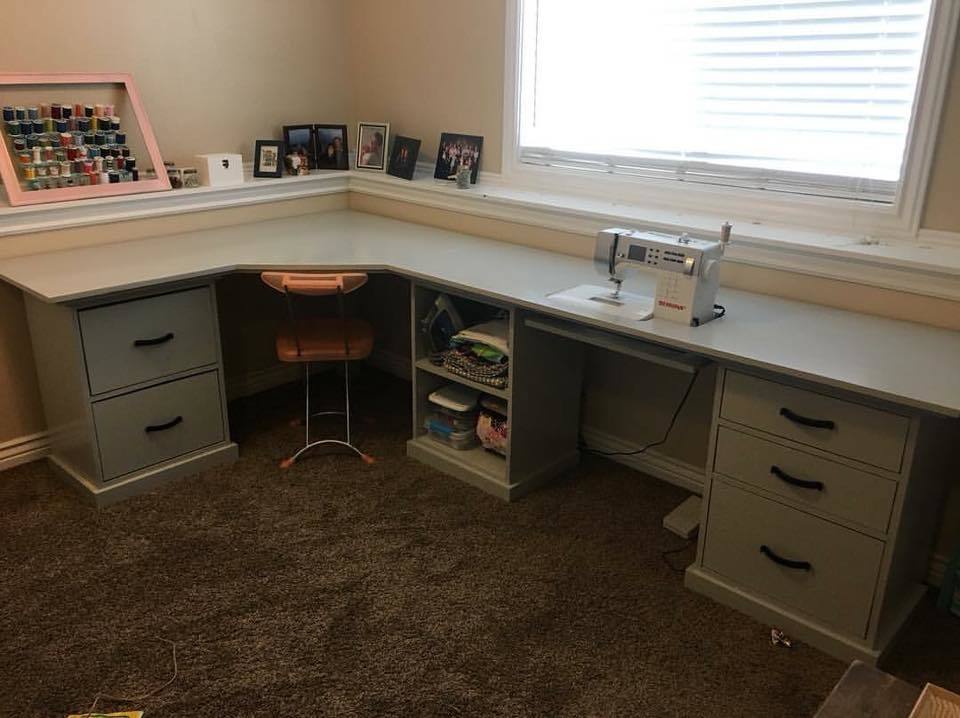
We made this sewing/craft table by combining plans from the modular office. It was a big job but SO worth it! We love your plans and use them all the time!
Submitted by Candace Ann Williams
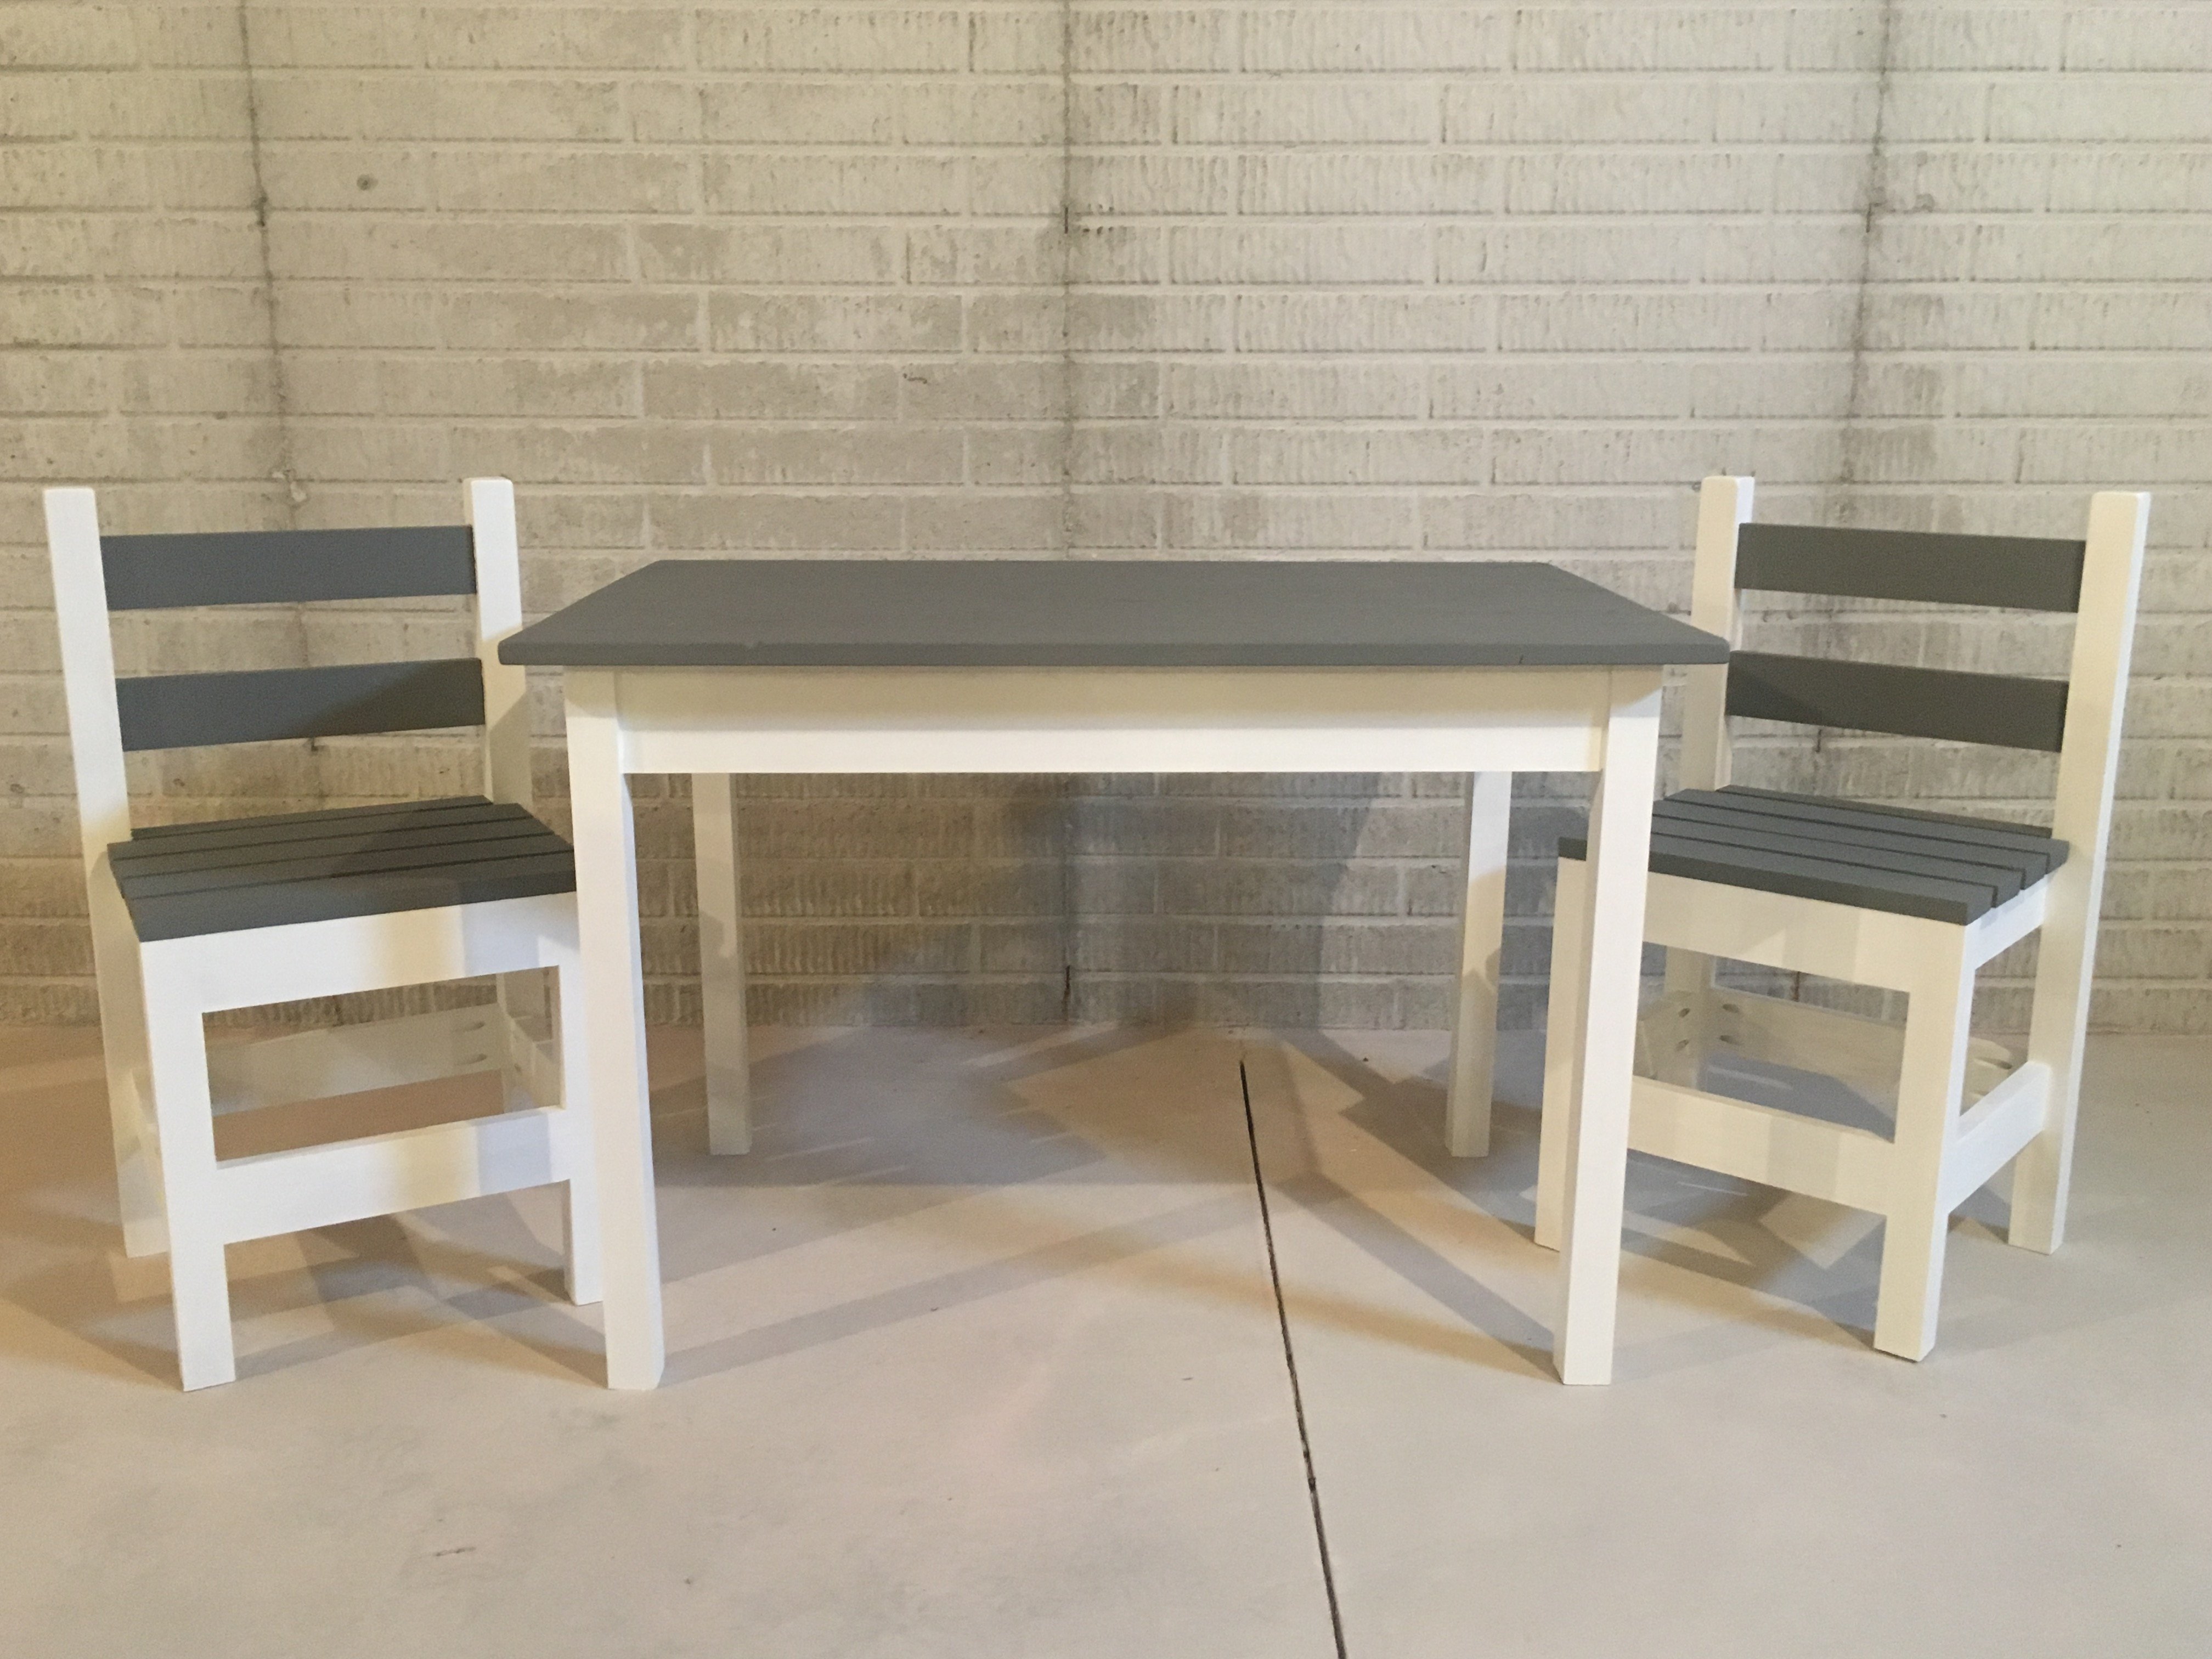
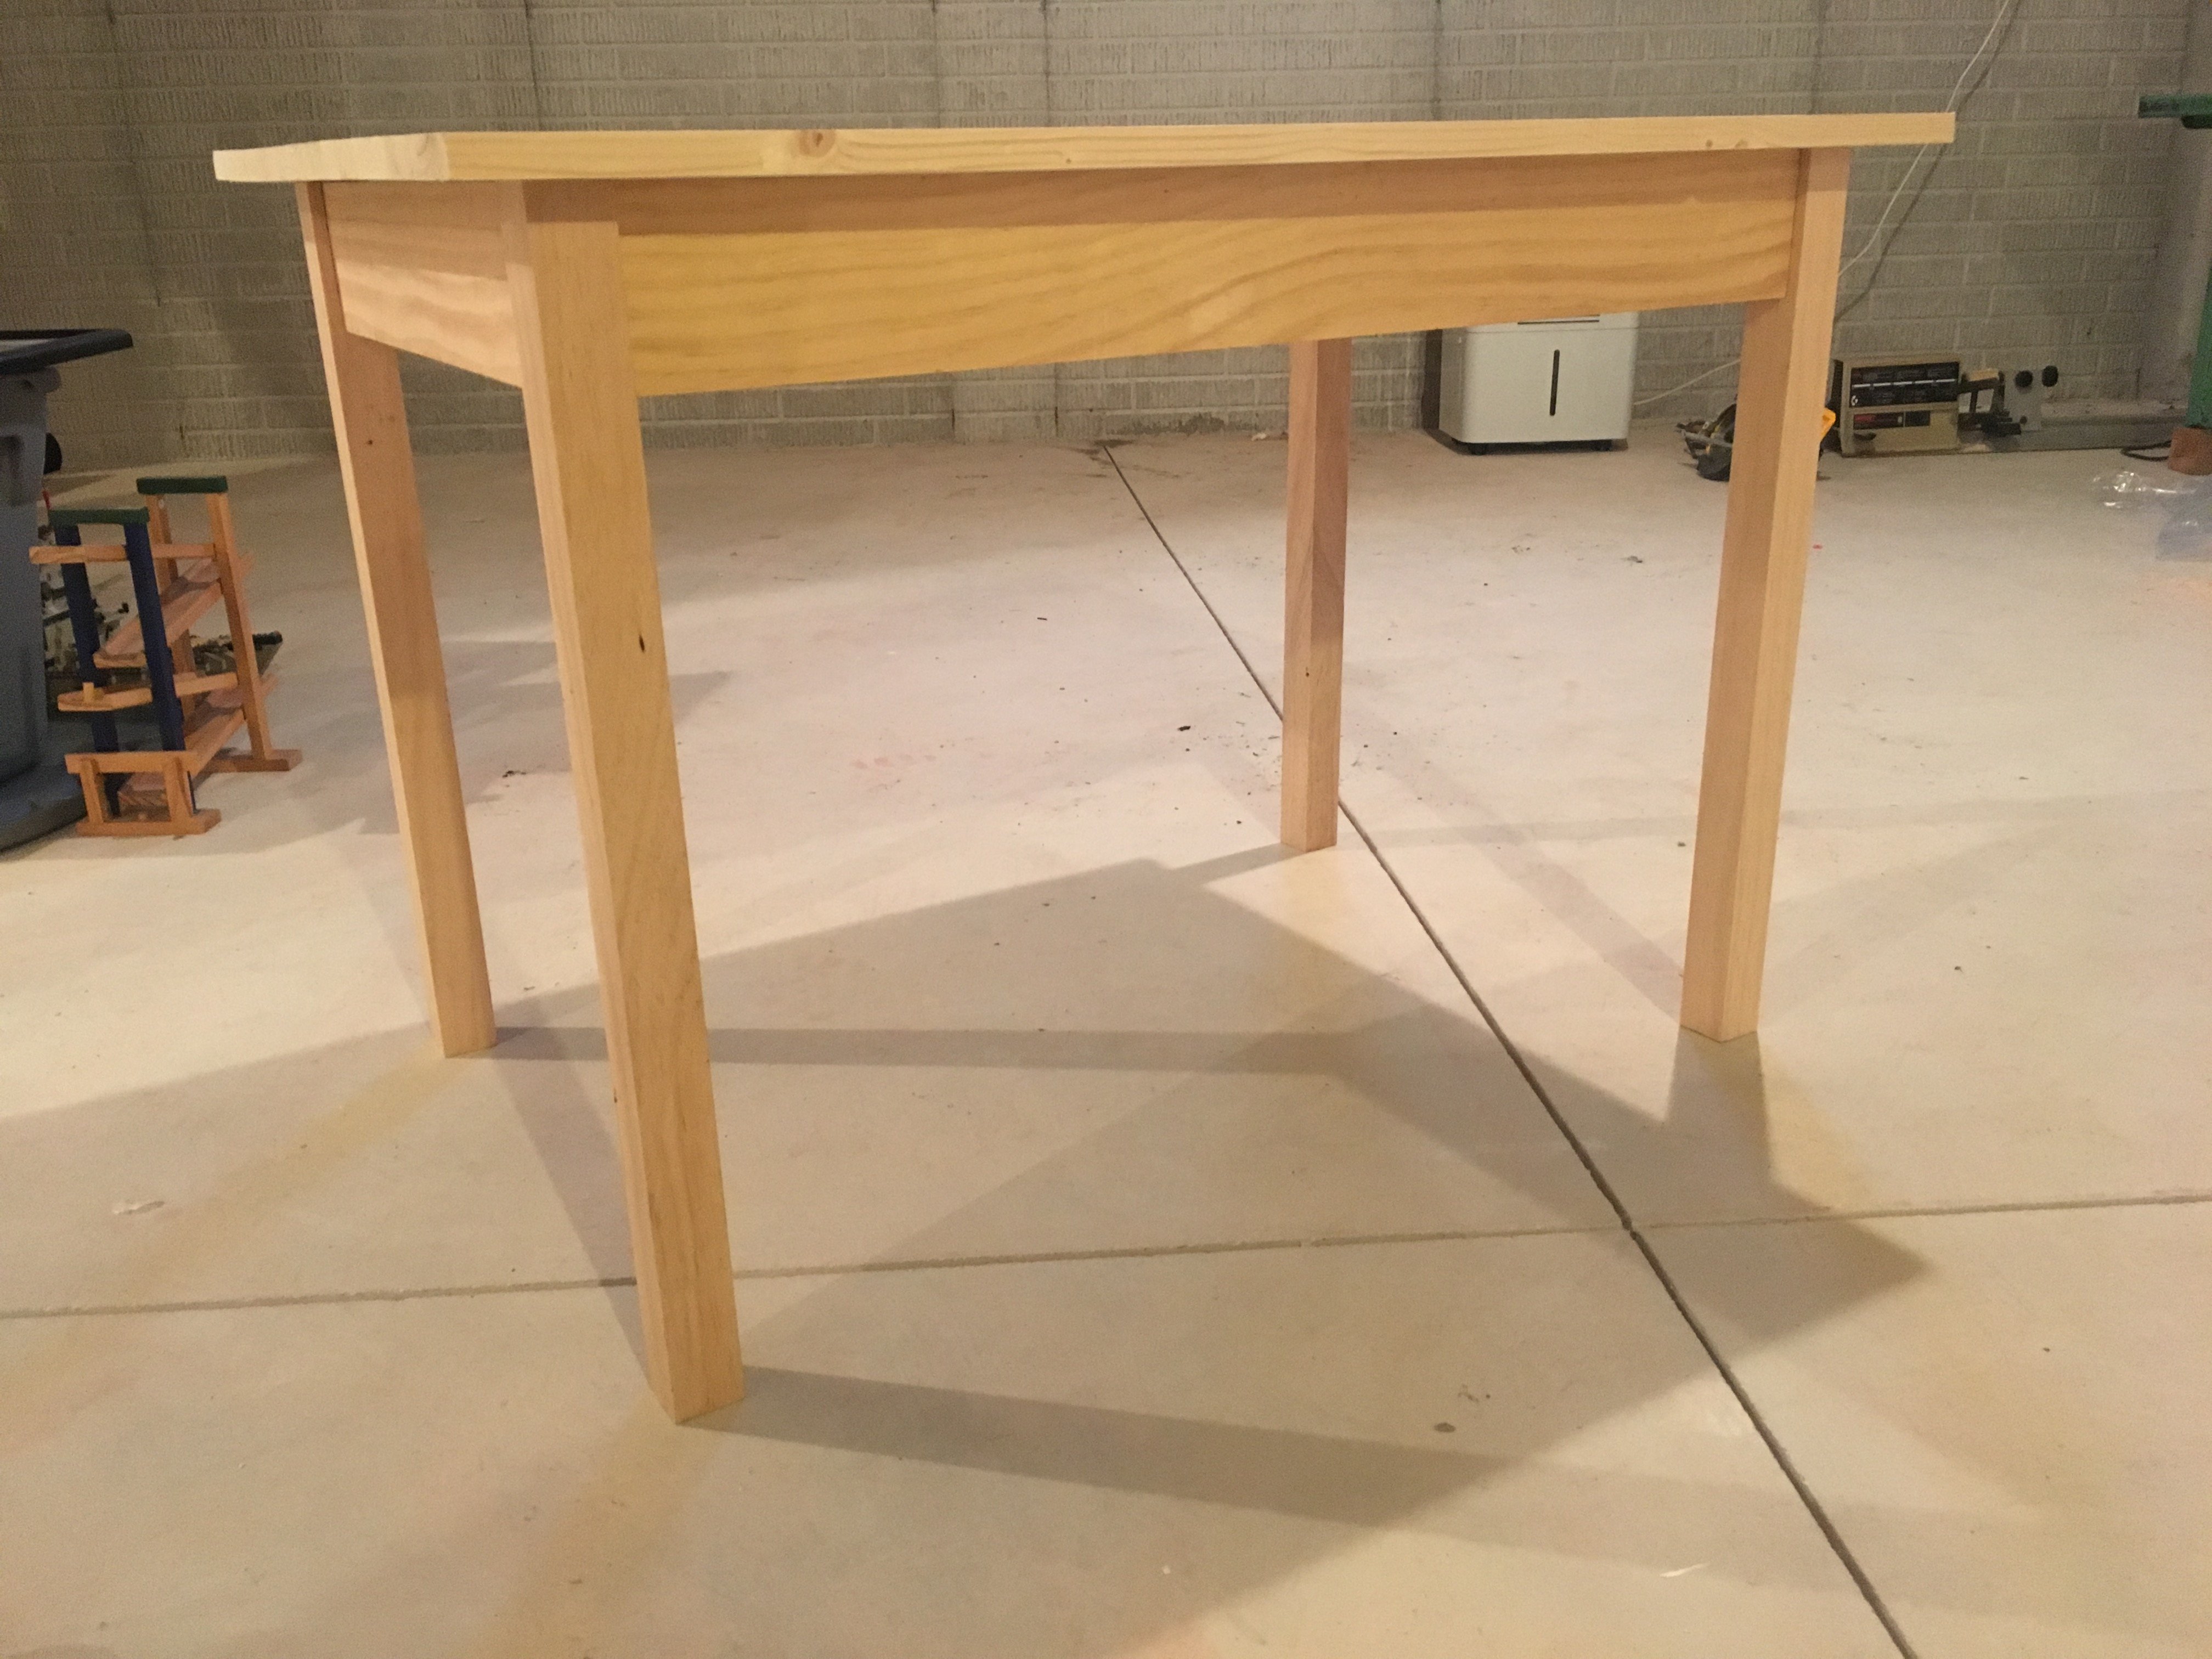
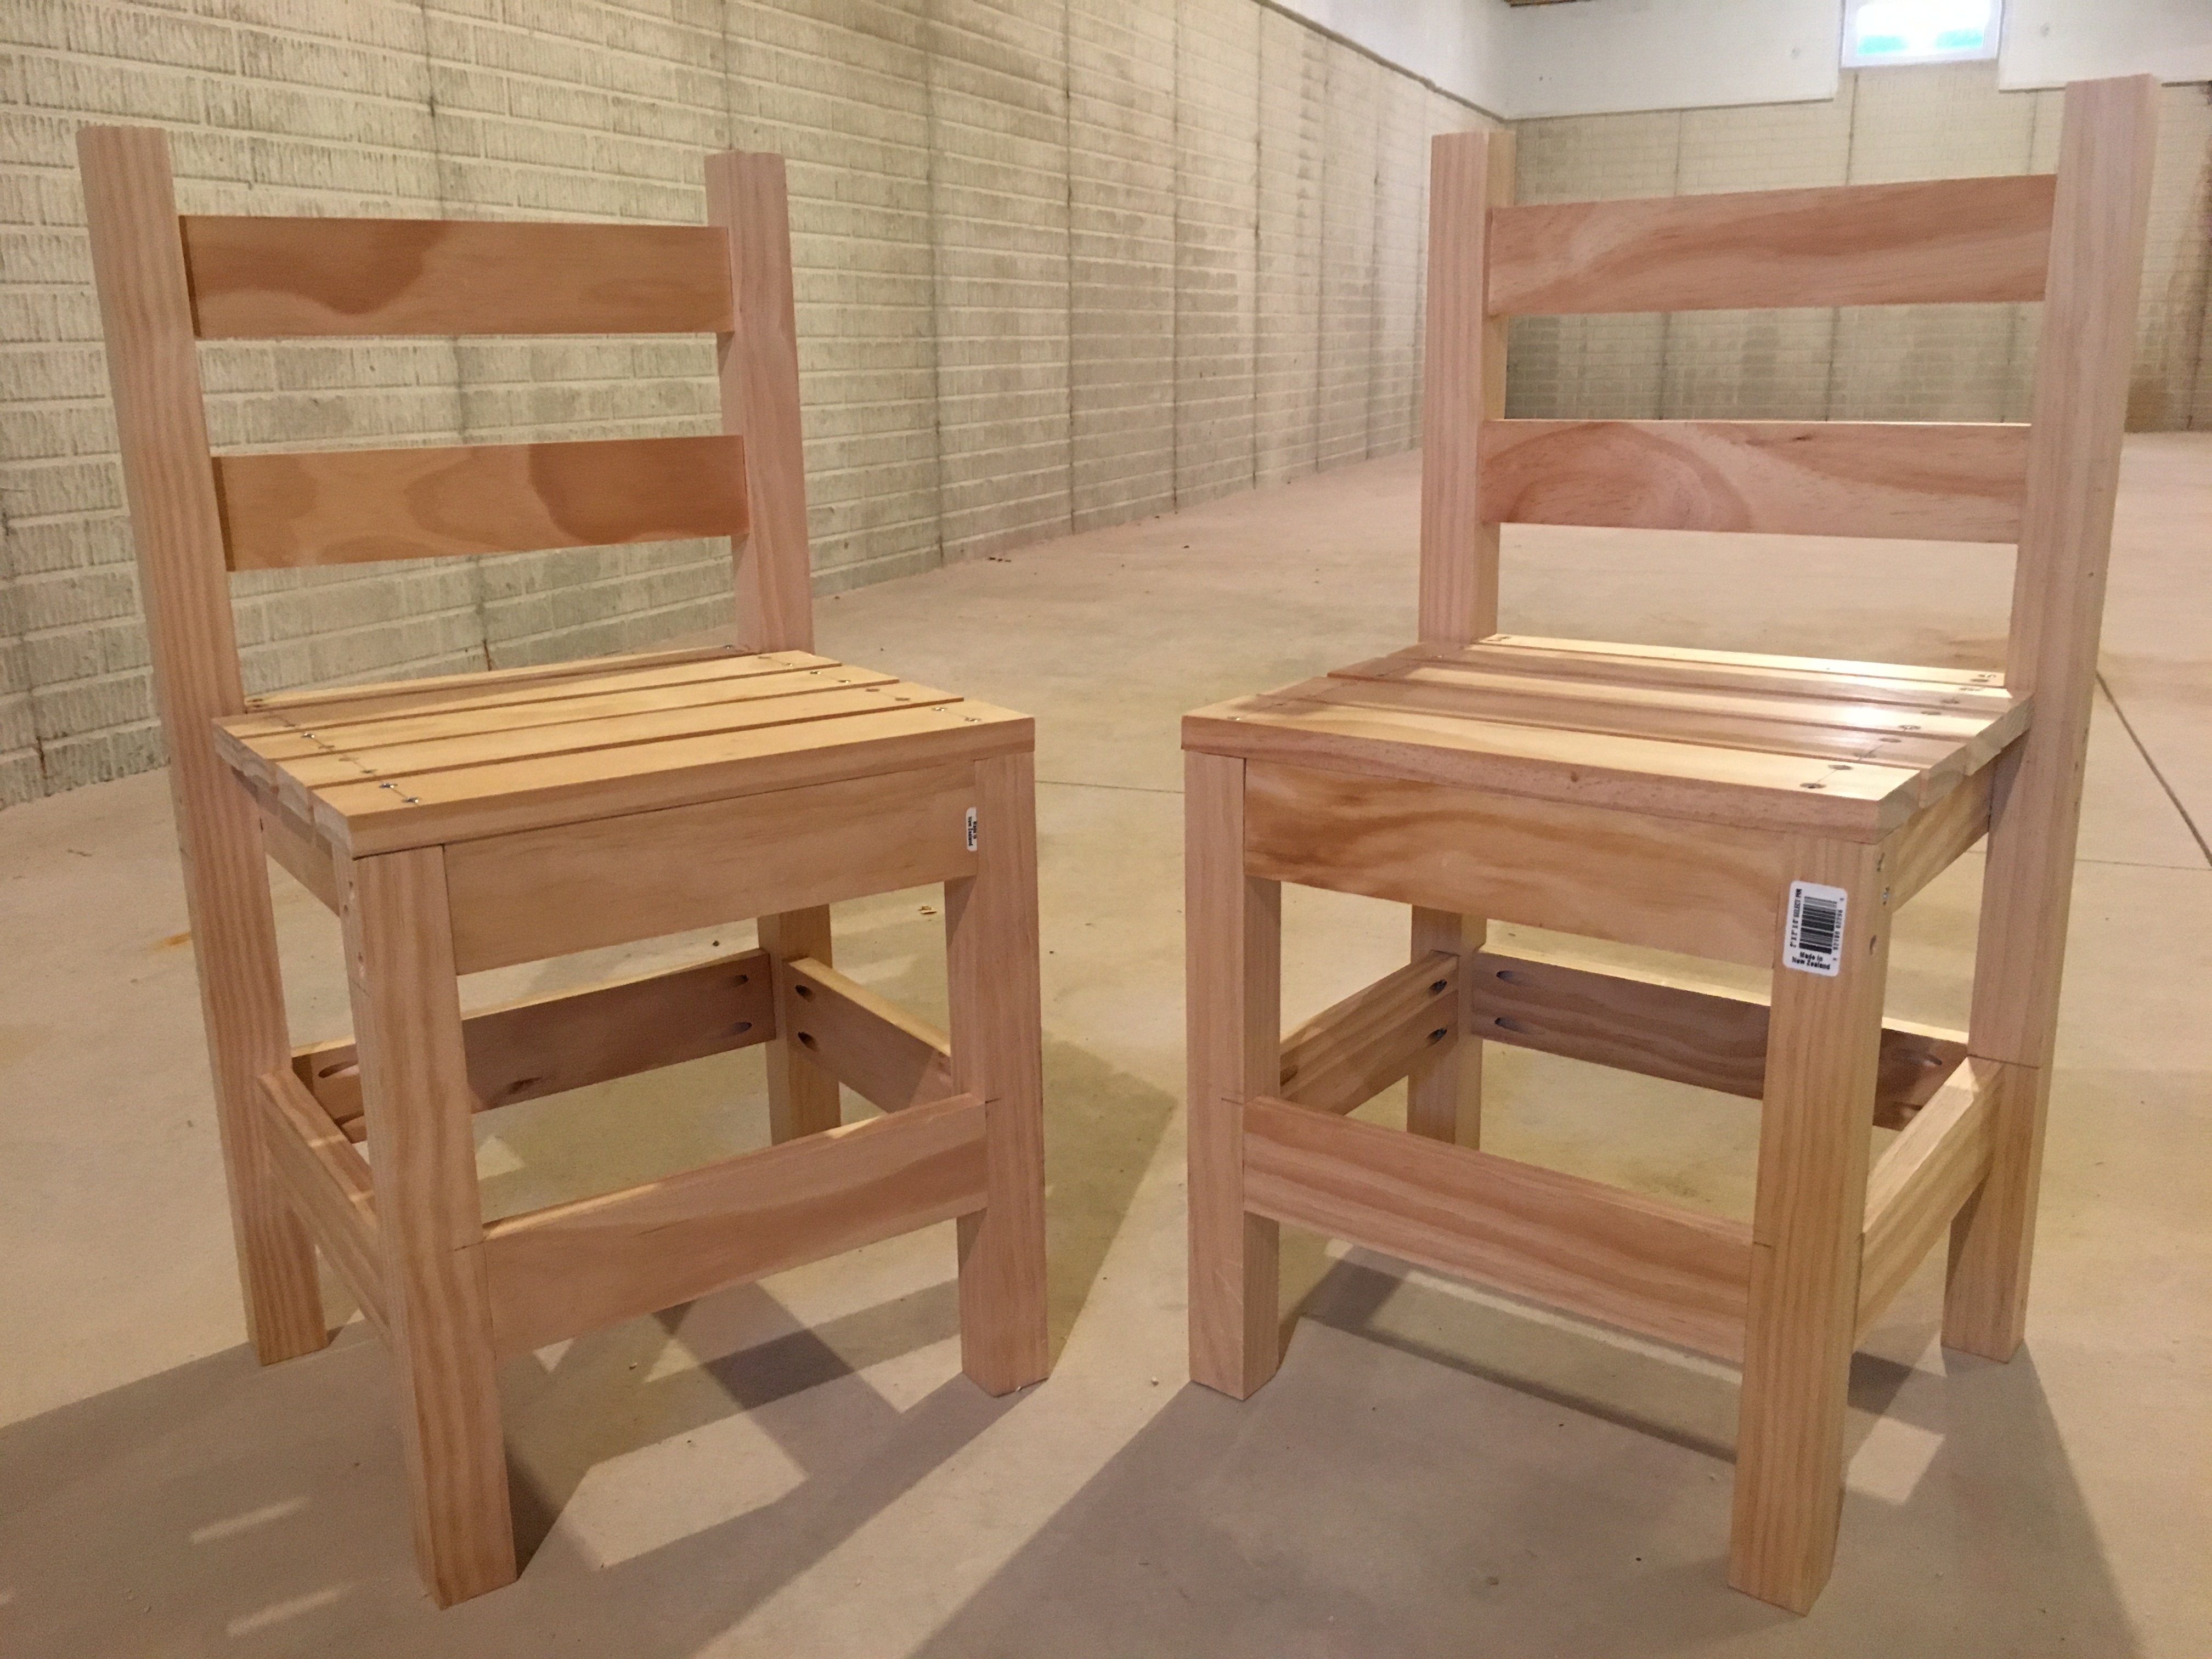
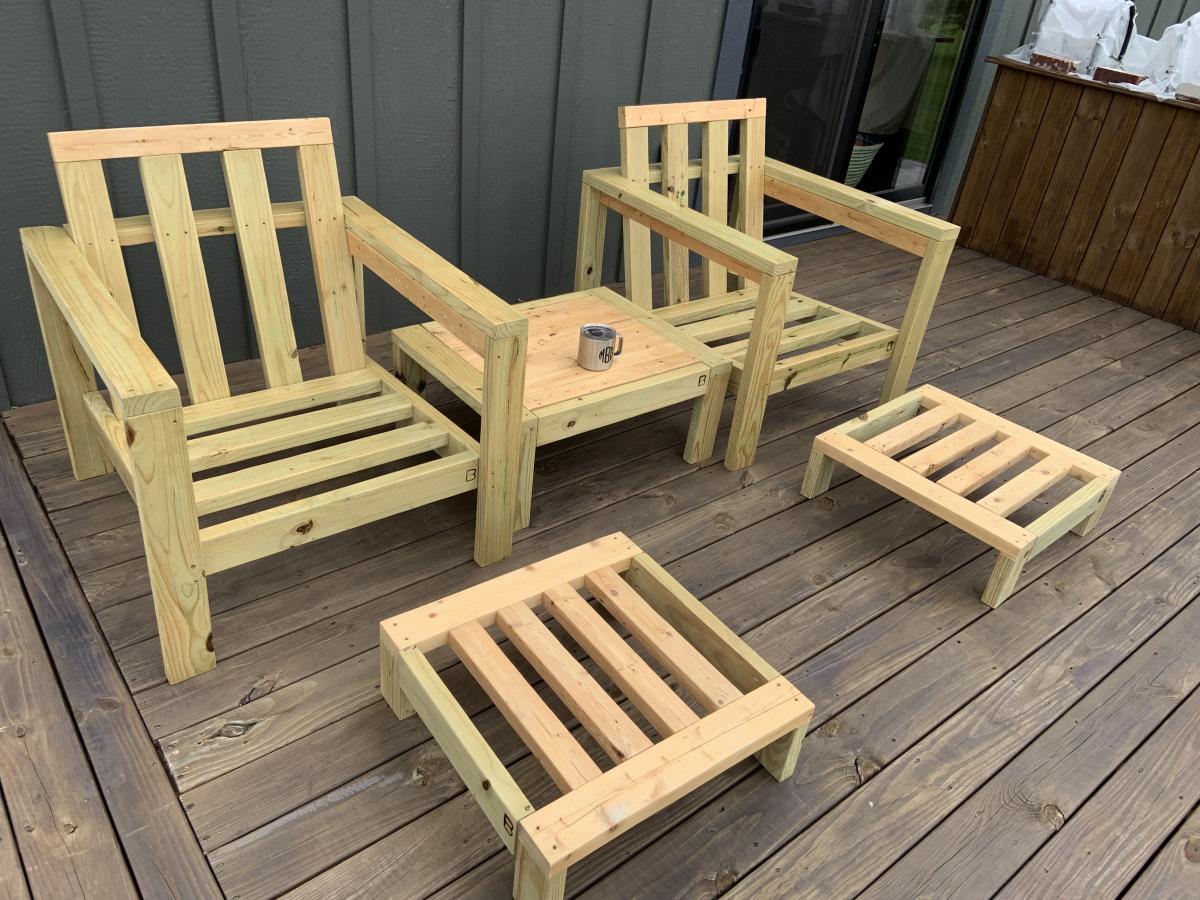
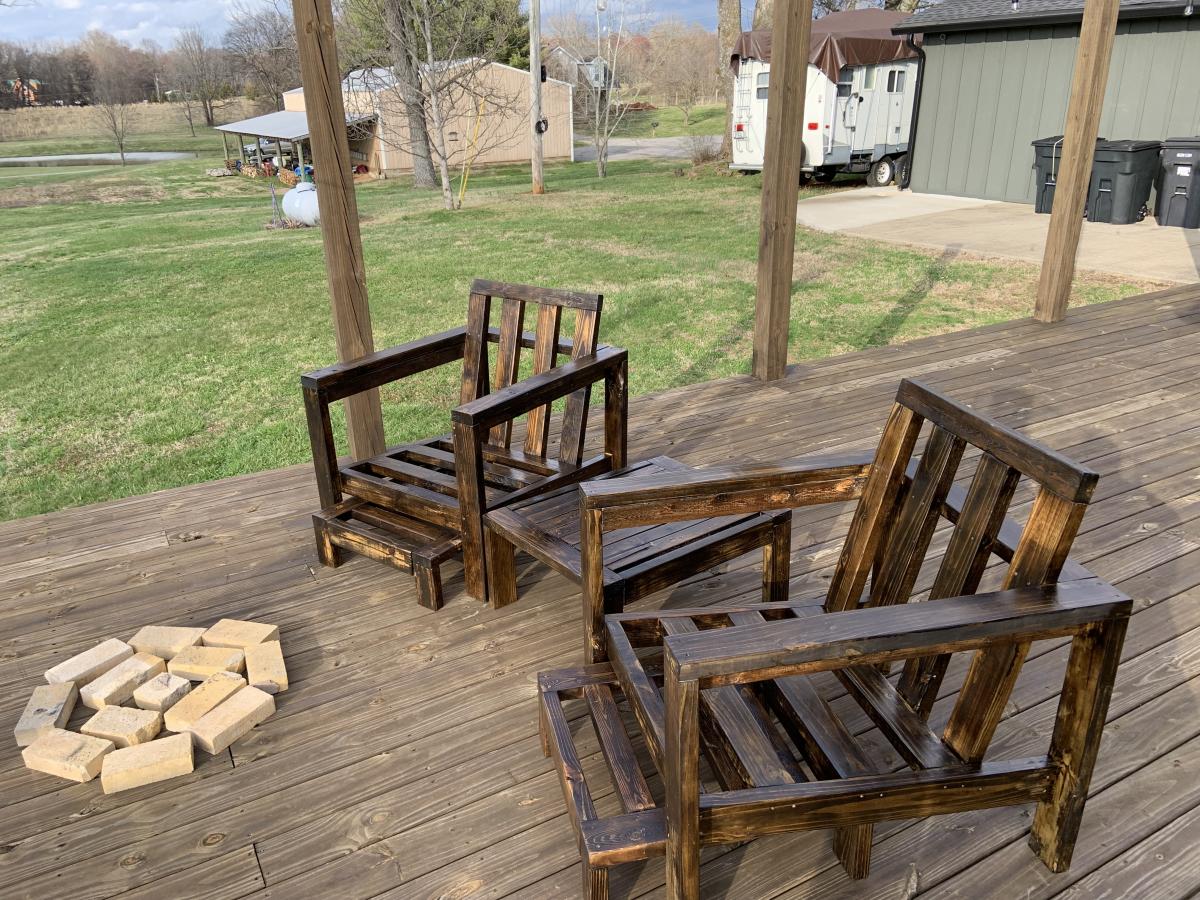
I made this table and chairs for my 1 year old nephew. He is still a little small for it but the table and chairs are both very sturdy. The table top is a one piece, 24 x 36 ,edge glued pine board. I used the one piece table top as an alternative to screwing the 3 boards together. I followed the plans for the table for the most part. As for the chairs, I followed the plan to build the seat base. For the legs of the chairs I took advise from carongirls' table and chair brag post and used 2x2's. I used 1x3's to stiffen the chair legs. I also lengthened the table legs and chair legs by 2 inches.
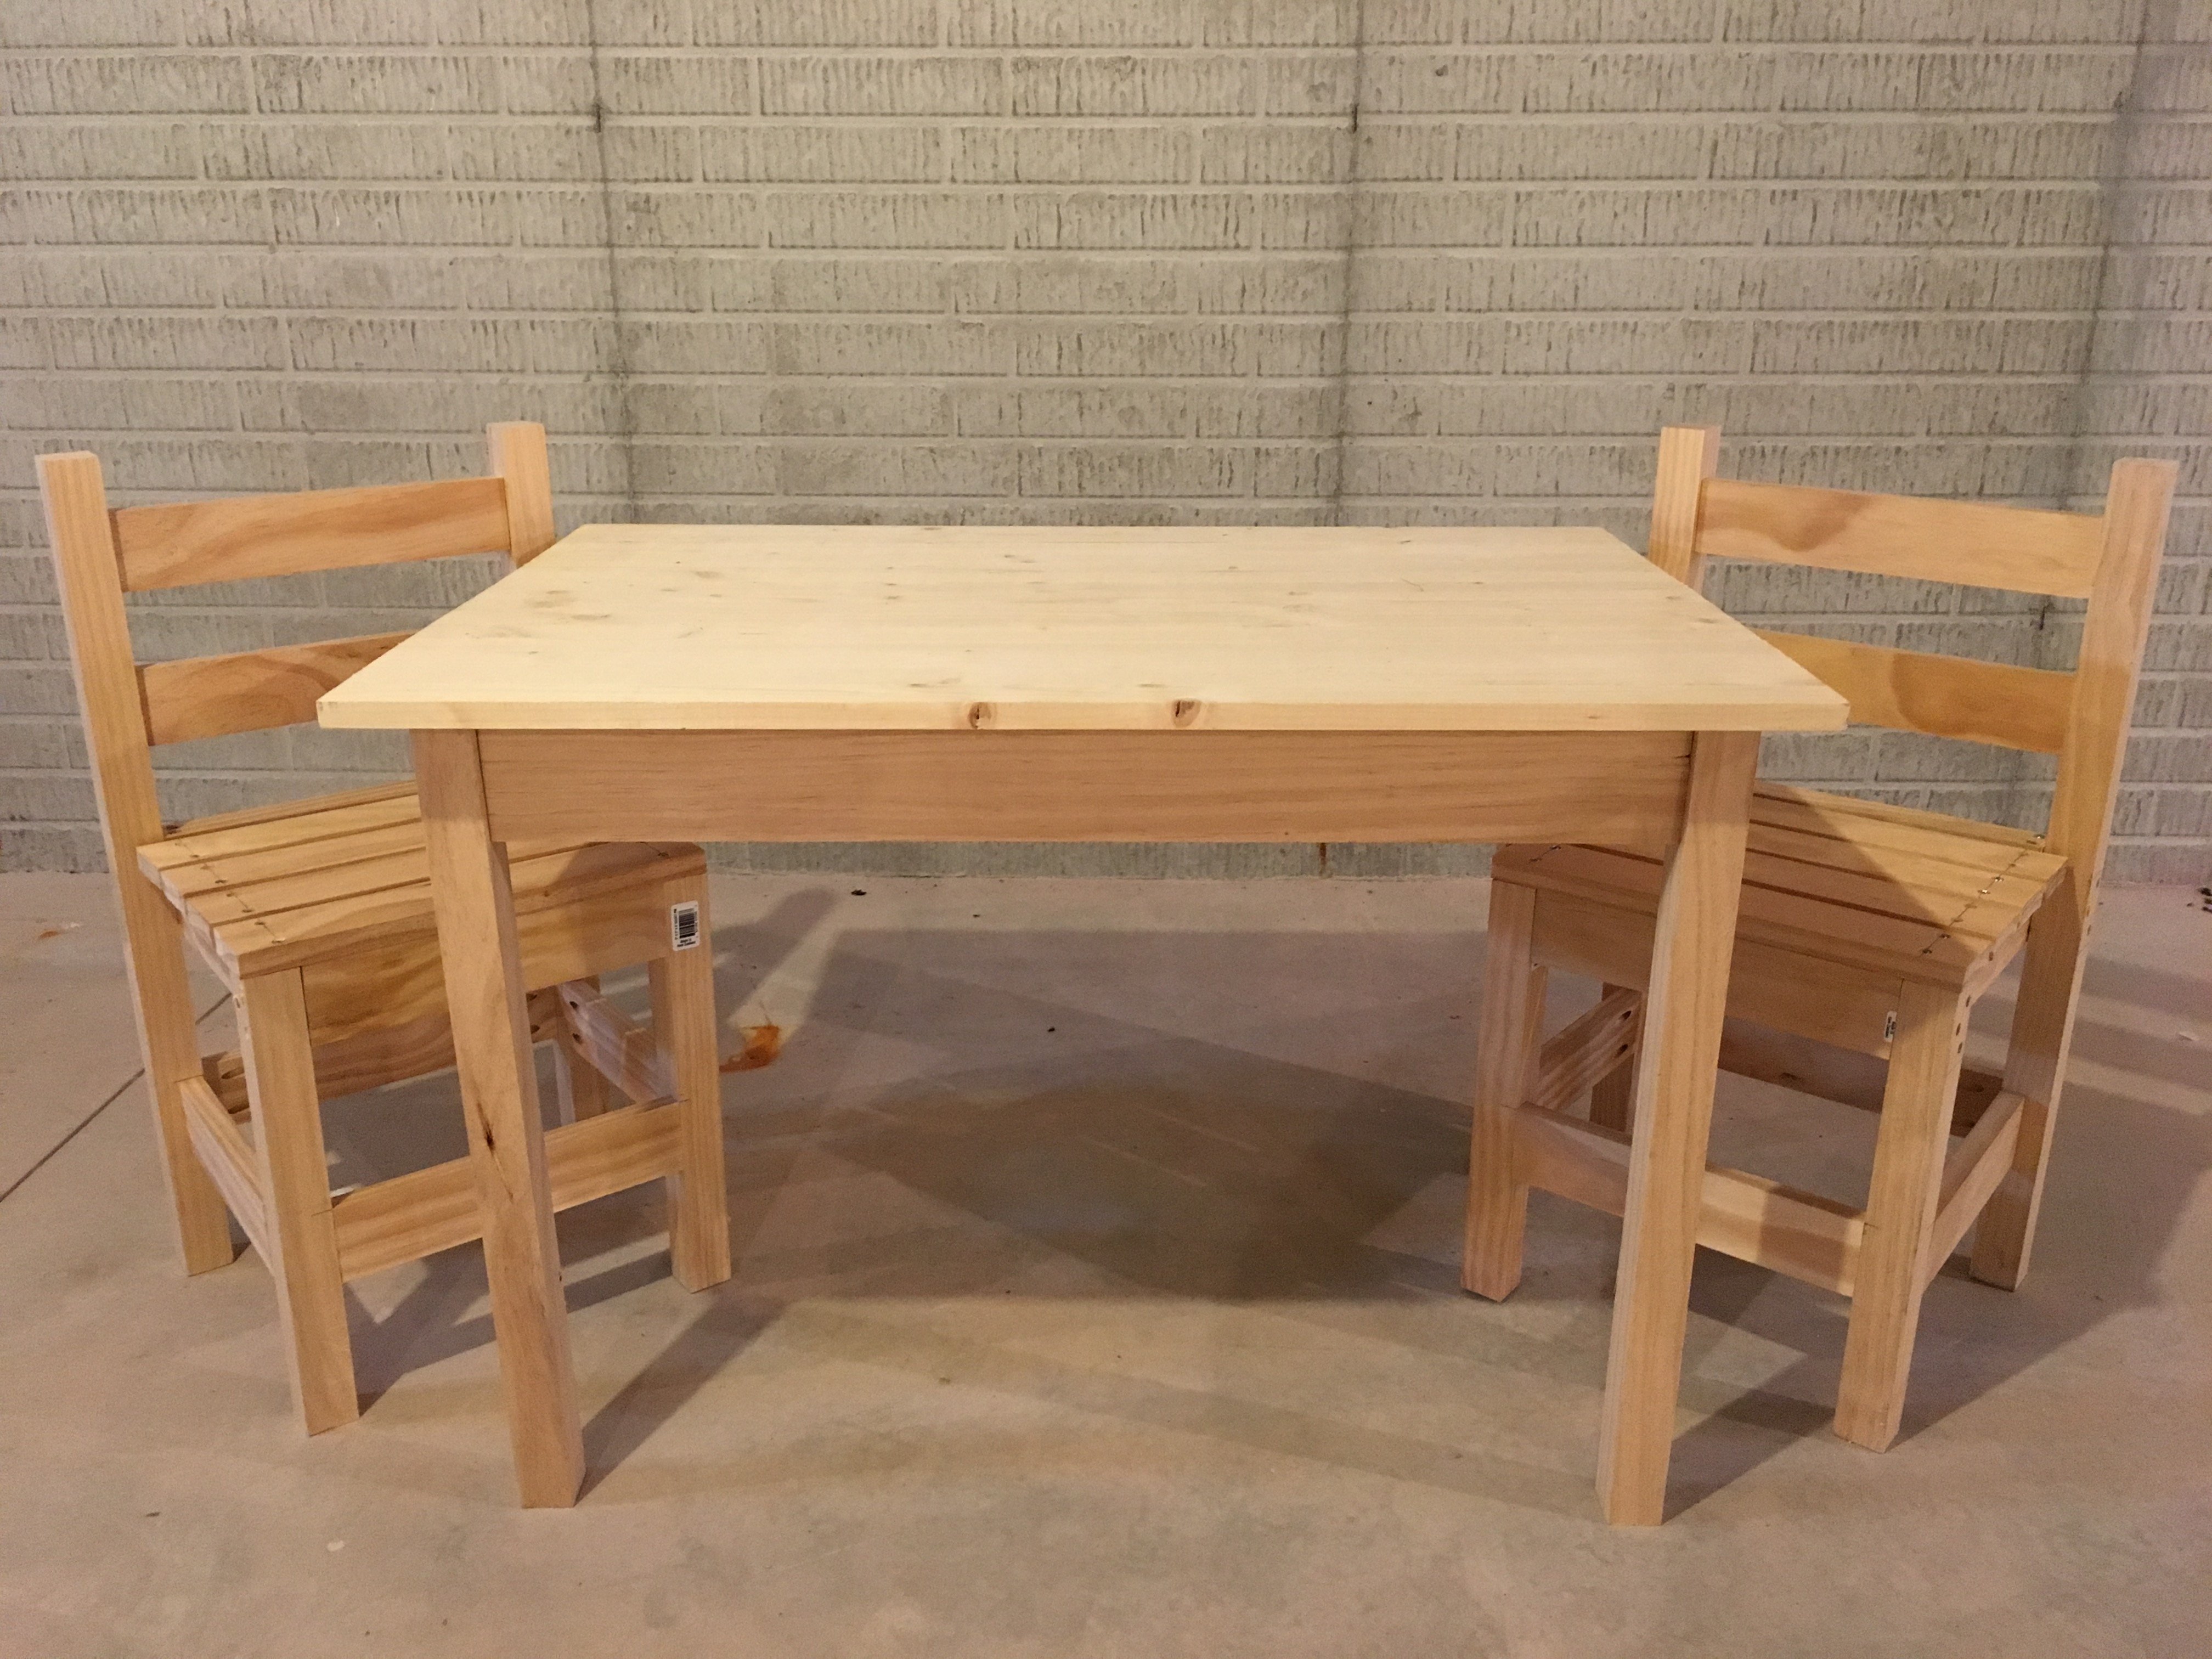
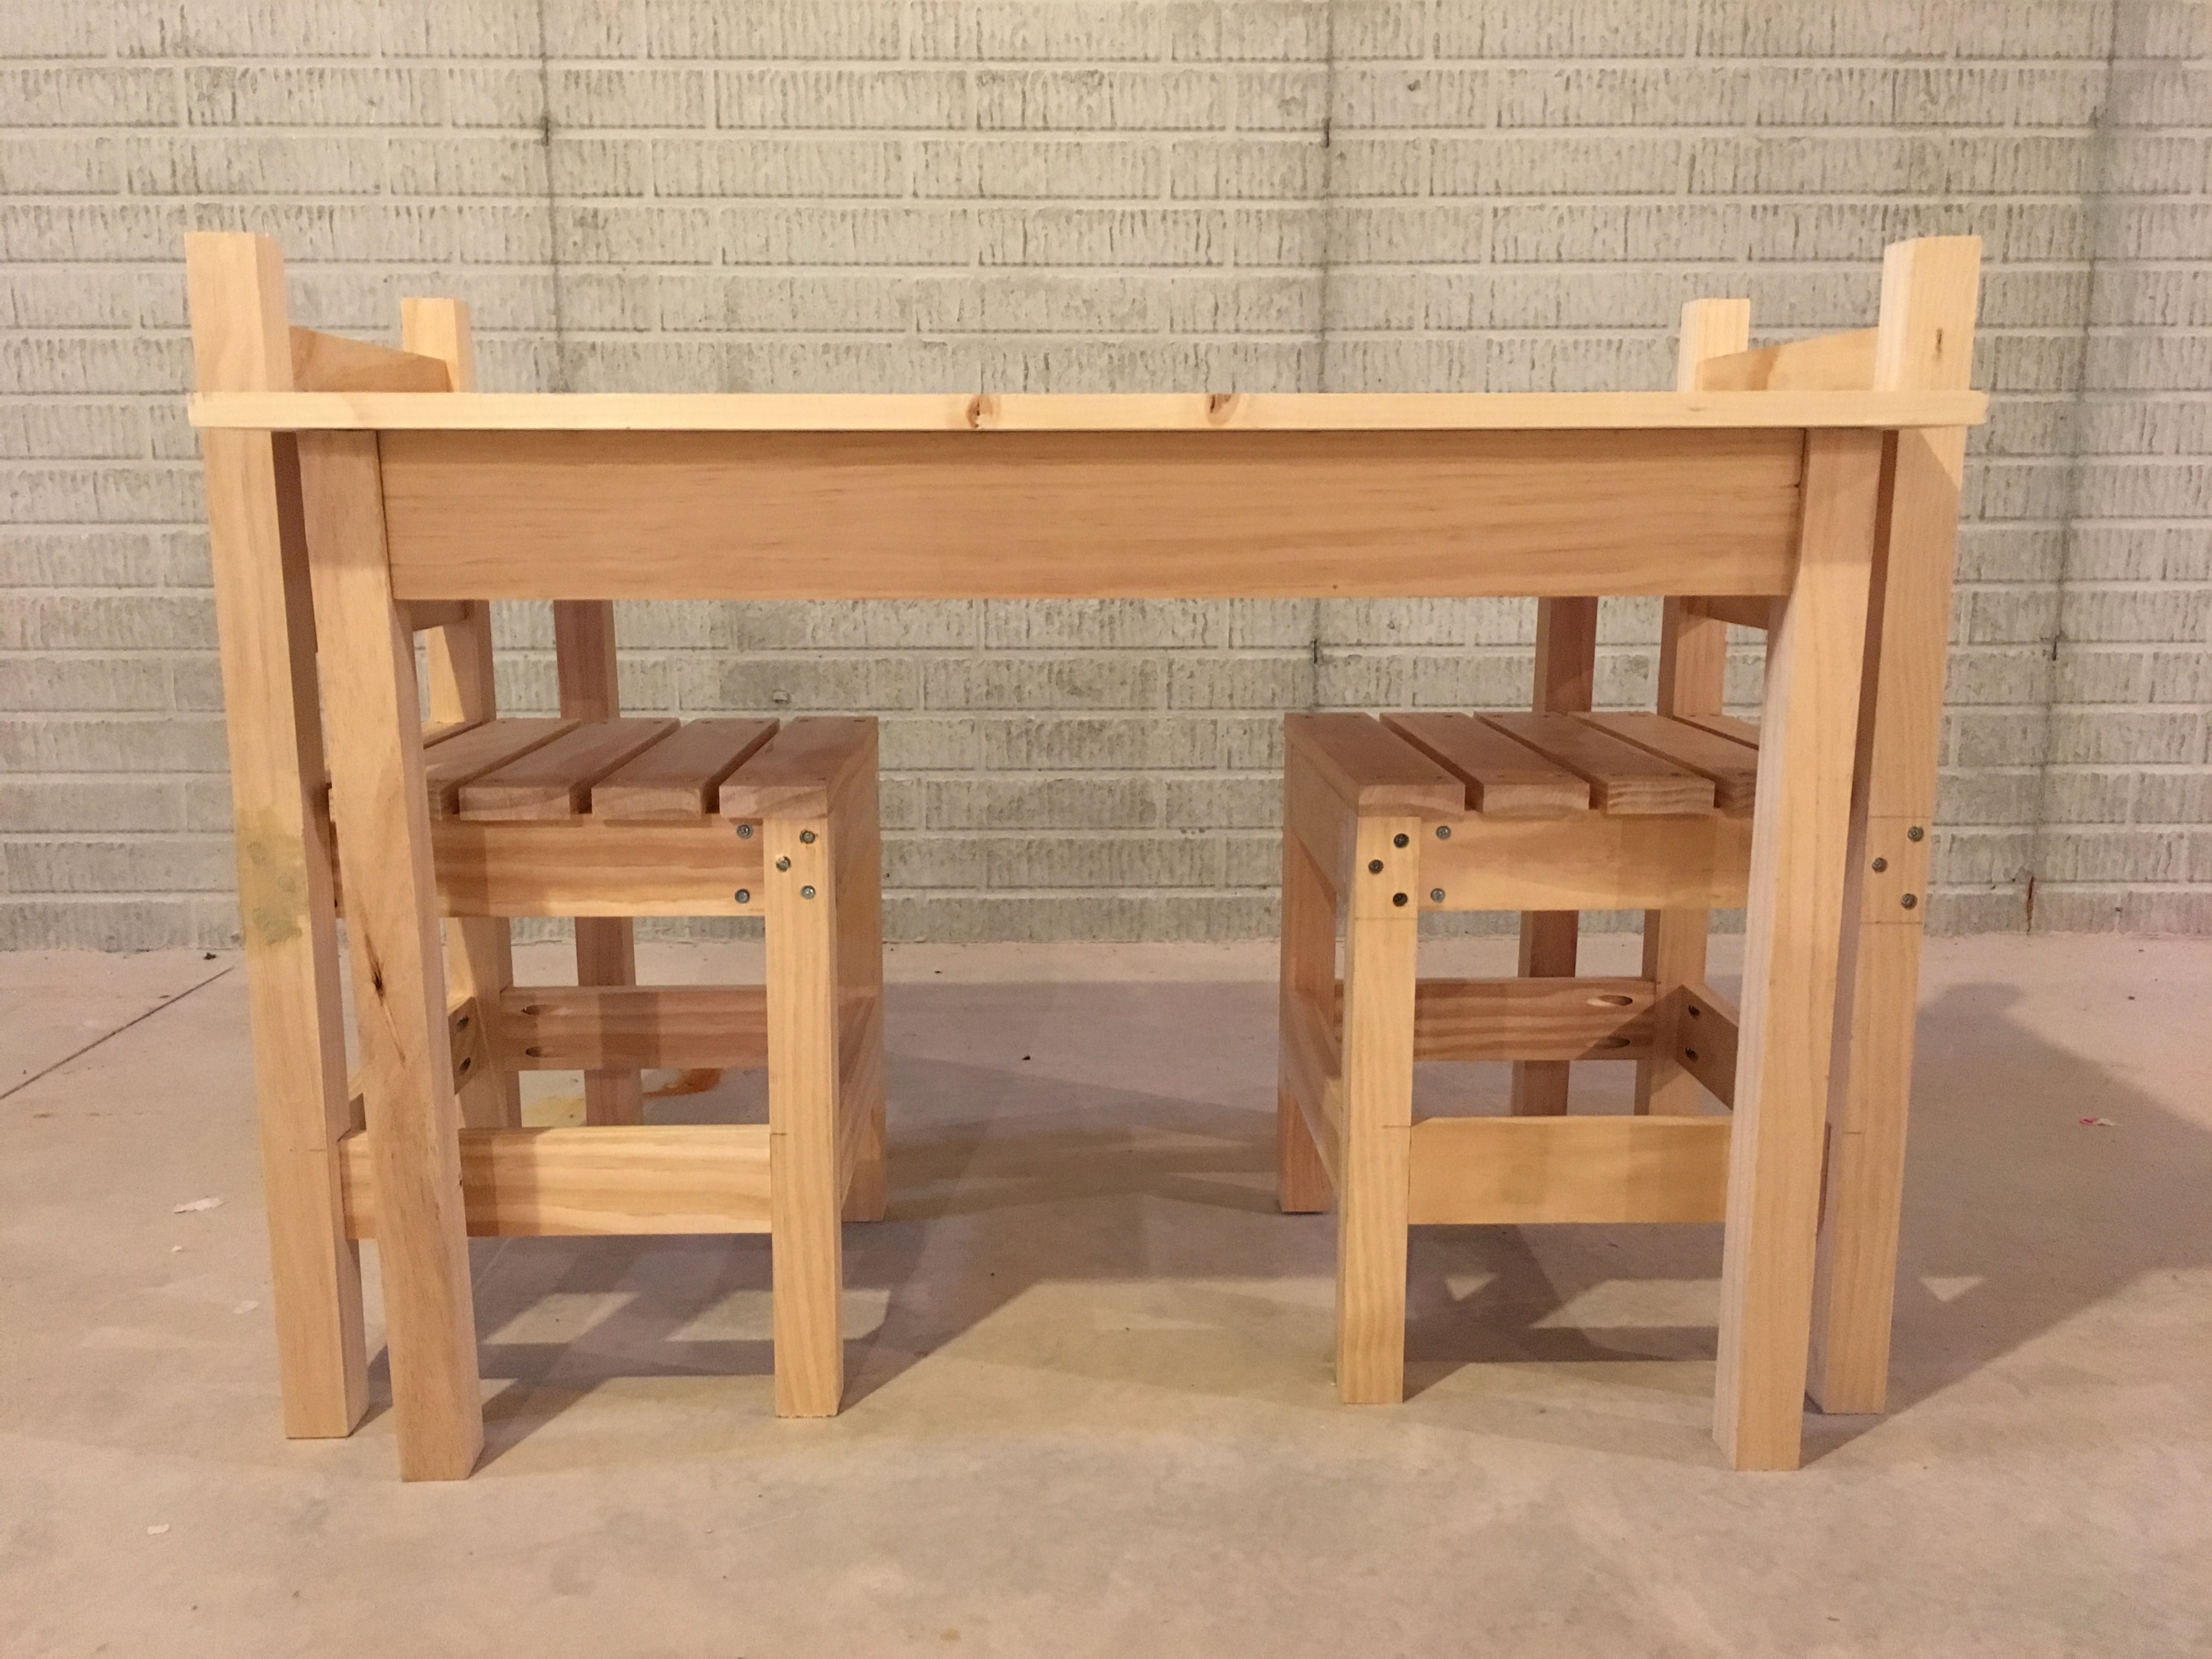
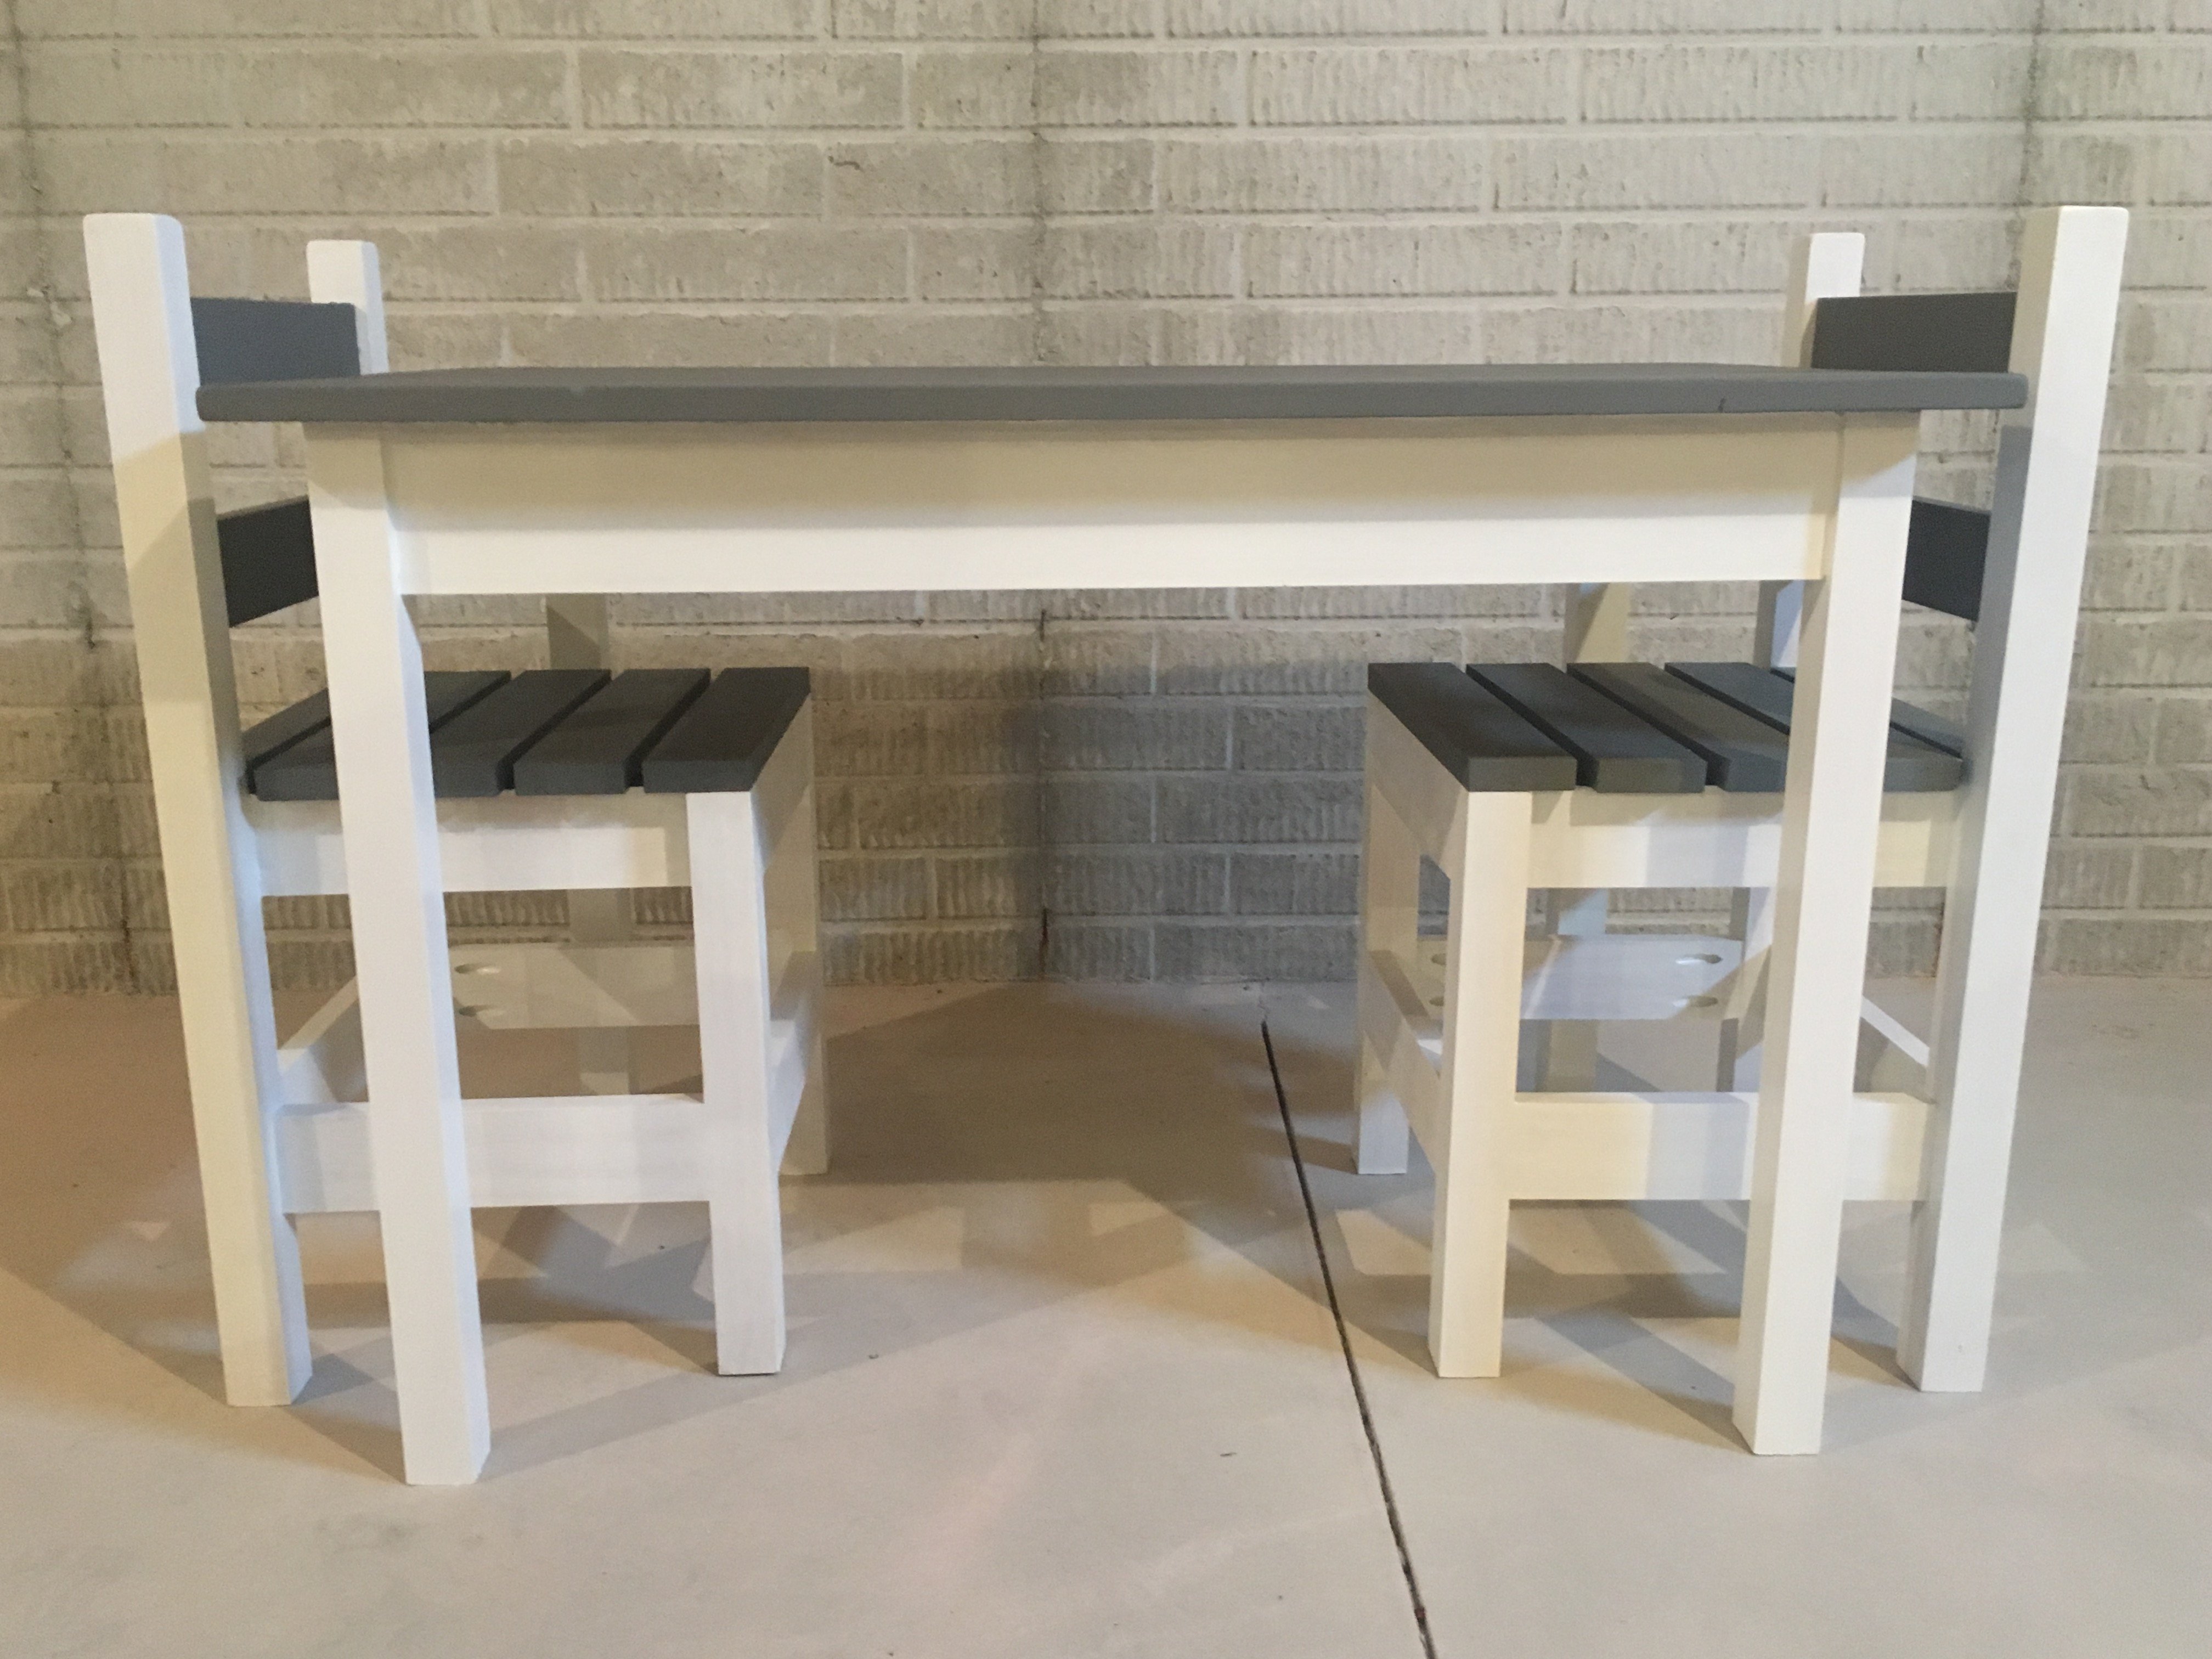

I made a couple of additions/modifications
I also made a couple of side tables and foot stools for the chairs. A total of four chairs, two tables and two foot stools for the deck set.


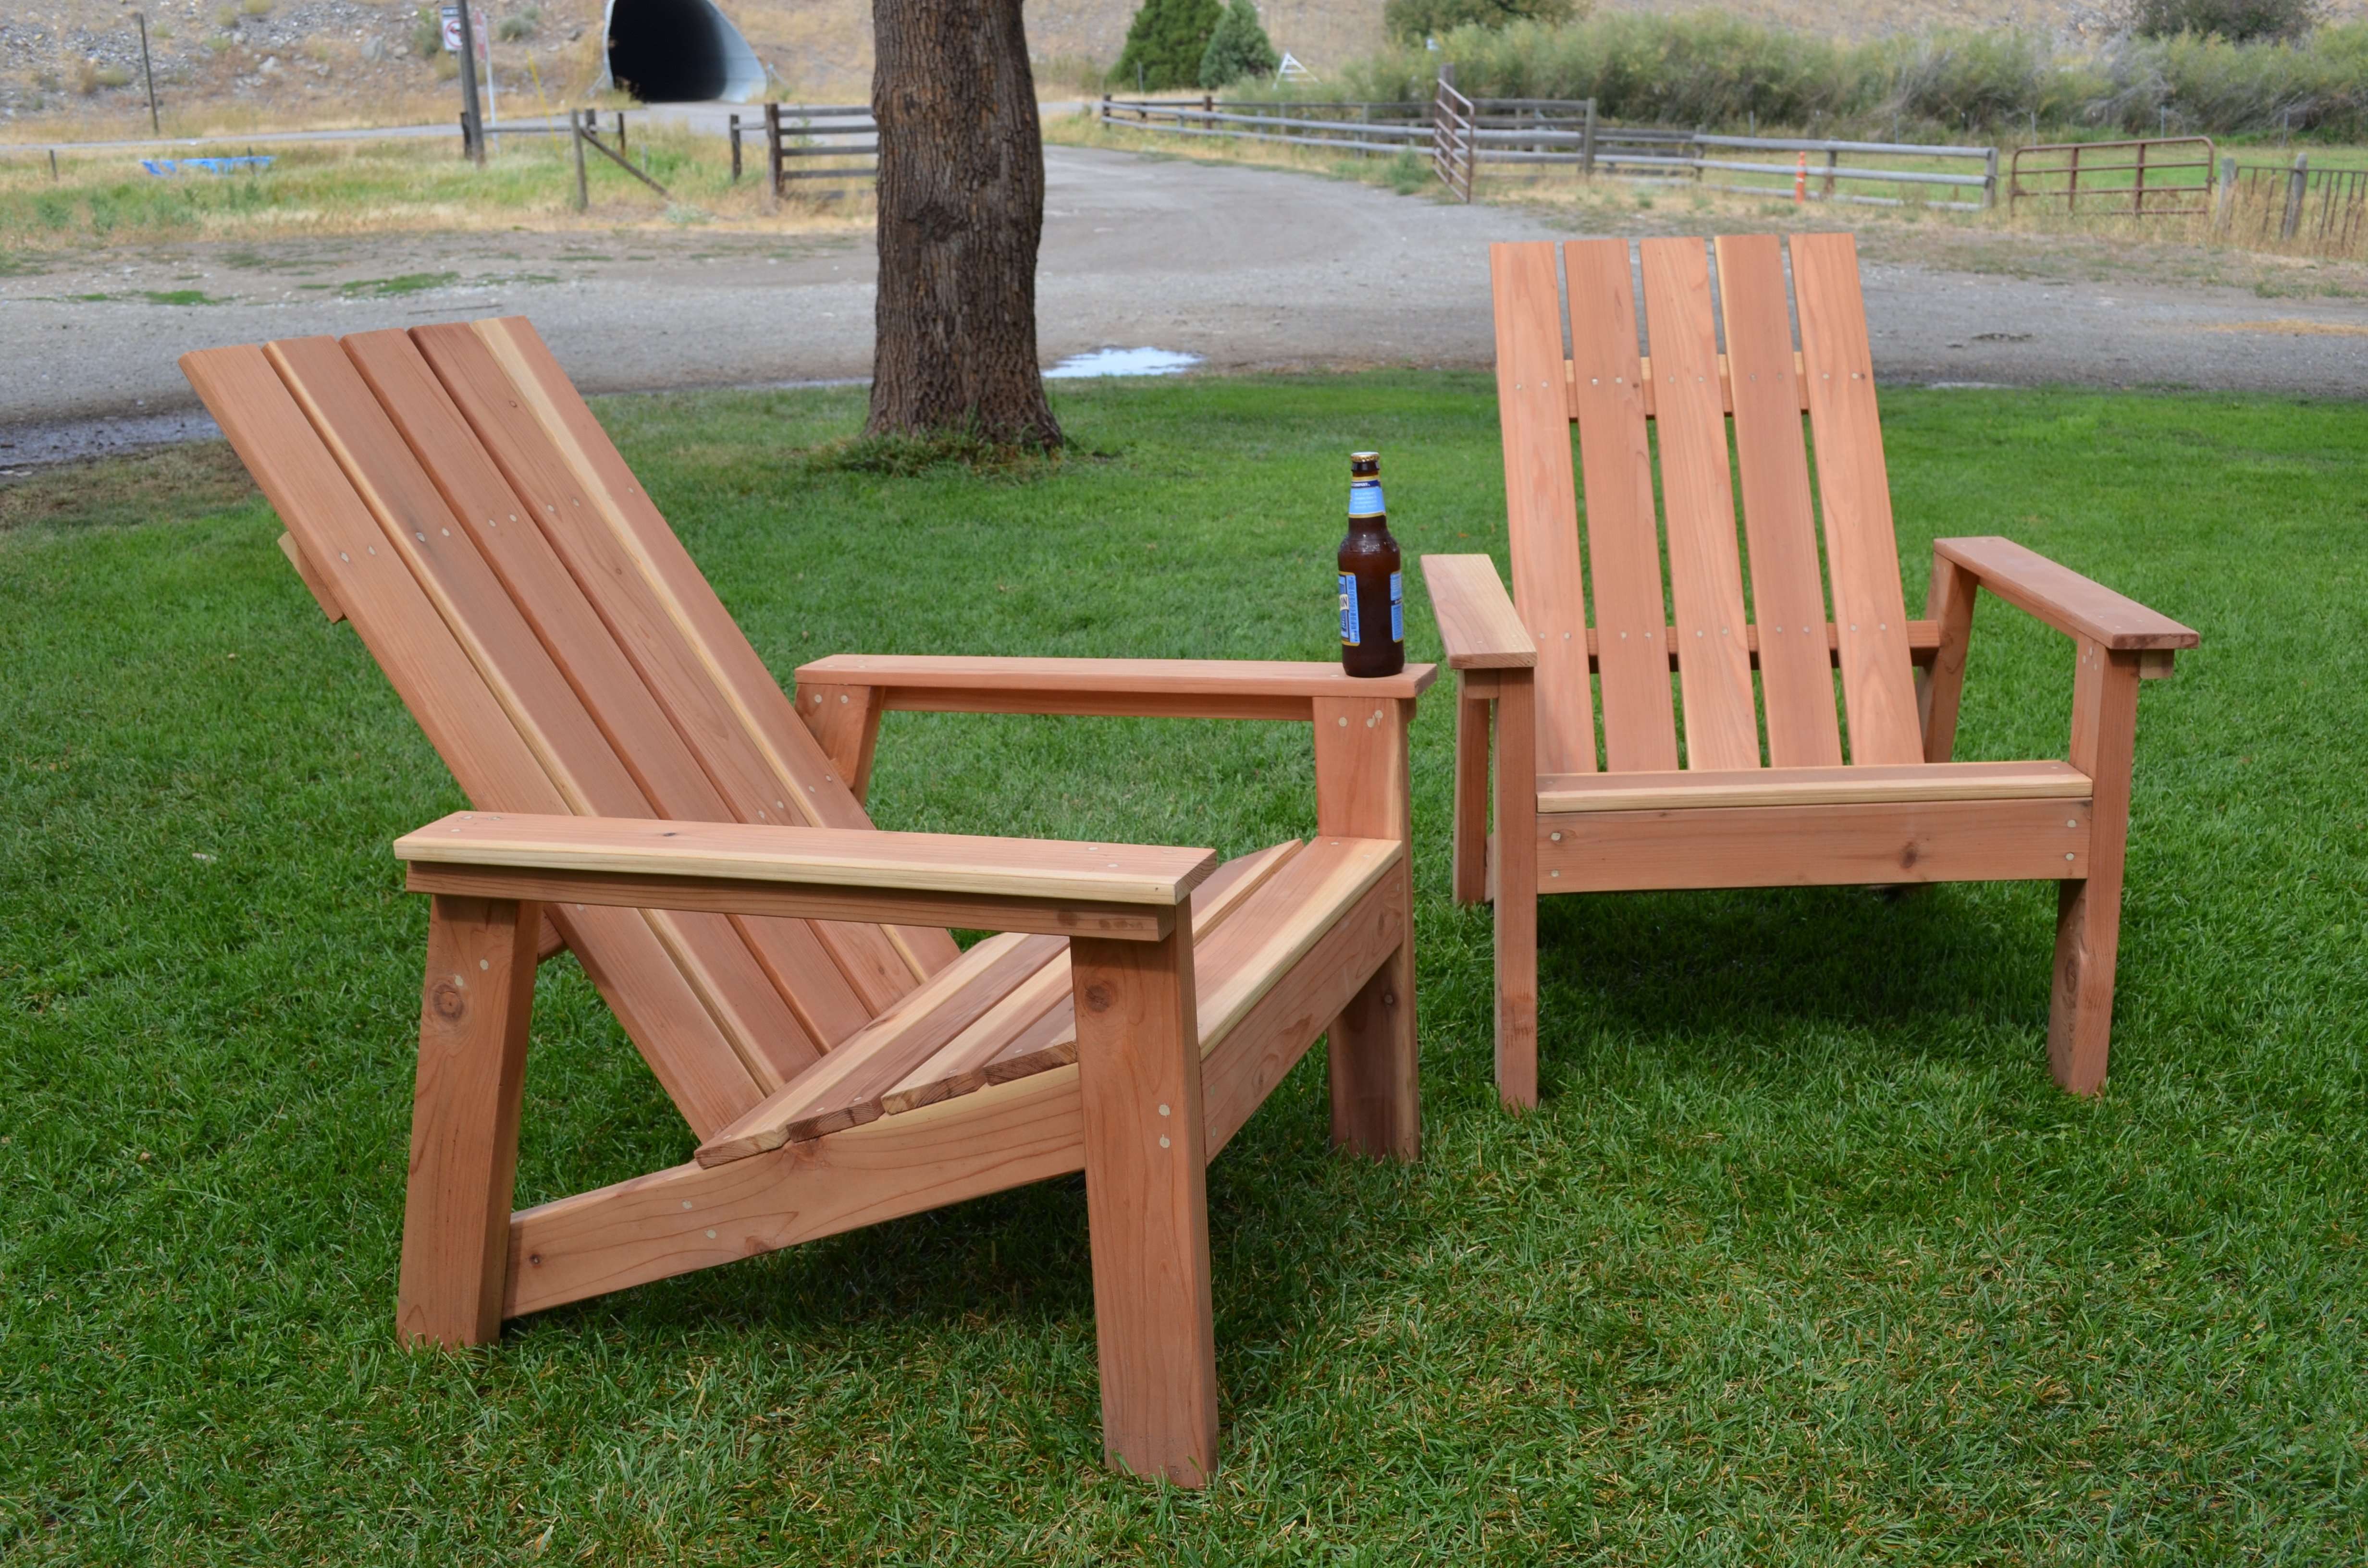
Love the results of my first building project.....a pair of redwood adirondack chairs. Angled cuts were a great way for a beginner to learn to use the miter saw.

Sat, 09/07/2013 - 19:59
Love these gorgeous redwood chairs! The color and grain on that wood is awesome, and the clear coat is perfect for it. You did a great job on this build! I popped over to your blog and I enjoyed your post on this build very much. Well done!
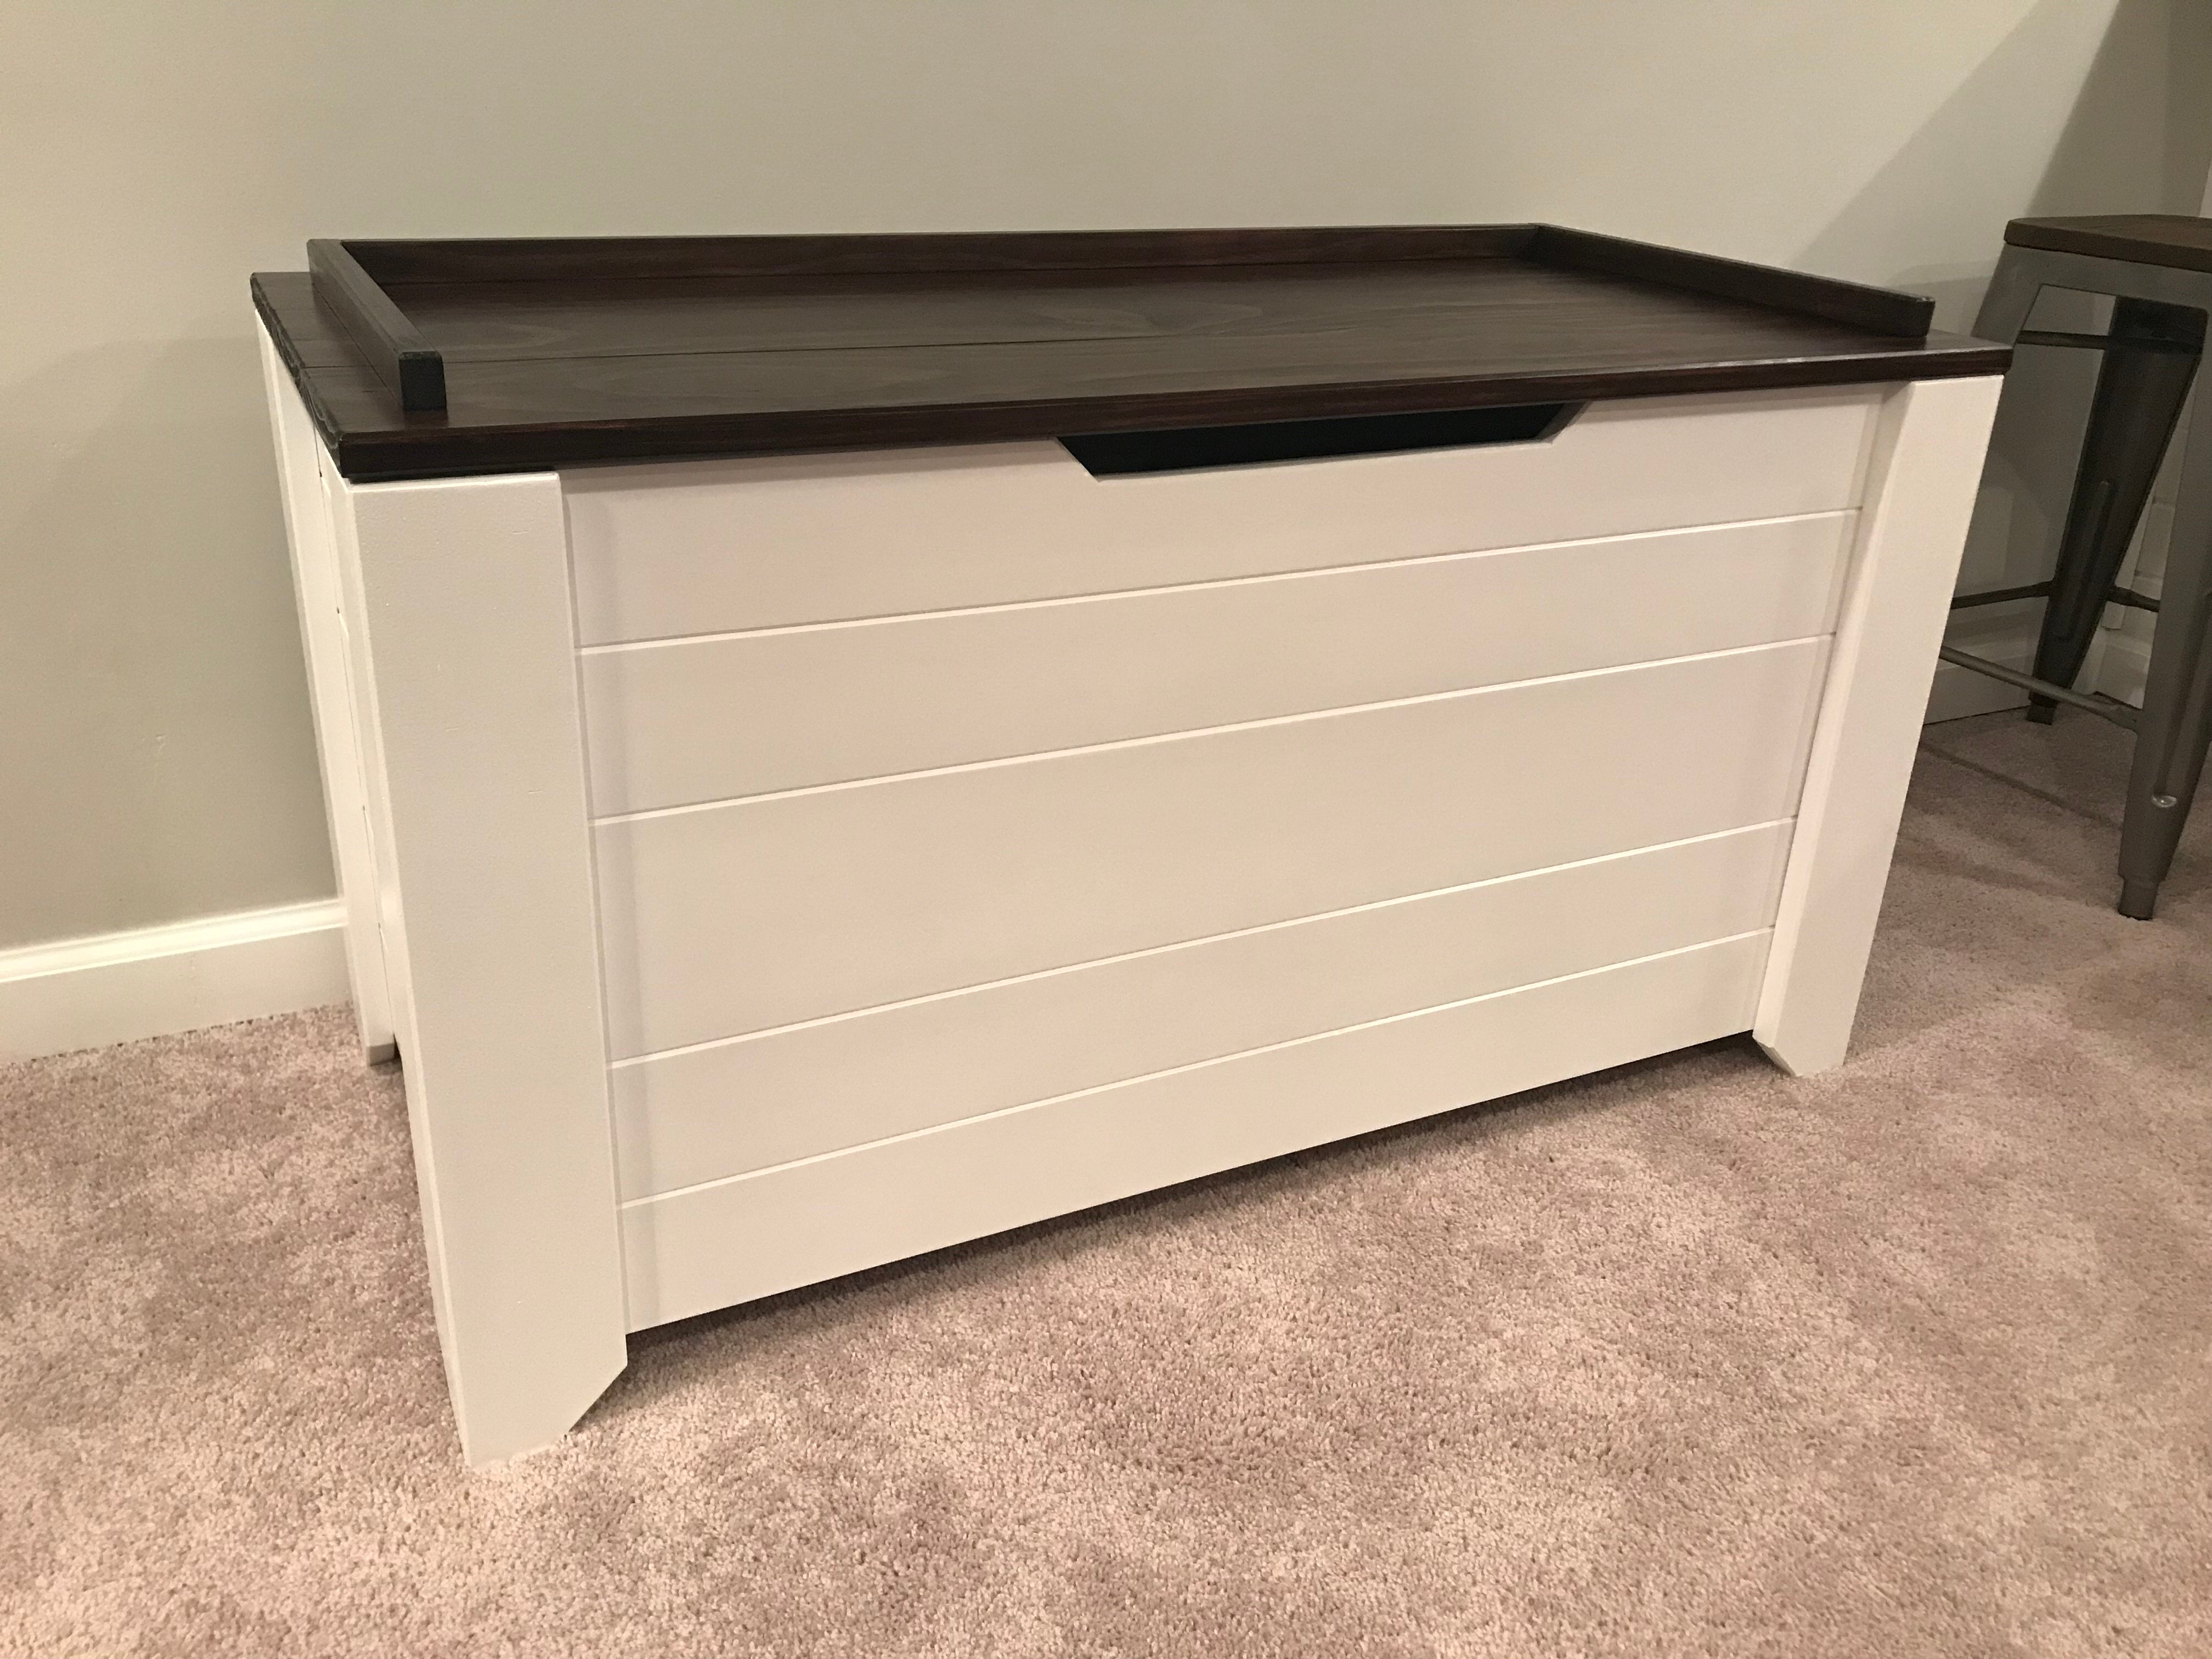
Picture of my own version of the Ana White Design linked here
http://www.ana-white.com/2017/01/DIY_furniture/farmhouse-style-toy-box-…
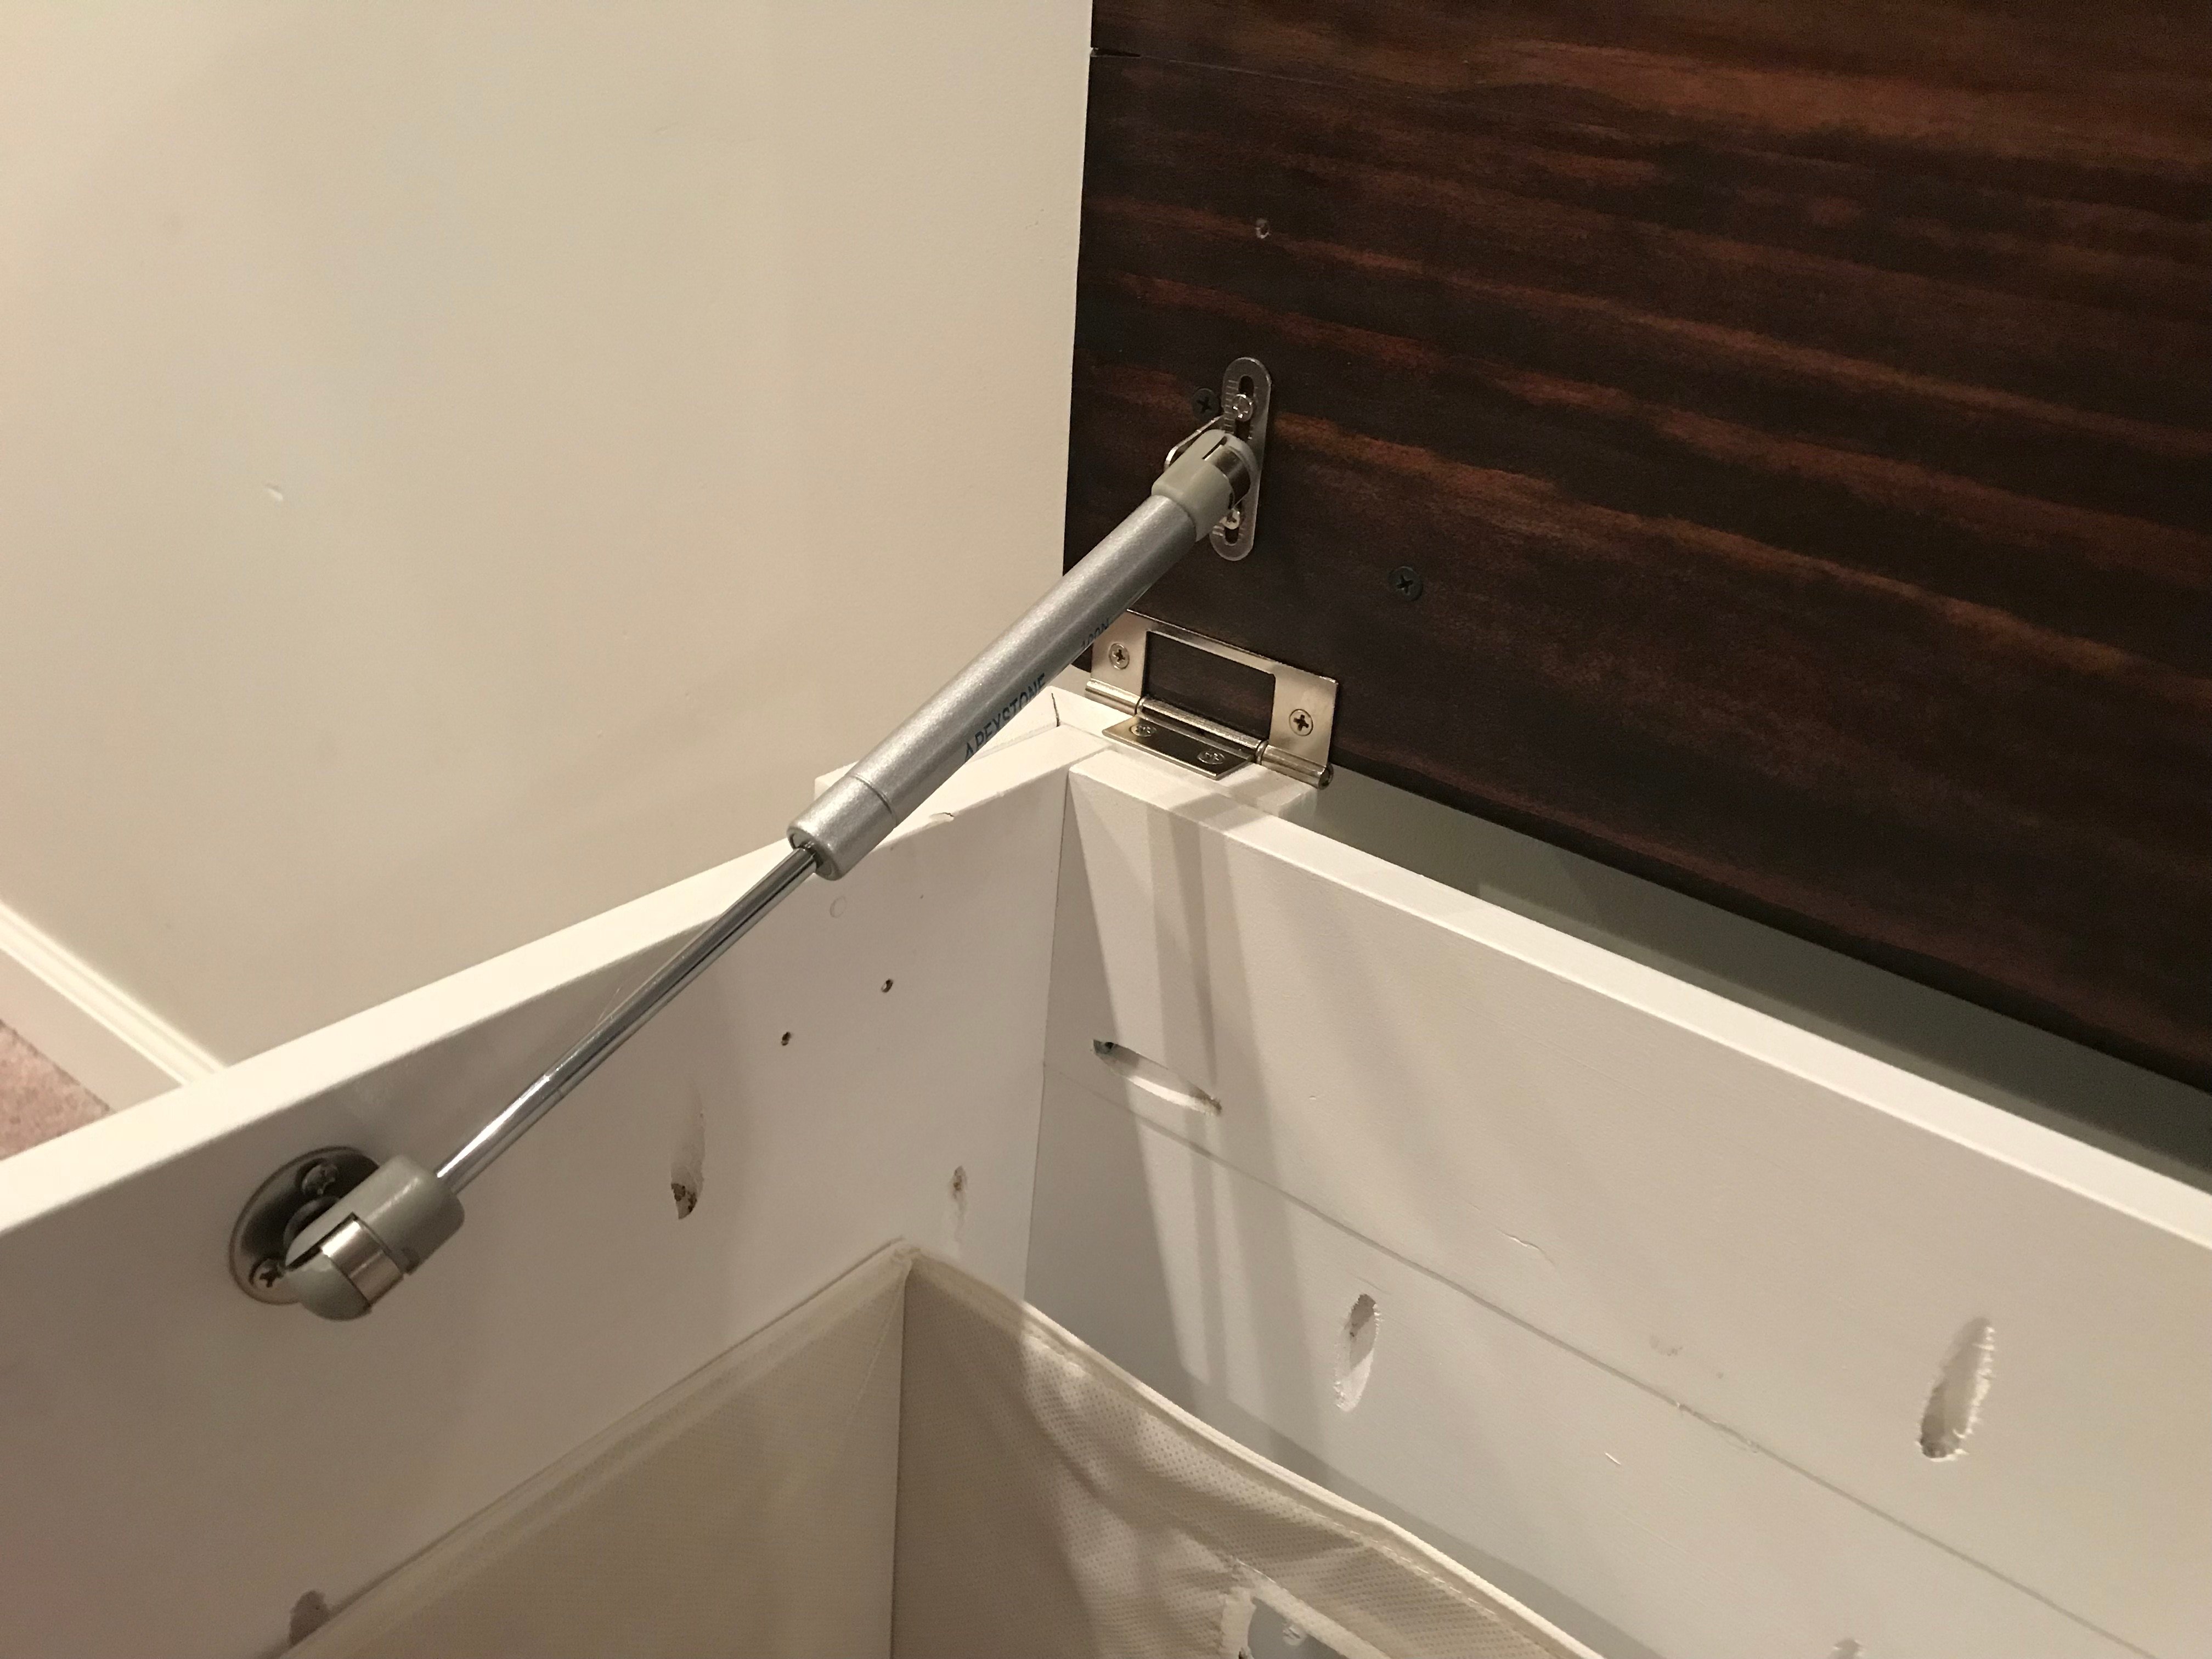
Added Gas Shocks from Amazon 100N/18lbs.
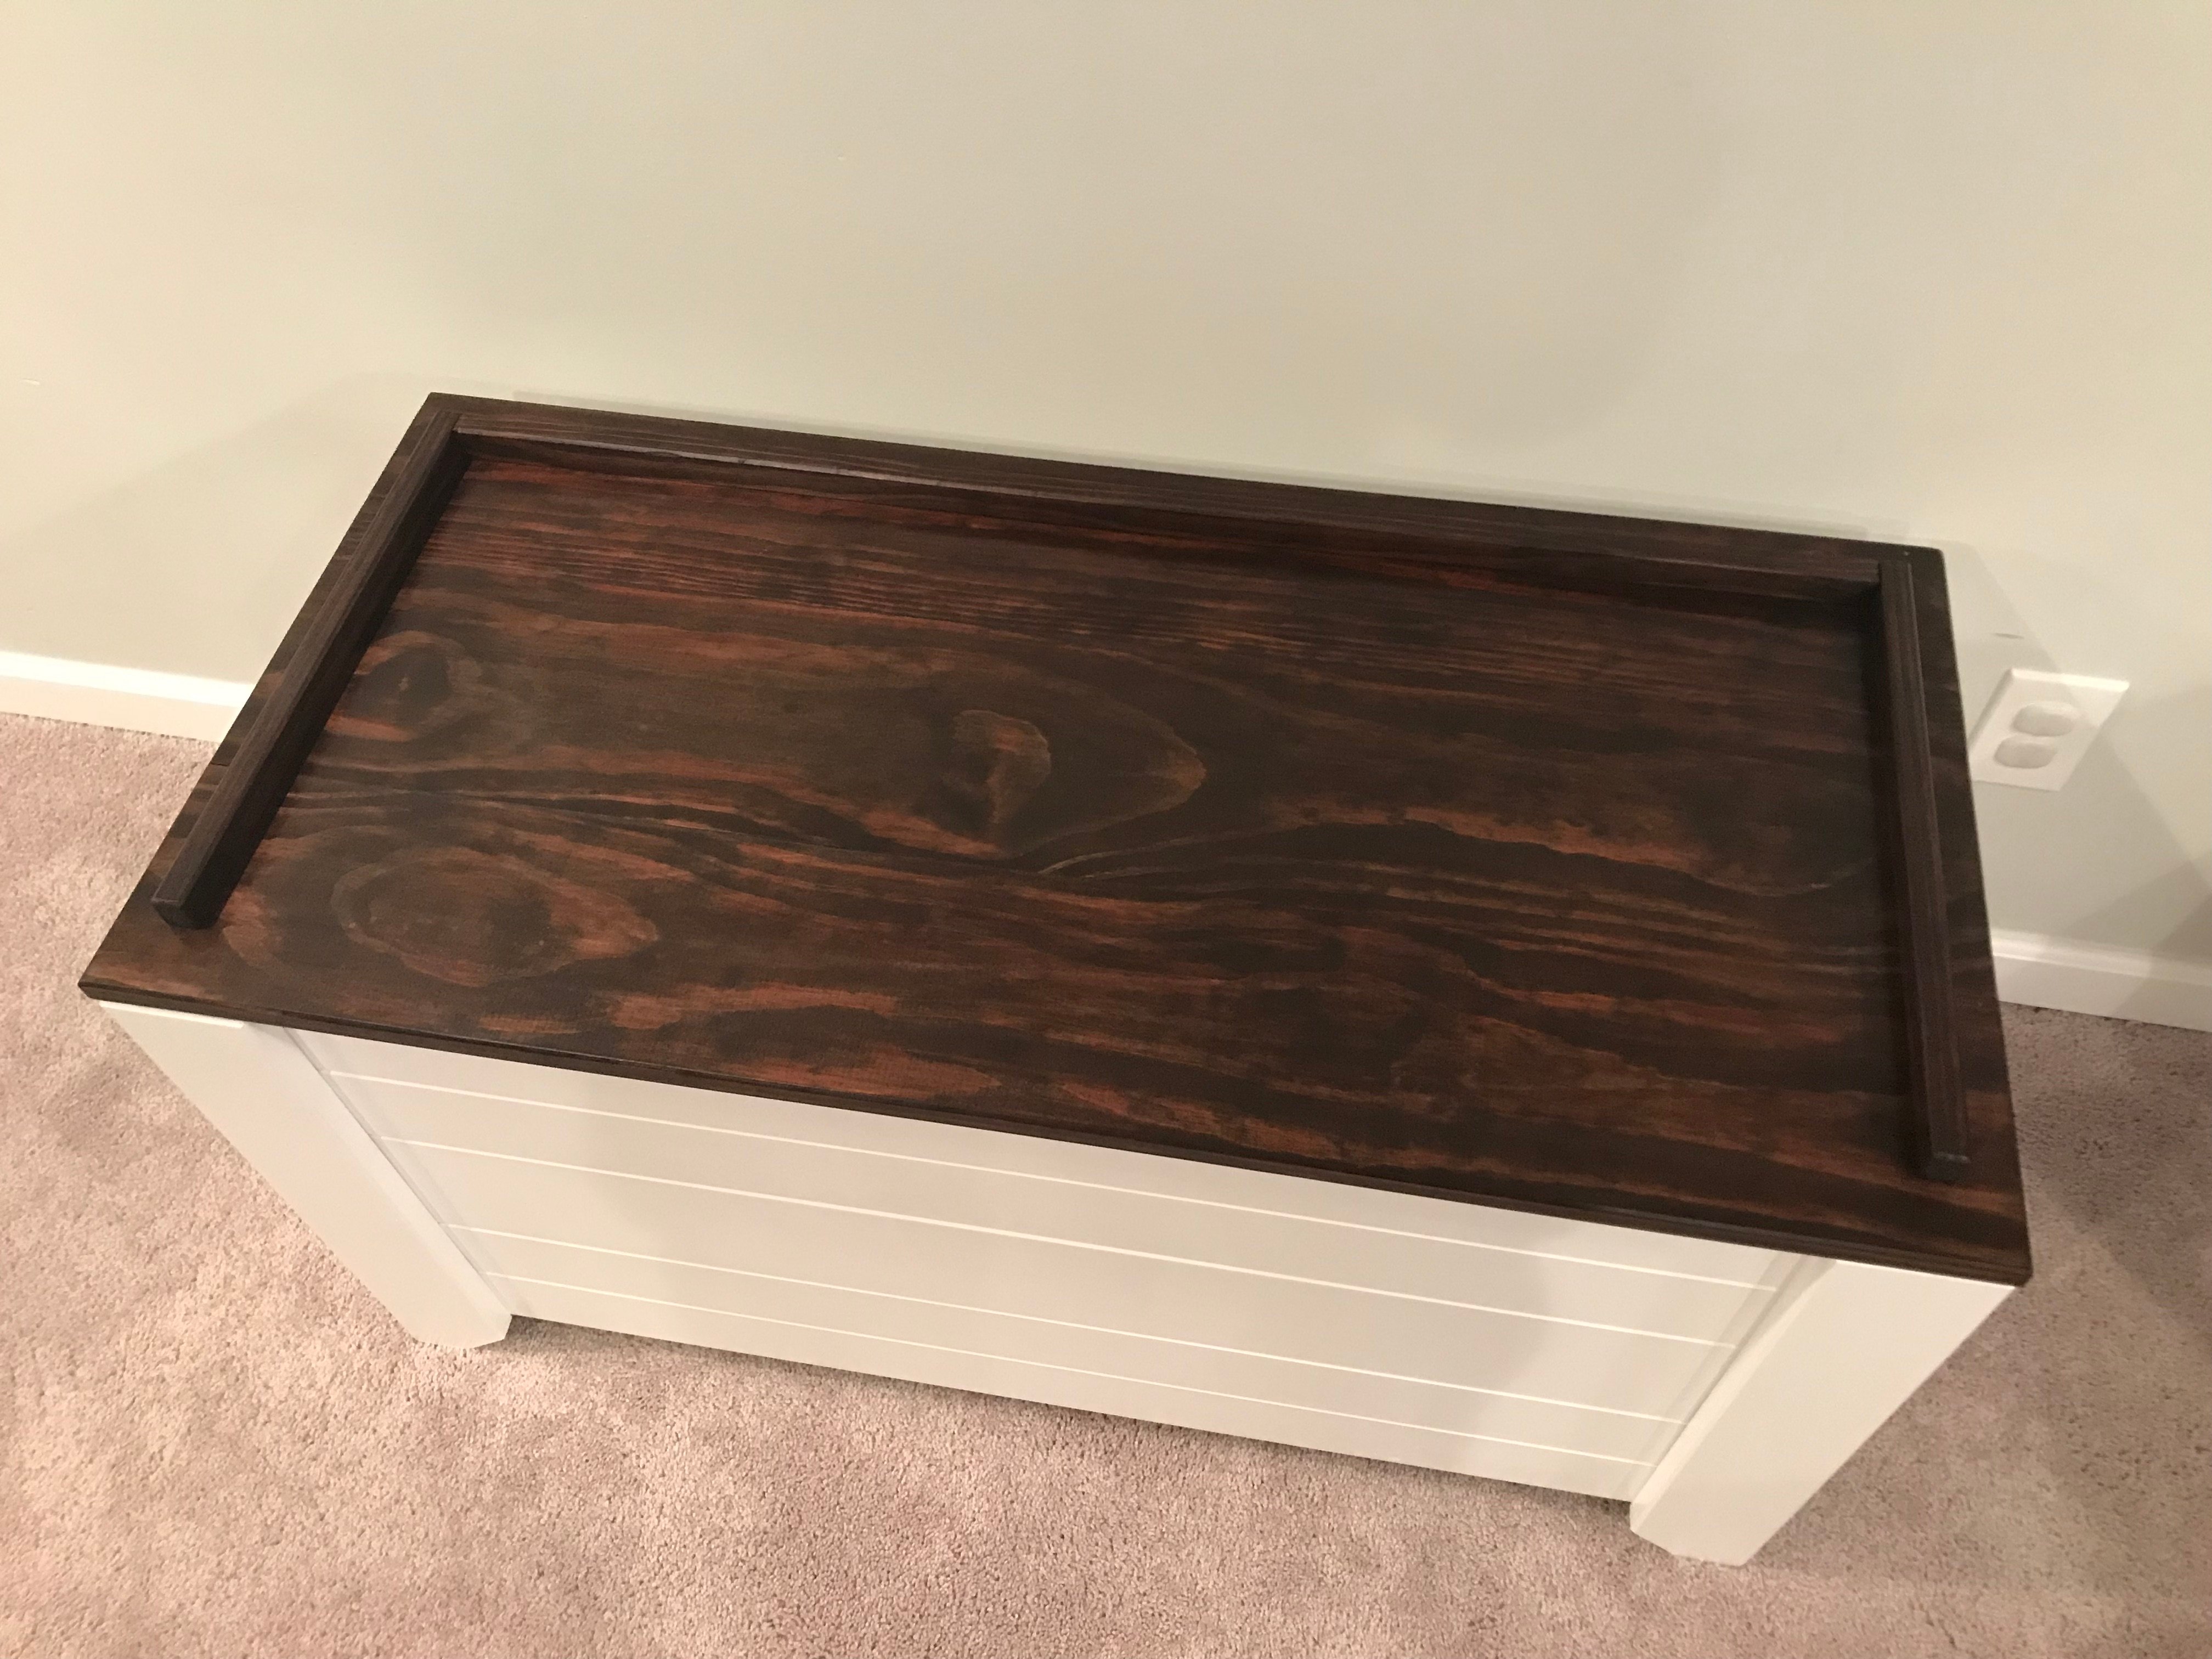

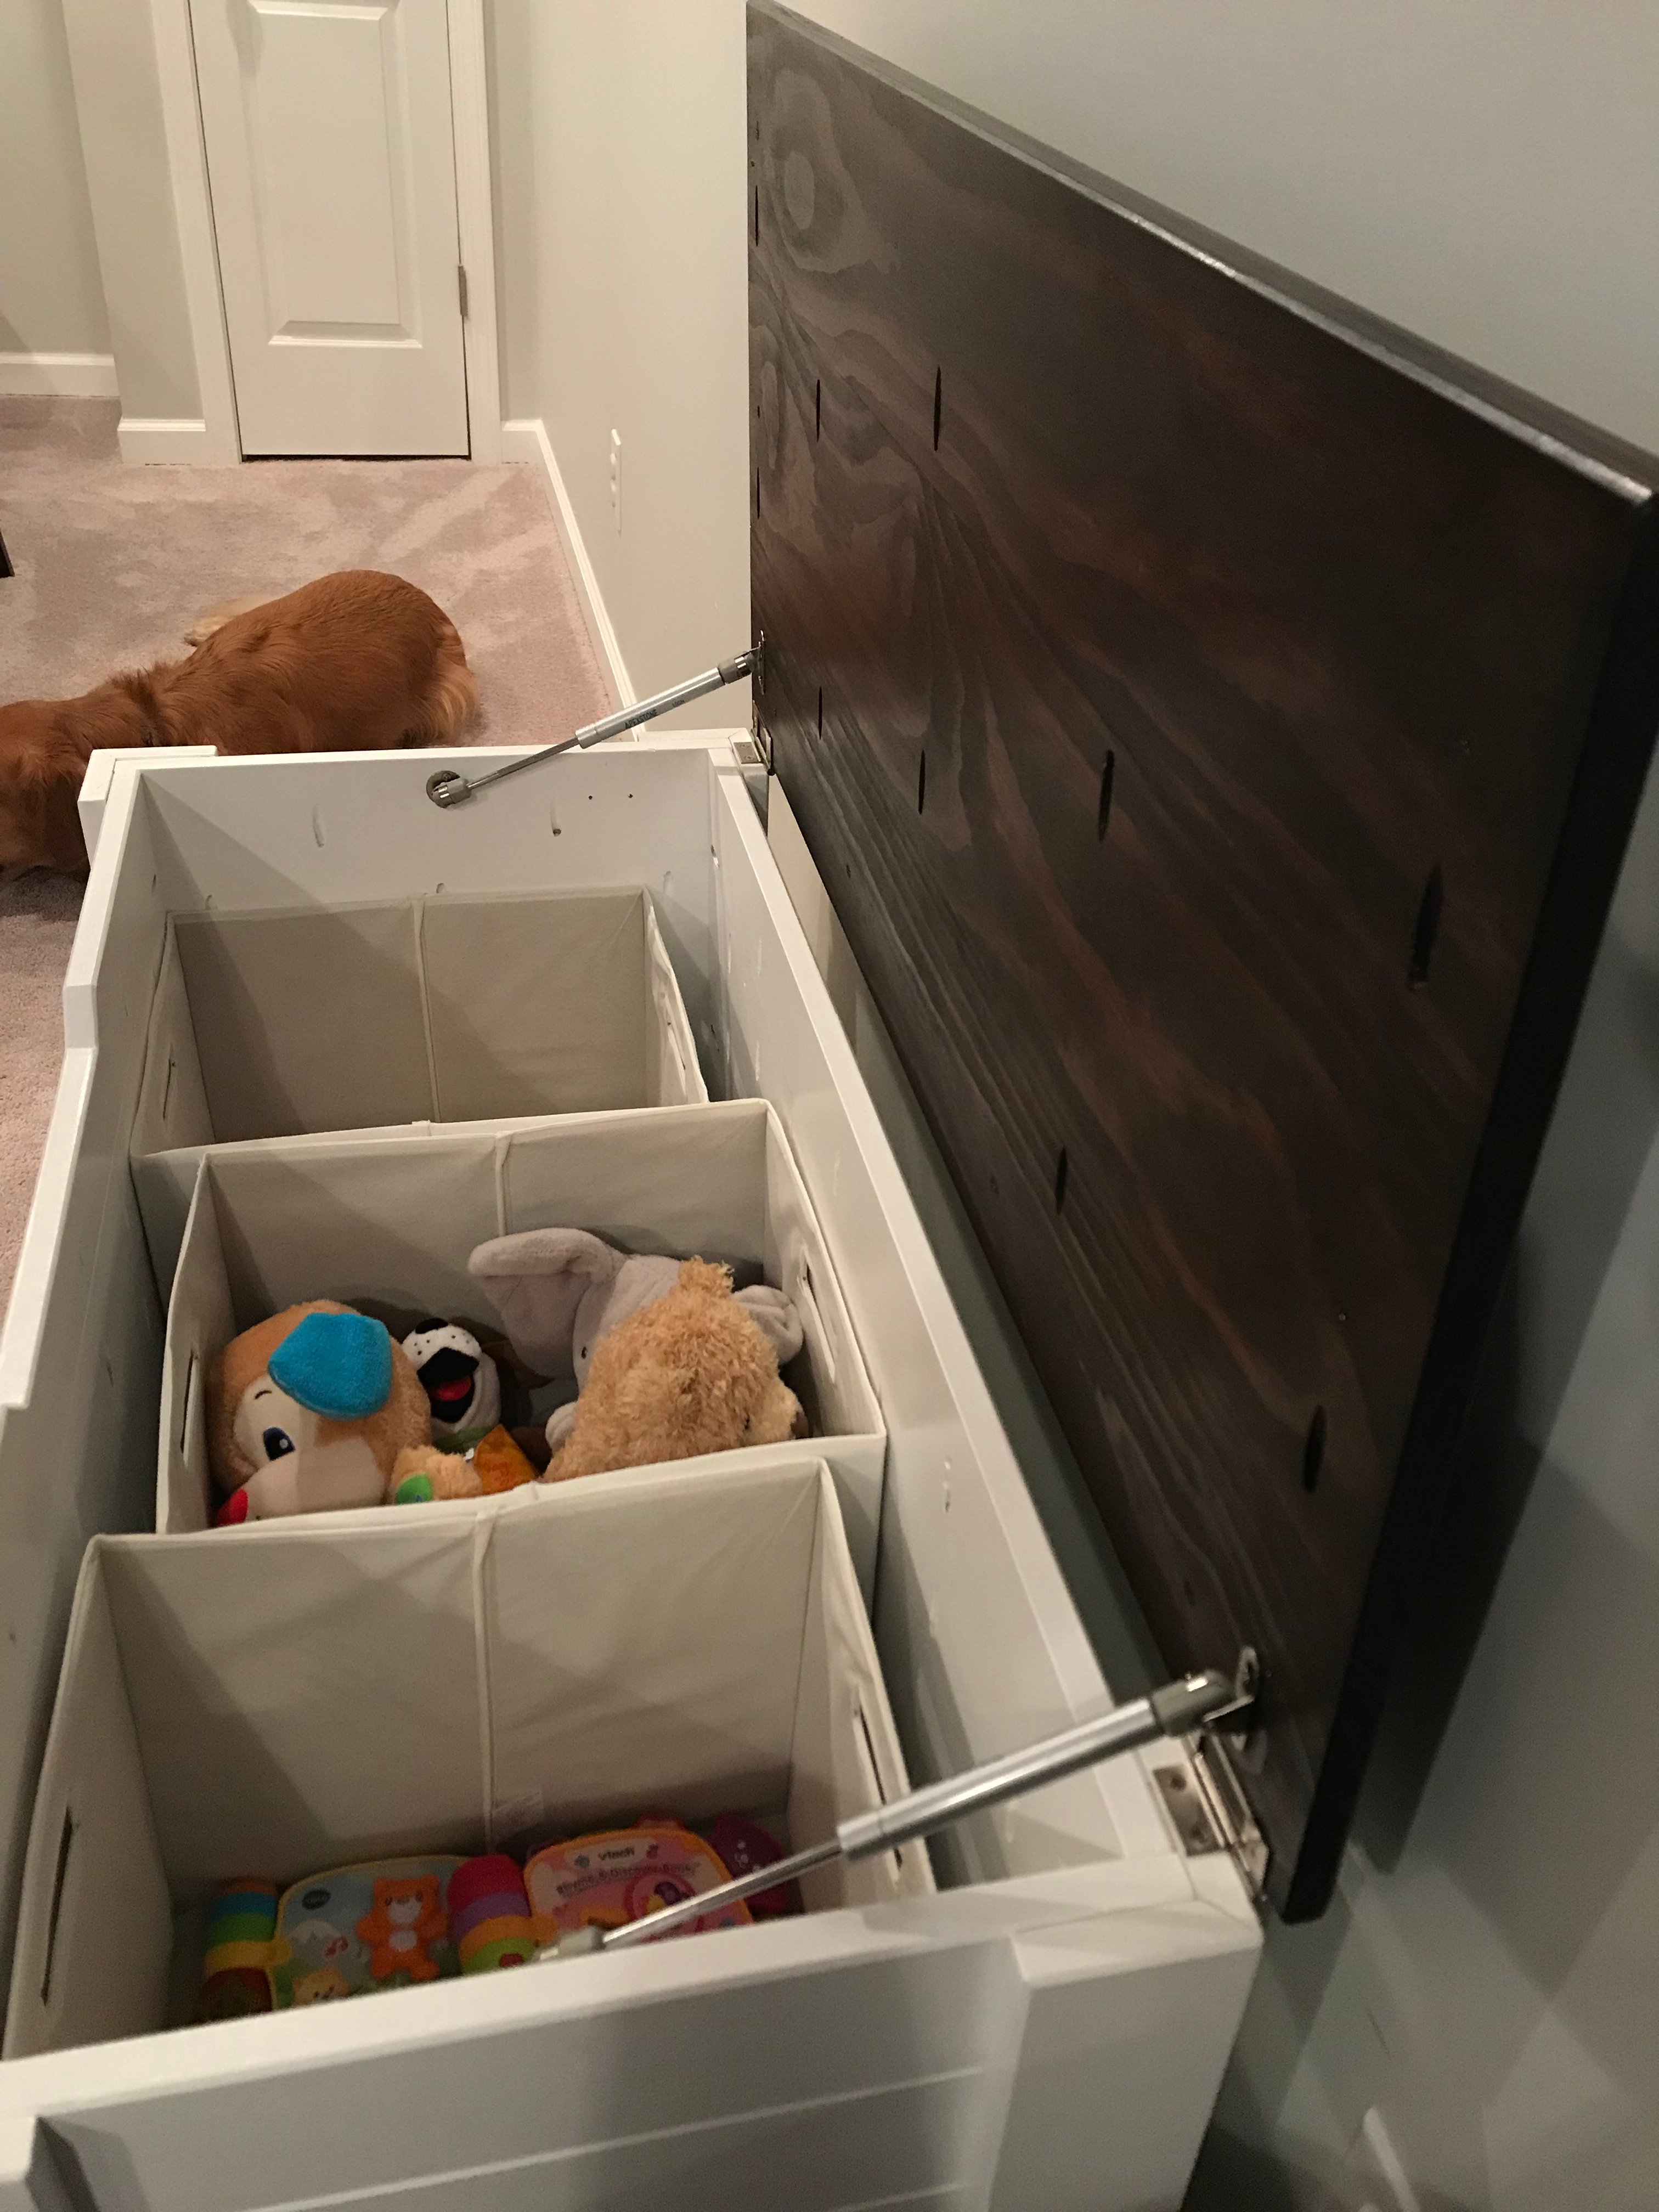
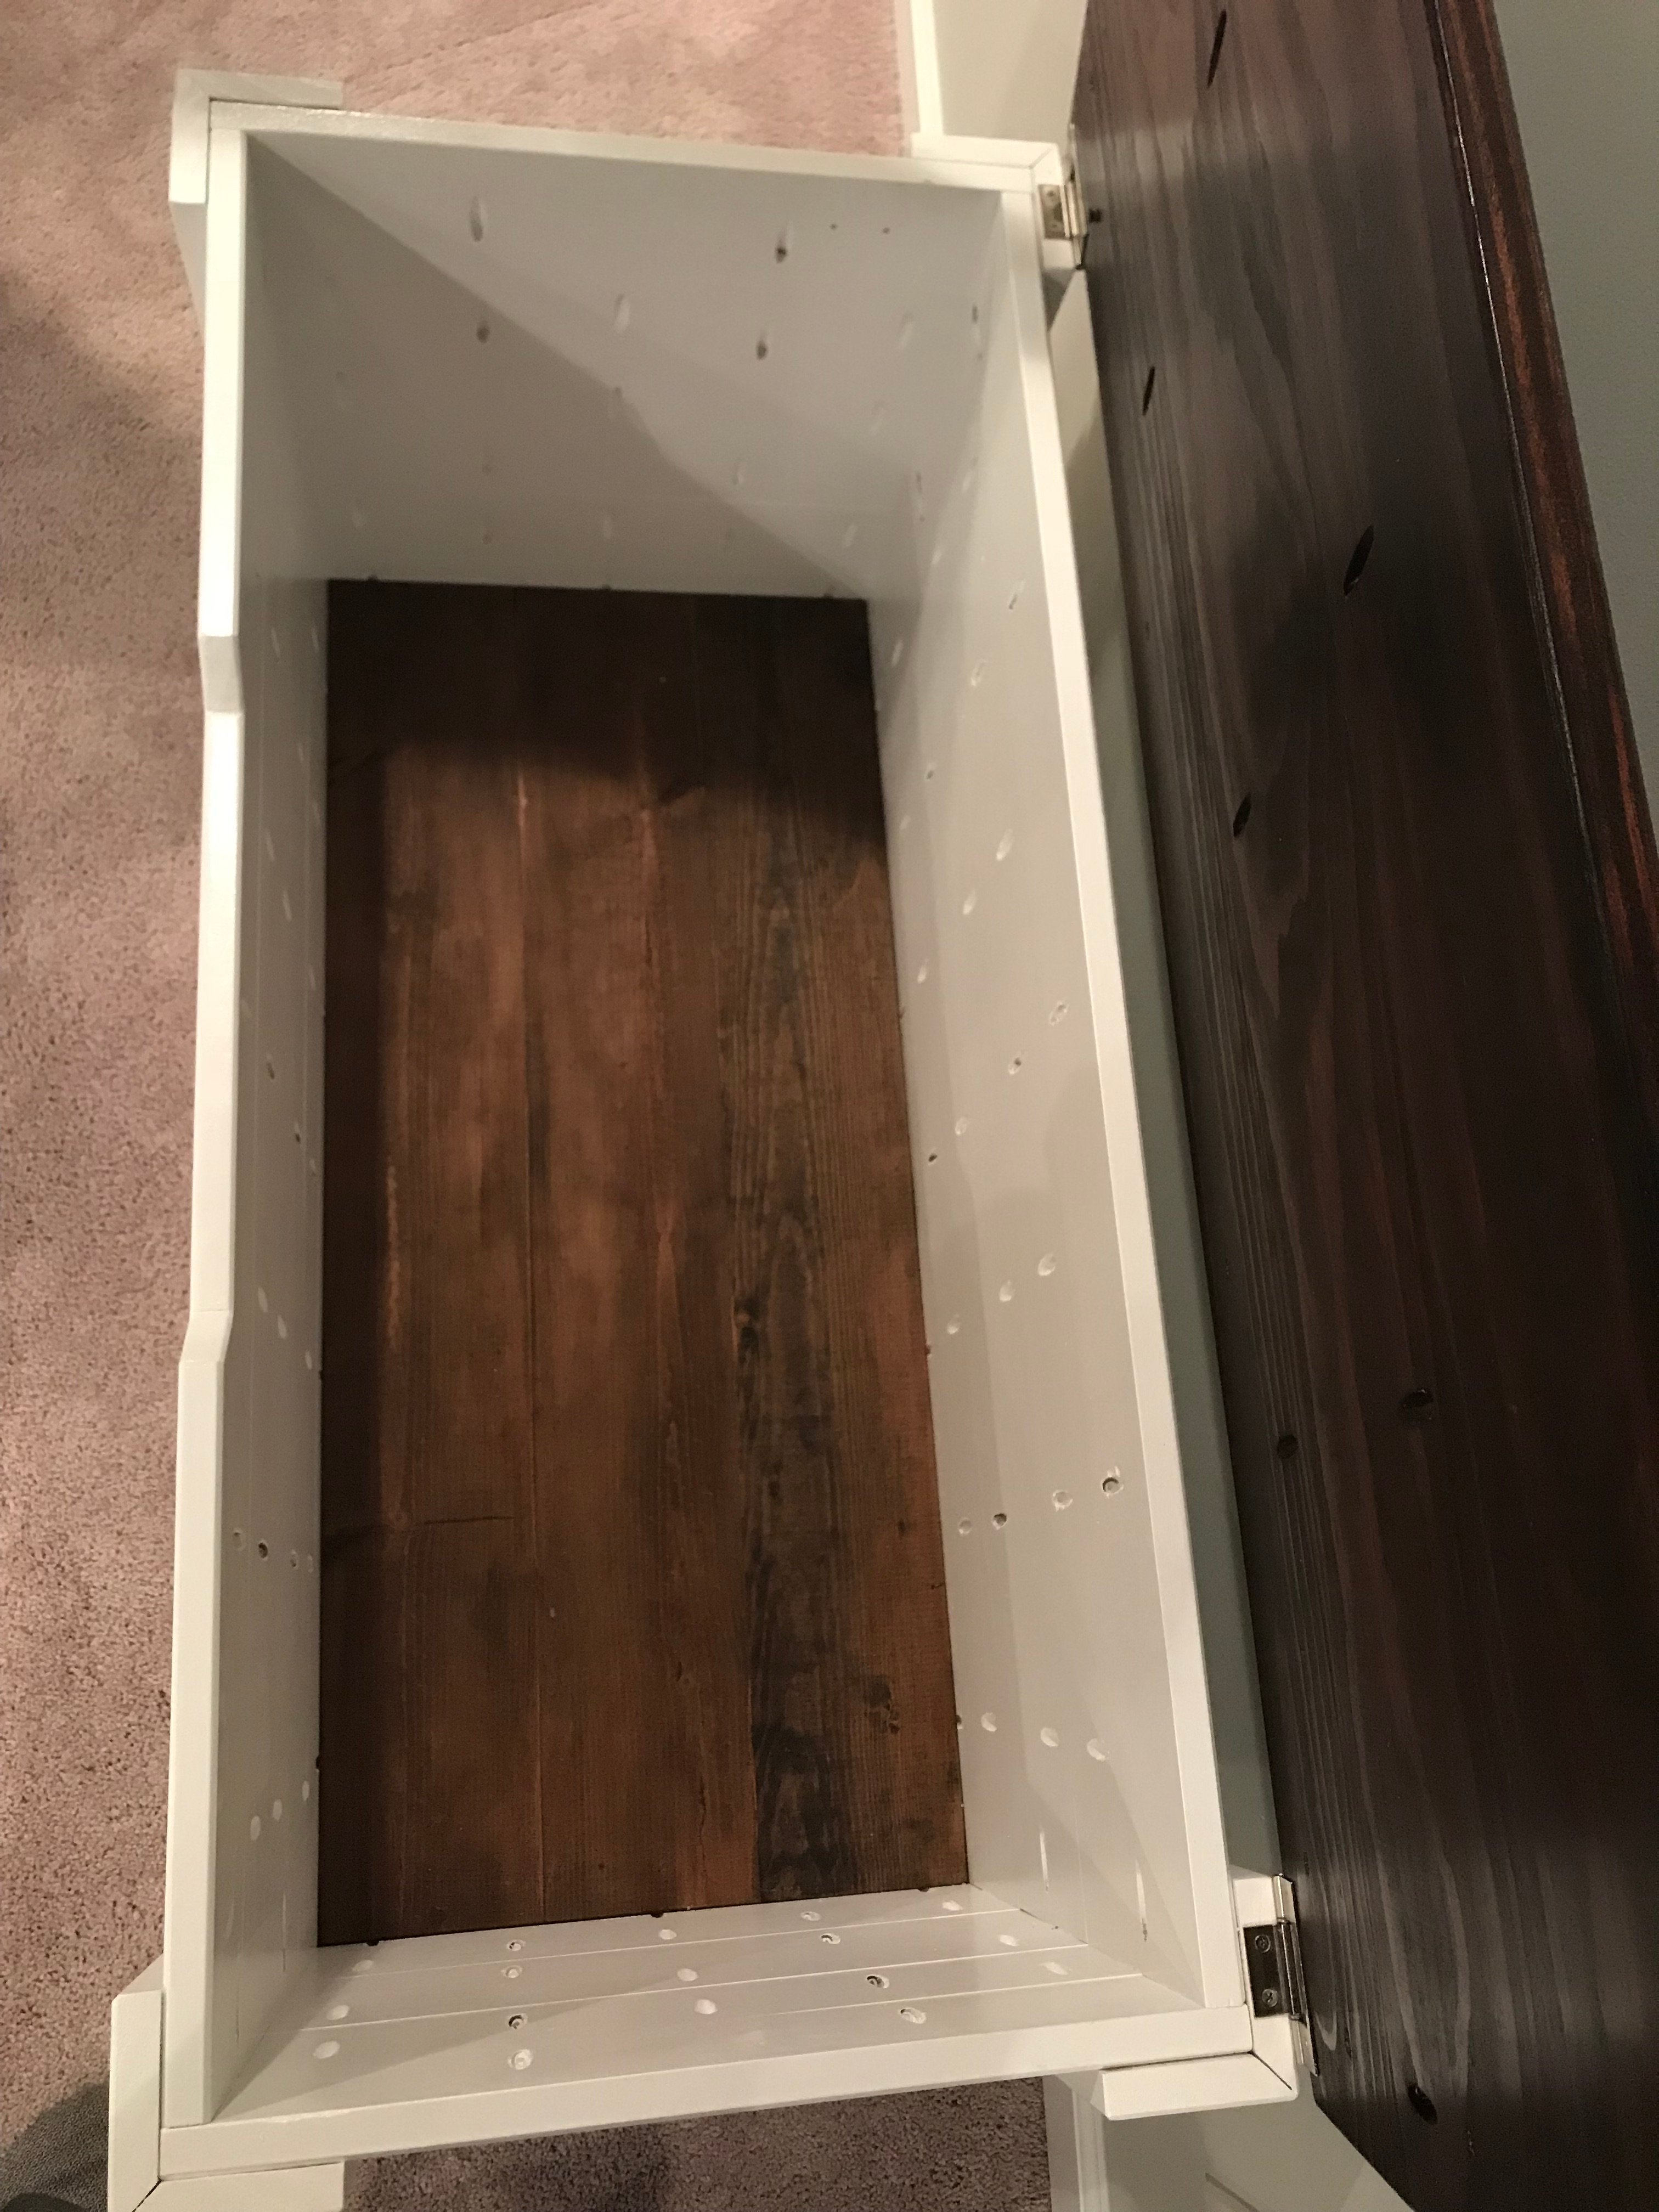

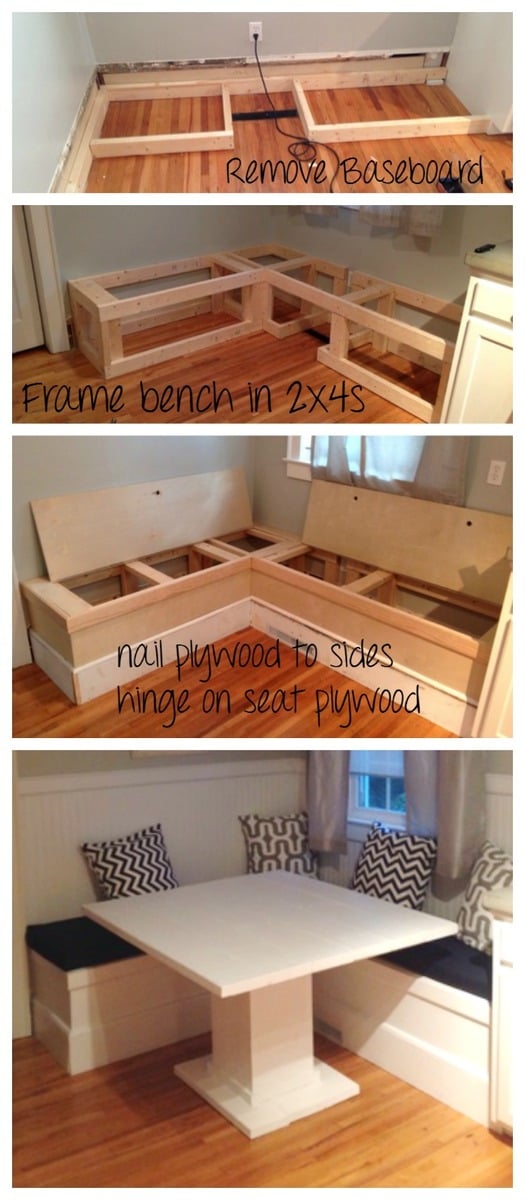
I completed this project in a weekend, over 2 days. The space was an empty void in the corner of our kitchen, so I decided to fill with a functional seating and eating space.
I first removed the trim from the wall, so I could reuse it on the front of the box later, to make the bench match the rest of the kitchen. One challenge I came across was rerouting the a/c vent through the front of the box so we didn't lose that circulation.
My sister-in-law chipped in to make the cushions and pillows to soften it up. I added the DIY table, and further defined the space with wainscoting and trim.
Sun, 01/09/2022 - 16:45
Hey there,
Absolutely love your DIY breakfast nook. Unfortunately the additional blog/info link is no longer working as I'm trying to gather more information. Would anyone be able to send the instructions and/or new link?
Thank you

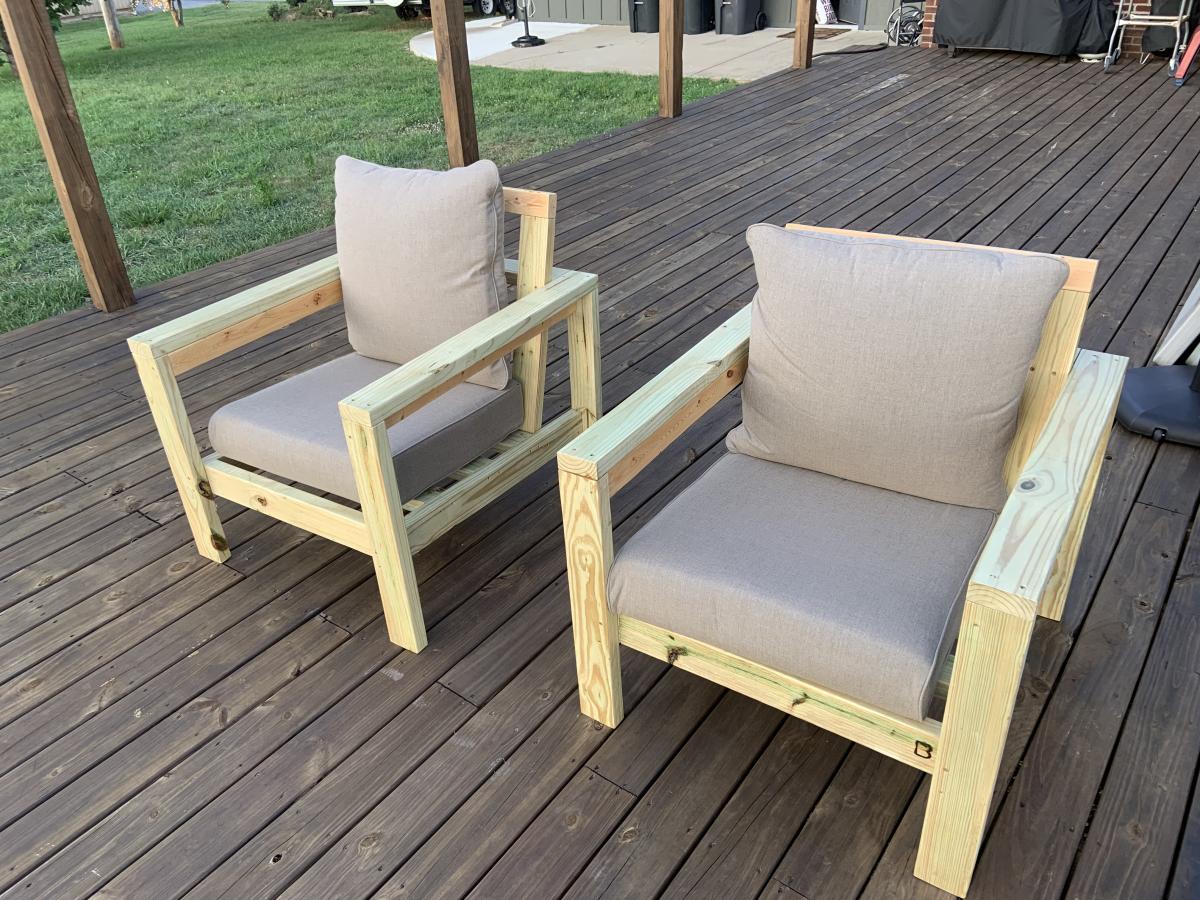
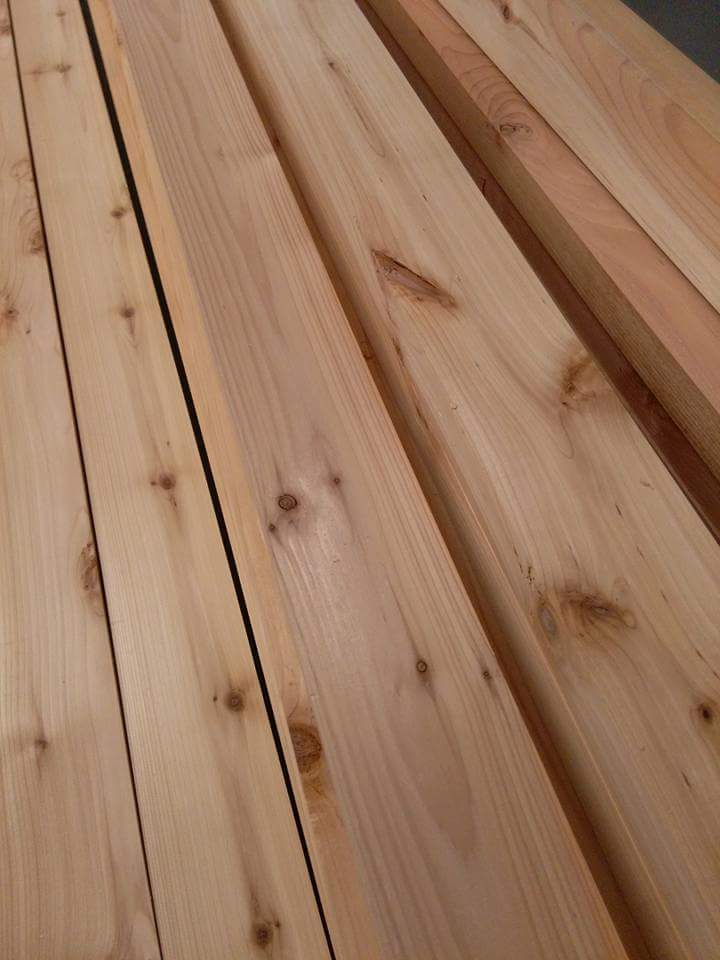
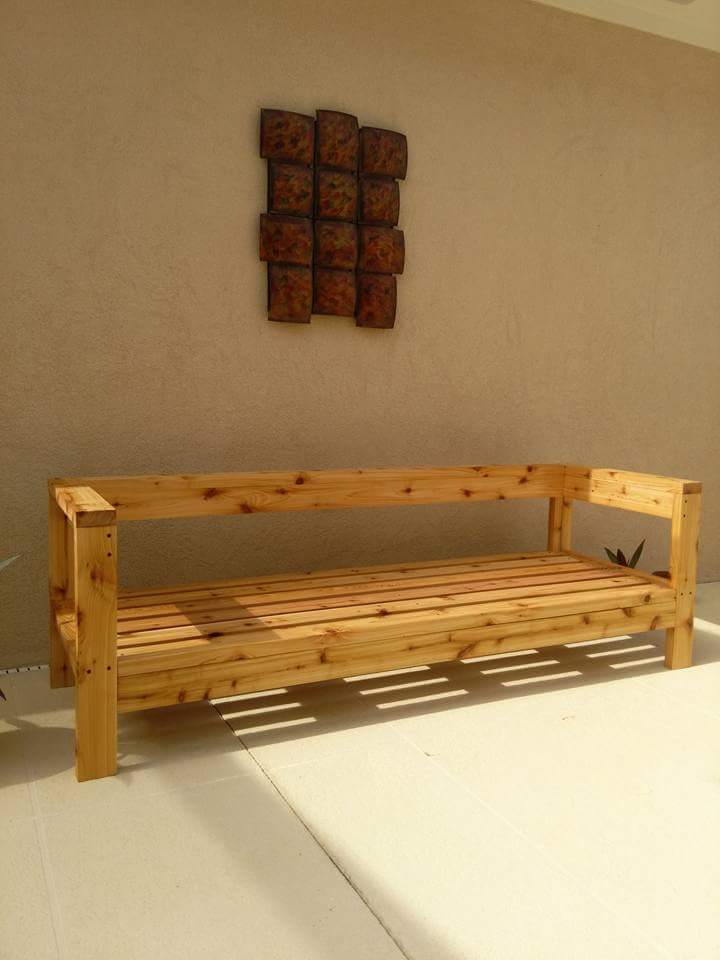
Thank you thank Ana for this awesome plan. It took me a week to transform the ruff cedar into beautiful 2x4. We use the kreg jig everywhere we could so the holes would be hidden, and black deck screws, and I couldn't wait for the cushions to share :) we added the extra pieces at the back and armrests. We used 12 boards 2x4x8 and no waste as we changed the measurements of 24" instead of 25.5 and height at 11" for the seat. One regret I used Thompson water sealer... we live in Florida and I am planning on leaving it outdoor.
Thu, 06/09/2016 - 18:32
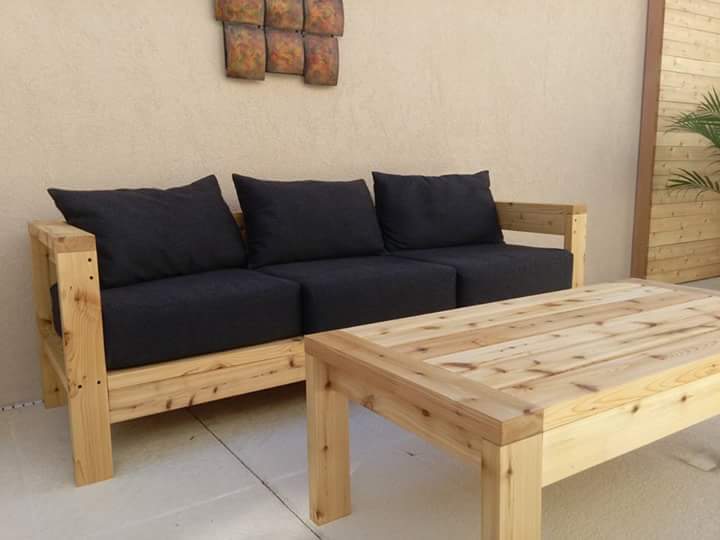
I made them ;) bought the foam on Amazon 72x24x6 (I wished I bought 5 inches high instead) and the fabric I found in a discount fabric store , sumbrella fabric for $12.00 a yard!!! And cut all the cushion seats 24x24 and the back pillows I copied the pottery barn lumbar pillow size, I believe it was 26x18 razor age .
Thu, 06/09/2016 - 18:34
I made them ;) bought the foam on Amazon 72x24x6 (I wished I bought 5 inches high instead) and the fabric I found in a discount fabric store , sumbrella fabric for $12.00 a yard!!! And cut all the cushion seats 24x24 and the back pillows I copied the pottery barn lumbar pillow size, I believe it was 26x18 razor age .
Thu, 06/09/2016 - 18:41
I made them ;) bought the foam on Amazon 72x24x6 (I wished I bought 5 inches high instead) and the fabric I found in a discount fabric store , sumbrella fabric for $12.00 a yard!!! And cut all the cushion seats 24x24 and the back pillows I copied the pottery barn lumbar pillow size, I believe it was 26x18 razor age .

Thu, 06/09/2016 - 18:37
I made them ;) bought the foam on Amazon 72x24x6 (I wished I bought 5 inches high instead) and the fabric I found in a discount fabric store , sumbrella fabric for $12.00 a yard!!! And cut all the cushion seats 24x24 and the back pillows I copied the pottery barn lumbar pillow size, I believe it was 26x18 razor age .
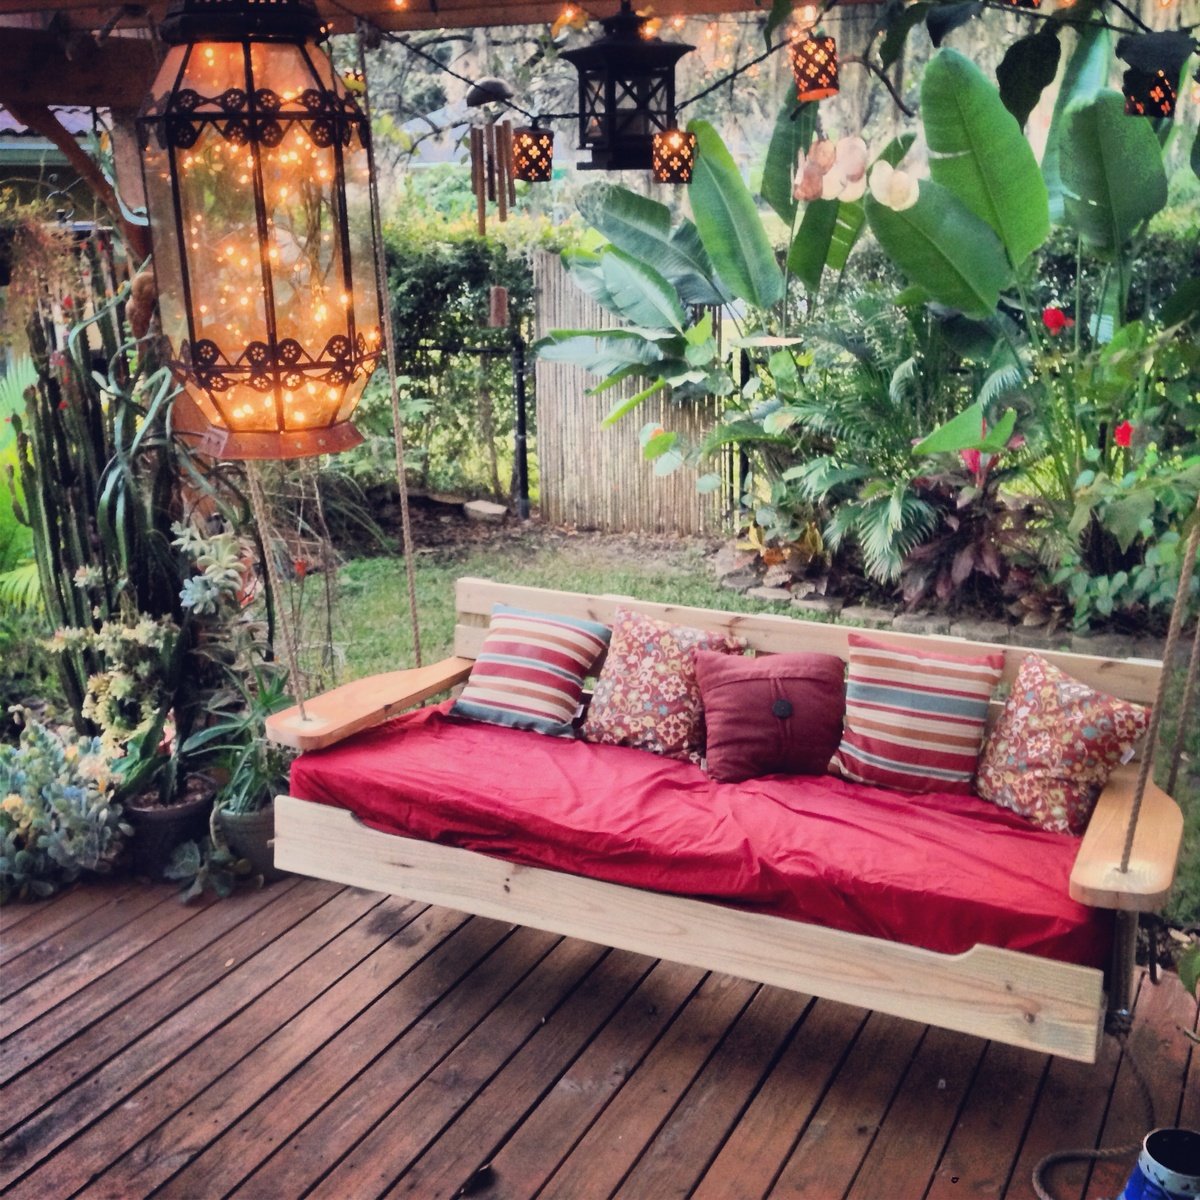
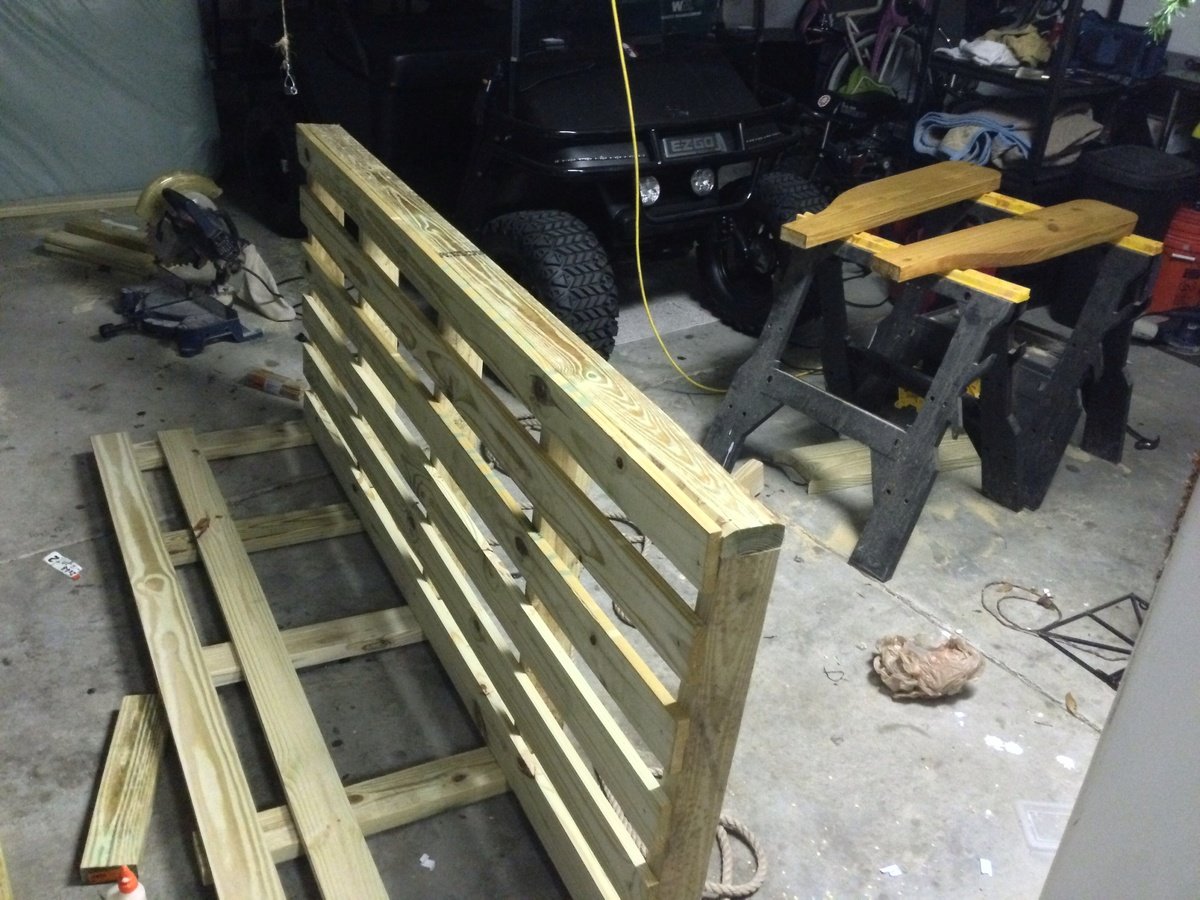
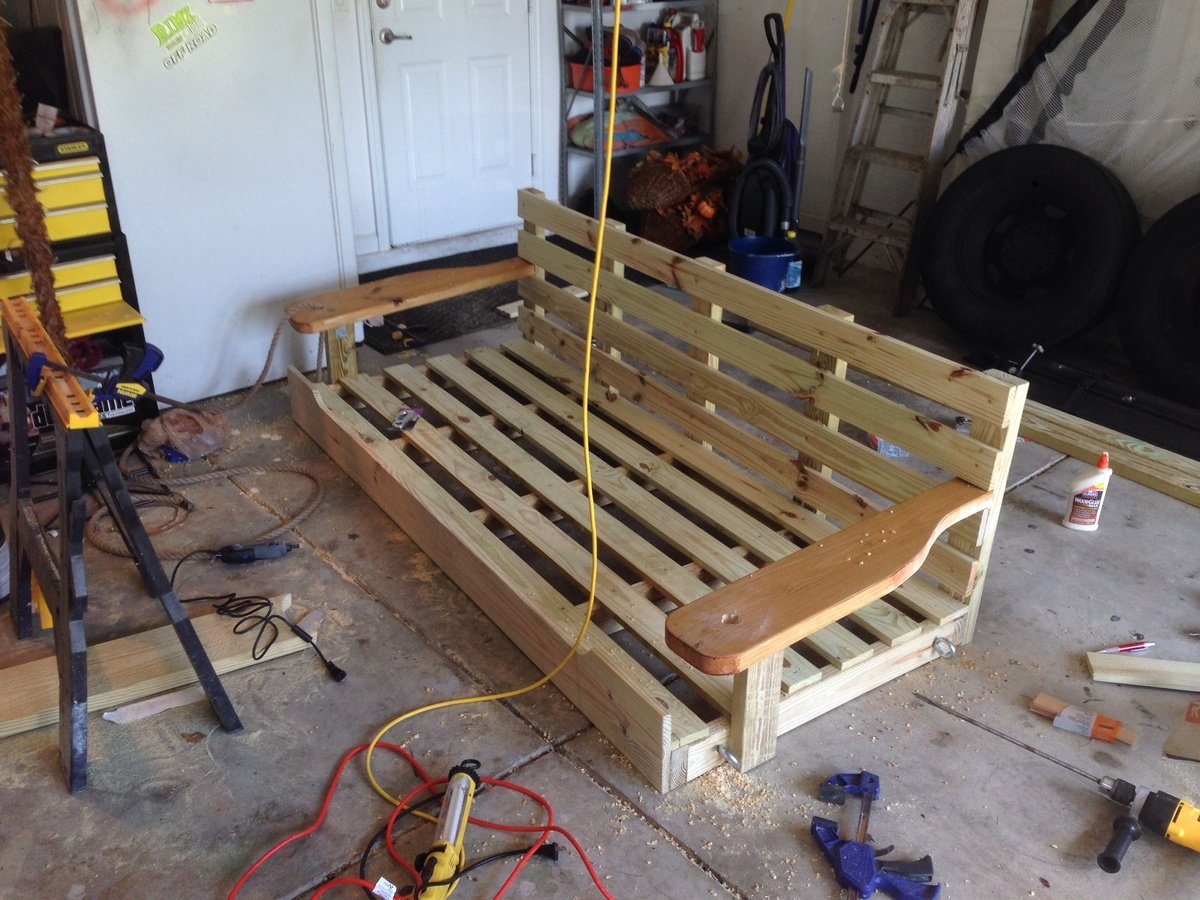
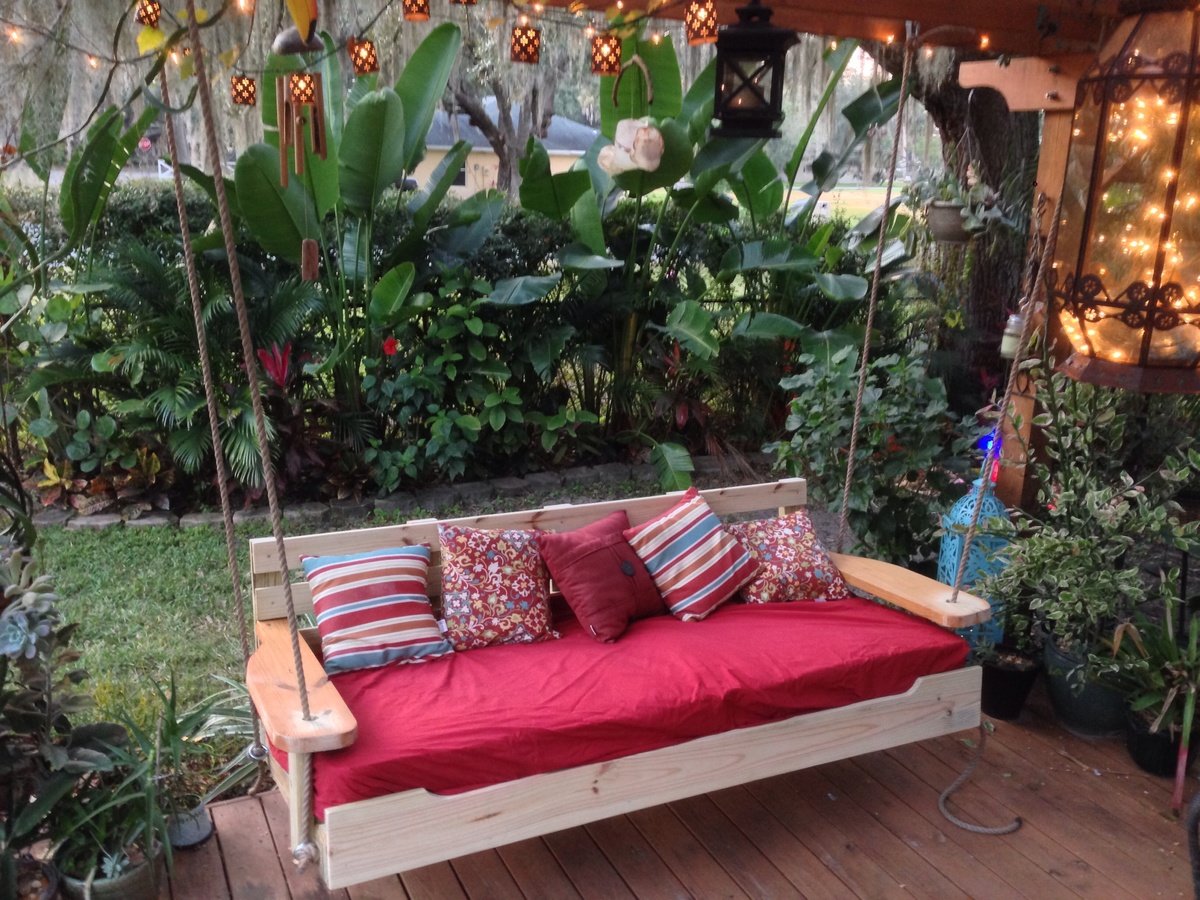
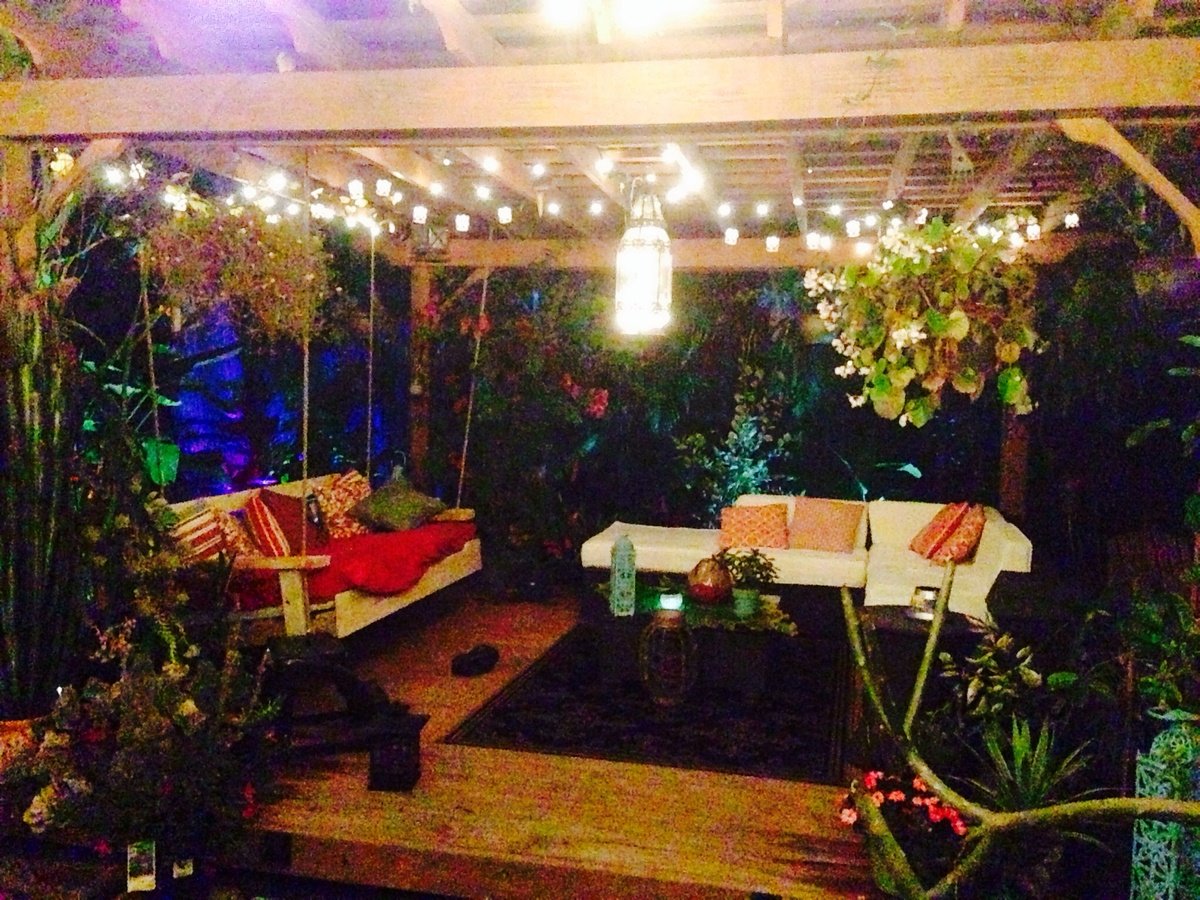
Started off with the original design but enlarged it to fit an oversize single mattress. The mattress cost me $35 from a local faith farm, while the materials came in around $200. I decided to hang under my backyard pergola. Fun and easy project.
Tue, 01/28/2014 - 21:10
Wow this looks so inviting I might just have to make one too! Nice work-- it looks great!
Mon, 04/07/2014 - 22:49
Really lovely! Great job! This will be one of your favorites spots all summer long.
Mon, 07/27/2015 - 22:45
I want this! I just made a couple of plant stands for my front porch. My husband asked me what my next project was, why, a swing bed. (This was only my second project!) I want to put cup holders in those big ole arms! We have a house at the beach in South Alabama, so, you gotta "hydrate." This is an awesome swing. I can't wait to do mine...pillows to rest on, one foot on the concrete pushing me in a slow swing. Cold beverage in my hand or in my cup holder. Yep, southern girl has a new project. Love it!
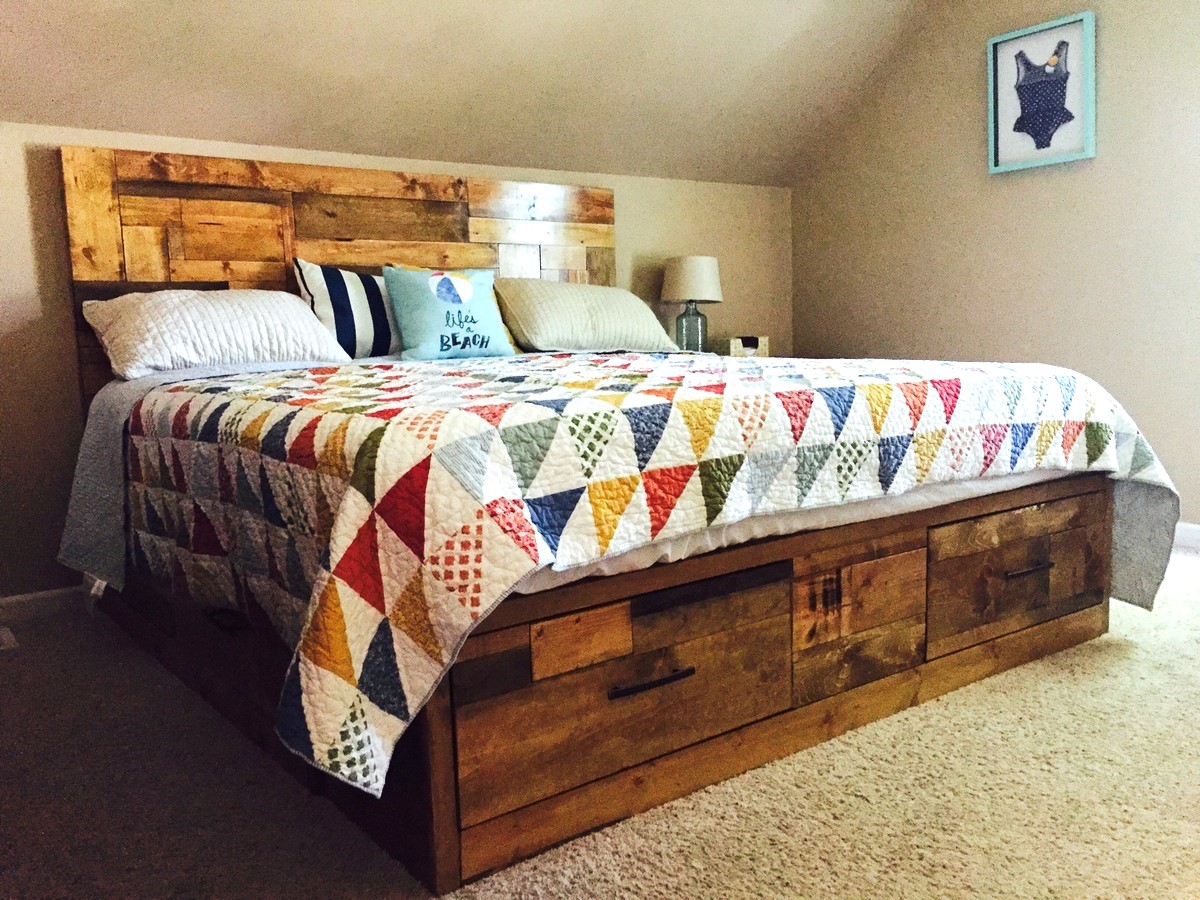
I built this bed for my wife for Mother's Day. I loved the idea of the drawers and I knew she would love the scrap wood look, and lucky for me it just so happened I had a lot of scrap wood. The build was pretty simple other than it was my first time doing drawer slides. I went with the ball bearing slides which were a little tricky to get just perfect, but with a little patience and finding a few tricks along the way I was able to complete this project in a couple days. I also added a simple headboard. I made 1x6 legs connected by (2) 1x4s horizontally with pocket screws. Next I cut a piece of 3/8 plywood the dimension of the headboard wanted so I would have something to nail the 1x scrap pieces to. Finally I trimmed the edges out with 1x2s and stained to match the bed. These are great plans and I loved the fact that I didn't have to be perfect when it came to staining it, all my whoops-a-daisies just turned into character instead of flaws like they normally would!!
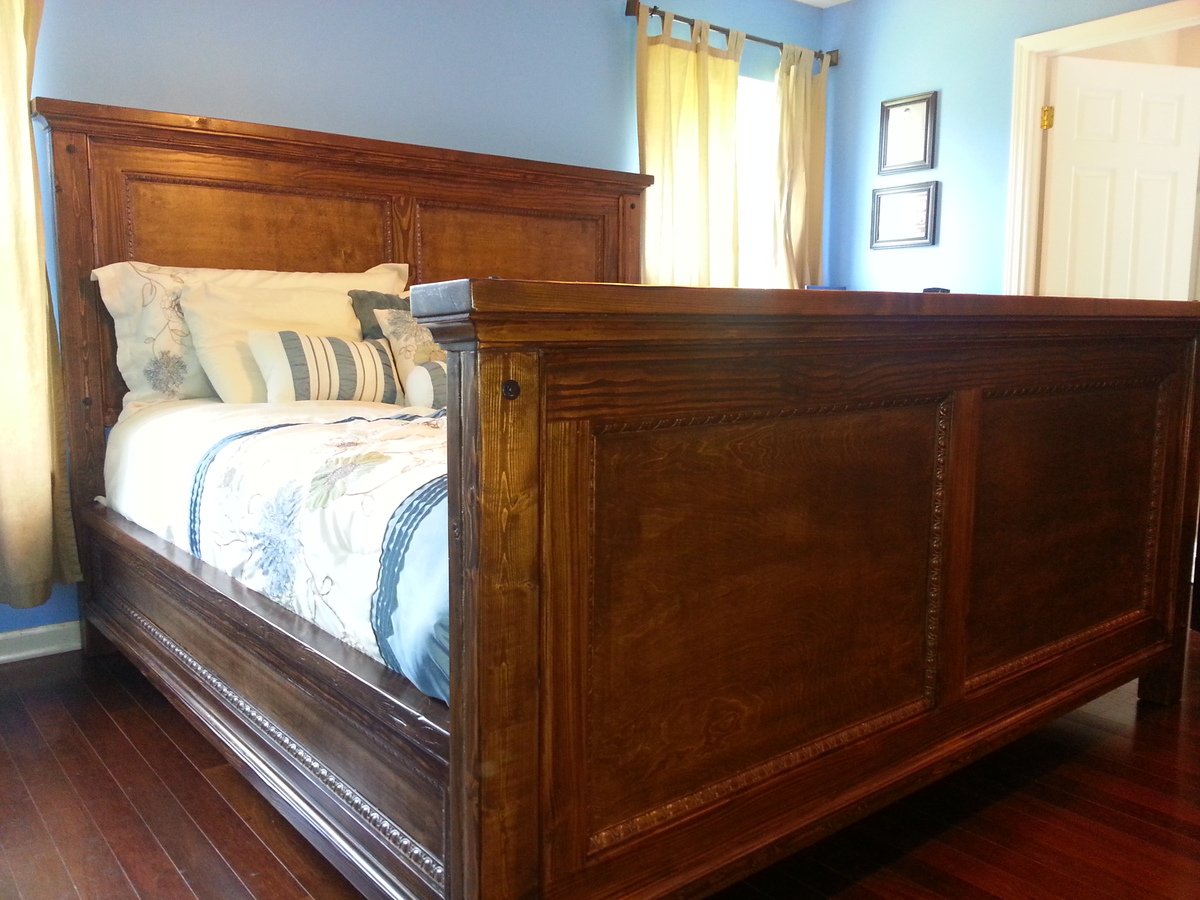
My wife and I recently upgraded from a queen to a king bed, so we needed a new bedframe. I came across this website and saw the plans for the farmhouse king. After looking at everyone's brag posts, I set about making plans for our bed based upon what Ana had provided and what I (meaning my wife) wanted.
While I had sketched out a plan and bought all my lumber based on that plan, I ended up modifying things as I progressed along...which meant additional trips to the store! There was some lumber that I didn't like once I put it together and had to start over (at least this happened in the very beginning!).
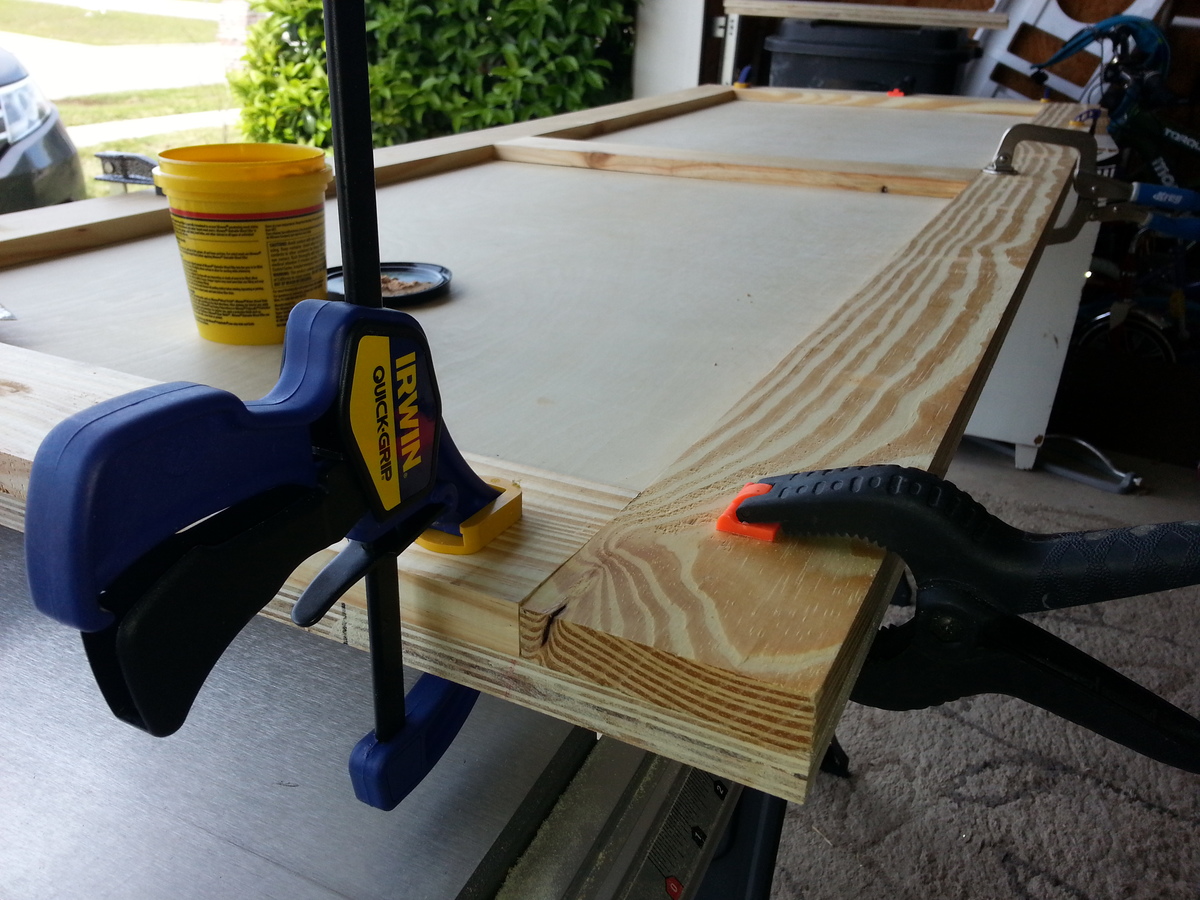
Basically, the head and foot boards are identical with the exception of the length of the posts attached. Since I couldn't find any 4x4 posts that weren't treated lumber, I had to make my posts by gluing two 2x4's together and then securing them with screws.
I spent quite a bit more money that intended, but that was because instead of using boards to line the head and footboards, I chose to use 3/4" sanded plywood. And since my wife wanted a large footboard to go along with the headboard, I ended up having to buy two sheets at around $50 a sheet. I trimmed that with 1x4's and then added a nice molding to the inside edges. It was that molding which was the single most expensive part. I think I bought 12 pieces for a little over $12 bucks a pop (I added it to the head/footboards and side rails). The funny thing is, that adding this was an afterthought and wasn't in the original plans, but I believe it's what makes the bed!
As far as getting the bed in the box, I incorporated a ledge on each of the side rails, footboard, and attached a ledge the bottom of the headboard. I also have a floating support that sits in the middle of the frame. Since this is a king, I've got two box springs and they're both well supported. I don't think any of my pictures show it, but I ended up getting bed rail hooks to attach the side rails to the head/footboards. I had to chisel out a spot for these 5 inch long hooks and receptacles on each end of the side rails and head/foot board. So, the bed comes together and apart very easily and quickly.
It took me a month and a half to build this, but that was off and on. I'd work on it for a few hours after I got home from work if I had time and I'd pick a day on the weekend. If I worked on this straight through, I would say it would have taken me a week and a half.

Thu, 04/24/2014 - 12:10
Love this bed. My sister is moving near me and I told her about this site so we could refurnish her home (and give me more things to build). The 1st thing we talked about building is a king size bed and I knew the plans would come from Ana's farmhouse bed. But I wanted it different and use plywood instead of the boards, like yours. I saw your bed and new it was the one. What won me over was the molding. It looks like a bed from a furniture store. Great job.
Thu, 04/24/2014 - 14:02
Thank you! I got the molding at Lowes and while it put me over my initial budget, I can't imagine the bed without it now! I just glued them down and put in 1" finish nails. I countersunk the nails using a small hammer and a punch. This way, I didn't damage the molding. I wish I could put up more pictures to show how it all went together.
The bed is quite heavy, so I'm glad I installed steel bed rail fasteners. It make it easy to tear down and put together without too much help.
Thu, 04/24/2014 - 13:28
This turned out great! They're great looking head/footboard but that moulding really does take up another notch...definitely worth the extra investment. The finish turned out very nice as well. great job!
Fri, 04/25/2014 - 16:53
Yeah, I was really pleased with how the molding turned out! I liked the bed unstained just as much as it is stained. I lost some of wood grain color variations when I stained it that I was hoping would show through, but oh well. My family, as well as the neighbor across the street, have put in bed/headboard requests! I might try some other molding variations and I'll post pics of those of course!
Tue, 09/13/2016 - 10:57
Your bed turned out beautiful! I love the modifications you made. I am wondering what size boards you used for your topper? From the pictures I am guessing maybe a 2x6 on top of a 2x4, both routered?
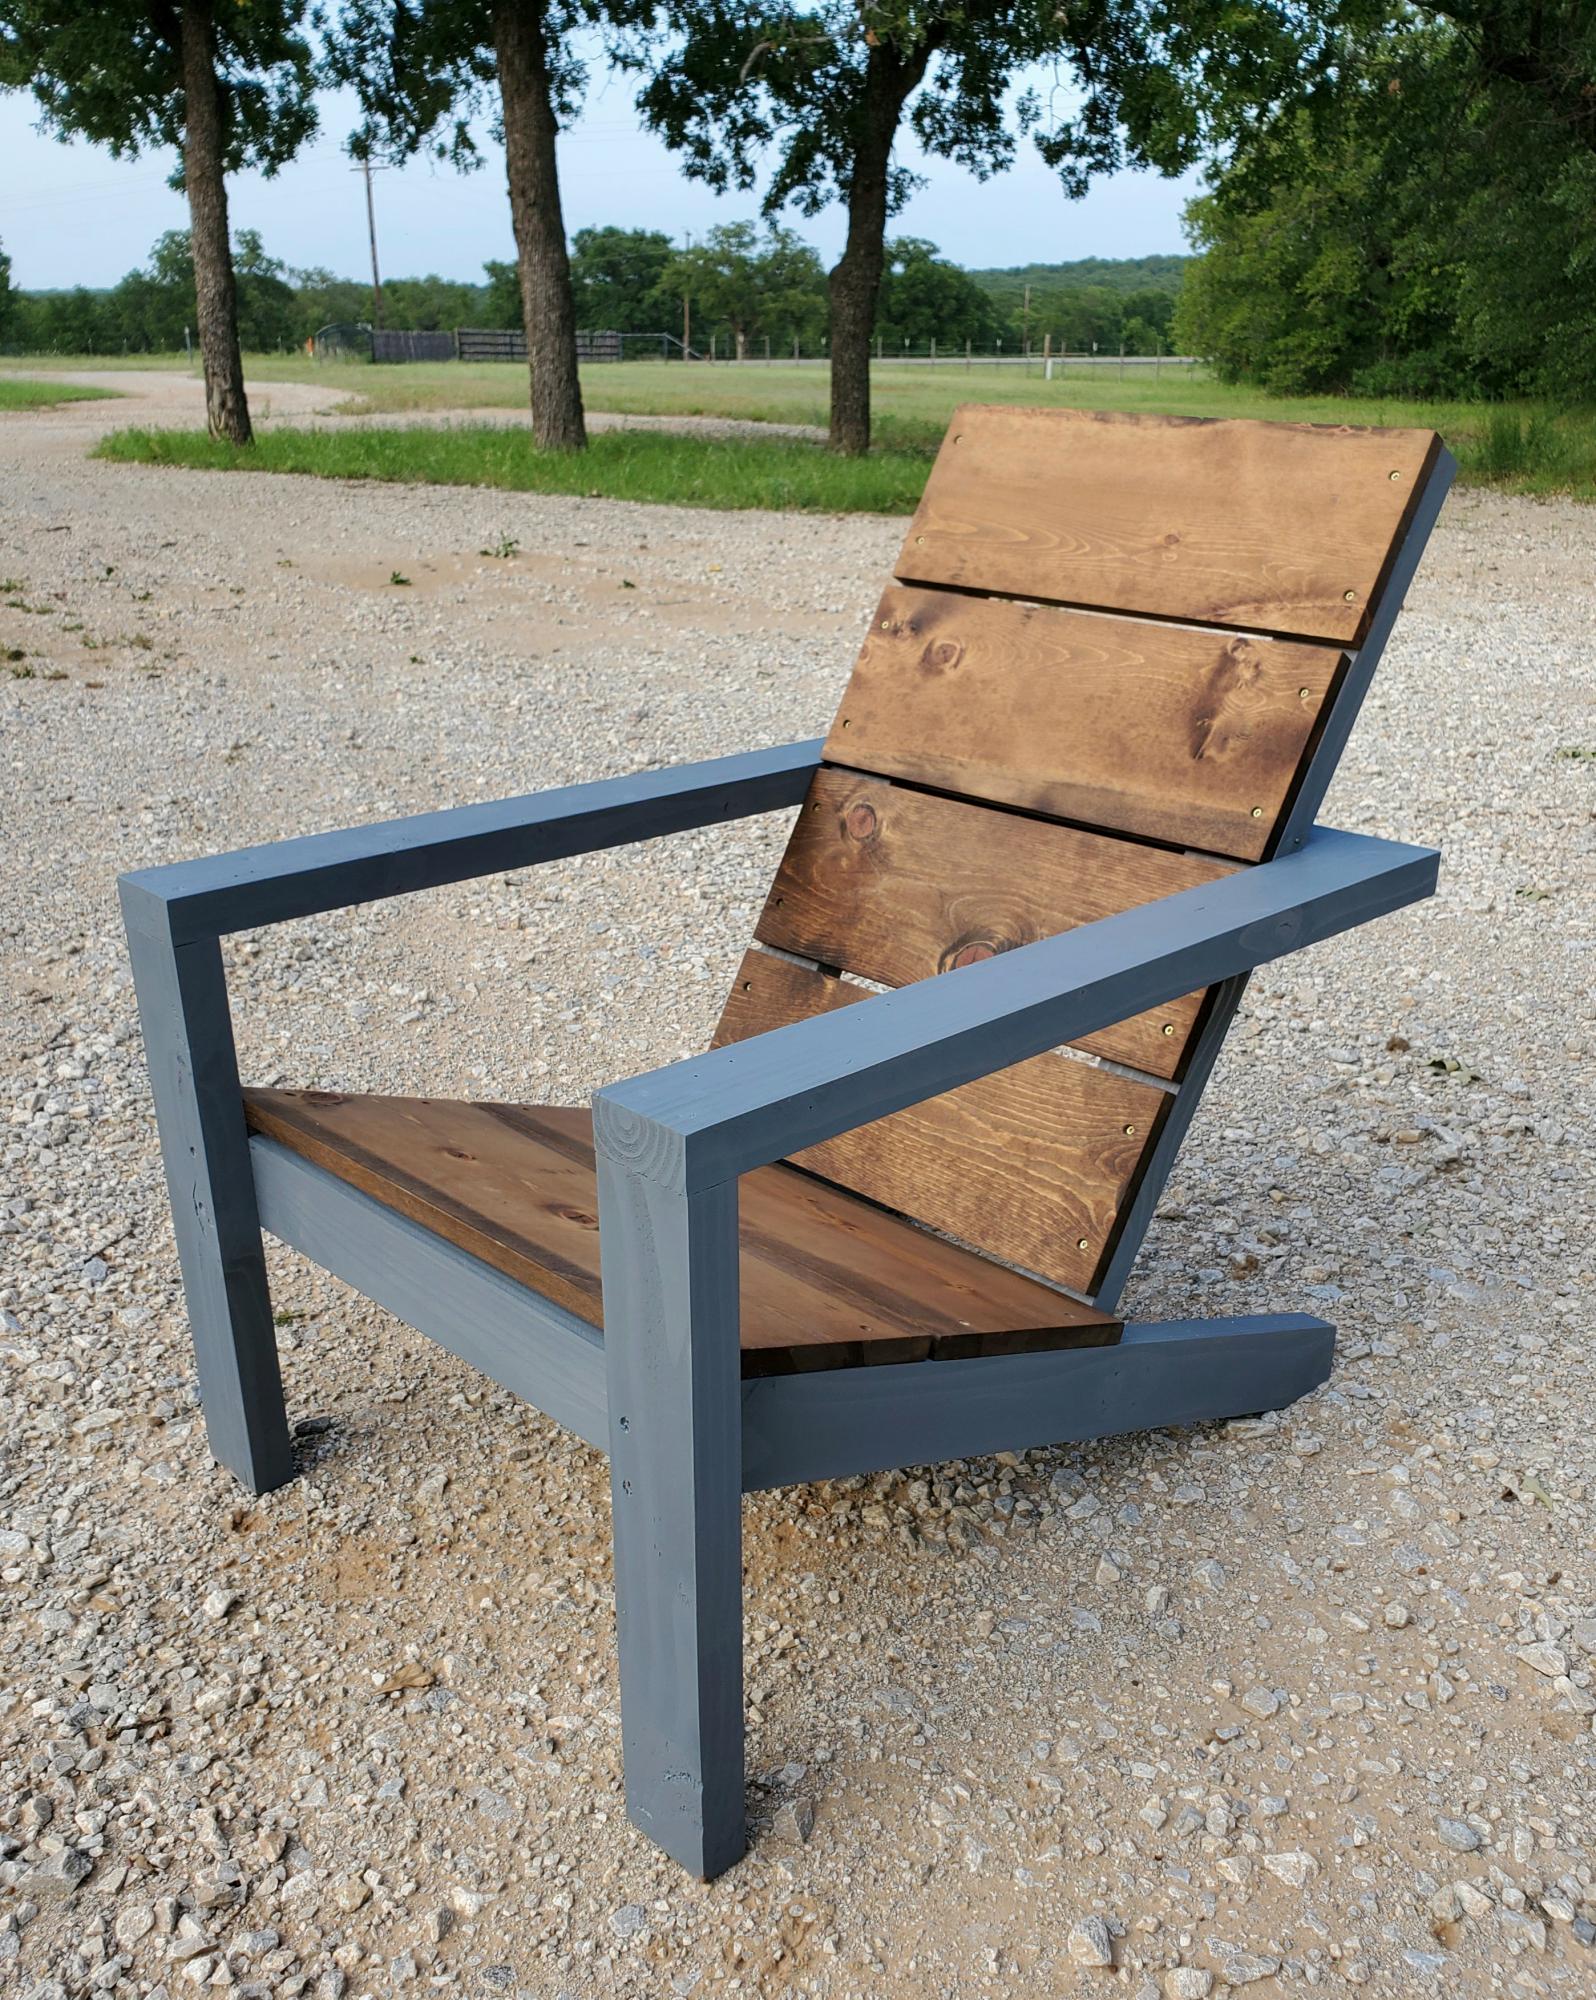
Like this chair! Changed the 3 1x10's on the back to 4 1x8's ripped down to 6 ¹⁵/¹⁶
This was probably my favorite build yet! Love how it turned out
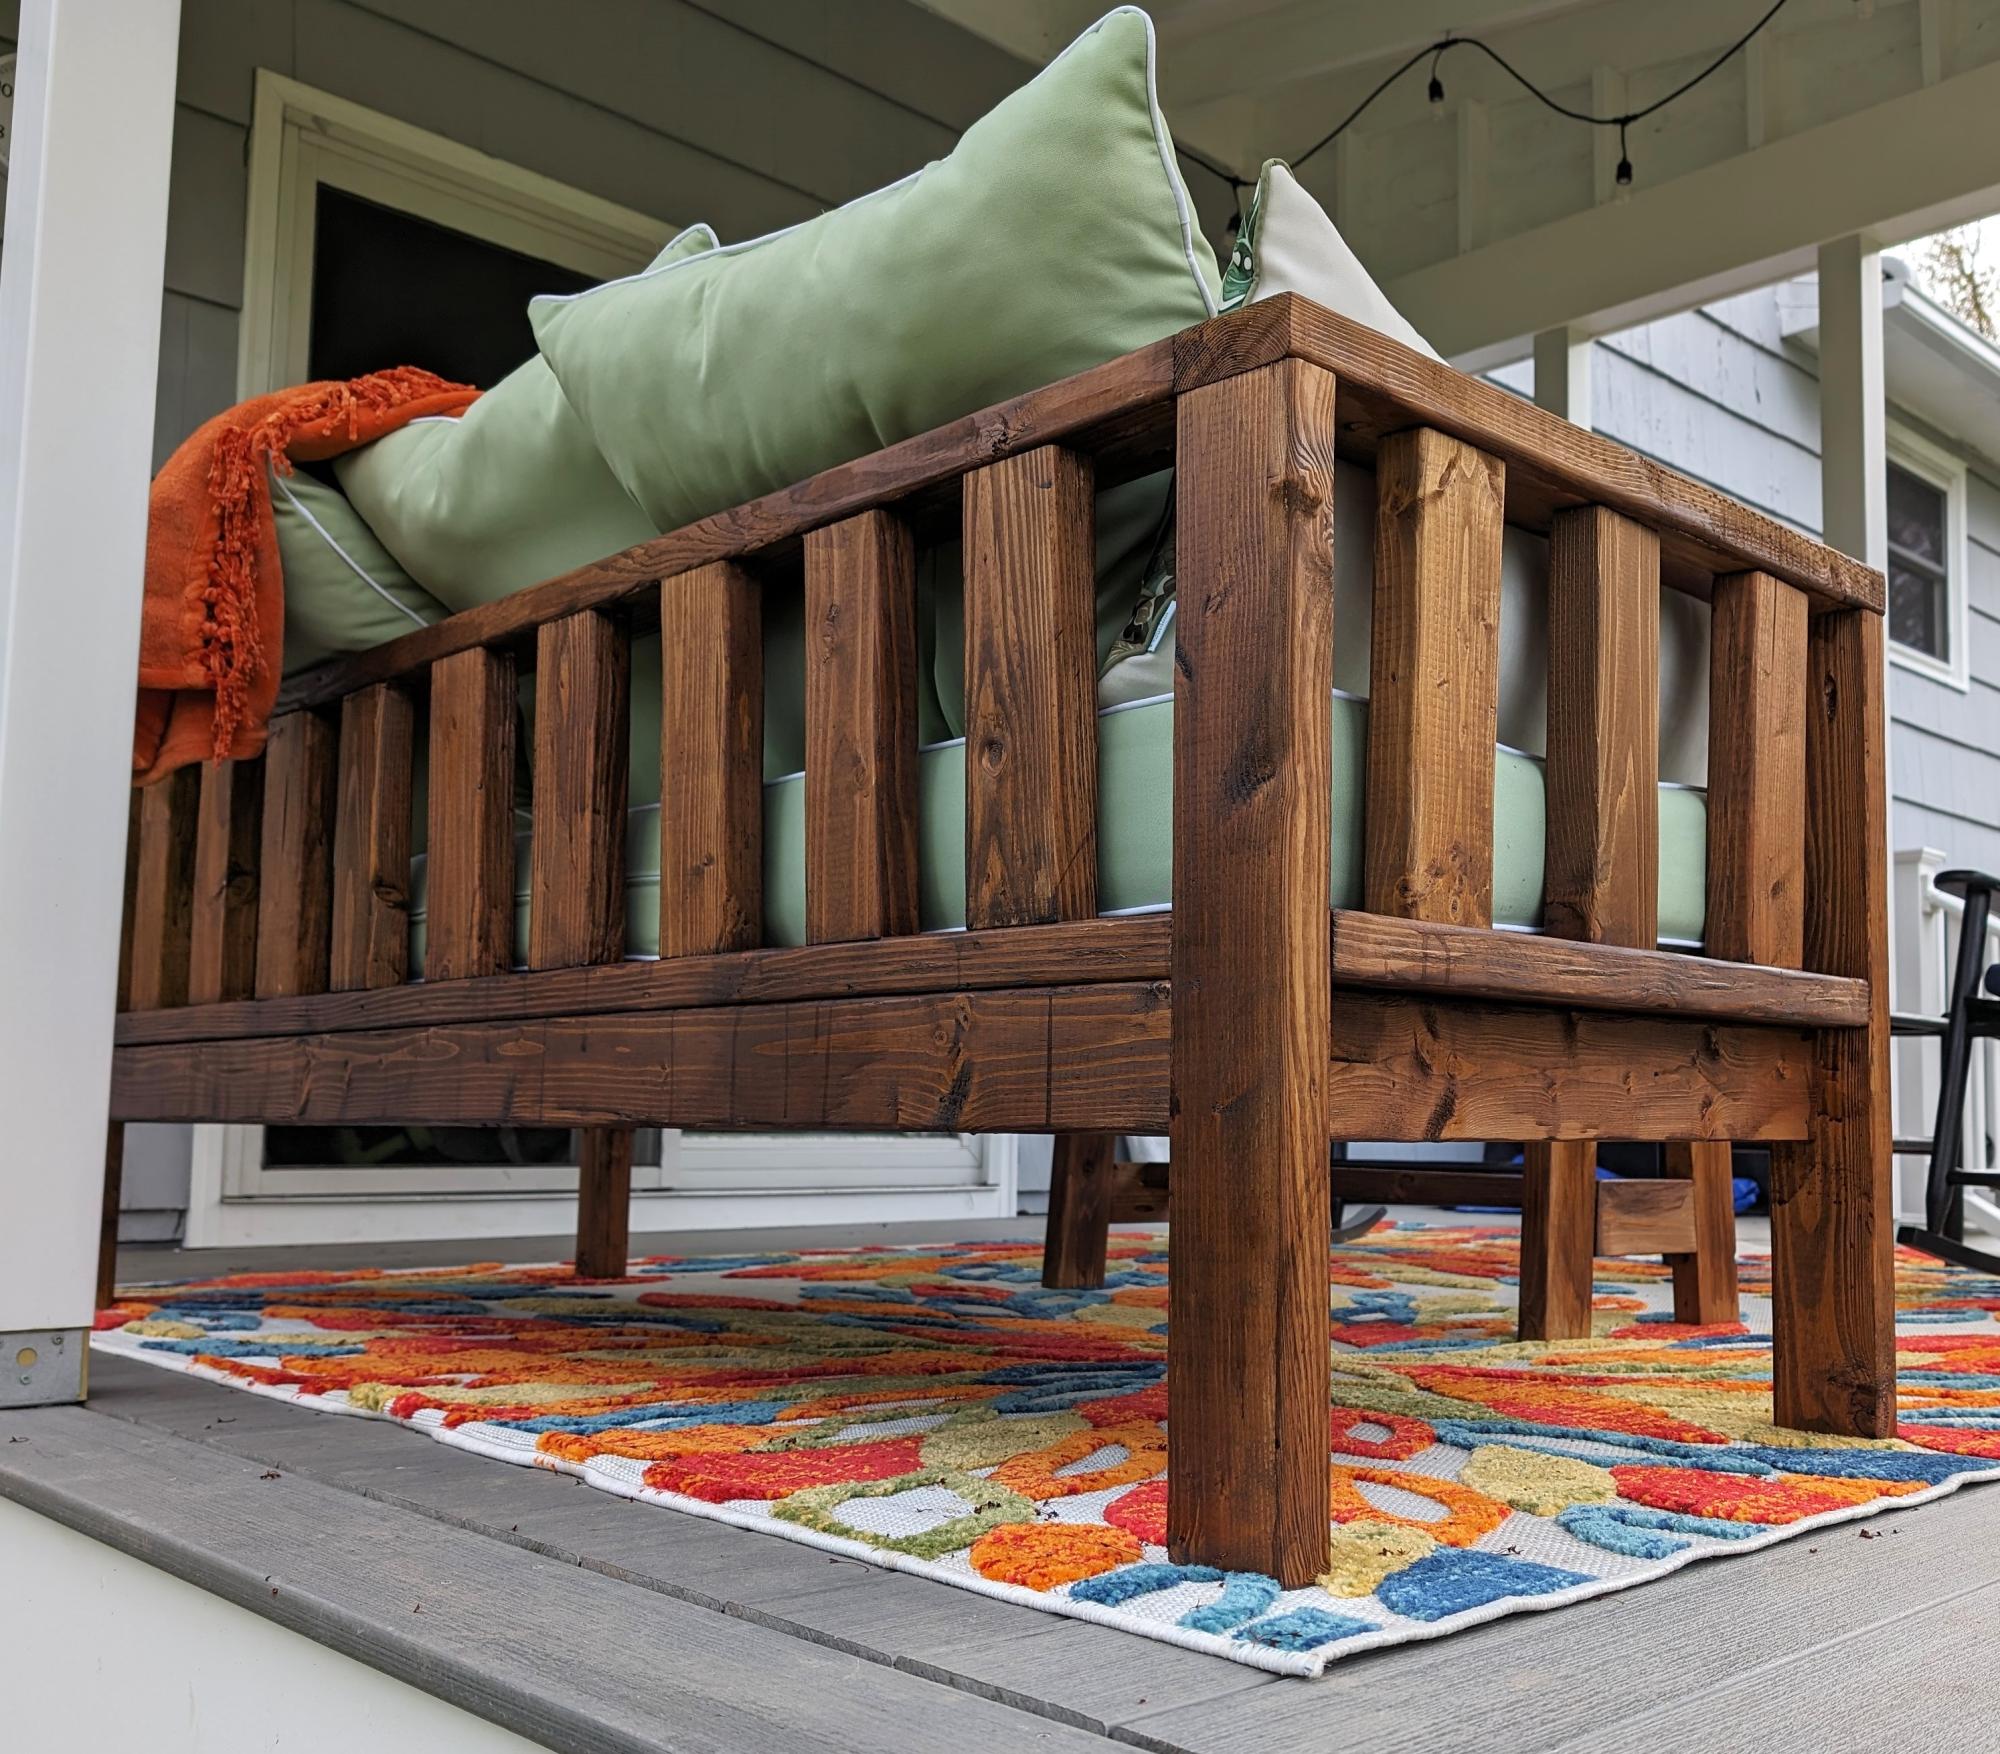
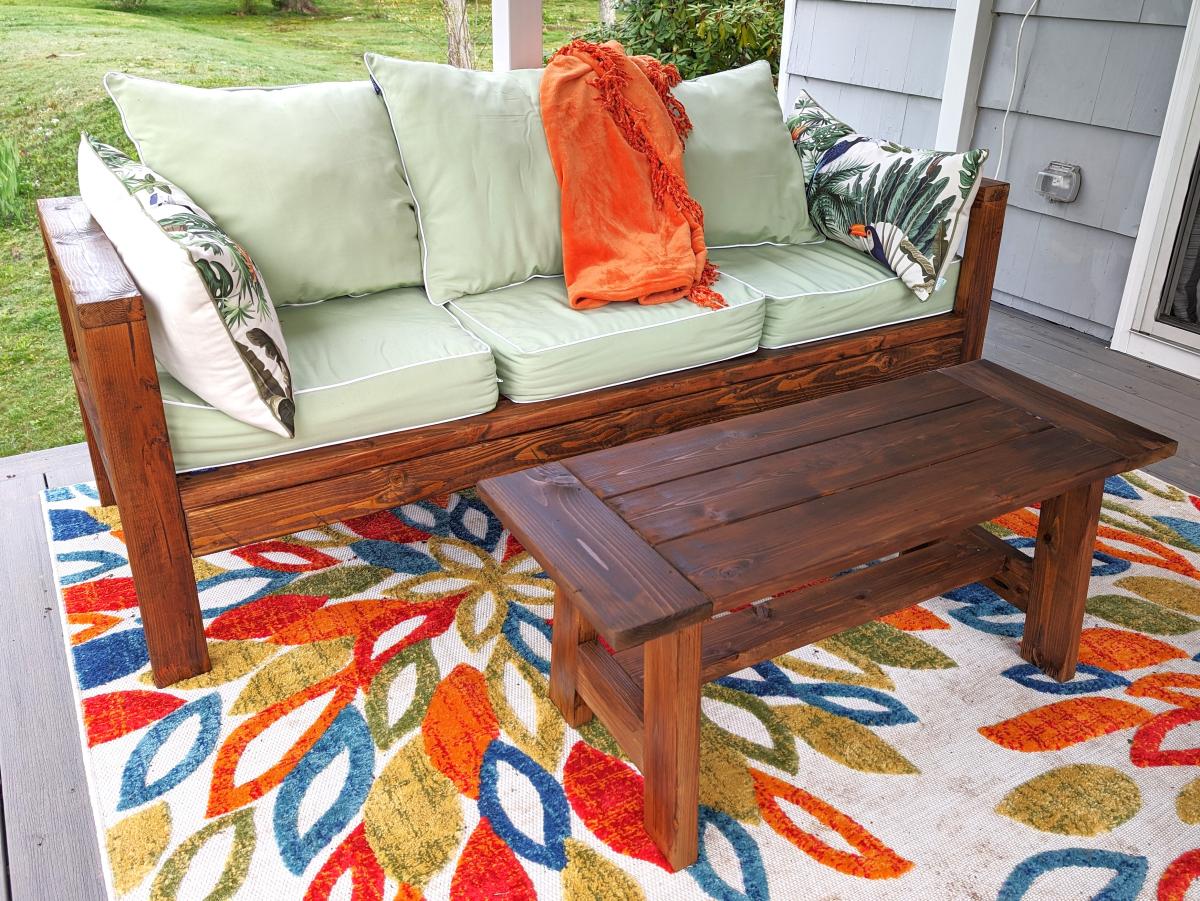
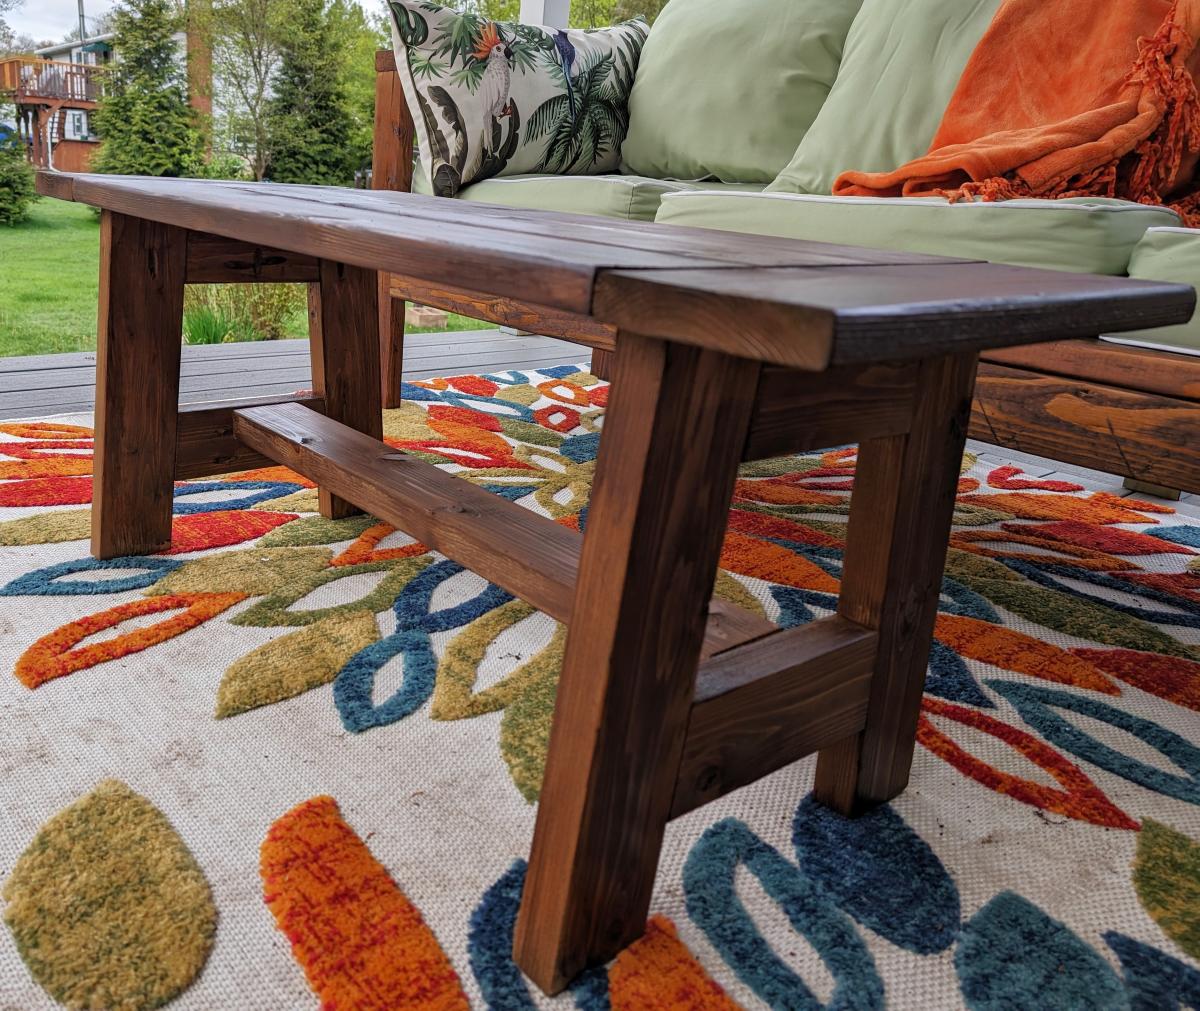
The sectional is based off the 2x4 outdoor sectional plans and the table is loosely based on the 4x4 truss beam table plans, although it's built out of leftover cedar decking boards and 2x4's. I made some additional adjustments to the sofa to keep the pillows in place and used the full 10' boards from the plan (and a few extra). Super happy with how it turned out!
Sarah E

Built three Adirondack chairs from Ana White's plans. they worked out real well still got to stain them yet. Thanks Ana
Bowlegged Cowboy
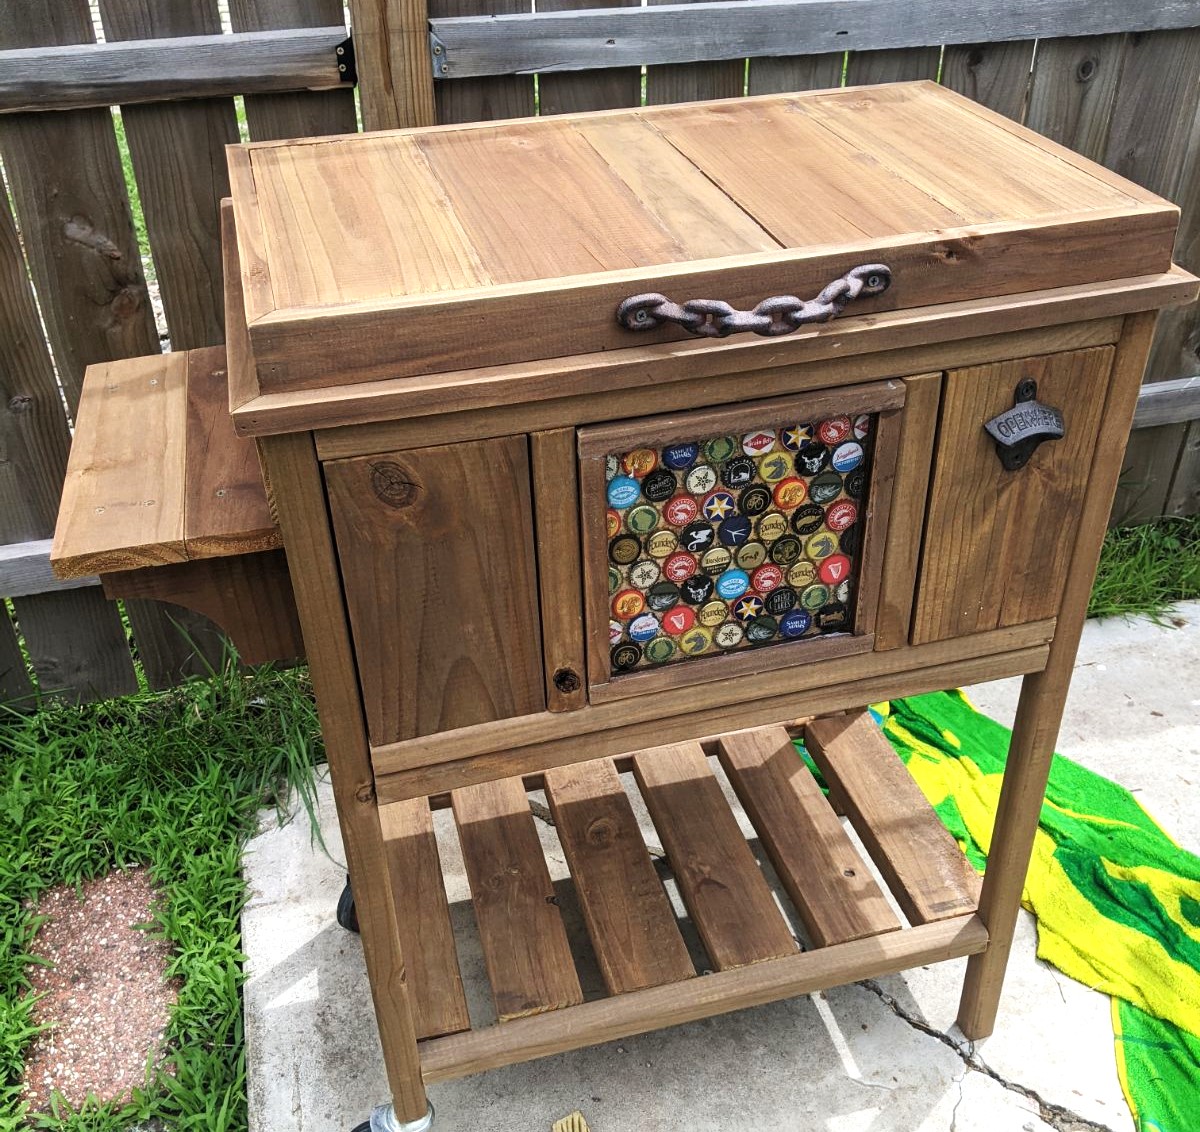
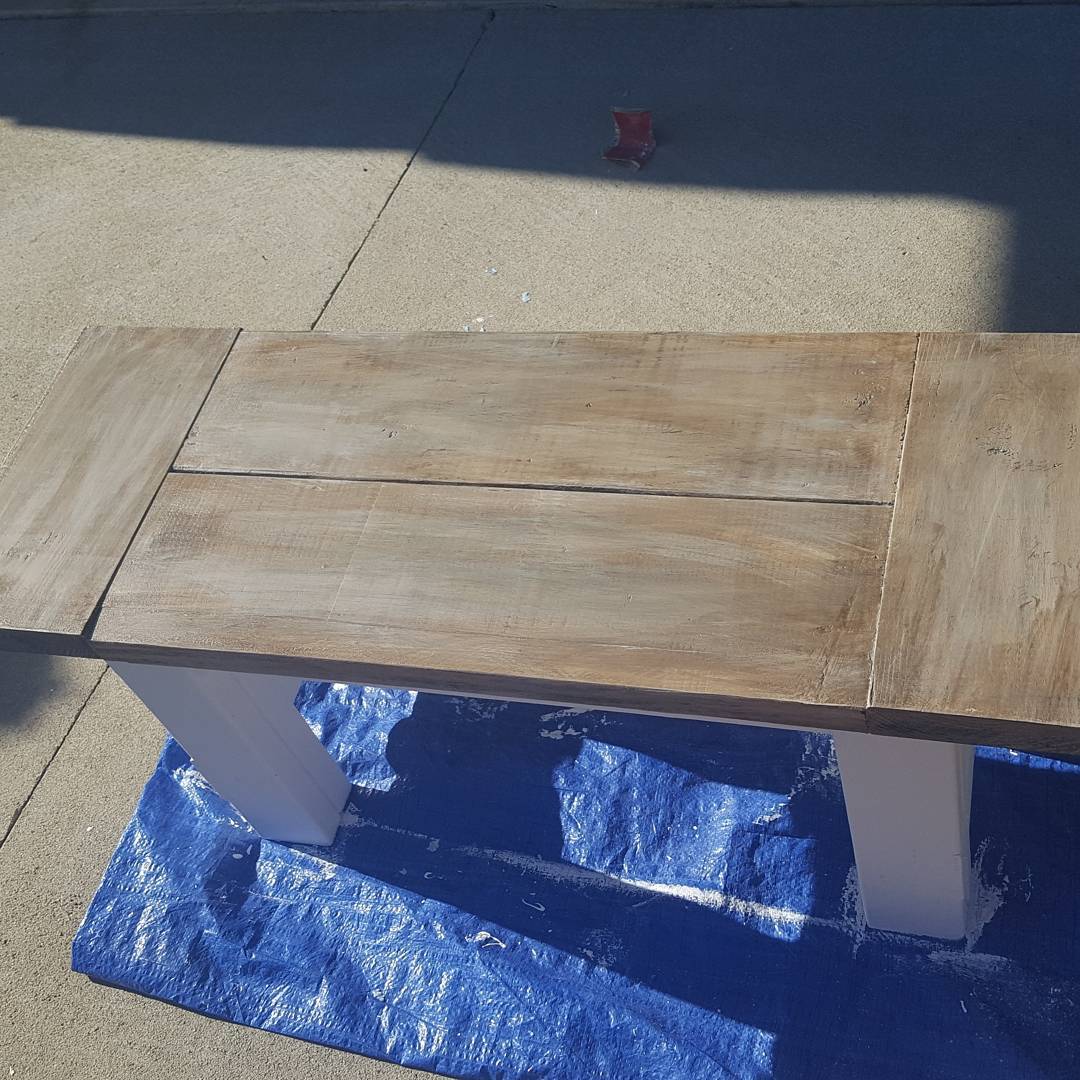
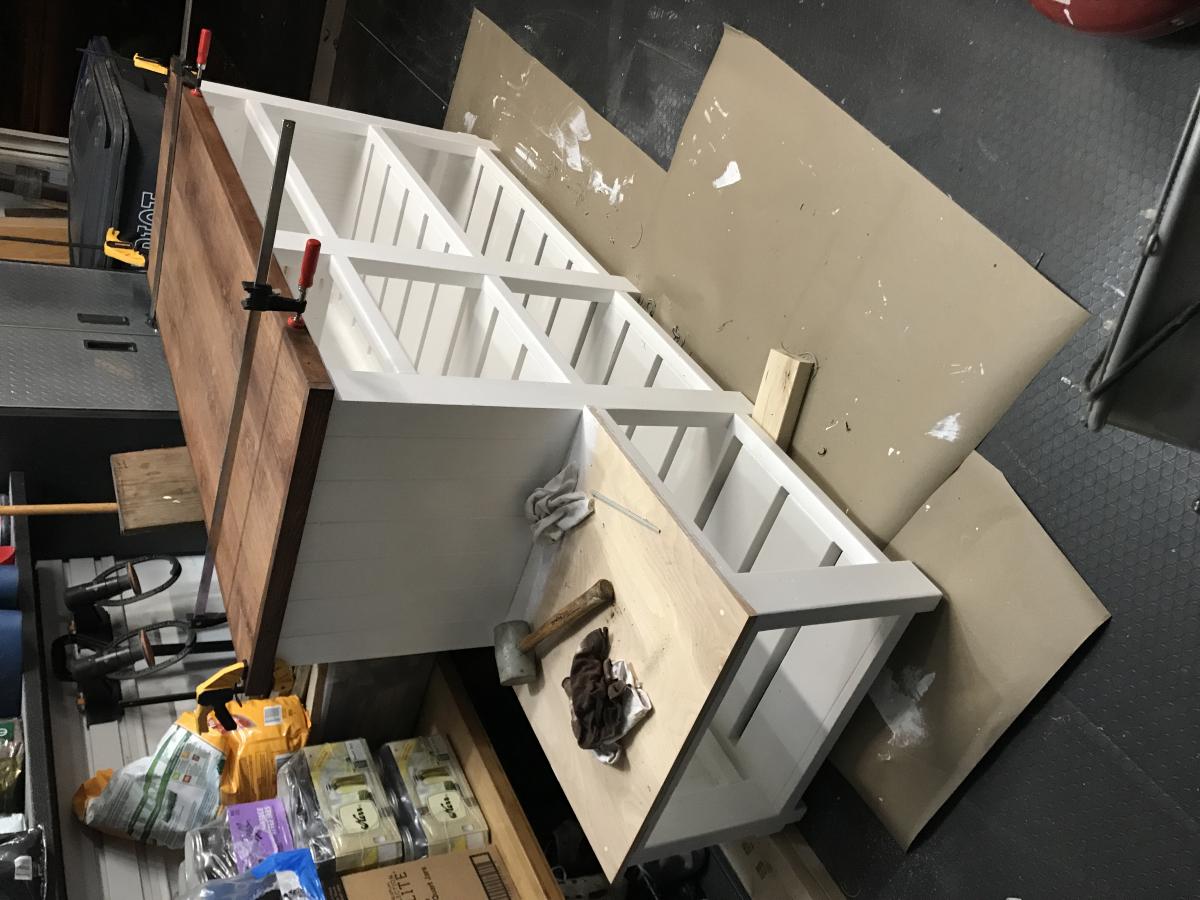
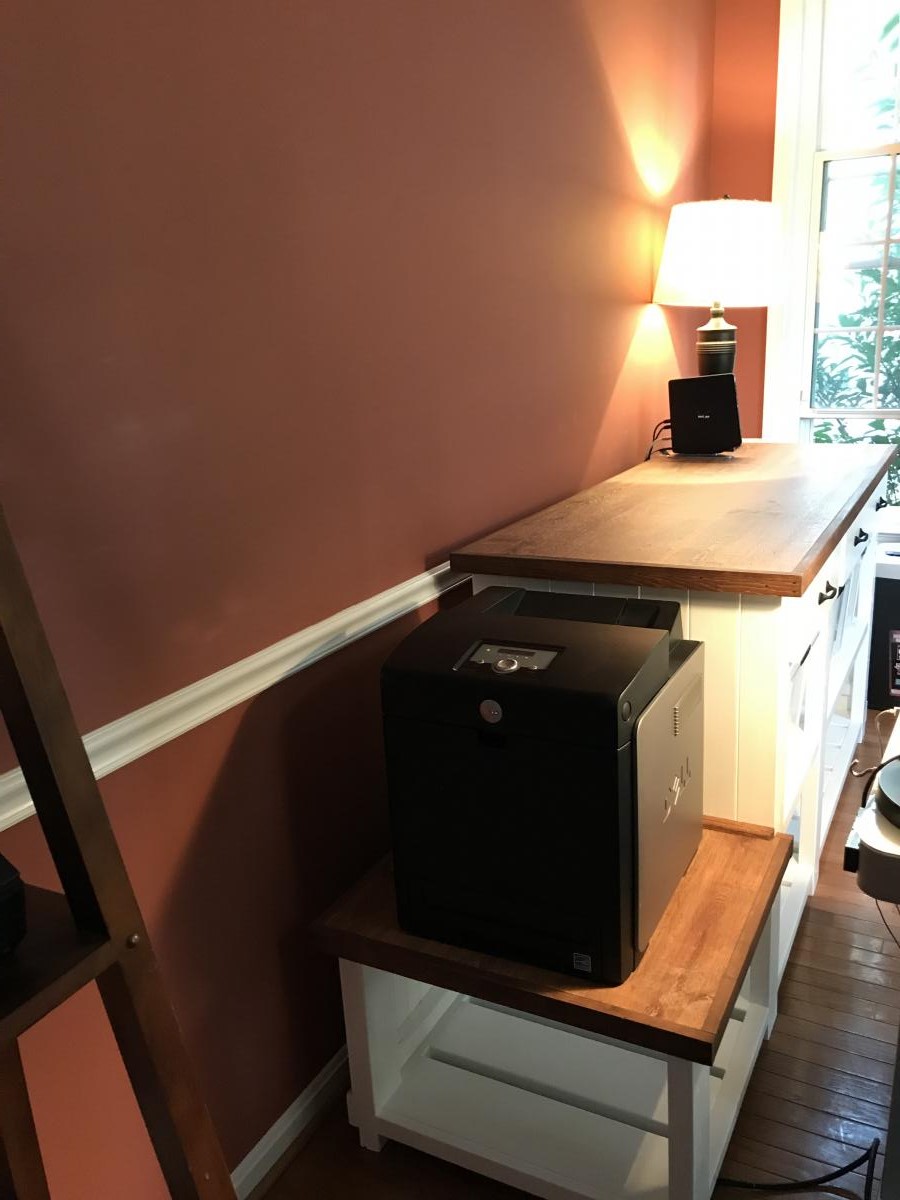
DIY Cooler Stand
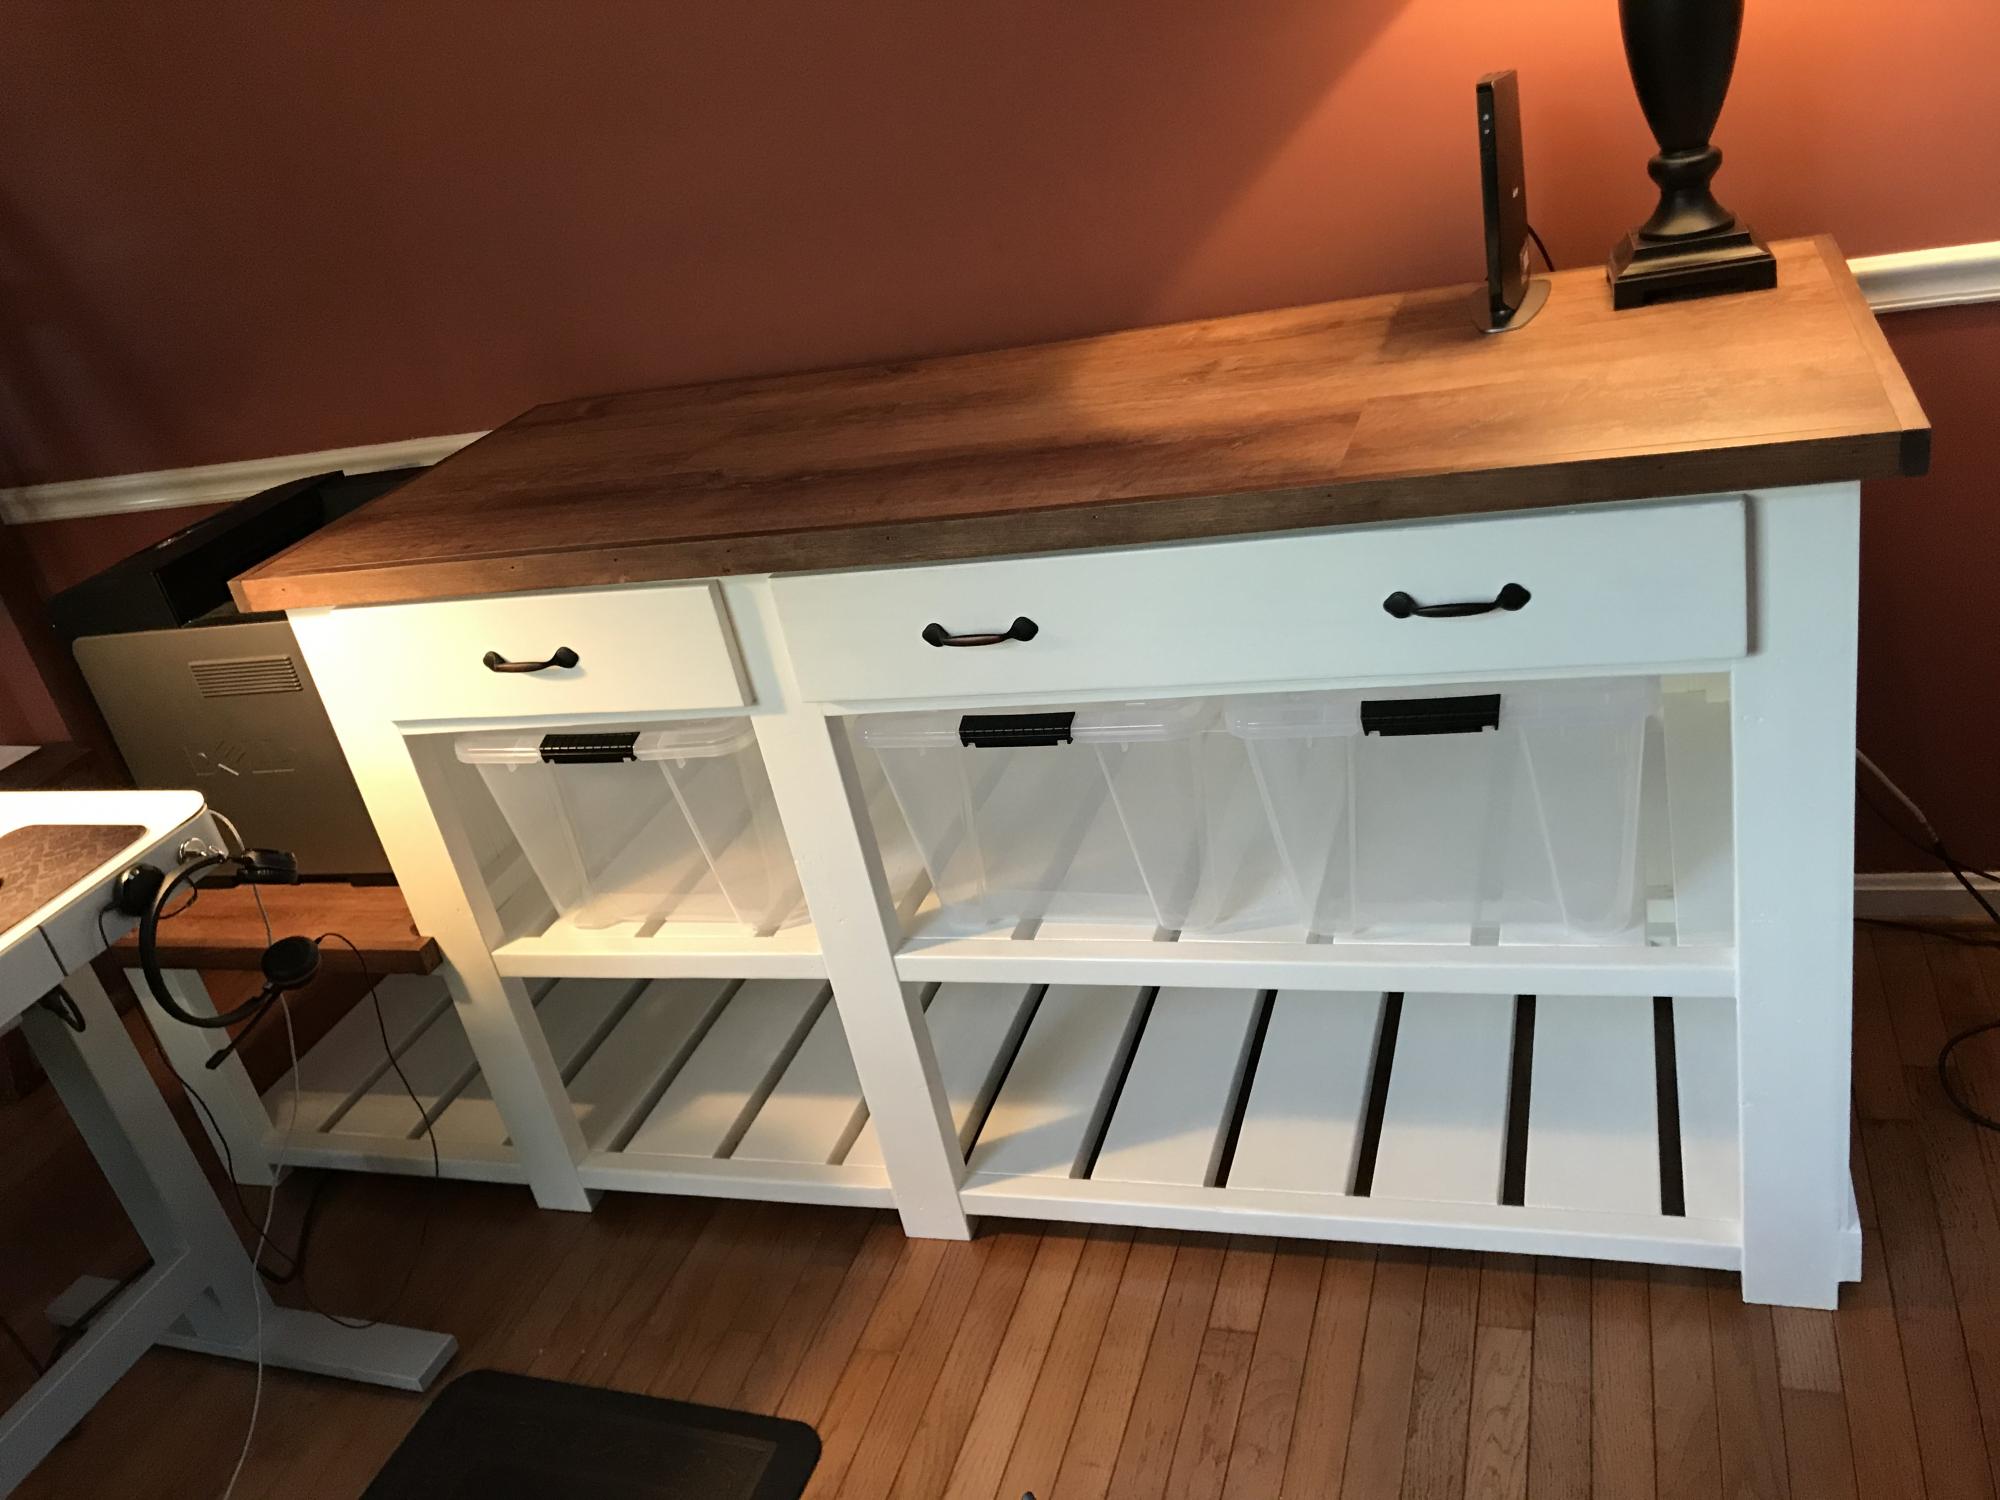
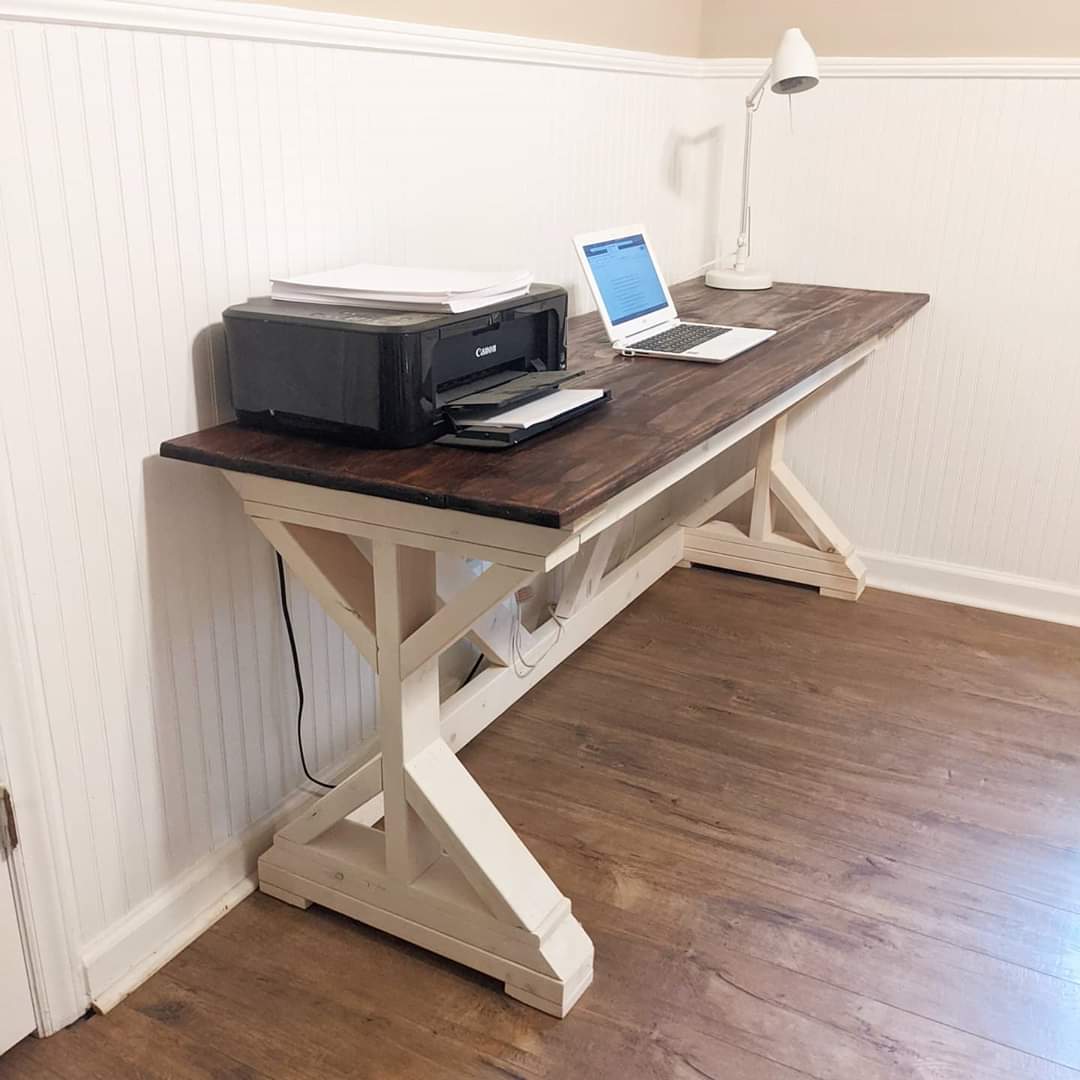
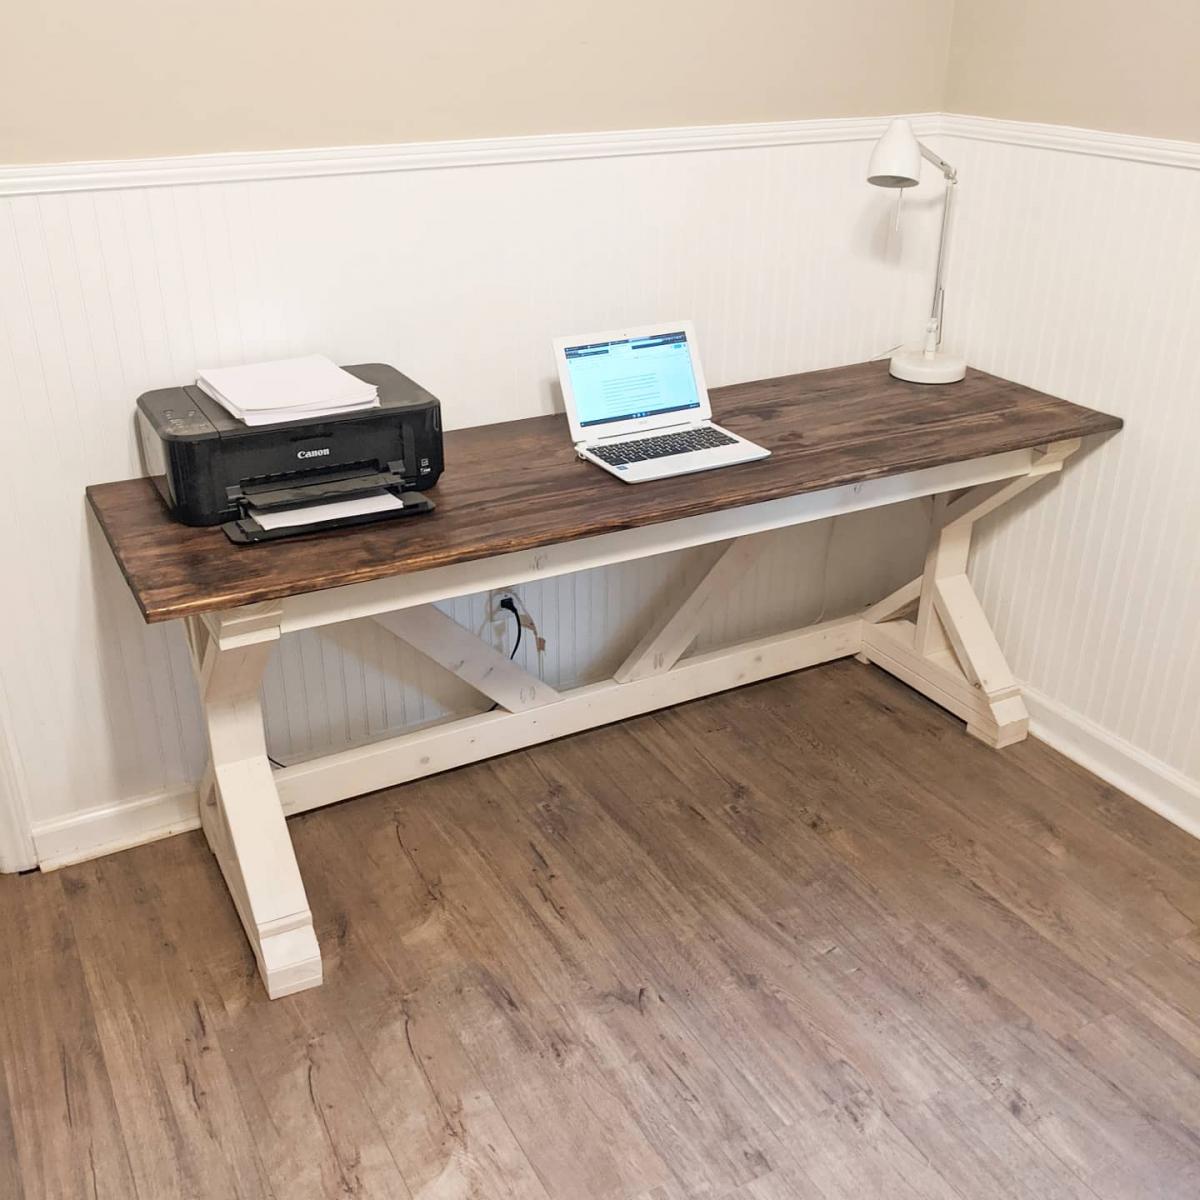
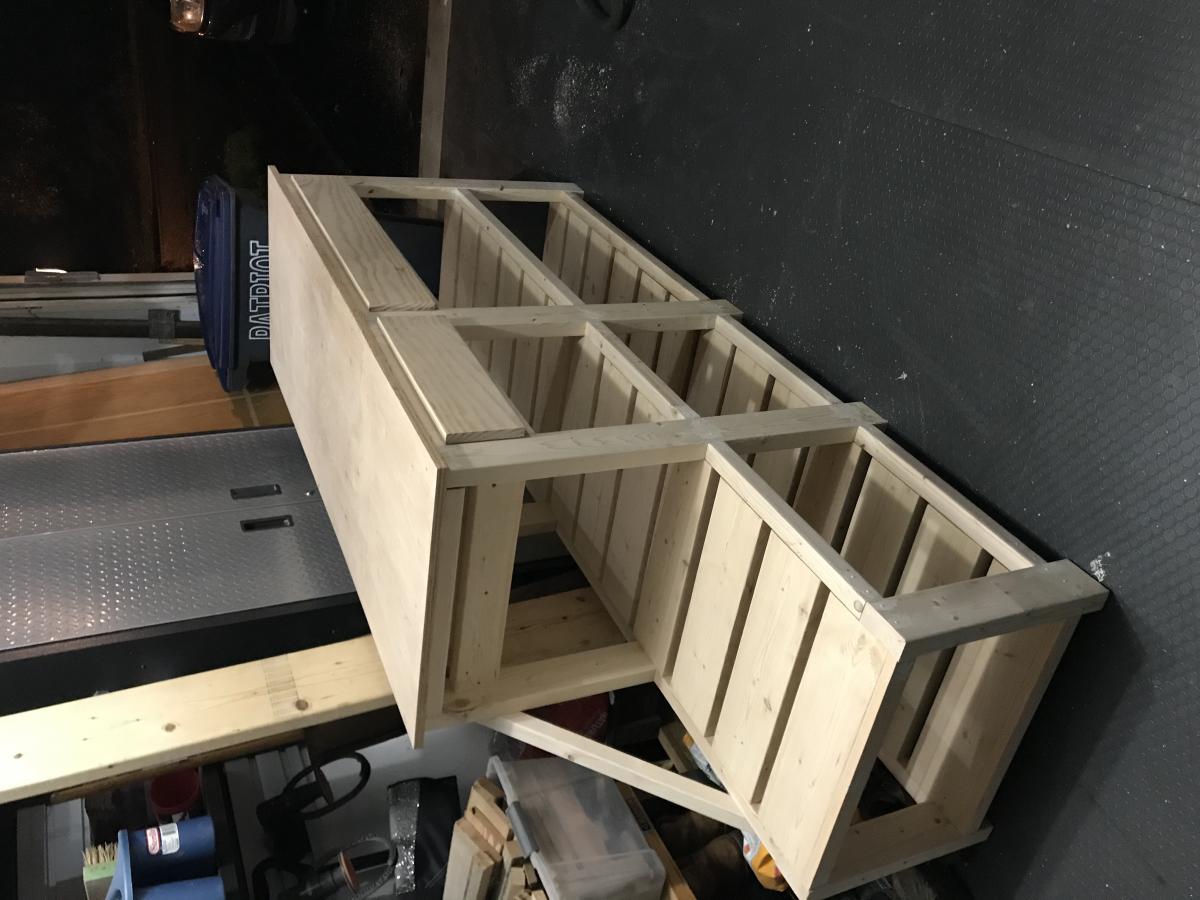
Started with the Farmhouse Console design and ended up modifying a bit but still wanted a similar look of the console. This was my first time building a piece of furniture so not too hard, just more time. Here are my changes: 37" height (12" height between shelves plus drawers and 1" top) 23" base width (wanted to use for storing clear bins) 25 3/4" top width 65 3/4" main top length 22 1/2" lower top length (wanted to a place for my printer with storage for paper below it) 88" (full top length) 34" interior width large section (2 bins for each shelf) 18" x 2 interior width for smaller sections (1 bin for upper and lower) 18" x 4 1/2" drawer opening 34" x 4 1/2" drawer opening 1 - 32 11/16" w x 21 1/4" drawer with 18" Everbilt full extension ball bearing slide set 1 - 16 11/16" w x 21 1/4" drawer with 18" Everbilt full extension ball bearing slide set Additional Notes: - Used Pine/Spruce Edge V planks (.25" thick, 3.5" width) for sides and back - Used 2x4 for drawers with 1/2 birch plywood for bottom and 1x6 face (19" and 35" long) - Assembled with pocket screws, GRK finishing screws and glue just like the farmhouse console instructions. - Had to modify the location of the 2x6 slats for the two center legs to account for the change in length to keep the 1" space between them. As noted in the title, I experimented by making the top using lifeproof vinyl "Trail Oak" floor planks glued on top of 3/4" birch plywood and trimmed it with 1 x 2 stained to match the vinyl flooring. I'm pretty happy with the turnout but was prepared to use 2/6's if it didn't look the way I envisioned.
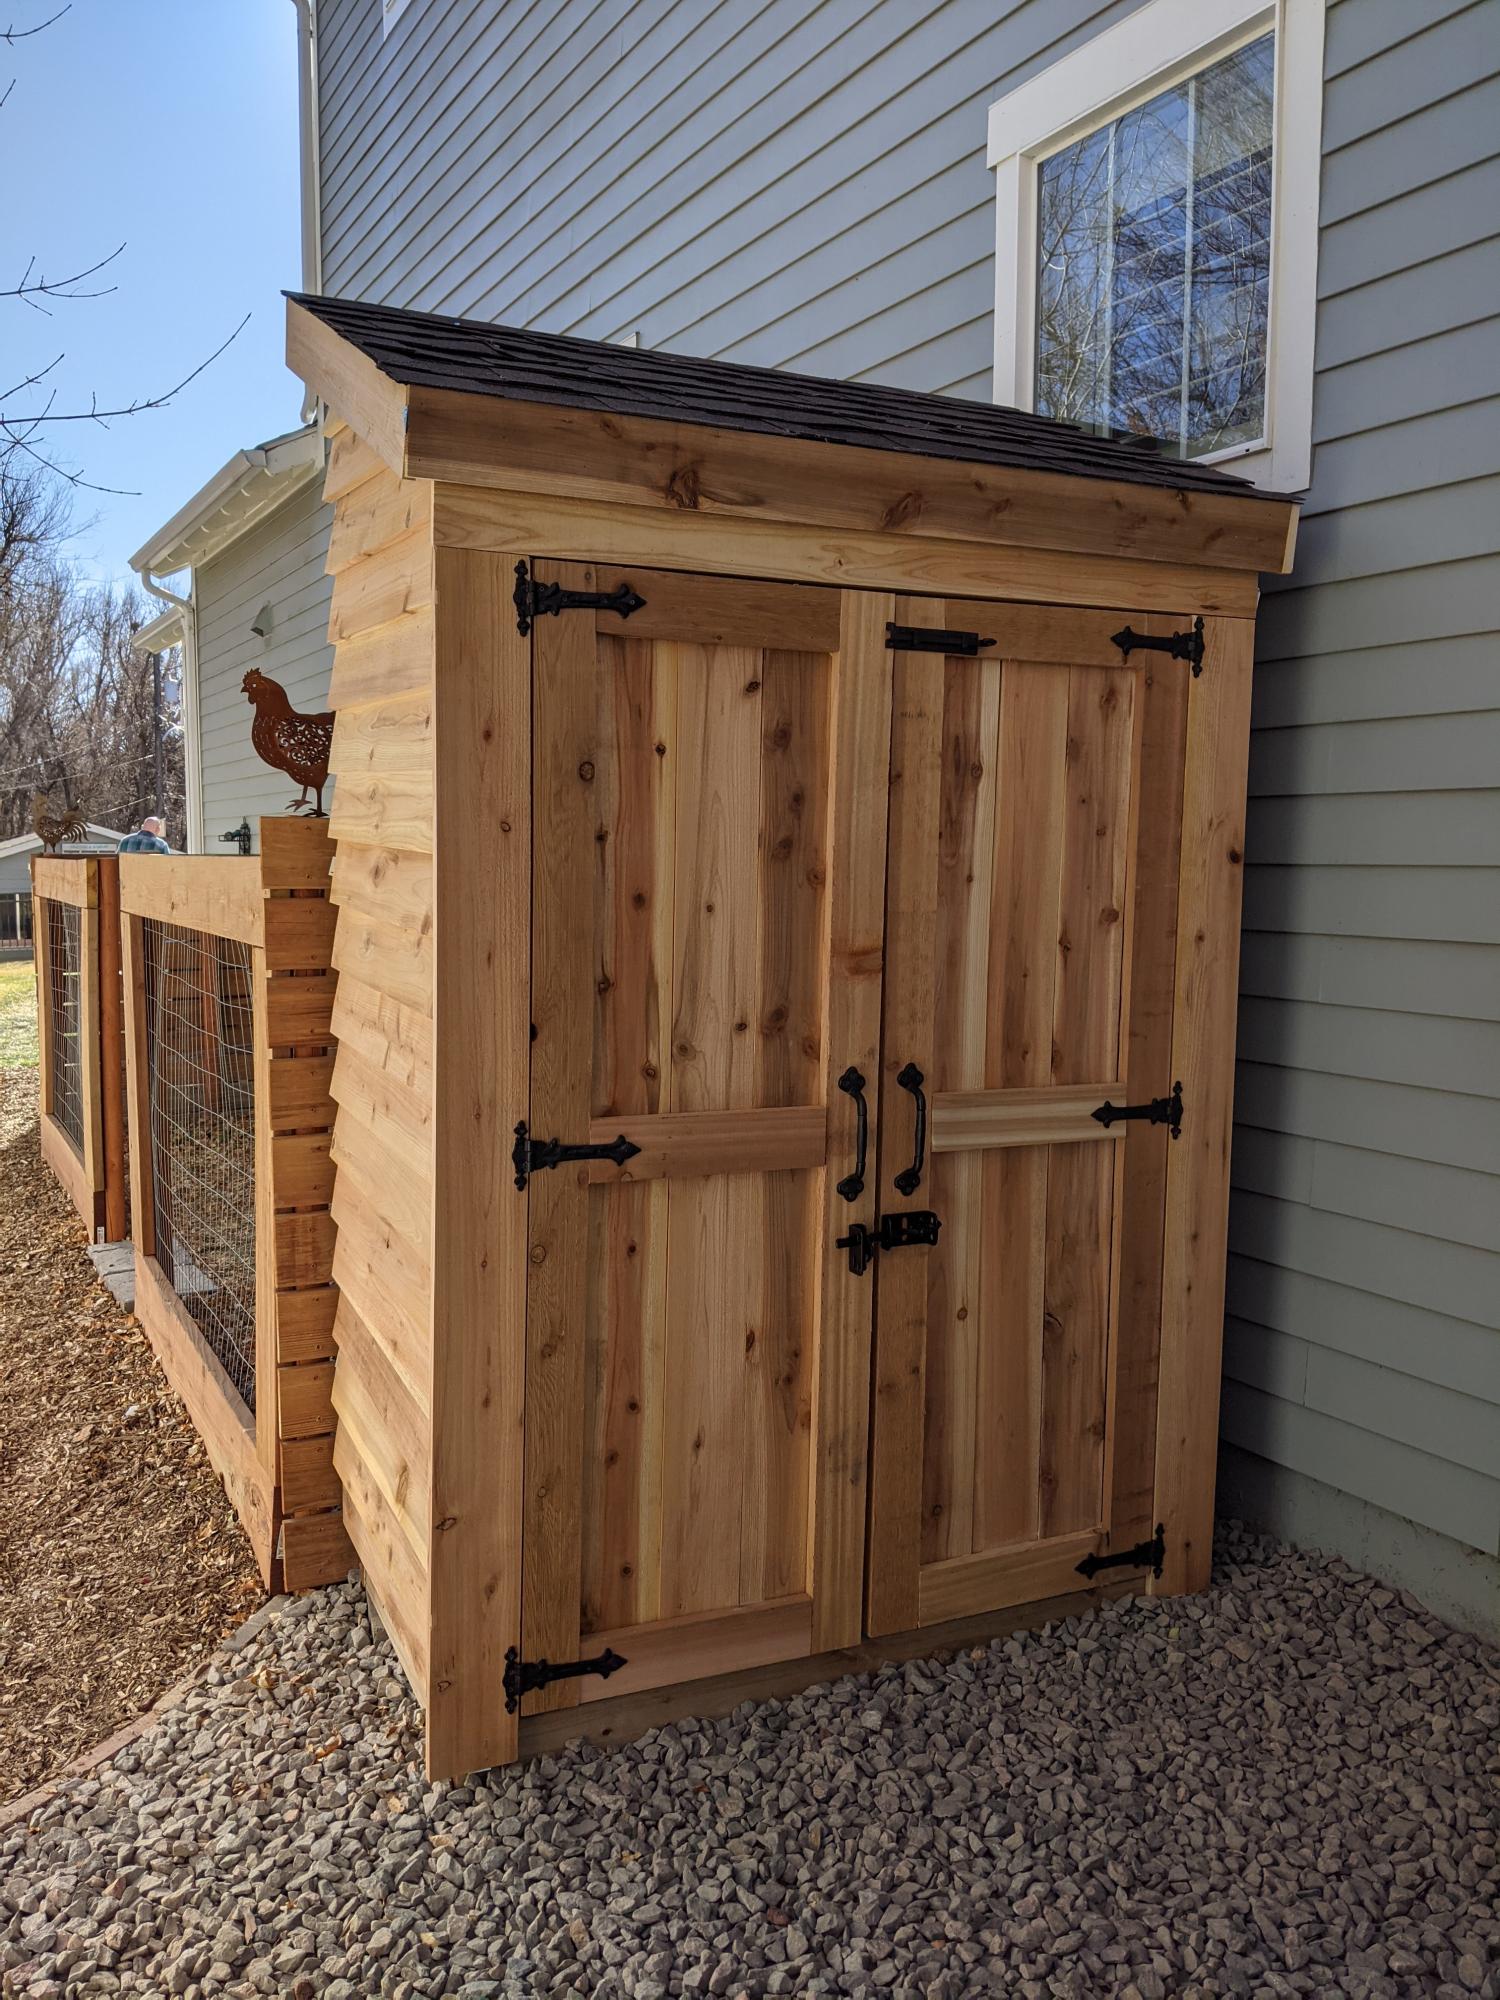
Our take on the small garden shed. Ours is 4 1/2 by 7 feet. We used cedar fence pickets and 2x4 construction. Left over shingles from when our house was built. We are definitely not roofers or framers, also chasing around a 3 year old didn't make things easier. Turned out beautiful for what we want it for. Just rustic enough. Great intermediate project.
Mon, 11/30/2020 - 11:14
You did a great job, the 3 year olds add just the perfect amount of challenge to really appreciate a completed project!:)
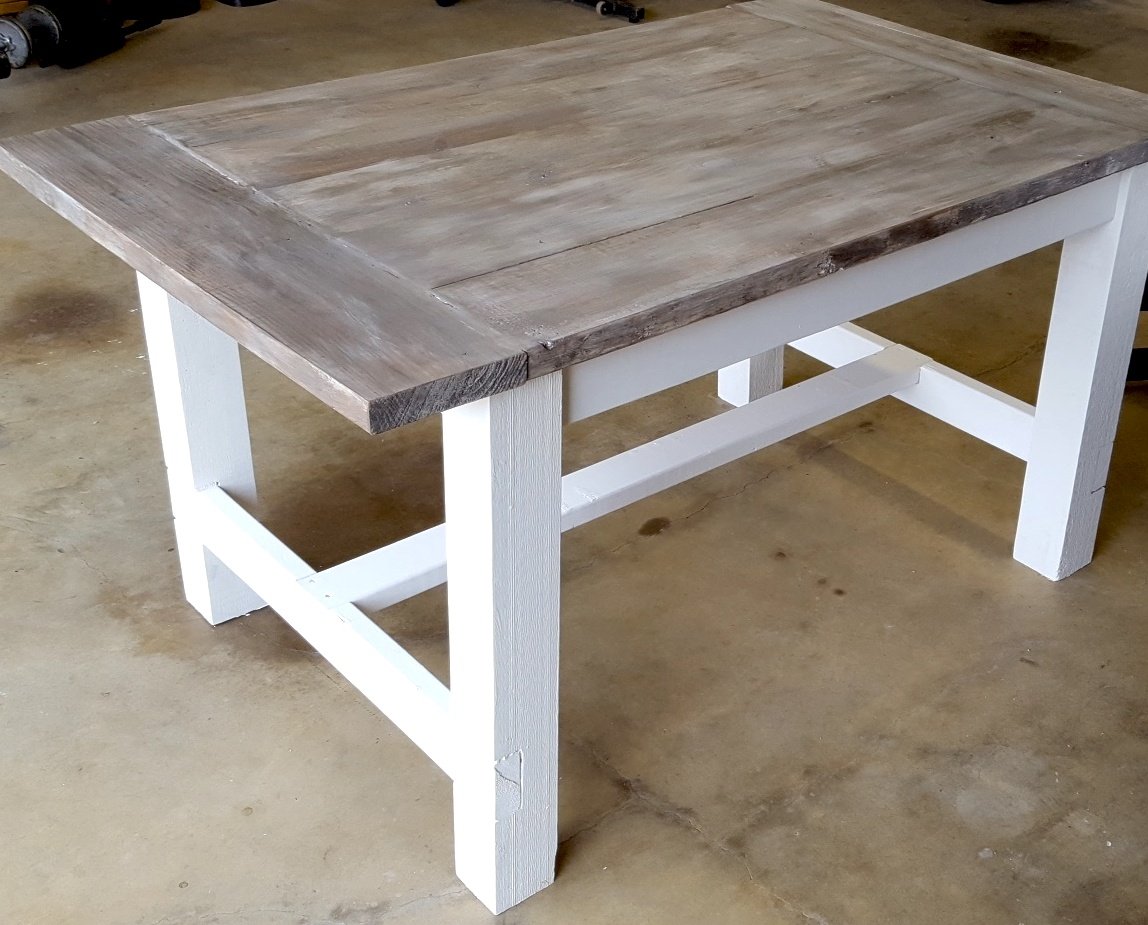
We went off the Farmhouse table and bench design but had to customize the length of the table and bench so that it fit in our kitchen space. The table was our first ever project and we made a few mistakes but learned from them and built the bench and are hoping to move up to the Farmhouse bed and then the fullstorage bed.