Pallet hope chest
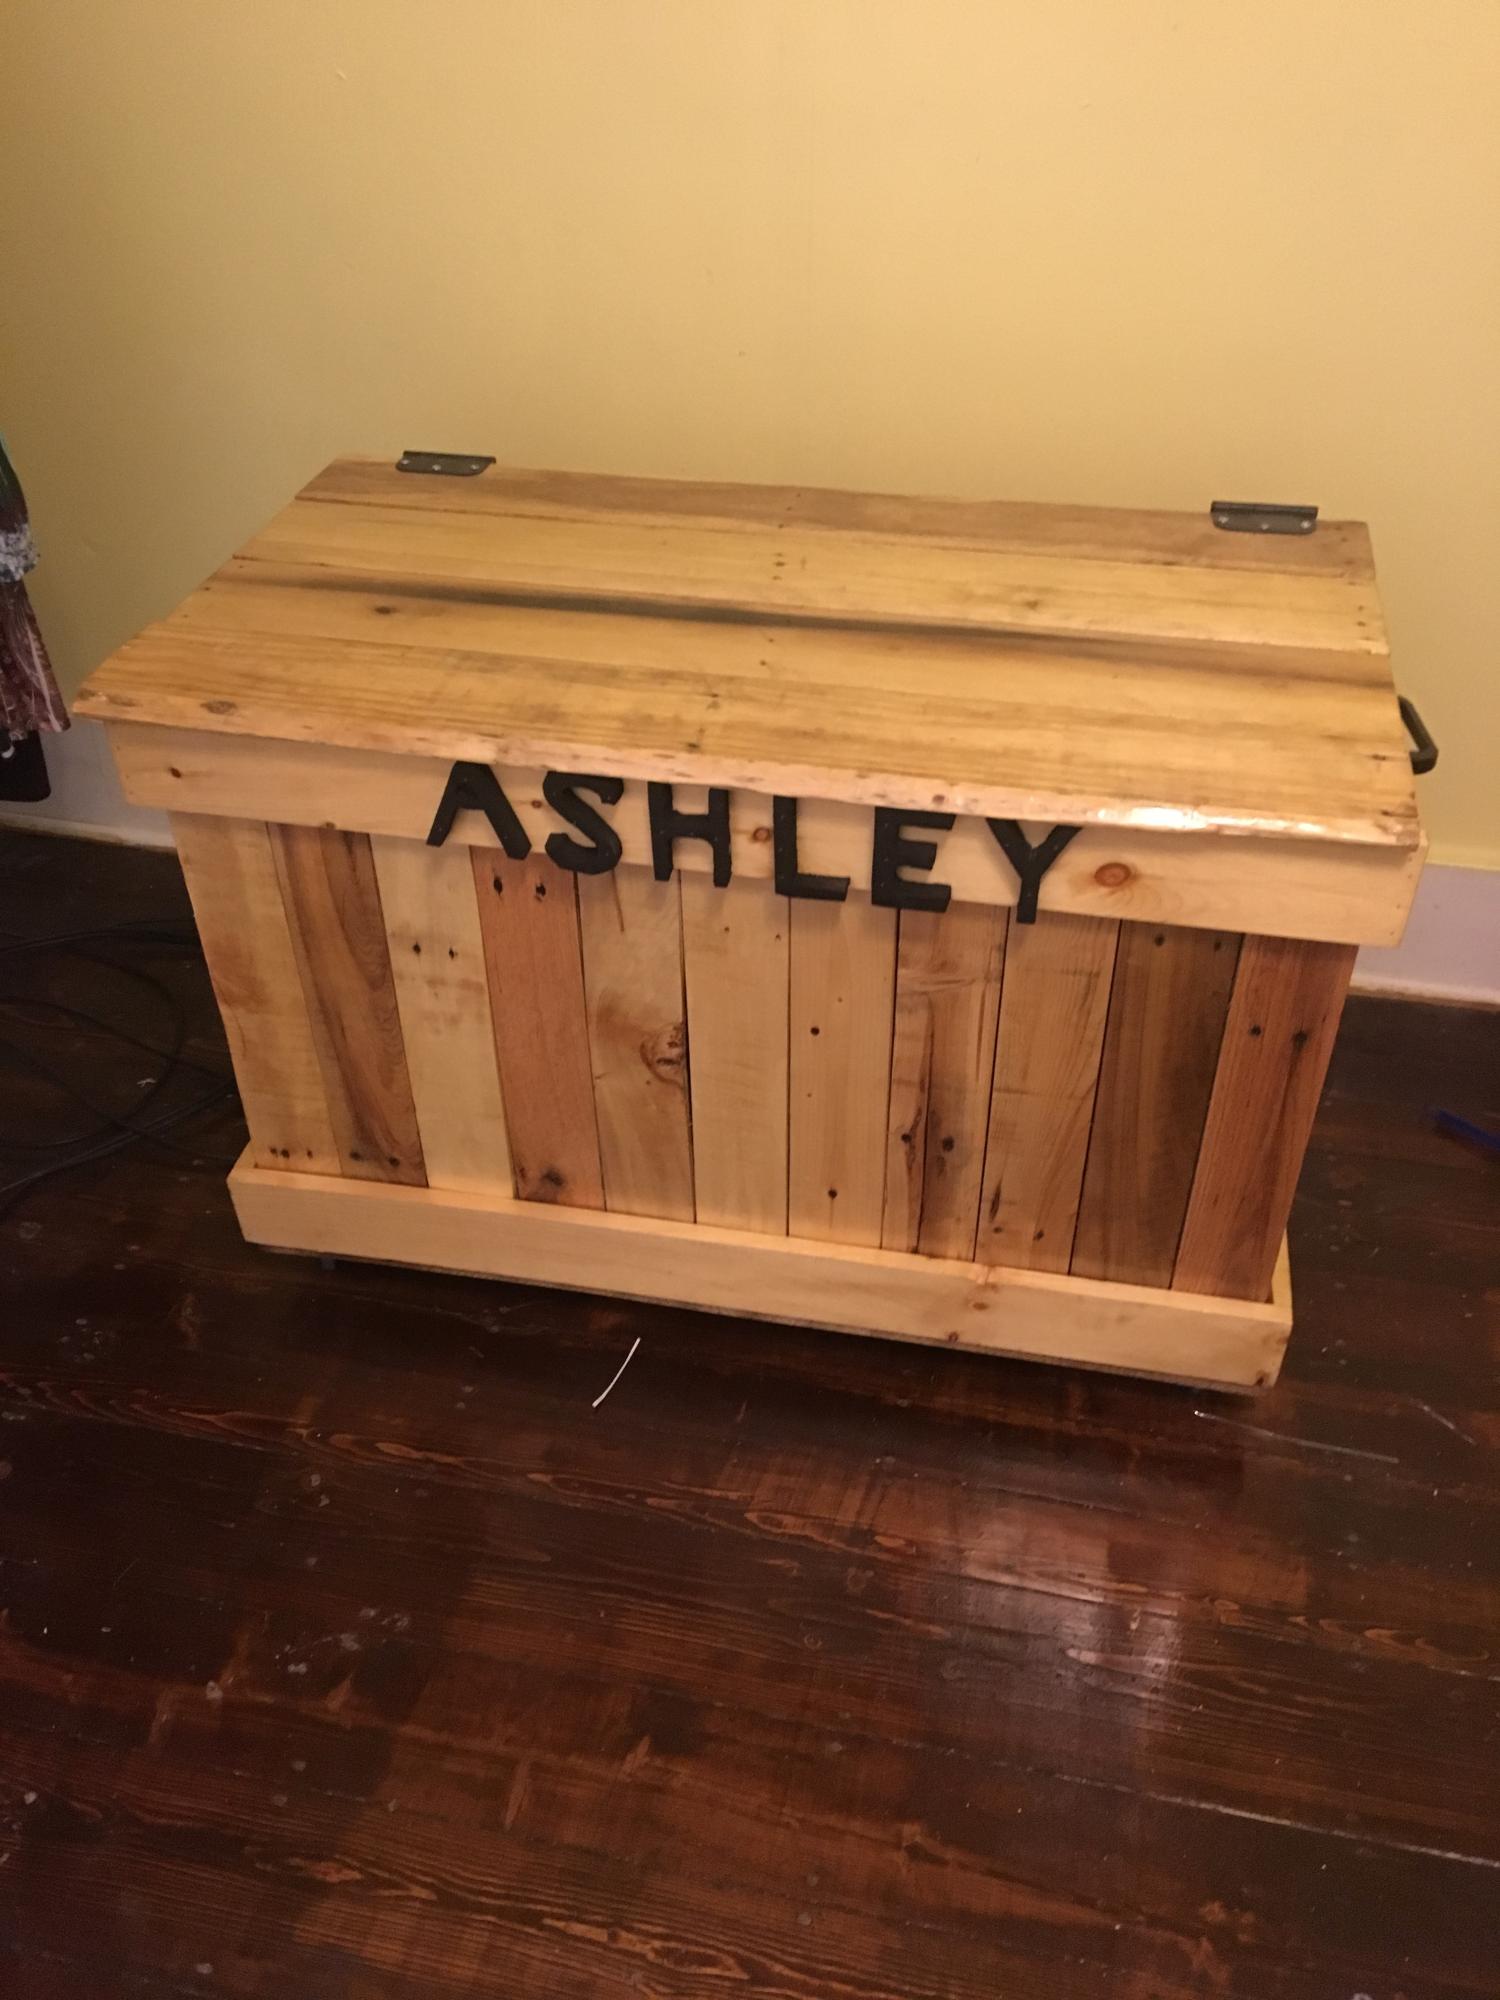
This is a hope chest I made for my step daughter this Christmas it is made intirely out of pallet wood except for the frame which I used 1by4 by 8 pine board

This is a hope chest I made for my step daughter this Christmas it is made intirely out of pallet wood except for the frame which I used 1by4 by 8 pine board
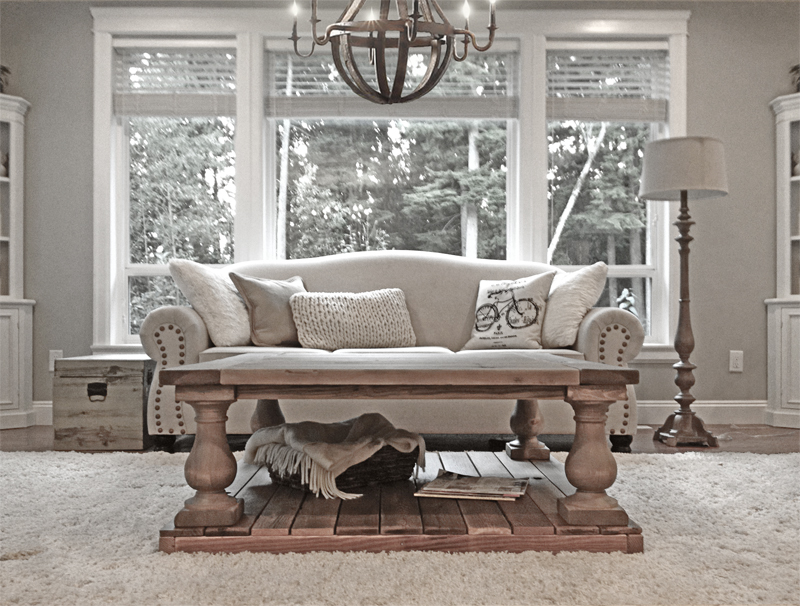
Loved this coffee table ever since I saw it at Restoration Hardware. Thank you Ana & Jen.
In reply to So Perfect! by Ana White Admin
Mon, 09/29/2014 - 15:59
I loved building it! the funnest thing I have made so far. Thanks again for the comment Ana. =)
Cheers,
Justin
Tue, 10/07/2014 - 20:59
I love how your table turned out! Fabulous job! Did you use the knotty pine legs? I also love your couch! Do you mind sharing where you purchased it?
Thanks!
In reply to Beautiful! by Mrsfinefettle
Tue, 10/14/2014 - 10:08
Sorry for the delayed reply.
For the legs I did use the Knotty Pine. Cheapest and still look great.
As for our couch set, we had them custom made from a local Furniture store called Canadian Furniture Manufacturing. If your ever in the lower mainland of BC, Canada, be sure to stop by there!
Cheers,
Justin
Sat, 01/24/2015 - 13:10
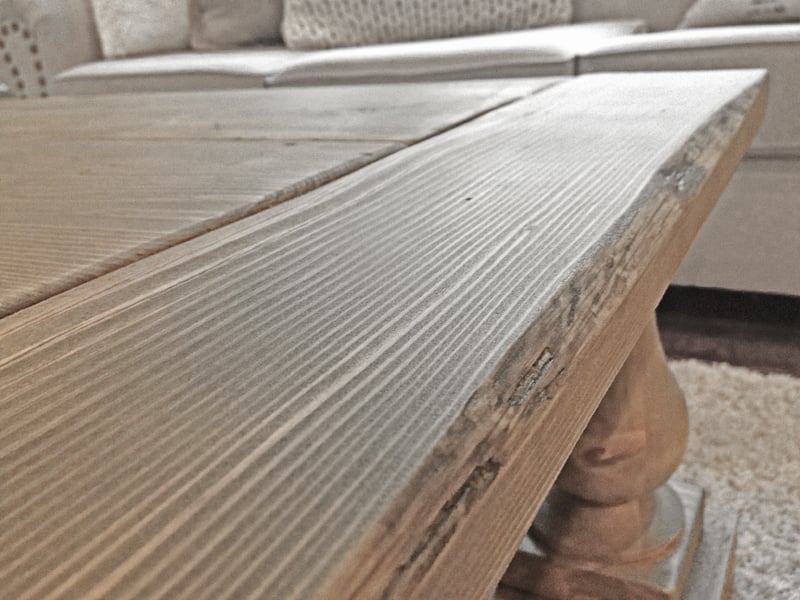
A BUTT load of sanding.. no planeing necessary. I used a mix of weathered oak and special walnut stains to balance out all the mixmatched wood as 1 colour. For example the cedar planks for the bottom shelf i didnt stain at all, while the legs are pine and had to make them gray/brown to match the cedar planks.
Cheers,
Justin
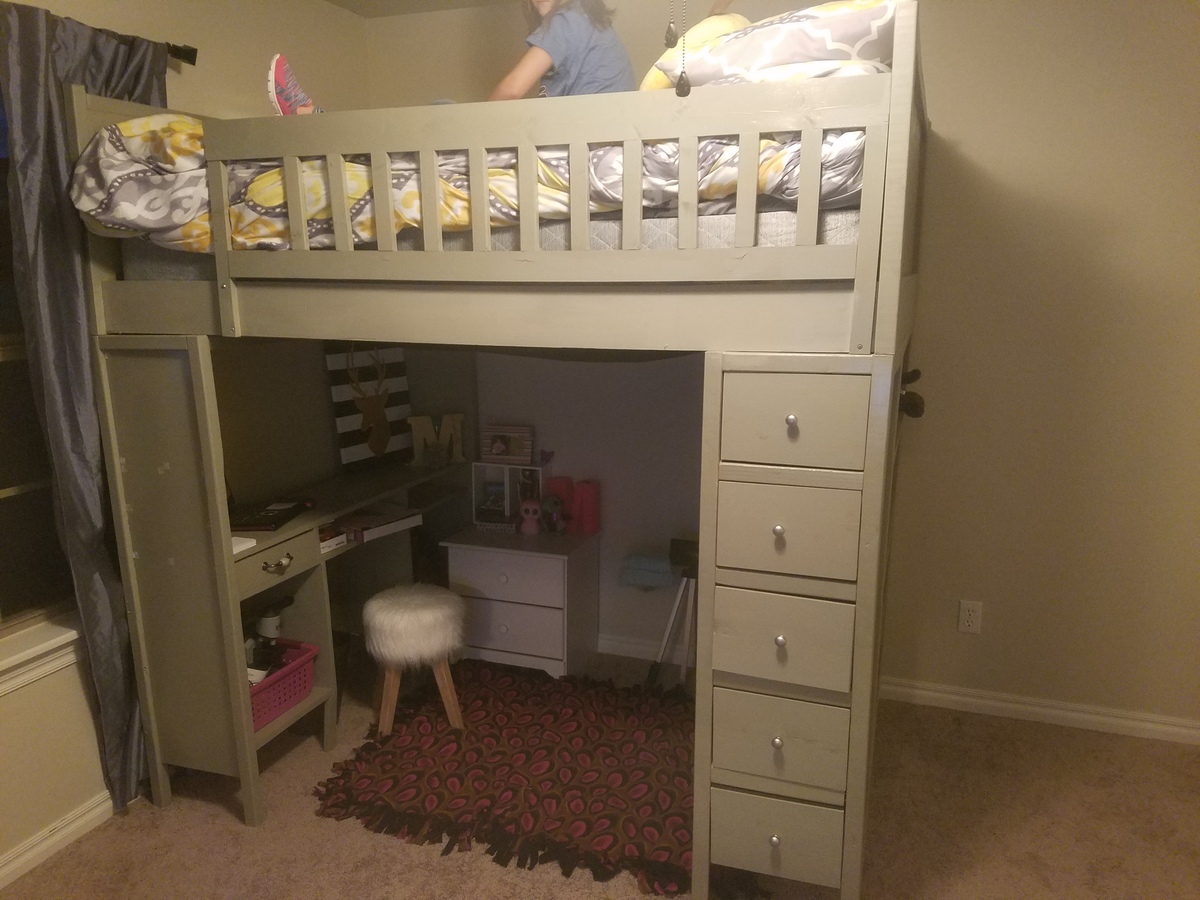
this project was pretty easy over all, I had a little trouble getting the drawers level, but that was about it. I did have to change the measurements to make it a full size bed but it came out fitting perfectly!!
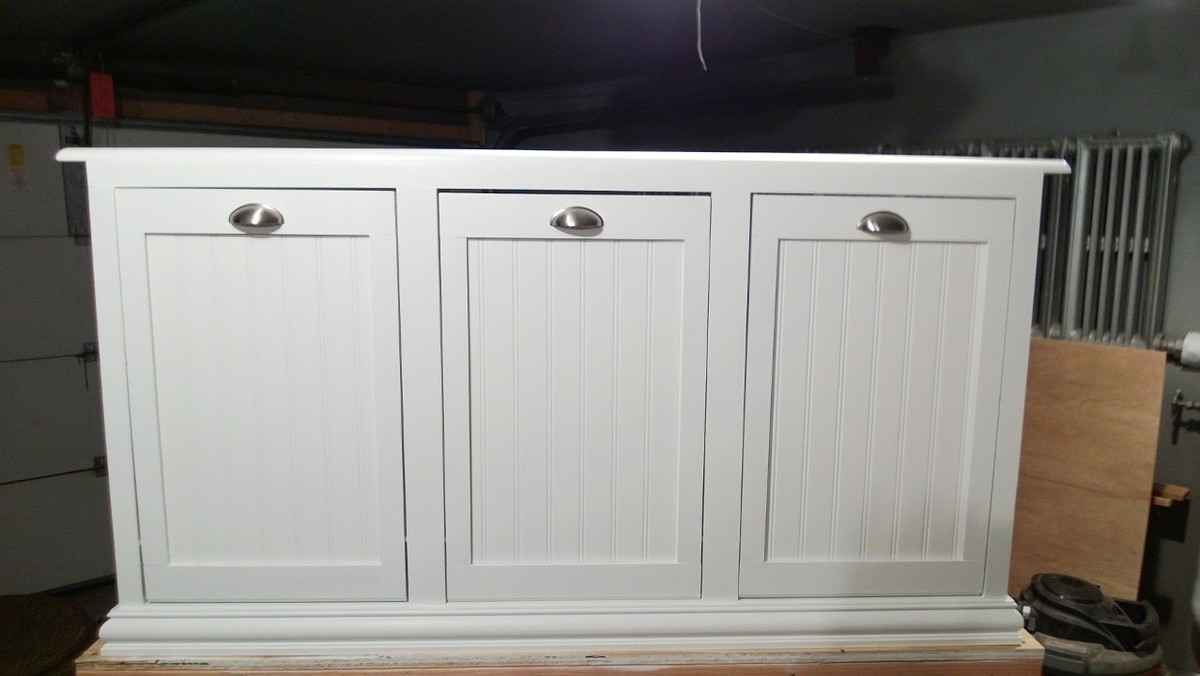
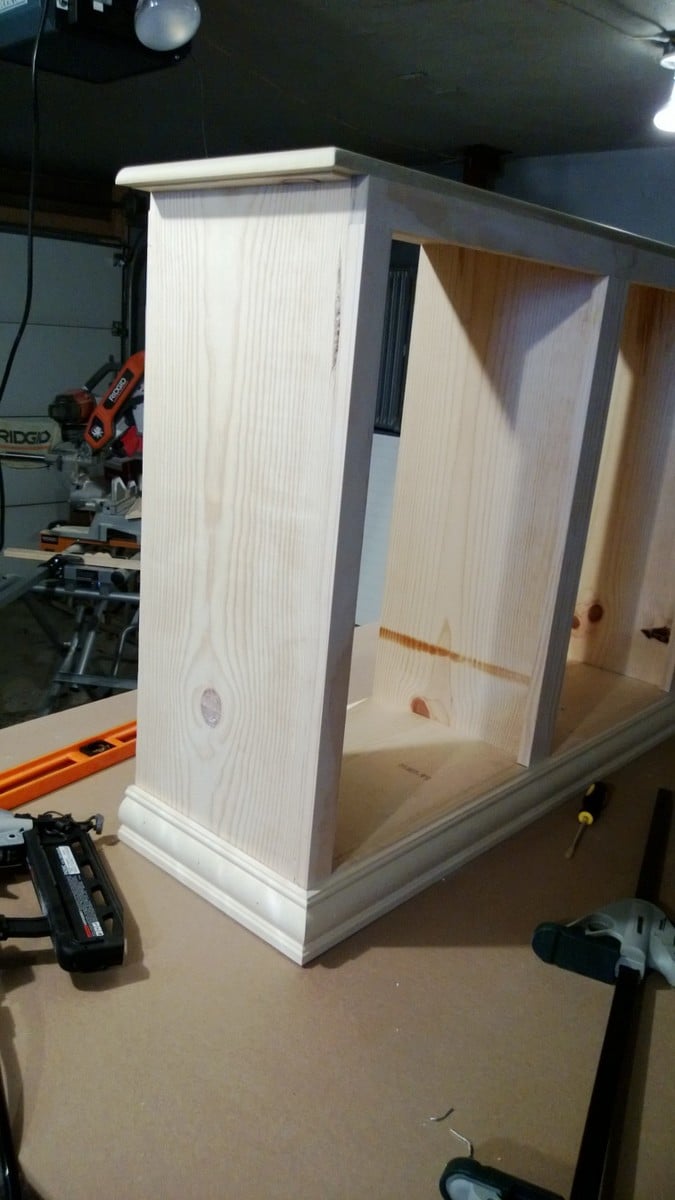
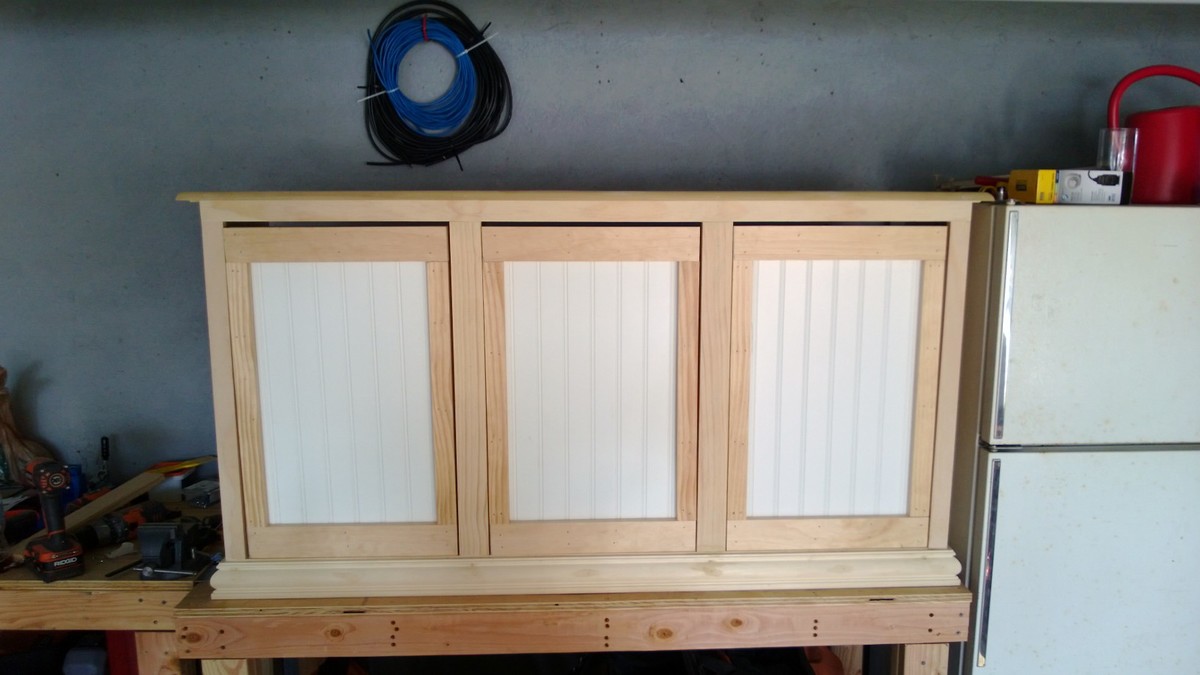
Modified the original plan to meet our needs of a laundry sorter. Had problems with the hinges so ditched them. I used dowels with a combination of a chamfer cut on the bottom of the door. Dado-ed the trim on the doors and slide the bead board panels in. The face frame is all held together with pocket hole screws, which I highly recommend because it eliminates nail holes and keeps the face frame square. This was my first wood working project, took me a little long to get it done. Thanks for looking.
Modified January 28
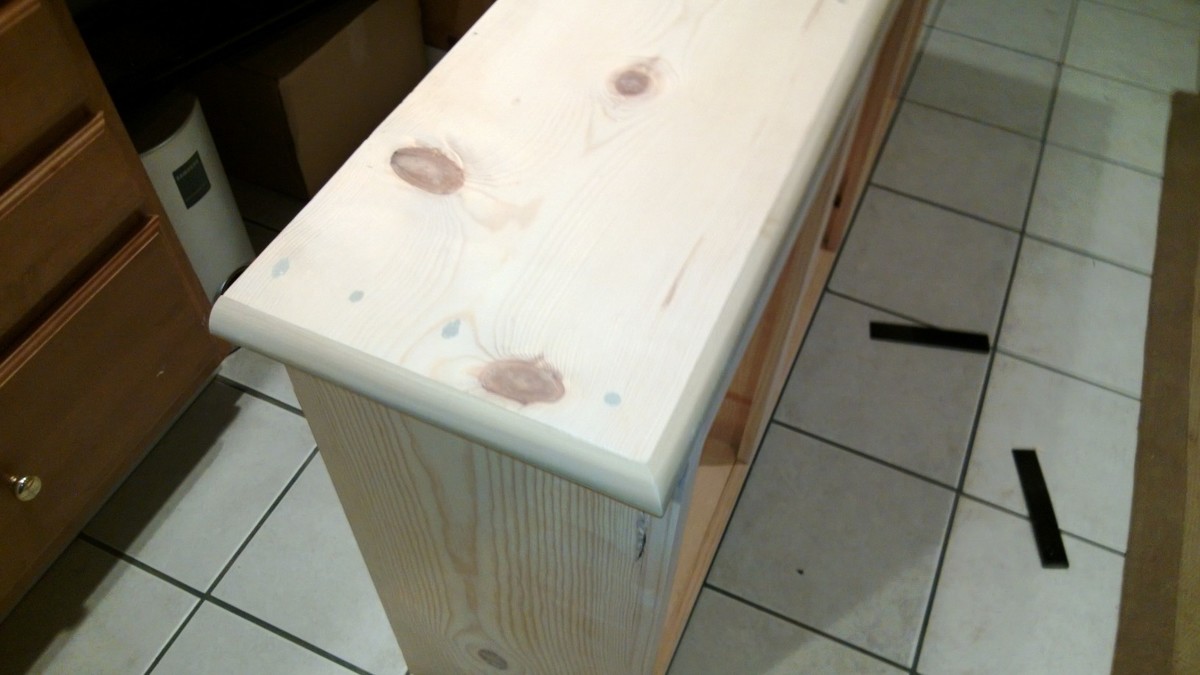
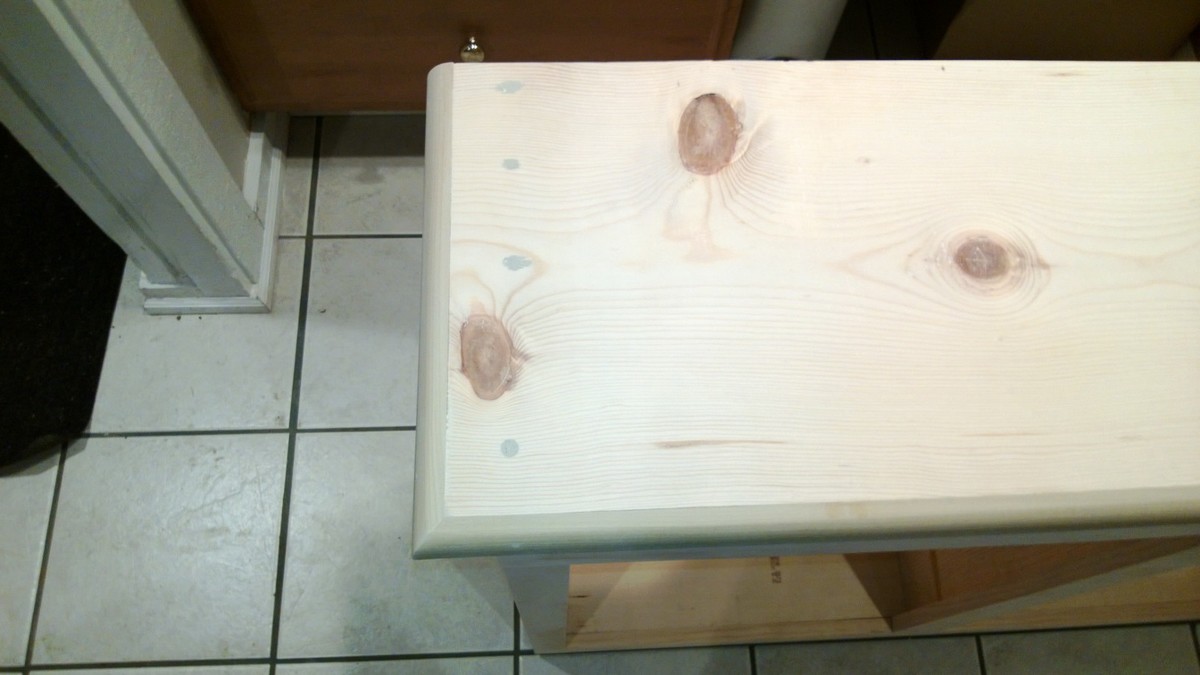
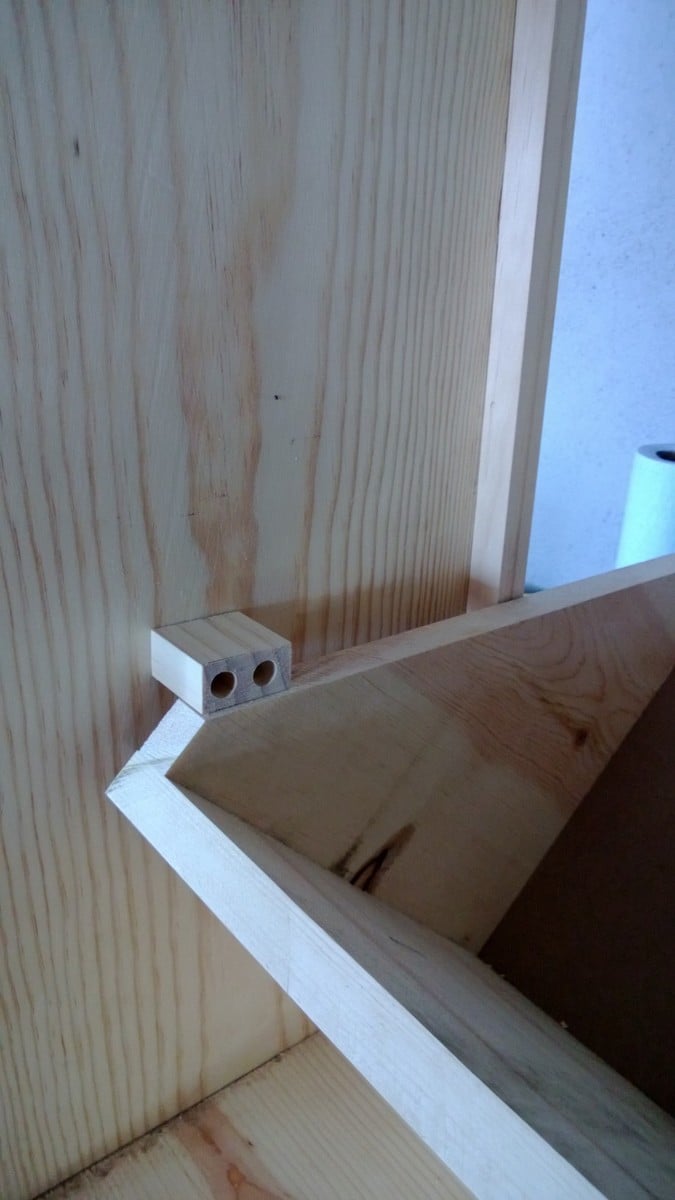
So here are some more pictures of my project. I don't really have any good pictures of the dowels. But what I can tell you is, I drilled holes through the sides of the face frame and the trim pieces and then measured where the holes would be in relation to the "drawer". I then drilled holes in the drawers at those measurements, I was careful to not go to deep. I think I went in half an inch. After that I started at one end and placed the dowels in, then put each drawer in. It wasn't easy but with a little patience it worked. The key is to wax the dowels so they will last longer as well. I also am including pictures of the top and bottom trim. On the top the original plans called for an overhang piece and I didn't like the way that looked. I ran the top board an inch long on each side and then wrapped it in quarter round trim. I did this because I plan on adding the Mimi Hutch Top. The bottom was built per the plan, but I ran into a problem with my bottom trim not being level and you could tell. So I raised the whole unit on 1 1/2 legs then placed it on a level surface and again wrapped it in a decorative trim. The key on both trims was a nice miter joint. Last picture I added was of my stoppers. I took scrap from the 1x2 trim and cut them to an inch and a half or two (can't really remember), then using the Kreg Jig drill bit drilled recessed holes. I then opened the doors until the side 45s were level then mounted the blocks on each side. I feel that it is better than a chain or string catch. Again thanks for looking and I hope I answered all of your questions.
Tue, 01/22/2013 - 11:29
Dowels! What a great idea! Would you mind sharing how you did it? Could you possibly add some pictures showing the dowels? You did a great job. It looks beautiful.
In reply to Dowels! What a great idea! by moosmani
Tue, 01/22/2013 - 20:11
Yes I will send you the info you requested, I'll try to get it out to you tomorrow or Thursday.
Wed, 02/15/2017 - 11:05
Can you send the plans to me?!?! I need this for my new home! [email protected]
Thu, 01/24/2013 - 09:27
I love what you have made! Could you post pictures of the top and the bottom trim? I'm very impressed that this is your first project!
Sat, 11/16/2013 - 18:23
I am a little confused. I love the three bin laundry sorter, but everyone is mentioning plans. I am not finding plans for it on the site. Also, what goes in to hold the clothes? There may be obvious answers, but I am not seeing them. I'd appreciate any help you could give.
Tue, 12/02/2014 - 02:58
I've been thinking of working up one very similar to this, also with 3 bins, but I didn't want to use chain either. Those stoppers will be ideal - do you put them on both sides or is one enough? Thanks for the share!
Sat, 01/24/2015 - 11:29
Hi-
Im not sure if you still have the plans to this awesome project, but if you do, would you be able to share them with me? Ive been looking to make something like this forever, but just couldnt find any help!
thanks,
karah
[email protected]
Wed, 02/25/2015 - 12:35
If you still have these plans, could you please send them to me? [email protected]
THANK YOU!
Wed, 02/25/2015 - 16:45
I am searching for the plans for the gray corner entertainment center. Does anyone still have them that could email it to me….
Tue, 01/19/2016 - 17:43
Hi there! If you still have the plans for this I would love to have them! Thanks a lot
Tue, 04/12/2016 - 18:51
I would love to have the plans for the laundry bin if they are still available, Thank you!
Wed, 02/15/2017 - 07:16
Can i also have the plans! This is perfect for what we want to do in our laundry room
Wed, 02/15/2017 - 11:24
Can you please send me the plans! [email protected]
Mon, 07/10/2017 - 04:19
I absolutely LOVE your laundry sorter!!!! You did a fabulous job and the TRIM, WOW amazing!!!! I've searched Ana's website and cant find the plans' could you please email me the plans to [email protected]. I started building my own furinture back in October 2016 and the reward is amazing... Keep up the good work.
Happy Building,
Lisa
Tue, 01/16/2018 - 19:55
Love this! Can you email the plans to [email protected] please?
Thank you
Tue, 01/16/2018 - 22:18
I'm too new at woodworking to be able to tackle this right now, but would love to download the plans for future. My most successful project so far is a pretty standard bookshelf. I got a free plan, with lots of guidelines and explanations, at https://tinyurl.com/ydeup8lo -- it came with a 440 page guide, "The Art of Woodworking" that has tips and techniques, and am plowing through that right now.
Wed, 02/28/2018 - 12:53
This is amazing. I am very new to woodworking. Could you send me the plans please? I would be most appreciatative
Wed, 03/11/2020 - 23:27
I would love to have the plans for the three bin laundry sorter to build for my laundry room. Are the plans available? Awesome work!
Thu, 07/16/2020 - 14:14
Looks amazing!! I want to build one just like that, can you please email me the plans, thanks!! [email protected]
Tue, 01/12/2021 - 06:26
This looks like something I can build. Would you please e-mail me the plans? The address is [email protected]
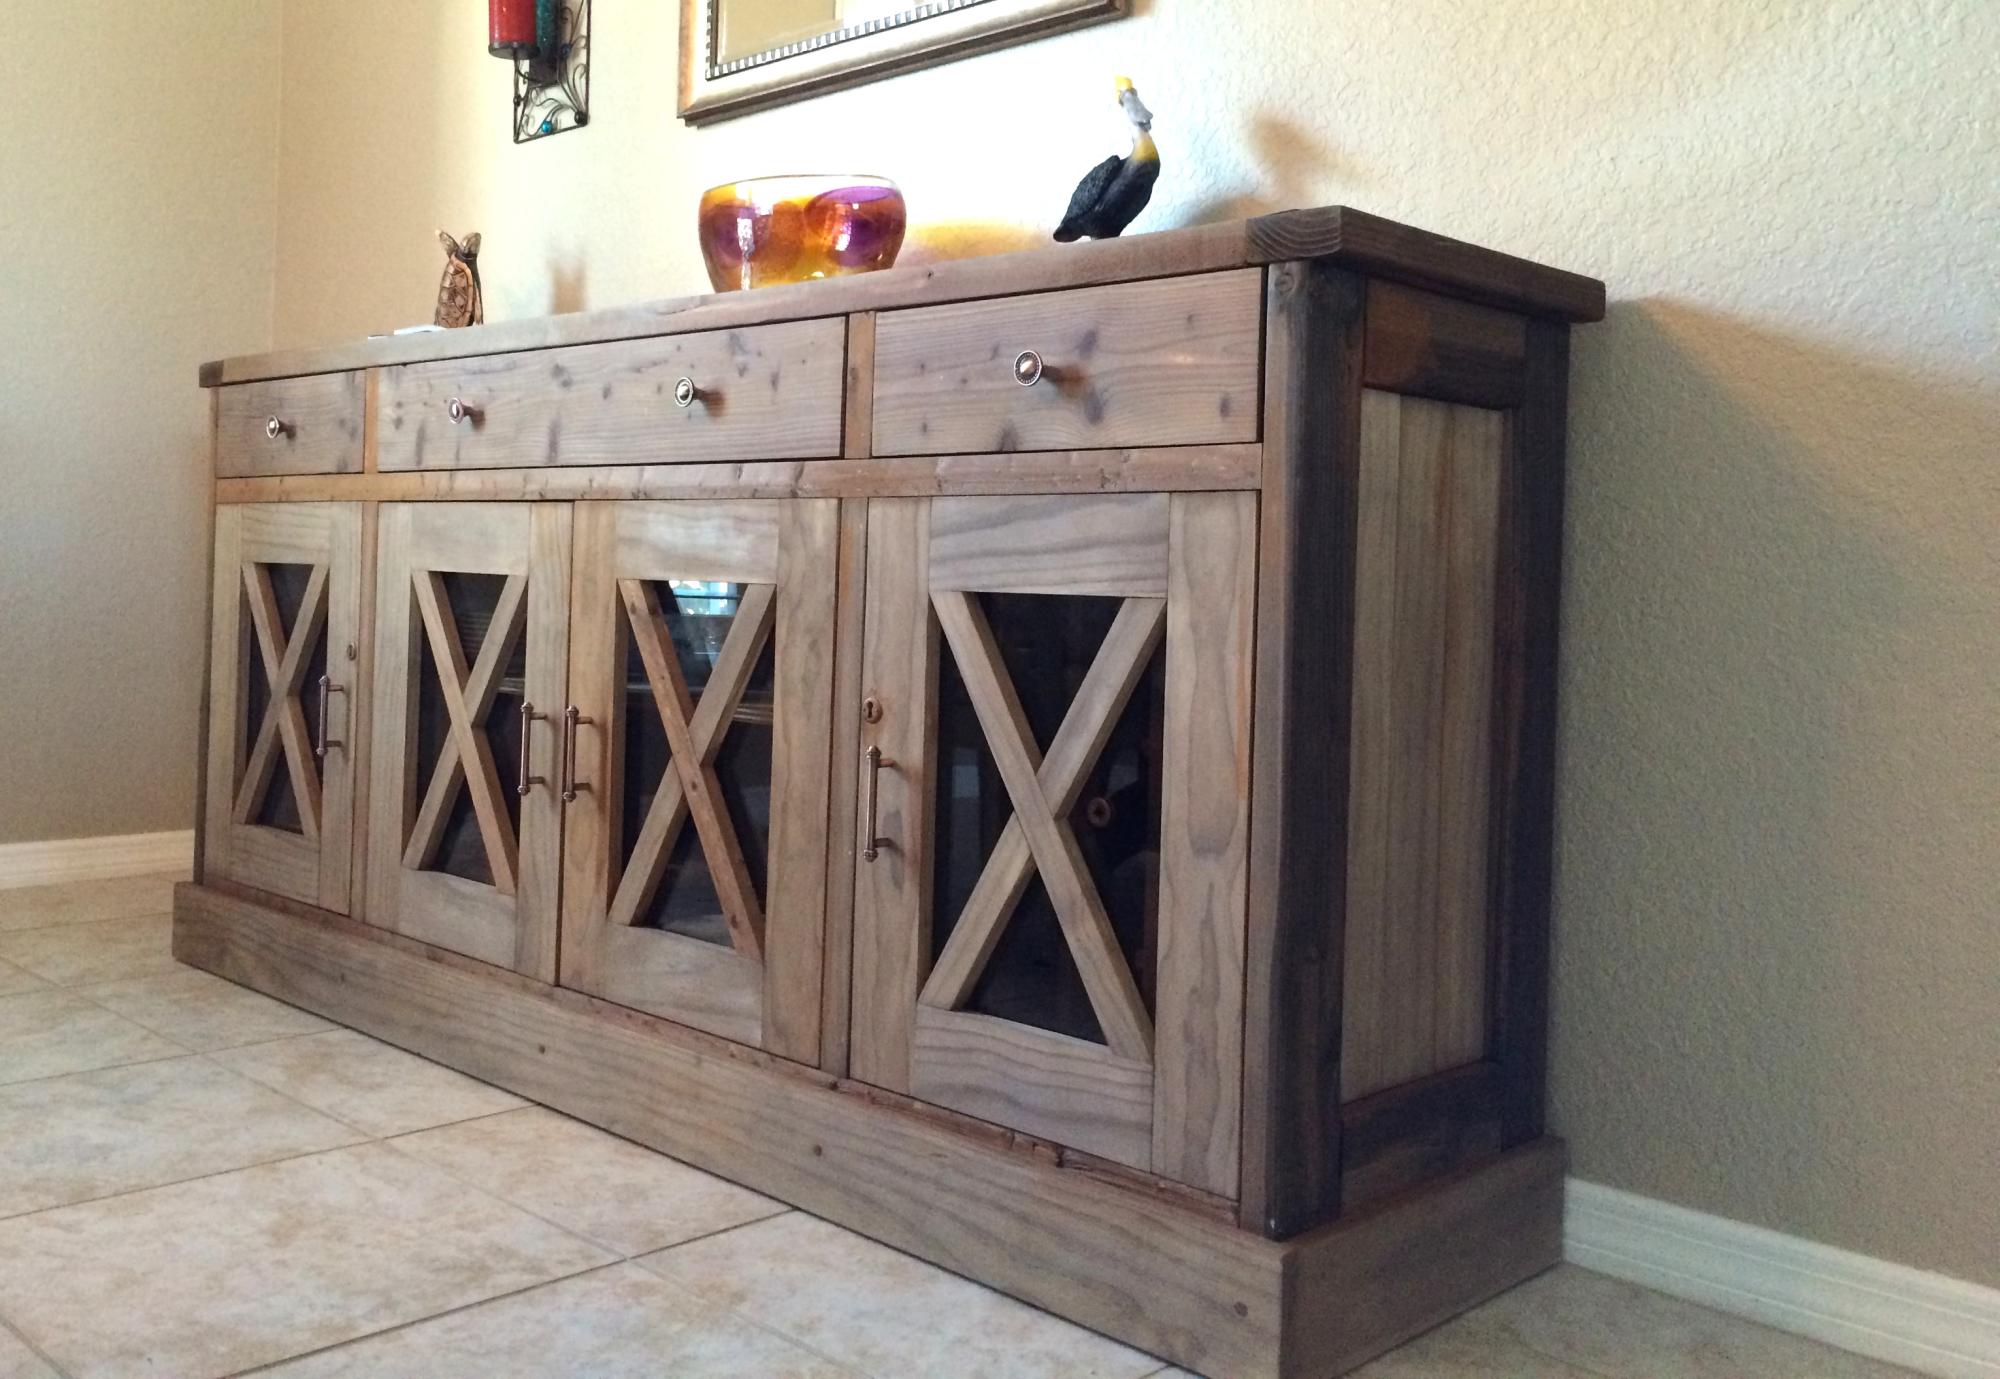
I made a few modifications from the original plans as I wanted to have some visibility into the cabinets. I used natural pine and finished with a tea, vinegar/steel wool solution to give it the reclaimed wood look.
Wed, 08/17/2016 - 23:42
Would you have plans available for the modifications that you made? This is beautiful!!
Mon, 07/22/2019 - 10:52
Do you have plans for the modifications you made on the doors? Thank you
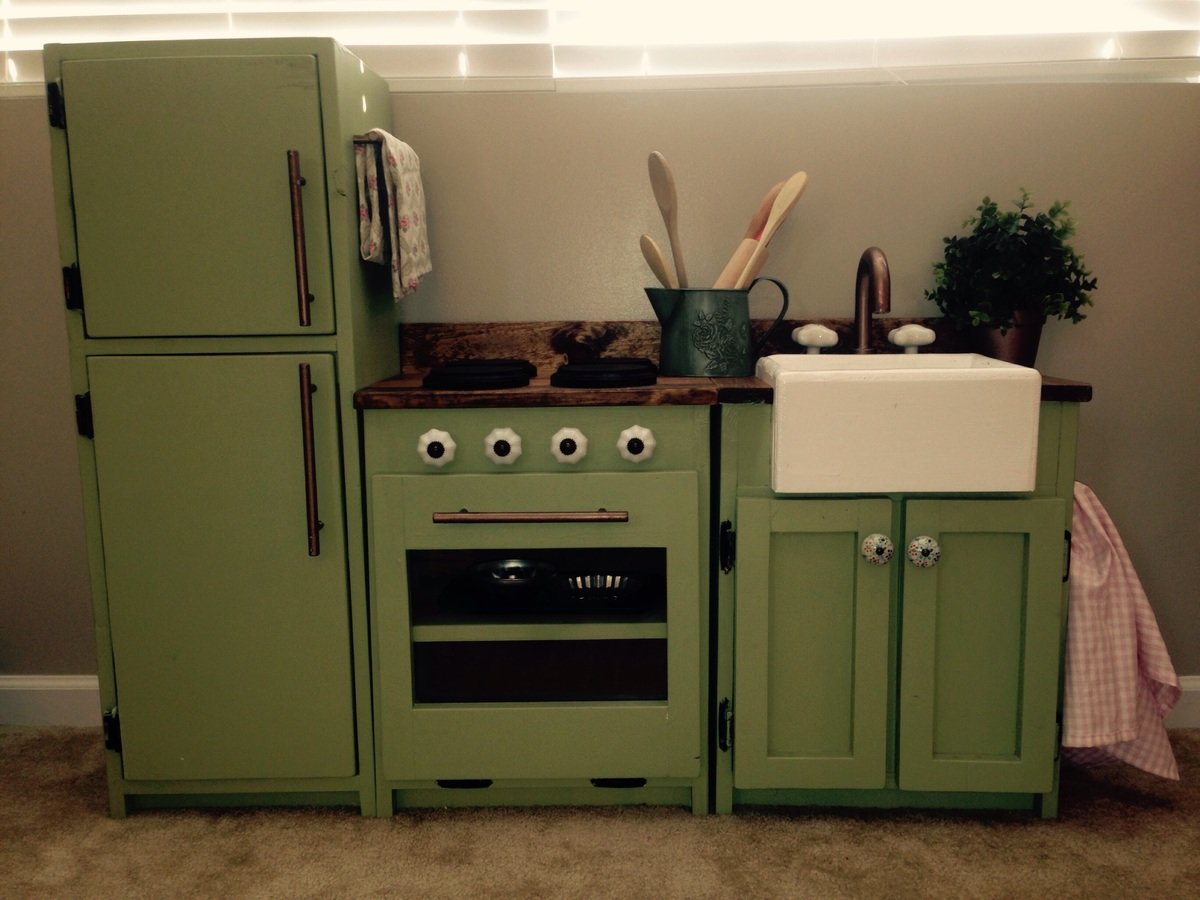
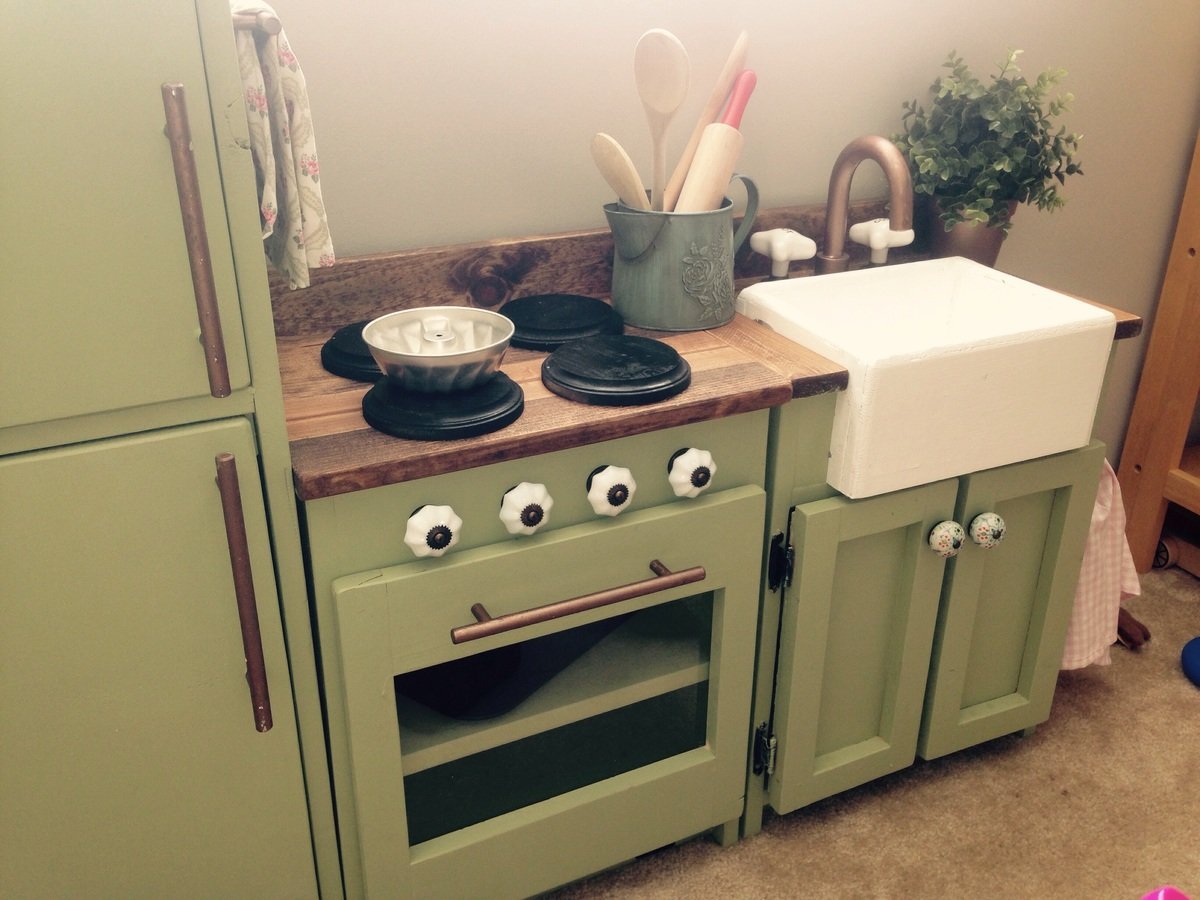
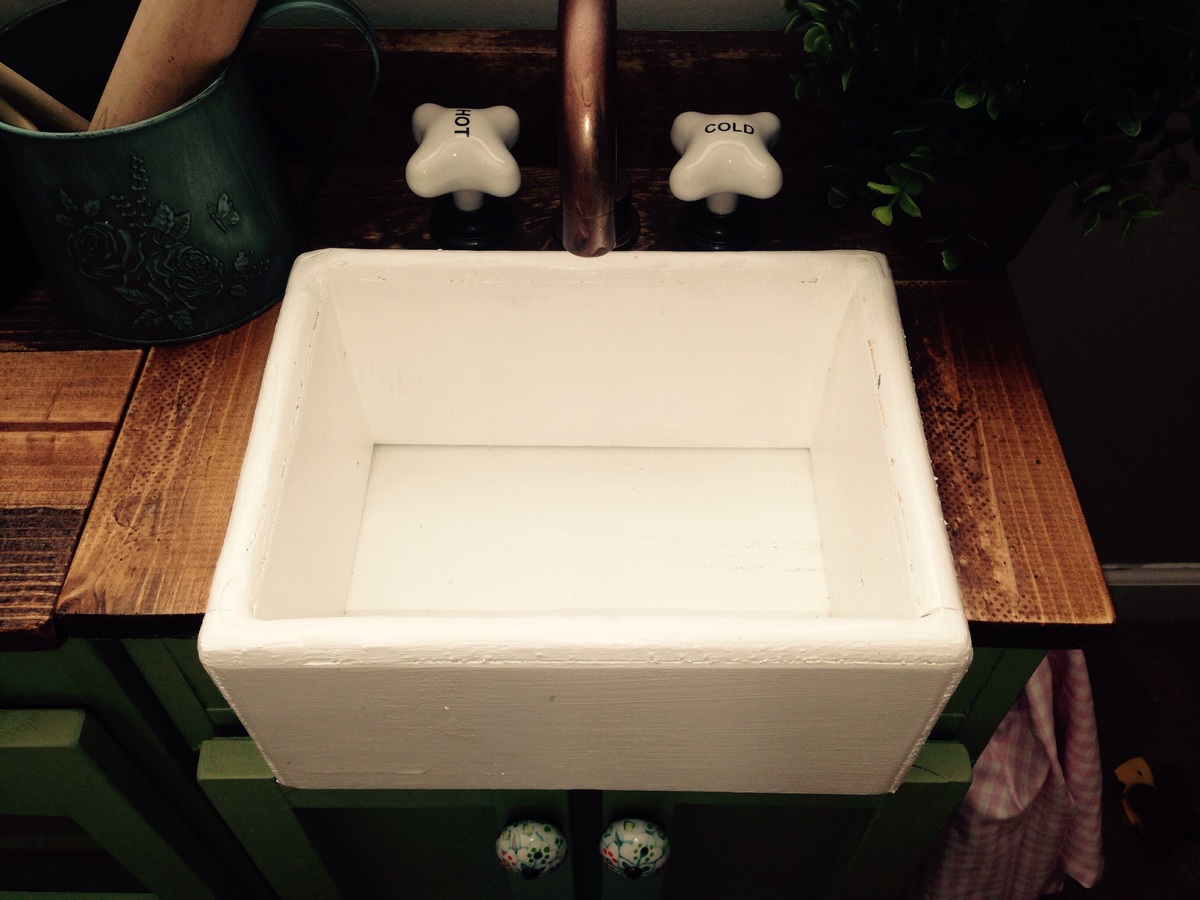
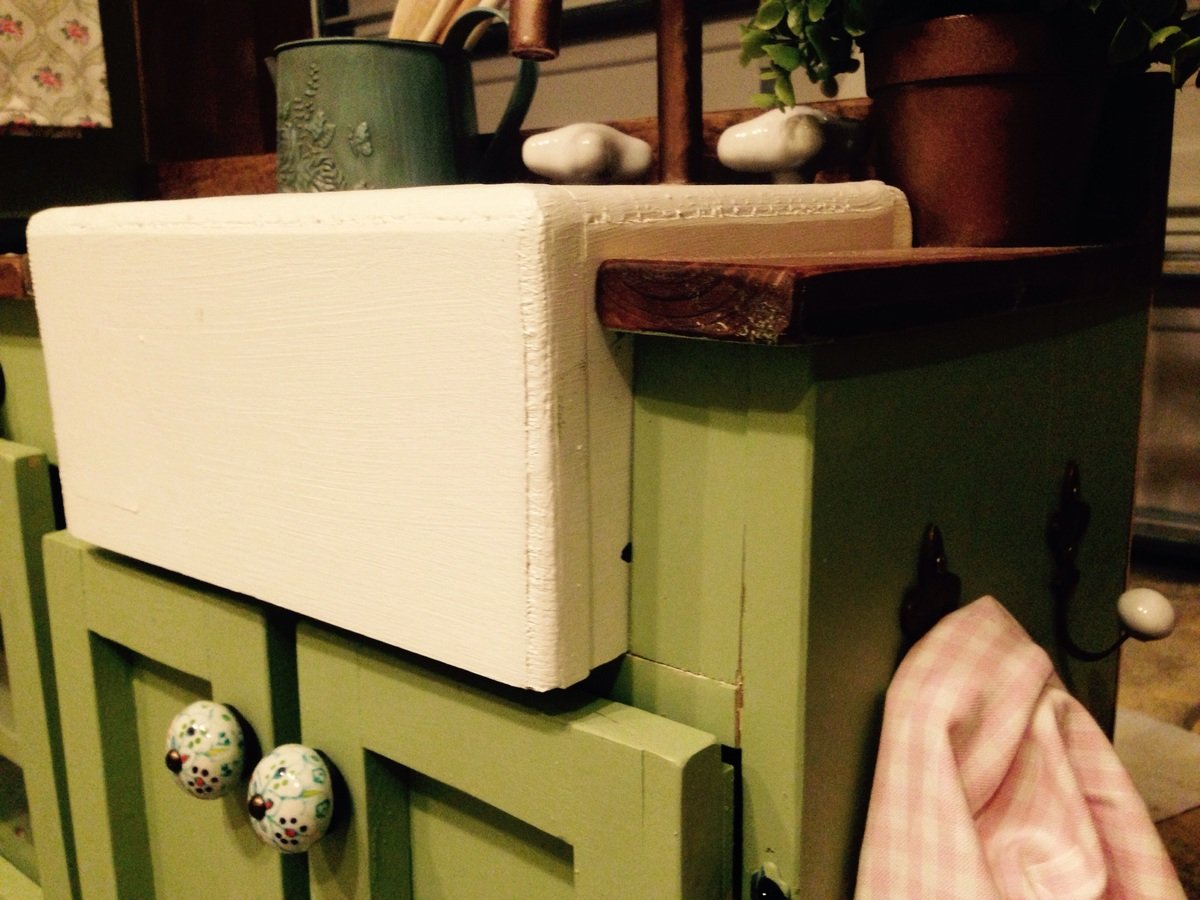
We really wanted to give our 2 year old a play kitchen for Christmas. We also didn't want to spend the money on the likes of the Pottery Barn set, and weweren't sold on the lesser-expensive options. Fortunately, a quick internet search led me to Ana White's website and plans for this play kitchen. As someone who has never built anything before, the plans seemed very doable. All of the brag posts were also inspirational and sold me on starting this project. I worked on this an hour or so after work for a couple of weeks, and then a few longer nights running up to Christmas Eve (always a bit of a procrastinator!). As neither my wife or I know how to sew, we decided to turn the space underneath the sink into a cabinet. The paint color was left over from painting our kitchen and family room, and we decided to stain the stove and counter tops. Overall, we are very pleased and proud with how this turned out, and our 2 year old loves playing with the set!
Wed, 12/31/2014 - 13:15
This looks awesome! Love all the details and the green color with the stained counter. Great job!
Wed, 12/31/2014 - 15:17
This is so adorable. I especially love the little sink.
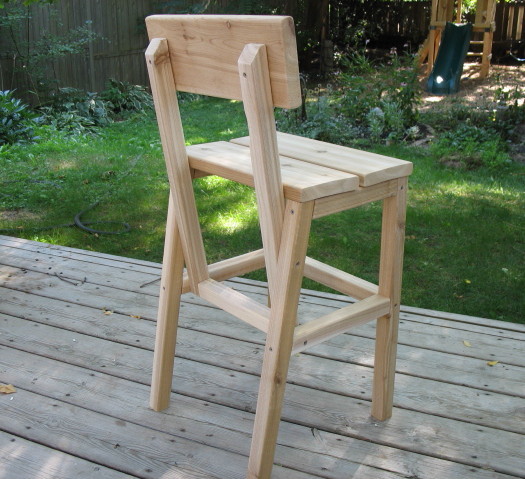
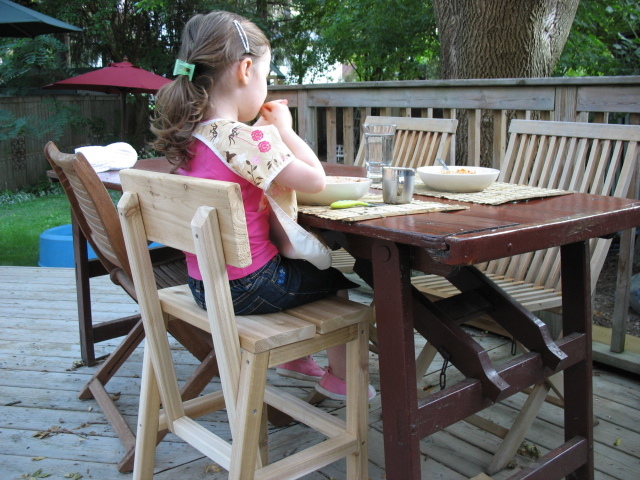
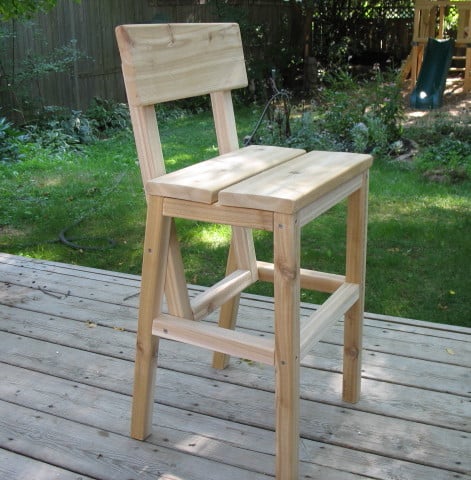
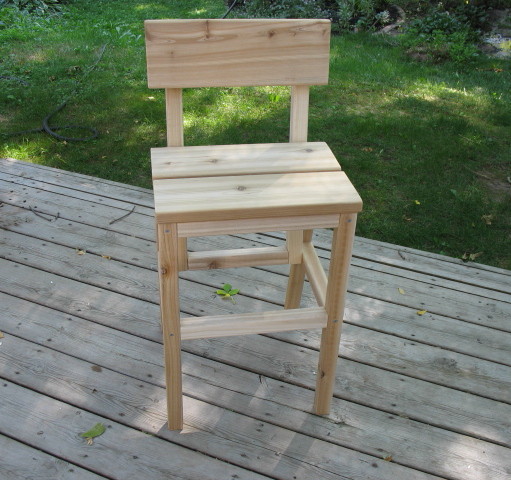
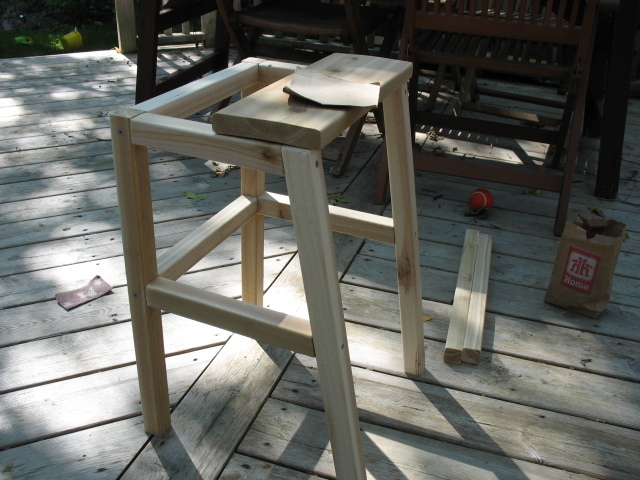
I used cedar deck boards and rails to make this chair - A little more costly, but definitely worth it!
The seat and back rest were made using 5/4 x 6" boards. I cut them 1/2" to 3/4" longer so that they would overhang the supports - for a more finished look. The 2x2 rails came with an angled cut, so I decided to use that to my advantage on the back supports - I made them a bit longer so they would sit higher on the back rest, and I think the angled cut looks a little more "friendly". All screws were left exposed, since this is an outdoor cedar chair.
The table in the photo is an original picnic table from the 1920's, complete with the original paint. It folds flat for storage. I hope to measure it someday and make a plan to build a reproduction - If that ever happens, I will post it on Ana's site.
Thanks Ana for the great plans!
In reply to Just beautiful! by dananryan
Wed, 03/06/2013 - 11:48
Thanks So Much! :)
In reply to Thanks So Much! :) by Tea Granny
Wed, 03/06/2013 - 11:50
Thanks So Much! :)
Fri, 03/08/2013 - 19:43
The chair looks beautiful! You did a great job! I love the contrast of the outdoor table and this chair! Thanks for your post!
In reply to The chair looks beautiful! by Ana White
Sun, 03/10/2013 - 14:48
Oh My Goodness!! Thank you, Ana!! I'm sure you're very busy and I'm honoured by the fact that you took the time to comment on my chair! You've made my day!
Fri, 05/17/2013 - 00:48
Hey,Wow the chair structure is so cool .Really good work done .
unique wedding favors
In reply to Hey,Wow the chair structure by EdmonsonWilliam
Mon, 05/20/2013 - 10:06
Ana has the greatest plans, doesn't she?
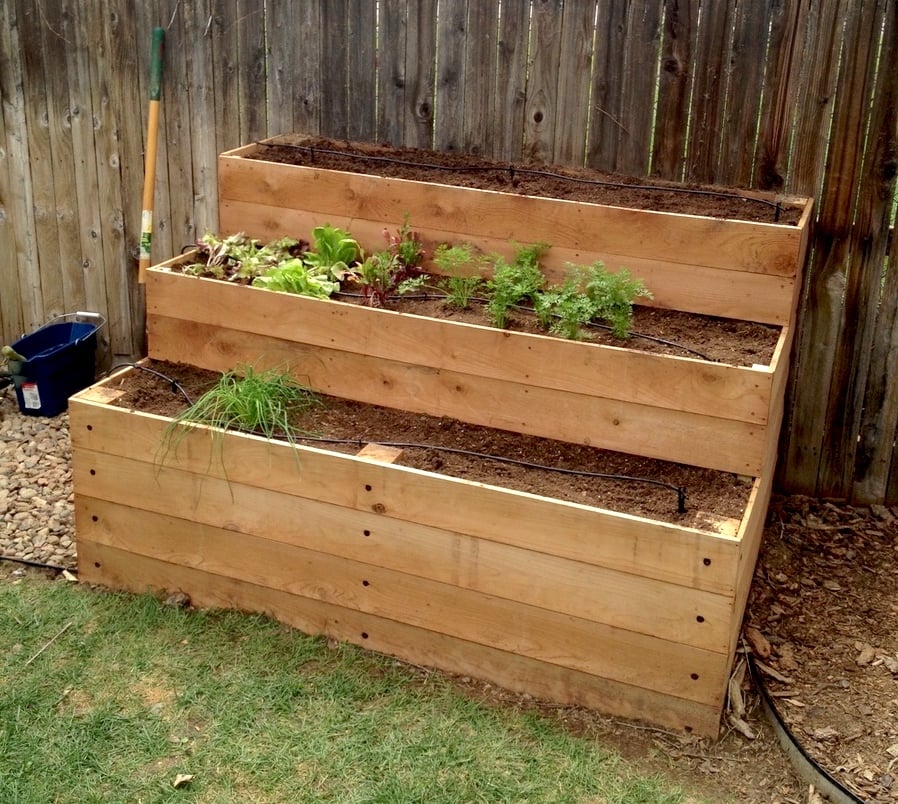
Steps:
1) Cut the boards to the specs below or adjust to your space
2) Kreg Jig the cut boards along each of the sides (length wise and on the ends) for attaching and making a box.
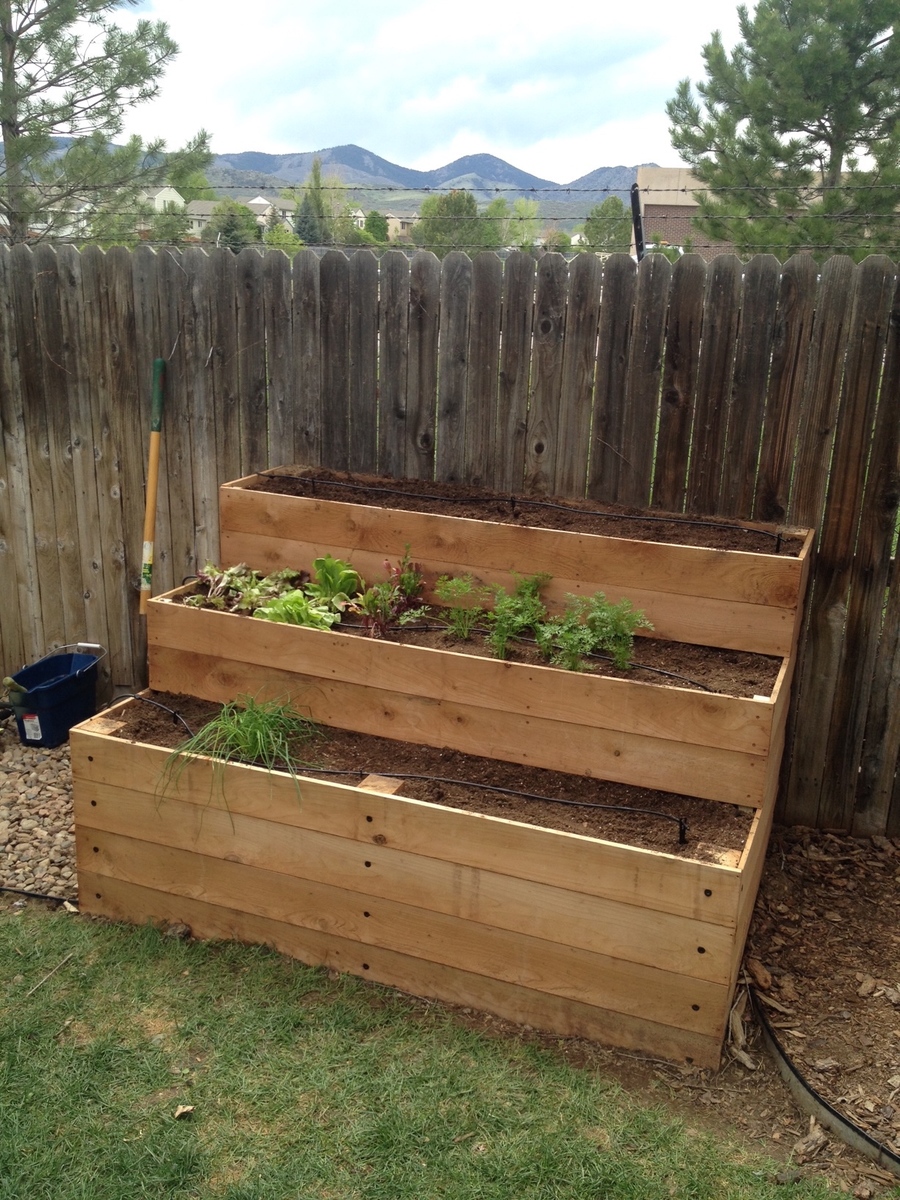
3) Make 3 separate boxes, don't assemble until you move to location. I used 4x4 cedar posts in the corners of the base box to add stability. I used 2x2 pine in the front corners of boxes 2 and 3 for stability. Install these after the dirt has been added so you can hammer in as a stake, attach with screws on front and sides. I created 2 stakes for boxes 2 and 3 and added to the front to prevent bowing when the dirt is added.
Box Dimensions:
1) (base) 70.5" L x 46 W x 4 cedar boards high
2) 70.5" L x 32 W x 2 cedar boards high
3) 70.5" L x 16 W x 2 cedar boards high
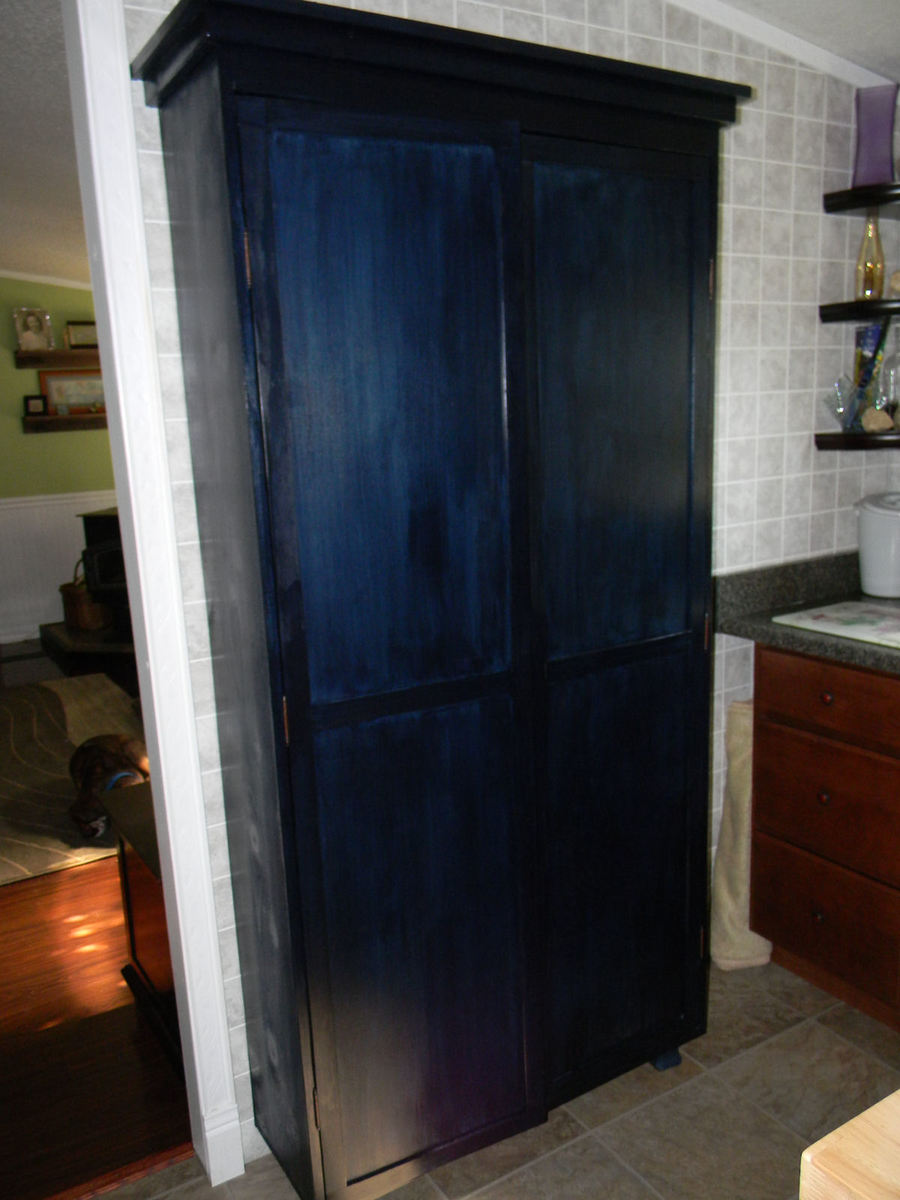
I ABSOLUTELY LOVE THIS CABINET! It's the perfect finishing touch to our kitchen remodel. We are still waiting on the finishing touch; a hand-polished Hoosier style latch for the doors. We found them at House of Antique Hardware. I will say that this cabinet required "non-mortising" hinges, ones that don't require you to dig out anything in the wood and that don't bulge up together in the space behind the door. These were nearly impossible to find in our town in a small enough size, even with the two big box stores and smaller hardware shops. We had to order them online HardwareSource. These were cheap at this source and we even ordered two styles in case we didn't like one of them. A local shop could order them for us @ 6 hinges for 48$!! The ones we found online came to $17 with shipping.
We modified our cabinet a bit because we wanted it to have feet that were different than the original plan. I have a thing about cabinetry that I can't see under! So, we just made the cabinet flat bottomed instead of having the bottom shelf sit higher and the facade on the bottom front. We also added I-frames to the interior of the doors because we have high humidity where we are and we thought it might help keep the doors keep their shape over time.
After building just the bookshelf part, we kept looking at it like we couldn't believe we built it. It's really beautiful. We do a lot of remodeling, demolition, and rebuilding in our home, but have always been intimidated by building furniture until finding this site.
My husband was so jazzed by our newfound furniture building skills that he built the planter/trellis for his mother last weekend for her birthday right after we finished this project. Pictures of that will be forthcoming as soon as we plant the rosebush in it. Thank you Ana White!!!!
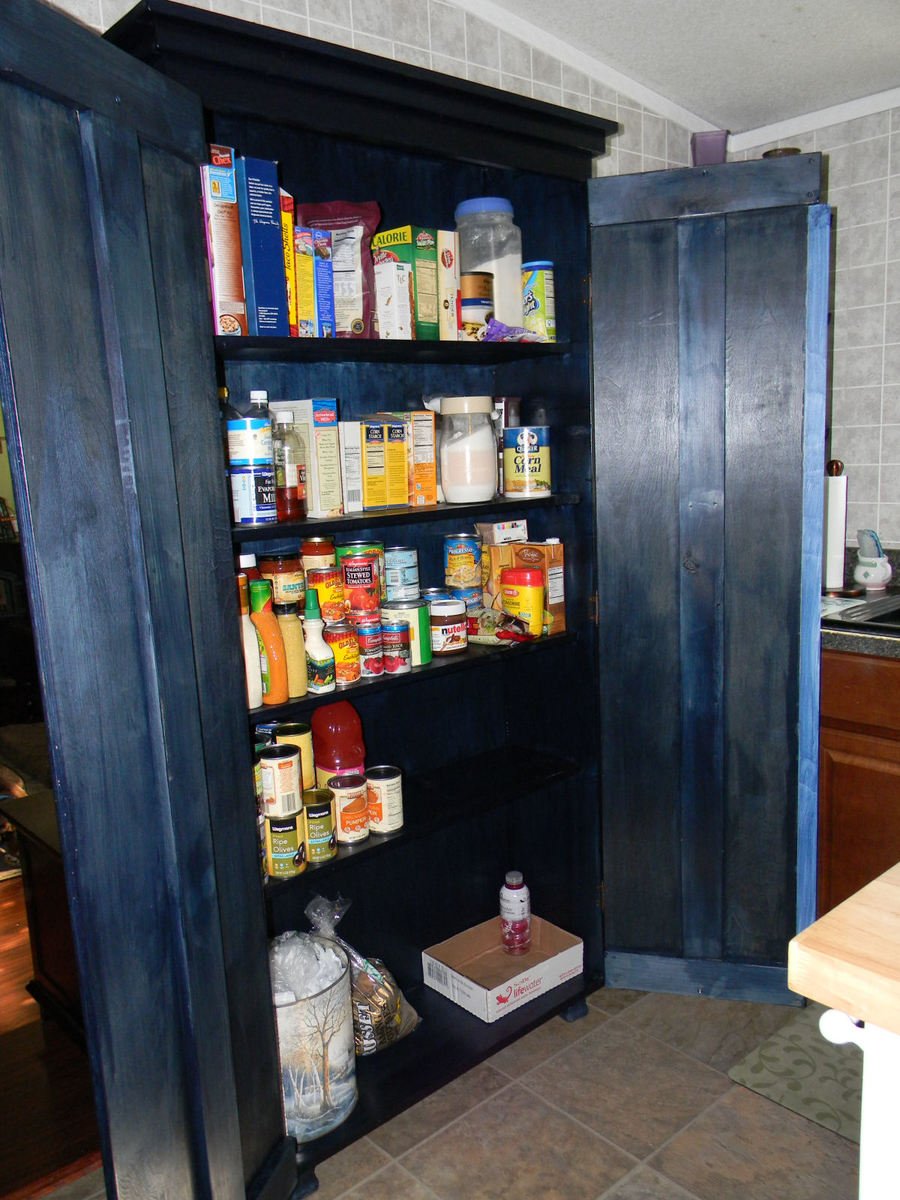
Wed, 06/29/2011 - 10:19
We are moving into a home that doesn't have alot of storage so I'm looking into building this. But depends on the cost. About how much would you estimate that this armoire pantry cost to build? PS- I love the look and color of yours! Awesome job!
In reply to We are moving into a home by Nicole S (not verified)
Thu, 12/29/2011 - 20:14
Wow. Sorry I just realized your question was here! I would say we spent about 120$ on wood and finish products.
It was much less than buying the perfect piece of furniture somewhere else. For us, this piece, in this finish was THE perfect piece of furniture. I still love just looking at it in our space.
Tue, 07/12/2011 - 03:55
We used birch plywood for the back and the doors so it was a bit pricier because we wanted something that was already a smooth finish without much sanding. I would say all together with the stain and the Hoosier latch we ordered for it the cost totaled almost $150. The wood cost was about $90, plus we purchased feet, stain, hinges, and a latch.
We LOVE this pantry in our kitchen and although it took a week to build this and have it ready for use, it was worth it to take our time and put care into building something we love. It was our first project and it has inspired us to build a ton of stuff in just a few weeks since.
Good luck!
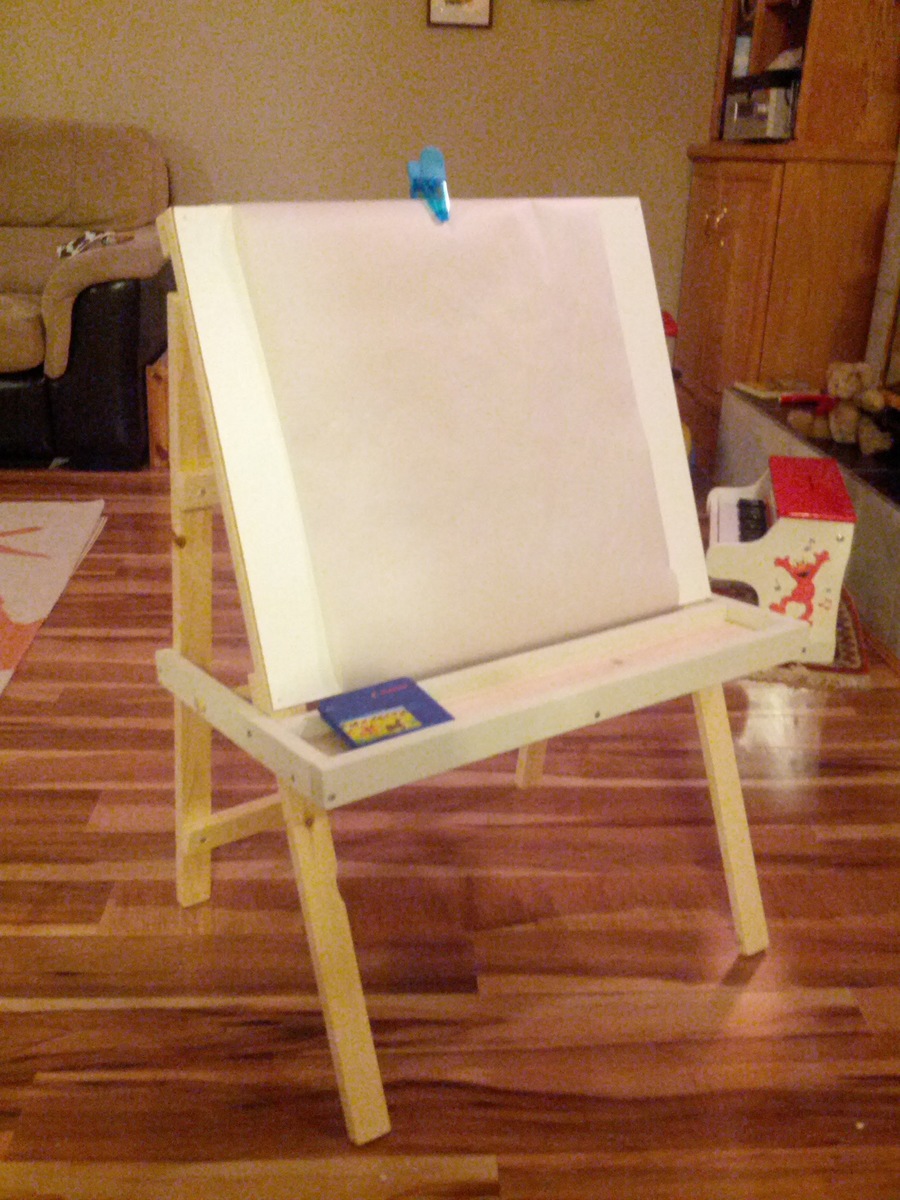
We opted to make this a regular easel (no chalkboard) and just used a sheet of paneling as the background. It's perfect, our toddler loves it. Thanks Ana!
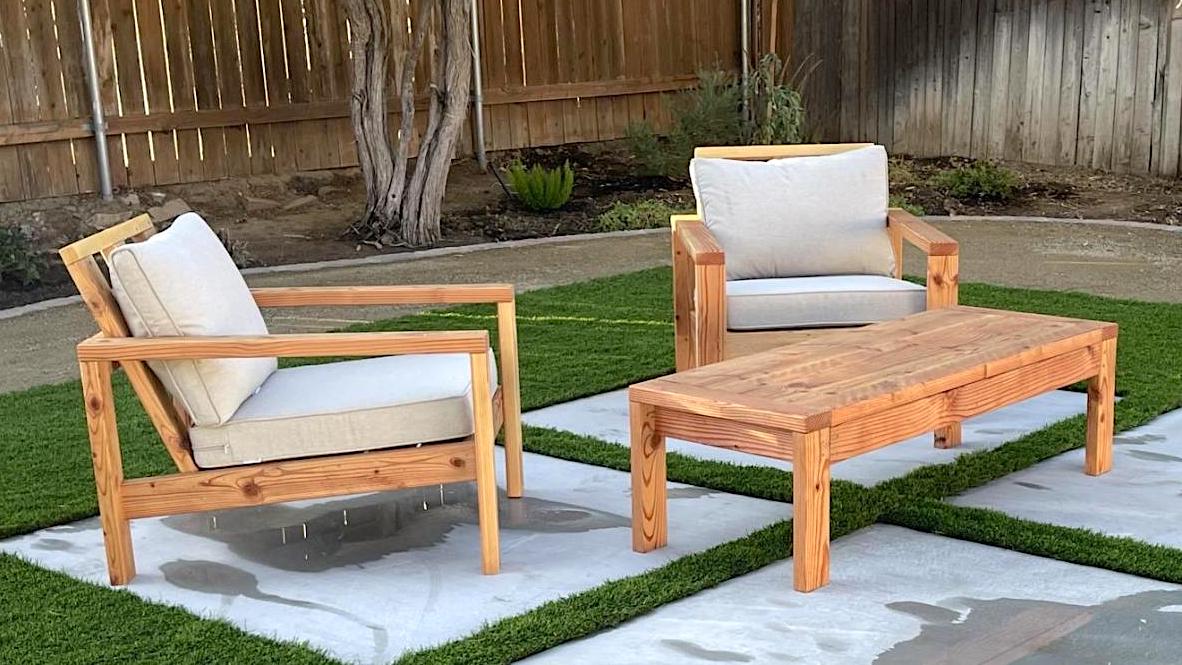
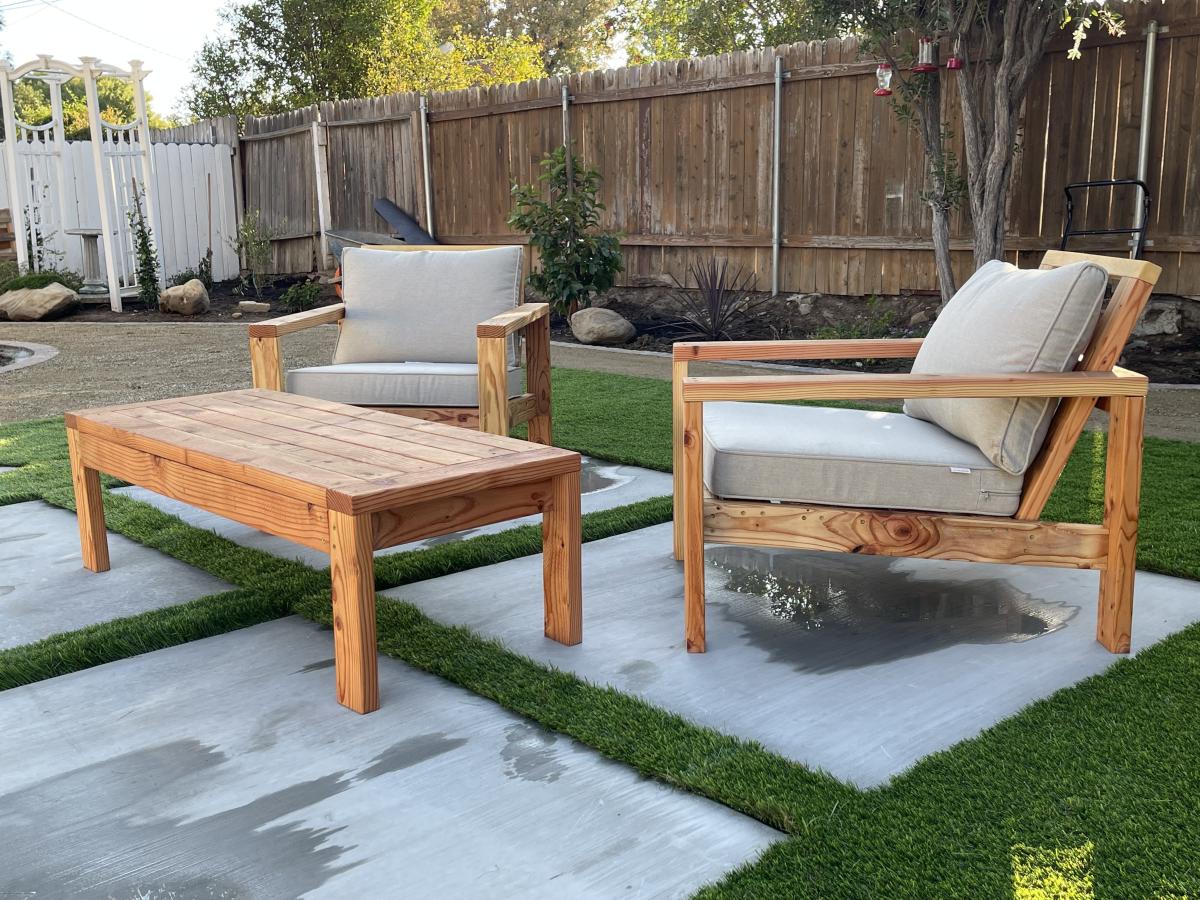
I built a set of chairs and a coffee table for our newly designed outdoor area. These look amazing and people love sitting on them and hanging out outside our house.


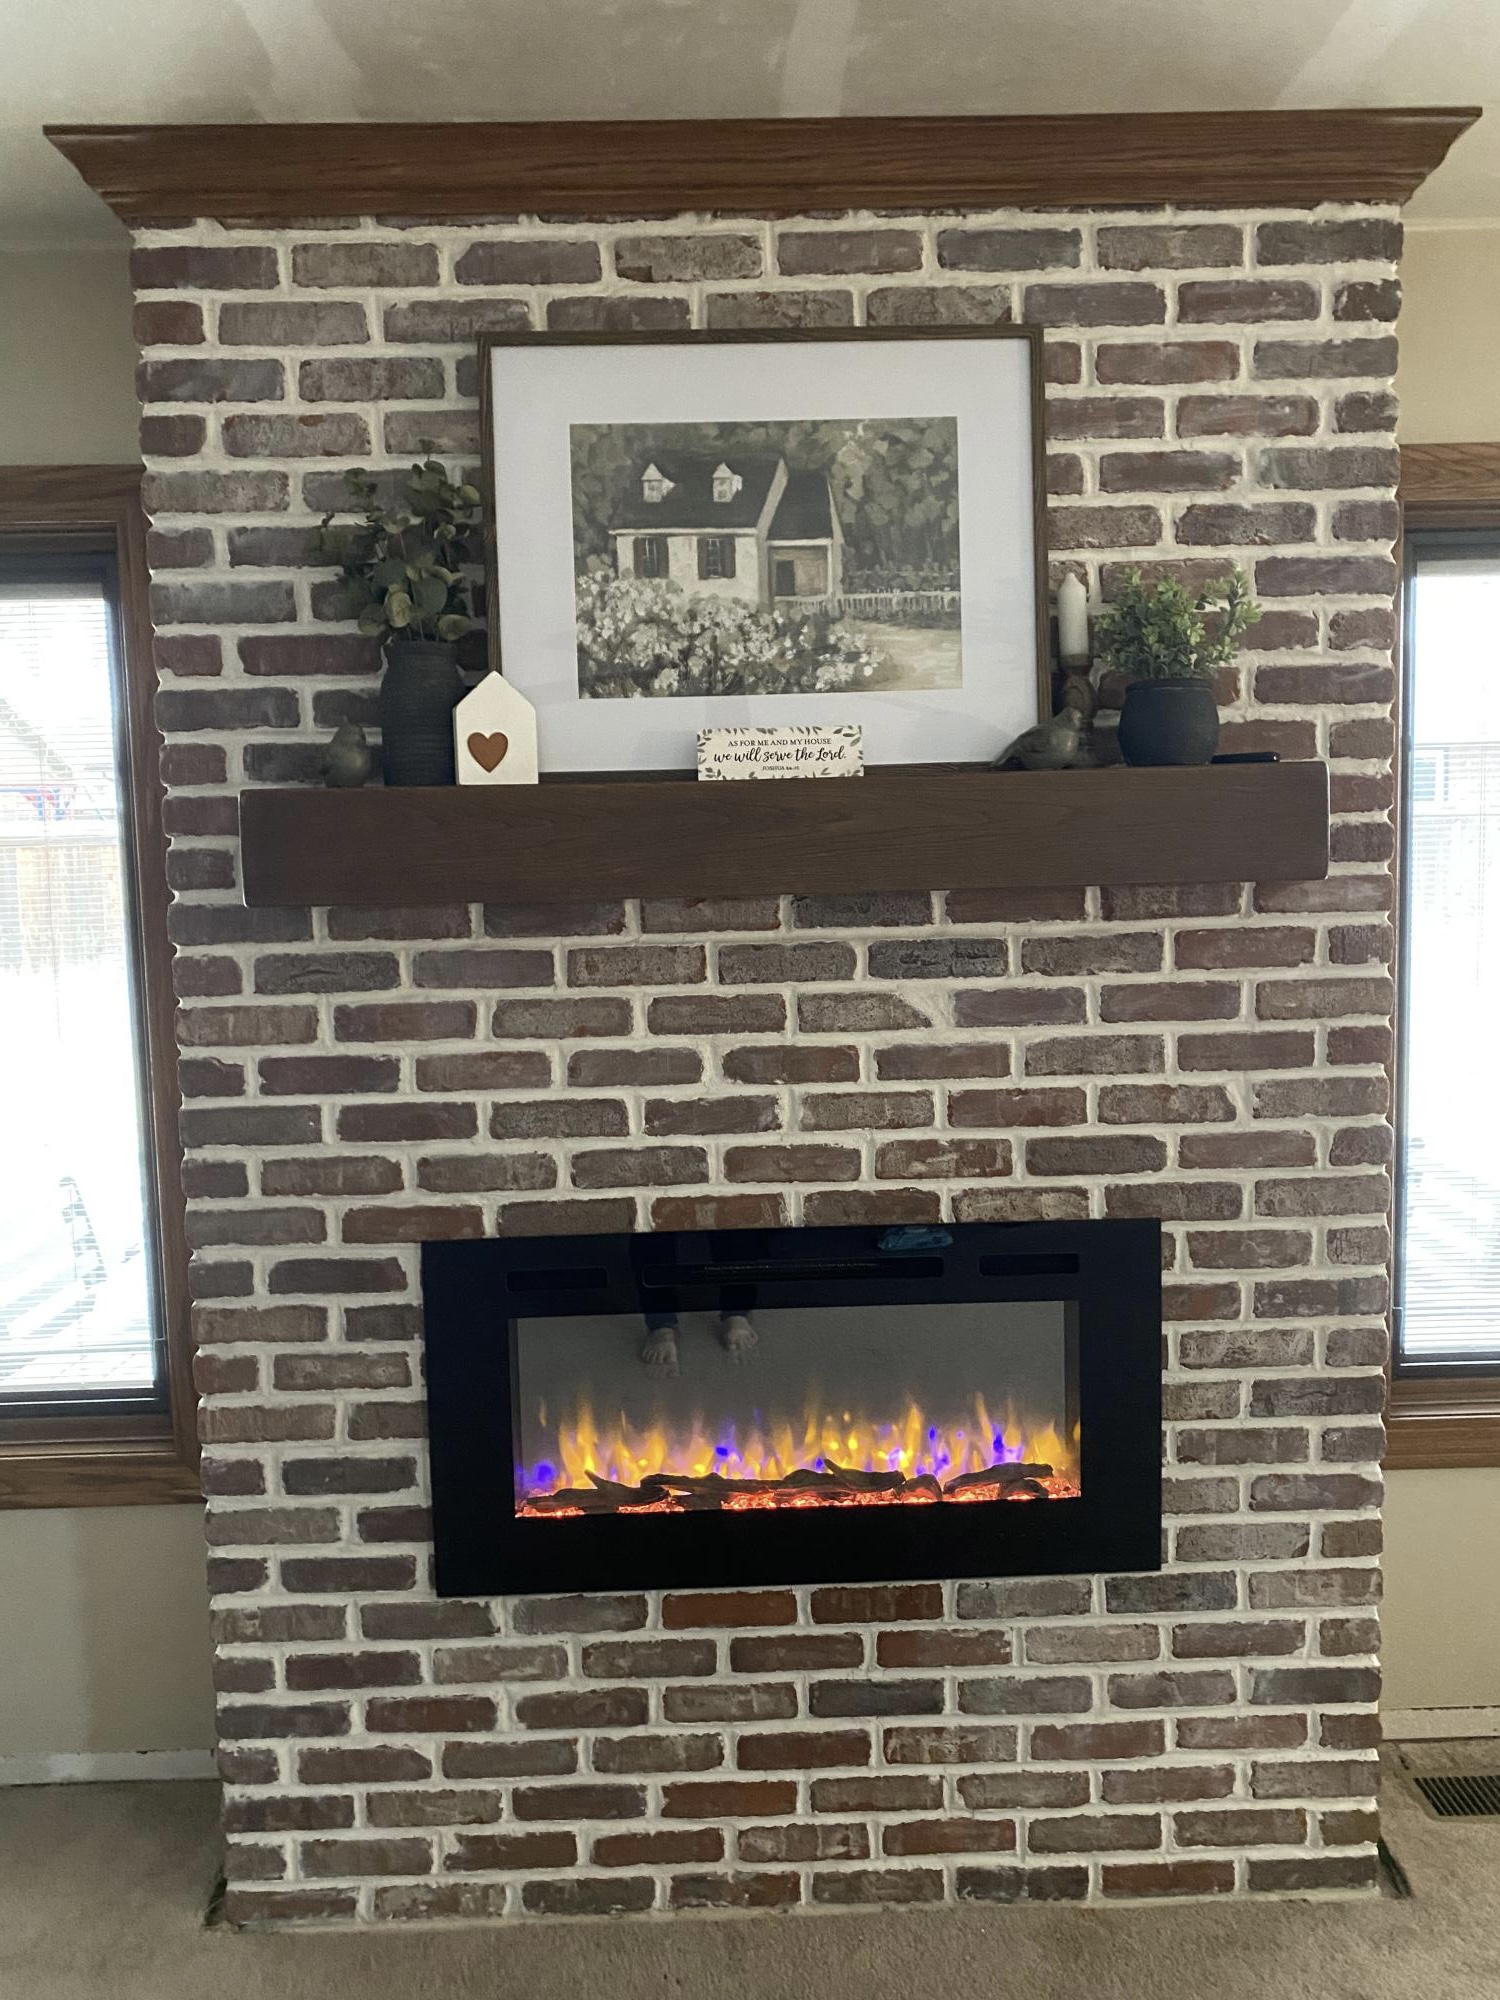
We used Ana White shiplap fireplace tutorial to build the structure and then followed her advice for brick installation instead of shiplap. It all turned out so great. The fireplace has changed the entire feel of our house now. Thank you Ana!
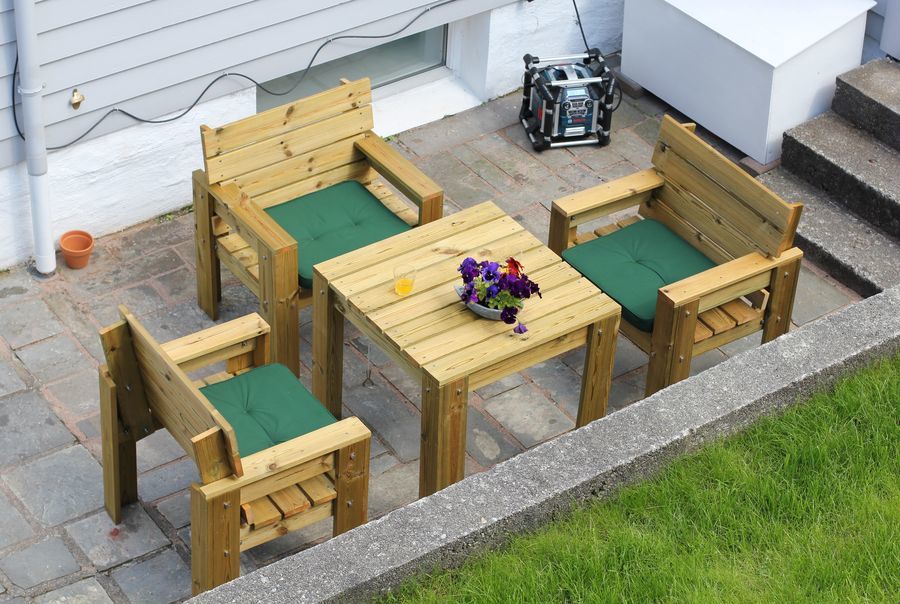
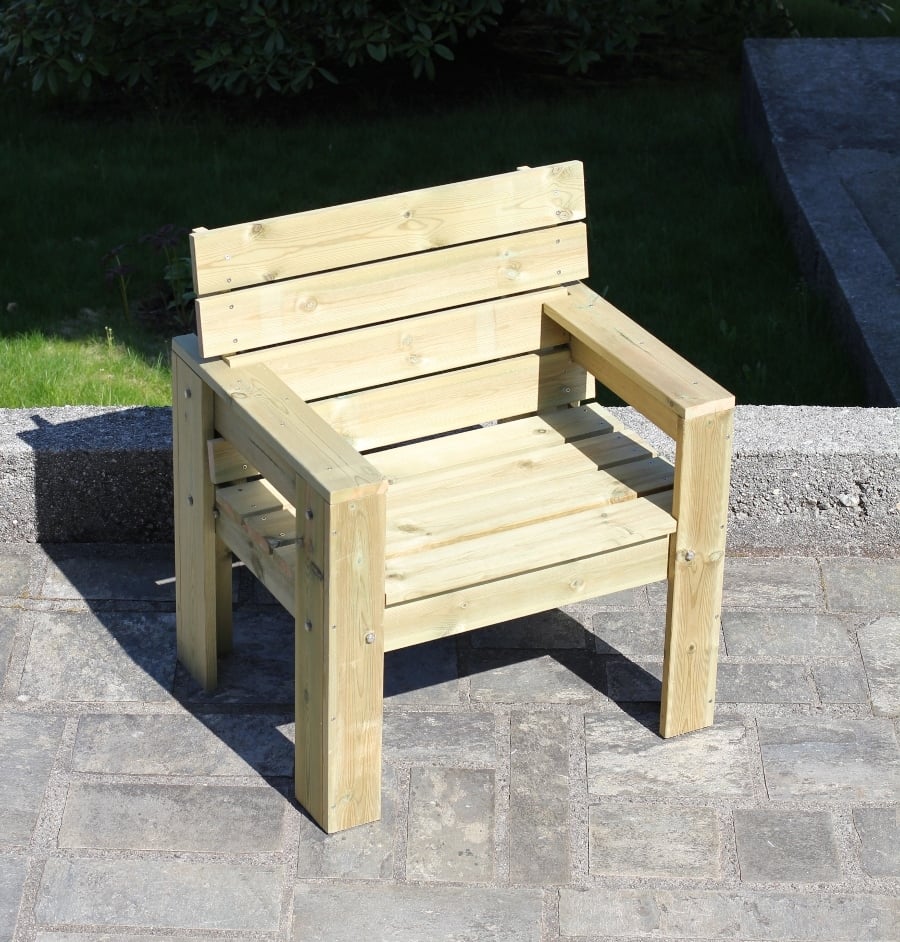
It was after getting to know your website and seeing all your nice craftsgirlship we decided to make our own garden furniture.
We are wery satisfied with the results, thanks a lot for the inspiration!
PS) Time investment = per item.
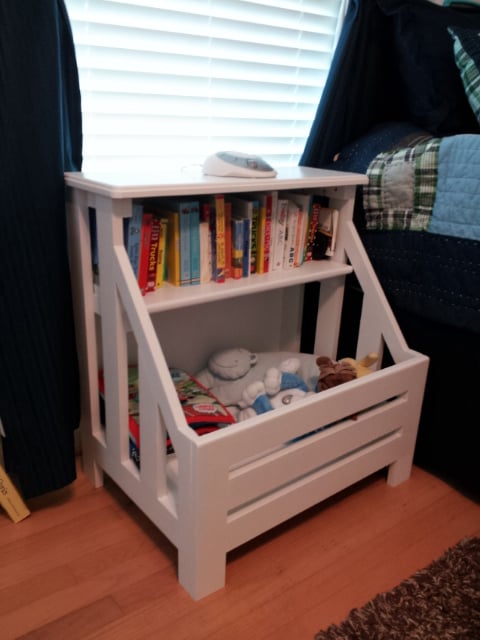
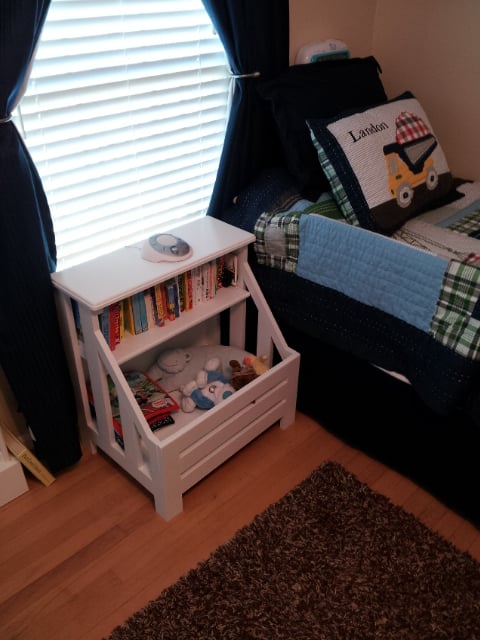
Thanks for the GREAT plans. Slightly modified to allow more space on the top shelf.
Sun, 03/09/2014 - 12:21
Can you please send me the plans for this, send them to [email protected] thanks!!
Sun, 03/09/2014 - 15:23
Lauren,
They are found on this site called the "Kendra Storage Console". Click on "plans" in the tool bar above, type in that title, then hit "apply." The original plans will pull right up.
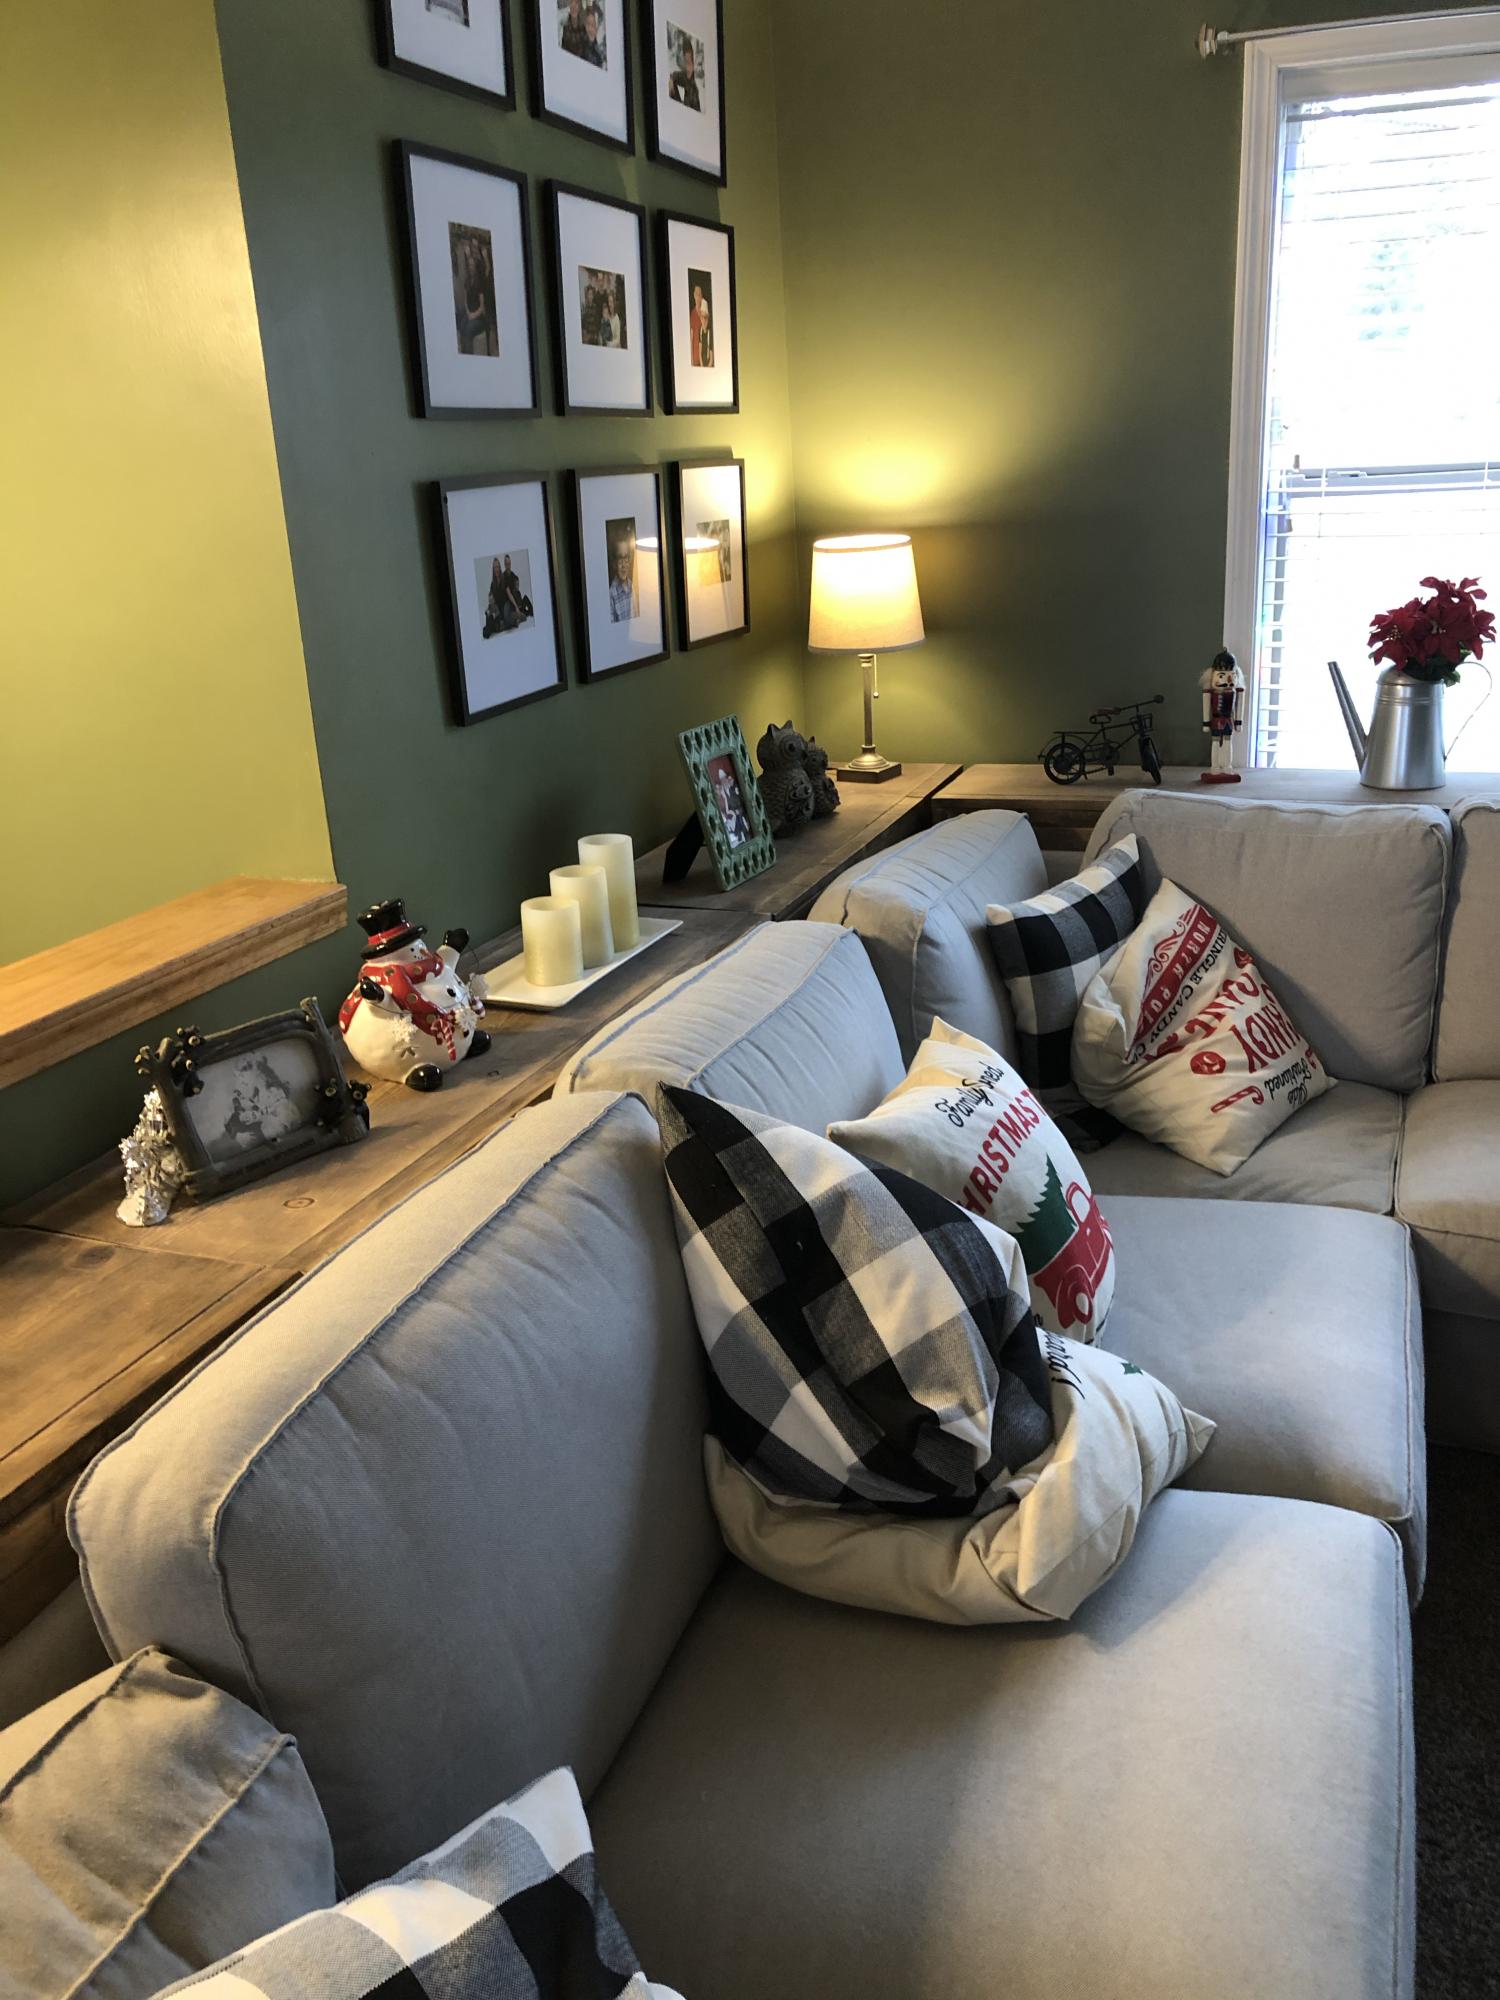
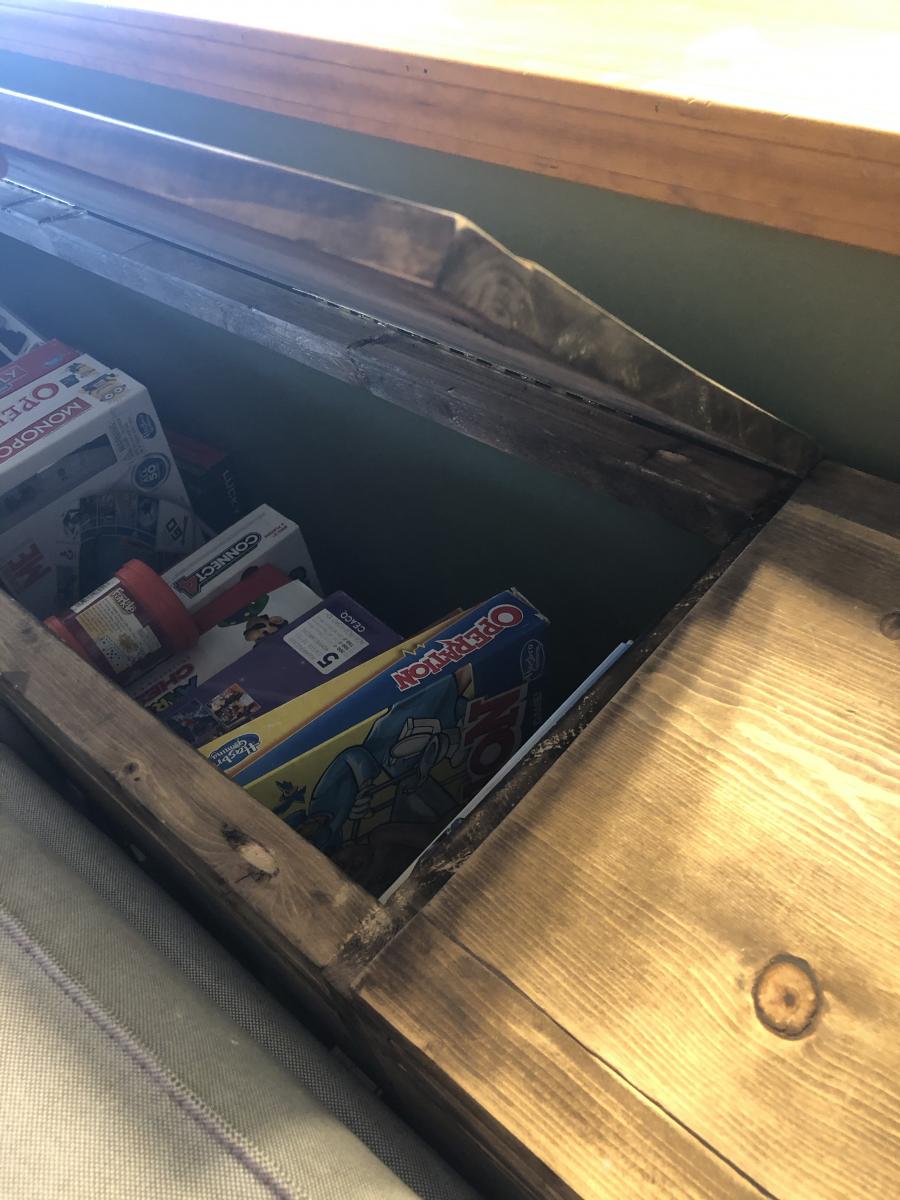
Our living room has no closets or storage. As a family we love to play board games and we love to cuddle on the couch with blankets. So, I was trying to come up with a sofa table for our large couch that also had a ton of storage. I looked all over the internet and could not come up with a solution. So, I decided to try here on Ana White and I found plans for a bookshelf. I adjusted the height to be just below the back cushions and went for it. I am not going to lie, it was not easy for me to adjust these plans and I DID make several small mistakes, but I am so glad I made this. We use it daily and it makes life so much easier. The only add I will do in the future is to add stoppers so when you raise the lid, it doesn't fall on your head. It makes life interesting though at the Van Lente household lol
Tue, 02/09/2021 - 22:53
I love this idea! Just curious - did you keep the bottom shelf of the bookshelves, or did you leave that off since it's not accessible behind your sectional?
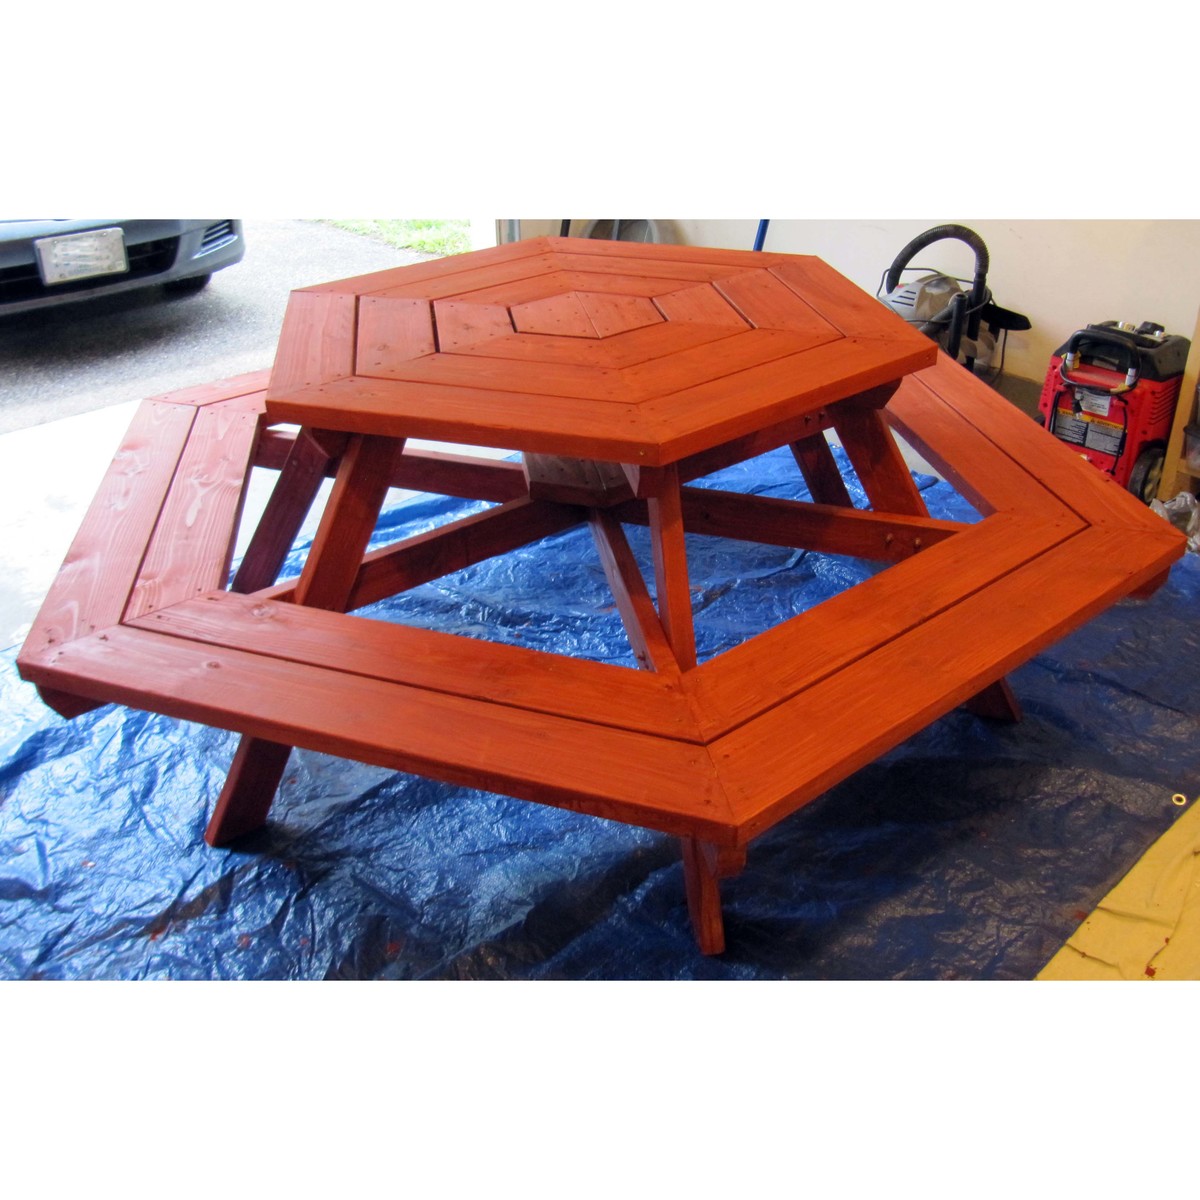
Thanks for the plans. My little brother from Big Brothers Big Sisters and I made this table and had lots of fun doing so. We made a few modifications which might be useful to others:
1. We modified the center joints (at the lower and table level) so that one 2x4 could continue across the entire diameter of the table for greater strength (see pictures for details).
2. As recommended we extended the seats out 4". This made it very comfortable to get in and out.
3. We started the center with 2 pieces of 2x6 rather than 6 with the thought being that this would help strengthen the center of the table. (see pictures for details).
4. We added a stiffener at the center 6-way joint on the lower level to help really strengthen that center joint. This was made out of 2 pieces of 2x6 as shown in the pictures.
Thanks,
John
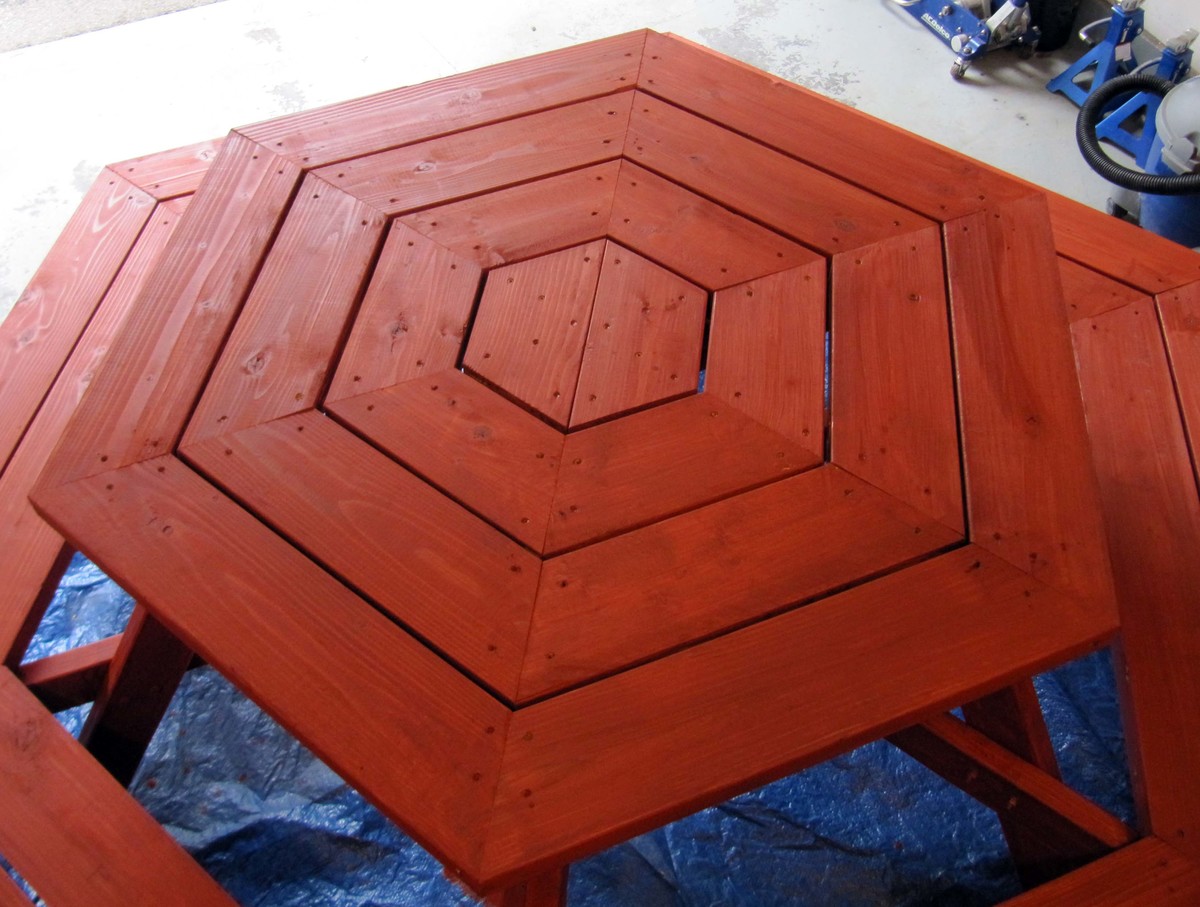
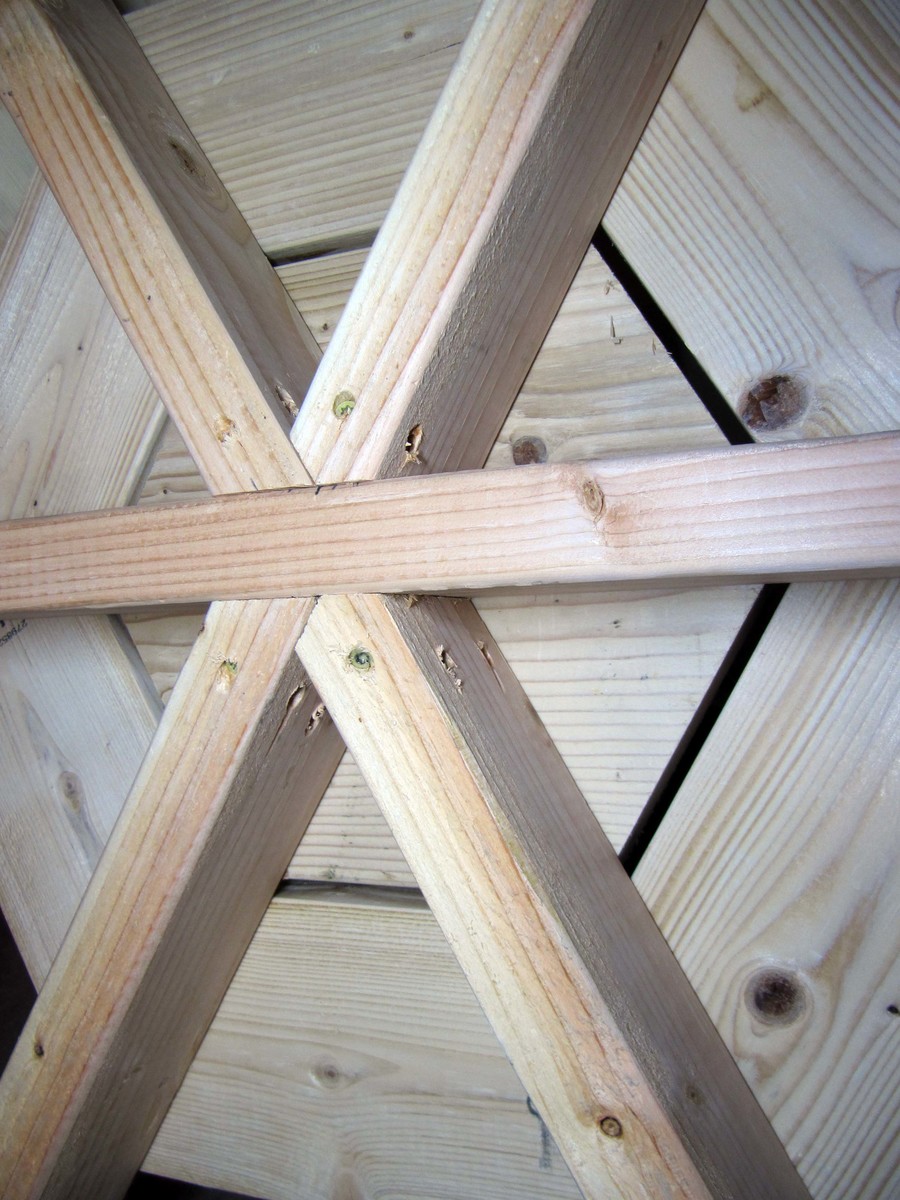
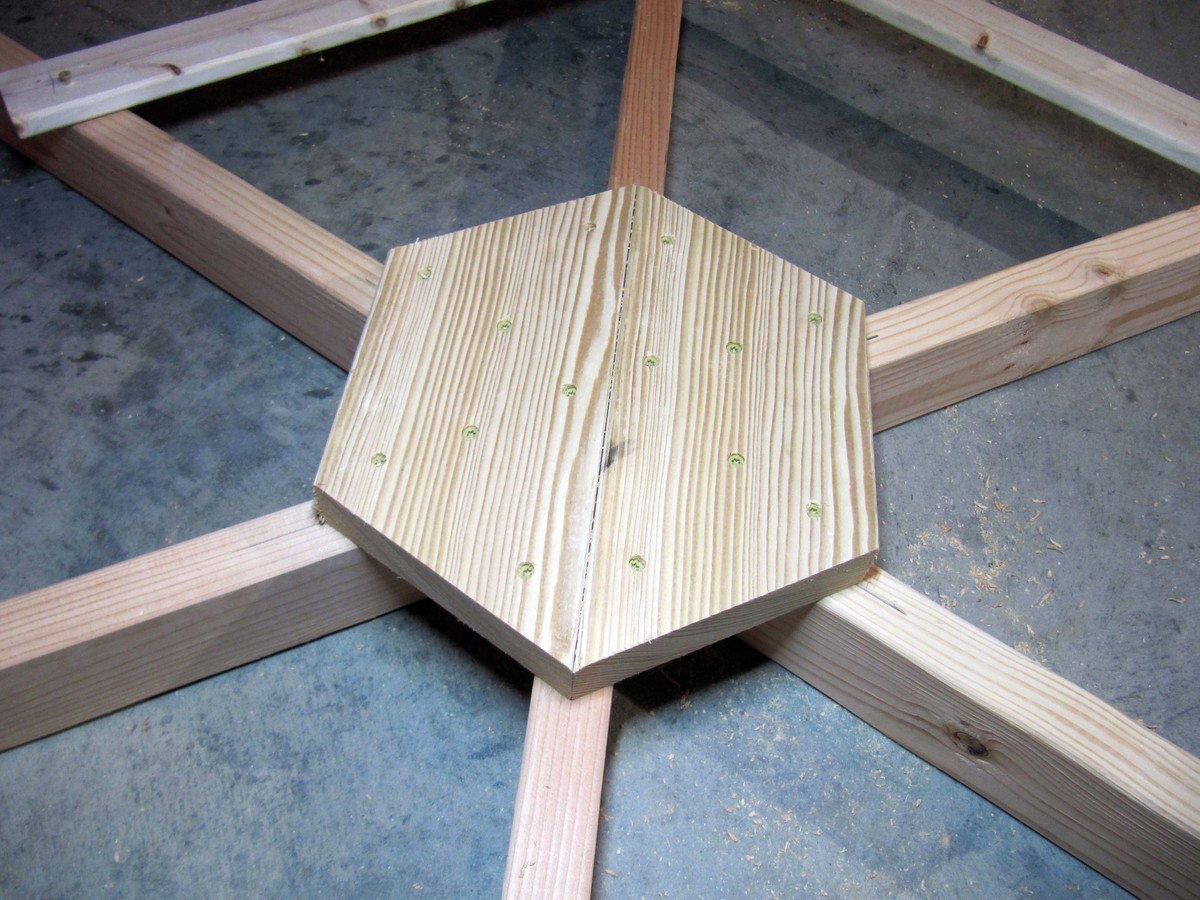
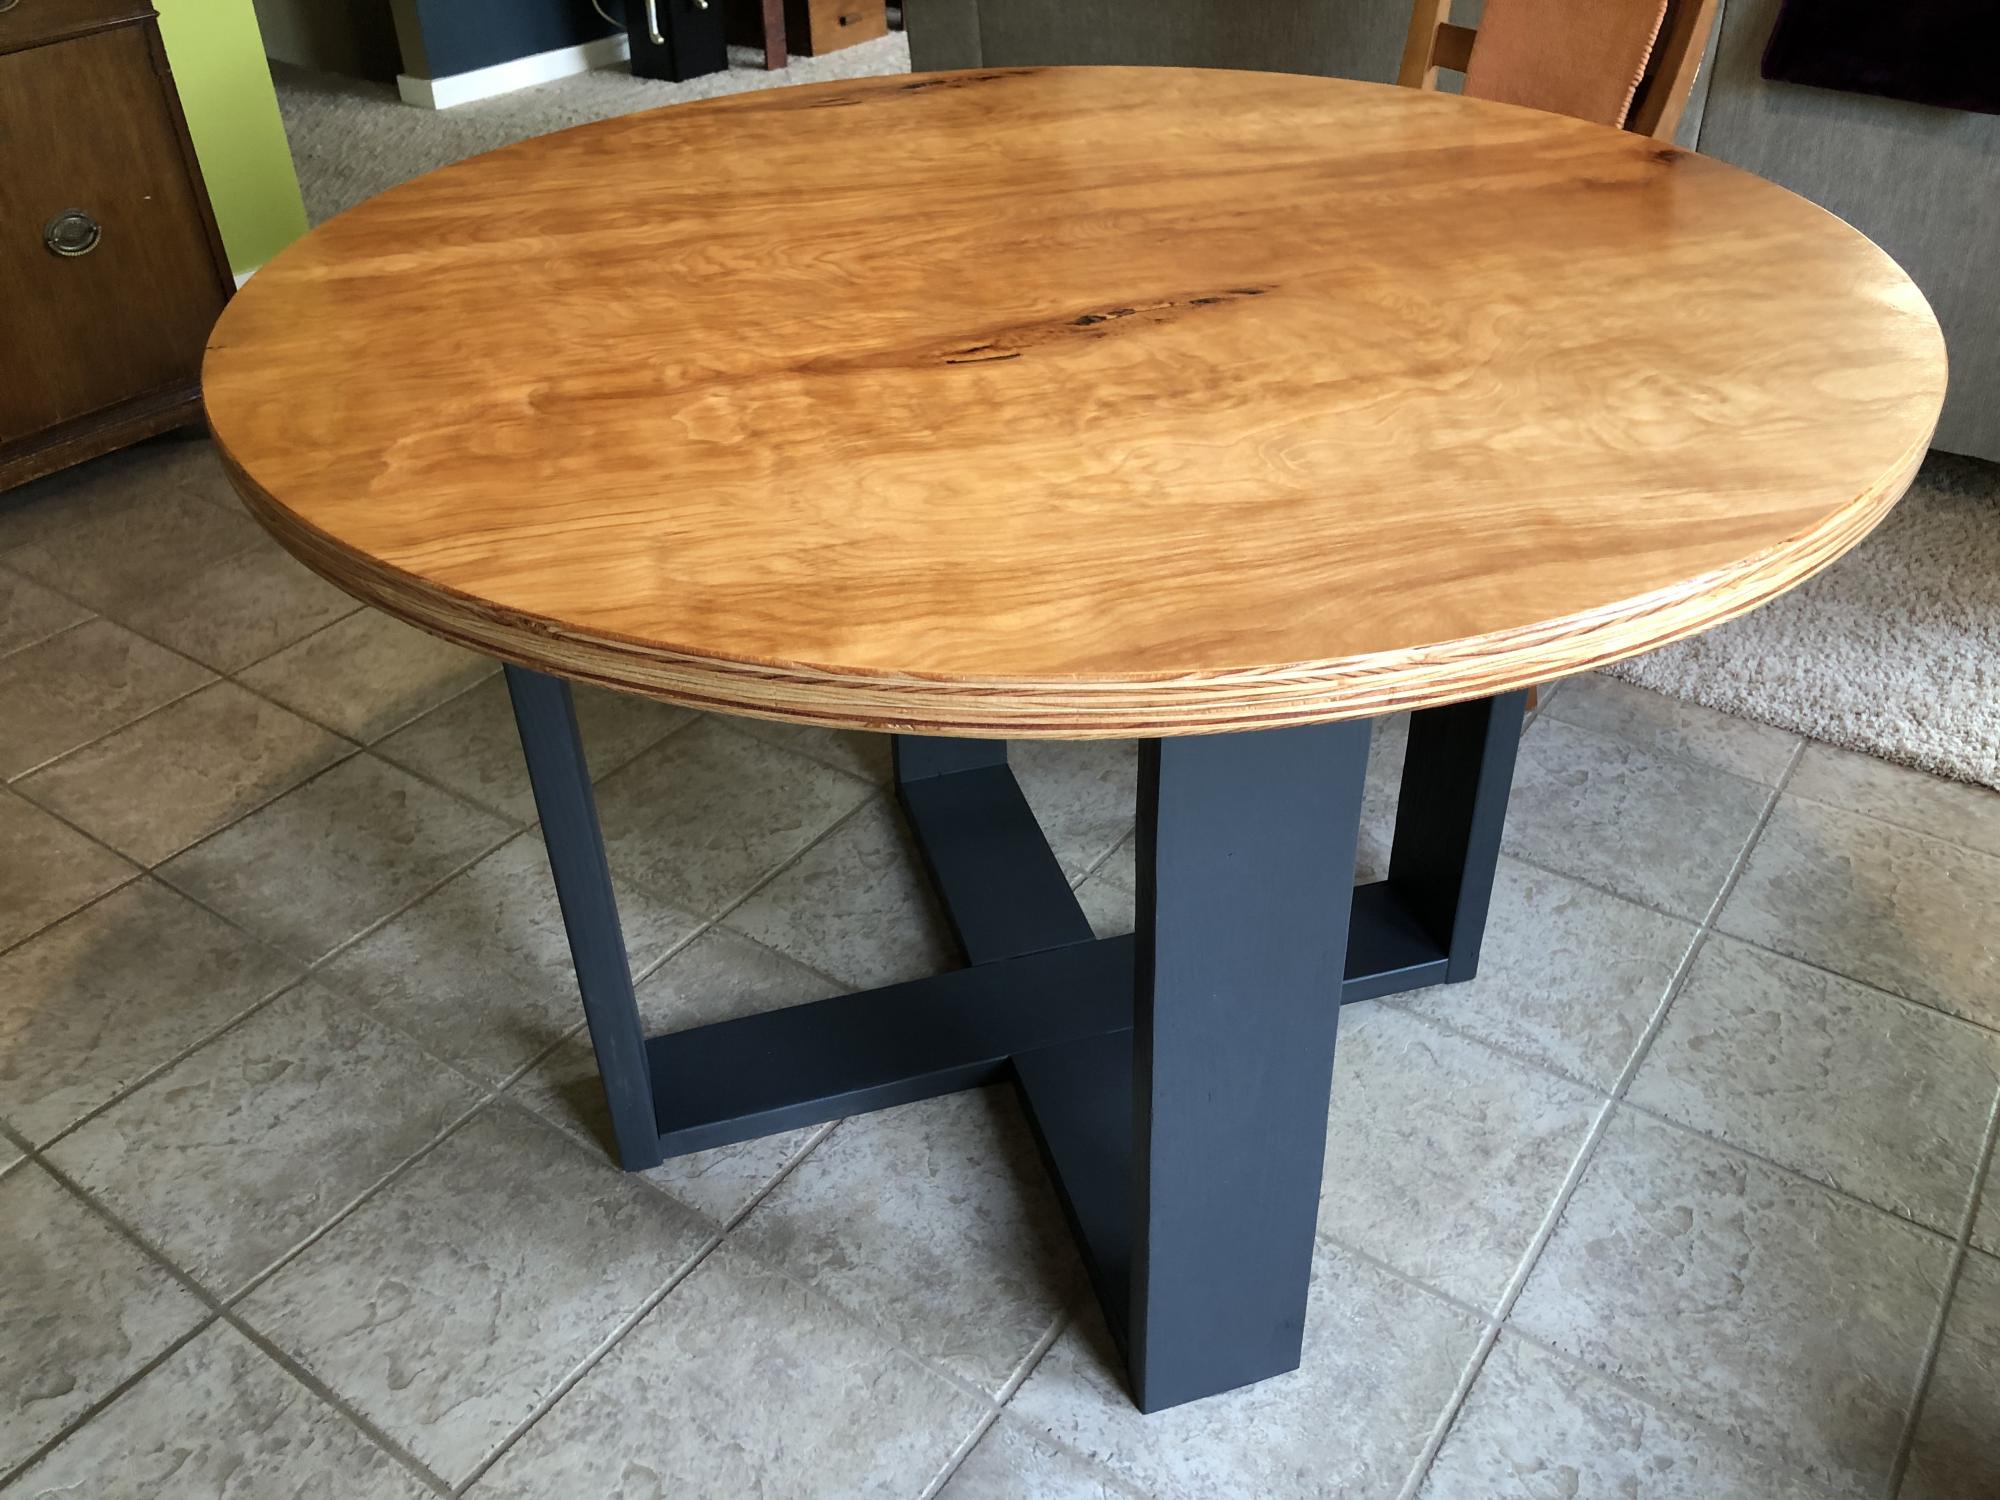
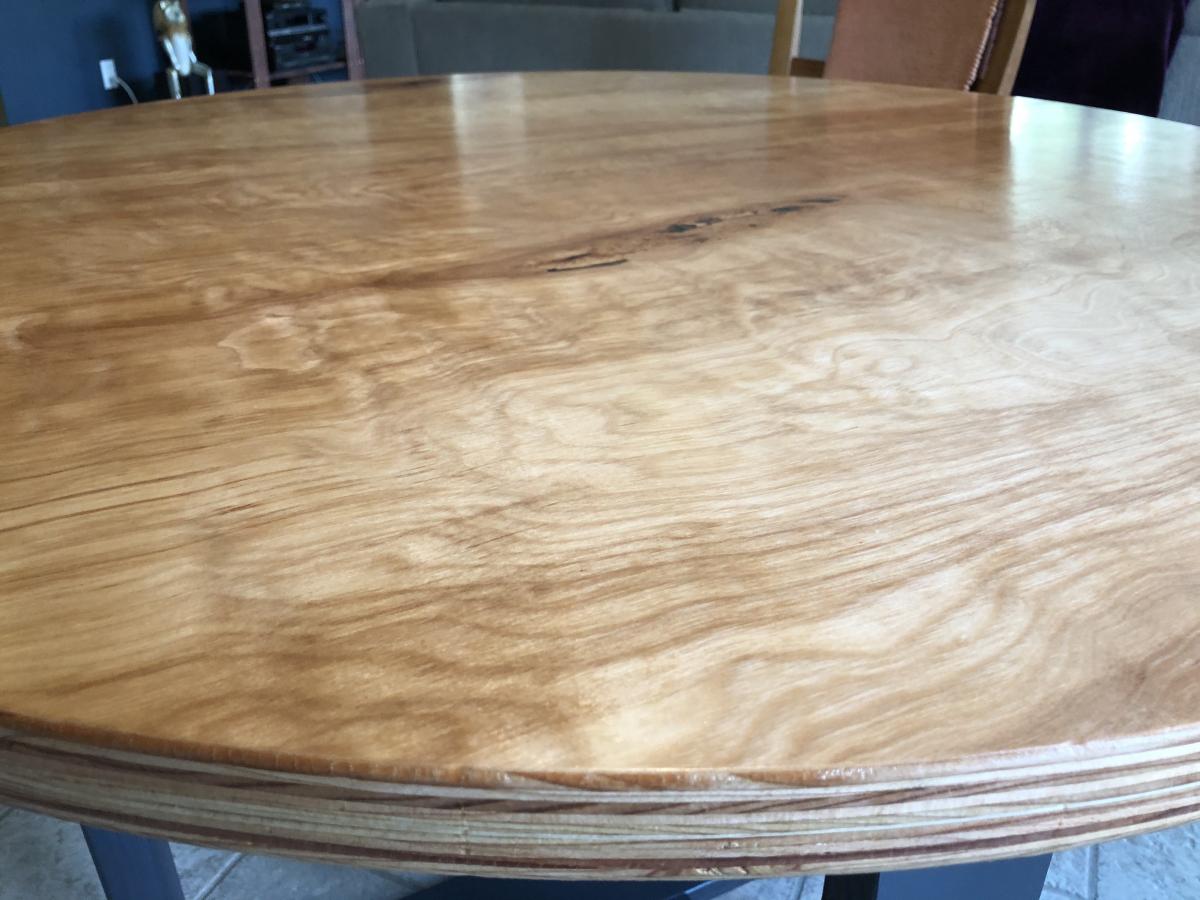
Like any good DIY project, I started with plans and then changed pretty much everything.
We wanted a modern but sort of rustic table for our dining area. The Modern Round Table plans almost fit the bill but not quite. The local Lowe’s had the perfect answer—Birch plywood. It also fit our Alaska setting.
I laminated two half sheets of 3/4” together, then cut out a 48” round top with a router.
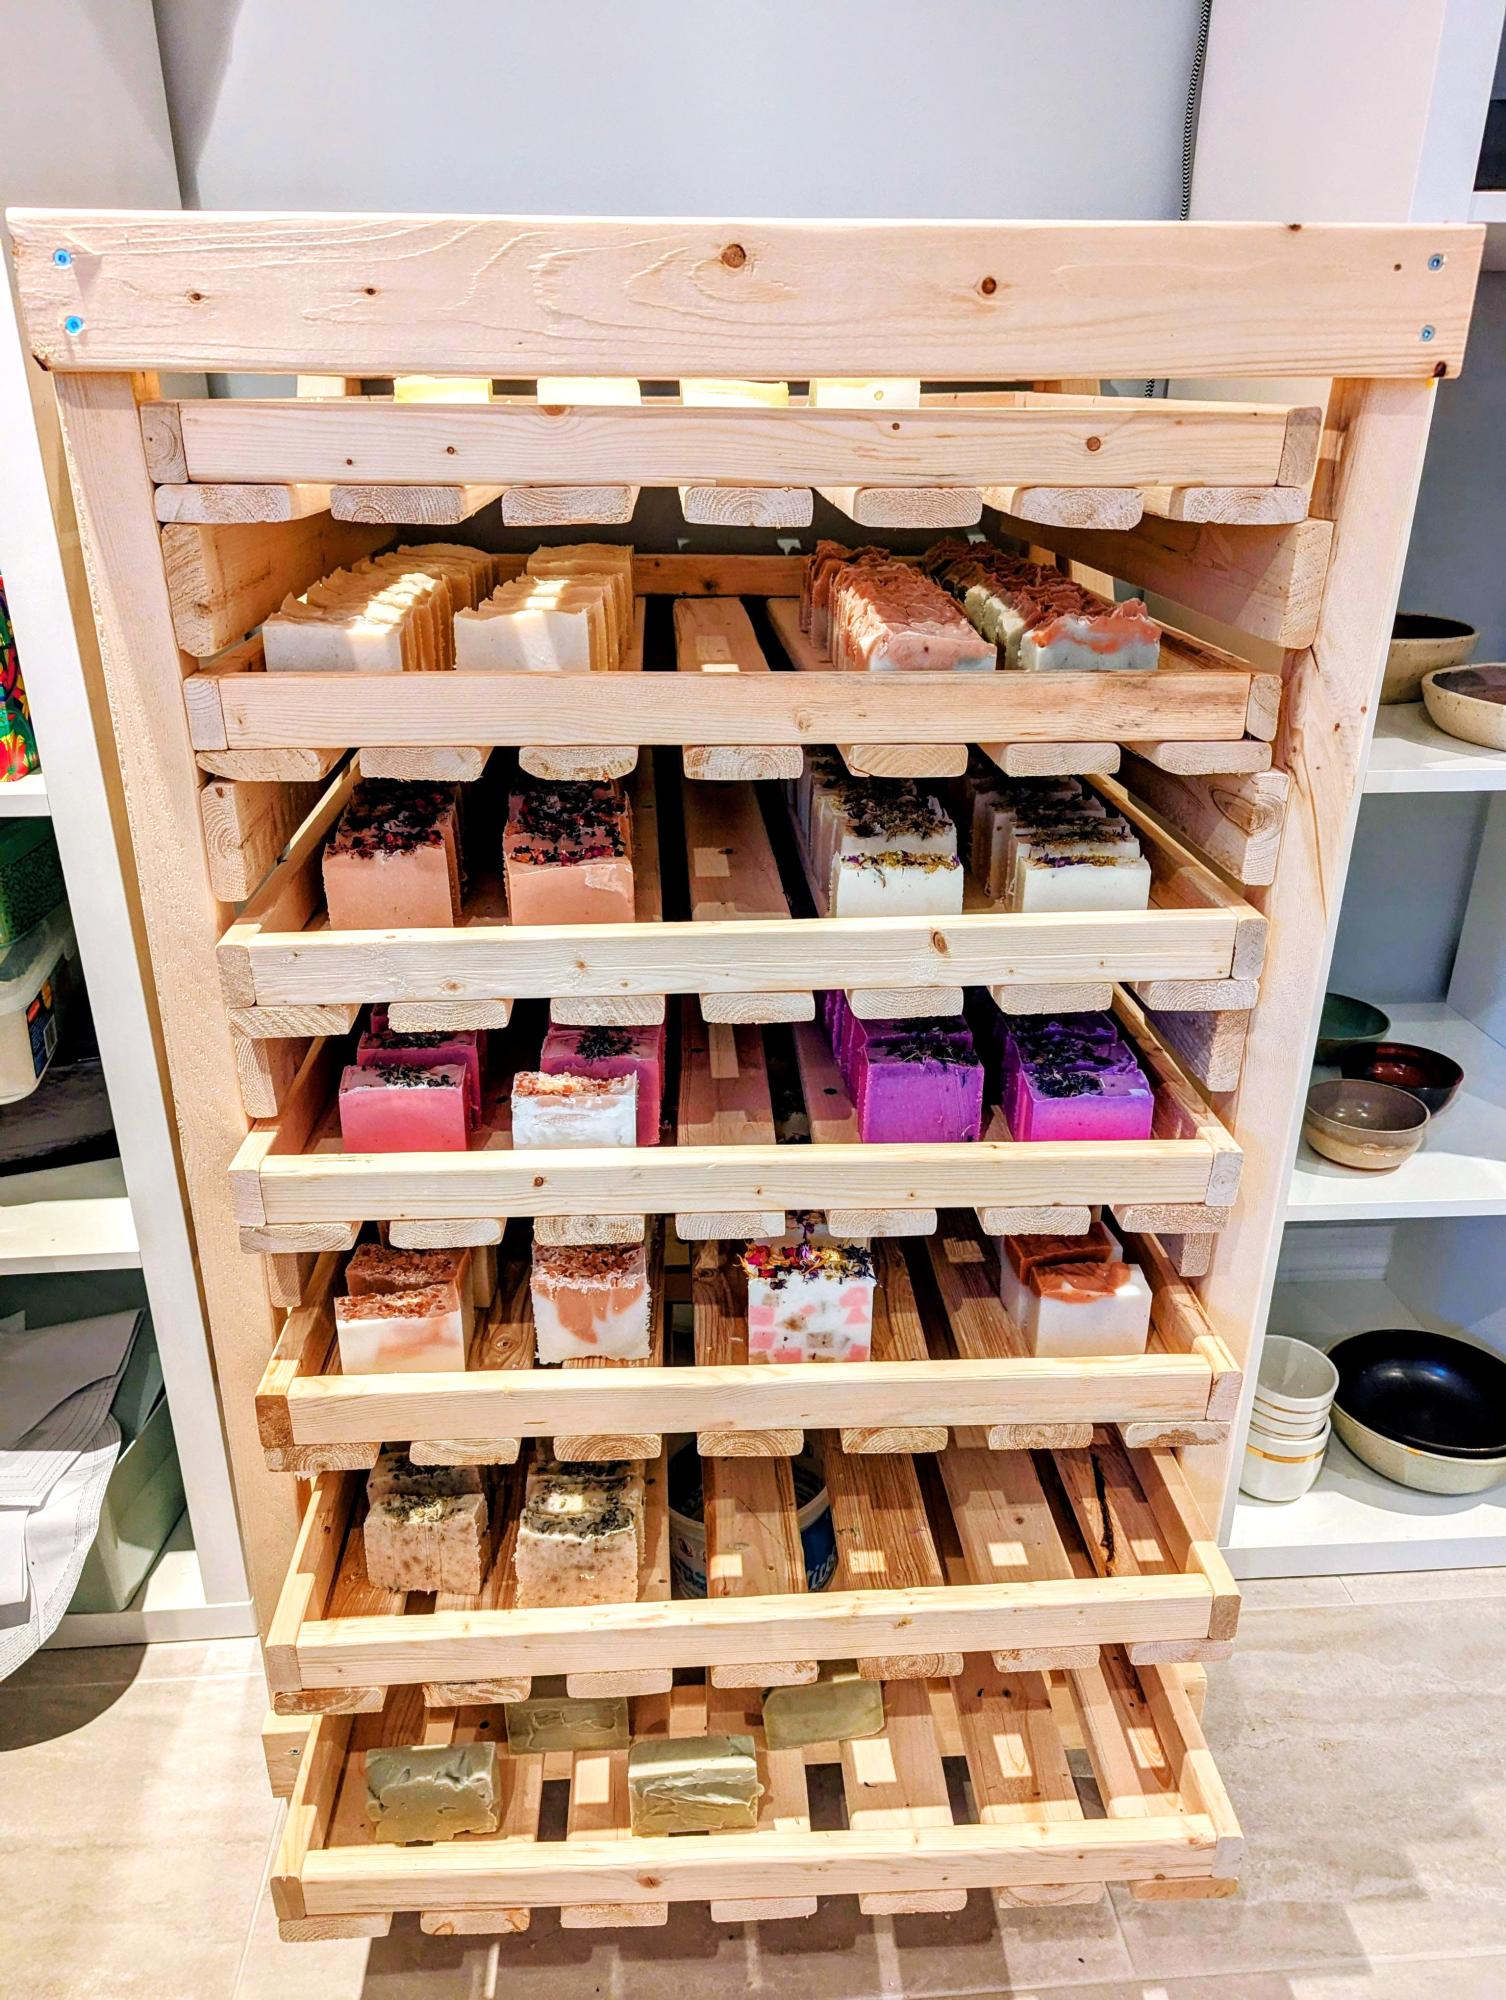
My wife loves handcrafting soap, potery, weaving, etc. She needed a solution to cure her soap and she found your plan. We made a deal : I'll do the project but I'll (finally!) buy a brad nailer. It turned out to be a great project to do for her. The plan is very well explained and the design optimizes the usage of wood. Thank you so much Ana for the idea and the plan! - Martin
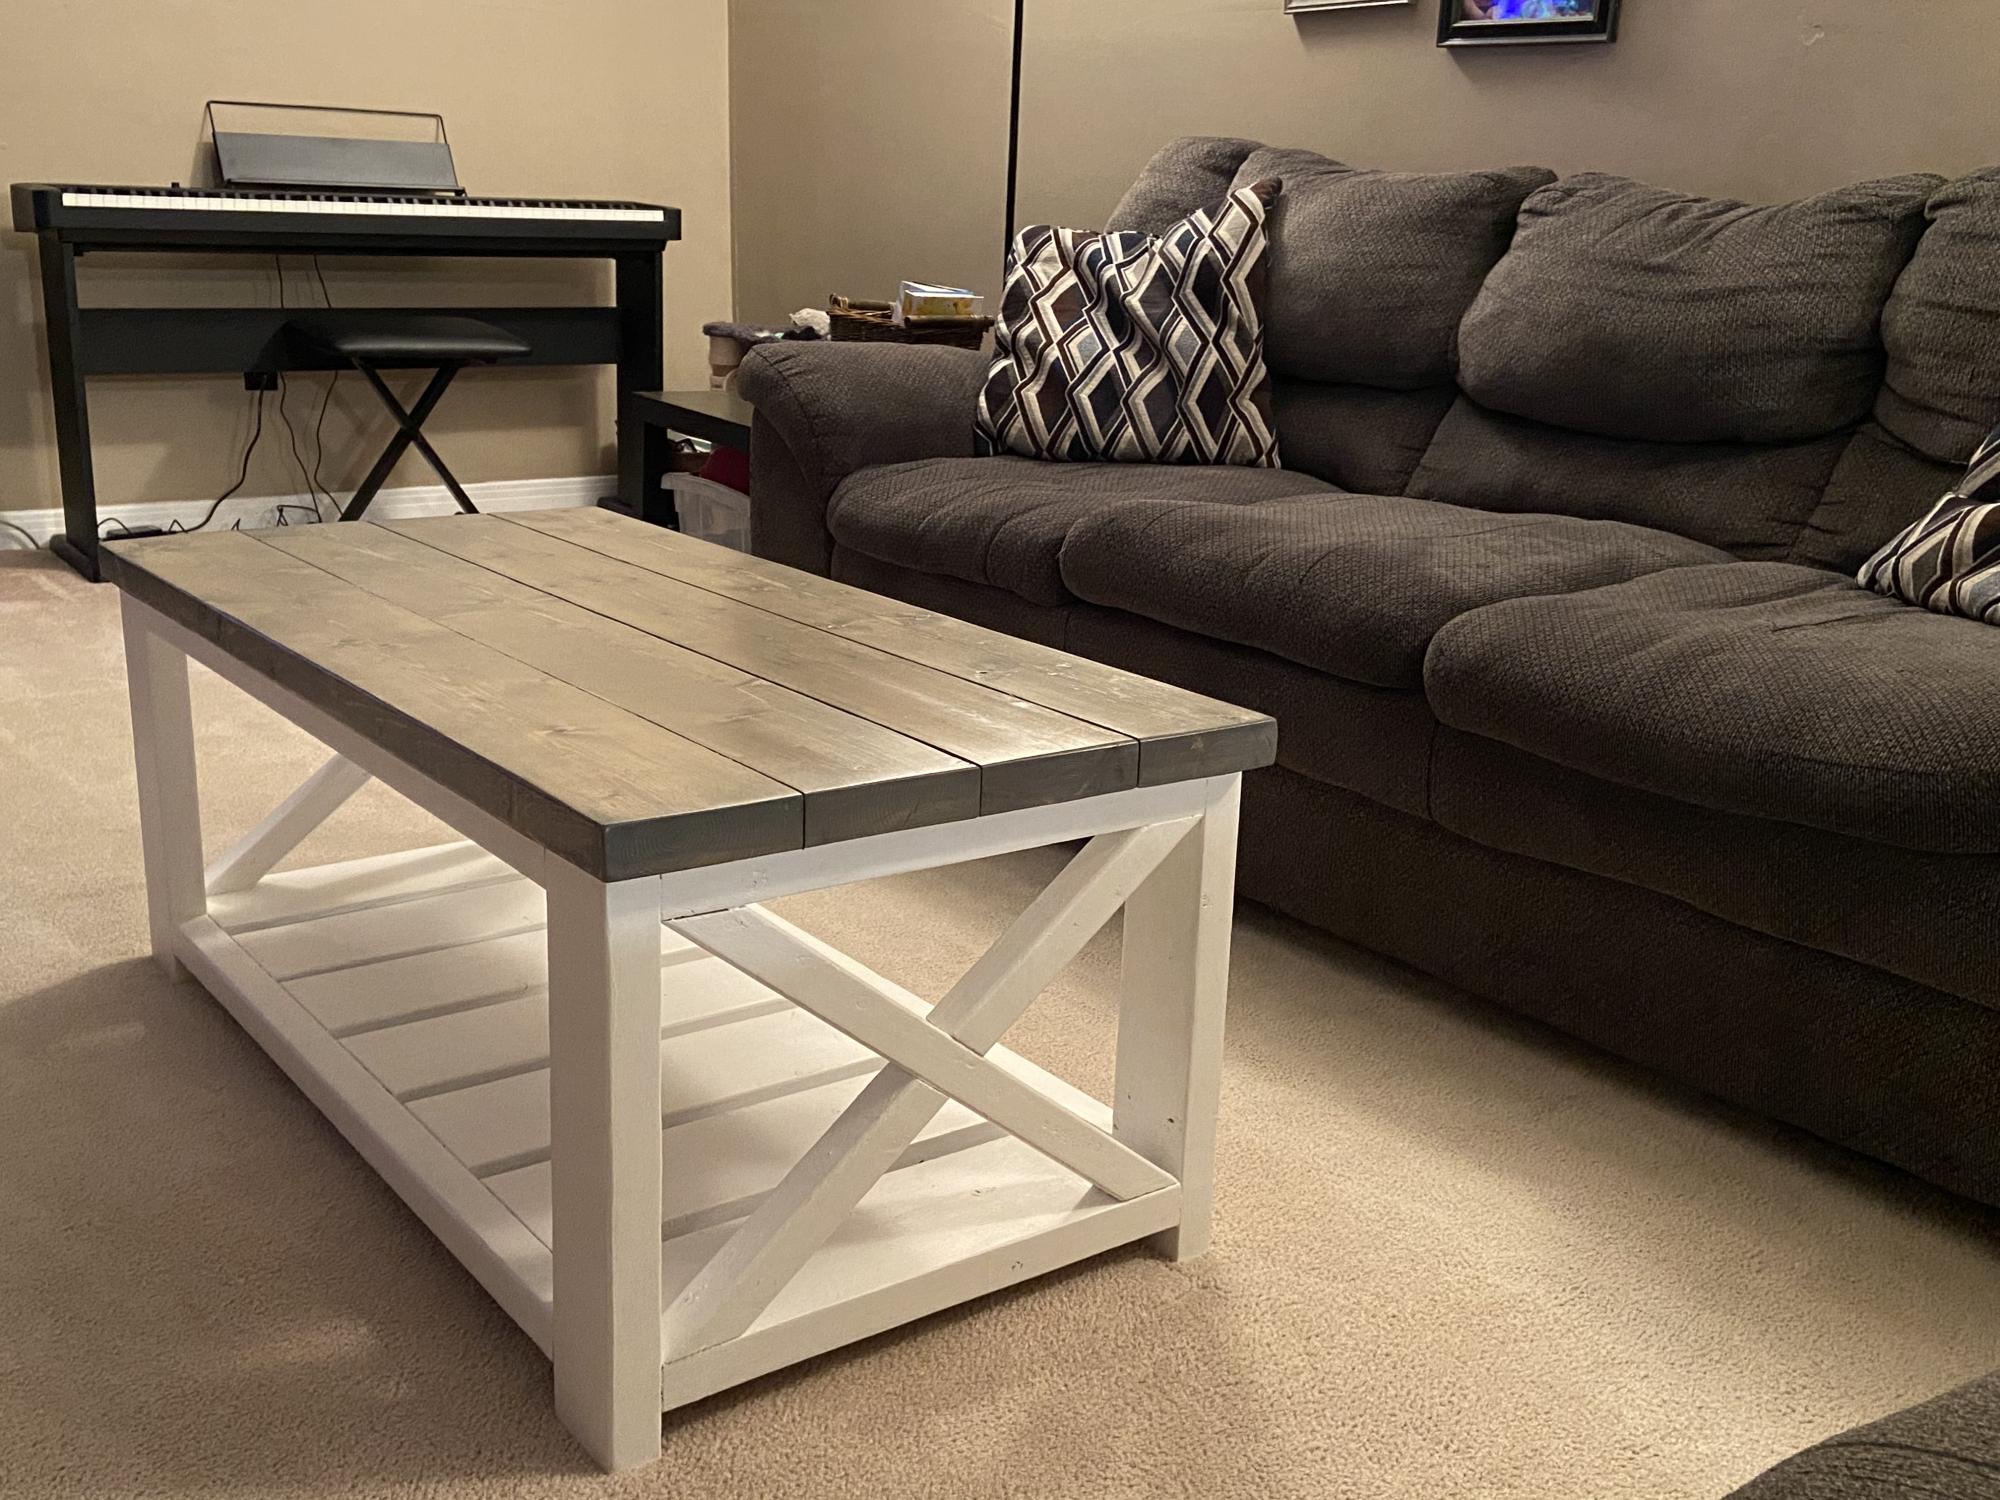
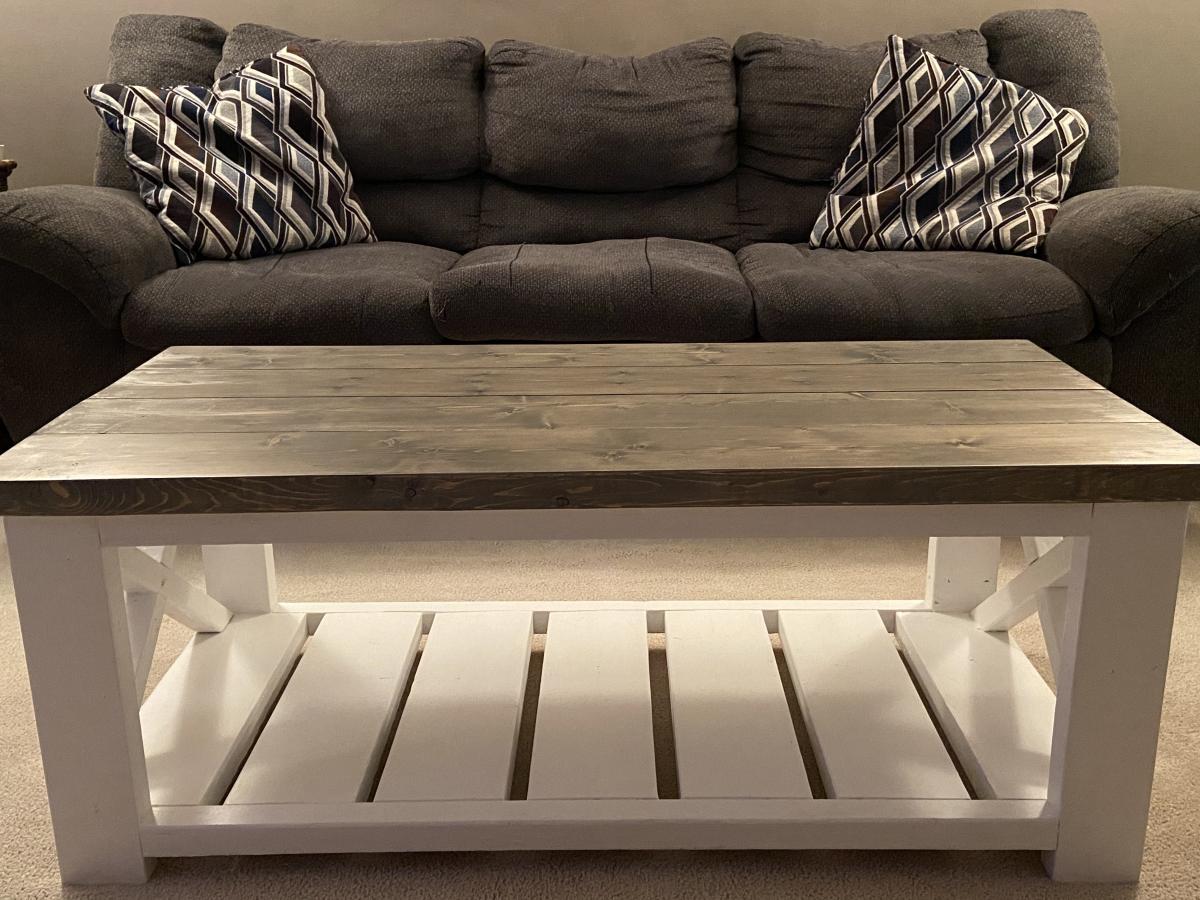
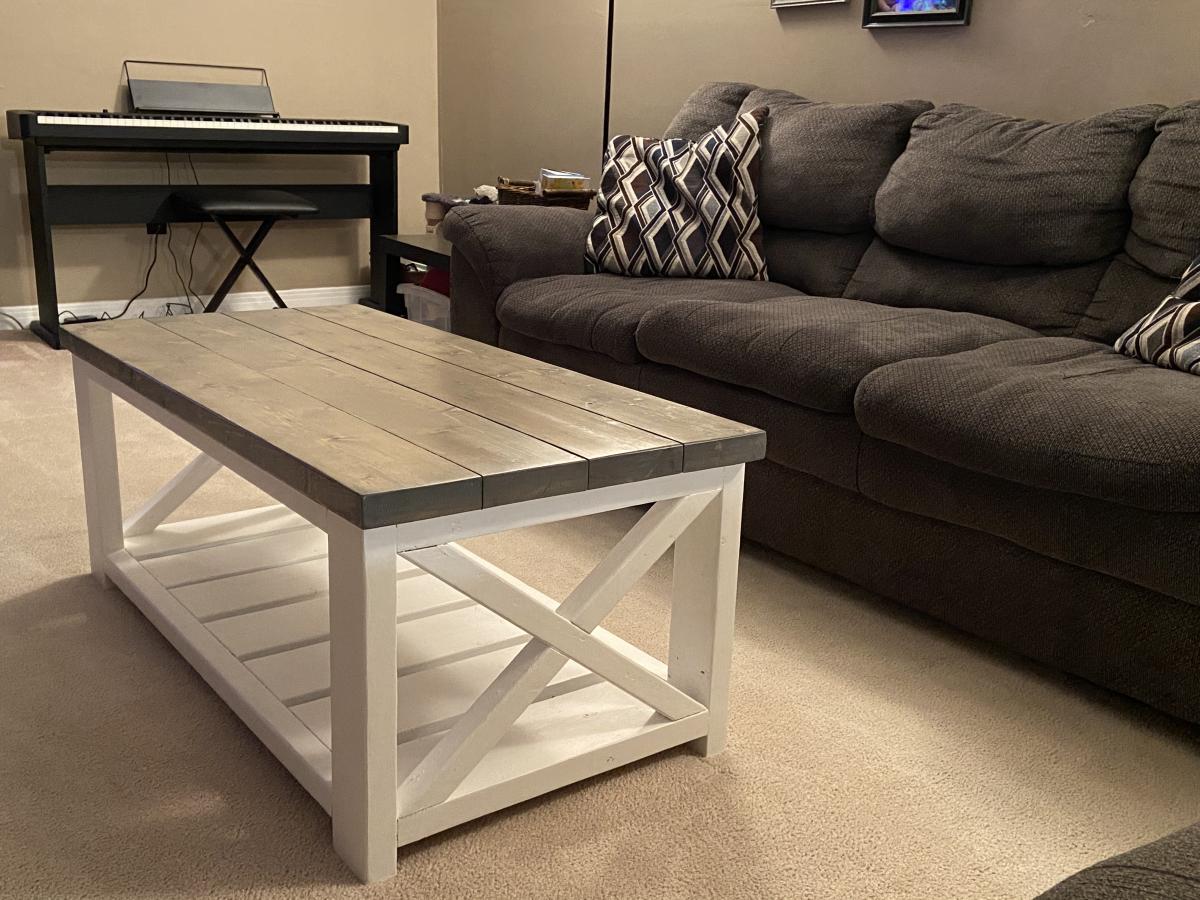
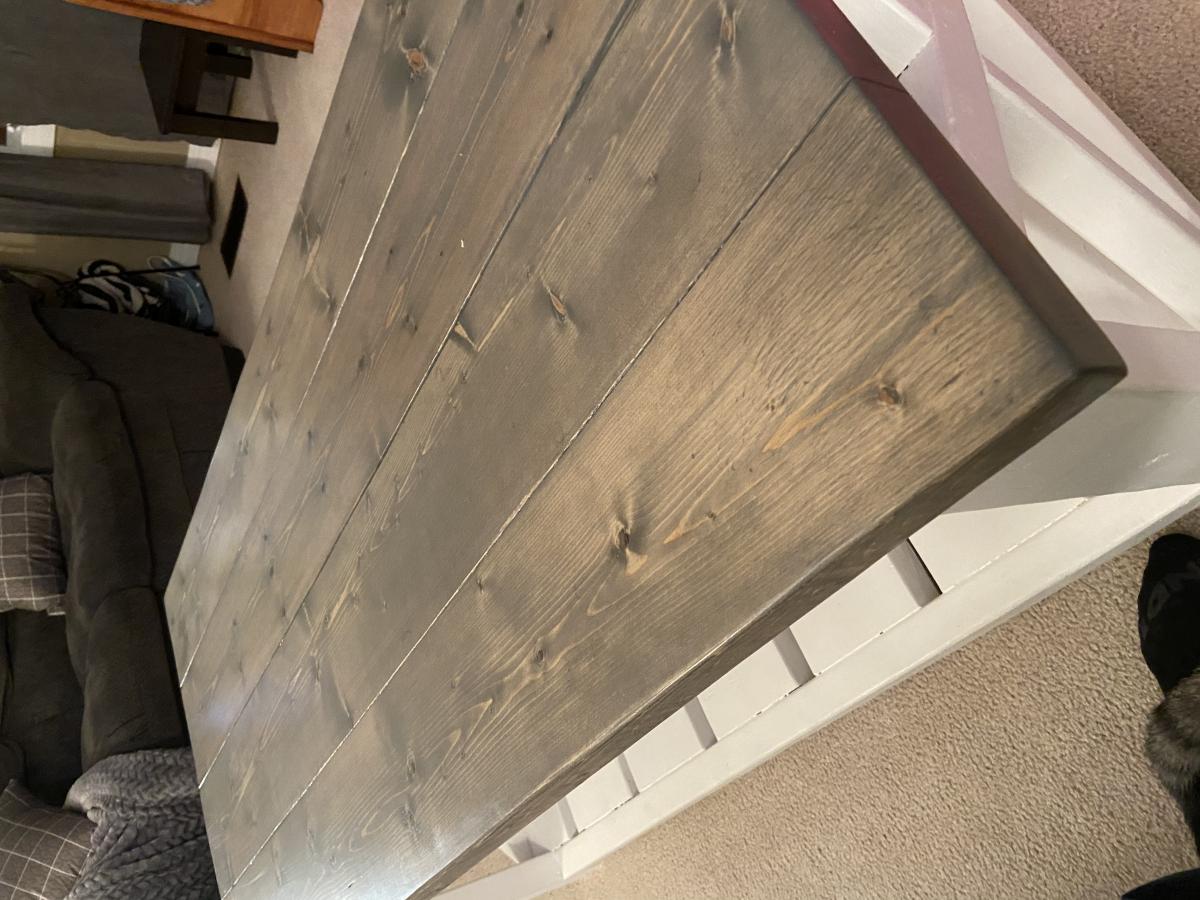
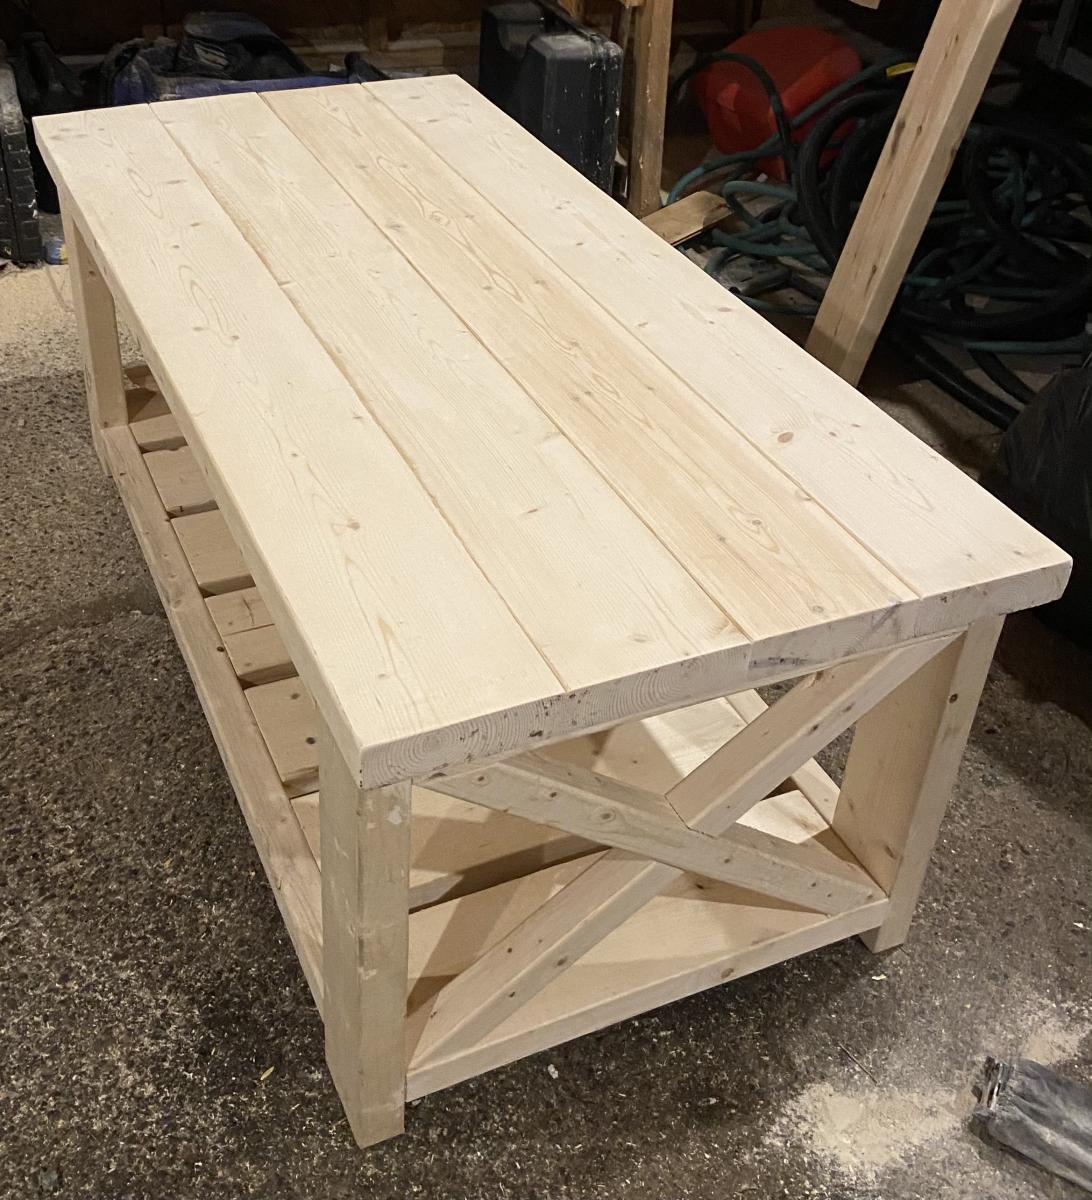
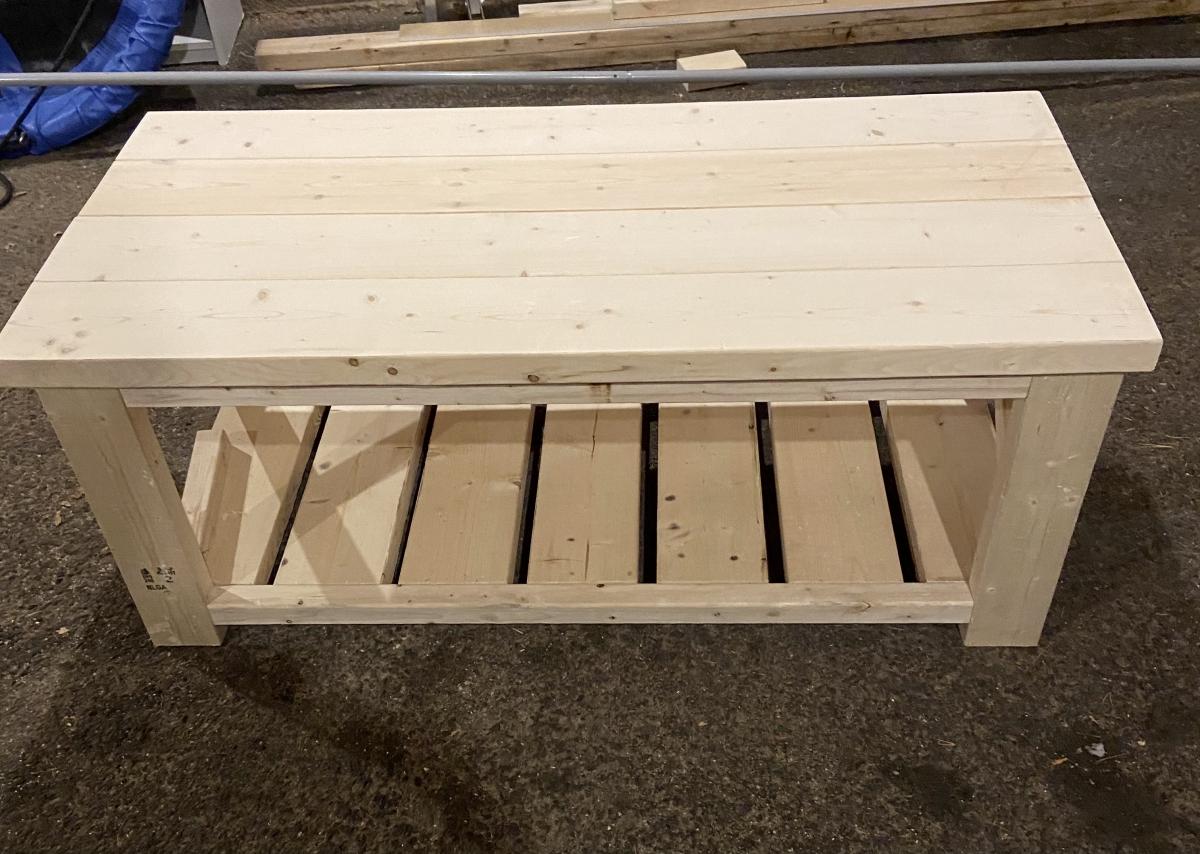
This was my first project and had tons of fun building it. Can’t wait to build to end tables to match.
The plans are so easy to understand. The only change I made was instead of exposed screws I used the pocket hole method
Fri, 01/12/2024 - 08:33
This is beautiful and just the look I'm going for with the color scheme. I am wondering if it would be easier to paint the wood before constructing it? Also, what is the pocket hole technique? I think I would like the screws hidden too.
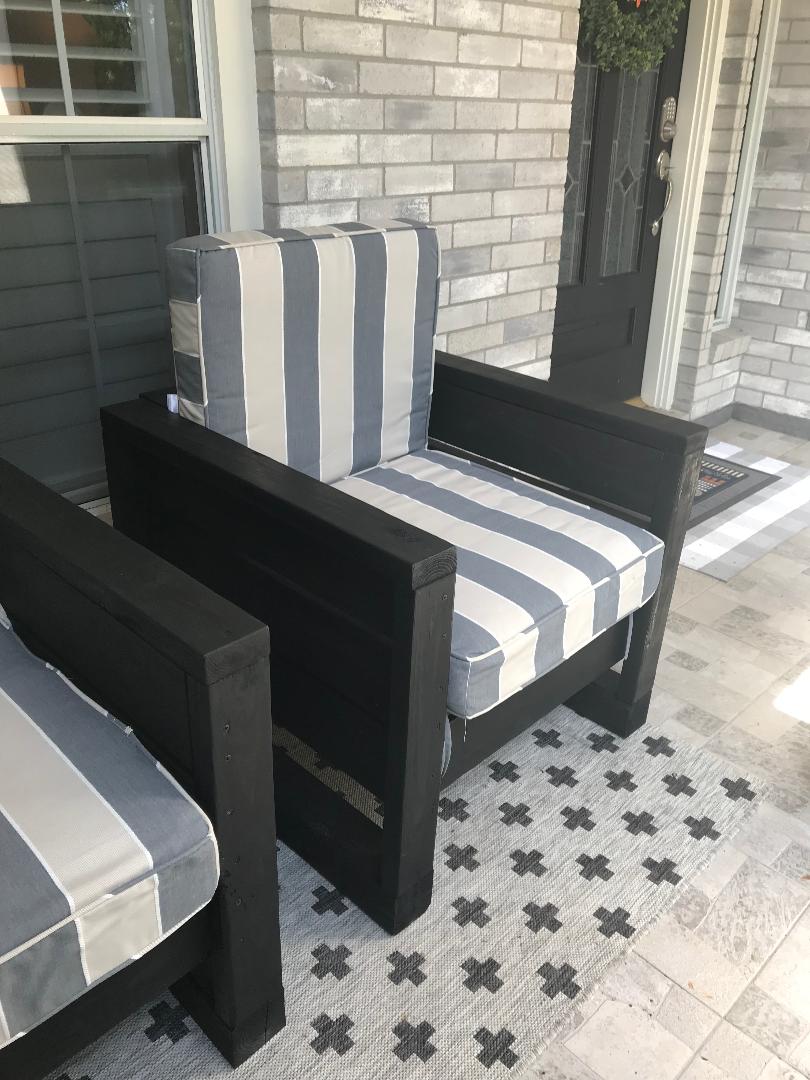
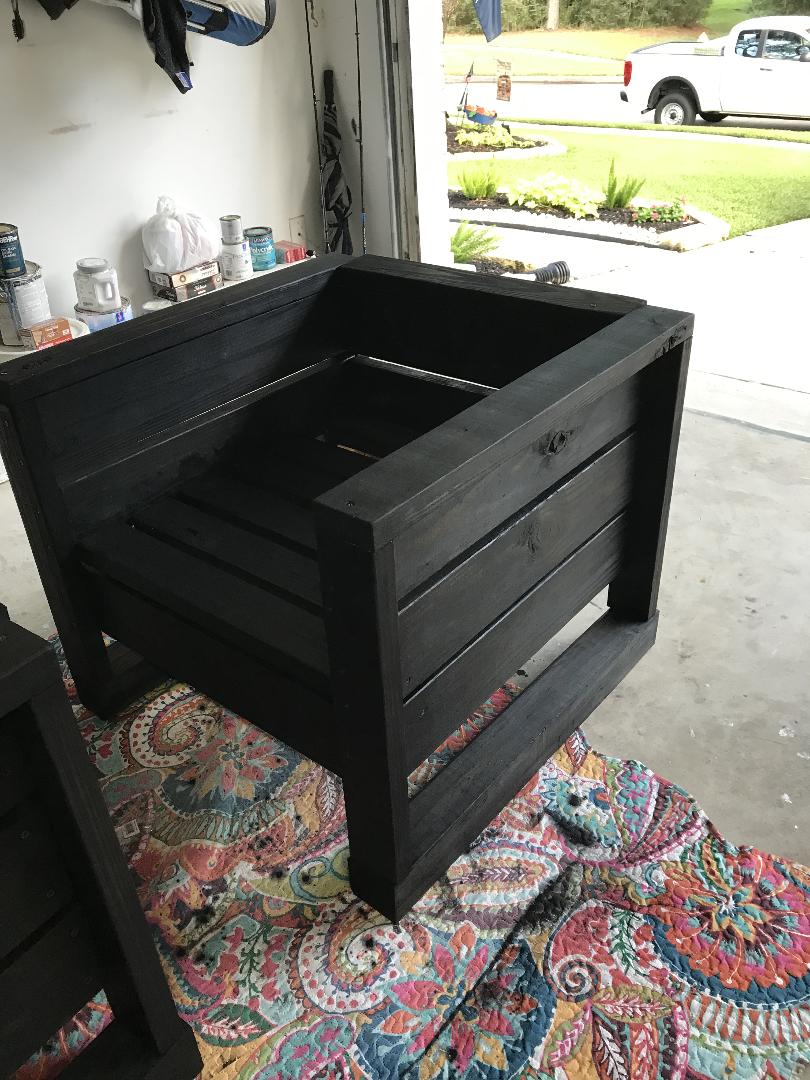
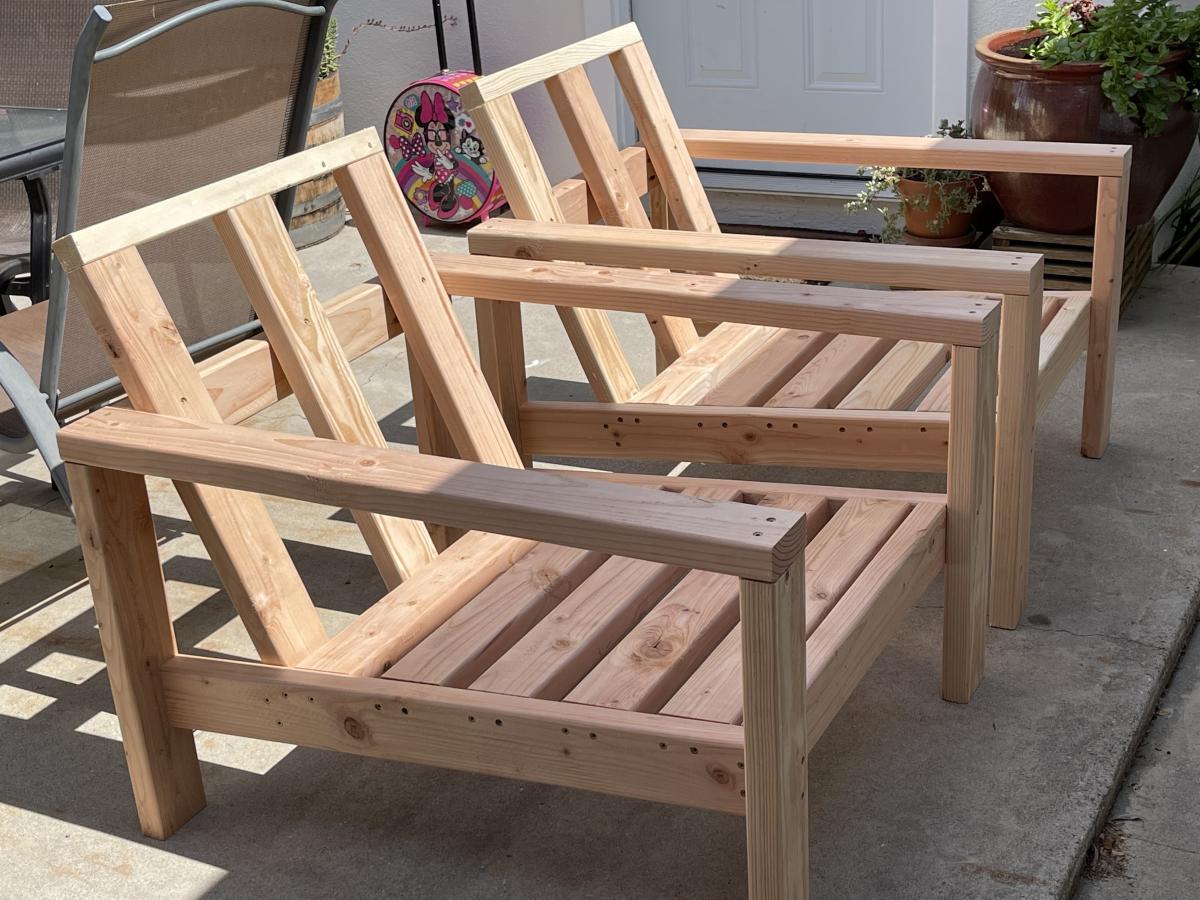
We love the new chairs on the front patio! My daughter and son in law's FIRST project! They completed both chairs in 1 day. We did add an additional 4x4 on the bottom to raise them as my son in law is tall. They sanded and stained them black to go with the gray brick and black door of their home. We picked up the cushions at "At Home" on clearance. Just need a new carpet and we're all set! On to our next project!
