Washer/Dryer Pedestal

I changed up the plan by making 3 pedestals, adding drawer slides and creating flute work on the pedestals.

I changed up the plan by making 3 pedestals, adding drawer slides and creating flute work on the pedestals.
I built this cabinet as a Christmas present for my mom, but life got in the way and I just got around to finishing it this week. It didn't helo that I was just learning my way around a Kreg Jig when I started this project. I used 1x12 dimensional lumber from lowes, and went with the cheap stuff. Looking back I would have just splurged on purebond 3/4" plywood because the boarda would have been smoother but at the time I didn't have my rip cut saw attachment. Instead of the euro secretary hinges I used short pieces of chain attached with eye screws for the drop down door, and I like the look and ease of the rustic black hinges versus the euro style for the doors.
This was my first ever attempt at making something real out of wood. I've only made some really basic floating coat hangars and docorative rustic pieces to set around peoples houses and a spice rack. I really wanted more of a challenge and this was a perfect place to start. I had to purchase the Kreg Jig and a couple of large clamps but once I got the hang of drilling and filling pocket holes it was smooth sailing.
The Mrs then finished it off with some lovely rustic baskets and a serving tray with all the latest Southern Living magazines.
I made these for my BFF to sit outside by her alpacas...
She loves them!
We've been looking for some saddle back stools for quite a while that would fit snug under our kitchen island. I couldn't find any, so I checked Ana-White and found the perfect building plan. I used scraps to build two matching stools and so I altered the plans to fit what I had. Other then the dimensions being different, I also used a 2x12" piece of wood cut down to 9x15" for the stool top.
I've documented the process as best as I could at; http://www.tommyandellie.com/Site/Home/Entries/2011/6/13_More_Seating_f…
Thu, 06/30/2011 - 04:50
I skipped a step that I might redo. I'd recommend taking some wood filler and spreading over the knots and imperfections before painting it. Sand it down, smooth it out, and it'll be Looking flawless.
Thu, 07/07/2011 - 15:02
I've been looking for some stools like this, so I followed your lead and just finished making some. Thanks so much for sharing!
We adapted these plans to build our tree house, I hope it's not too much of a stretch for brag posts! Every kid seems to have two wishes: a fort or tree house and a secret passage way. Or is it just my kids? Turns out we live in the desert and trees are hard to come by. Our solution? Build a tree house in the house. Why not!? Our magic tree house is well used and well loved. This is one of those projects that simmered and in my mind trying to think of the perfect way to build the thing. The stuff our parents built and played in was a hodge podge of left over wood and their own creations, crooked construction and messy paint. So, I set the perfect aside and dove in. The only things our tree house really needs to be is safe and fun. Most families try to find indoor activities for the winter, but in the desert it is so blazing hot we need indoor retreats in the summer. This tree house is the solution a gagillion times over! Thank you Ana!
Sun, 08/18/2013 - 21:32
Thank you! I just was elevated to cool mom and i love it :)
I worked with a local charity group in my area as well as Home Depot, who donated the wood to make a set of bunk beds for a family in need who all shared a room. It was great to help them out and the kiddos were super stoaked to have bunk beds and something special they could call their own!
Here are two table pedestal bases I made for a friend. These are made from standard 2x8s (I could have used 2x6s, but I wanted enough extra to cut off the rounded corners), 1x6s and 1x3s.
More pictures are available on our blog here: http://famousartisan.com/hand-made-table-pedestal-bases/
My first build! I tore apart two old pallets to get the surface boards for the table. The skirting is 1 x 6's from the hardware store. I need larger casters but am saving up for the real vintage ones.
Tue, 06/28/2011 - 02:26
You need to post what you come up with. Plus how did you get you photo on my comment posts?
Tue, 08/07/2012 - 00:05
My daughter cleaned her room so instead of renting a dumpster I hauled it to the dump i mean"land fill". Anyway instead of coming back the normal route they detoured us around the dump and I found the mother load of pallets. You could ask and they will be free if your "land fill" is like mine...
Tue, 06/28/2011 - 01:32
I worked at a candy factory that received several pallets all day long and I loved the ones that had writing on them, like Ghirardelli (a chocolate company), Blommer (chocolate manufacturer) and a few others! I've picked up a few and have made picture frames and shelving from some.
Tue, 11/01/2011 - 10:24
I took some pallets from the pumpkin patch last week, with the dream of making something similar!! I want mine a little taller so I am going to attempt a shelf or something, I have had my casters for weeks and was psyched to find the free pallets! Great Job!
Tue, 11/01/2011 - 10:24
I took some pallets from the pumpkin patch last week, with the dream of making something similar!! I want mine a little taller so I am going to attempt a shelf or something, I have had my casters for weeks and was psyched to find the free pallets! Great Job!
Thu, 04/05/2012 - 06:49
Love your site and the fact that you share so much info for Diy's. Where is the best place to get the caster wheels? Vintage are sooo expensive so I got to believe that they are out there new with the idea in mind to antique them..
Thanks for all that you posted and shared..
In reply to Caster Wheels? by Queenie (not verified)
Sun, 04/15/2012 - 12:03
The two best sources I've found for cart wheels are Menards and Harbor Freight. I think you can order them from Rockler or Lee Valley too, but I know that the two physical stores have a good selection and the prices are reasonable.
Mon, 04/23/2012 - 13:38
I love it! I've been searching for one to buy but might try to make my own now I've seen yours....and definitely more satisfying when you've build something yourself from scratch. Fab job.
Fri, 05/25/2012 - 23:21
With lots of wonderful options of North Experience Jakcets Outlet, you will be ready for all seasons and all sorts of climate conditions.Obtainable in only about every single shade from pink to orange, sky blue to lime green, this slim coat undoubtedly delivers a bit a thing for everyone.Hat, the particular size can influence the actual degree involving in shape.Karen Millen Dresses Neck marriage ceremony this year set off the rate of growth in retro type with the appeal of asymmetric solitary glenohumeral joint wedding ceremony attracts everybody's consideration, once again going back to fashion trends.Within the cold of winter,it truly is essential to have the protection from North Encounter Jackets.They even touched the actual He Damon the particular Hollywood celebrity.
Thu, 07/19/2012 - 22:23
"That’s is so impressive; I am very pleased by this post. Complete information on this post!!! I really like it"
Thu, 07/19/2012 - 22:25
"That’s is so impressive; I am very pleased by this post. Complete information on this post!!! I really like it"
Fri, 08/31/2012 - 12:15
I want something like this only I might make it taller. Also you can search Goodwill for antiquish castor wheels! Good job!
This is the second farmhouse table that we have built but we modified it to fit the needs of our "clients" (my parents). This was a gift for my dad made to be an outdoor prep table/kitchen island. This was the project that would NEVER END! We built it originally and decided that it was just too tall. So, we shortened the legs, put it back together, finished it, loaded it and then SMASH! the darn thing flew out of the back of our truck! So we re-pocket holed, did our best to fix the table top and put it back together once again. We built this thing 3 times! But now it is happily home on my parent's patio and enjoying its new life.
Finish: Driftwood stain, lime wax, miniwax finishing paste wax.
Cost: $15 Most everything was scrap we only had to buy a 2x4 and a 4x4 for the legs.
Cushions are from Pier 1; Seat 25" by 25" by 4"; Back cushions 25" by 18". You can't make your own for less than end-of-season sale prices. Trust me, I tried. Foam is expensive.
About the plans: I did add a second back support because I turned the slat flat for a more comfortable back seat.
Princess loft bed
Two seater couch inspired by your web site . I have altered the design a little and added an ottoman . Built from Australian Eucalypt . Nicknamed Blackbutt Gum . It’s a hardwood but finishes very nice , sanded with 240 grit , varnished with marine grade diluted 10% with turps . Look forward to your weekly plans they inspire me to build projects and give me lots of ideas .
by Richard
Northland
New Zealand
This was a fun, easy and inexpensive project. Ana's instructions are very easy to follow. I modified her plan, only slightly, by adding 1X6 to the arms of the chairs, as well, I added a 1X2 cap to the top back of the chair. I also built four (4) accent tables (not stained yet) and a bench. Now I have a great set of outdoor furniture for my deck!
I built this for my daughters 3rd birthday. Because my wife works weekends i was only able to spare a few hours a day Monday-Friday. And because i did it in summer under the Texas heat it took longer than i would have liked. The flowers and birds came from Hobby Lobby. My daughter flipped out when she opened her room and saw it, as a father I've never felt prouder than to build this with my own 2 hands just for her.
Such a worthwhile build. I had to adjust the angles for the center/ interior dividers since these sit behind the front board. That causes the angles to be different. I also used Luanne for the backing, installed locking wheels and handles.
Tue, 11/01/2016 - 20:12
Hello, I clicked the provided URL for the plans you adapted your build version from, but was wondering if you could include your plans. I prefer the look of yours versus the linked plans. I am assuming yours is one unit based on the handle placement and the fact that it is on wheels and am interested in how you accomplished this. Thanks so much!
Hi friends!
Jen Woodhouse here, super excited to share our latest DIY project with you - a Sliding Barn Door Loft Bed! We built this full-size loft bed for our 7-year-old daughter because we wanted to make the most of her small bedroom. And as an Army family, we move around every two years or so, so I drew up the plans so that the bed can be easily disassembled. We all love it so much and hope you do too! I'd love to see you build one for your kiddos (or yourself - no judgement!). Be sure to tag me @jenwoodhouse if you share photos of your build on social media!
And because some people have asked:
Get all the details and the plans on JenWoodhouse.com!
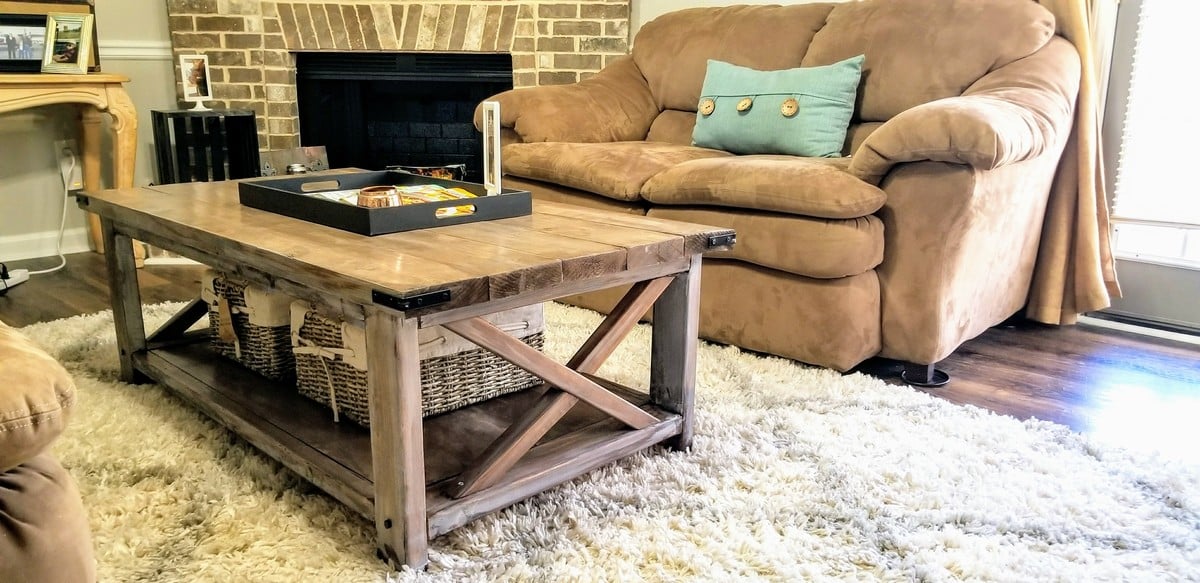
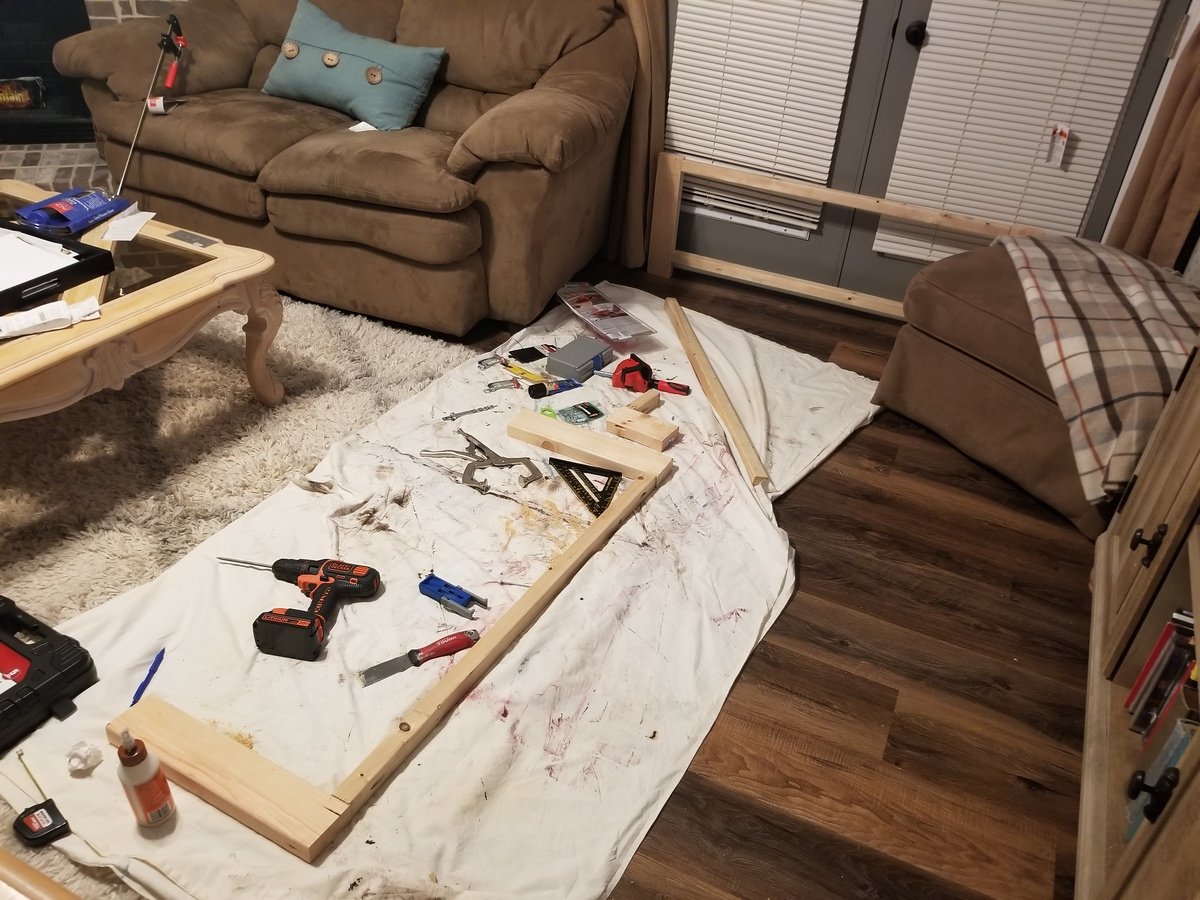
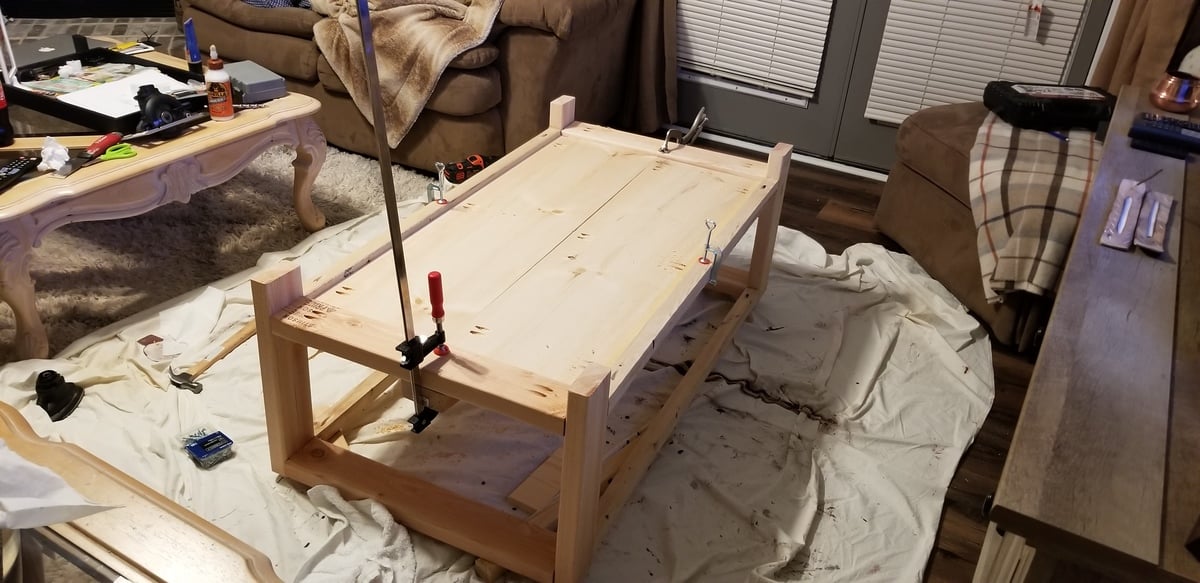
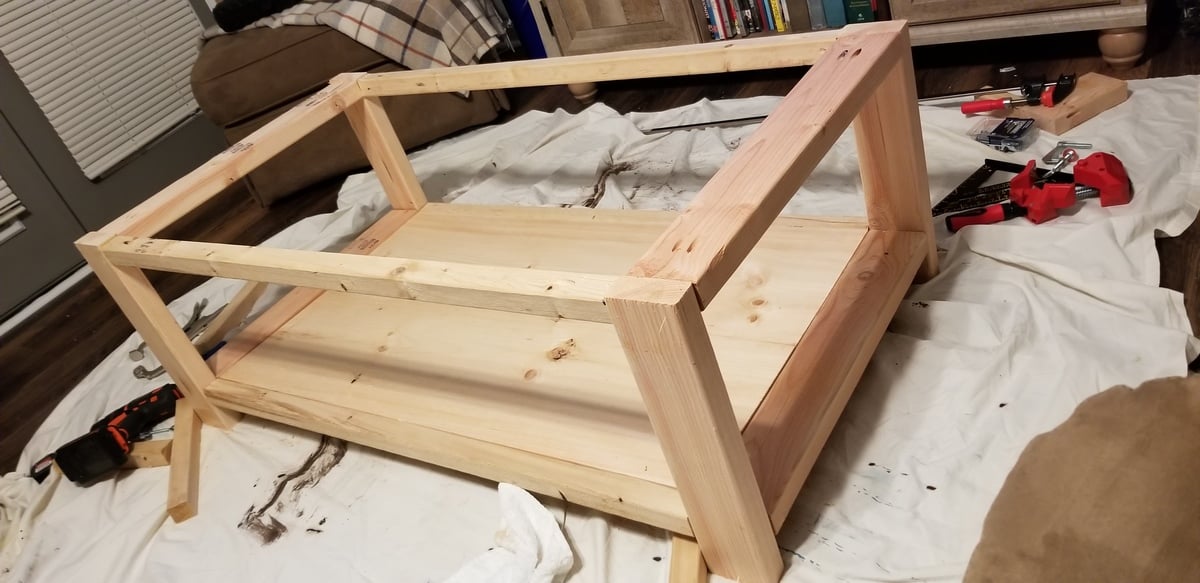
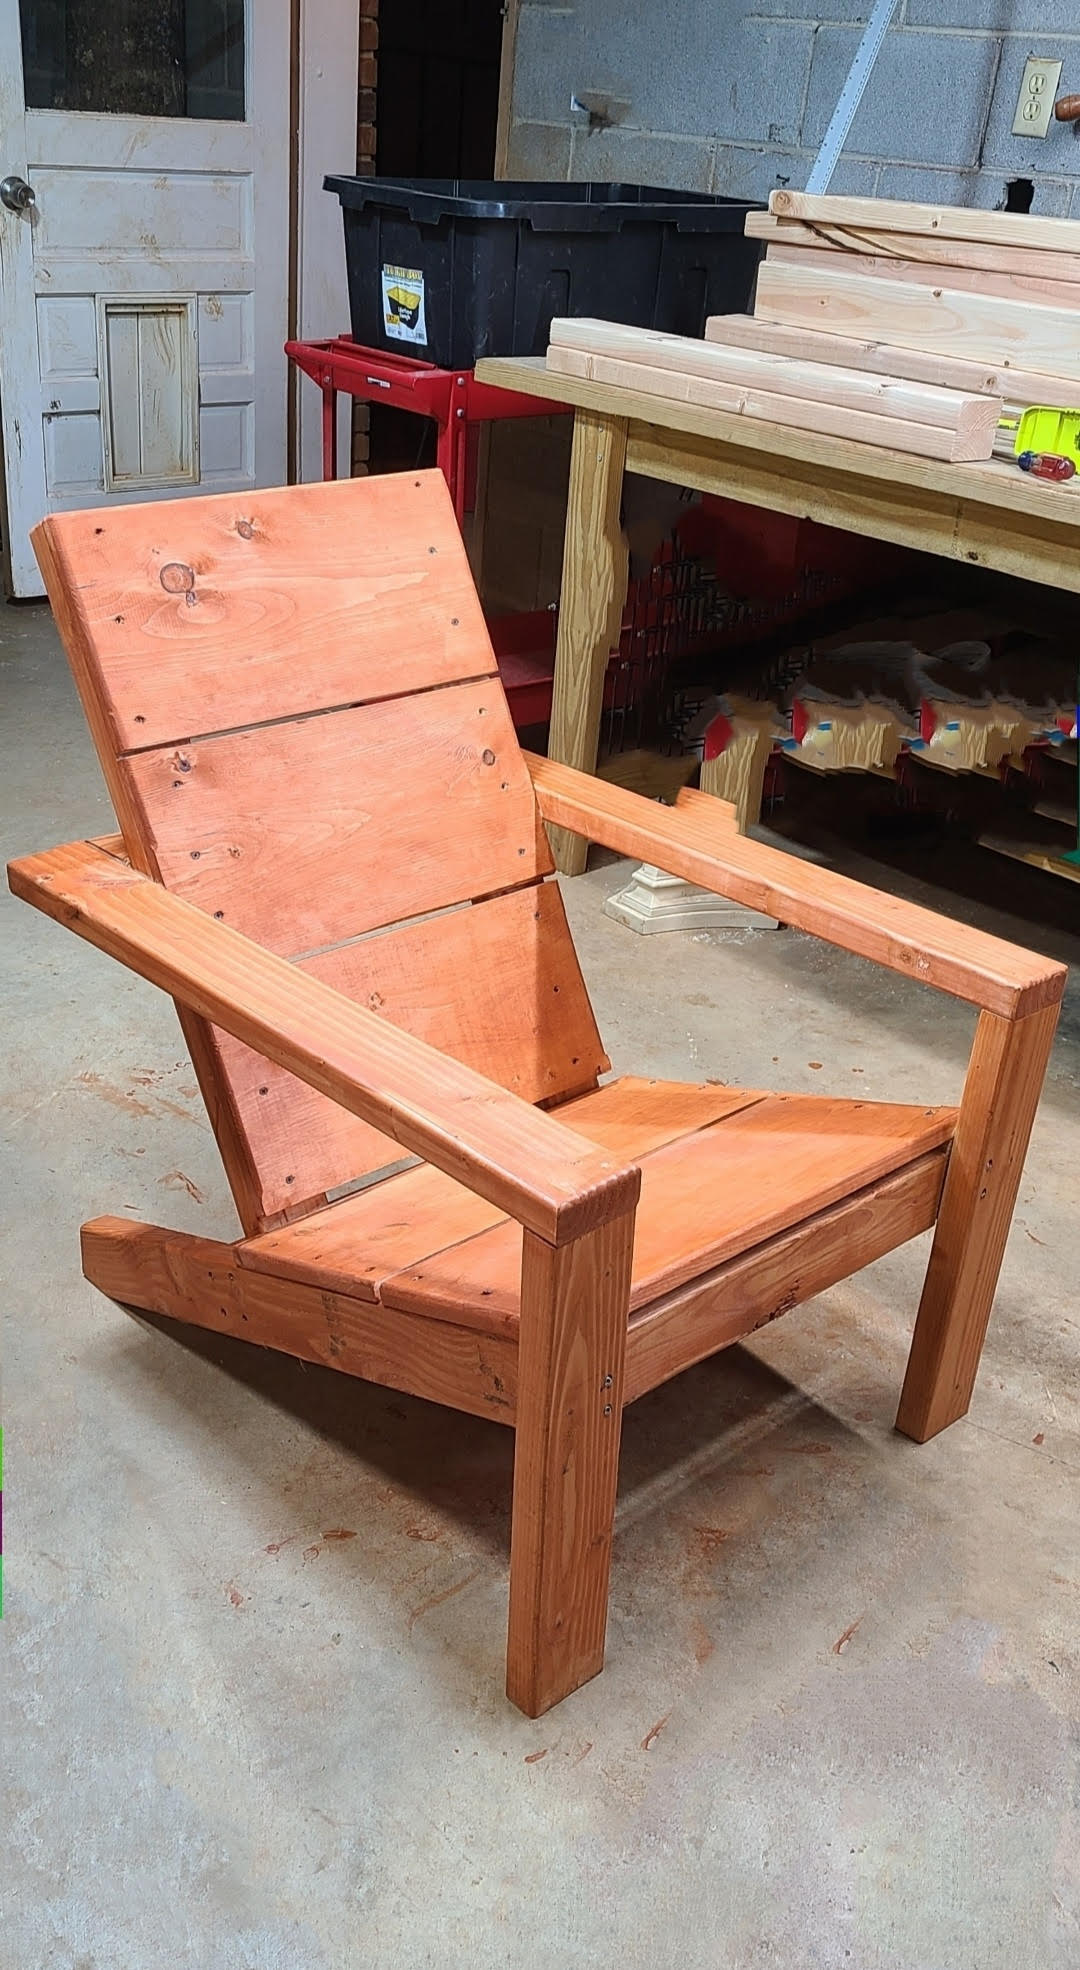
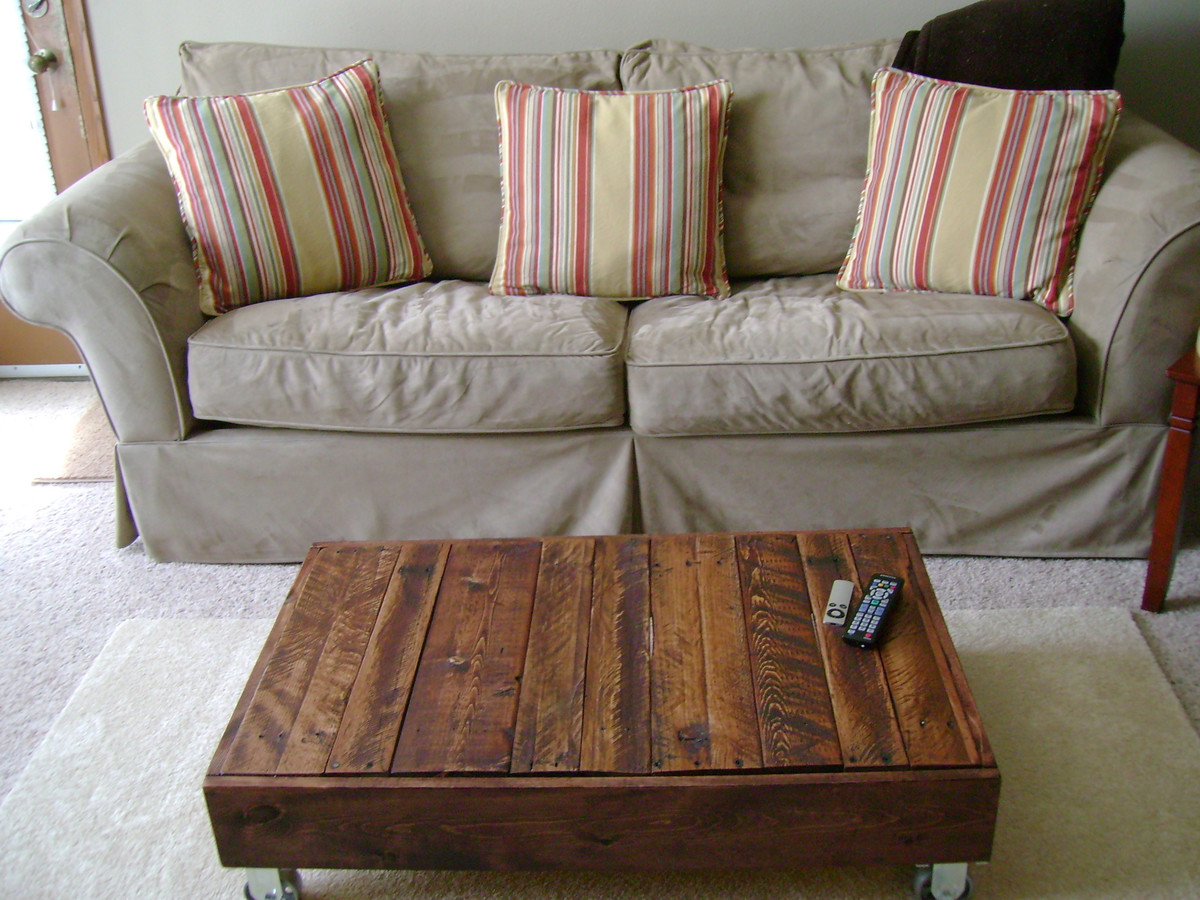
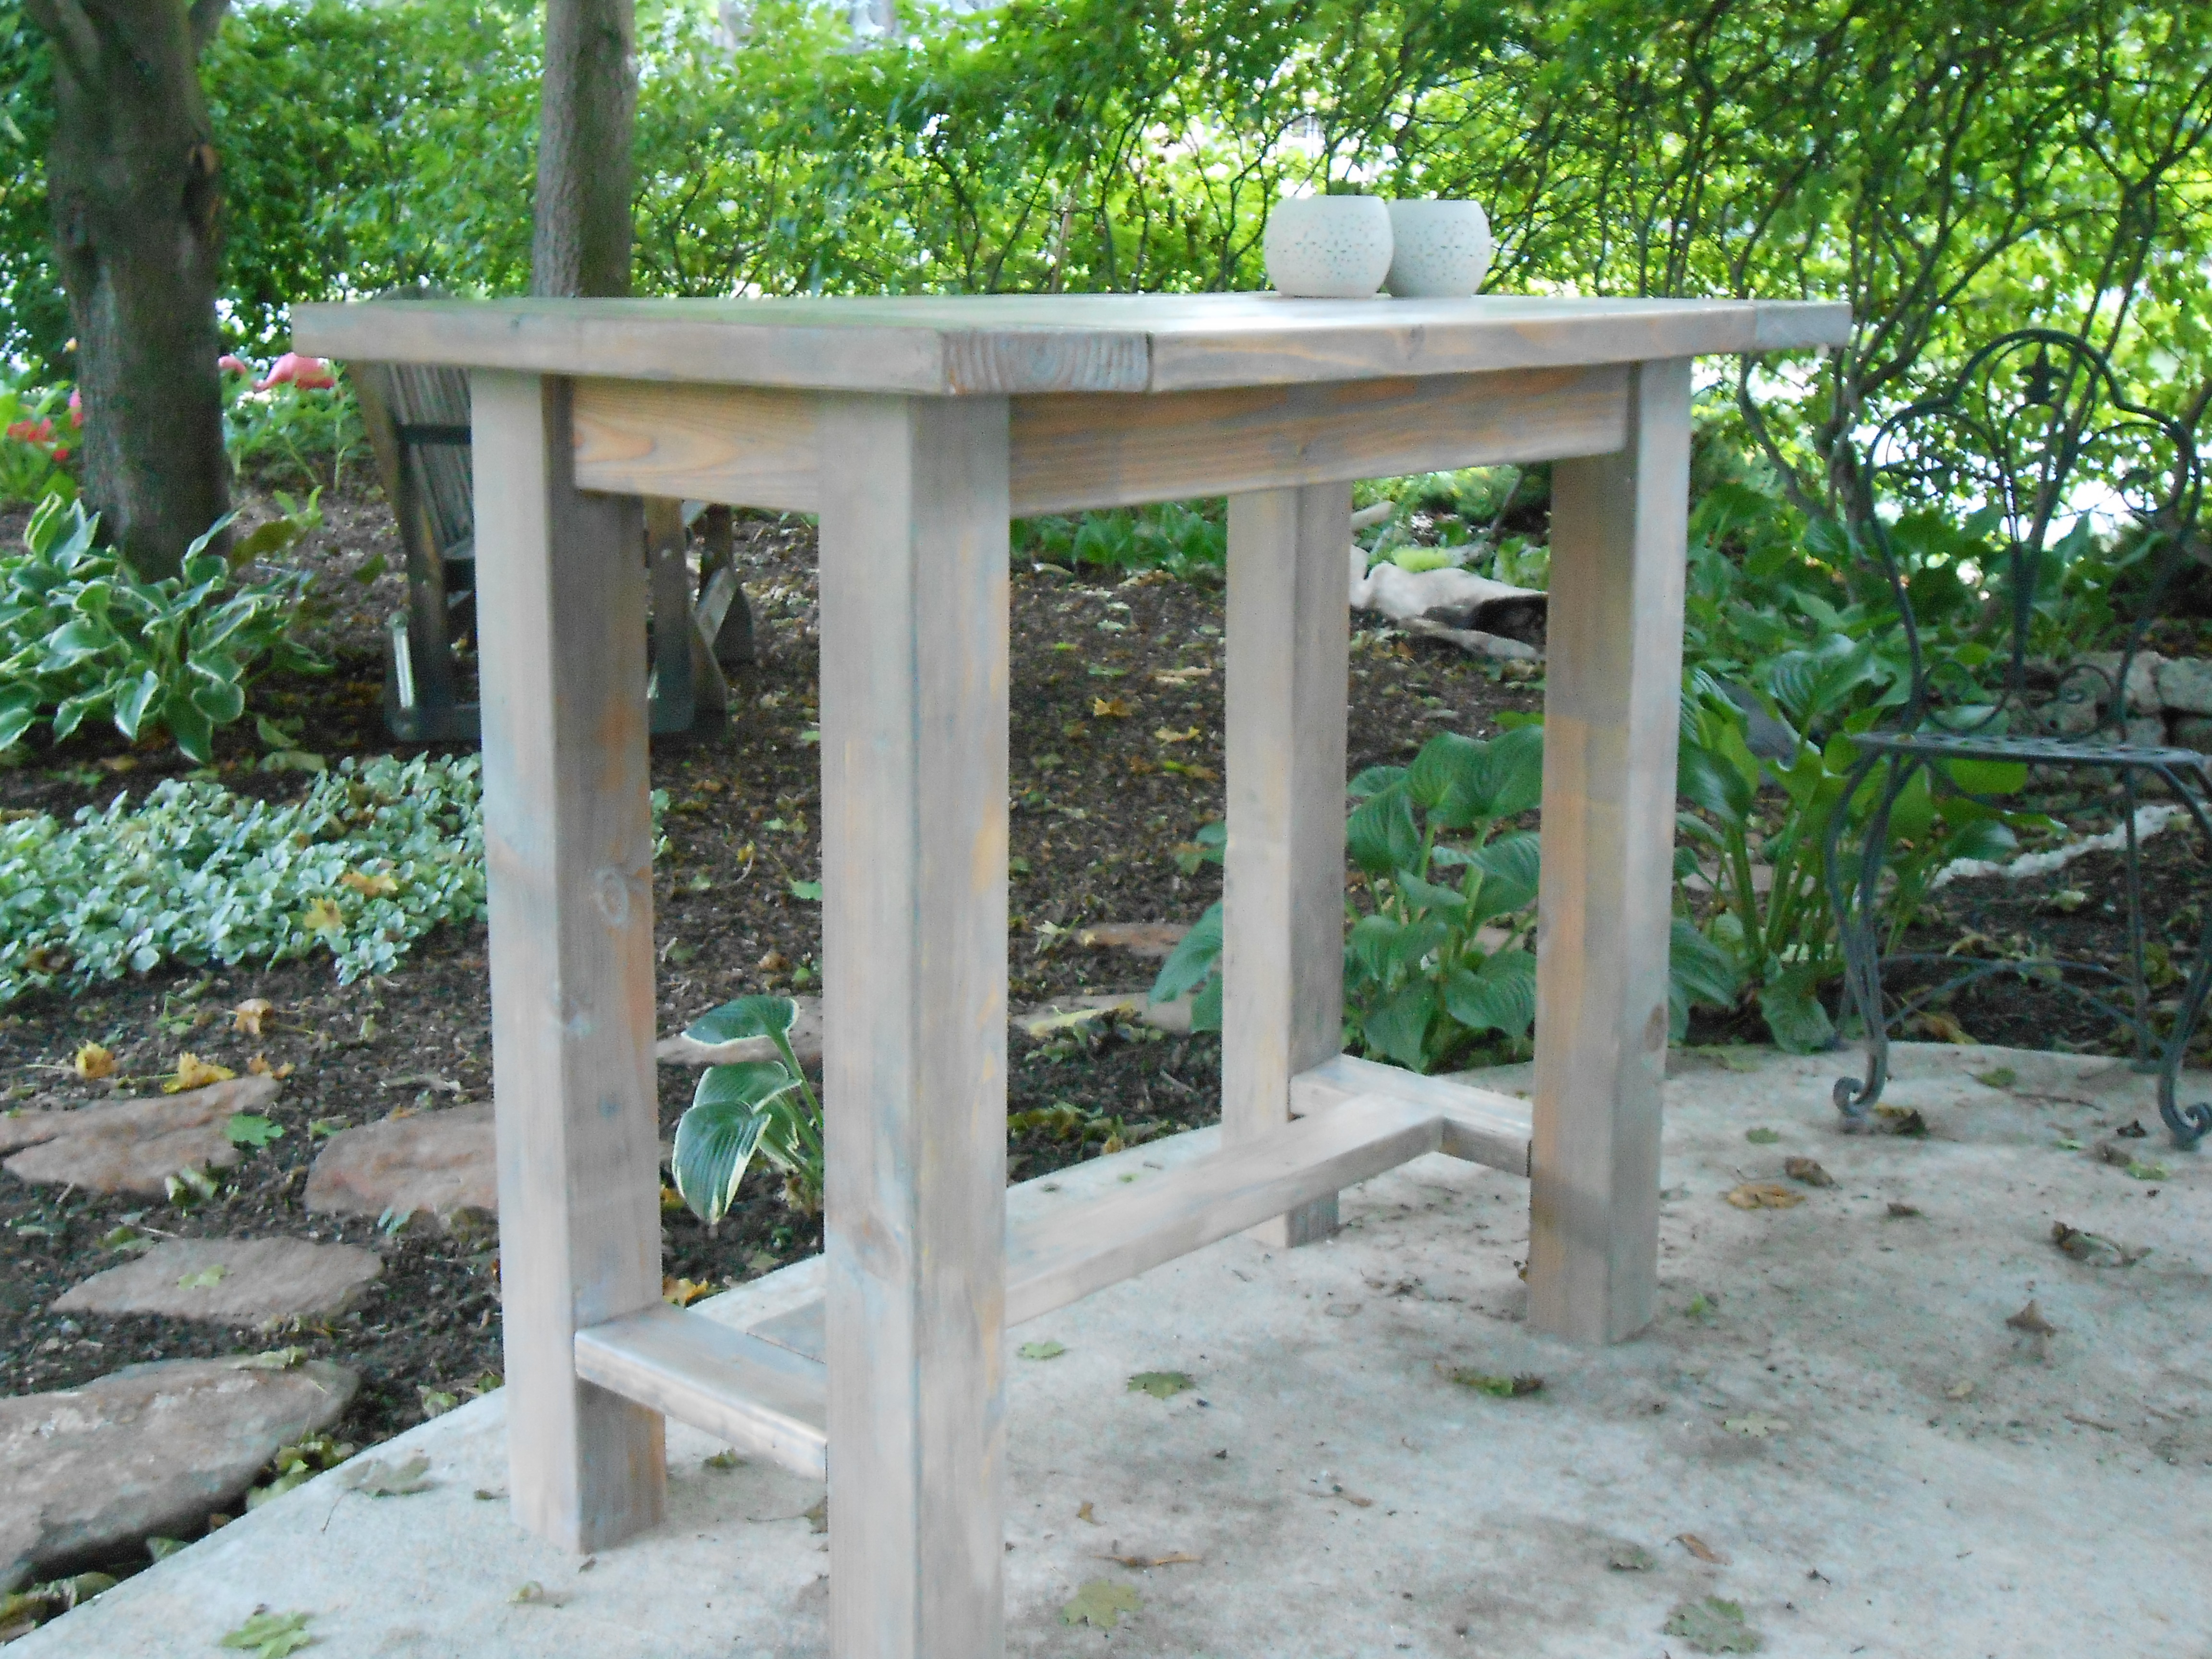
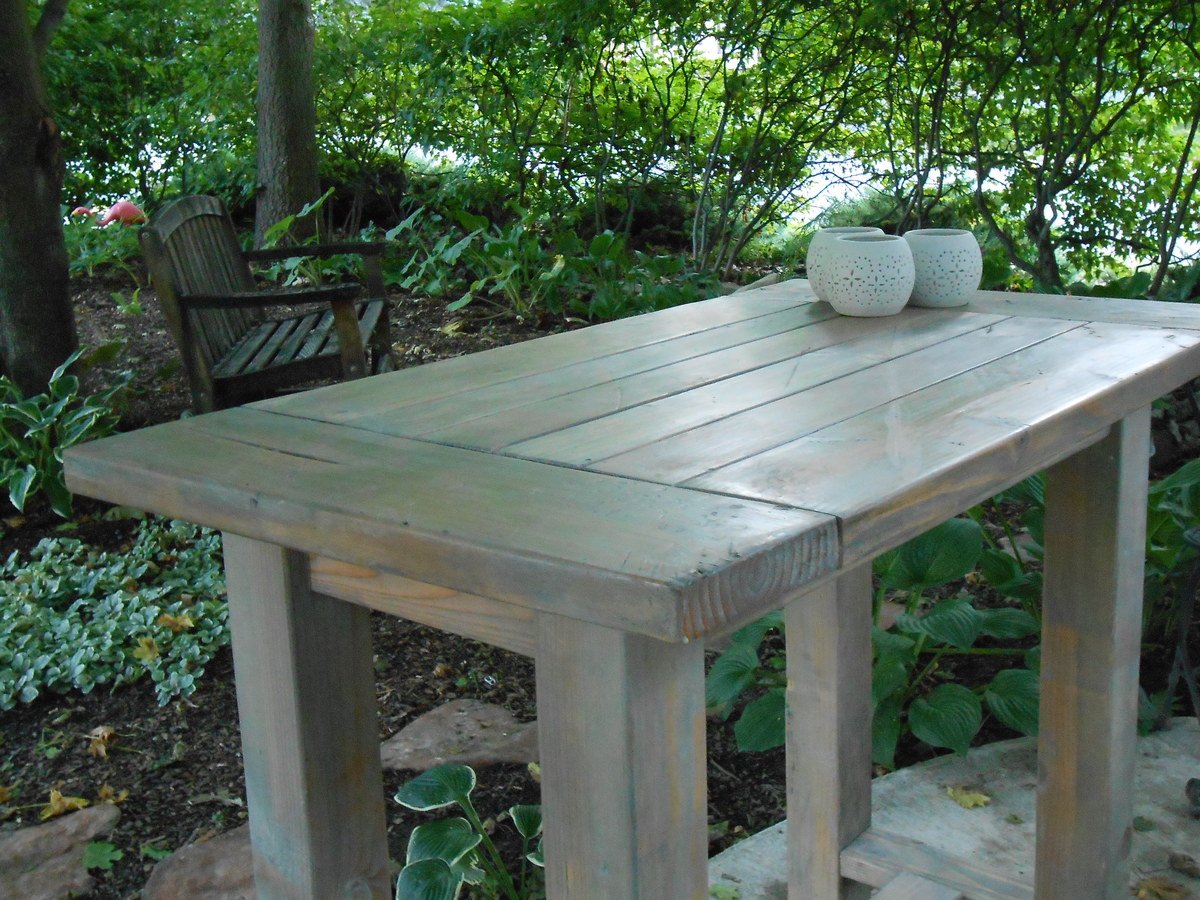
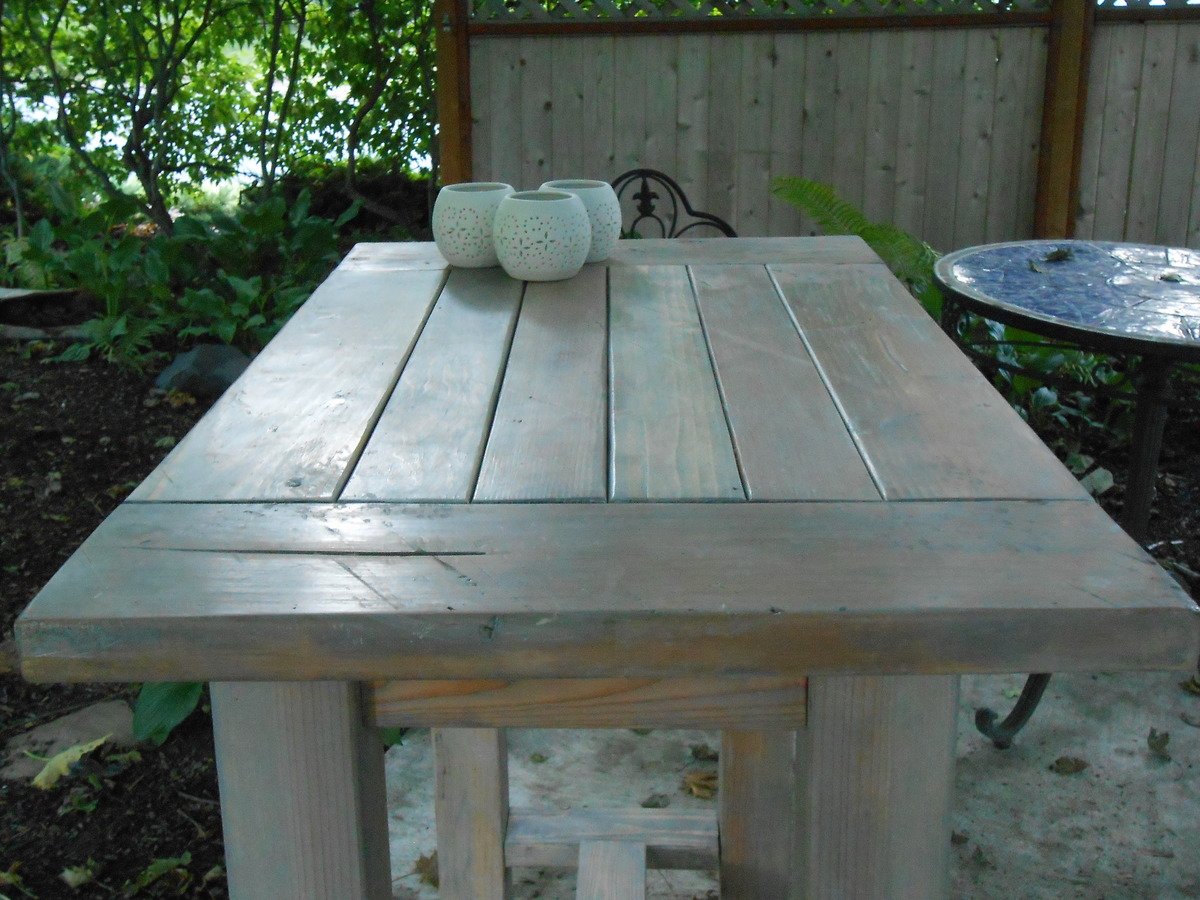
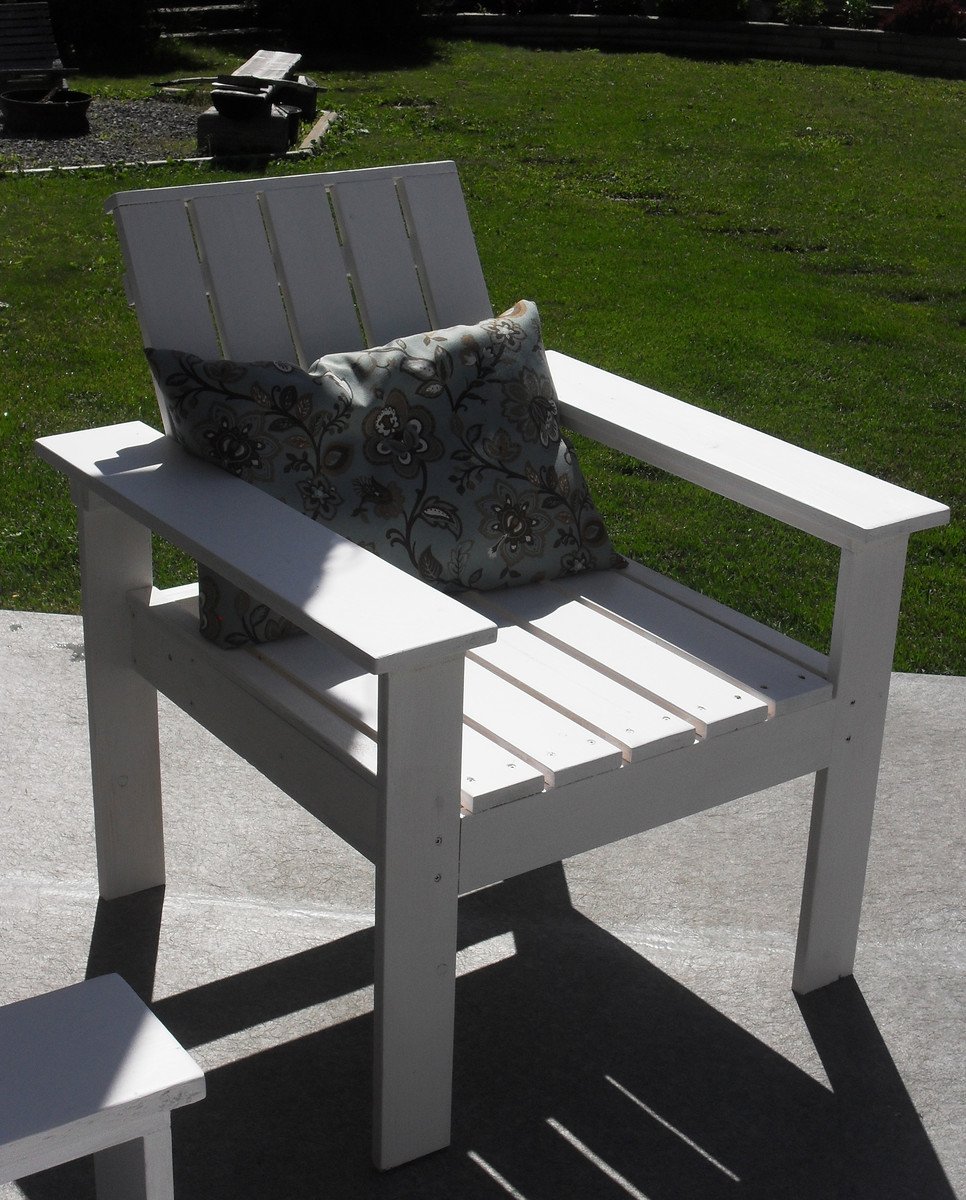
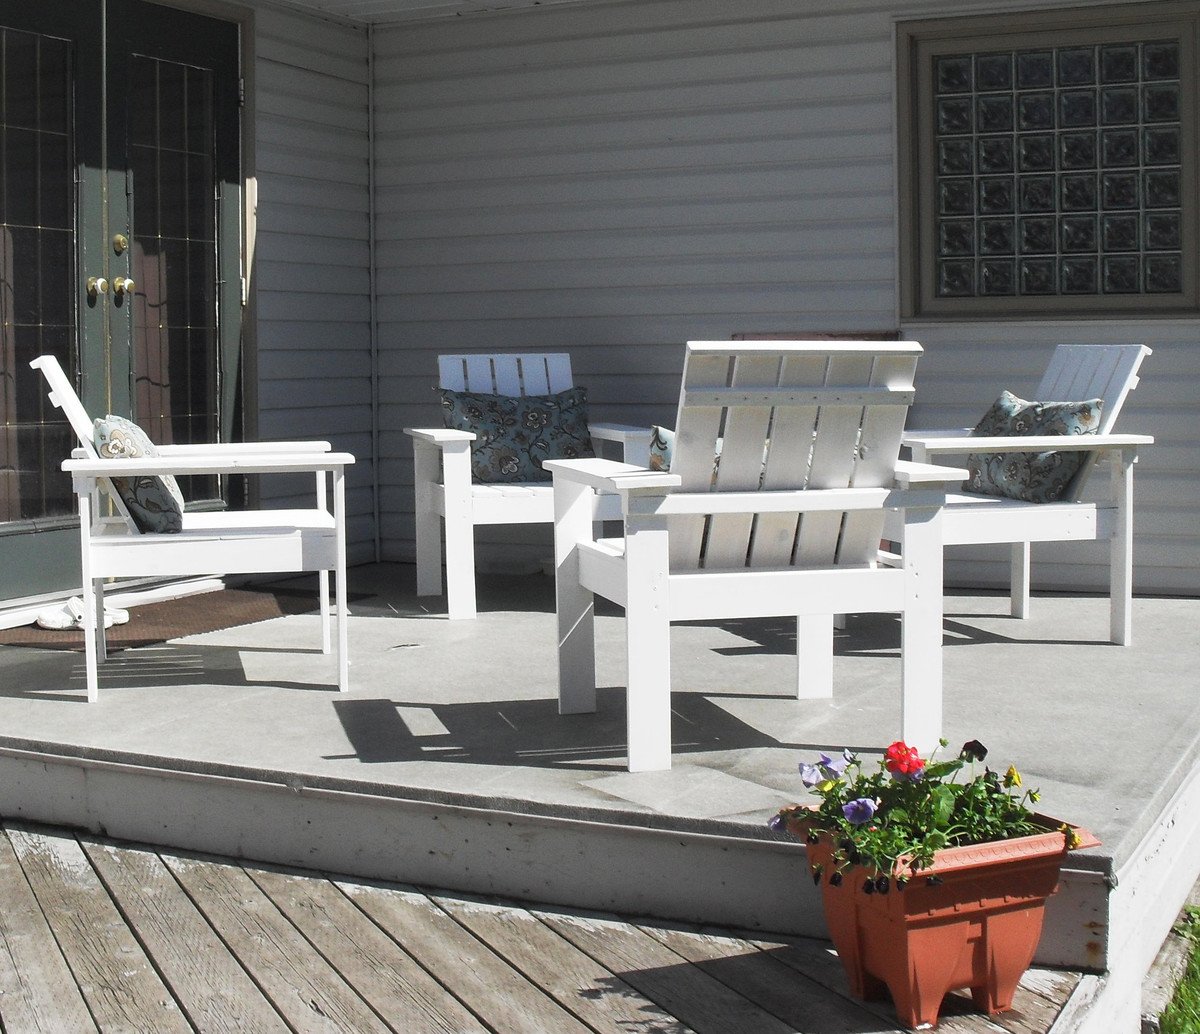
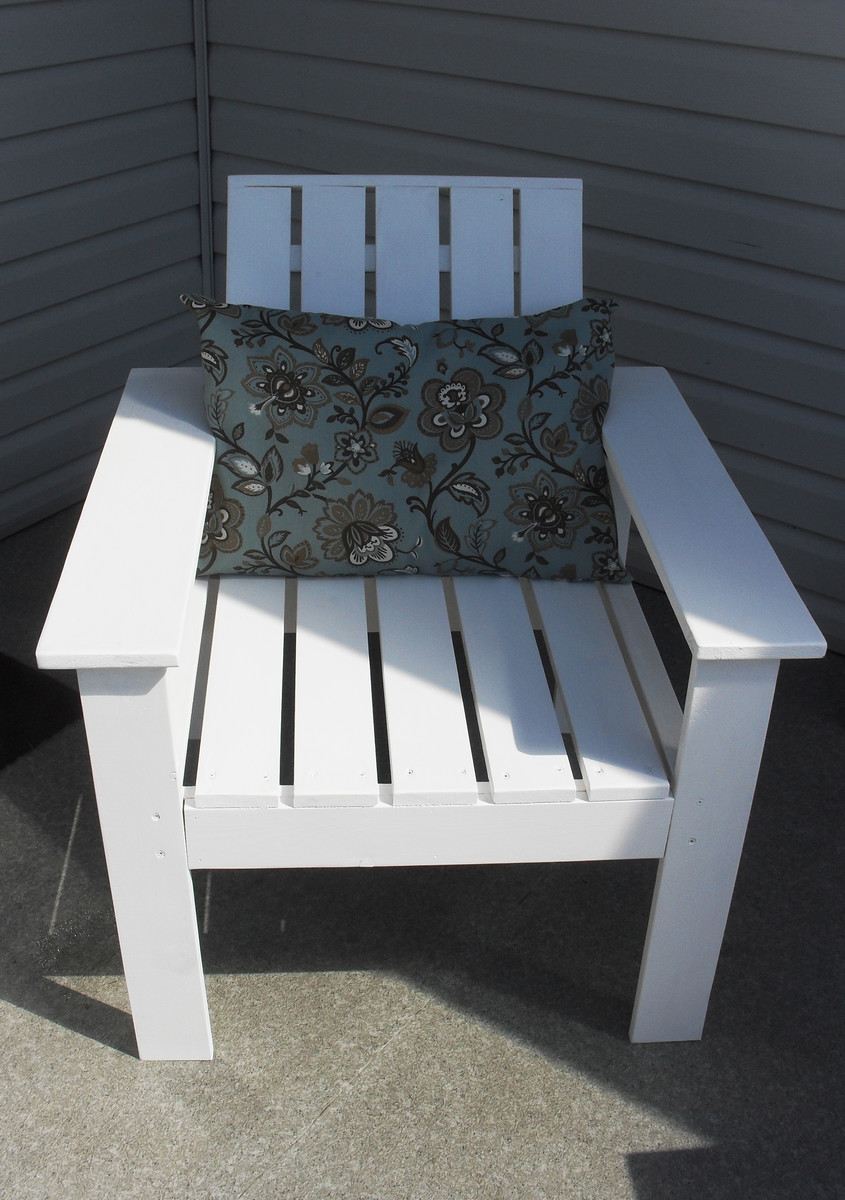
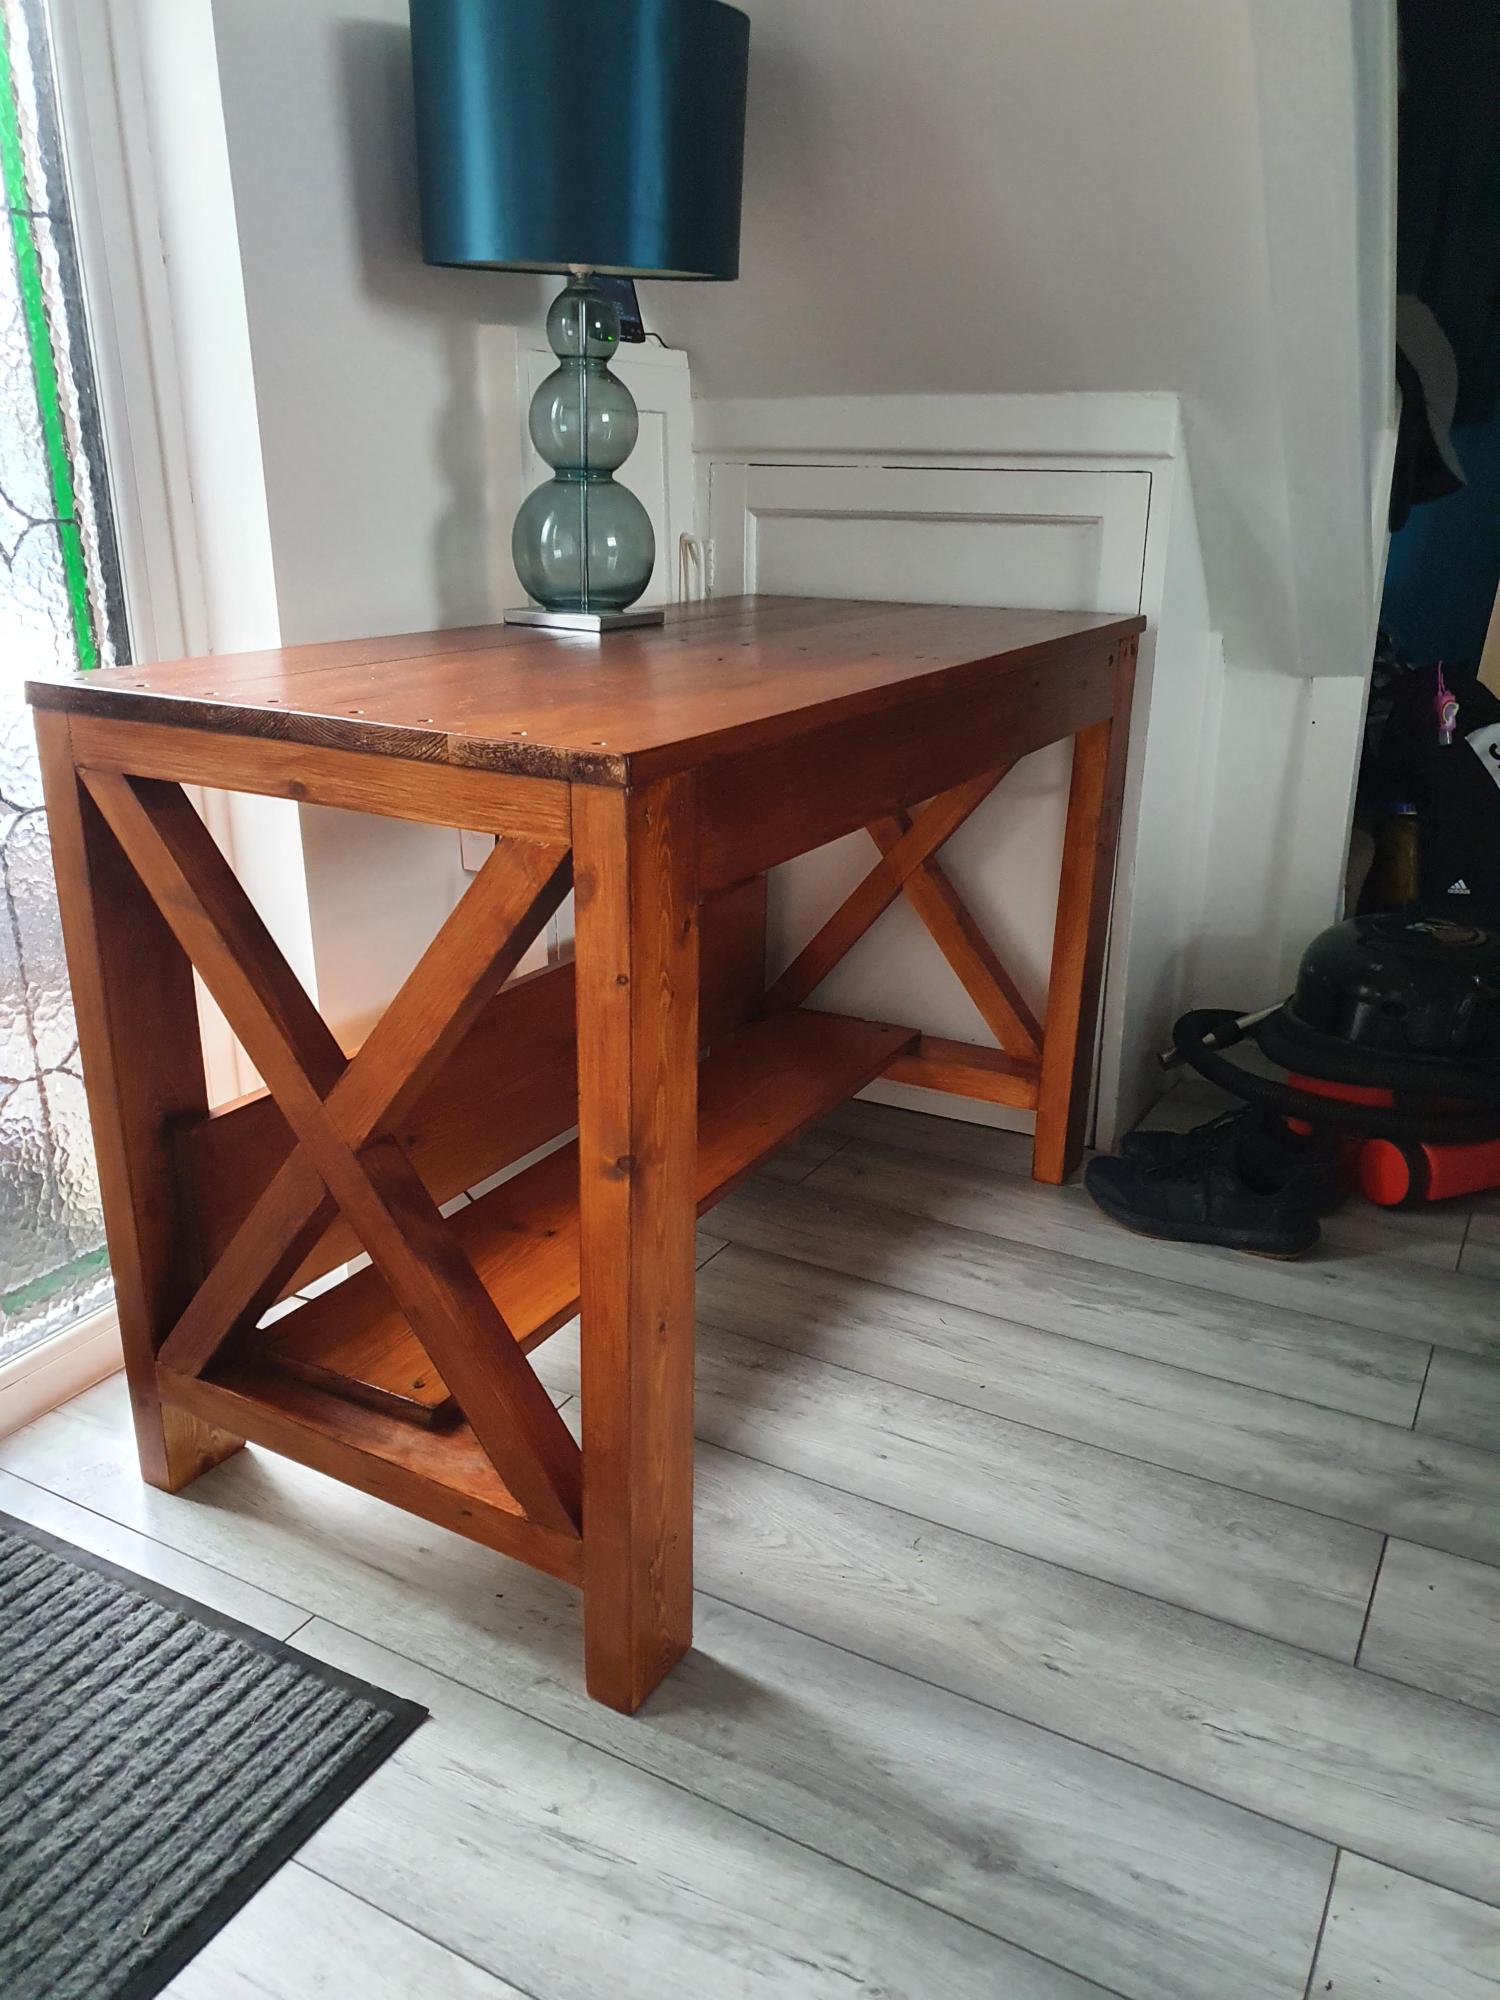
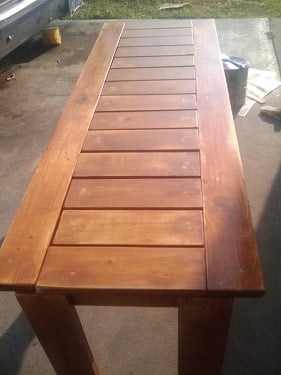
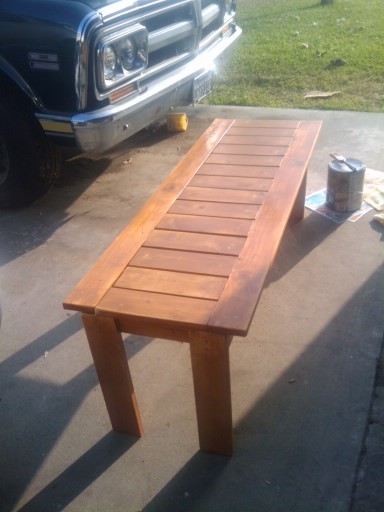
First Anna project, I needed a bench by the pool, so I did waterproof it, which is holding up well, and it's extremely nice even with my limited skills. Definately worth the time and sanding.
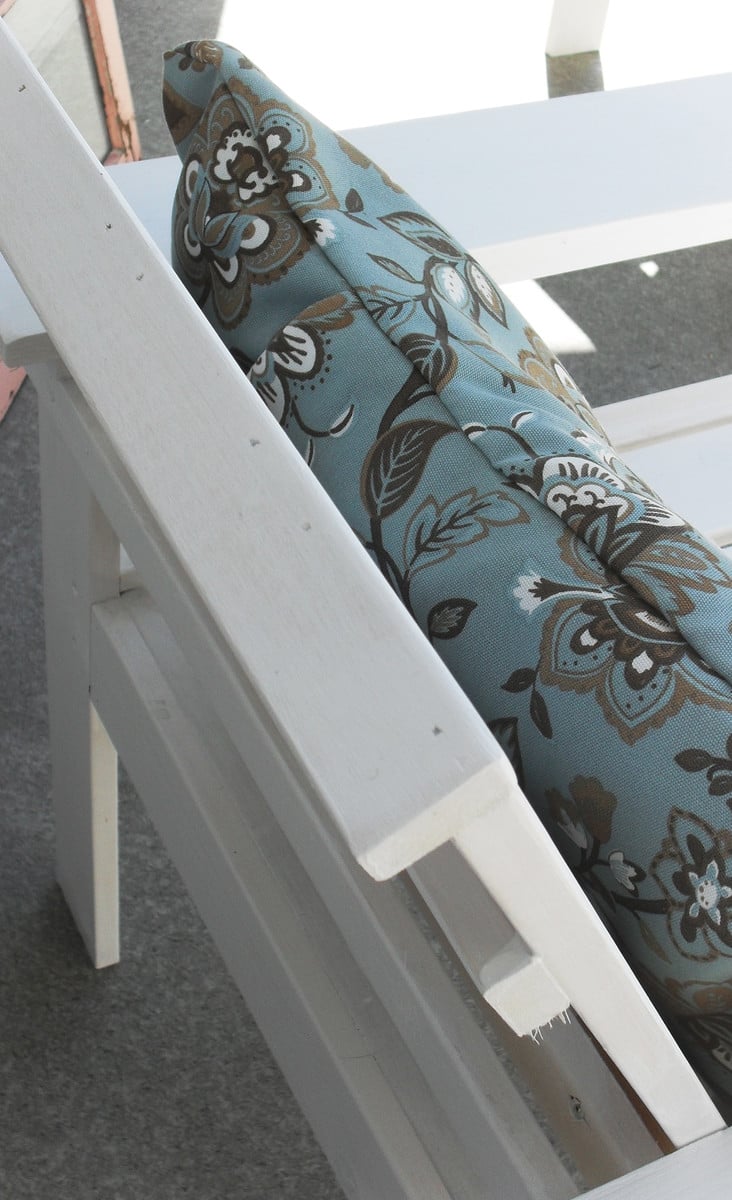
Things I learned, need to measure each cut out. I didn't, so my slats are not all the same length. Still works really good, but I should've measure, cut, measure, cut, because I didn't take into account the width of the blade. I wouldn't use so much wood filler. I really glopped it on there. The sanding and staining pre, good call.
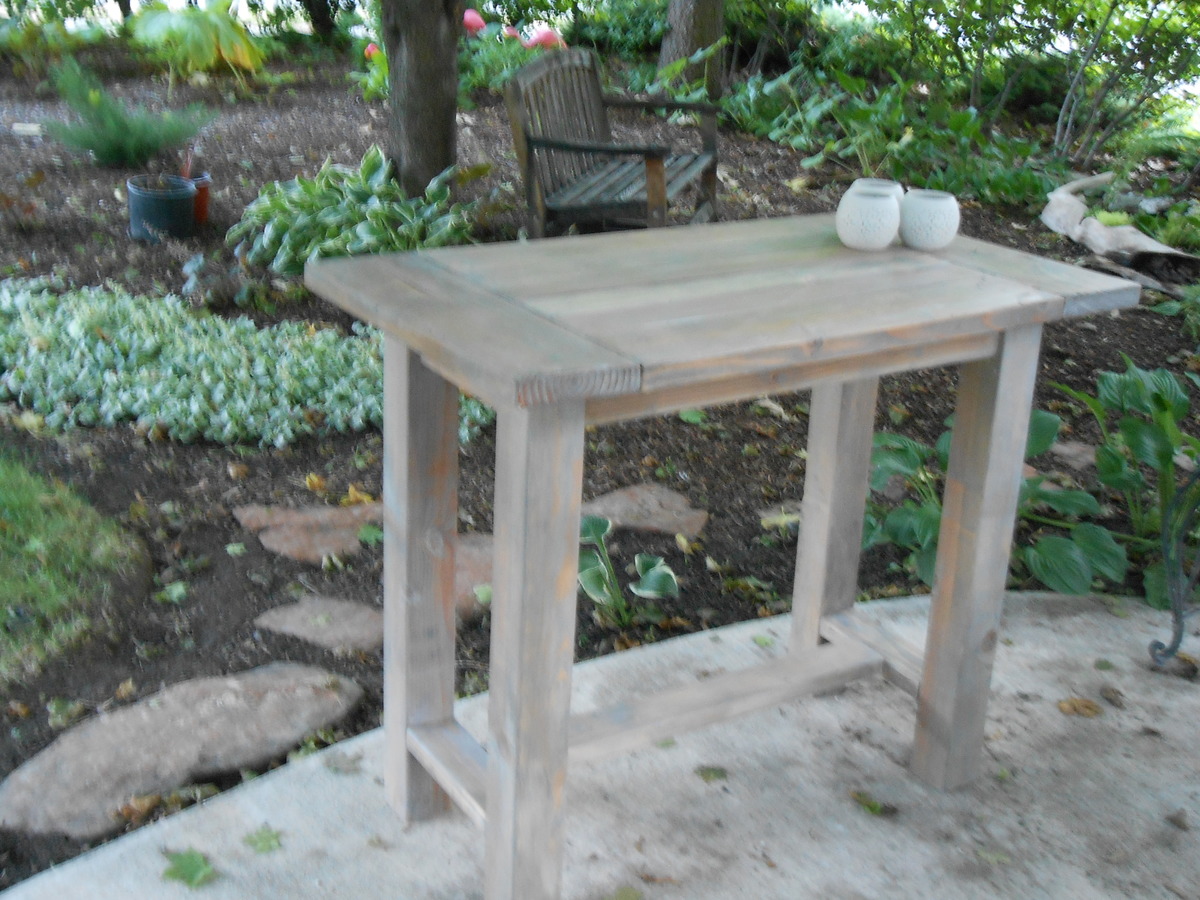
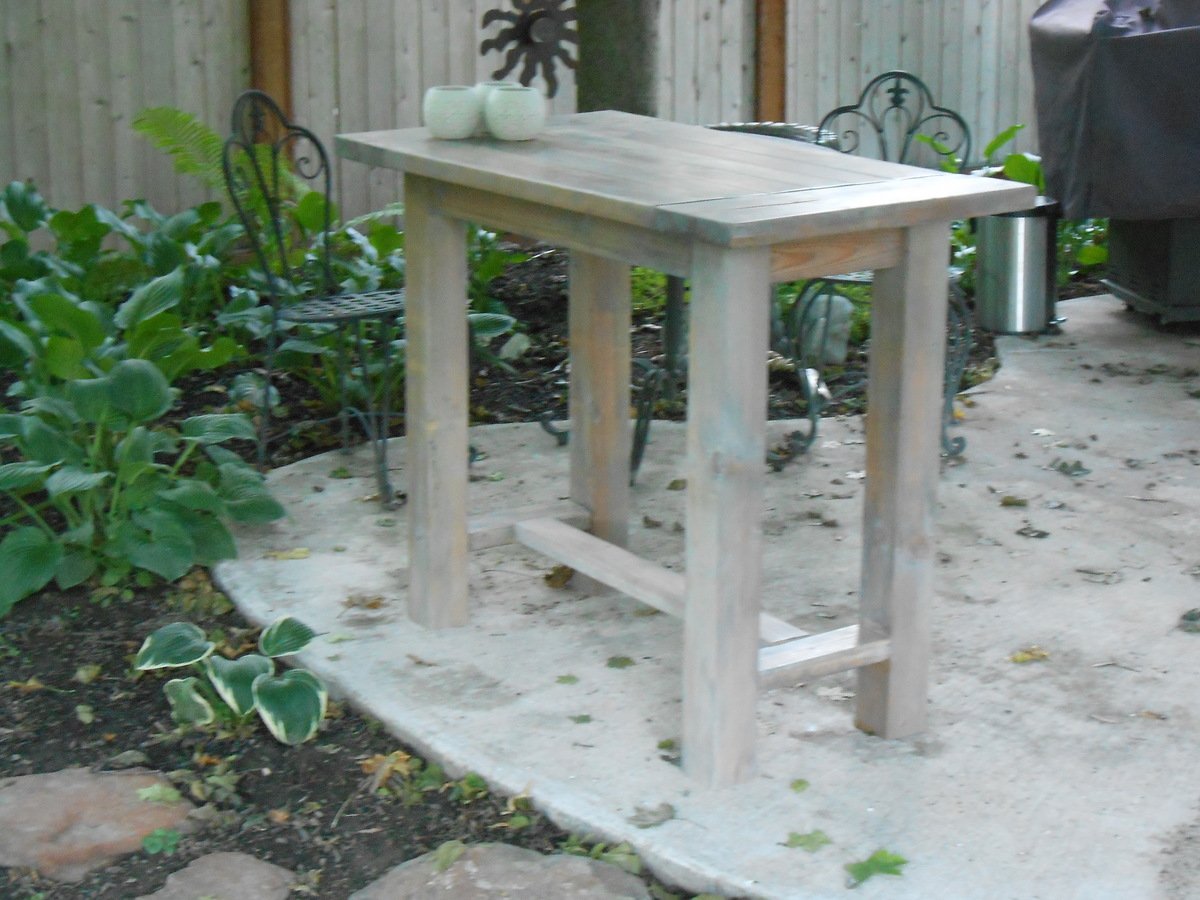
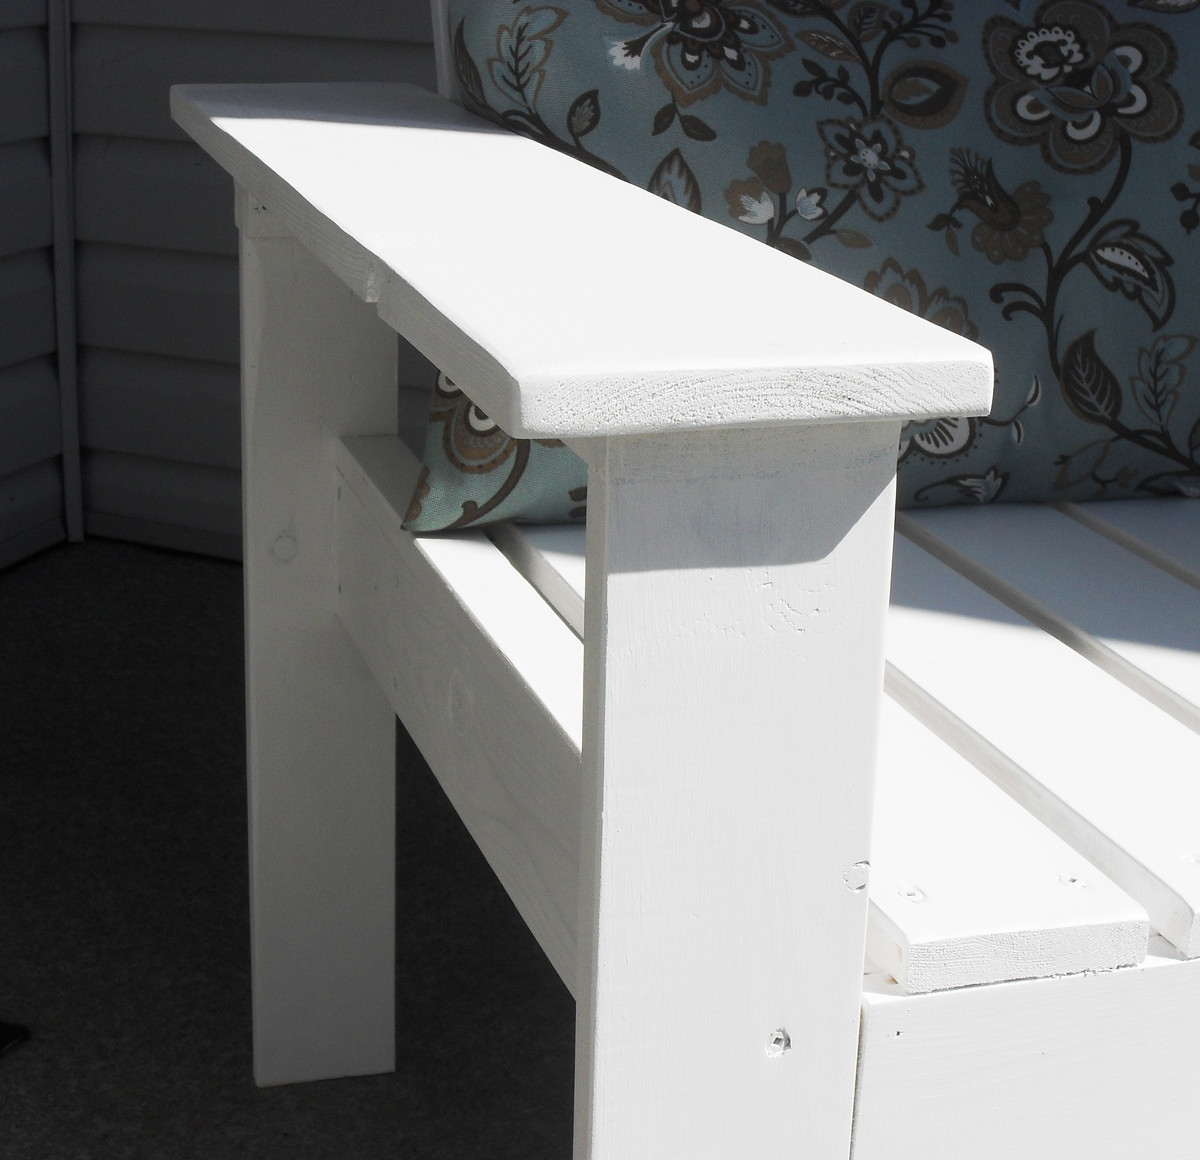
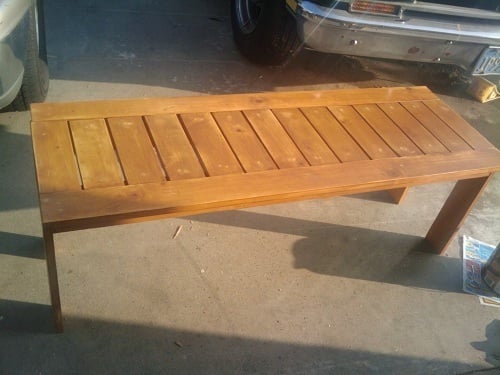
I would've used 2 pieces of wood for each leg.
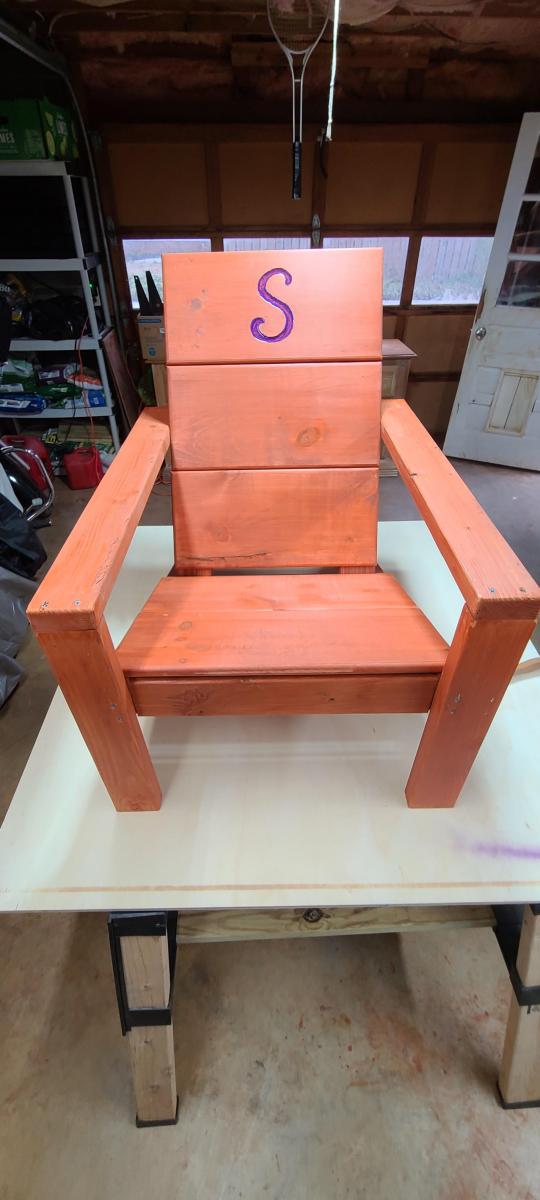
Well, next one. I've already learned so much from making it and had a great time making it. Can't wait to get started on the table to match!
Mon, 02/20/2012 - 11:11
Love this beginners bench! Saw this on pinterest...will be repinning for future reference! Amazing stuff on your blog!
Mon, 02/20/2012 - 11:12
Love this beginners bench! Saw this on pinterest...will be repinning for future reference! Amazing stuff on your blog!
Wed, 02/22/2012 - 23:37
Thanks! First thing I ever did. Teaches you a lot