Community Brag Posts

Outdoor Play Kitchen!
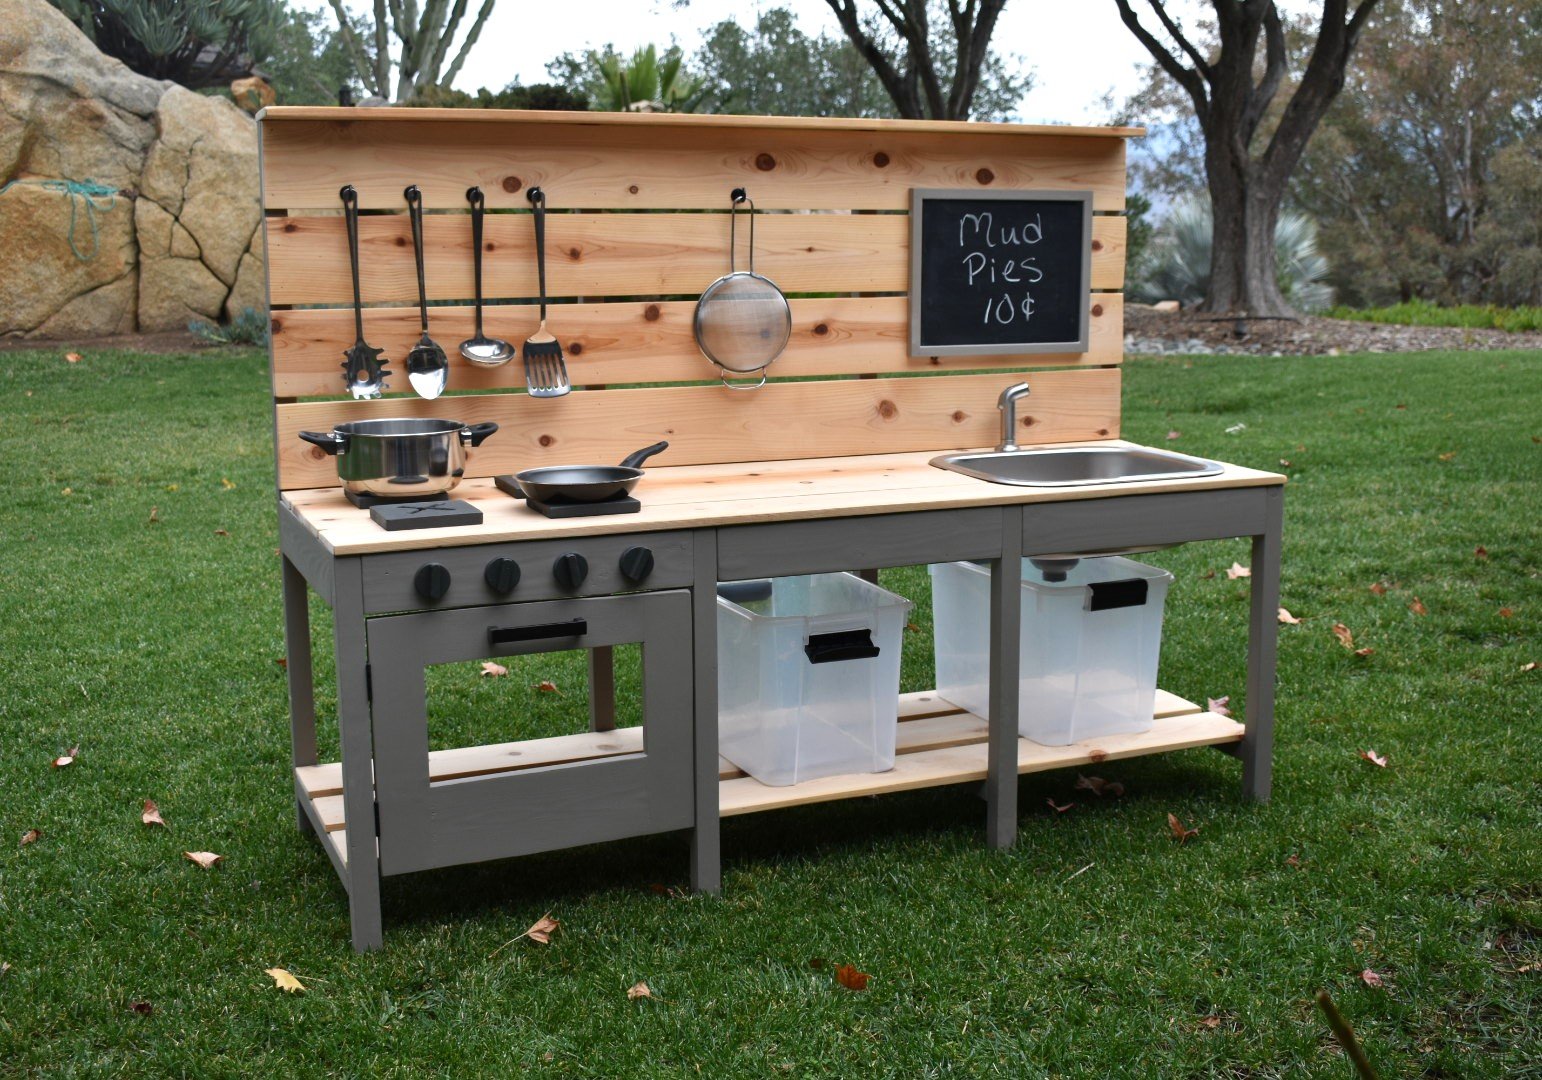
We modified Ana White’s excellent Mud Kitchen plans, adding a third section and scaling the whole thing slightly larger to be a better size for our 4 and 6 year old grand daughters. It was so much fun to make and accessorize!
Built from Plan(s)
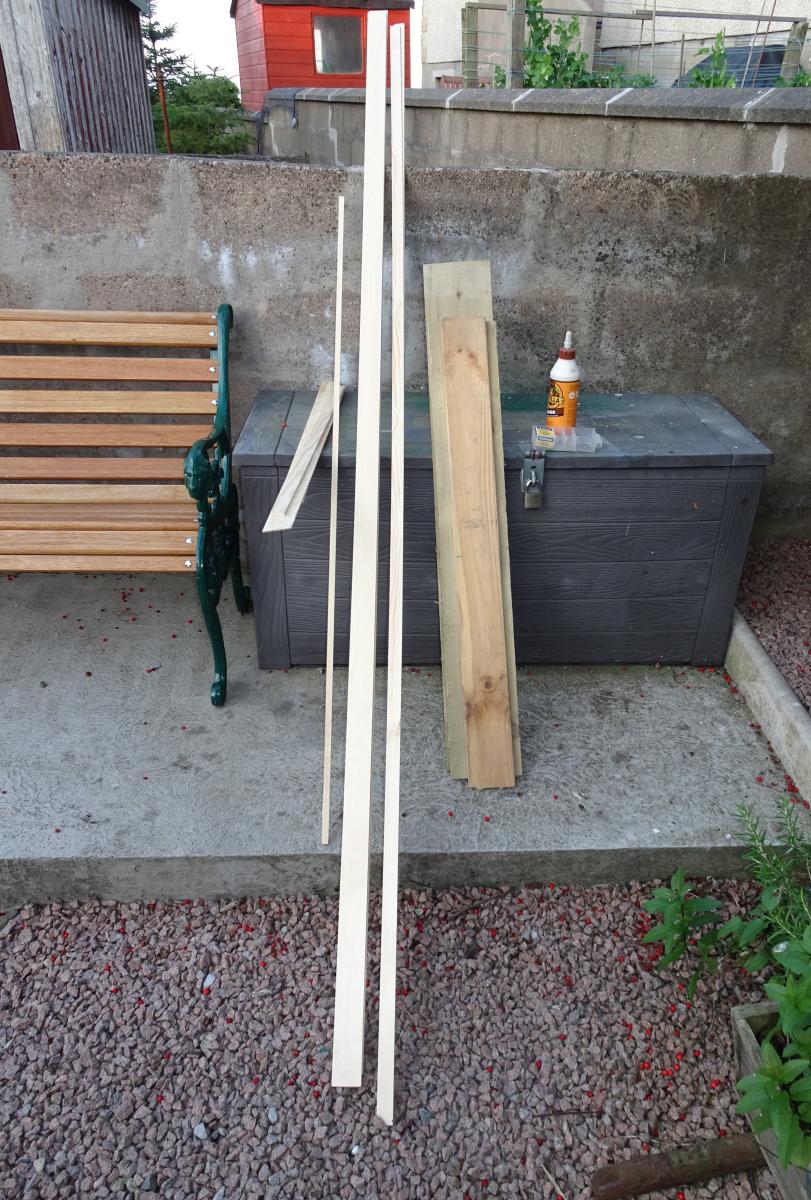
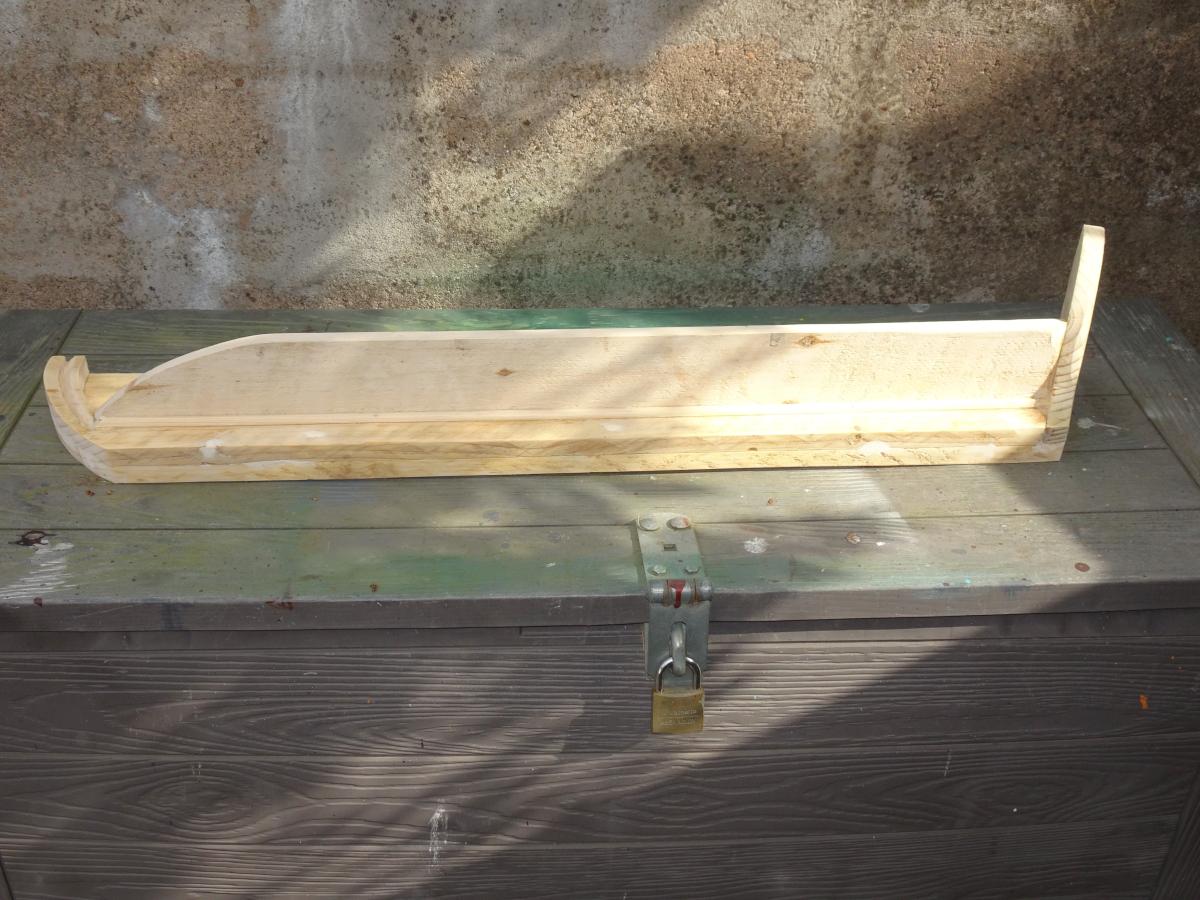
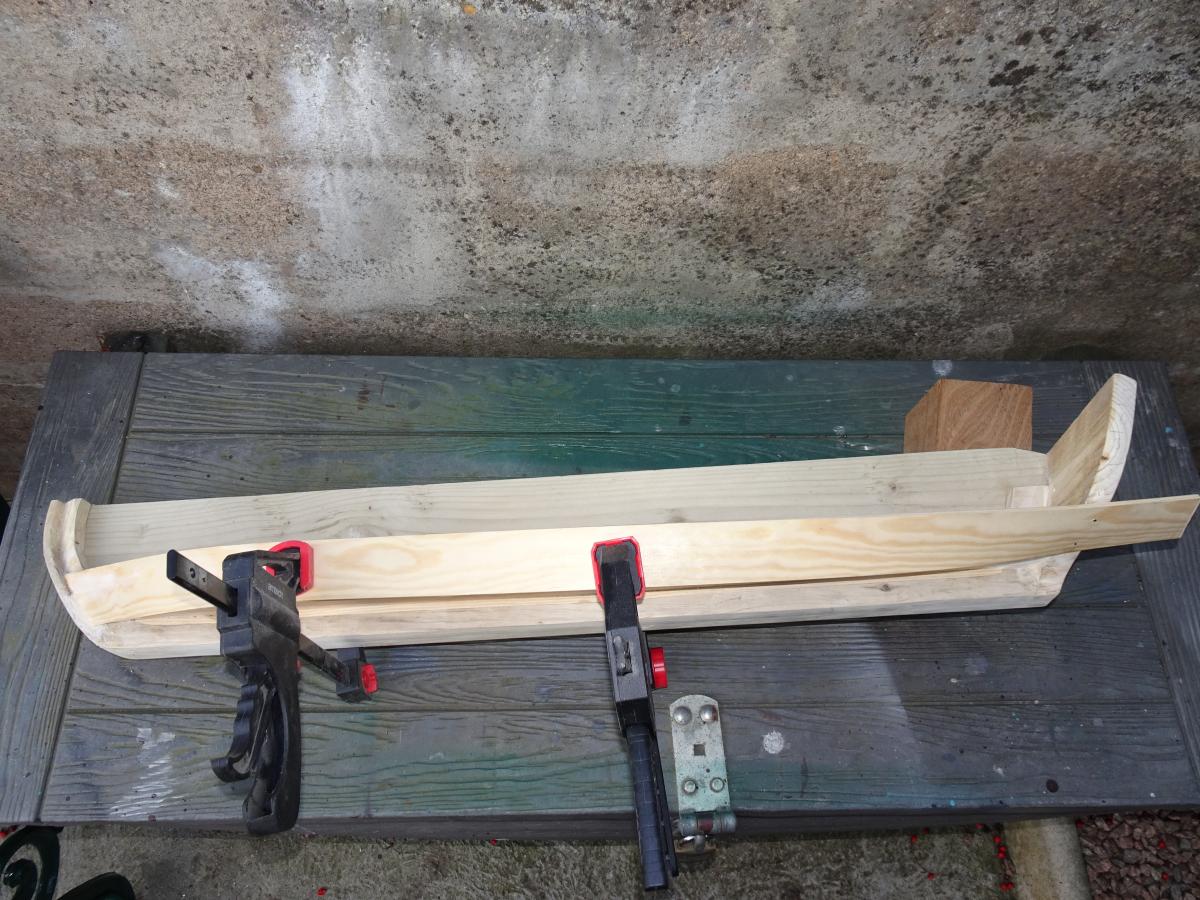
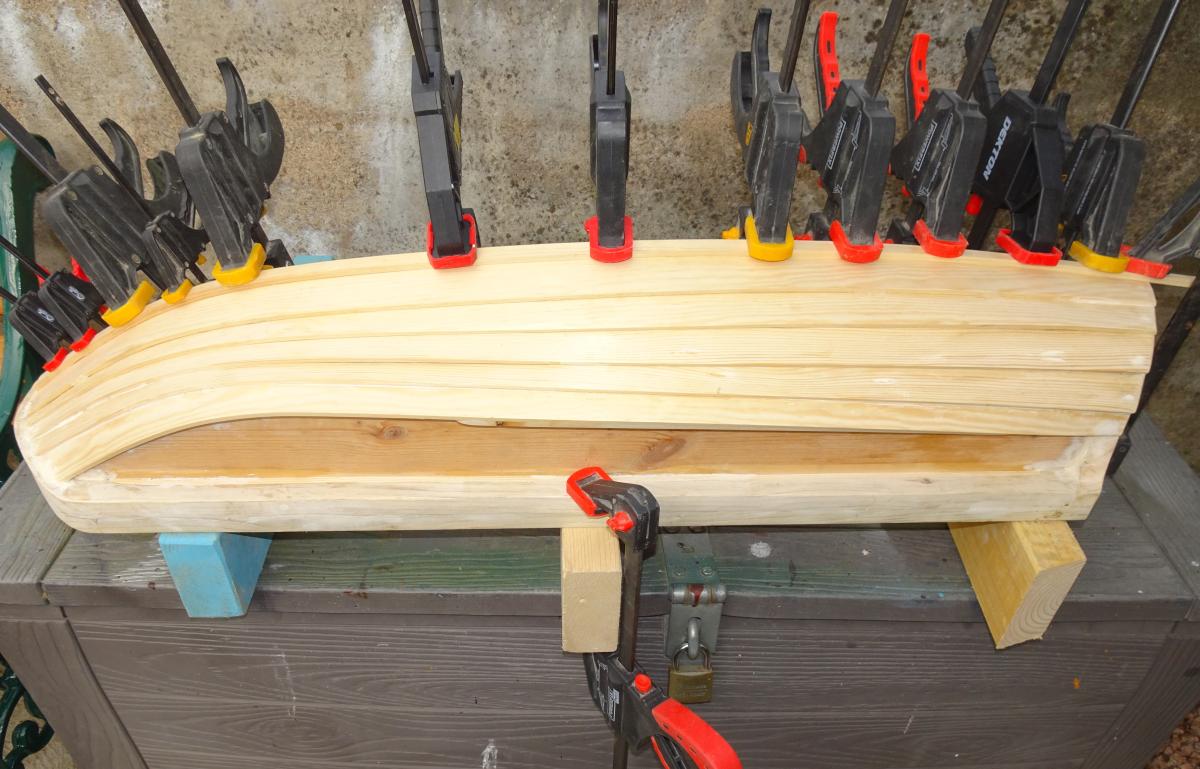
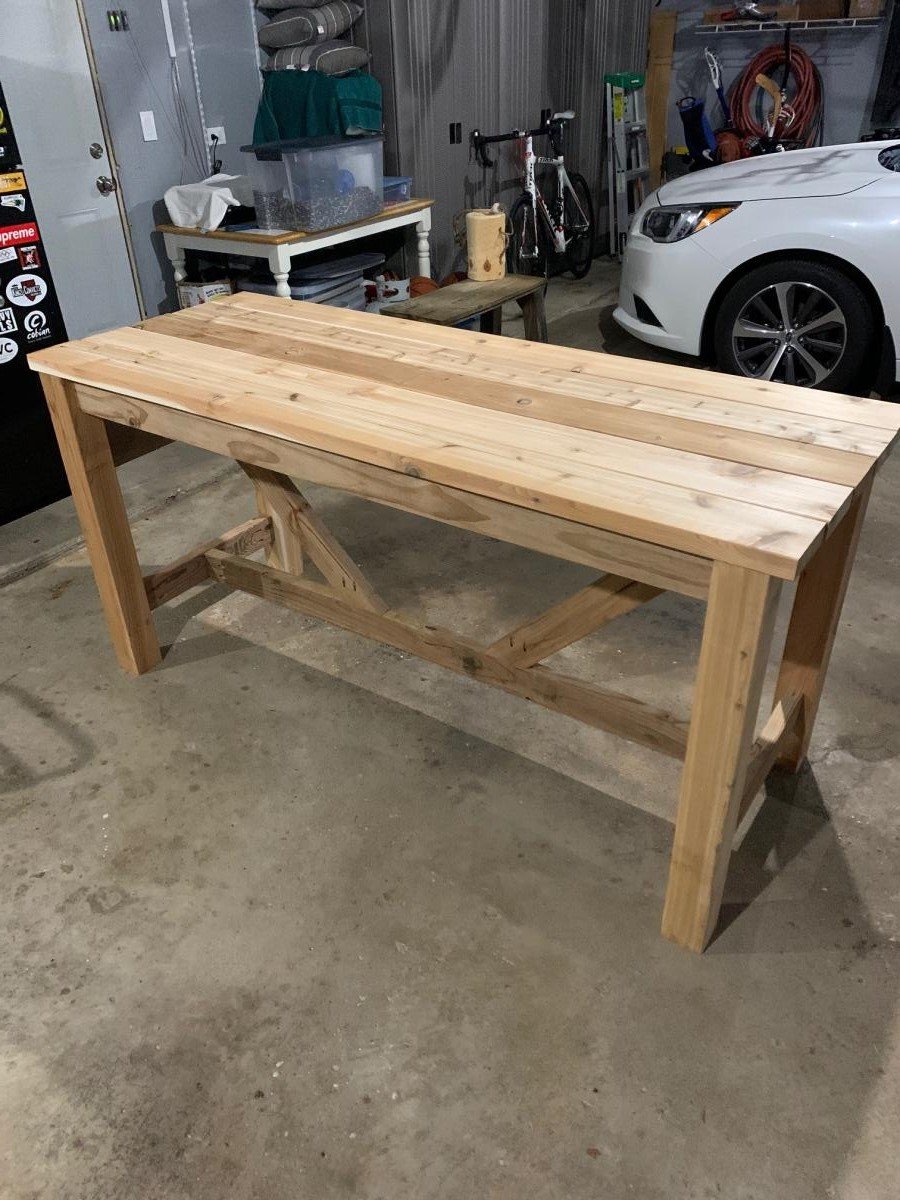
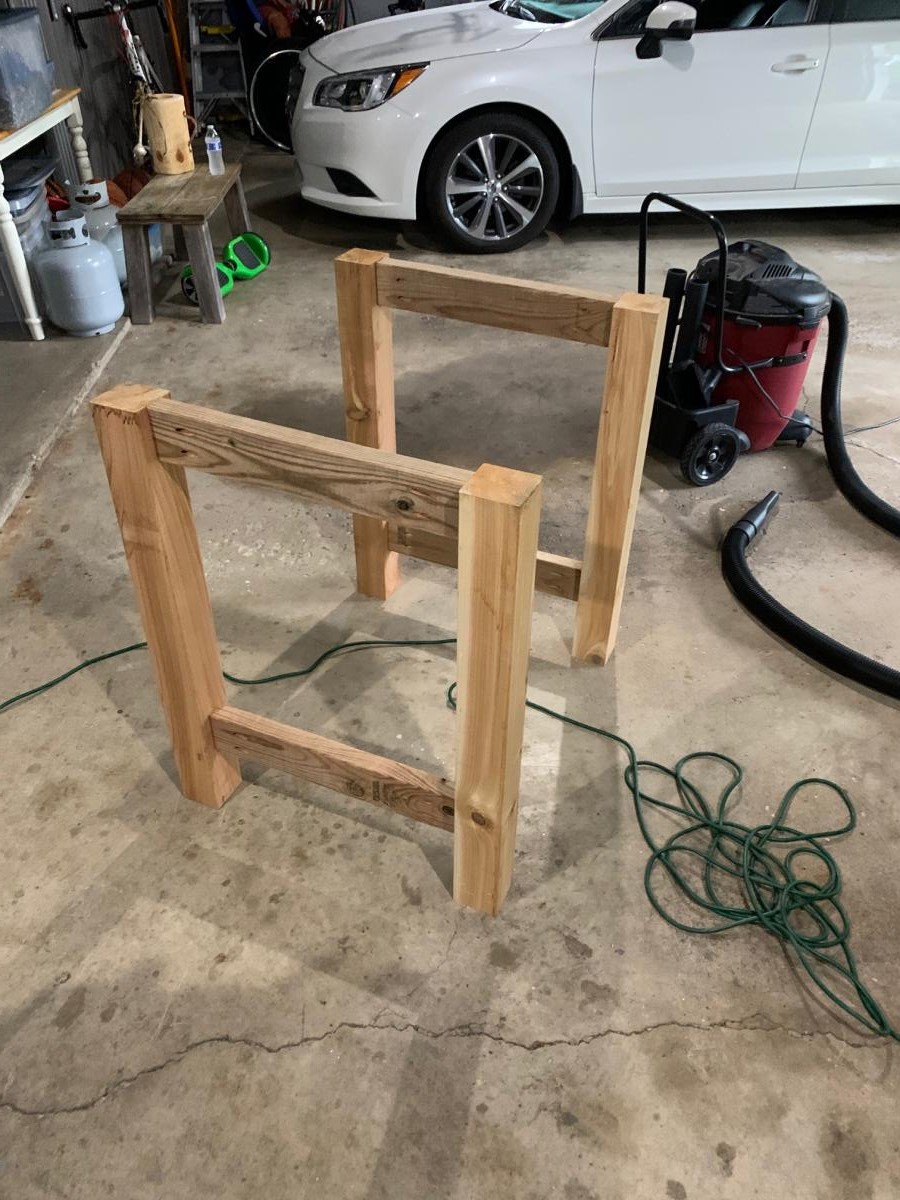
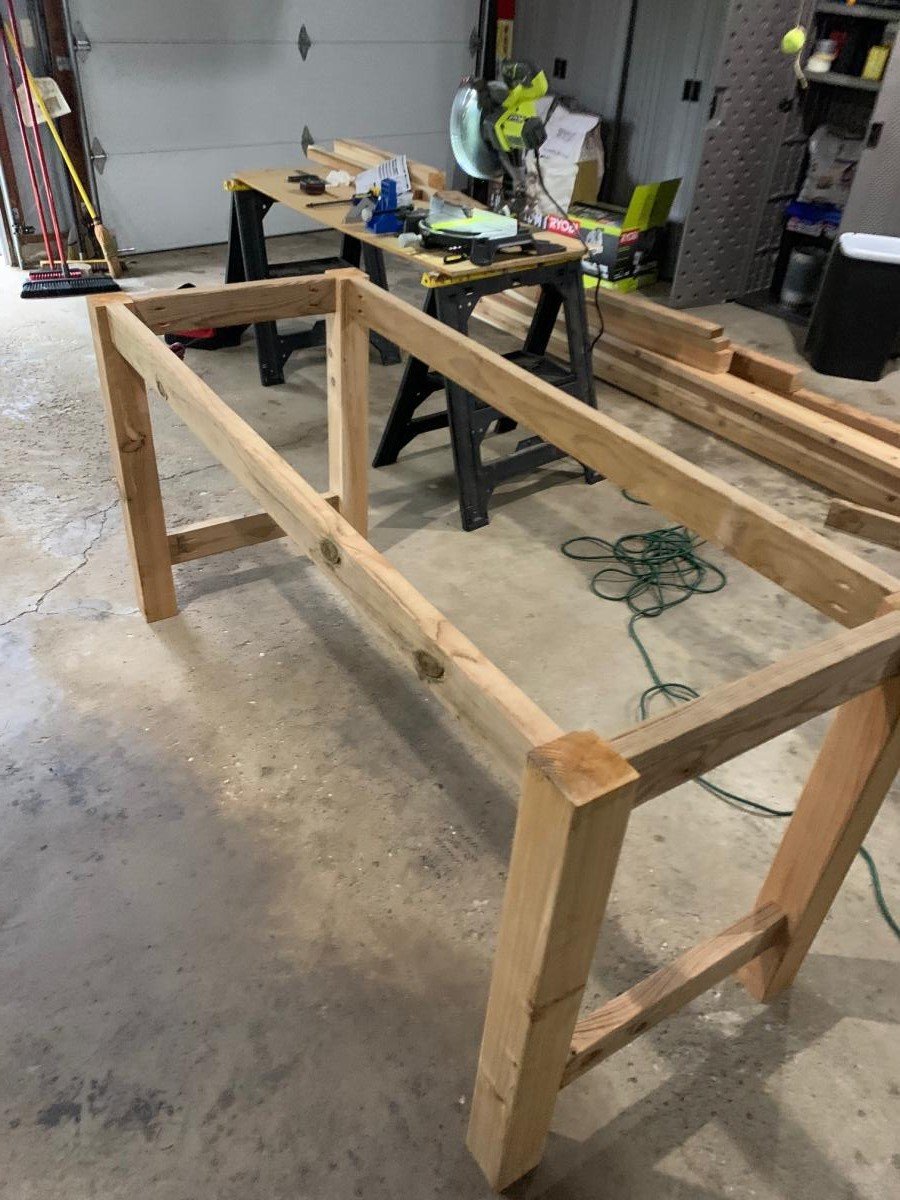
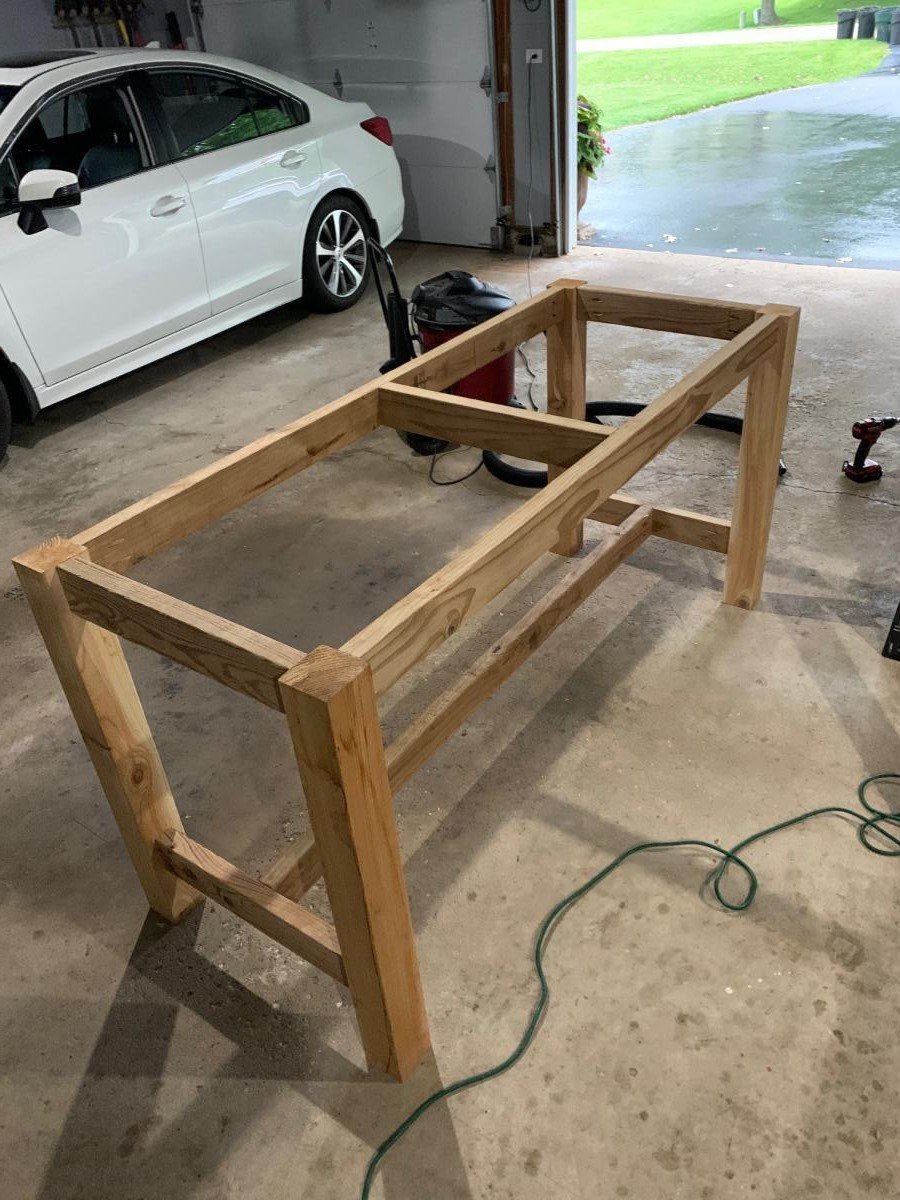
Small Workbench
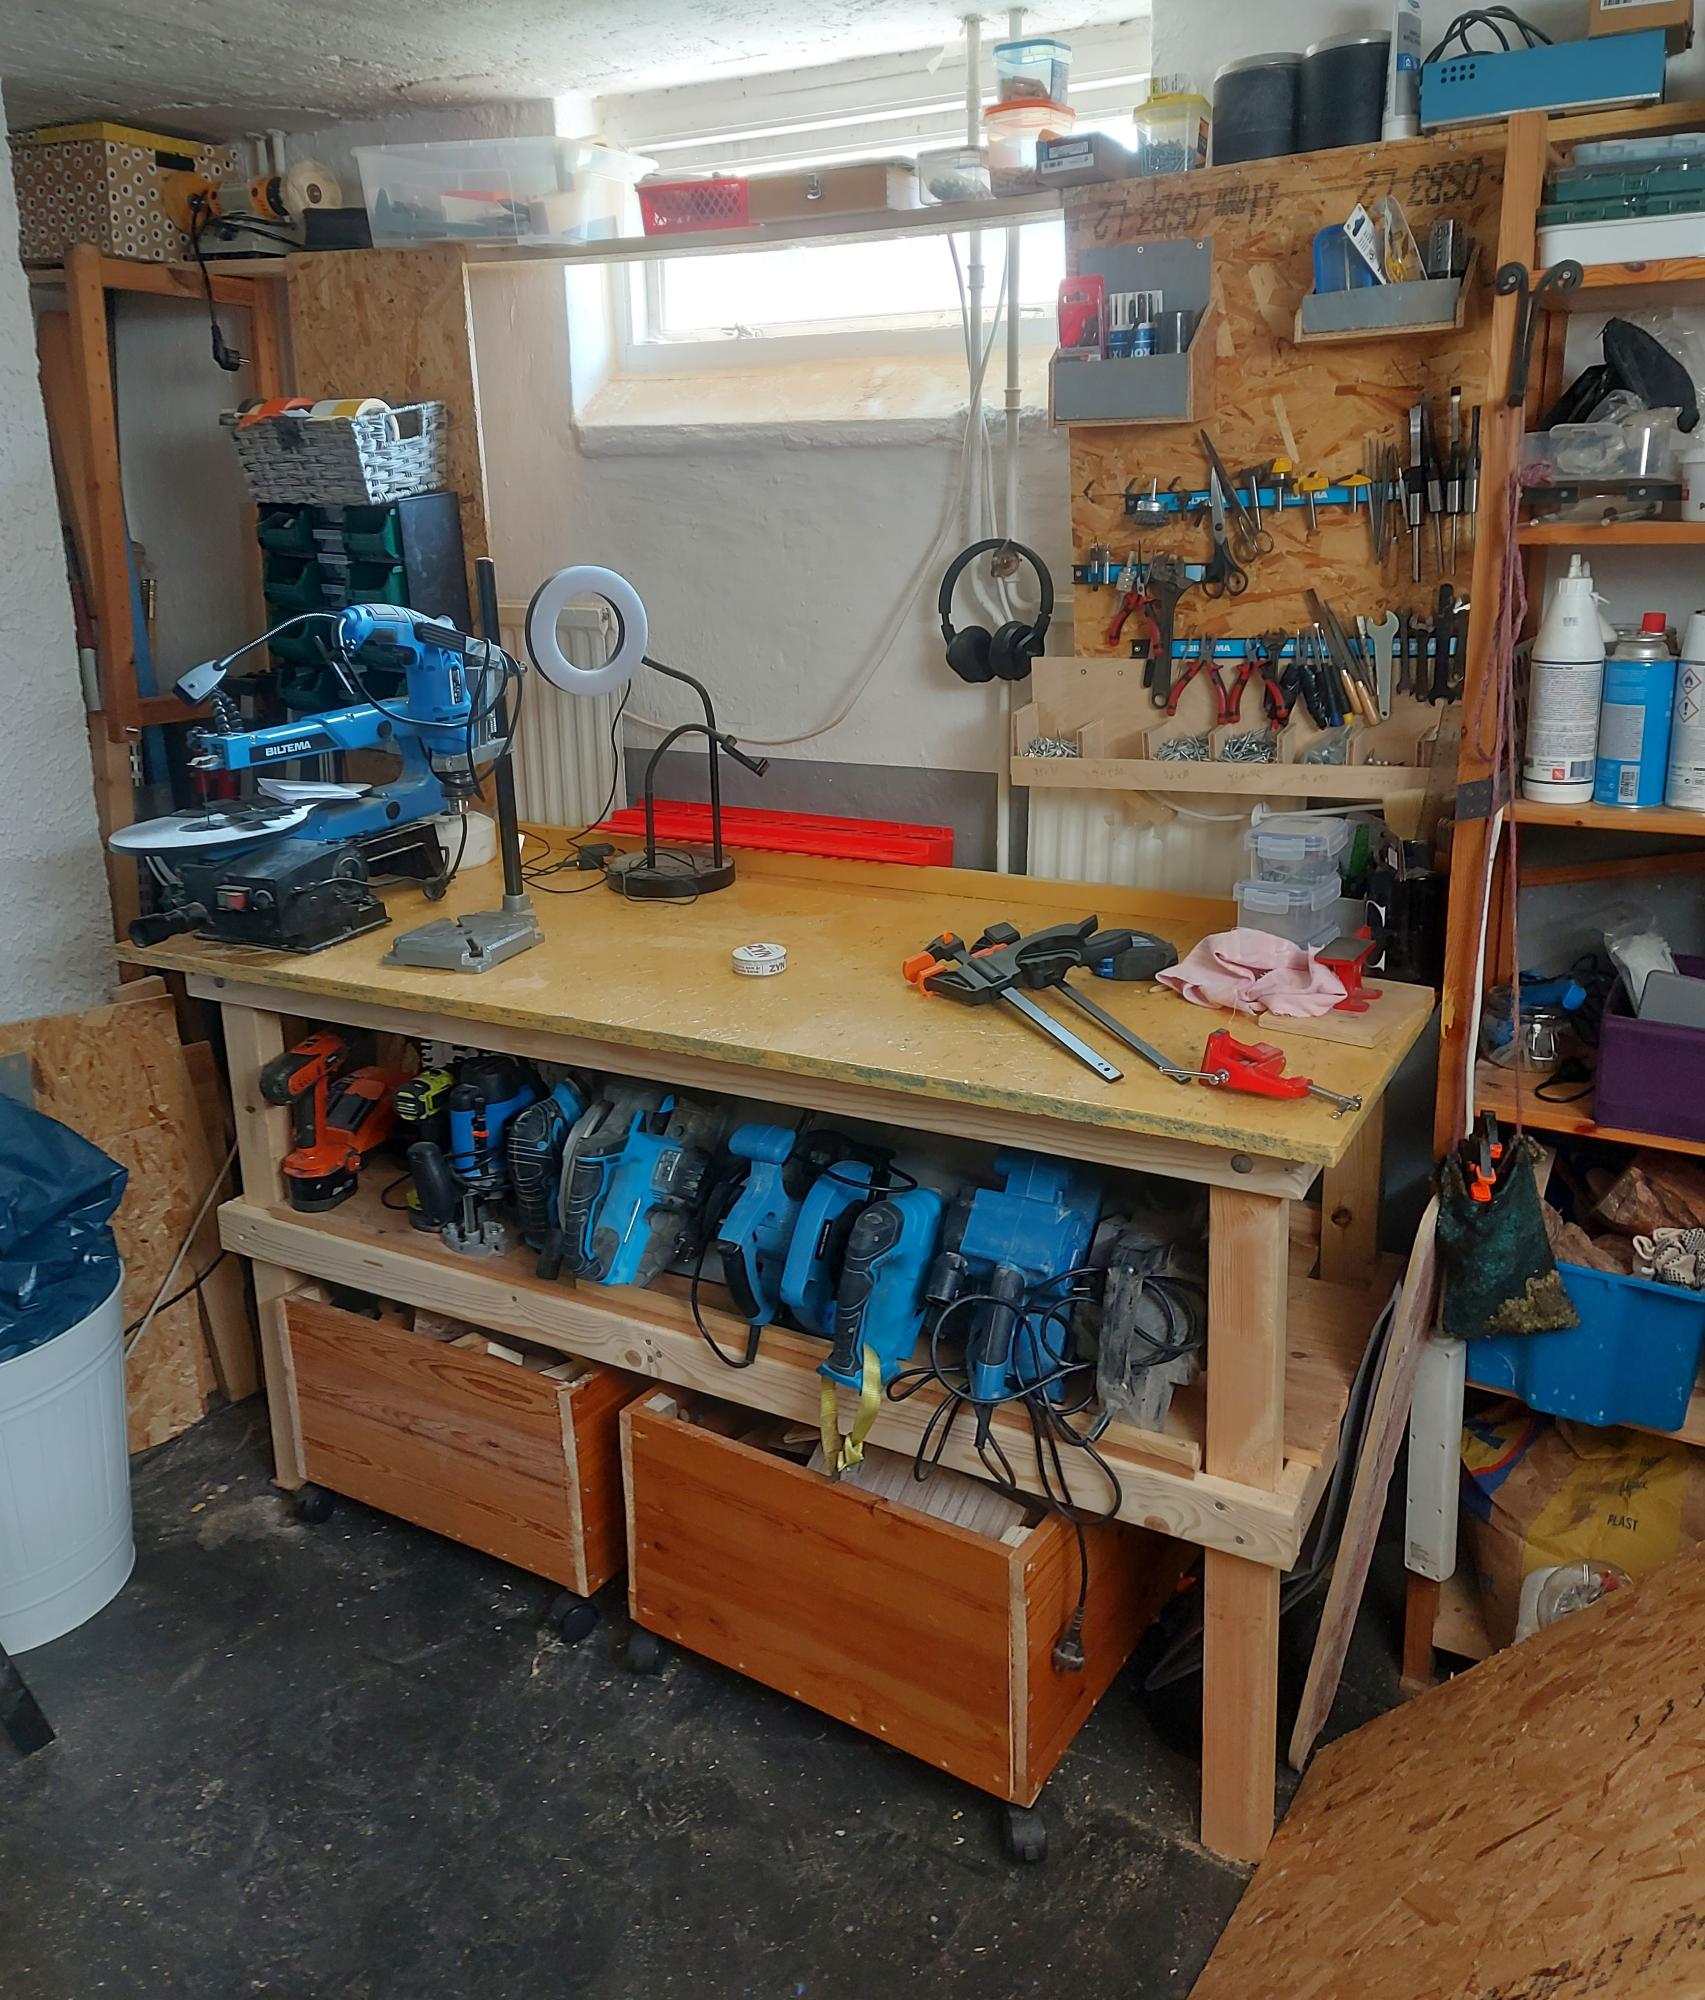
My working area is 7 square metre, so I had to think how to get the most in it. I found Anas working bench and made me my own bench.
Built from Plan(s)
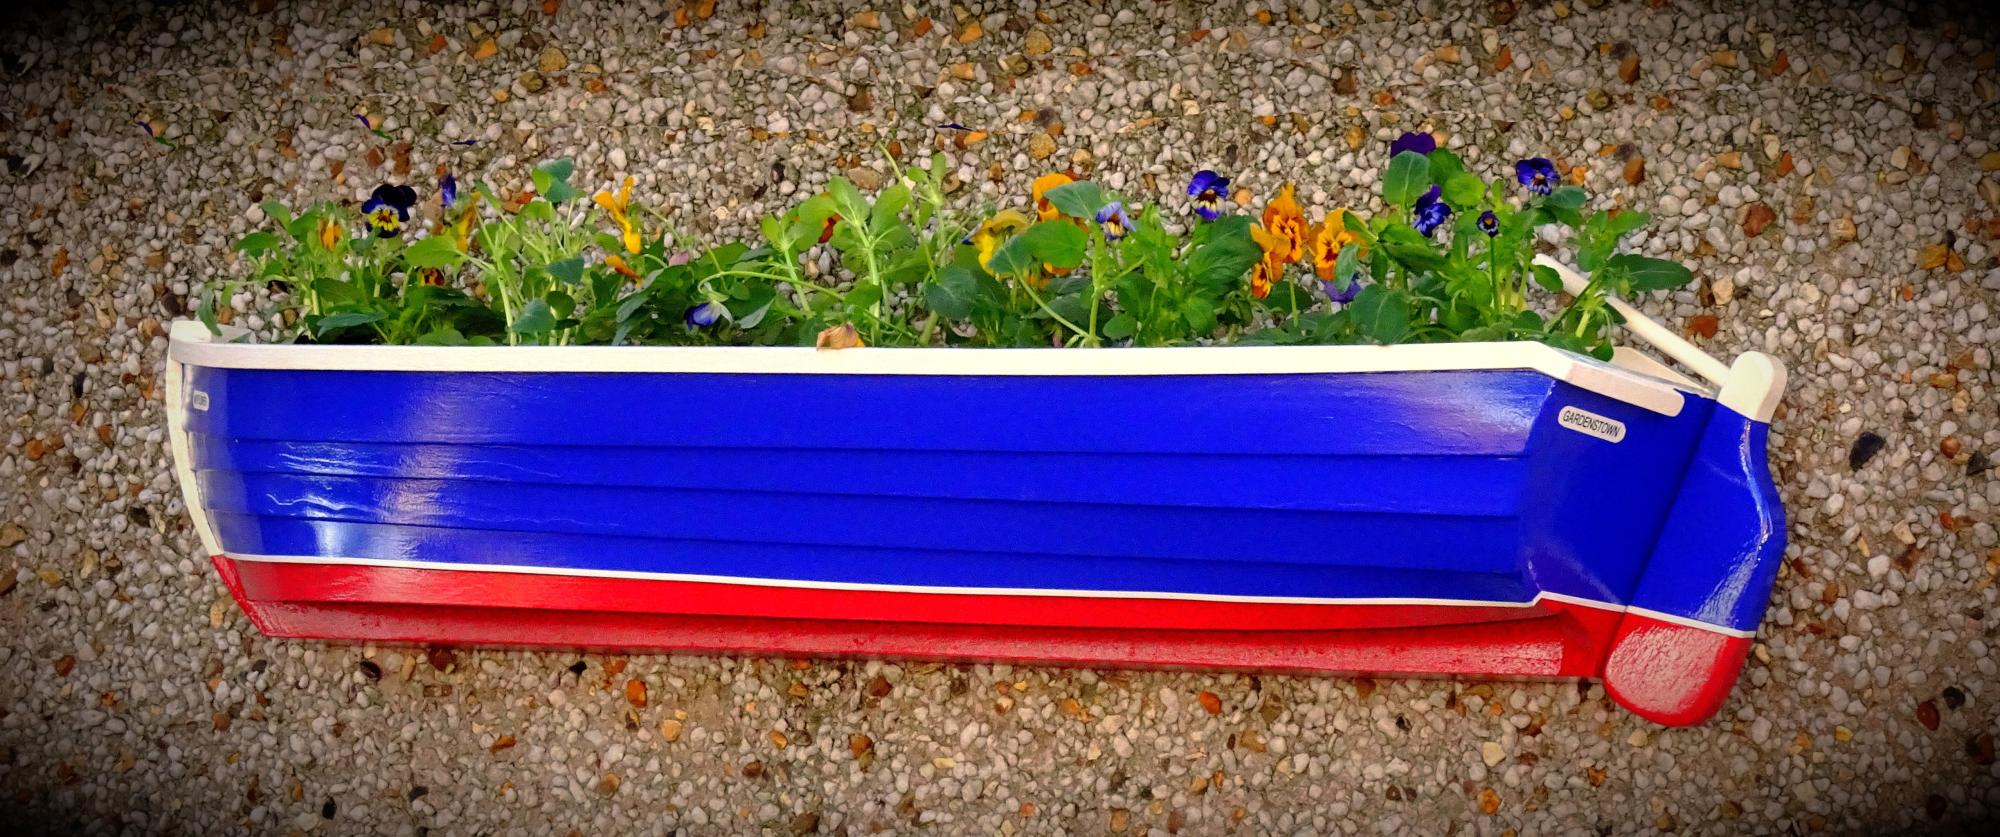
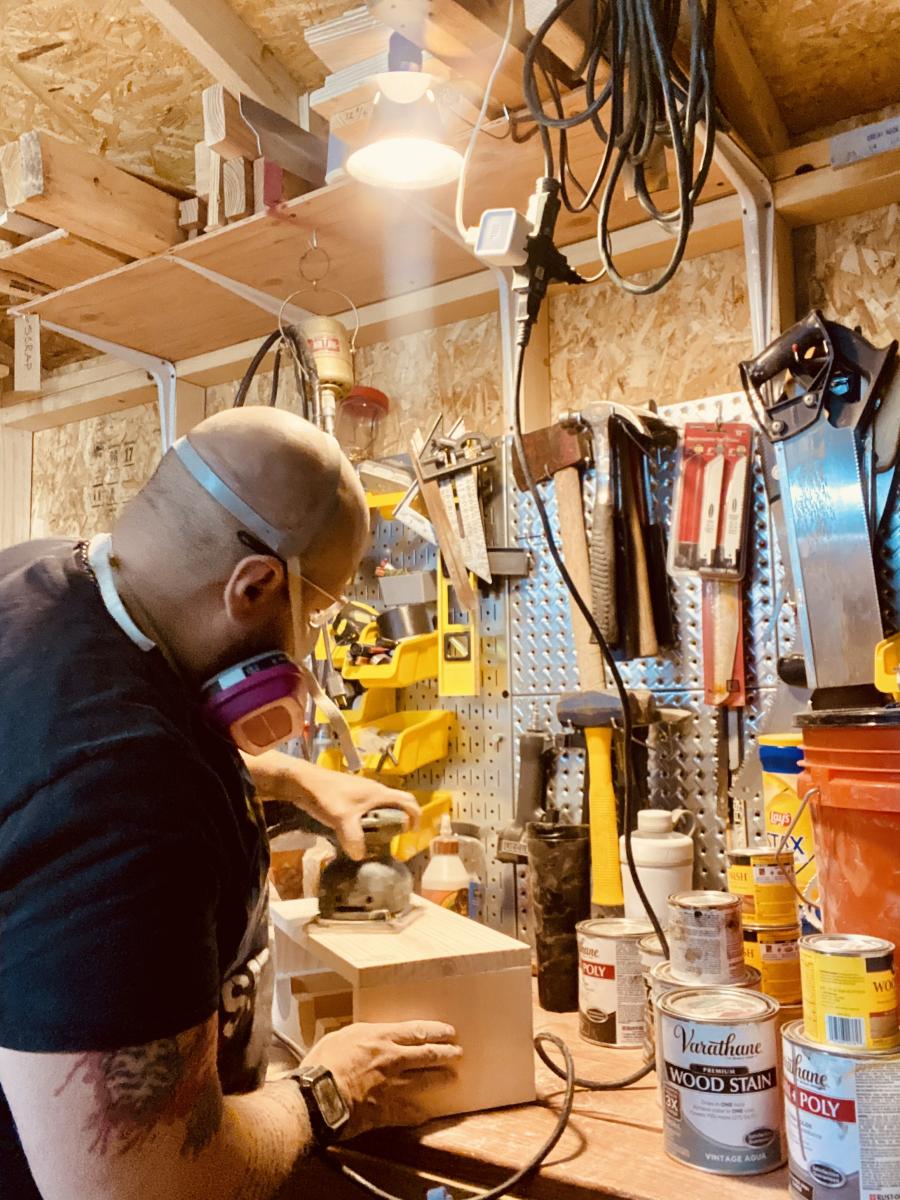
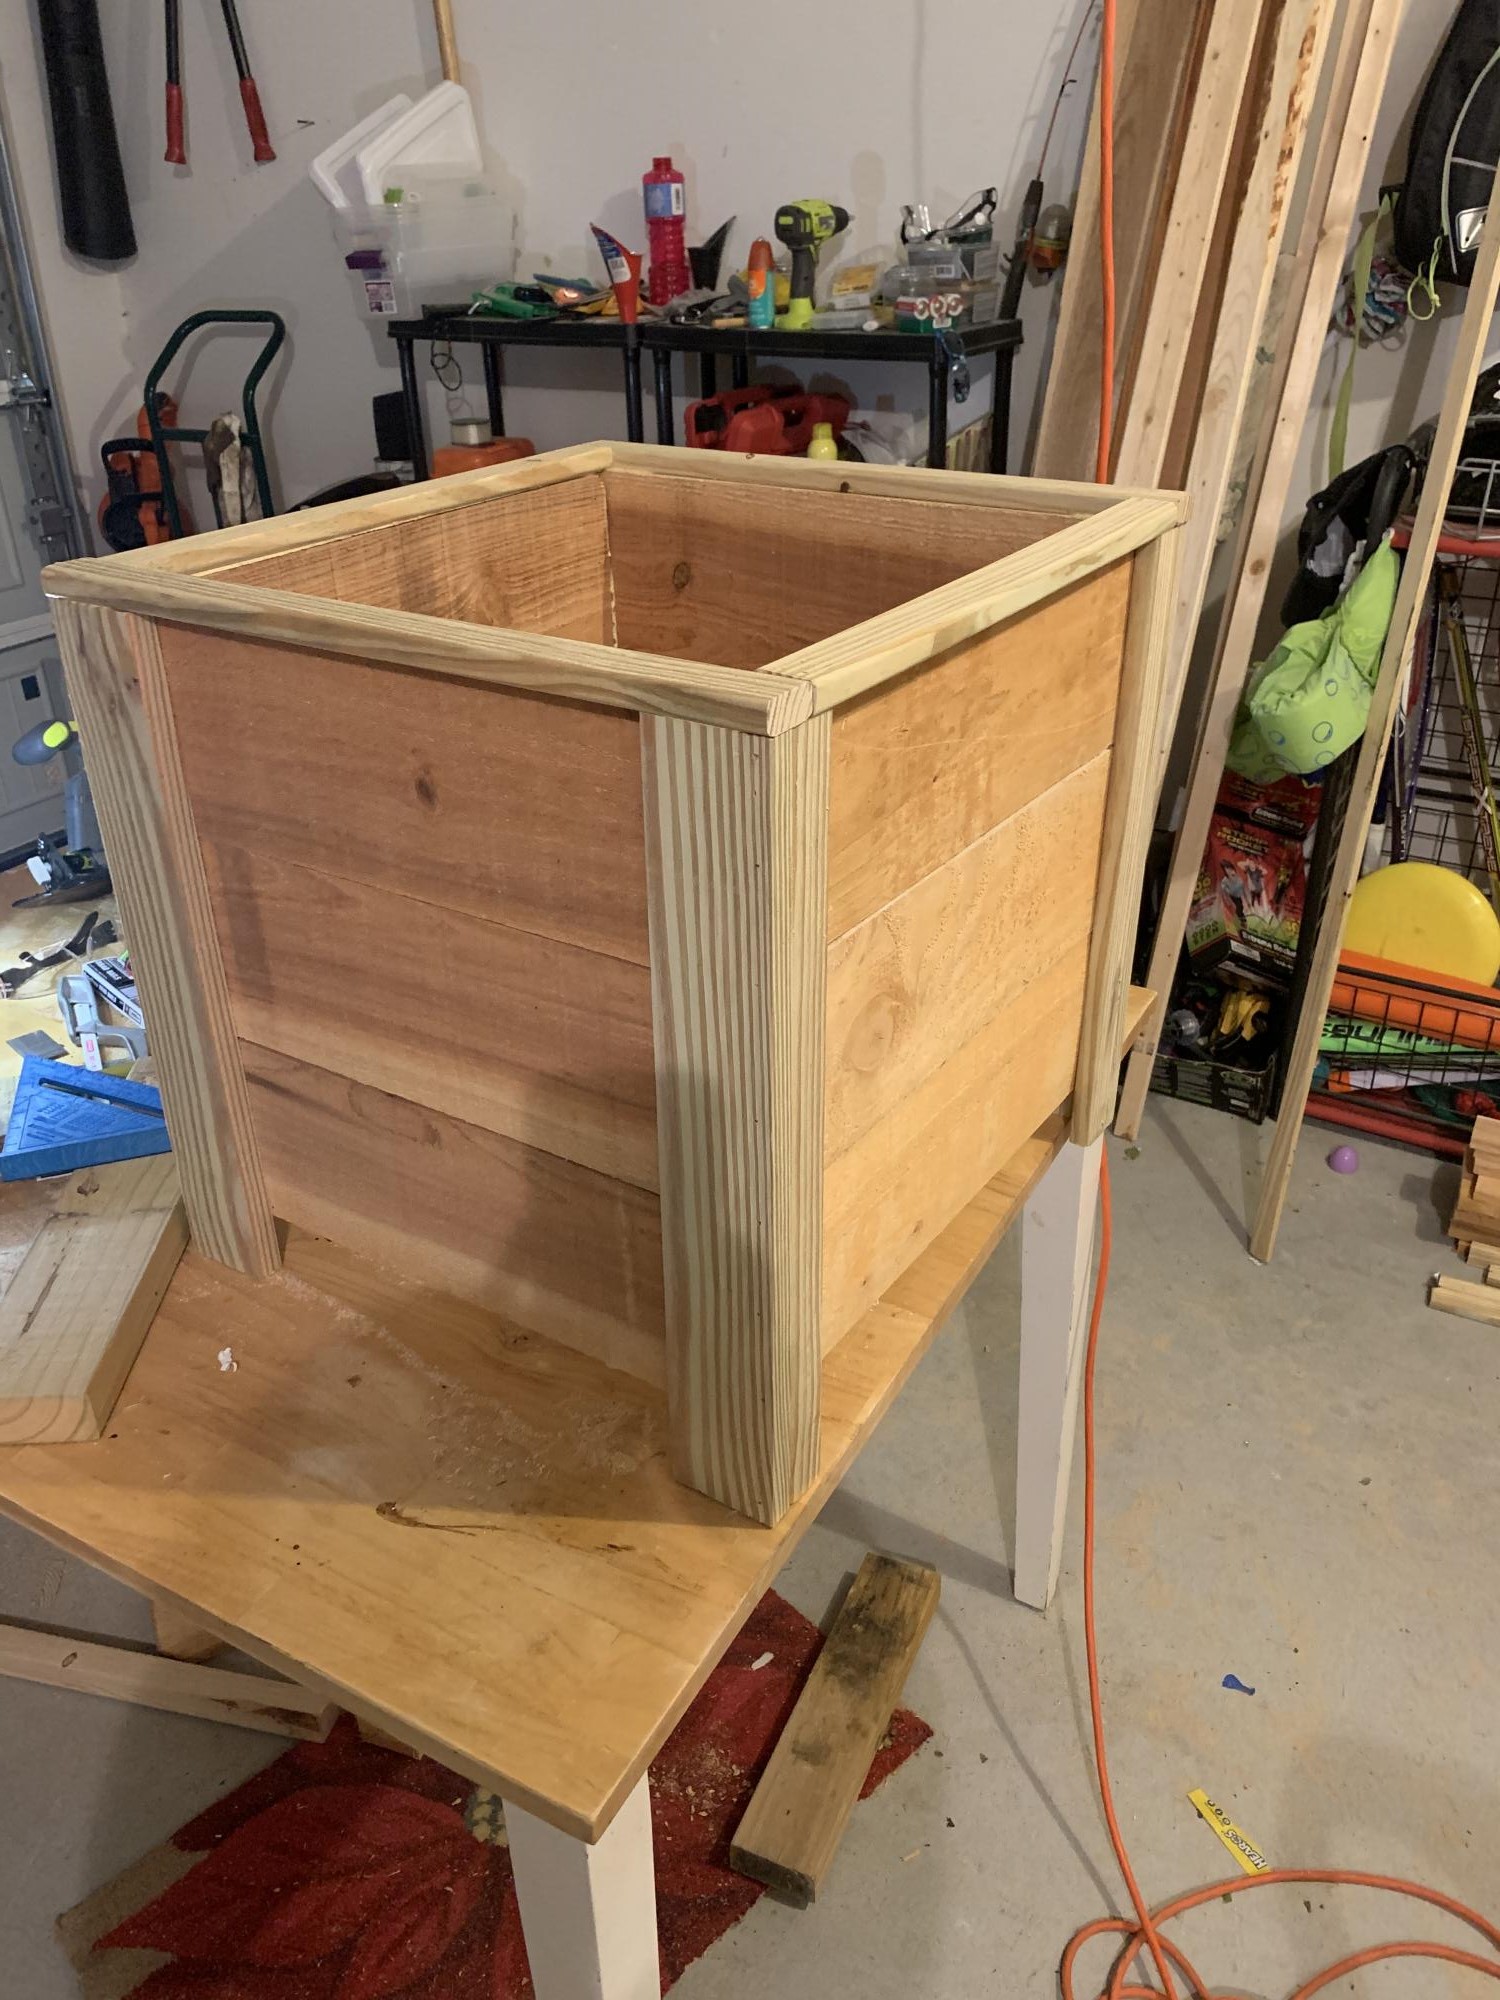
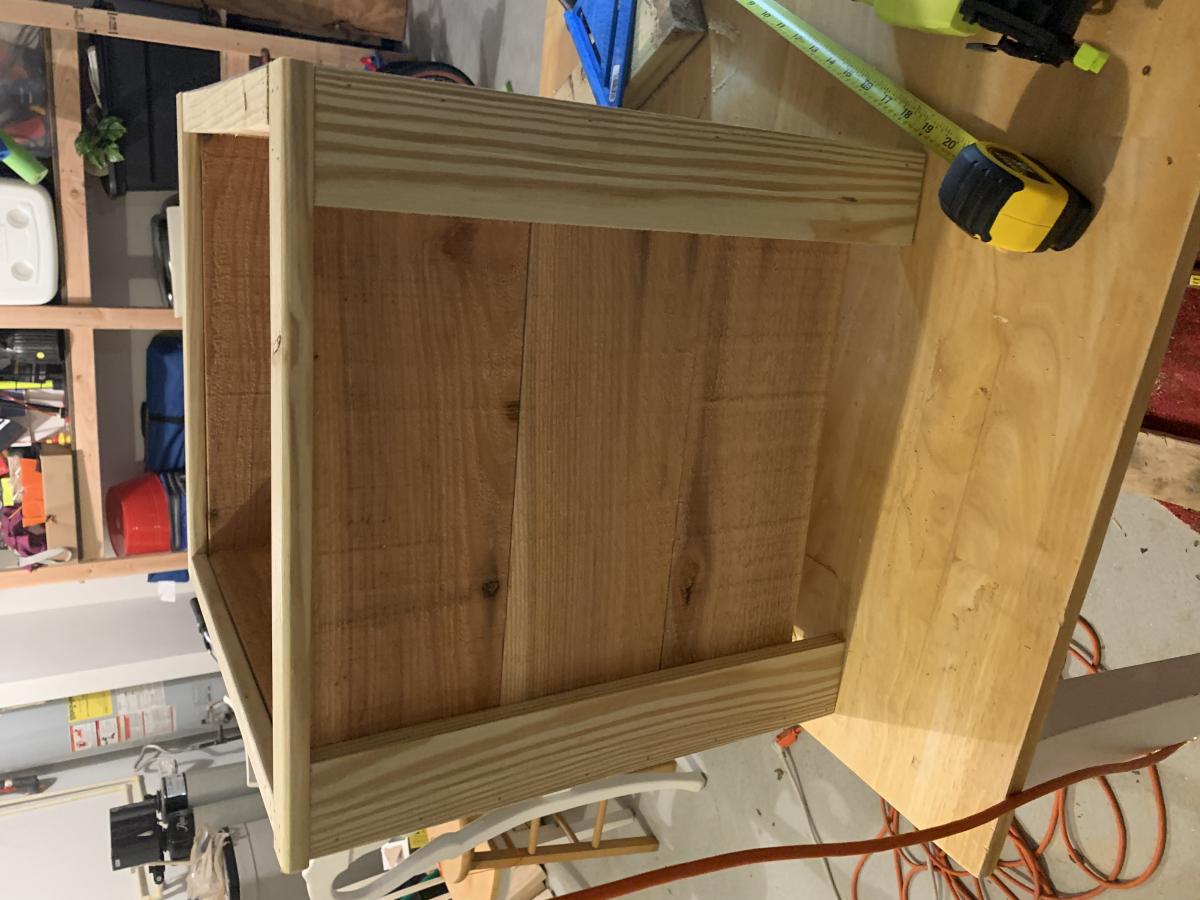
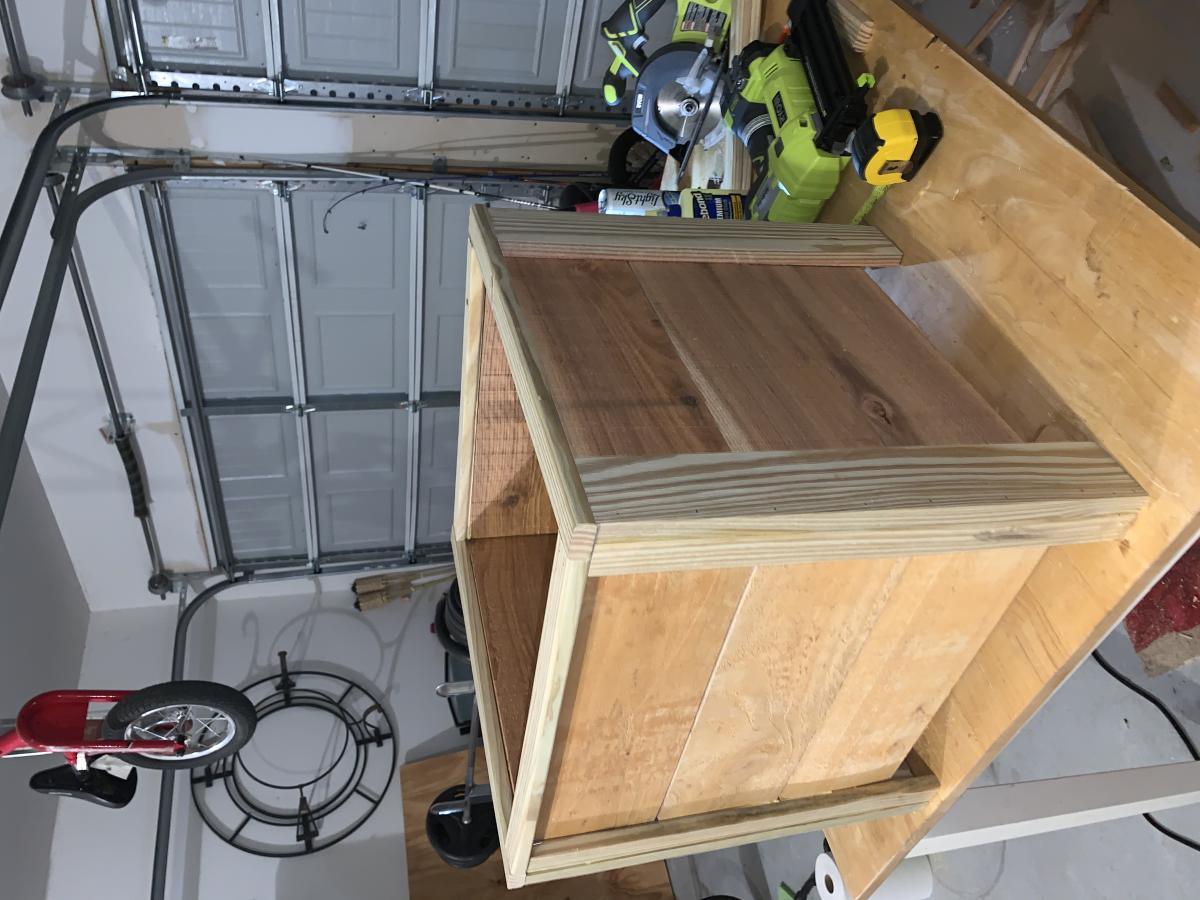
Wine & Cheese Crate
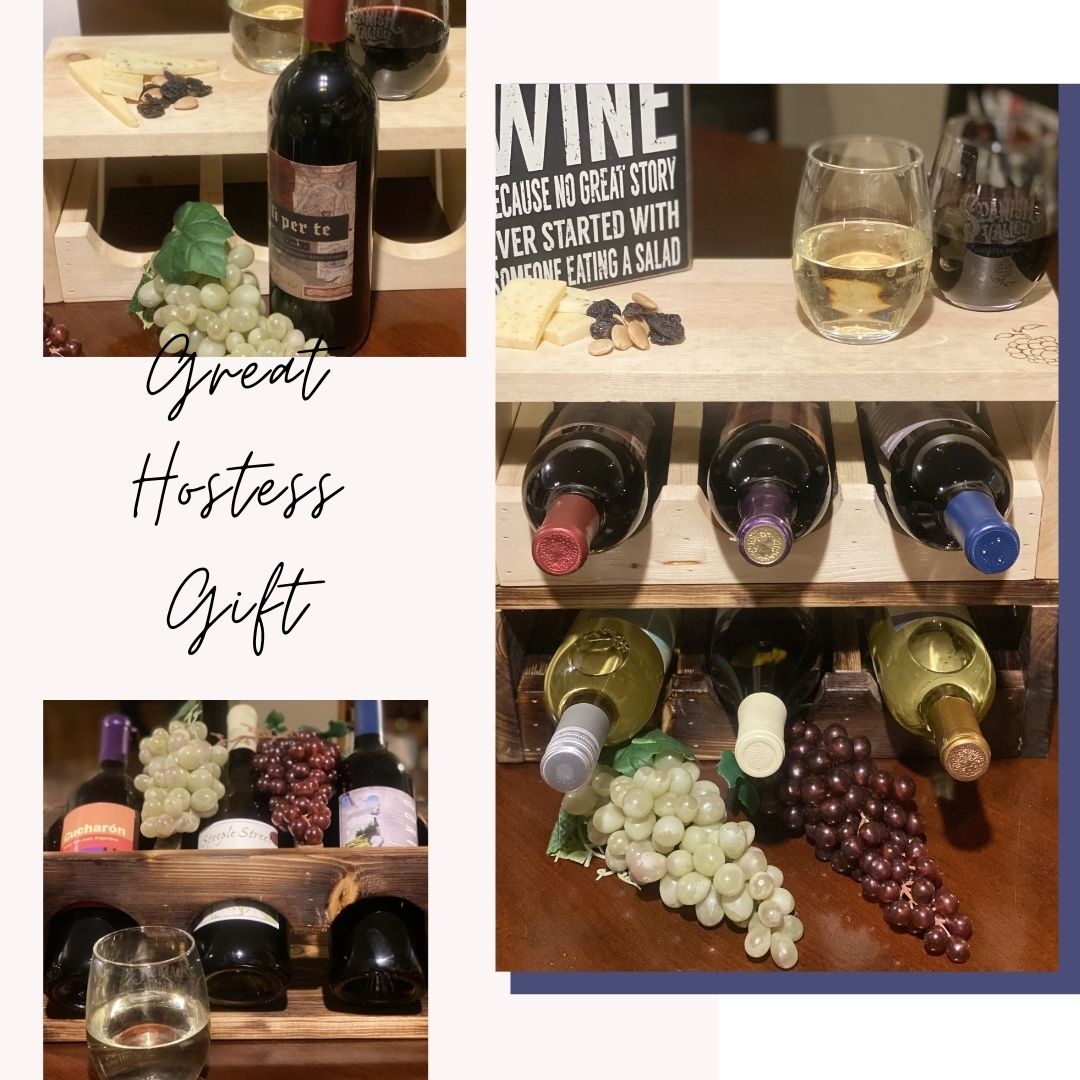
WE love these crates and have so much fun making them!
We have decided to sell these on Etsy and they have done well. we offer multiple stain colors as well as shou sugi ban.
(shou sugi ban traditionally involves scorching wooden boards with a torch or controlled fire, cooling the wood, softening the char with a wire brush, removing dust, and, if desired, topping the wood with natural oil)
Thank you for providing us with a source of income!
Built from Plan(s)
Estimated Cost
$14
Estimated Time Investment
An Hour or Two (0-2 Hours)
Finish Used
stain
brad nails
shlac
brad nails
shlac
Recommended Skill Level
Beginner
Comments
Fri, 10/30/2020 - 14:39
Love to hear this!
How great is it to make some extra money doing what you love?! These are great, thanks for sharing!
DIY Panel Bed

Simple Panel Bed
Built from Plan(s)
Seasonal And Holiday
Texas Flag Bench
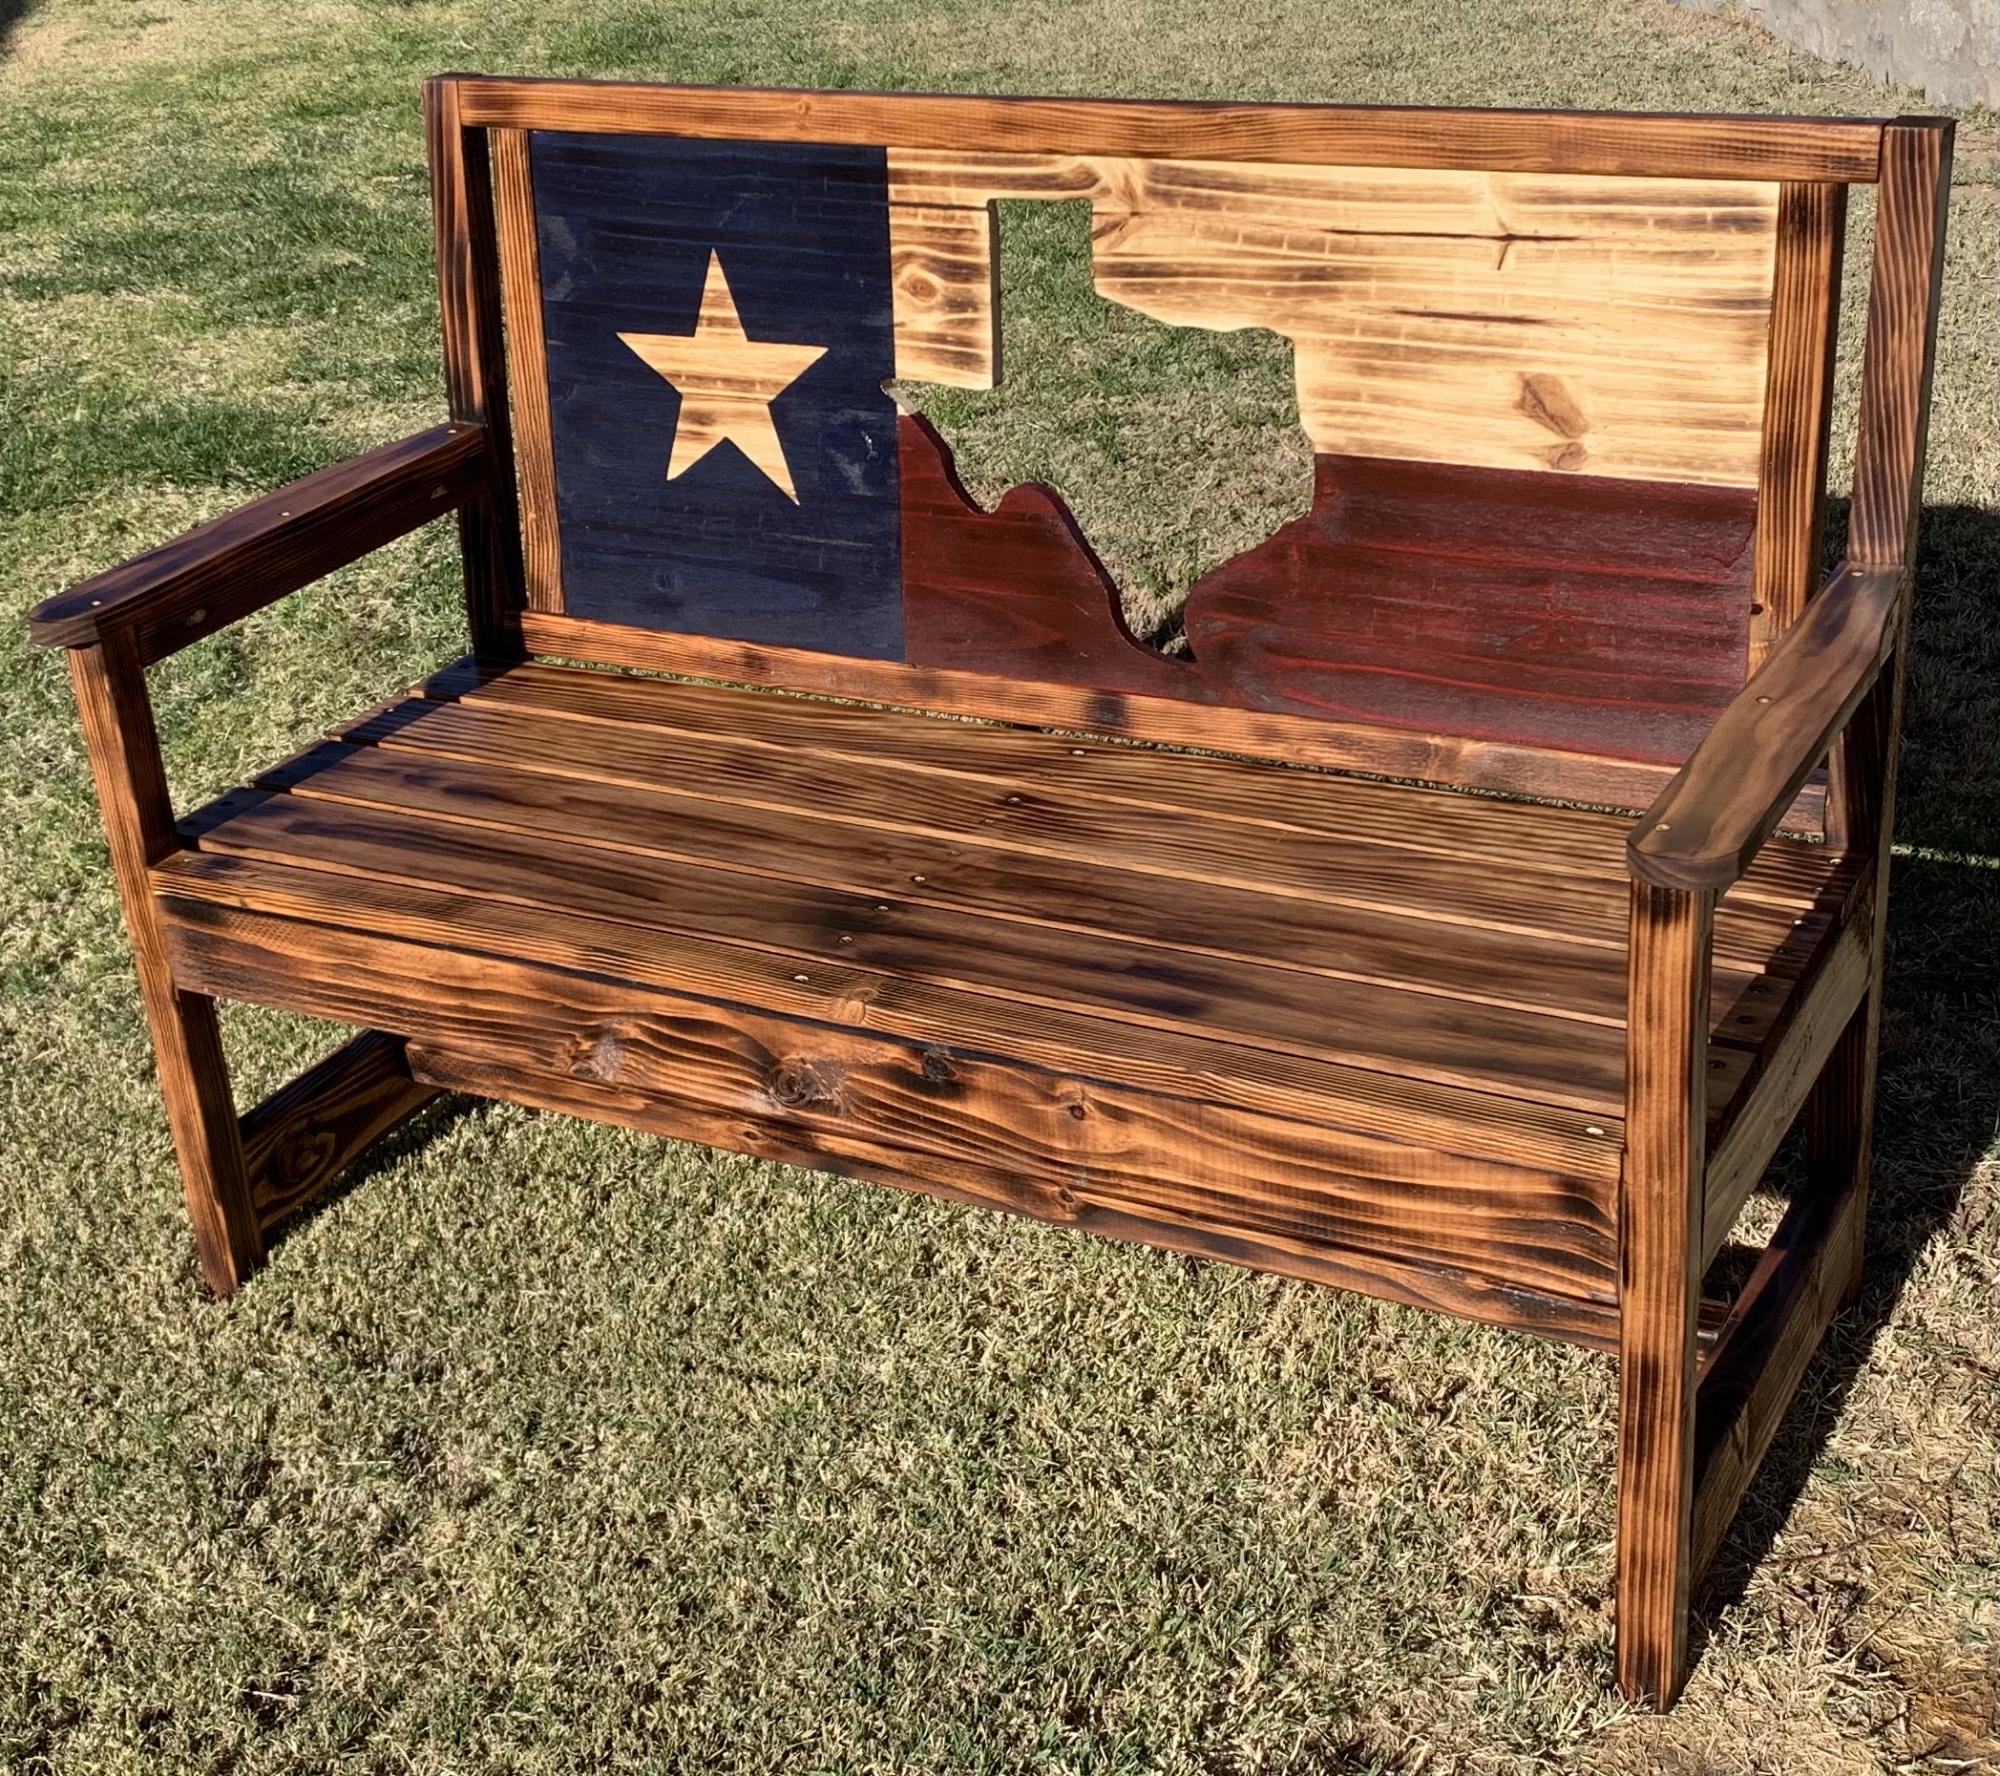
Modified the woven back bench plans to make this Texas Flag Bench. 48 inches wide.
Built from Plan(s)
Estimated Time Investment
Day Project (6-9 Hours)
Comments
Wedding Picnic Table
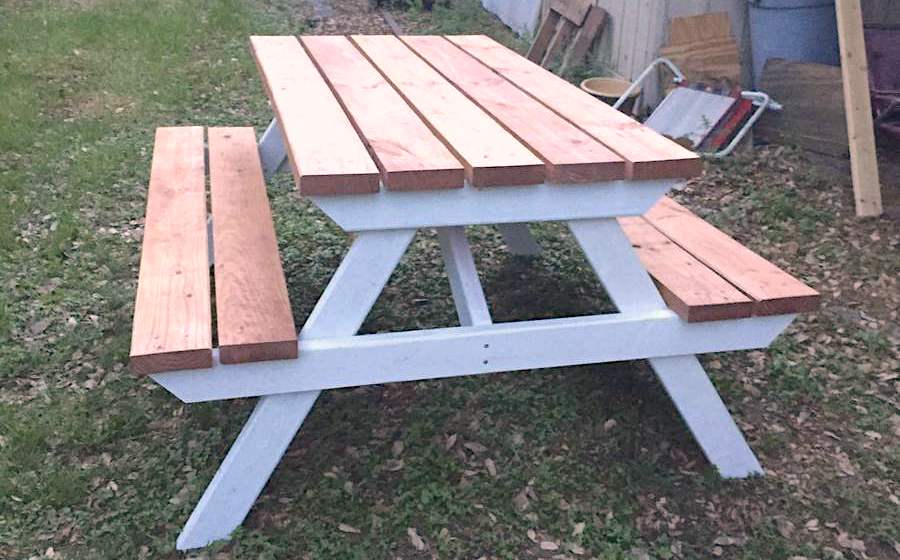
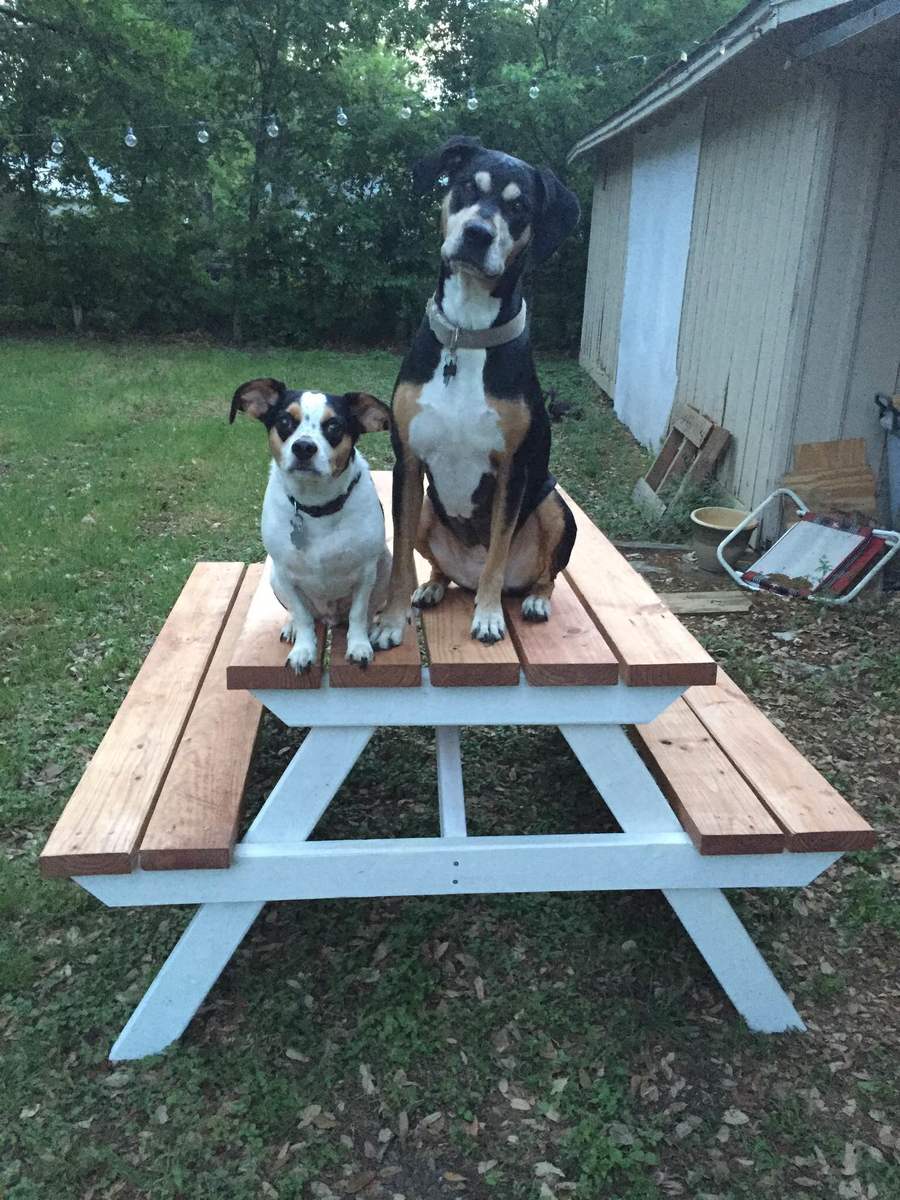
I made this picnic table for my upcoming wedding with the intent of using it as our guestbook. I'm hoping to have people sign, carve, and woodburn their names or a message on the table. I painted the legs and supports white and stained the top and seats with a cherry stain. I still need to put some finish on the whole thing, but overall I'm really happy with how it turned out. And so are my dogs.
Built from Plan(s)
Estimated Cost
about $70
Estimated Time Investment
Weekend Project (10-20 Hours)
Finish Used
White paint and cherry stain
Recommended Skill Level
Beginner
Comments
Mon, 04/13/2015 - 09:46
Great idea!
I love your idea for a picnic table as a guest book! There are several brags showing benches used as guest books on this site, but no picnic tables. Not wanting to sound like a know-it-all, I would caution you to use paint pens rather than a permanent magic marker if you have guests who aren't comfortable using a woodburning pen (such as an elderly person). Magic marker ink smears when you apply a finish over it. (I read a comment from a mom who made her daughter a guestbook bench. They used permanent magic marker, then applied a poly finish over it, which then ruined all of the signatures.)
Mon, 04/13/2015 - 11:08
Thank you!
Thank you for your suggestion about the paint pens. I hadn't had much time to do research and was planning on just using sharpies. But now I can avoid making that mistake. :)
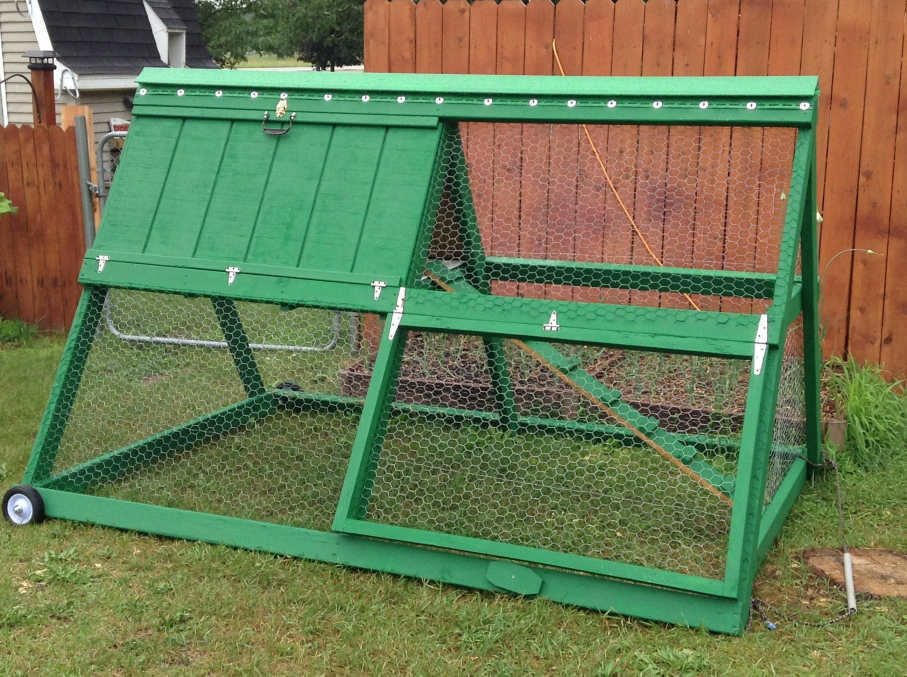
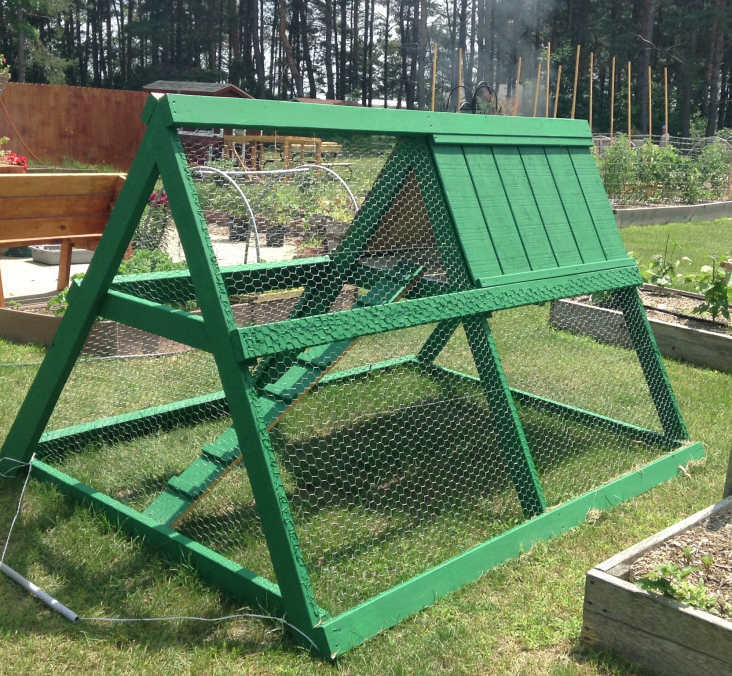
A-Frame Chicken Tractor
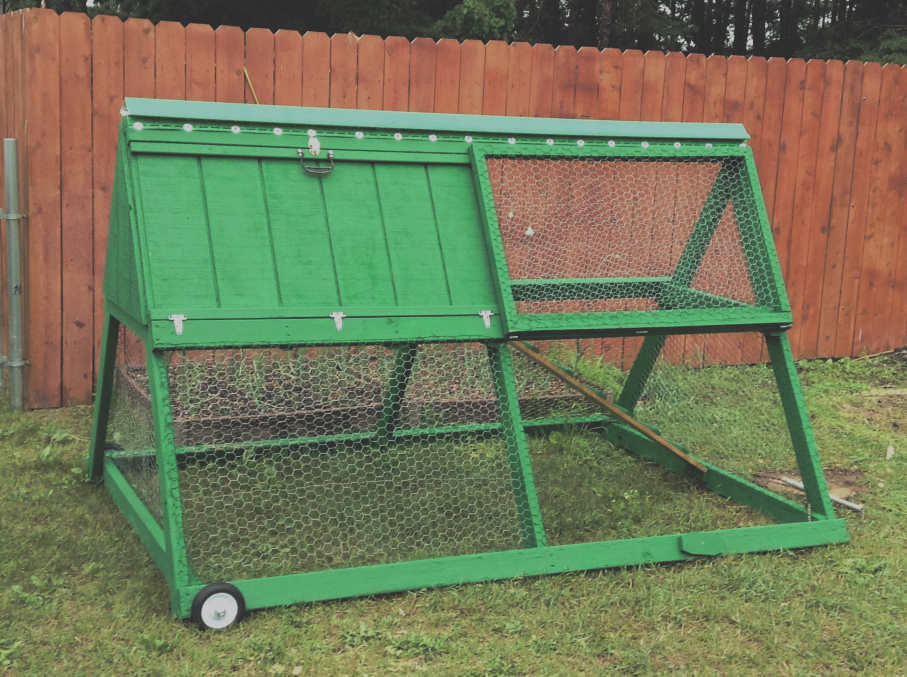
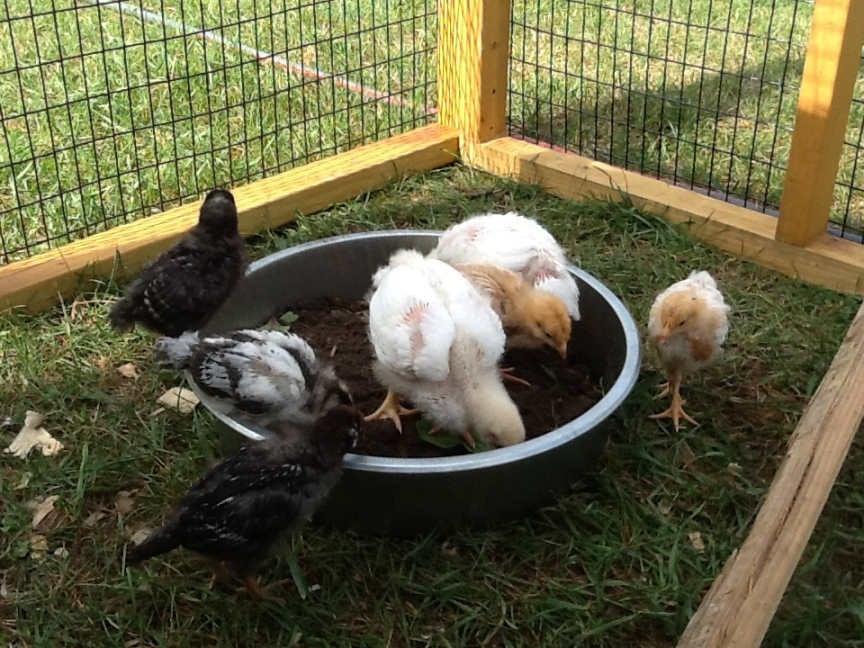
New to raising chickens, but eager to jump right in to it.
We bought a pre-made coop for the main home for our new chicks and it's very nice, not something I could do myself since I'm not yet at that level, but I saw this chicken tractor and thought it would come in handy for what I have in mind so I made up my mind to build it.
The lumber, chicken wire, staples, and wheels are all store bought new and came to about $75. The materials we had on hand were the screws, hinges, plastic coated metal shelving (used in the nesting area, I thought that would make it easy to clean), paint, and the corner piece of vinyl siding for the roof cap (hubby's brilliant idea, and I painted it green with spray paint for vinyl).
I did not try to build it quickly, I don't really know how much time it took me, but if I had to guess I'd guess total time would amount to about 3 afternoons, by myself.
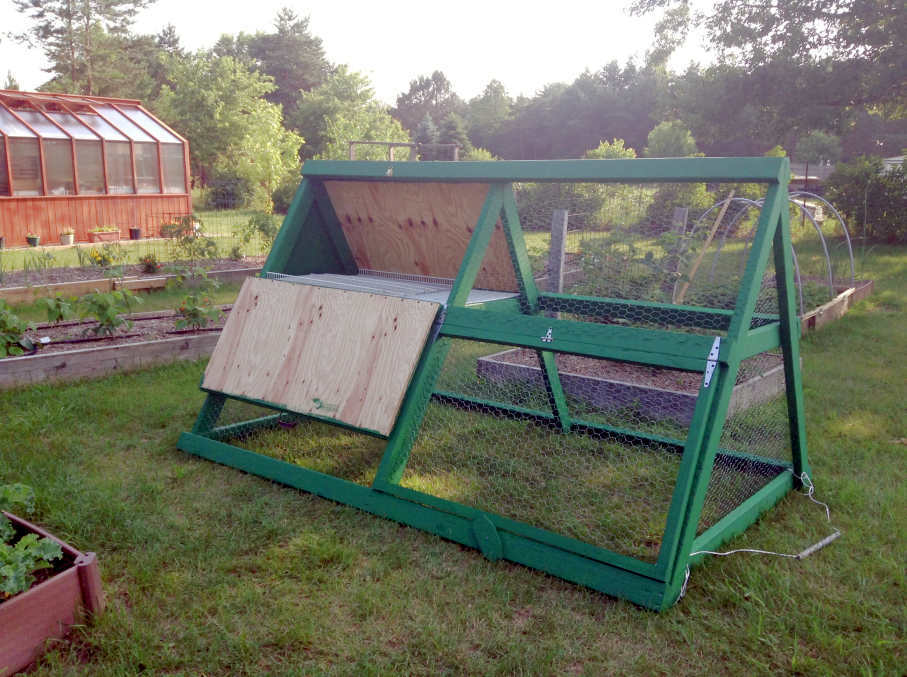
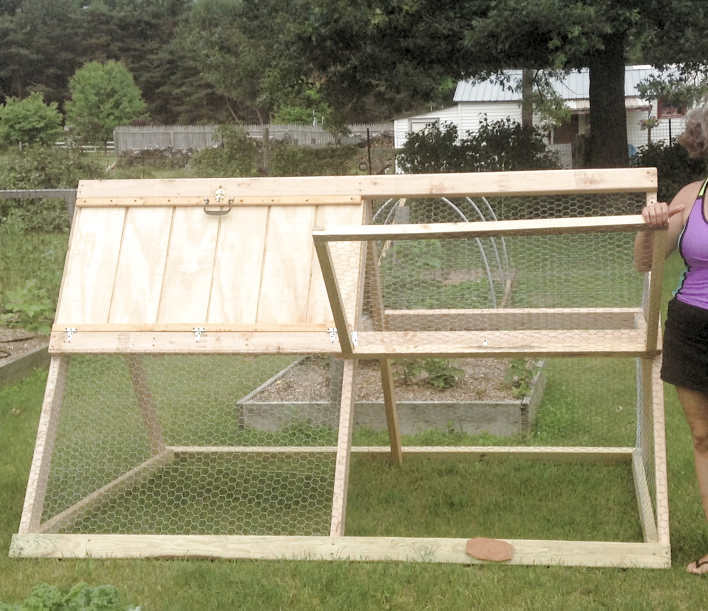
I wanted to leave the top on the one side open with the option to slap on the other boards if/when the need arises. I have the other t1-11 panels that can sit right in those areas because I stapled the chicken wire in a way that would allow it.
I also added a flip up panel as seen in the pictures for access. I didn't want a small door that I would have a hard time getting to things in there. I'm so glad I added this feature, it sure gives plenty of room for me to maintain the food and water dispensers as well as get in there and catch the little chickies :)
I wanted it green to blend into the wooded background in our backyard. I didn't want to take any beauty away from the cedar greenhouse and fencing we added last year, and this tractor would be moved from time to time and I felt this green that we had on hand was perfect to help it blend in rather than stand out.
This thing is heavy! I have a hard time moving it around and usually need my husband to move it so I won't hurt myself. I am considering some options... I don't like the rope I have on it to pull it, any suggestions would be appreciated.
As with the other items I've made with Ana's plans, this was fun and pretty easy to make. I love this site! Soon I will take on my next project, I've bought and gathered the materials, I'm anxious to get started :)
Thank you for looking :)
Built from Plan(s)
Estimated Cost
$75 - $85 for the new materials listed
Estimated Time Investment
Weekend Project (10-20 Hours)
Finish Used
Green exterior paint we had on hand.
Recommended Skill Level
Intermediate
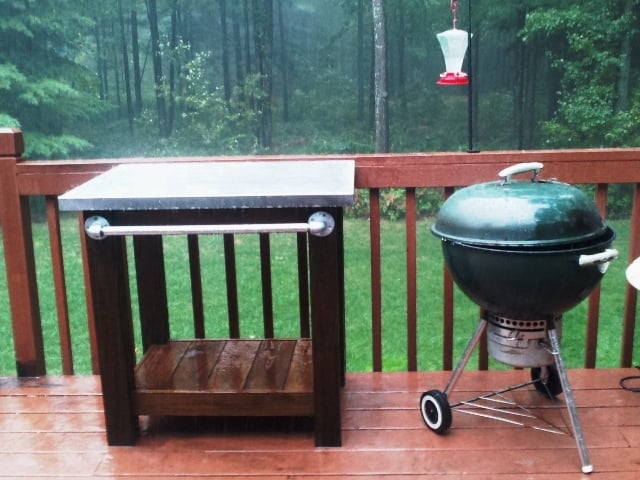
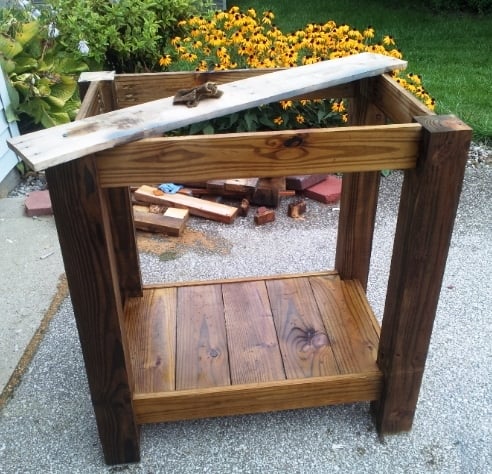
Grill table with stainless steel top

I made this table to go next to an outdoor grill to be used as a food prep area or just a surface for holding ingredients (instead of using the deck railing!). The top is stainless steel which fits tightly over 2 3/4" pieces of plywood laminated together. The bar/handle in front is made out of galvanized pipe. All wood was treated.
Legs - 4x4 posts
Bottom shelf - 1x6's
Sides - 1x4's
Top - 2 pieces of 3/4" plywood laminated together with a stainless steel top (custom fit) over top
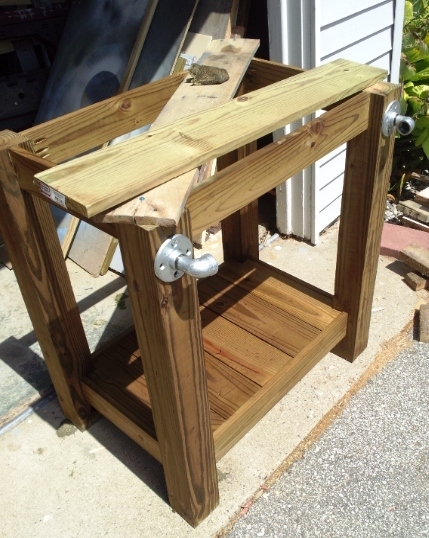
Towel bar - galvanized pipe (cut and threaded to size at Lowe's), floor flanges and 90 degree elbows
Estimated Cost
$120
Estimated Time Investment
Day Project (6-9 Hours)
Finish Used
I used Kona stain but since it was over treated wood the stain did not take as dark as it should have. I will have to restain this piece after it has completely dried out.
Recommended Skill Level
Intermediate
Comments

Thu, 05/15/2014 - 10:33
Stainless Top
Sorry about the late reply! Yes, I just gave my dimensions to a local steel supplier and they made the top. I think I have about $40 into the stainless. They didn't weld the corners but I've never had an issue with them.

Sat, 04/26/2014 - 15:41
Stainless steel sheet metal
I too would like to know your source for the sheet metal.

In reply to Stainless steel sheet metal by Pursuit of Handyness
Thu, 05/15/2014 - 10:35
Stainless Top
I just found a local steel supplier, told them what I need and they formed the top. It cost me around $40 (without welding of the corners). I took a fine grit sandpaper to it afterward to scuff it up so it didn't look so bright.
Wed, 04/30/2014 - 12:55
Grill table with stainless steel top
I would like to know are there any plans available to make this table? I am very impressed of its design.
In reply to Grill table with stainless steel top by AMR4412
Thu, 05/15/2014 - 10:46
Plans for top
No...I didn't have any plans when I built it but it's a very simple concept. I chose to use all treated wood since I knew it would be sitting outside unprotected. However, my 4x4 posts weren't square so this caused a lot of problems and everything was built to fit. I believe I just used 4x4's, 1X6s (for the bottom shelf) and 1x4s for the sides (top and bottom). For the top, I just laminated 2 pieces of 3/4" plywood together to bulk it up and then had the stainless top built to fit. It fit perfectly so I didn't glue it to the plywood. This makes it easy to remove and clean, if necessary. For the galvanized pipe (towel bar), I bought it at Lowe's and had them cut/thread it to fit my dimensions.
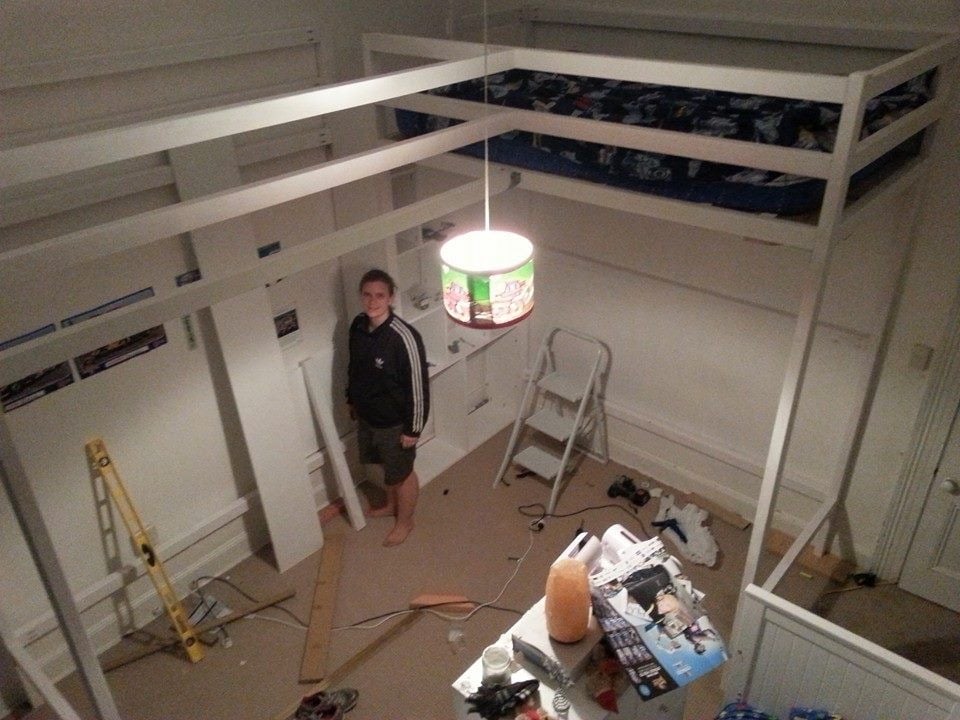
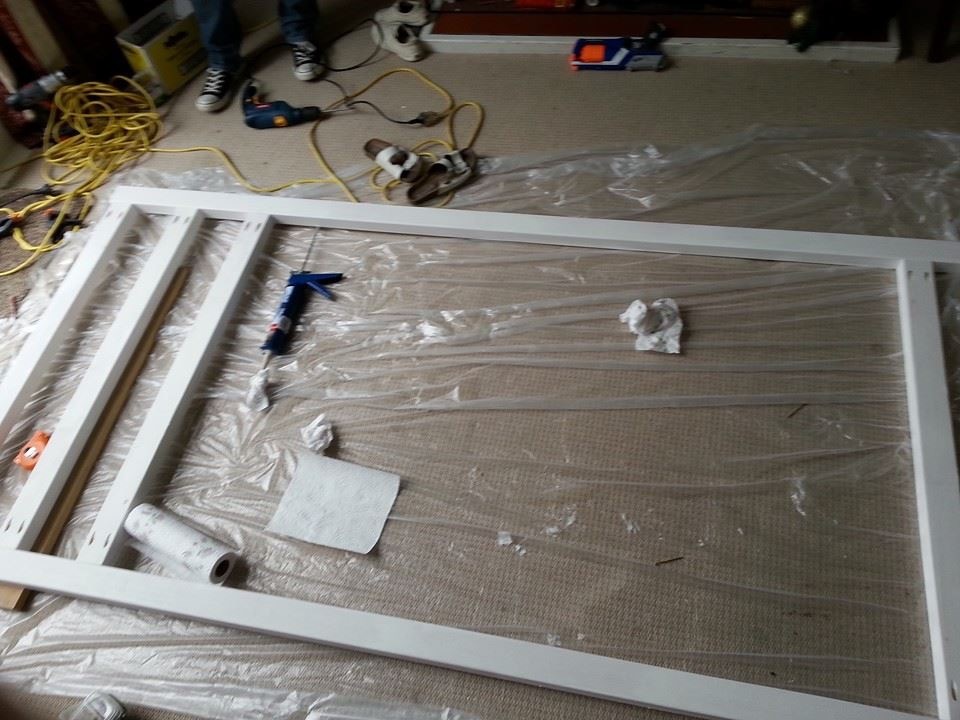
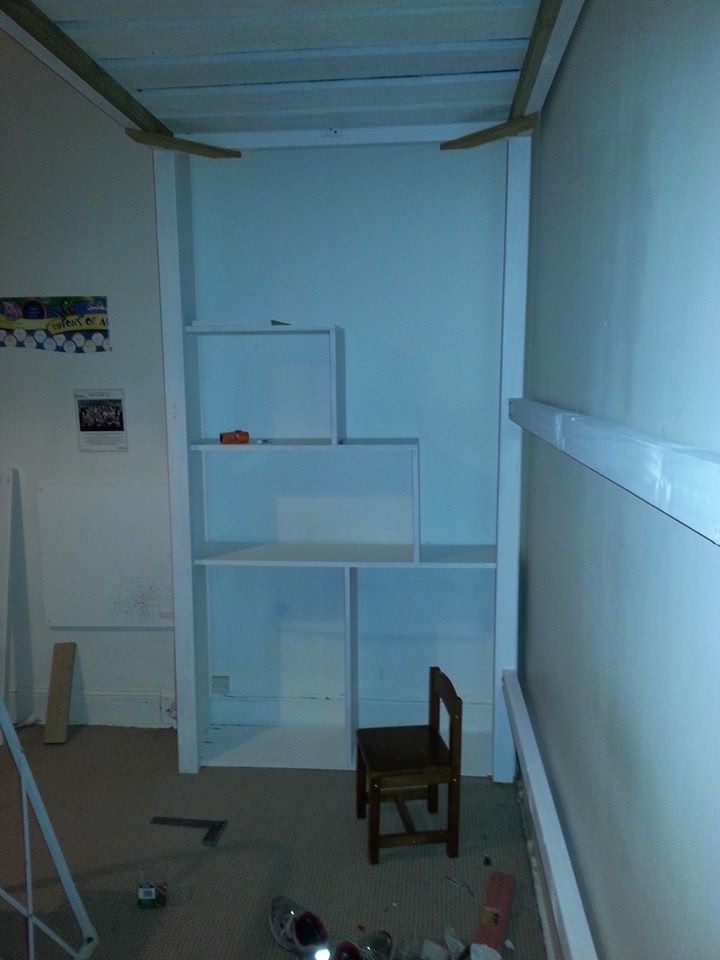
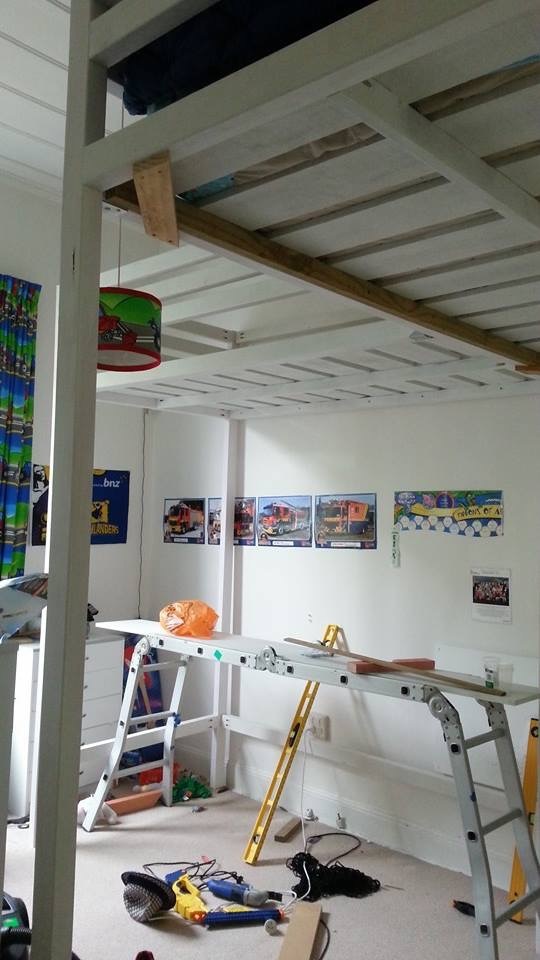
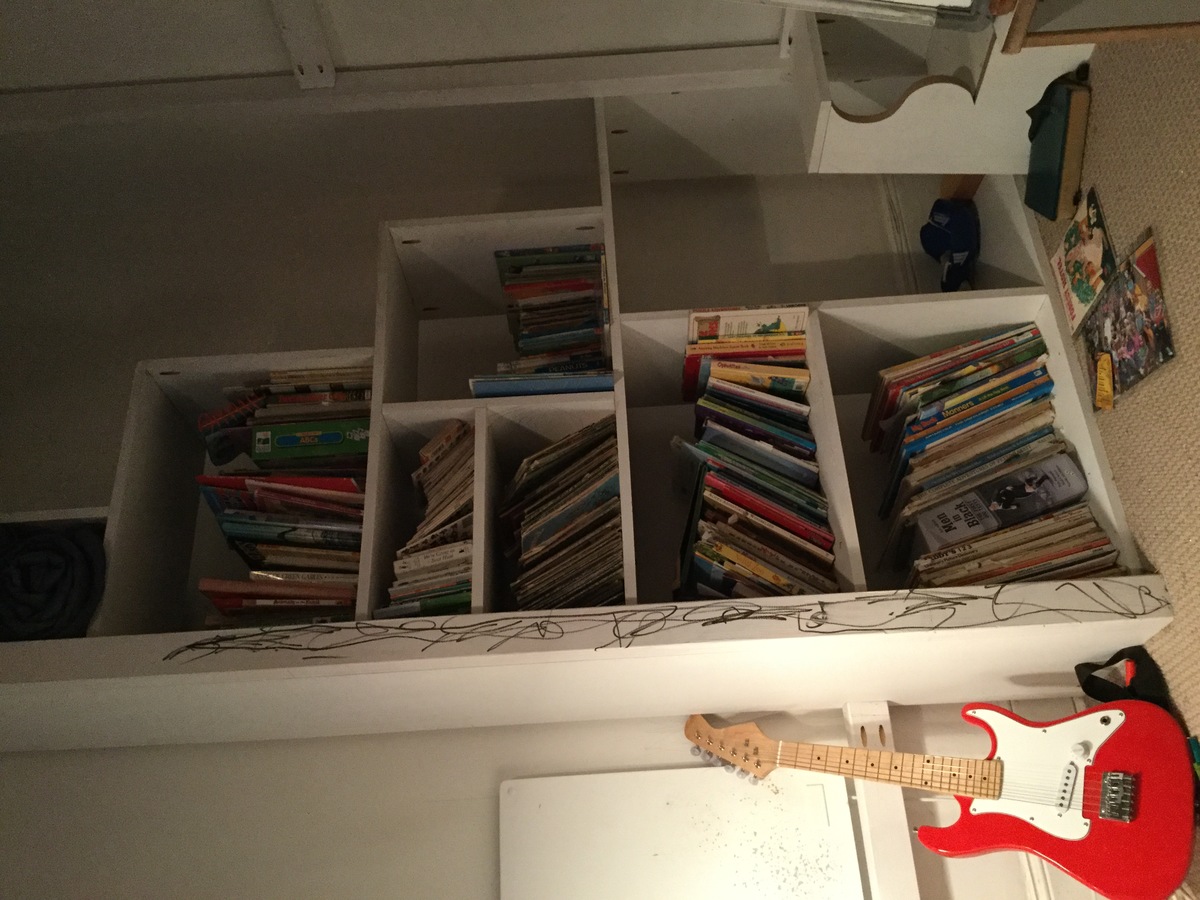
L shaped loft beds

We have 12 foot studs in our house so I wanted to make use of the height of our ceiling to provide more space on the floor for the boys to play! With two boys sharing a room, the beds were going to take up a lot of valuable floor space. I found the bunk bed plans in Ana's book and decided to modify them to make loft beds. We had to do two so decided on an L shape so we could fit them into the room! Once we made the first bed we decided we should put only one set of stairs in to save space. The safest way we could think to do this was to place the stairs against the wall so the boys were less likely to fall. The stairs double as book shelves. The coloured rope was an added safety feature we thought up and gives me peace of mind! This was a fun, relatively easy build for two non-builders making their first big project. I bought a Kreg pocket hole jig for this project and it was a life saver. I can't imagine doing this build with out it!!! We completed it in about two to three days while my brother was down on holiday. It was fun and good brother sister bonding time! I am about to embark on phase two of the boys room, this time by myself , adding a storage dresser under one bed. I will modify Ana's laundry dresser plans to fit some plastic storage boxes. Then a day bed/sofa under the other bed using Ana's Alaska cabins day beds plan and finally (if I'm still standing) a shorter version of the craft table for the middle of the room! That's my year planned! Hope you enjoy the pictures, the beds are so big and high it's very hard to get a good photo.
Built from Plan(s)
Estimated Cost
$300-400 NZD
Estimated Time Investment
Weekend Project (10-20 Hours)
Finish Used
Dulux - White paint matte finish. I painted all the wood before assembly, I highly recommend this. It needs another coat post build but I can confess I haven't gotten around to it yet!!!
Recommended Skill Level
Beginner
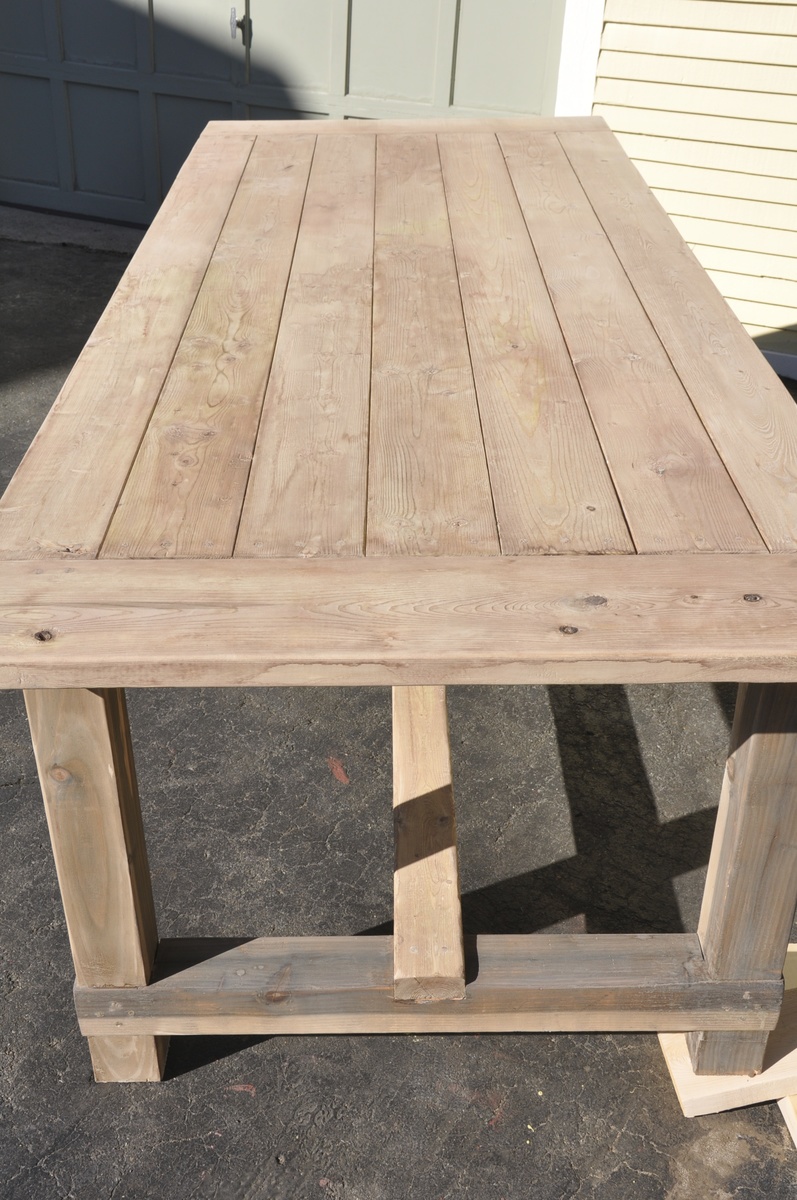
Farmhouse Table with Extensions
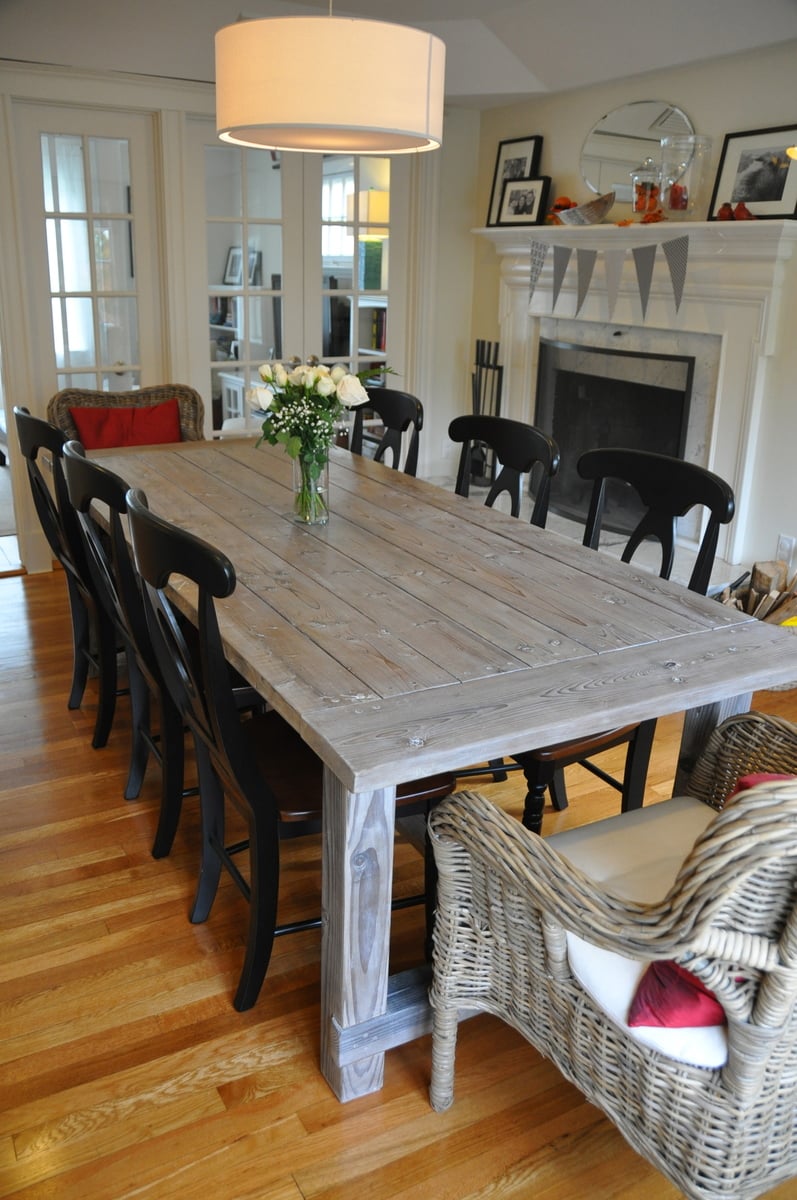
This was my first build and I learned A LOT and watched A LOT of youtube diy videos. The main take-away from this project is not to build in the freezing cold if the finished project is for inside. I finished this project in below freezing temperatures and I noticed that the wood expanded (increasing slightly the gap between the finished boards on the top) when it was brought inside.
I built this from the original farmhouse table plans with no kreg jig although I did buy and use a pocket kreg jig to make the extensions. The main modifications were using 4x4s such as were used in the Country Living magazine spread that inspired this build and also making modifications to allow the addition of 15" extensions at each end of the table's bread boards.
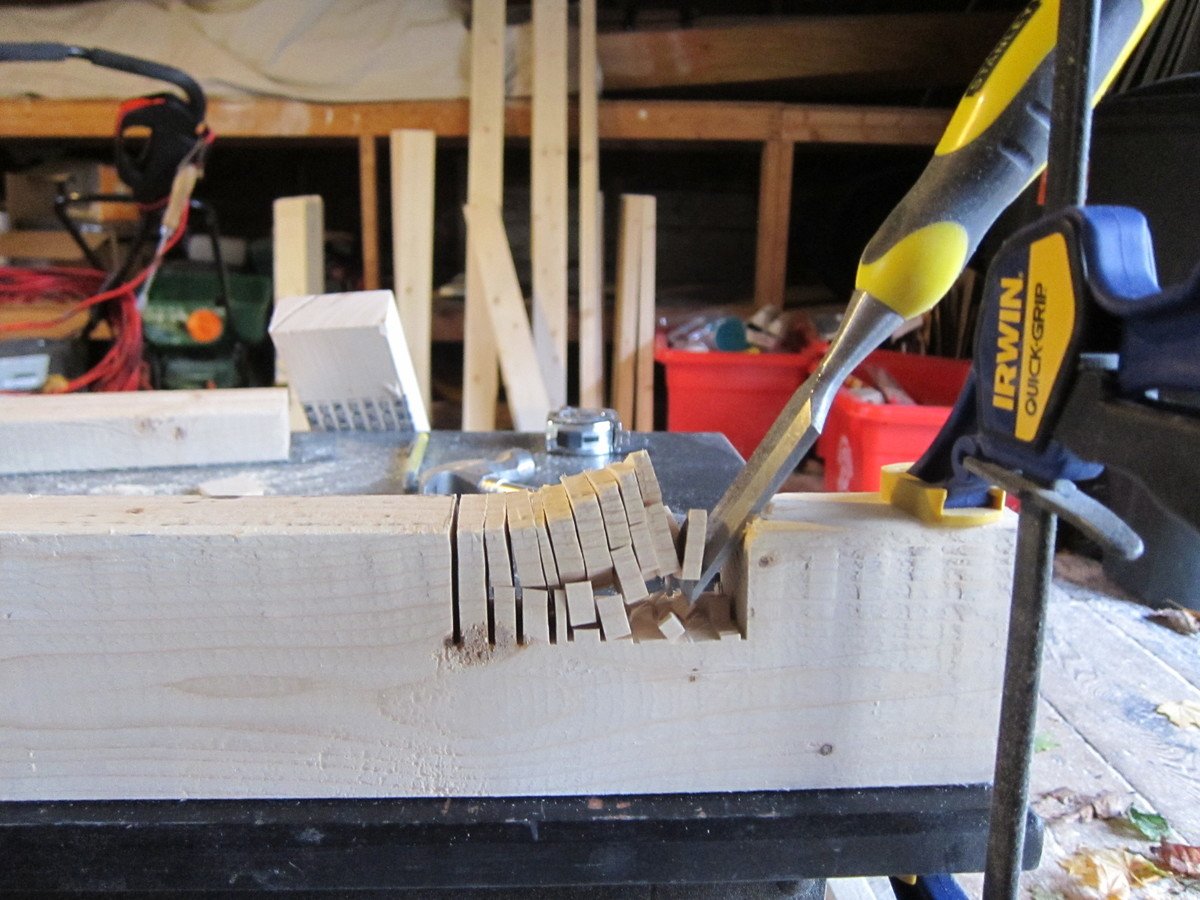
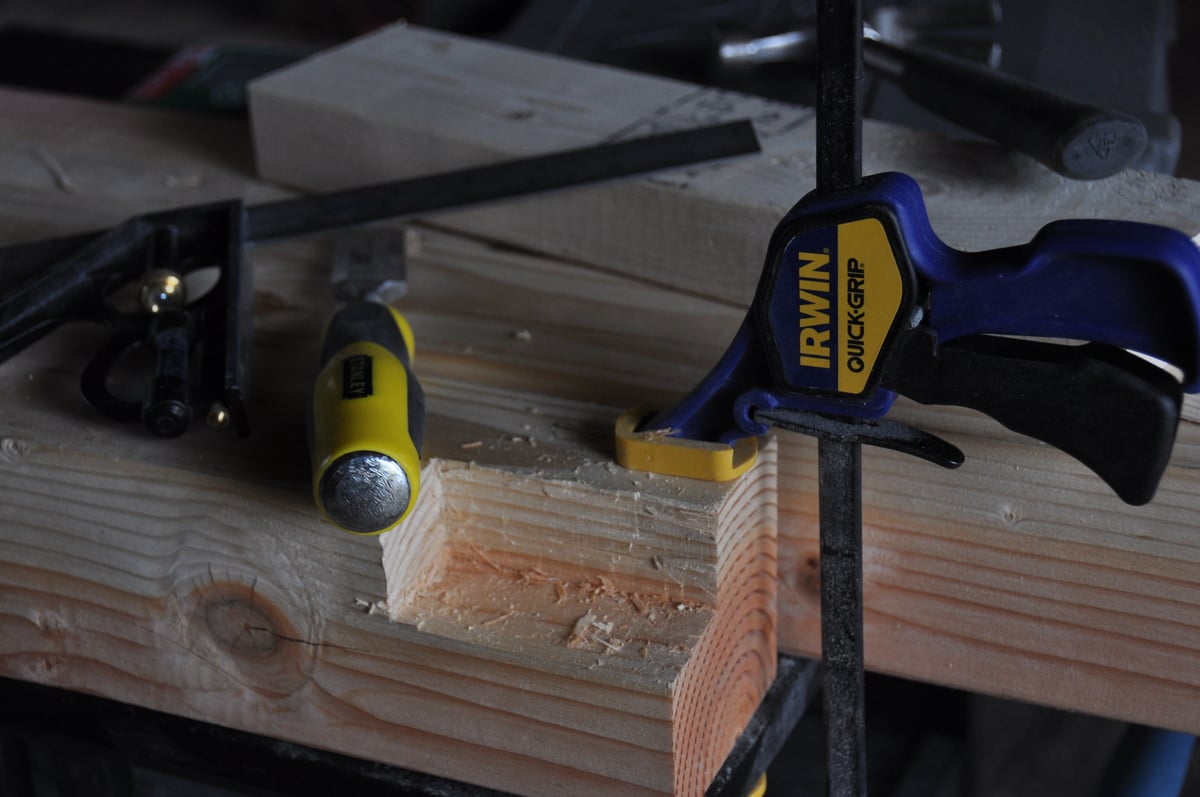
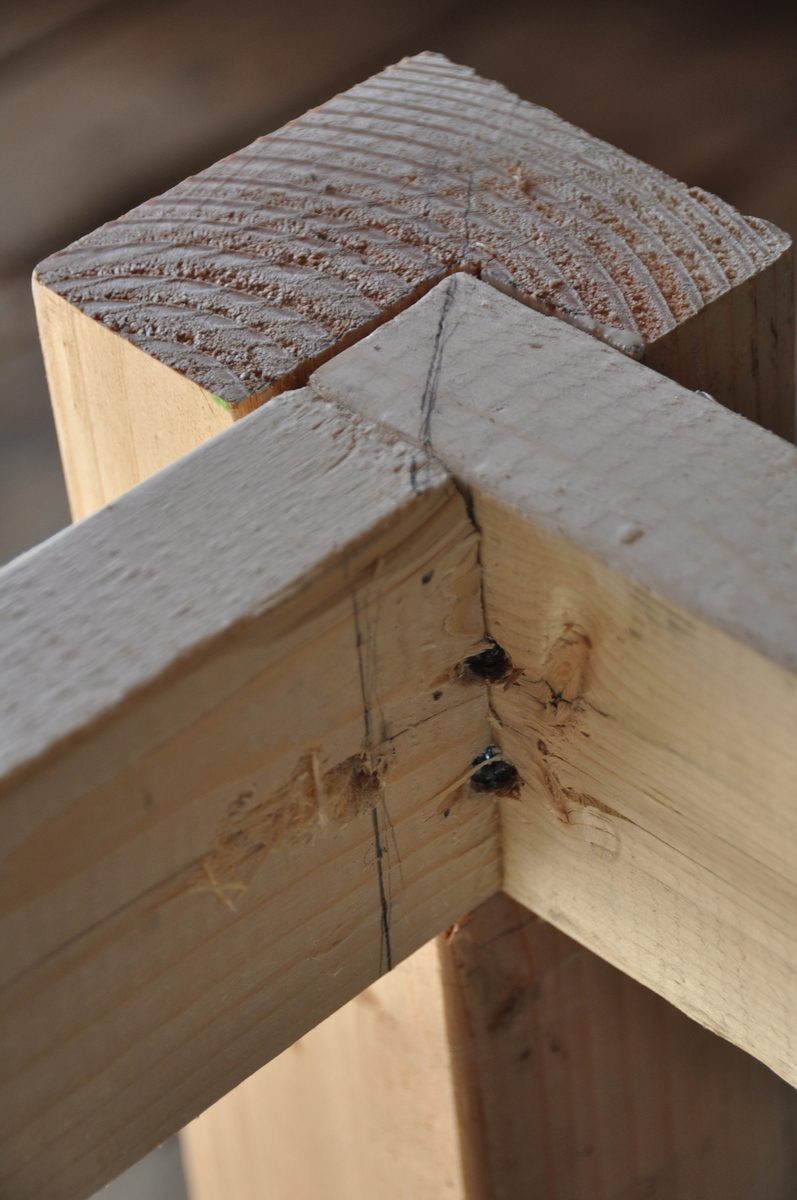
My first challenge was figuring out how to build with the 4x4 legs instead of the 2 2x4s screwed together. In order to accomplish this i had to use a chisel to create the corner lip that the table top frame would sit on. I added photos of this so I hope it will help someone. Chiseling these 4 corners (one on each post) only took an hour or two and was so worth it for the look of the 4x4s. Just measure carefully and work carefully with a sharp chisel. I actually removed half the wood by sawing off the corner at a 45 degree angle. Remember when cutting your boards for the table ends that a 4x4 has different dimensions than 2 2x4s screwed together. Compensate for this in your cuts.
Another challenge was hiding the screws on the table legs and table top. I was leaving the finish natural so didn't want to use wood fill. I accomplished this by getting a countersink bit and then buying wooden dowels the same diameter. For these screw holes, after finishing screwing, I put a dab of wood glue in the countersink hole, inserted the dowel as far as it would go, used a fine hand saw to cut off the dowel flush with the table and then used a hammer to make sure the dowel was in tight and flush.
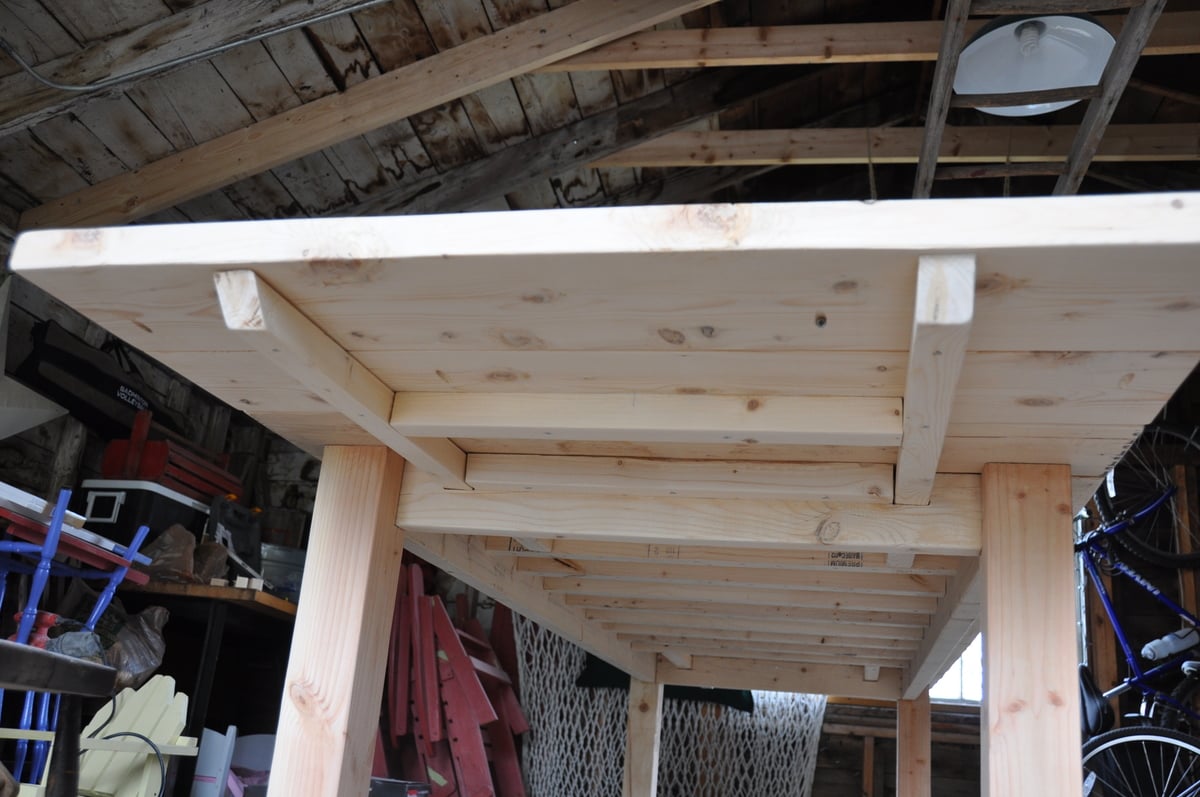
I had trouble figuring out how to attach the table top frame to the table legs with the long screws from the plans so I included a picture of this step. Its really easy but I was not able to use three screws as the plan calls for. I used two instead and it has been very solid. I used the long screws as proscribed.
Finally, I wanted to build extensions (2 2x8 boards kreg jigged together) so I could increase seating up to a max. of 12 persons, so I needed to cut out 2x2 gaps on the table ends. I also included a picture of these in place. To make room for the 2 2x2s that extend under the bread boards and table top to brace the extensions, I left out one of the 2x2 cross beams at each end of the underside of the table (the boards that the table top boards screw into).
I hope this is helpful to you!
Built from Plan(s)
Estimated Cost
$250
Estimated Time Investment
Week Long Project (20 Hours or More)
Finish Used
Vinegar and Steel Wool Solution (soak steel wool for 24 hours in vinegar and be sure to test on a sample) to "age" the wood. Tung oil over this sealed the stain/wood. over this I applied a wax finish. First I used Briwax Liming Wax to enhance the gray finish and leave a slight white wash patina. This finish was enhanced because I had steel brushed with the grain to remove some soft wood so the liming wax would enhance the grain. I finished the project with clear briwax. We have been using this as our everyday table since February and there are no stains or problems with this finish.
Recommended Skill Level
Starter Project
Comments


Mon, 02/10/2014 - 11:55
So on the same page
Great job on the table! I love...I had visions of this table before I saw it. I wanted to use the 4x4's for the legs as well, the same finish. I am concerned now about the 4x4's because I am an amateur and I think that may throw too many wrenches into my plan. I started with the bench, finished in 3 hours I have patted myself on the back. Plotting on a Kreg jig right now.
Rustic Classic Storage Bed and Reclaimed Wood Look Headboard

seven years ago we built this bed. It takes the place of needing a dresser. See more on my Instagram account.
Built from Plan(s)
Got my confidence in building back!!!!
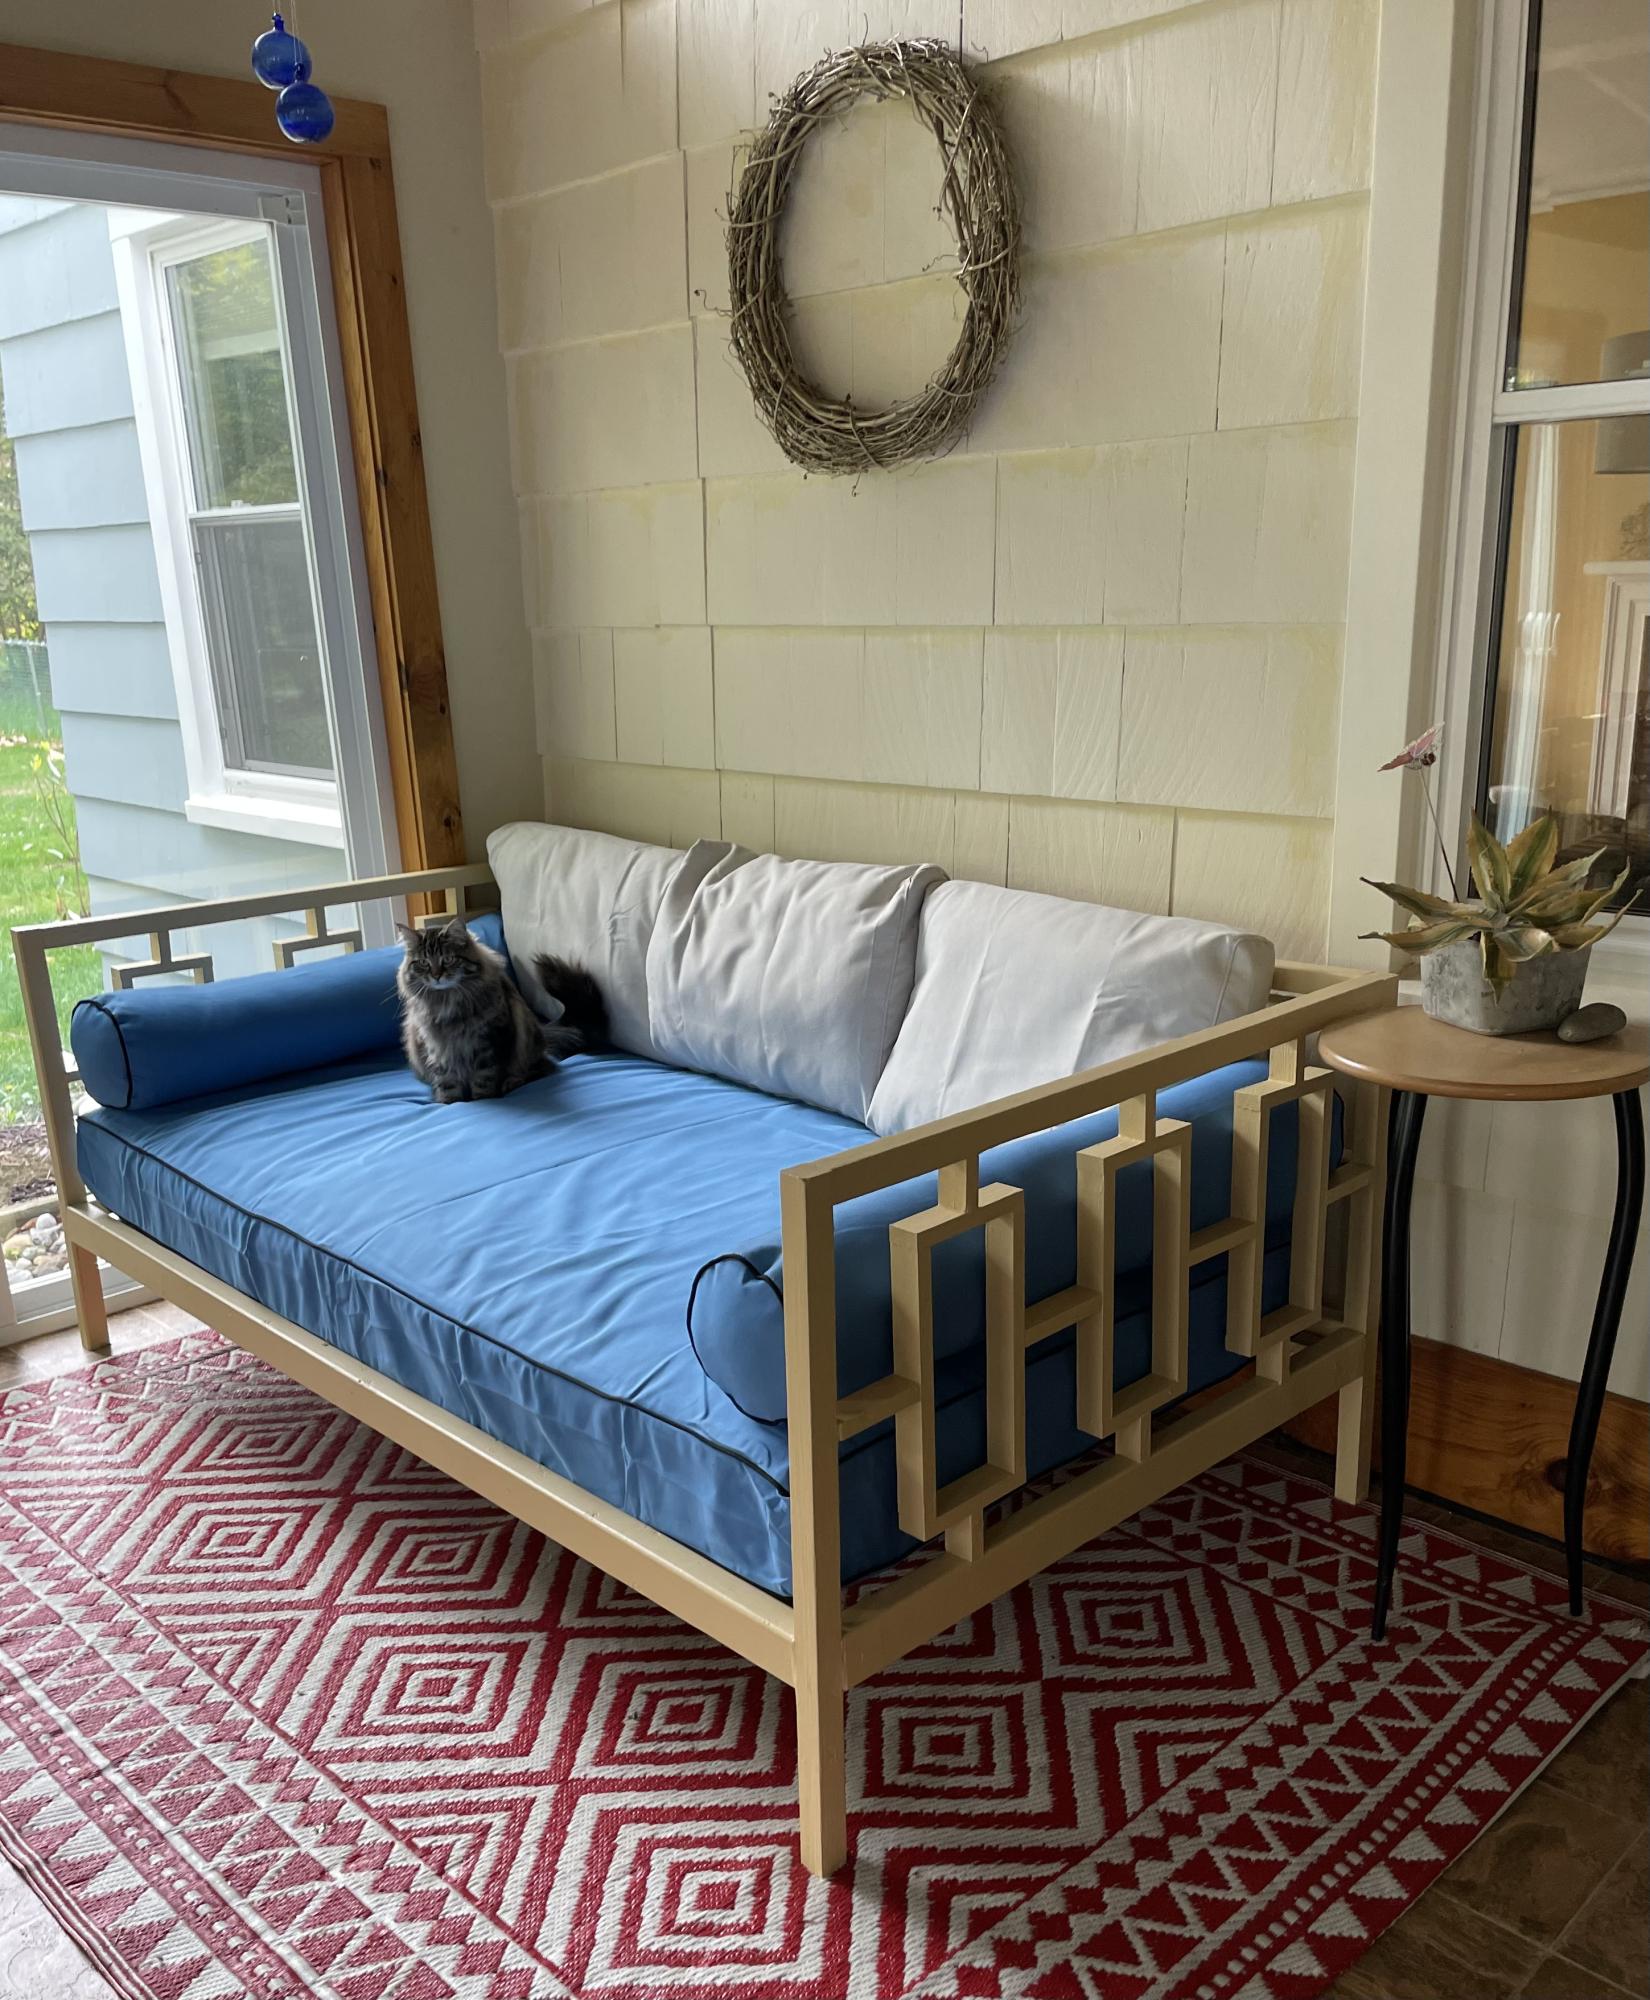
I woke up one morning and decided this space couldn’t go on without a day bed. One week later I am standing tall. This is my first intermediate build. Excited to jump into the next project!
Built from Plan(s)
Comments
Easy Build DIY Planter
Directions were perfect! This is my 3rd project and I really enjoyed it! Fast and easy.
Built from Plan(s)
Estimated Time Investment
Afternoon Project (3-6 Hours)
Recommended Skill Level
Beginner
Outdoor bar table
Not quite finished but love the table already. Trying to decide how to stain/paint it. The Kreg jig was a must for this project. It was my first of hopefully many! I used cedar for the 4x4s and 2x6 top pieces. The 2x4s are treated lumber (only because there were no more cedar ones....apparently lumber is getting hard to get lately!!!). Anyway....thanks for the great plans and motivation for this project.
Built from Plan(s)
Estimated Cost
Lumber was about $150 bucks (I bought mitre saw and kreg jig, too)
Estimated Time Investment
Afternoon Project (3-6 Hours)
Finish Used
Will probably use semi transparent stain
Recommended Skill Level
Beginner
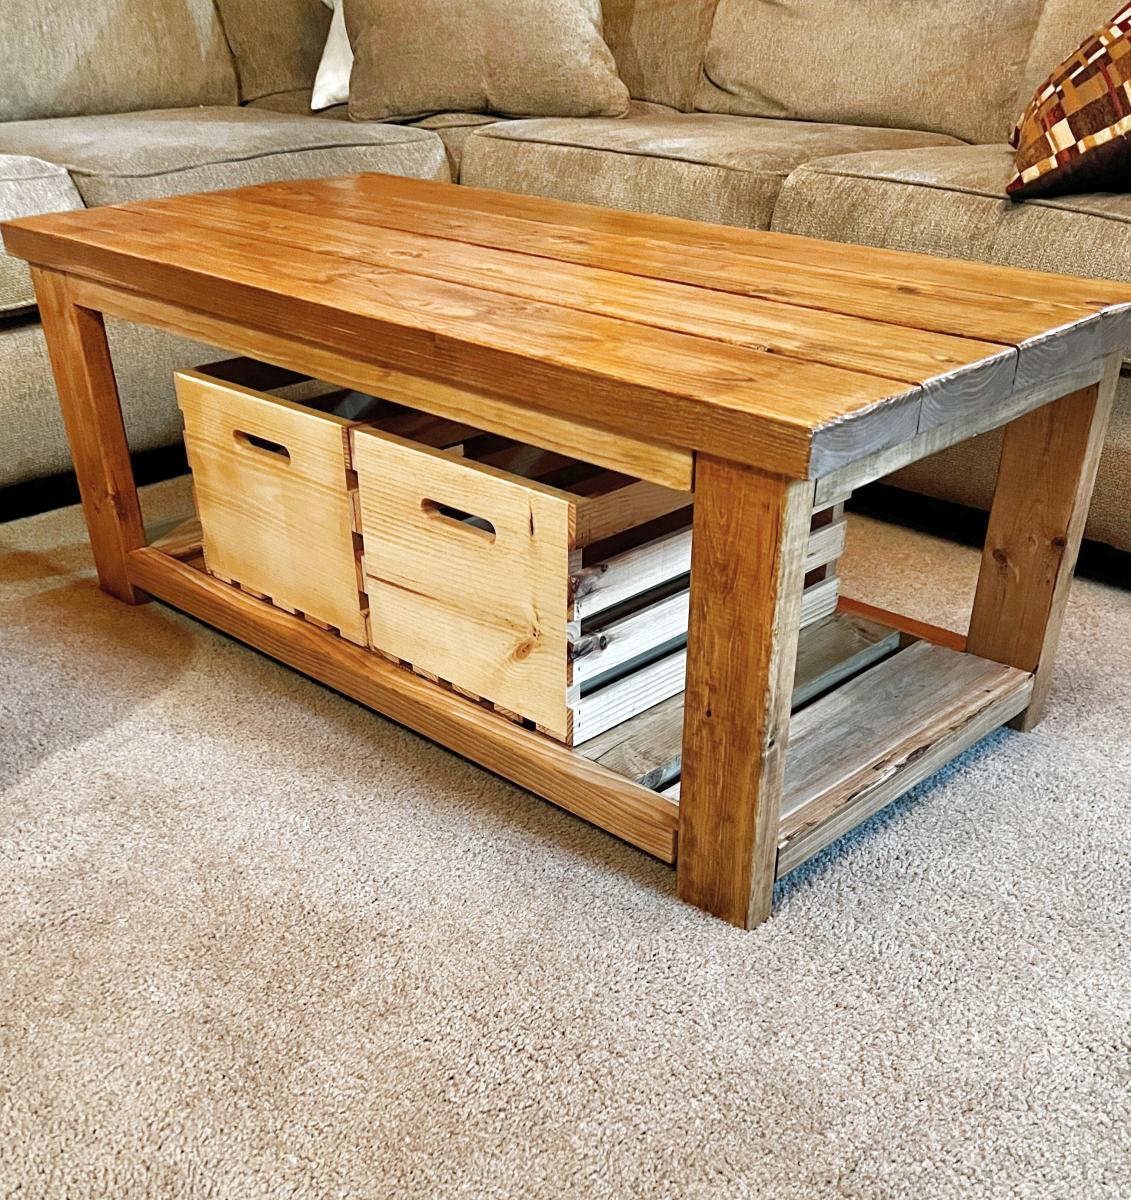
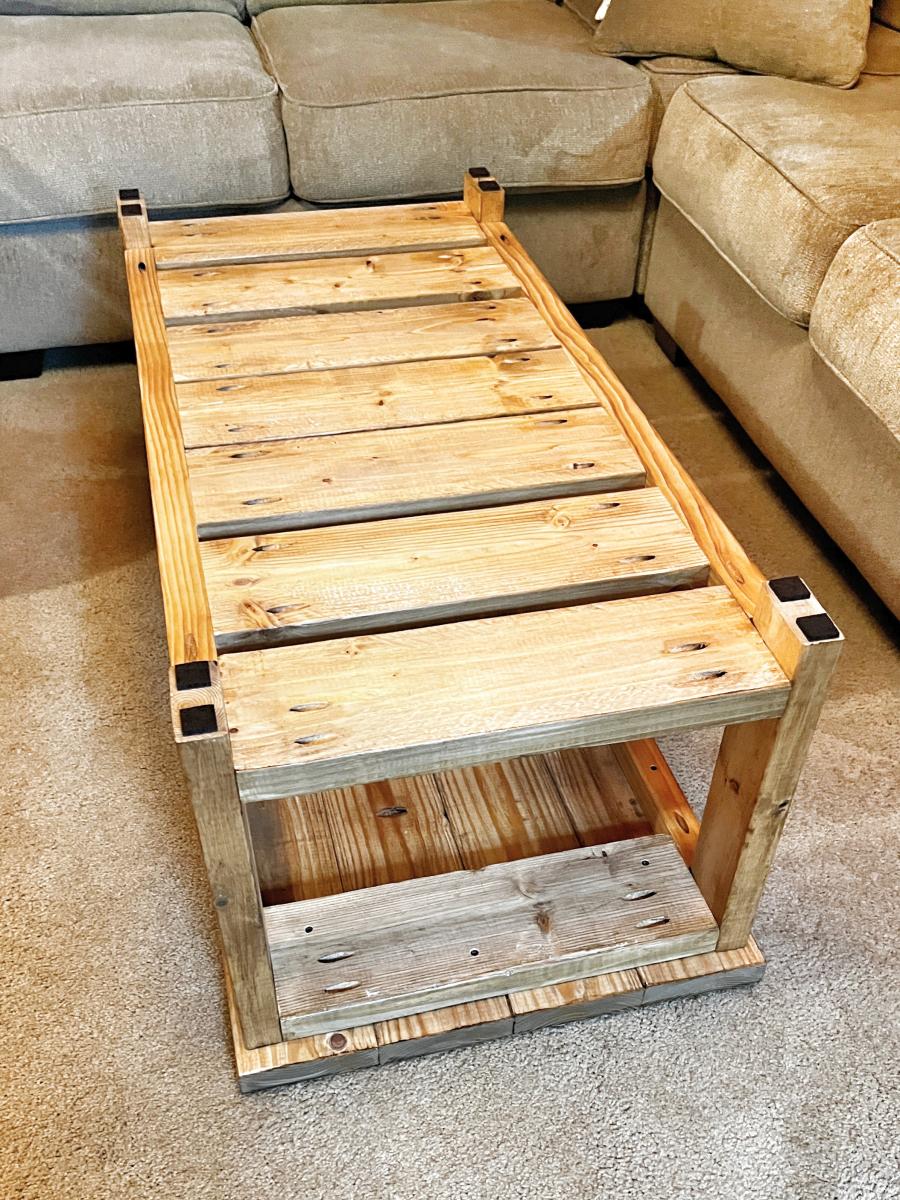
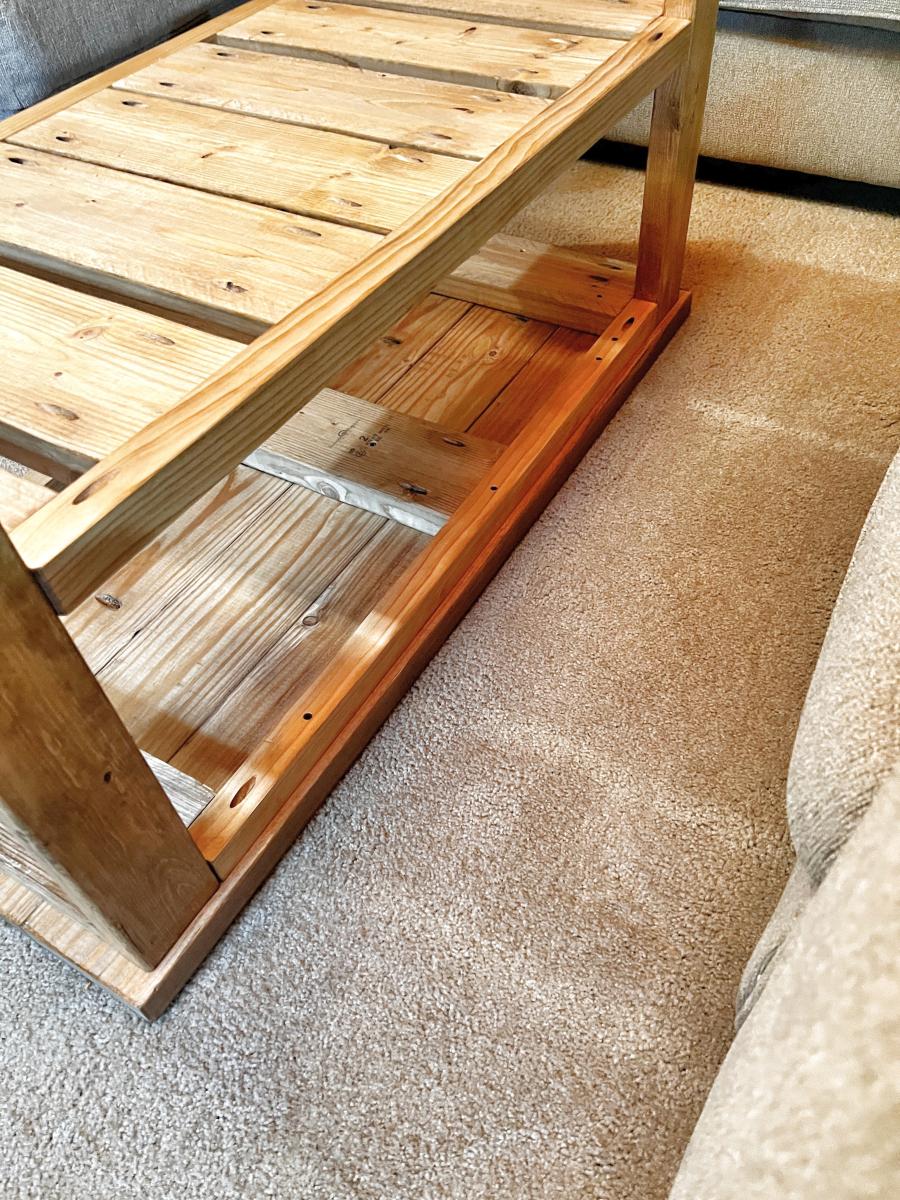
Beginner Coffee Table
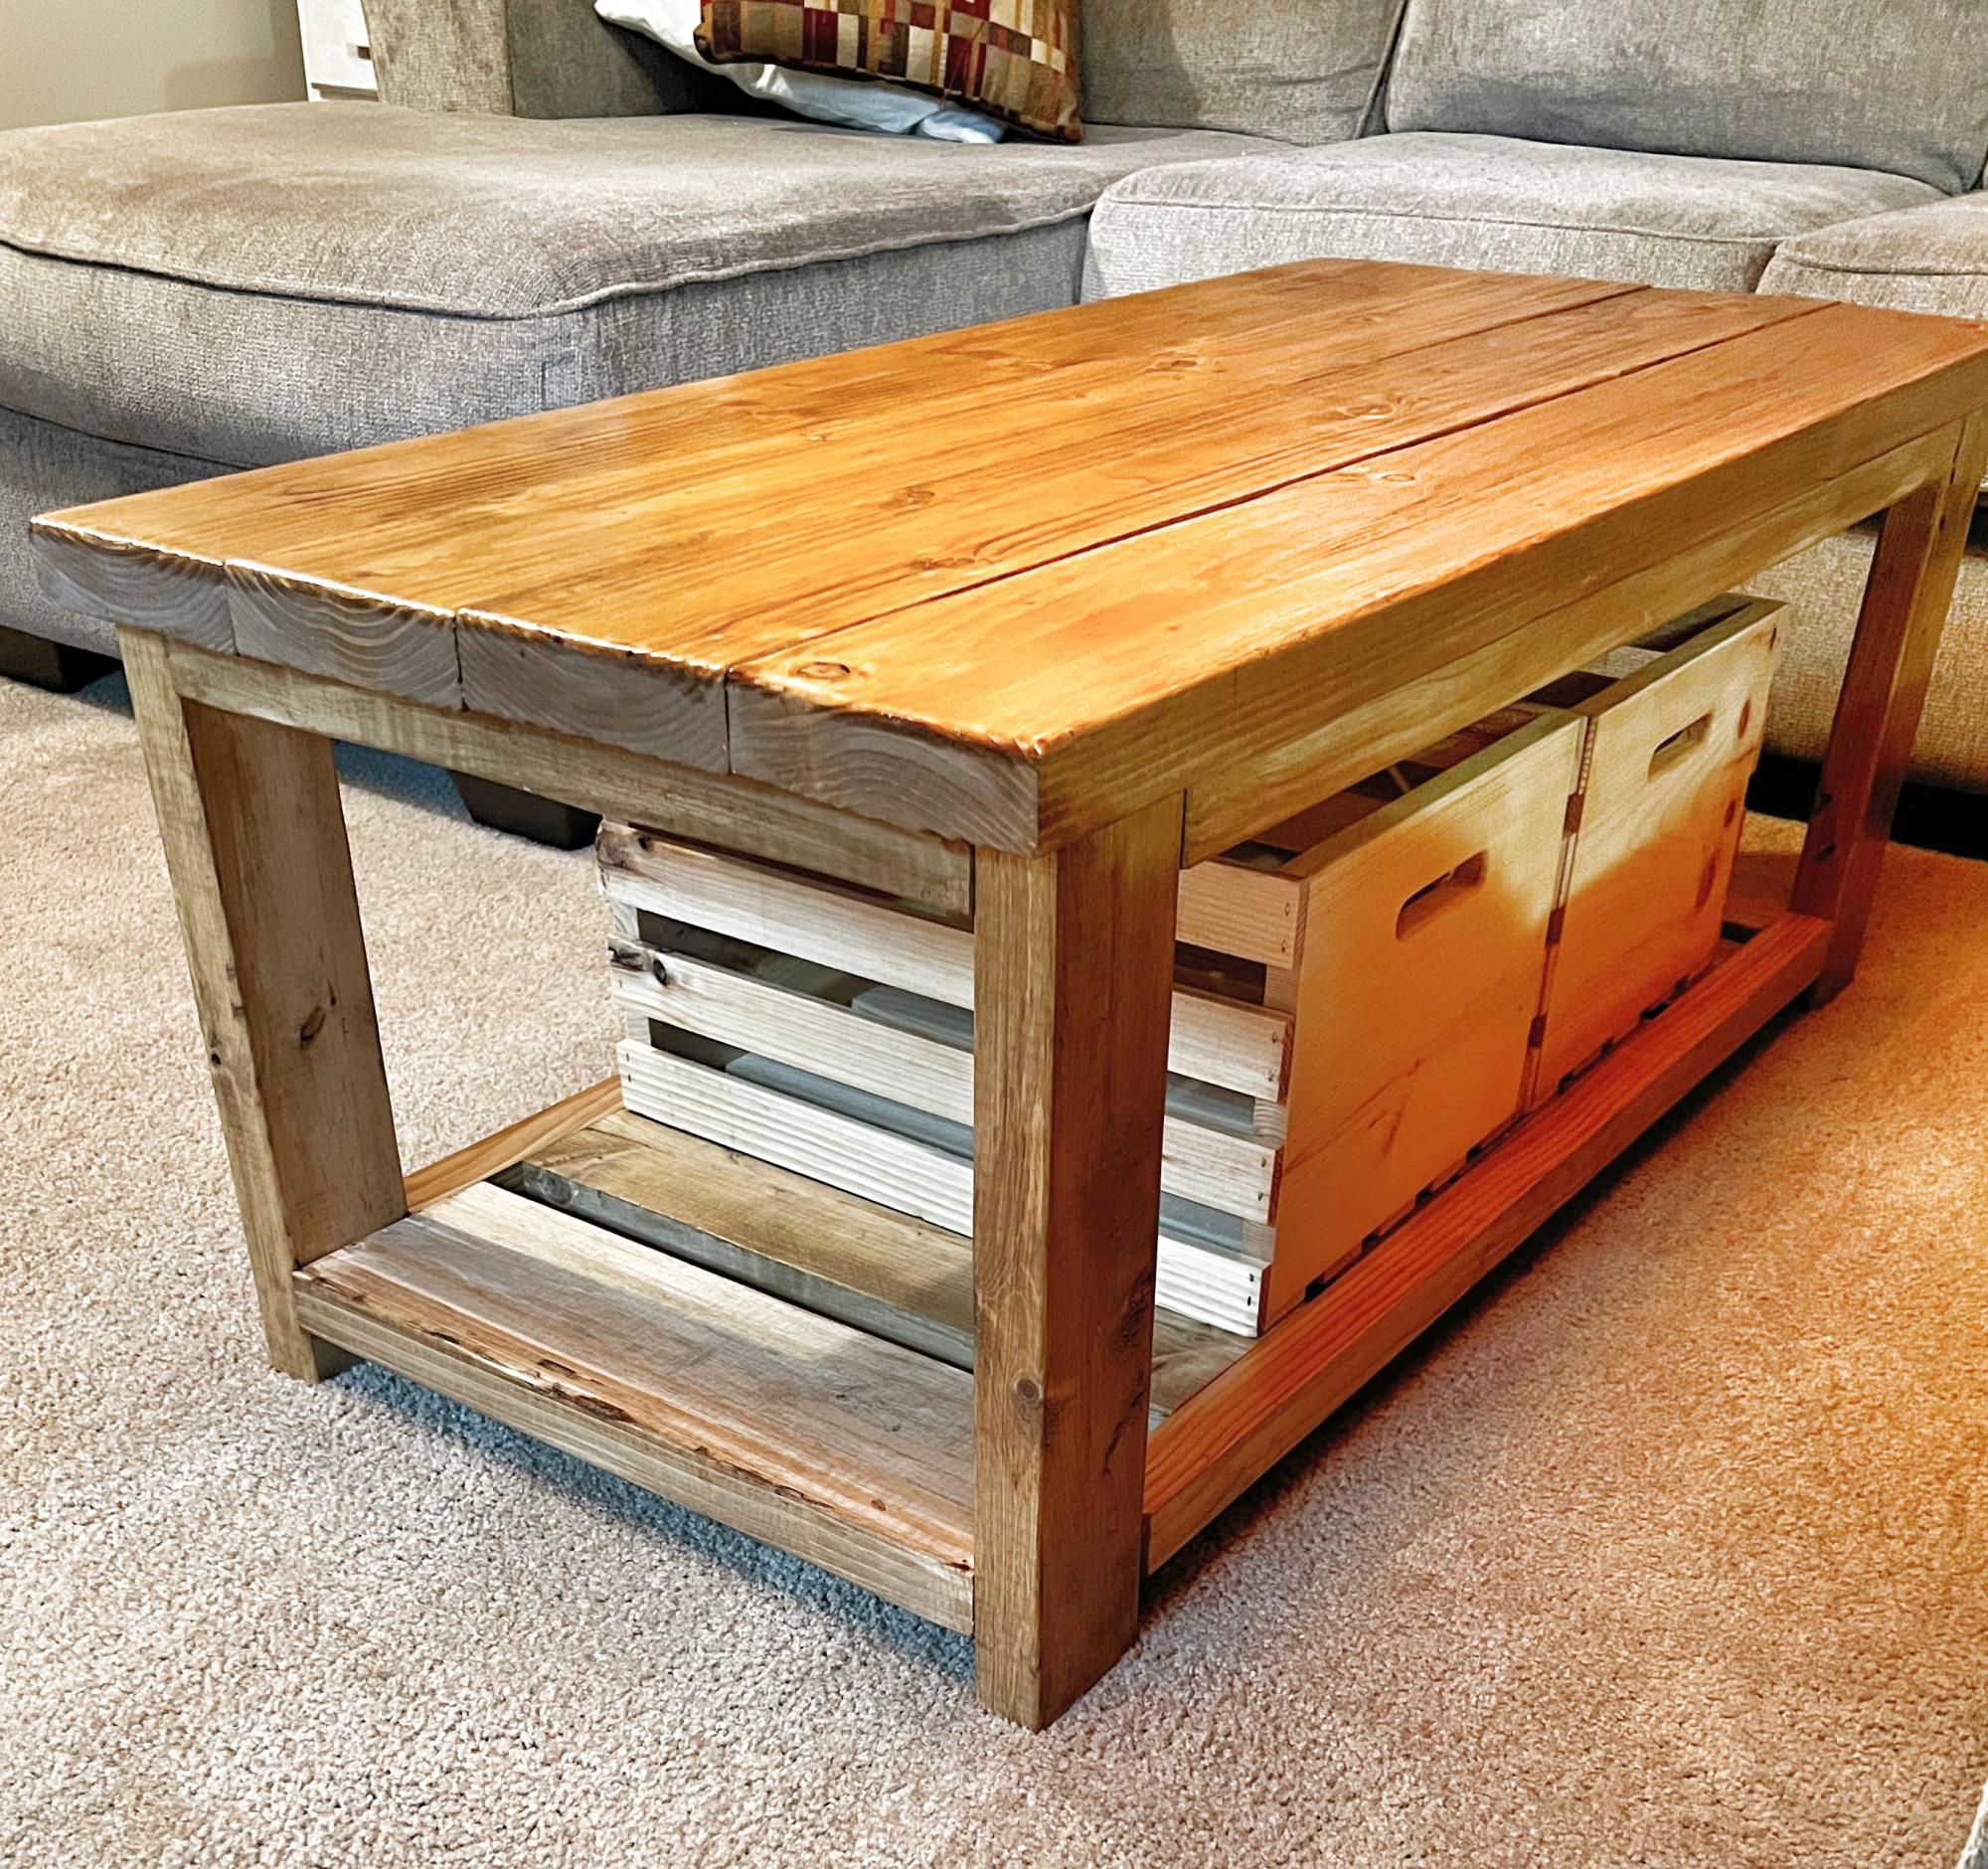
Just finished this farmhouse coffee table for my in-laws who live in Nova Scotia, Canada! This was my first try with the coffee table, but I have used plans from Ana for other projects and genuinely appreciate the simplicity as I am far from a master carpenter. As I started this project, I was determined to use pocket hole joinery (and glue) wherever I could. It took a little more thought, but the goal was accomplished! I finished the wood with BEHR water-based stain & poly, golden oak, and high gloss. I added crates, finished with a natural stain, for storage of small blankets; I also added the felt pads to protect their laminate floors. Thanks again for the plans, Ana!
Built from Plan(s)
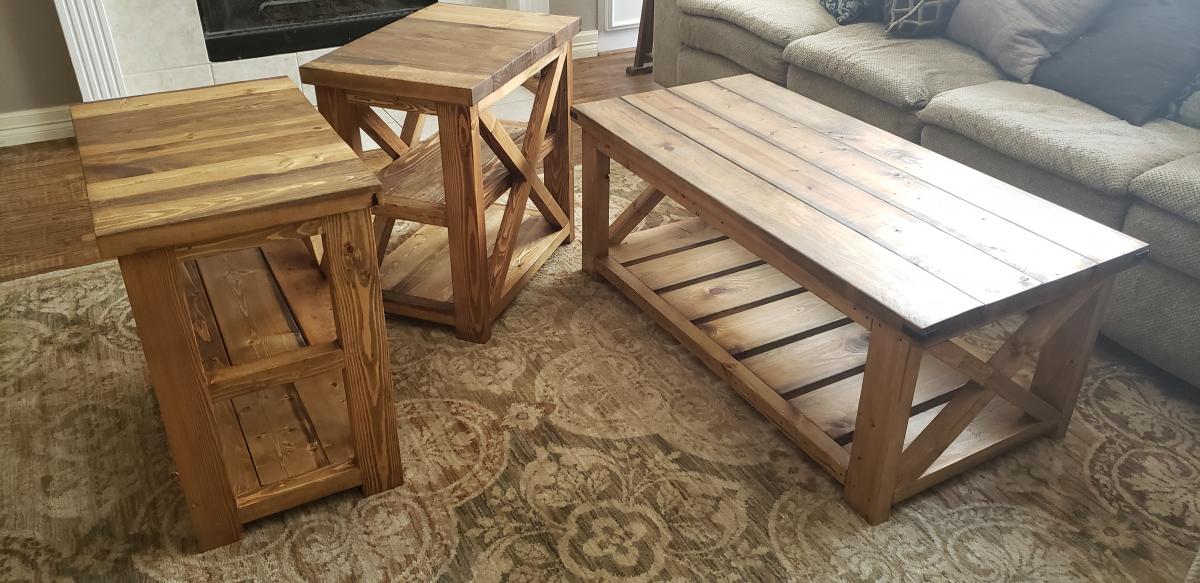
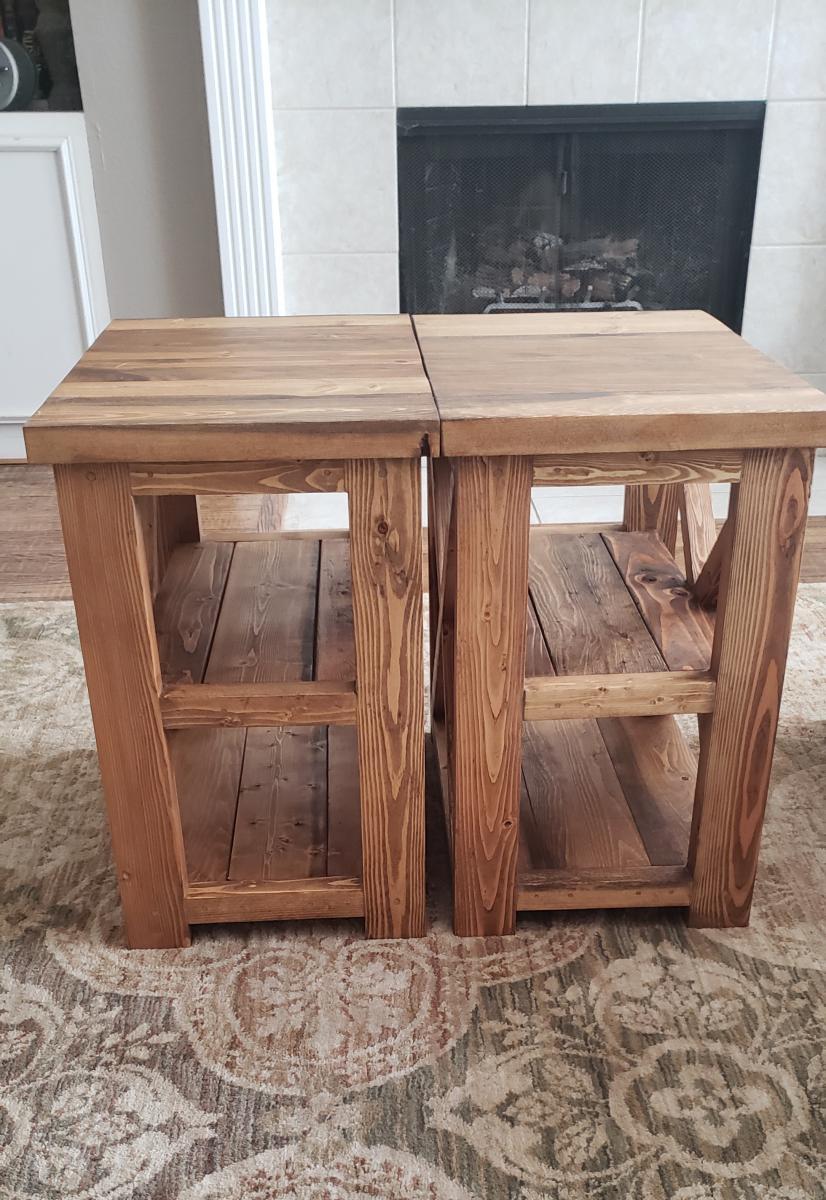
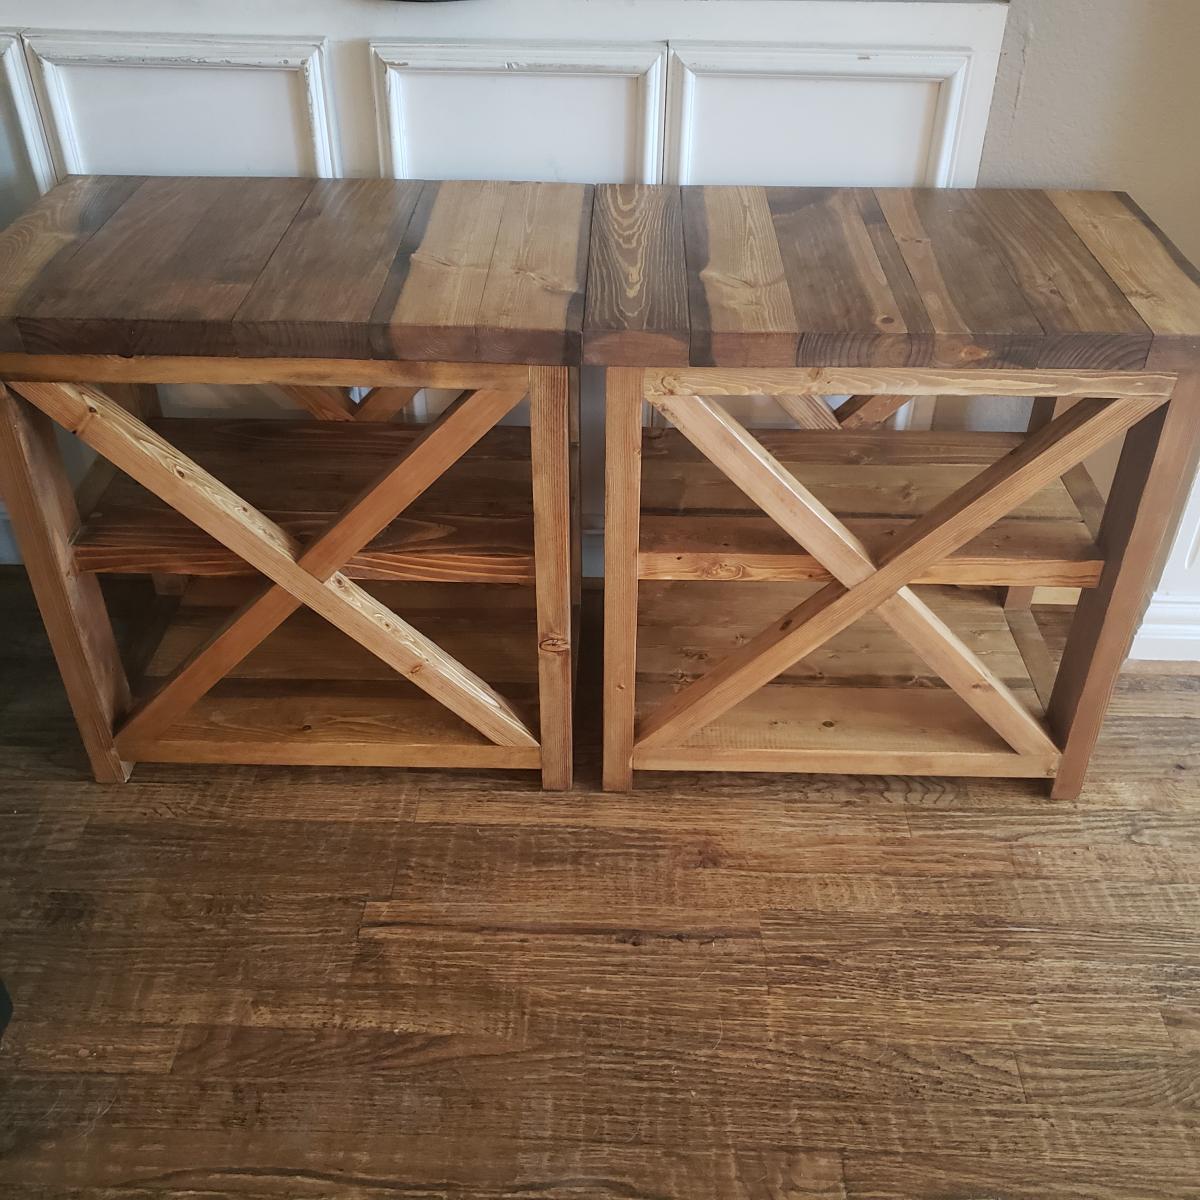
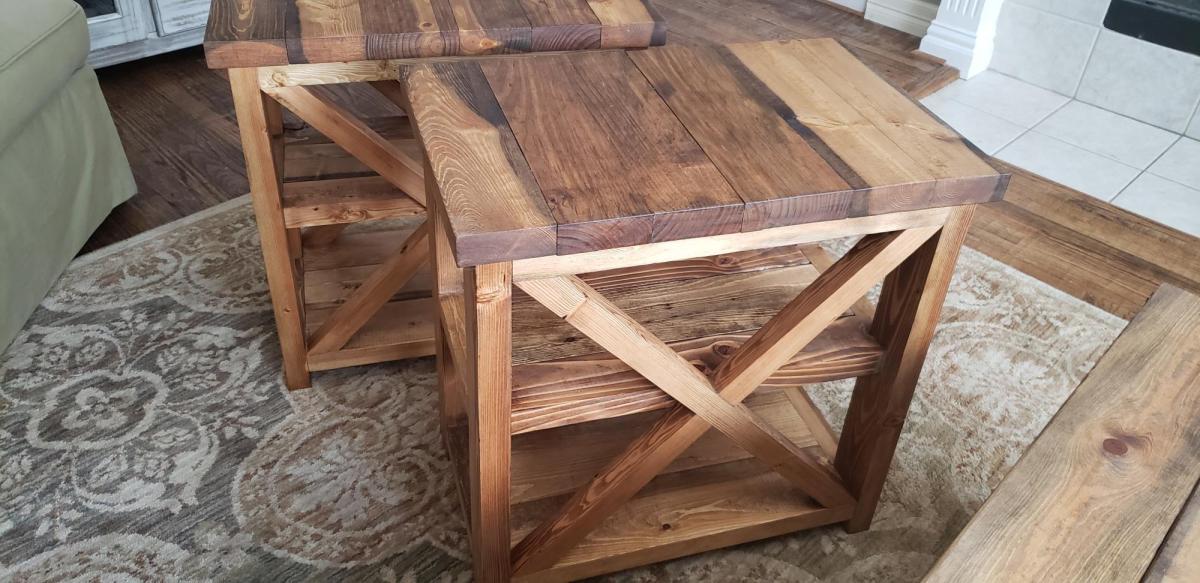
Rustic X Side Tables - Added Shelf
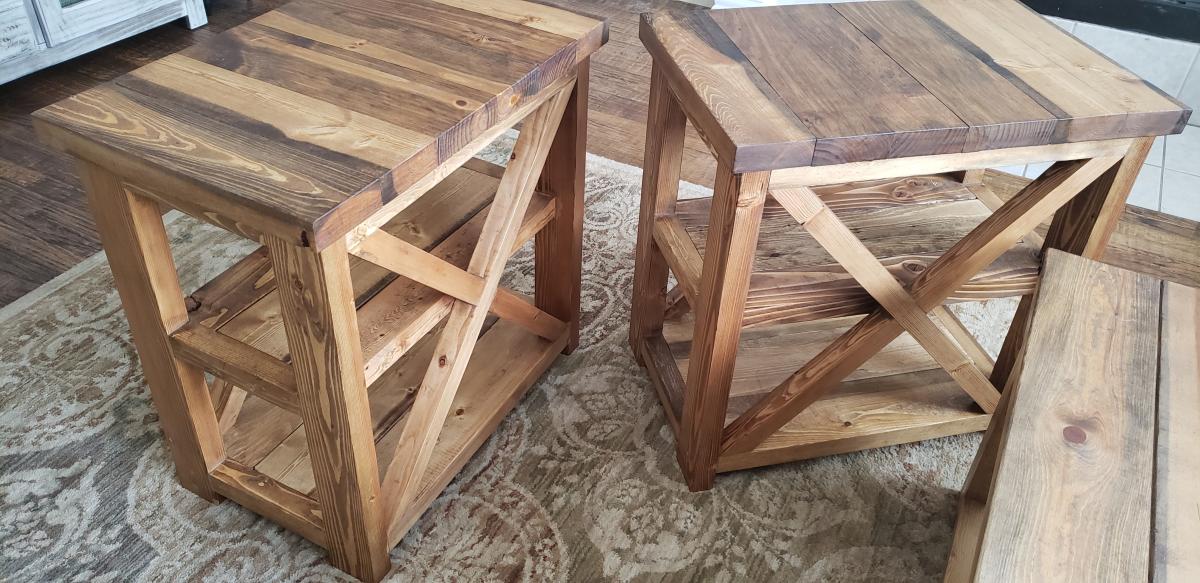
This was a fun project! We had already made the coffee table and someone wanted side tables. We assisted the plans for the side table to make these 16w x 25h x 25d and added a center shelf. After getting our cut list the build was easy and quick. It took about 6-9 hours to cut, build, sand, stain, apply finish, and finish sand.
Built from Plan(s)
Estimated Cost
$60
Estimated Time Investment
Day Project (6-9 Hours)
Finish Used
Dark Walnut Stain with rubbed matte finish
Recommended Skill Level
Beginner
Comments
Handmade Soap Rack
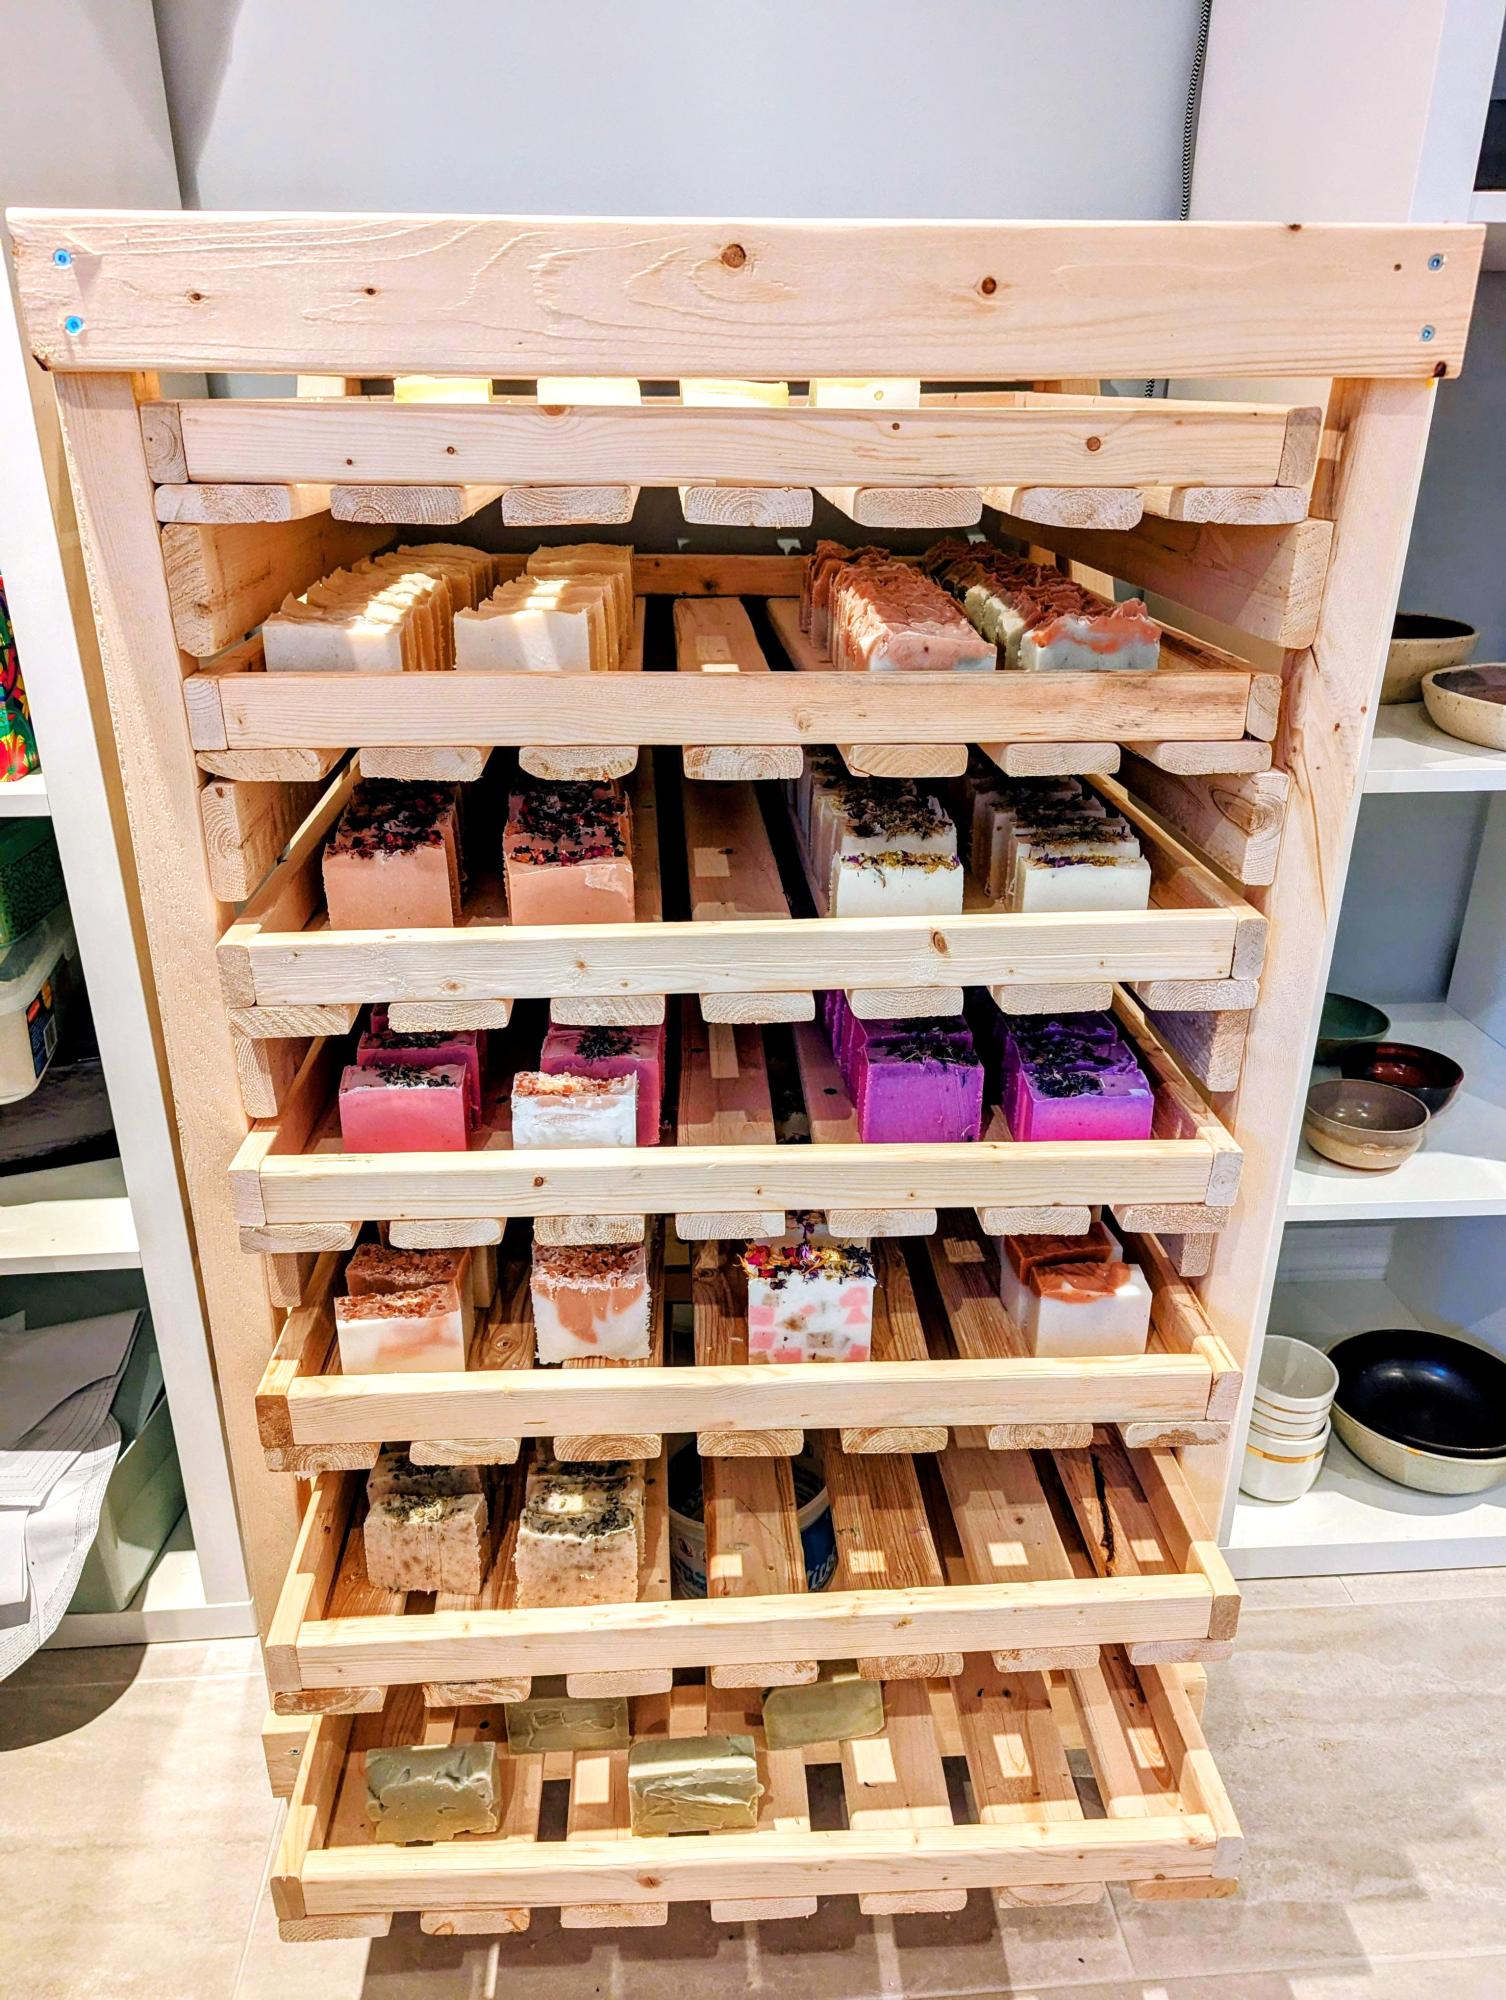
My wife loves handcrafting soap, potery, weaving, etc. She needed a solution to cure her soap and she found your plan. We made a deal : I'll do the project but I'll (finally!) buy a brad nailer. It turned out to be a great project to do for her. The plan is very well explained and the design optimizes the usage of wood. Thank you so much Ana for the idea and the plan! - Martin
Built from Plan(s)
Comments

Drawer Bench with Open Locker Storage
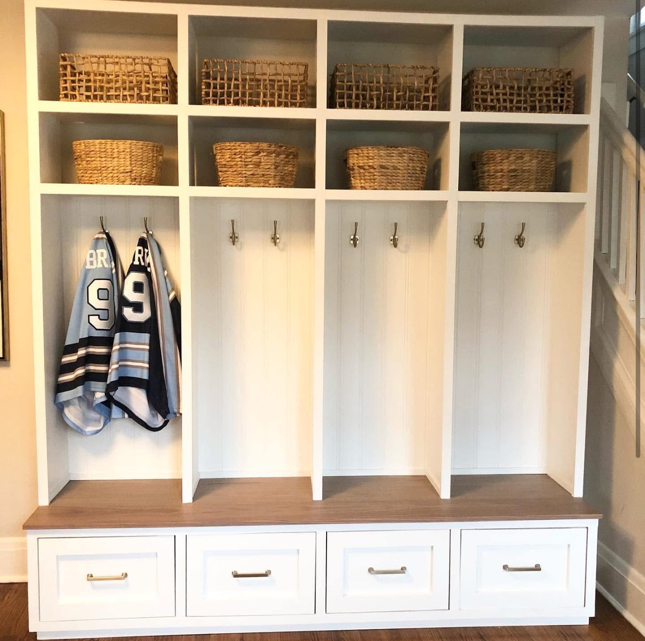
Hi! I'm new to this group. I recently joined because I’ve always loved making things out of wood. I discovered Ana White’s plans over 10 years ago. I don’t always have time, but love a good project when I can dig into it! Here is the last big thing I built ![]() I’m sure I’ll be inspired for the next project here! - Marisa Lundt O'Brien on Facebook
I’m sure I’ll be inspired for the next project here! - Marisa Lundt O'Brien on Facebook
Built from Plan(s)