Easy Build Wood Sofa

Supper proud of this. It was so easy too!
I plan to add on the sectional piece and build the matching coffee table too!!
Thank you so much! - Orlagh
Built from Plan(s)
Seasonal And Holiday
Supper proud of this. It was so easy too!
I plan to add on the sectional piece and build the matching coffee table too!!
Thank you so much! - Orlagh

Turned Leg Wood Farmhouse Table
Mon, 04/21/2025 - 14:37
That’s a common issue when dealing with an international audience — not every tool plays well with documents from outside the US or EU. Trust Swiftly actually supports a wide range of global ID verification and document formats. Whether it’s passports, national ID cards, or driver’s licenses from different countries, it’s all covered. What’s nice is that their system uses a mix of automation and optional manual review, so things don’t get held up. It also supports multiple languages and even biometric verification if you want to go that route. The flexibility is a huge help when you’re trying to scale globally without constantly tweaking your onboarding flow for each market.
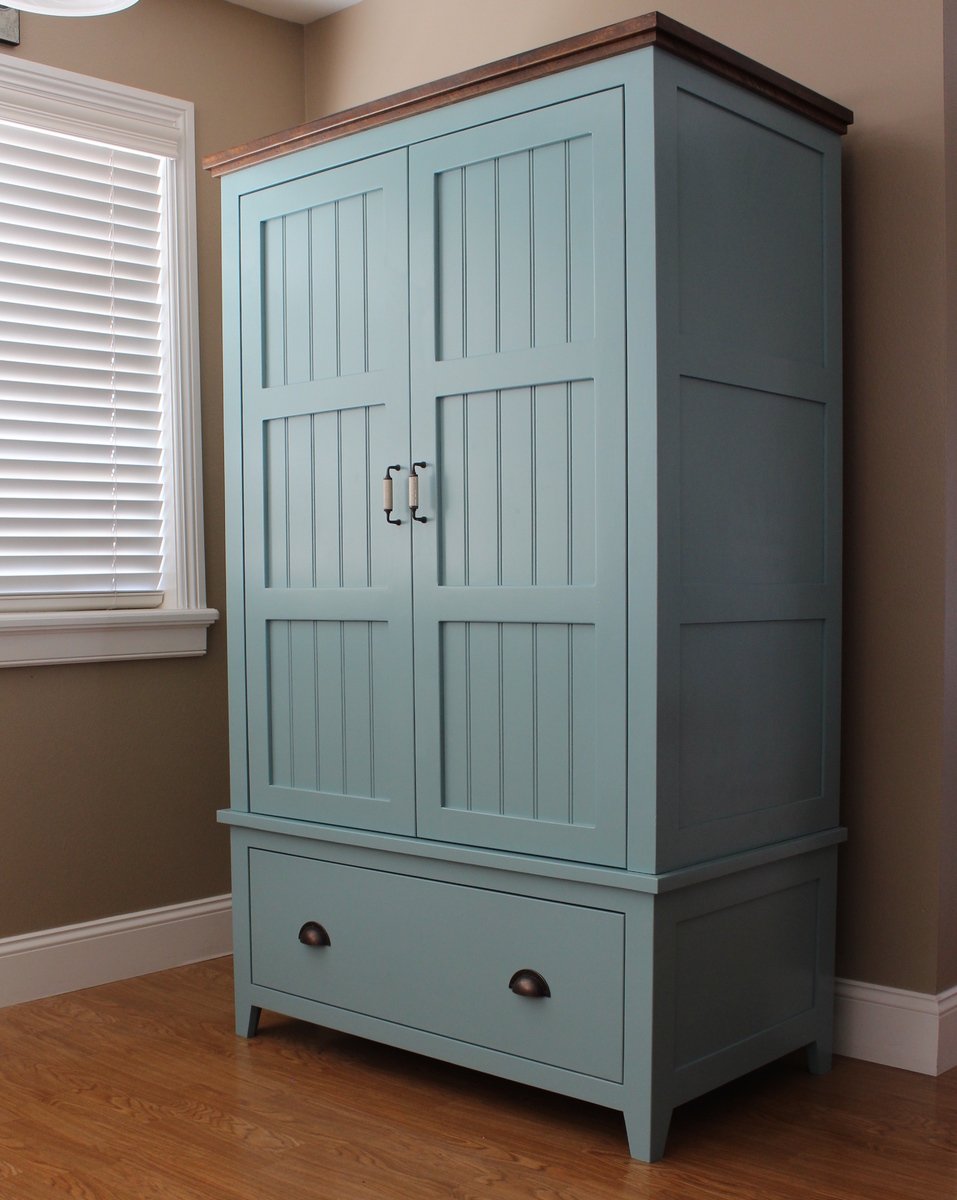
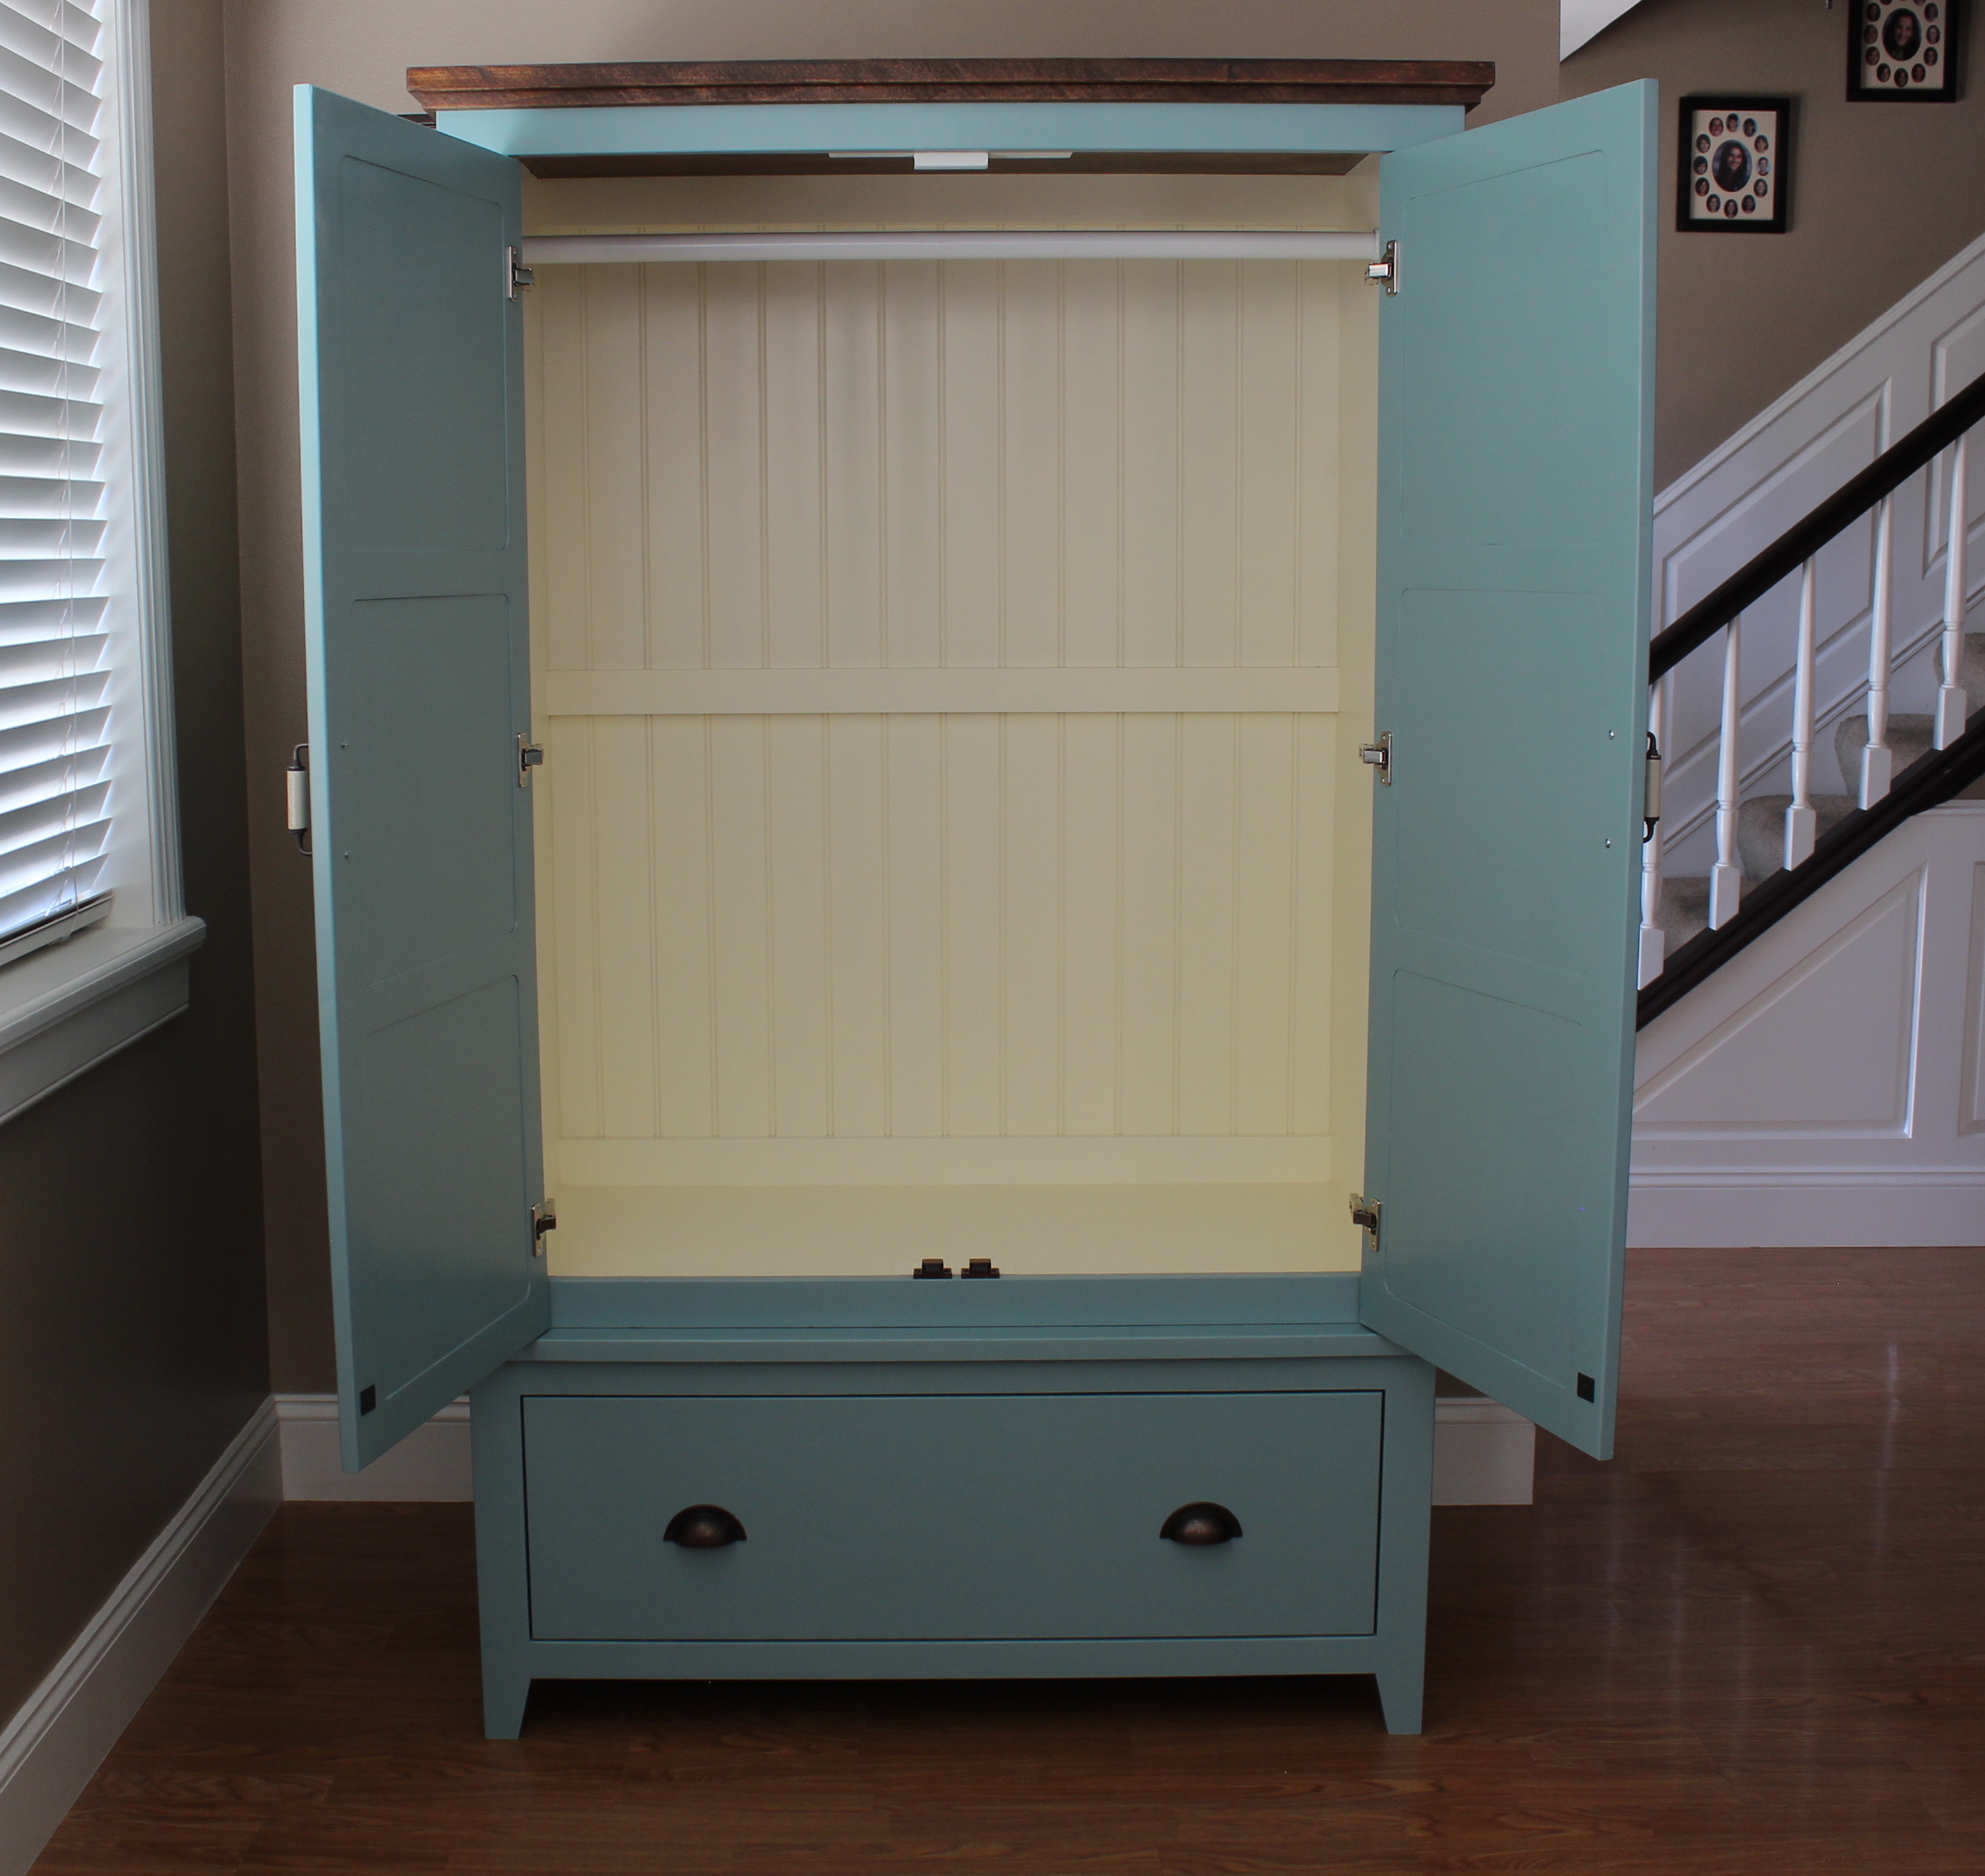
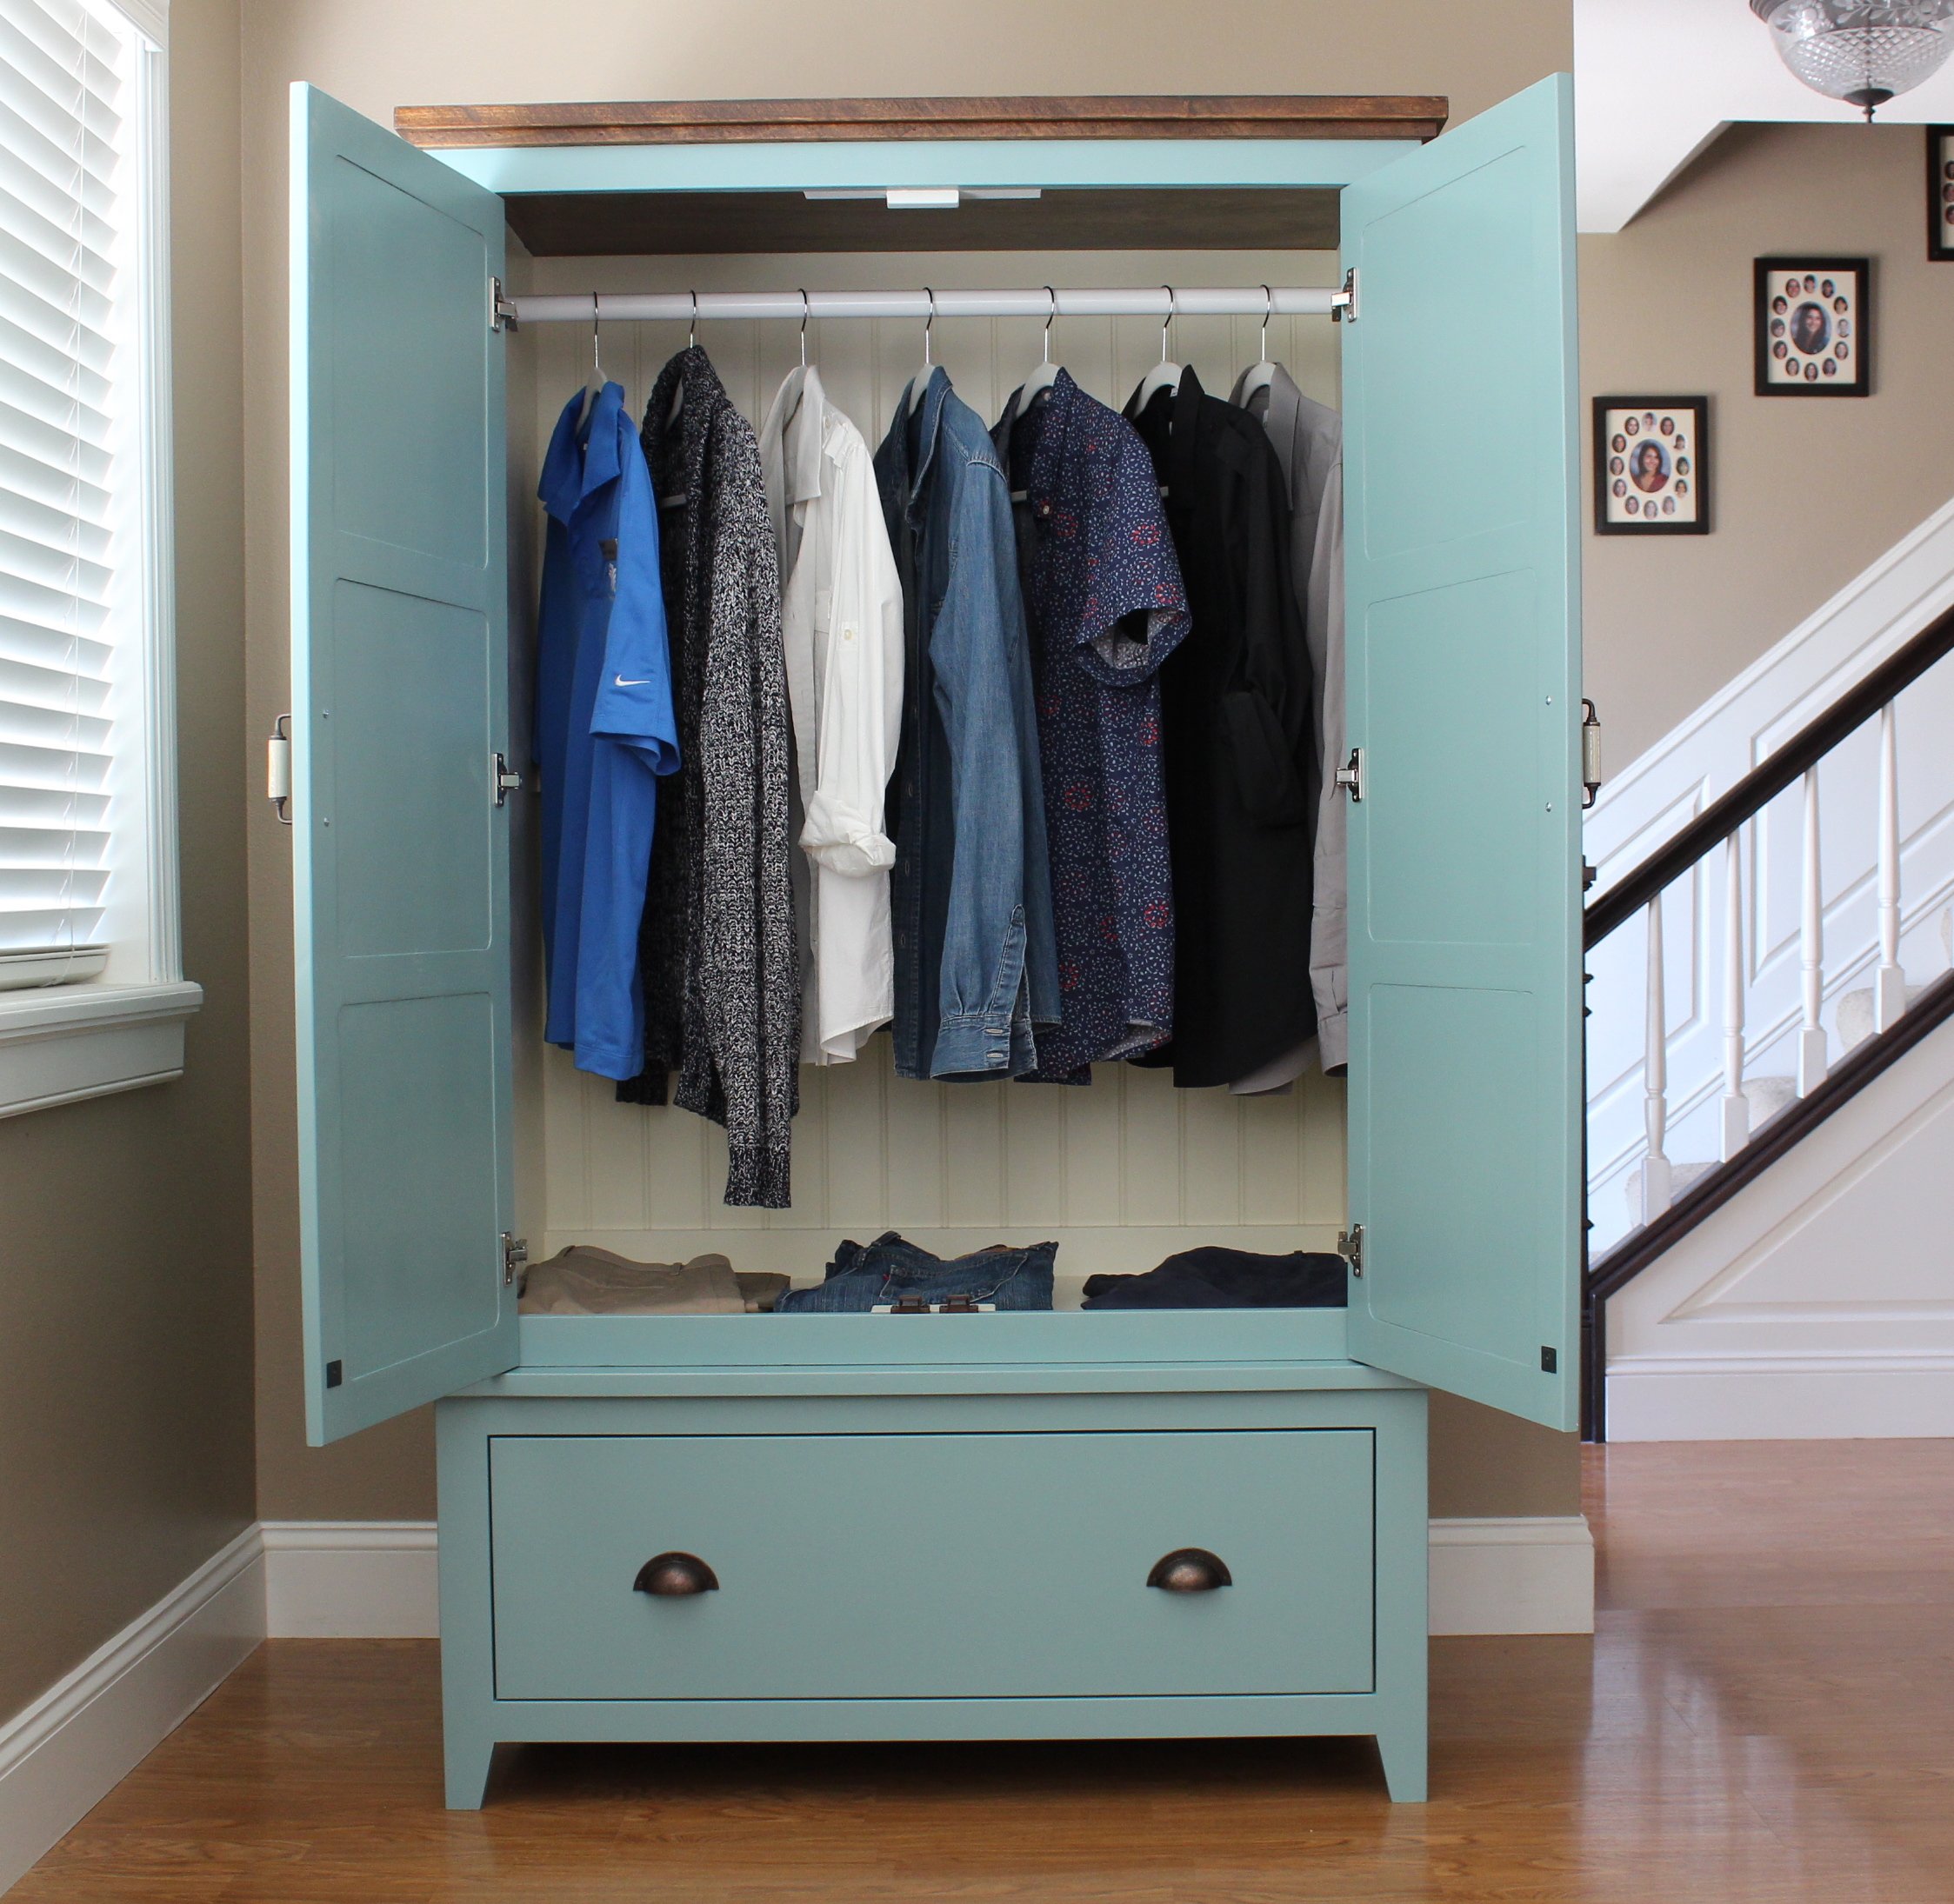
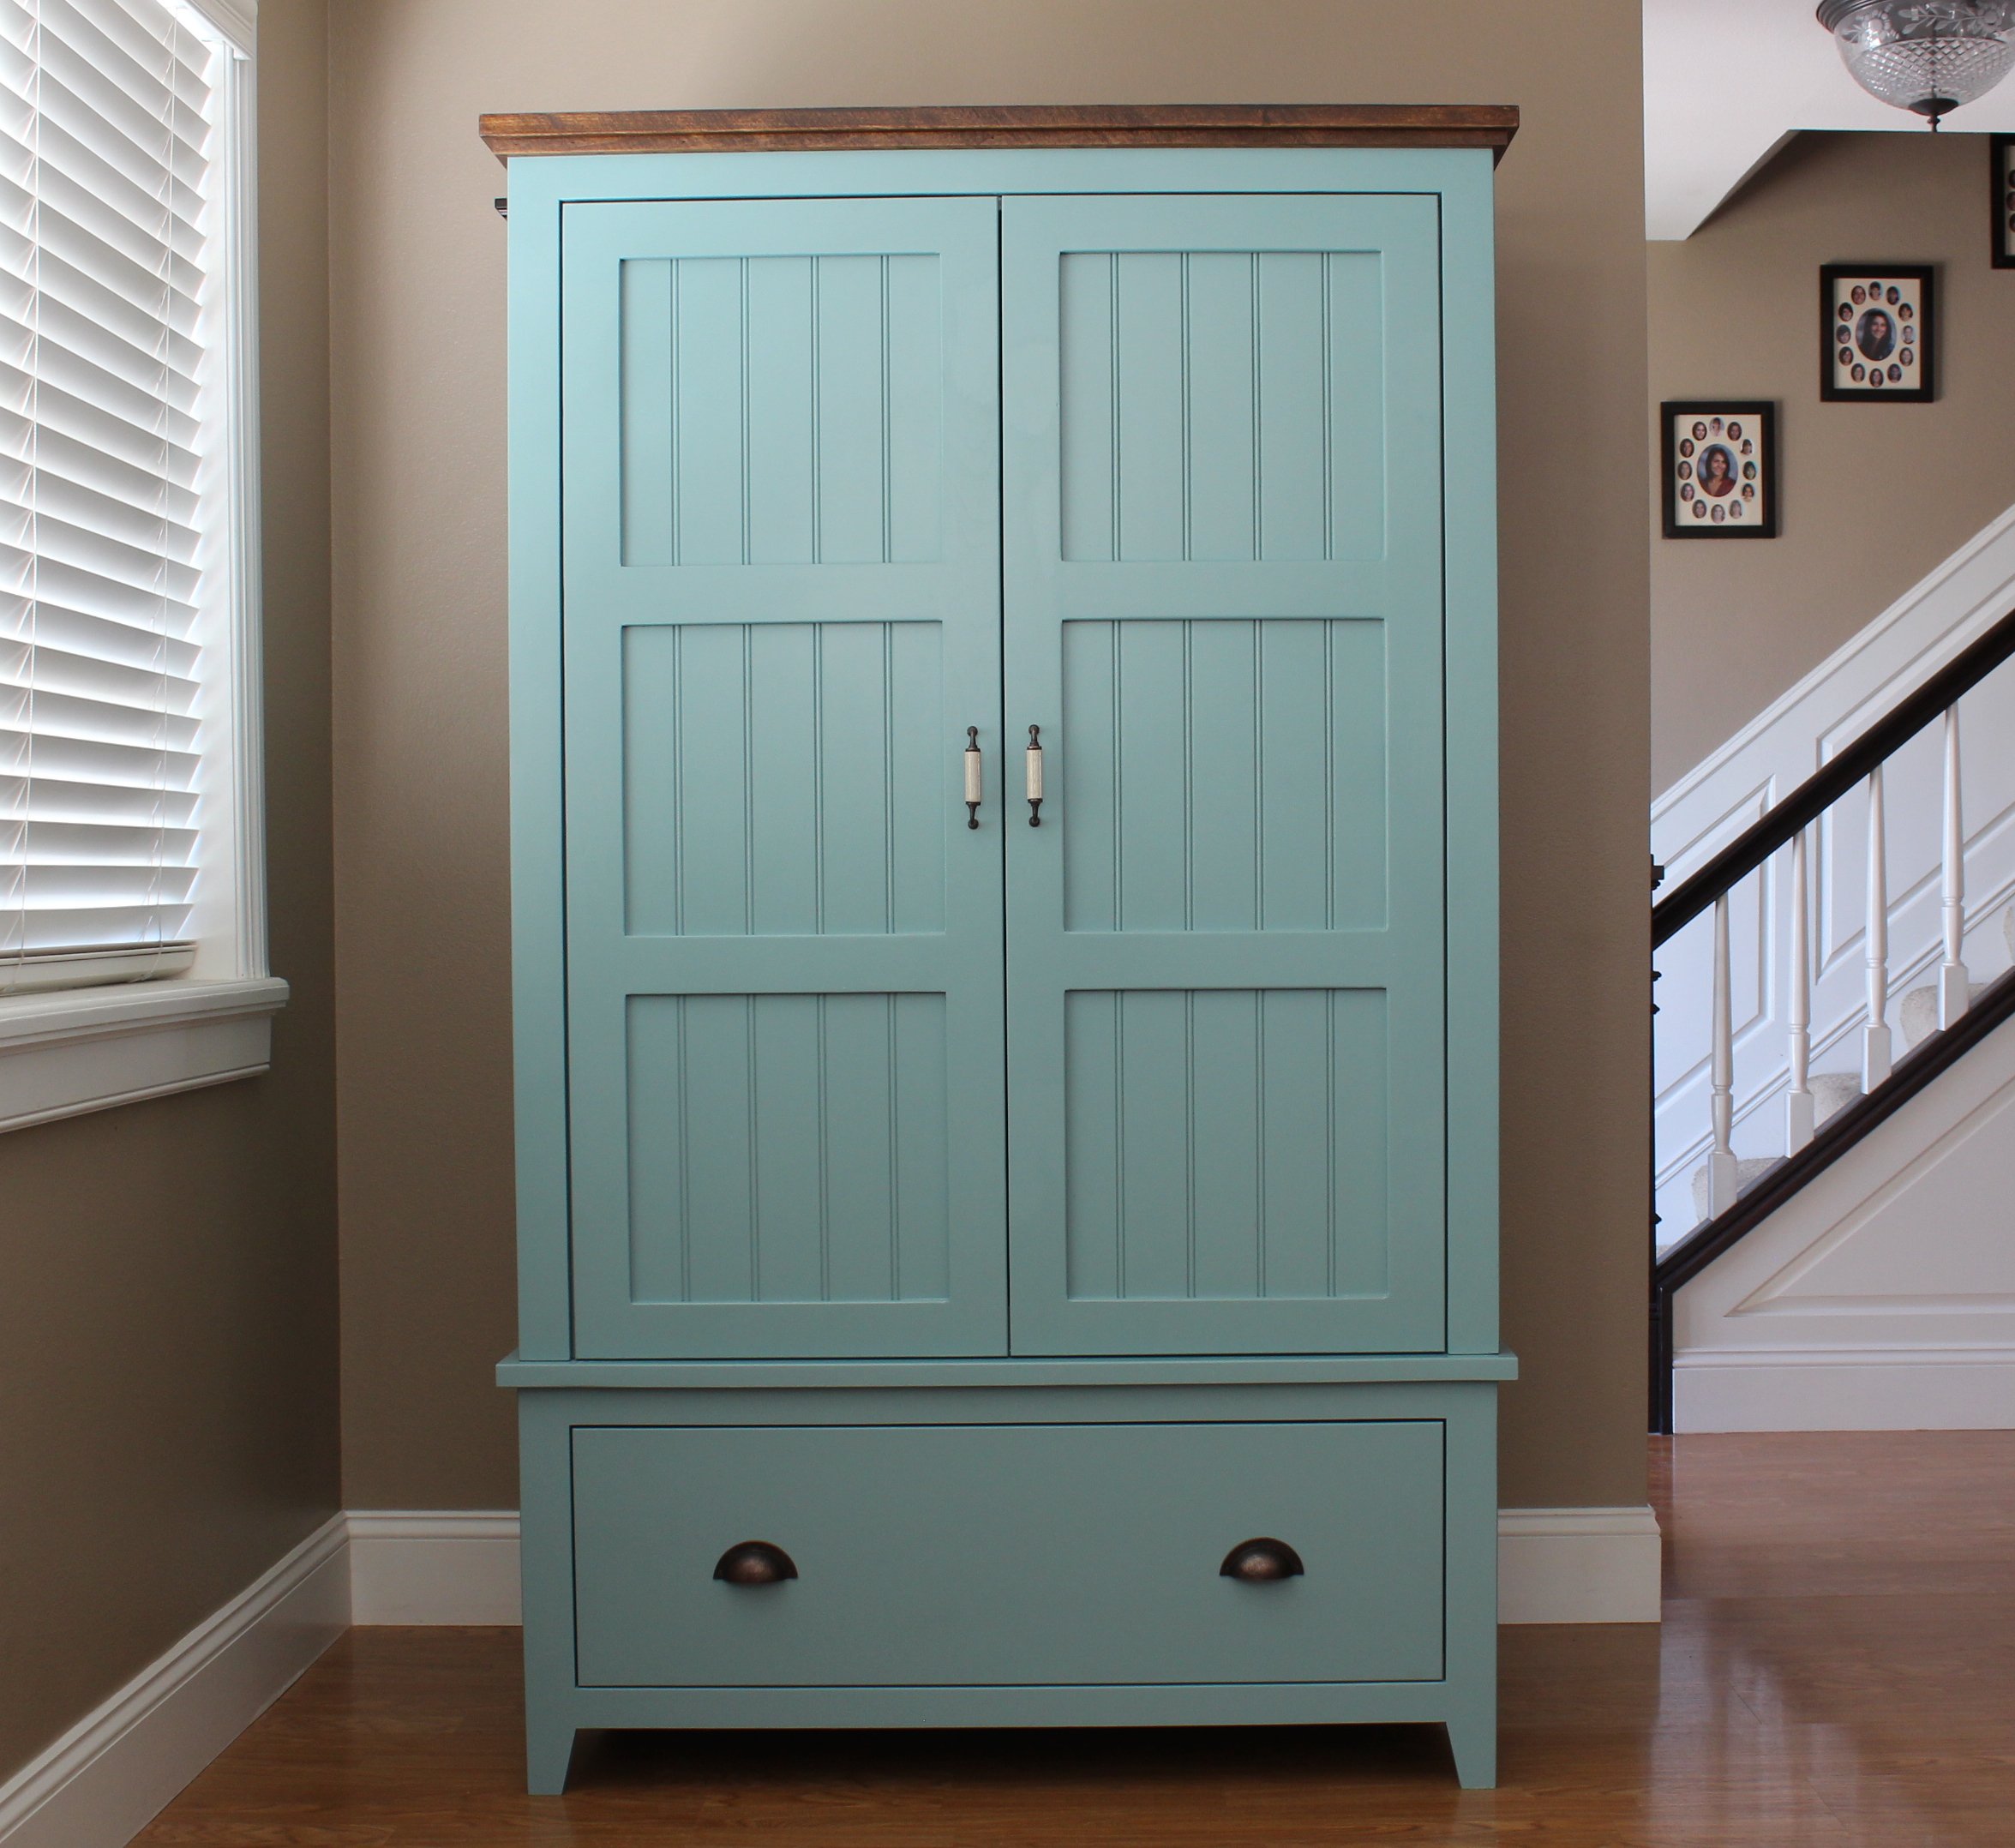
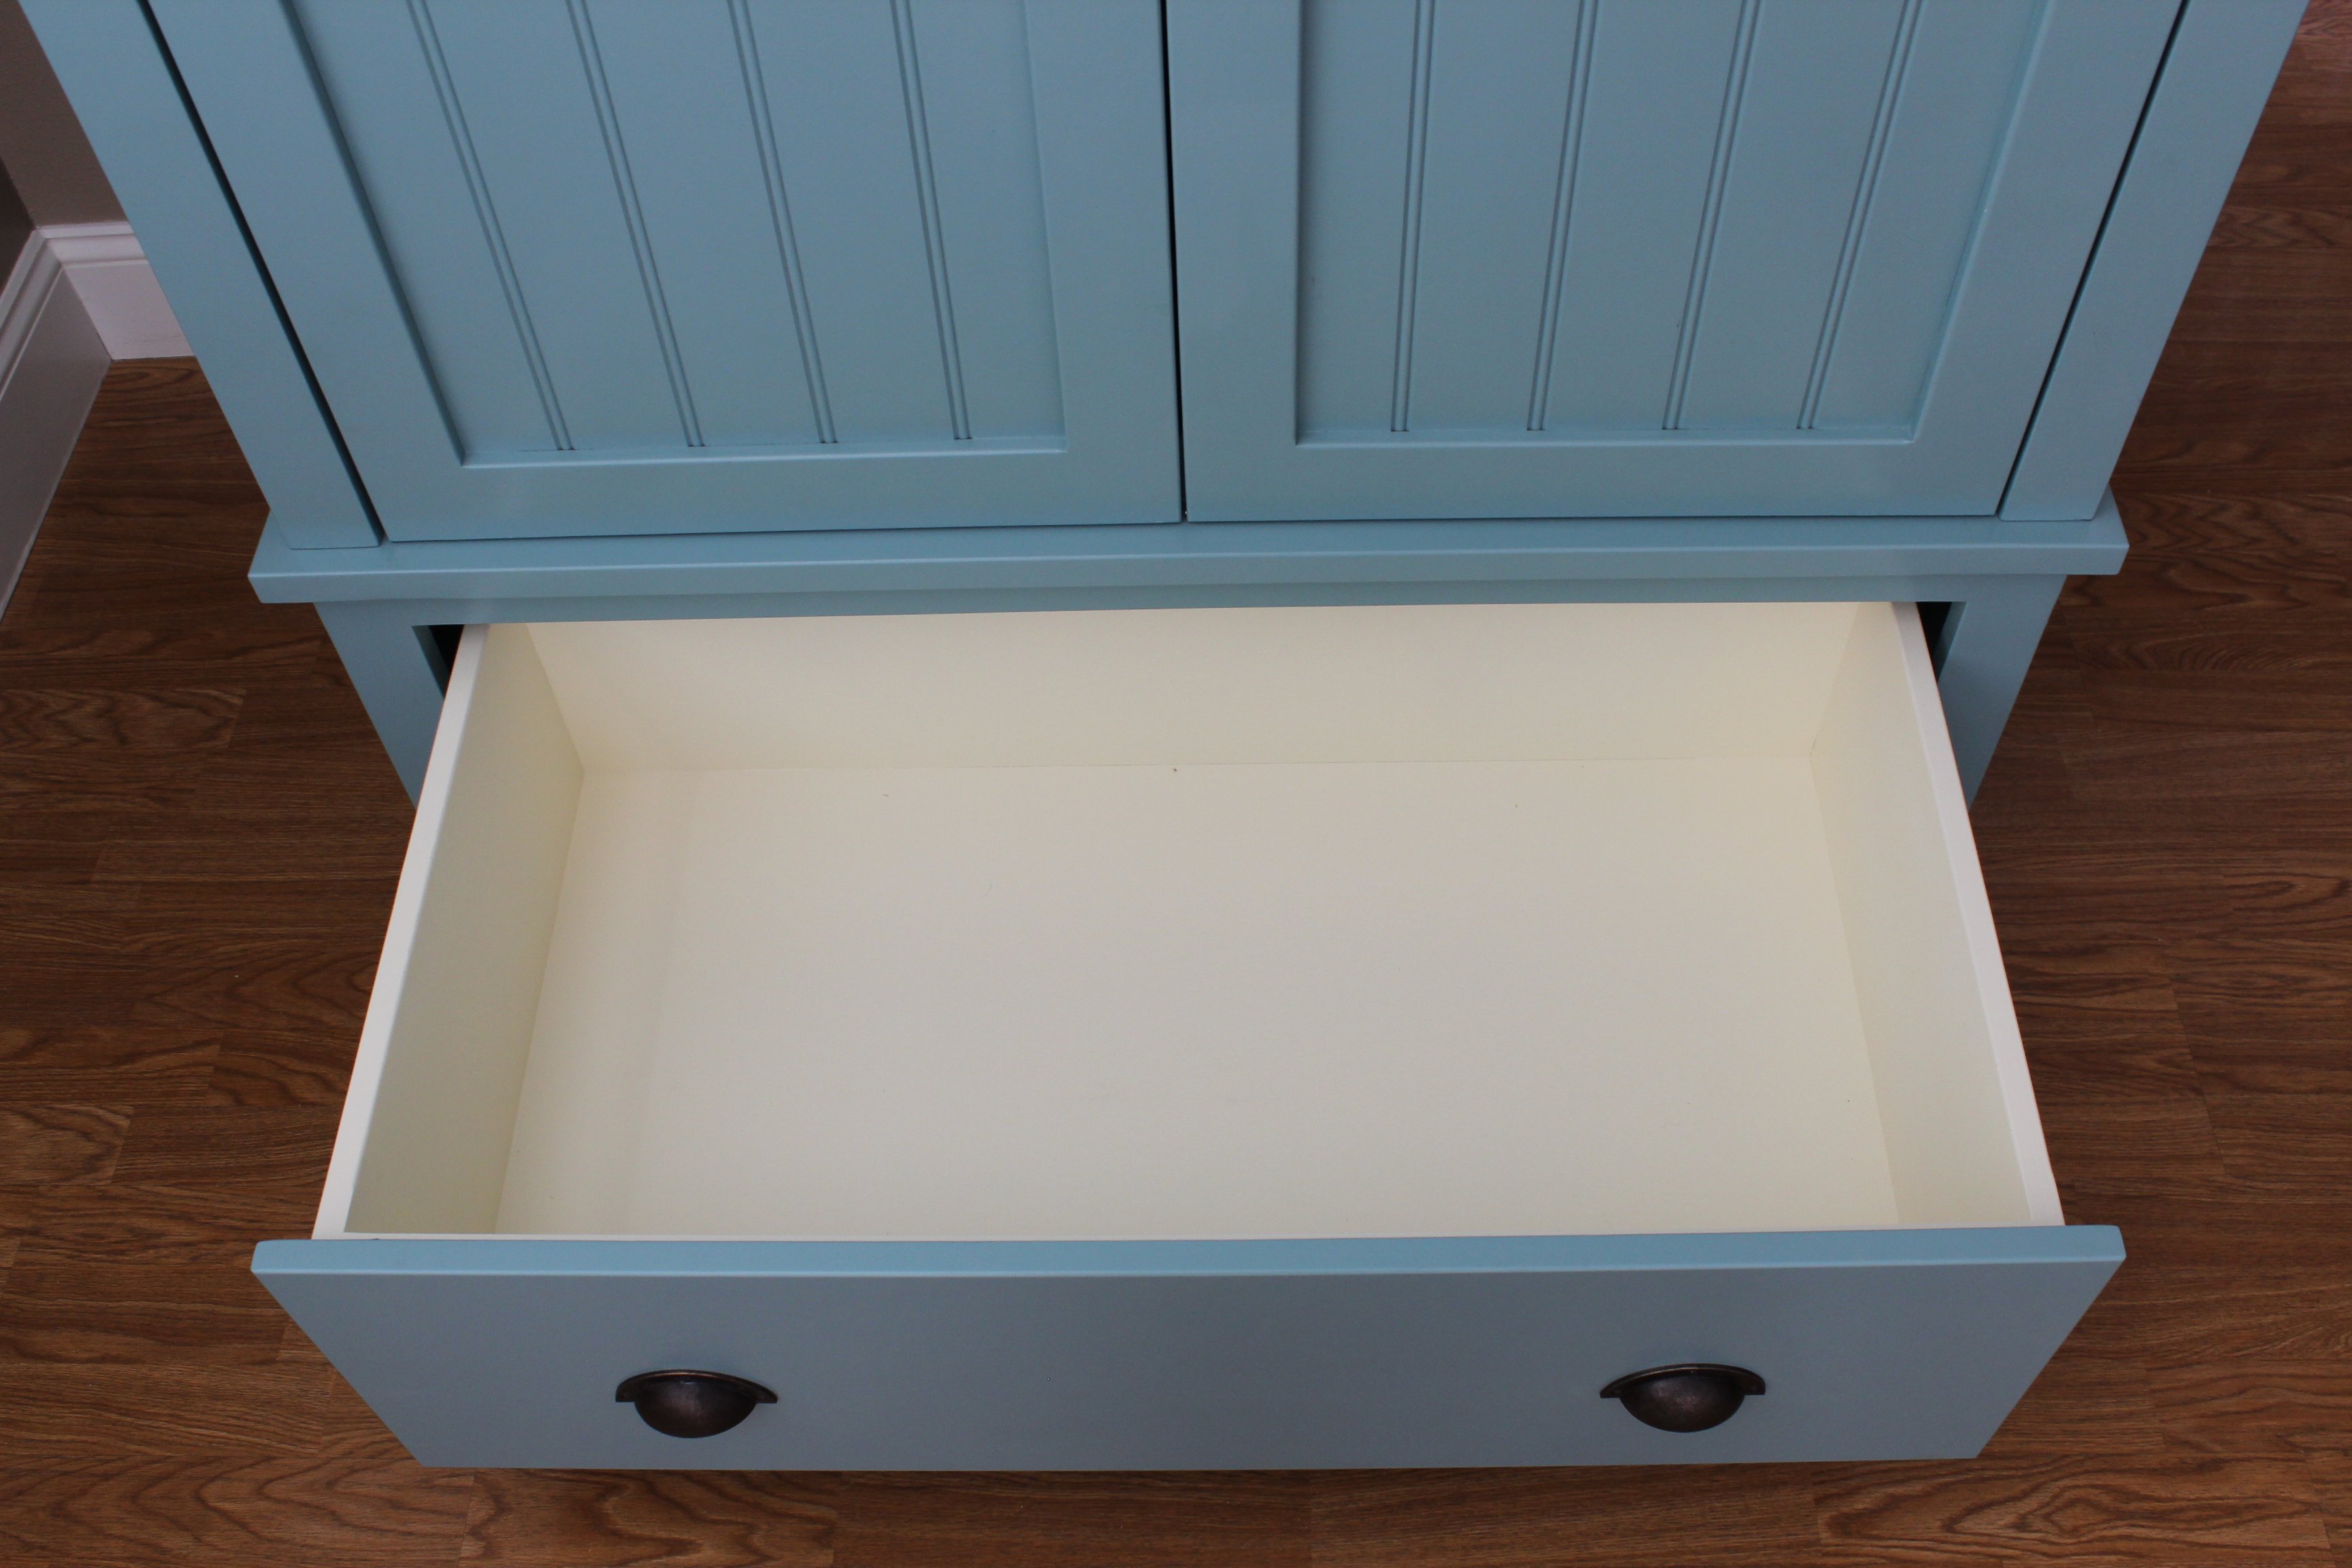
This is probably one of my favorite pieces I have built. Challenging but fun. I built it as two separate sections, an upper and lower cabinet to make it easier to carry indoors. I added a full-extension drawer below for storage. The two-toned paint combination did take a lot of extra time. Because I used an airless spraying to paint I had to tape and cover each section separately.


Fri, 03/06/2015 - 10:43
WOW it looks awesome the extra time spent on the painting was more than worth it looks spectacular. I bet you also could make a great profit selling this Wardrobe either on line or in a consignment shop, if I had the need for one and the money I would defiantly buy one!!

Sat, 03/07/2015 - 18:55
I love all the attention to detail. Great job! I especially love the color selection. How did you achieve the look of the top stained piece?
In reply to I love all the attention to by handmadewithash
Mon, 03/09/2015 - 22:01
Hi Ashley,
The top was built separate, stained, varnished and then attached to the painted wardrobe. :)
- Brad
Sun, 03/08/2015 - 07:36
This looks awesome! I love the the paint finish and it your profession work

Mon, 03/09/2015 - 17:30
I agree this is your best so far...which is hard to say b/c all your projects are amazing! I love the style, the paint colors, the stained top, and the hardware!
In reply to Beyond Beautiful by TwoCuteKids
Mon, 03/09/2015 - 22:02
Thank you so much! :)
Sat, 03/19/2016 - 15:06
It looks really great!
I have fallen in love with it the second I saw it and somehow I am now convinced that I need a new wardrobe ;)
I guess you don't have plans for the wardrobe laying around - but would you mind doing a fast sketch (just a simple one on paper) with all the measurements noted? I would be thrilled to try building it myself in the summer.
Greetings from Germany!
Sat, 03/19/2016 - 15:07
It looks really great!
I have fallen in love with it the second I saw it and somehow I am now convinced that I need a new wardrobe ;)
I guess you don't have plans for the wardrobe laying around - but would you mind doing a fast sketch (just a simple one on paper) with all the measurements noted? I would be thrilled to try building it myself in the summer.
Greetings from Germany!
Tue, 07/18/2017 - 05:43
Are there plans used for this beautiful piece? I do not see any links. Help please!! I absolutely need to make this armoire :) :)

Fri, 01/03/2020 - 08:09
Anyway I can get plans for this beautiful piece?
Mon, 01/03/2022 - 05:53
Love this wardrobe! Are there plans available to build it?
Thank you.
Mon, 01/20/2025 - 06:15
This is fantastic. I know this was years ago, so hopefully you will see this comment because I'm trying to figure out how to cut legs like this? Are they 1x lumber or plywood or tapered 2x2's? If you happen to see this, I would love some insight. Thanks so much!
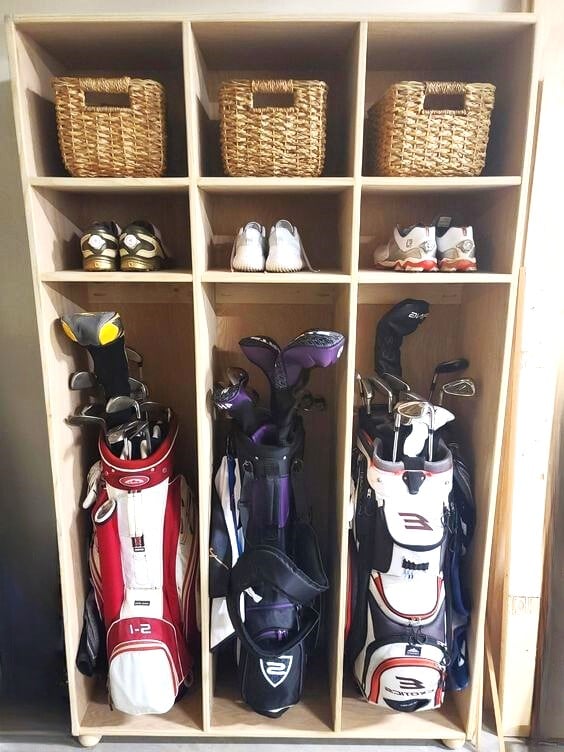
Utilized the plan for the Locker Book Shelf-Full Size and modified it a bit to convert to a golf club locker. Definitely keeps all the clubs, shoes, and accessories organized and eliminates the clutter. My wife loves it, course she added the baskets, which makes it look awesome! Actually this is how I stumbled upon Ana White's website. I was looking high and low for a plan for golf club lockers, and found Ana's website as part of the process. Best google search I've ever done!
Mon, 04/11/2022 - 14:51
WOW, that looks awesome and is the perfect storage solutions for all the golf gear! Thank you for sharing.:)
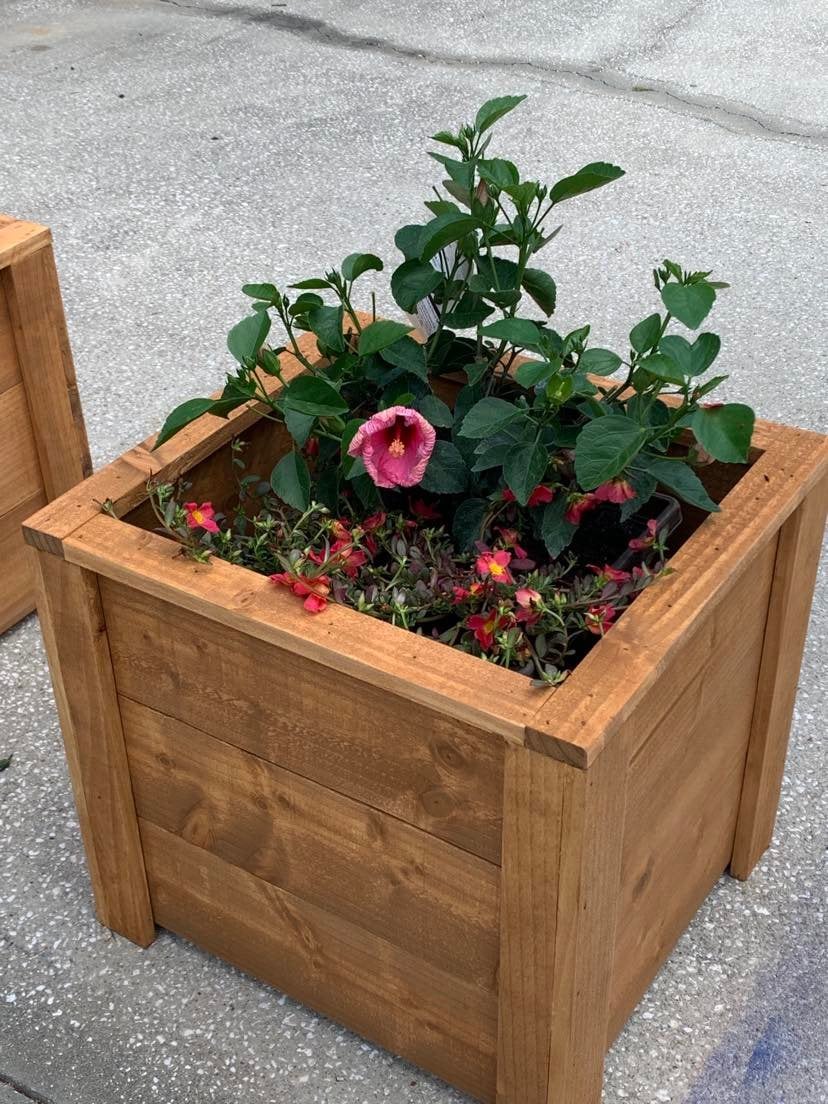
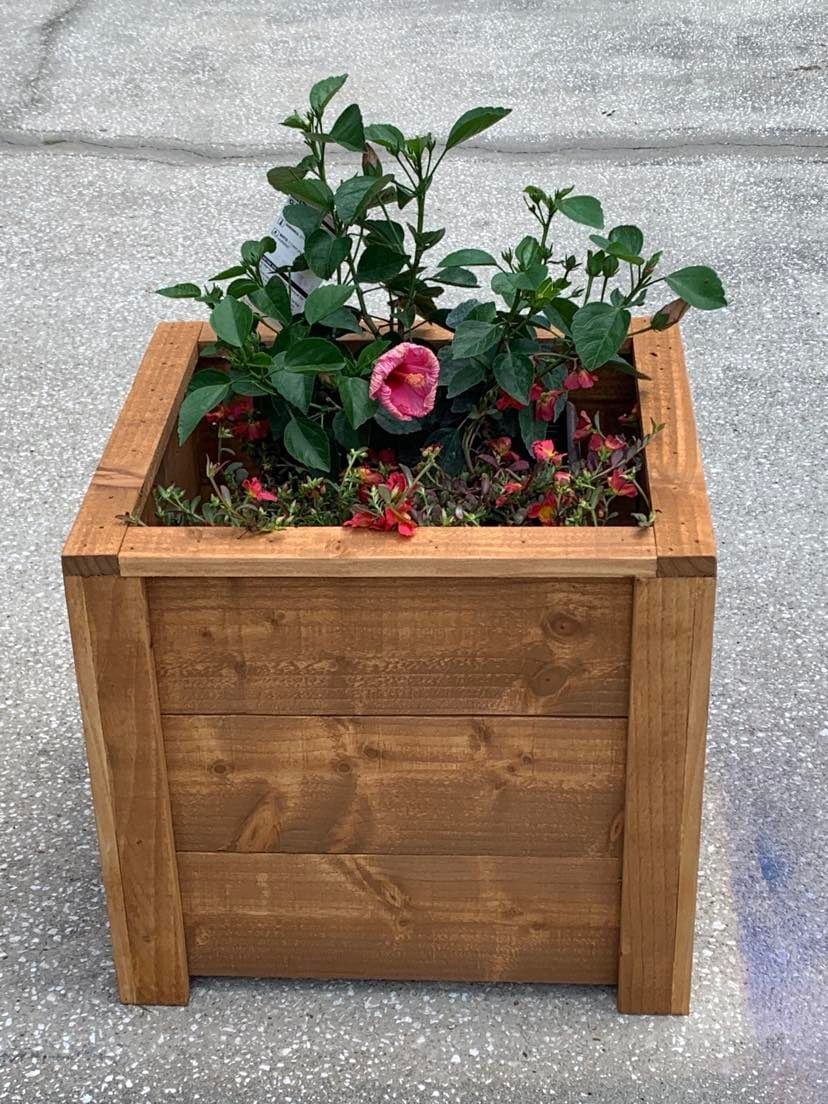
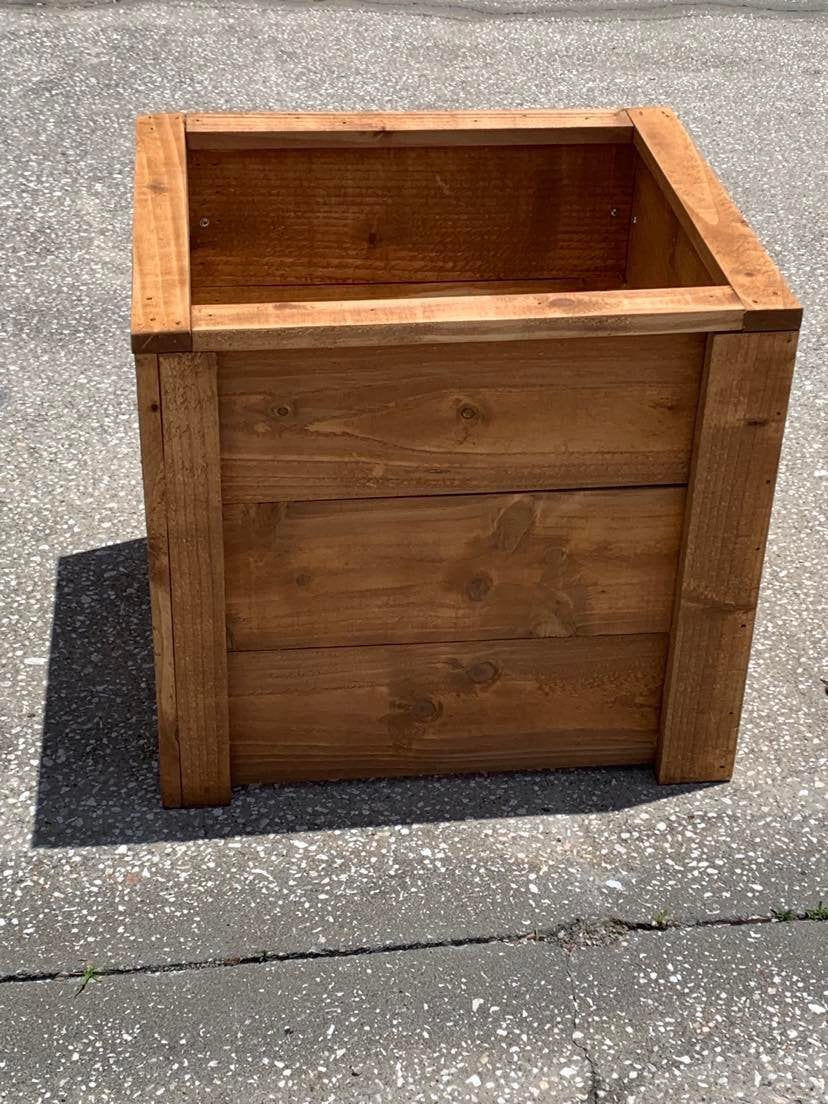
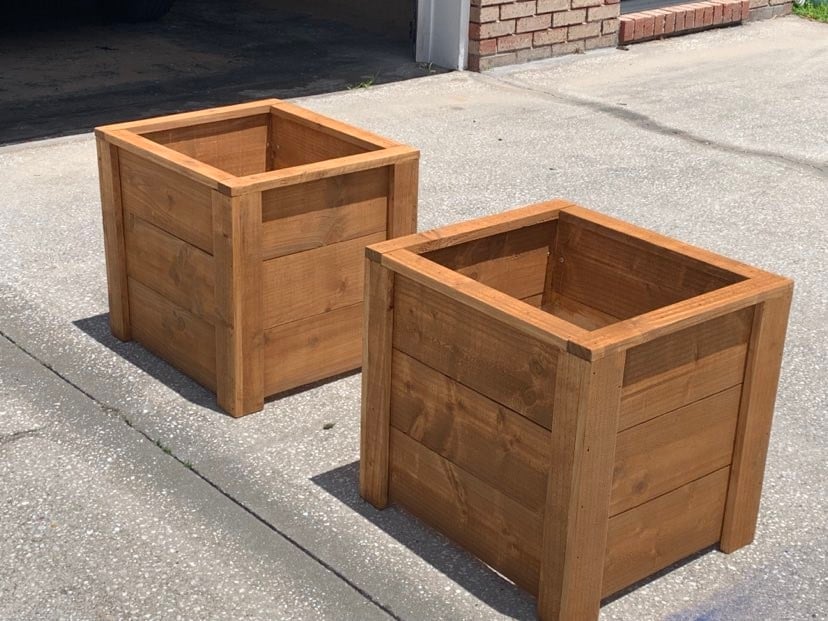
Thanks Ana, I built your planter box, actually built 2 of them, one for each mom. The were a huge hit and I already have people asking me to build them one.
So loved building this planter box. Thanks for all you do for your fellow woodworkers!
Dale G
Callahan, FL
Tue, 05/10/2022 - 07:05
Love these, wonderful idea for a mother's day gift, thank you for sharing!
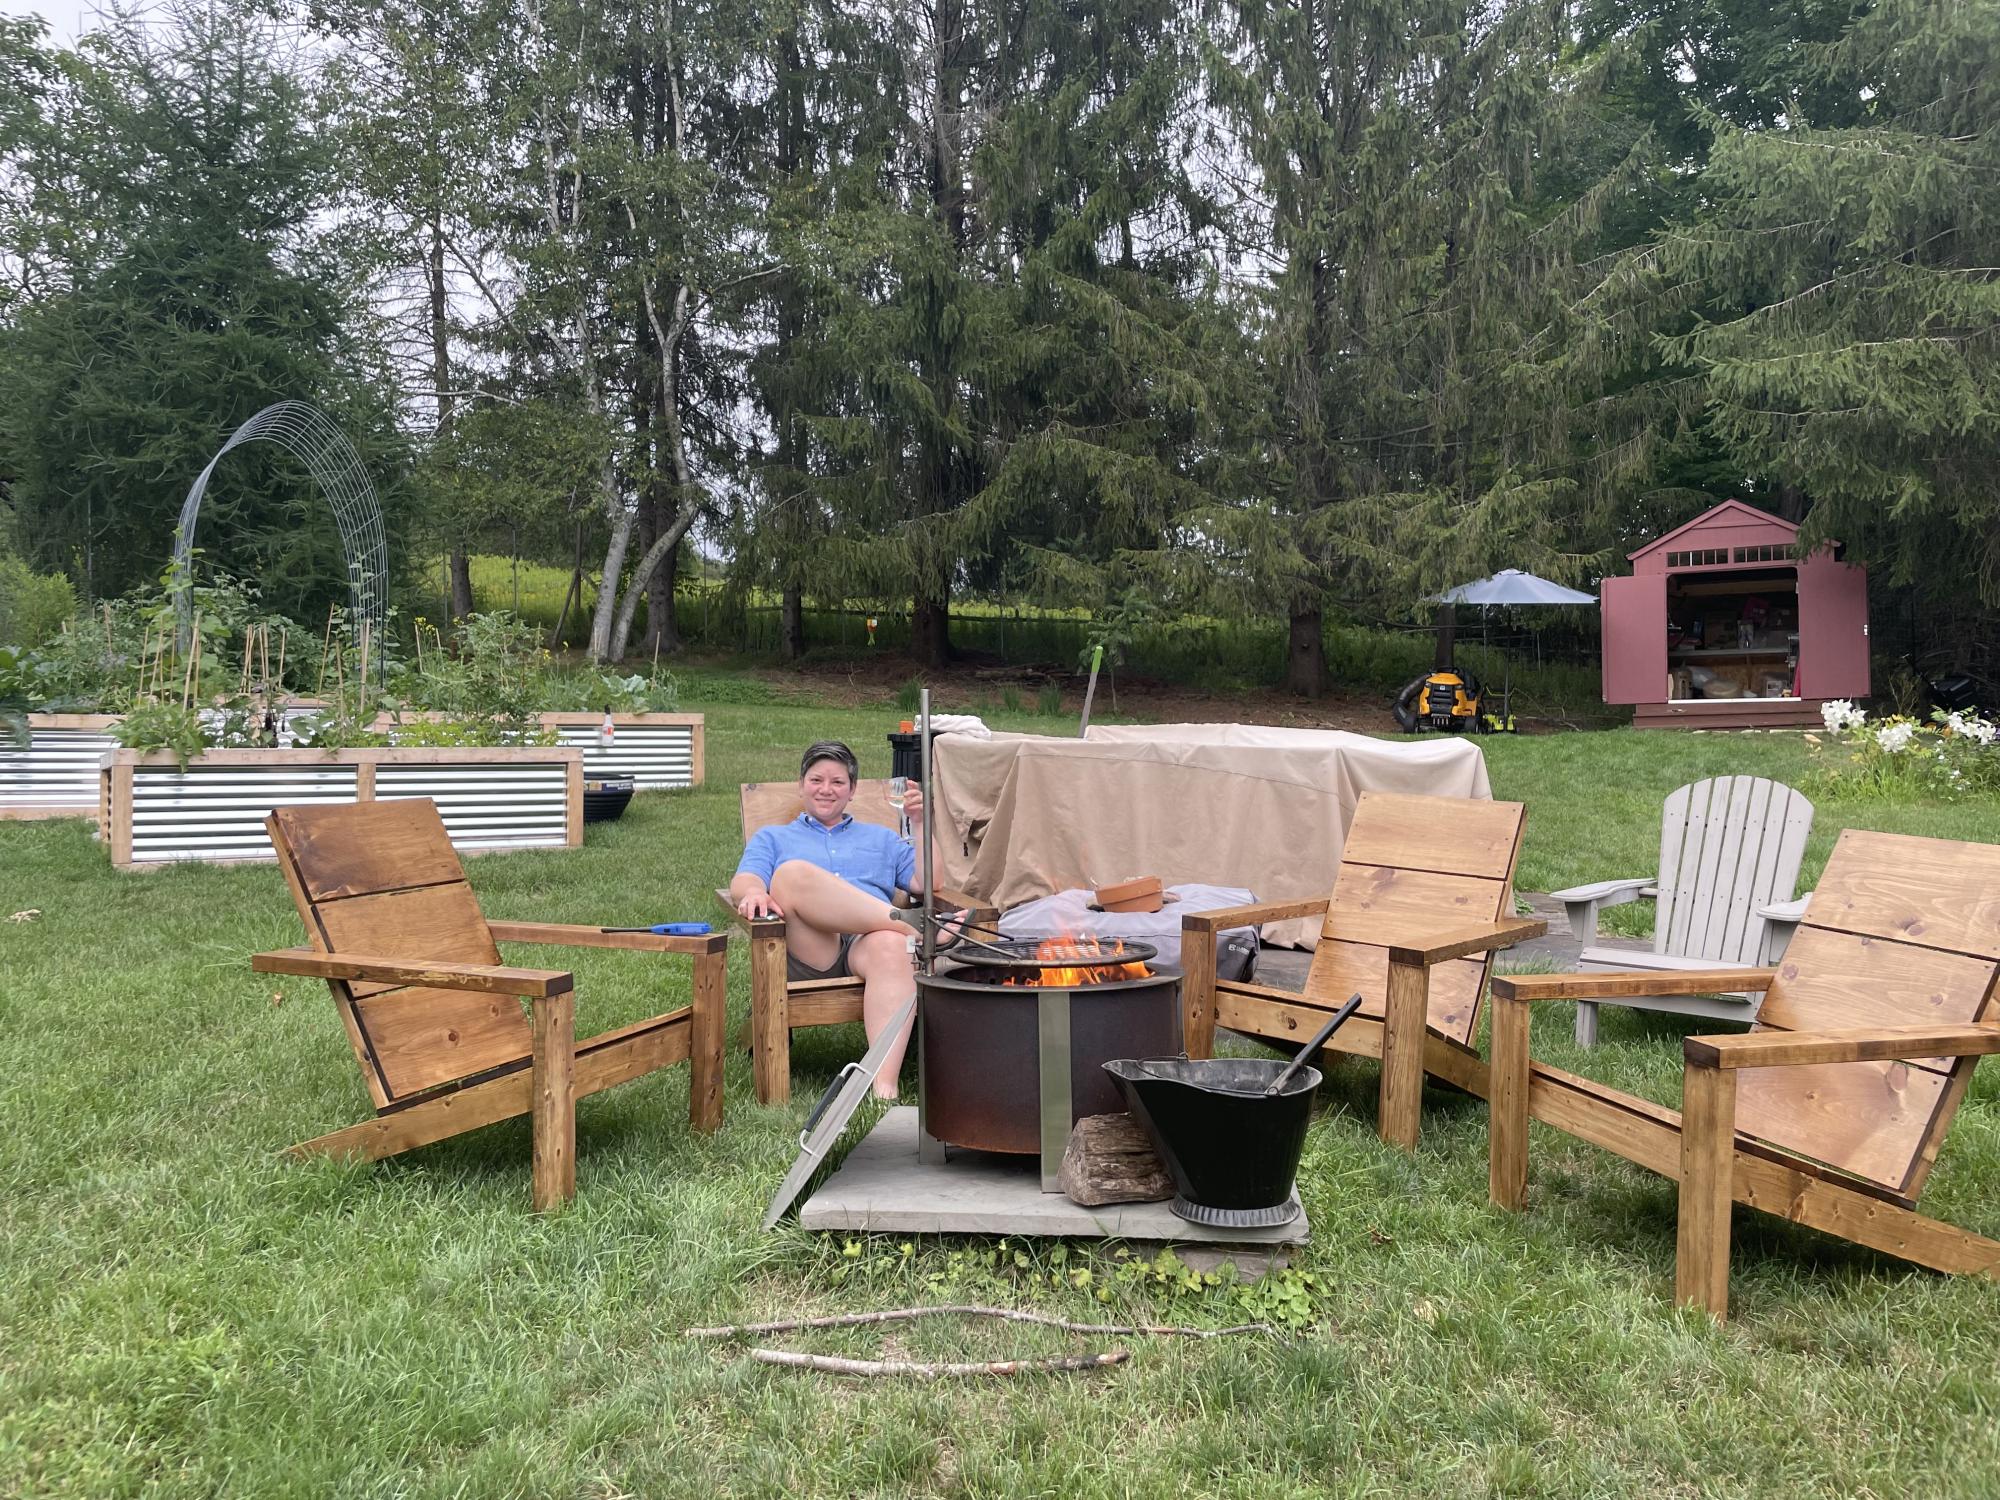
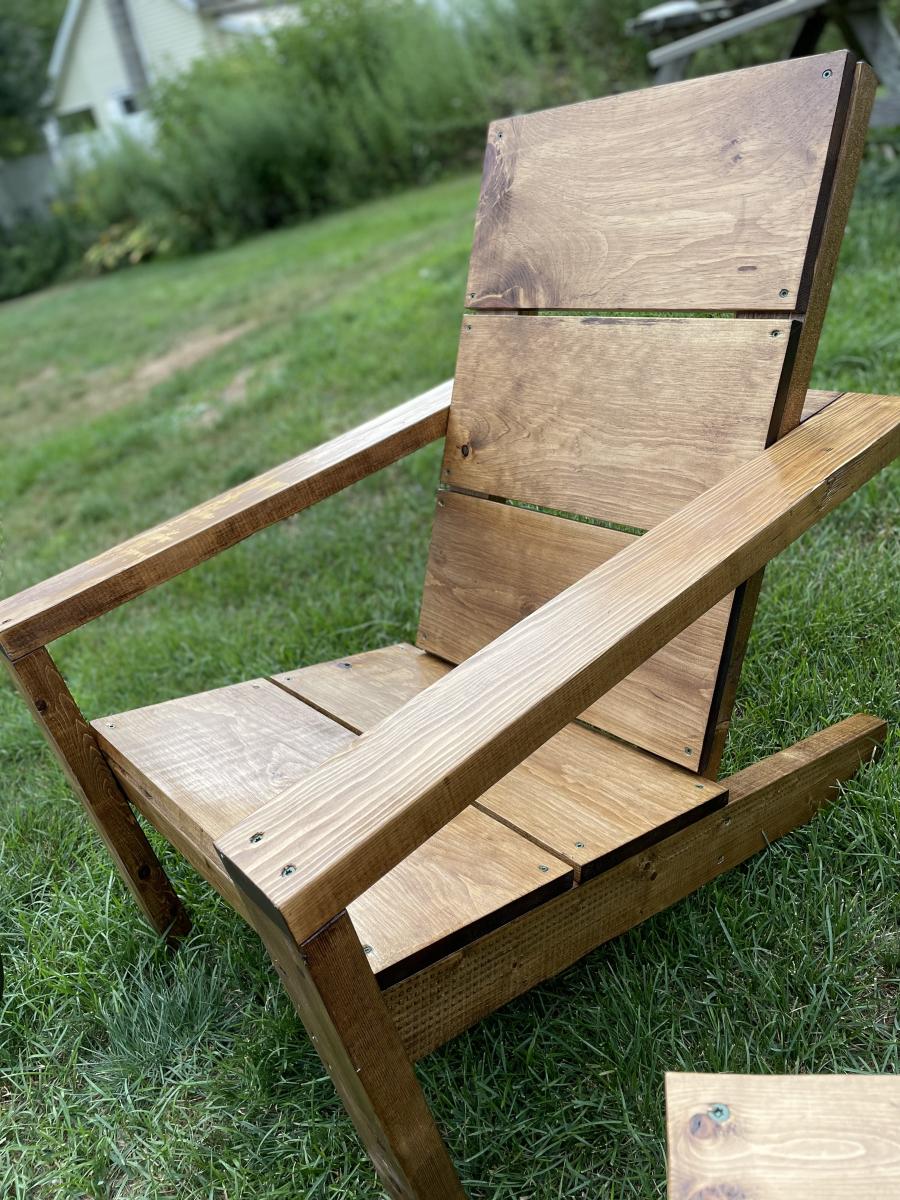
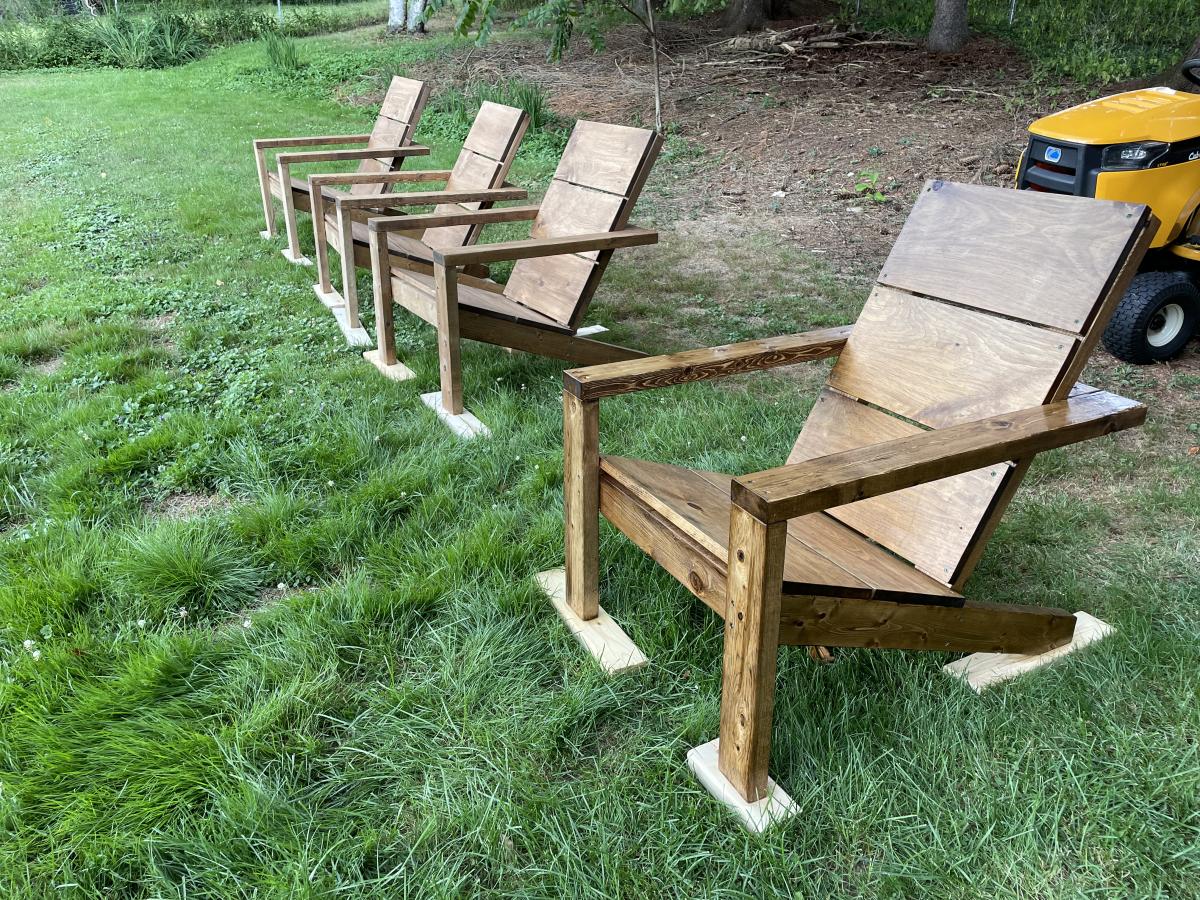
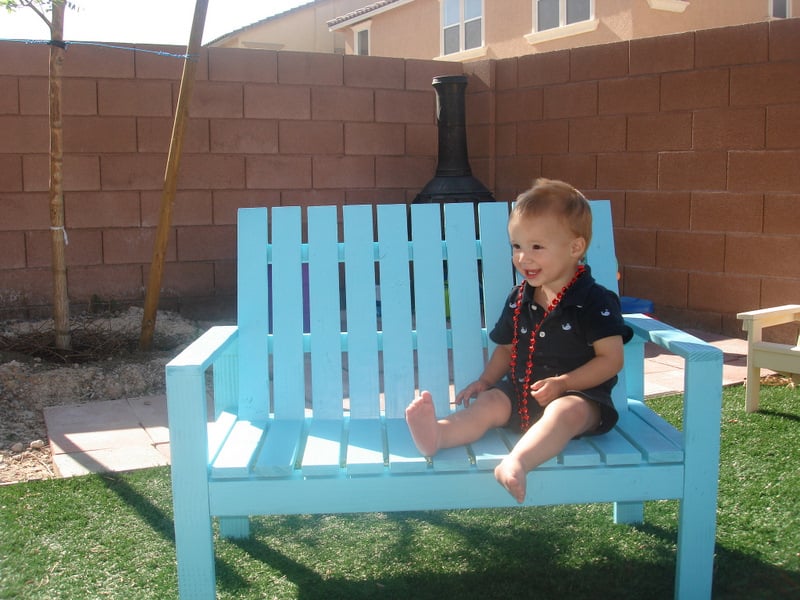
We had some very old Adirondack chairs that just broke on us (in the middle of summer, no doubt) so I went looking for some new ones. They were so expensive I thought I’d make some but I have limited tools (circular saw, drills, etc. but no band saw or mitre saw or table saw). Found these because they were fairly simple and didn’t require fancy tools.
It took me a couple of weekends to build four of them, and they still need another coat of sealer, but I’m stoked with the results, and they're SUOER comfortable too!
Thanks Ana for these awesome plans!
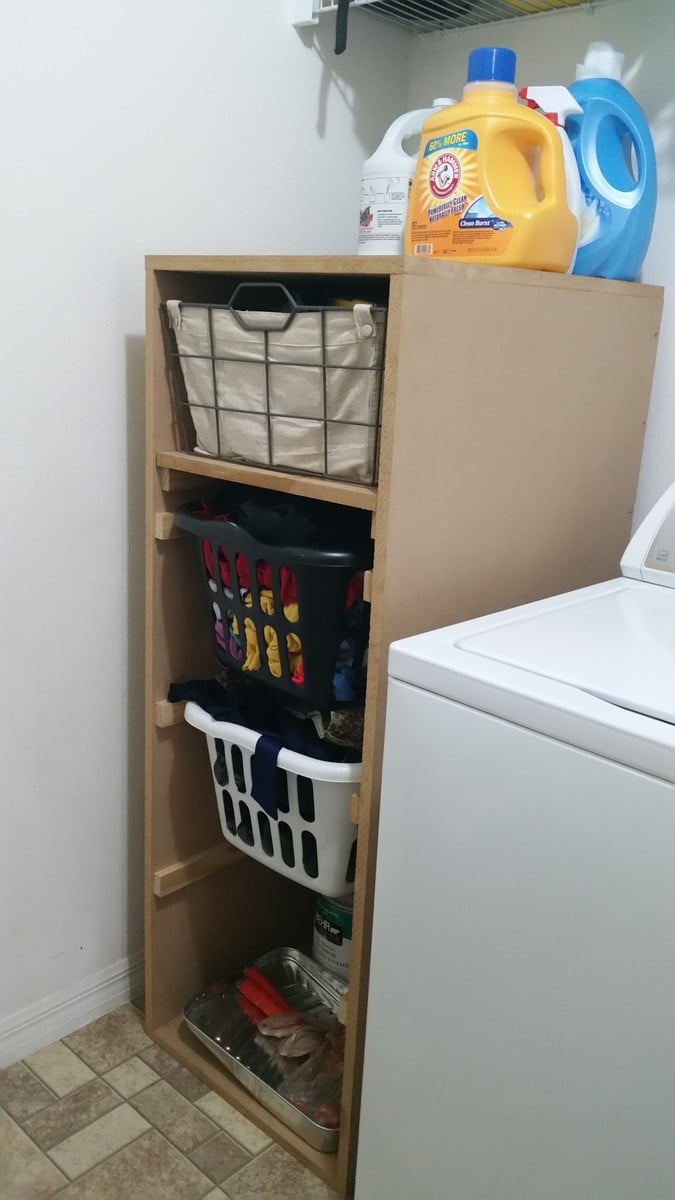
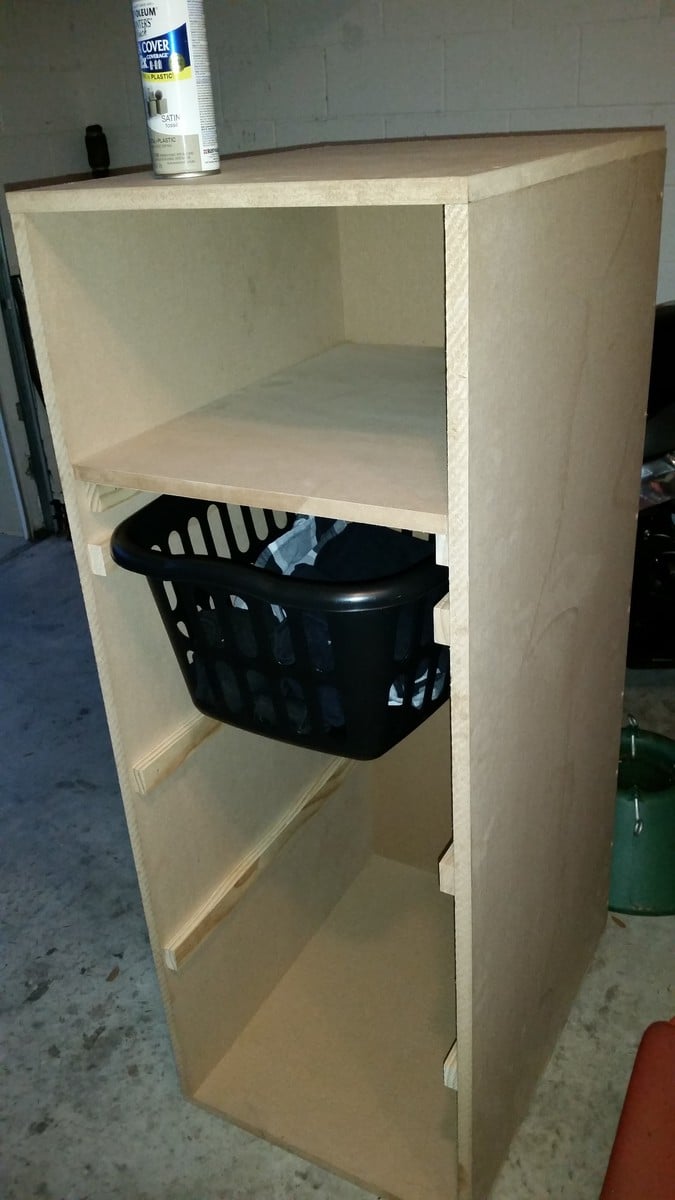
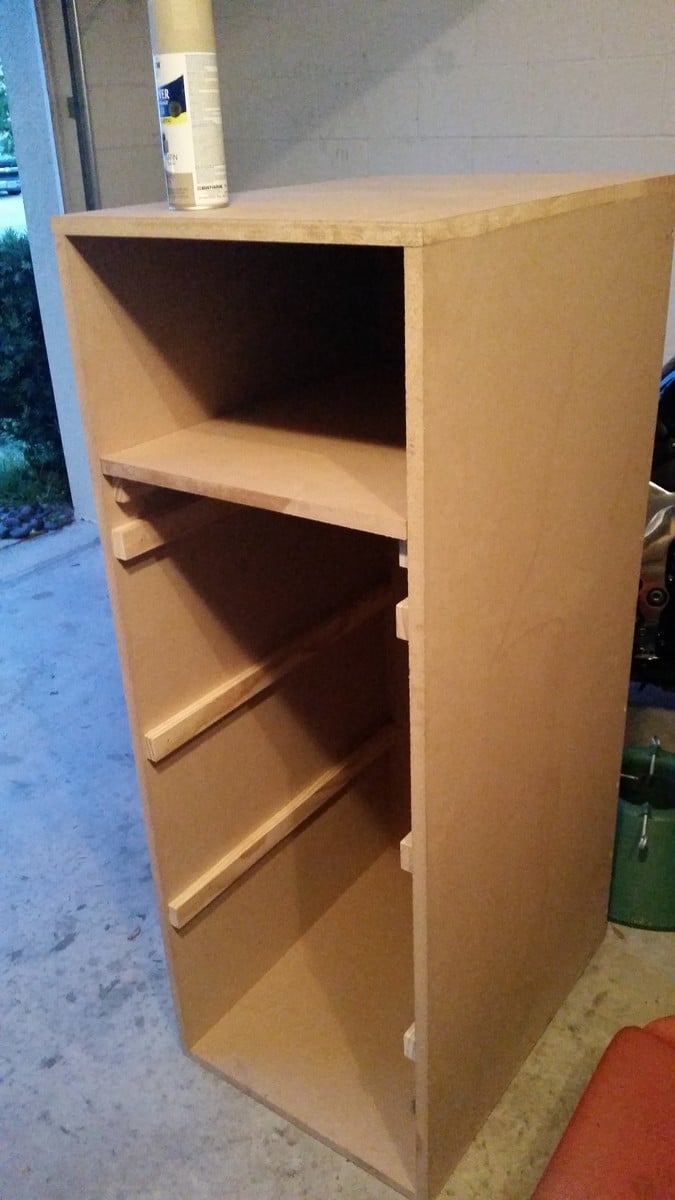
Modified the laundry basket dresser to hold 3 baskets and have a storage space for laundry/cleaning supplies in our small laundry room. We were going to paint it white, with some leftover paint we had (at the bottom there) but decided we want to change up the room and add some color. We will paint/stain it once we figure out what we want to do with the space but are using it as is until then.

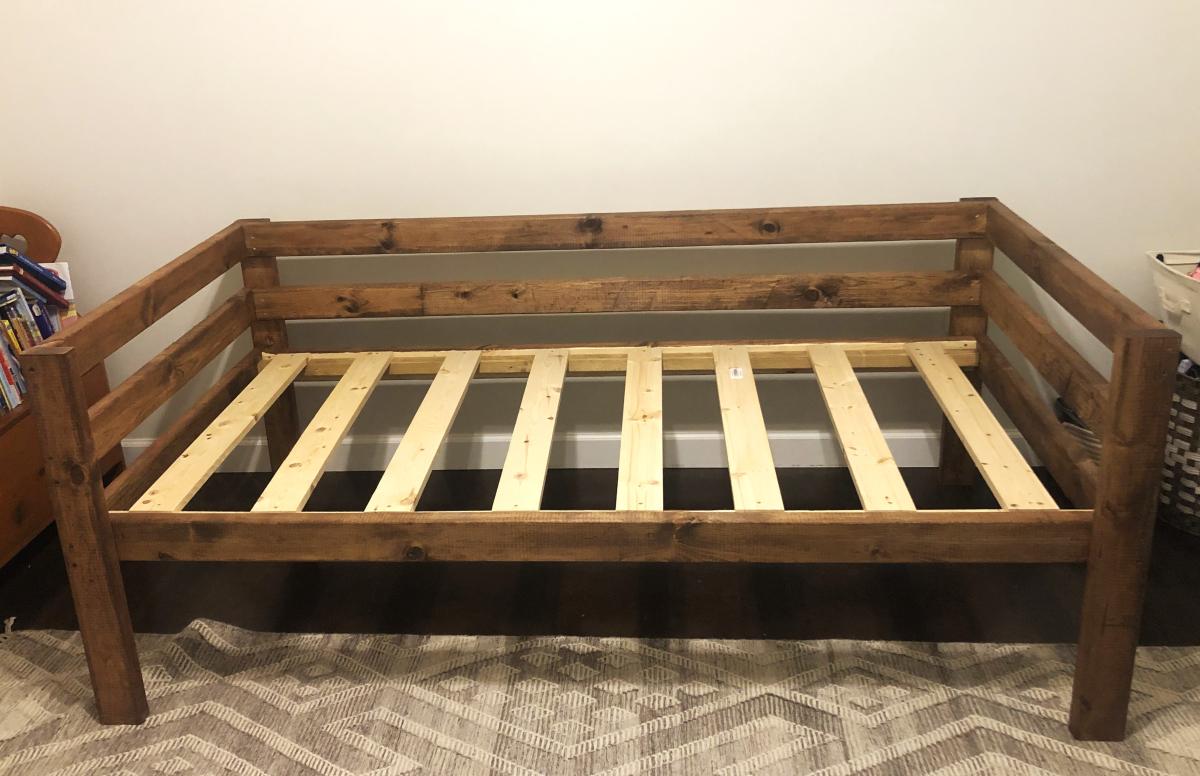
This is the daybed option. The plan and cut list worked great.

We did some conversions to the smokehouse plans to make a locker for all of my horse tack! :)

Fun project!
Hesasmoothoperator
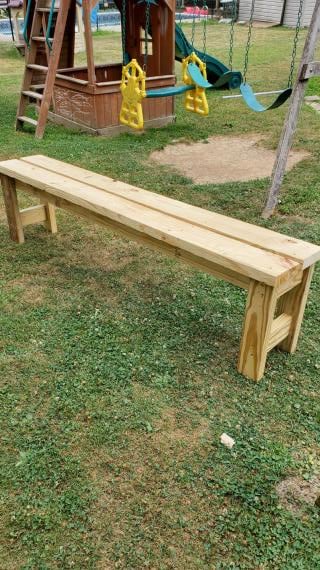
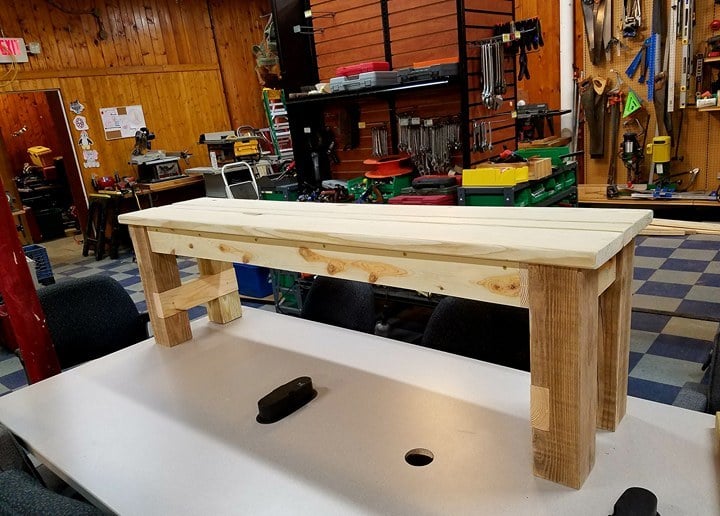
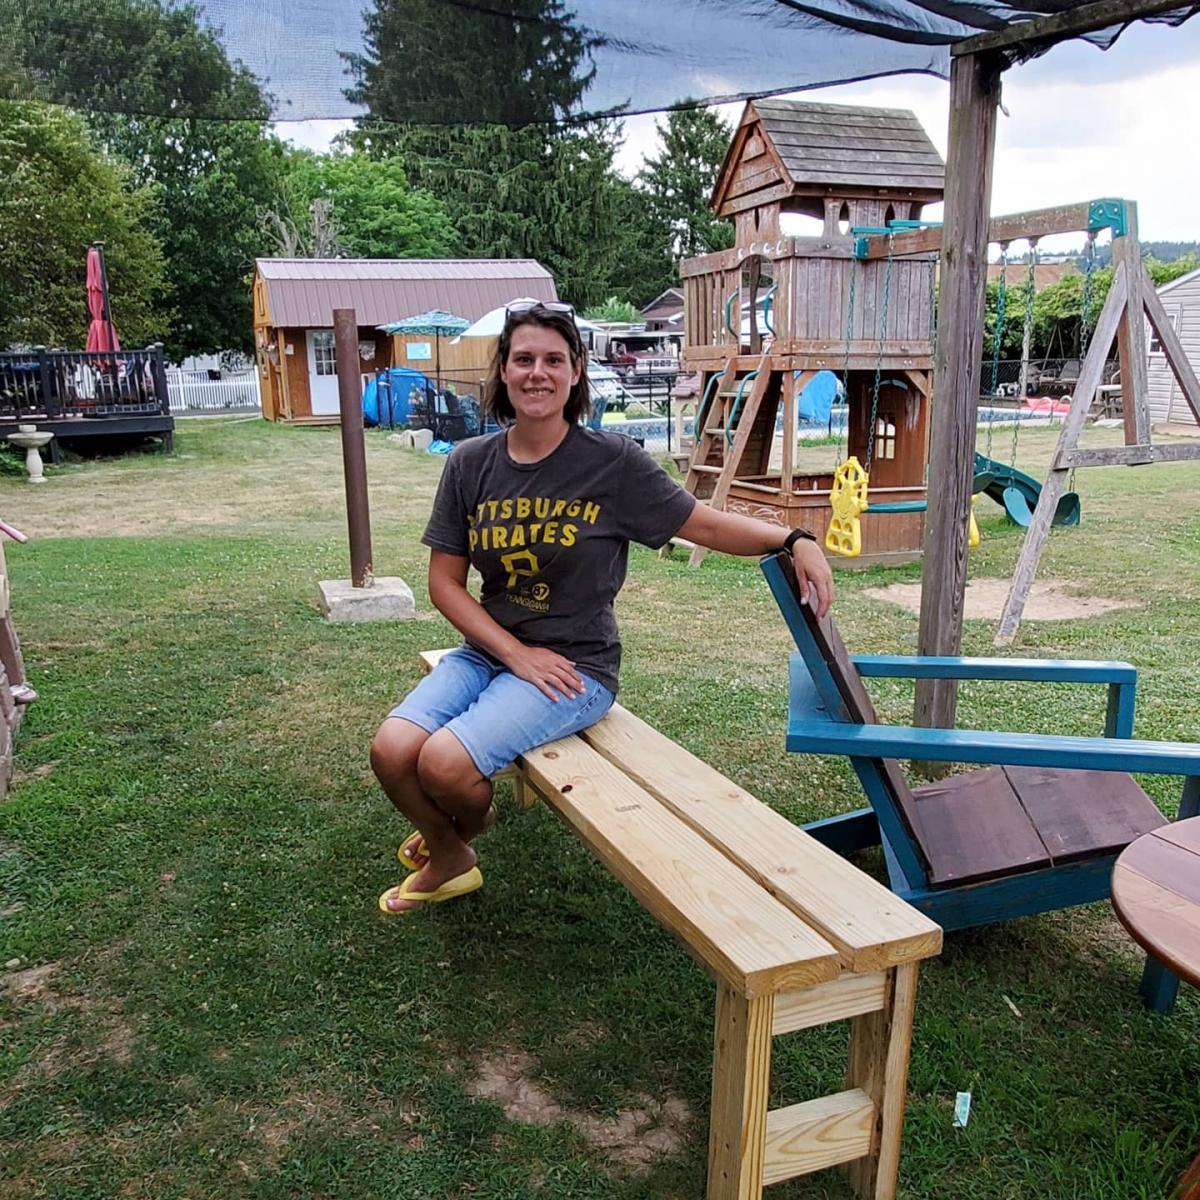
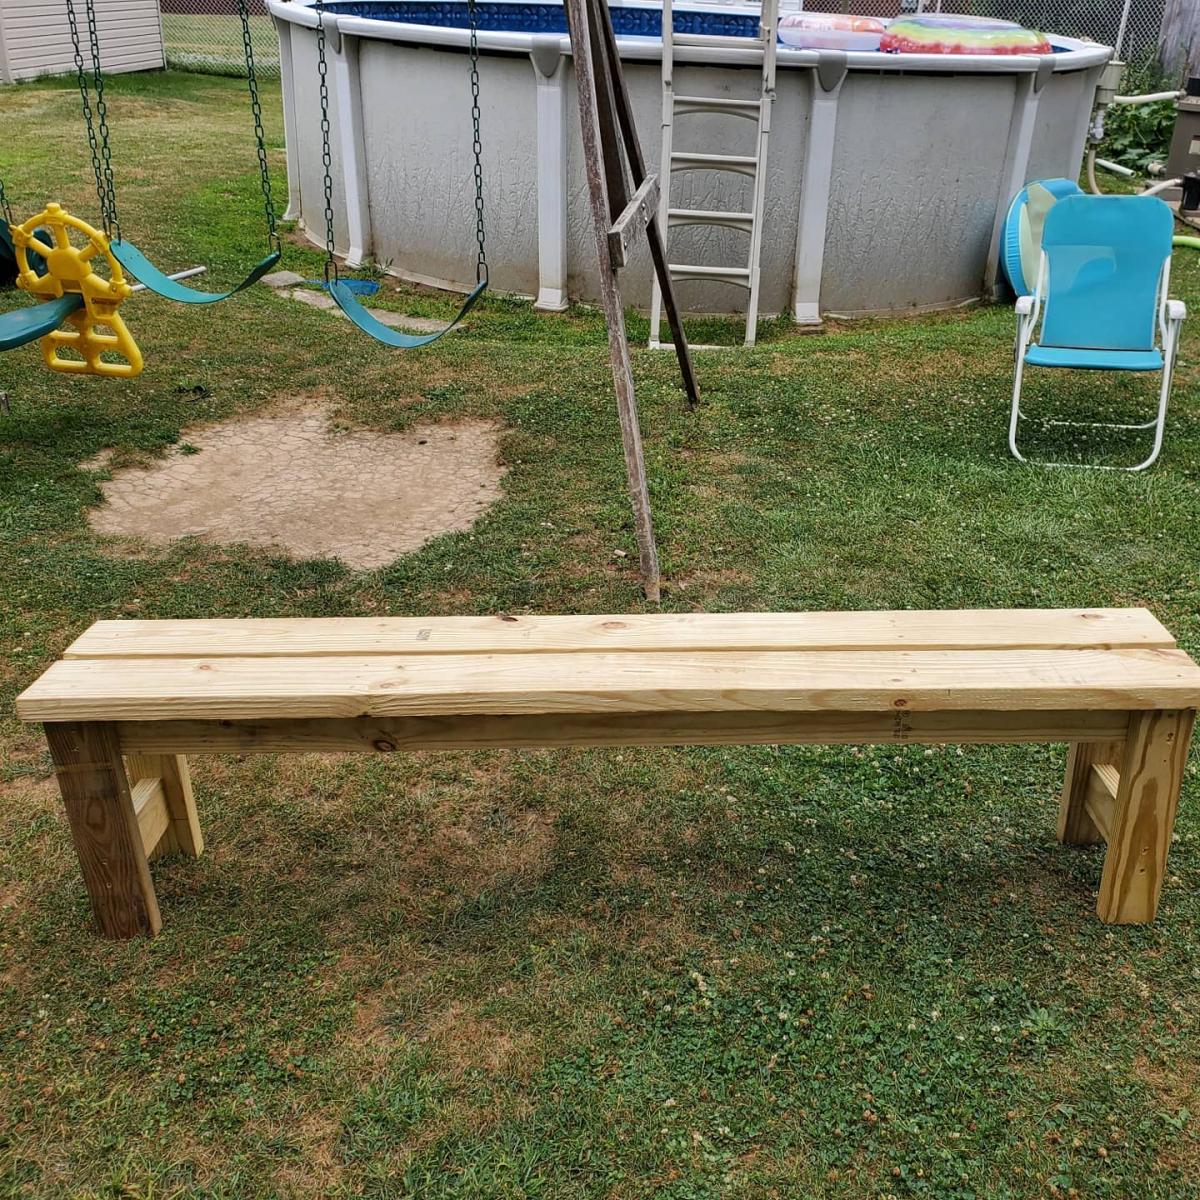
Great, sturdy, easy build!!! Looks amazing and will be my new picnic outdoor seating. I cannot wait to build the next bench and table to go along with it. Thank you for the plans!!!!
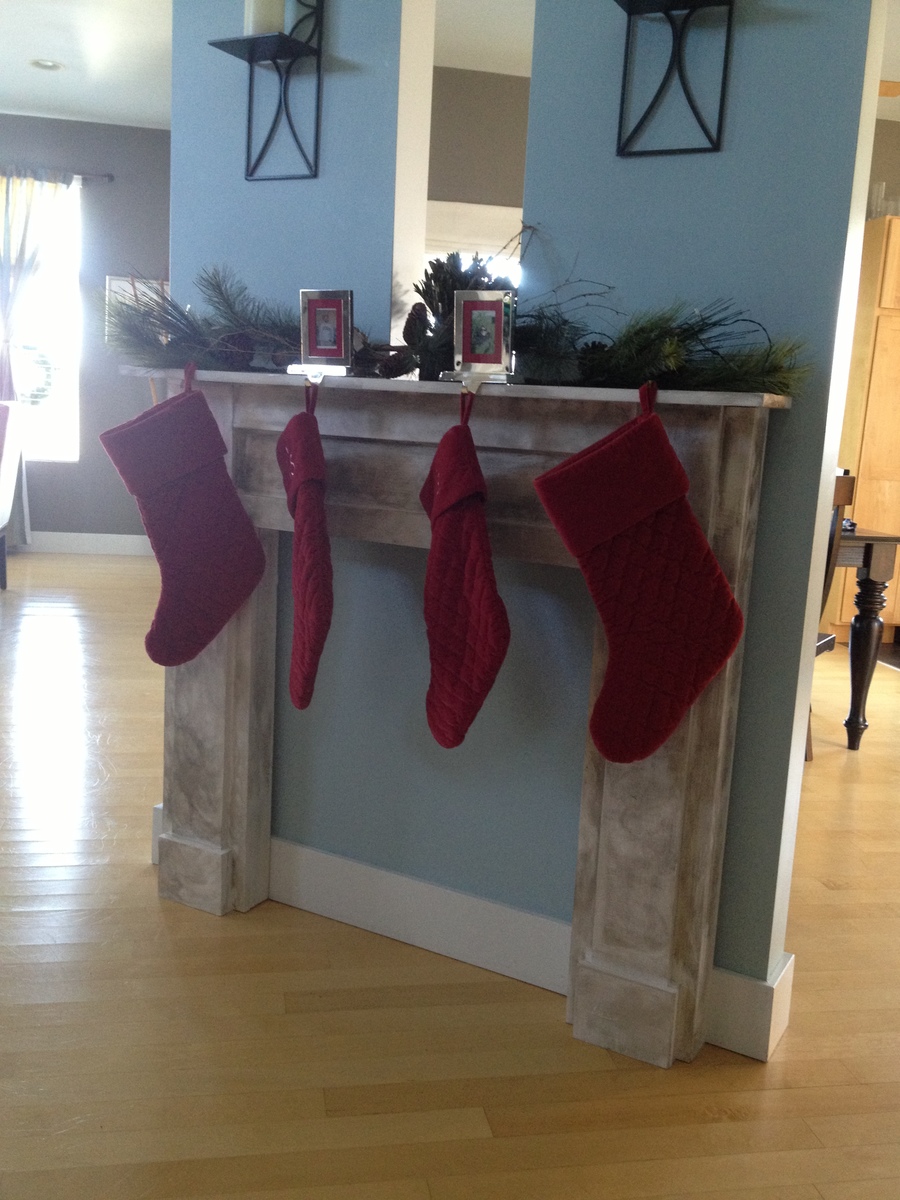
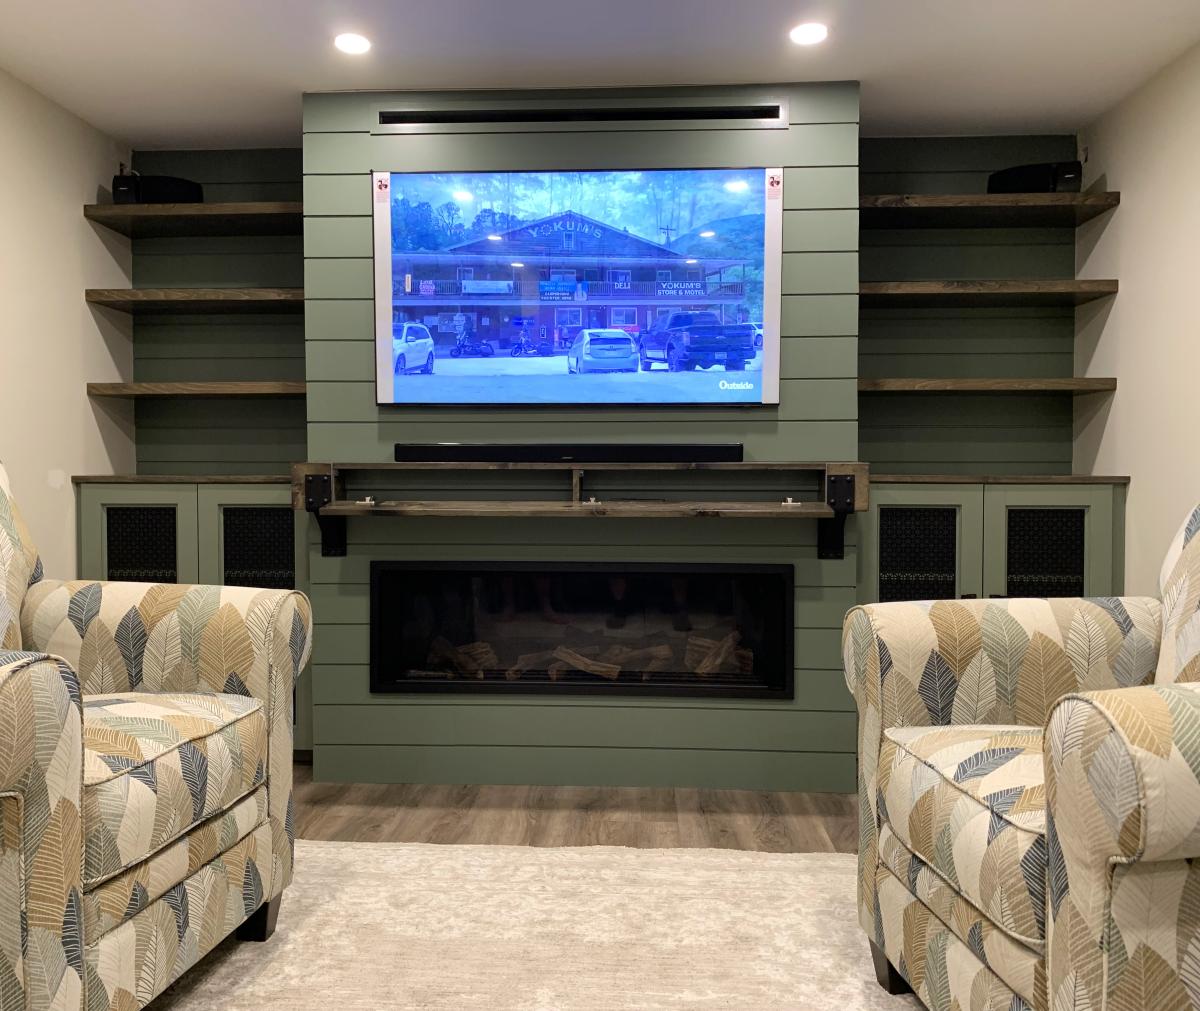
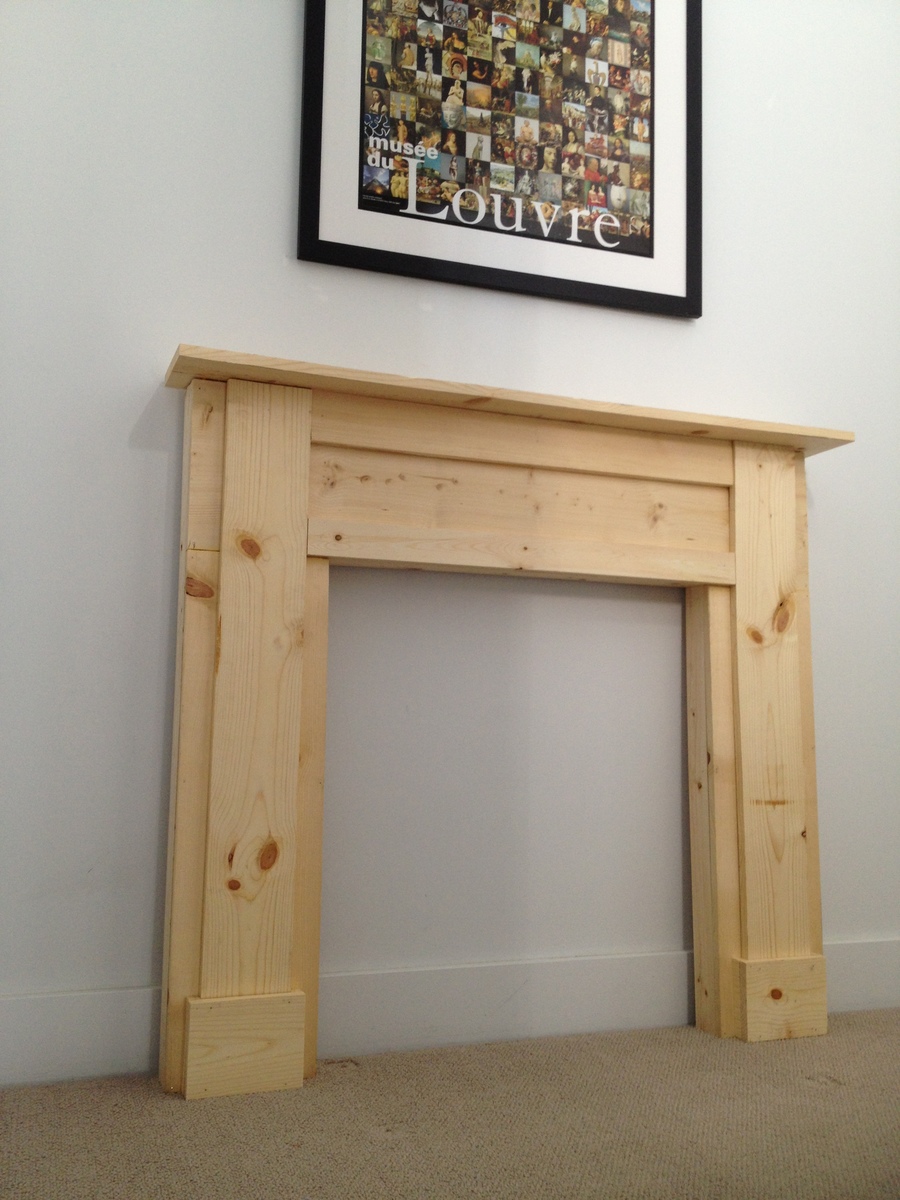
Our home (like many) does not have a fireplace or mantle. So, I decided to build one. Thank goodness for Lowes. They pre-cut all wood for me. I was afraid to use a drill (I'm a rookie), so I nailed all pieces of wood with 1 1/2 inch nails. Wood glue was fabulous prior to using the hammer. I omitted decorative molding too. I think I used too much antique paint, but I can always re-paint it next year. I don't think I'll have the mantle up all year long, but it's great for a Christmas decoration. I hope this gives hope to anyone out there considering this project. If I can do it, YOU can totally do it! Thank you SO much for helping a novice builder like me add something to our home.

Sat, 12/08/2012 - 11:12
That turned out really nice! The paint looks like marble in the picture.

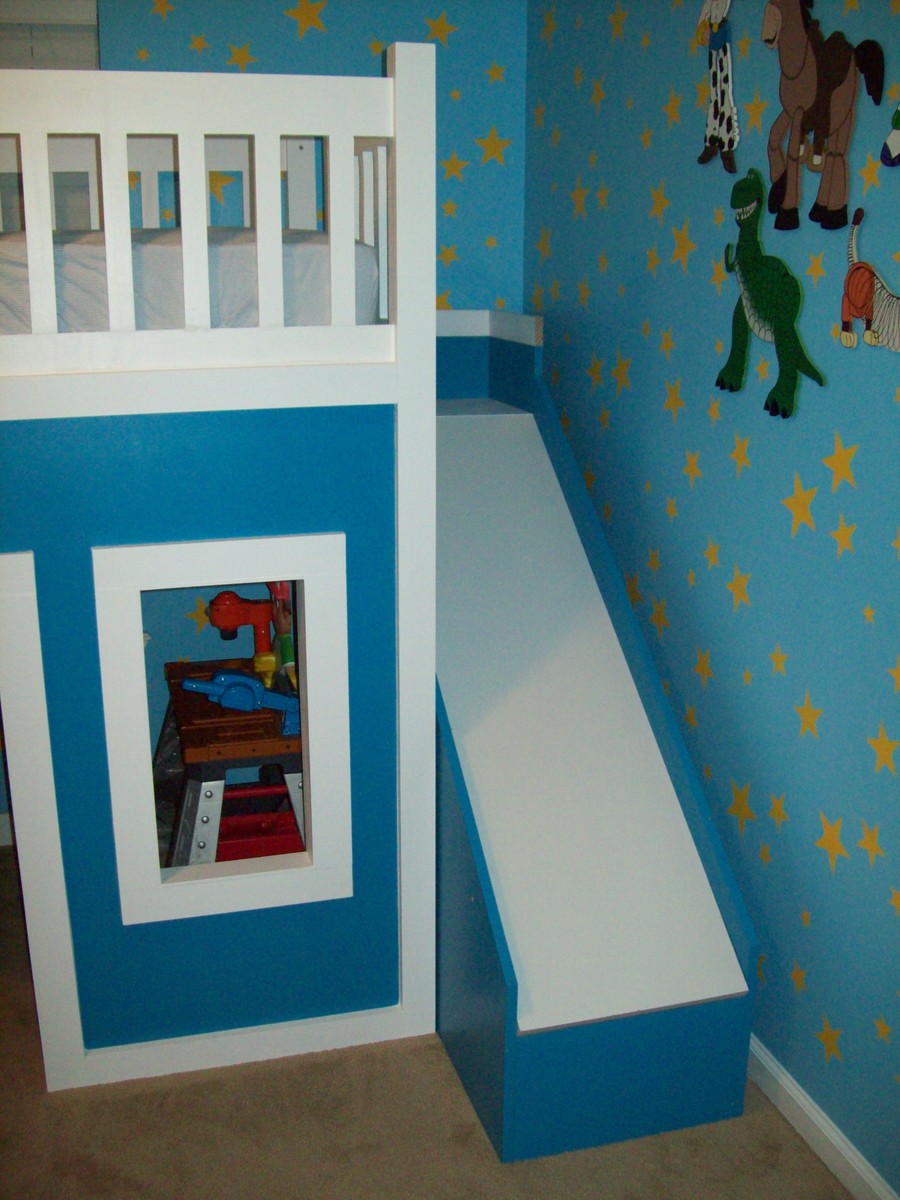
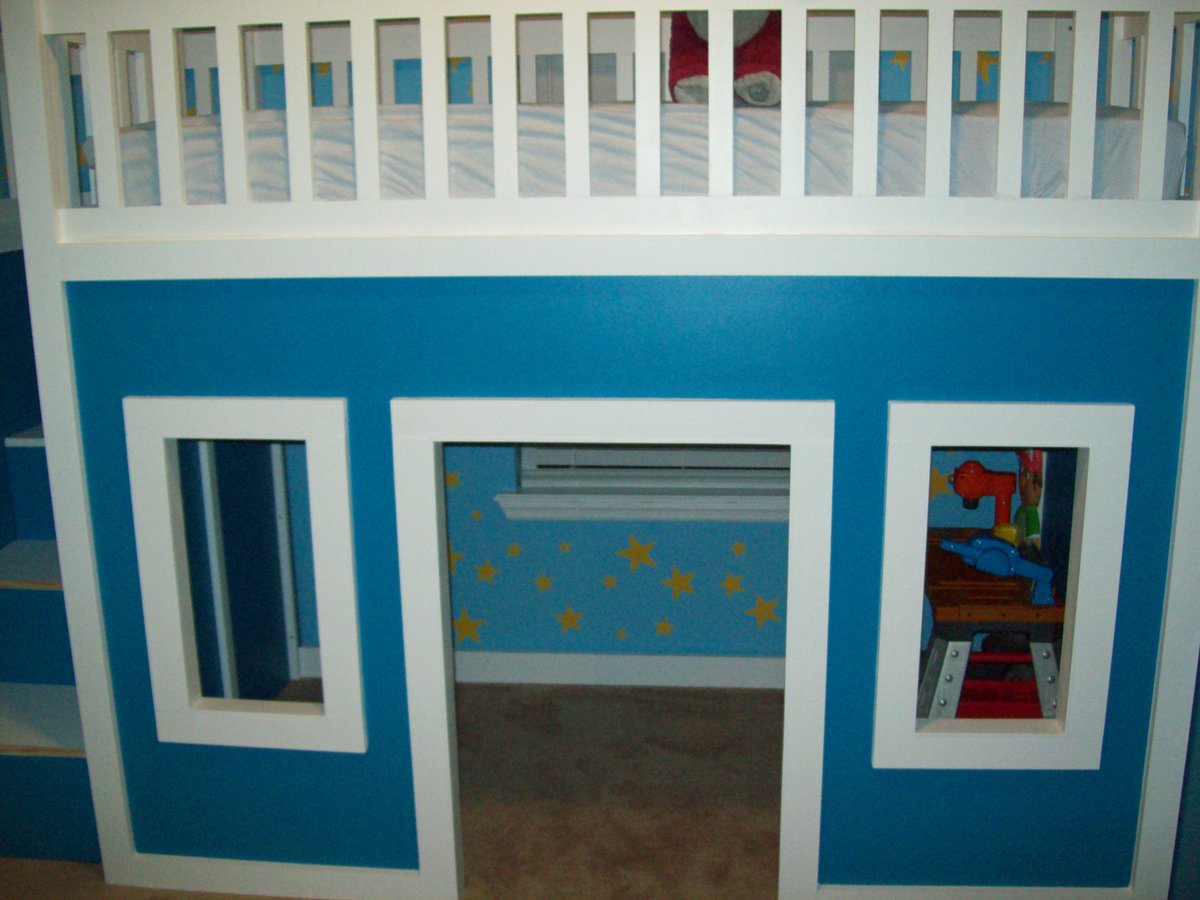
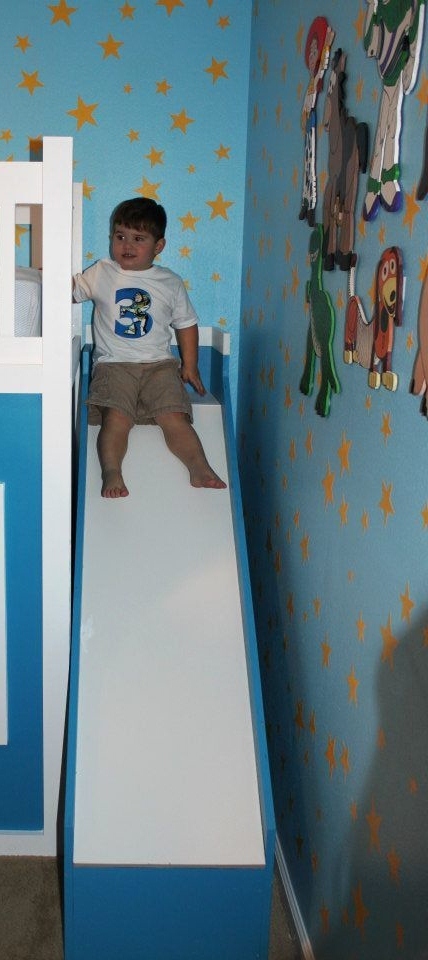
My son was about to turn 3 and I really wanted to redesign his bedroom as a birthday surprise. We went with a Toy Story themed room, he just loves Toy Story. I started off by painting the walls blue with yellow stars like Andy's room in the movie. I added some custom painted art work and then it was off to find a cool playhouse bed. My husband and I were shopping around and we could never really find what we were looking for in the store. So we decided to build one ourselves using plans from this website. I used the playhouse loft bed and the playhouse loft bed stair plans, for the bed and the stairs. I used the castle loft bed plan as inspiration for the slide. The project took us about 5 weeks from start to finish. We both have full time jobs and we did most of the work on the weekends. I looked at each plan very carefully and made notes. I had to modify the stair plans slightly to fit the space where we wanted to put the bed. The stairs look narrow, but they work just fine. My husband and I can both use them to get up in the bed. The stairs feature hinged stair tread with built in storage. We built them like that at first, but then later decided to make them stationary stair treads, with plywood. I didn't like the way the hinges looked and the top stair was so deep that I was worried my son would fall in there and get stuck. The storage idea was neat, but his safety was more important to me. The bed turned out really nice and VERY sturdy. Both my husband and I are able to get up there with my son (not at the same time). Another modification that I made was instead of slats to hold on the mattress, I used a piece of plywood. I wanted the roof in the playhouse to look finished, and I didn't want to see his bedding hanging down from the slats. I painted the top of the plywood white, where the mattress goes to blend in with the slats, and the other side was painted blue to match the walls inside the playhouse. I did modify the playhouse front facade to have 2 windows and one door. I like the symmetrical look. The total project cost about $400. I used birch plywood and select pine boards, and about 6 quarts of paint. I noticed AFTER we had finished the bed using the birch plywood, that Home Depot had cabinet grade plywood on a random end cap, that was just as nice for $12 less a sheet. If I could do it all over again, I would definitely use that!. I wanted the paint to have a nice smooth finish, without having to do a lot of sanding or patching. We had Home Depot cut the plywood to the dimensions we needed. I had my husband cut the rest of the wood dimensions listed in the plans, and then I painted all of them before we put the pieces together. I used a small roller and self priming paint. The paint finish looks great. After assembling the bed I can not imagine what I would have gone through trying to paint it after the fact. The slide was a bit tricky, I looked at the plan for the castle loft bed and attempted to use those dimensions, and for the most part they worked. But when we went to assemble the slide, we did end up recutting some of the wood to different dimensions. I used a piece of the melamine coated closet shelf material for the slide. It is already finished in white and its nice and slick, like a slide should be! I hate MDF, but for this it seemed the best fit. We cut the top edge at an angle to meet up with the slide platform. PLEASE BE CAREFUL with this material. After it was angle cut the edge was razor sharp and I sliced my fingers up. Once it was installed it butted up perfectly to the slide platform, and the edge was hidden and not a danger. But use caution during the install. Clamps are your friend! We used Kreg clamps for everything. They kept the wood in place while we were screwing the parts together. The coolest thing that my husband came up with was clamping two identical pieces for plywood together, and drawing the template for the slide support walls. Then he used his circular saw to cut them out. We ended up with two mirror image pieces. They looked awesome. I left them clamped together when I sanded the edges as well. We really didn't have any building experience other, than building tables and chairs for children, We got the deluxe Kreg jig kit and a miter saw on Craigslist for $50 each and they were both practically brand new. This was the first time we had ever used a Kreg jig and we are both addicted. That thing is the bomb. We locked my son out of his room for a week while we assembled everything. We had the big reveal at his birthday party and all of the guests were excited to see it after seeing my facebook teaser posts of our progress. There were 8 kids up there at one time and the bed did not budge. They all enjoyed the slide. I did the planning and paint and my husband did an awesome job making all of the cuts and sanding everything. We are both very proud of the final product. My son love his new big boy bed. DISCLAIMER: This bed is not recommended for a child under 6 years old. My son is mature for his age and we monitor him carefully.
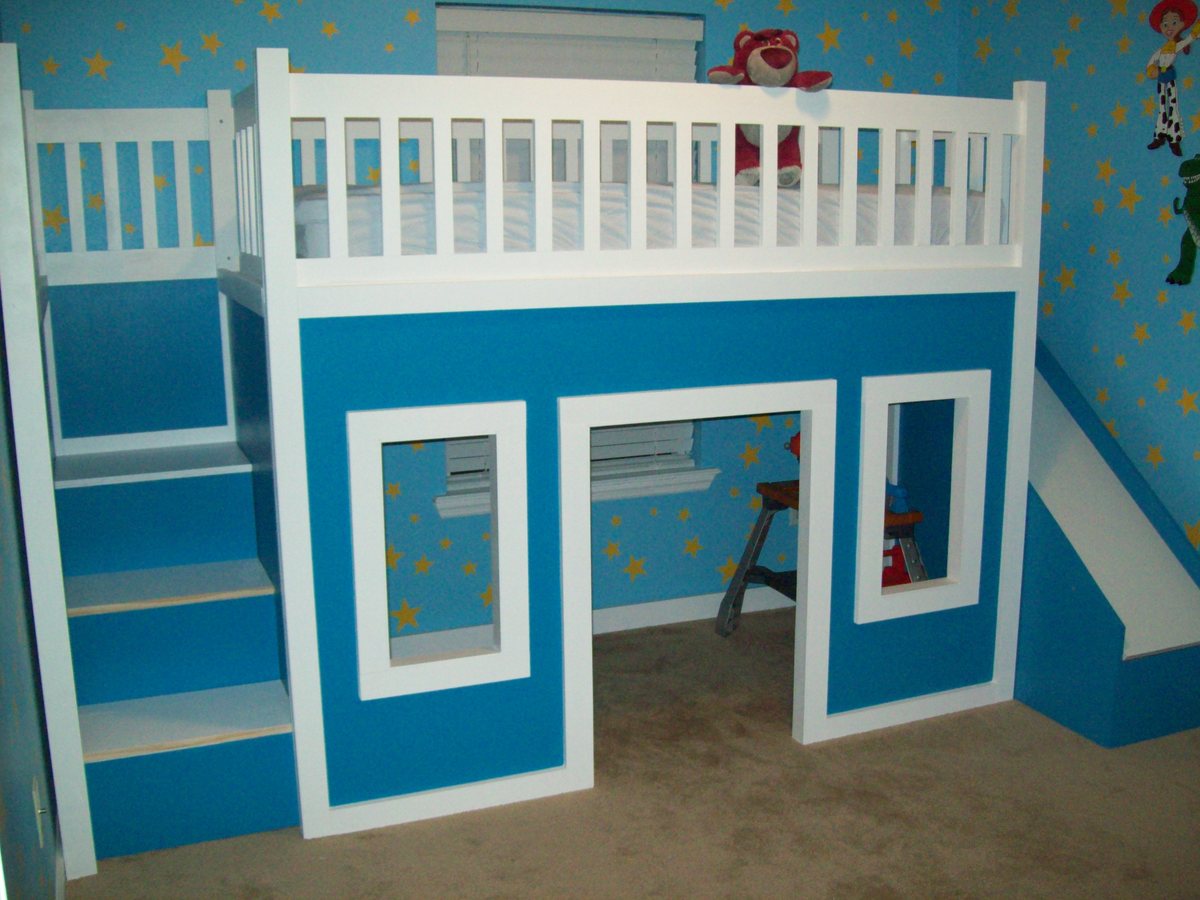


Wed, 07/06/2016 - 10:05
Hi, my husband is building this bed for my 6 yr old daughter, but in purple blue and white. We adding the slide too. May I ask what size bedroom you guys have for your son, and did the bed fit well? Did you have to make any adjustments for it to fit in the bedroom? Thanks in advance! Your bed looks great! I hope ours turns out as good.
Christine N in PA
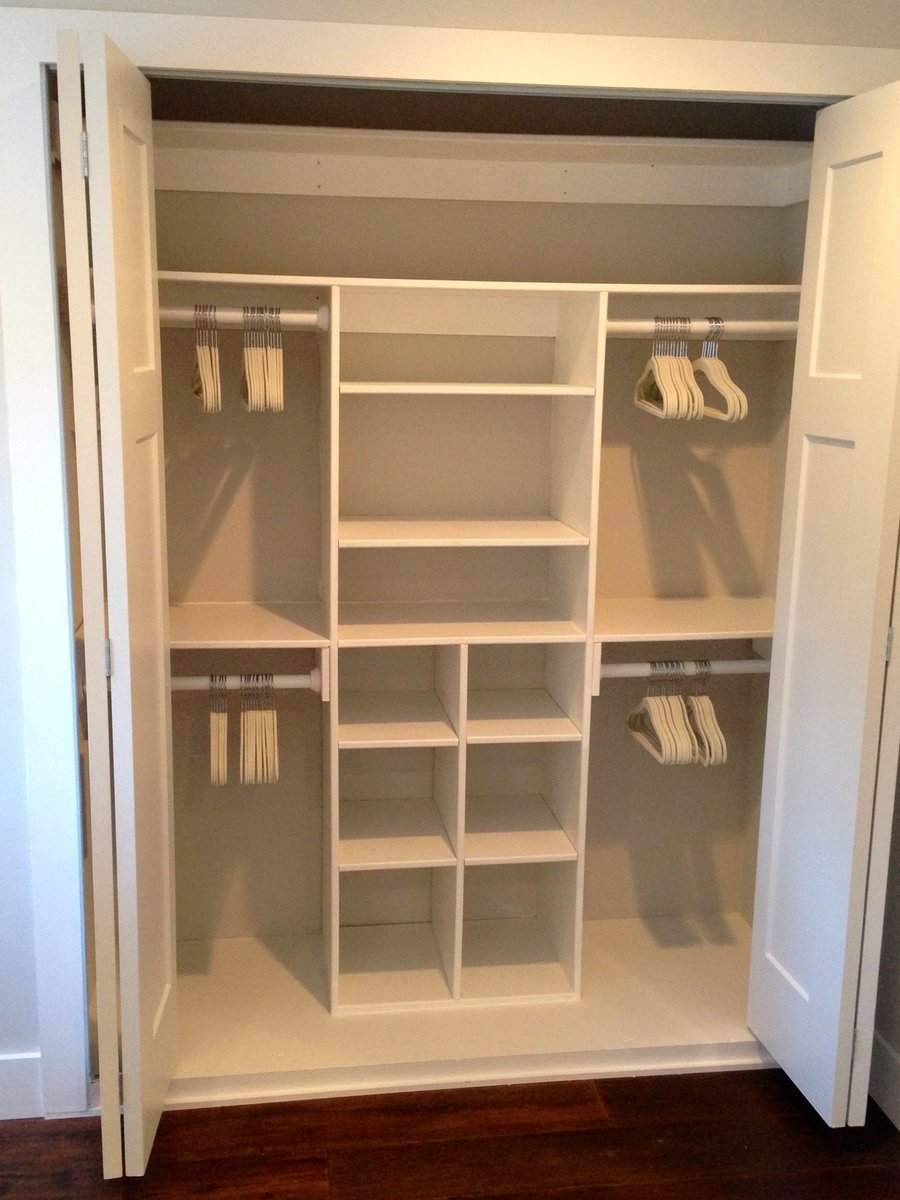
Just My Size Closet!
Built this from Ana's plans with a few modifications.
Started with a big empty box after ripping the old stuff out and finished with this look.
Adjustable shelves and all !

Wood Slat Outdoor Chair


This is a wishing well I made for my sister for her wedding. It will be used during the wedding for people to drop "wish you well" cards into and afterward she can use it as a planter in her yard.
I followed ideas from multiple plans here on Ana-White.com, but I didn't follow any specific plan. Mostly I followed tips and instructions for cutting angles, drilling pocket holes and some finishing tips. This is the first "big" project I've done and I"m quite proud of it.
With everything, it measures 44.5 inches high. The well measures 21 inches across and 15 inches high. The roof measures 22.75 inches by 23.75 inches.
I hope y'all like it. I worked hard on this! :)
Thank you, Ana and everyone who contributes to this site. It's been so much fun and I've got lots of ideas for more stuff. If I was any good at all at Google Sketchup I'd put up the plans but I'm not. If anyone could help me with that, that would great. :)
Have a great day!


Mon, 07/21/2014 - 20:04
Anyway you can please tell me the angle for the boards ont the walls. I reallly like your well, and would like to build this for my wife but im not sure on what angles to use thank you

In reply to wishing well by bellows86
Sun, 07/10/2016 - 17:10
The 8 sided wishing well is going to be 22.5 degrees all the way around. hopes this helps
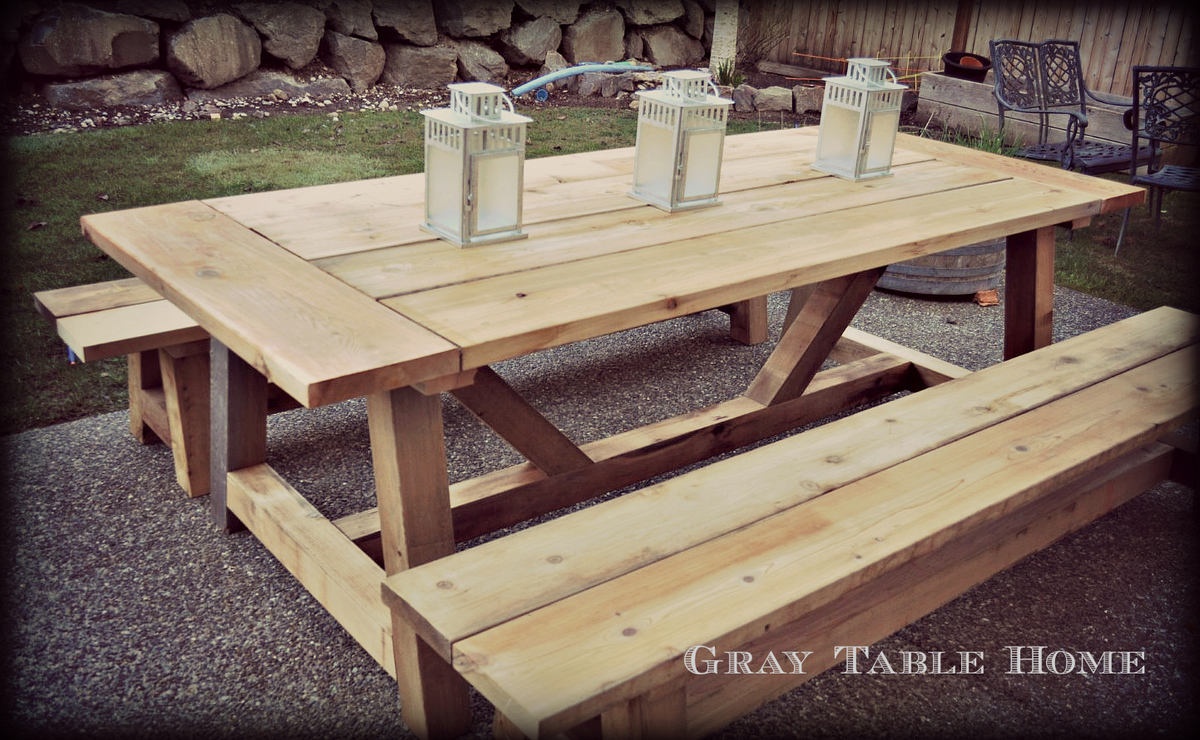
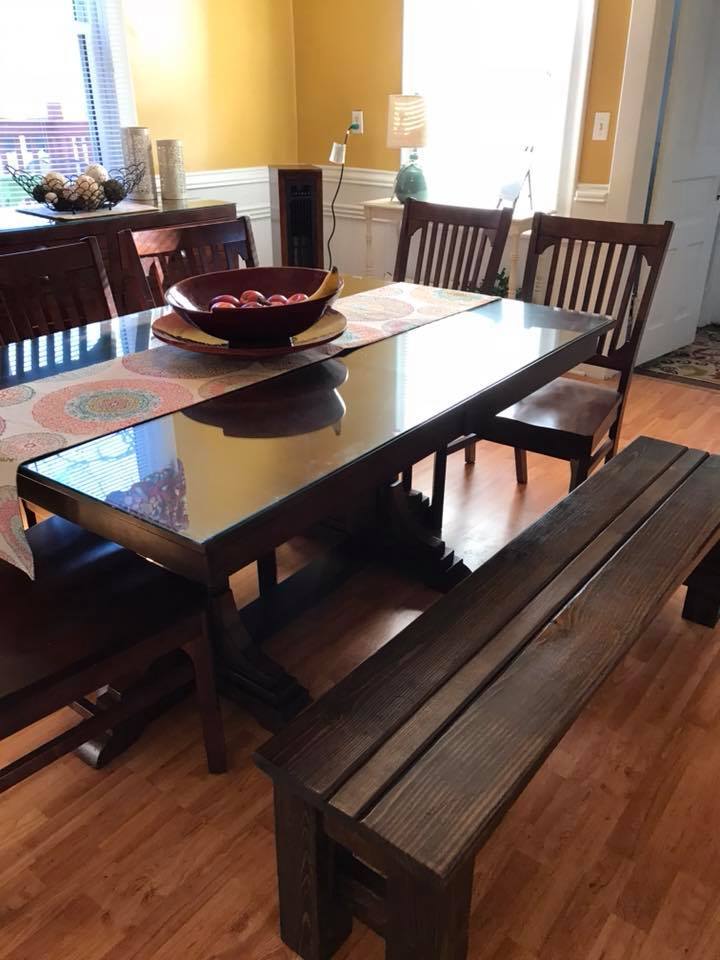
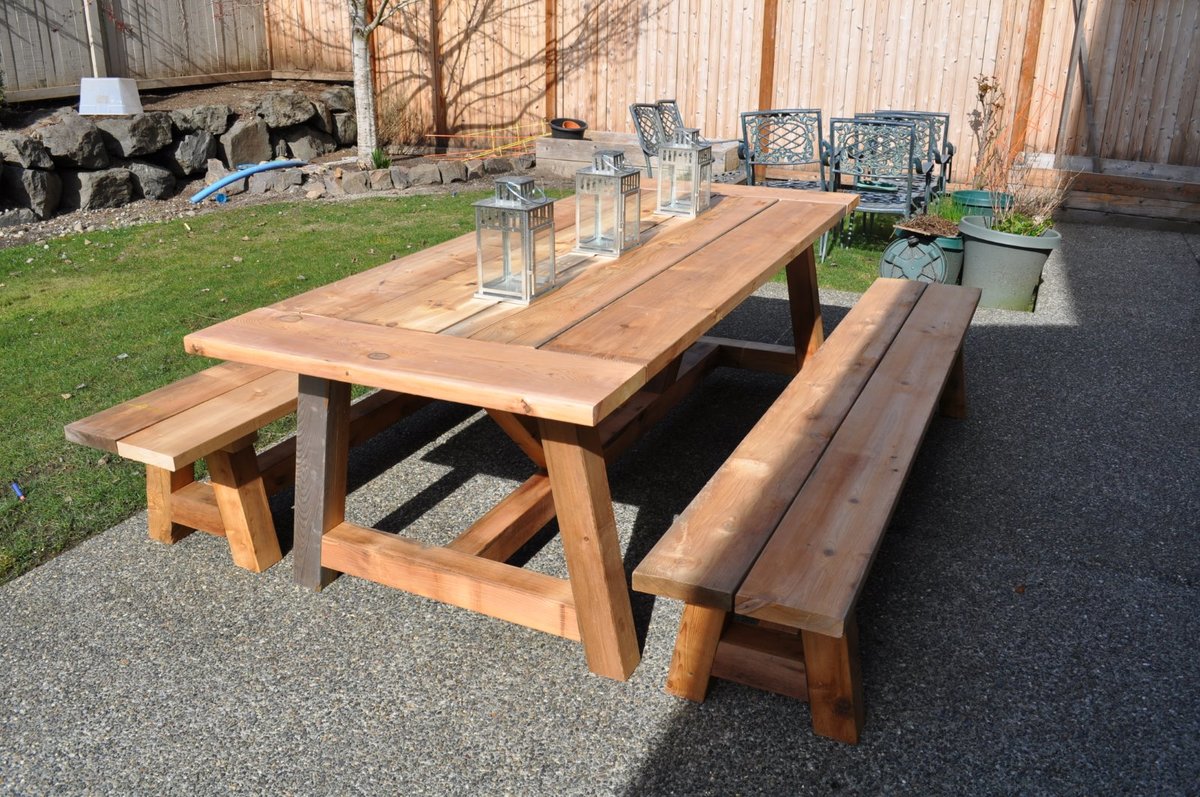
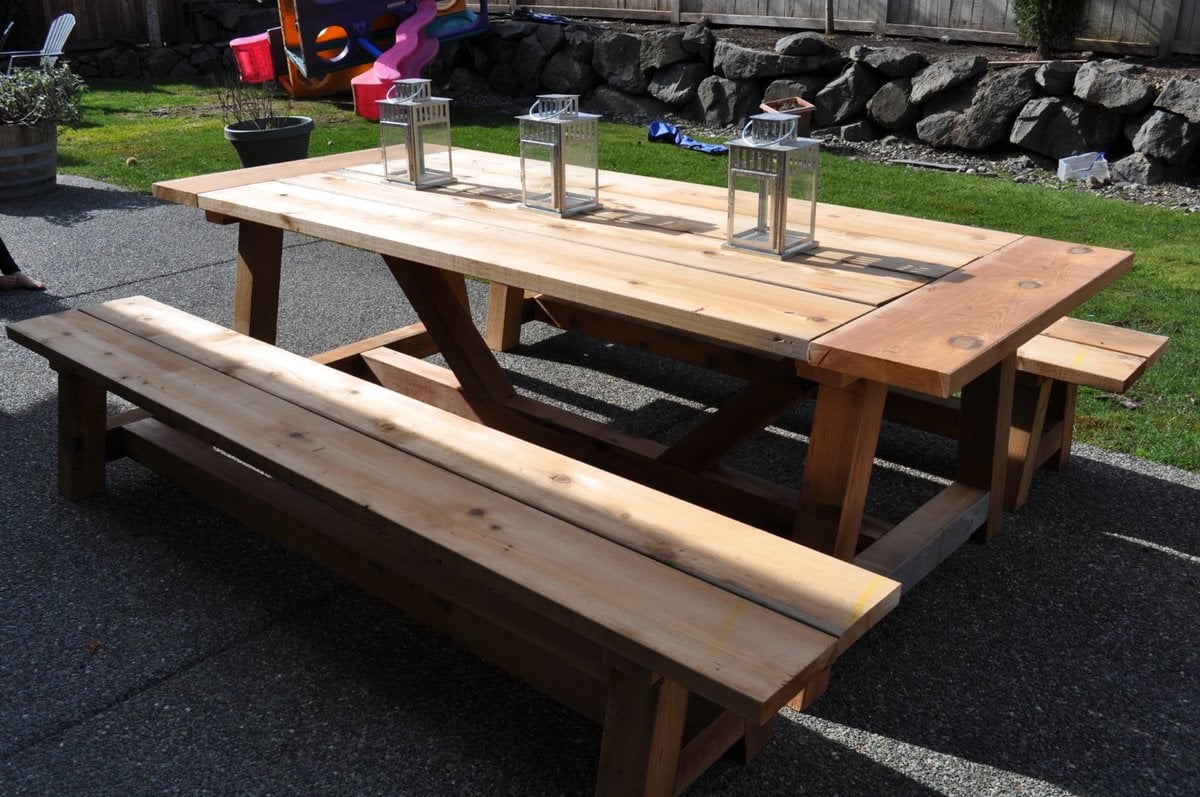
Hi! I was truly inspired by the plans I found at this site and the many brags that I saw! I have now built this table set a few times (first for myself, then for friends & family) and learned a lot each time. The things I have modifiied include...
1) Length = make it longer or shorter as space allows (I've done tables from 84" to 108" long)
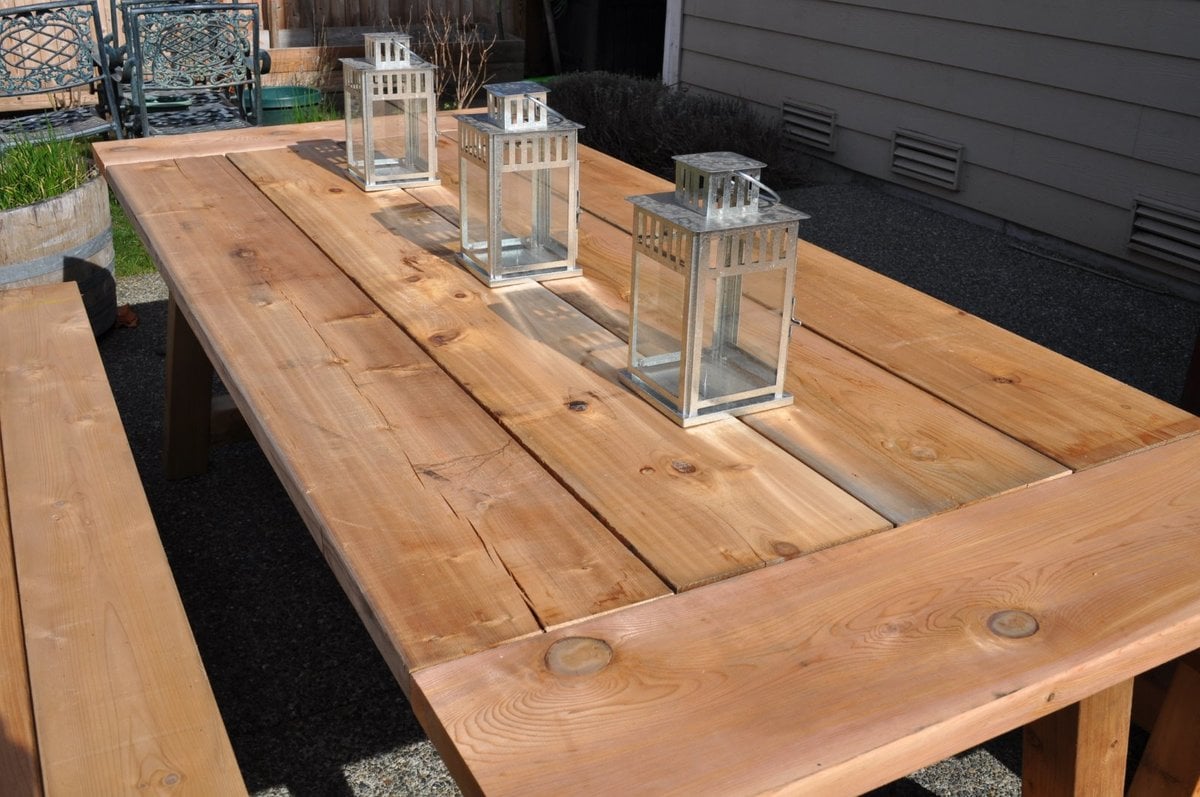
2) Outdoor table top = because these are being used outdoors, I use screws as spacers between boards so that they have a 1/8 to 1/4 gap to allow for water to run through
3) Breadboard end support = I found that with just the pocket hole screws, my breadboards were a little 'wobbly' so I added Simpson Stong Tie metal plates underneath to reinforce the ends.
4) End length = in order to provide a little more legroom to those sitting at the end of the table, I recently changed the plan so that I would have at least 15" from the table base to the end of the table top (although this pic shows the regular plan with the ~8" overhang)
I really appreciate all of the plans and brags which have been shared by users of this site. Thank you!!!
Thu, 04/30/2015 - 21:38
Thank you!!! That sounds about right for the cost - I spent about $425 on my lumber and hardware. Cedar is more expensive, but I was happy with the results. And it still seems like a good 'deal' when you consider what you would get for that price from a store.
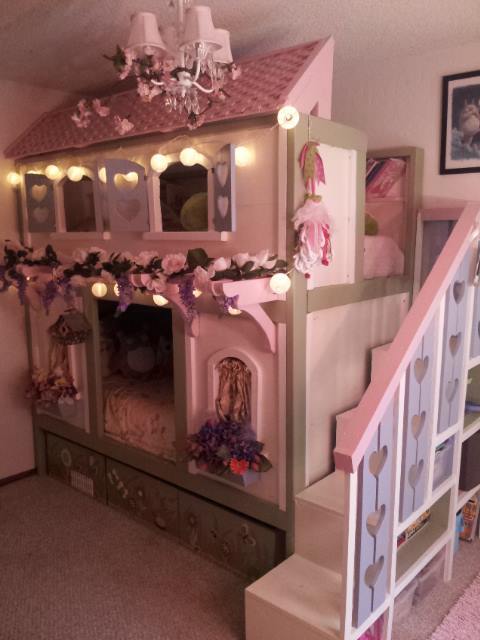
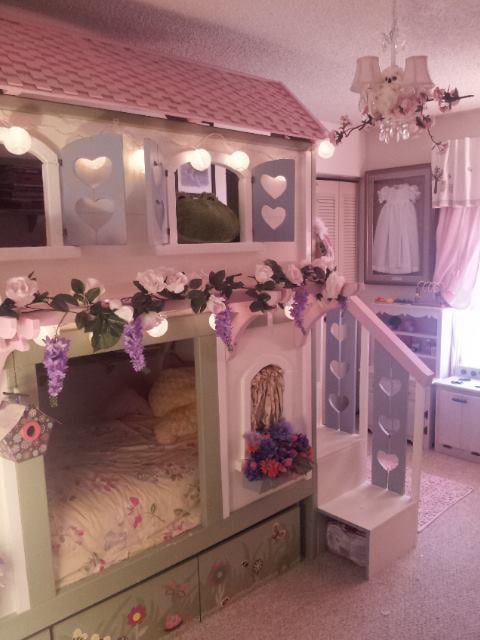
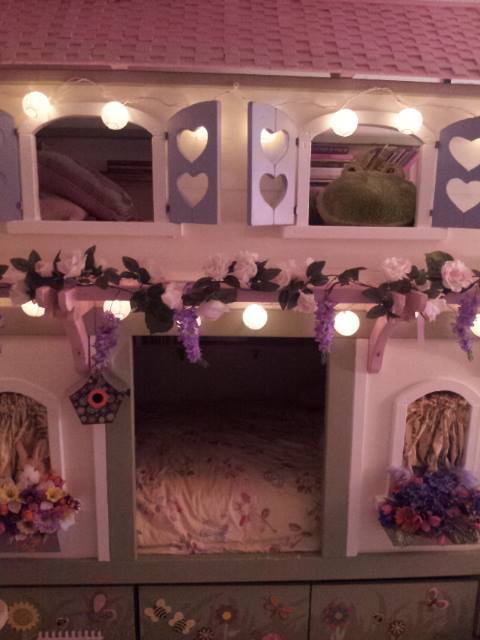
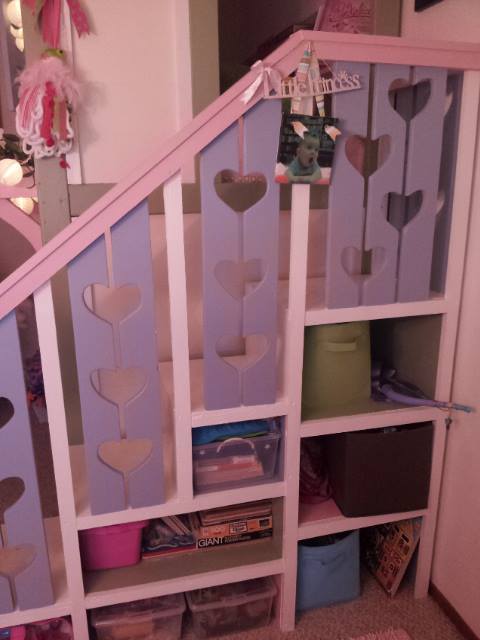
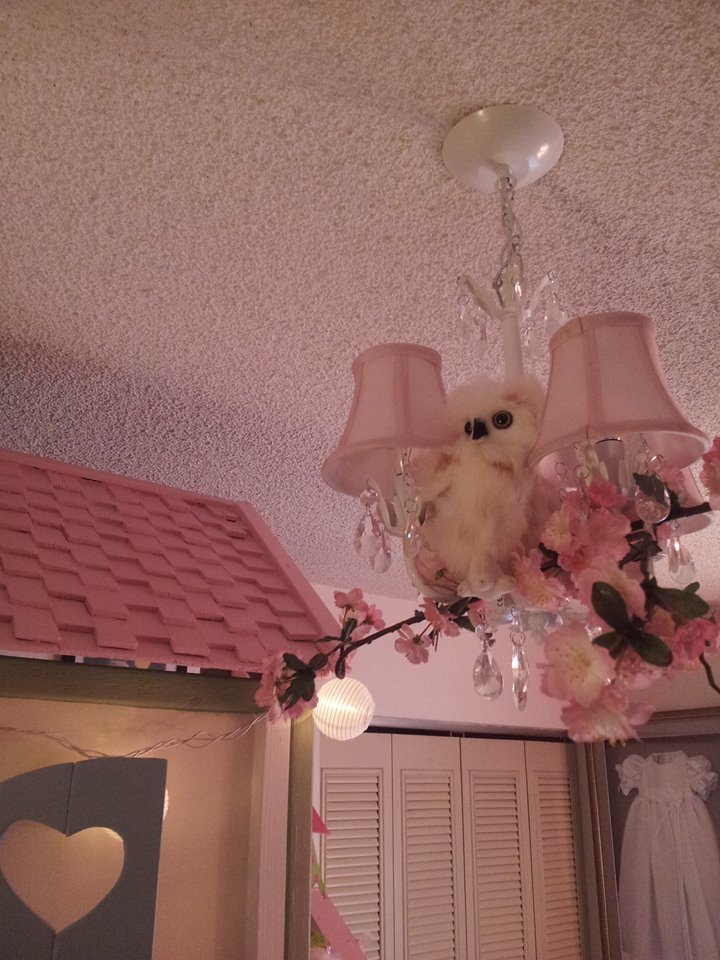
After yet another move (this time to Monterey, CA) and with a baby on the way, it was time to build the girls some big-girl beds of their very own. I was going to need to re-convert their double bed back into its original crib form by September, so in June, I started looking for plans. When I stumbled on Jenny's "Sweet Pea" bunk beds, I knew I'd found a winner! She also made it sound so easy, and I'd only assisted my dad on remodeling projects, never built anything from scratch. But I was familiar with the tools and terminology, so six months pregnant and in a serious nesting phase, I got to work. My hubs helped with the heavy lifting and I had some friends assist with sanding and priming -- many hands do indeed make light work! It took just under a month working four to six hours a day (on average), five to six days a week. I used screws for EVERYTHING, as this baby has to come apart easily for future moves (and does it ever -- Jenny's not kidding when she says you can have it up and down in ten minutes!). I'm most proud of the roof -- I had originally planned on finding real cedar shingles, but those babies are expensive! So I came up with idea of using door shims. A pack of 12-15 is only a couple bucks, and it took about 24 packs to cover the entire roof. I found some light wood trim and glued/screwed it to the edges, slathered on some pink paint, and voila! A wood shingle roof! The whole project ended up costing nearly double what I'd originally budgeted, but I'm so happy with it and my girls love it so much that I don't really care. Plus, if I'd had this baby custom made, it would probably have cost quadruple (at least!) what I paid in building materials. Let me know if you have any questions -- I'm happy to share what (little) I know :)!

Thu, 01/02/2014 - 01:16
Awww...This is so SWEET! You did such a great job- the roofing is ingenious! I wish I had thought of that! And you are right, wood shingles cost a fortune. You came up with such a clever way around it! Love how your bed turned out, I'm sure your girls feel like little princesses!
In reply to Awww...This is so SWEET! You by birdsandsoap
Thu, 01/02/2014 - 08:12
Thanks :)! And yes, they do love it -- bedtime has not been an issue since completion!
Thu, 01/02/2014 - 01:16
Awww...This is so SWEET! You did such a great job- the roofing is ingenious! I wish I had thought of that! And you are right, wood shingles cost a fortune. You came up with such a clever way around it! Love how your bed turned out, I'm sure your girls feel like little princesses!
Wed, 04/09/2014 - 15:35
hi do you happen to havea copy of the plans the pdf link is broken and id love to build thr bed for my daughter
In reply to copy of the plans? by thomen
Mon, 05/19/2014 - 16:18
So sorry this took so long -- I only just now noticed your comment! I do not have a copy of my plans, unfortunately. They were pretty much destroyed by the time I finished!
Mon, 05/19/2014 - 14:51
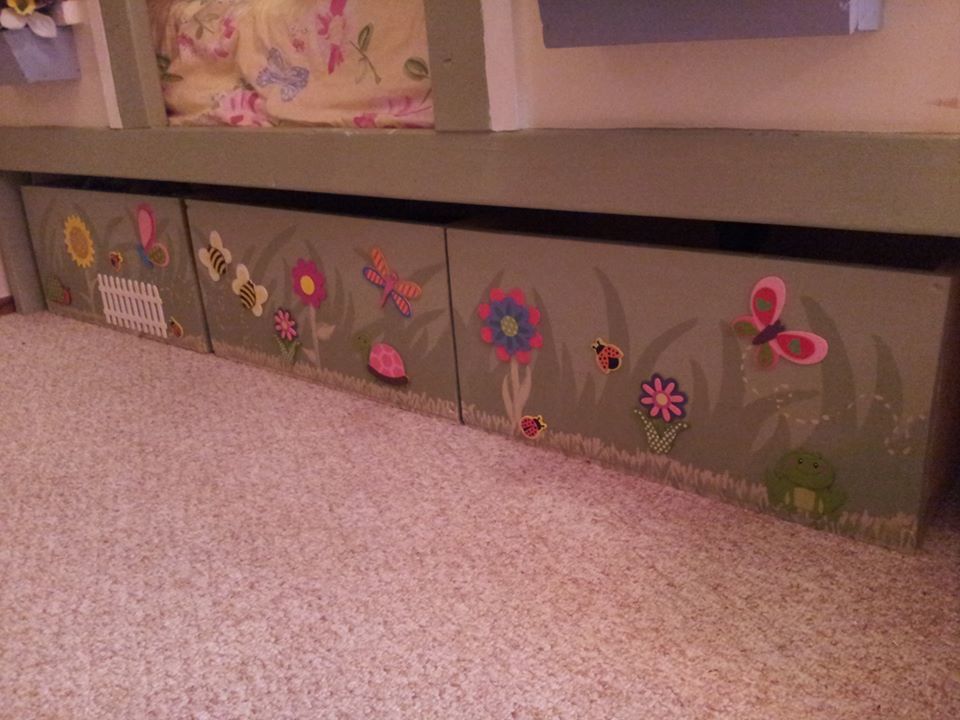
This is marvelous! My husband says this is the best he's ever seen and wants to do exactly this. You have a designer's eye. The paint pallette is very pleasant. Can you tell us the specific color names of each paint you used and where you used it?
Did you use stencils to paint the flowers, etc? If so, where did you buy them from?
Also, where did you get the lights and what are they called specifically?
Thank you so much!!!
In reply to Specific Paint Colors and Other Details? by Bountiful Acre
Mon, 05/19/2014 - 16:23
Thanks for your kind words! I do not know the exact names of the paint colors I used -- they were sample cans, by Behr. The cream color was actually a very pale yellow, though. I free-handed the green on the drawers, and the flowers are actually made of wood and came from Michael's (in the craft department, where they keep wooden letters and stencils). The lights are oriental paper lights, and I got those at Ace Hardware. Hope this helps!
Tue, 05/20/2014 - 11:20
Yes, that was helpful. Thank you for taking the time. It is appreciated!

I modified these plans slightly so as the add wrought iron mantel supports. I increased the length of the top and bottom and then added 2 additional internal supports where I made cuts on the front board (just on the inner edge of the mantle support. love how it turned out.
Stacyw3838