Community Brag Posts

Indoor Fancy Pet Kennel

Submitted by Anonymous (not verified) on Fri, 02/10/2017 - 11:51

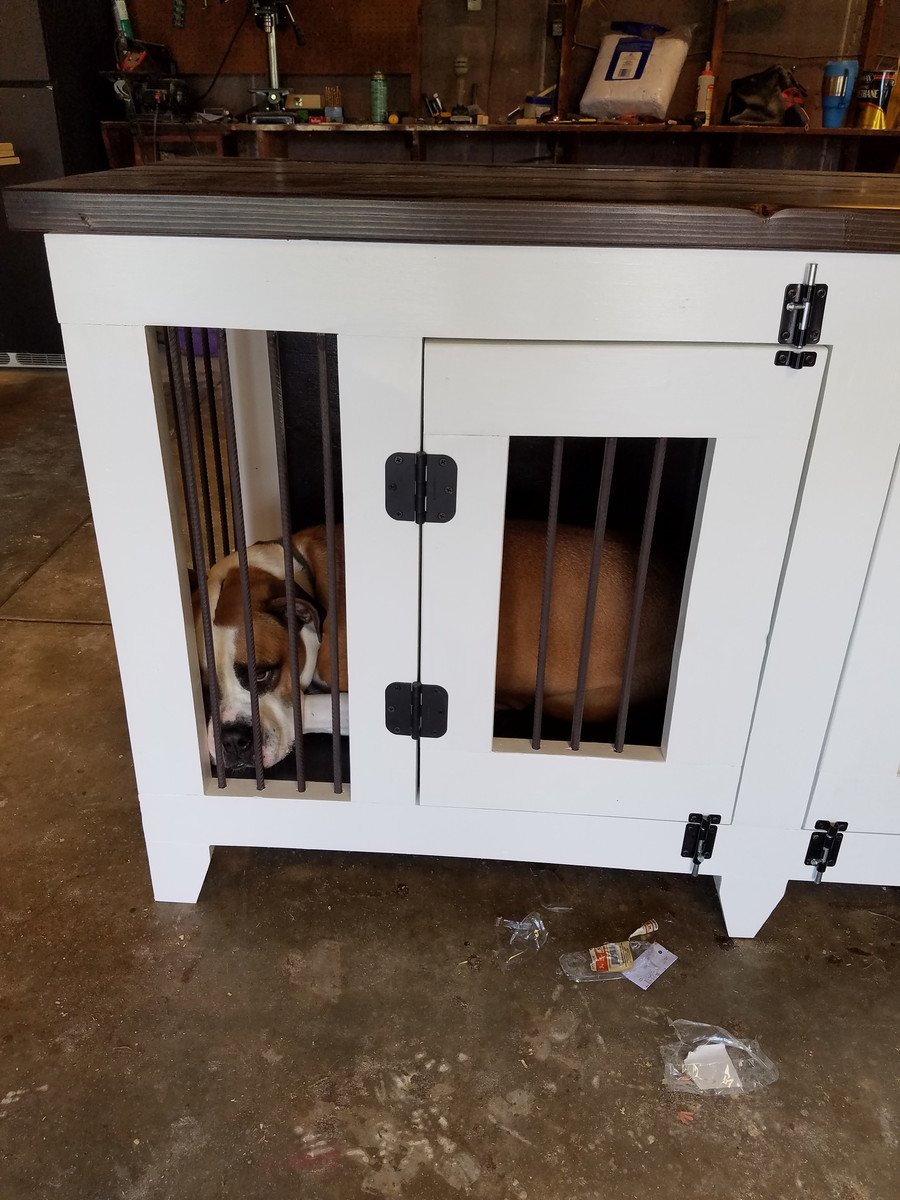
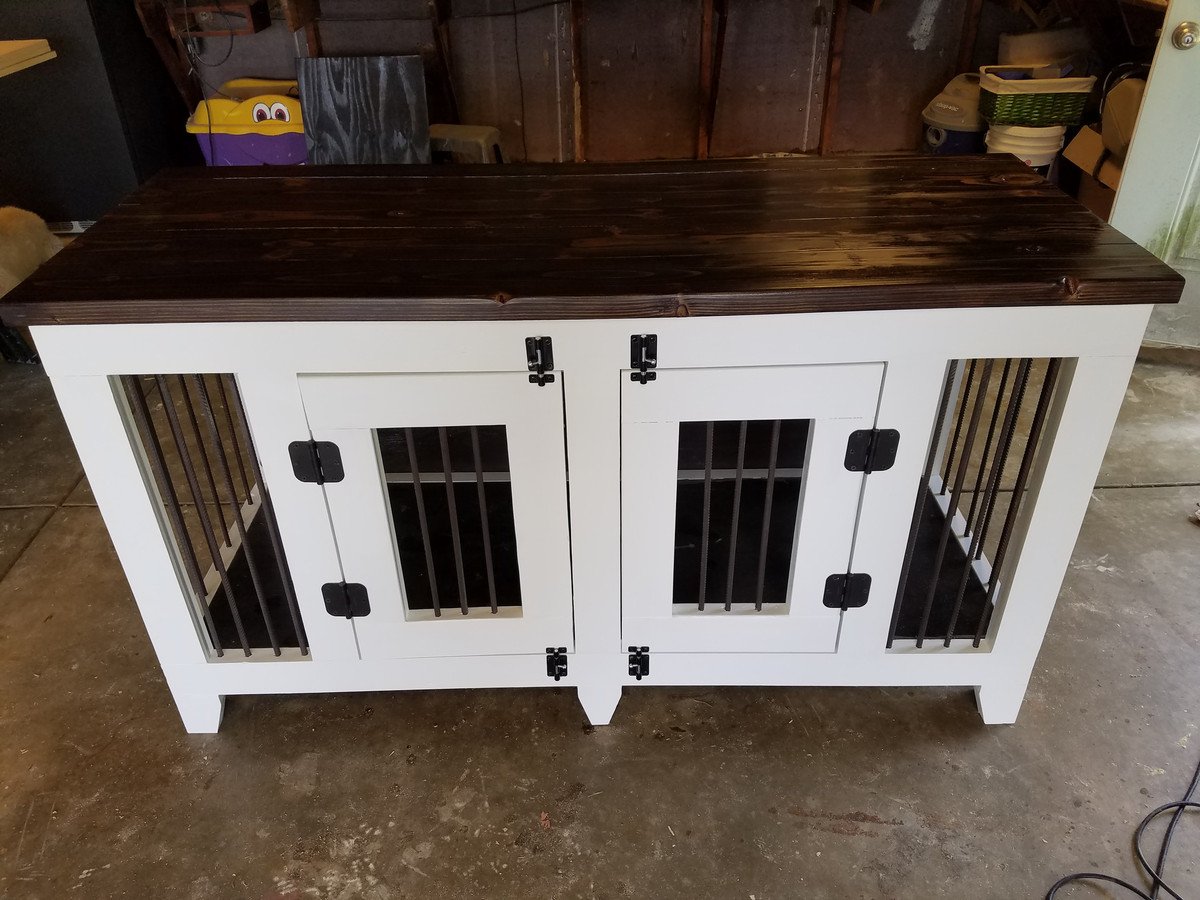
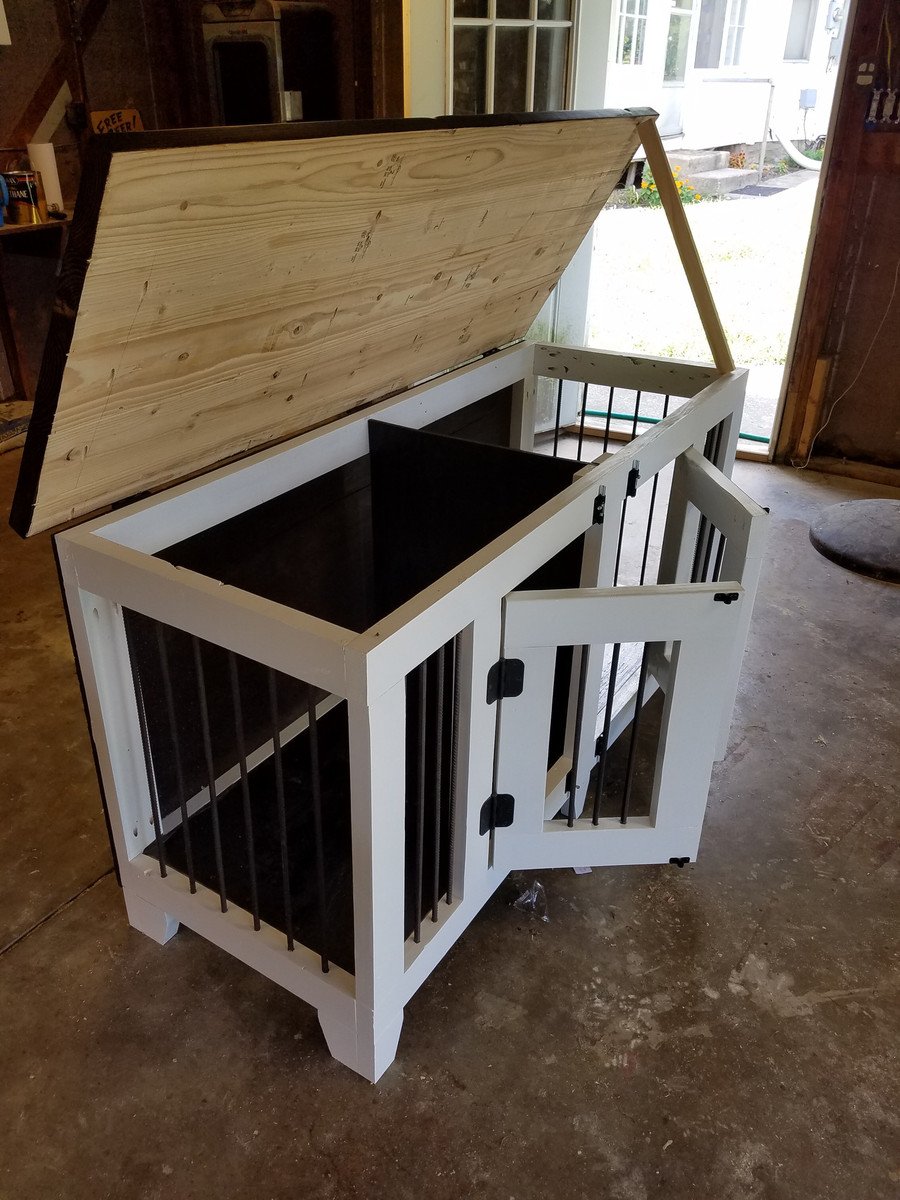
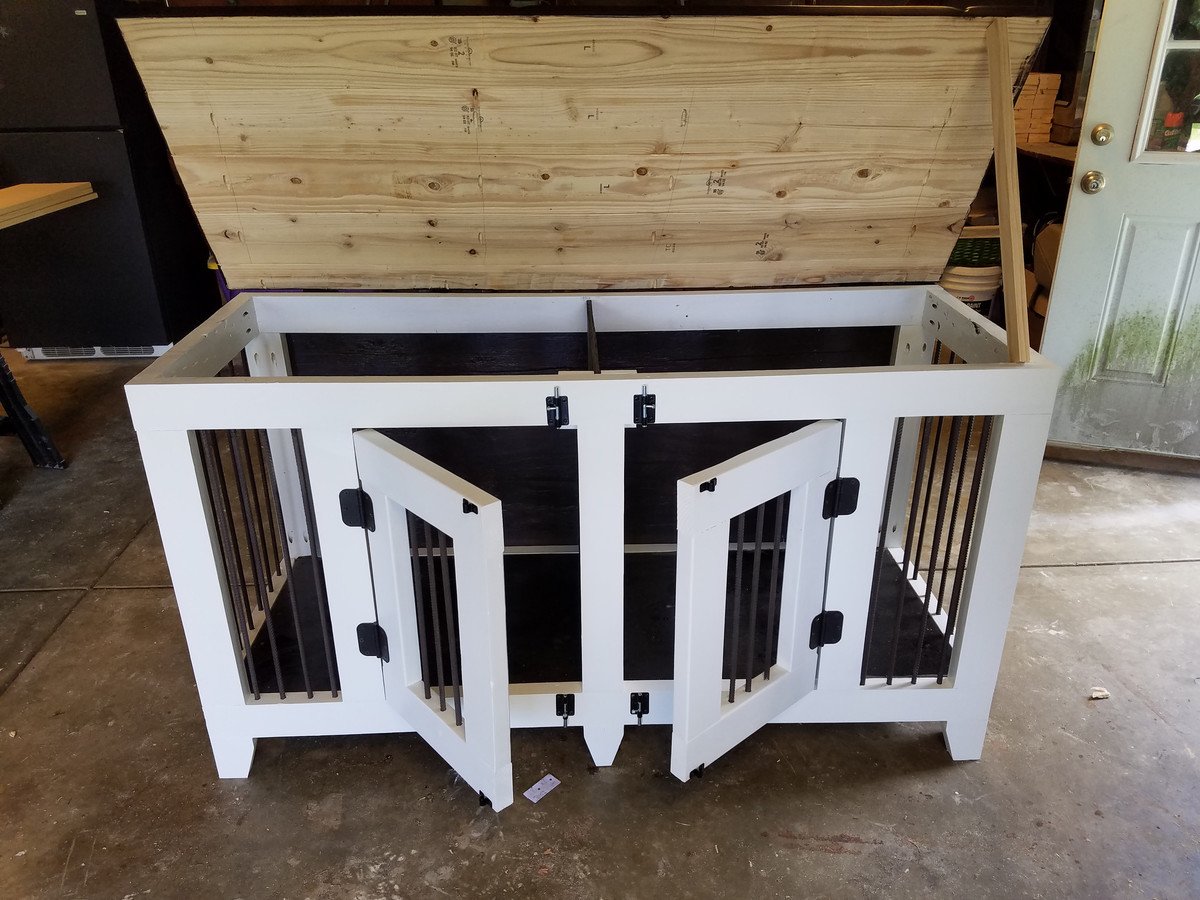
I had so much fun building this!! It ended up being 80"L x 29"W x 40"H

I added a removeable center seperator to make it available for 2 dogs and a hinged top for easy cleaning. If you would like to know more, mssage me here! https://www.facebook.com/almshousecreations

Estimated Cost
$300
Estimated Time Investment
Day Project (6-9 Hours)
Finish Used
White Gloss and Jacobean Minwax Stain
Recommended Skill Level
Beginner

Comments

Reclaimed Wood Outdoor Sofa

Submitted by Anonymous (not verified) on Sun, 07/30/2023 - 14:43

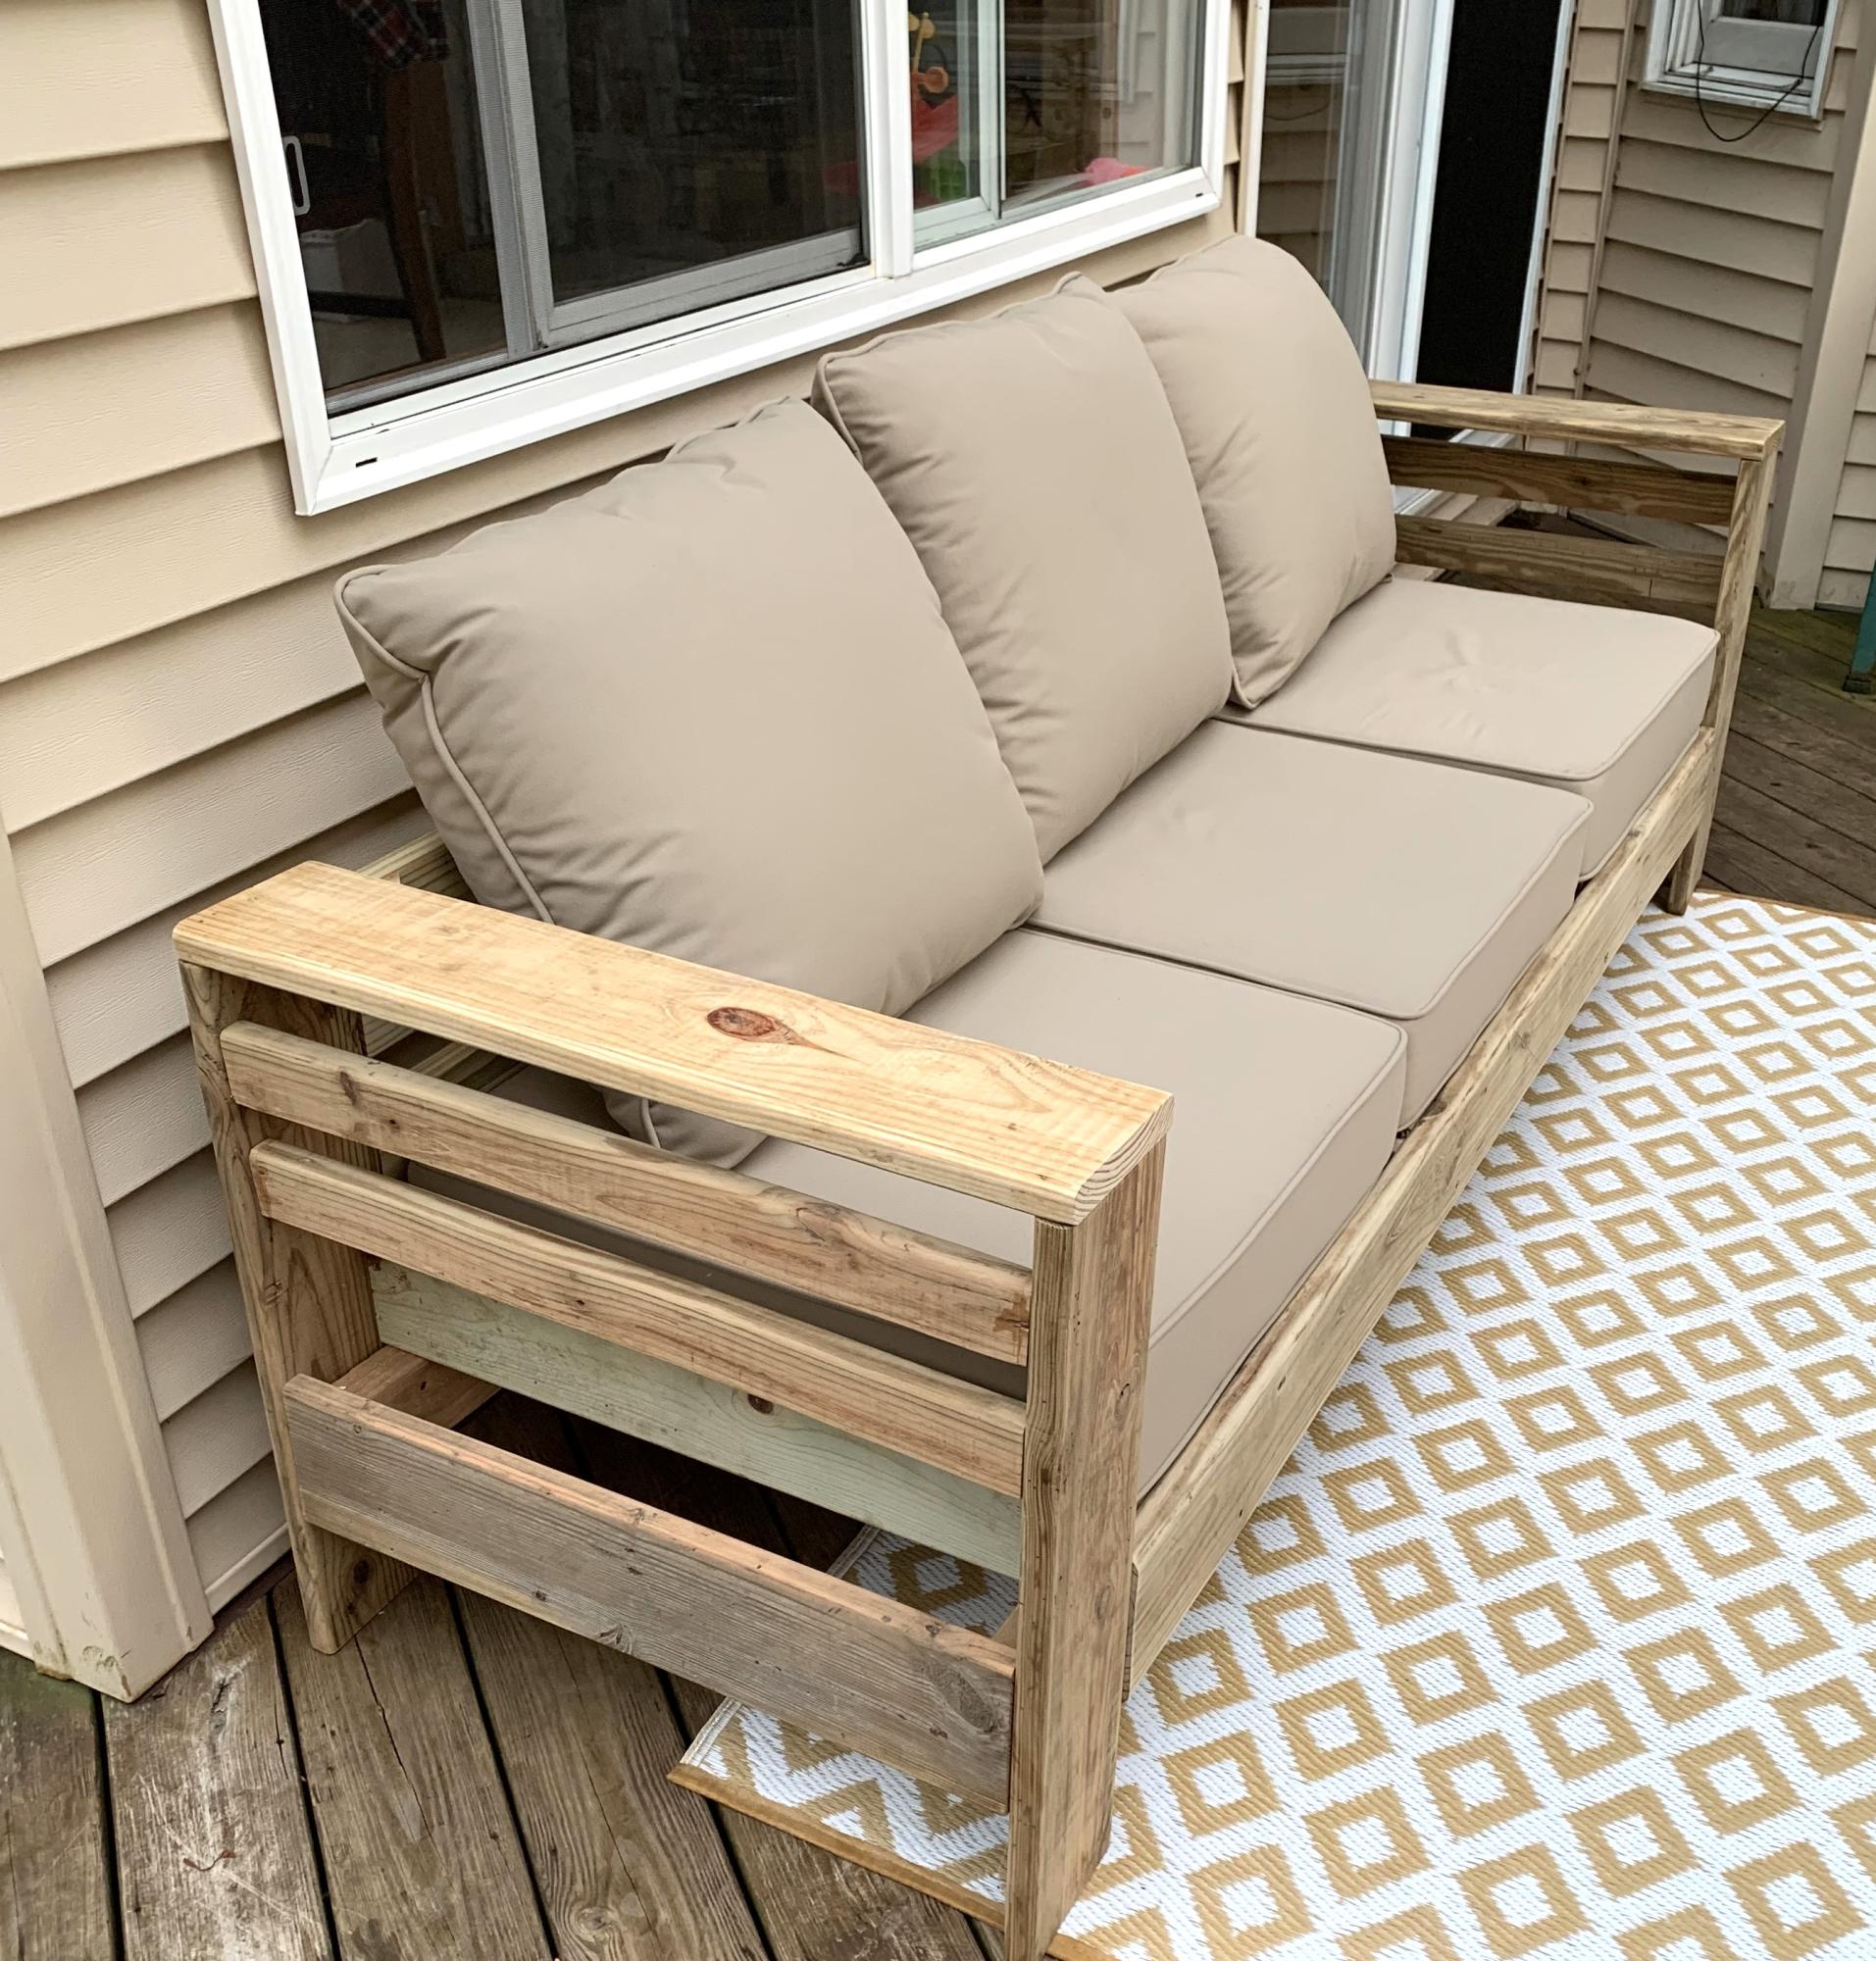
We had a small deck with many rotted boards. The contractor who demoed it, knowing my interest in diy projects, sorted out any usable boards. I loved the idea of an outdoor sofa, so altered your beautiful pattern to accommodate decking boards - I literally only had to purchase 2 boards for the entire project! I’m so thrilled with how it turned out! Thank you!!

Camey Brown

Built from Plan(s)

Farm house queen/ crate storage

Submitted by Mathcky on Mon, 04/21/2014 - 10:50

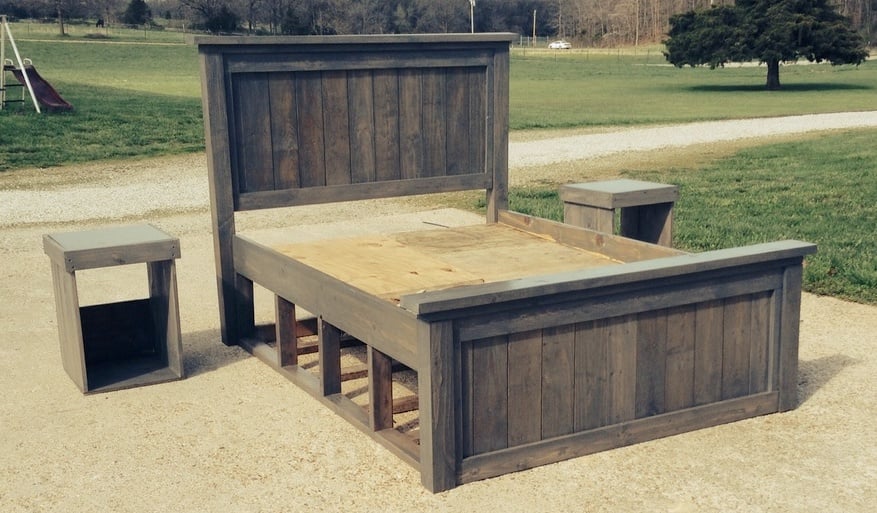
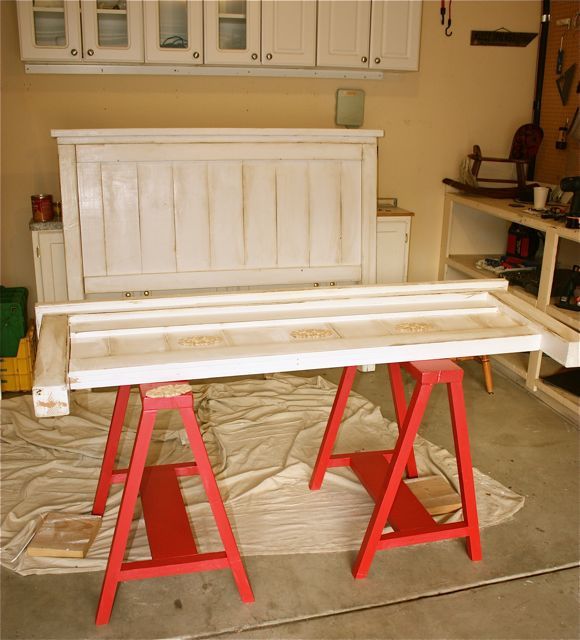
Started with the farm house queen bed and changed the plans. I made the head/footboards 3 inches taller and took the panelling on the footboard all the way to the floor. I made storage underneath the bed and night stands. I'm using old apple crates for the storage. I made the night stands with the crate in it too to match the bed. I used a single piece of 18x18 ceramic tile for the top of the nightstand. The set is stained Minwax classic grey. I used a mixture of wood. Oak and pine, surprisingly it stained good and matched up. The crates aren't in the pictures yet. We have an older house with small rooms so the storage is perfect. The grey finish looks good for the old wood look with newer wood used

Estimated Cost
$100.00
Estimated Time Investment
Weekend Project (10-20 Hours)
Finish Used
Minwax classic grey
Some pieces were stained more then once to get an even,matching color
Recommended Skill Level
Intermediate

Camp loft bed with stairs

Submitted by themombot on Fri, 05/09/2014 - 13:27

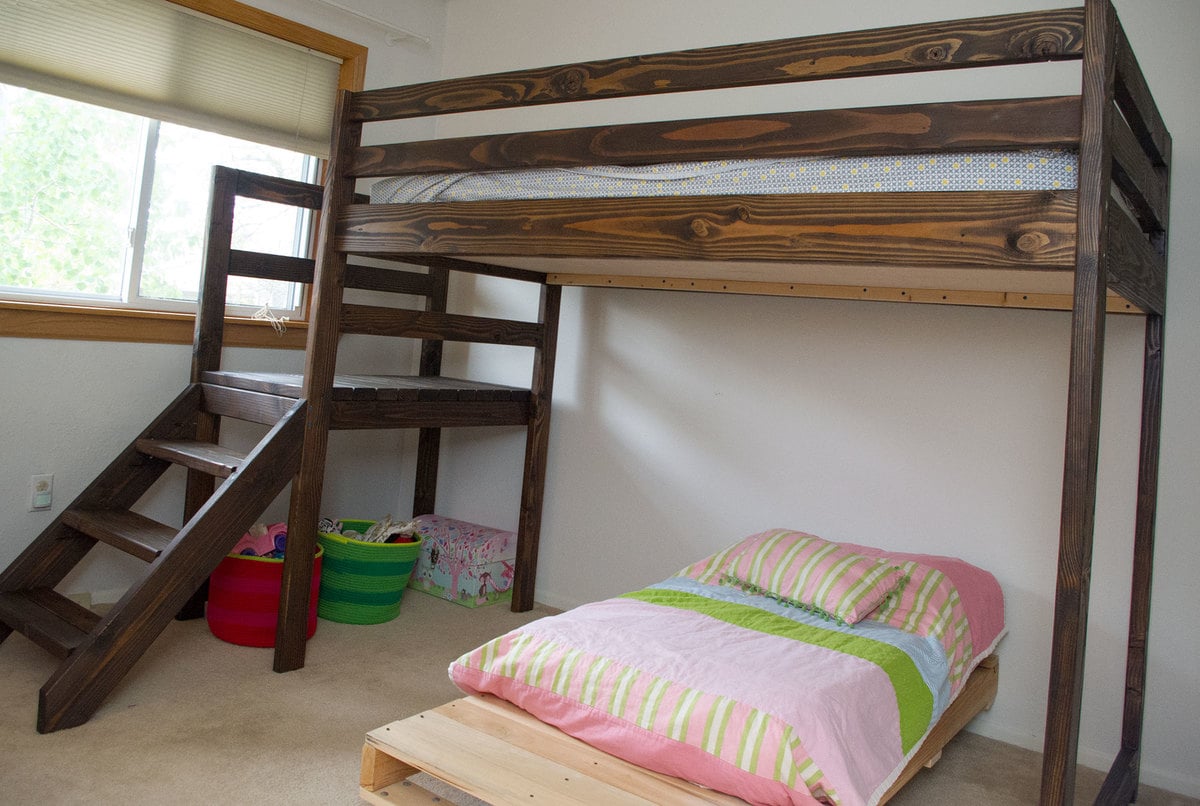
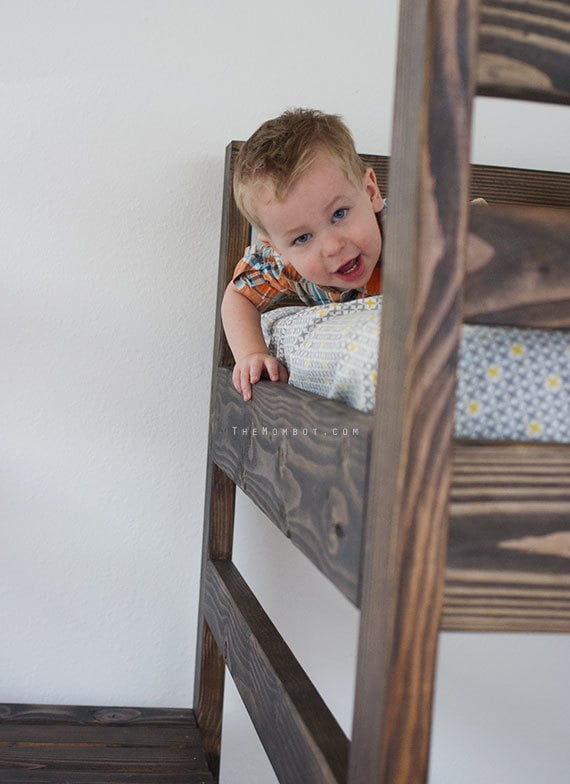
I had my dad and father-in-law come help with this project. We are all pretty much beginners, but have done some building in the past.

Because I'm not experienced, I didn't find the plans to be in depth enough. Some parts weren't not fully explained and took some guesswork.

I also didn't know what a Kreg Jig was or how expensive it was! This upped my cost by $100. It was well worth buying however, and will be used again in future projects.

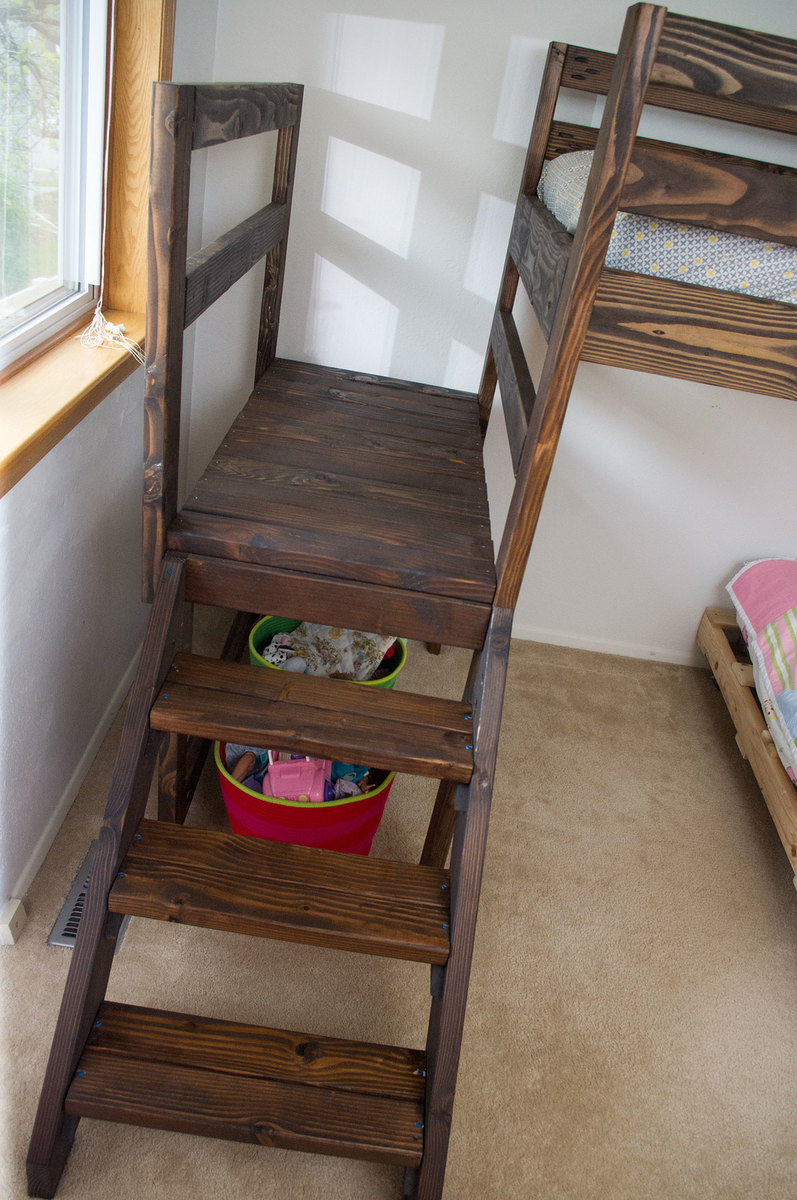
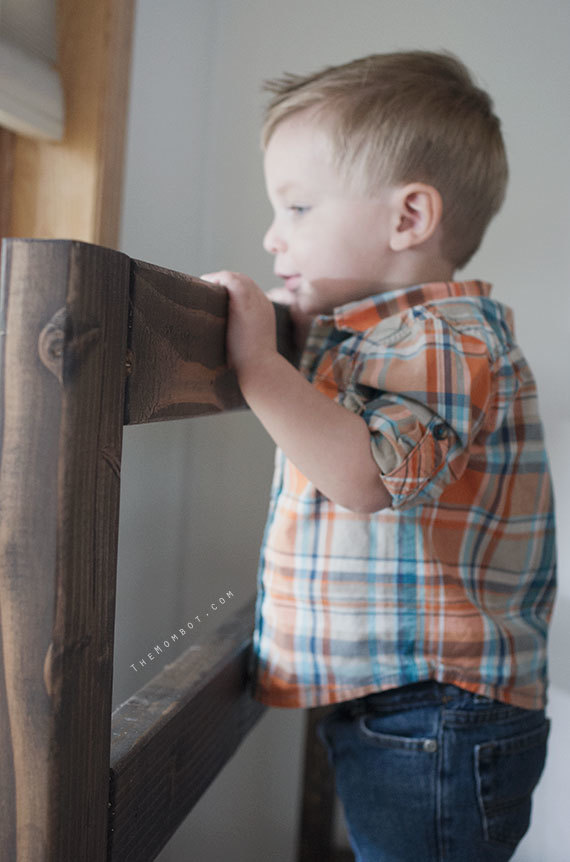
We added a railing to the platform since the bed is up against a window with a screen. If the kids were to fall off the platform and hit the screen, they could fall 2 stories. The railing is just screwed into the side of the platform and can be removed at any time.

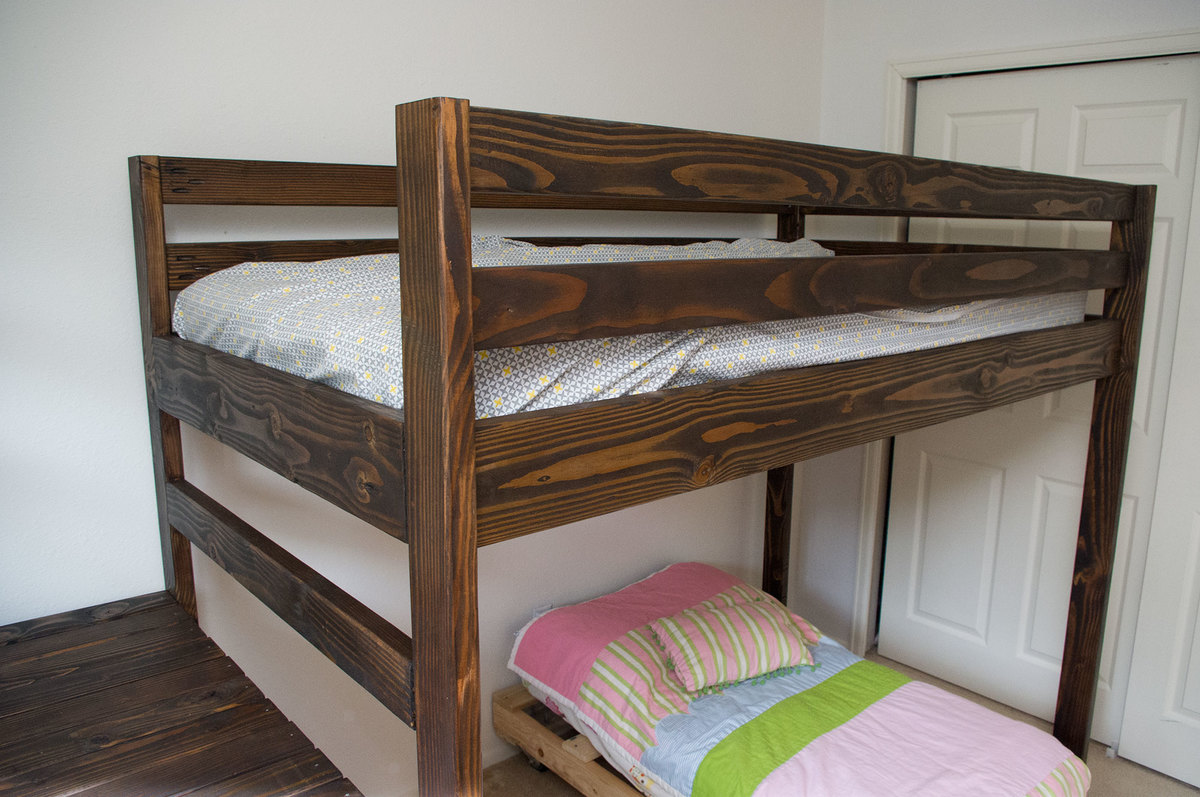
Overall, I love how it turned out and so do my kids! It fits the toddler-sized DIY bed that my husband and I built right underneath so my 4 year old and 2 year old can now share a room.

More details and pictures are on my blog: http://themombot.com/crafting/2014/05/09/details-our-diy-bunk-bed

Estimated Cost
$150-$250
Estimated Time Investment
Week Long Project (20 Hours or More)
Finish Used
Minwax wood stain in Jacobean, with pre-stain conditioner and 2 coats of polyurethane
Recommended Skill Level
Intermediate

Garden Bench!!

Submitted by Nathan1342 on Mon, 08/06/2012 - 12:09

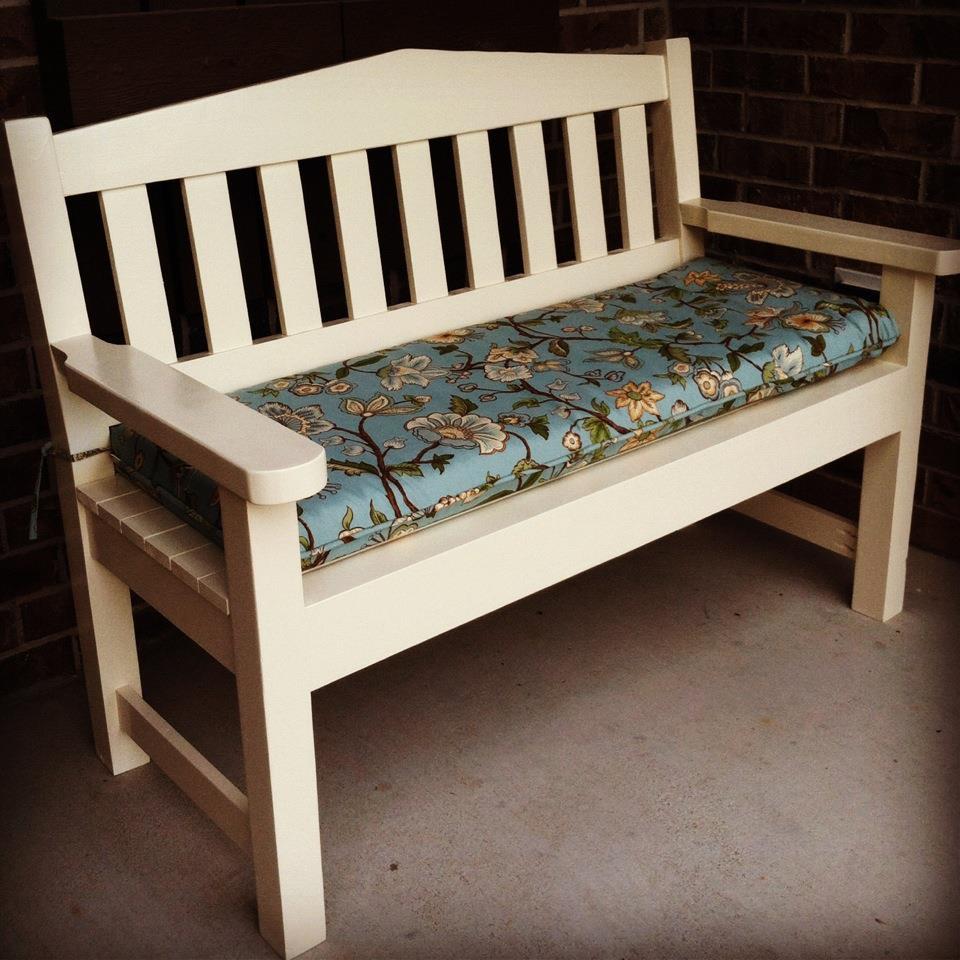
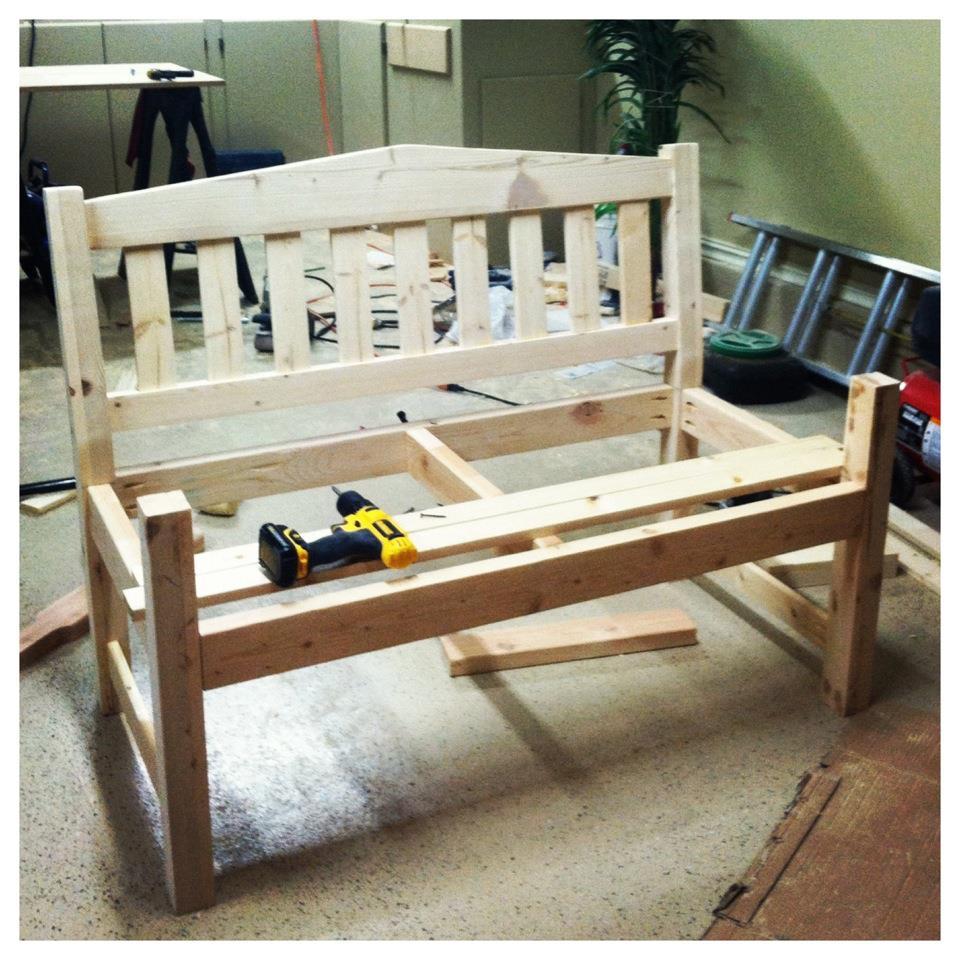
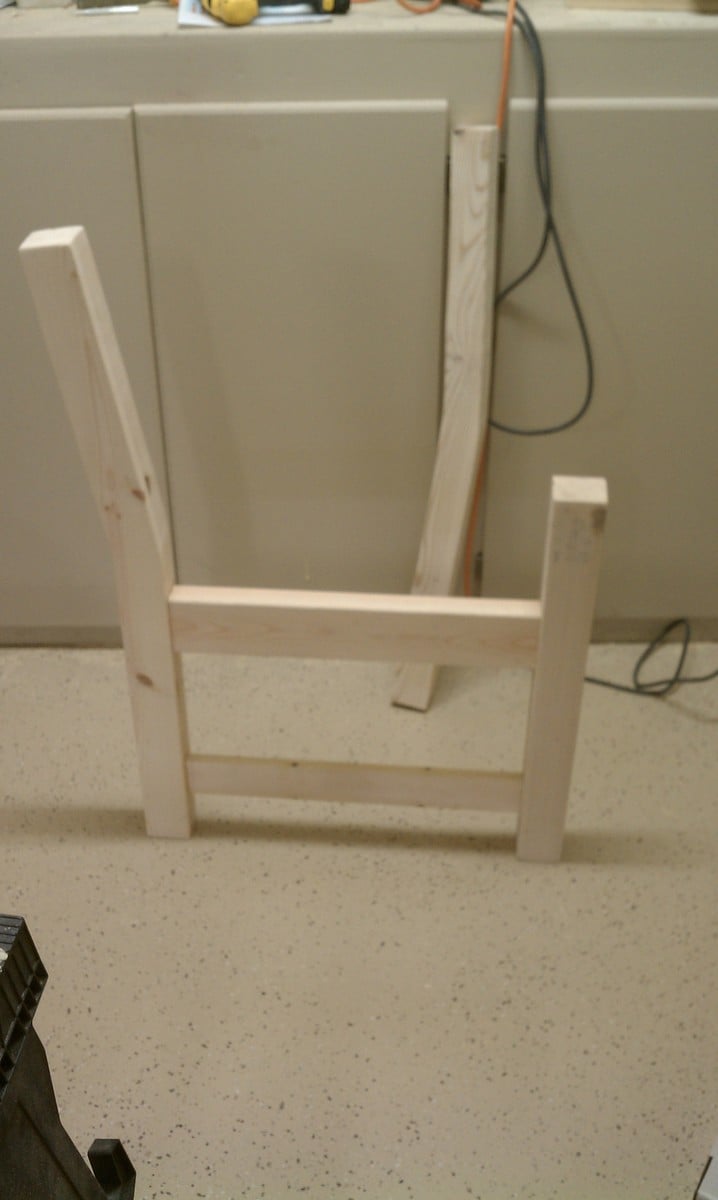
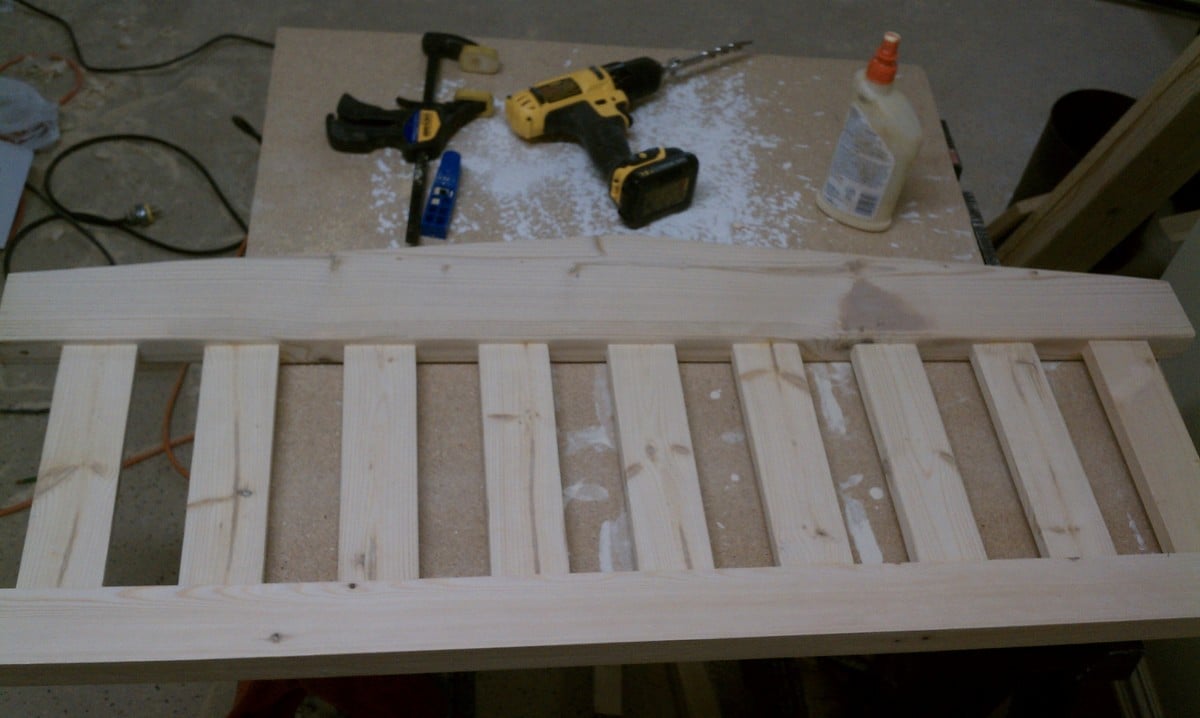
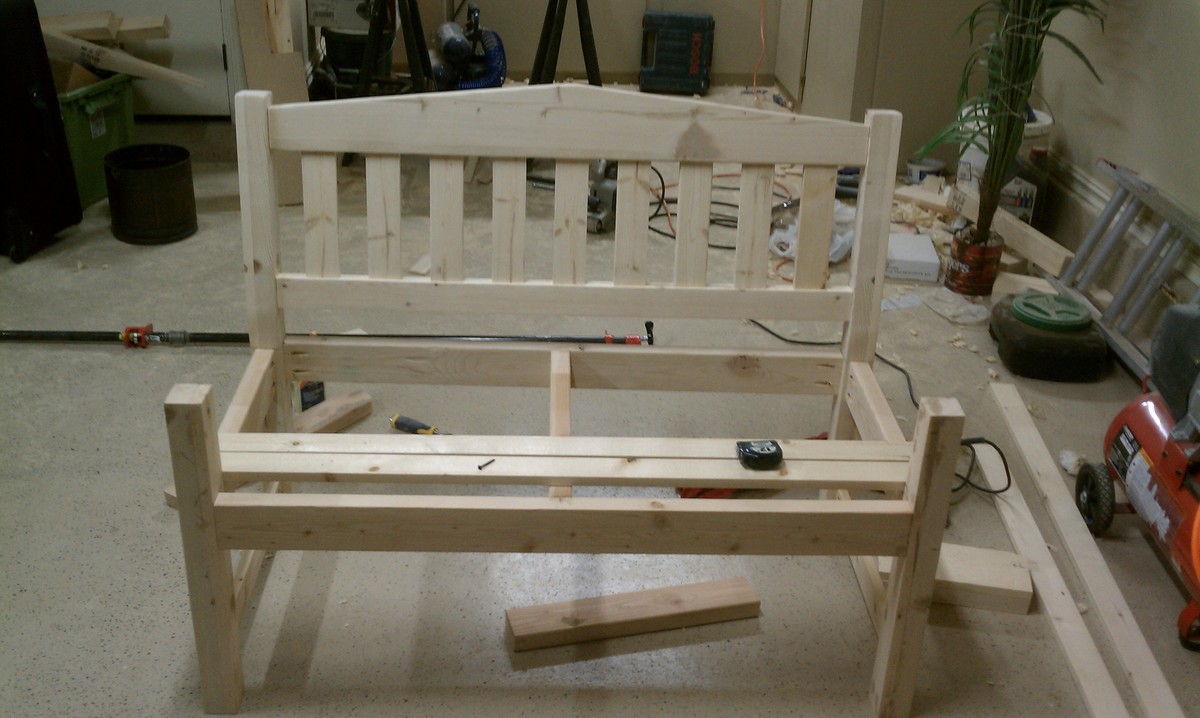
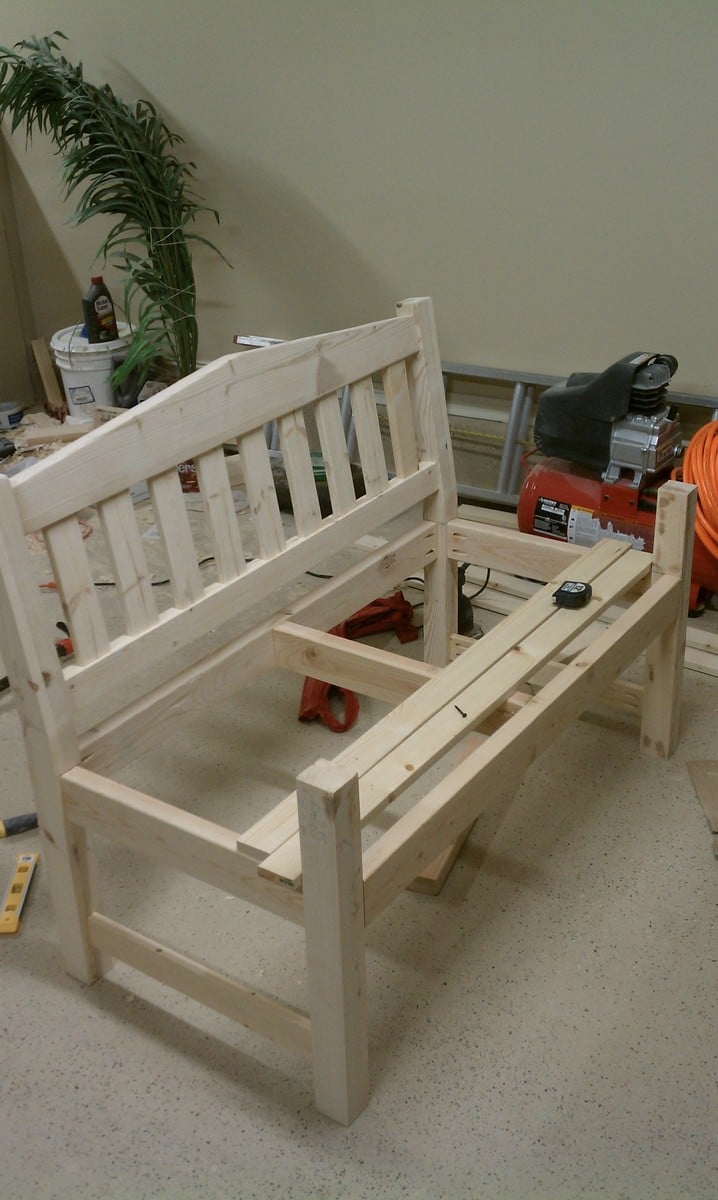
I built this for my wife for an anniversary present. She had wanted a garden bench for some time but the ones that she wanted were between $500-$700 which is ridiculous for this type of bench. So, I did a search on here for garden benches but there weren't really any plans for them and the few brag plans were not really the type of bench I was looking for. I printed off a few pictures of benches that I liked and got to work. The front and back legs a 2x6 and a 1x6 glued together and then cut to be straight. I wanted something thicker then just a plain old 2x6. If I had to do this again though, I would have just glued 3 1X6's together. The reason being, is that 1x6's usually do not have a rounded edge and a 2X6 does. So needless to say when you glue them together you have a nice little gap on either side. Without a table saw to take this off, its pretty difficult to get a straight cut. But I ended up getting it right after sweating for a few hours in the garage. The bench stands 36 inches high, 48inches wide and about 18 inches deep. The seat height is right at 18in also.

In the unfinished pictures I actually had the depth being 24 inches. After sitting on it though it was just way to deep. So I pulled it apart, made the adjustments and its now much more comfortable to sit in.

If anyone has any questions or wants more details feel free to drop me a line!

Thanks!

Estimated Cost
85
Estimated Time Investment
Weekend Project (10-20 Hours)
Finish Used
Oil based acrylic paint
Recommended Skill Level
Beginner

Comments

Torwart13

Tue, 06/16/2015 - 11:25

So legs are about 2 1/4" square? Are the seat supports 2x4's? Back cross pieces 2x4? Slats 1x4"?

smz1919

Wed, 06/17/2015 - 12:39

how did you get the curve on the back legs?

In reply to by smz1919

Nathan1342

Fri, 06/19/2015 - 13:34

I glued a 2x6 and a 1x6 together to get the thickness. Now that i have a table saw and a jointer this entire process would have been much easier but after getting it to look like one solid piece i just outlined the slant i wanted and cut it using a jig saw.

smz1919

Fri, 06/19/2015 - 20:17

So the back slats are just glued in place right? I wonder if it would be easier to use a biscuit joiner or not

Mikeyw221

Sun, 10/23/2016 - 17:46

on the back legs how high up did you go before you started cutting the angle? and was it around 15 degrees fromt he edge?

SawdustMaker21

Wed, 05/26/2021 - 08:32

Hi Nathan
Love the look of the bench. Would you have a list of material requirements. I intend to make a bench like this and would like to know the measurements of the top back spar (the shaped one).
Here in the Uk our timber yards do not always supply the same cuts as the US so I need to have some idea of the pieces I need
Many thanks

Outdoor Playhouse

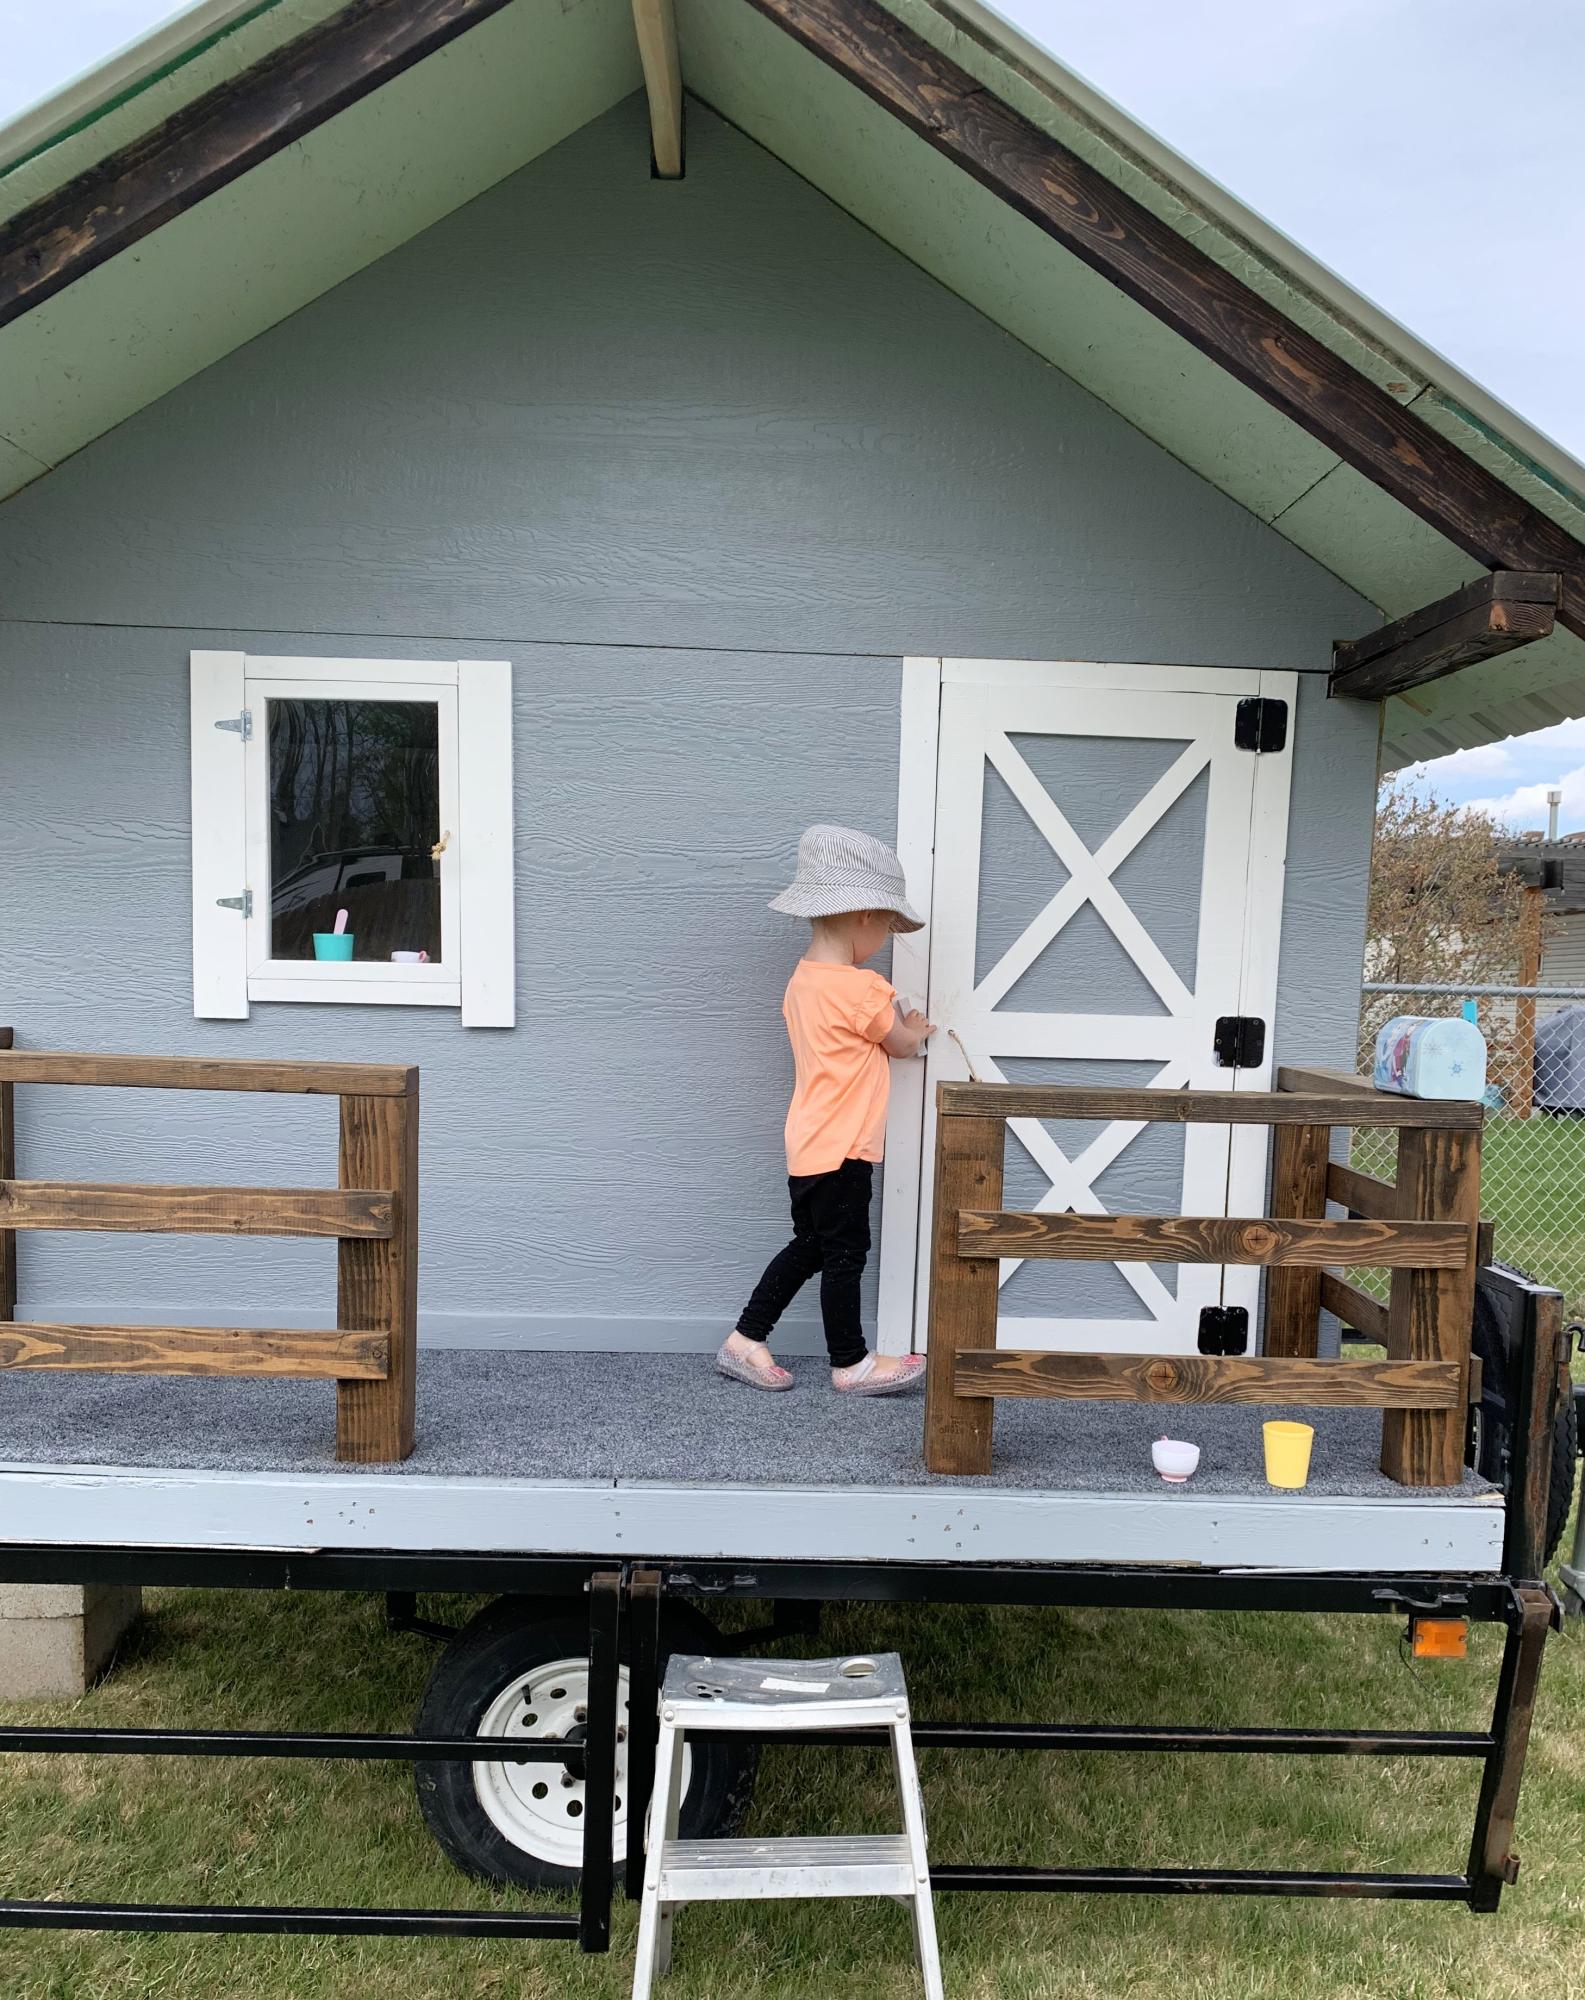
Submitted by Anonymous (not verified) on Mon, 06/03/2024 - 09:05

I had just retired and wanted to make a playhouse for my 2 year old grand-daughter. I always wanted one as a kid and wanted to build one for my kids but never found the time.
This was made mostly out of scrap wood that couldn’t be used to build a house and I was lucky enough to get permission to take whatever I needed. Learned a lot doing it. Thanks to my boyfriend for letting me borrow his nailer.

Cindy

Simple 2x4 Potting Bench - Modified

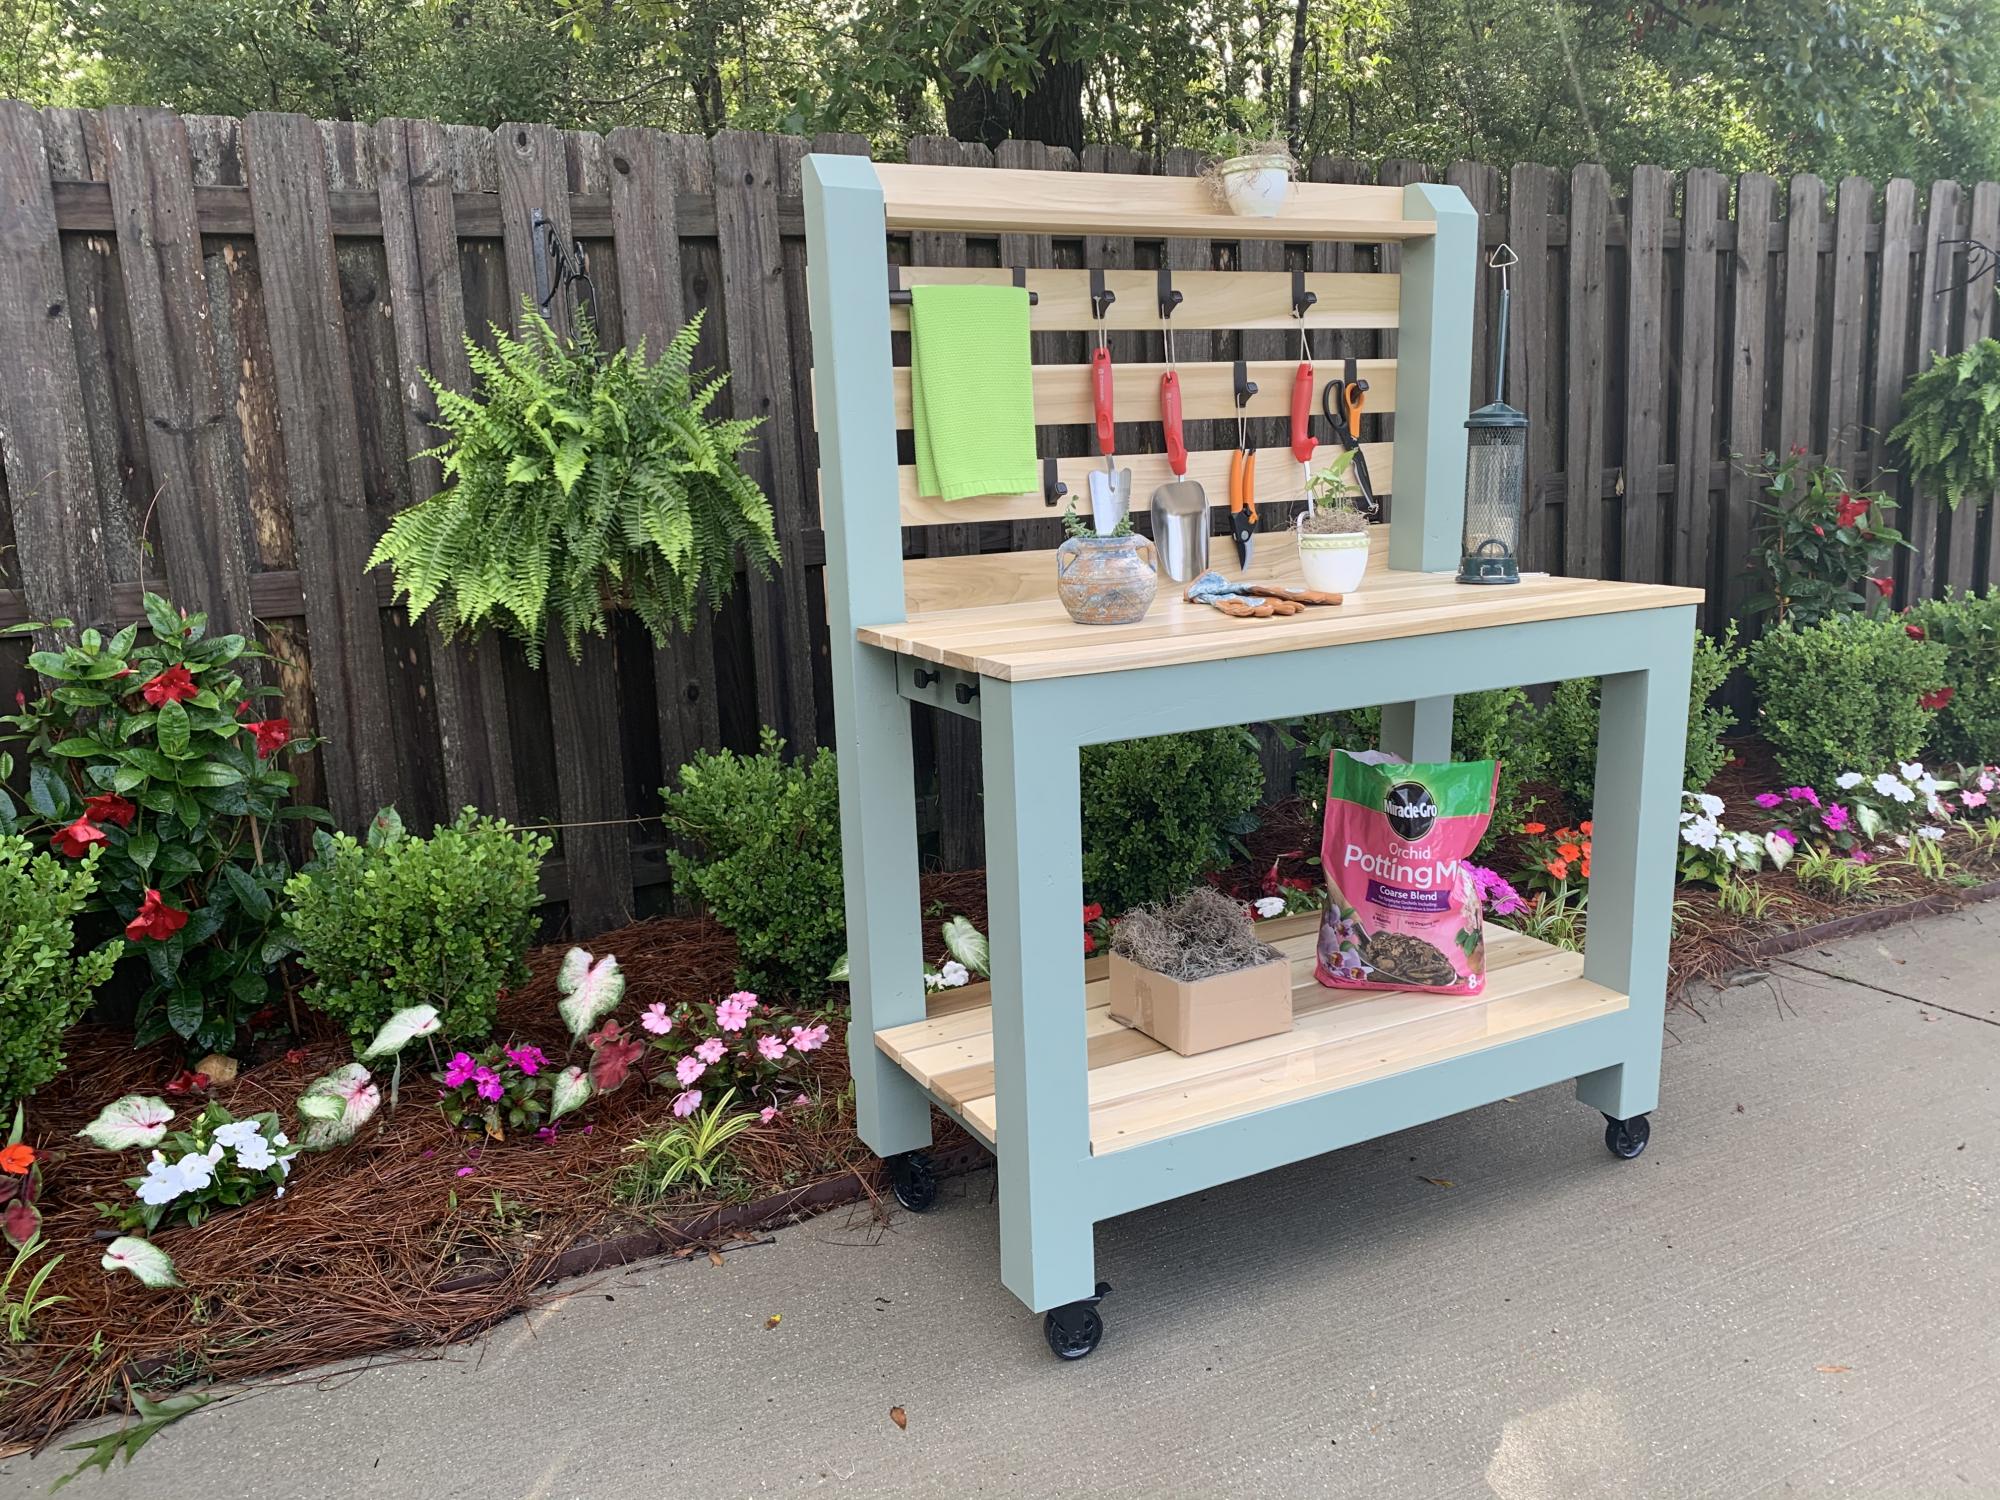
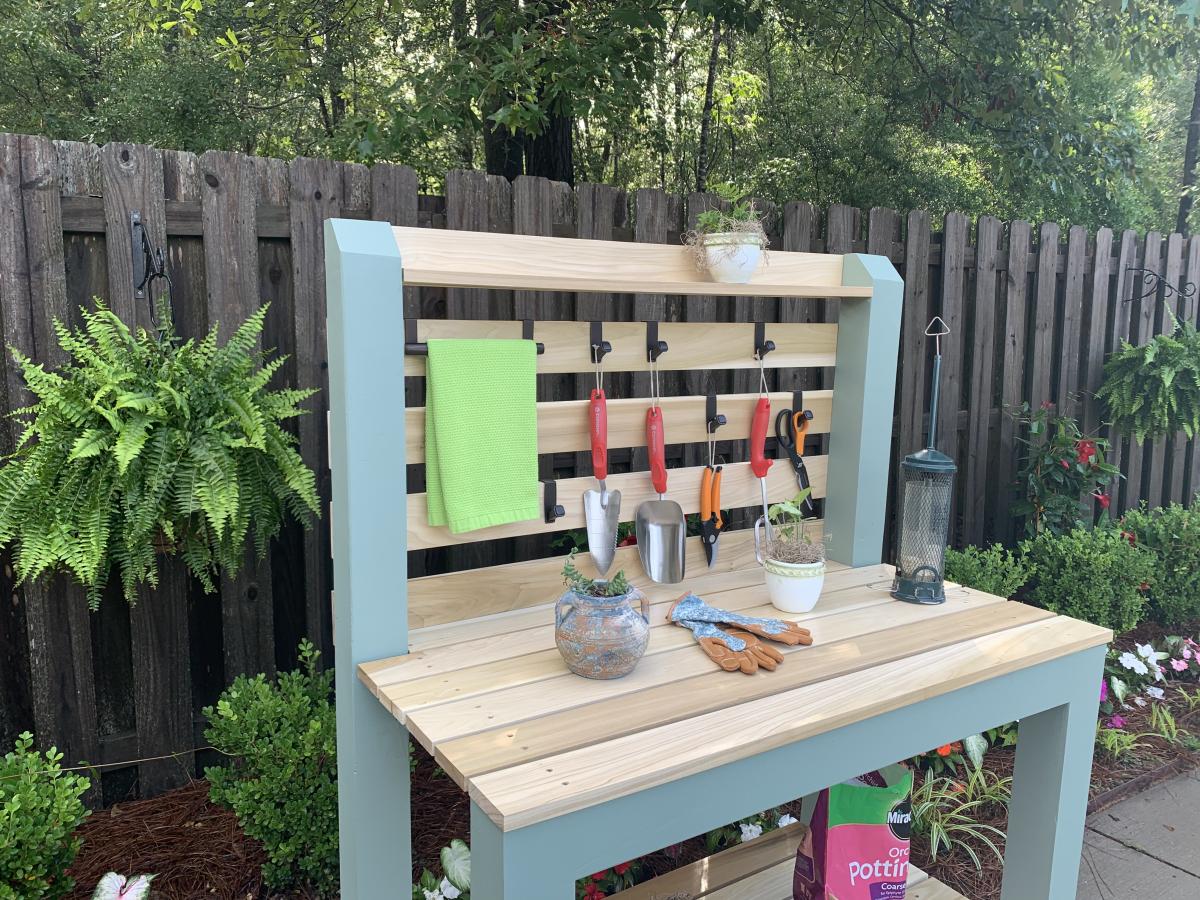
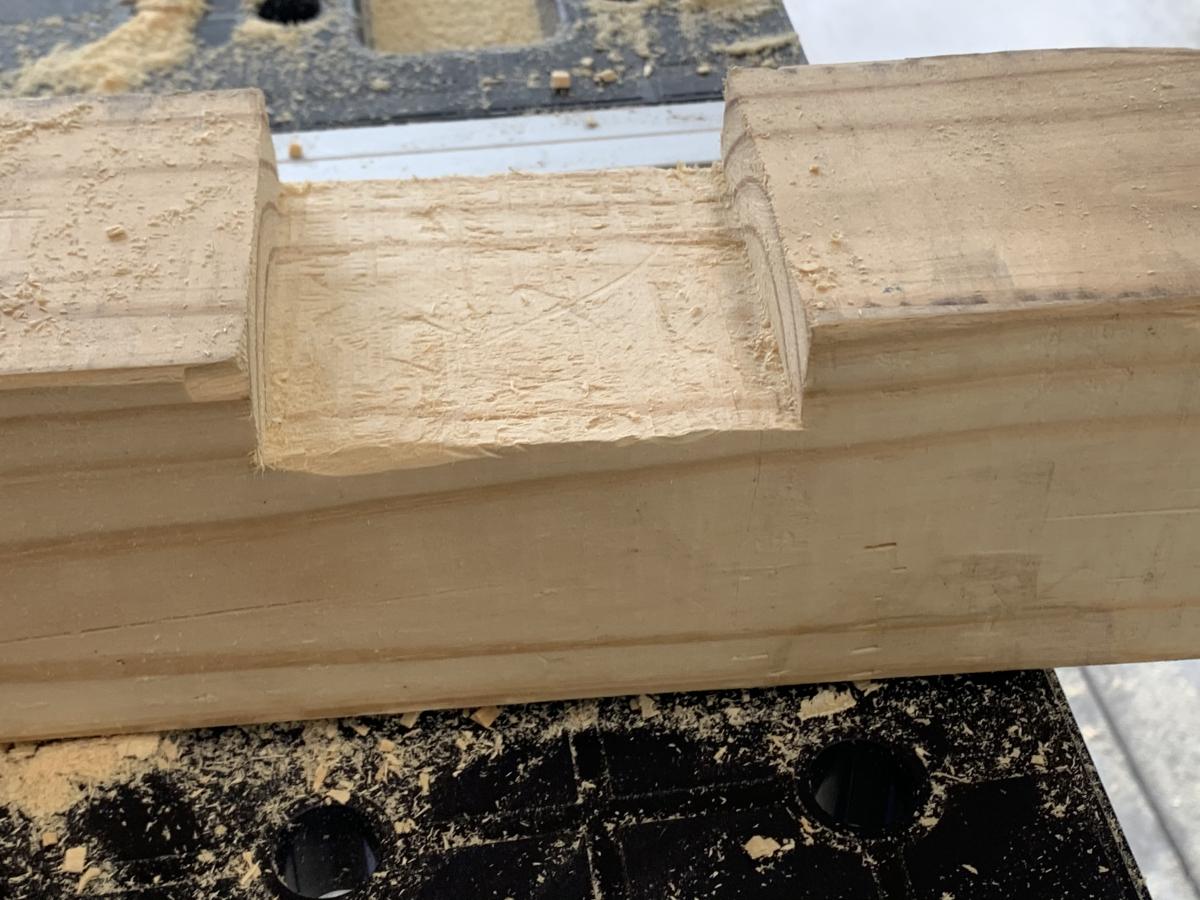
I was intrigued by Ana’s Simple 2x4 Potting Bench. The project seemed simple enough and it would be used as a means to clean up clutter in the garage. My main focus was to make it semi-portable and weather resistant. Instead of using 2x4’s for the corner posts, I used 4x4’s to accommodate casters. I also shorted the length of the posts by 4 inches to compensate for the height of the casters. To provide extra rigidity I did a dado for the 2x4’s that connect the front and rear legs. In retrospect, I wish that I did not dado the legs because it made it more difficult to attach some of the shelf planks. I painted the frame green and left the shelves and backboards clear for beautiful contrast. My wife is ecstatic with the result.

Estimated Time Investment
Weekend Project (10-20 Hours)
Finish Used
Benjamin Moore Environ Green paint for the frame and Minwax Polycrylic for the poplar shelves and backboards.
Recommended Skill Level
Intermediate

Comments

Seasonal And Holiday

Modern Dorm Mini Refrigerator Microwave Cabinet

Submitted by rachelcb on Sat, 07/31/2021 - 12:35

I changed plan to make deeper. I also modified the bottom trim and top. I put a ball bearing soft door drawer guide on modern door so it can slide back and forth. I feel we need more modern plans on here but with a bit of creativity and using plans you can make anything. I have never built anything before. I love General Finishes Milk Paint in Snow White and I brushed rolled it on (sanded between 3 coats). It’s basically self leveling and leaves a nice matte finish. Used door glide in picture bought from homedepot in the 24 inch and that’s how wide door was and it was 36” tall. Door glide I only used one on top of the door not on bottom as well. Door piece of fiberboard with just strips glued on and quarters spacing them correct.

Estimated Cost
$200
Estimated Time Investment
Weekend Project (10-20 Hours)
Finish Used
Dorm mini refrigerator microwave cabinet
Recommended Skill Level
Starter Project

Comments

Ultimate workbench

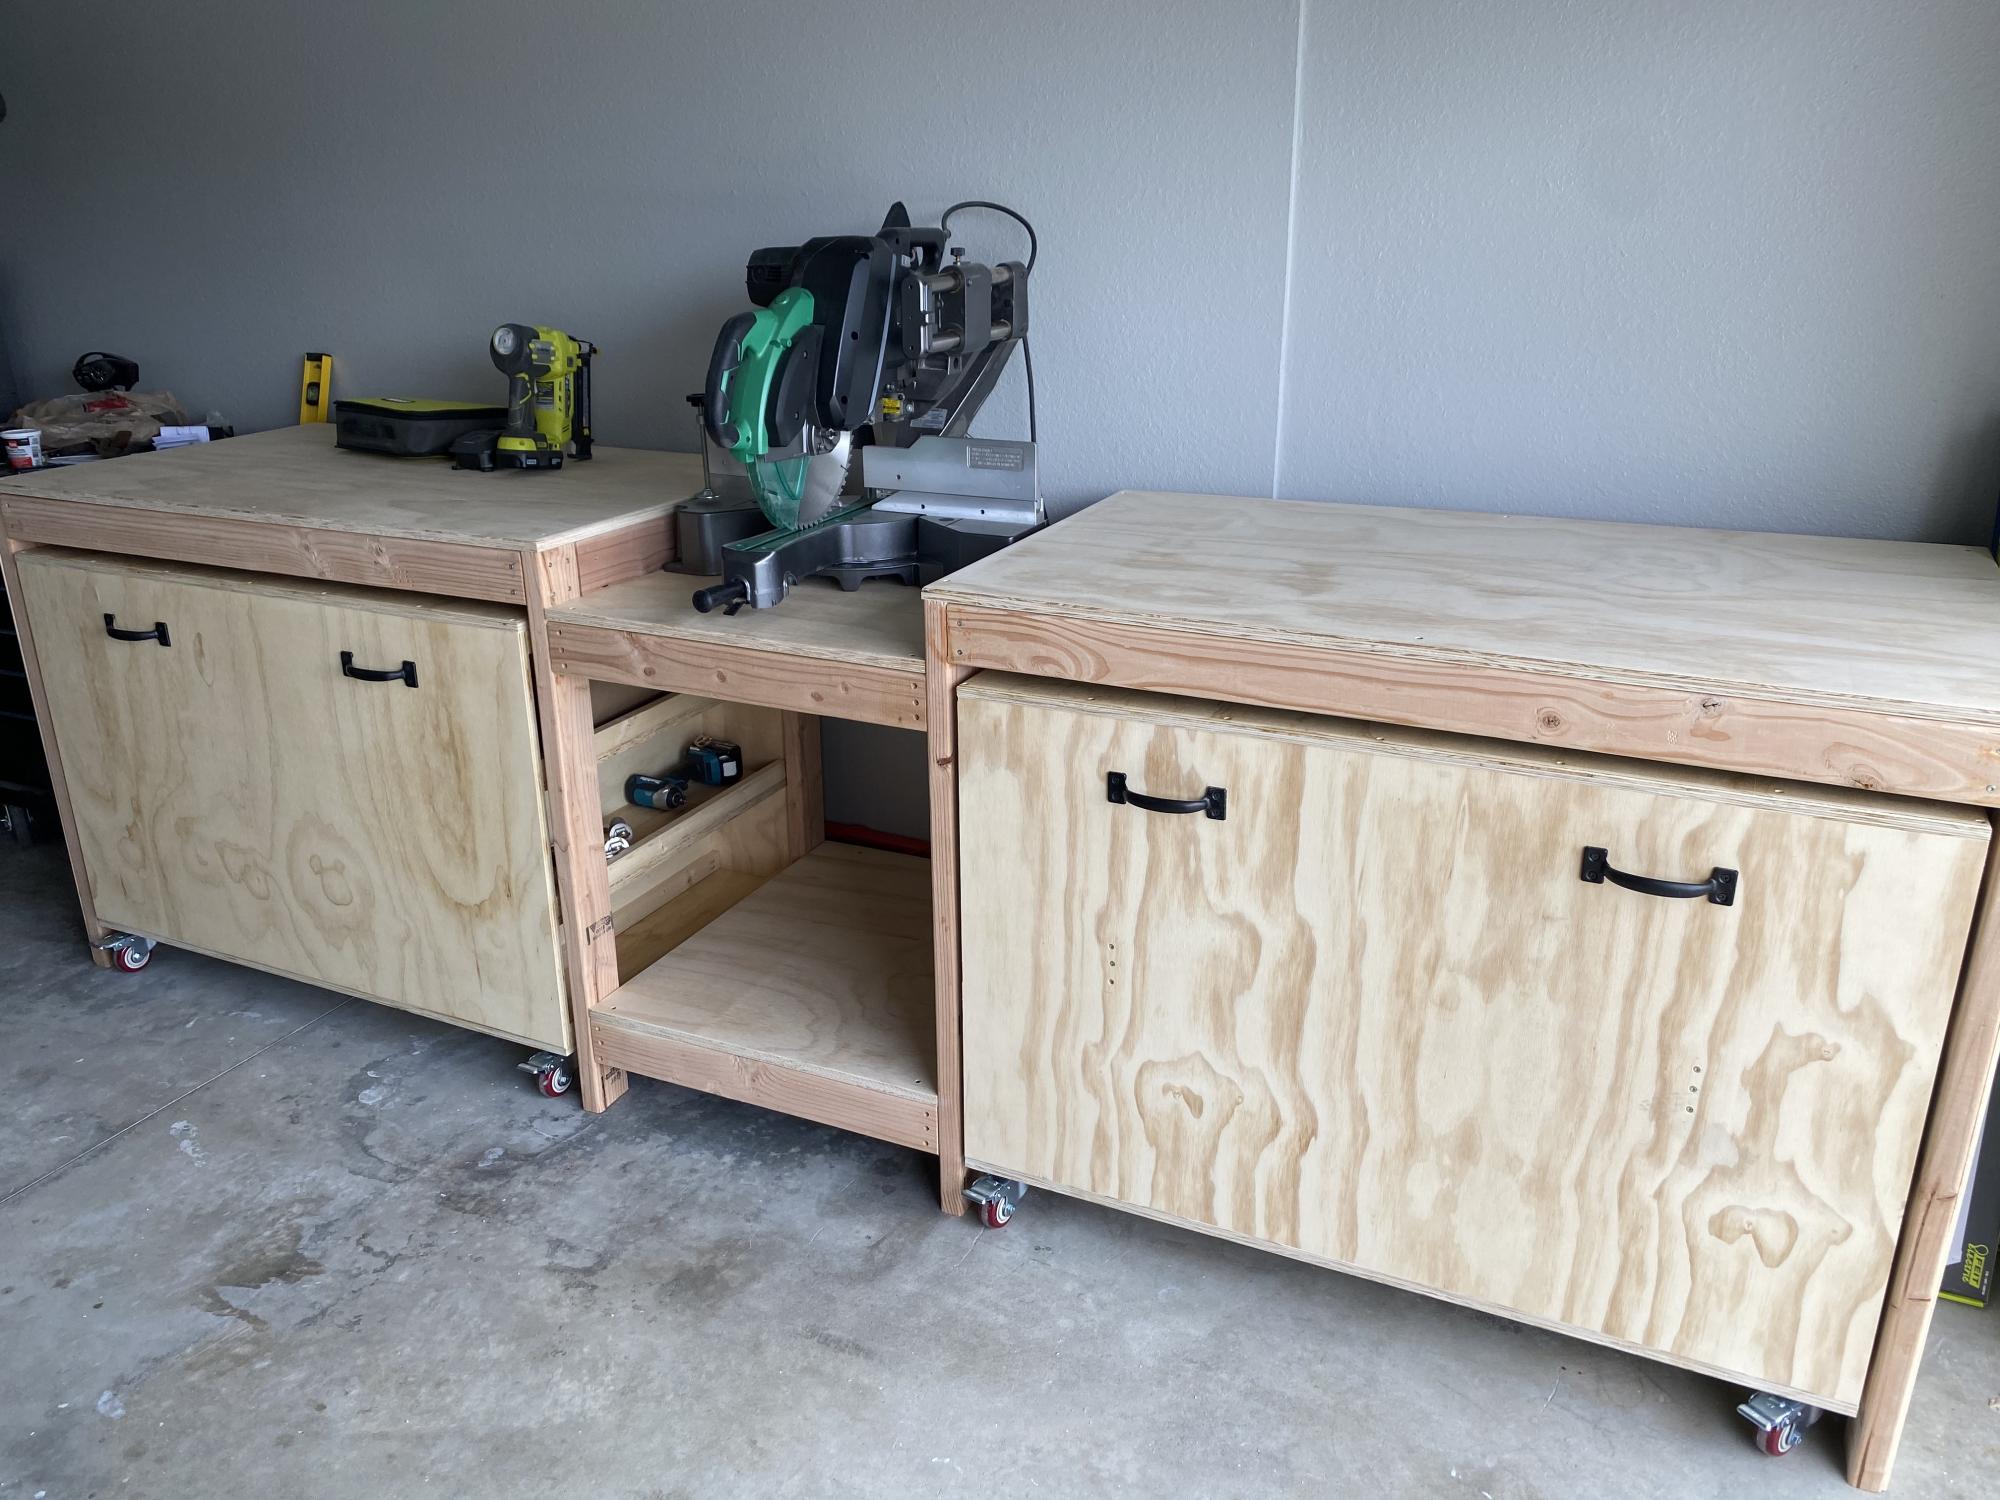
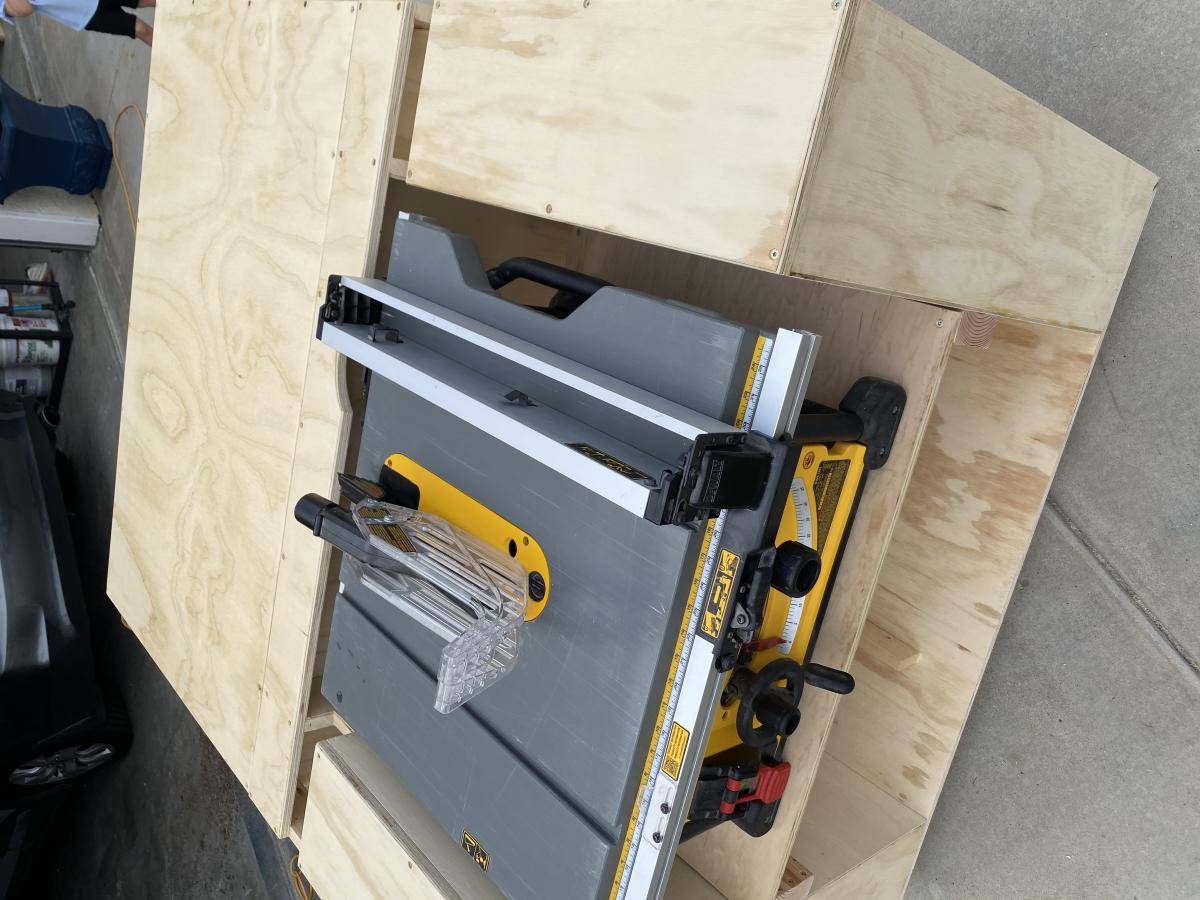
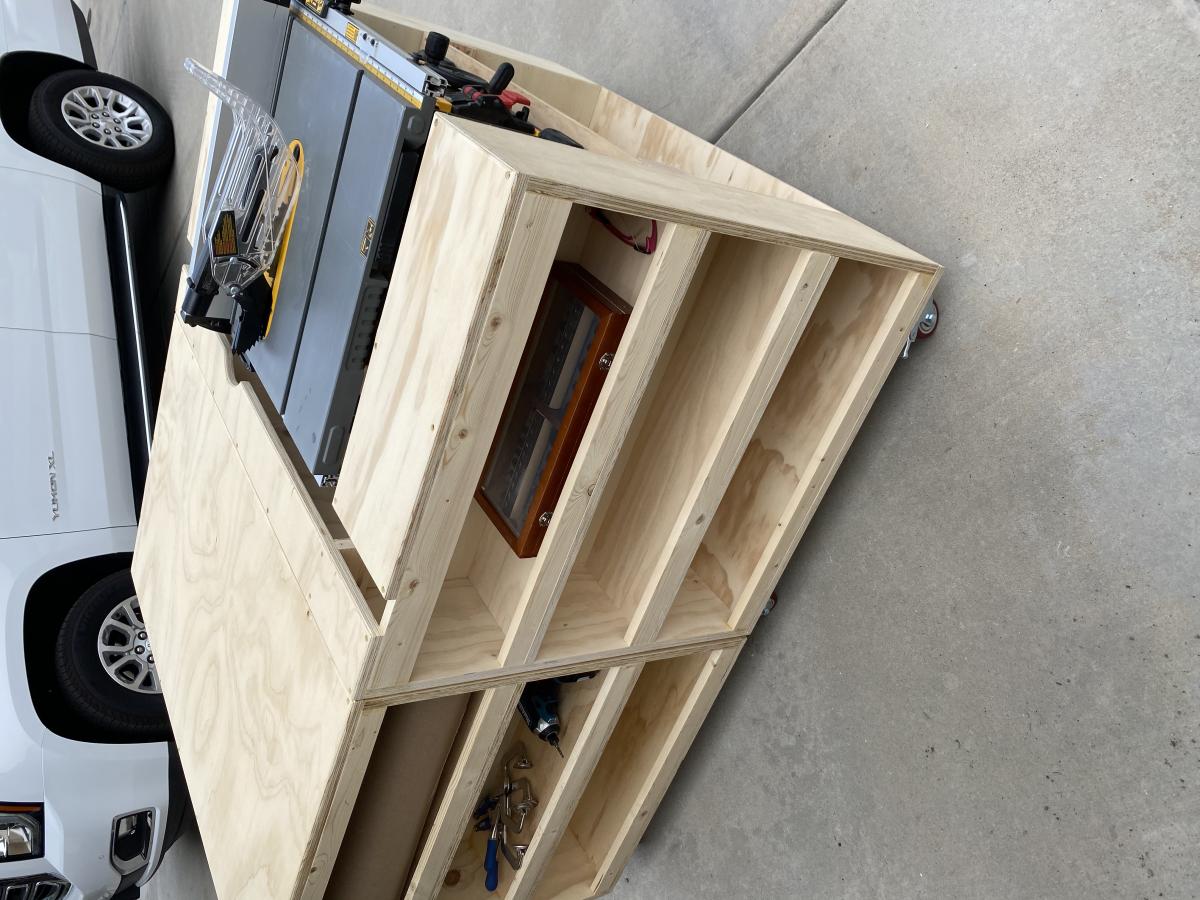
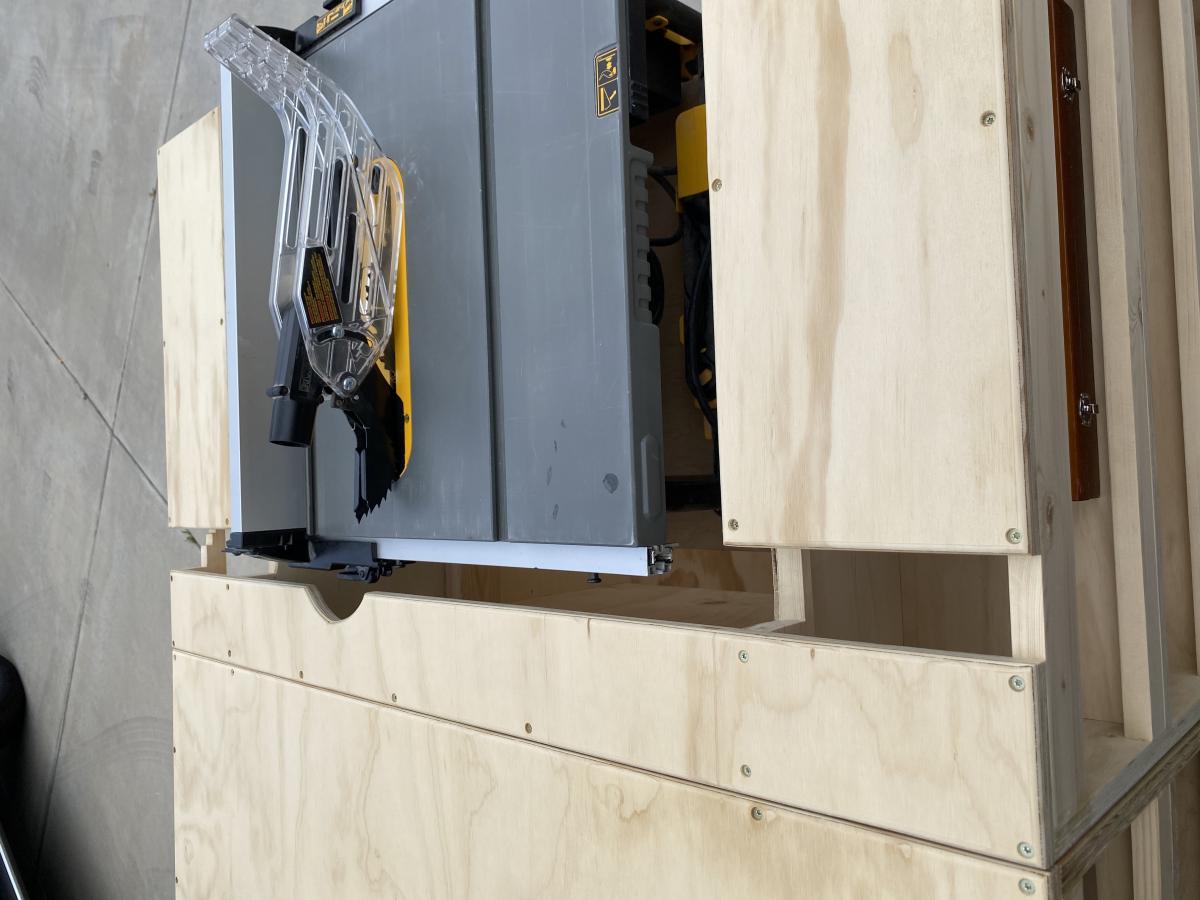
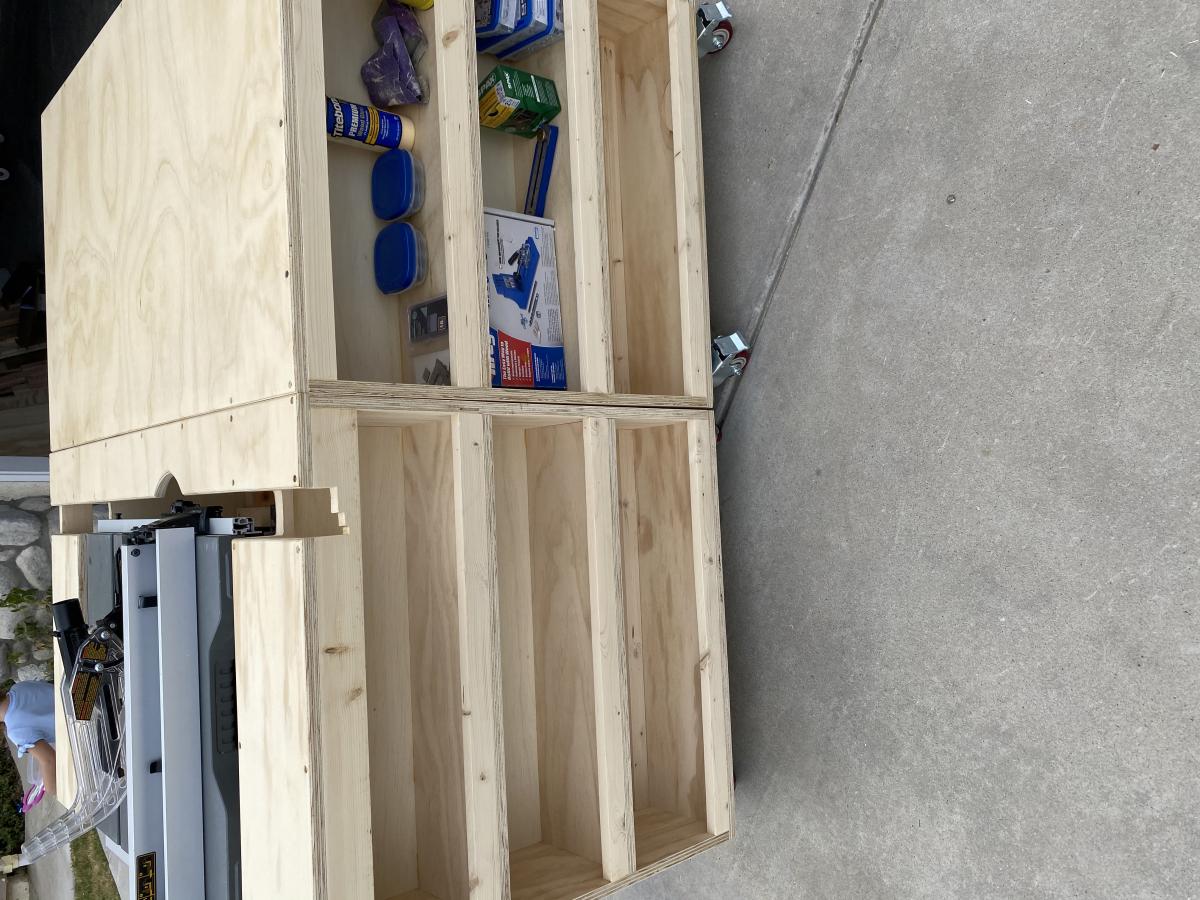
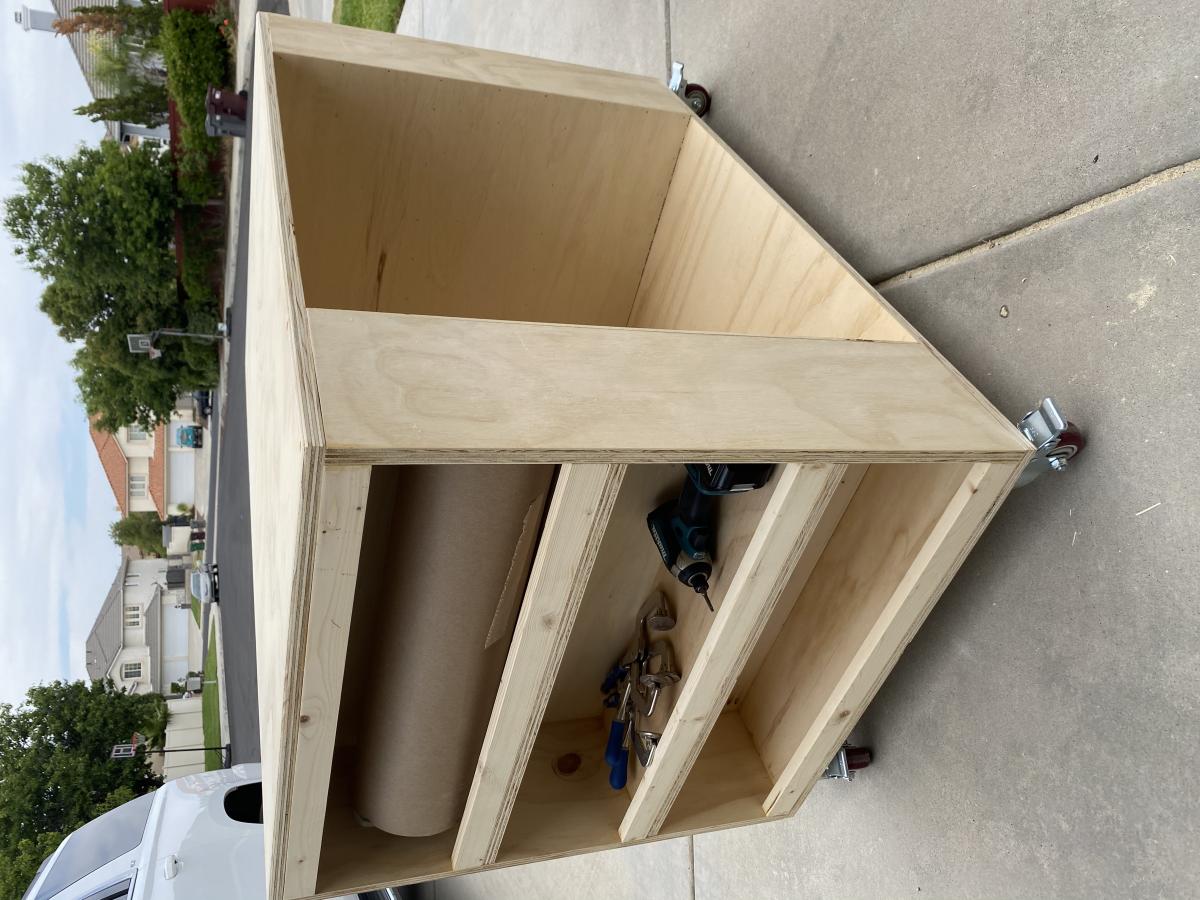
I absolutely love this build. I did end up using pocket holes for the carts to make them slightly stronger. I also had to do custom work on the top of my table saw cart due to rack and pinion fence. I routed the the plywood tops with a slight round over and waxed them smooth. I plan to add a dust collection hood around the miter saw and then install an inset stop block for the miter fence.

Estimated Cost
300
Estimated Time Investment
Week Long Project (20 Hours or More)
Finish Used
Wax
Recommended Skill Level
Intermediate

Comments

rjcarr1911

Fri, 07/24/2020 - 16:08

Very nicely done! It never even crossed my mind that the cart would need modifications to fit that table saw. That's the exact same table saw I've had my eye on, and I plan on purchasing any day now; so that is definitely good to know! My project is still a work in progress. I currently only have one cart built.

Do you have enough room to adjust your miter saw to make 45 degree cuts from the position pictured? Or do you have to move it forward in order to clear the work bench frame? I only ask because that's what I have to do with mine at the moment. I have to have it all the way forward on the shelf. I am considering making the miter saw shelf a little bit wider to remedy that minor issue.

12 year old built her bed!

Submitted by gmktt on Wed, 07/08/2020 - 20:01

Thanks Ana White for the awesome plans! My daughter decided she wanted a new bed, so I told her I’d help her build one. I am not a carpenter, by any stretch, but I thought it would be some good dad/daughter bonding time. She tweaked your plans, did all the cuts, drilling, sanding, and painting (well, most of the sanding and painting anyway), and tolerated her father with great grace. It turned out pretty well. We couldn’t have done it without your plans! Thanks again! —Gabe

Built from Plan(s)
Estimated Cost
$600.00
Estimated Time Investment
Week Long Project (20 Hours or More)
Finish Used
White semi-gloss interior latex.
Recommended Skill Level
Beginner

Comments

XL Modern Craft Table

I modified this plan so I could have 4 total work areas. Total Size: 48" x 96"

Built from Plan(s)
Estimated Time Investment
Weekend Project (10-20 Hours)
Finish Used
White paint to match walls and trim (SW Alabaster)
Recommended Skill Level
Intermediate

Comments

briannamcelfresh

Tue, 09/08/2020 - 19:42

Is there anyway you can share these plans with me!? I drew out some plans for an identical table but I think my cuts may be off! It would be so helpful.

DIY_Women Owens Nightstand

Submitted by diy_women on Mon, 09/08/2014 - 08:39

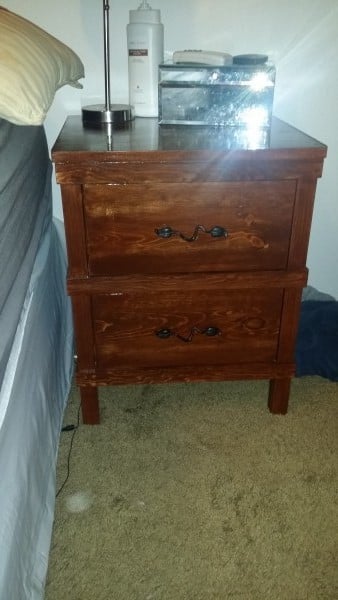
This piece came out beautifully! Took all of 6 hours to complete it. I used pine on this project.

Built from Plan(s)
Estimated Cost
Cost about 75 dollars.
Estimated Time Investment
Day Project (6-9 Hours)
Finish Used
Polyurethane.
Recommended Skill Level
Beginner

Loft Bed with Desk & Bookcase

Submitted by Anonymous (not verified) on Tue, 04/04/2017 - 12:47

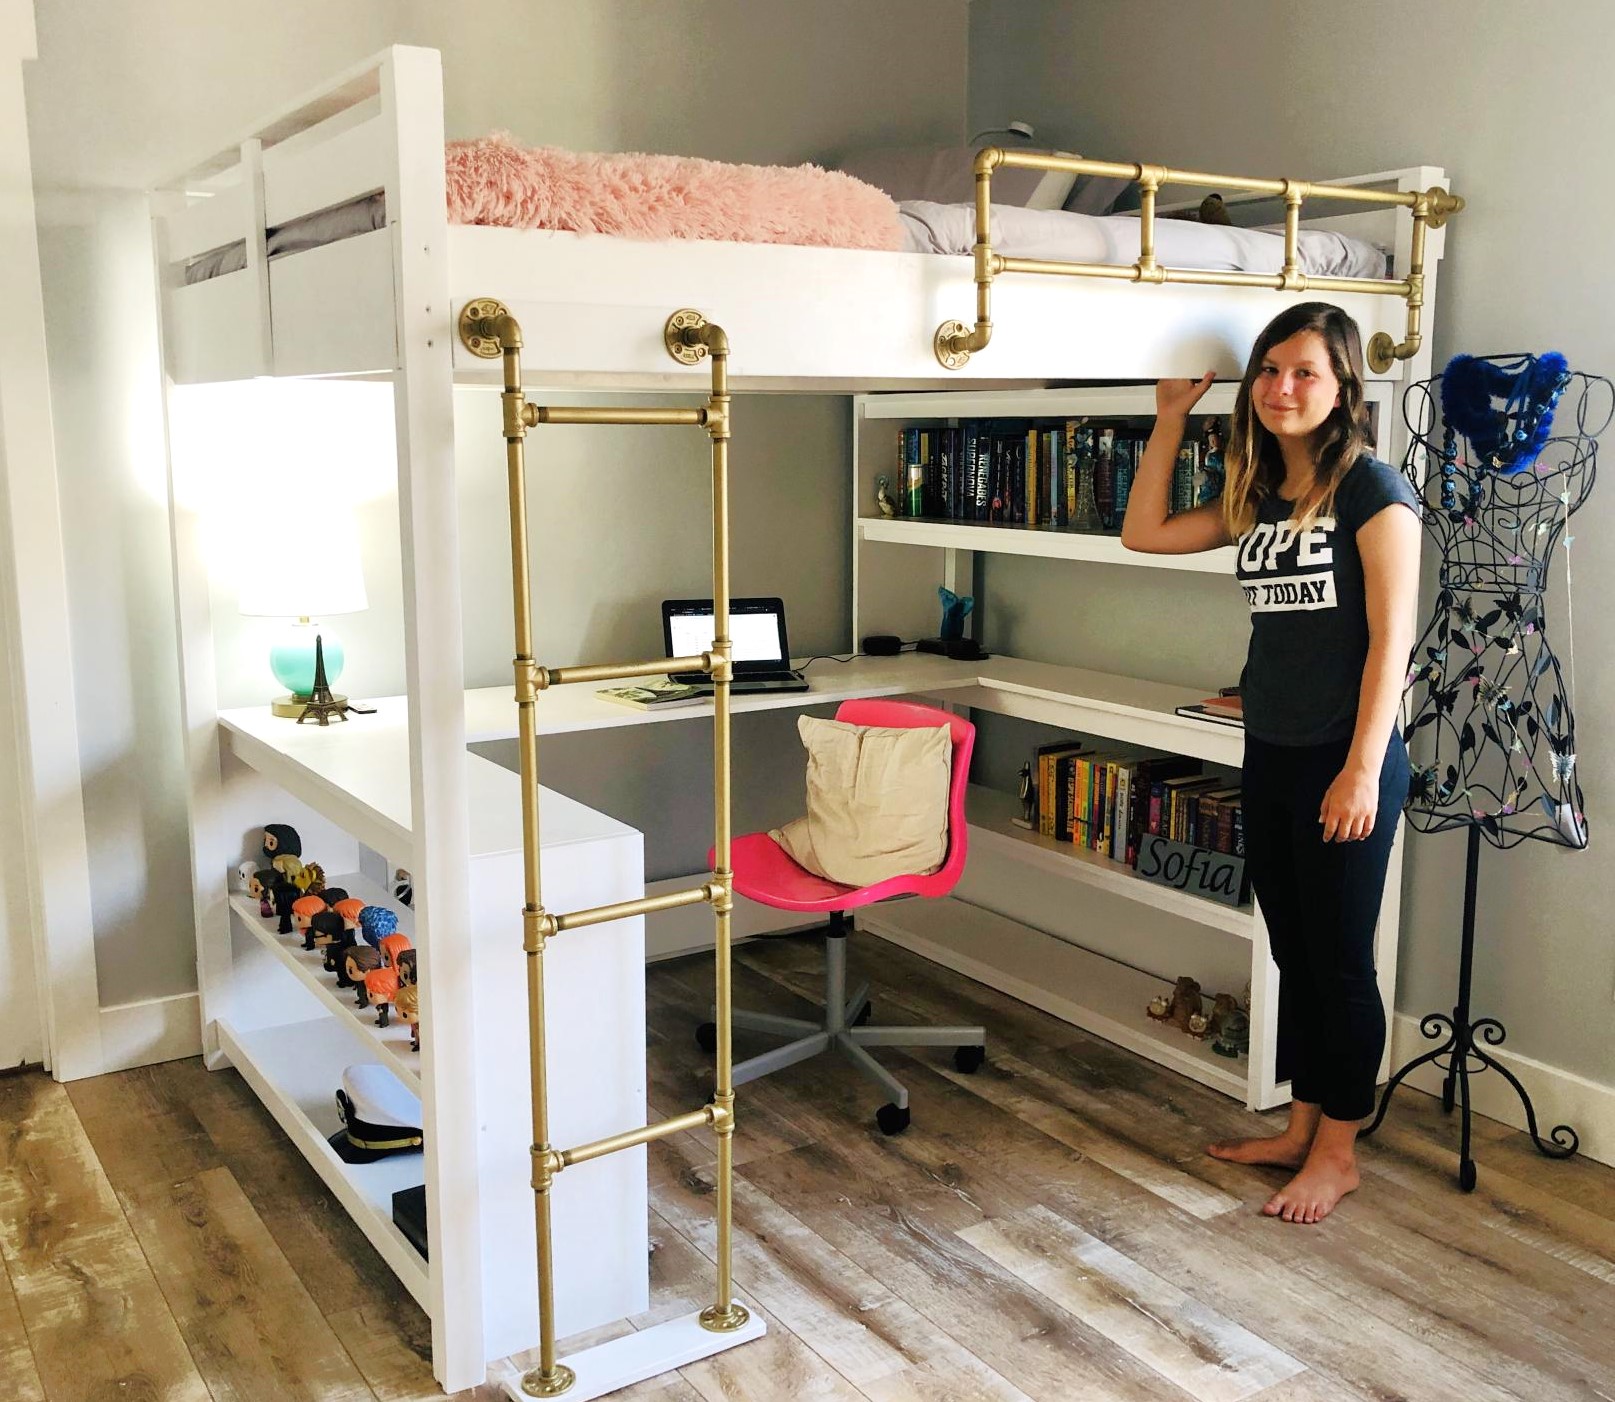
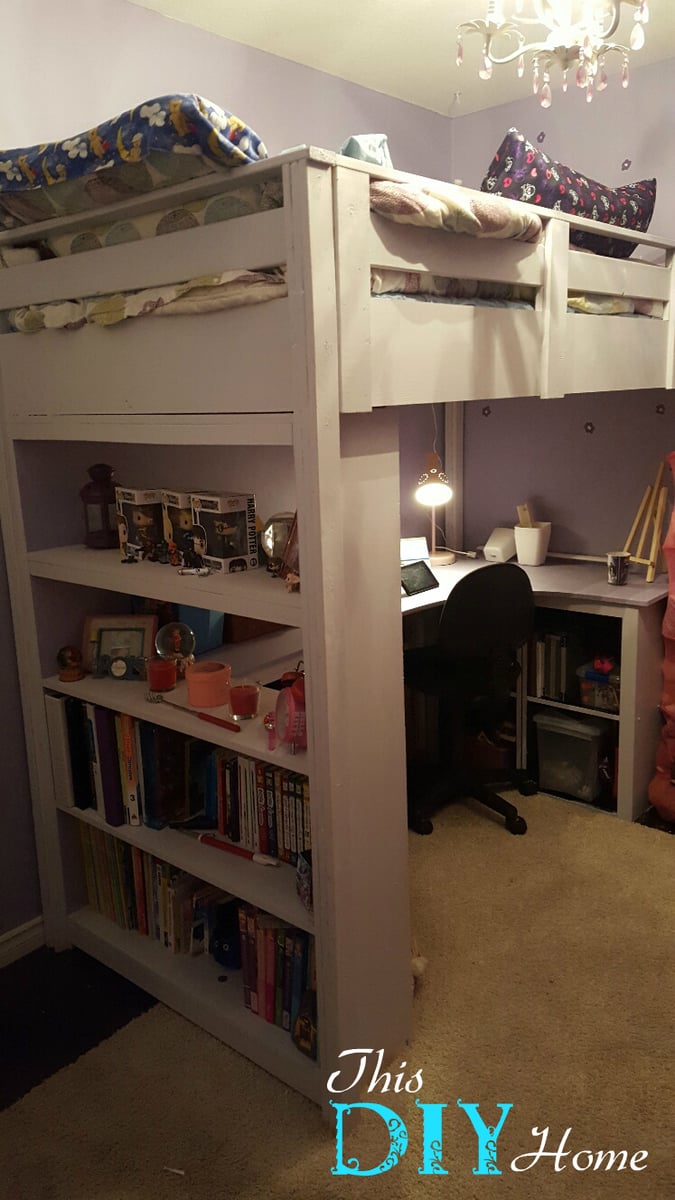
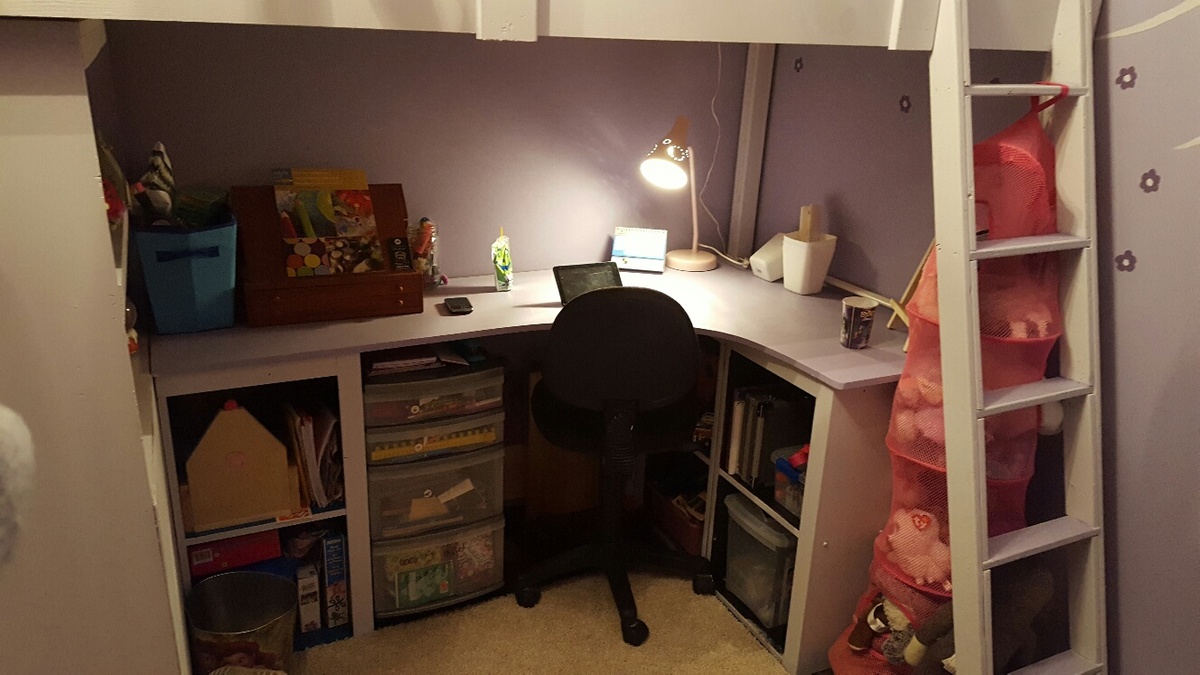
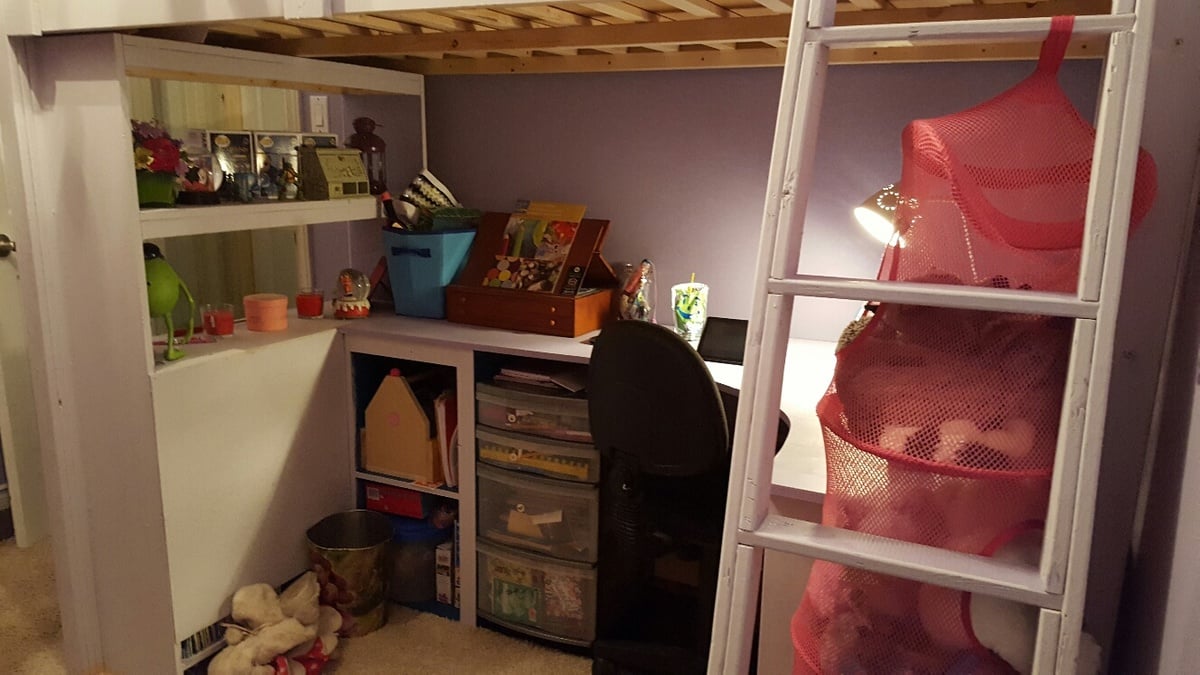
Created but Modified from the plans found on here, my daughter has a great new bed. This bed saved a ton of space in her very small room. PLUS it allowed her to have an area to do her homework and all the art projects she does! Very easy build. Took a day to build and another to paint. 

Estimated Cost
$250.00 CDN
Estimated Time Investment
Weekend Project (10-20 Hours)
Finish Used
Behr Marquee Paint
Recommended Skill Level
Beginner

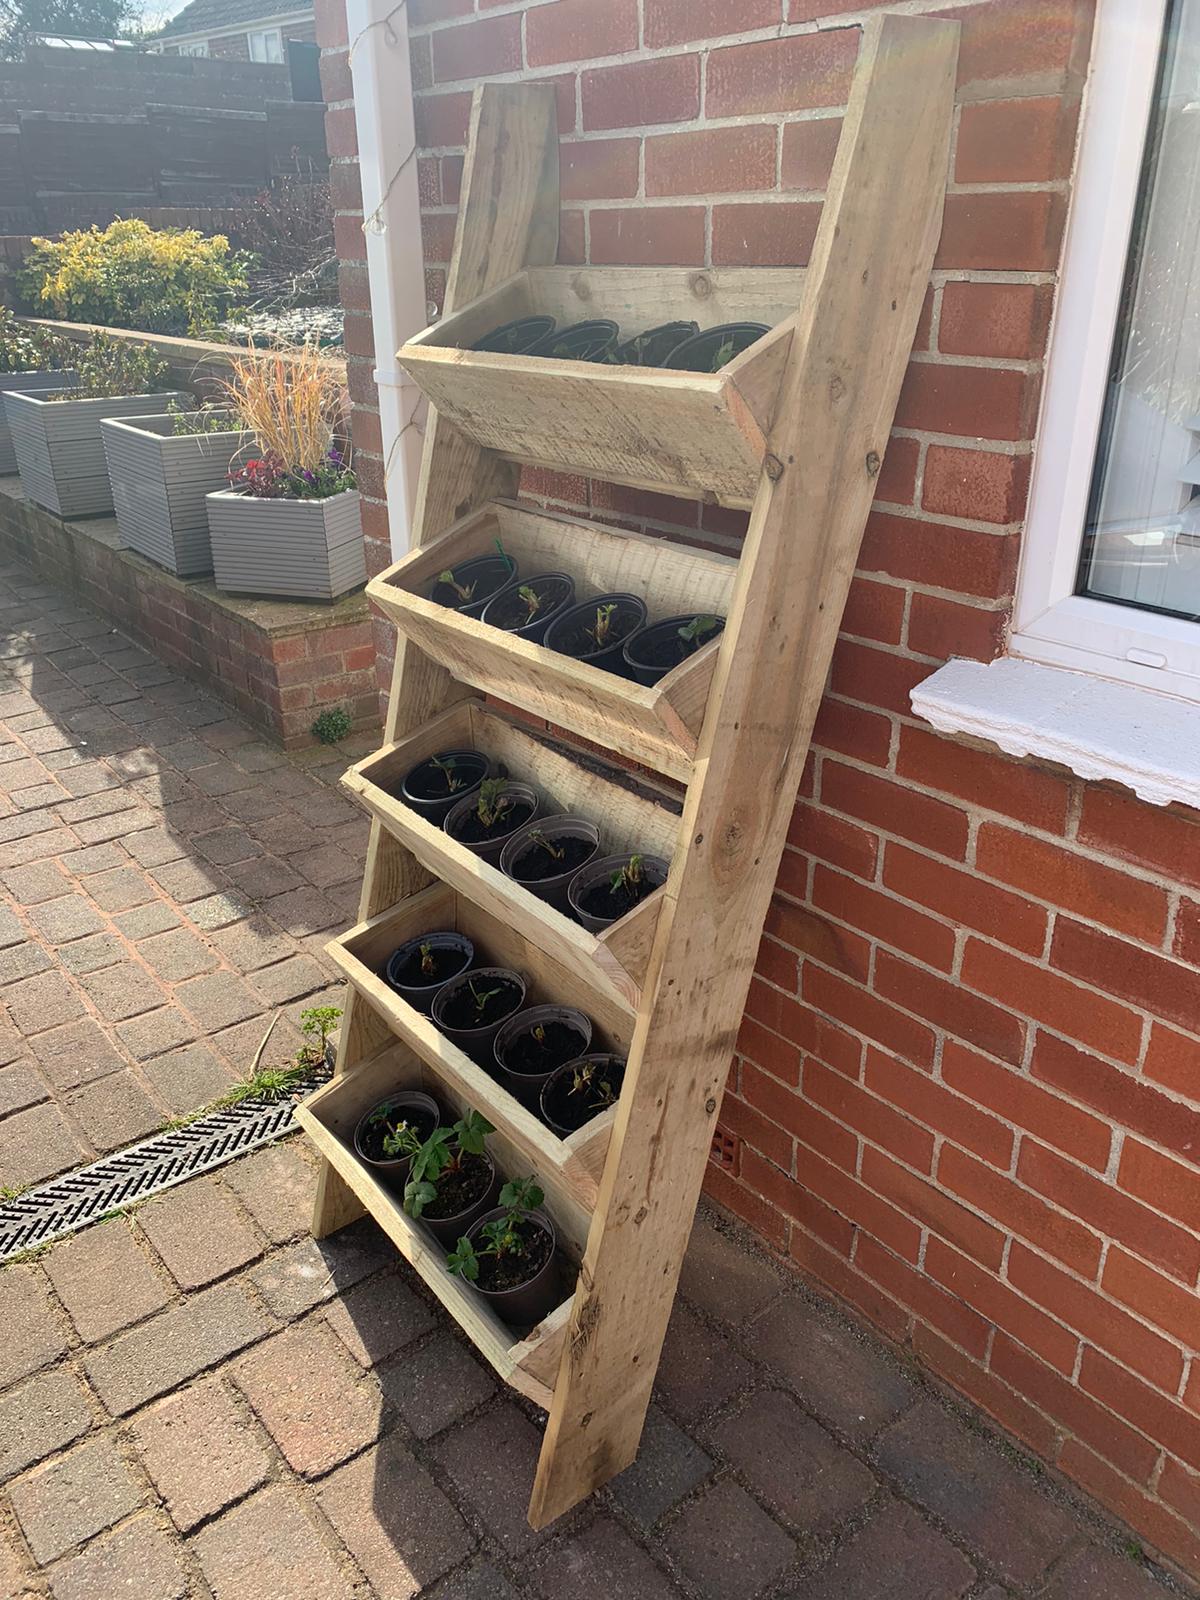
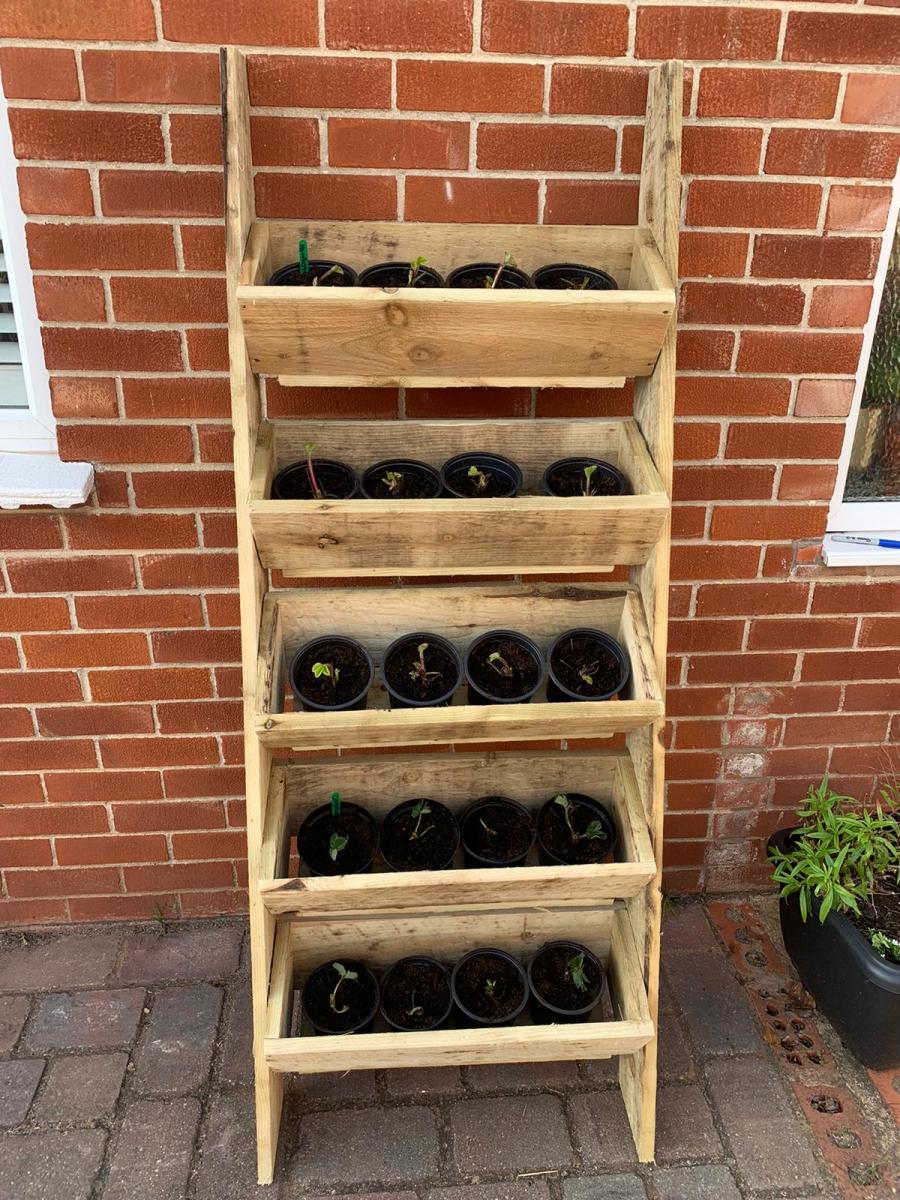
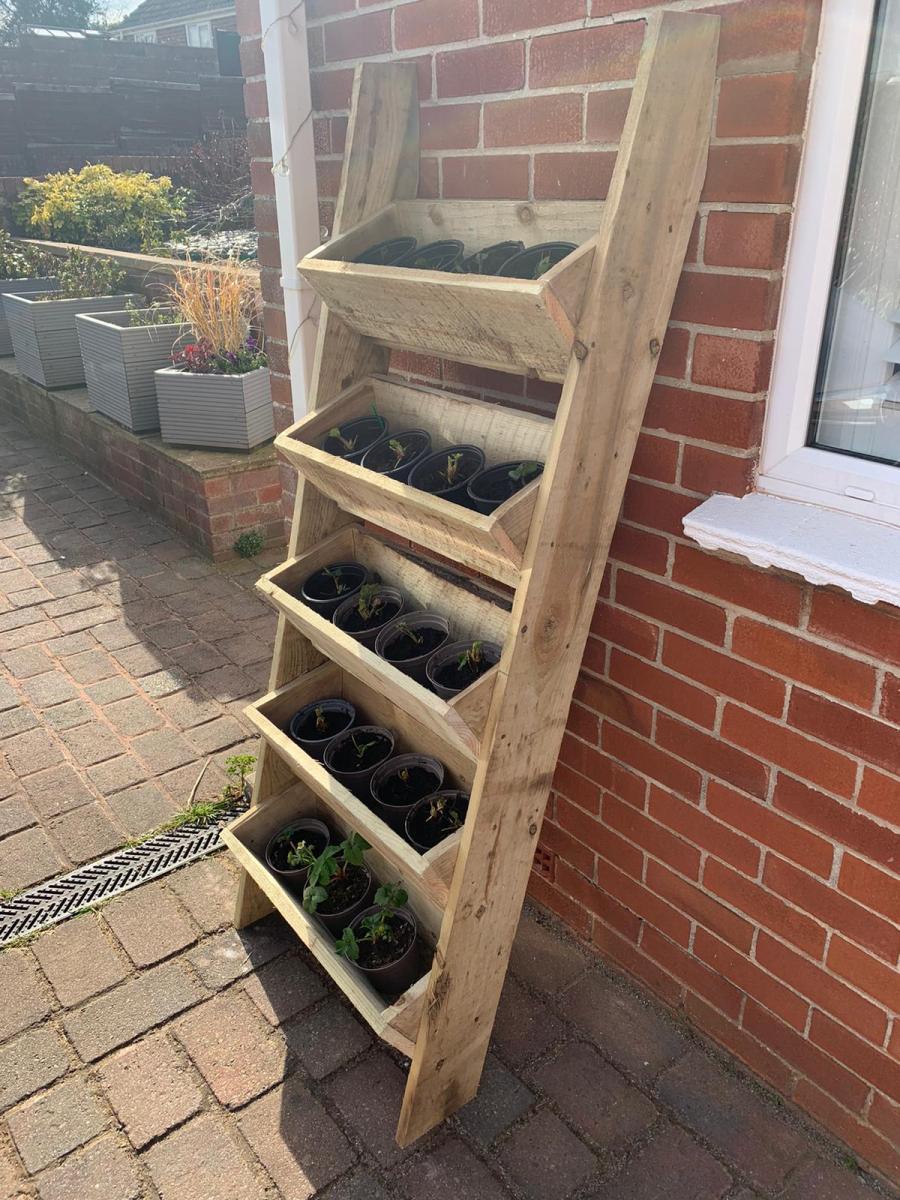
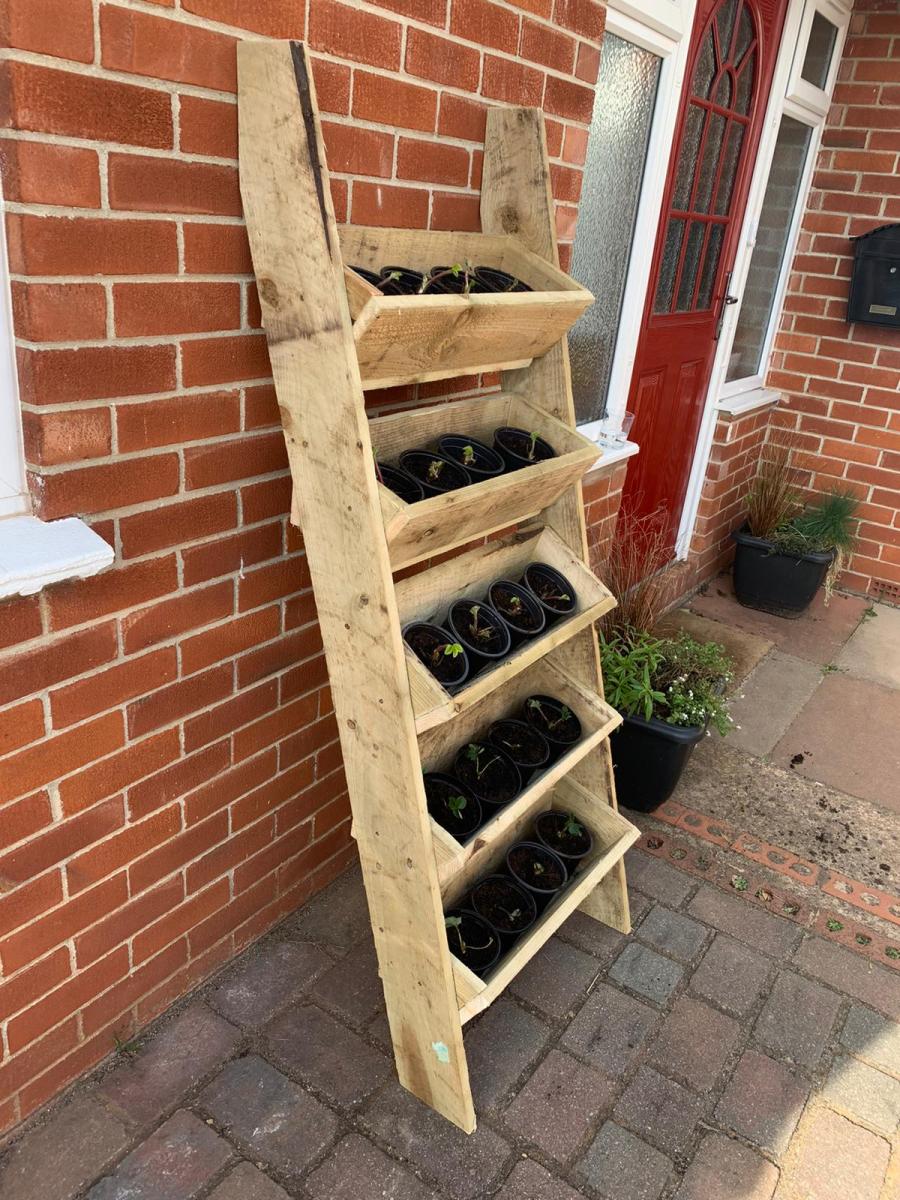
Strawberry planters

Submitted by DevonWood on Thu, 04/08/2021 - 00:17

Using plans from this website here are pictures of two, five tier strawberry planters.
Each tier is wide enough for 4 plants in one litre pots.

Estimated Time Investment
Afternoon Project (3-6 Hours)
Recommended Skill Level
Intermediate

Comments

2x4 Outdoor Chairs and Side Table

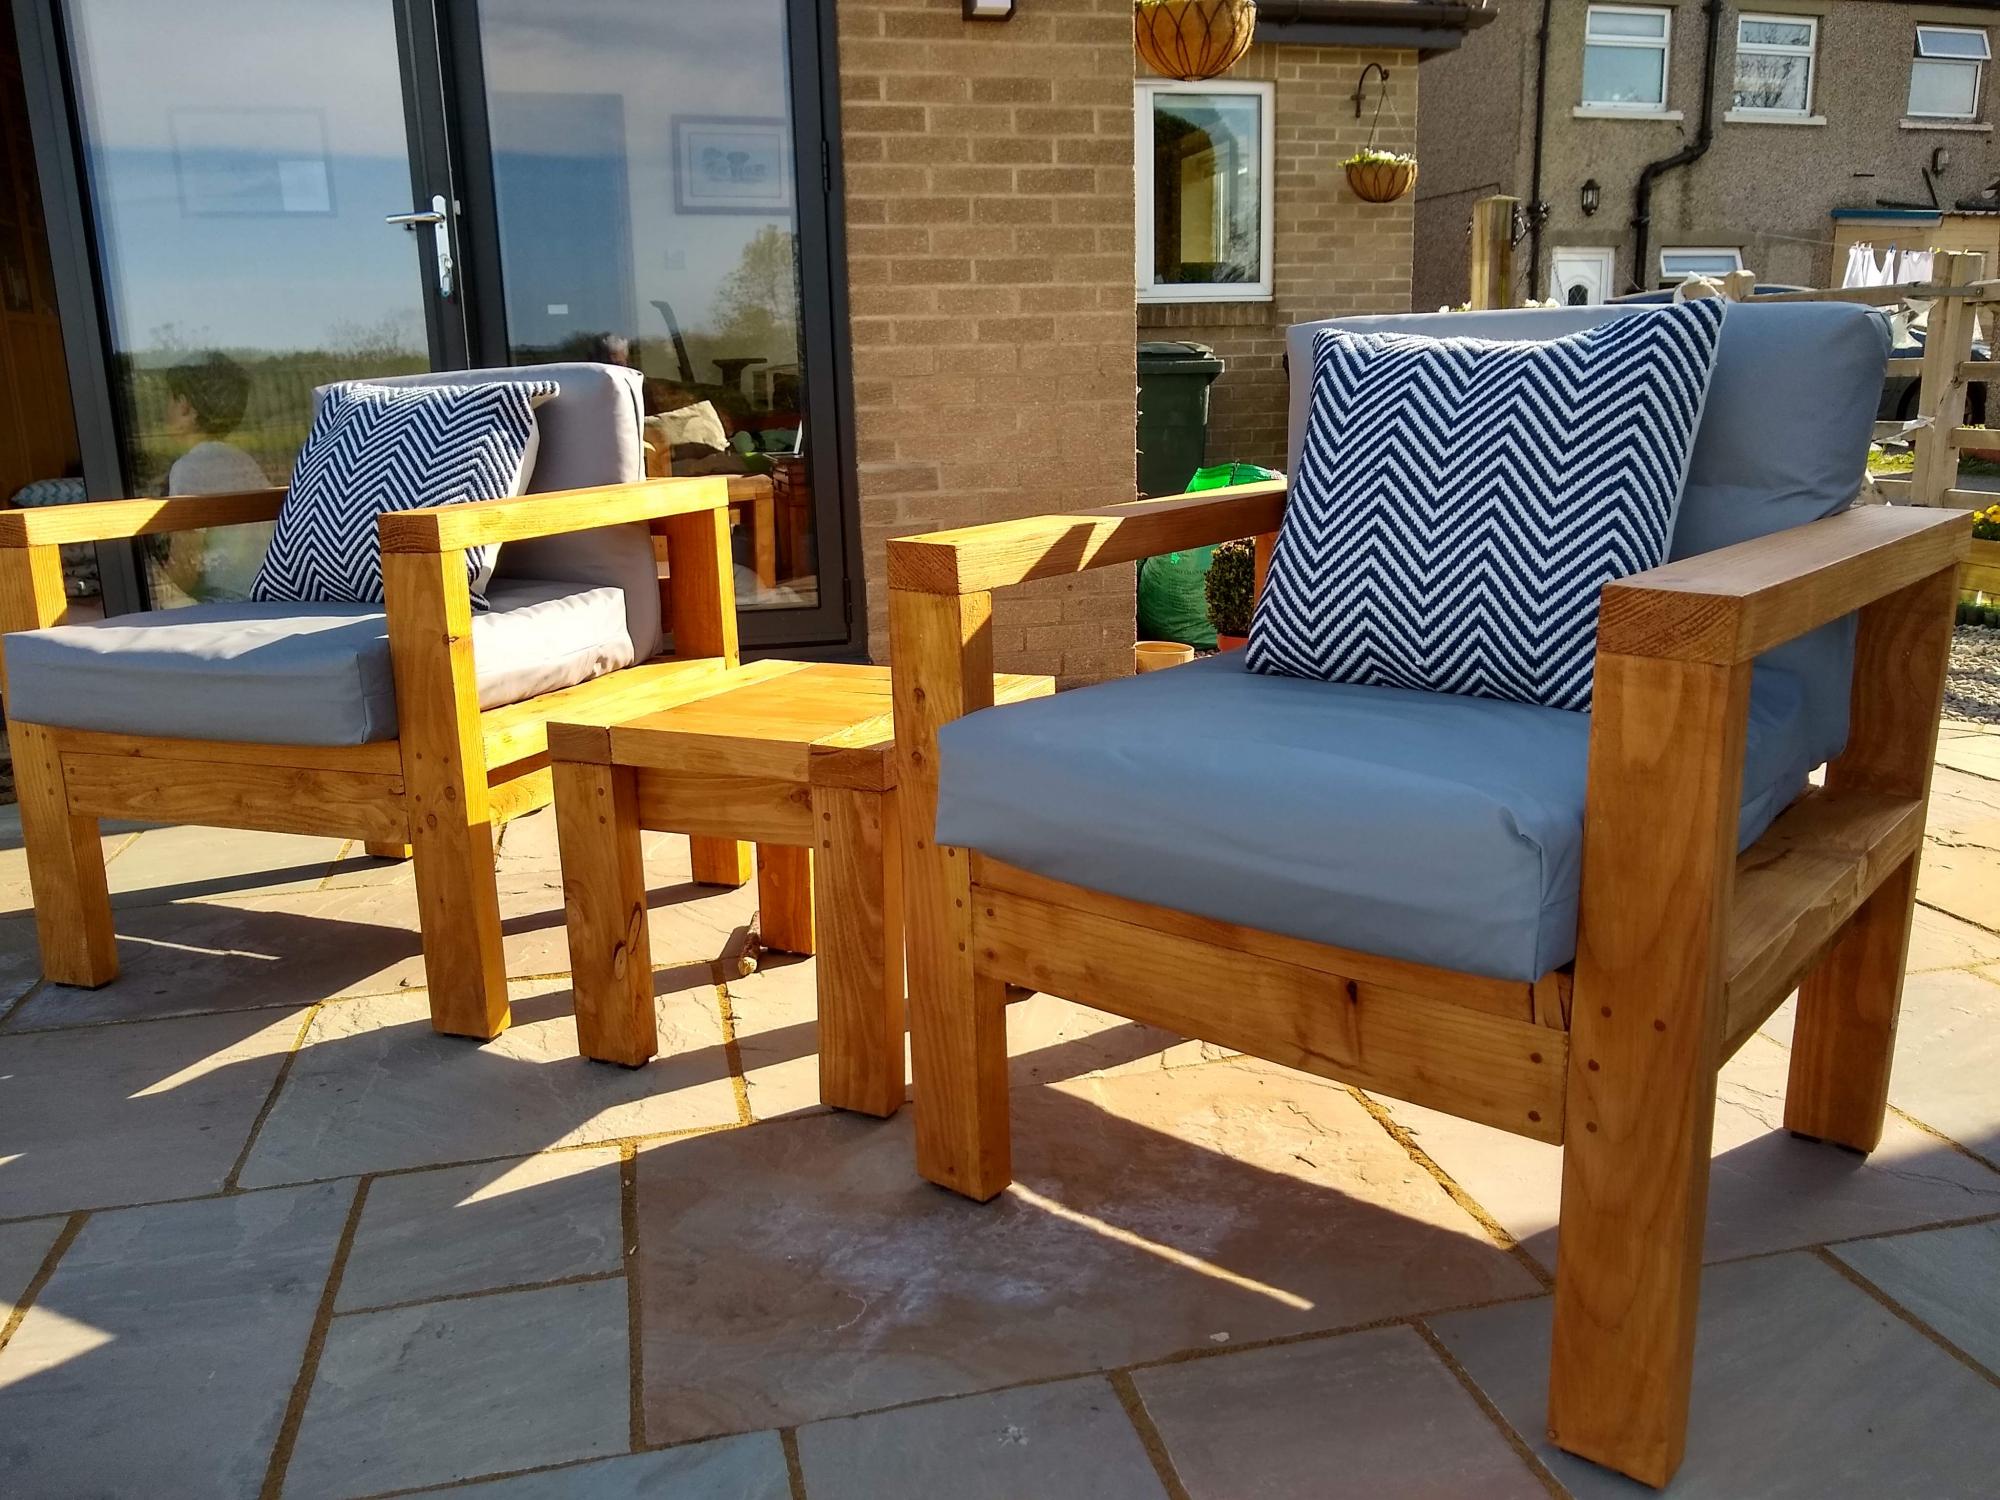
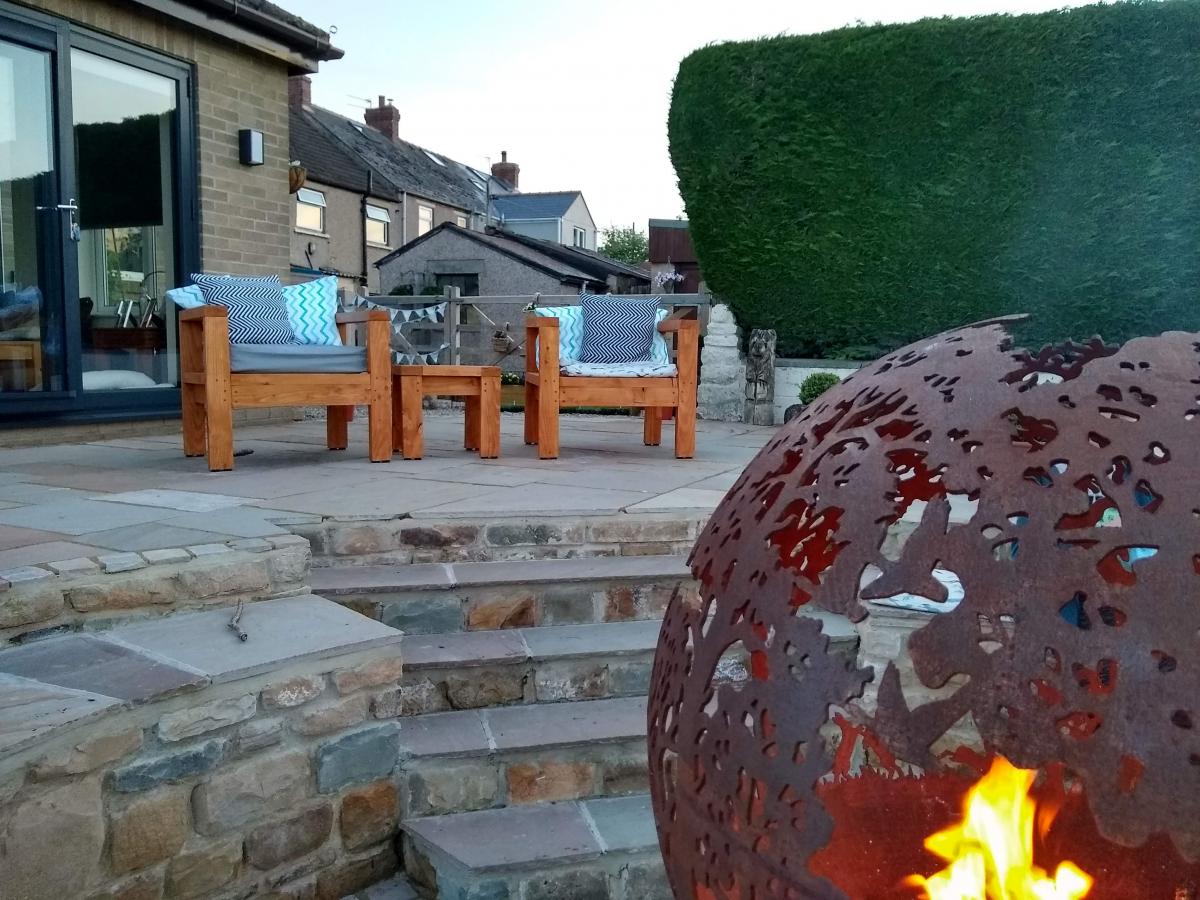
I built the 2 chairs and side table using Ana's plans. Wood in the UK is perhaps not as cheap and ubiquitous, so I managed to get hold of some rough siberian larch to build them. After what seemed like a lot of sanding I started cutting. I've used stainless steel screws and have used a plug cutter on a mahogany board I had to plug the screw holes. I really liked the contrast and neatness that this has given the project. I also used some rubber feet to raise it off the ground and try and reduce any water damage. The side table is reduced in size from the 2 foot version in the plans, this was easy enough once I'd worked out the impact on all of the other measurements. My wife has commented that I should have used less wood in my next project as they are very heavy, they certainly aren't going anywhere! My wife did produce the lovely grey cushions that you see in the pictures.

Estimated Cost
120
Estimated Time Investment
Weekend Project (10-20 Hours)
Finish Used
Used a wood preserver followed by a coat of stain to obtain the light finish seen
Recommended Skill Level
Intermediate

Comments

my IKEA knock-off Expedit 4-cube bookcase

Submitted by cbrowan on Sun, 08/21/2011 - 11:40

I had been eying the IKEA Expedit 4-cube bookcase and figured I could build it for cheaper and have lots of leftover plywood for some other projects. I was right!

Estimated Cost
$40 (but left enough wood to build a console table and flat bookcases)
Estimated Time Investment
Day Project (6-9 Hours)
Finish Used
2 coats of Valspar chocolate brown, eggshell
1 coat of Minwax Polyurethane, satin
Recommended Skill Level
Intermediate

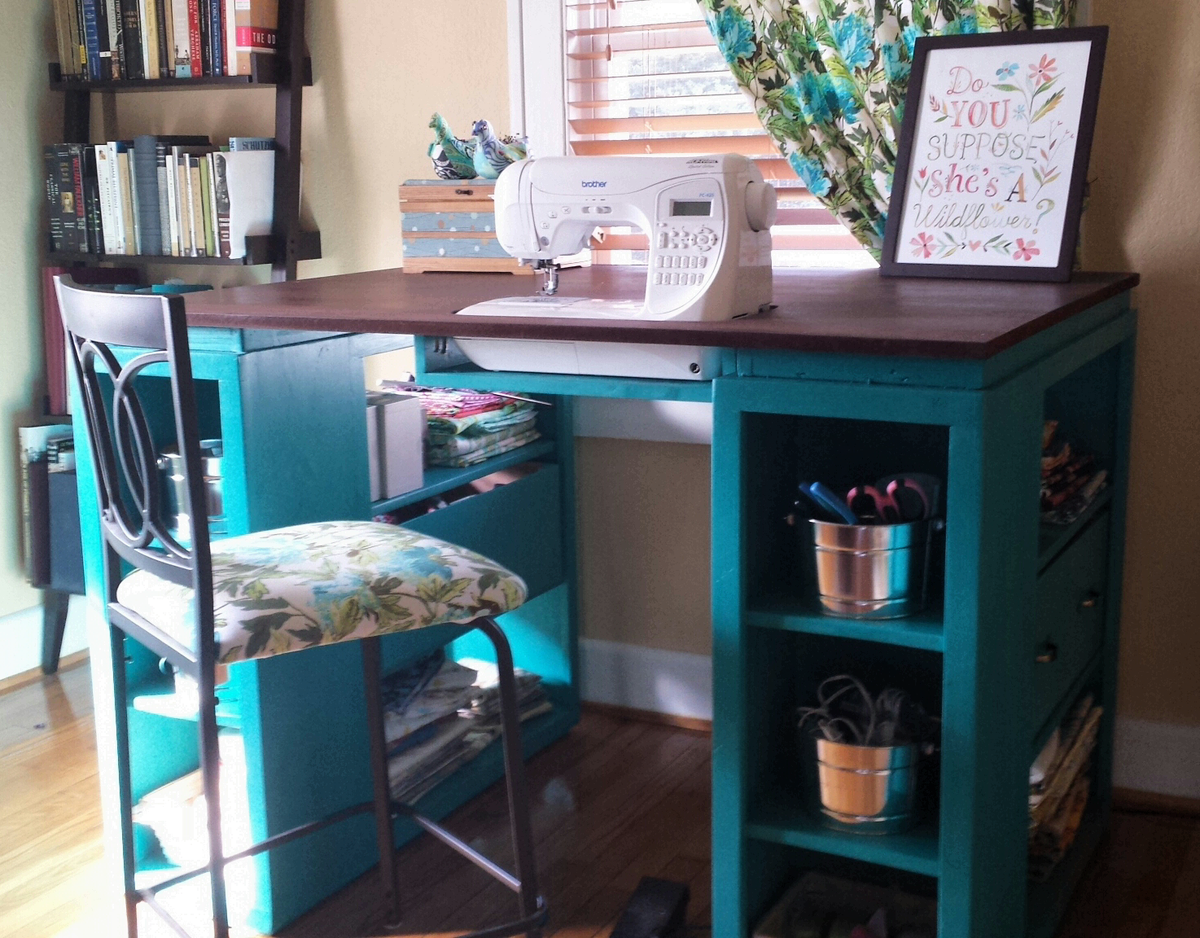
The perfect sewing table!

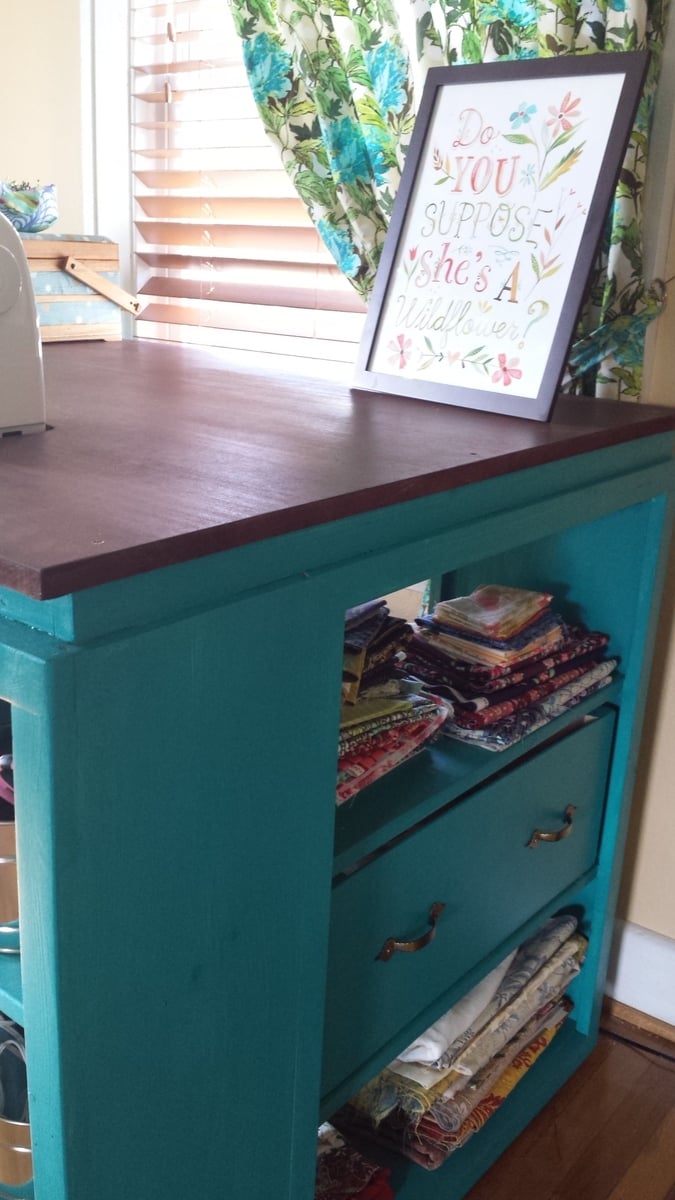
I have been looking at sewing furniture for years, but the prices always made my jaw drop. I have a small craft room, so I needed a table that could also triple as a cutting table and fabric storage. Thank you so much to Ana White for this plan! I built exactly to the plan in The Handbuilt Home, and it's the PERFECT size.

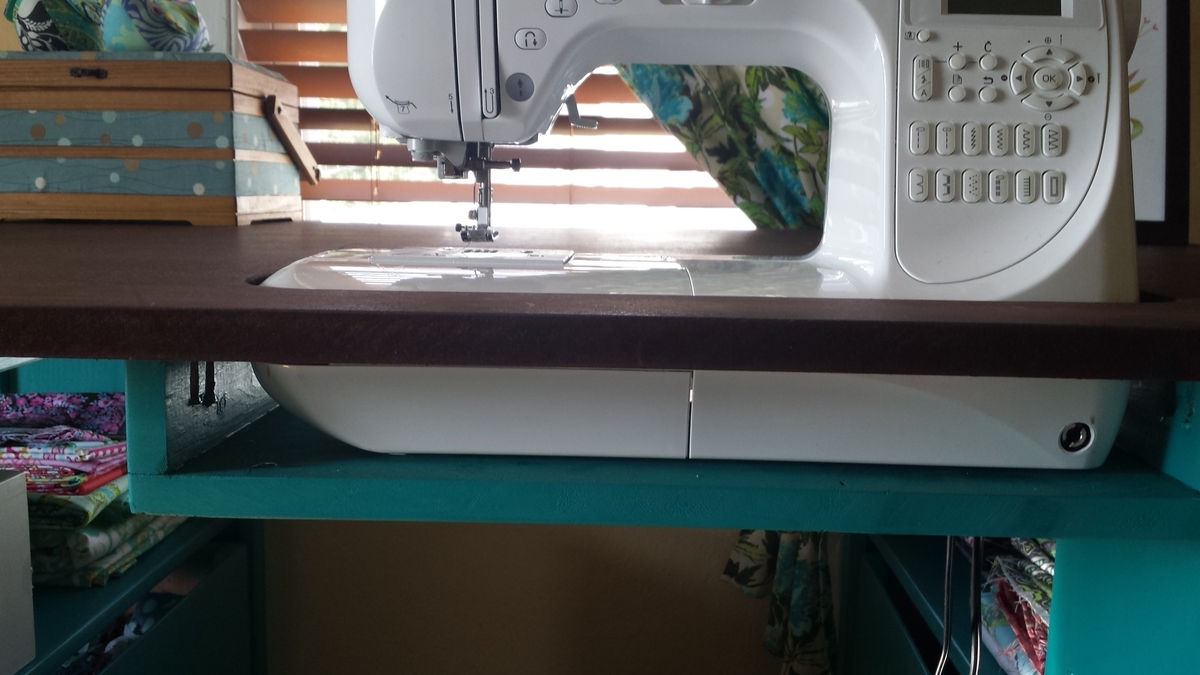
So the sewing machine can sit flush with the top, making working on big sewing projects way easier, I traced the outline of my machine on the MDF and cut it out with a jig saw. Then I built a small shelf using a 1x12 scrap and 2 1x3 scraps. Putting the 1x3s on top of the 1x12 made the shelf 3.75 inches deep, which is exactly the depth I needed. I attached it to the underside of the tabetop using a pockethole jig and screws.

I built 2 boxes using 1/4 inch plywood, and installed drawer pulls on them, giving the illusion that the table has 2 drawers built in. This is where I keep my ugly stuff--interfacing and fabric scraps.

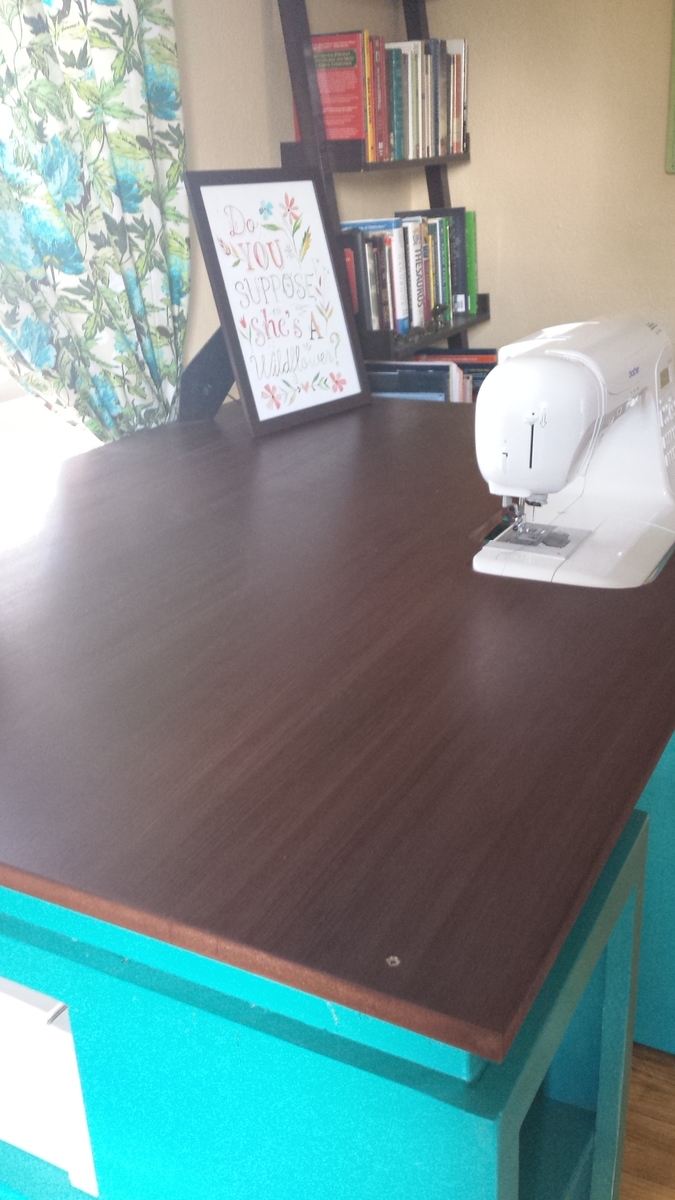
I got the color scheme for the table from the entryway console plan in The Handbuilt Home. In order to make the MDF top look like it had a wood grain, I applied mahogany gel stain with an old washcloth in very thick strokes that spanned the length of the tabletop. It soaked in and lost the "grain" look in some places, but the majority still looks like wood. I did have to apply several coats of polyurathane over the stain; the MDF has a prickly texture that grabs fabric and makes it hard to feed through the sewing machine.

My only complaint is that I didn't quite think through the fact that seating is bar height and I'm 5'7". It's a little difficult to reach my sewing machine pedal. I may build a small stool for the pedal to sit on so I don't have to half sit/stand to sew.

This is the first woodworking project I've done alone from start to finish: from going to Lowe's and picking out the wood, to cutting the wood with a circular saw, assembly, and finishing. (My fiance did carry it up the stairs for me. :) )

I'm so in love with this table! And now to finish the quilt I started 6 months ago....
Built from Plan(s)
Estimated Time Investment
Week Long Project (20 Hours or More)
Finish Used
I used 2 coats of Valspar Signature paint in Laguna Beach, and Minwax mahogany gel stain on the MDF tabletop.
Recommended Skill Level
Intermediate

Comments

MissMehndi

Mon, 09/23/2013 - 15:22

I love this idea!! I too have wanted a sewing table for a long time but the prices of them take my breath away. I may have to make myself one! Thanks for the inspiration!!

Email Me
Free Plans

Get new plans sent right to your inbox for free!

    We won't send you spam. Unsubscribe at any time.

    Back