Community Brag Posts
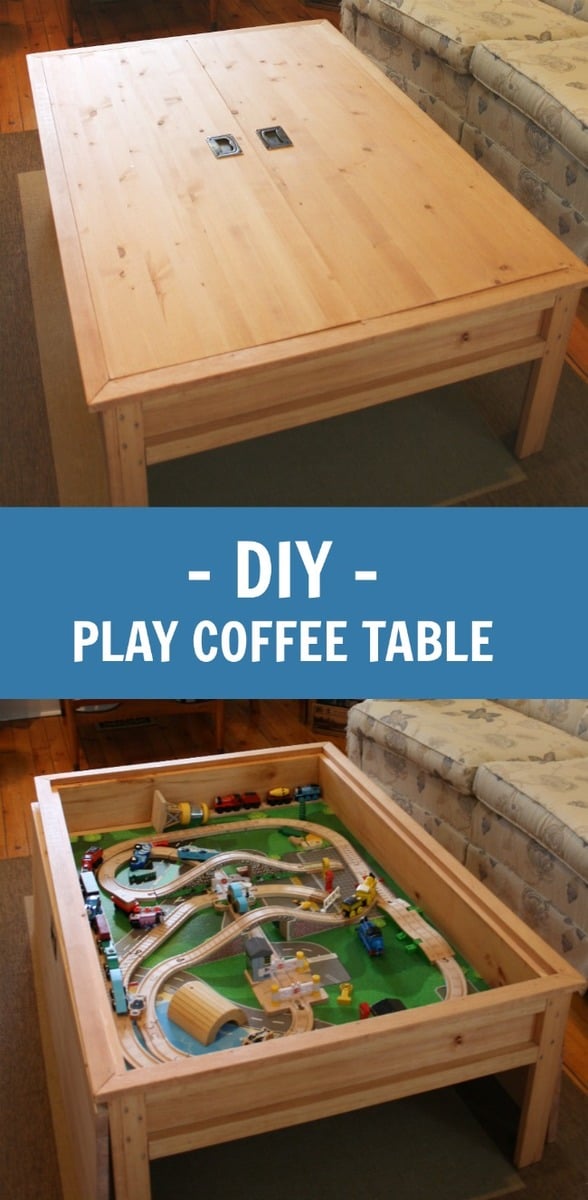
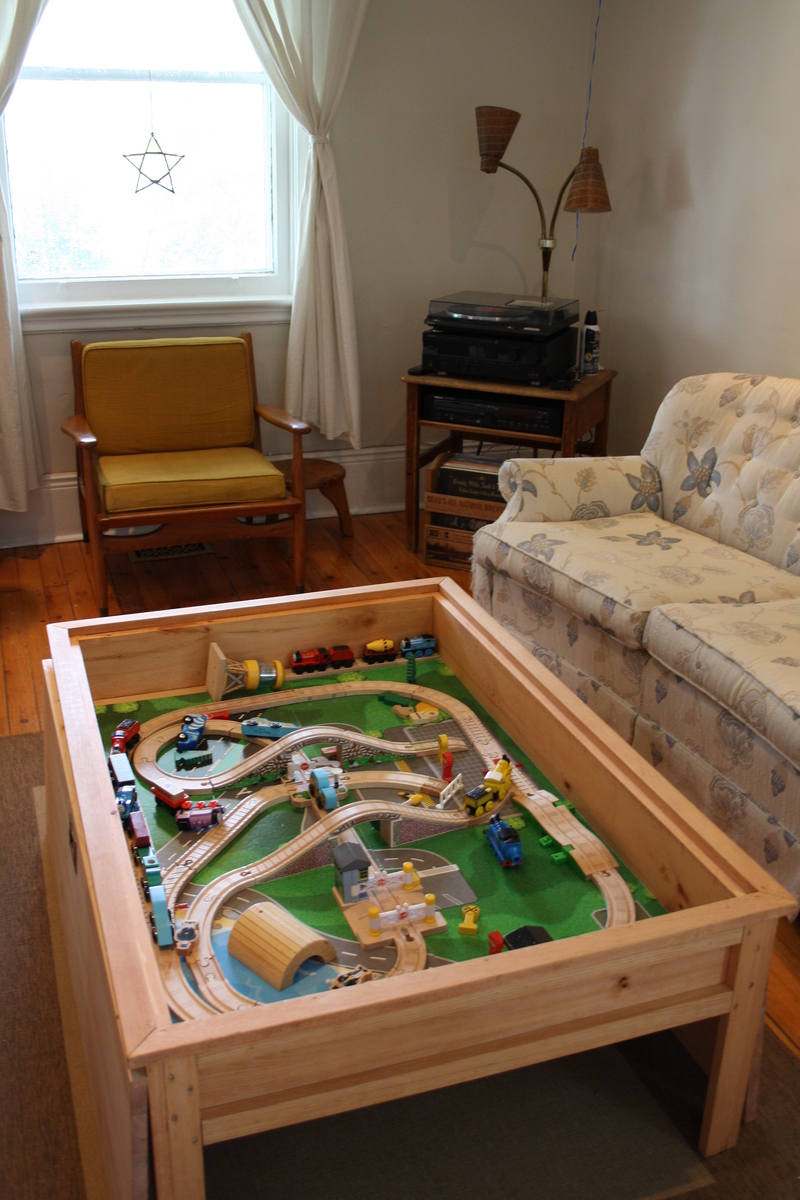
Mom's Train Table - our version
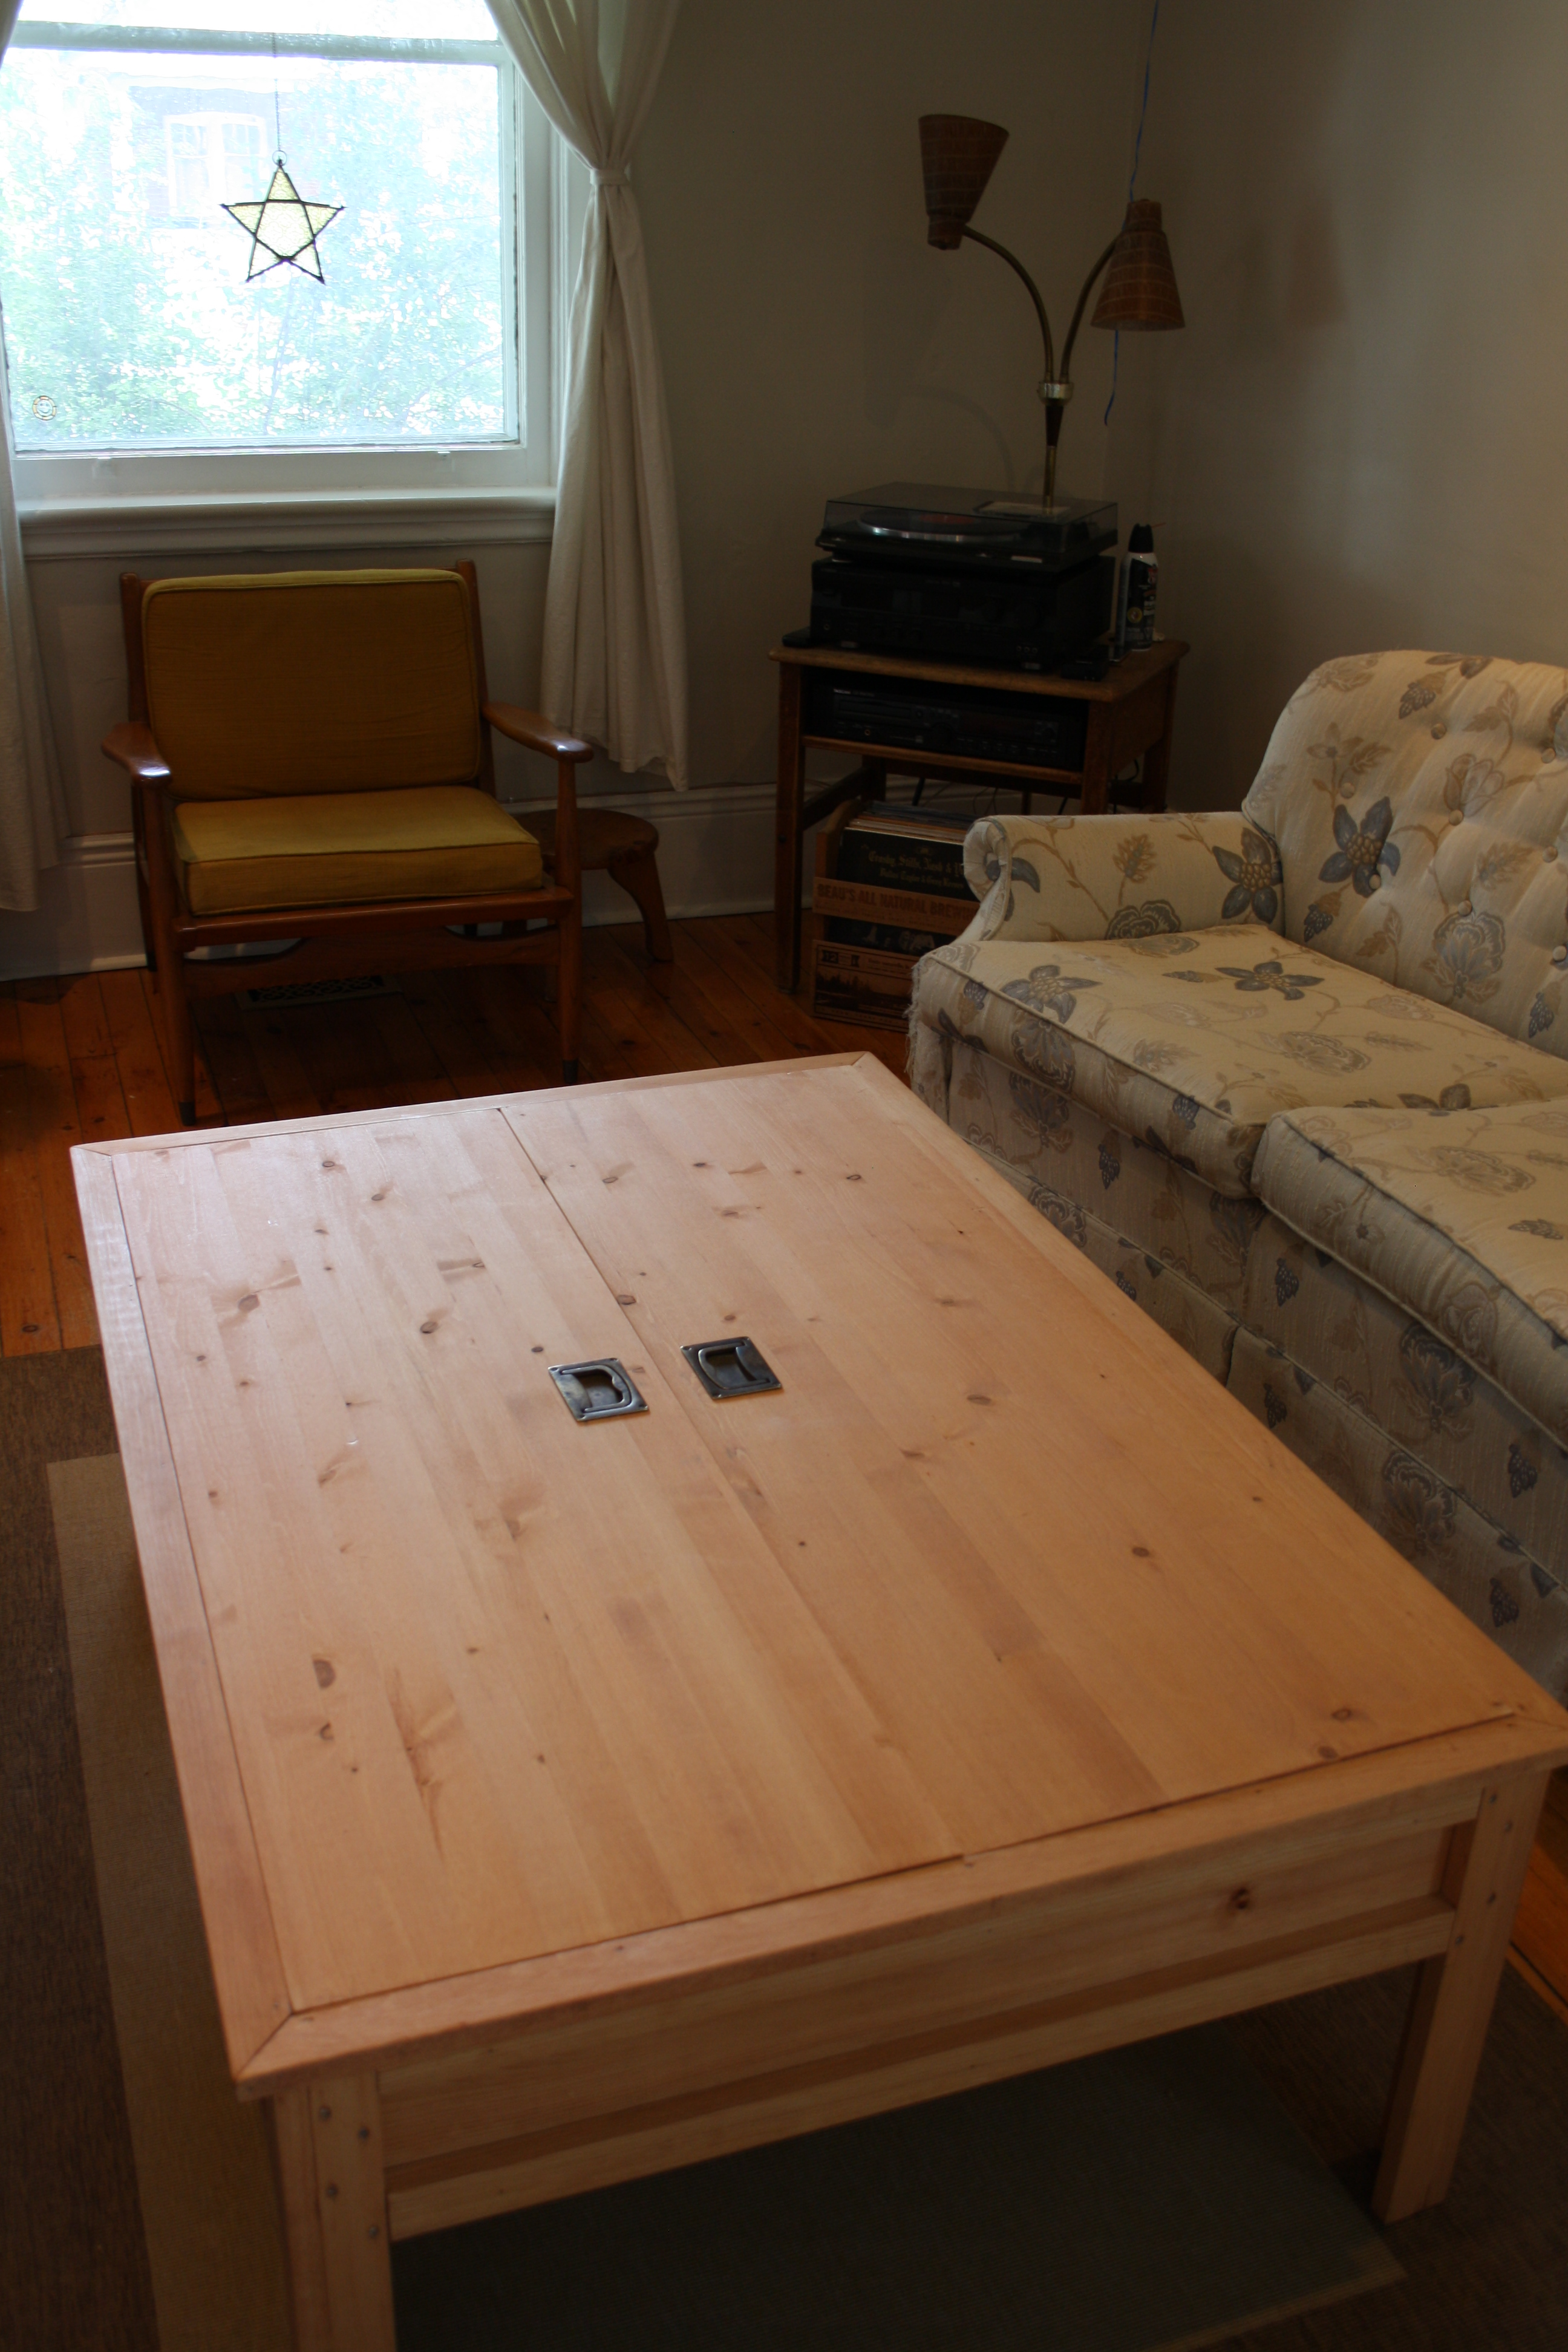
I was planning to make a train table trundle for my son's bed, but once I saw this plan everything changed. I'm so SO happy with it. Modifications: 1) We took off the bottom shelf because hubby likes to stretch his long legs out underneath. 2) We used laminated pine project panels for the top, they cost more, but they were already the correct size, and the finished look of the top would be nicer. We altered the design to make the panels go lengthwise. So far so good, neither have bowed whatsoever. 3) we used inset handles from Lee Valley with an antiqued finish. I had yet to lacquer this when I took the photo because we couldn't wait to get the trains in there! I have since done 3 coats of minwax Poly to protect it from little hands, crayons, etc.... We're hoping this table will graduate cars, then to legos, and then....who knows!? Thanks to Ana and all the contributors here.
Built from Plan(s)
Estimated Cost
$150 with the hardware
Estimated Time Investment
Afternoon Project (3-6 Hours)
Finish Used
Minwax Stain in Golden Pecan, one coat
Recommended Skill Level
Beginner
Comments
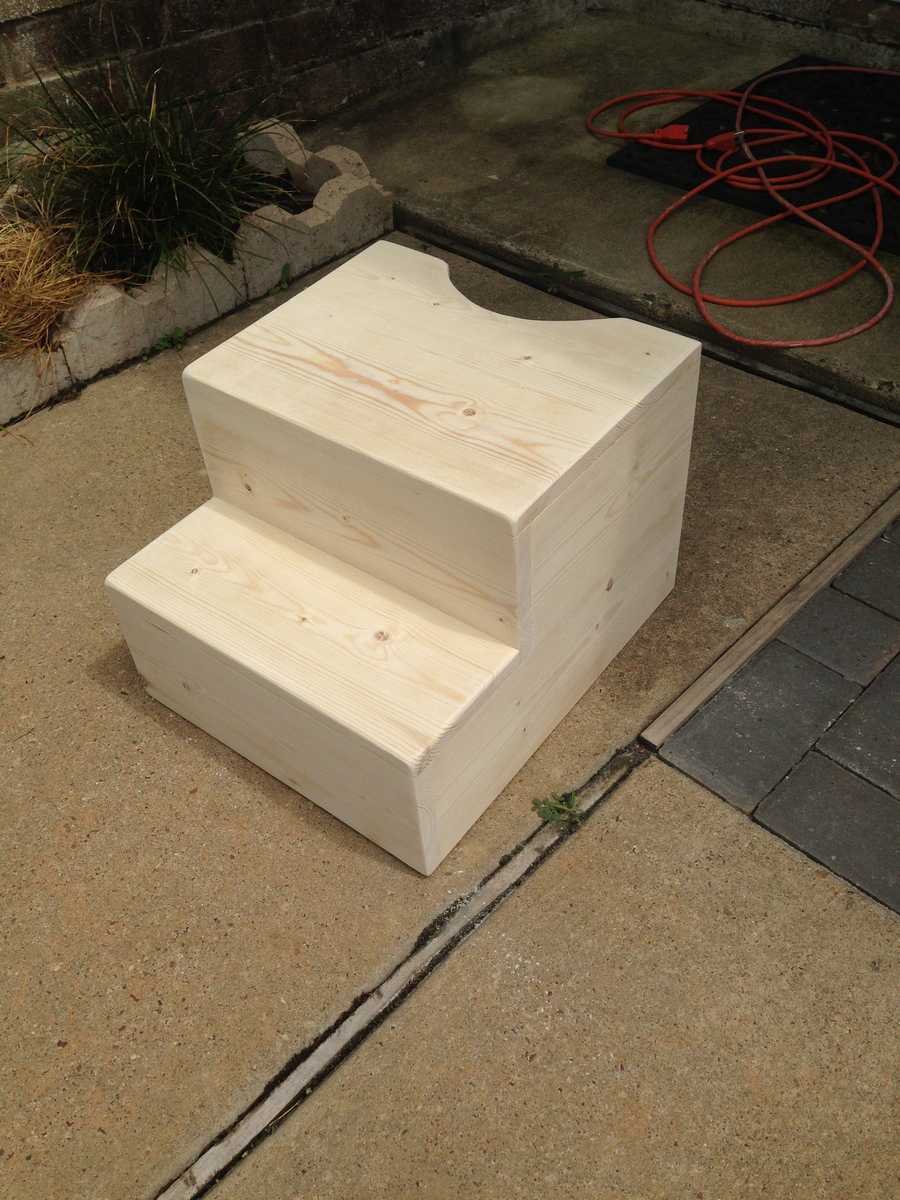
Toilet step stool
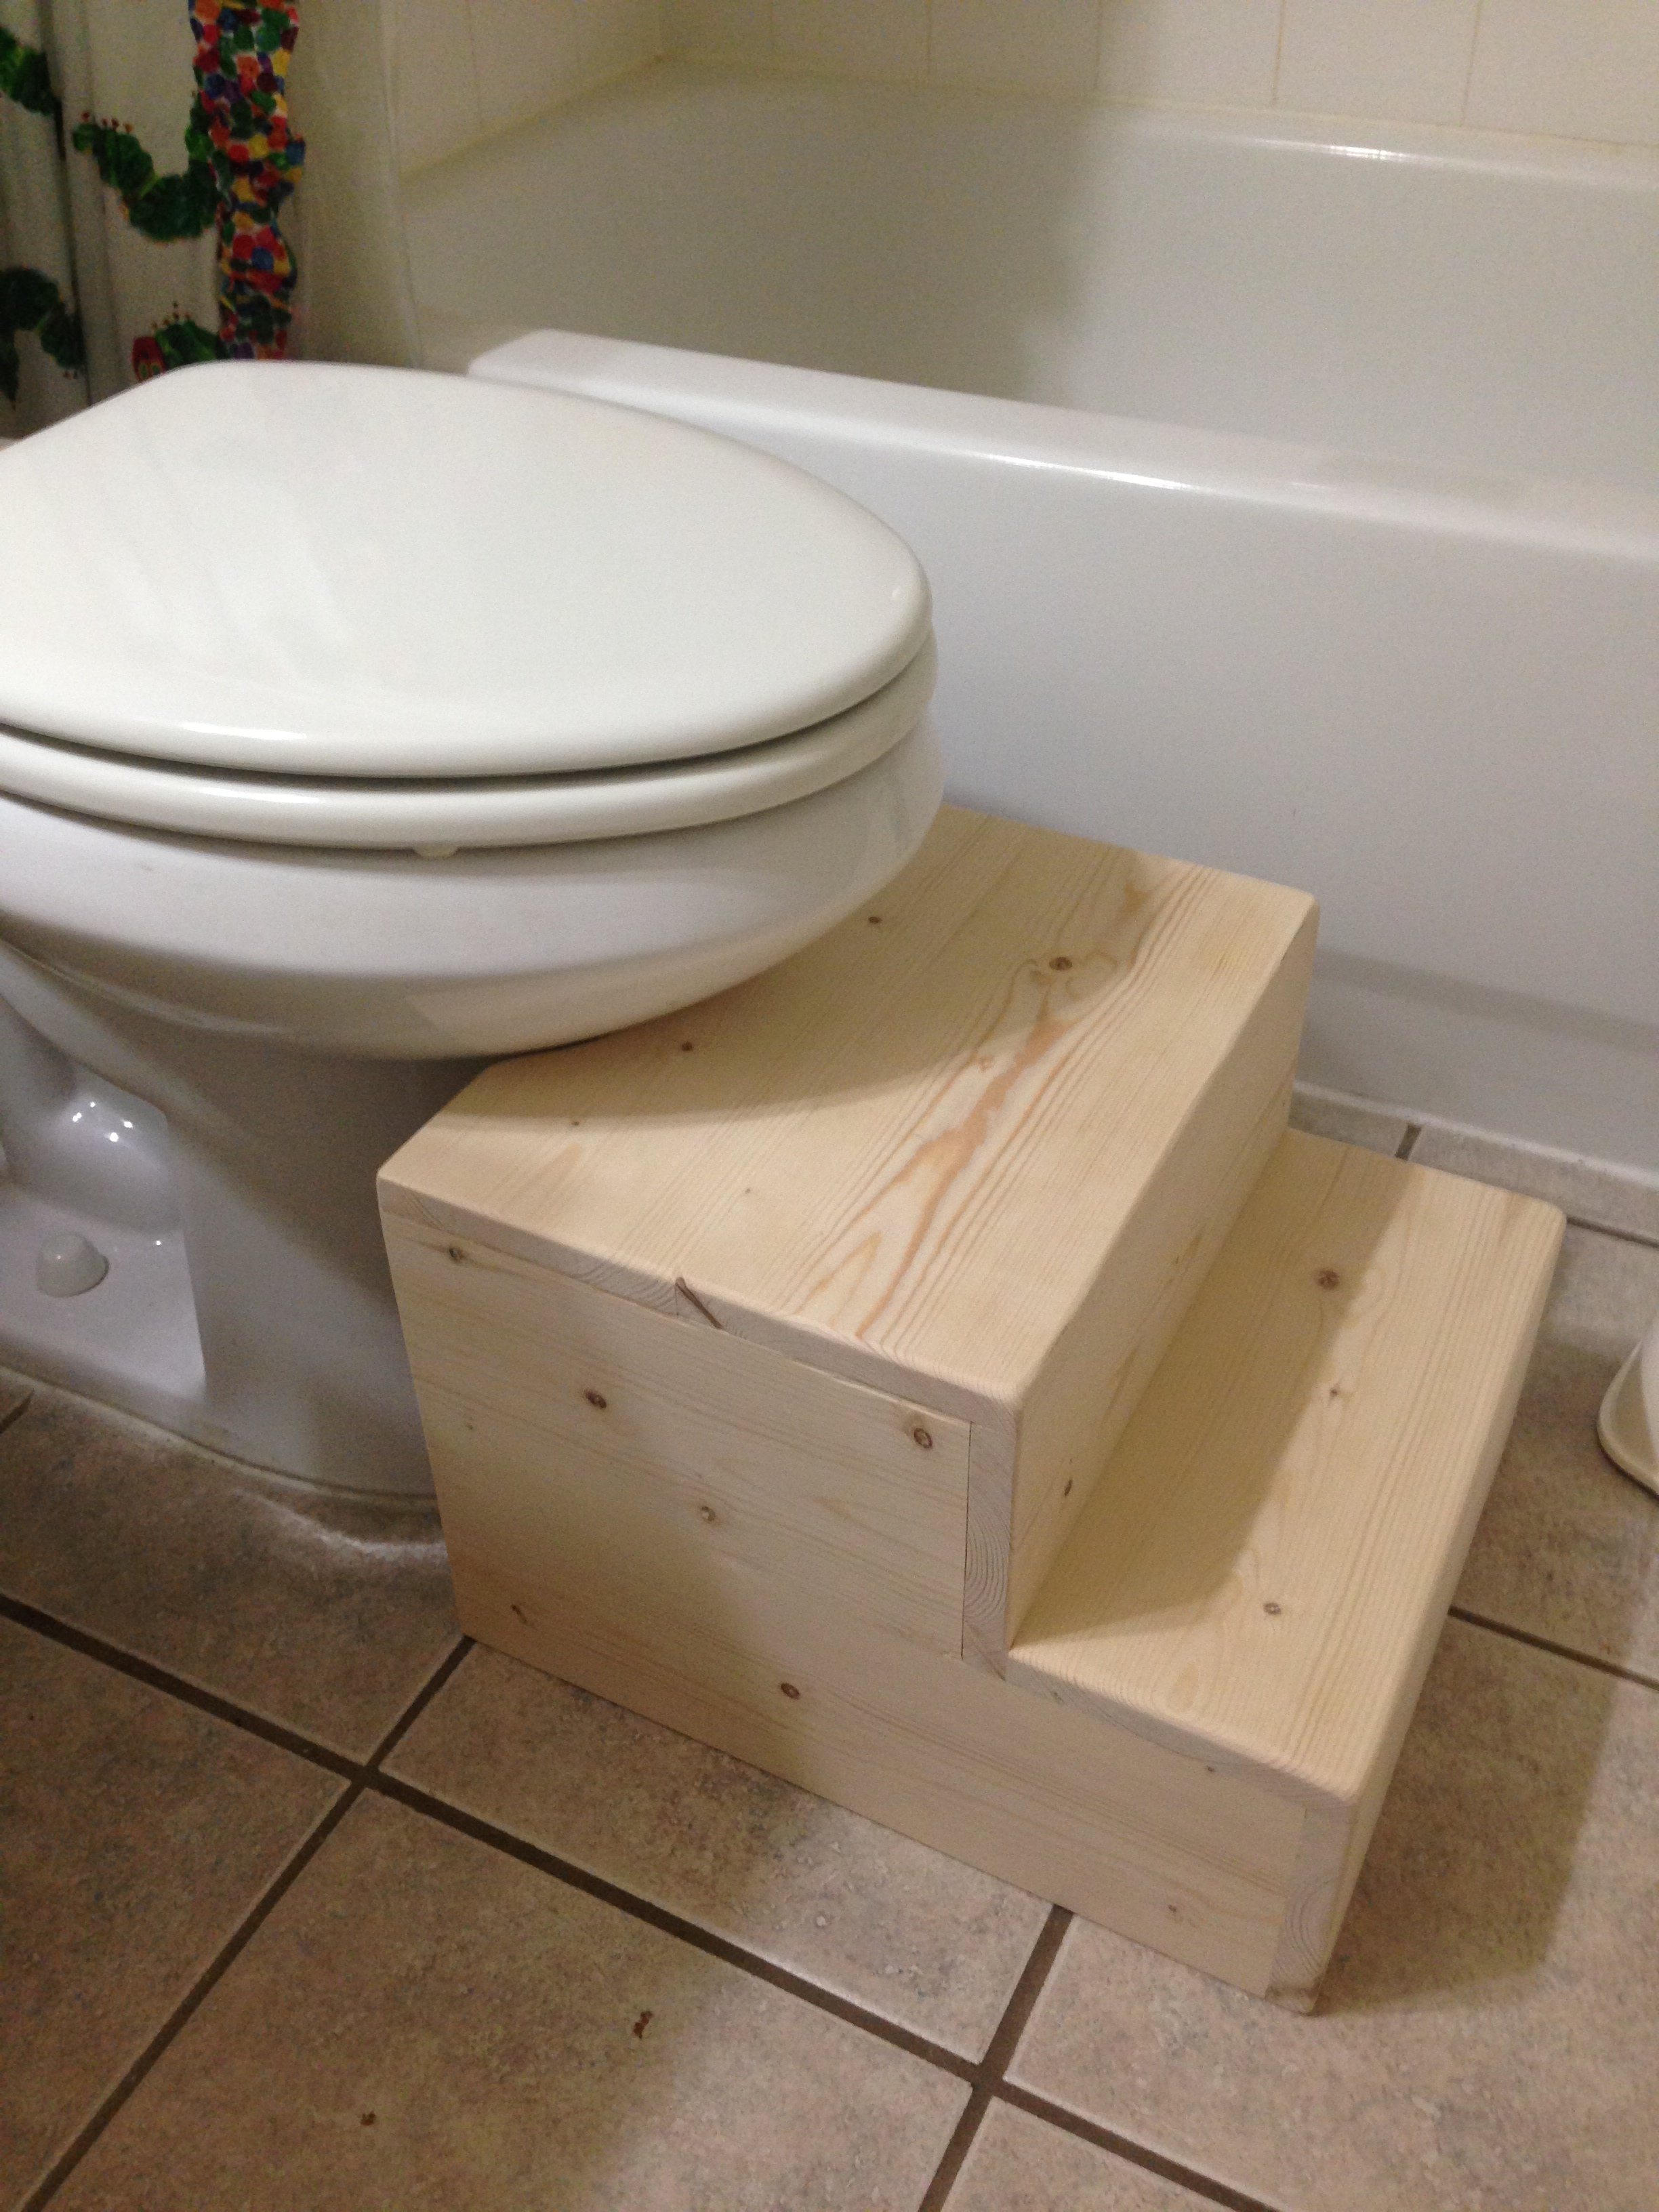
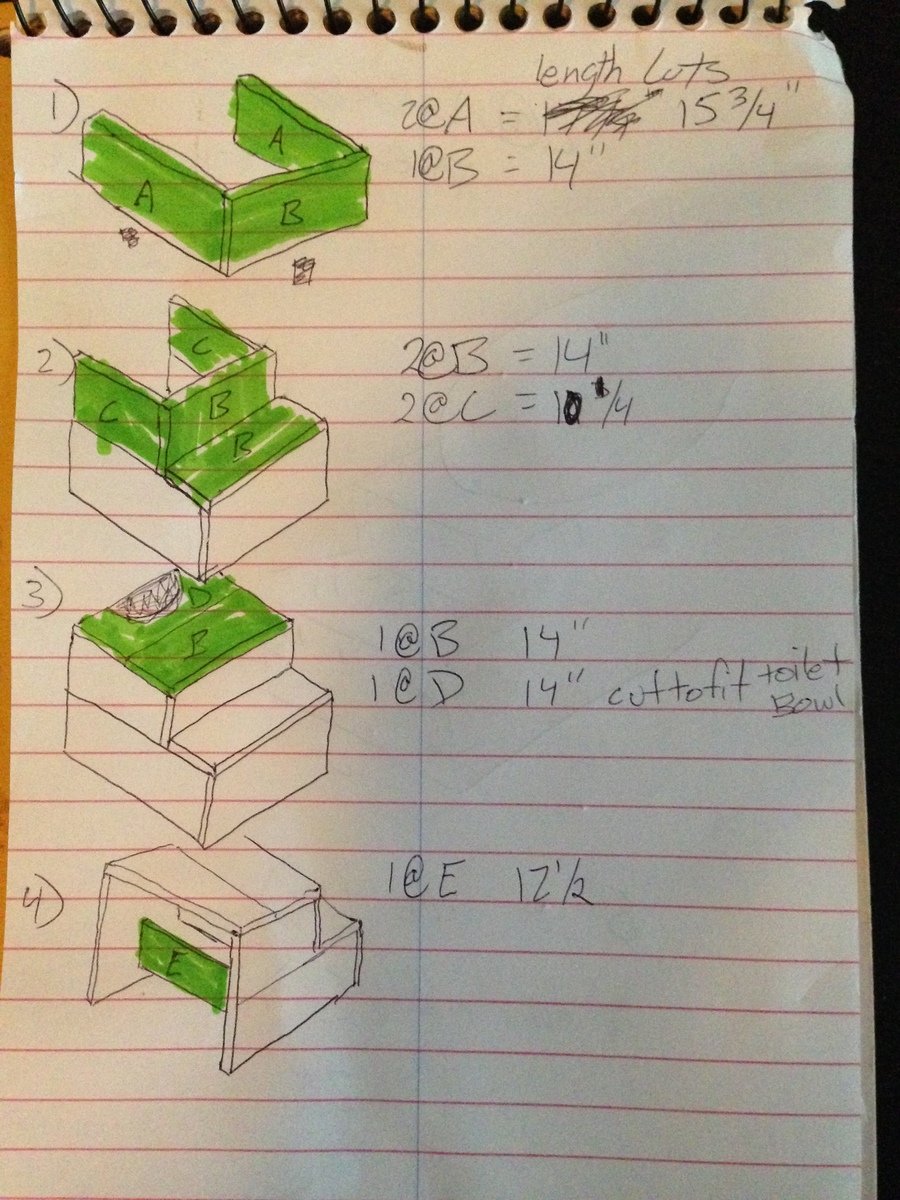
This was my first project at building some sort of furniture. we wanted a stool that really fits out toilet bowl shape, the height, etc. and 2x6's worked perfectly. I could have bought 2x12's for the sides, but it would have cost significantly more and with the inside support board it is plenty sturdy.
I bought 2# 2"x6"x6 foot coarse pine boards from Home Depot (not the expense Select Pine boards. They cost about $6 each. Then I bought a 100 count package of Kreg 1.25" coarse screws.
Cut lengths
2 @ 15 3/4" for lower sides
2 @ 10 1/4" for upper sides
5 @ 14" for steps and fronts
1 @ 12 1/2" for inside support
I used my Kreg Jig and connected all the pieces along with wood glue. I sanded the whole thing down after and tried to round/smooth the corners.

Estimated Cost
$17
Estimated Time Investment
An Hour or Two (0-2 Hours)
Finish Used
none yet.
Recommended Skill Level
Starter Project
Comments
Tue, 03/01/2016 - 10:29
Potty Seat
Does anybody have plans for a potty seat. I would like to build a childs chairs that has a ptty
Cornhole game
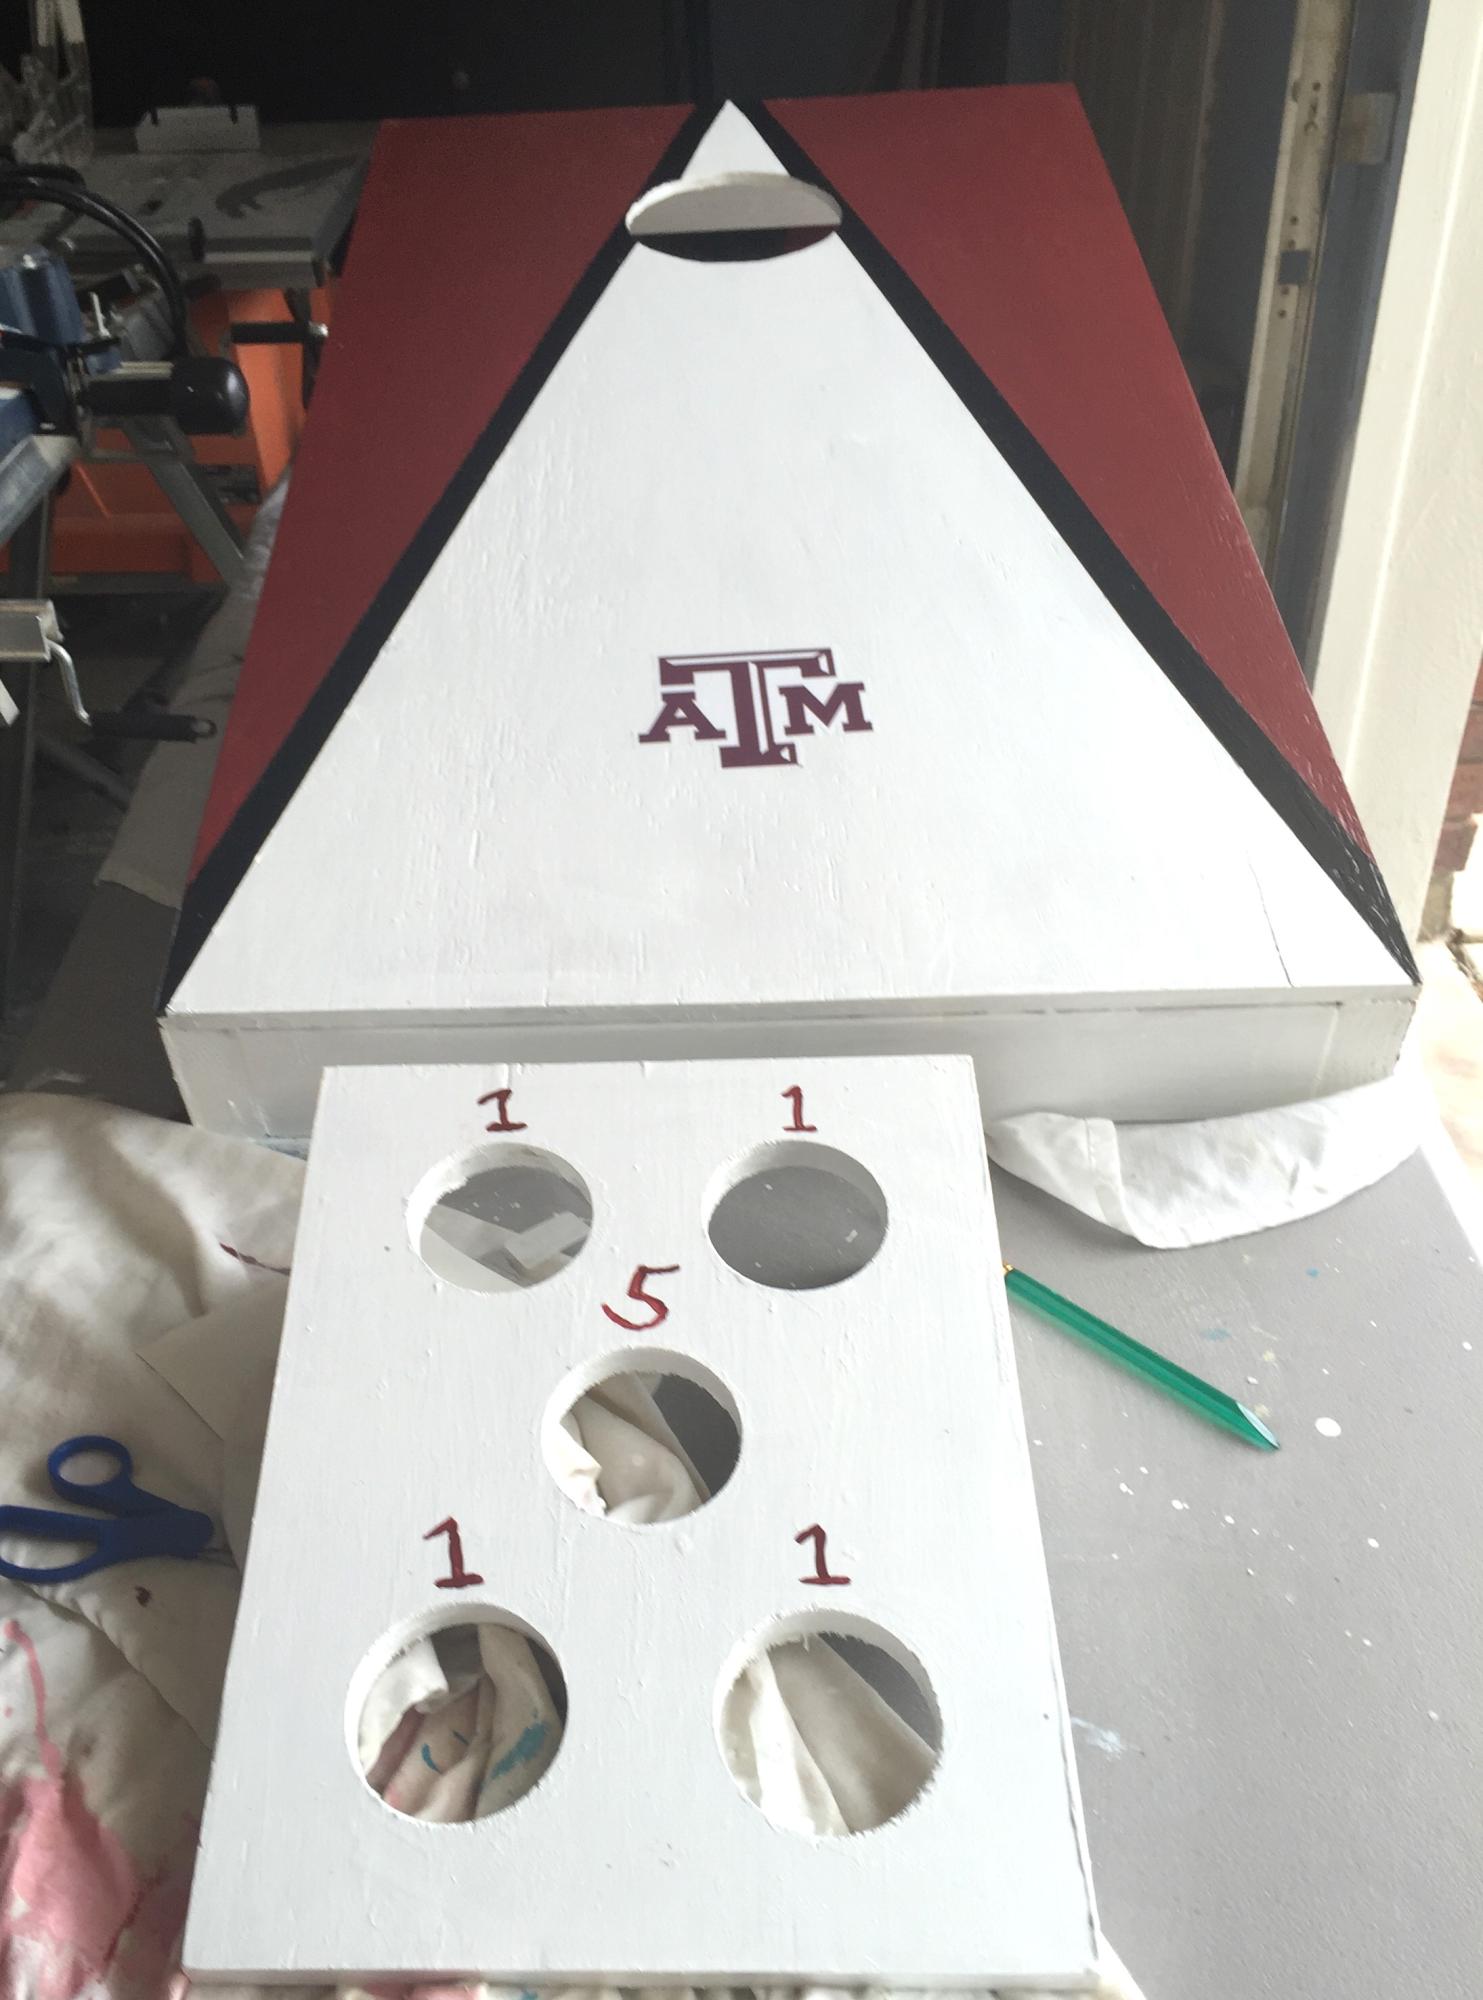
Built this for my son in law. Texas A@m cornhole game and a bonus washer game with the left overs
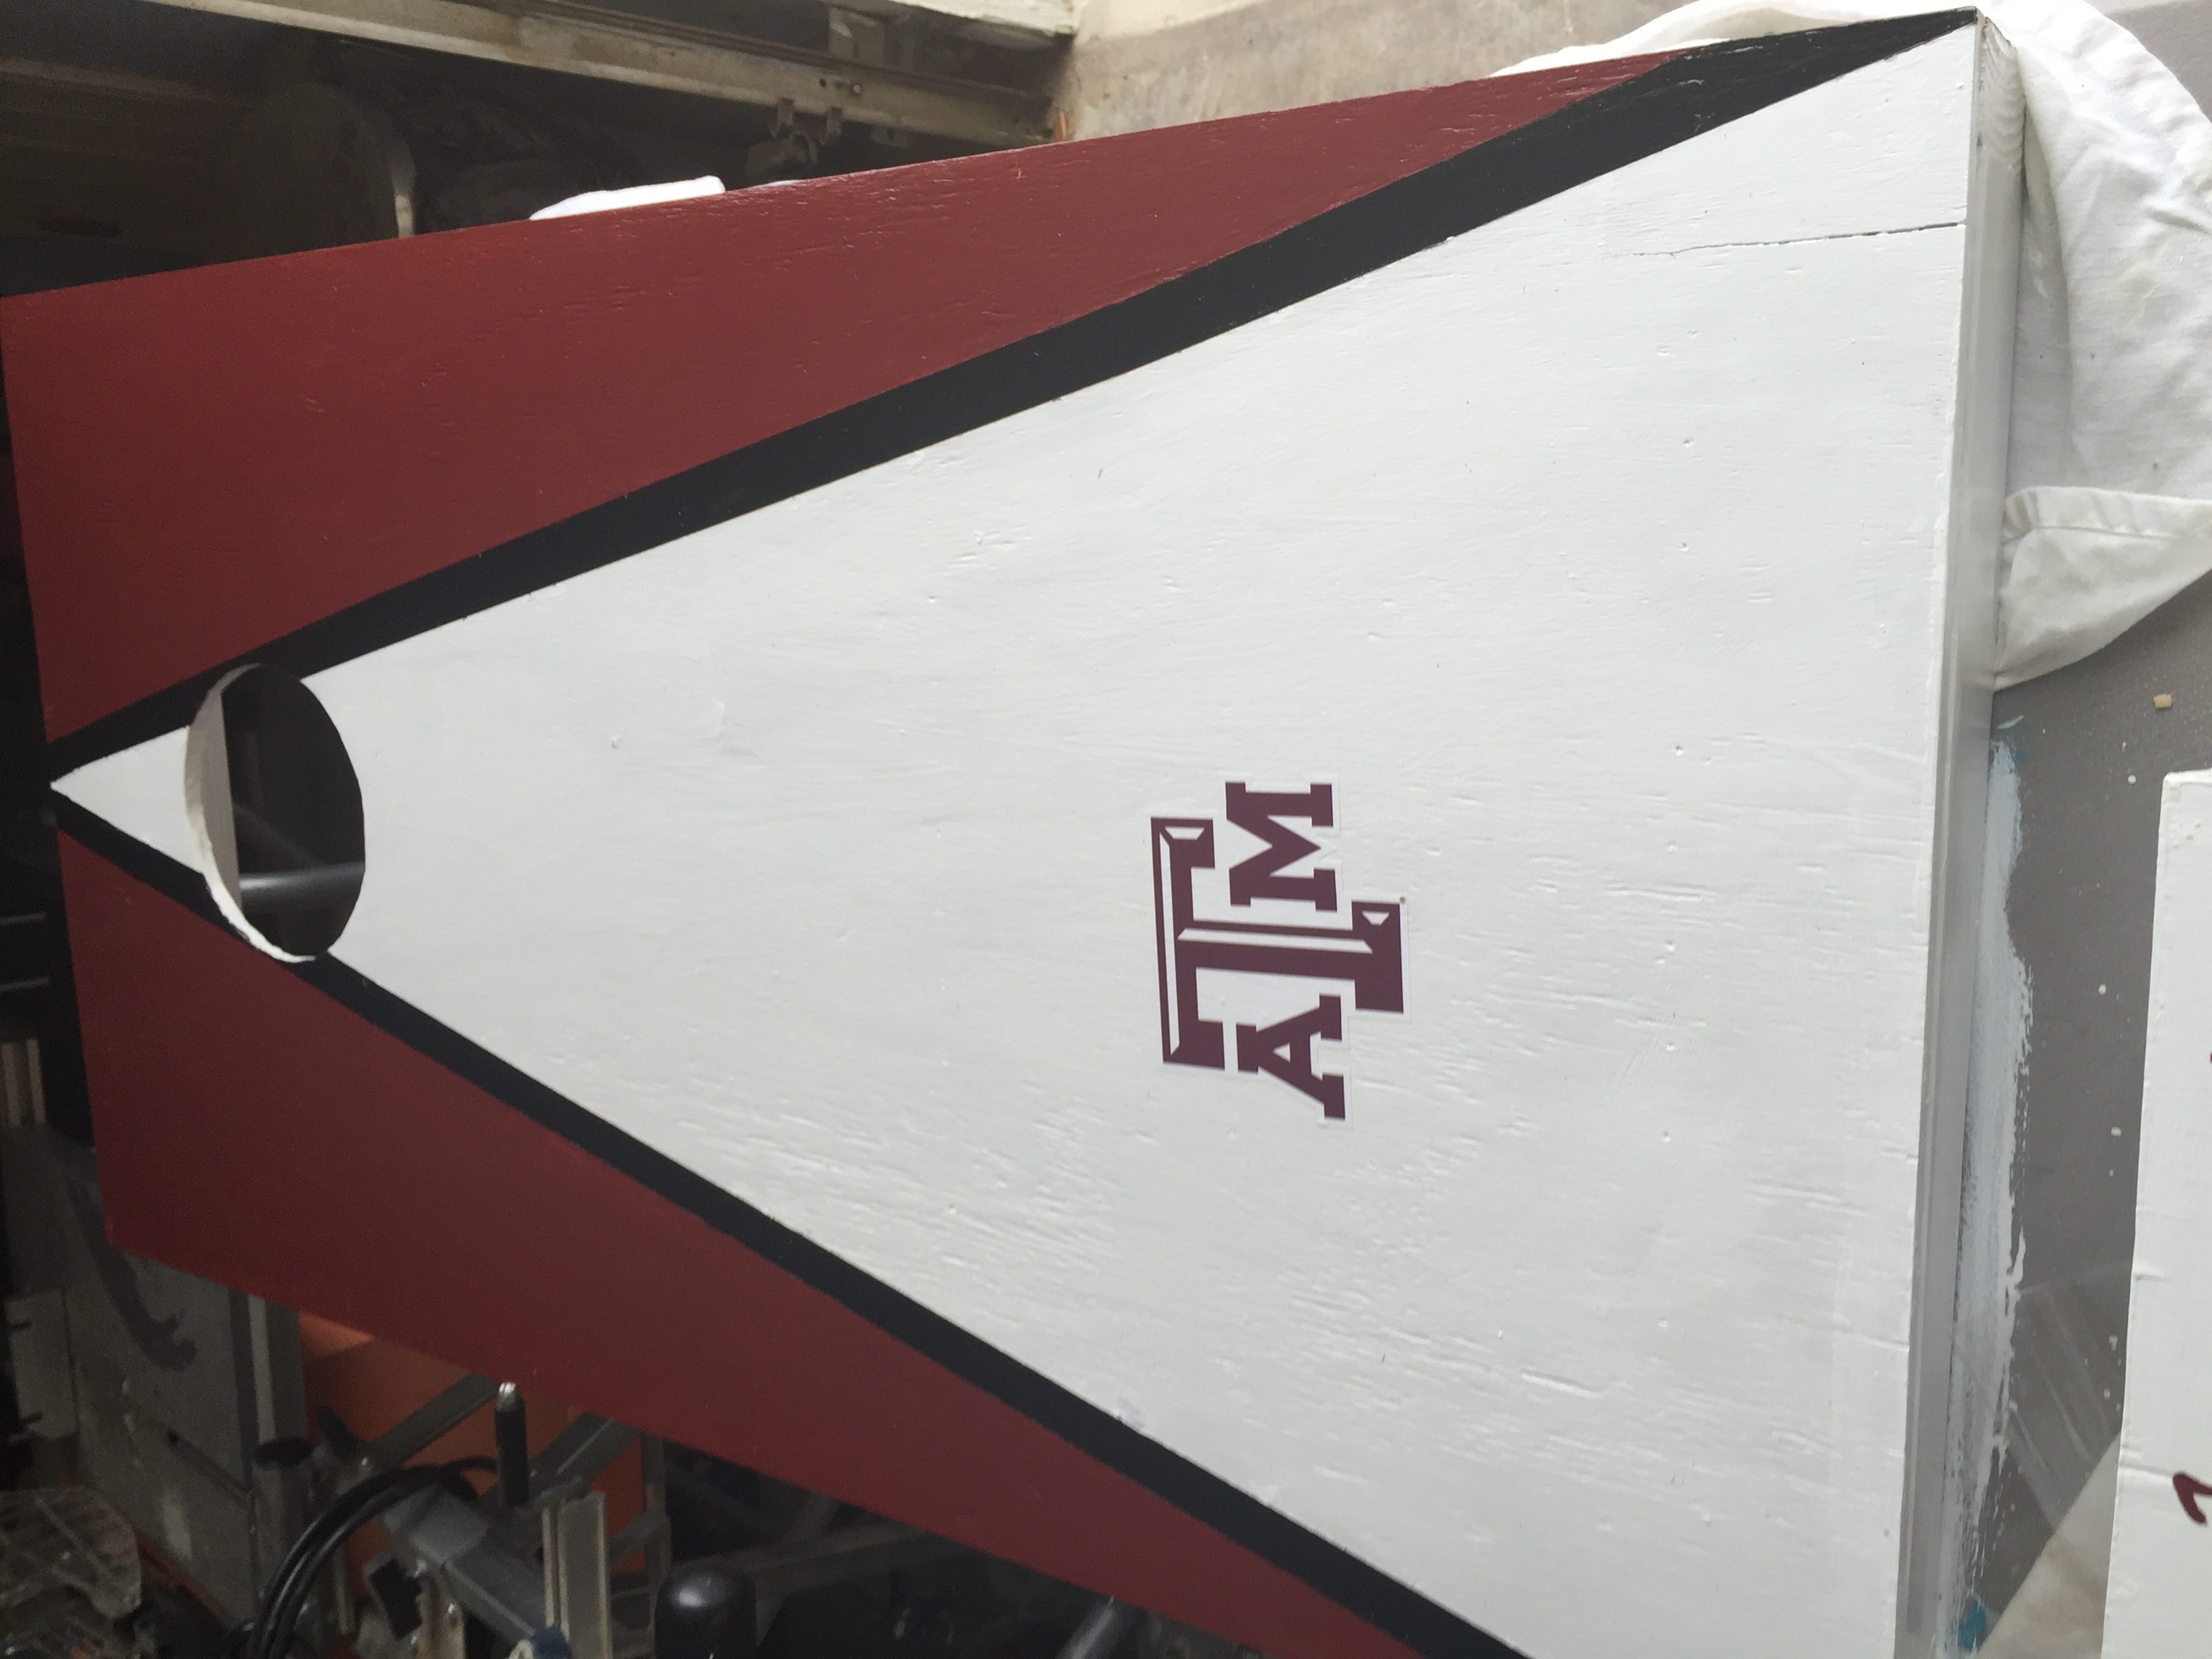
Estimated Cost
35.00! in plywood and two by four. That also is for paint and stickers.
Estimated Time Investment
Afternoon Project (3-6 Hours)
Finish Used
Paint
Recommended Skill Level
Intermediate
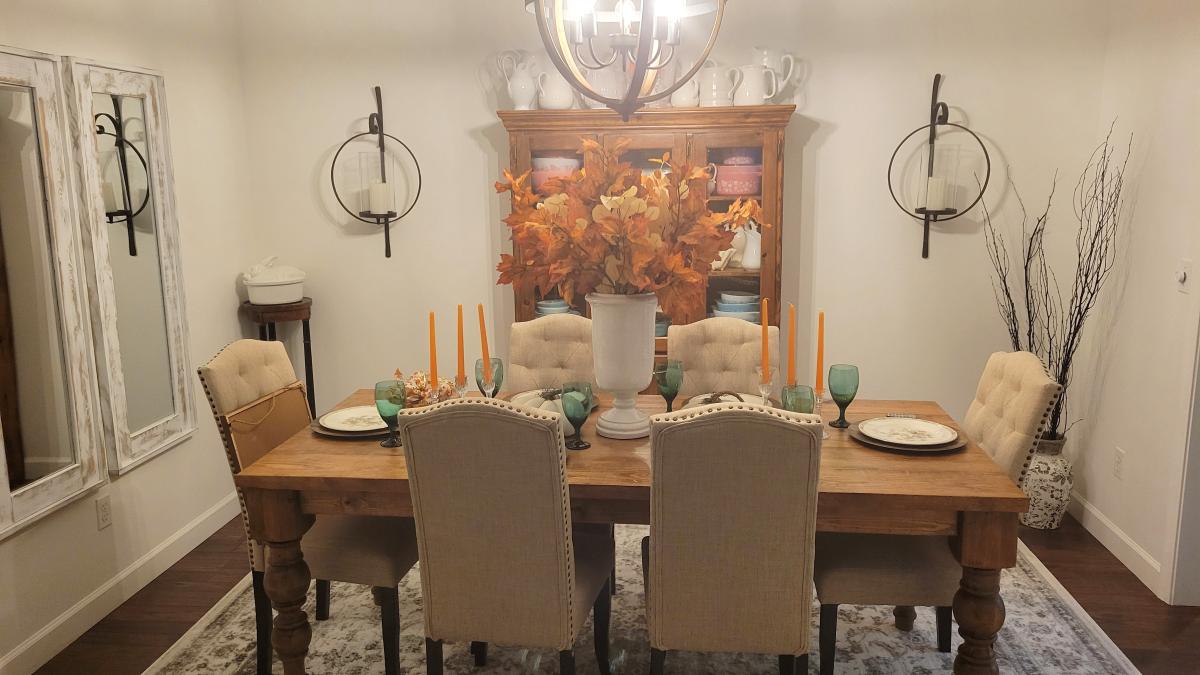
Turned Leg Dining Table
Fancy turned leg dining table.
Built from Plan(s)
Apothecary Console
My husband and I decided to make an entertainment center from the Apothecary Console plans. We mostly followed the plans, but wanted it to be taller than the original in case we want to use it in a dining room as a buffet in the future. To do this we just added another level of drawers. I wanted the drawers on the bottom to be wider, so each of them is four false front's wide. The wood on top is walnut from some trees my dad cut down over 25 years ago. We wanted more of this to show than would have if we followed the original plan, so we put a two inch trim piece around it. I really wanted card catalogue drawer pulls but couldn't find any that were dark that were at all "cheap"...so I bought gold ones online and spray painted them with a "hammered" spray paint which worked really well.
Built from Plan(s)
Estimated Time Investment
Week Long Project (20 Hours or More)
Finish Used
Pittsburgh Paint--Latex--"Highest Peak"
Walnut on top: Minwax Polycrylic
Drawer Pulls: Rustoleum "Hammered" in Brown
Also, I very slightly sanded the edges of the false drawer fronts and then used coffee grounds to darken the wood a little bit. It's not very noticable, but without doing it I thought it all blended together too much.
Walnut on top: Minwax Polycrylic
Drawer Pulls: Rustoleum "Hammered" in Brown
Also, I very slightly sanded the edges of the false drawer fronts and then used coffee grounds to darken the wood a little bit. It's not very noticable, but without doing it I thought it all blended together too much.
Recommended Skill Level
Intermediate
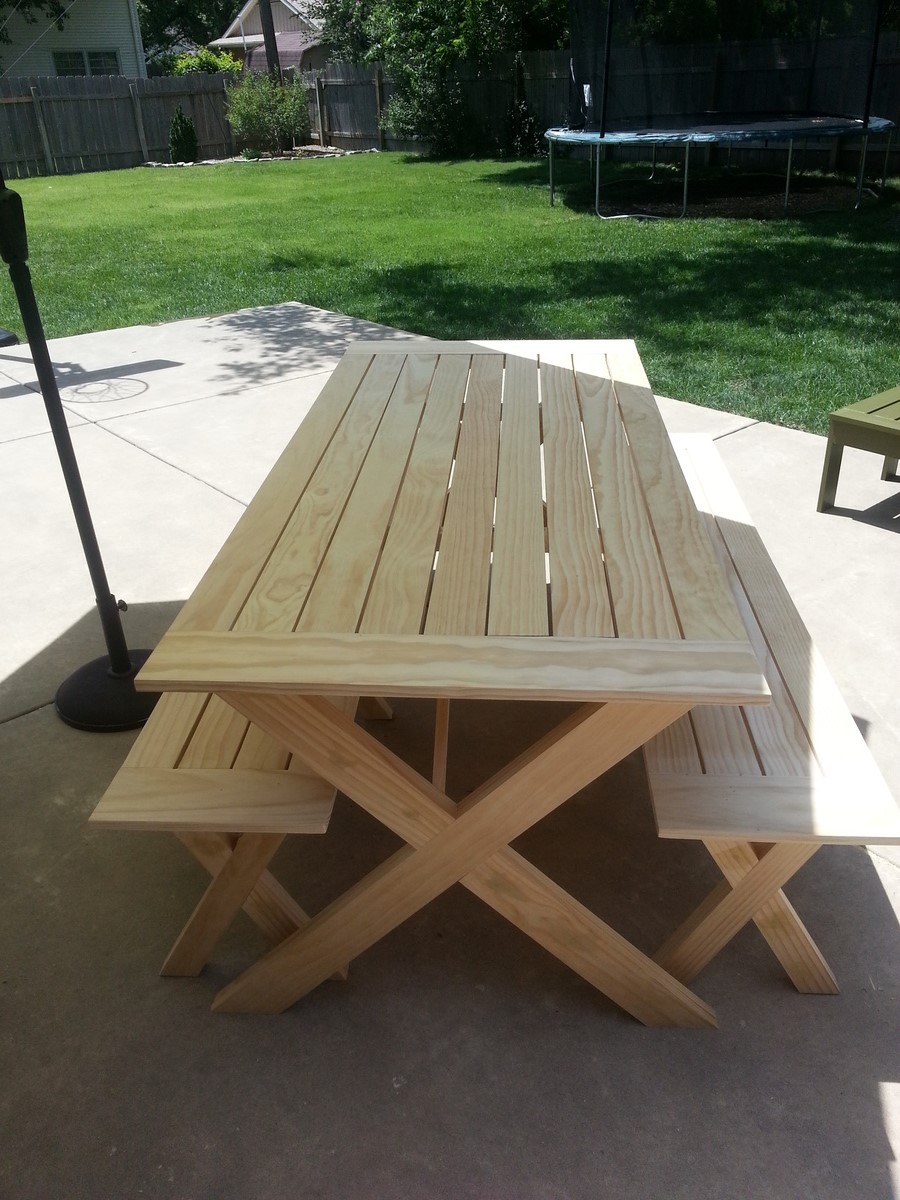
Big Kids Picnic Table
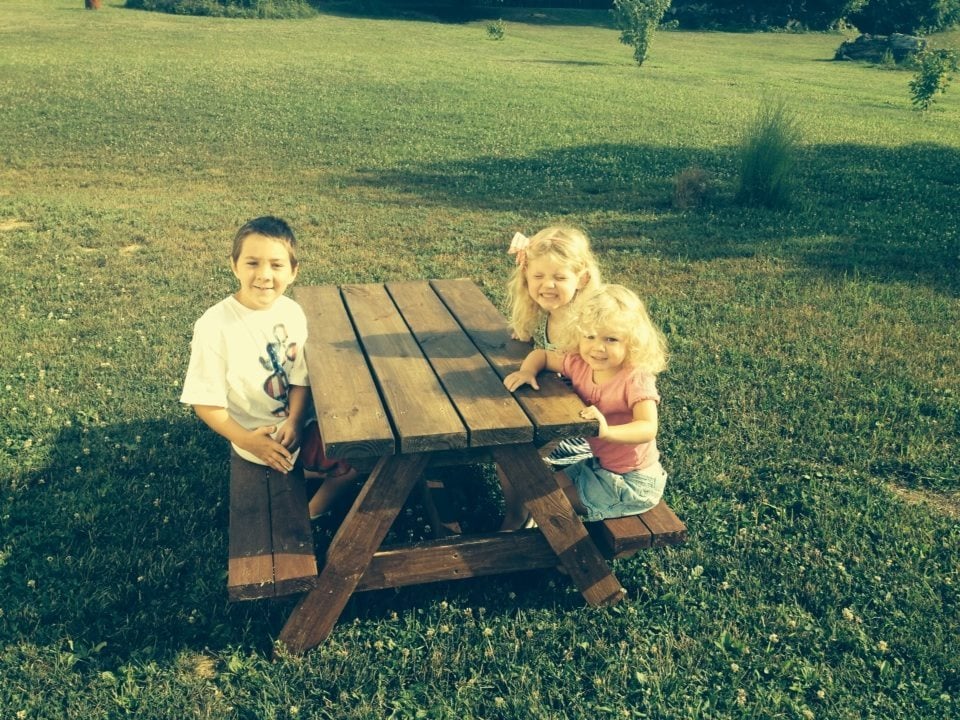
I built this table in one day by myself. Well, just me and these three kiddos. We were at Home Deopt selecting wood at 9am and by 7pm they were sitting on a finished table. Thank you so much for the easy to follow plans, Anna!
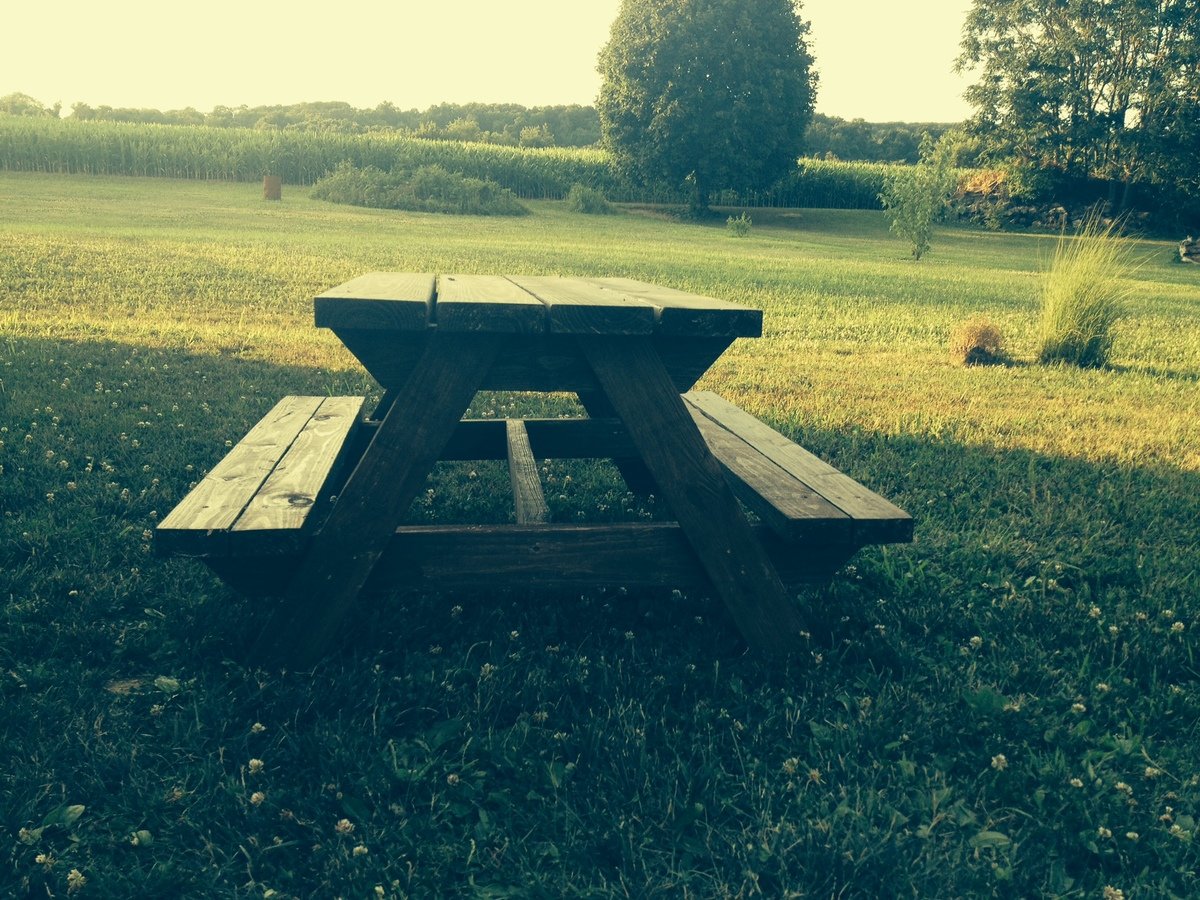

Built from Plan(s)
Estimated Cost
$40
Estimated Time Investment
Day Project (6-9 Hours)
Finish Used
I used a hodge podge of three different kinds of stain that we had in the garage. Each board is slightly different. I like the final look that gave, actually.
Recommended Skill Level
Beginner
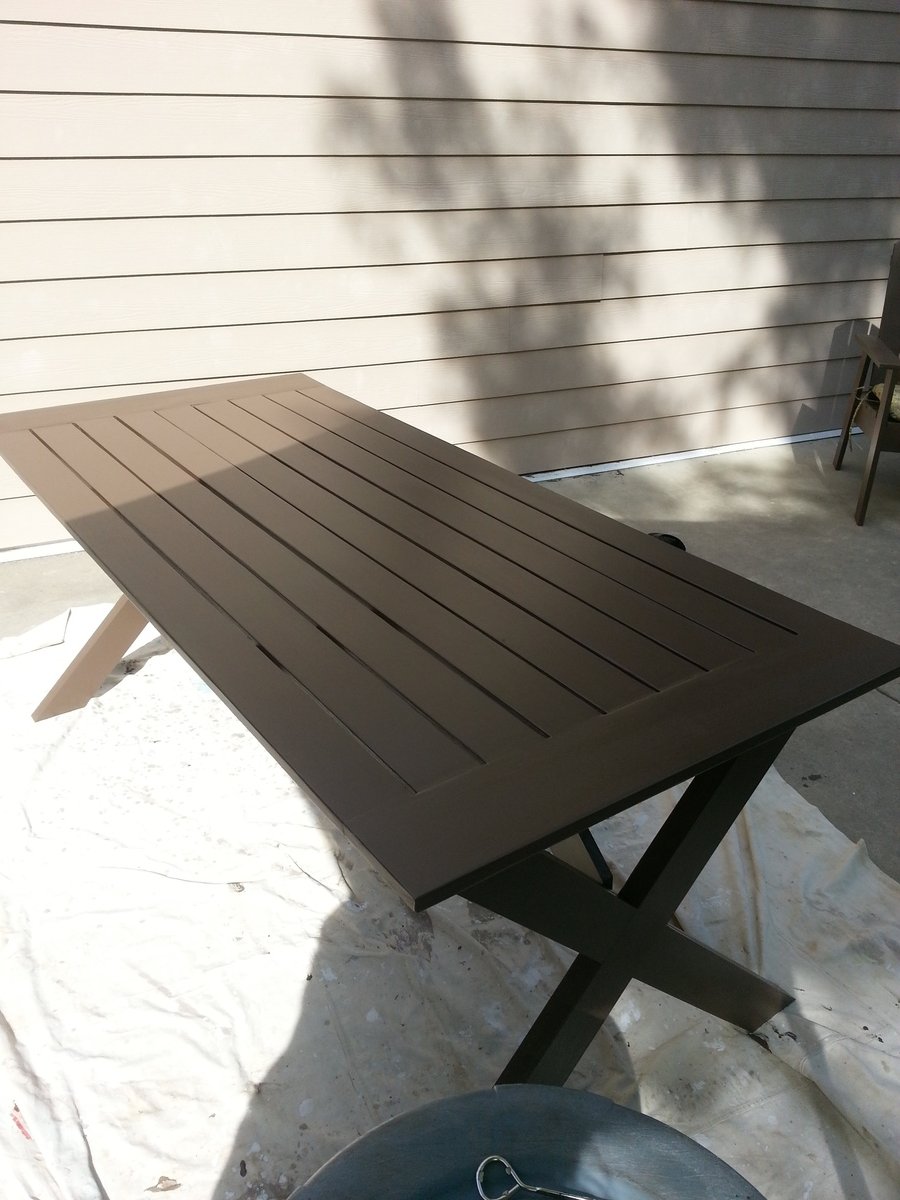
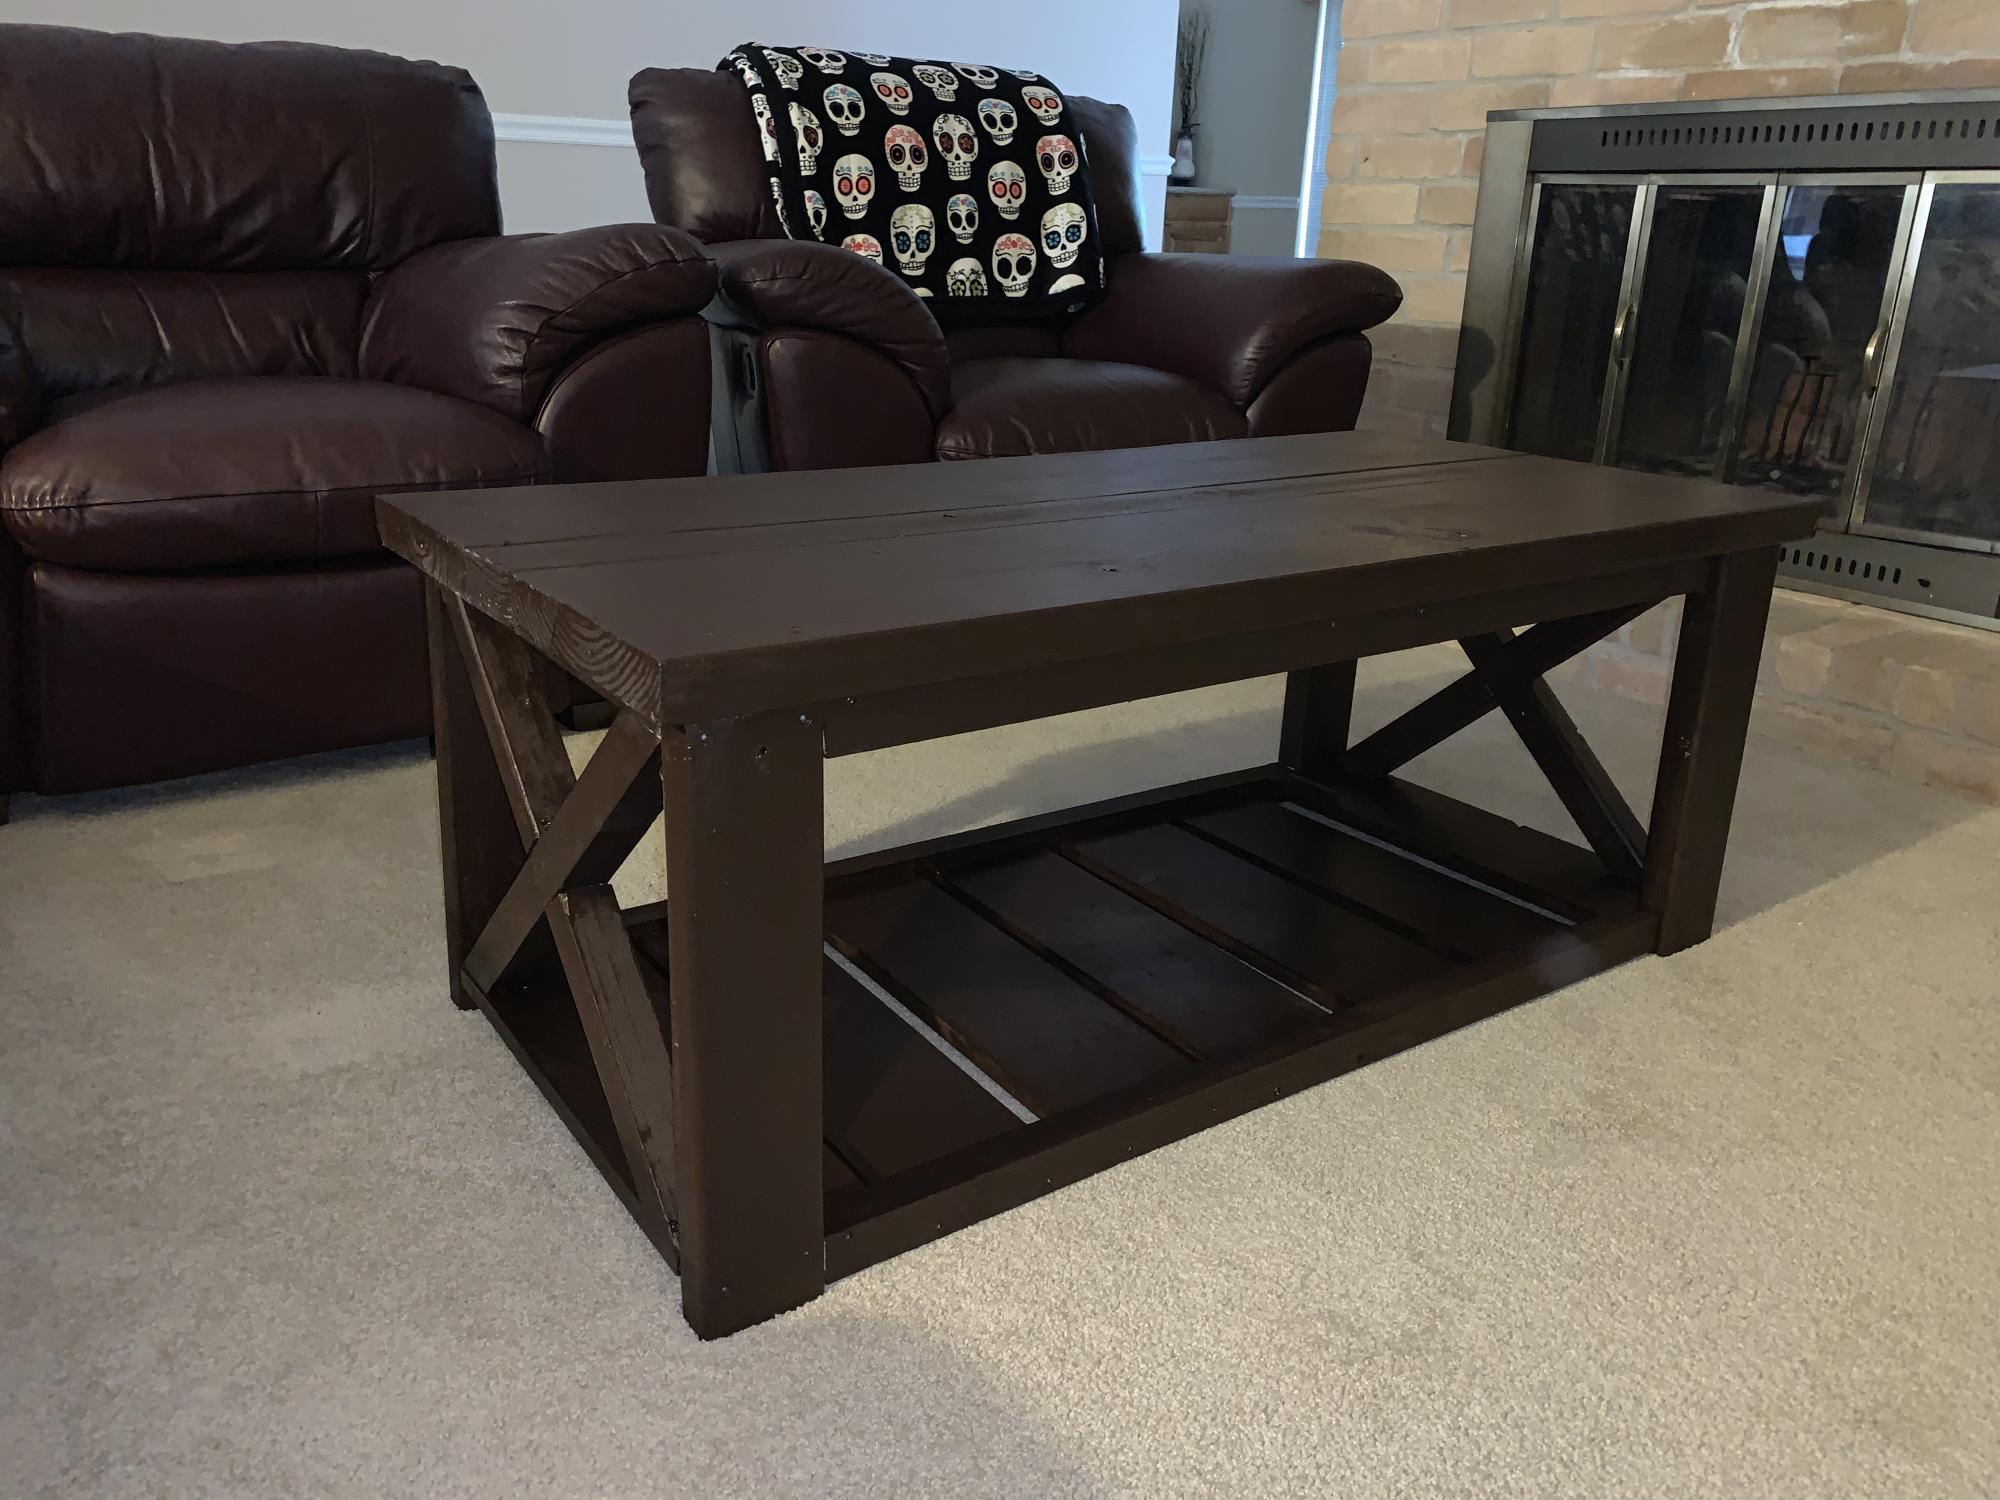
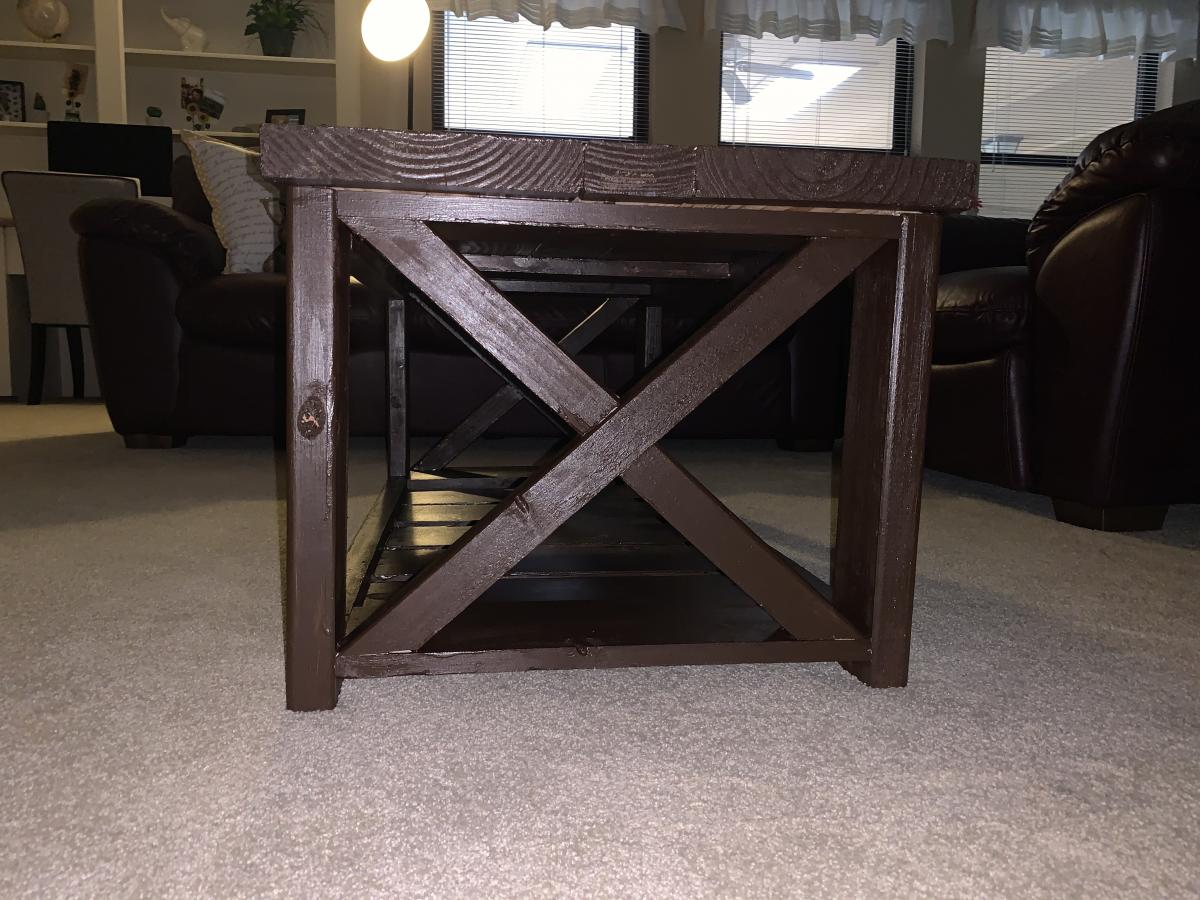
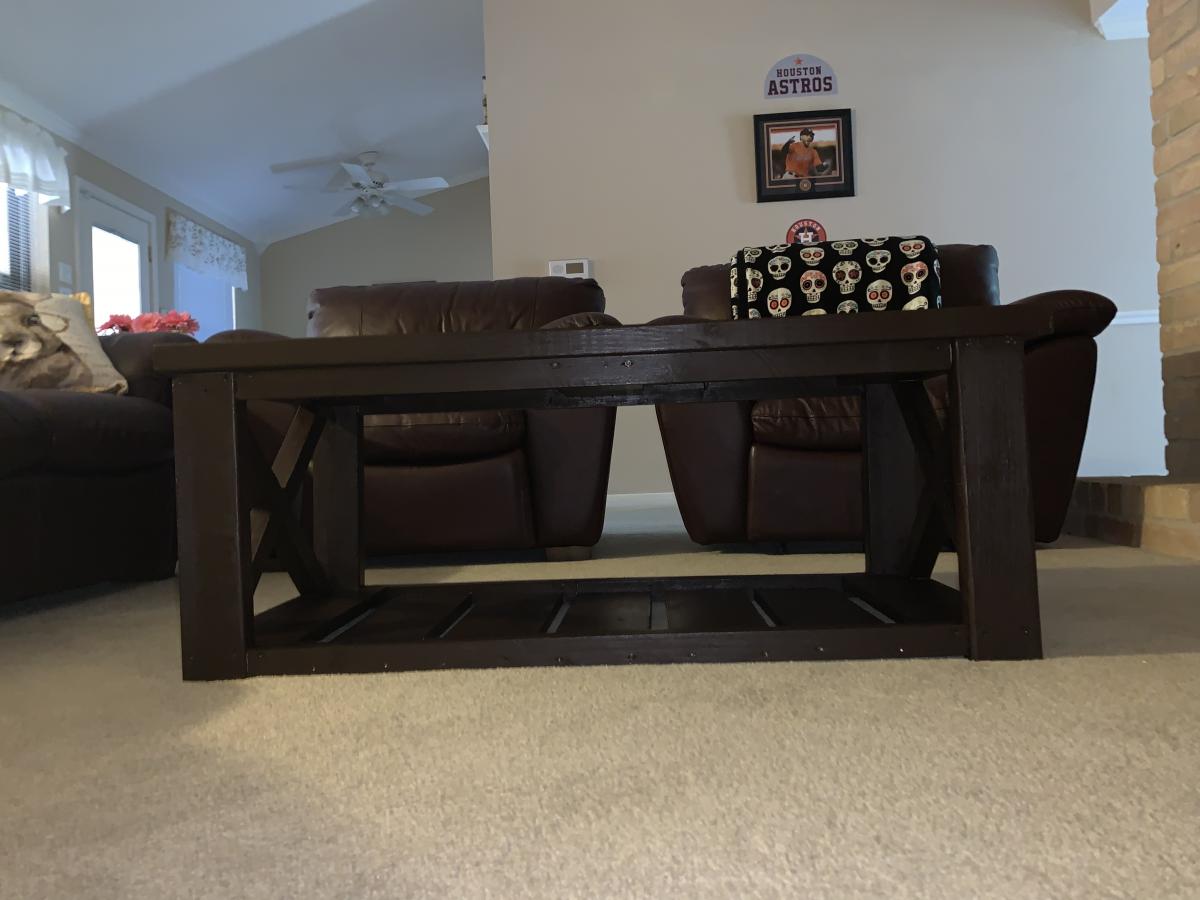
Rustic X Coffee Table
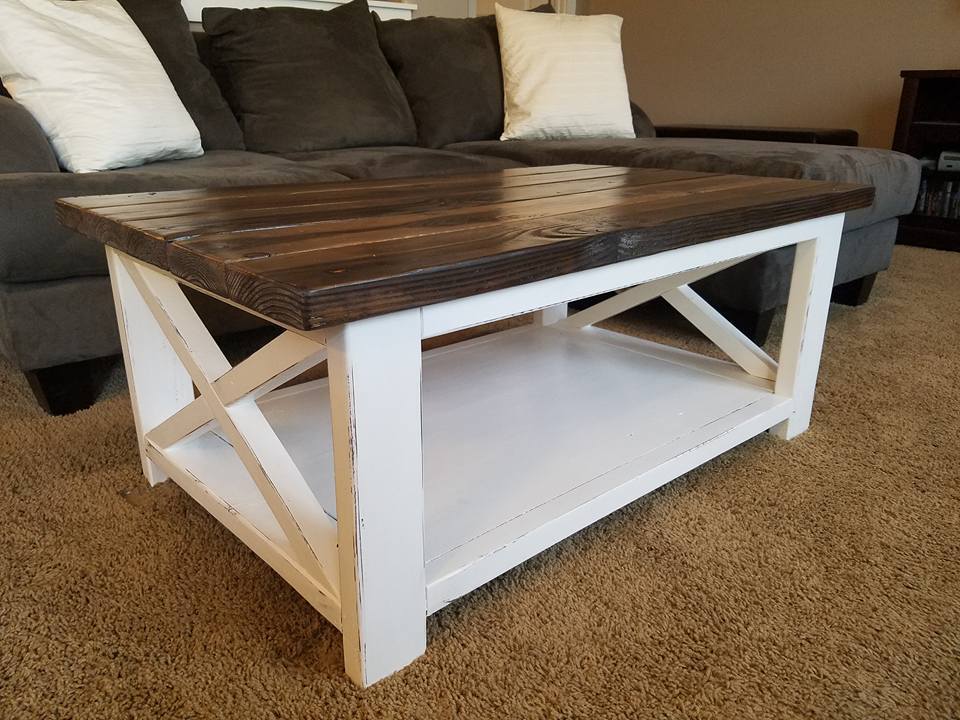
I had already built the Rustic X End Tables, and 3 years later I finally built the Rustic X Coffee Table to match! I shorted the length by 8" and coated the whole piece in a steel wool and vinegar solution. I then went back and used White Adirondack chalk paint by Folk Art for the base. I sanded the edges lightly for the distressing and put 3 coats of Minwax Matte Polyurethane over the entire piece for the top coat. I ended up putting 2 large wicker baskets underneath for extra storage and it is perfect!
Built from Plan(s)
Estimated Cost
$60-$100
Estimated Time Investment
Weekend Project (10-20 Hours)
Finish Used
Steel wood & Vinegar, White Adirondack chalk paint by Folk Art, Minwax Matt Polyurethane
Recommended Skill Level
Beginner
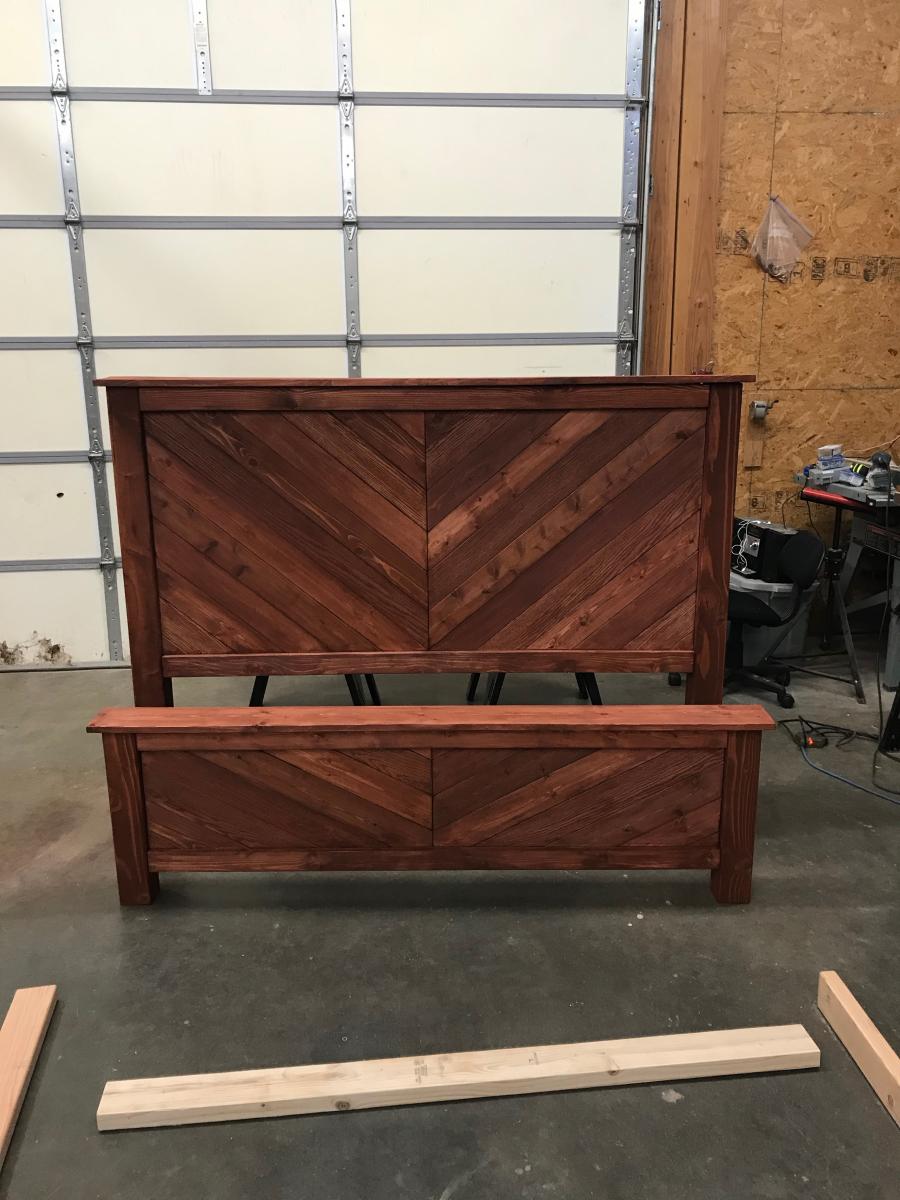
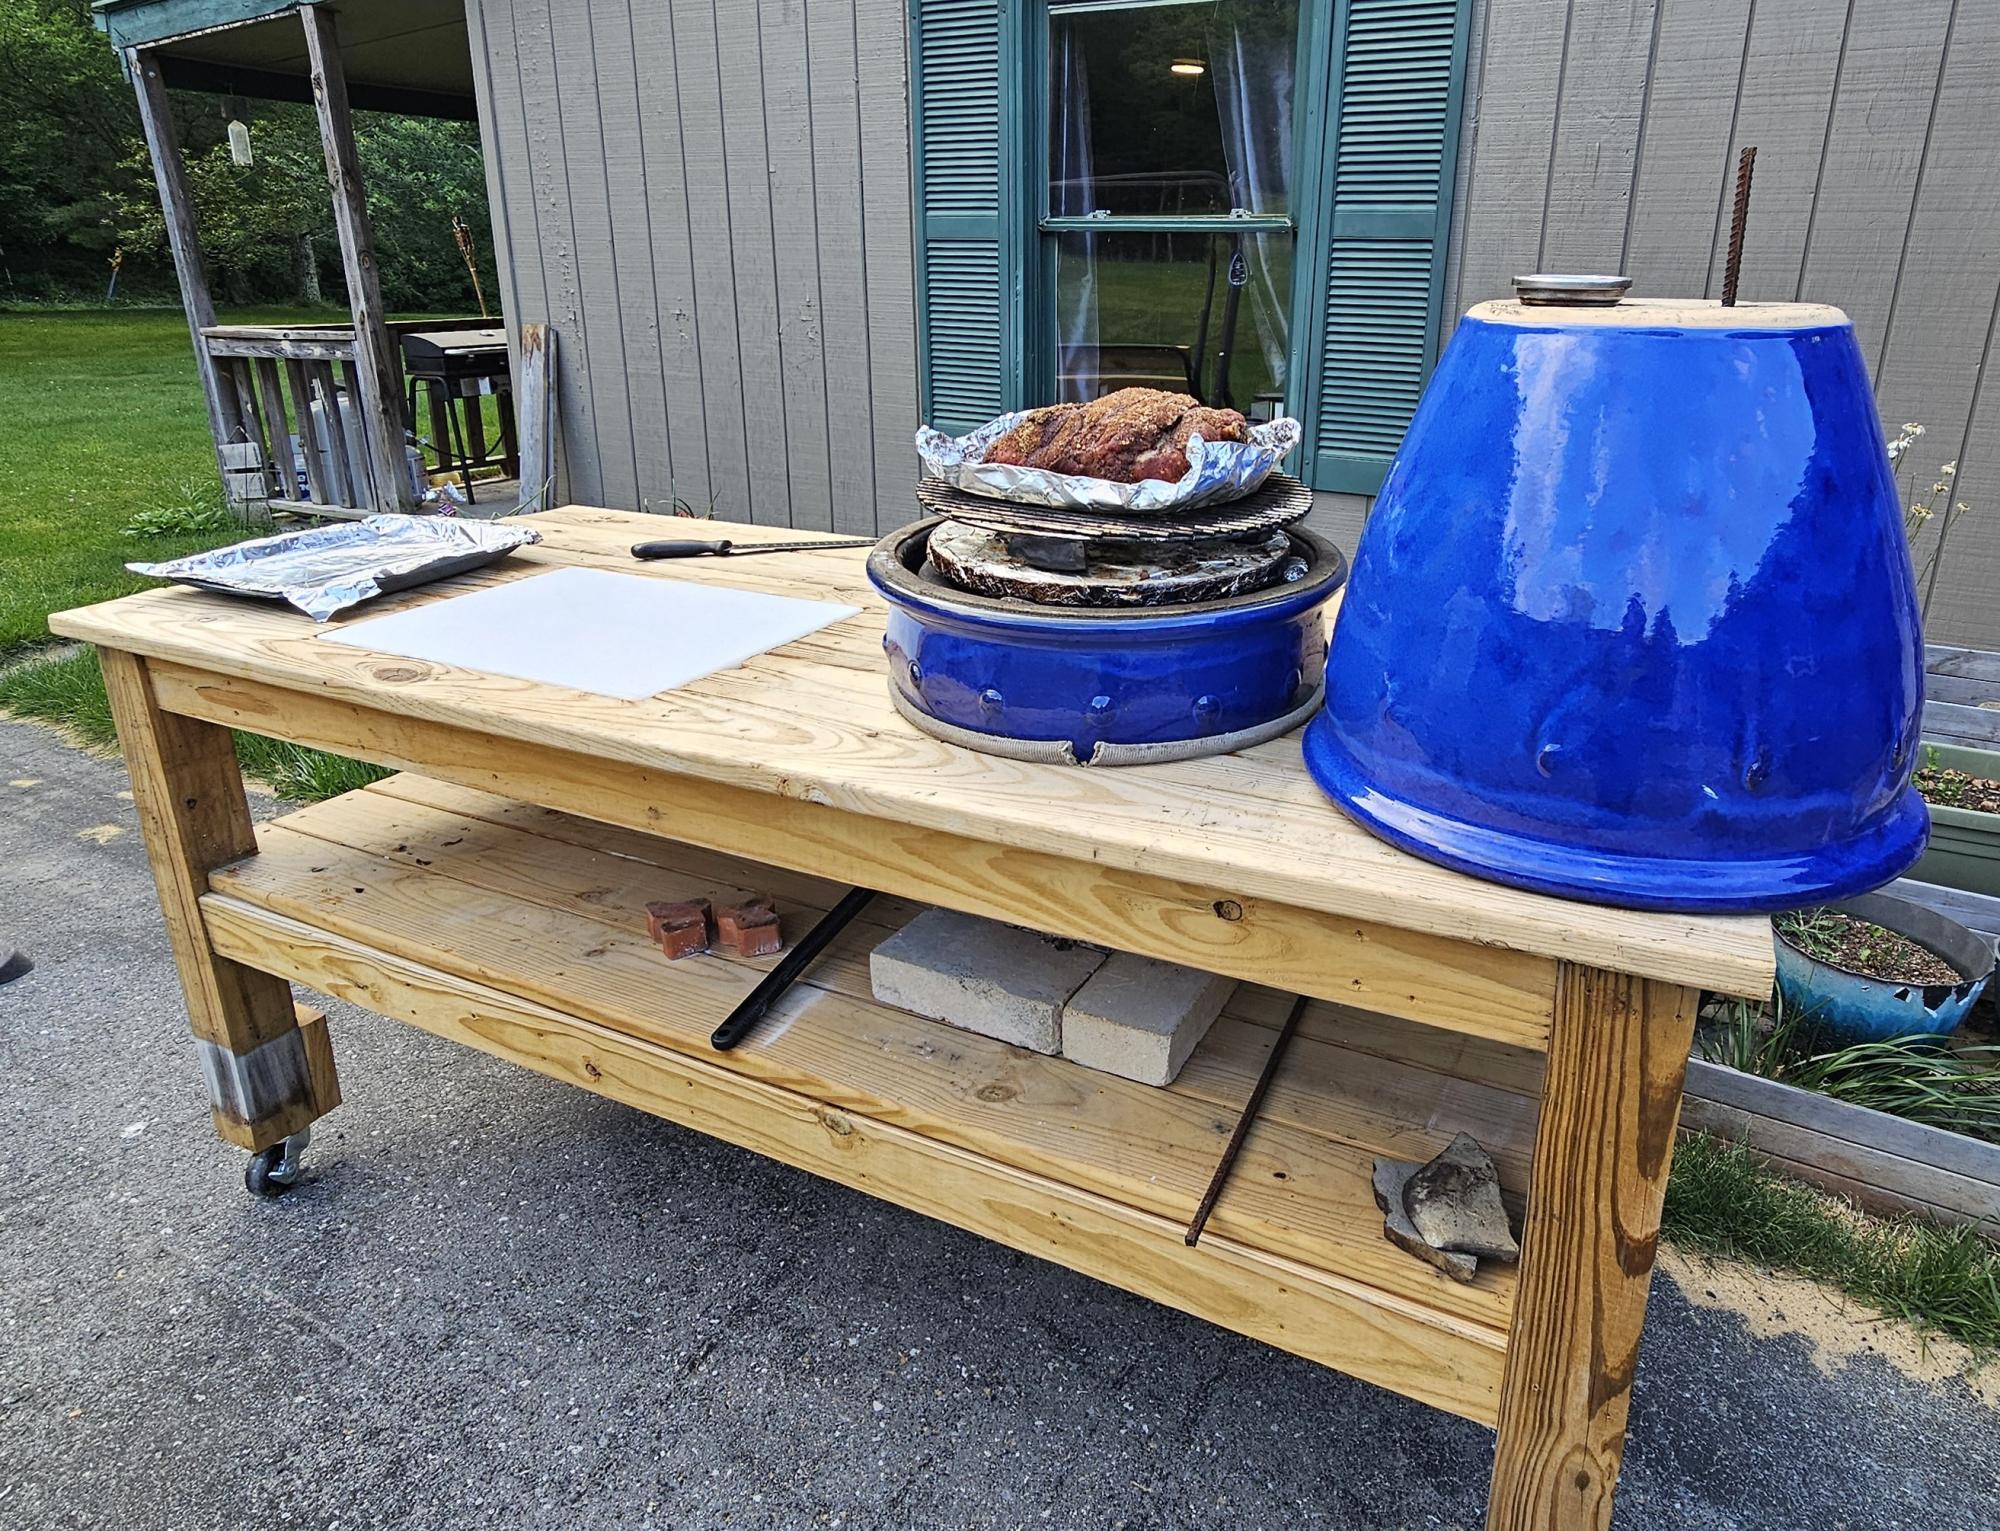
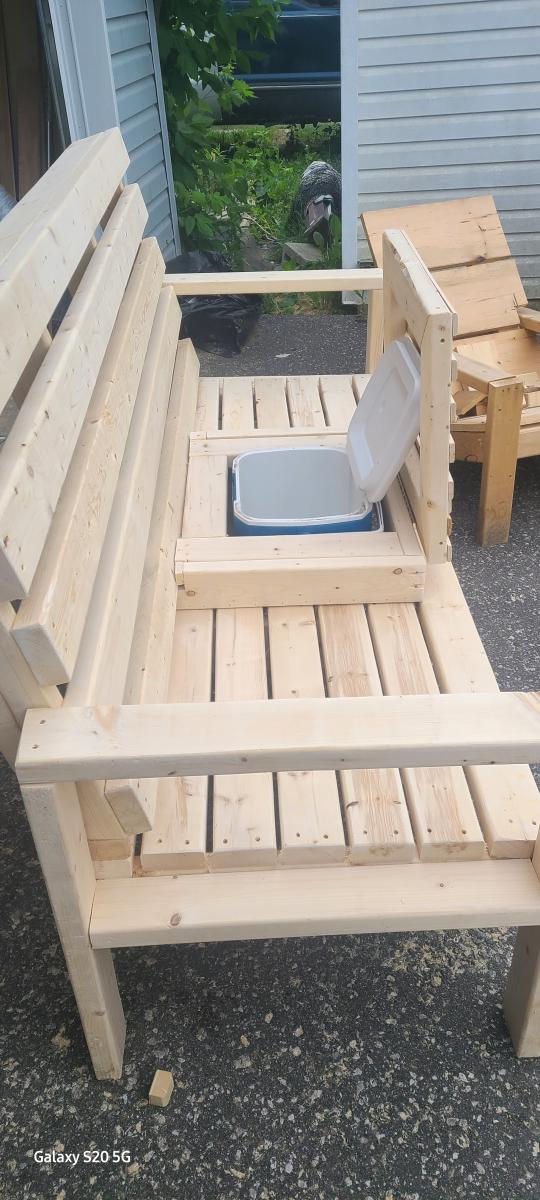
Bench with Mini Cooler Holder
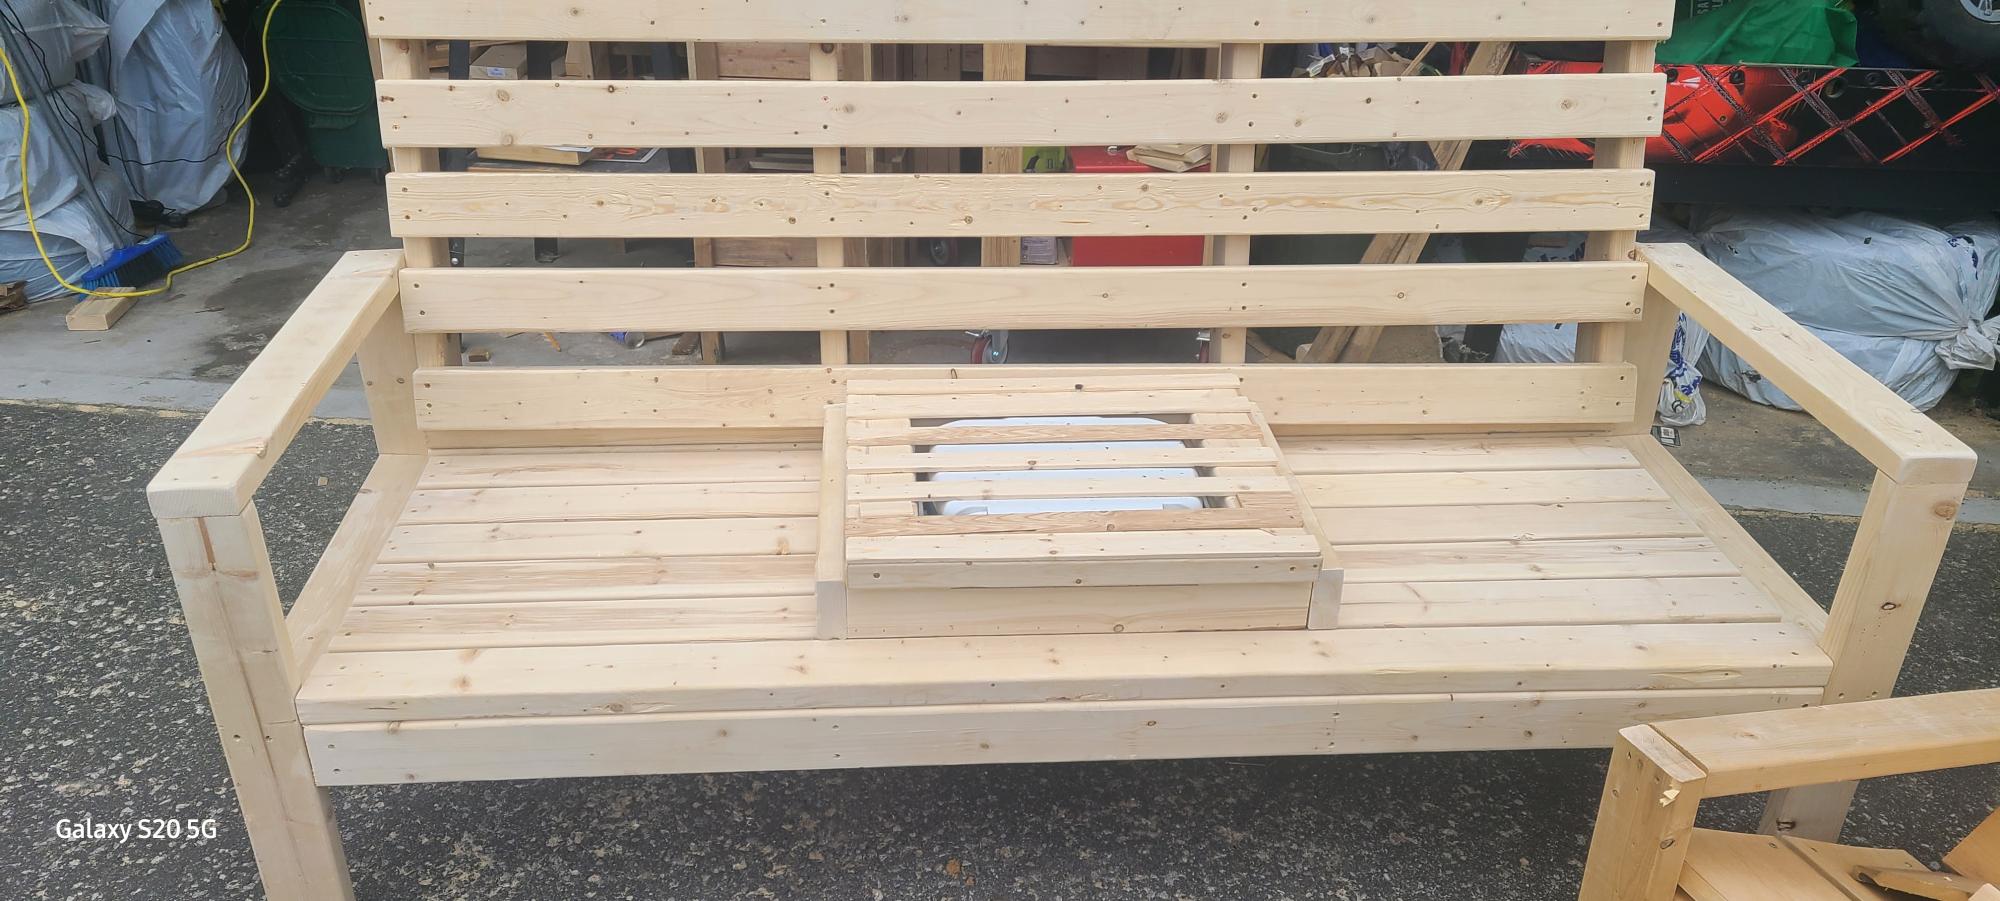
Took your bench and used center to hold the mini cooler ,u-type frames fastened to 2x4 in bench frame underneath. all 2x4 with the exception of flip top which is 2x4 cut down on either side then the remainder cut again and sanded to give rounded edges. Mitre saw, table saw, 18 gauge brad nails around edges of top bench side and to fasten straps down covering cooler.

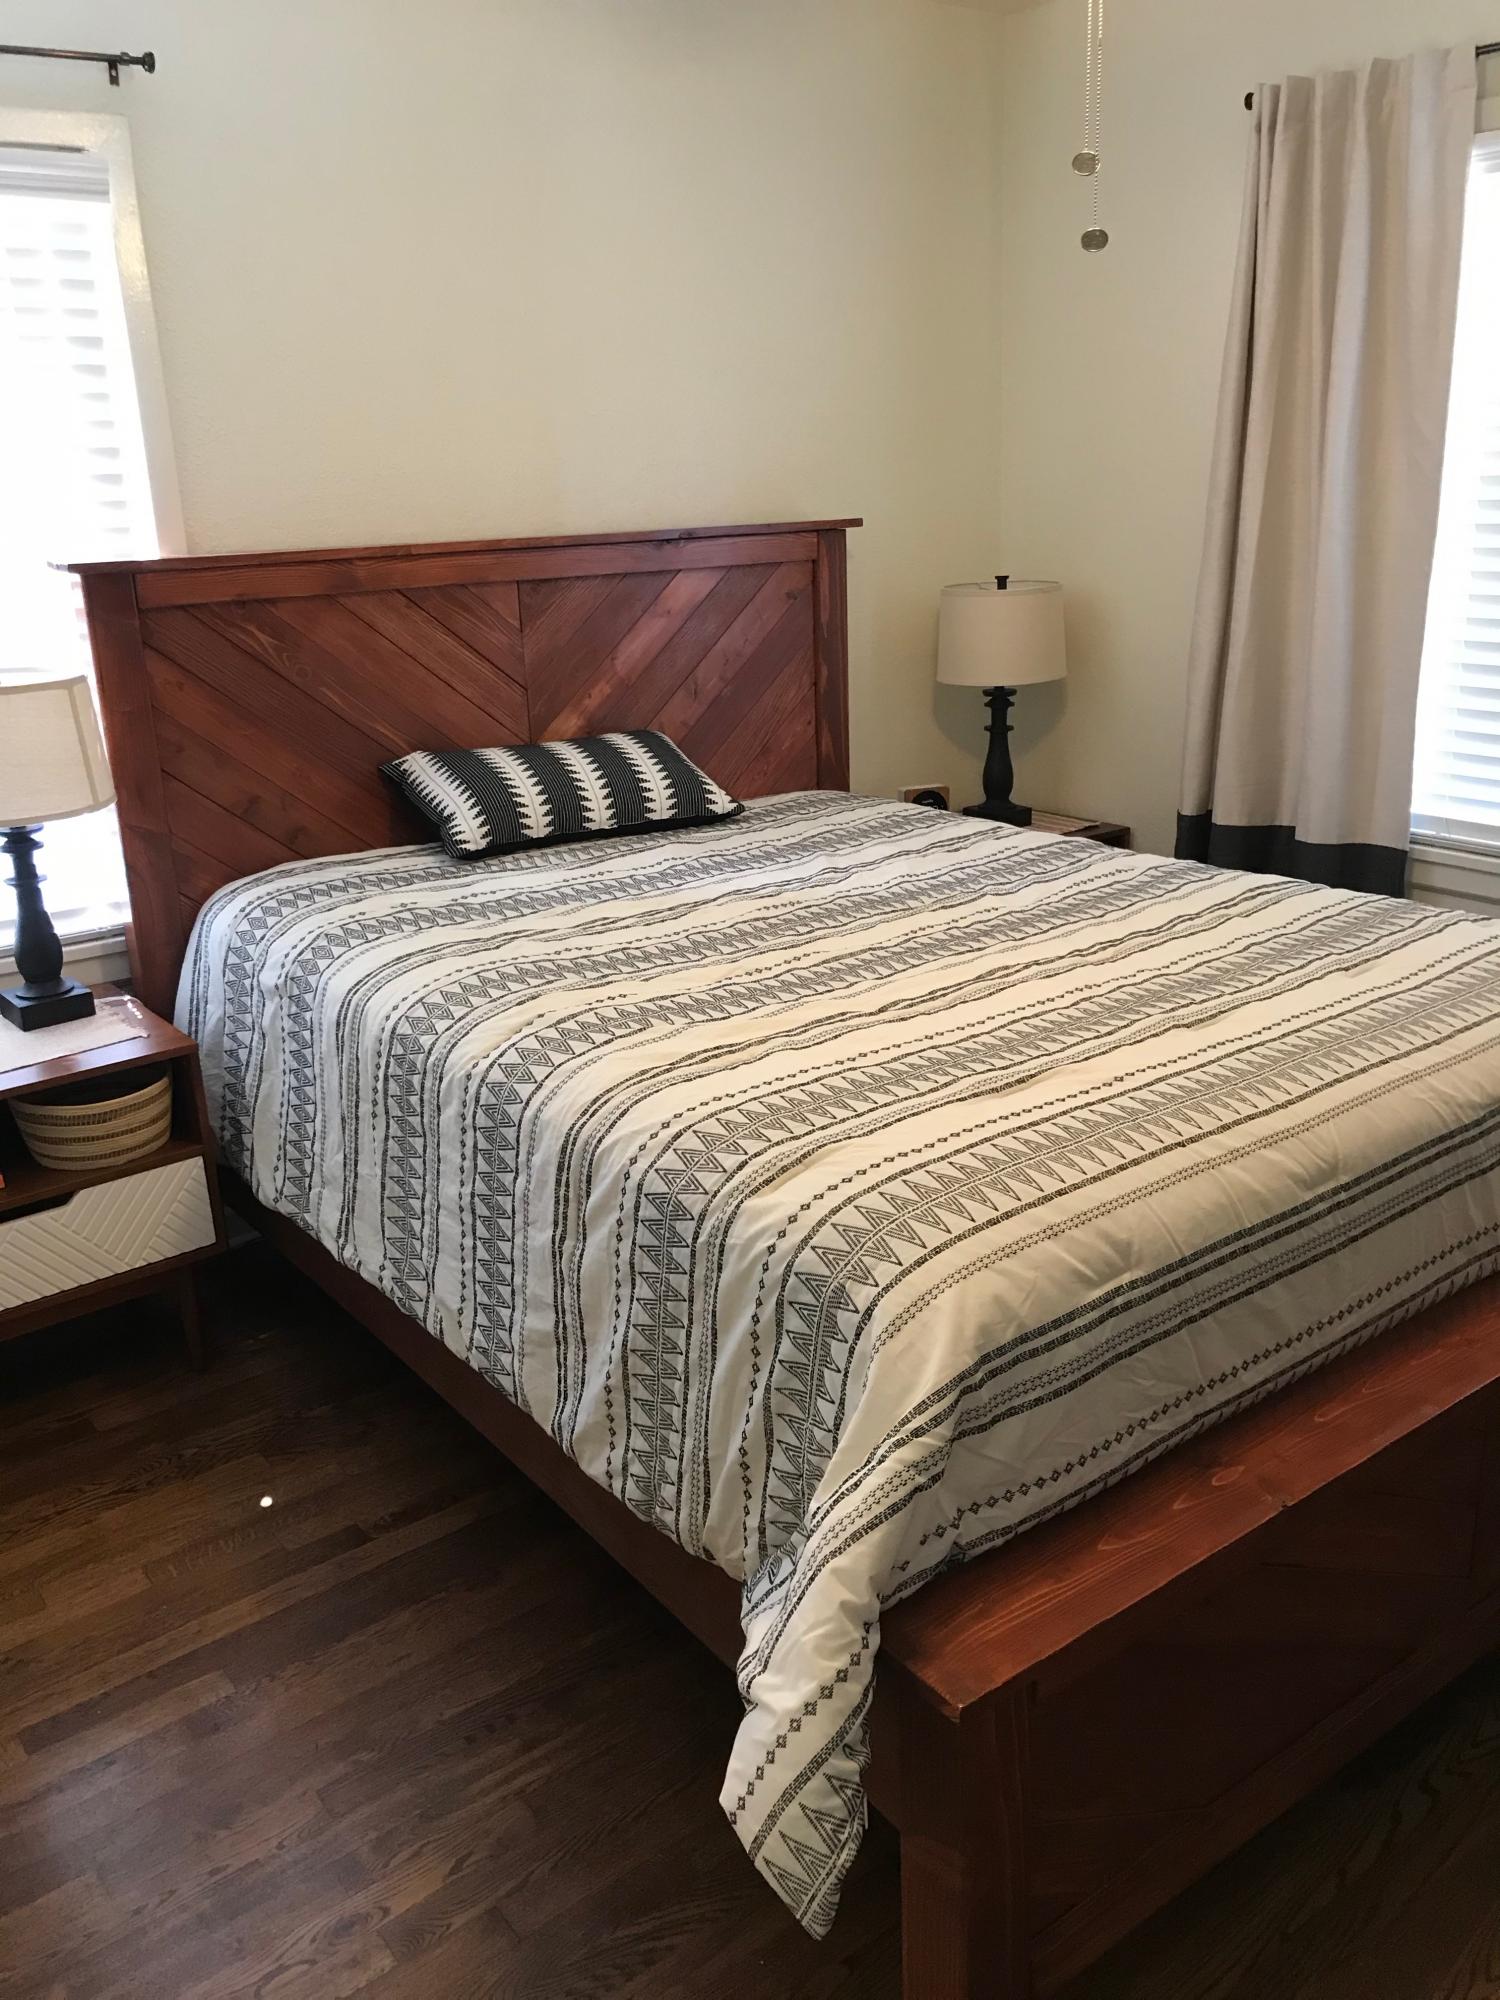
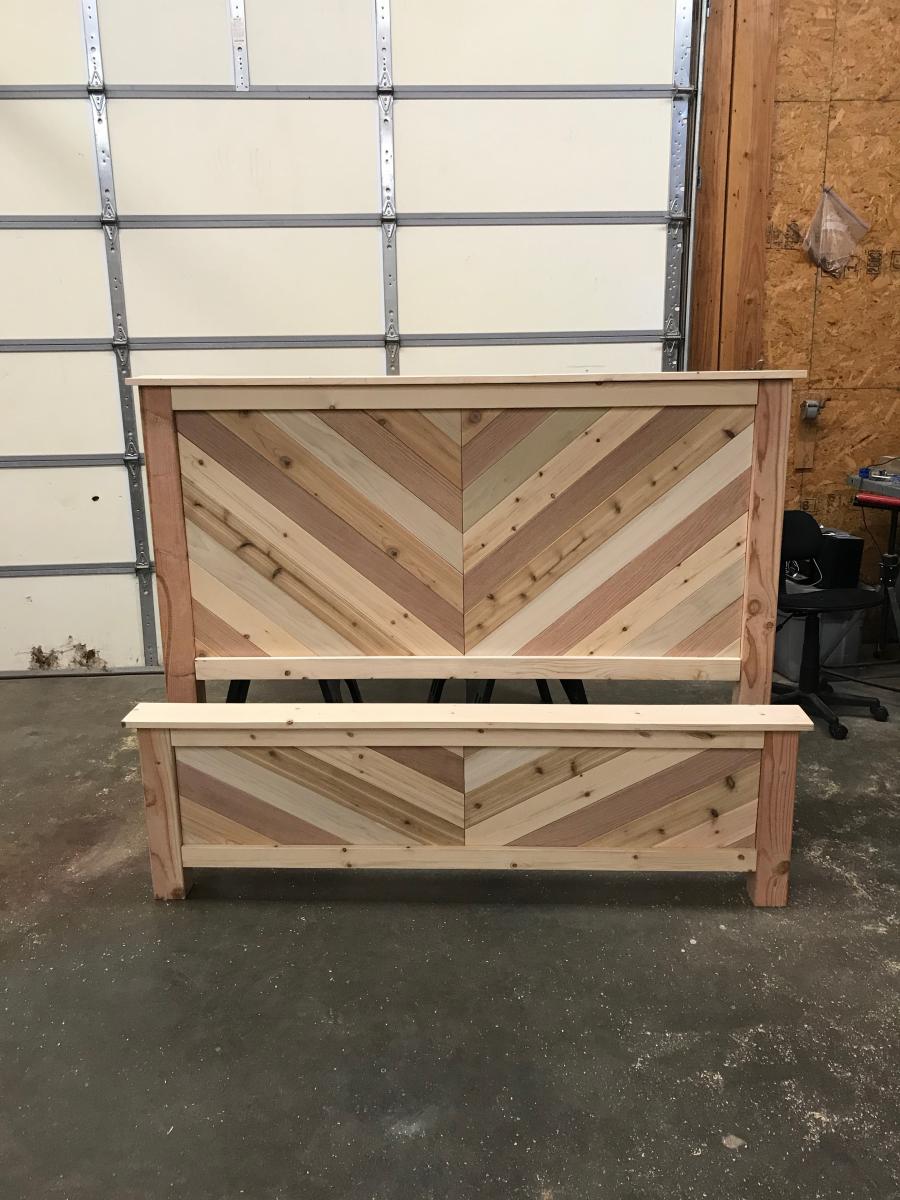
Built from Plan(s)
modified farmhouse bed
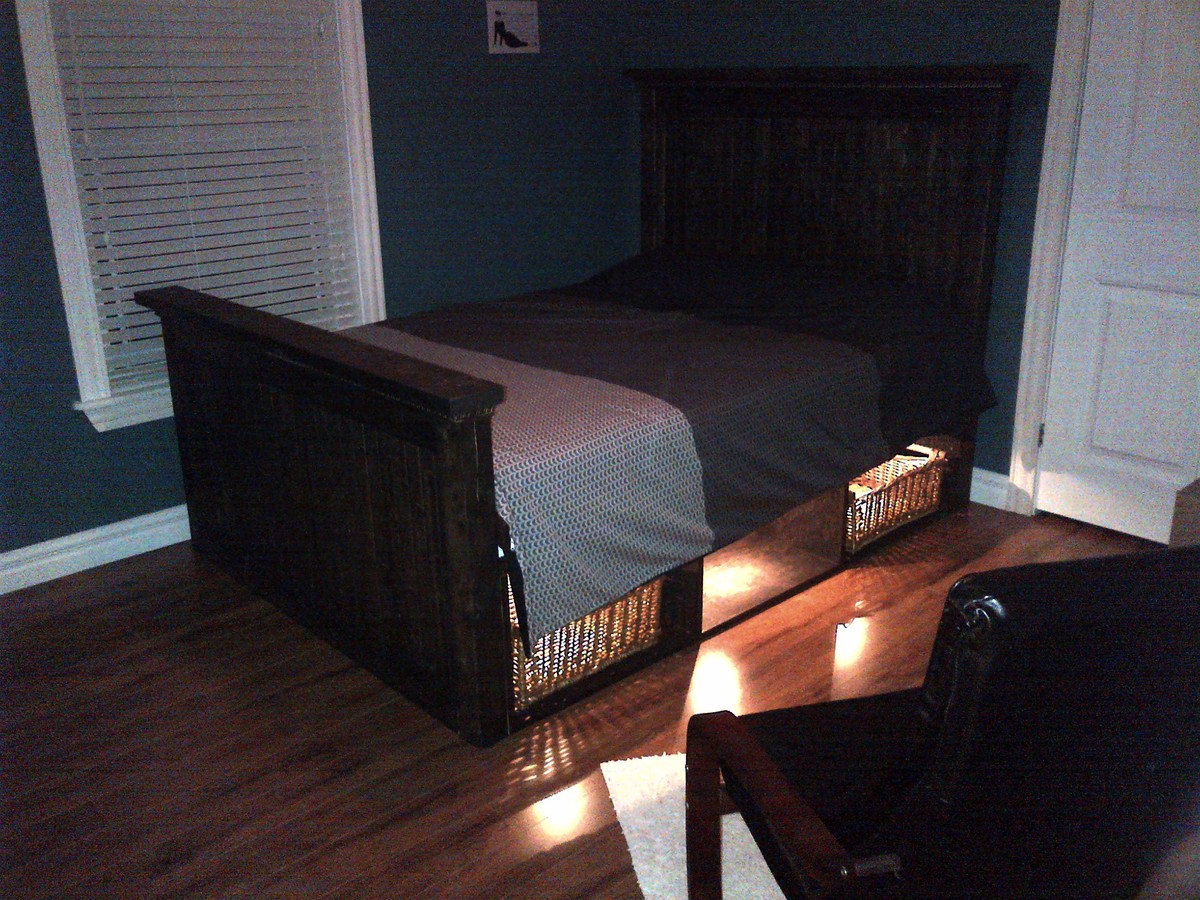
spare room home project
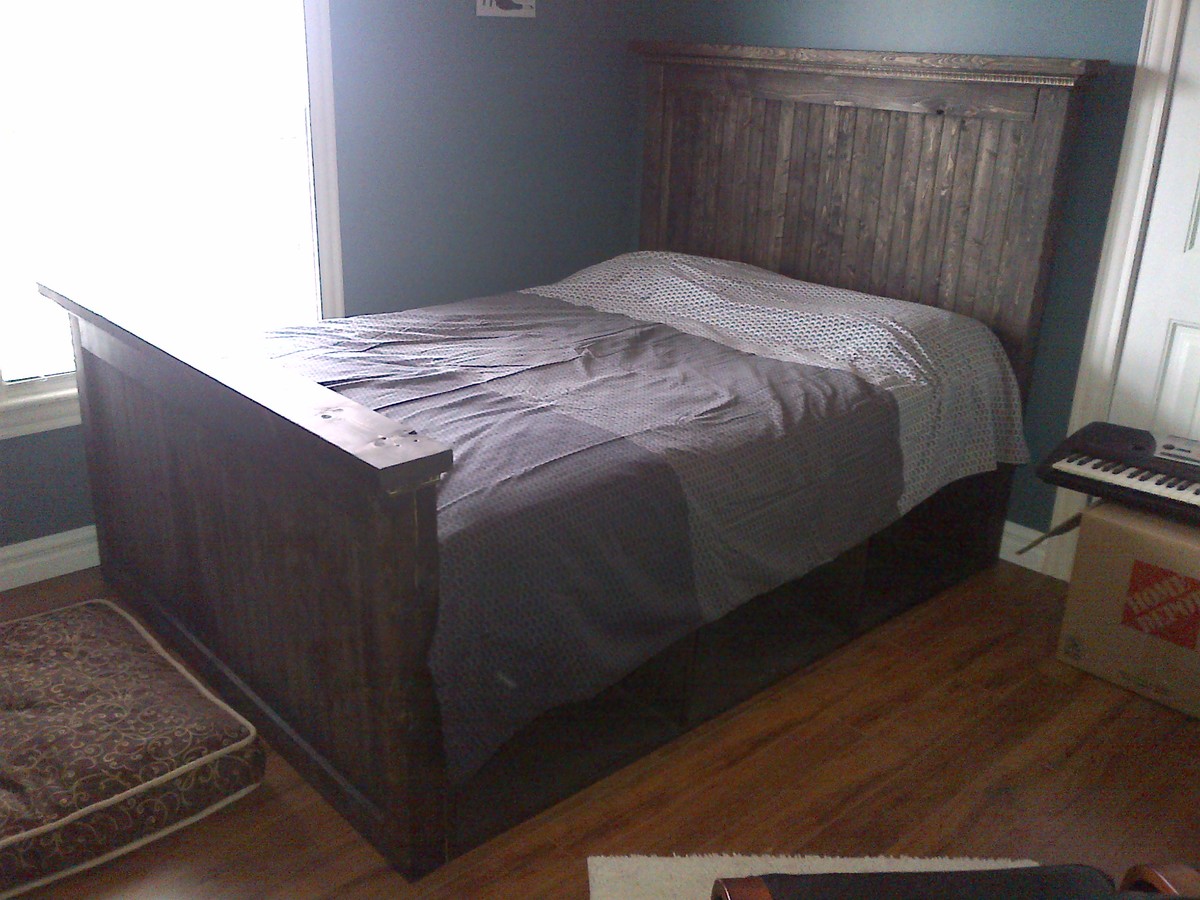
Estimated Cost
250 - 300
Estimated Time Investment
Week Long Project (20 Hours or More)
Finish Used
ebony 2718
Recommended Skill Level
Beginner
Comments
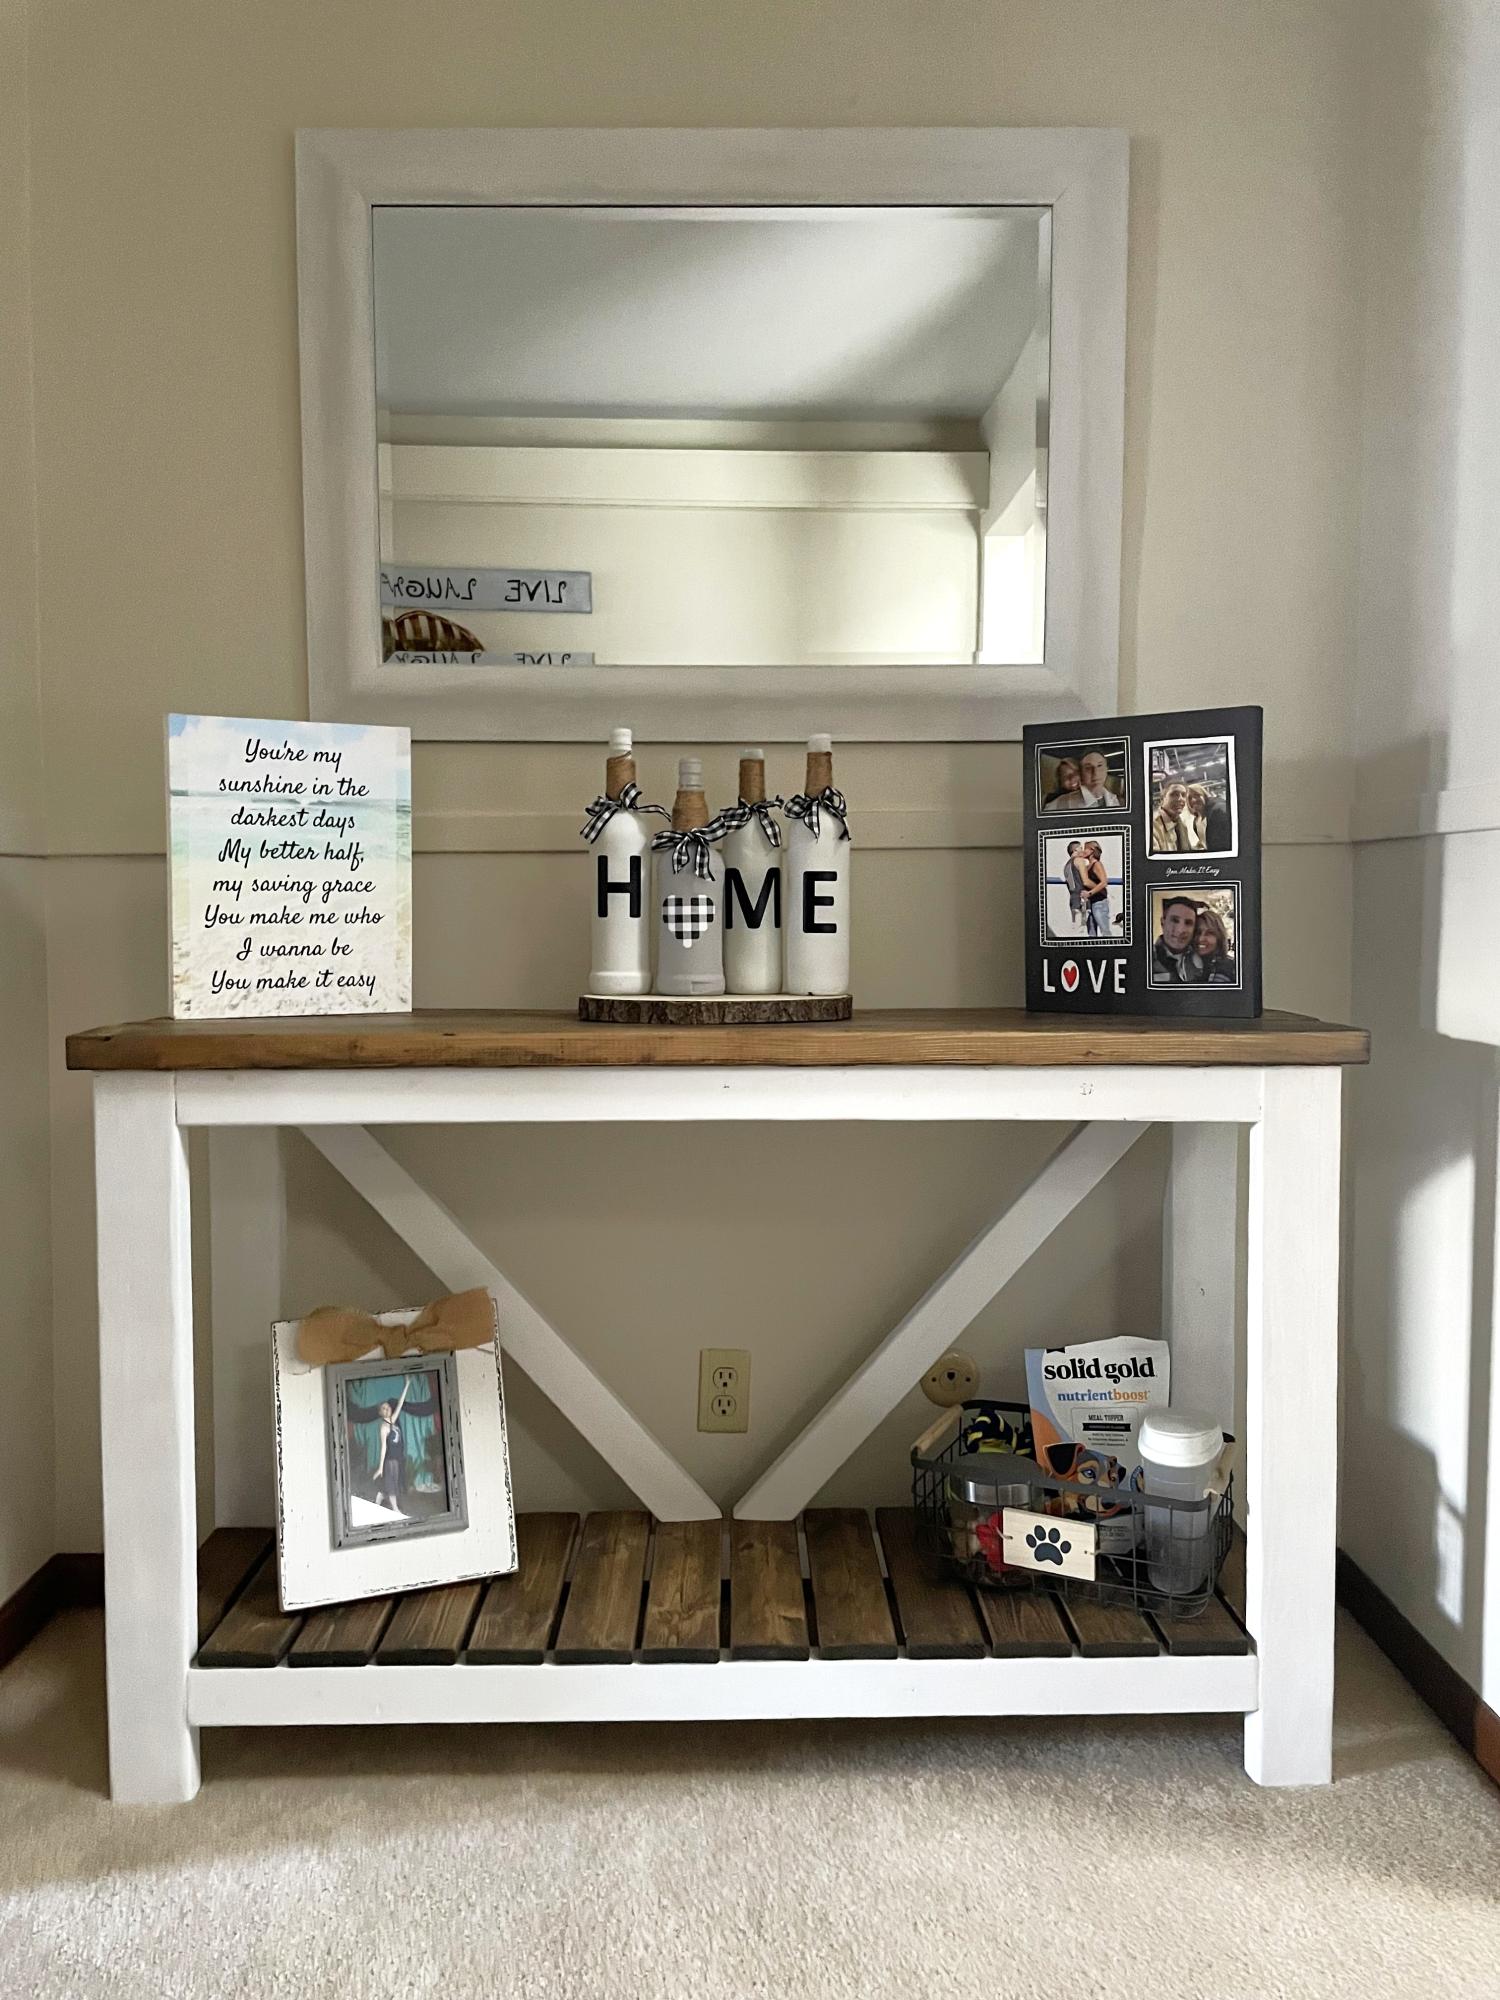
Simple console with shelf

I used antique white paint for the bottom and dark walnut atain for the top. I added a appilque to make it look a little fancy.
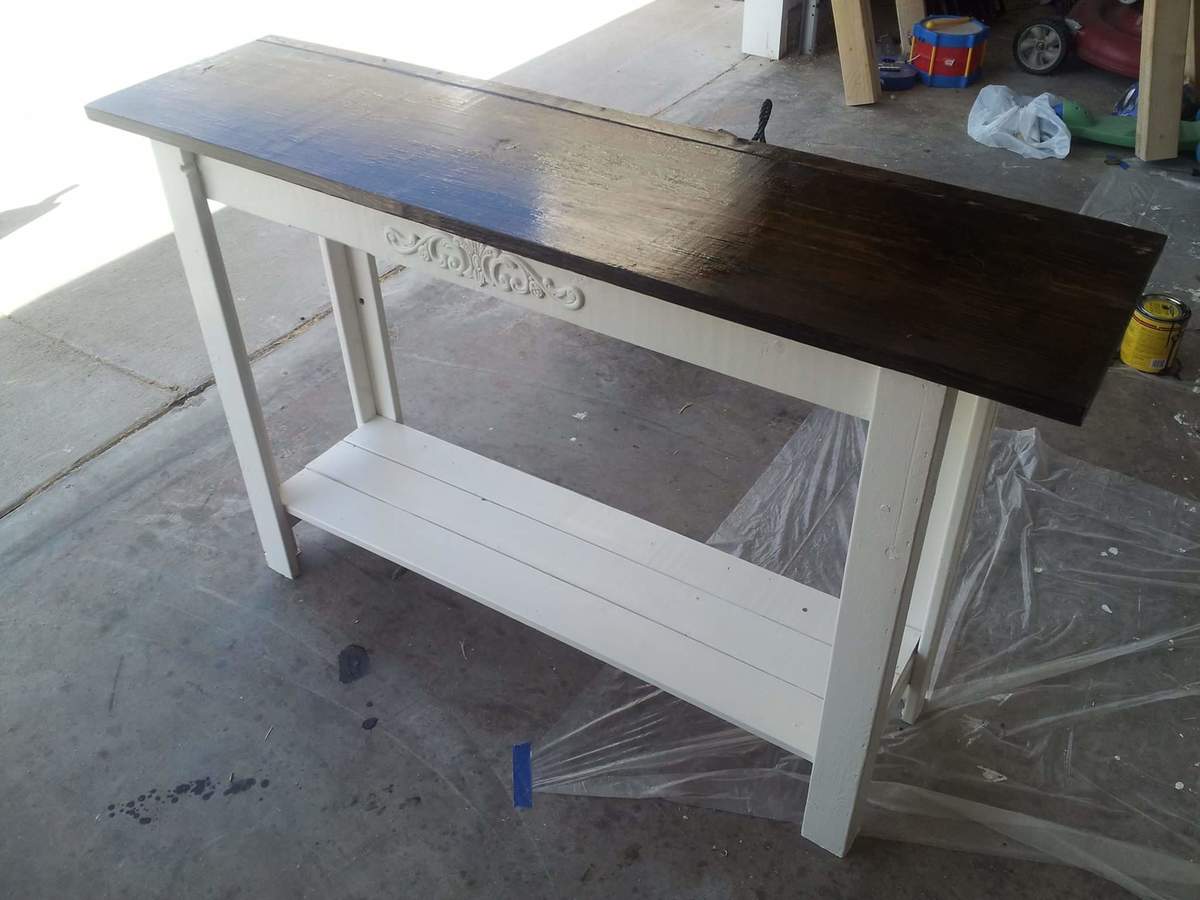
Built from Plan(s)
Estimated Cost
$40
Estimated Time Investment
Afternoon Project (3-6 Hours)
Recommended Skill Level
Beginner
Farmhouse style coffee table
I finished this coffee table for my cousin’s living room. This was a really fun build and i was actually able to complete it with wood I had left over from other projects. The only money I had to spend on this one was for the paint she wanted that would match her other furniture. I love this website and the plans provided make it easy to get projects done.
Built from Plan(s)
Estimated Cost
$50
Estimated Time Investment
Afternoon Project (3-6 Hours)
Finish Used
Latex paint
Recommended Skill Level
Beginner
Shiplap Fireplace and Side Shelves
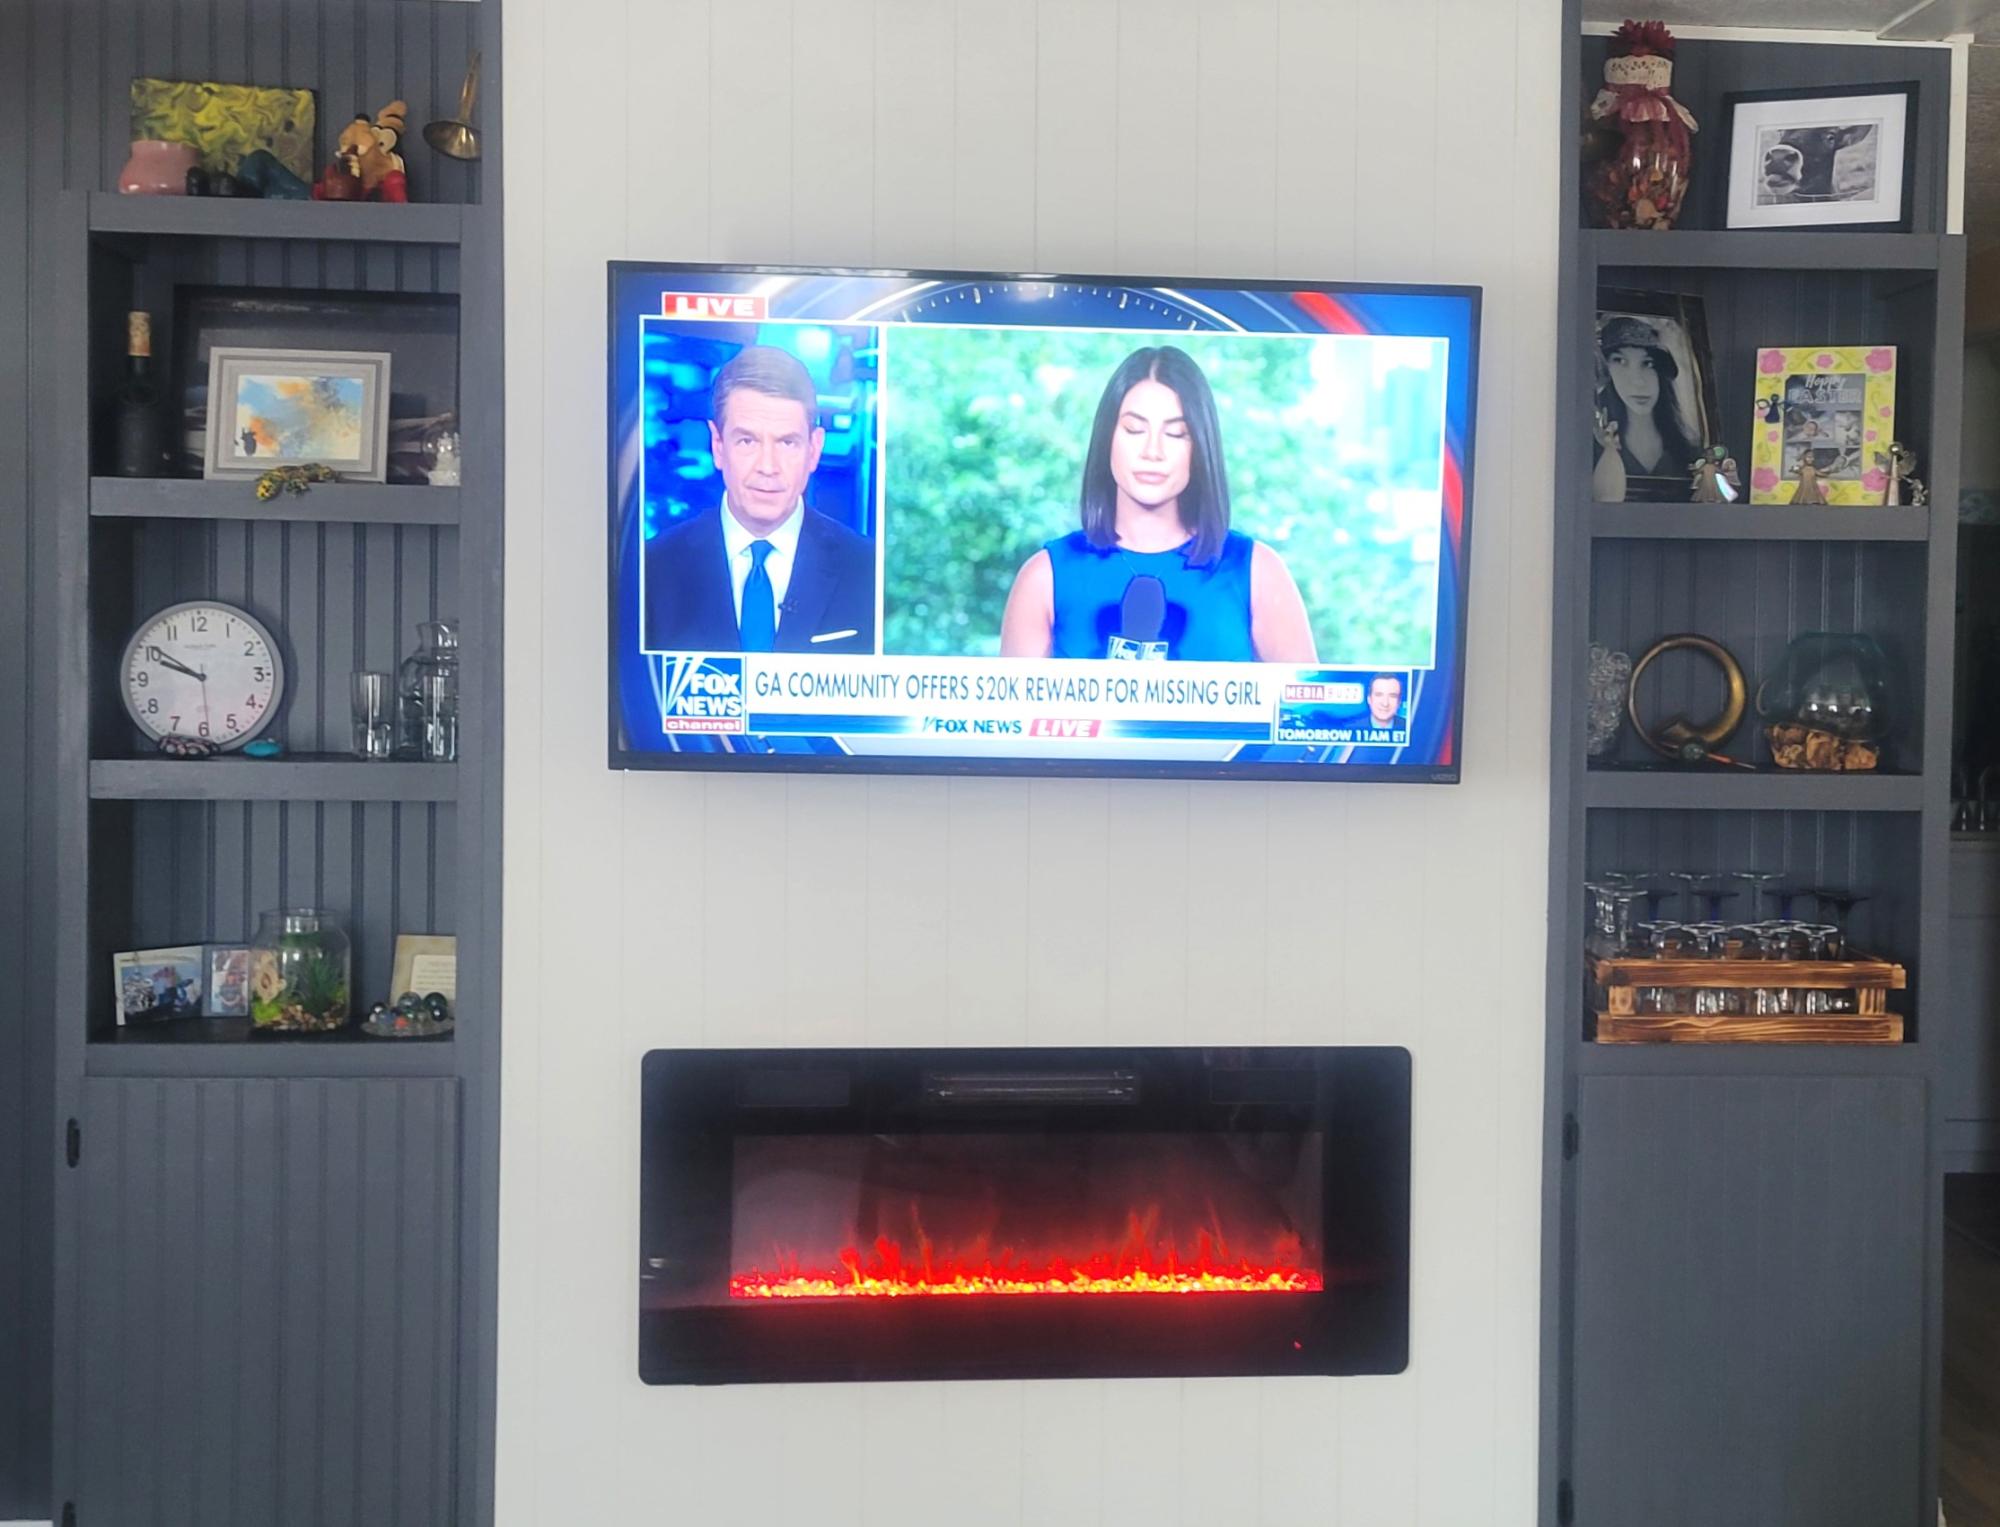
This is the shiplap fireplace design, we added built-ins to each side and left the mantel off, we may do one later. We love it and it added so much floor space.
Cindy Hutchison
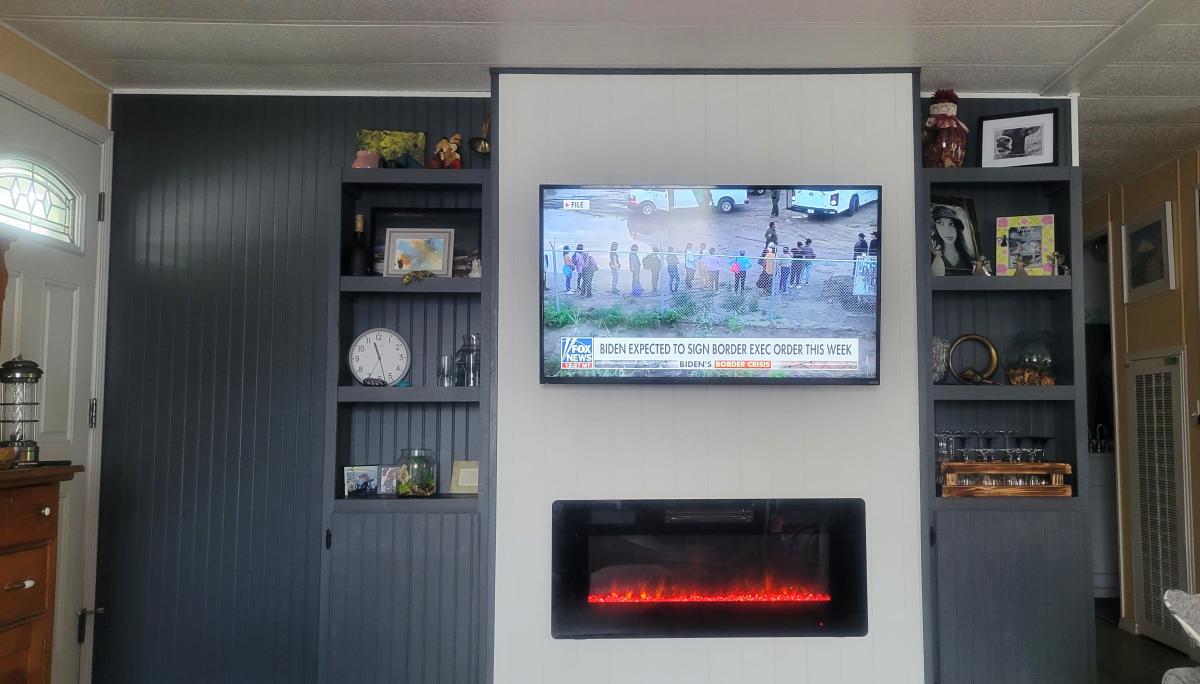
Built from Plan(s)
For Annika -
I have too many scraps … and a granddaughter with a 2nd birthday coming up soon … so spent a couple hours cutting the pieces … took extra time since i was trying to make scraps work … but it still came together well. I had trouble making pocket screws work on this project … but the design makes it easy to bury and cover regular screws.
Built from Plan(s)
Estimated Cost
free - used scraps
Estimated Time Investment
Afternoon Project (3-6 Hours)
Finish Used
martha stewart satin latex - custom mix - with wax finish
Recommended Skill Level
Intermediate
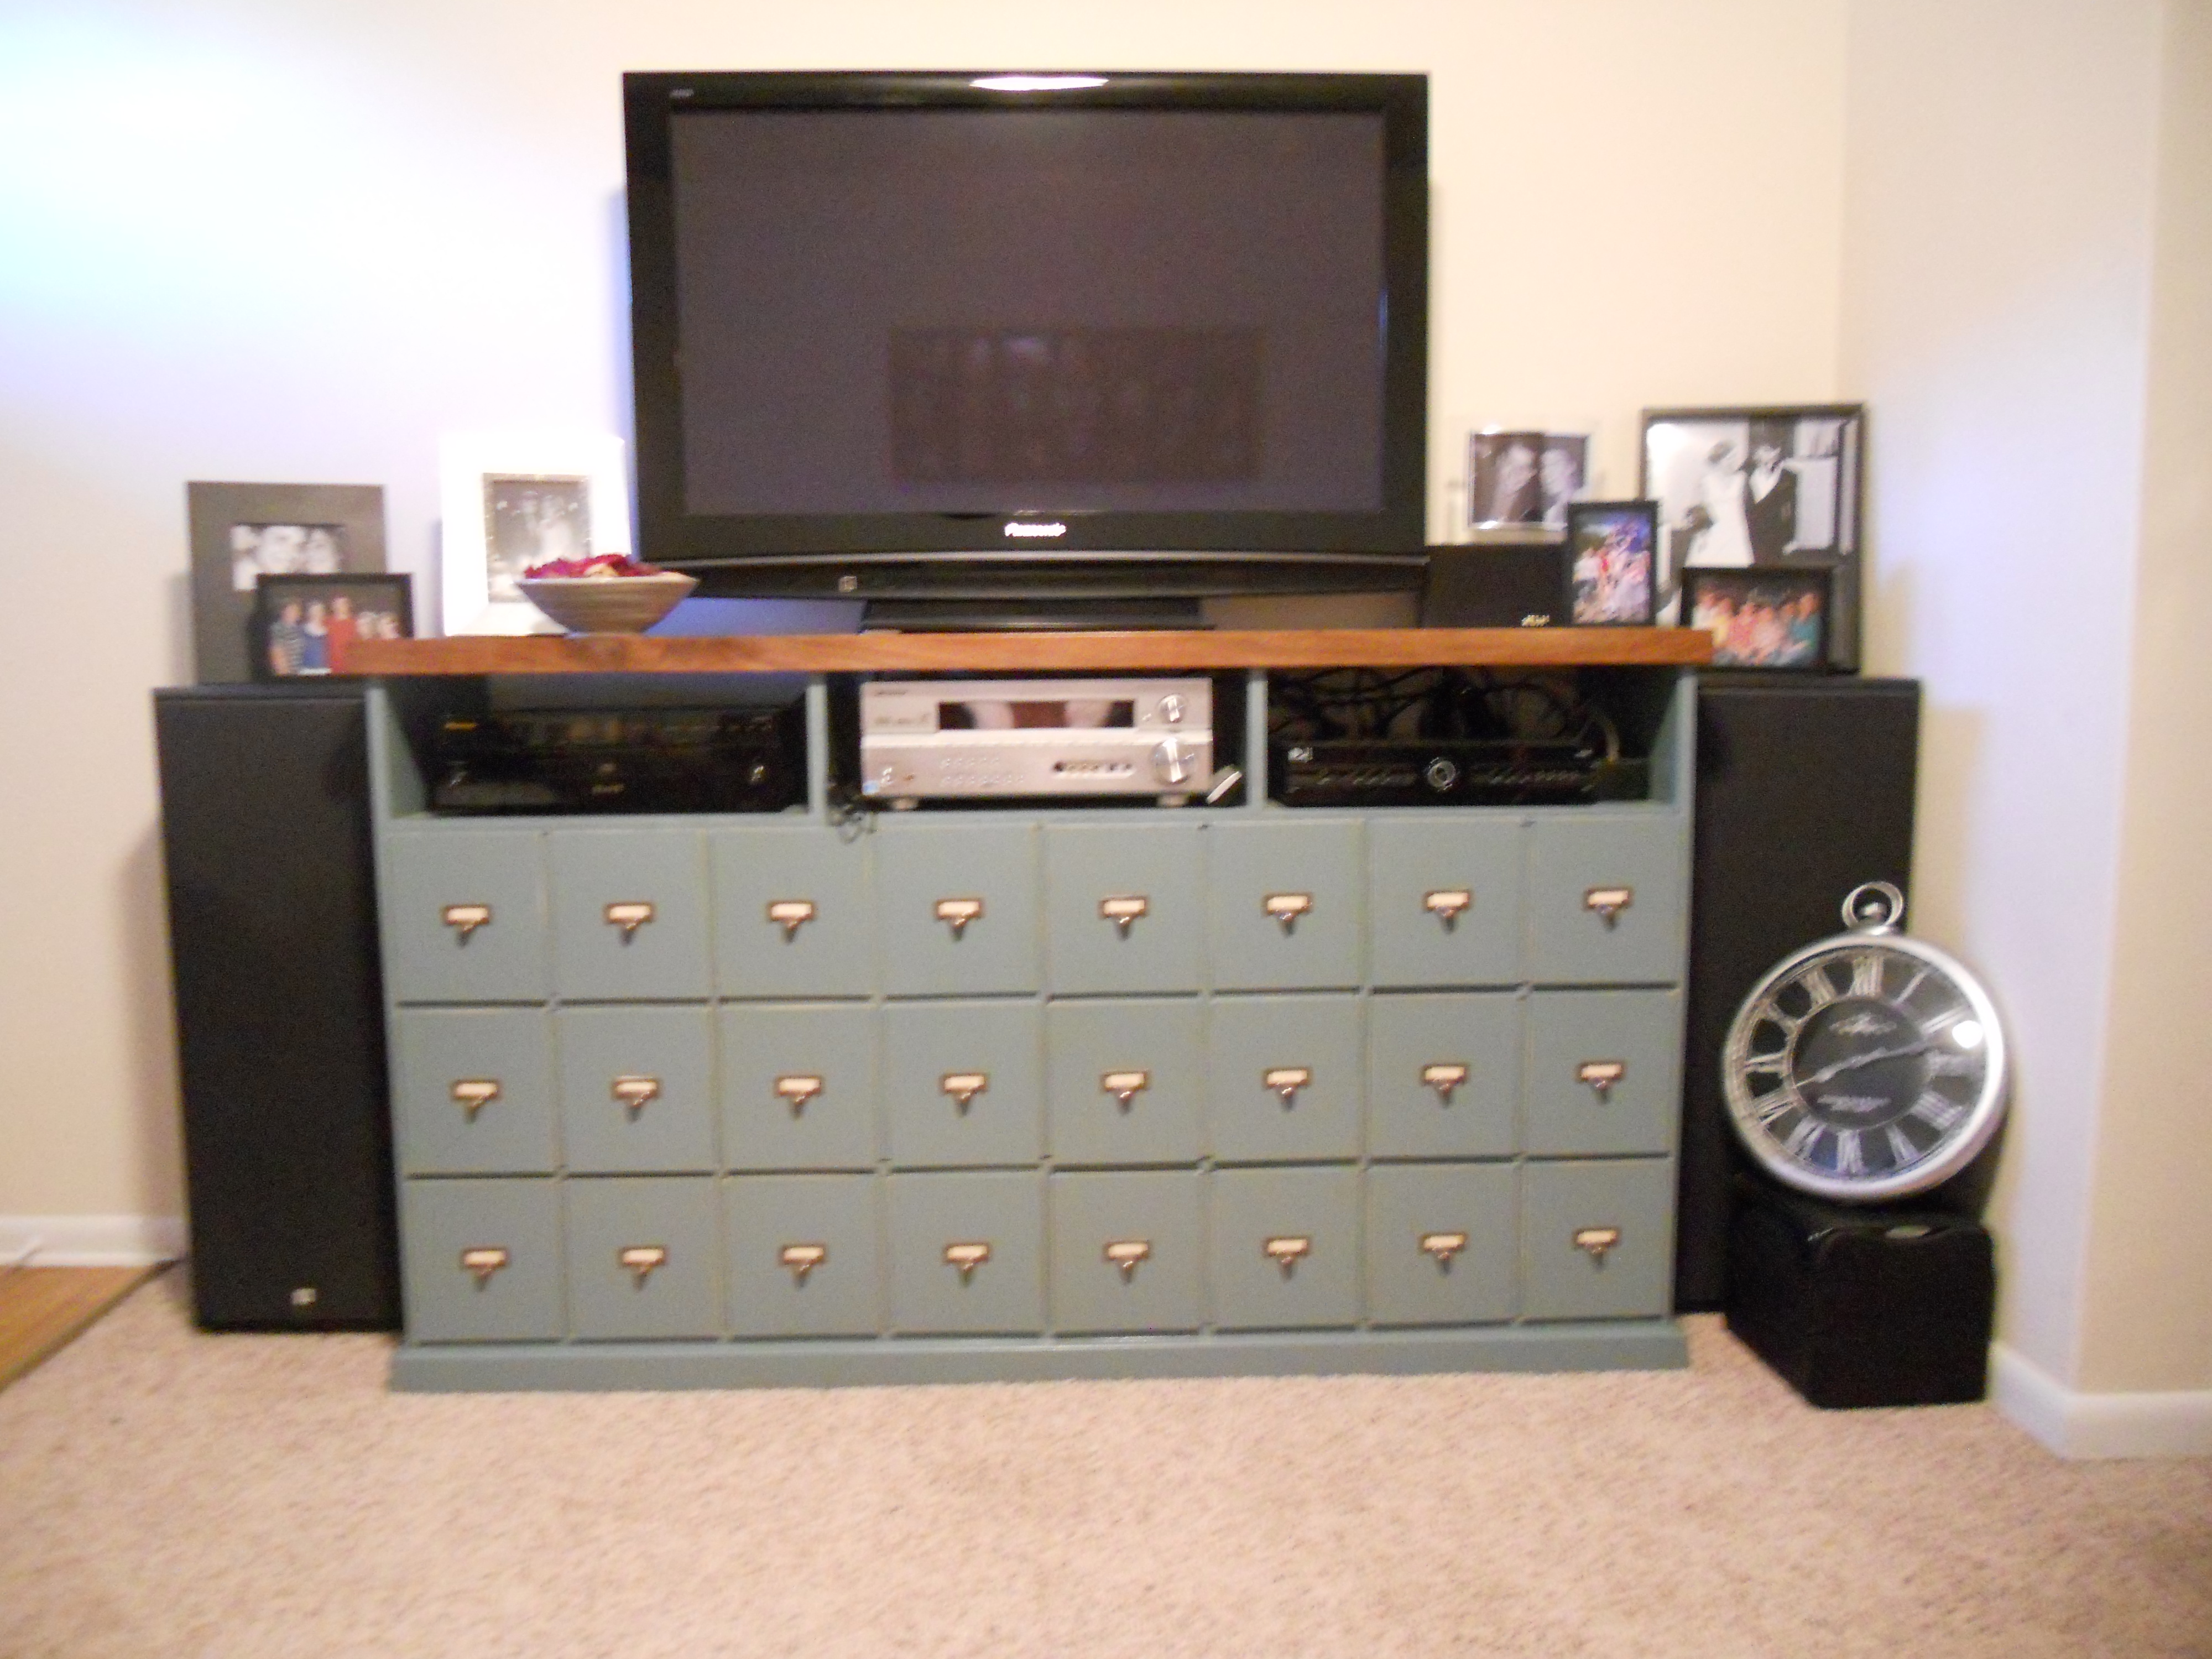
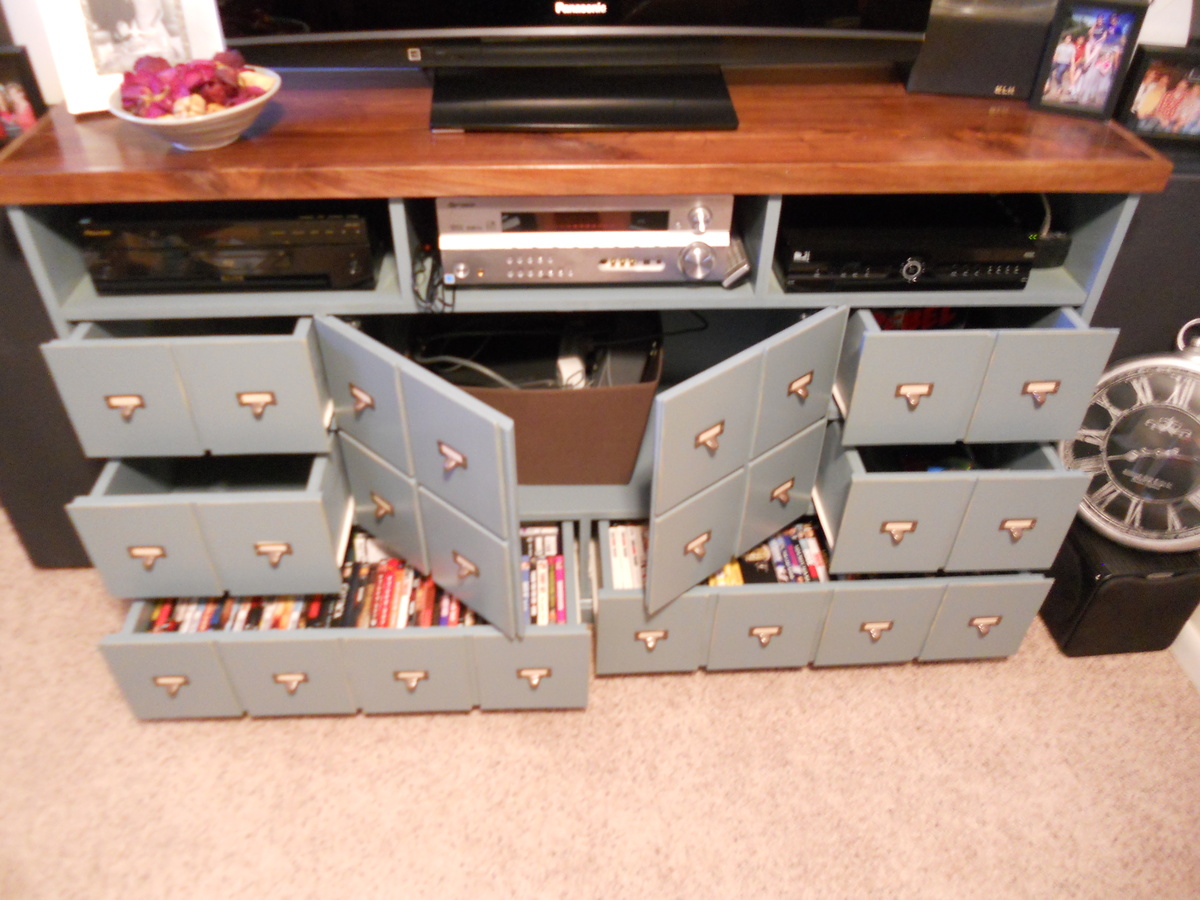
Extended Farmhouse Bedside Table/End Table
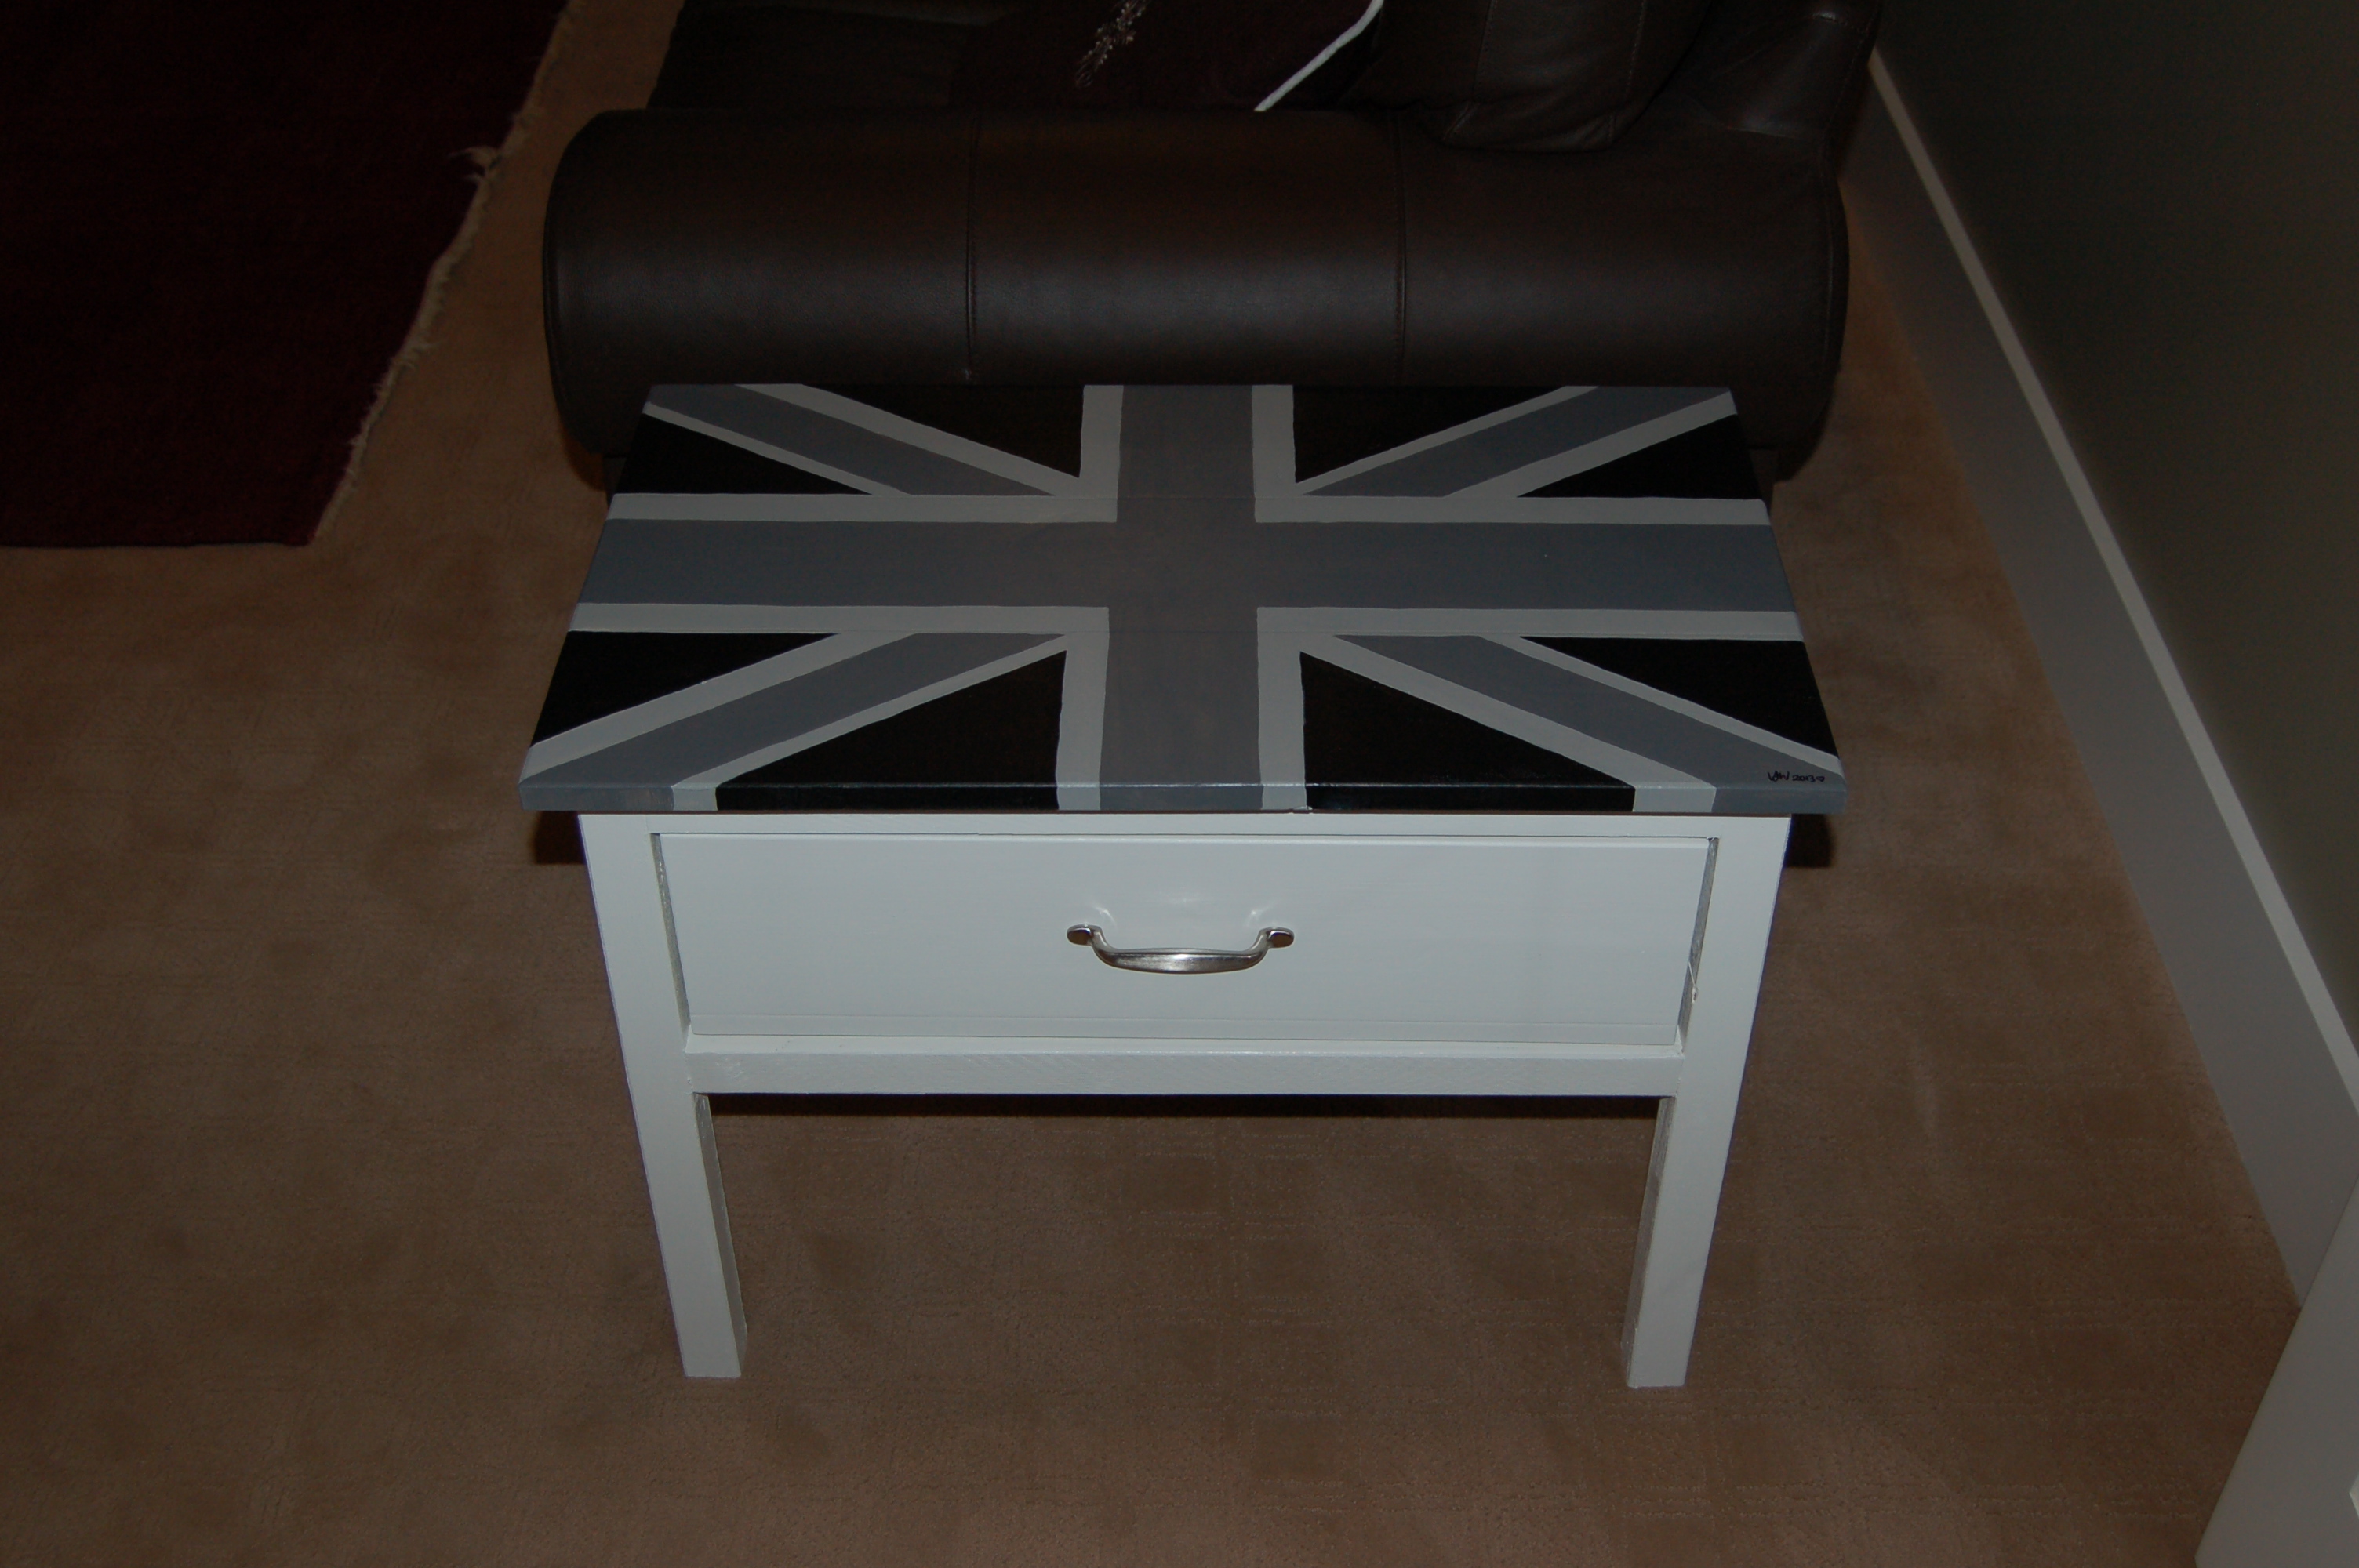
I used the Farmhouse Bedside Table plans as a starting point for this Christmas gift project for my husband. I removed 5" off the legs, omitted the shelf and doubled the width so that it would hold 30 DVDs in the drawer. I wanted something unique for his man cave and coming from England this seemed a great way of introducing our heritage without being overpowering in the room. Great project plan and easy to follow and only took a day to make including the painting time.
Built from Plan(s)
Estimated Cost
$20
Estimated Time Investment
Day Project (6-9 Hours)
Finish Used
Benjamin Moore Cloud White for the main unit with Martha Stewart's all purpose craft paints for the Union Jack.
Recommended Skill Level
Beginner
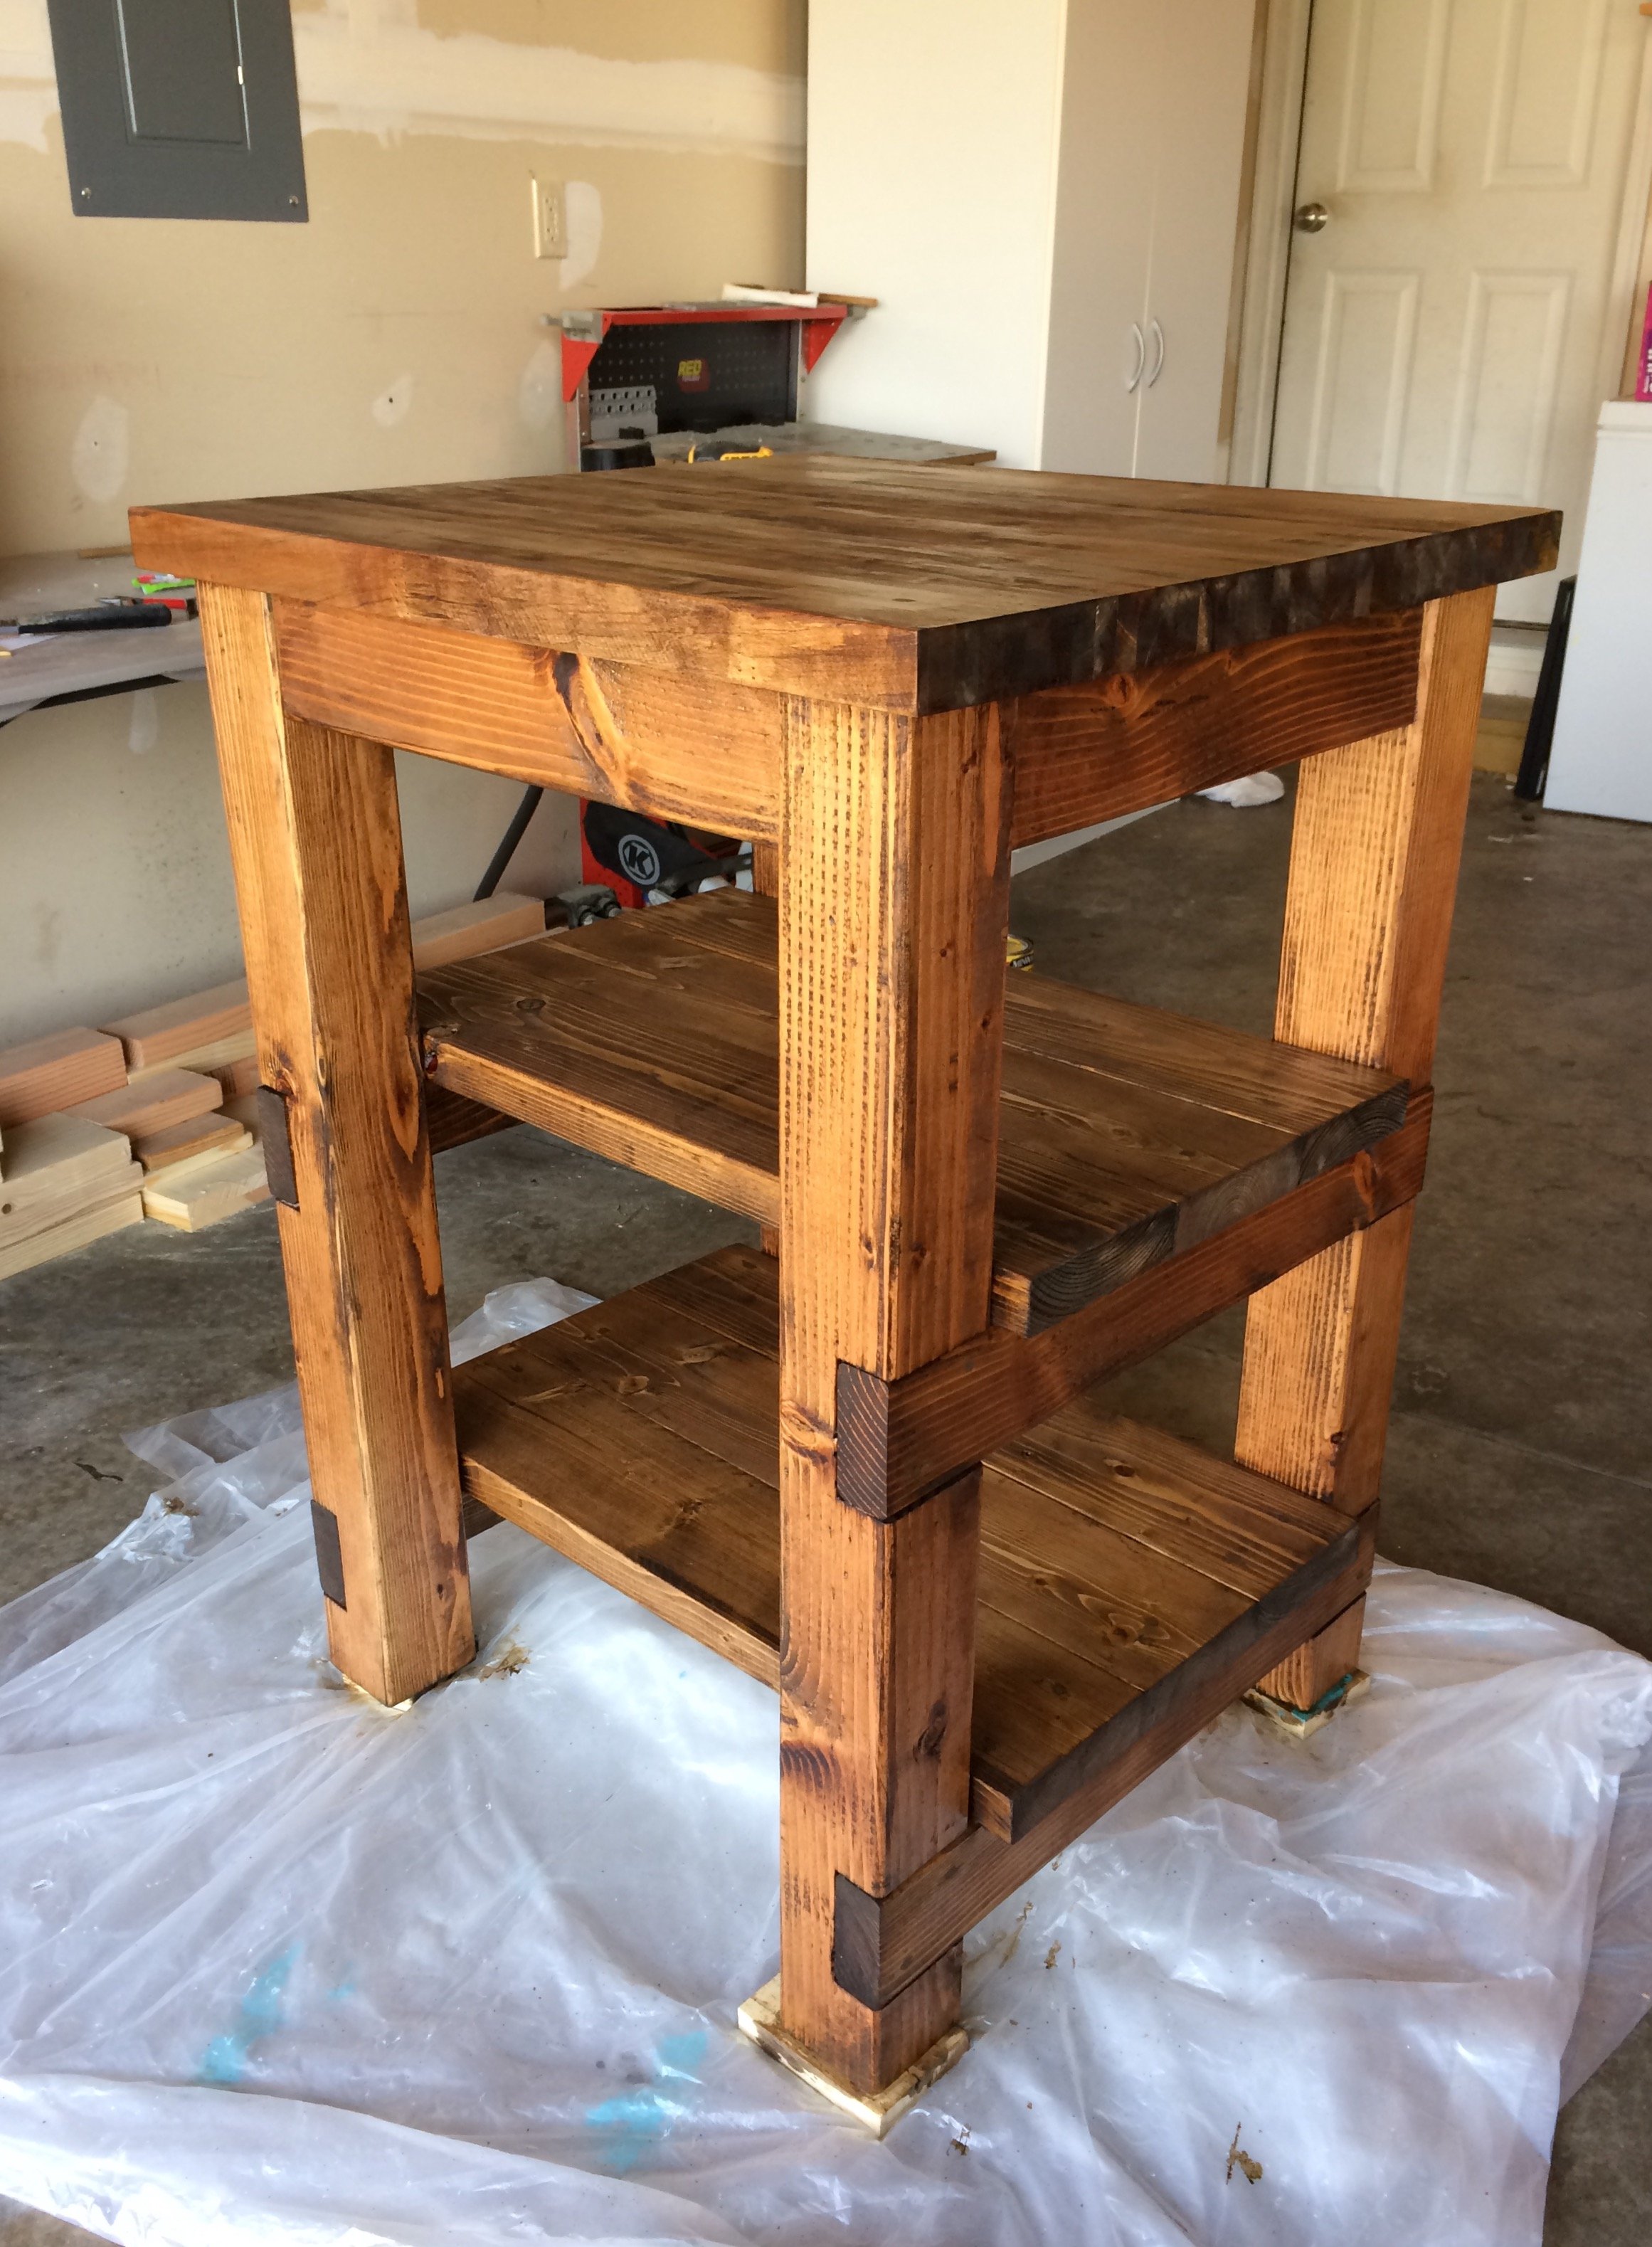
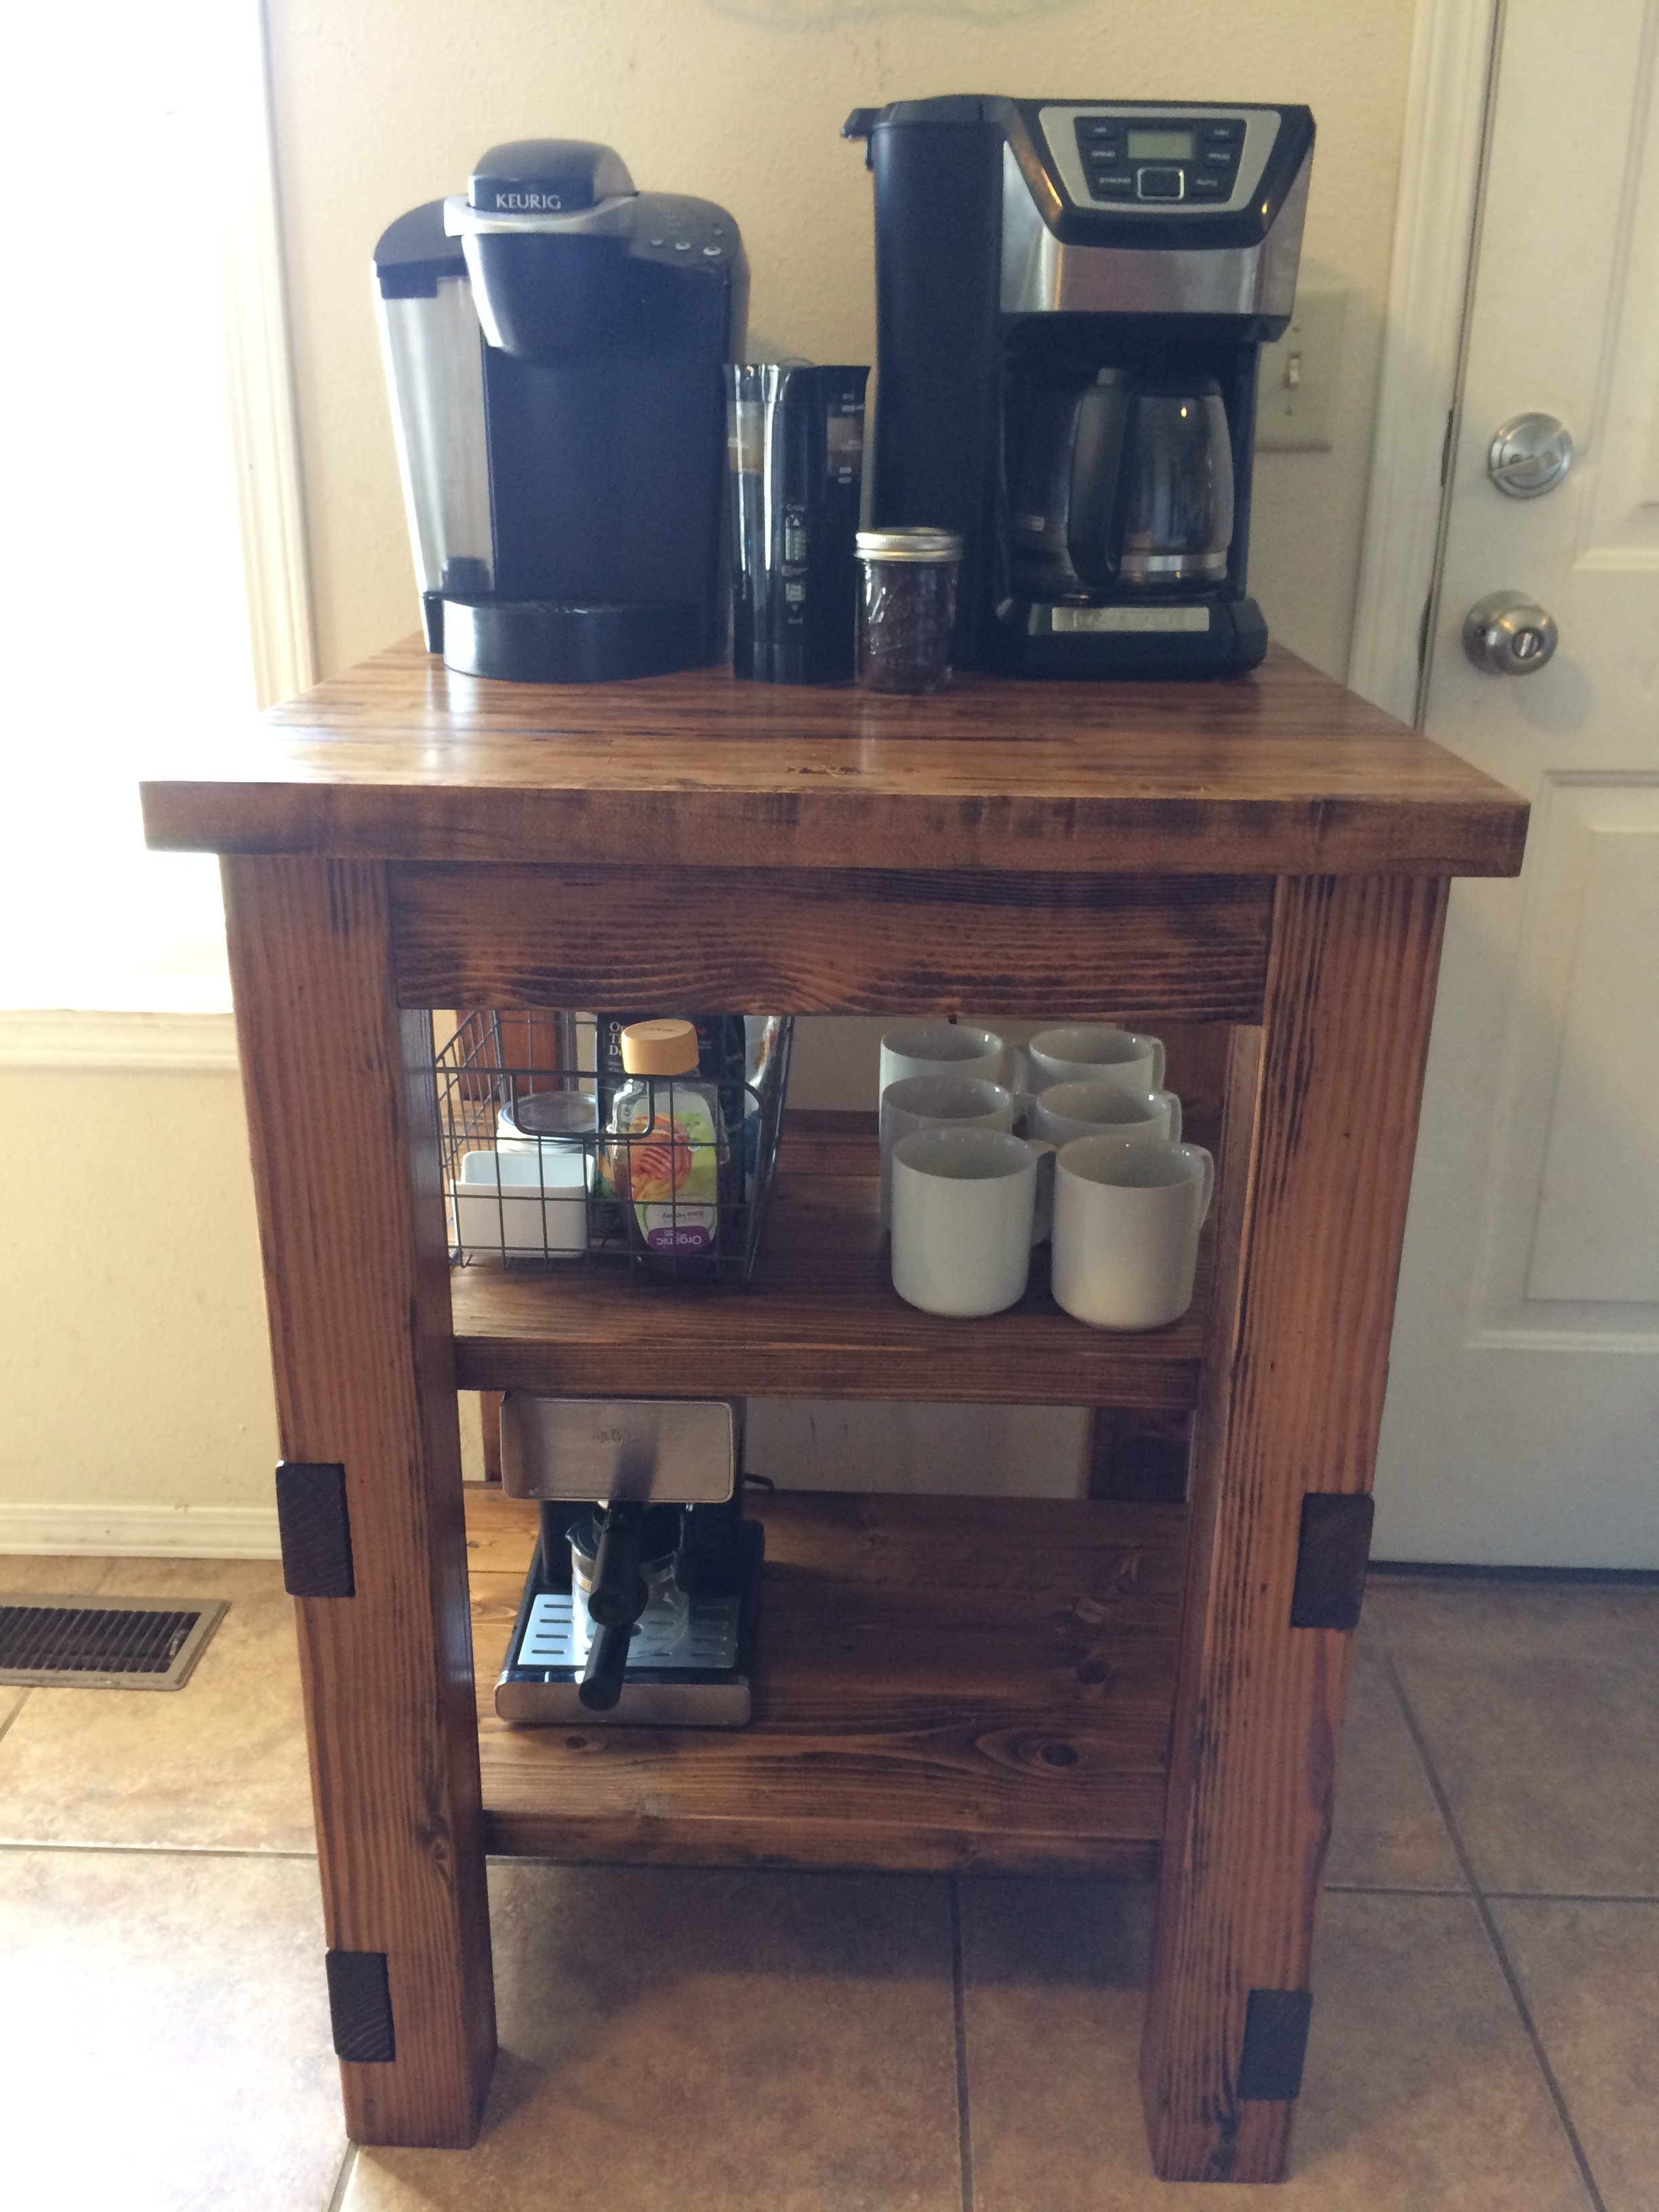
Coffee Bar
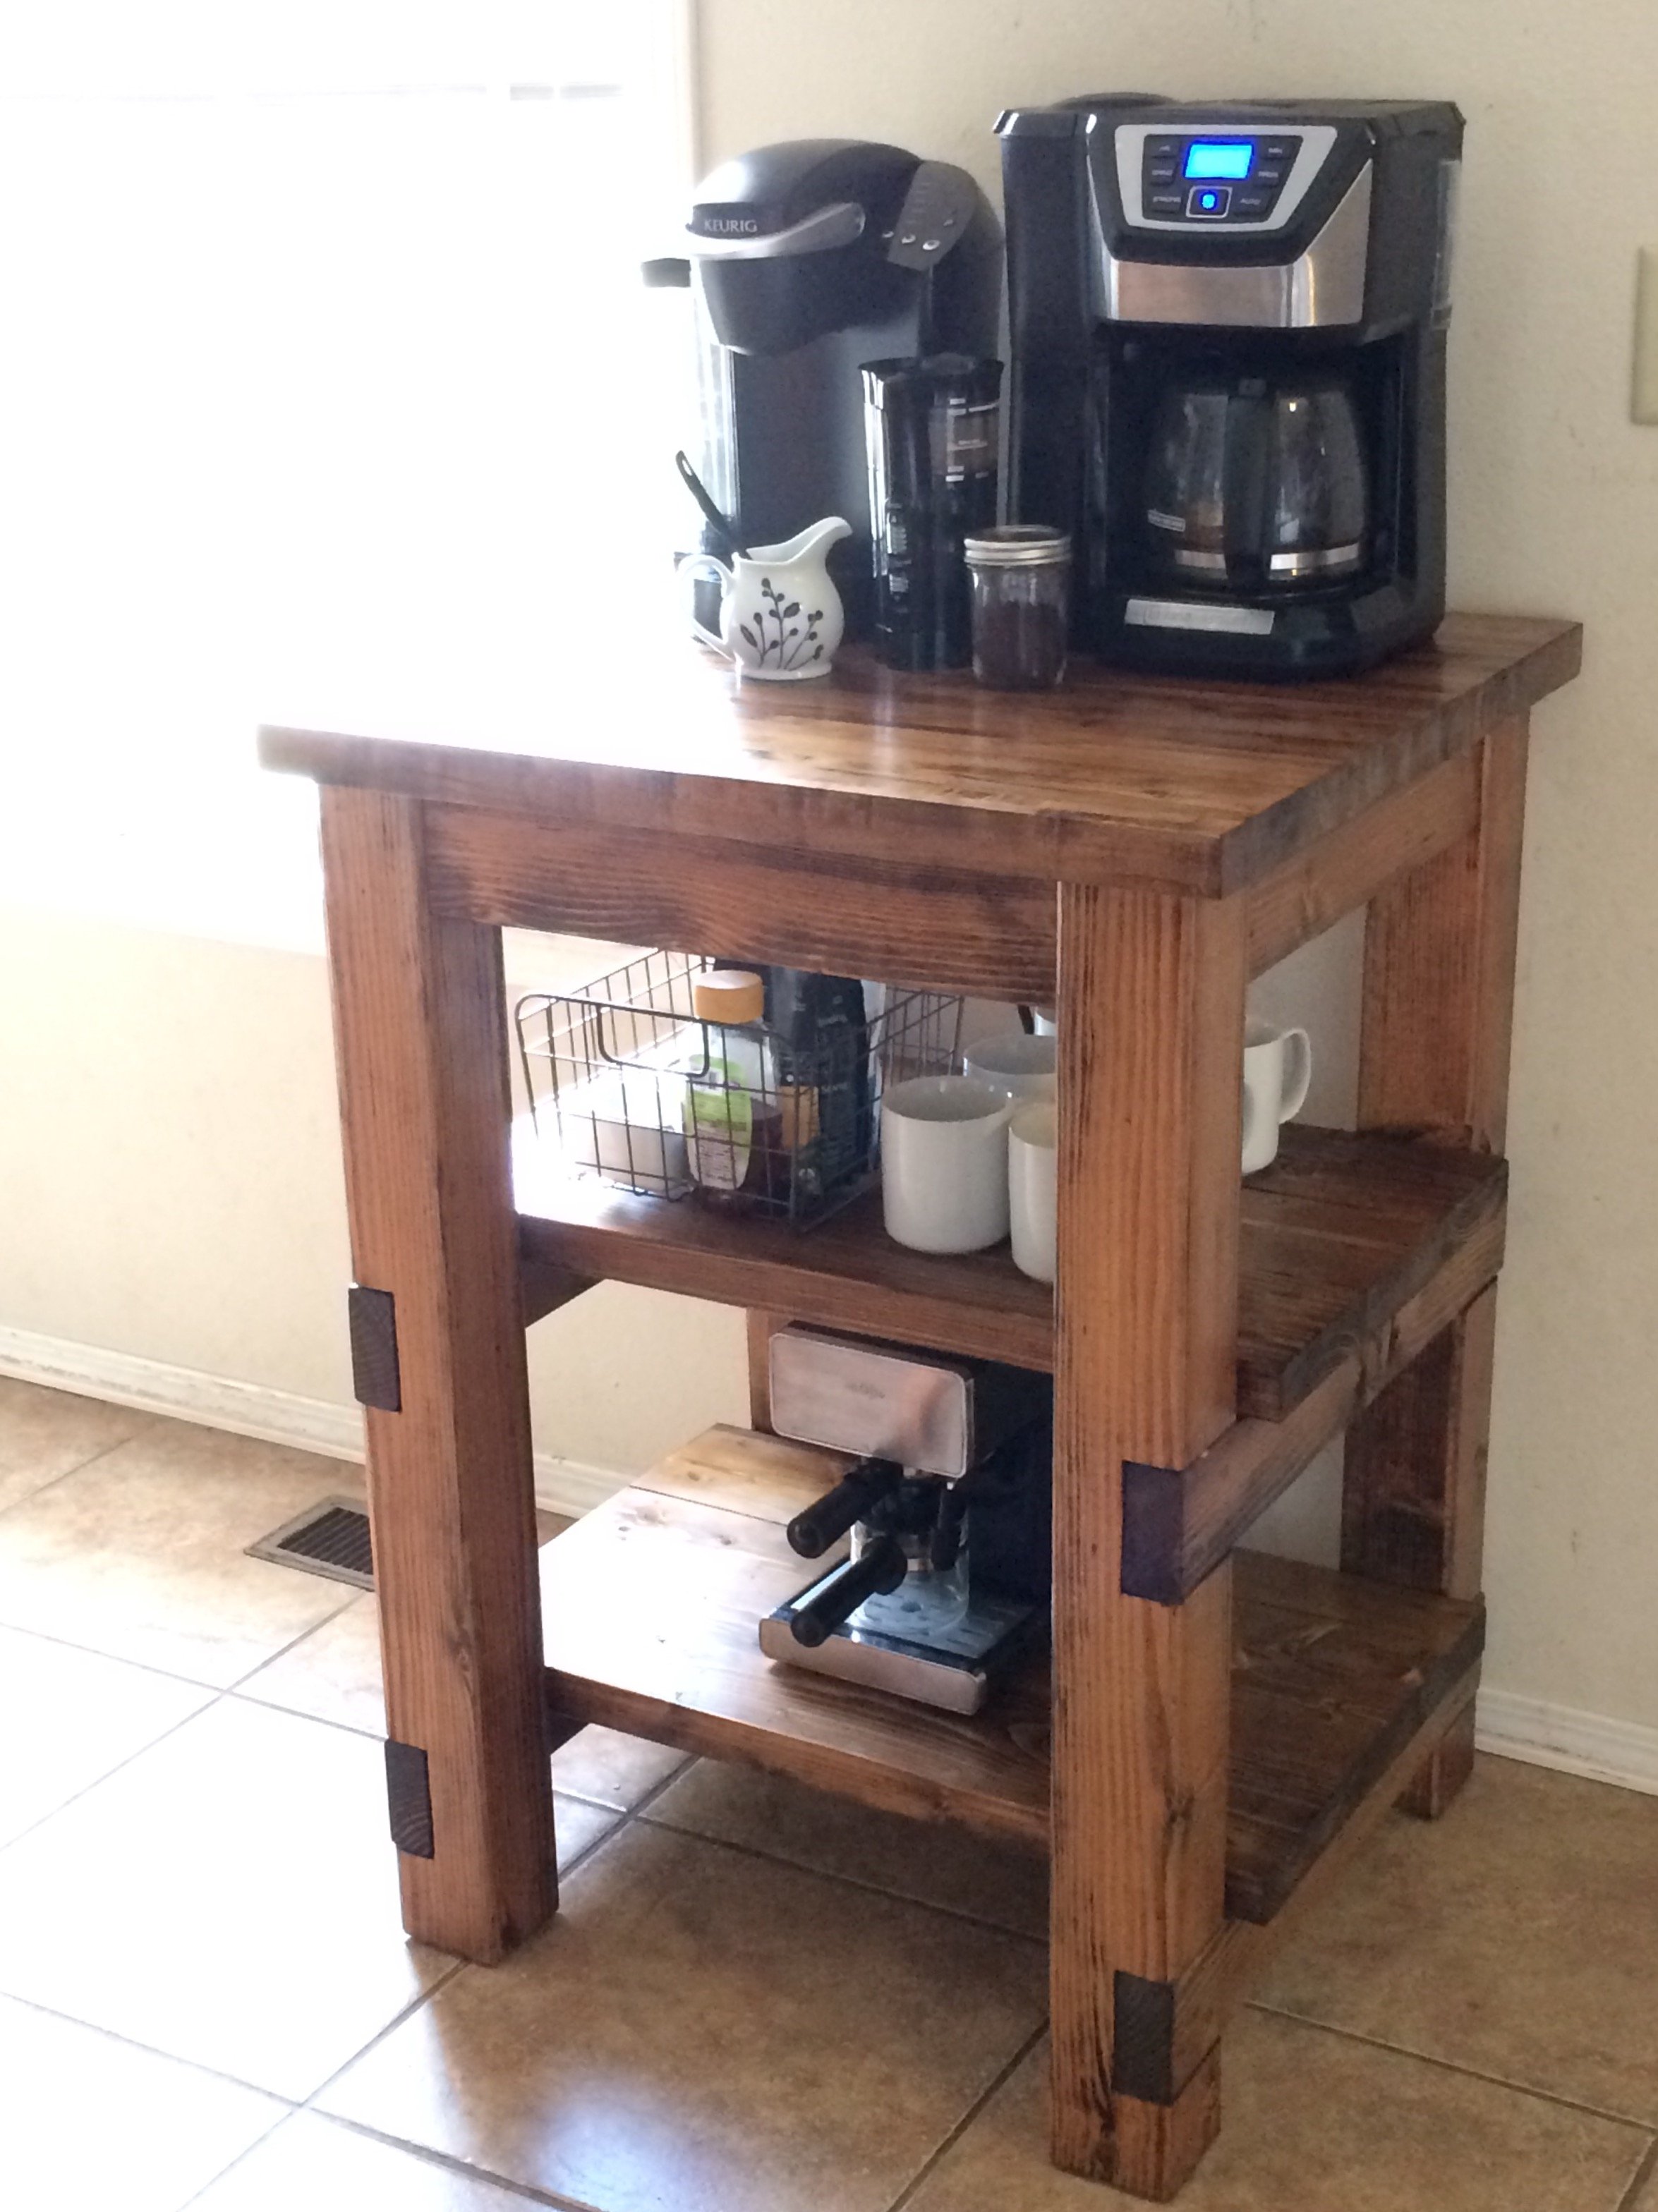
I modified this plan to fit a 27"x 25" chunk of butcher block that my mother-in-law gave me. The finished height is 36 & 1/2". I didn't have any special tools to make the notches for the shelves. I simply lowered the blade-stop on my 7&1/4" miter saw and fastened the screw with hair ties (or in other words, I jimmy-rigged it ;)). I practiced on scrap wood until I reached the depth I needed. There is a 9&1/4" clearance between both shelves, and the shelves have a 1" overhang off the sides. I mainly used pocket holes to connect the pieces. The shelves (3-2x6s each) were fastened together with wood glue and pocket holes, then I slid them into place and screwed them into the side aprons/supports from the top, then filled with wood filler. For the top, I added support from underneathe (2x2s that I had on-hand), then used 2&1/2" screws from underneathe through the 2x2s into the butcher block. At first I used zinc wood screws, but learned quickly that they strip extremely easily, so I switched to sheet rock screws. Fun project!!
Built from Plan(s)
Estimated Cost
$35 in lumber, not counting the butcher block top which I got for free from my mother-in-law.
Estimated Time Investment
Weekend Project (10-20 Hours)
Finish Used
For the butcher block, I decided to stain it since it would not be coming into contact with food. I sanded the butcher block with 220 grit sandpaper with my orbital sander. For the rest of my project I first used 80 grit, then 220 grit. Then I applied pre-stain wood conditioners overall, then Minwax provencial stain (I left it on for about 3 minutes then wiped it off). Then I used two coats of polyeurethene, sanding with 400 grit between the coats.
Recommended Skill Level
Intermediate
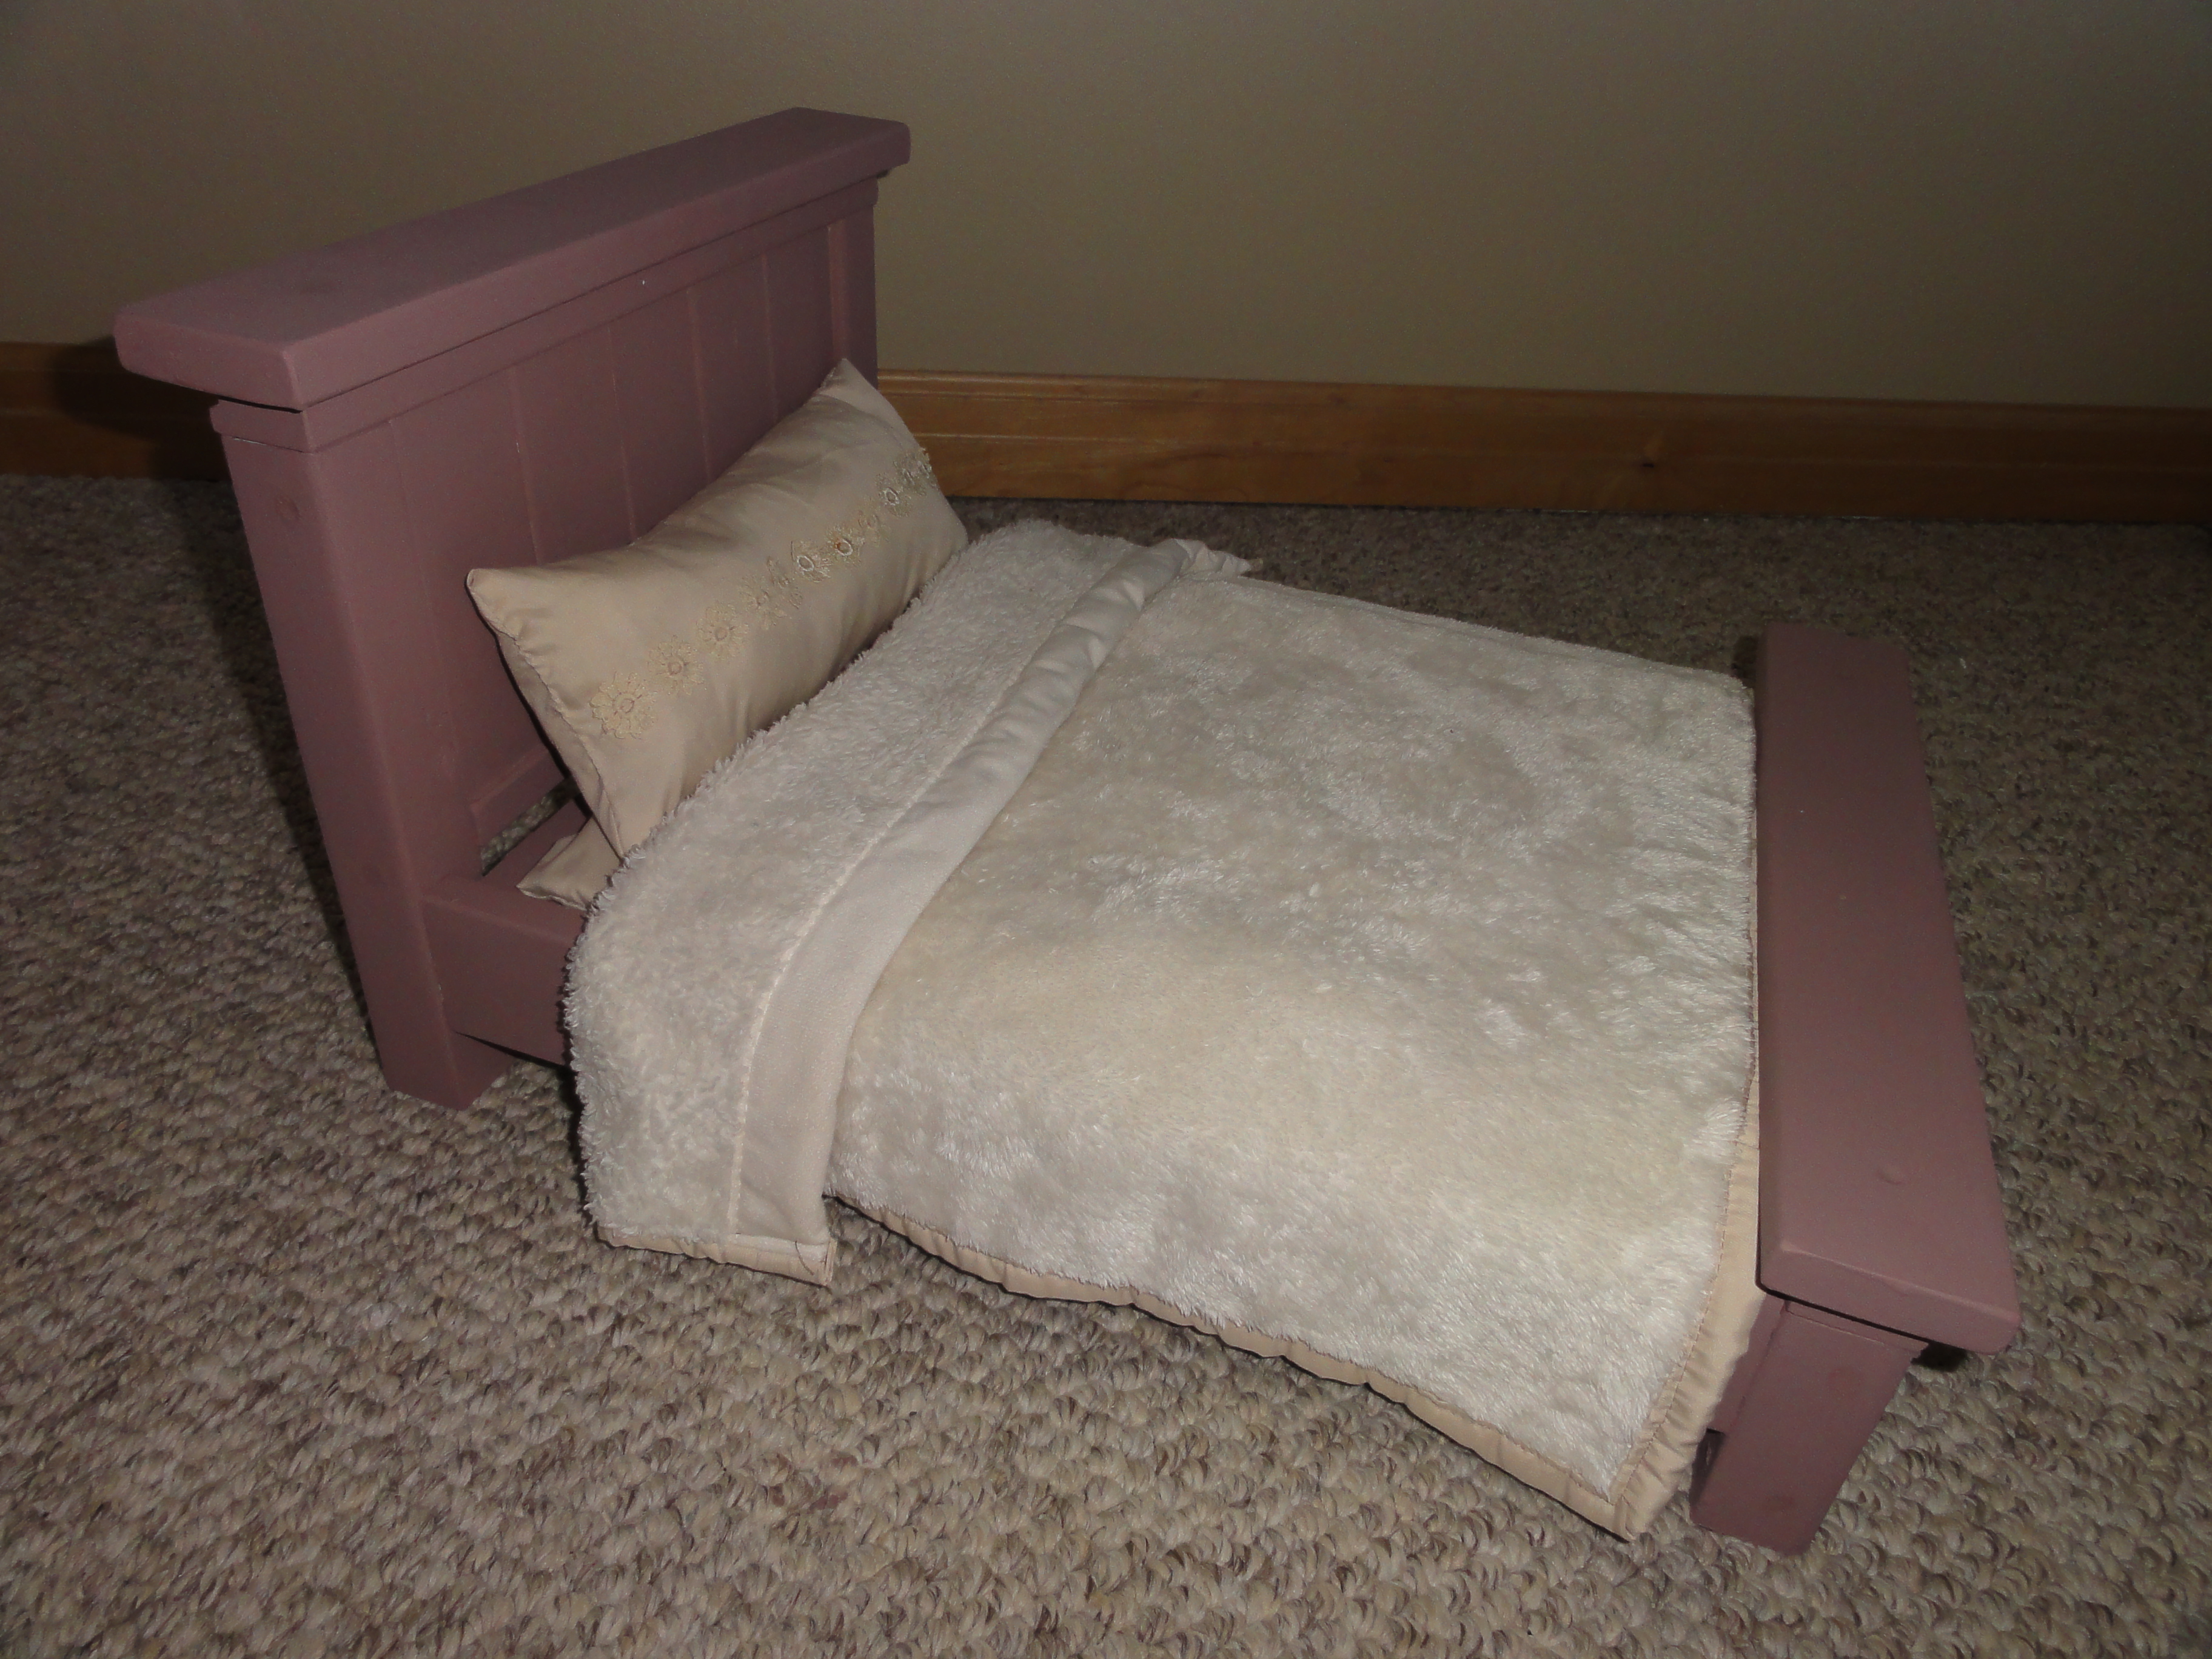
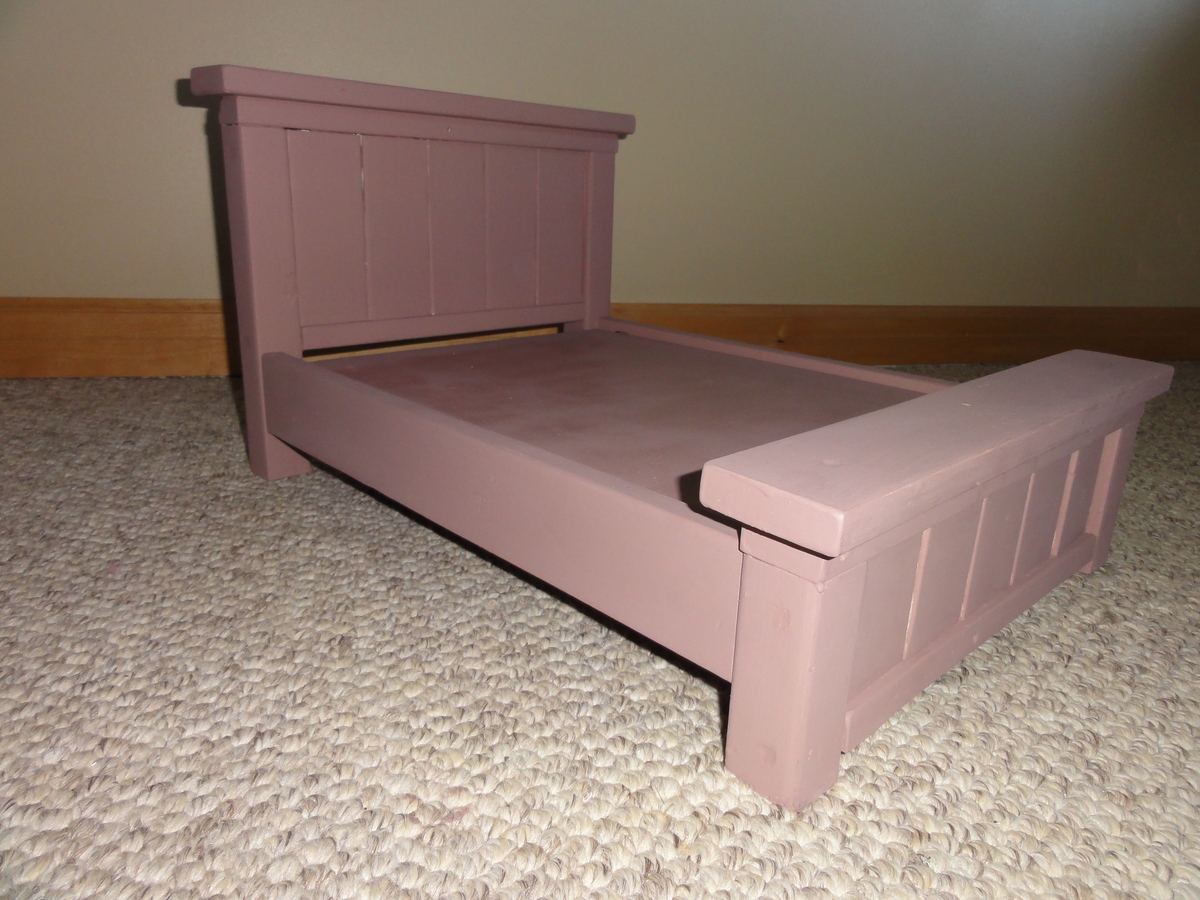
18” Doll Bunkbed
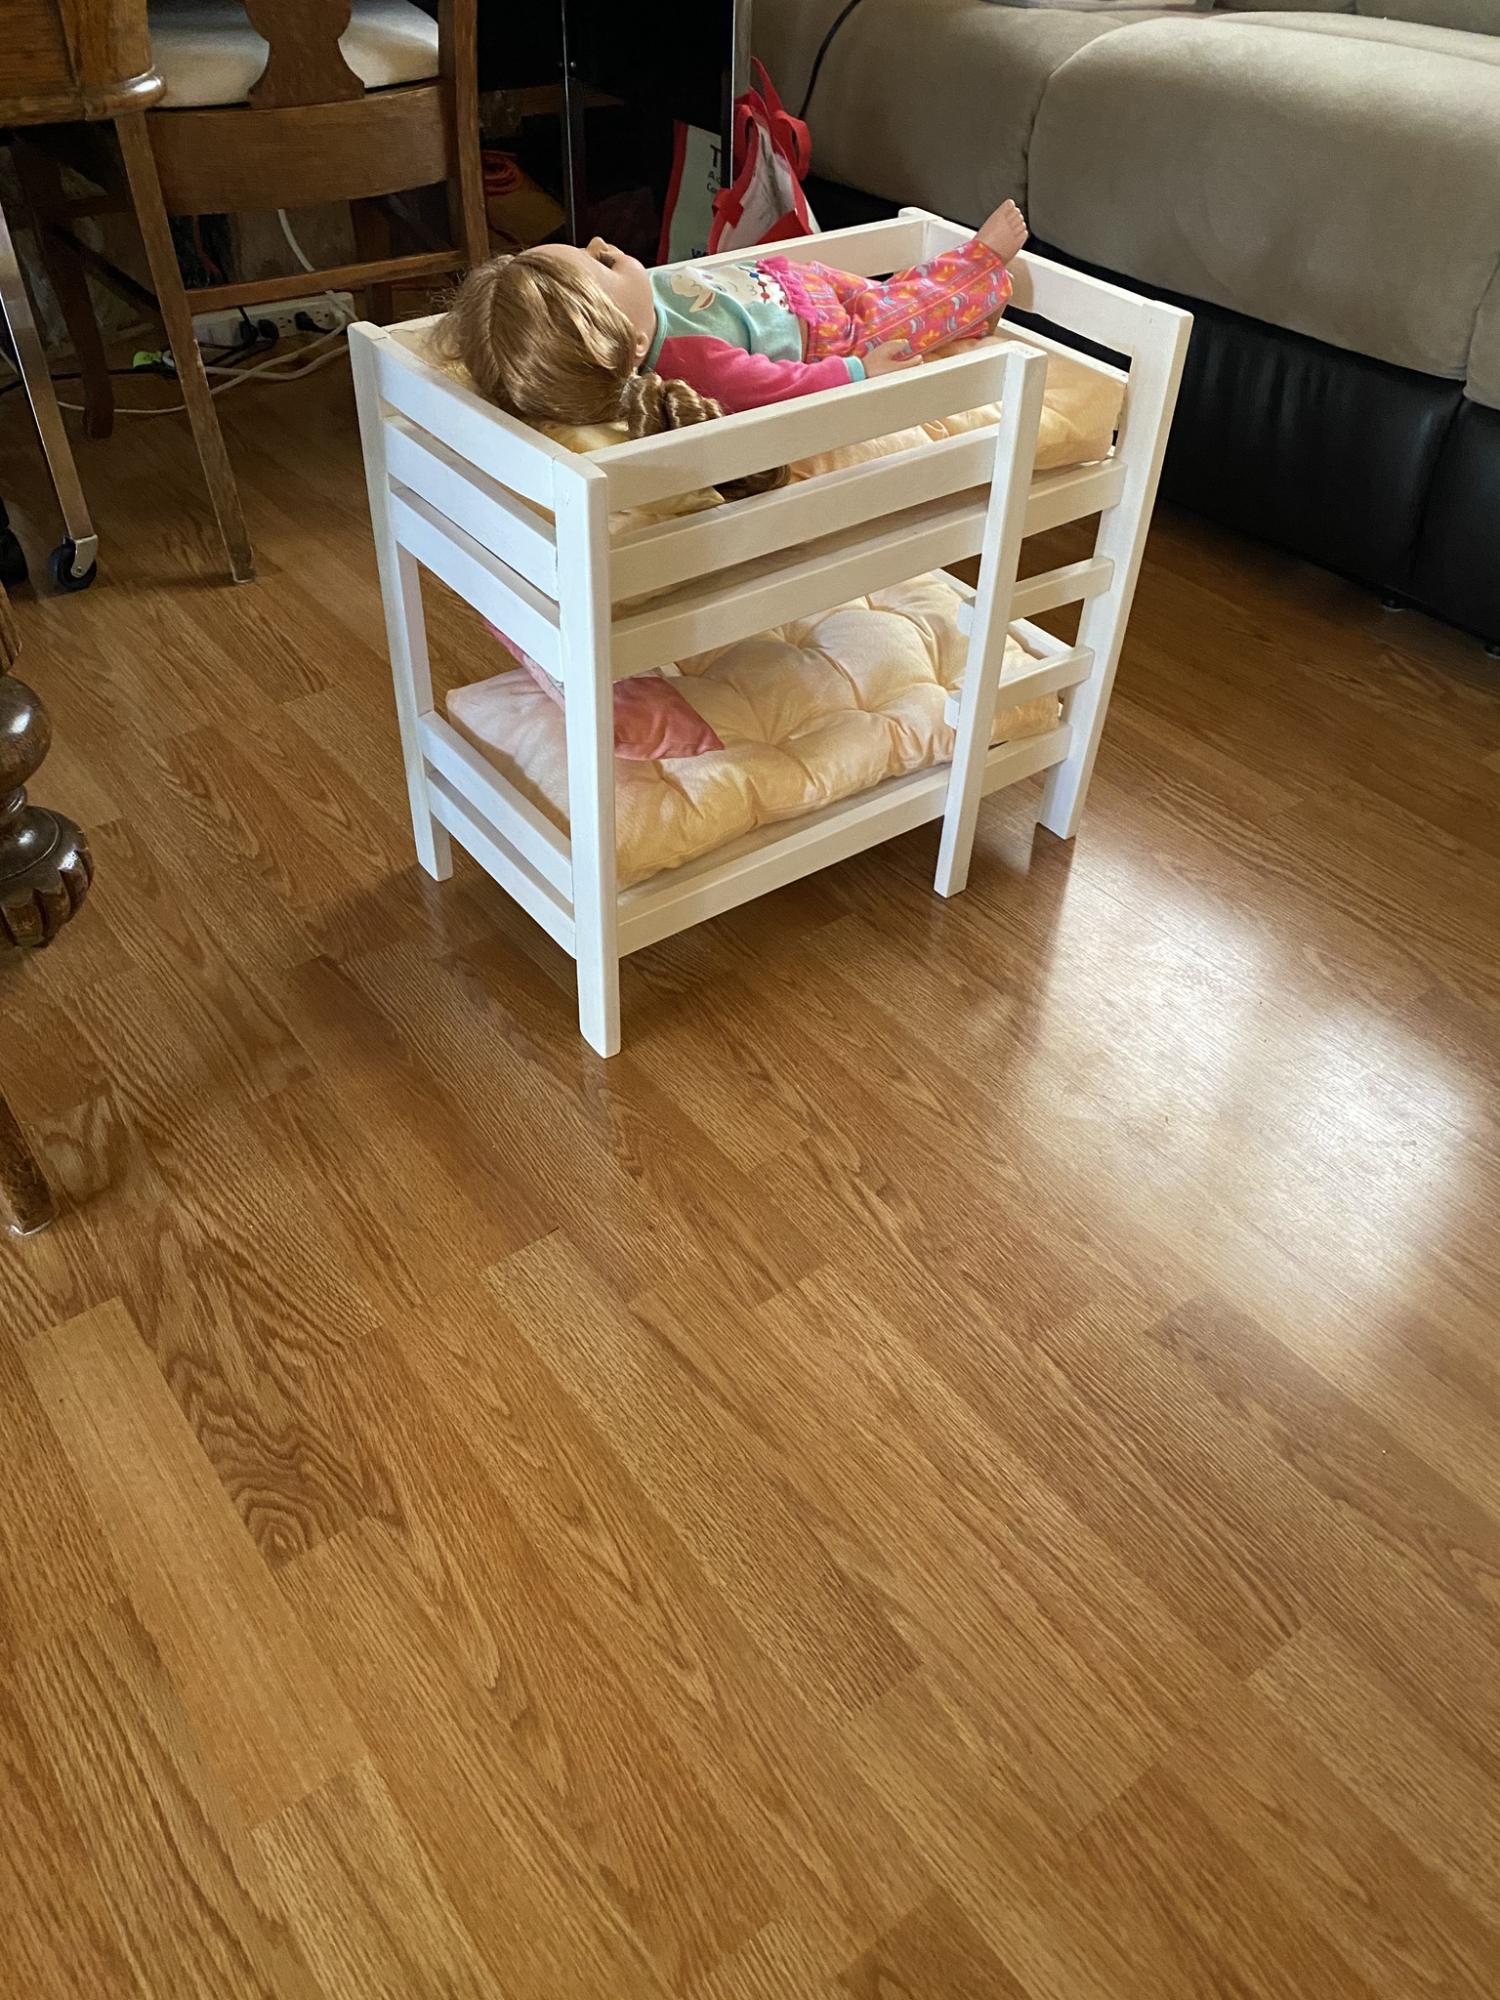
Awesome plans, Ana. Had to fight with not being able to get nice straight 1”x2” boards, and refused to go buy anything bigger to rip from. But overall, it turned out super nice and my granddaughter loved it. Already have a request for another one from her cousins 😊
Built from Plan(s)
Estimated Cost
$65
Estimated Time Investment
Afternoon Project (3-6 Hours)
Finish Used
CIL Semi Gloss - Vintage White
Recommended Skill Level
Beginner