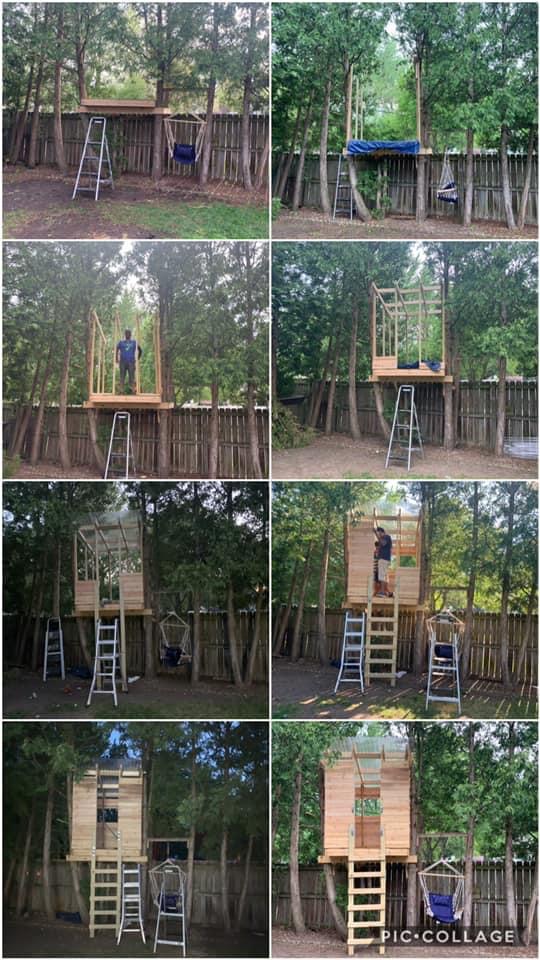
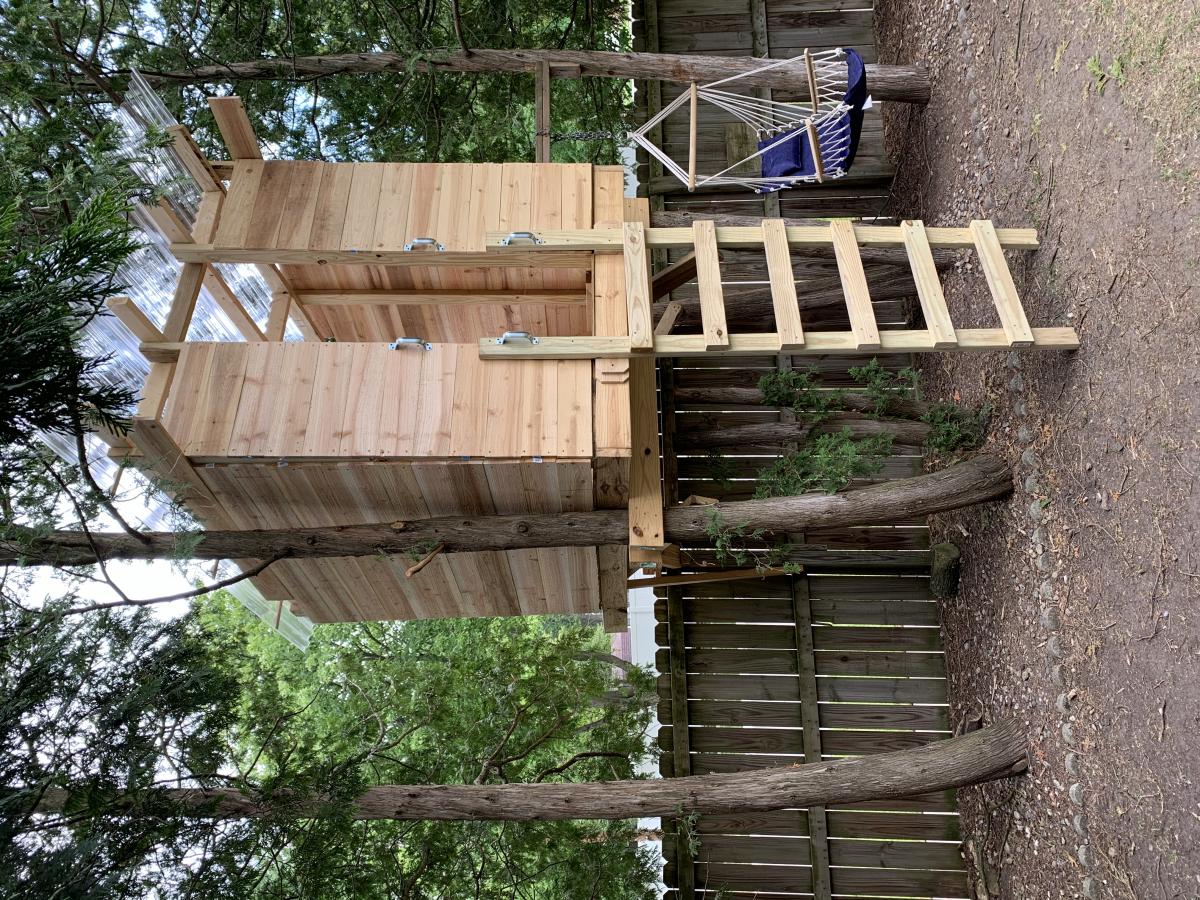
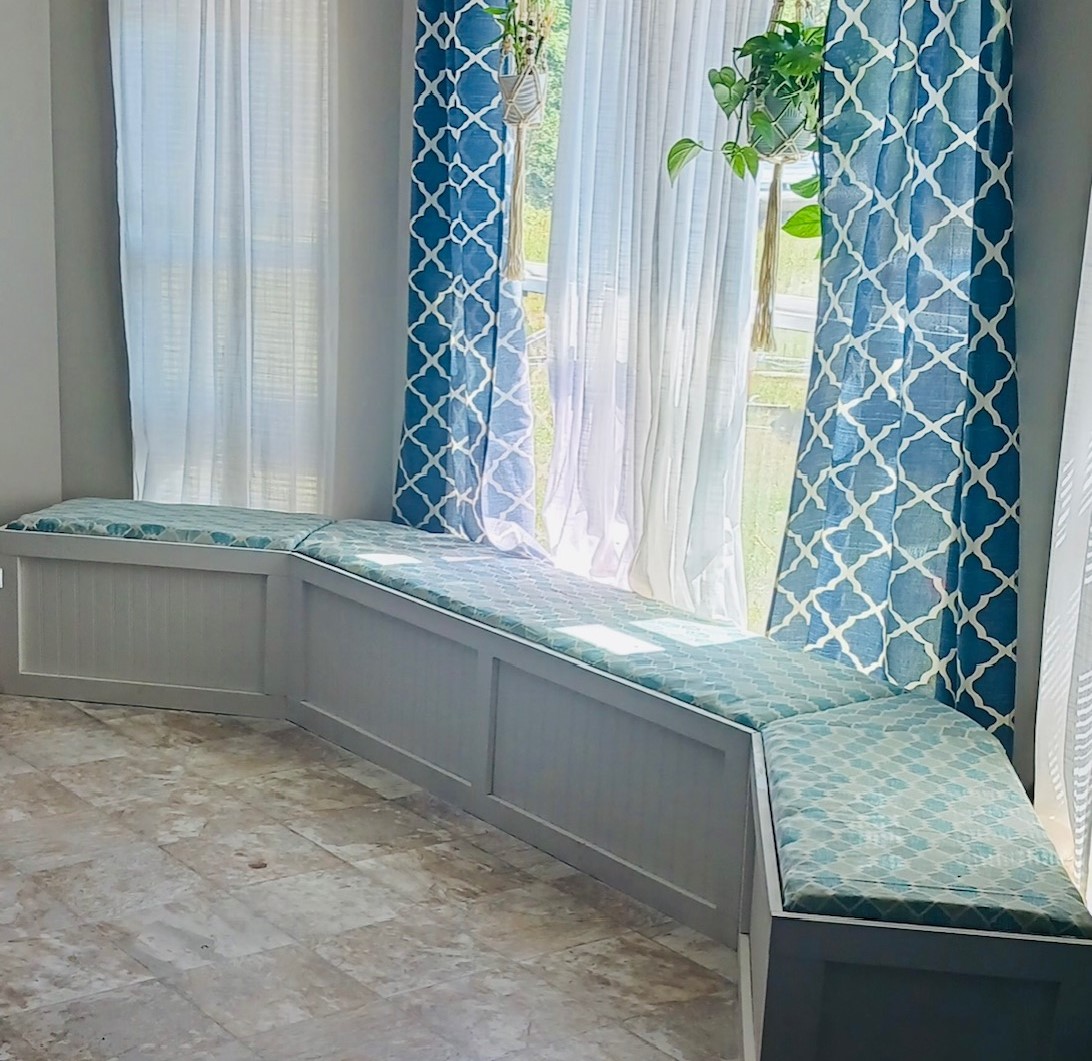
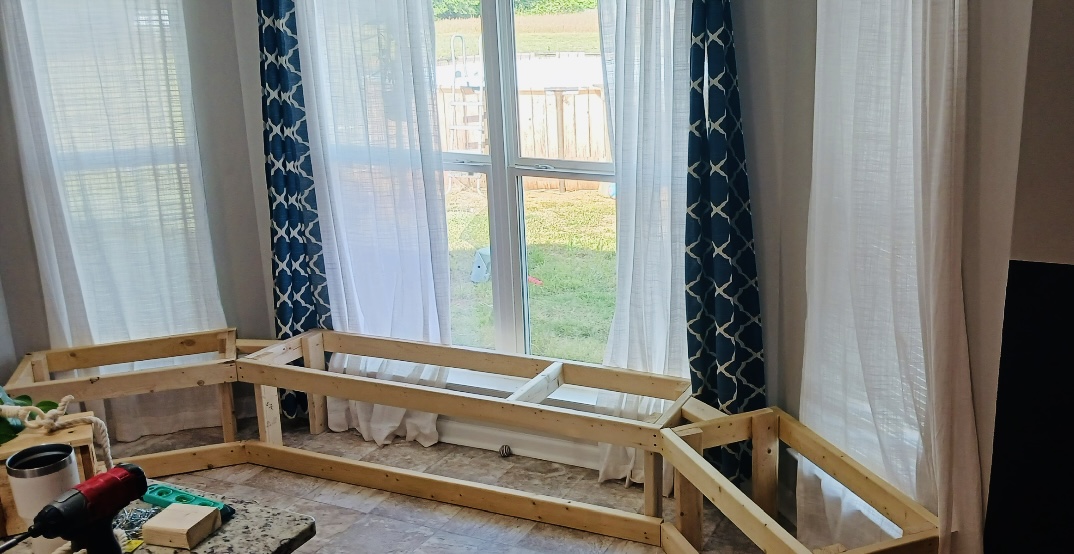
Corner Storage Banquette
"Thank you Ana White for your plans I'm in love!"
Tarryn Leigh Curlee

Built from Plan(s)
"Thank you Ana White for your plans I'm in love!"
Tarryn Leigh Curlee
This was one heck of a project LOL! But I am so pleased with the results!!
Wed, 02/29/2012 - 13:34
It looks awesome. I really like the built in look!!!
Mon, 07/23/2012 - 19:37
My husband just built us one of these for our laundry room, take a look!!
http://glamorousbride.blogspot.com/2012/07/making-most-of-your-space-la…
- Fotini
Mon, 07/23/2012 - 19:38
My husband just made us one of these!! Take a look :)
http://glamorousbride.blogspot.com/2012/07/making-most-of-your-space-la…
- Fotini
Mon, 09/03/2012 - 15:06
This excites me!! :) Such a great idea - practical, and yet pretty!
Sun, 09/23/2012 - 08:03
My washer will shake on the metal pedestals. Will it shake on this one?
Mon, 12/31/2012 - 19:01
My husband just finished one similar to this for me today-total cost about $65.....Thank you for the fabulous & frugal idea!!
Wed, 06/19/2013 - 11:33
Do you have the plans posted for the washer dryer pedestals?
Sat, 11/07/2015 - 07:47
Please help me find out where to get plan specifics, new here
Sat, 11/07/2015 - 10:54

I modified this chair with 2x4's as the base and 2x2 for decoration on arms, this is prior to sanding and finishing

This project was so easy and fun to make. Love the way the instructions are laid out.
David Van Dyk
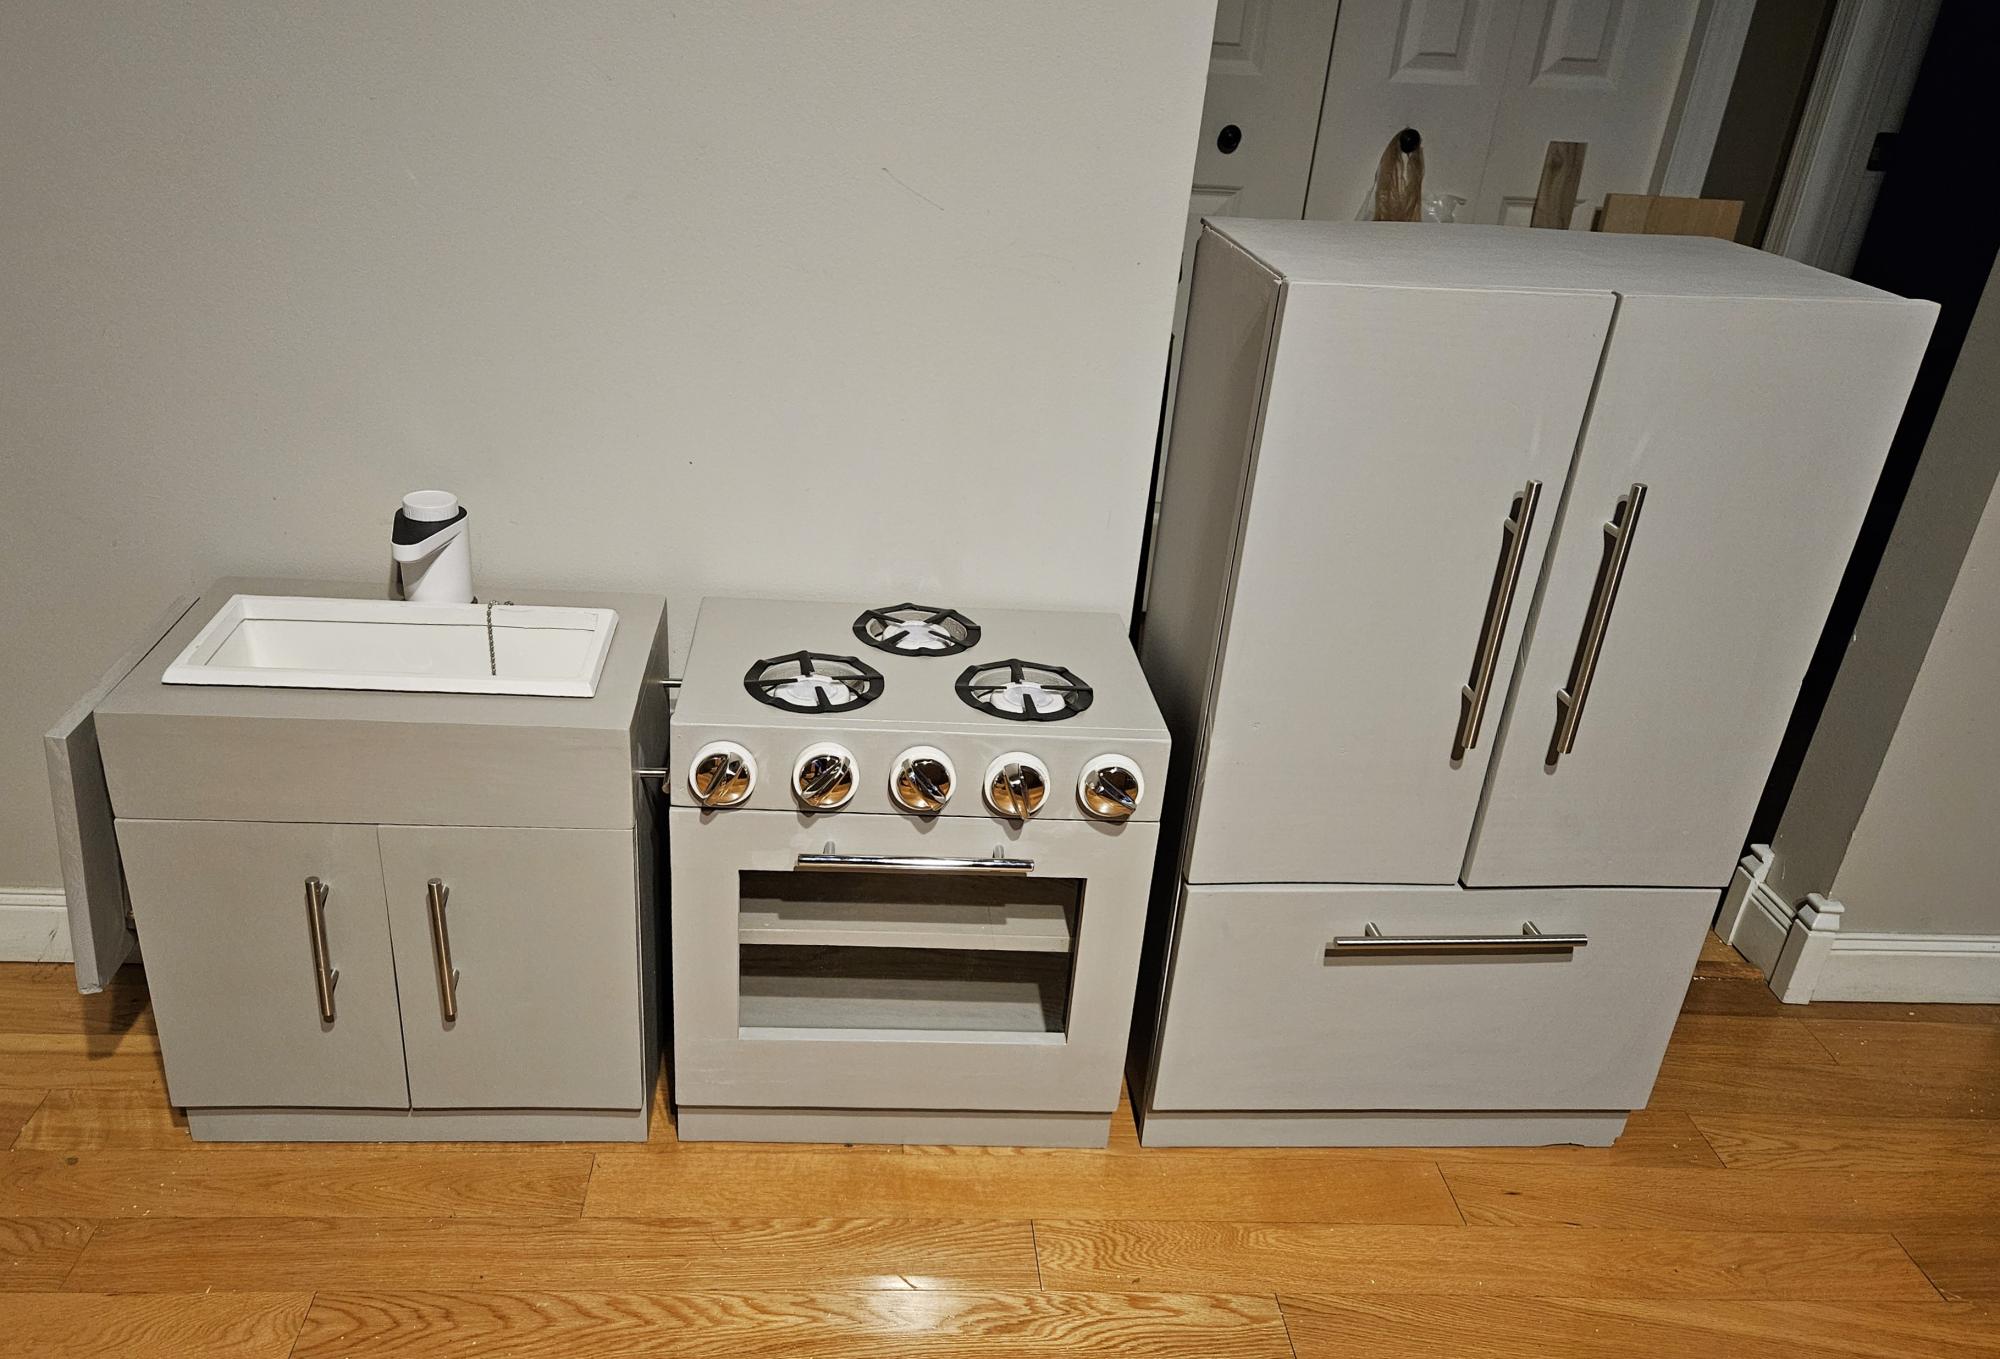
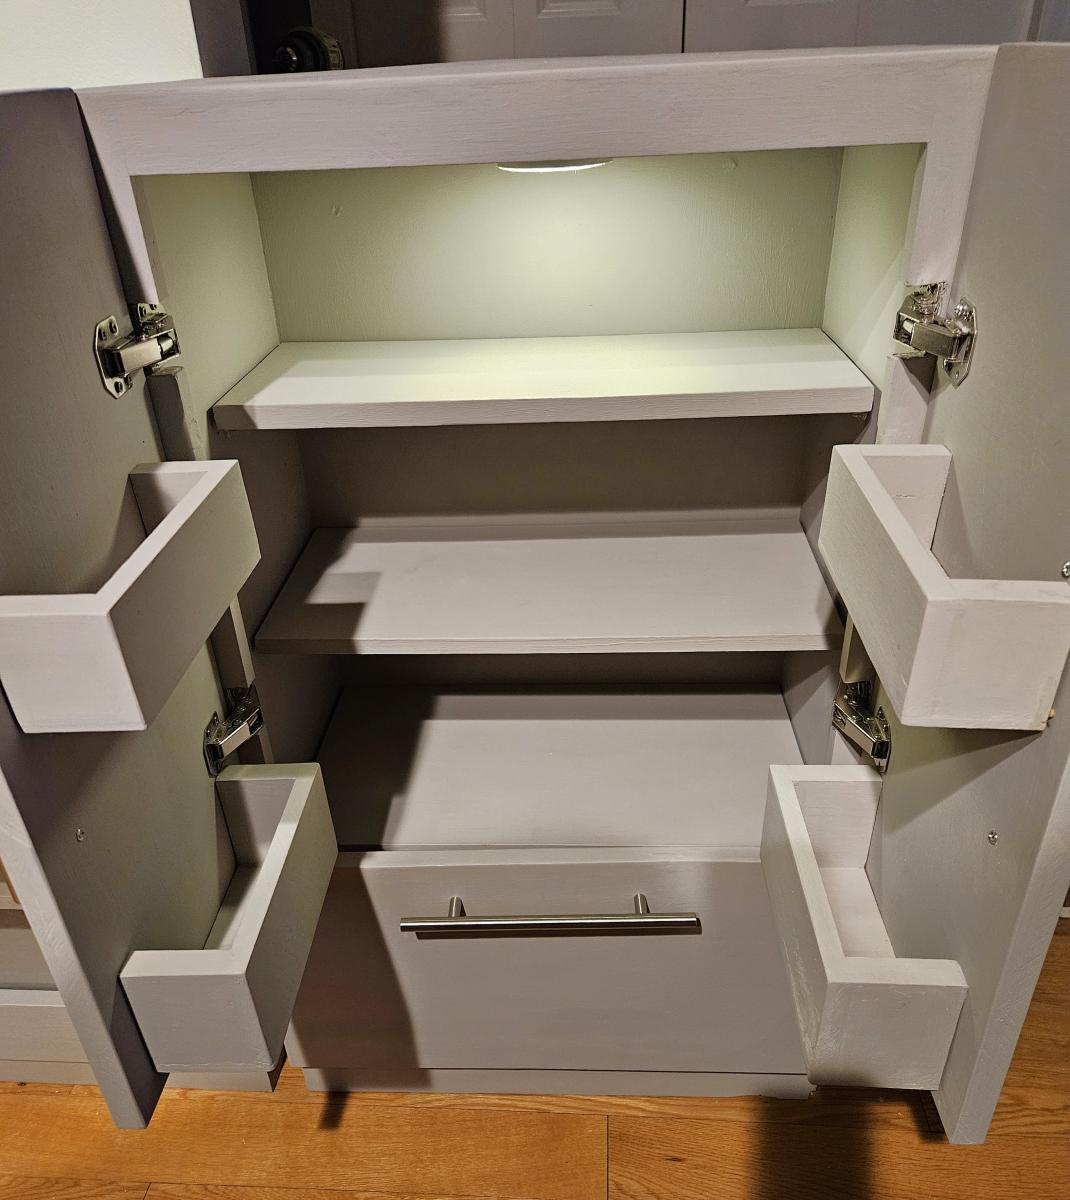
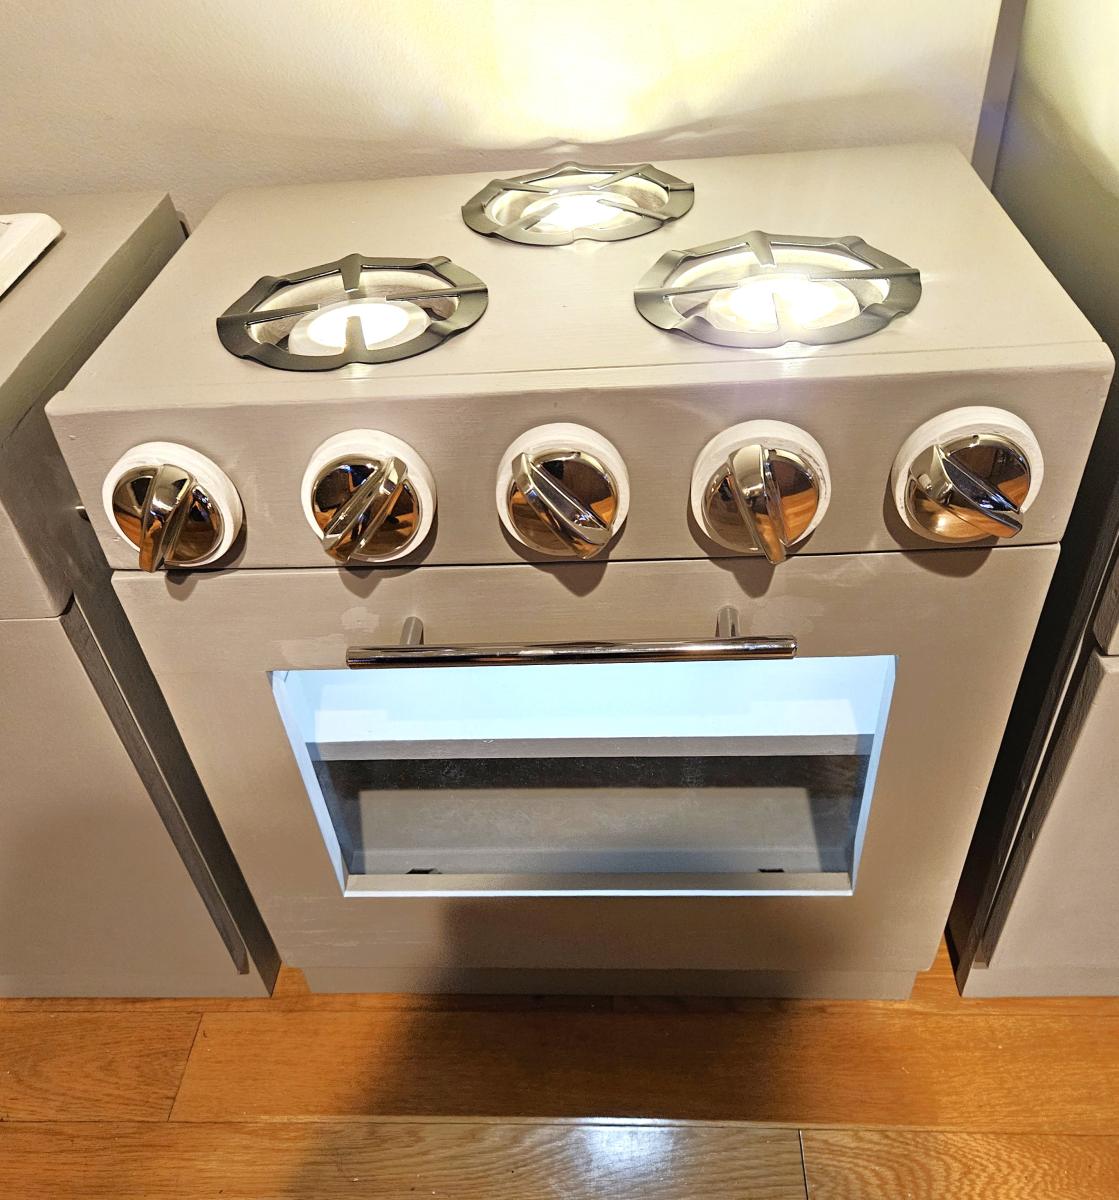
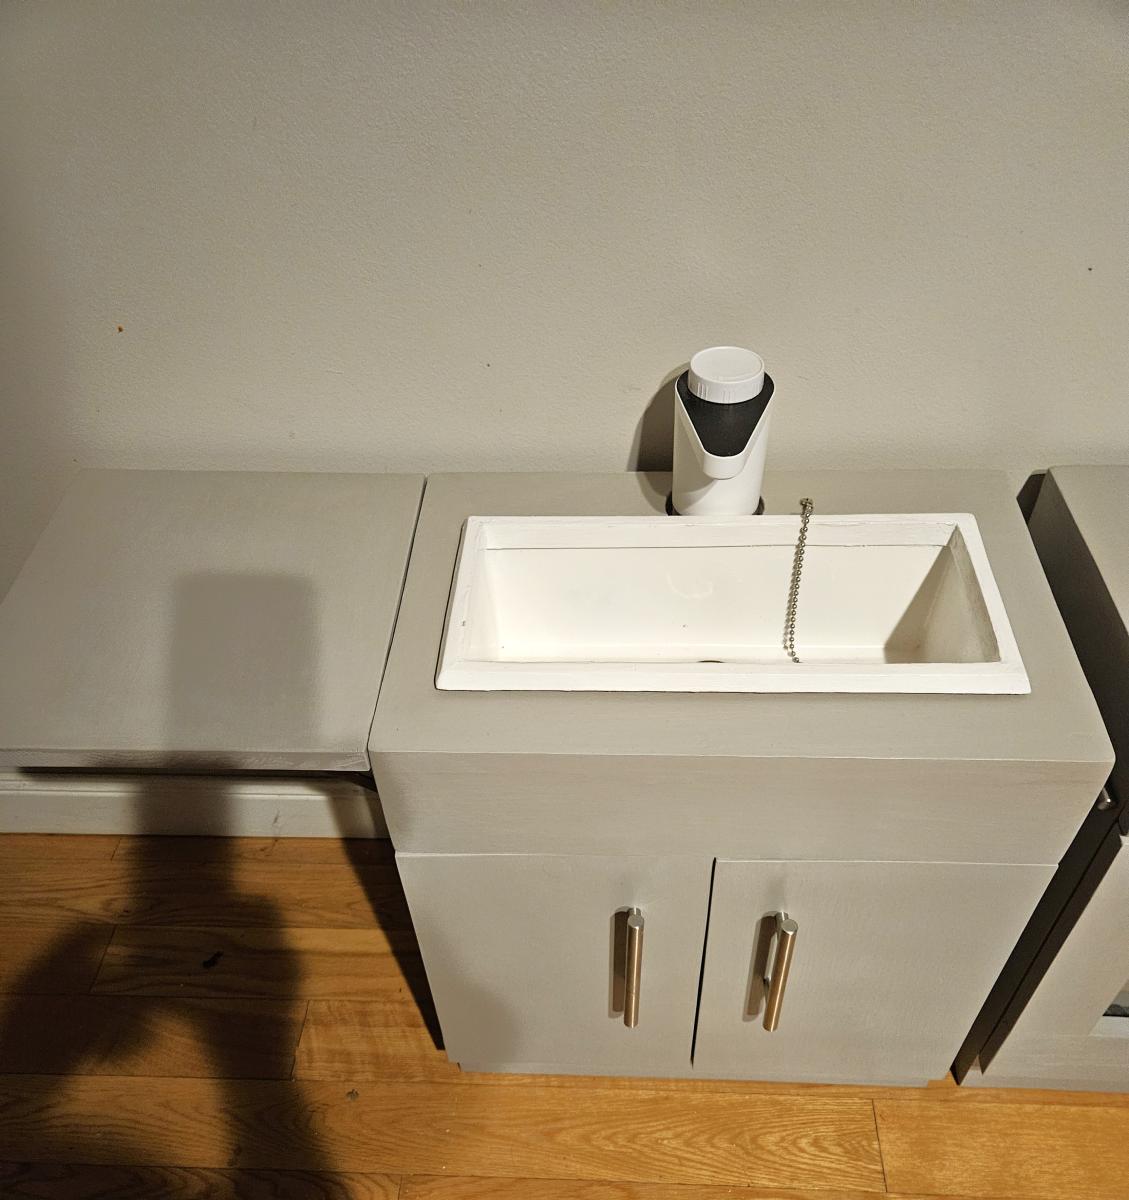
Christmas kitchen for my granddaughter using Ana's kids kitchen plans.
Raelyn's Gramma
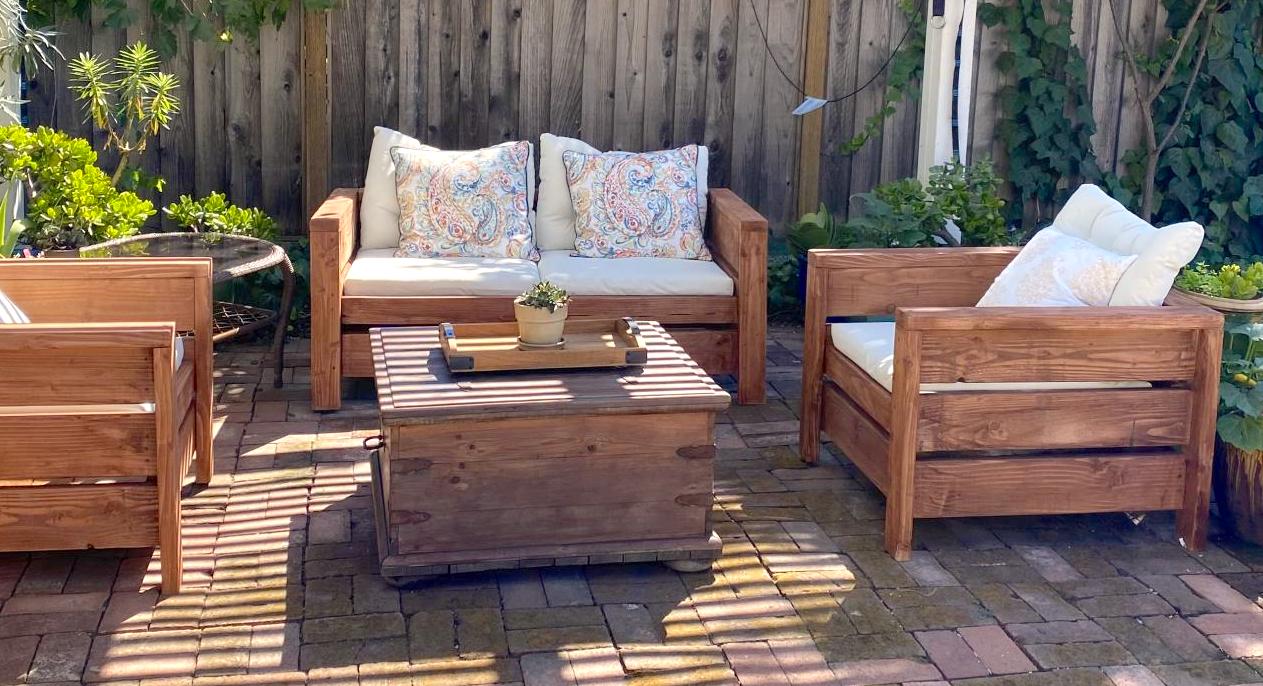
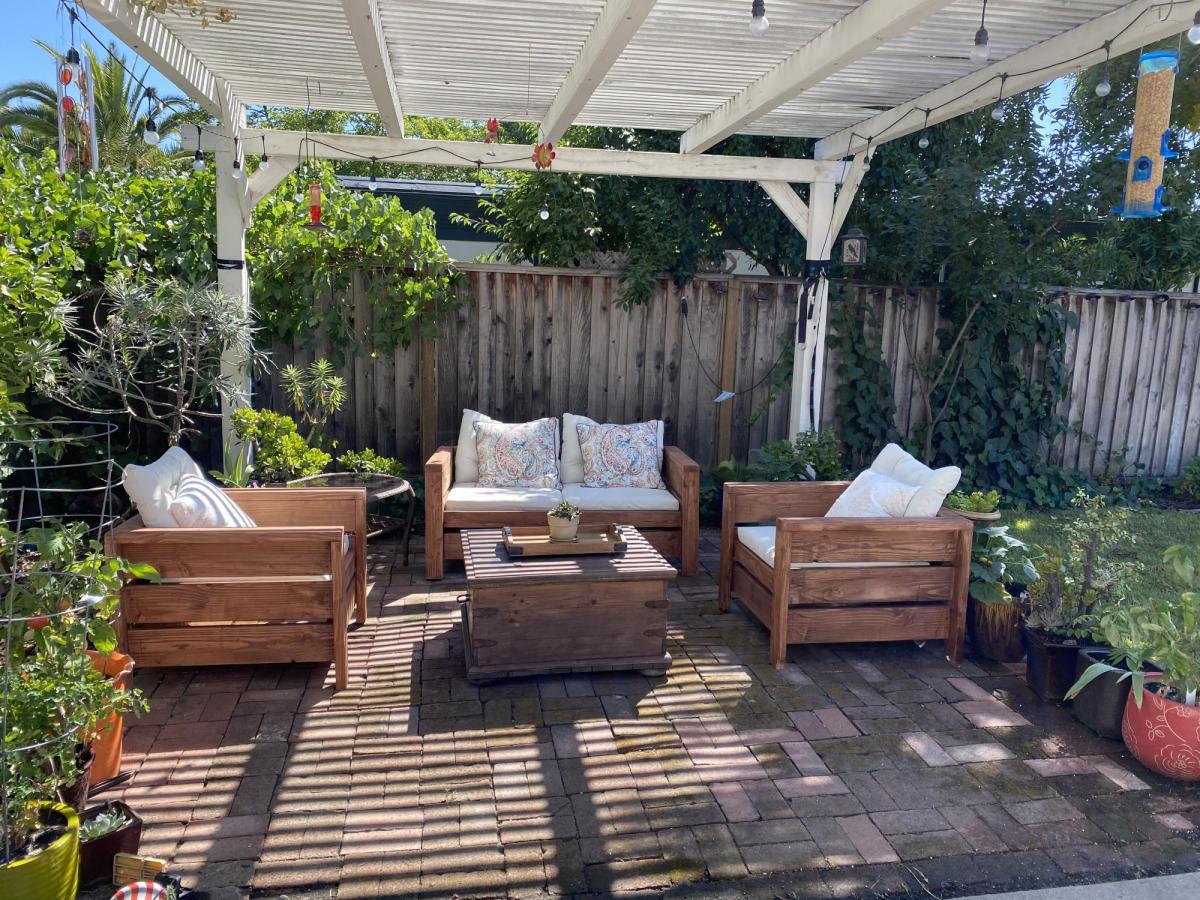
These plans were great. Easy to put together and they look quite amazing. And they are solid! Bought cushions from IKEA and the wood from Home Depot. Stained and sealed.
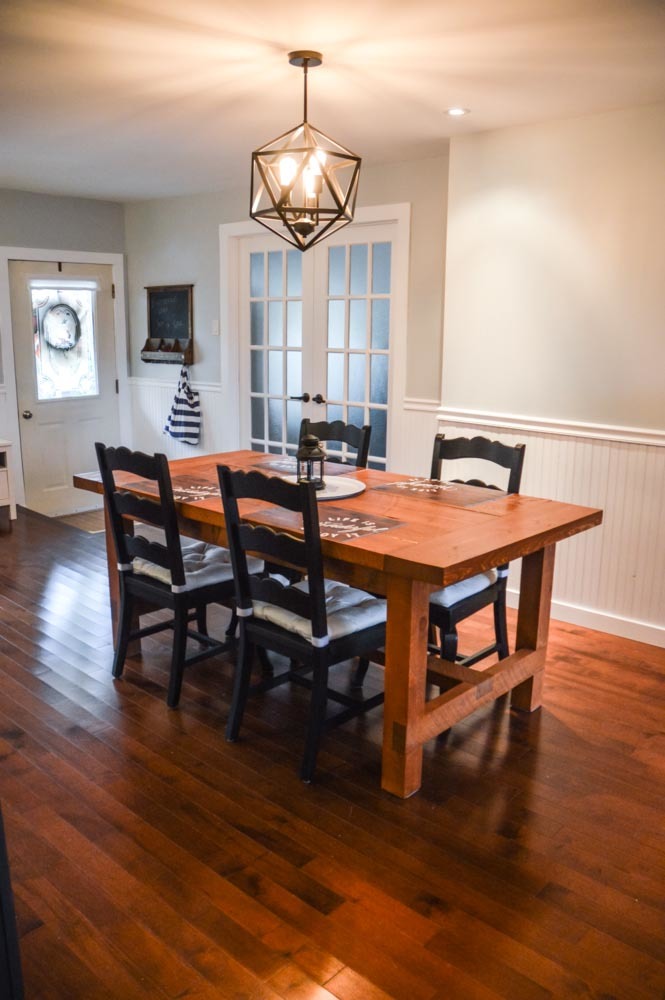
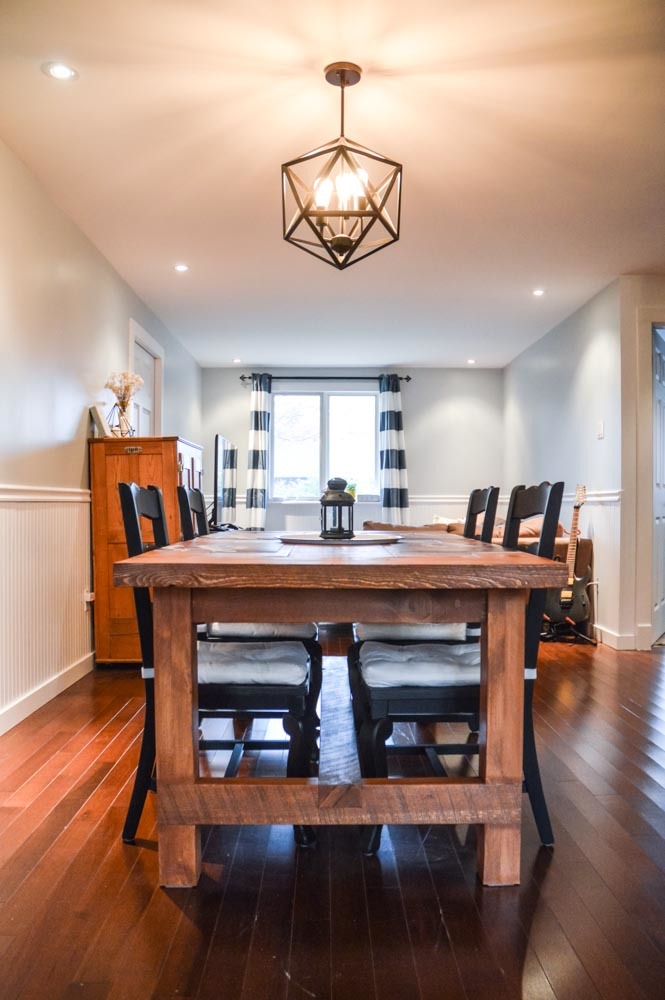
I had shown this plan earlier on to my bf, telling it I really like it and it would be so much cheaper to make our future rustic dining table on our own instead of buying it. He seemed reluctant.... And then, 2 months later, I come back from my parent's house in the evening to find that he has built me my rustic dining table just as I had wished!

Sun, 10/23/2016 - 11:20
This is absolutely gorgeous! Is it a reclaimed wood dining table? What a wonderful suprise! What's next? :)
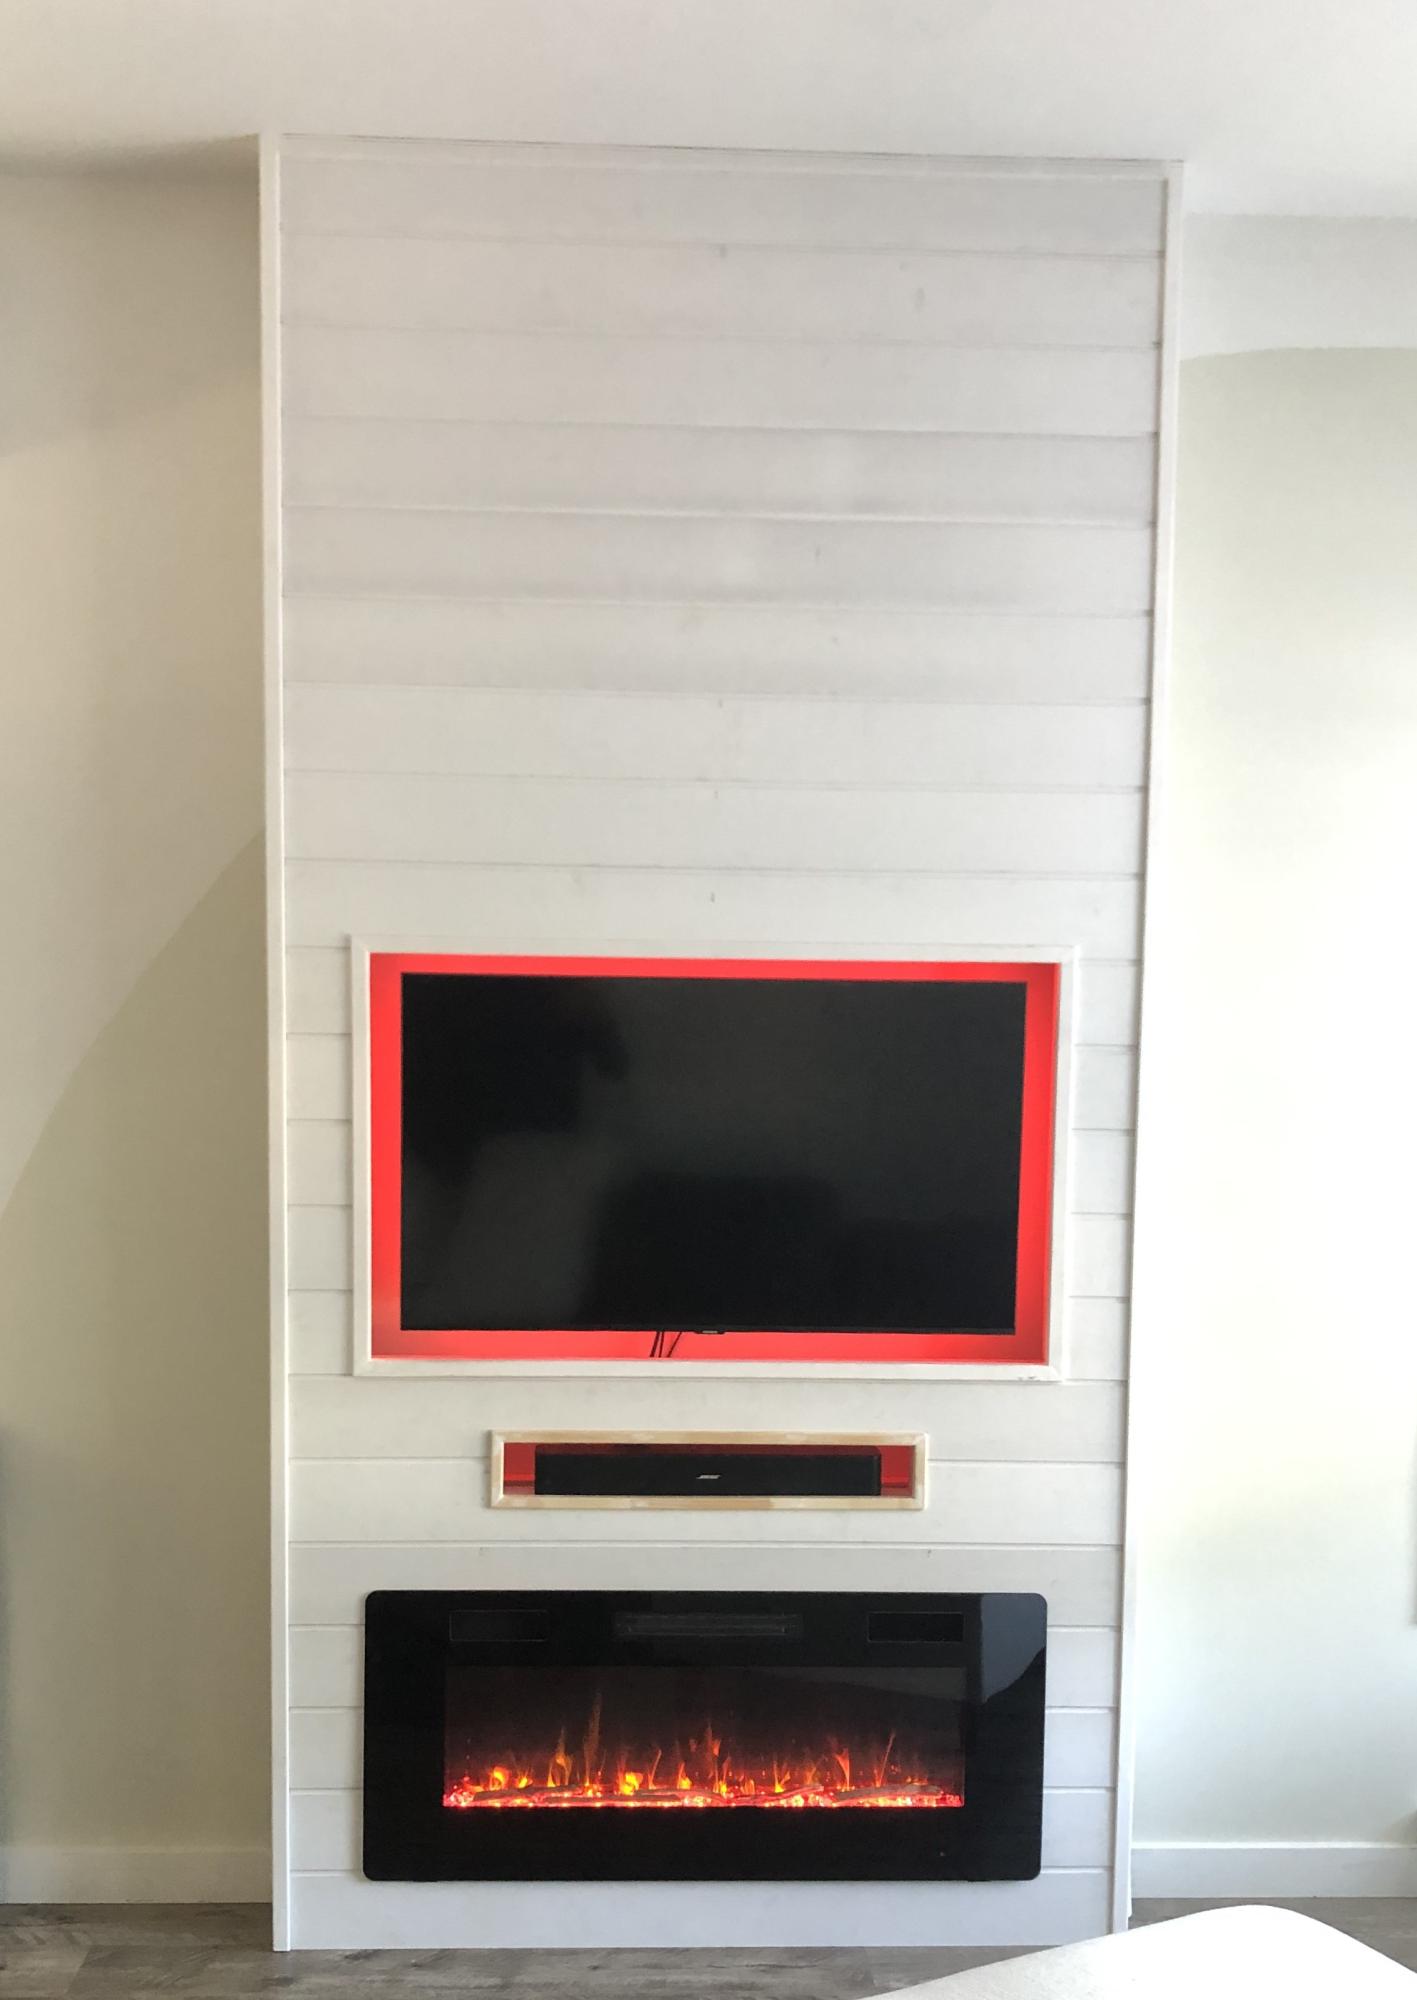
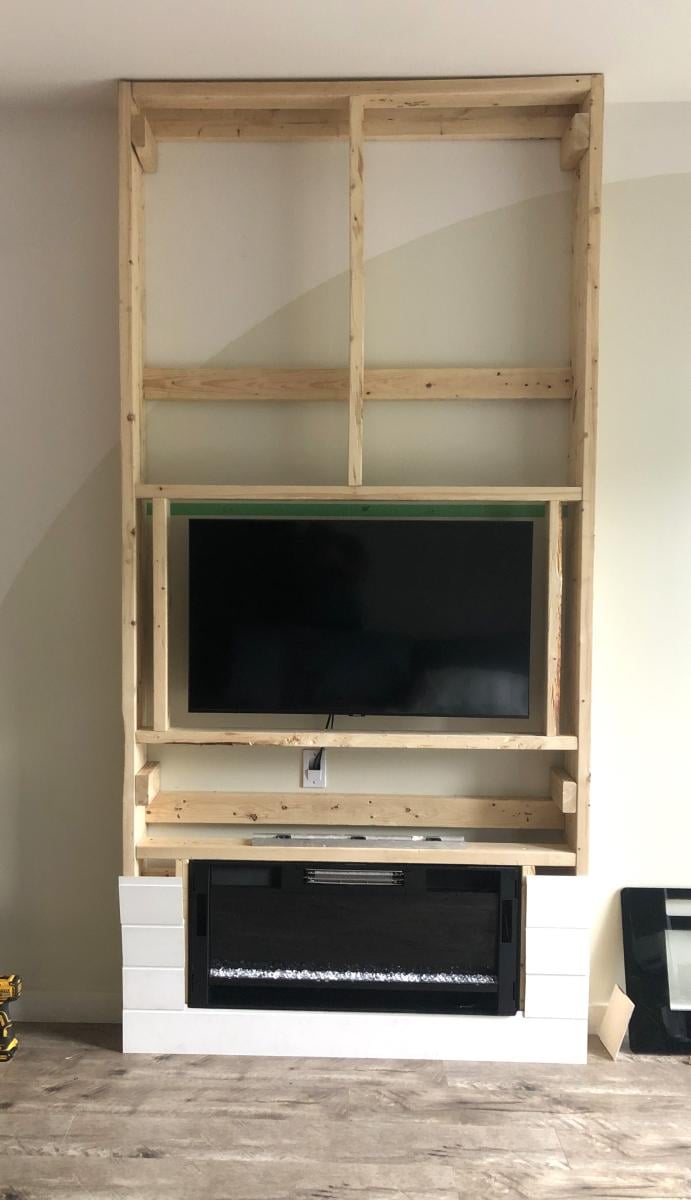
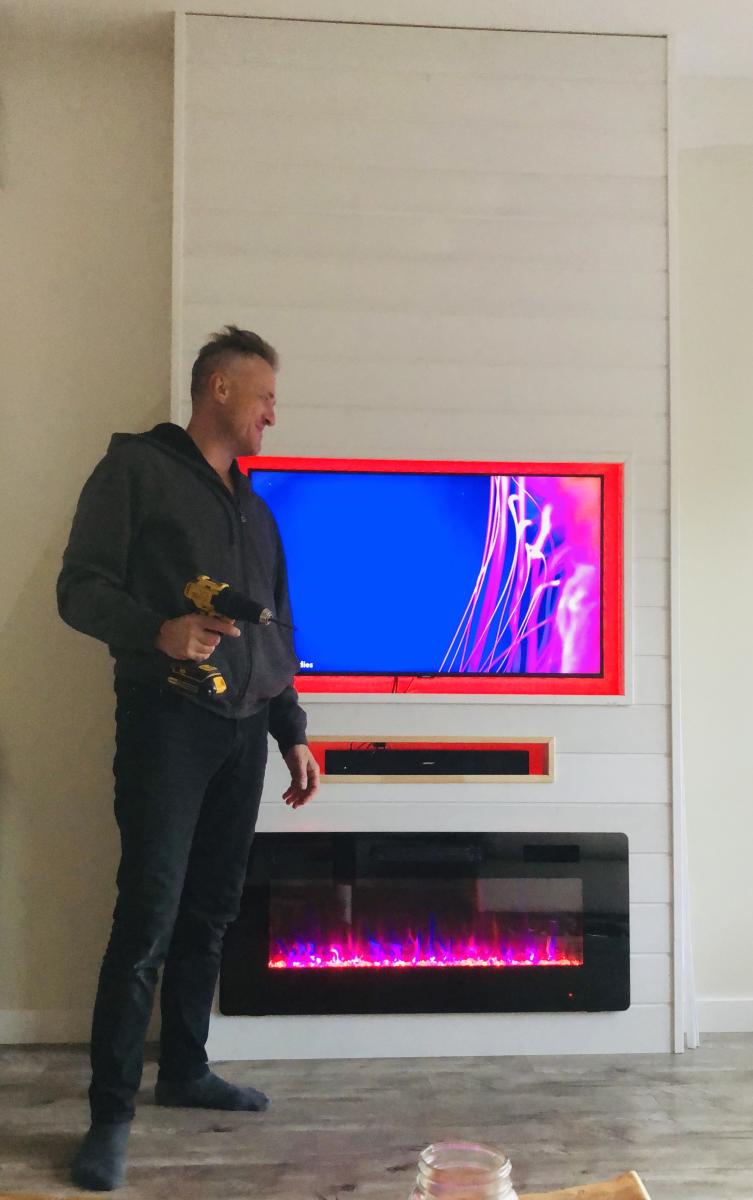
Dear Ana,
I was absolutely inspired by your fireplace shiplap wall project. After pondering a couple of years to get started on it, I finally brought it to life.
I wanted a rather thin design so I modified it to my taste creating a depth of only 7” inches (2 x 3 1/2 studs). Included a cutout frame for a soundbar and added rear LED lighting.
Very proud of it! Thank you for the motivation, your plans and guidance.
Cheers!
Ron

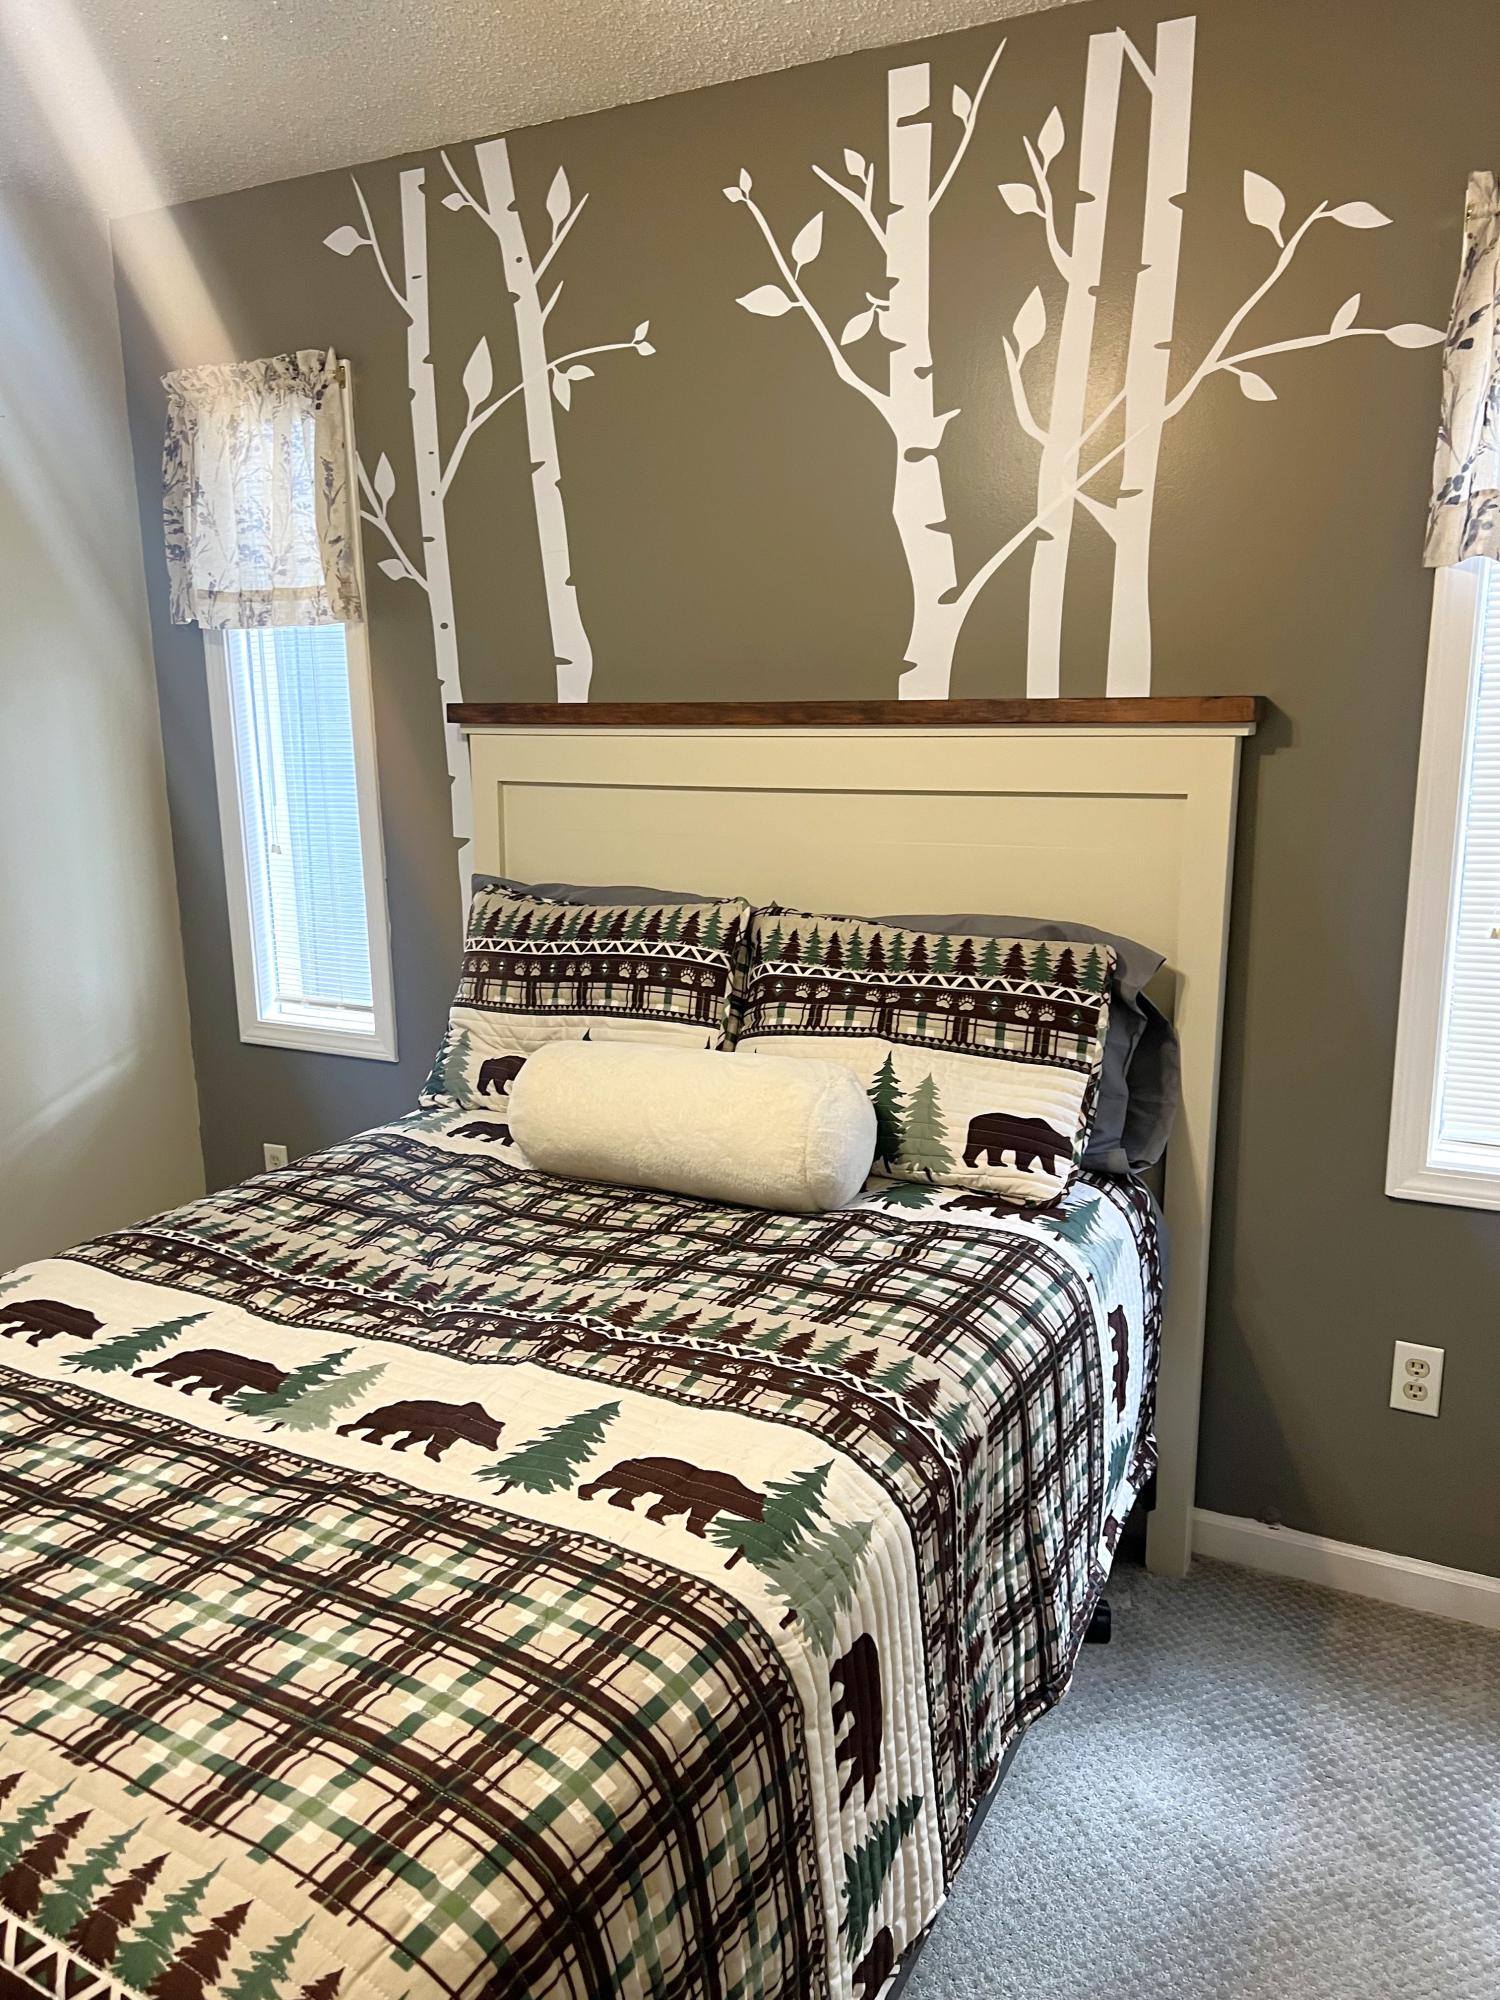
Bed built off of plans. For one person this was a big job to finish in 3 days, but I was able to get it done before Christmas.
Sat, 12/29/2012 - 08:19
My 6 yr old recieved this bed for Christmas as well and we decided to let her choose the paint colors. This looks great with the purple and white! I love it! I showed her this picture and she likes it too. :)
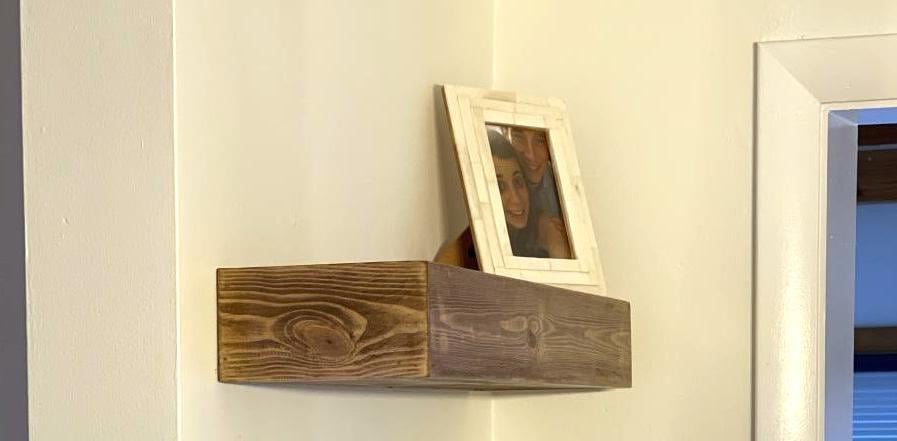
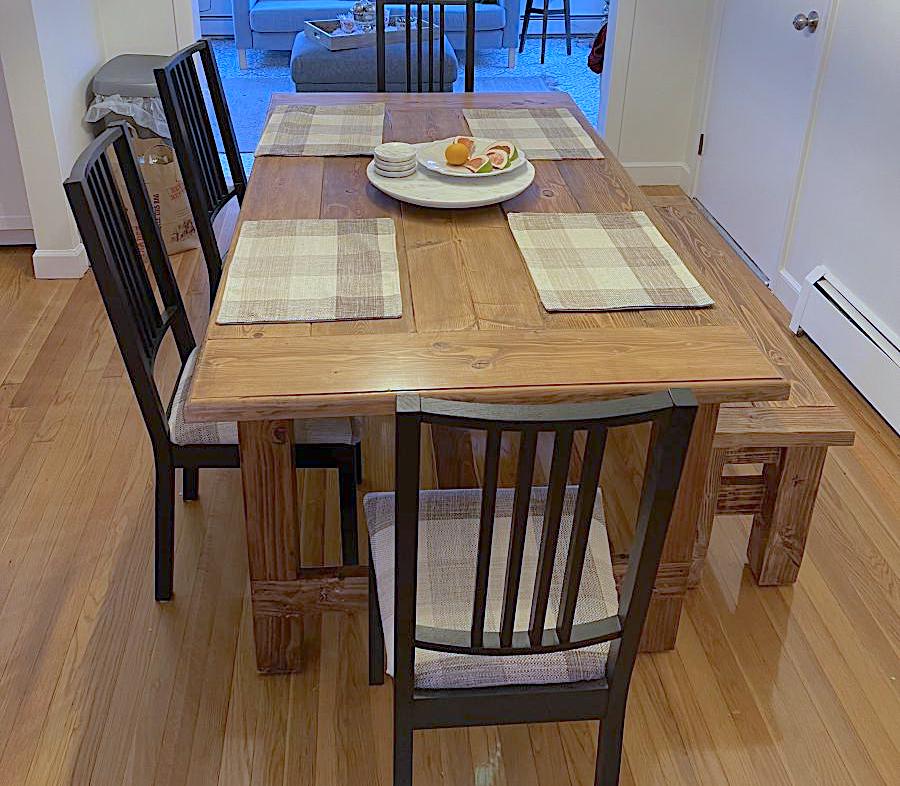
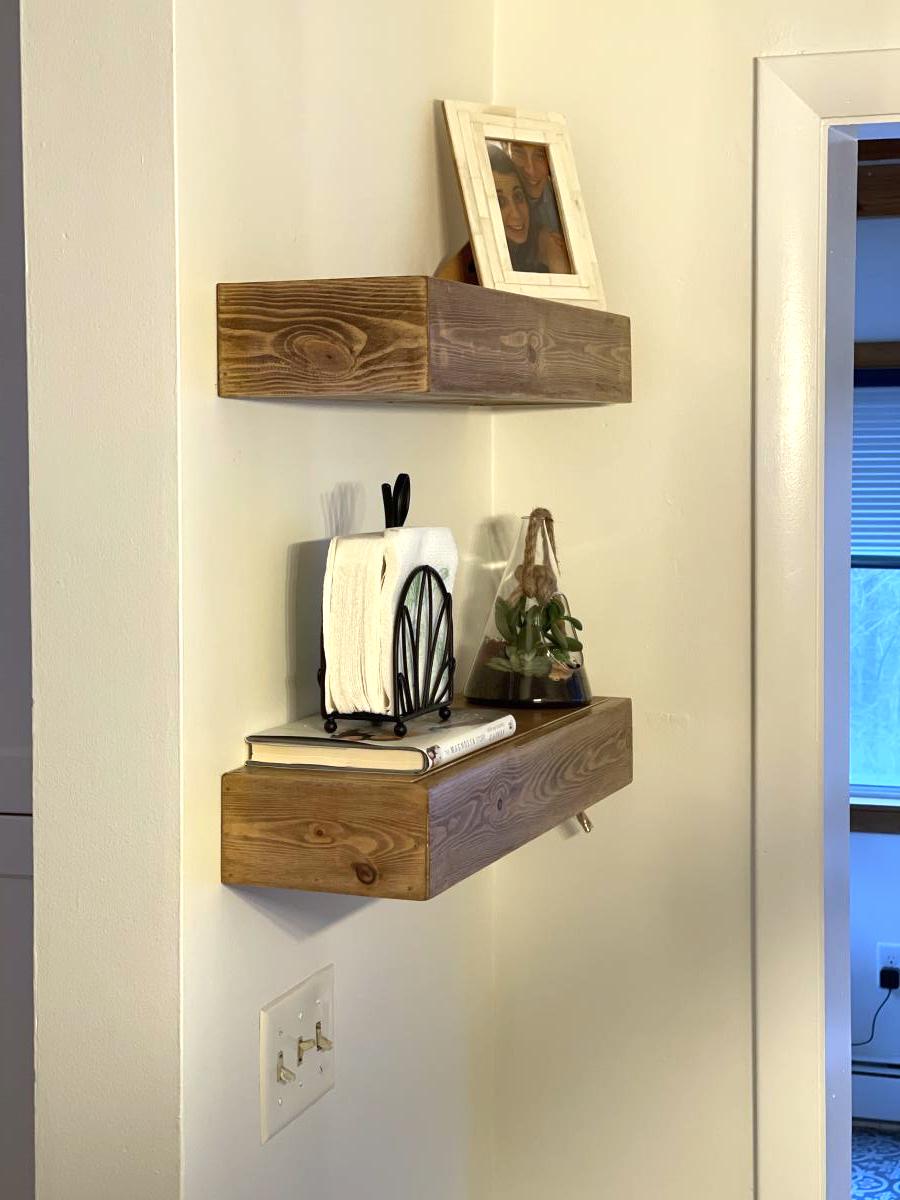
My daughter wanted to create the Farmhouse look for her New England home. Had so much fun building the Table, Bench and Floating shelves. The Plans were perfect, and of course customizable (she wanted it a little shorter). My next project is a real workbench for my garage. I think the only issue is the New Jersey winters.
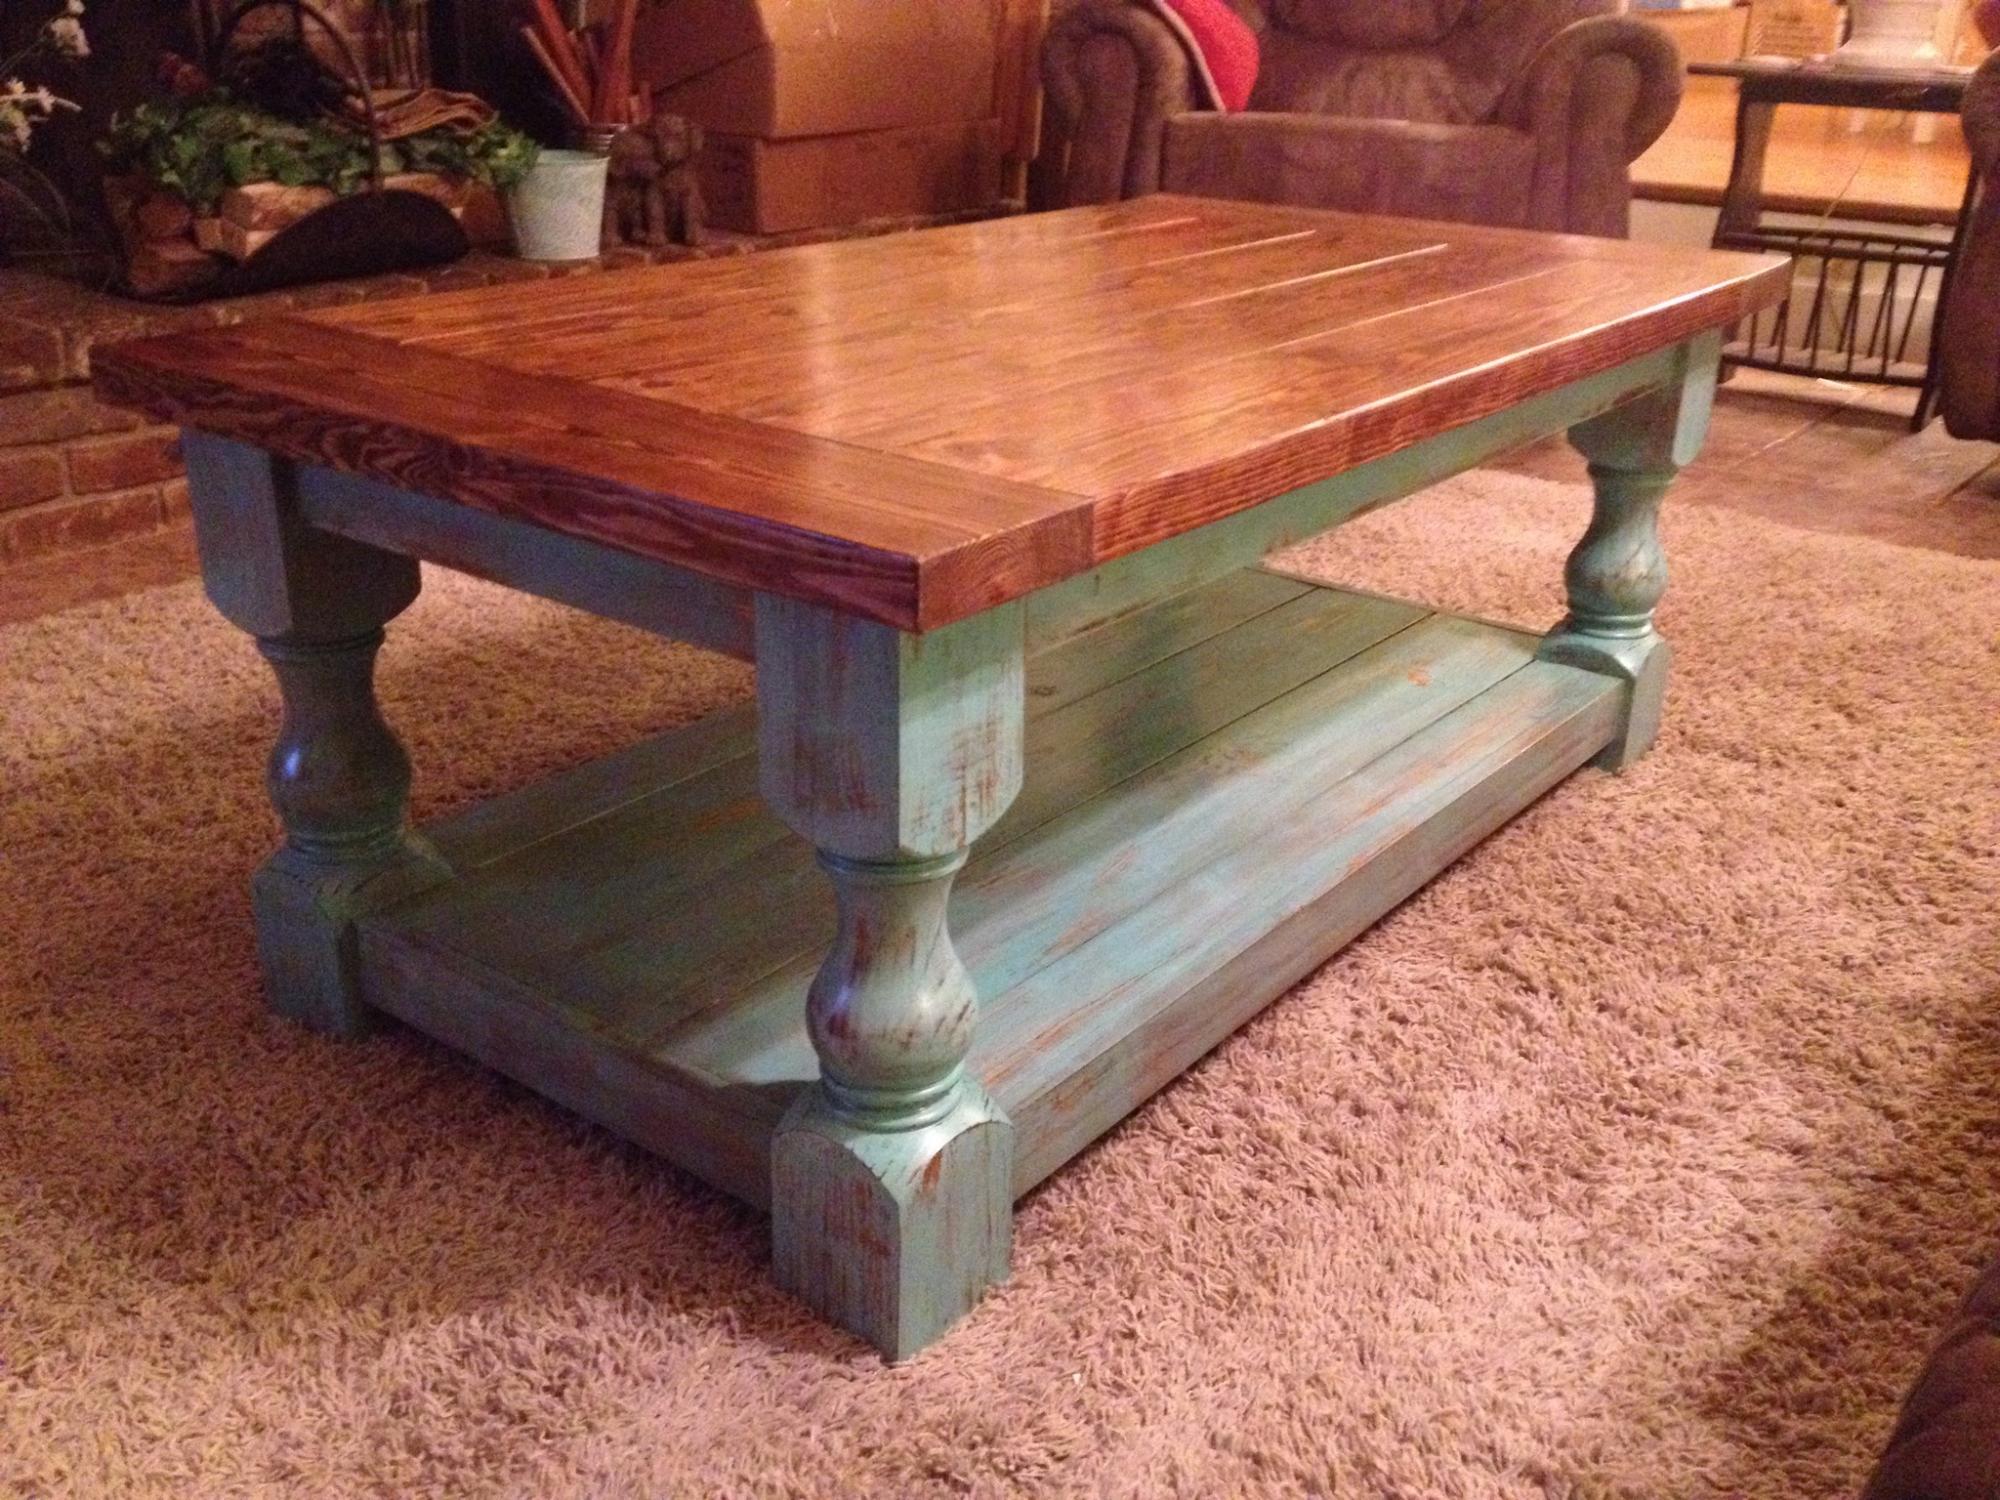
I ran across this when looking for ideas for a coffee table. My wife wanted a rectangular table, rather than a square - simple adjustment. I ordered the legs from
Osborne - great selection and good service.

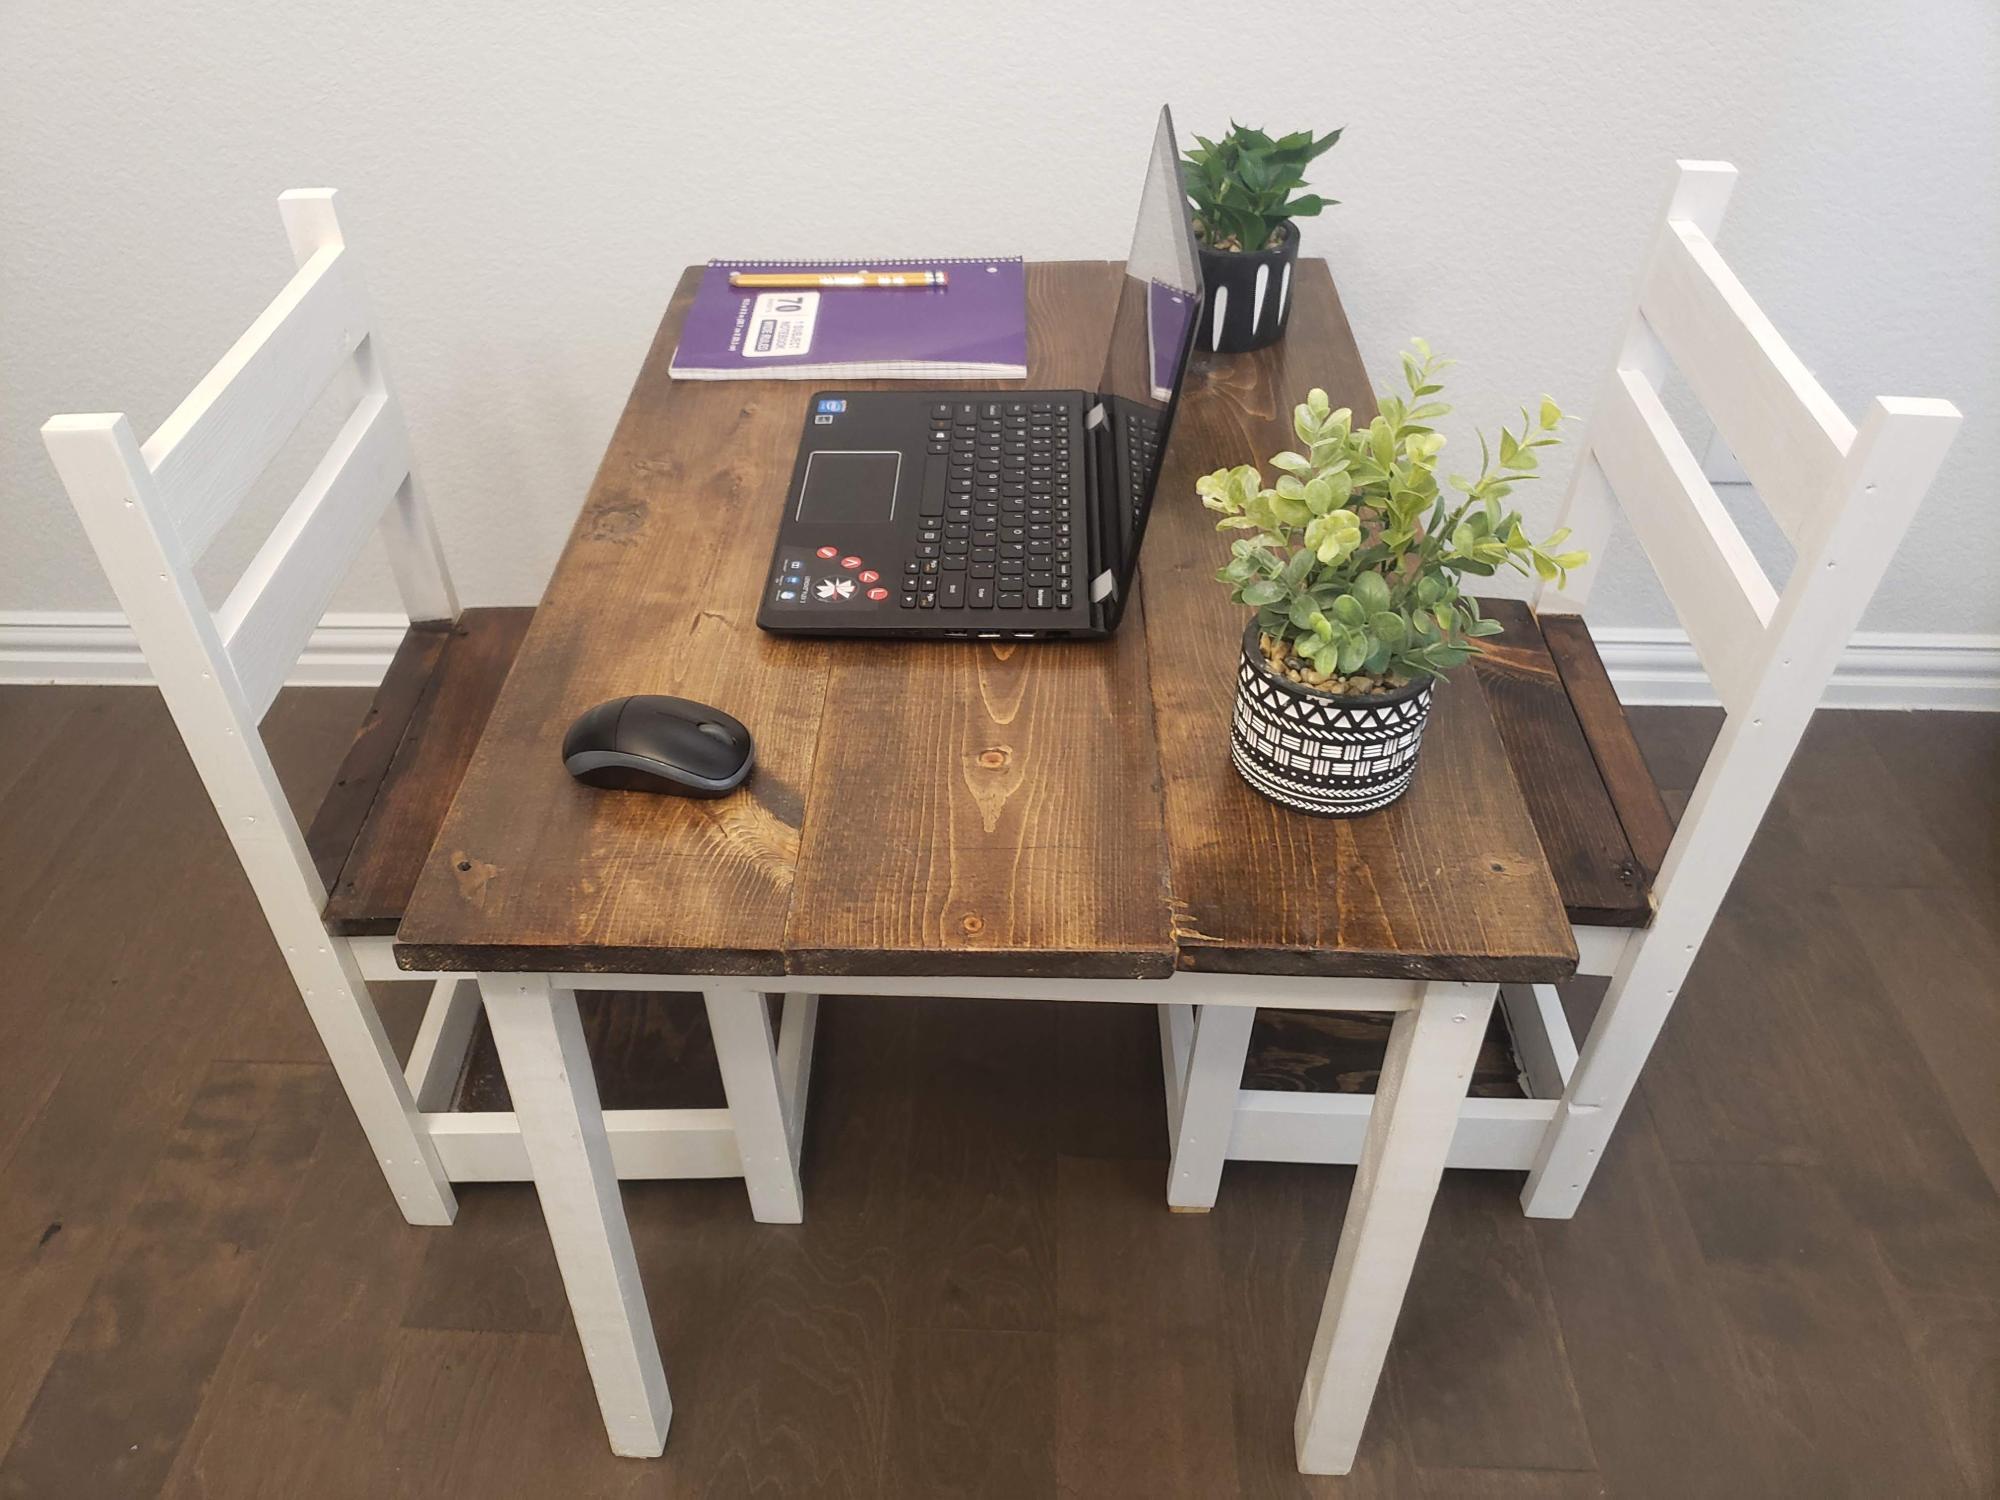
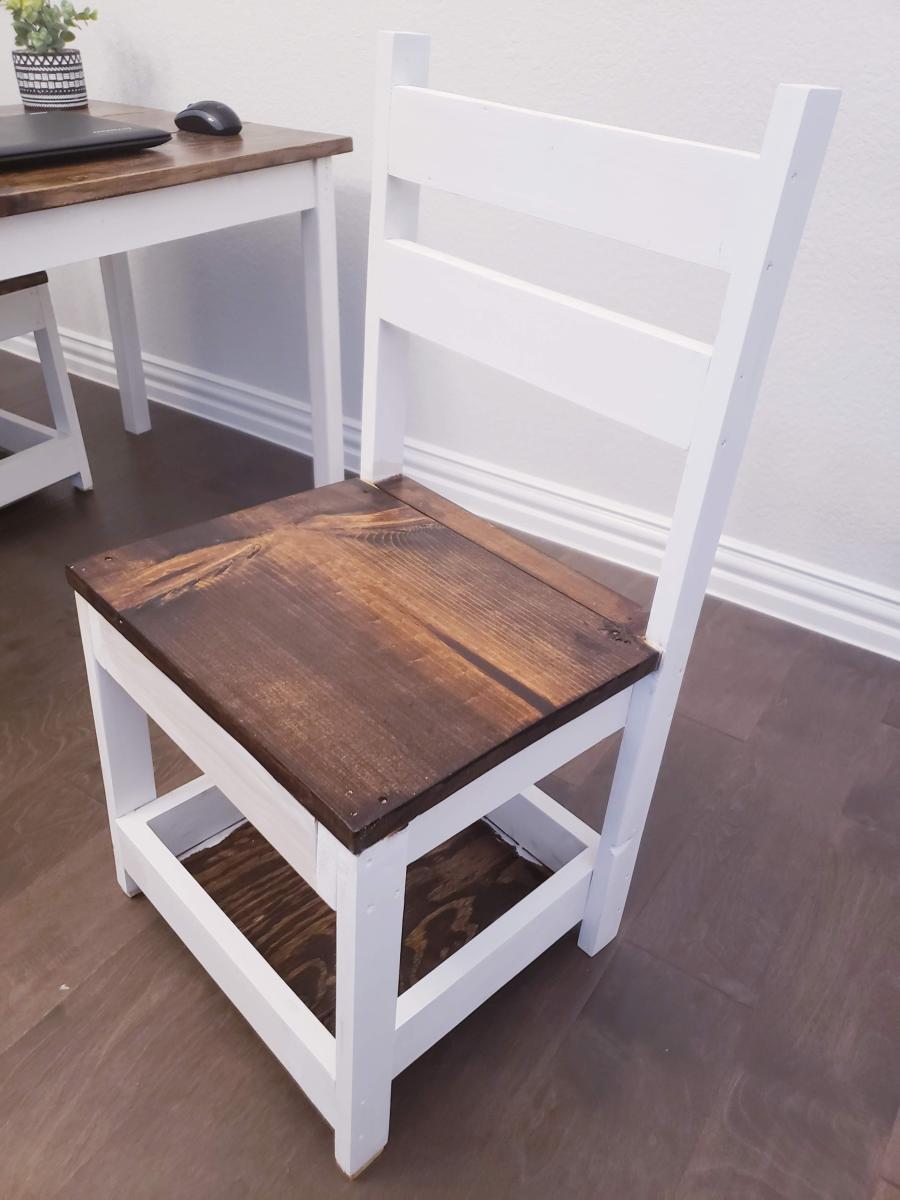
I decided to try and use the plans on Ana's site but with a twist. I wanted to limit myself to using only pallets. I think it turned out great! I can't upload all the photos because they exceed the maximum size limit. If I was able to you could see how each chair is slightly different and has a lot of character. I finished them with a waterproofing oil which I highly recommend over other finishes.


Mon, 04/10/2017 - 08:51
This is exactly what I'm looking for !! Fantastic build and re-purposing is always better.
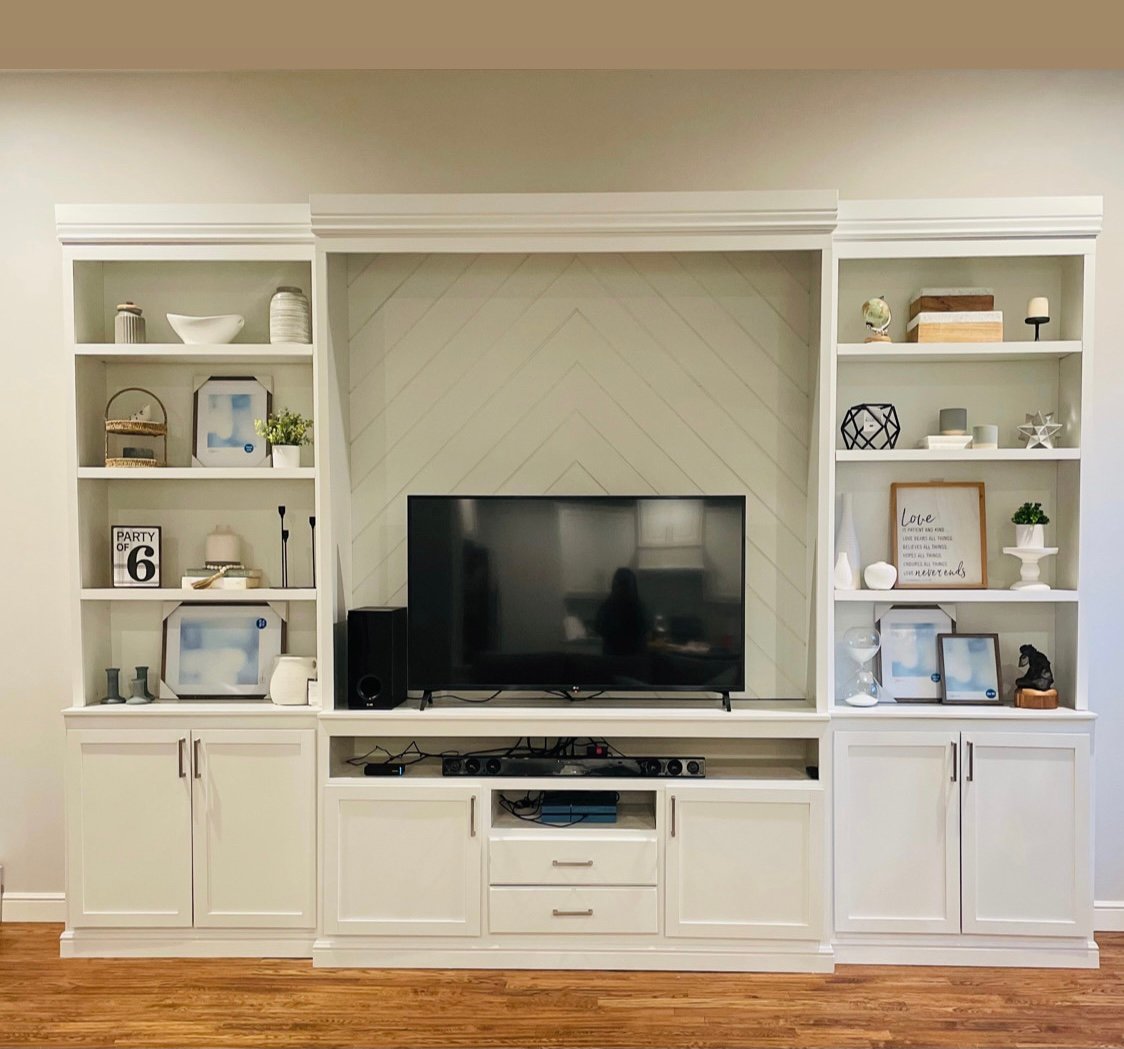
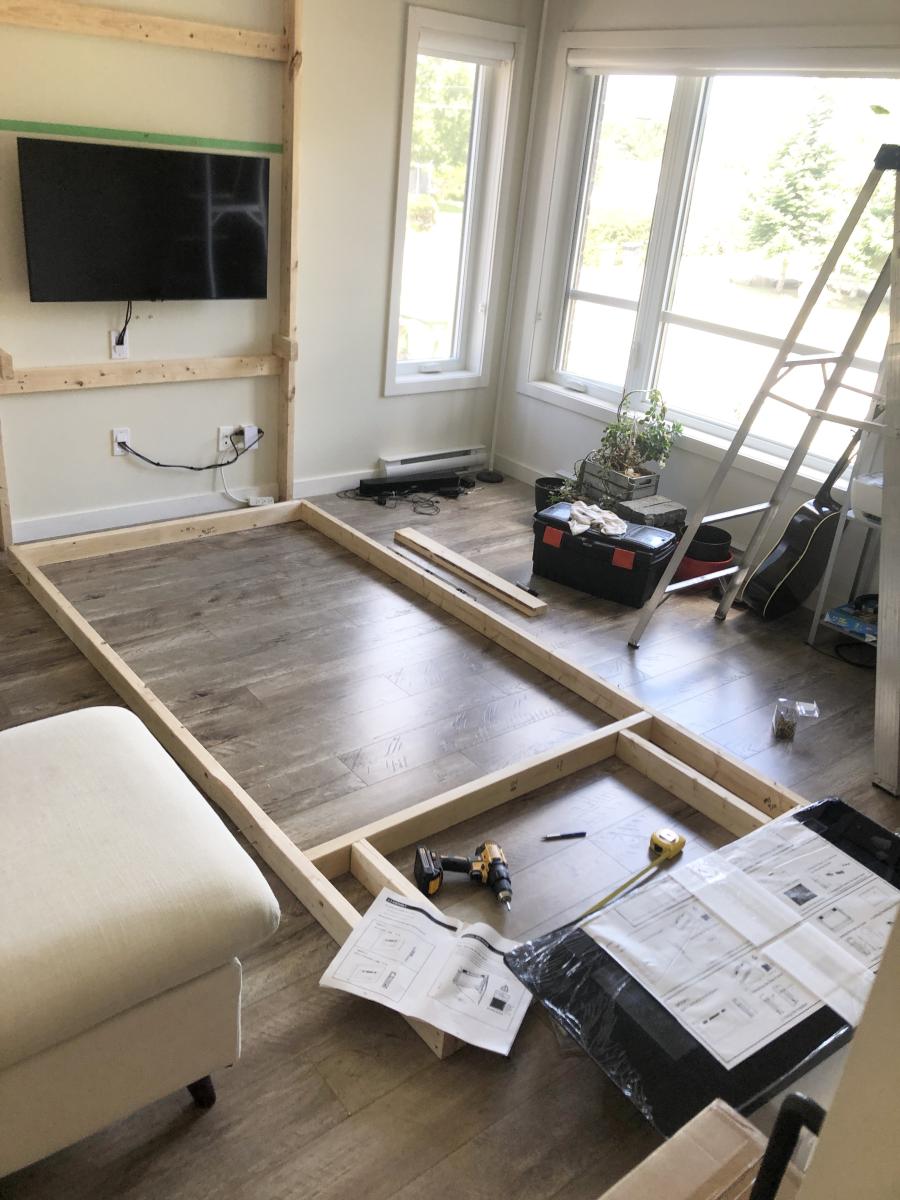
My Biggest build so far. We have a large living room and needed something large for that wall. I really had fun on this one. It took longer than I wanted but in the end, I’m really proud I finished. This was my first time to use the router and learned how build shaker style doors. -Instagram.com/theorthfam

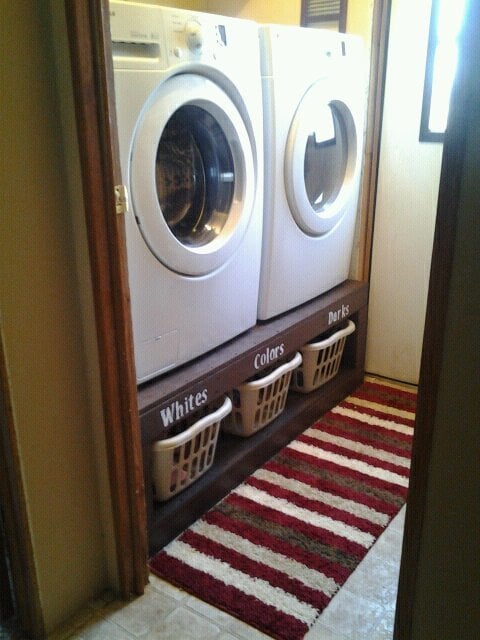
Used square laundry baskets instead of regular rectangular baskets. The square ones aren't as deep but are a bit taller so I had to modify the plans. I added a backsplash and some wooden tags to the baskets to designate them for certain colors. I also added some decorative trim and finished the bottom in a gray stain and used white chalk paint for the top.


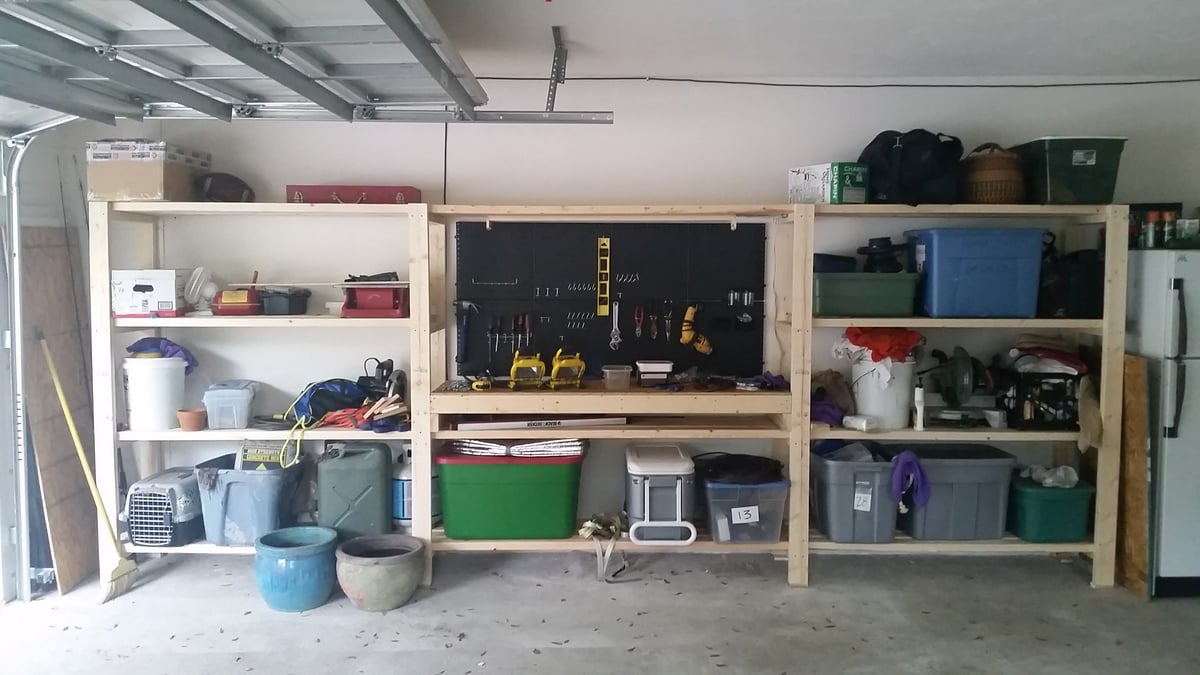
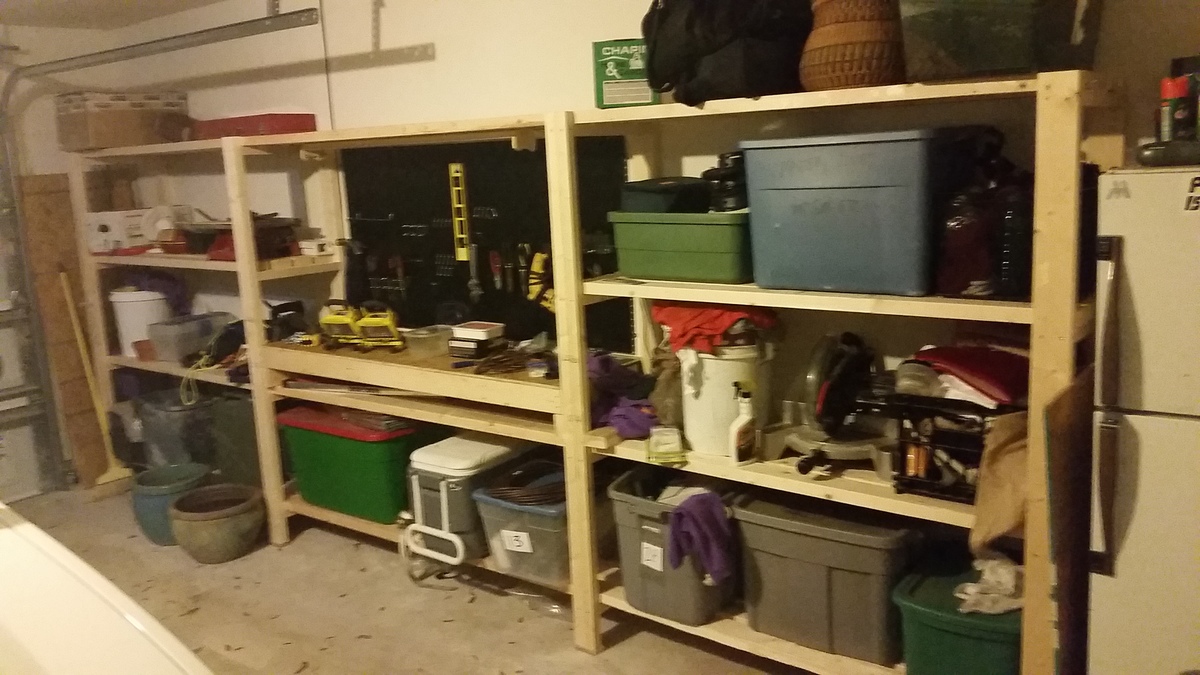
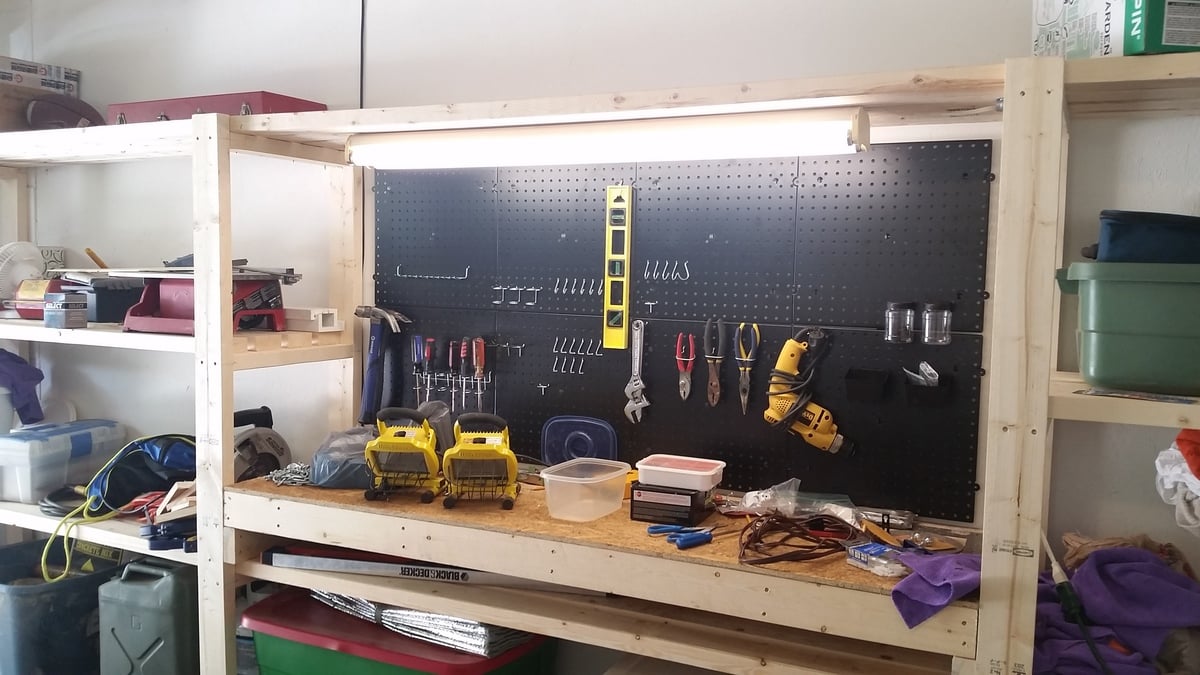
Great plans allow for versatility and easy customization. Put the whole thing together in a day w/ one other person. My set up is 16' long - 5' on the side shelves and 6' for the workbench. Added a pegboard and fluorescent light under the top middle shelves. I'm also designing a slim drawer to go under the workbencheck area. Thanks a bunch!
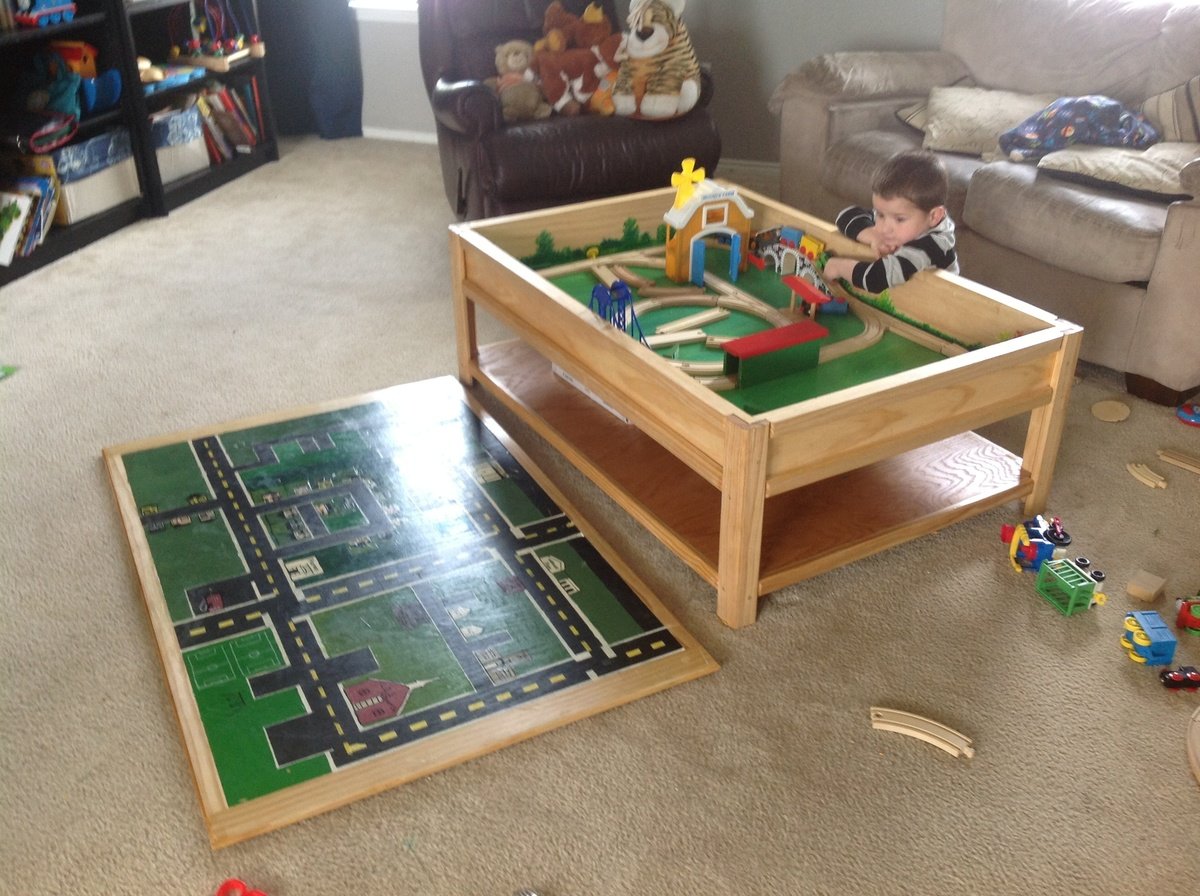
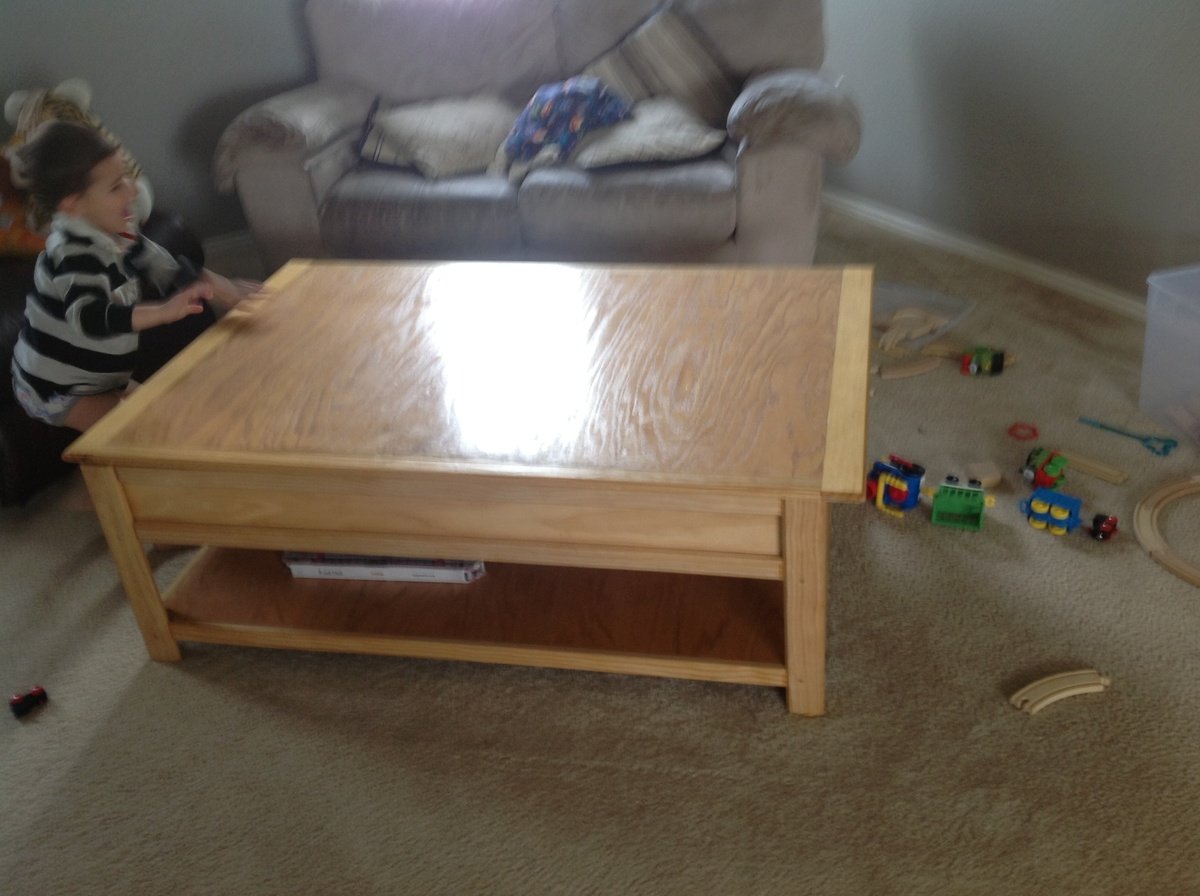
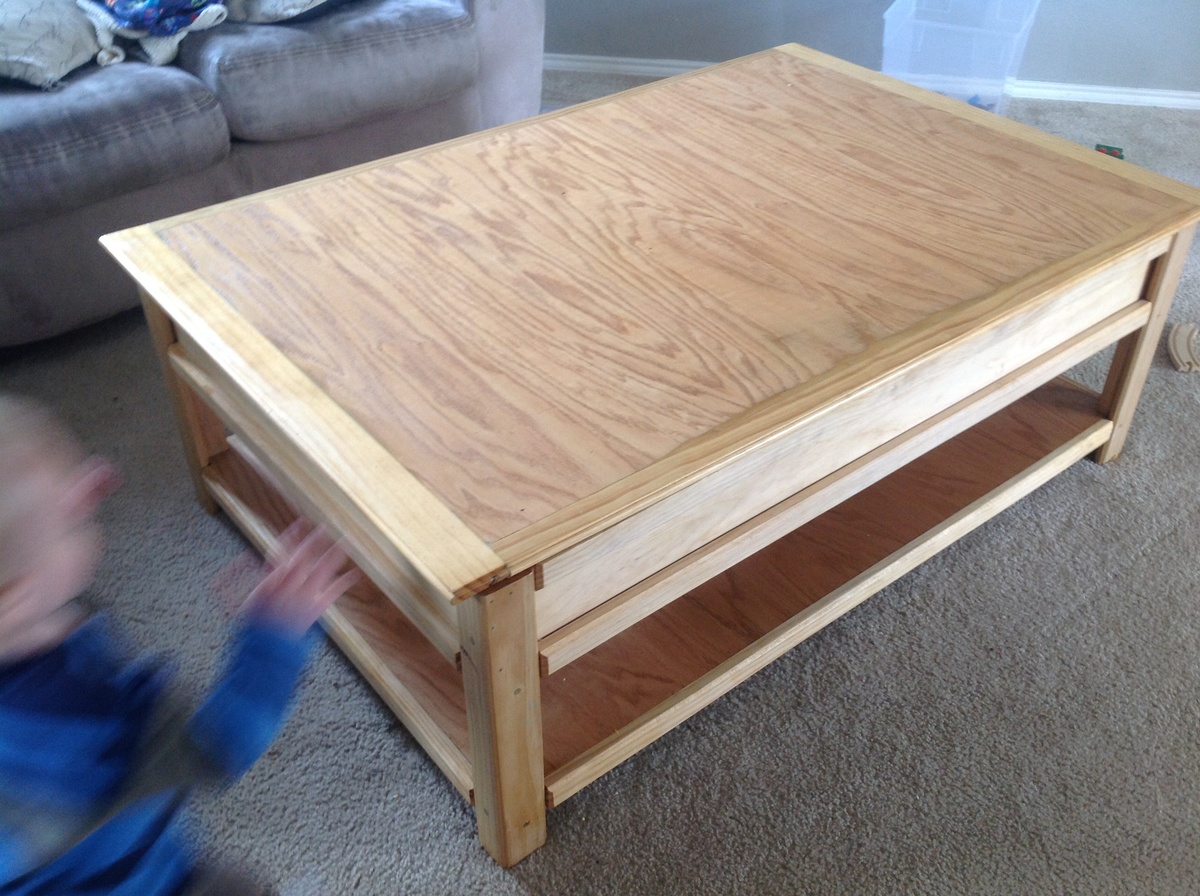
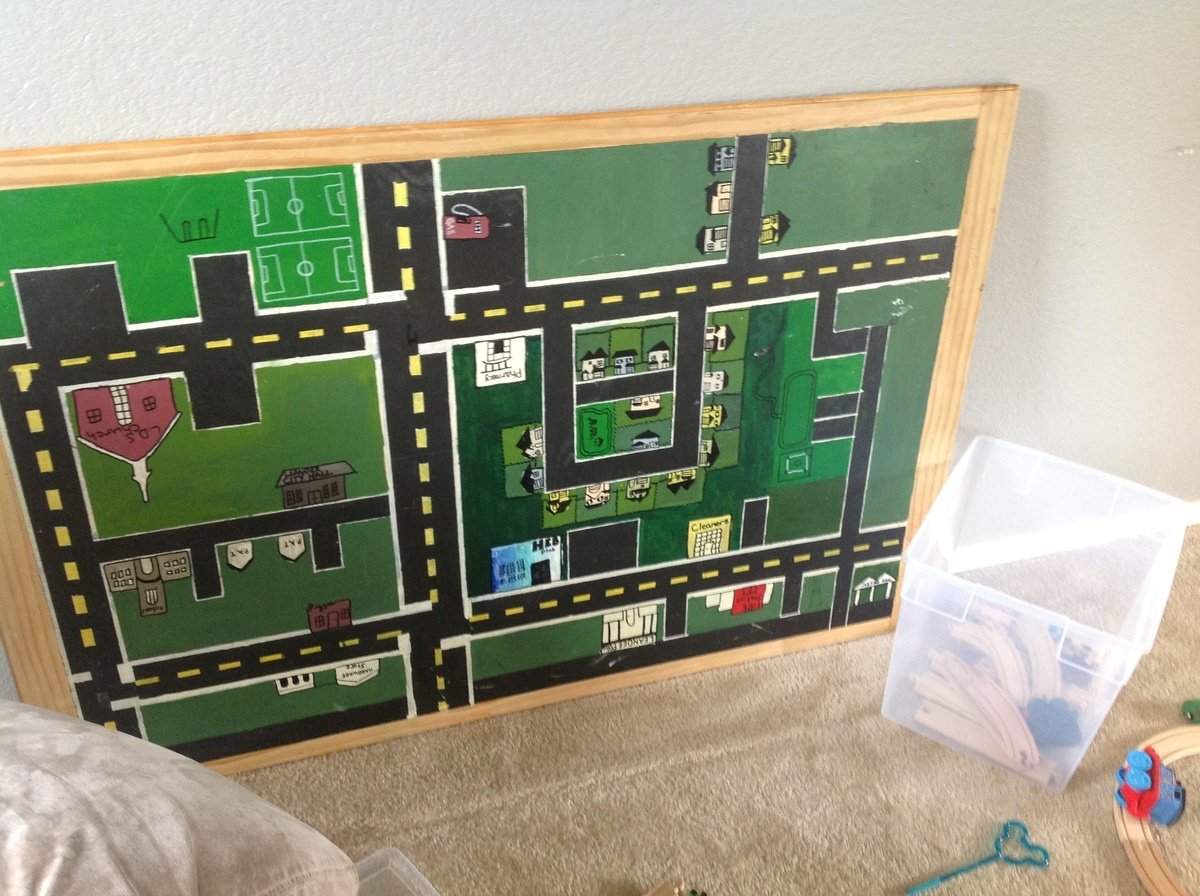
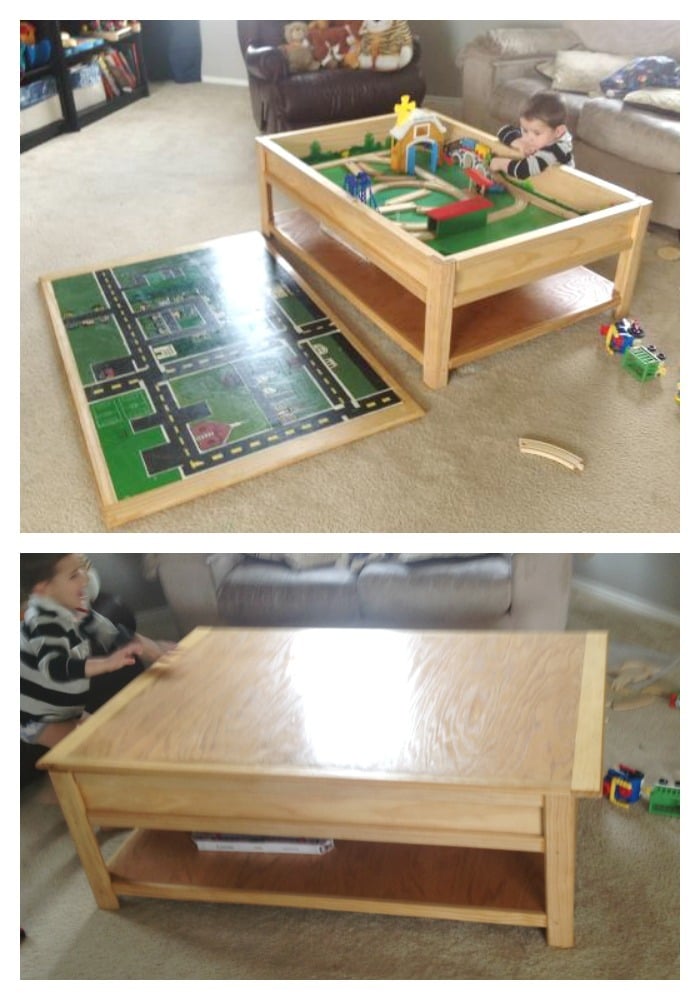
We customized the train table a bit and laminated the top into one solid piece so that we could paint a car map of our neighborhood on the underside. It's heavy! But with two boys in the house it's never really on anyways! :)
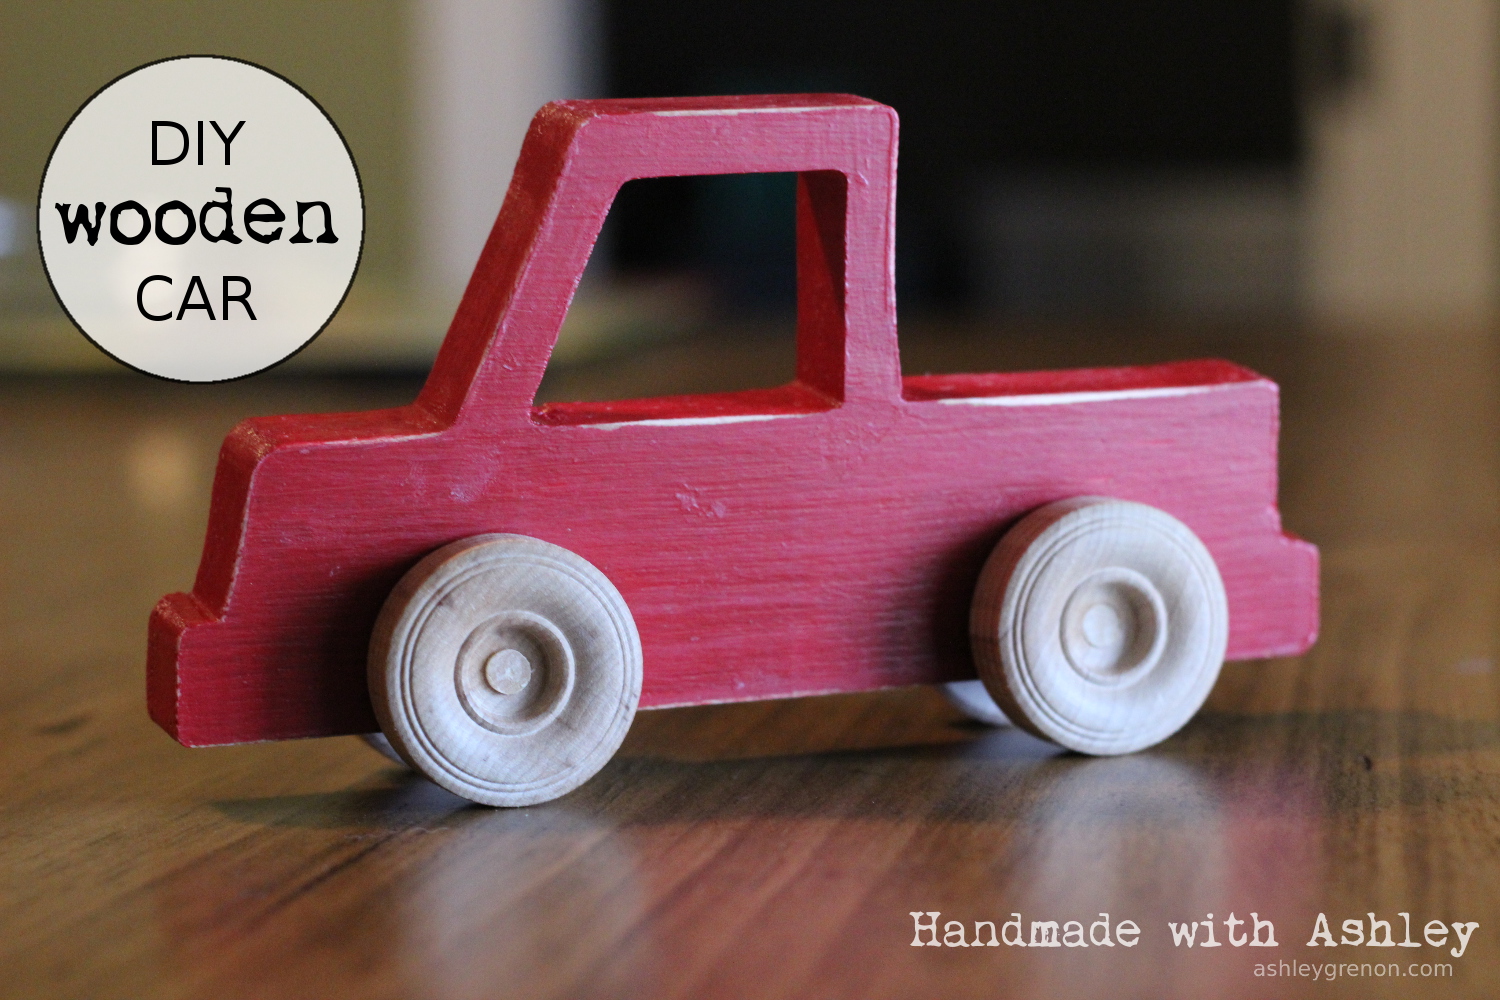
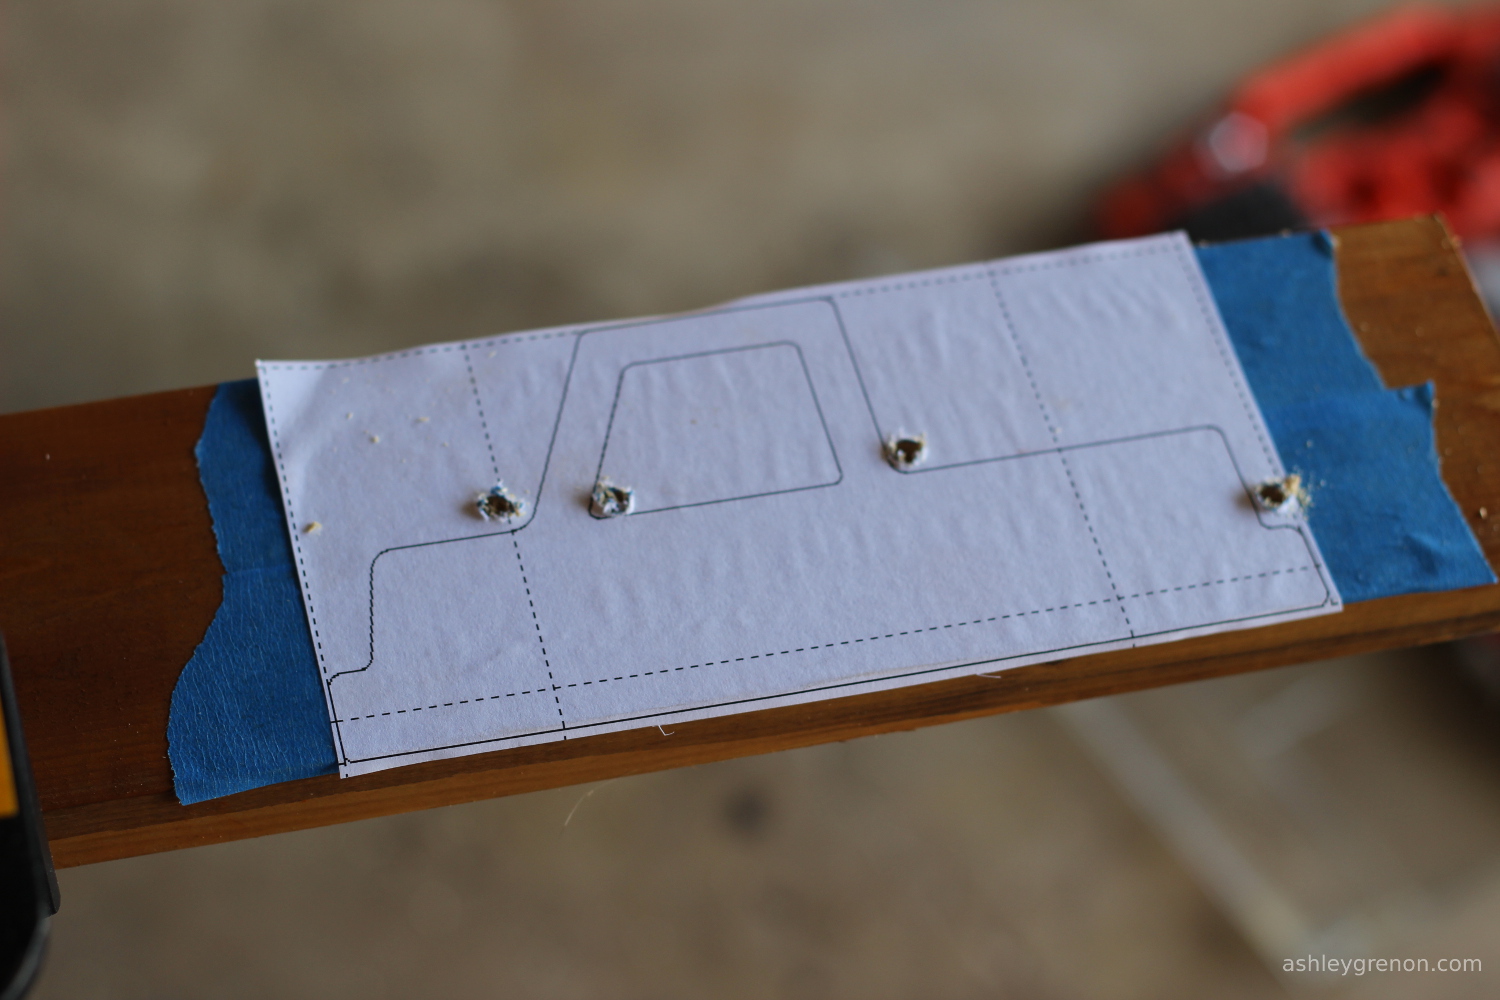
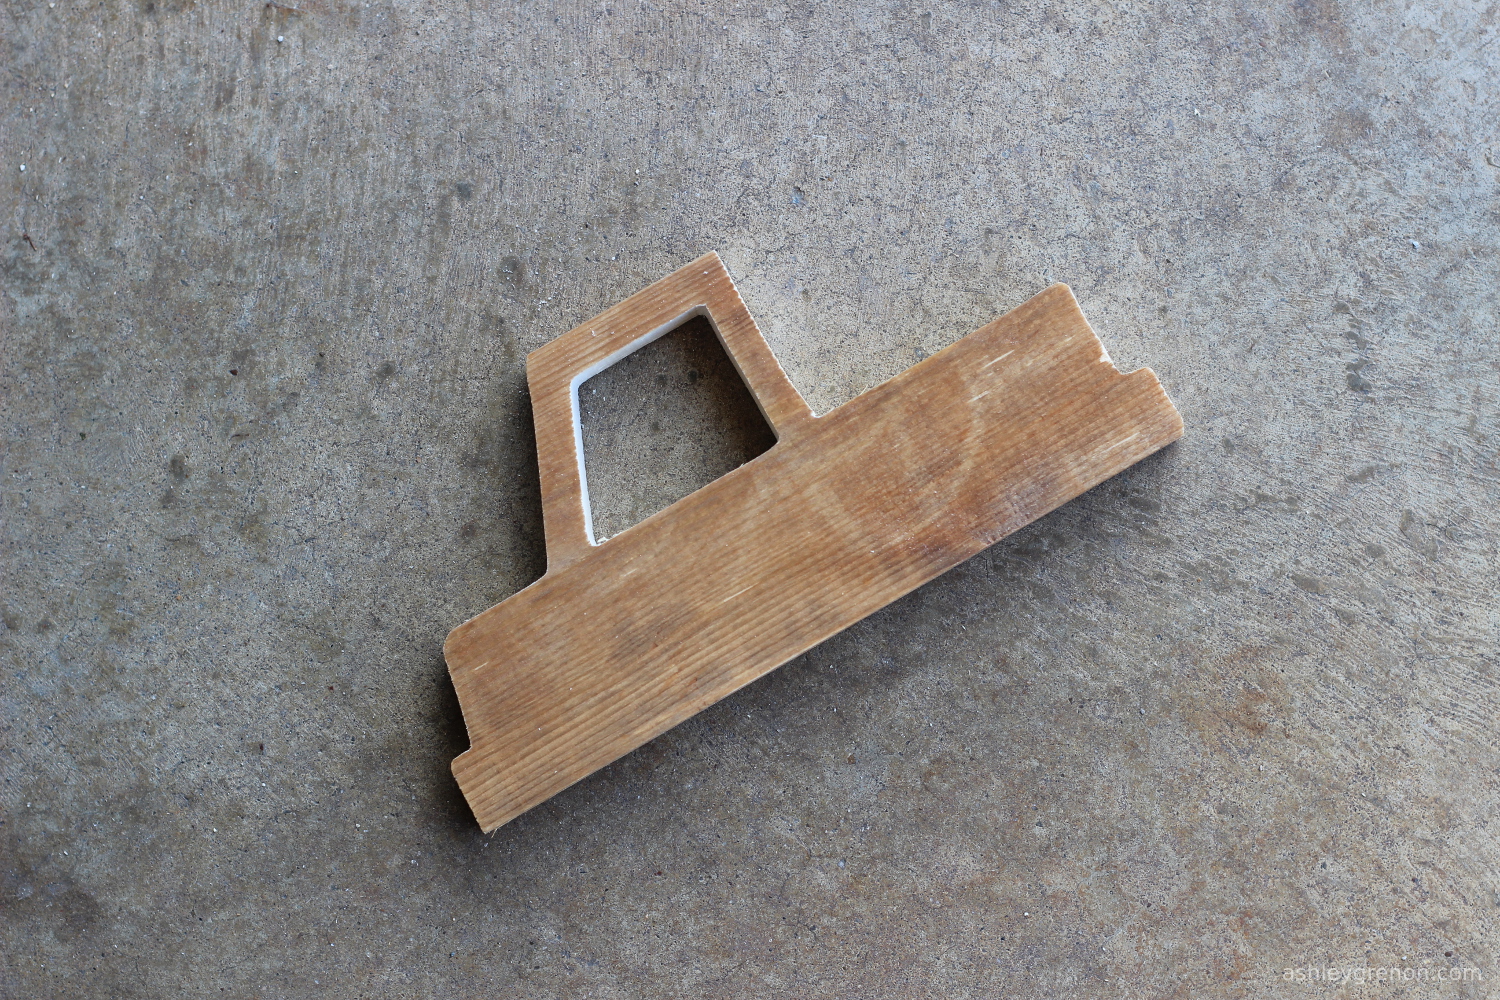
I built a wooden toy truck using a leftover 1x4 board in my garage. For this build I used Ana White's plans for the wood wheelie cars. This was a quick and easy project and my first project using my scroll saw. Not too shabby for my first go at toy making. However, I am not happy with the finished toy. If I did it all over again, I would take my time with the finish. Also, the driver was not perpendicular to the truck's body when I created the holes for the axles, so the truck leans slightly. My son does not seem to notice its flaws, so I will try to overlook them as well! Check out the blog link for more project details!
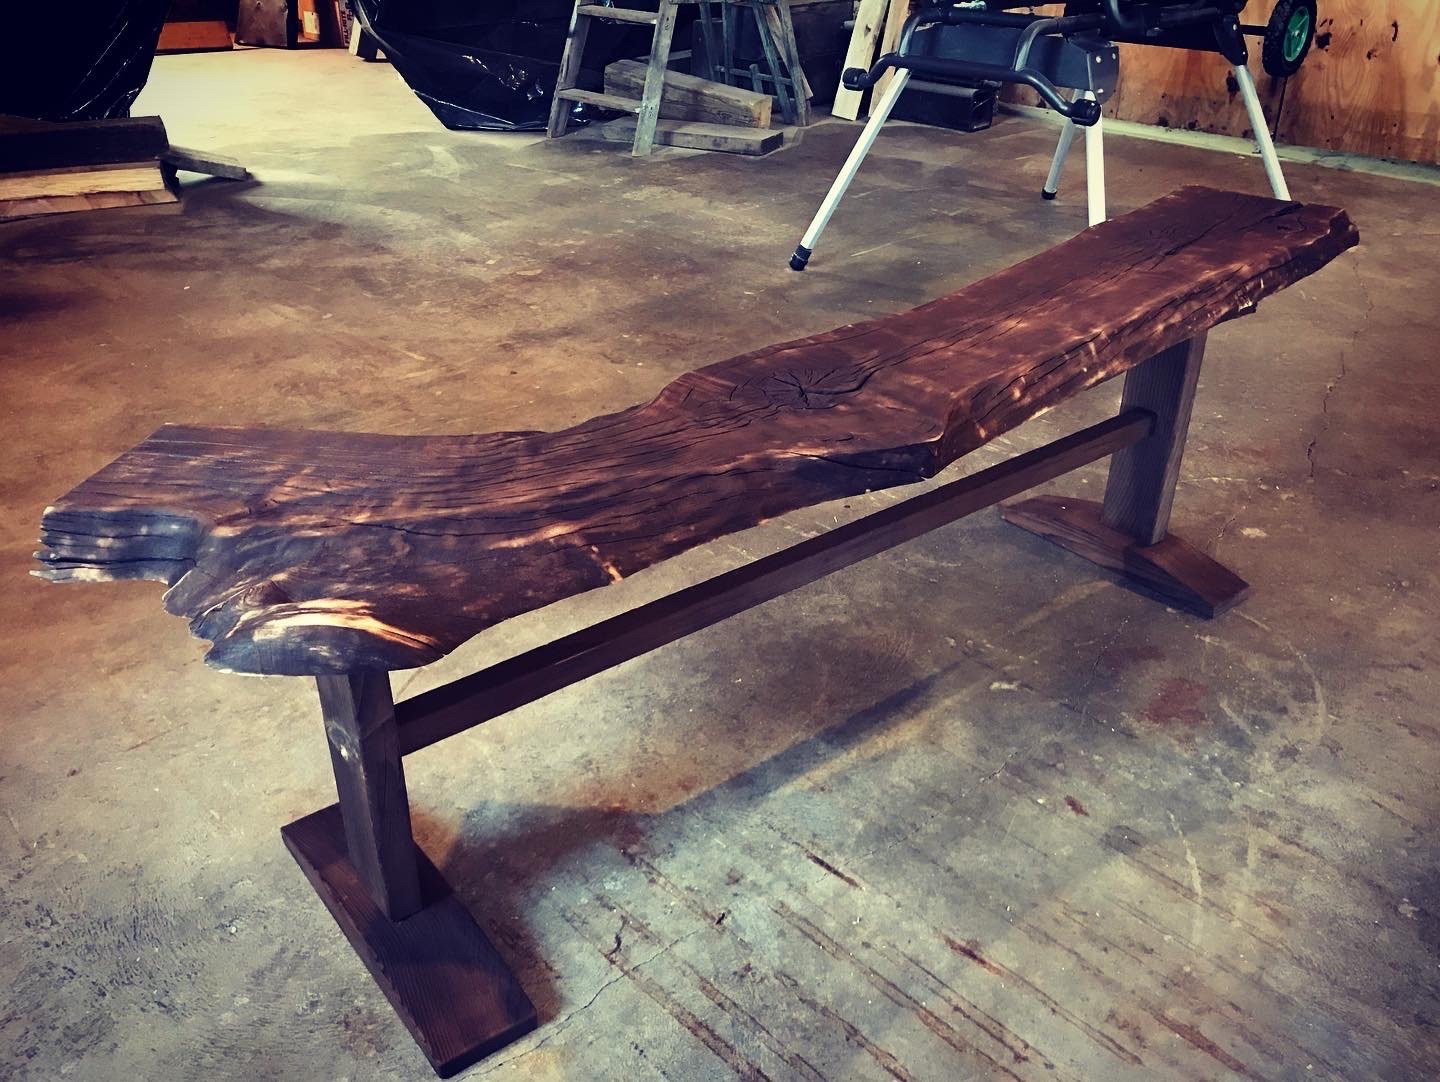
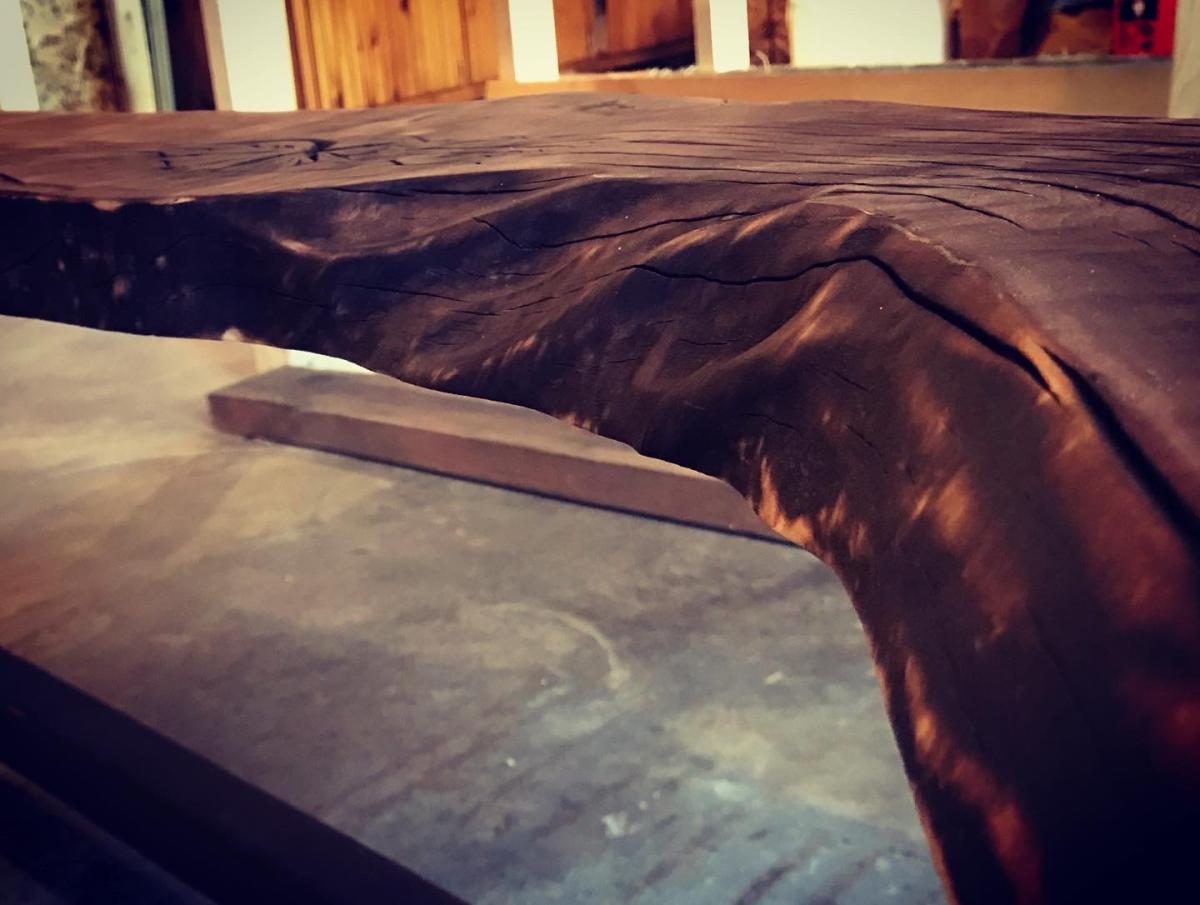
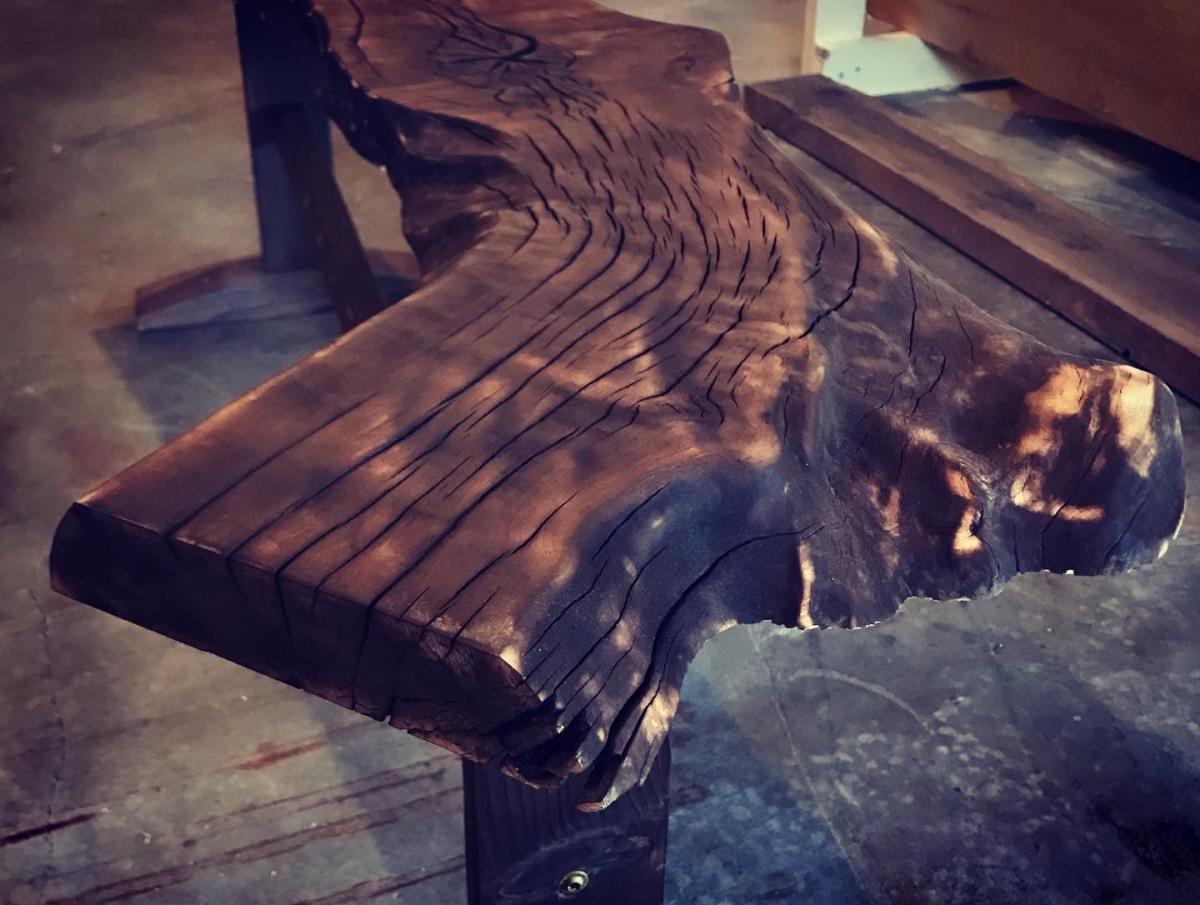
I found this oak character slab at a local lumber yard and fell in love with it. I loved it so much I bought a second one. After torching the slab using the Shou Sugi Ban method, I scraped away the charred surface and used tung oil to complete the finish. I added two more coats of tung oil allowing at least 24 hours in between each coat. The legs are made from rough cut pine from the same lumber yard (these guys take good care of me!). I also used the same charring method on the legs and feet along with tung oil. Check out all the detail and character of the edges! This bench could easily be used as a coffee table. It is approximately 6 feet long and 30 inches tall.
I love woodworking and trying different techniques...Thank you Ana for the detailed plans!..My niece loves it
Mon, 12/27/2021 - 22:21
Awe, love this, it looks great! Thank you for sharing:)
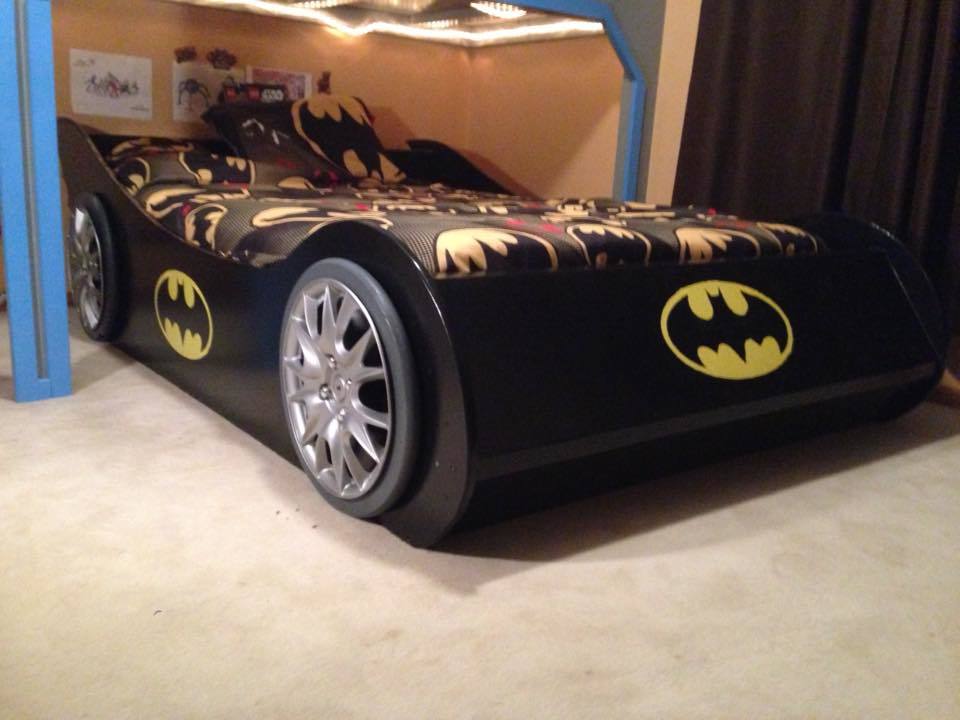
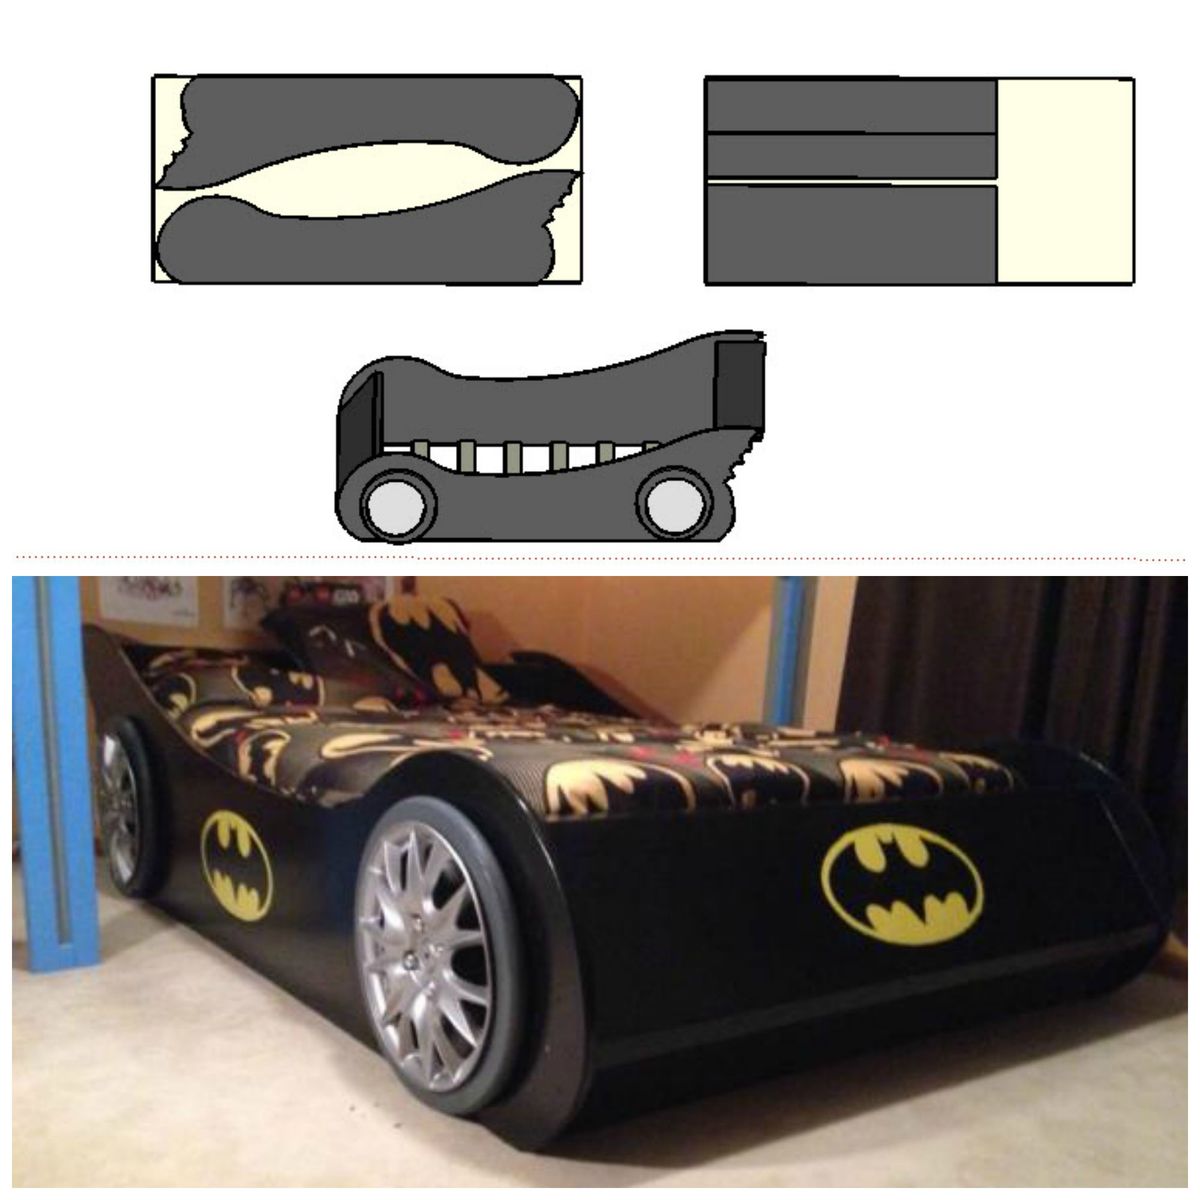
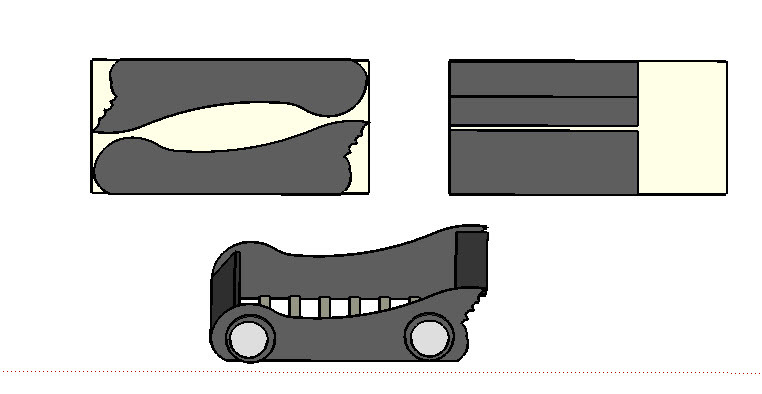
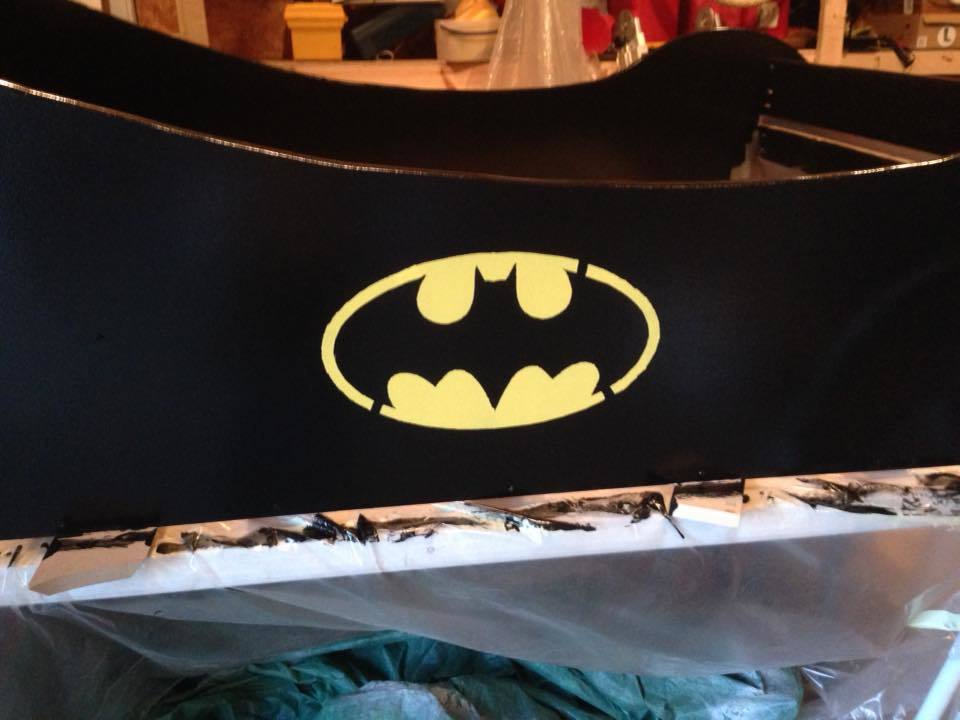
My son had a 'lightning Mcqueen' toddler bed- but we needed to get him into a little bigger bed. We had a spare full bed, and Batman is his current favorite... Since there aren't Batman full race car beds- time to start planning and building from sketchup! Took me about 2 weeks of evenings (after the kids go to bed) and about $110 in materials. The model is available in the sketchup warehouse at:
https://3dwarehouse.sketchup.com/model.html?id=u6b750a53-37a4-4d52-9d31…
For the wheel covers I ordered online at Amazon for $25 for a set of 4.
For the Wheels both HD and Menards make a 18" wood table top for ~$7 that I just cut the middle out with my router to fit the wheel covers.
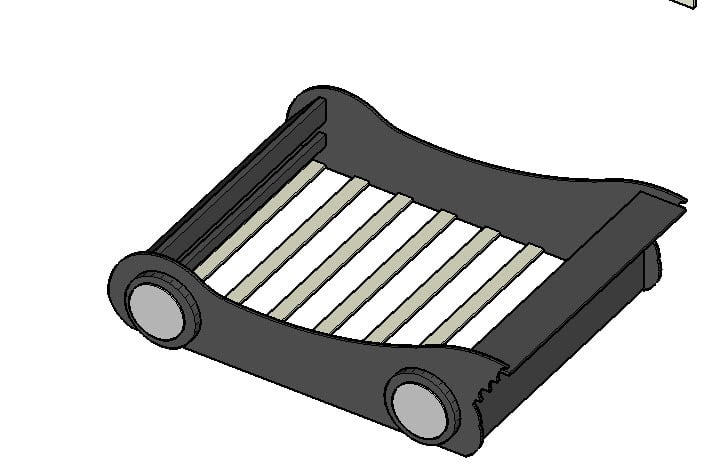
The slats to hold the bed (made to fit both box spring and mattress) were just 1x4 pine boards from menards.
The body was made from 3/4 MDF, though you could of course use plywood.
I used a projector to project the image from sketchup onto the board to get it transferred- else it would have been 50+ pages if printing..
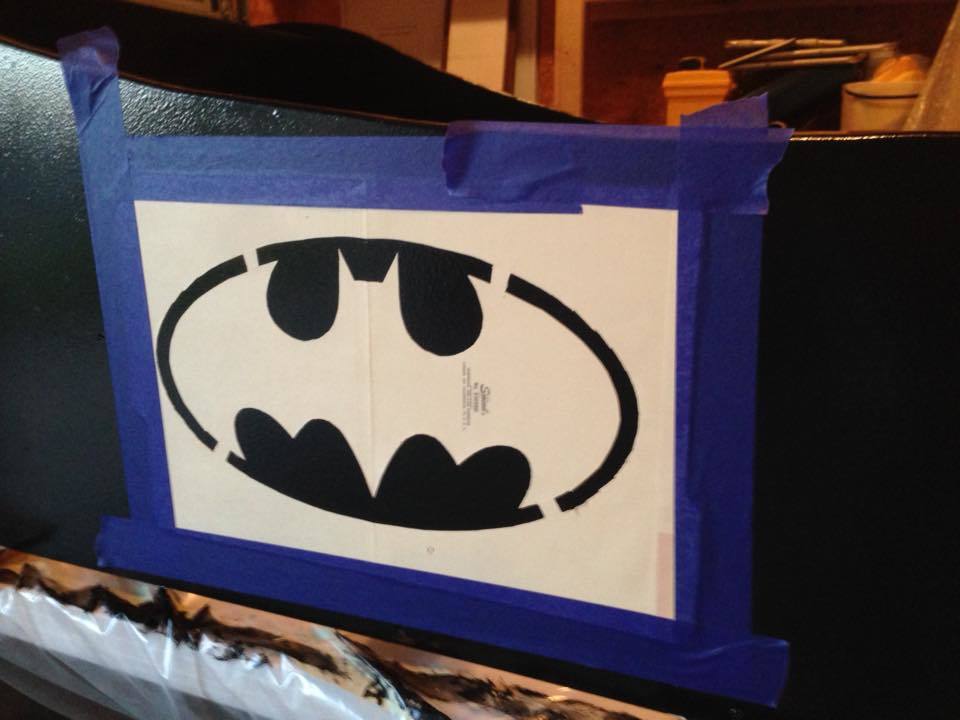
For the logos I just used a minila folder as my stencil and cut out the logo. Needed to touch up the 'tabs' to hold the logo in the circle after pulling off the stencil.

In reply to So cute! by Ana White Admin
Fri, 01/29/2016 - 21:18
I give you credit when people ask how I got started in woodworking because until I found your site and my first project (library cart) then 2 helper stands for my kids and other friends kids and it just went on from there. The skils taken from this site and learning Sketchup have brought a lot of nice furniture to our home as well as a sense of confidence to me!! Thank you!
Sat, 09/12/2015 - 19:10
My son really wants this and I promised him that I would make it. Do you have a PDF or anything of the outline of the batmobile? Thanks!
In reply to Looks great! by MoxieMan13
Fri, 01/29/2016 - 21:10
Thanks - sorry I took so long to respond. The plans are in the sketch up warehouse - search for "Batmobile full race car bed" otherwise et me know and I can try to get you a off of the dimensions.
In reply to Thanks- will skp file work? by bbcarey
Sat, 01/30/2016 - 10:59
Here is the screen shot as well.

I used a 49x97 sheet of MDF... thush the 4'1"x8'1" dimensions.
Sun, 02/21/2016 - 14:29
Thank you so much for the greatest idea ever! We stumbled on this and believe it will be the perfect next bed for our son, however, we cannot download any of the files. Do you have a PDF of the measurements or any other form you can upload so we can make this bed? Thanks in advance! Great work!
Tue, 12/06/2016 - 07:23
I apologize if I am just missing this, but... do you have step by step instructions on building this bed? I see the pictures of each part and its corresponding dimensions, but I cannot located instructions on assembling the bed.
Thanks!